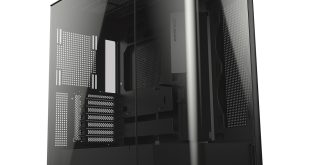
NZXT have used thumbscrews to secure the side panels which makes accessing the interior of the case quite simple. We found that they were affixed tightly so we had to resort to our trusty screwdriver to gain access. The inside is painted completely black which is sure to make the components stand out well.


Over on the left hand side at the bottom there is a large vent for the PSU fan. The tight budget means however that this isn't filtered against dust buildup. The PSU secures to the case in the traditional way, requiring us to insert four screws through the back panel.

For those who want to achieve the tidiest possible build, there are a selection of cable routing holes cut into the motherboard tray. There is also an adequate amount of room behind the motherboard tray for cable routing.
The only one minor gripe we have when it comes to cable management is that the hole in the top left corner of the motherboard tray isn't really big enough to fit the CPU power connector through without removing the fan at the top.
For those who want to retrofit a CPU cooler into their system, there is a cutout in the motherboard tray for doing so. It isn't ideally sized or placed, though, so you may still have to remove the motherboard.


Over on the right hand side of the case we find room for eight 3.5″ hard drives. Although these feature tool-less clips, we found that these didn't hold our drive in place very securely. So we would recommend using a couple of screws to secure them too, especially if you plan to move your system around a lot.
There aren't any mountings for 2.5″ drives in this case which is a little disappointing. If you want to use an SSD you can always place it at the bottom of the case using sticky foam pads. Above the hard drive bays there are three 5.25″ drive bays which also feature tool-less clips.

Before installing the motherboard we are first required to install the motherboard standoffs. This is a relatively simple process as NZXT include a small adapter which allows you to screw them in tightly with a screwdriver. Once they have all been installed, the motherboard can then be mounted in position.

Installing a graphics card is also a reasonably simple process. There aren't any thumbscrews included to secure expansion devices, just standard screws. As the hard drive bays face the front of the case, there is a possibility that the top few bays will be blocked by a long graphics card so this is something you should bear in mind when building the system. We can't imagine that there will be many users who plan to fill all eight bays with hard drives, though, so under normal circumstances it shouldn't be a problem.