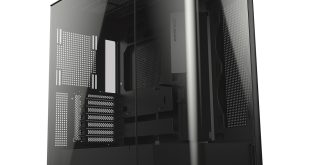
After removing the top panel, we are greeted with a sight of an optical drive cage on the left and a hard drive cage on the right. These have to be removed to access the area underneath. This is a very simple process, though, as we're only required to remove two screws in total.
There is an additional hard drive cage underneath the optical drive cage which can also be taken out without needing to remove any further screws. Finally we can remove the support bar which crosses the case in the middle by taking out the screws at either end.
Due to the design of the case, the motherboard actually sits on the floor. This means there is no motherboard tray to route cables behind.
There is also no CPU back plate cutout so you need to install your cooler before installing the motherboard into the case. Many of the motherboard stand-offs are preinstalled into the case but there are a few extra supplied which may need to be added depending on your motherboard. Once these have been put into place, the motherboard can be screwed down.
Installing expansion devices is quite simple as the case has conventional expansion slots. The case supports large graphics cards up to 320 mm in length and has a large perforated area in the side panel directly feeding any graphics card fan, so ventilation isn't an issue.
We would recommend thinking about the installation process a little before you start installing the other components. You need to make sure that you plug all the cables you need into the motherboard because it becomes much more difficult to access the various connections when you've installed some of the other components above.
We installed the power supply next which requires four screws through the back panel of the case. There is basically no cable routing support which means you'll have to put a lot of work and planning in to achieve a tidy system with unrestricted airflow.
The hard drive cages all feature rubber grommets to prevent vibrations from being transferred to the case. Each hard drive requires four screws to install. There are also two sets of 2.5″ drive mounts, one in the bottom of each hard drive cage. Replacing all of the drive cages into the case is a relatively simple process, requiring only two screws to secure them into place. Finally we can resecure the roof of the case using the six thumbscrews.
There are a couple of issues which we noticed throughout the installation process. The provided installation guide isn't very clear and is difficult to follow. Not ideal for a proprietary case design such as this.
Also, we were surprised at the lack of tool-less installation provisions. After removing the roof of the case we didn't find a single thumbscrew or tool-less mechanism for installation. While this isn't a massive issue, it usually simplifies the installation process considerably.
 KitGuru KitGuru.net – Tech News | Hardware News | Hardware Reviews | IOS | Mobile | Gaming | Graphics Cards


