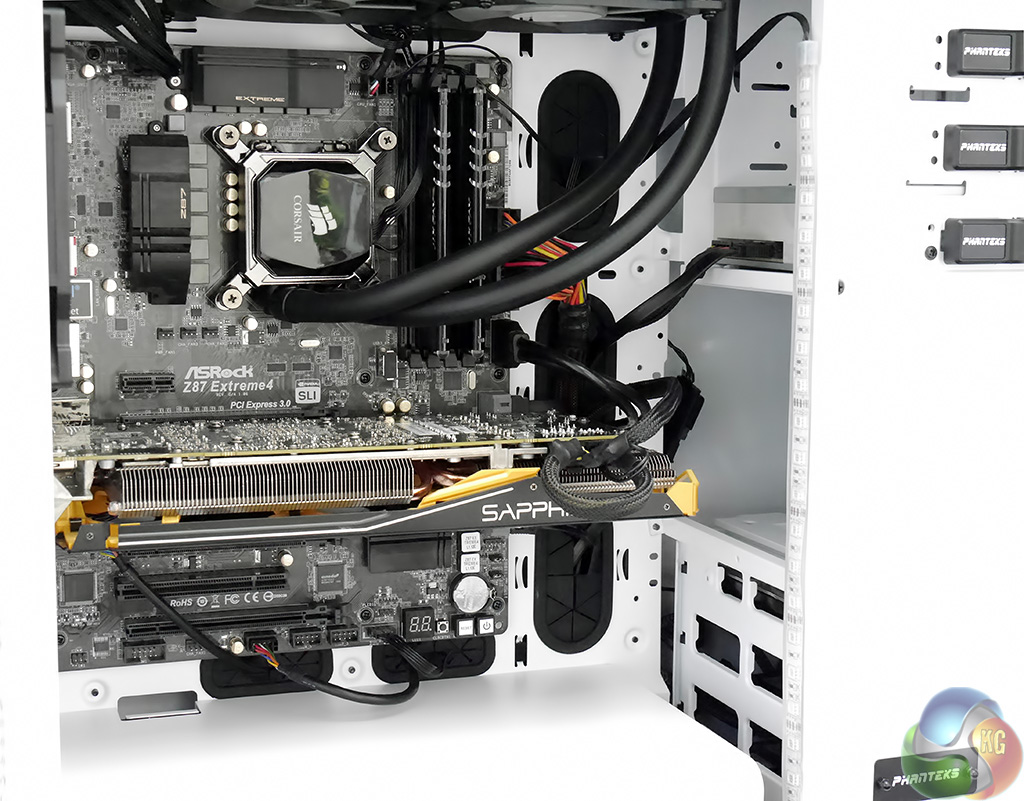

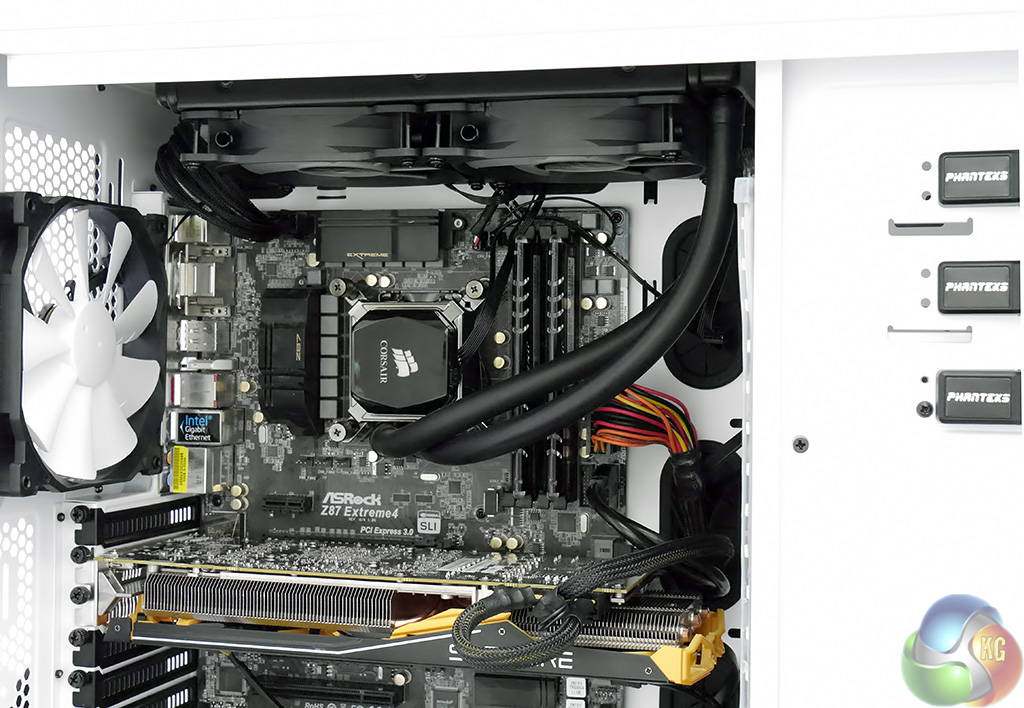
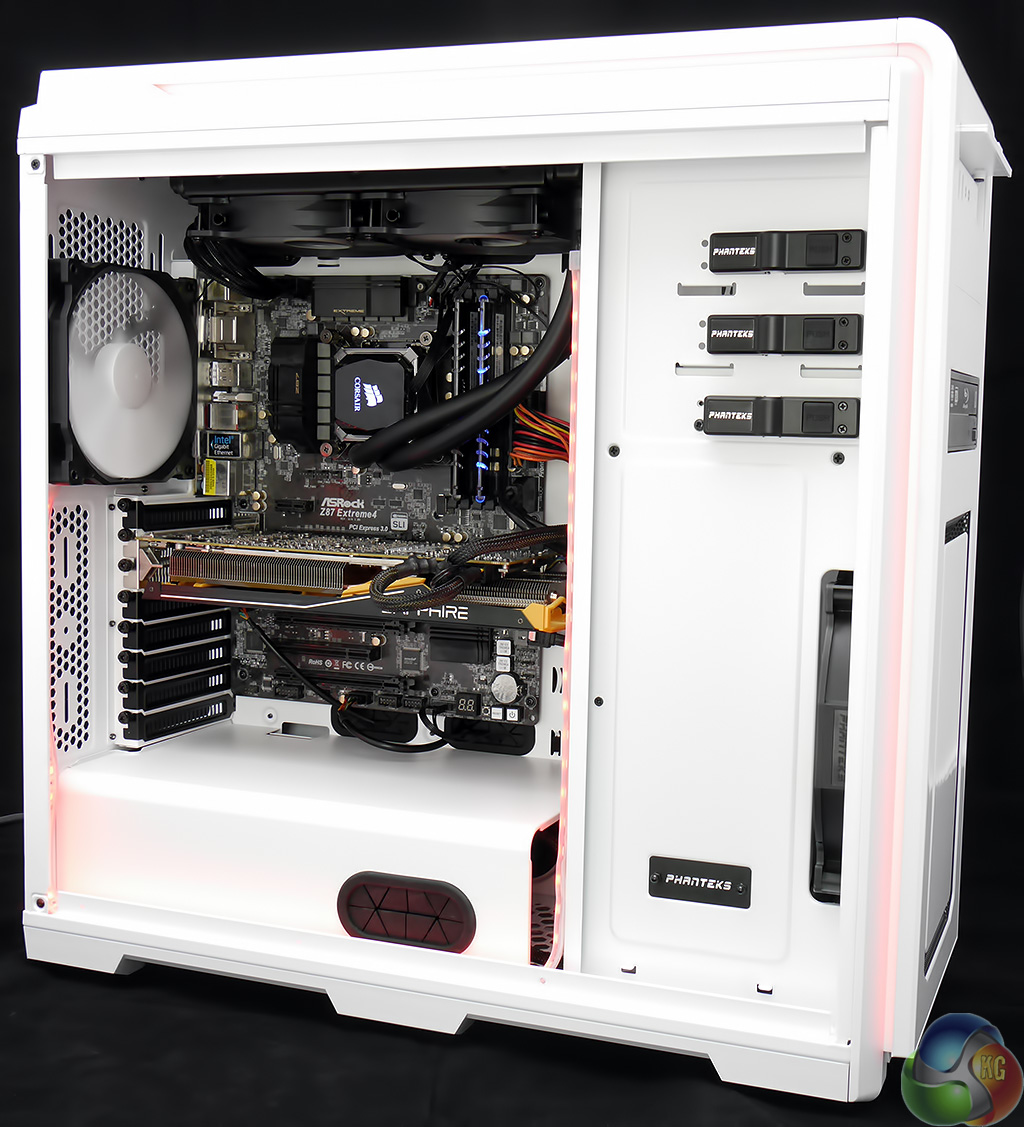
Installing an ASRock Core i7 motherboard in the Enthoo Luxe was a simple matter, however the same had also been true of the Enthoo Pro. It was during the installation of the Corsair H100i liquid cooling system that I came to appreciate the extra space in the roof of the case. The radiator vanishes out of sight with plenty of clearance above the top edge of the motherboard that allowed me to route the wiring pretty much wherever I wanted.
It is worth pointing out that I removed the upper 140mm fan from the case to ease the installation of the Corsair H100i. This wasn't strictly necessary as there are so many options for installing fans and radiators however the fan was redundant and only took seconds to remove.
I'll leave you to form your own judgement but I was happy with the finished PC.
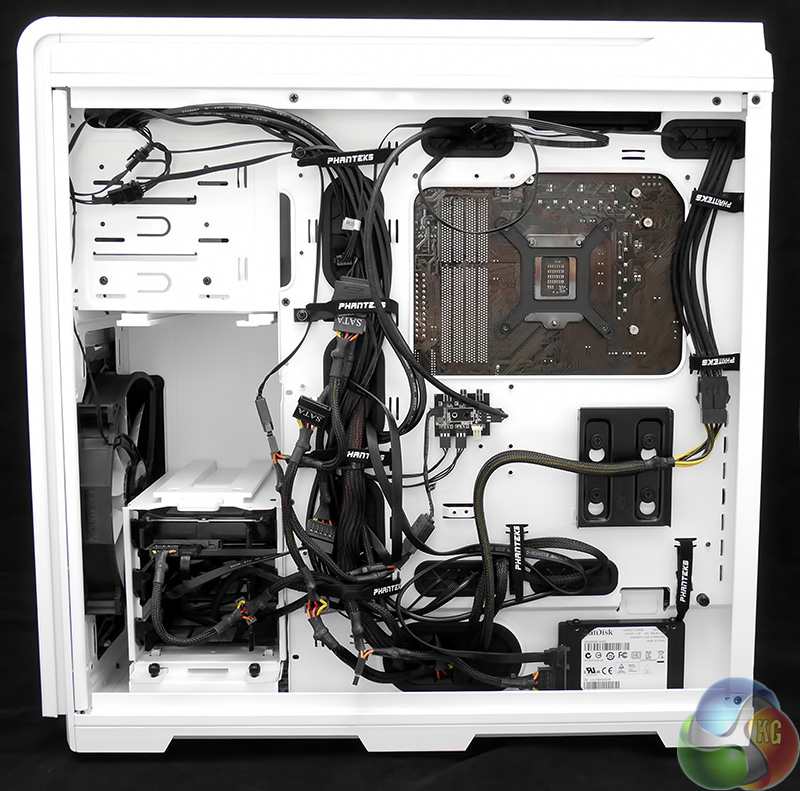
Admittedly the rear of the PC isn't quite so tidy as the front but I took a ‘That'll do' approach and did just enough work for the PC to look correct when viewed through the windowed panel. I installed a SanDisk SSD in one of the bays on the rear of the motherboard tray and a single data HDD in a 3.5-inch bay, which meant I was able to remove one of the two drive towers to assist airflow from the 200mm fan.
I didn't need to use any cable ties during the build as the supplied hook and loop straps did a fine job.

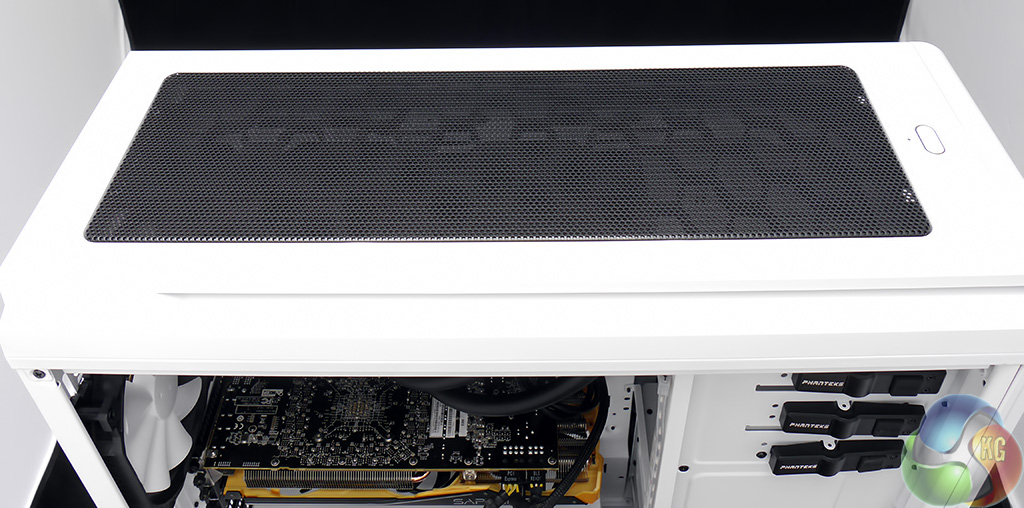
This top view shows you the access provided by the removable top grille. You can see the two latches that hold the grille in place on the left of the photo (the rear of the case). The latches were a bit hit and miss and it took a couple of attempts to get both latches to work at the same time.


[yframe url='http://www.youtube.com/watch?v=7C–NBnfgWE']
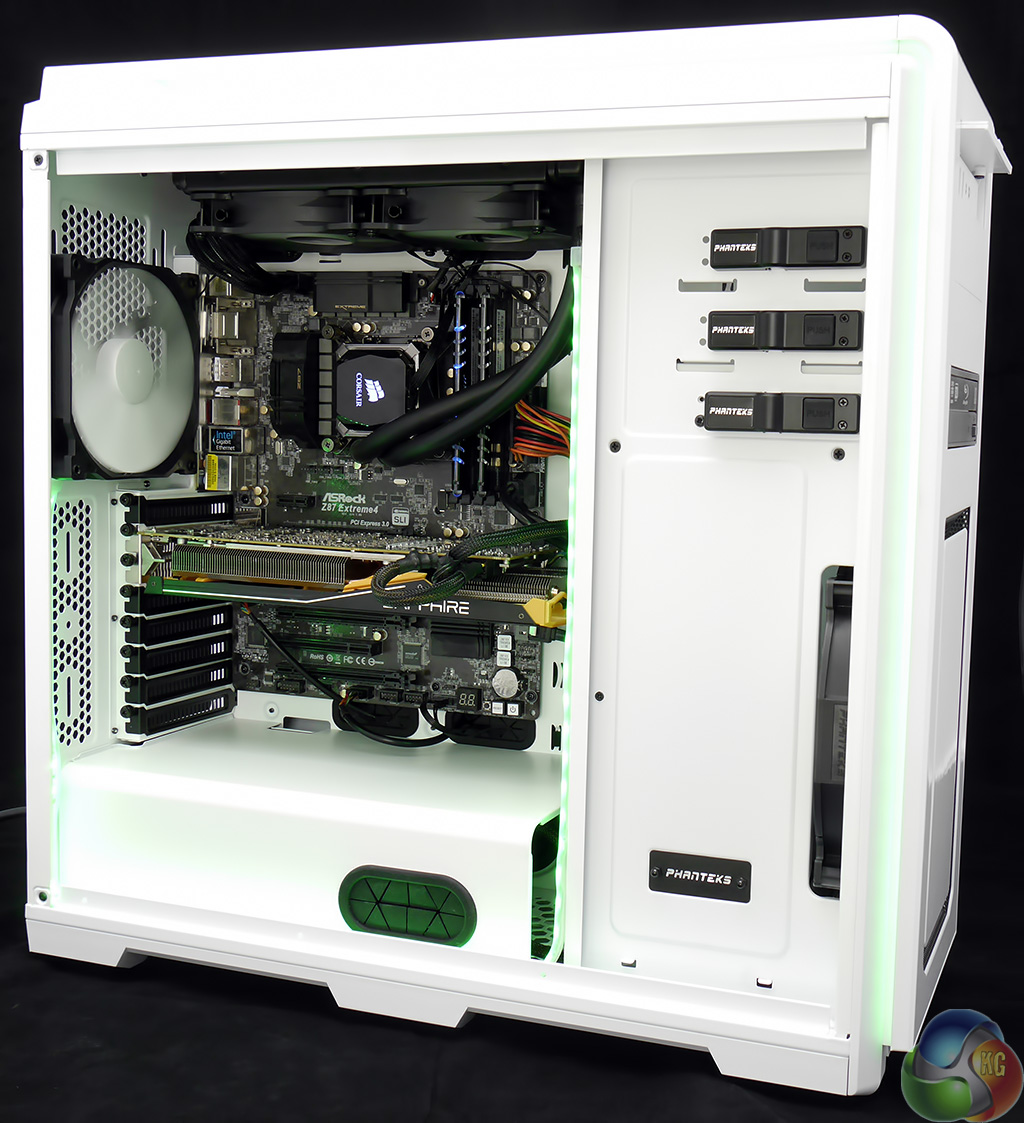
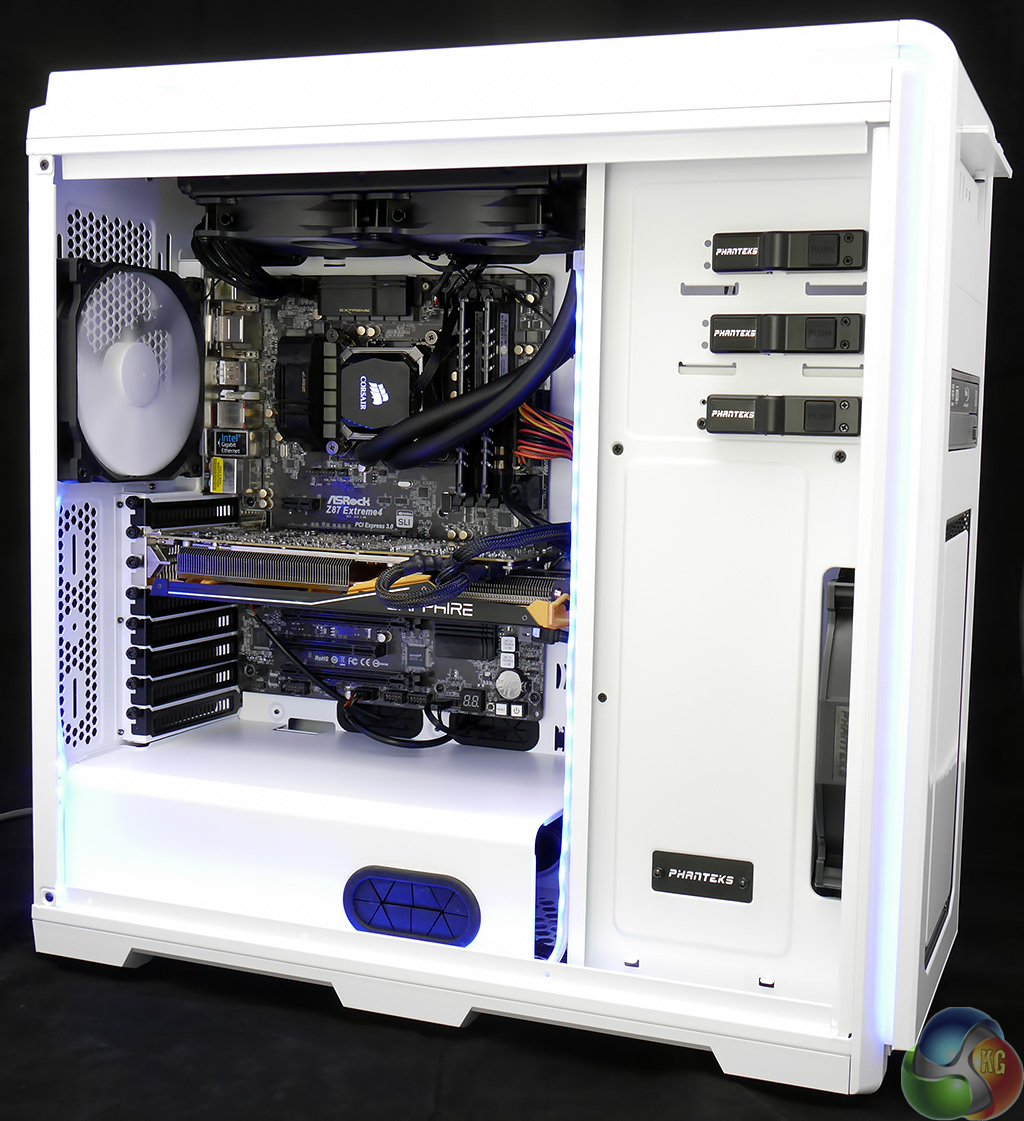
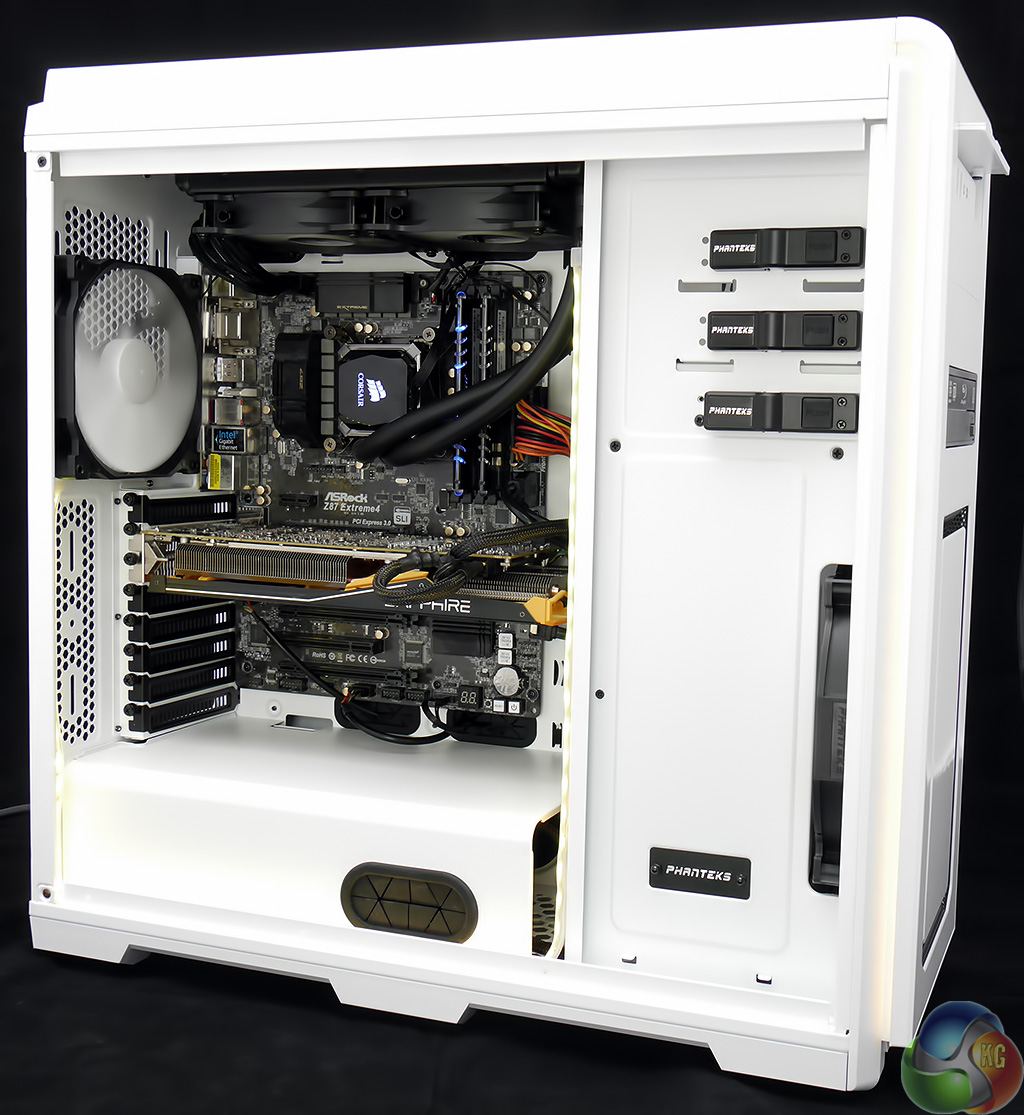
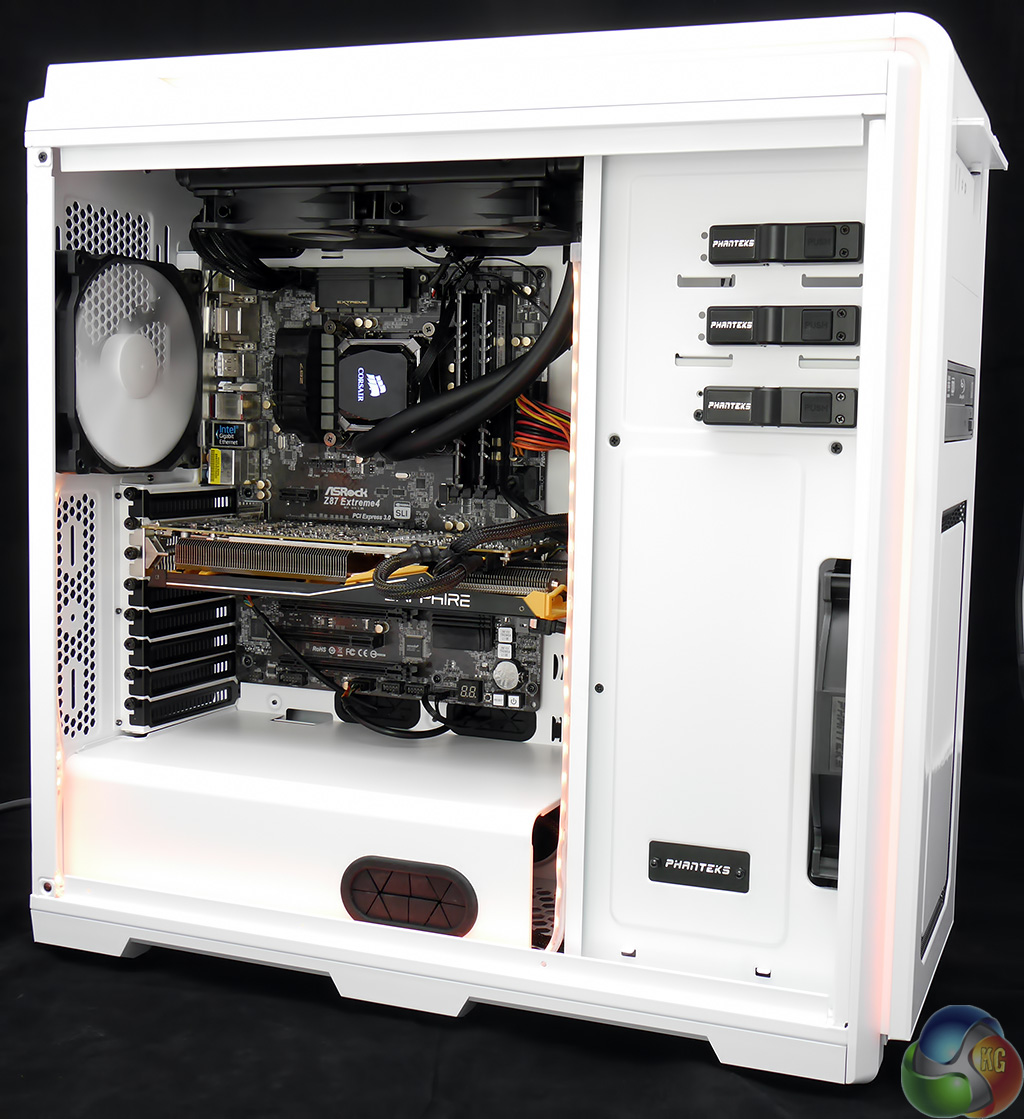
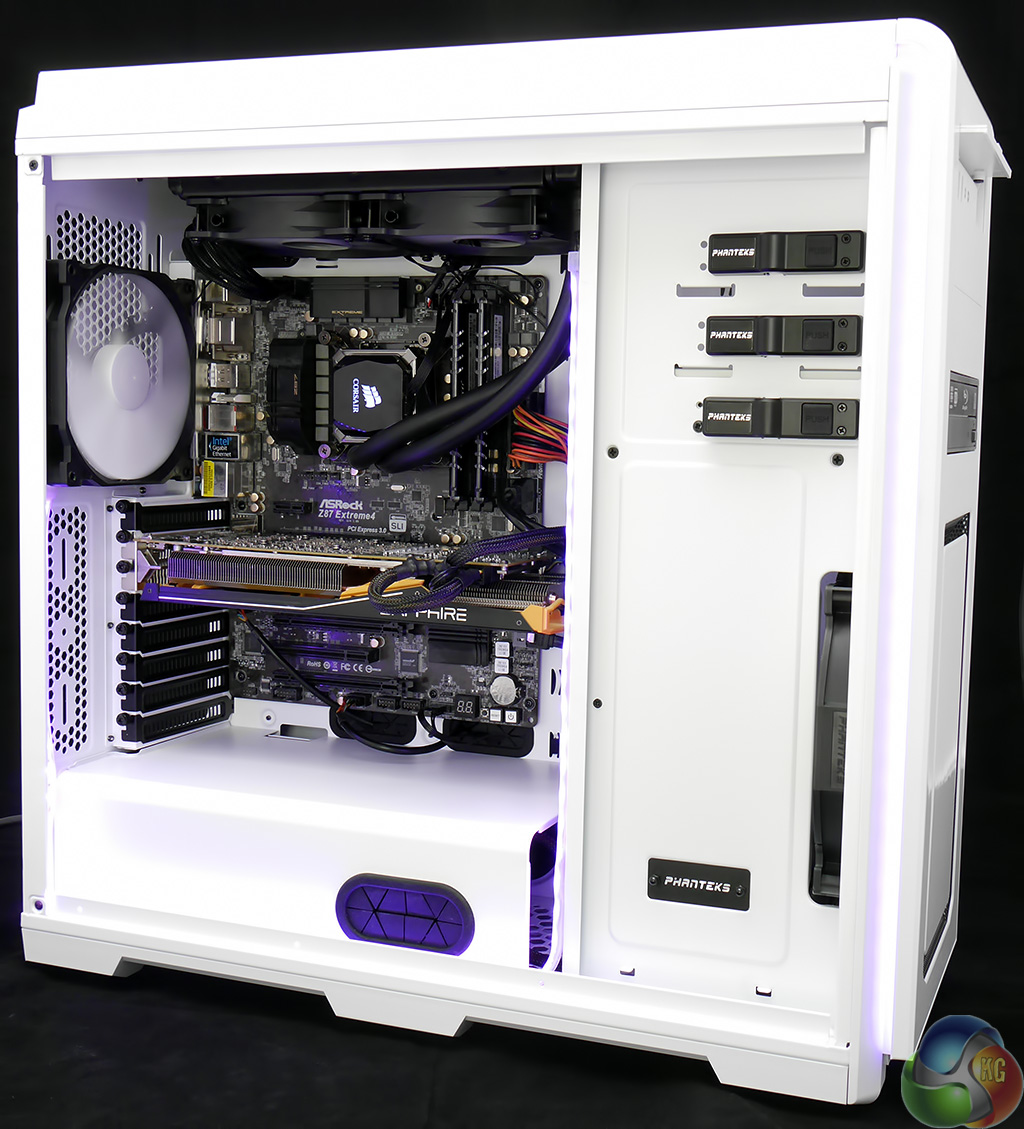
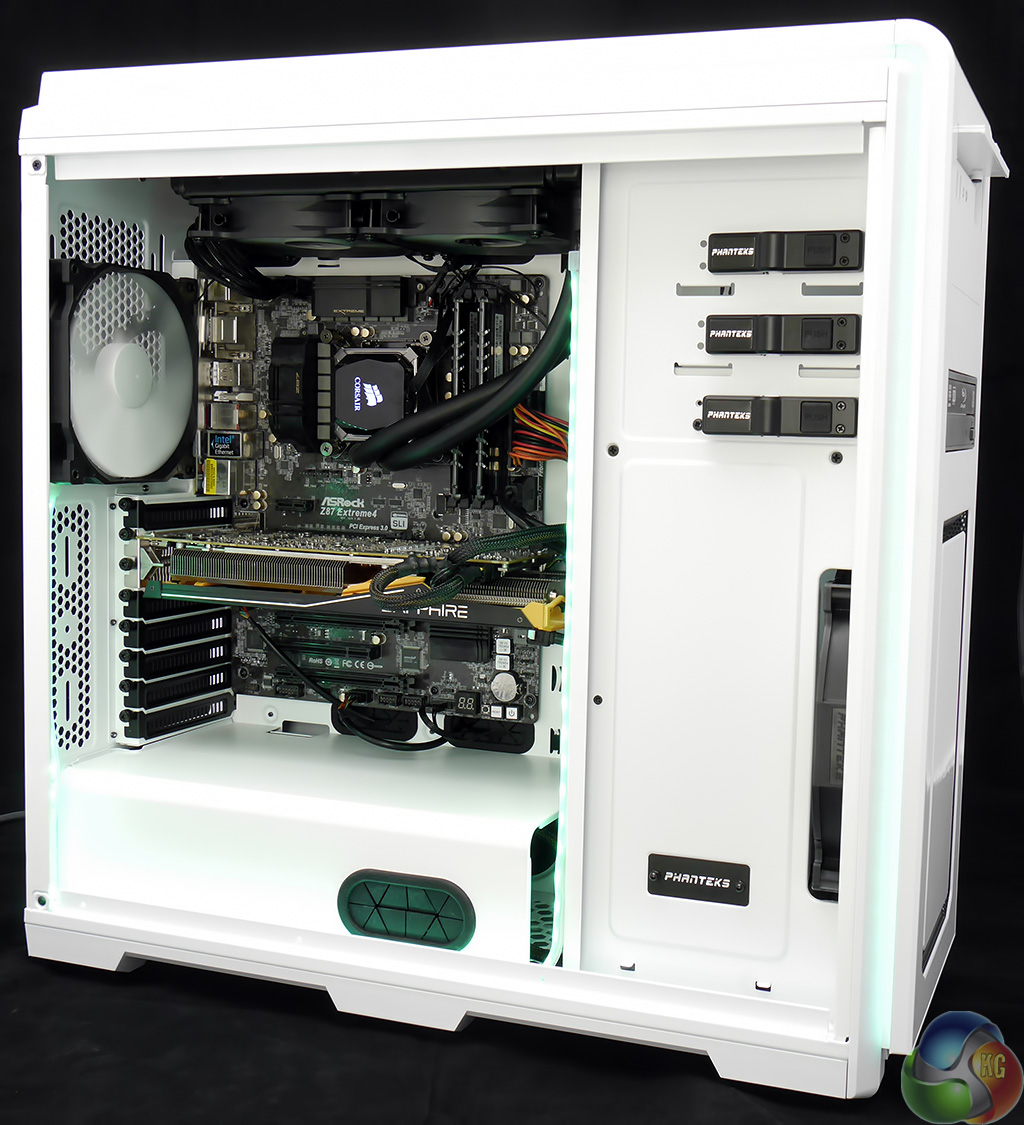
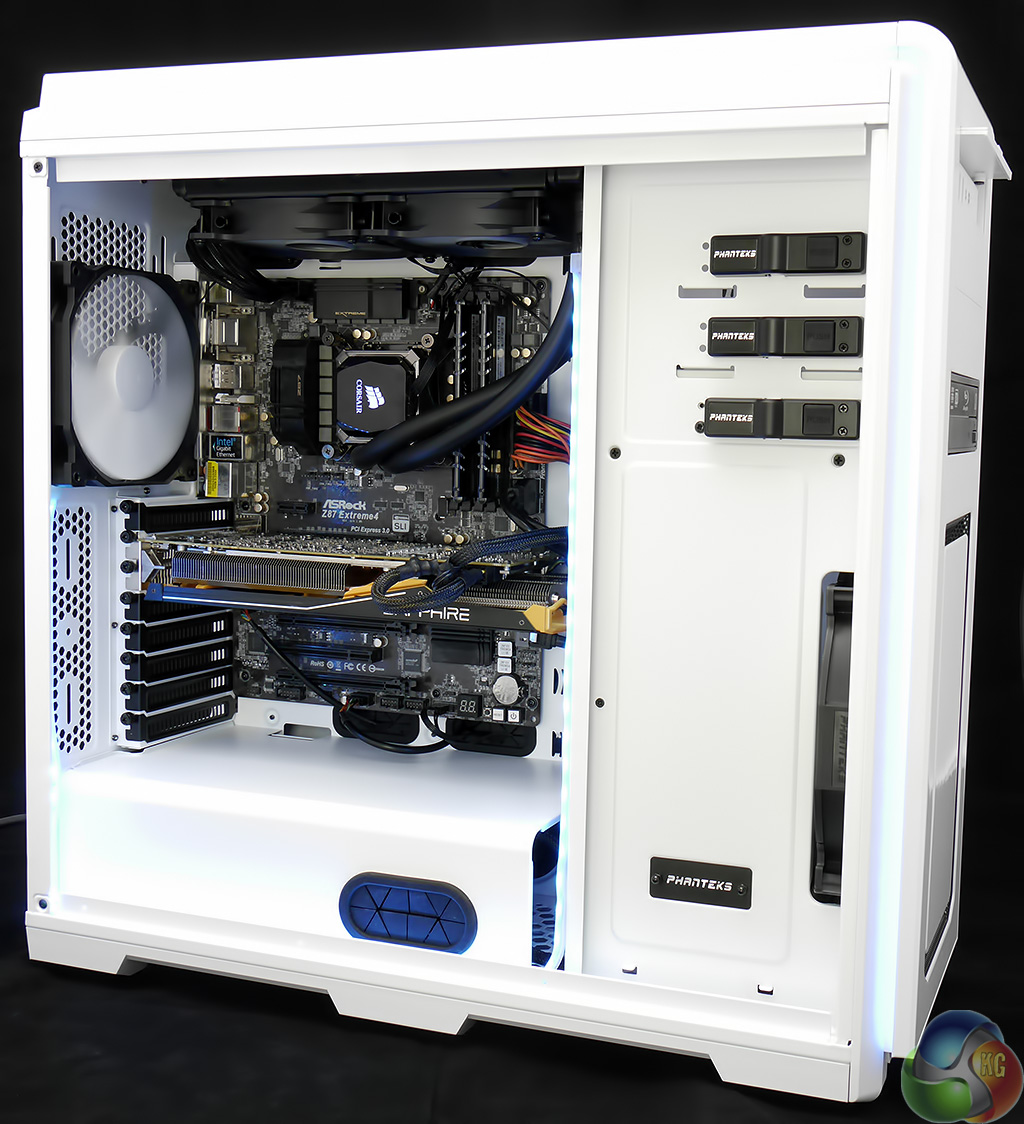
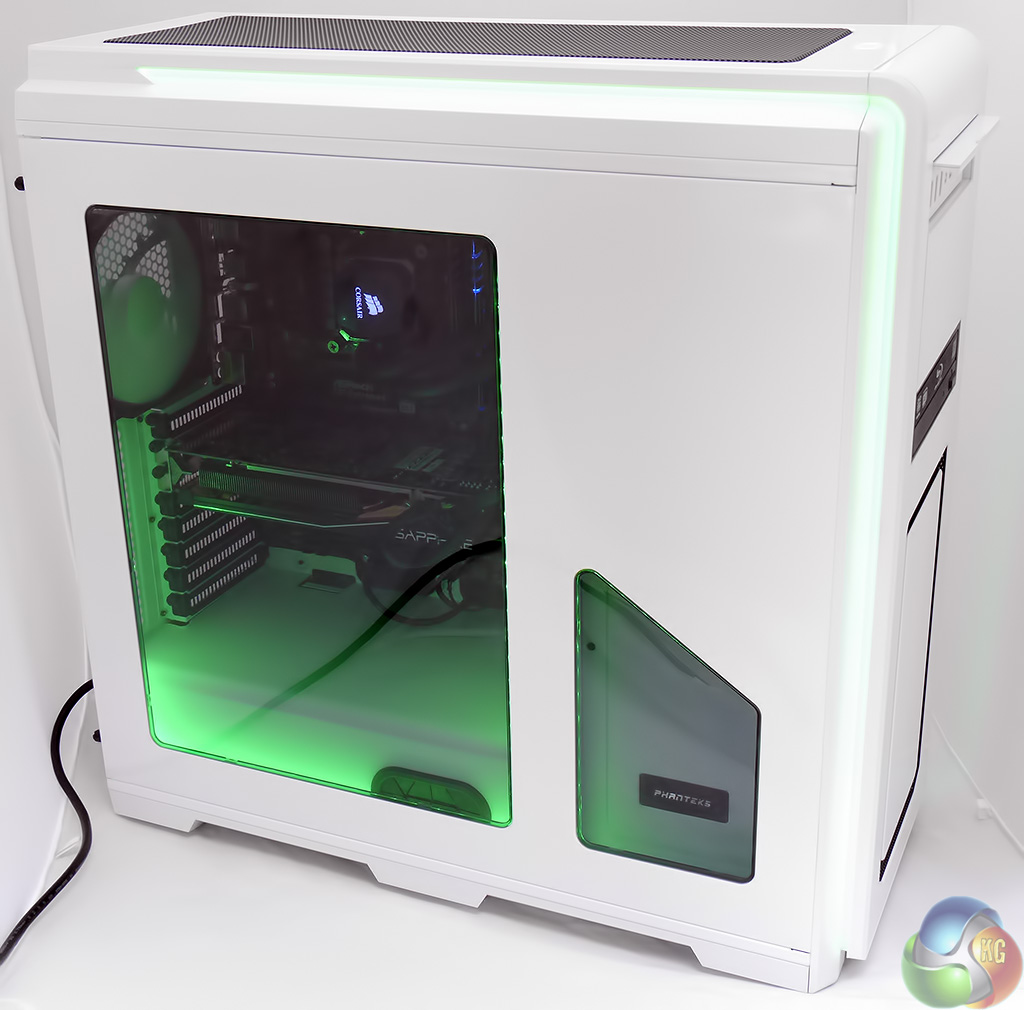
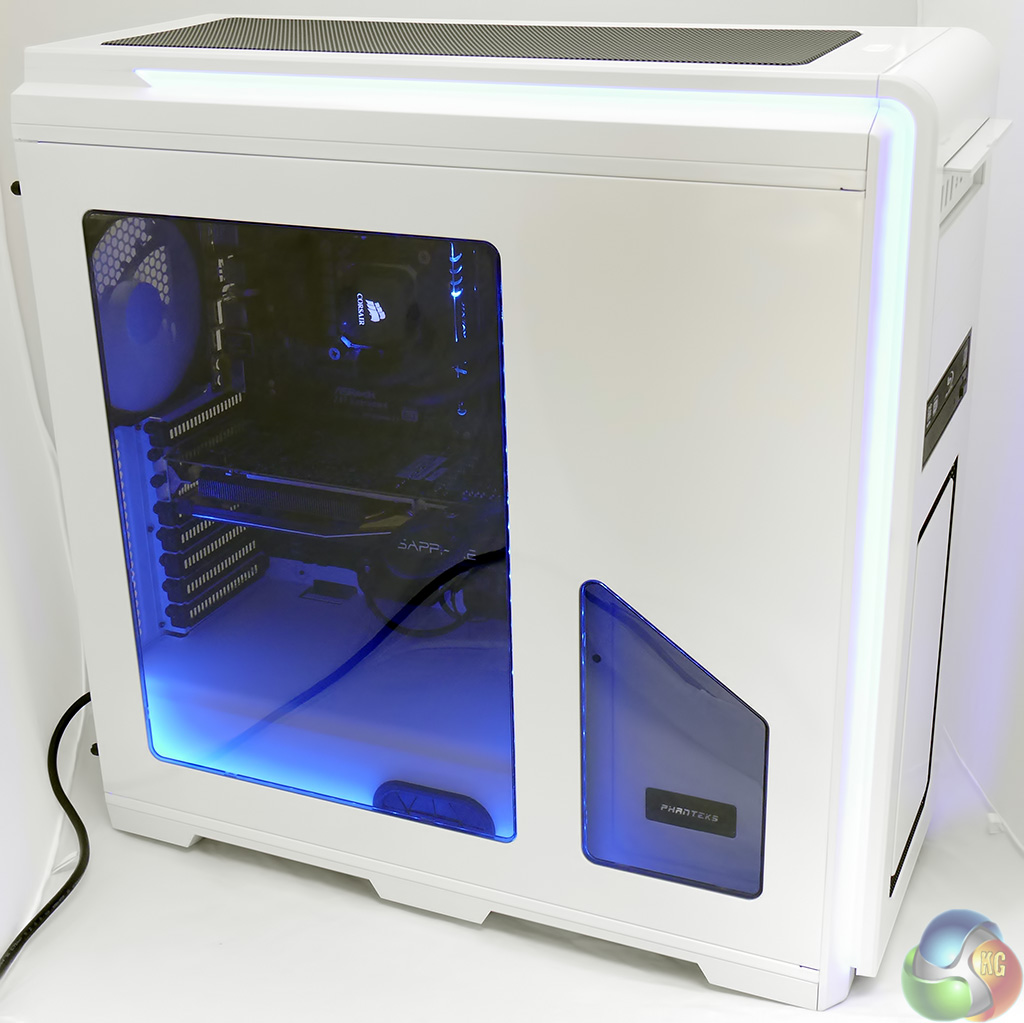
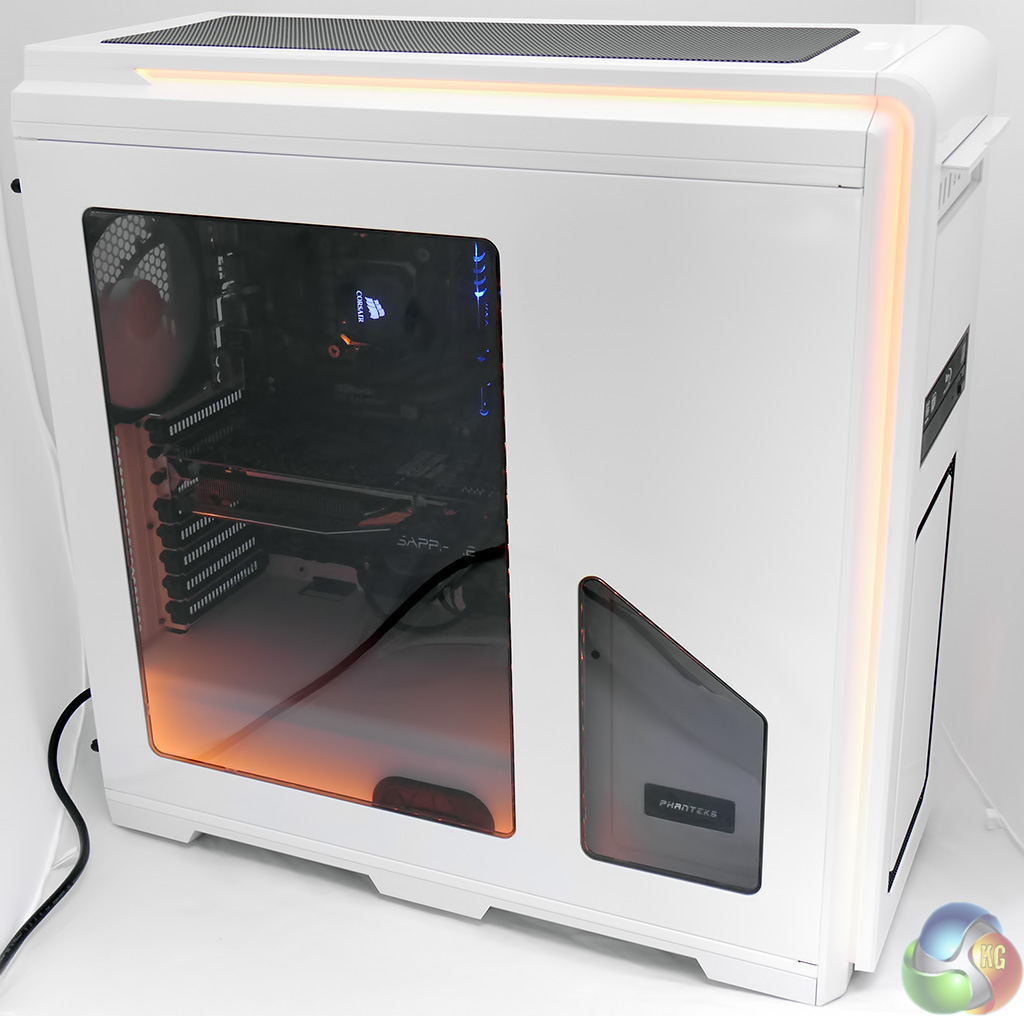
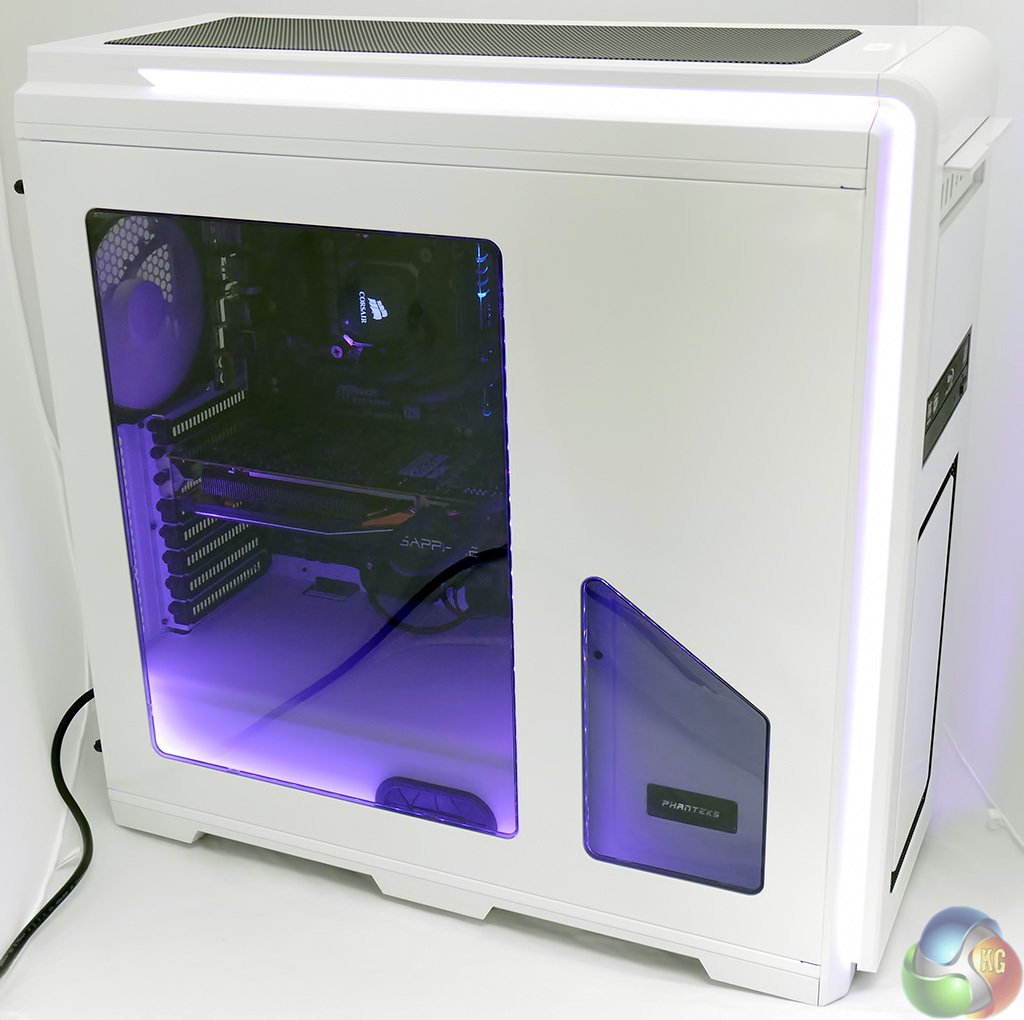
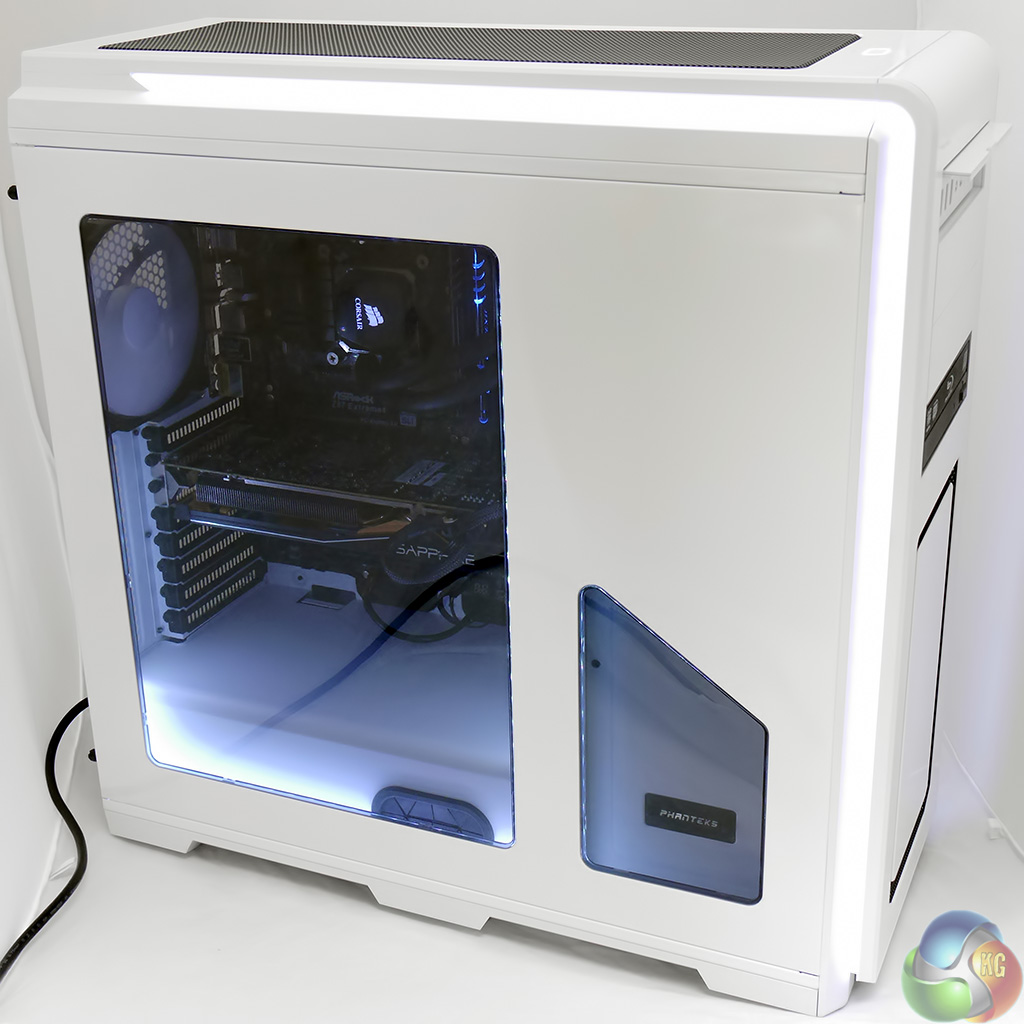
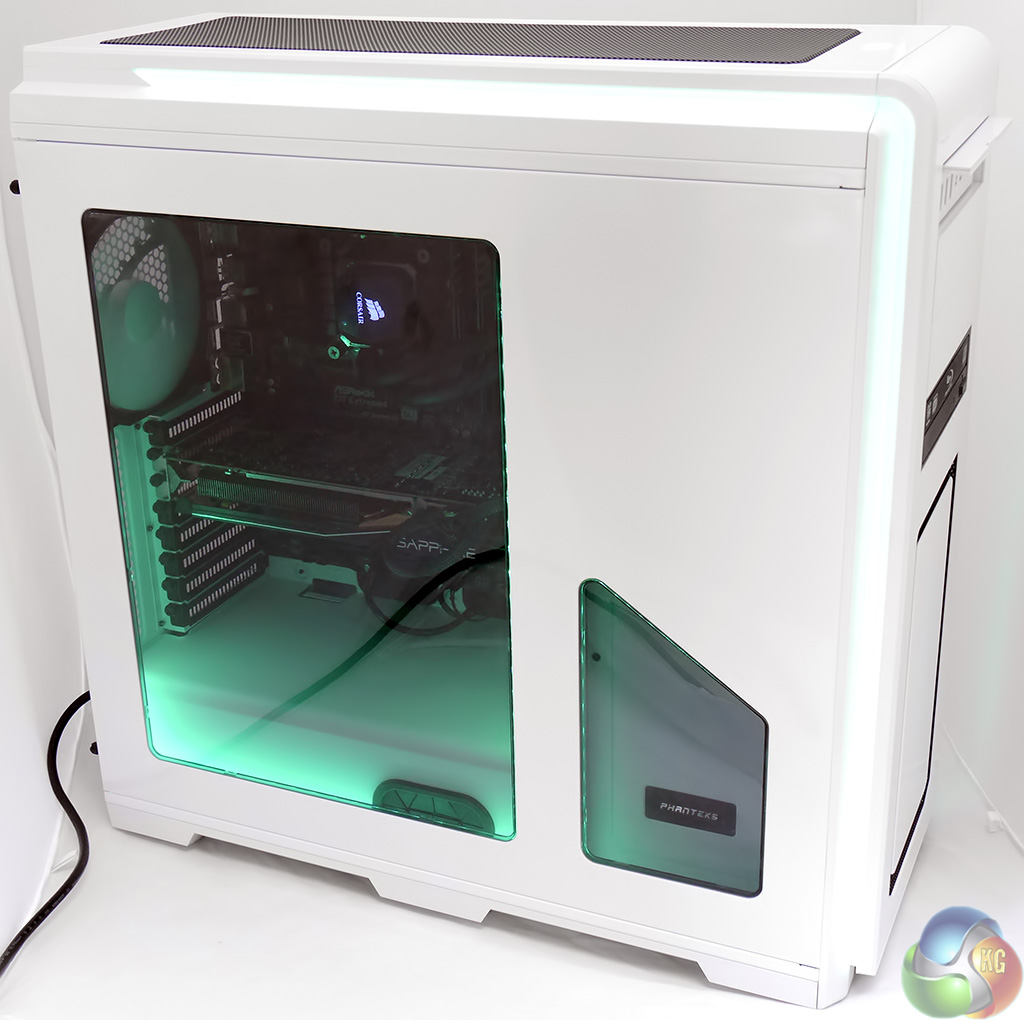
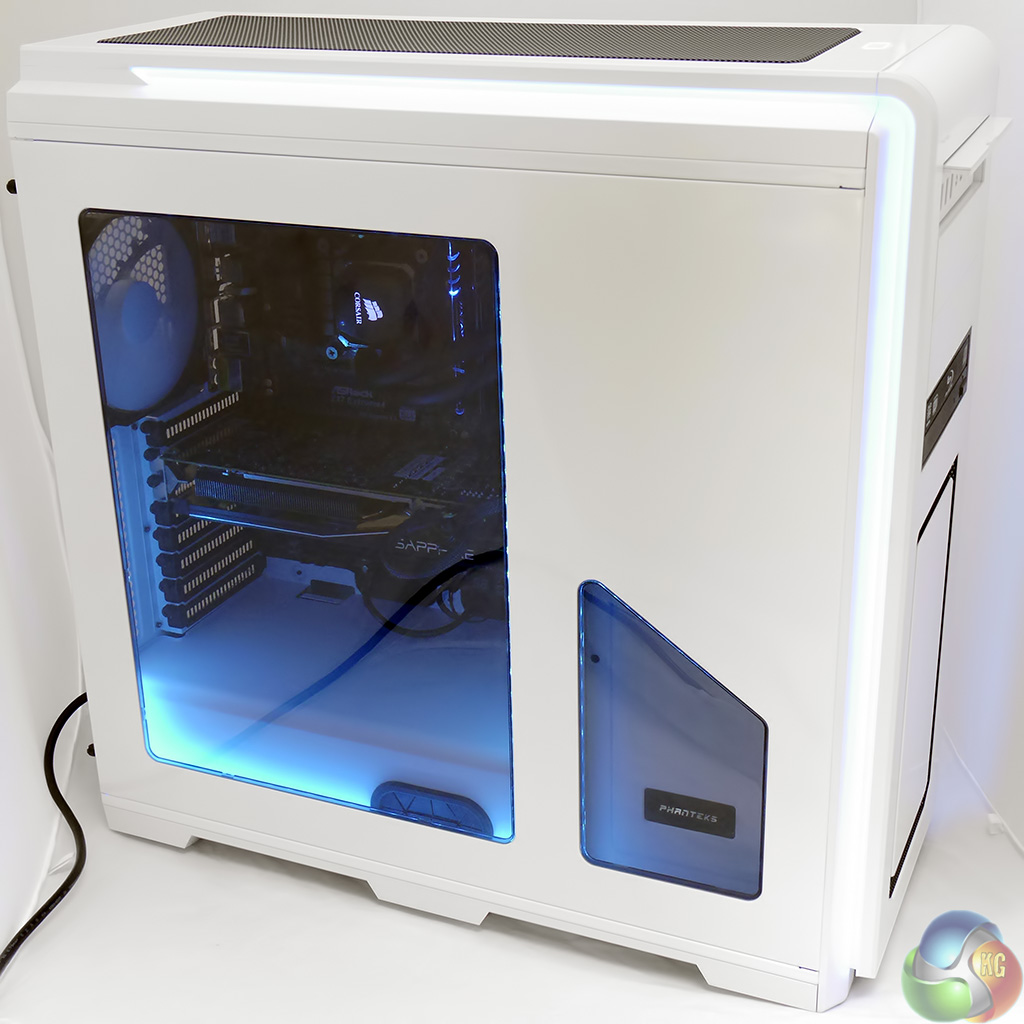
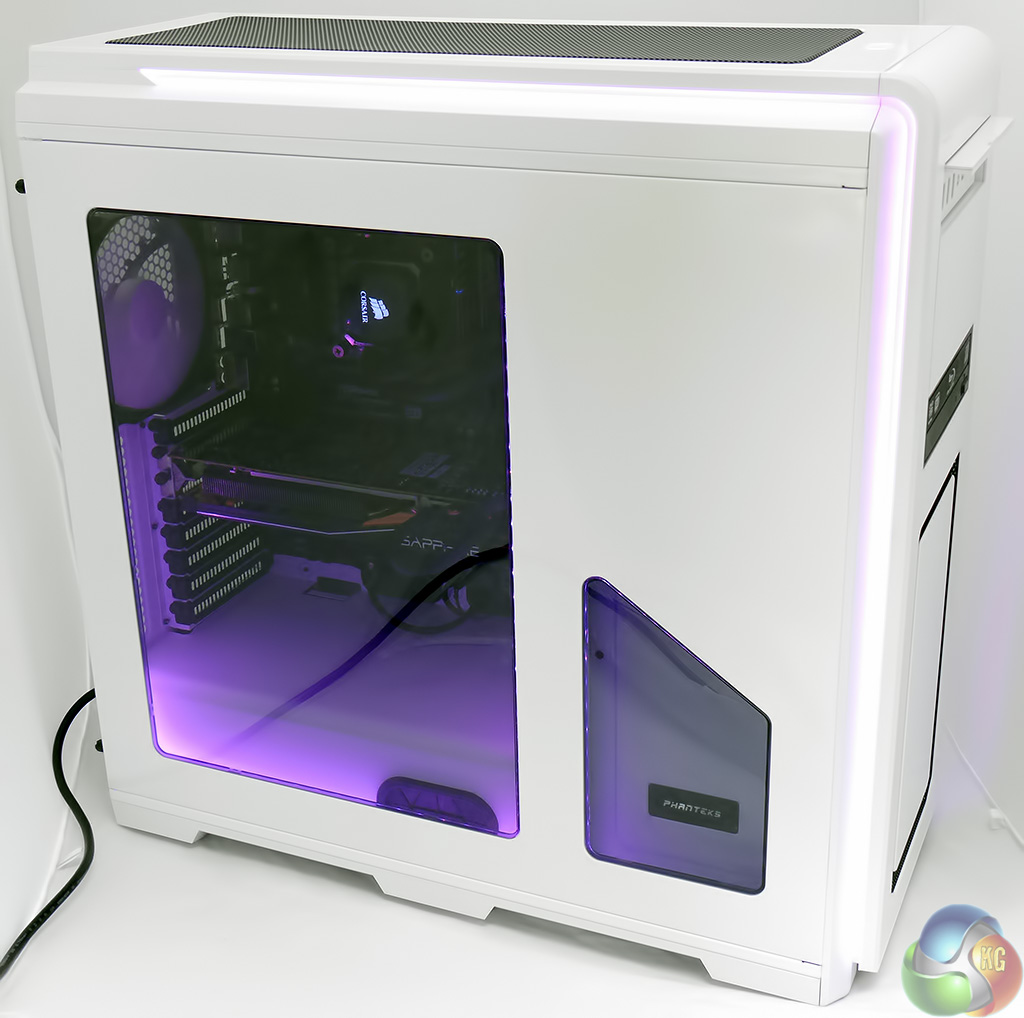
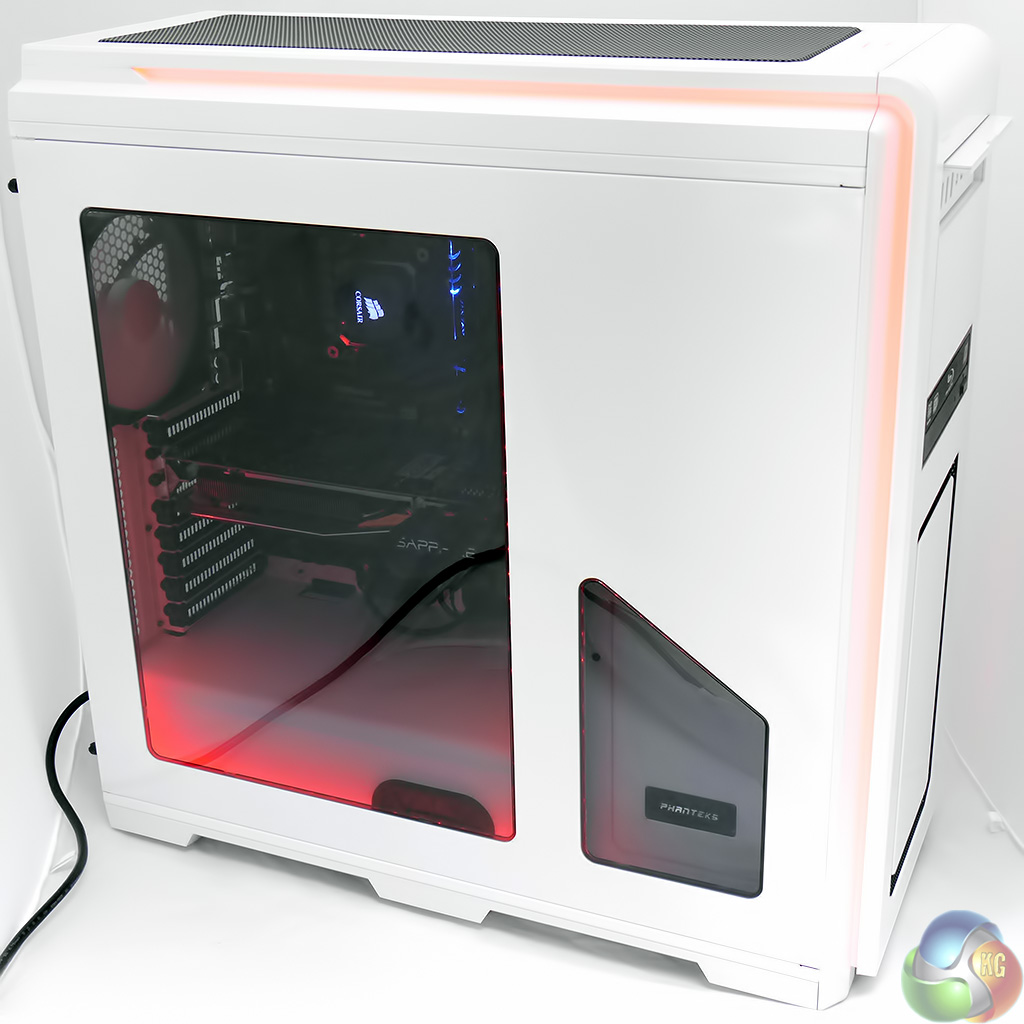
The photos and video of the lighting system pretty much speak for themselves. The lighting that is built into the case is impressive and sets the Enthoo Luxe apart from the competition. If you feel the urge you can add the one metre (£14) or two metre (£17) LED self adhesive lighting strip to illuminate the interior of the case. The strip isn't especially flexible and I feel that routing the two metre strip would be awkward. I liked the look of the one metre strip and was impressed by the results, and would certainly recommend you spend the extra £14 on this accessory.
Changing between the ten colours is a simple matter of toggling the control button on the front panel. I was glad to see that, unlike my Christmas tree lights, there are no options for flashing lights or flickering patterns, just a pleasant steady glow.