The mean meat of the review is the installation, chassis versatility and performance. If a case looks great from the outside but is a mess inside then you can be sure that KitGuru will find any weaknesses.
After installing the appropriate motherboard standoff’s we are ready for the motherboard.
For today’s build we will be using the GIGABYTE 890GPA-UD3H 890GX AM3 Motherboard.
It’s quite obvious from the image below that there should be plenty of space for one or more of today's oversized video cards.


After making sure our motherboard is properly secured we can install our PSU and look for good ways to route our cables. The PSU we will be using today is the Silverstone Strider Plus 850W which happens to be fully modular. These modular power supplies make it so much easier to keep the interior neat and tidy. I must admit that as I get older I am generally lazy with cable management so any help is welcomed.
To complete our system build we added the Asus EAH 5850, the AMD 1055T processor a 4 GB kit of G-Skill Ripjaws DDR 3 1600 and 2 WD hard drives.

Adding and optical drive to the Tempest is a breeze. We just pop out the bay cover, slide the device into place and secure it with the provided retention mechanisms.

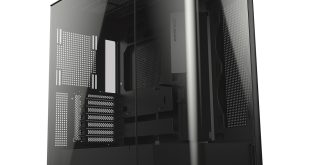
Below are 2 pictures with our system powered up and running; once again take note of the spacious interior. We can imagine this chassis with a 5970 or two installed but chances are that is just in a dream :). The second shot shows the finished product LED’s included. Now with assembly completed and fully operational we can move on and look at the internal temperatures of our components before we put a wrap on this one.