


The interior of the Xigmatek MidGard II is completely black which is quite common these days. The optical drive and 3.5″ hard drive cages operate tool free except for solid state drives which require four small screws. The expansion slots in the MidGard II all have thumbscrews provided to secure add on cards.


The optical drives are tool free, it's as easy as rotating the X in the center of the retention mechanism to unlock it. Then simply remove it and place the drive in the desired position. Once the drive is positioned correctly we simply replace the bracket and rotate the X once again to lock the mechanism in place.


Hard drive installation is quick and easy in the MidGard II. The drive bays are capable of holding 3.5″ hard drives or 2.5″ SSD drives. Each of the drive bays have rubber vibration dampening devices that will reduce the noise generated by the drives.


The MidGard II can support ATX, Micro ATX or ITX motherboards. We used a Gigabyte Micro ATX board for the build and there was ample room for an easy install.


The power supply for the system mounts in the bottom of the MidGard II. There is a removable mesh dust filter that sits below the power supply included with the MidGard II.

One of the most attractive features of the Midgard II is the top mounted 2.5/3.5″ SATA Docking Station. We placed a WD SATA drive in the docking station and it is pictured above.

Here is a shot of the rear panel after we have completed the system build. You can see the Xigmatek fan controller occupying the bottom expansion slot.


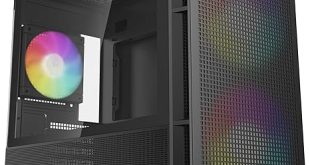
The Xigmatek MidGard II has plenty of room and some decent cable management options. These options allow for a quick but tidy build which is a welcome experience for any system builder.