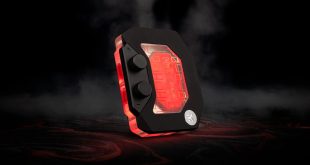
Corsair have altered the design of the mounting mechanism slightly from the H80 but it's fairly similar. The main difference is that the H80i features magnetic retention bracket which simply slot over the pump and are held in place by magnets. This makes things a lot easier for AMD users as the brackets no longer have to be unscrewed. We will be documenting the installation procedure with an ASRock Z77 Extreme6 motherboard.
Corsair recommend installing the radiator into your case before attaching the CPU block to the motherboard. However, we wouldn't advise installing the fan on the inside of the radiator until after you have everything else installed as it can get in the way of the screws which need to be attached to secure the CPU block in place.
We also wouldn't advise this if your case doesn't have a cut out section in the motherboard tray to allow CPU cooler backplates to be installed without removing the motherboard. In this case we would attach the backplate and stand-offs to the motherboard before installing the motherboard into the case.
Installing the radiator into the case is a little fiddly as you have to sandwich the fan in place between the case and the radiator while screwing everything together. We recommend installing the cooler so it exhausts air out of the rear of the case.
Next, the backplate needs to be placed on the back of the motherboard so the four protruding screw threads poke through the corresponding holes. The position of these can be adjusted to suit both Socket 1155/1156 and Socket 1366 motherboards.
Once the backplate is in place, the four stand-offs can be screwed in from the top side of the motherboard. These provide the mounting points for the CPU block.
Then, the CPU block can be secured into place using the thumbscrews provided. We would recommend tightening them with a screwdriver to ensure the mounting pressure is sufficient. We must take care not to over-tighten the screws.
Finally, all the cables need to be connected to your system. These include a 3-pin fan connector which needs to be plugged into your CPU fan motherboard header, a SATA power connector and an internal USB2.0 header which enables Corsair Link. Also, the two fans can be plugged into the CPU block using the provided adapter.
 KitGuru KitGuru.net – Tech News | Hardware News | Hardware Reviews | IOS | Mobile | Gaming | Graphics Cards


