To access the inside of the case, we only need to remove two thumbscrews from the left side panel. Unfortunately these aren't thumbscrews. The inside of the Enforcer is painted black throughout which will compliment almost any colour scheme that you choose to follow when building your rig.

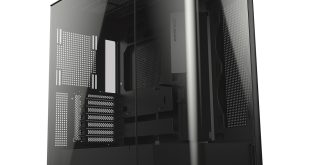
Below the 120 mm exhaust fan in the rear of the case there are seven expansion slots along with a single vertical one for further expansion if required. Cooler Master haven't chosen to use thumbscrews here either, opting for standard screws. The Enforcer supports all standard ATX power supplies although you may need to remove the 2.5″ drive bays at the bottom of the case for longer ones.
There are no fancy tool-less installation mechanisms here; Cooler Master have opted for the the traditional approach which requires four screws to secure the power supply to the back of the chassis. We installed a Corsair HX850W modular power supply for our test system. There are numerous cable routing holes surrounding the motherboard tray so you can achieve a very tidy build if you have the time. There are also a generous number of points on the back of the motherboard tray to secure all the cables down to.

Before installing the motherboard, we first have to install the motherboard standoffs. Cooler Mater supply a small tool which lets you screw these tightly into the motherboard tray. After installing the I/O shield, we can then secure the motherboard down to the standoffs using the provided screws. There is a large cutout in the motherboard tray which means you can install the CPU cooler after installing the motherboard into the case. If you install the CPU cooler first, though, it can be quite difficult to get all of the motherboard screws in due to the lack of space inside.

We installed a Gigabyte P67A-UD3 motherboard for our testing, combined with an Intel Core i5 2500S processor. Kingston kindly supplied us with 4GB of their high quality HyperX Genesis DDR3-2133 RAM for our testing. There was plenty of room in the case for our AMD Radeon HD 6790 graphics card and there should be enough room for larger 6970 graphics card without removing the top hard drive bays. If you use a HD6990 however you will need to remove the drive bays.

On the right hand side at the top of the case we find optical drive bays. Installation is very simple as there is a tool-less mechanism for securing the drives in place. Below the optical drive bays there are six 3.5″ hard drive bays, four of which can be removed to make room for longer graphics cards. There are also two 2.5″ hard drive bays in the bottom of the case which are ideal if you plan to use an SSD in your system. We installed a Kingston SSDNow V+100 128 GB solid state drive for our testing.