The entire installation process is simplified greatly by the clear instructions that In Win provide with the Dragon Slayer. Unfortunately there are a few aspects of the design which hinder the installation as well.
Firstly we installed the power supply which is a simple process, requiring us to fix it to the back of the case with the provided screws. Then we pushed all the cables through the cable routing hole next to the power supply to keep them out of the way while installing the other components.

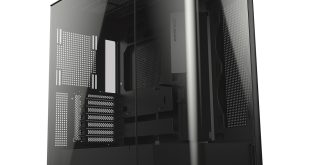
Next we installed the motherboard which is a simple matter of screwing it down – the motherboard stand-offs are built into the motherboard. Unfortunately we didn't have a Micro-ATX board available for testing so we used a Mini-ITX board which was kindly supplied to us by Intel.


Then we came to installing the hard drives. In win supply three sets of rails which have to be screwed into the sides of the hard drives. With hindsight, we would recommend adding any 3.5″ hard drives into the system before the PSU as it would simplify the process greatly. But as we had already installed the PSU when it came to this, we did it the more difficult way.
Firstly, the bottom of the front panel has to be removed by unclipping the covers and the hard drive rack has to be released by undoing the tool-less mechanism on the site. Then the whole rack can be pulled out the front using the fan and the hard drives installed into the back. Then the whole rack has to be reinstalled before we can connect up the hard drives. The one slight advantage of this grossly overcomplicated process is that you can remove the hard drive rack all together and install two 5.25″ drives instead.
Thankfully, installing the optical drive at the top of the case is a refreshingly simple process. After unclipping the bezel, the drive can be slotted in and secured with the tool-less mechanism.


After experiencing the hard drive mounting mechanism, we were hoping for a better experience when installing the graphics card. But unfortunately this wasn't the case. For some reason In Win have decided to use plastic clips as a tool-less alternative to screws for the PCI slots. This is a far cry from the impressive system we saw on the Lian Li PC-8FIB case that we reviewed recently and completely failed to lock our Sapphire 5850 TOXIC graphics card securely. In fact we had to remove one of the clips completely as it wouldn't clip into place and leaving it open interfered with the side panel.

Finally we connected all the cables up, routing them through the most convenient holes. We weren't able to connect the USB3.0 port as our test motherboard doesn't have a built in USB3.0 controller.