The BIOS is immediately familar to all ASUS users. It starts off in the ‘basic' mode, ideal for novice and inexperienced users. To change boot drive priority simply drag the icons into position for example.

When we opted for advanced mode, we are greeted with the ‘Main' panel. This highlights the BIOS revision number, processor identity and speed. Underneath is total memory capacity and frequency. We are using Corsair 2,400mhz rated memory but it defaults to 1,333mhz initially, to ensure a safe first post.

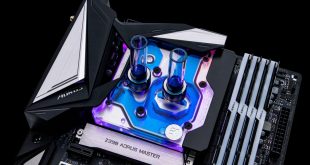
The AI Tweaker panel is were all the overclocking and tuning action takes place. We will look at this shortly when we go to overclock the Intel Core i7 4770k.

An overview of the Advanced panel showing the CPU, PCH, SATA and onboard devices configuration. This all works exactly as we would expect.

The ‘Monitor' panel highlights various fan speed, voltage and temperature related information. You an also configure the Q Fan settings at the bottom of this page.

The boot menu is used to select drive priorities as well as posting parameters. All very self explanatory.

The Tool menu is used to flash upgrade the BIOS, and to save and load BIOS parameters.


The default bios settings are all automatic, which makes sense.


We loaded the XMP profile to set the Corsair Vengeance memory at the correct 2,400mhz speeds. This worked without a hitch.


We selected the CPU Core Ratio to ‘per core' and overclocked the 4770k to 4.5ghz (45 x 100). Regular Kitguru readers will be aware that our particular 4770k sample is limited to 4.5ghz with 1.28 volts. Any higher and it can get very hot (over 90c).
We attempted to achieve the maximum overclock possible and get a post into windows. The 4770k posted at 4.7ghz with 1.34 volts but the core temperatures hit close to 100c under load and it was not prime stable. Still, if you are interested to know potential on tap, the Asus board seems to have plenty depending on your processor and cooling. Regardless, this is very impressive for a ‘budget' design.

Stability was enhanced by changing the Load Line Calibration to Ultra High and the CPU Power Phase Control to ‘Optimised'. We adjusted the CPU Power Duty Control to ‘Extreme'.

Memory voltage was automatically adjusted to 1.65v thanks to the XMP profile.