

For our testing today we are using a Core i5 760 system which we will overclock to 4.4ghz later. We want to compare this case directly against the Bitfenix Colossus.
Chassis: BitFenix Survivor and Colossus
Processor: Intel Core i5 760
Motherboard: ASRock P55 Extreme 4
Cooler: Corsair H70 Liquid Cooling
Memory: Corsair 4GB DDR3 1600mhz Dominator & AirFlow Pro
Storage: Corsair F40 SSD
Graphics: eVGA GTX460 SC
Power Supply: ThermalTake ToughPower XT775
Windows 7 Ultimate Edition 64bit
Thermal Diodes
Raytek Laser Temp Gun 3i LSRC/MT4 Mini Temp
Digital Sound Level Noise Decibel Meter Style 2
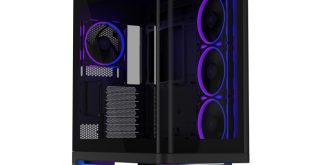
Firstly let us have a look at the chassis design and airflow, as it comes ‘out of the box’.

The Survivor relies totally on two huge 200mm fans acting as an intake and exhaust, with cool air flowing from the front, then expelled out the top of the case. The lack of rear mounted exhaust fan means the CPU cooler is dealing with flow in that direction, on its own.
We have placed thermal diodes in 5 case positions – 1; top optical drive bay position. 2; hard drive position. 3; top area between CPU and fan exhaust positions. 4; above PSU, graphics card (s) area. 5; motherboard central ‘dead zone’ area. Ambient room temperatures were maintained at 23c throughout.

We then overclock the CPU to 4.4ghz which is as far as it will go.

The Survivor unfortunately can't match the Colossus cooling proficiency and GPU temperatures are significantly higher under load. This is due to the smaller overall physical space and the lack of rear or side mounted fans.
Never really liked their products, the design is just over the top and doesnt appeal to me. they are overlooking the basics and jumping into new territories before they have the basics covered.
They use some weird looking materials. what is it again? SECC, ABS I think I read.
I like the shape of this one, but id like silverstone to build it. :p
Sorry, ill stick with my Lian Li. but i like the fact they are diong things differentely. Price isn’t too bad, but its still fairly costly, almost 100 quid.
HUGE step up from the Colossus. I think that was one of the most ugly things ive ever seen. I agree with the review, they need to focus on fans, positionings, cooling. and basics. then working ou the cool ideas later.
The review is a little harsh. ok the fan omission and screws at the back is a bad idea, but it looks very different and I think they deserve a little credit for trying to be different in such a populated marketplace.
Its not bad looking, the material doesnt appeal to me, its rather rough looking, like a cheap car part.
Id rather get a silverstone or even an Antec DF85. but as others have said, id like to see them hang around and try more ideas. the third one is normally the killer.
Nah, bad design all round, sorry not for me. read about this elsewhere. some of their thinking makes no sense.
Its a different idea, but that rear mounted panel seems so stupid. why have it screwed in when many people need to get inside? negates the thumbscrews idea.