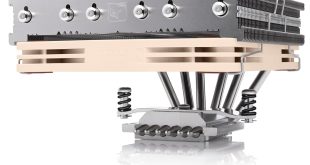
The installation process the simplest we've experienced and care must be taken to get a good mount on your CPU. There is a comprehensive installation guide, though, which simplifies the different steps. We will be documenting the installation process on the Intel Socket 2011 platform.
First of all, we are instructed to screw down the four ‘screw pillars' into the CPU socket.
Then, the retention bracket can be screwed down into place on top of these.
Next, the thermal paste must be applied before positioning the cooler. Then, it can be secured into place by screwing down the mounting plate across the CPU block. This is by far the most fiddly step of the process. While the installation can theoretically be completed with the motherboard in the case, in reality this would be very difficult.
We would recommend using a magnetic screwdriver to manoeuvre the screws into position as it can be quite difficult to put them in place with your fingers due to the large size of the heatsink and the proximity of surrounding components.
This was further complicated for us as our Mushkin RAM was too tall to install after the heatsink so it had to be installed first.
With this RAM installed, we also had to mount the cooler vertically on the motherboard which restricts access to the top PCI Express x16 lane. Those who want to run multiple graphics cards with this cooler should consider ultra low-profile memory.
Finally the fans can be attached to the cooler. We must stick some rubber patches to the heatsink to prevent vibrations, before securing the fans in place using the provided wire clips.
 KitGuru KitGuru.net – Tech News | Hardware News | Hardware Reviews | IOS | Mobile | Gaming | Graphics Cards


