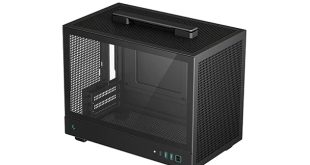
Removing the side panels of the case is a very simple process as they are both secured in place using thumbscrews. The interior of the case is powder coated black which will compliment many components aesthetically.
Installing a power supply in the TJ04-E is a relatively simple process as we need to remove the drive rack first by removing four screws in the floor of the case. There are a generous selection of cable routing holes cut into the motherboard tray which makes it very easy to achieve a tidy build.
SilverStone have adopted an unusual 3.5″ hard drive rack which can be completely removed from the case to install hard drives. This is one area in which the TJ04-E is showing it's age as it requires us to screw the hard drives into the rack before screwing the rack back into the case. Modern tool-less designs make it far easier to install storage drives into the case.
It is also tricky to install solid state drives into the case as the rack has to be removed beforehand. It makes sense to install the solid state drive at the same time as the power supply as we have to remove the rack anyway. The Solid State Drive then has to be screwed into place and then the rack has to be screwed back into the case. When it's in place it can be quite difficult to fit all the cables in as they conflict with the 3.5″ hard drive cables.
The problem would be made worse with longer power supplies installed as this would require us to move the 2.5″ rack towards the front of the case.
There are tool-less clips included for installing 5.25″ drives but we would recommend using screws to secure them as well, for added rigidity.
Installing a motherboard into the case is quite a simple process. First, we are required to screw in a few motherboard stand-offs before screwing the motherboard into place using the provided screws. There is a sizable cutout in the motherboard tray for installing a CPU cooler so it should be quite easy to update down the line.
Finally we installed our AMD Radeon HD 6950 graphics card into the case. There is plenty of room for long graphics card but we have to unscrew a small section on the back of the case to access the expansion slot screws. While this isn't a great deal of effort, we feel that it needlessly complicates the installation process.
 KitGuru KitGuru.net – Tech News | Hardware News | Hardware Reviews | IOS | Mobile | Gaming | Graphics Cards


