

At long last, NZXT has released something new to its H-series line. The three cases in question are the H400i – the micro ATX version, the H200i – the mini ITX version, and finally the ATX H700i, which is the case I’ll be reviewing. The H700i is the spiritual successor to the H440, an immensely popular but now rather aged chassis, so expectations will be high for the new model. With a RRP of £199.99, can the H700i prove to be a worthwhile investment and a worthy successor to the H440?


If the gallery above does not display then you will need to whitelist us in your ad blocker as they can interfere with our display code.
Specification:
Motherboard support: E-ATX (up to 272mm), ATX, Micro-ATX, Mini-ITX,c
Expansion slots: 7.
Included fans: 3x 120mm NZXT AER front intake, 1x 140mm NZXT AER rear exhaust.
Fan mounts: 3x 120mm/2x 140mm front, 2x 120/140mm roof, 1x 120mm rear, 1x 120mm floor.
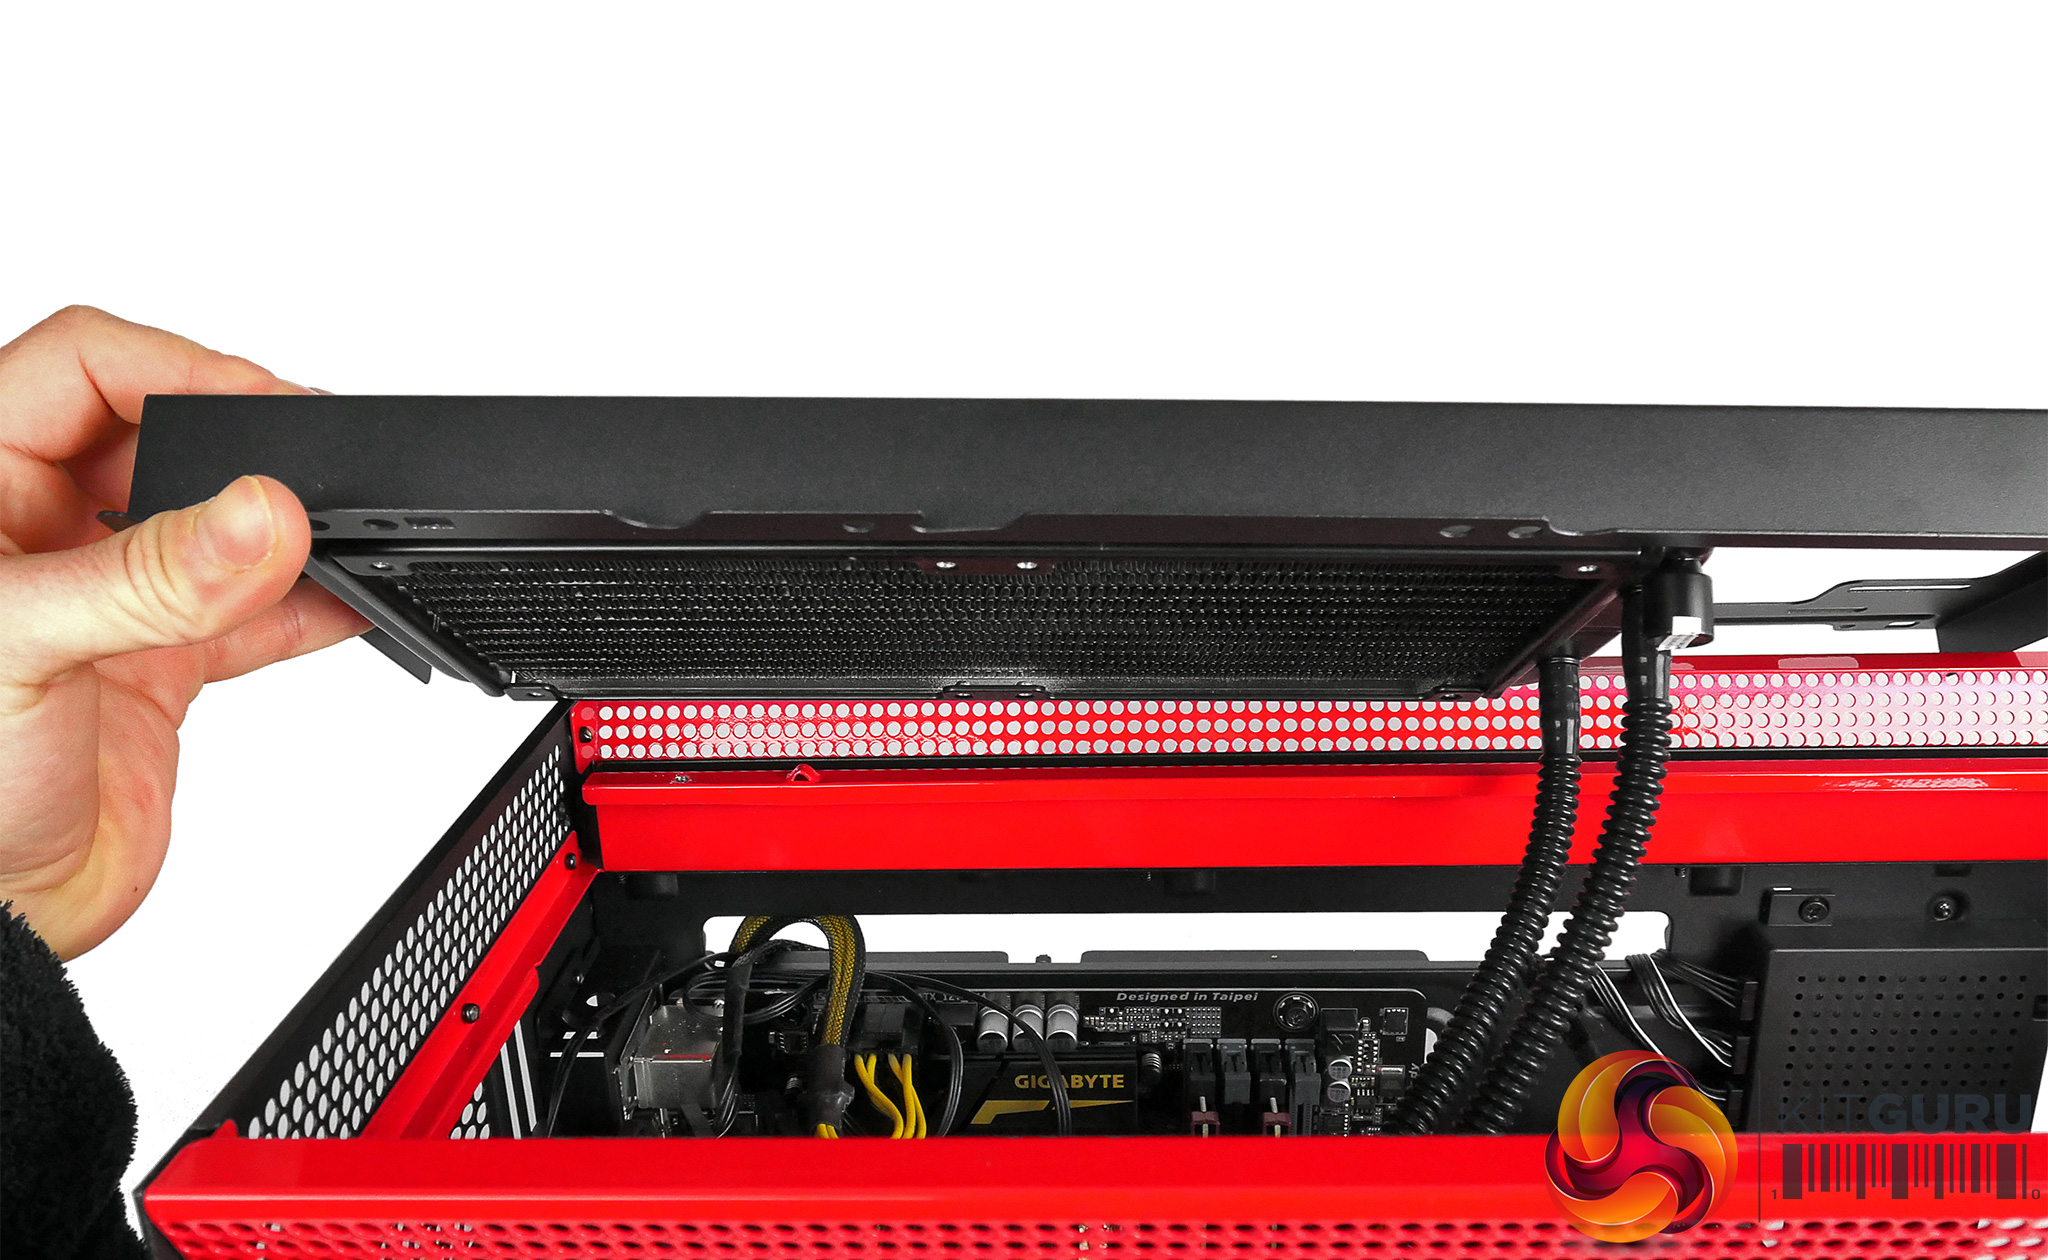
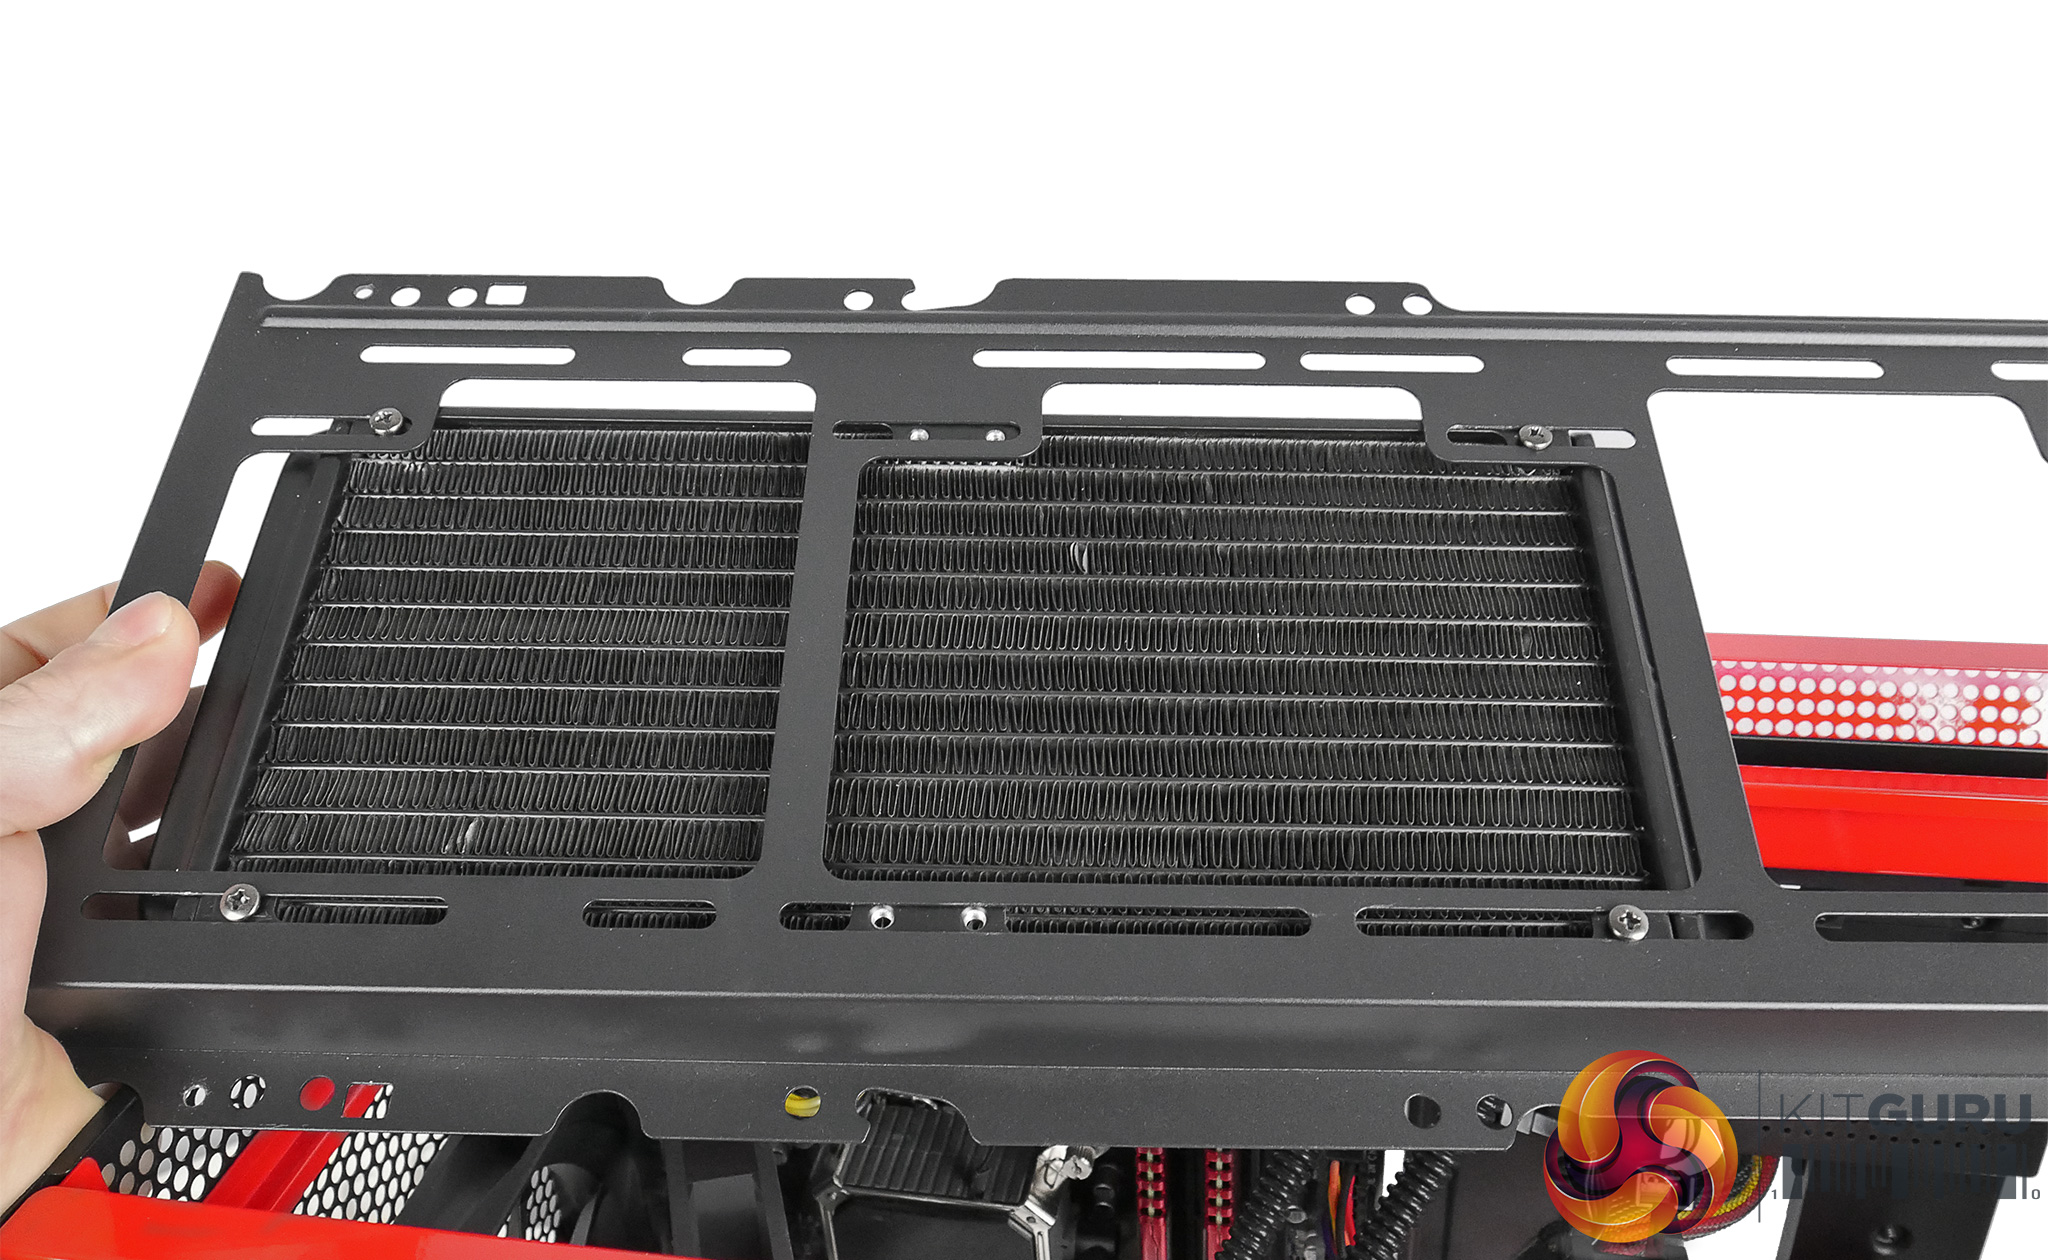
Radiator mounts: Up to 360mm front 60mm depth clearance , Up to 360mm roof 30mm depth clearance, Up to 140mm rear.
Internal drive bays: 2.5” x 7, 3.5” x 2+1 Smart Hub: 3 x Fan channels with Max 10W per channel output
1 x RGB LED port support up to 4 x HUE+ LED strips or 5 x Aer RGB fans GPU clearance: 413mm CPU Cooler clearance: 185mm
Dimensions: 516mm H x 494mm D x 230mm W.
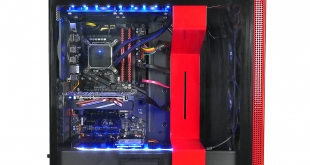
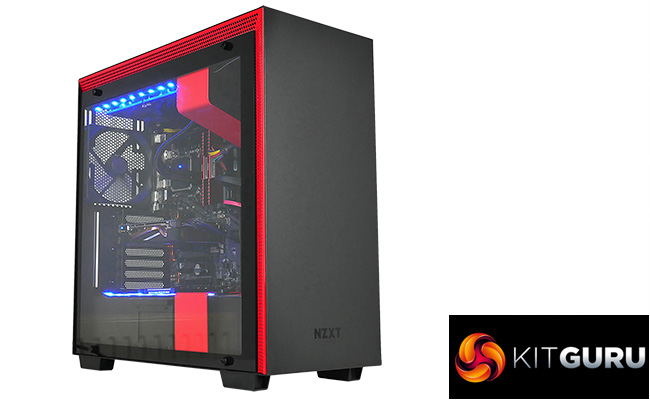
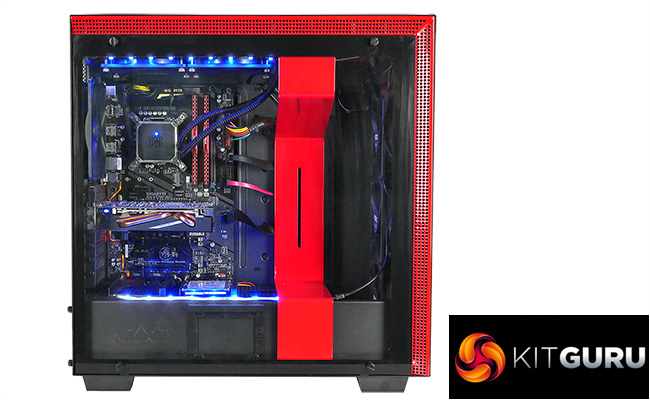
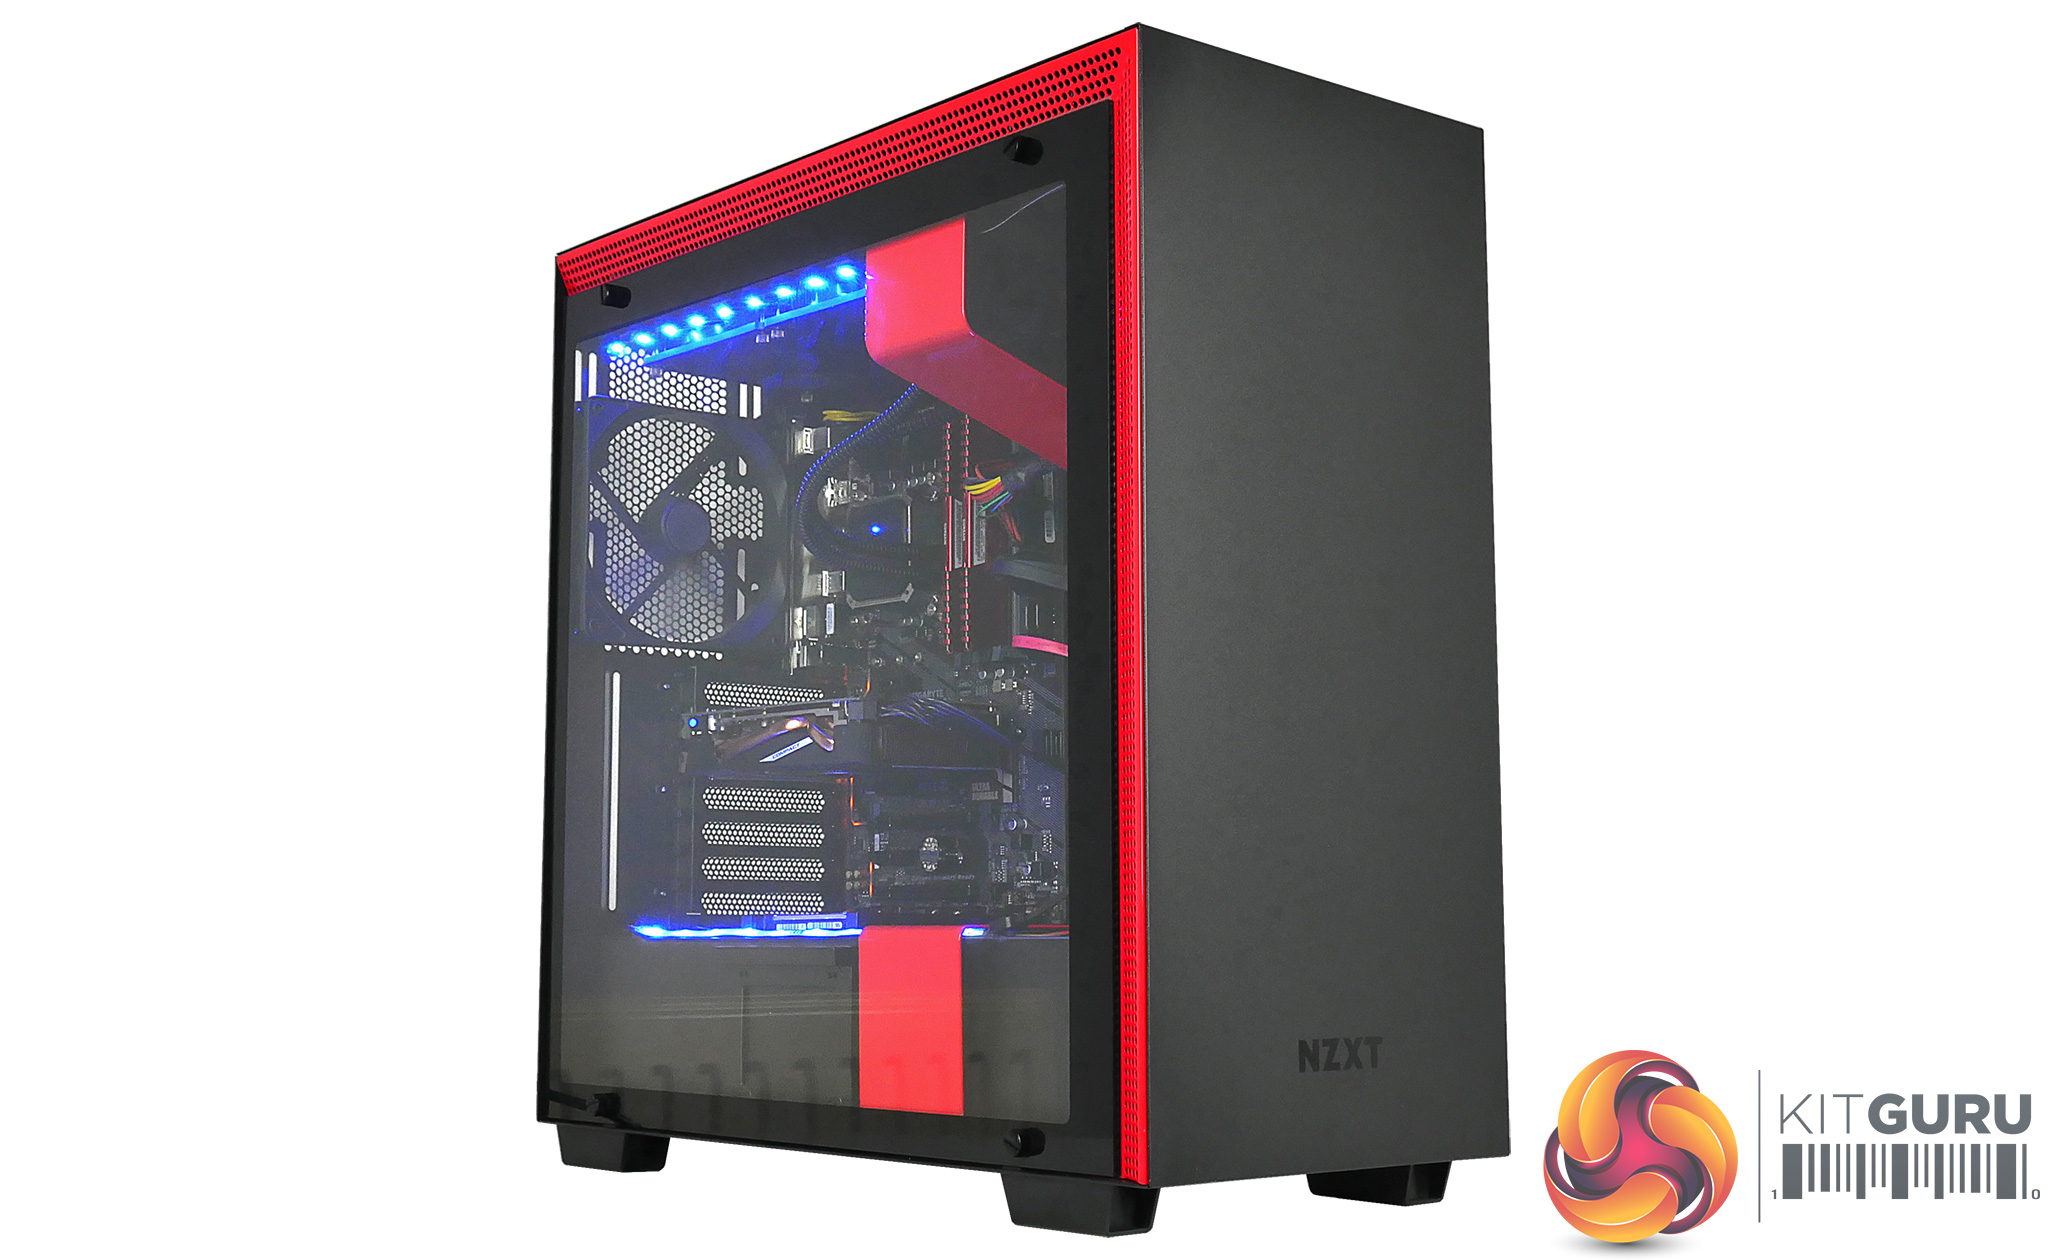
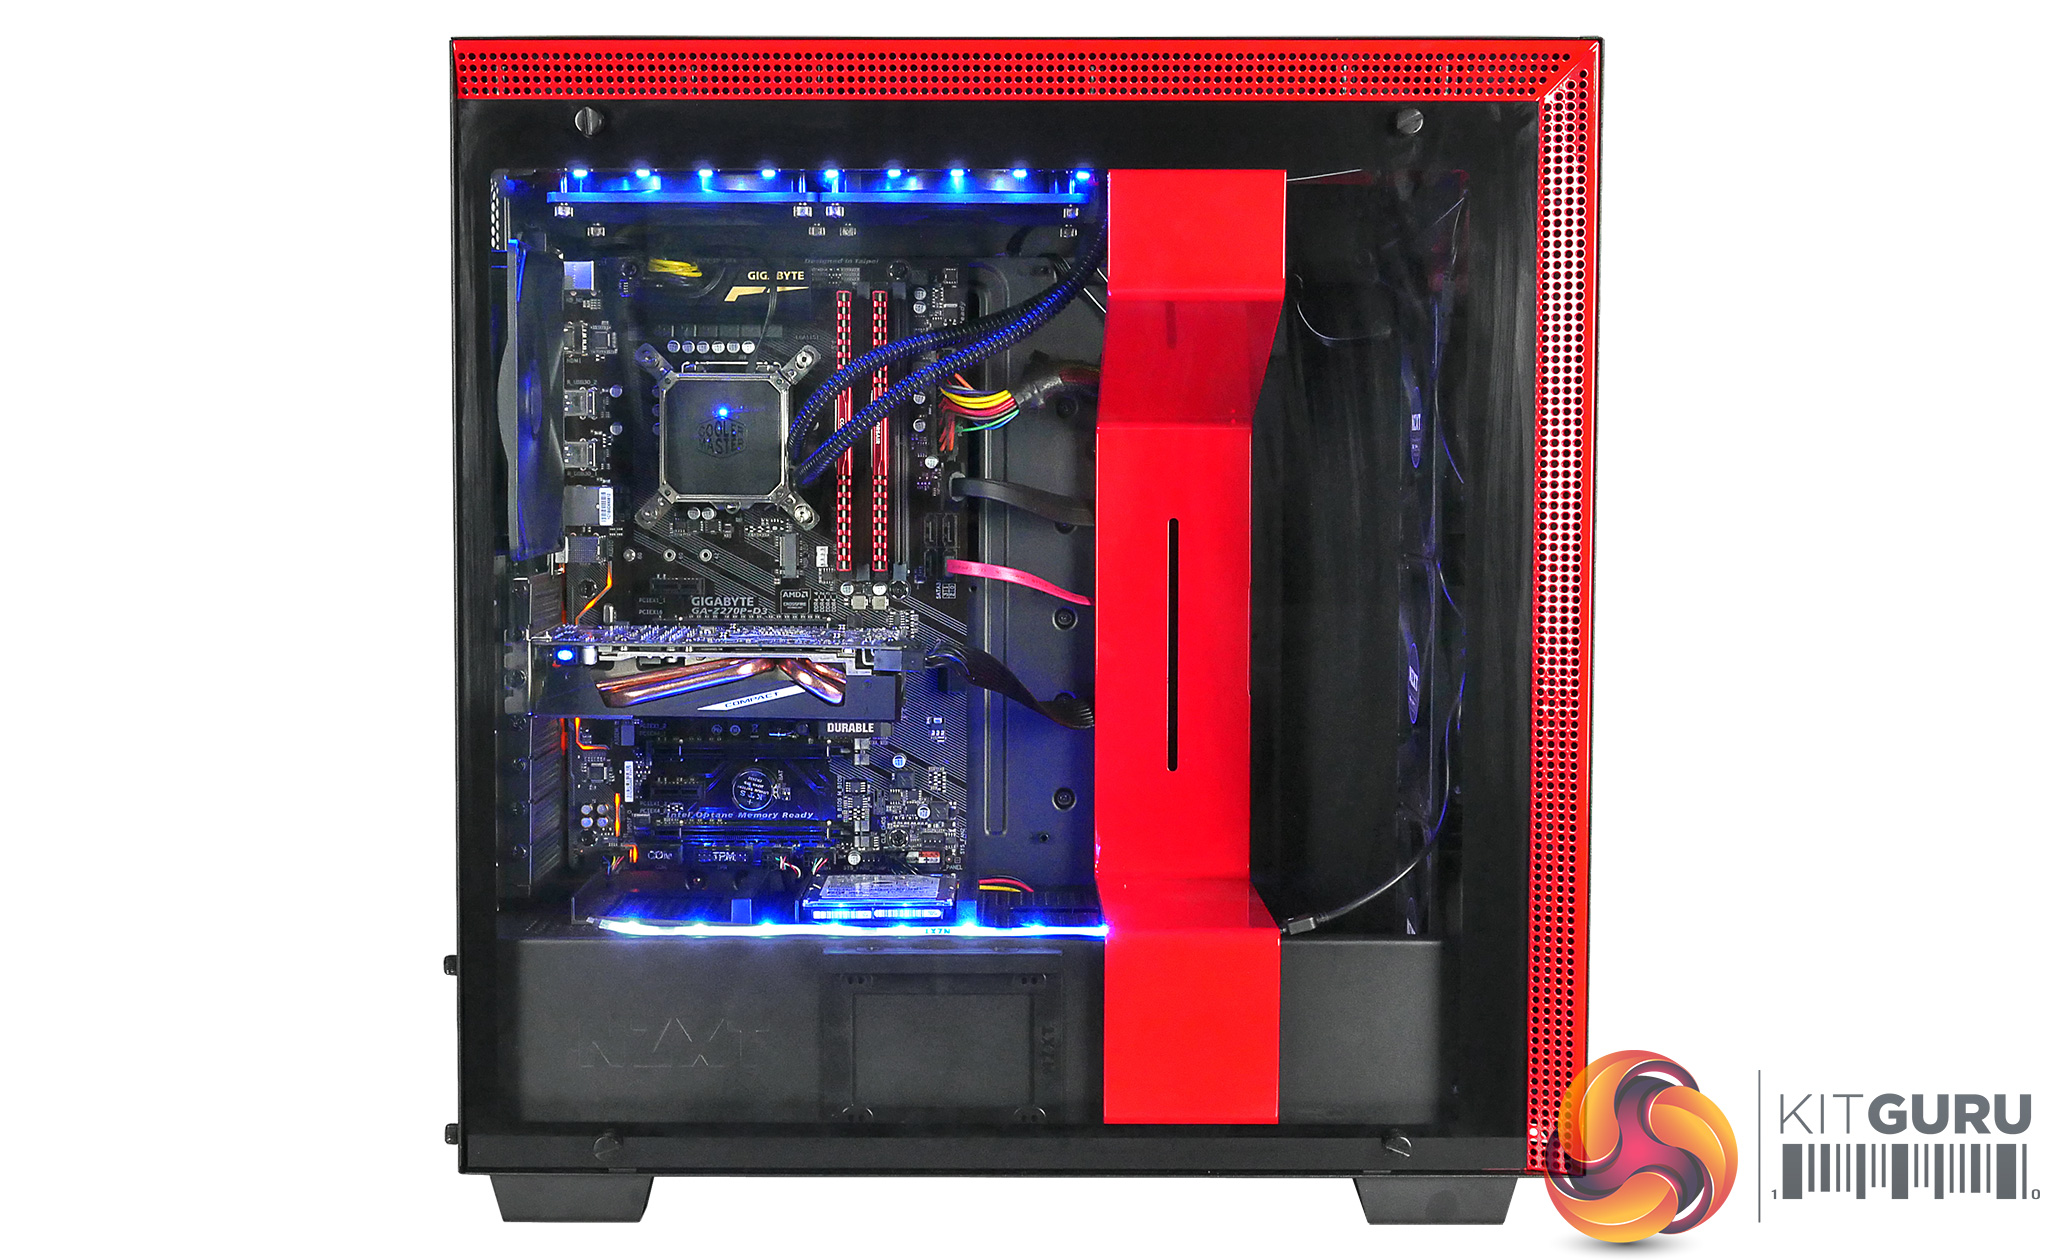
Getting right into it, we have to start with the design – after all, the H700i is probably one of the best looking cases I’ve ever seen. It has a very clean, almost minimalistic design, with sharp edges and plain matte black front and top panels.
Like the H440, this case is available in a number of colour options. You can have the case in a very stealthy all-black, or you can have it with either white, blue or red accents. I obviously reviewed the latter variant, and I think those red accents really give the case a striking look that is bound to appeal without going over the top.
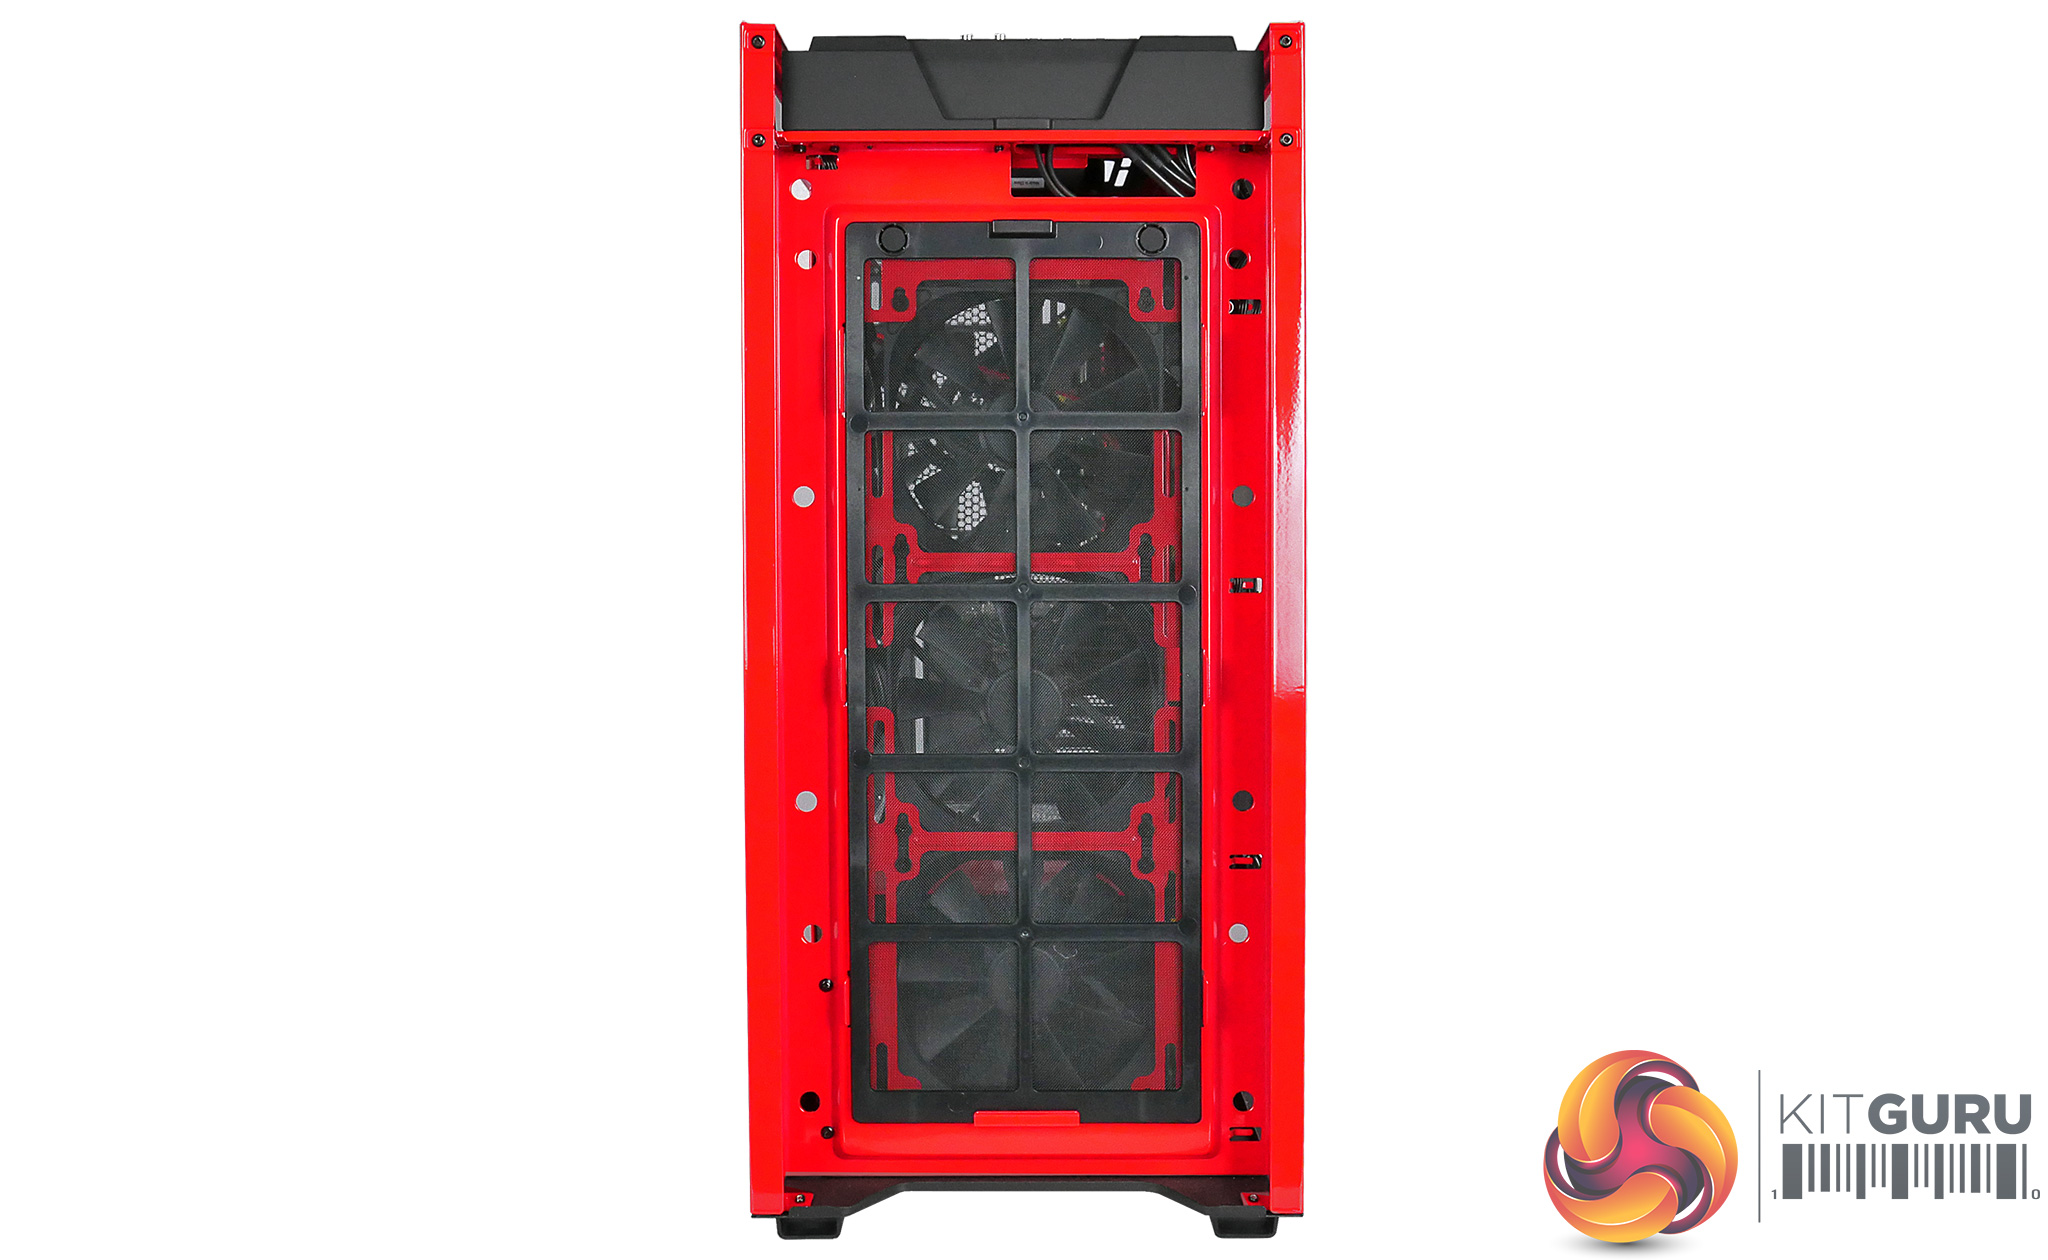
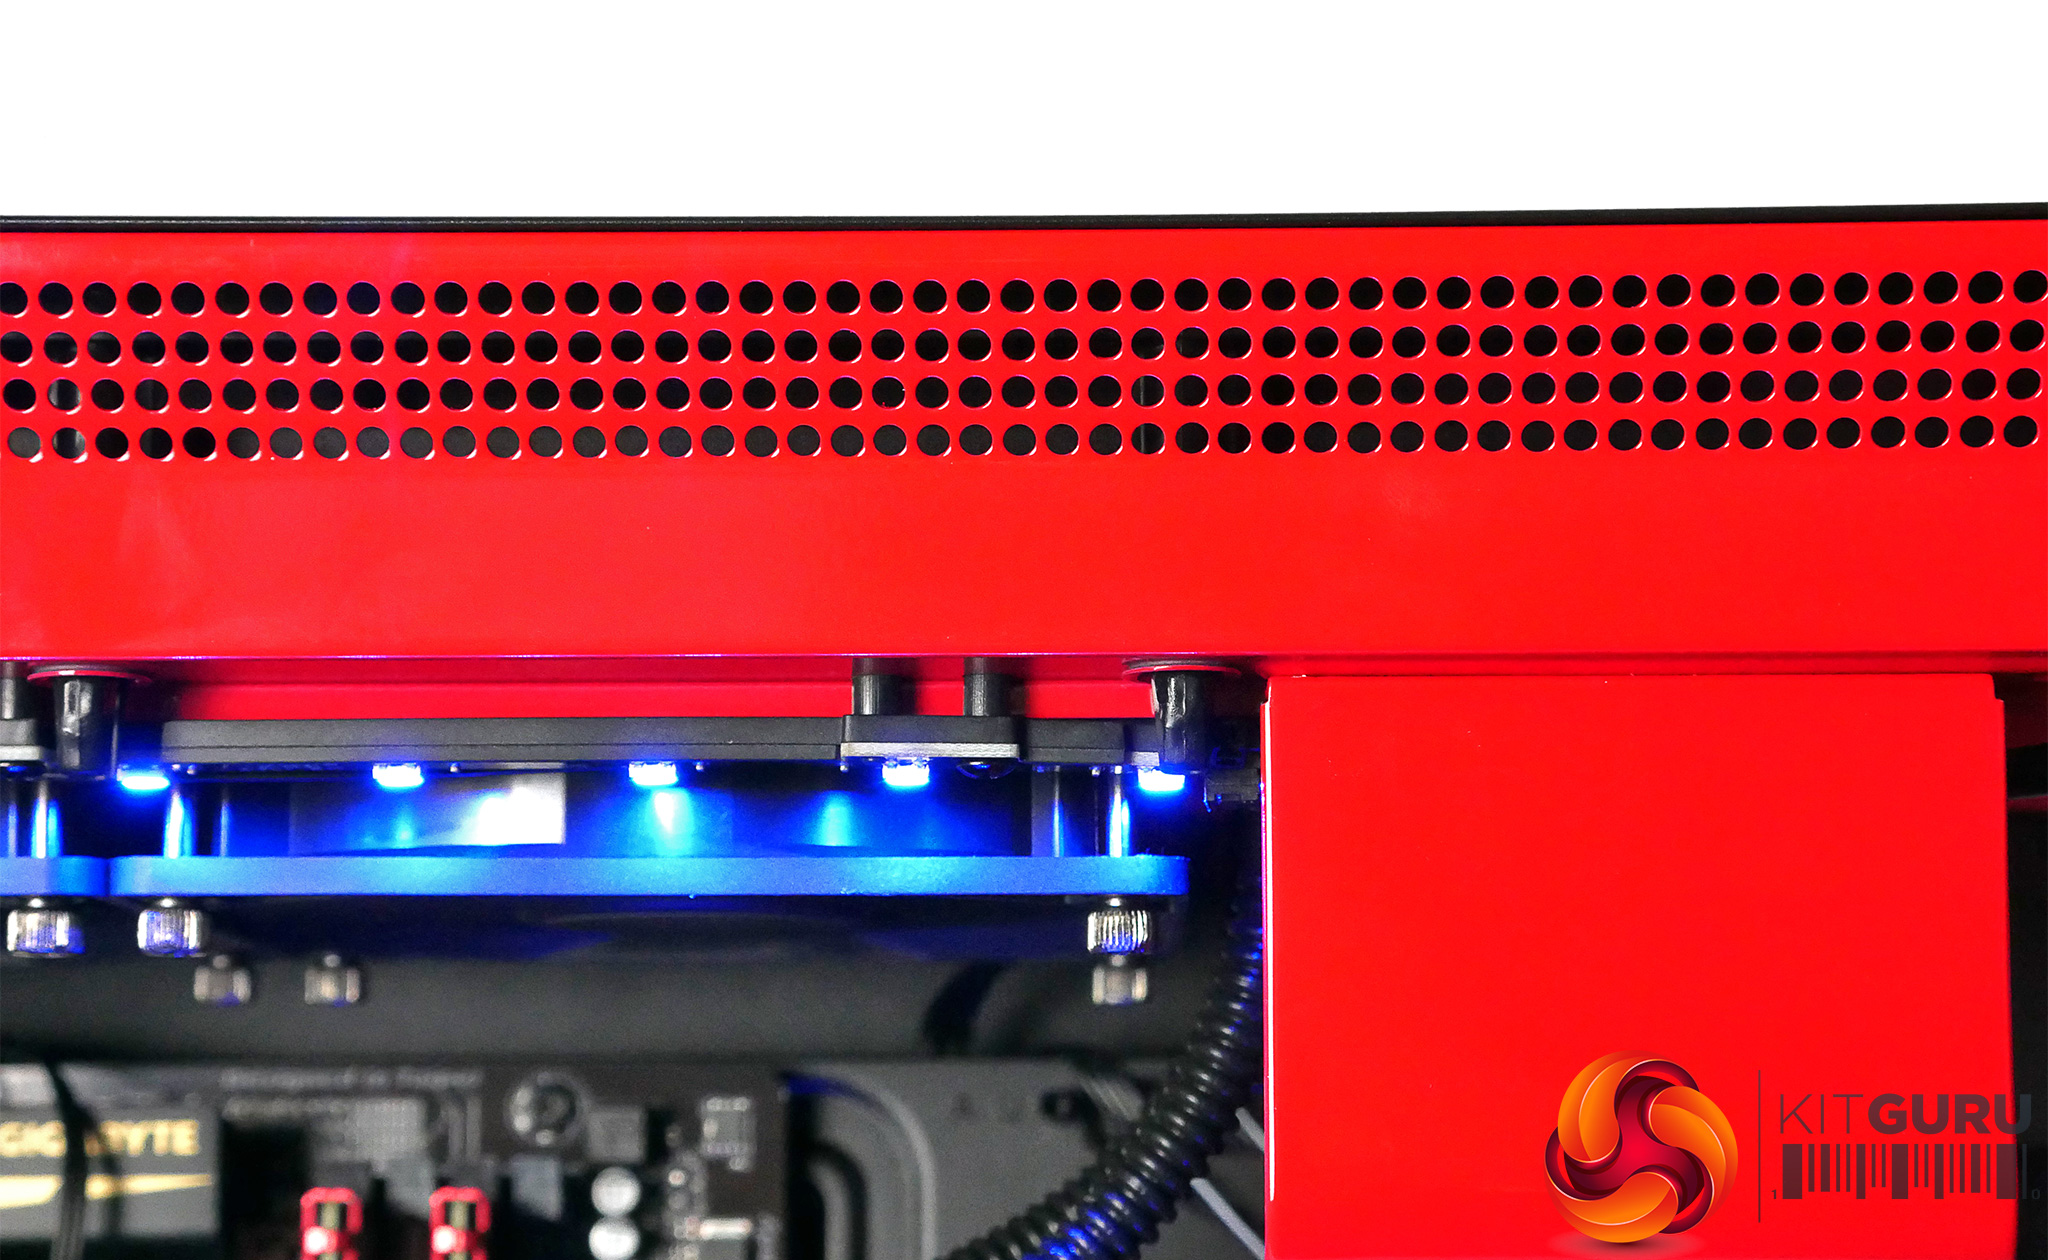
The ventilation is located to the sides of the panels, with about three quarters-of-an-inch of space to allow air in and out. Our first impression was that this will definitely restrict air flow but we will talk about thermal dynamics in more detail below.
Another big feature to talk about is the very large tempered glass window, complete with a black frame, which does a very nice job of displaying the hardware inside. As for the build quality, the case definitely delivers. It’s not brushed or sandblasted aluminium, instead NZXT has opted for an all-steel construction with a matte finish. However, I actually prefer this because the steel is much less of a fingerprint magnet than other aluminium cases I have worked with.
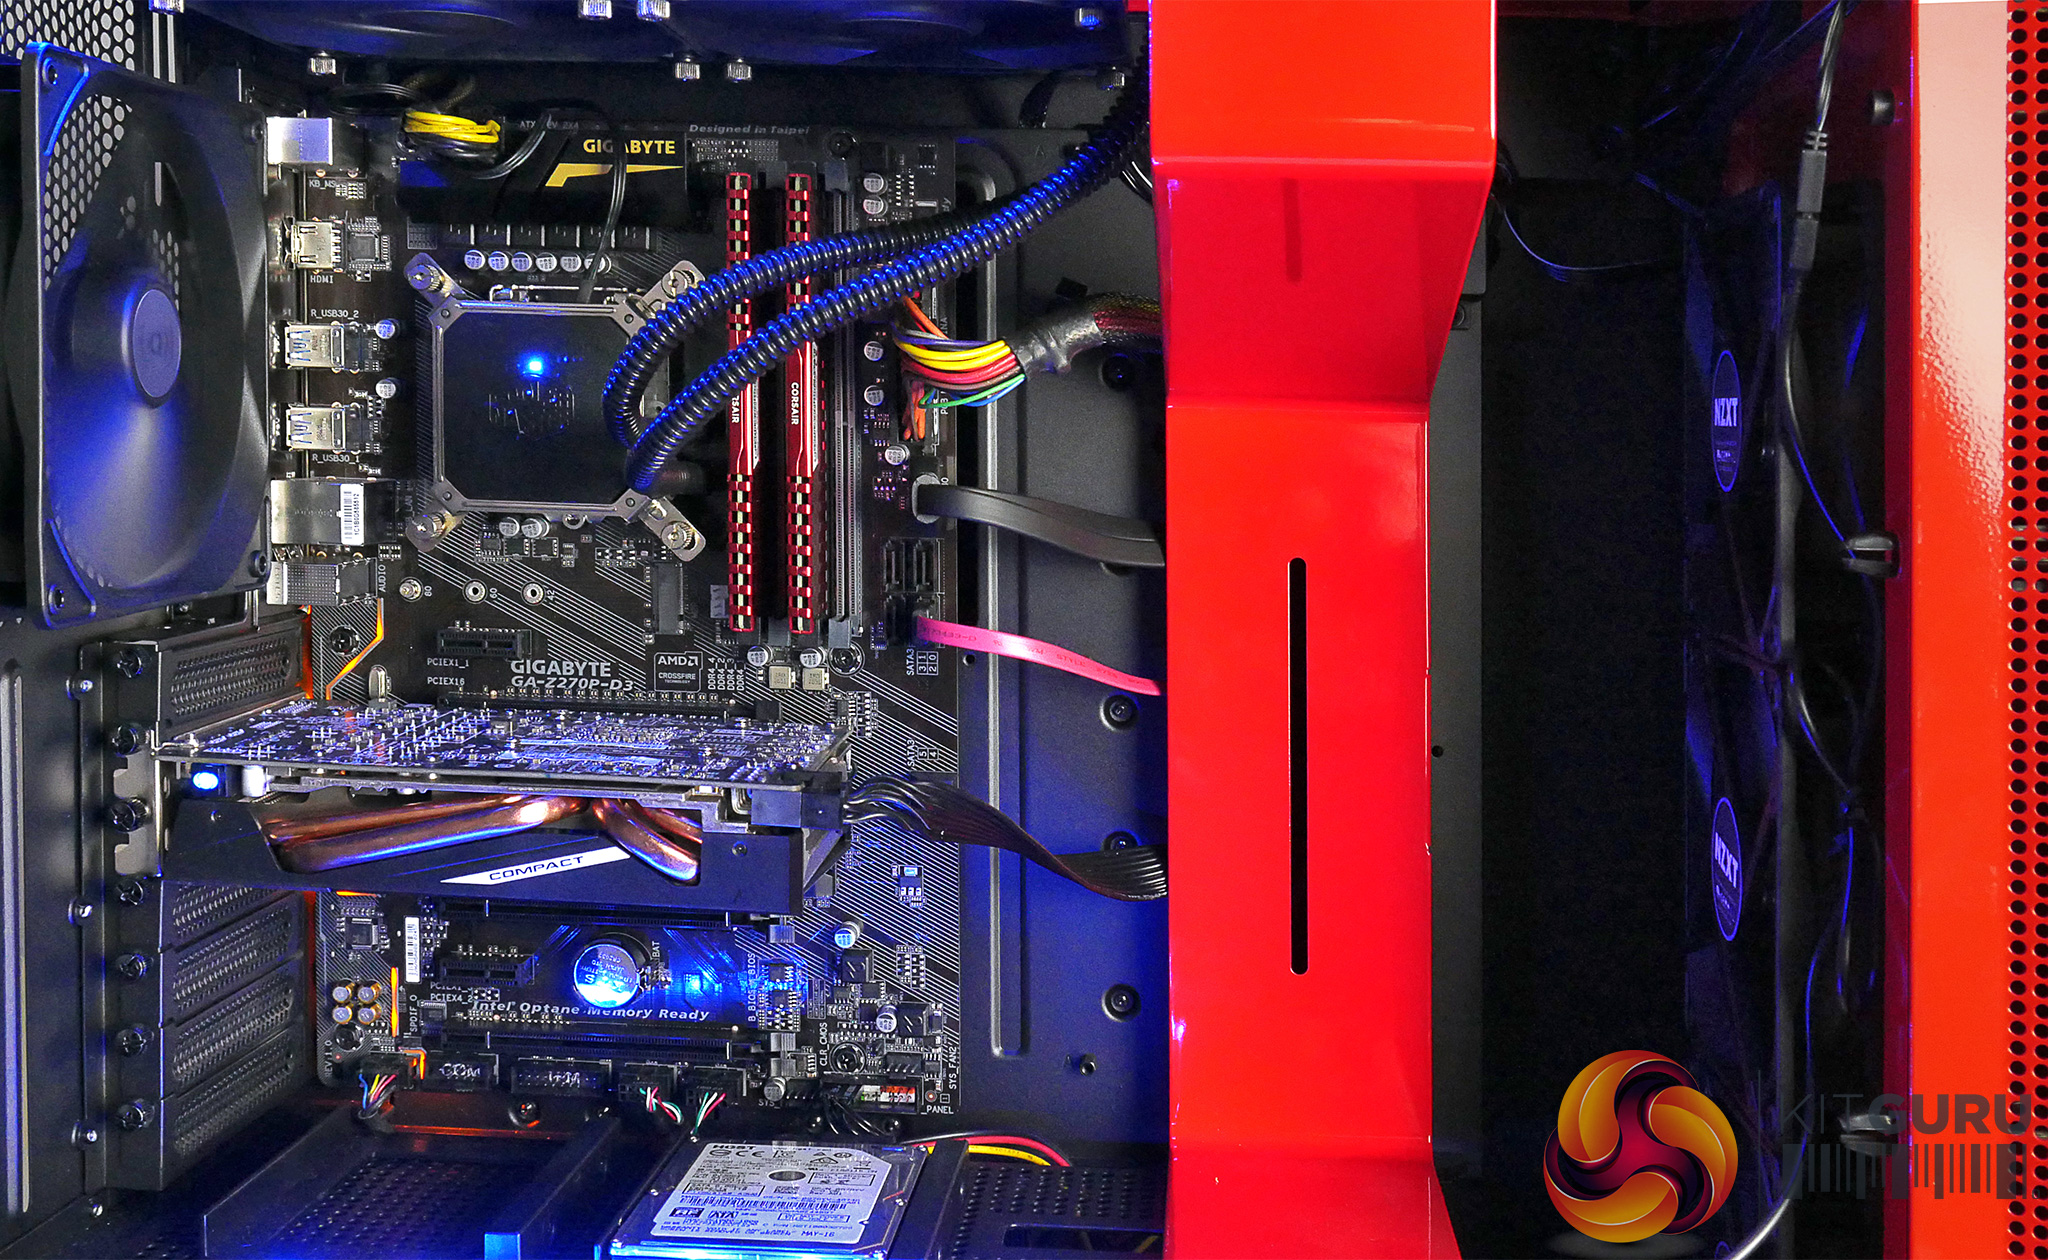
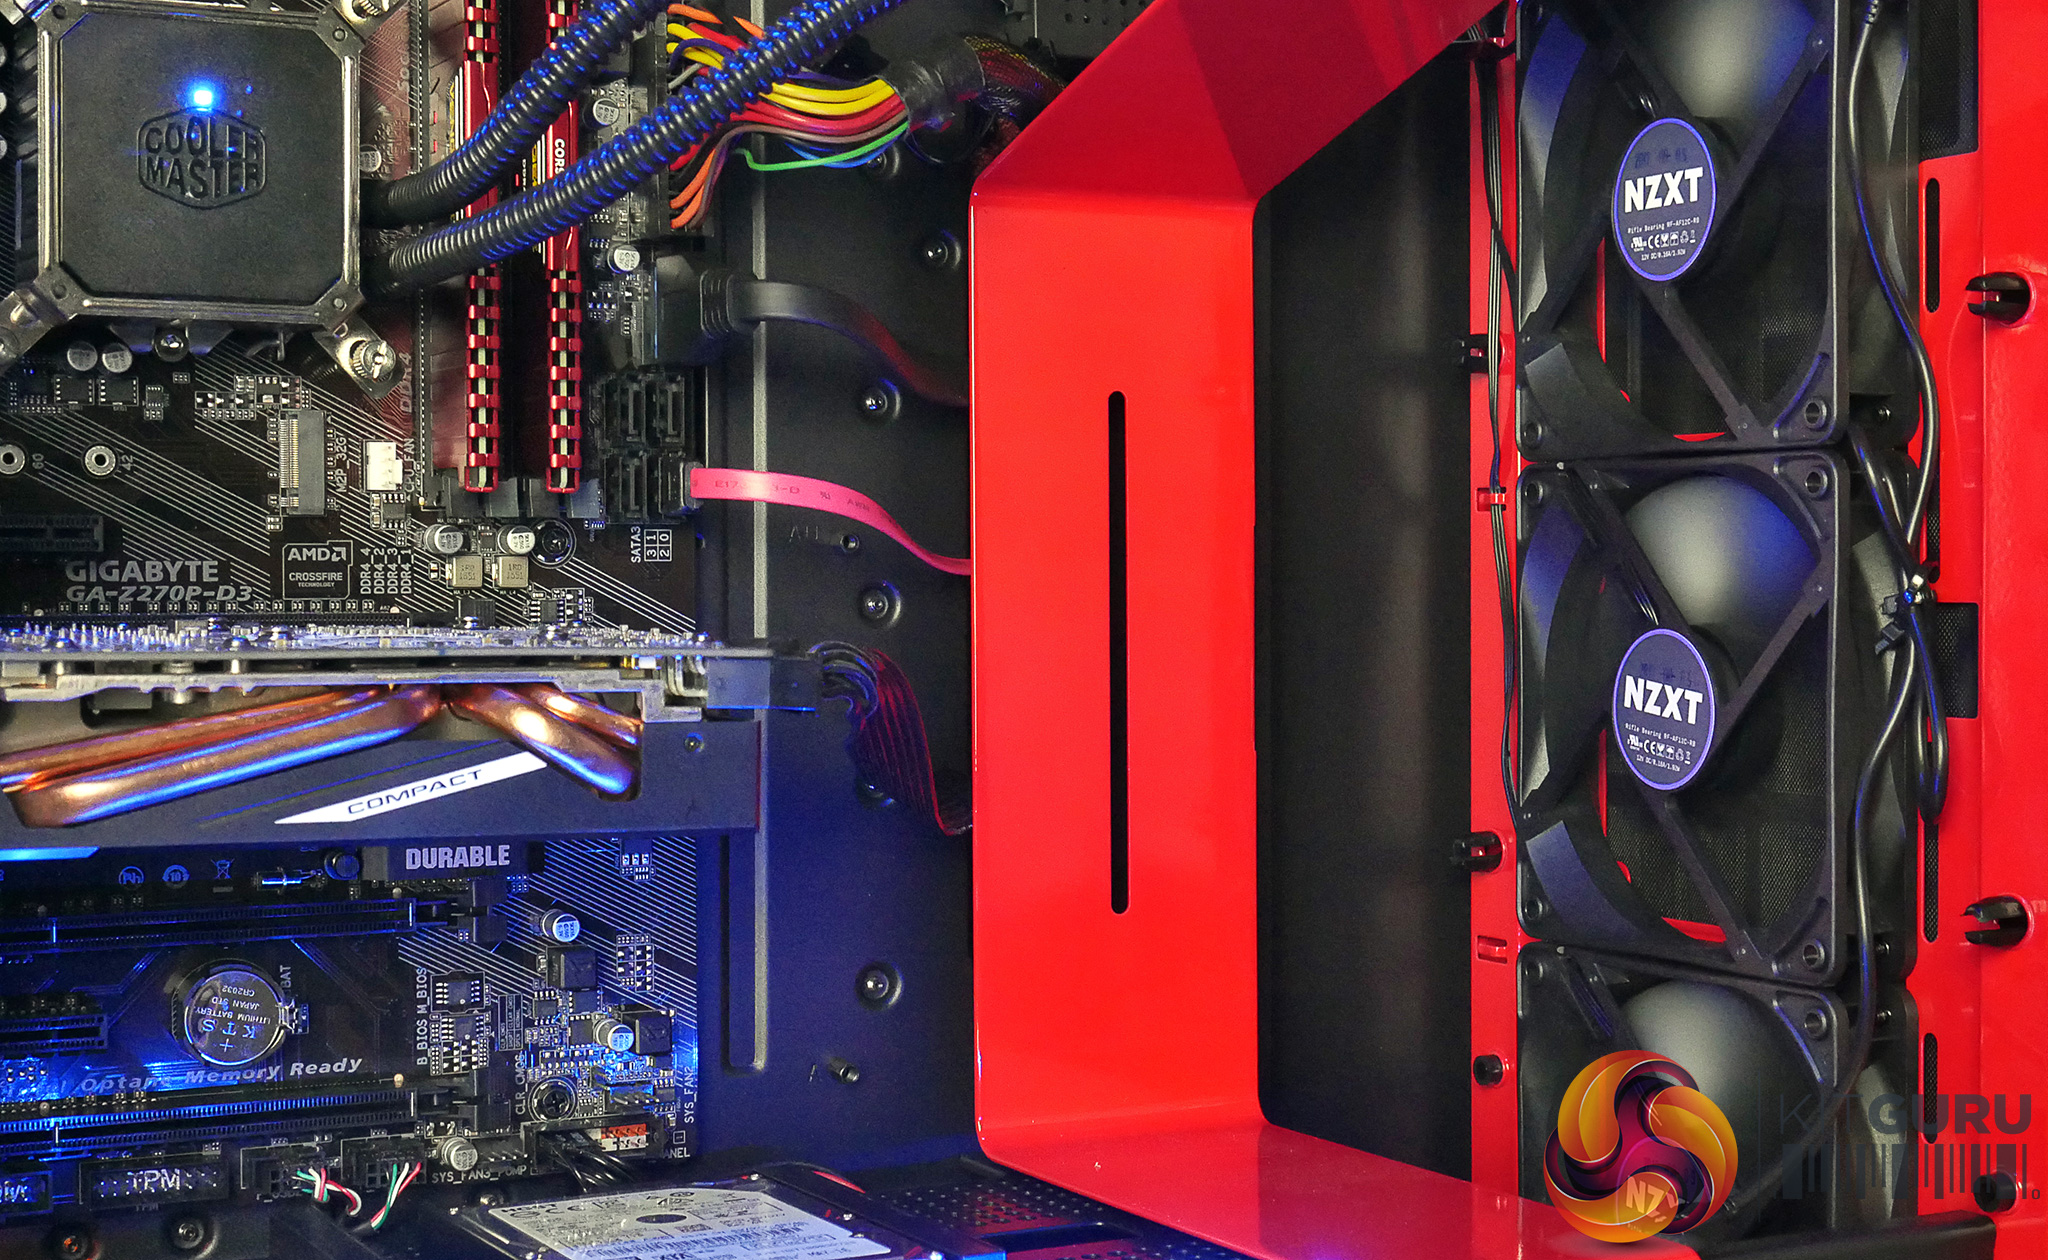
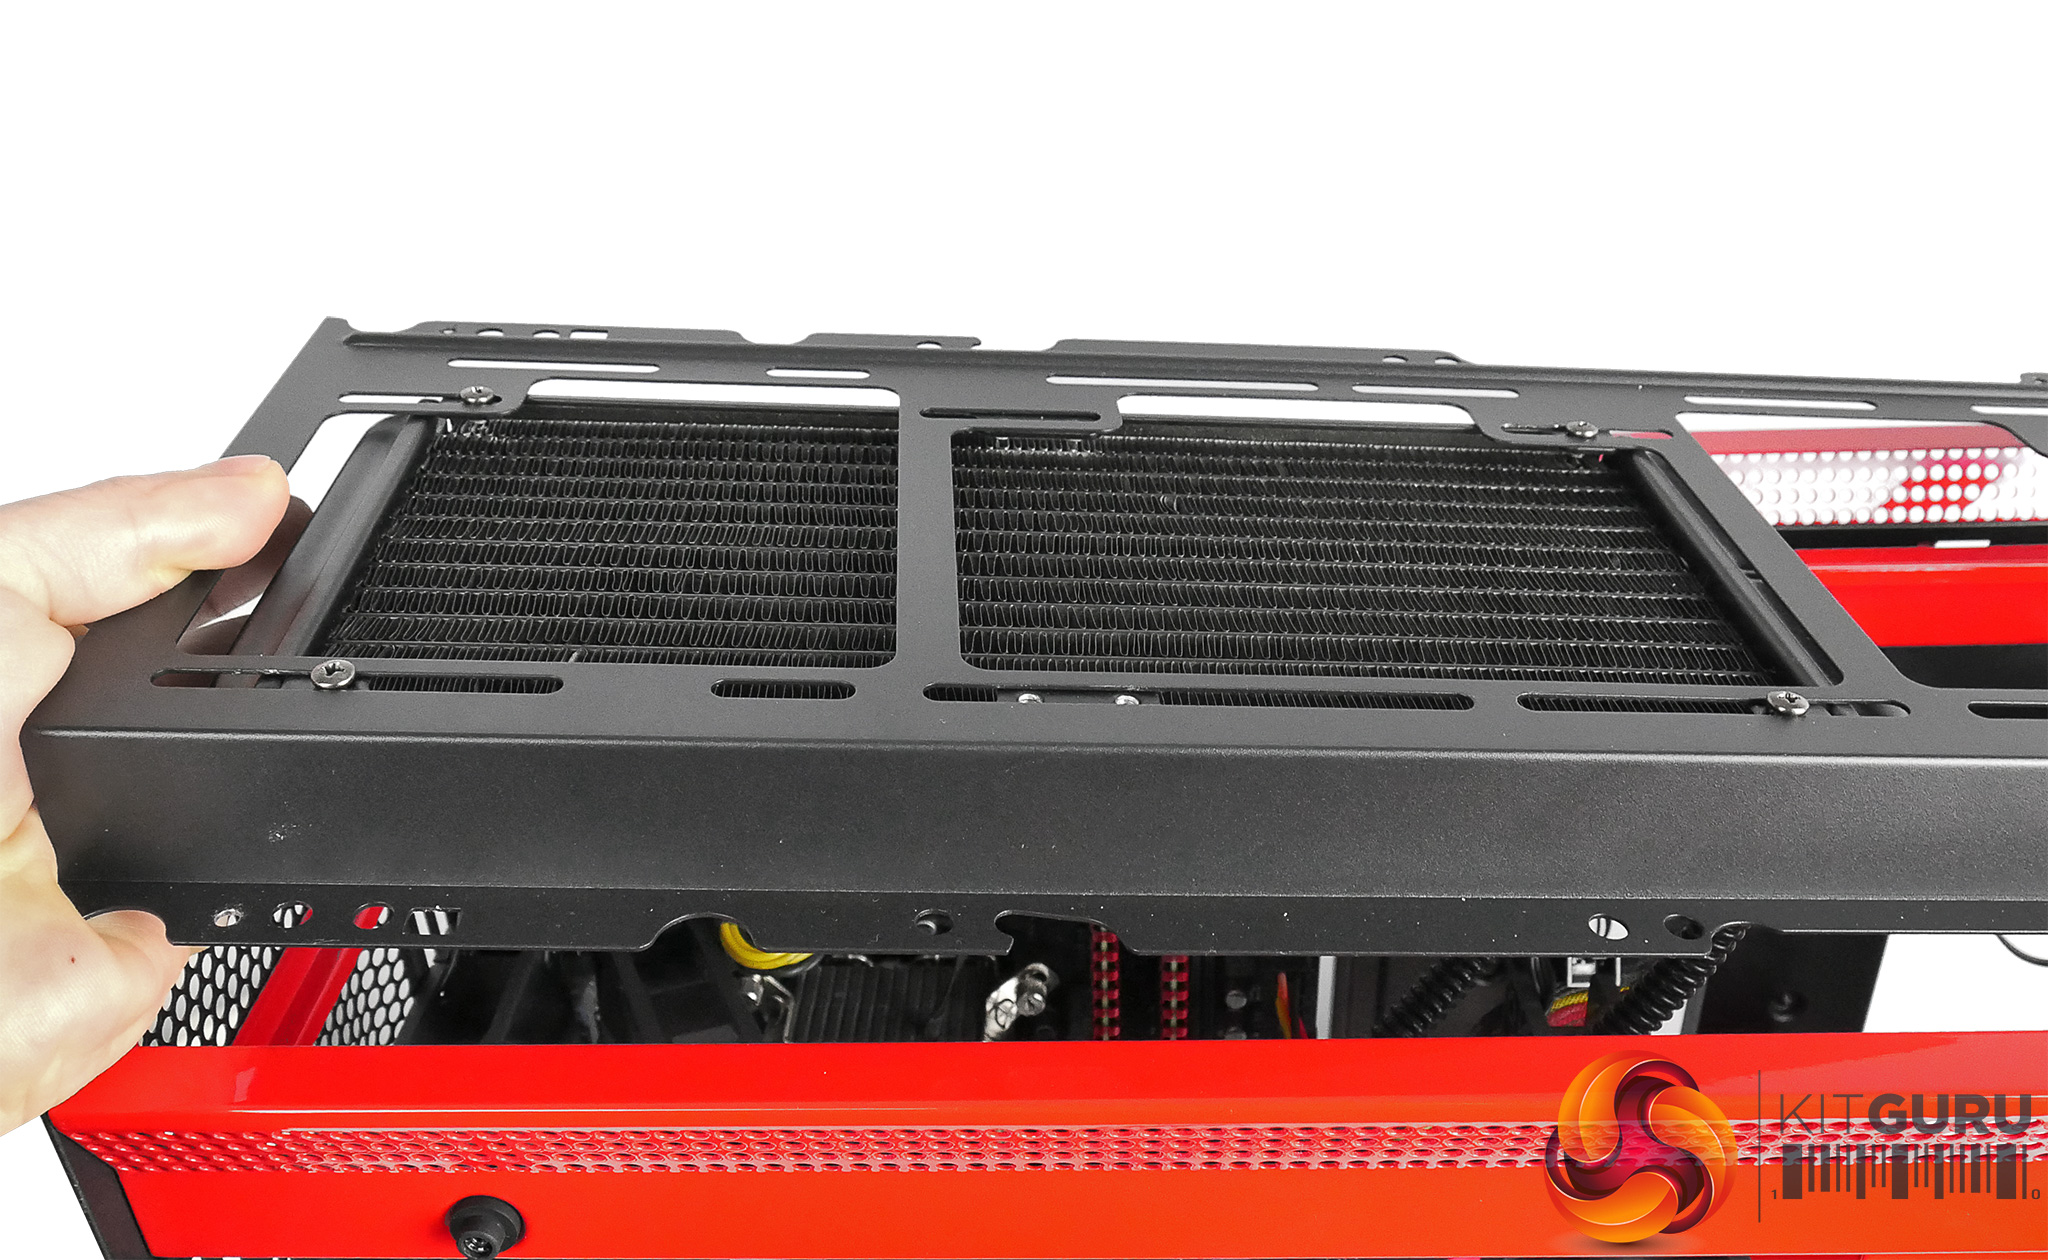
In terms of physical dimensions, the H700i is the largest of the three new cases, and it does actually support E-ATX motherboards which is a nice touch. There is also clearance for graphics cards up to 413mm long and support for CPU coolers up to 185mm tall so your options are certainly not limited in that regard. As for additional cooling options, there is room for up to a 360mm radiator at the top and up to 360mm radiator in the front. When you factor in the integrated reservoir mounting points on the cable bar, which supports reservoirs up to 224mm tall, this is certainly a water-cooling friendly case.
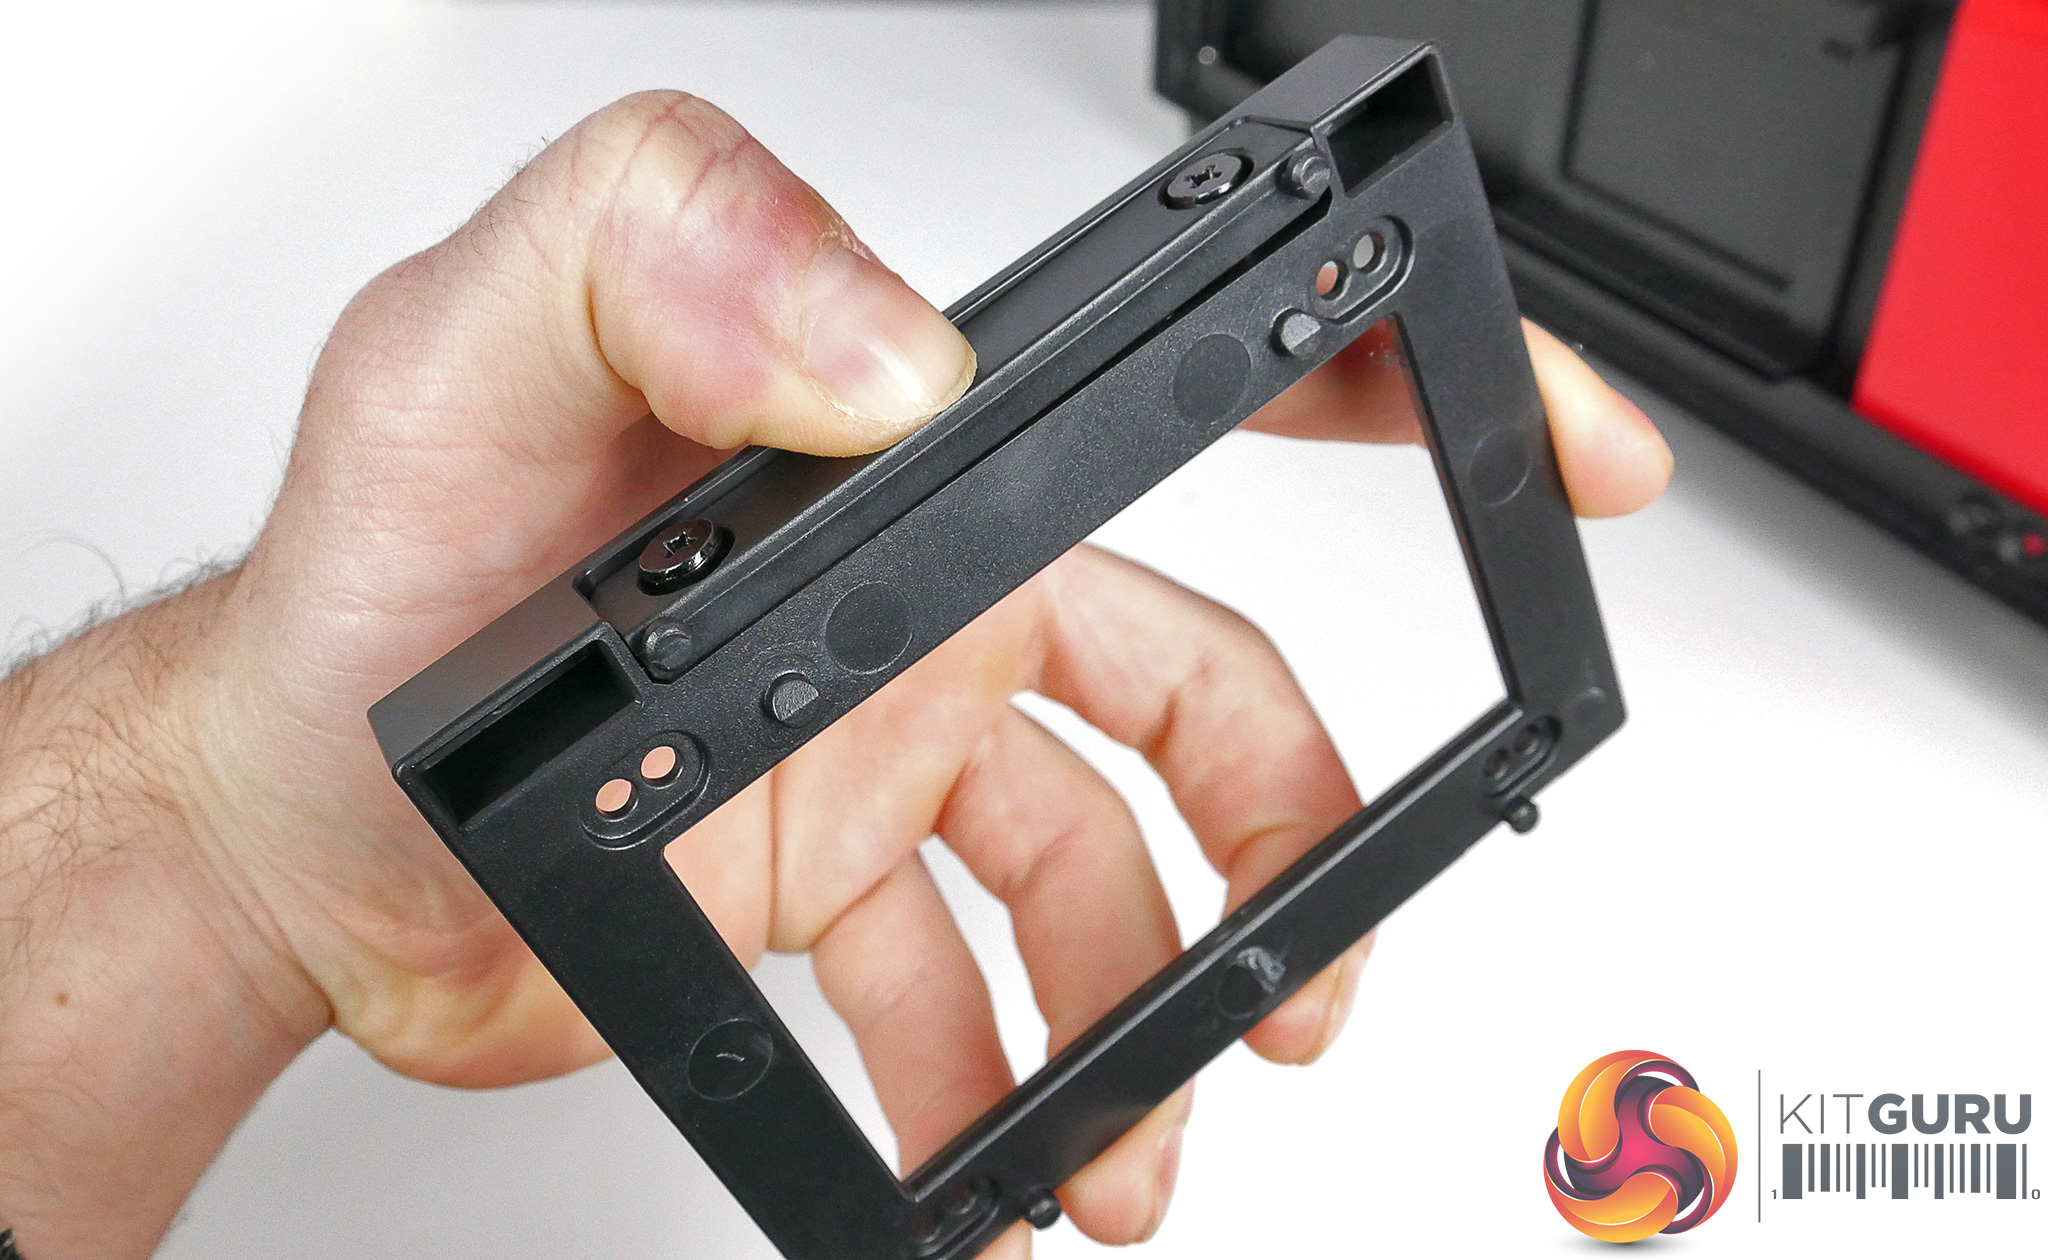
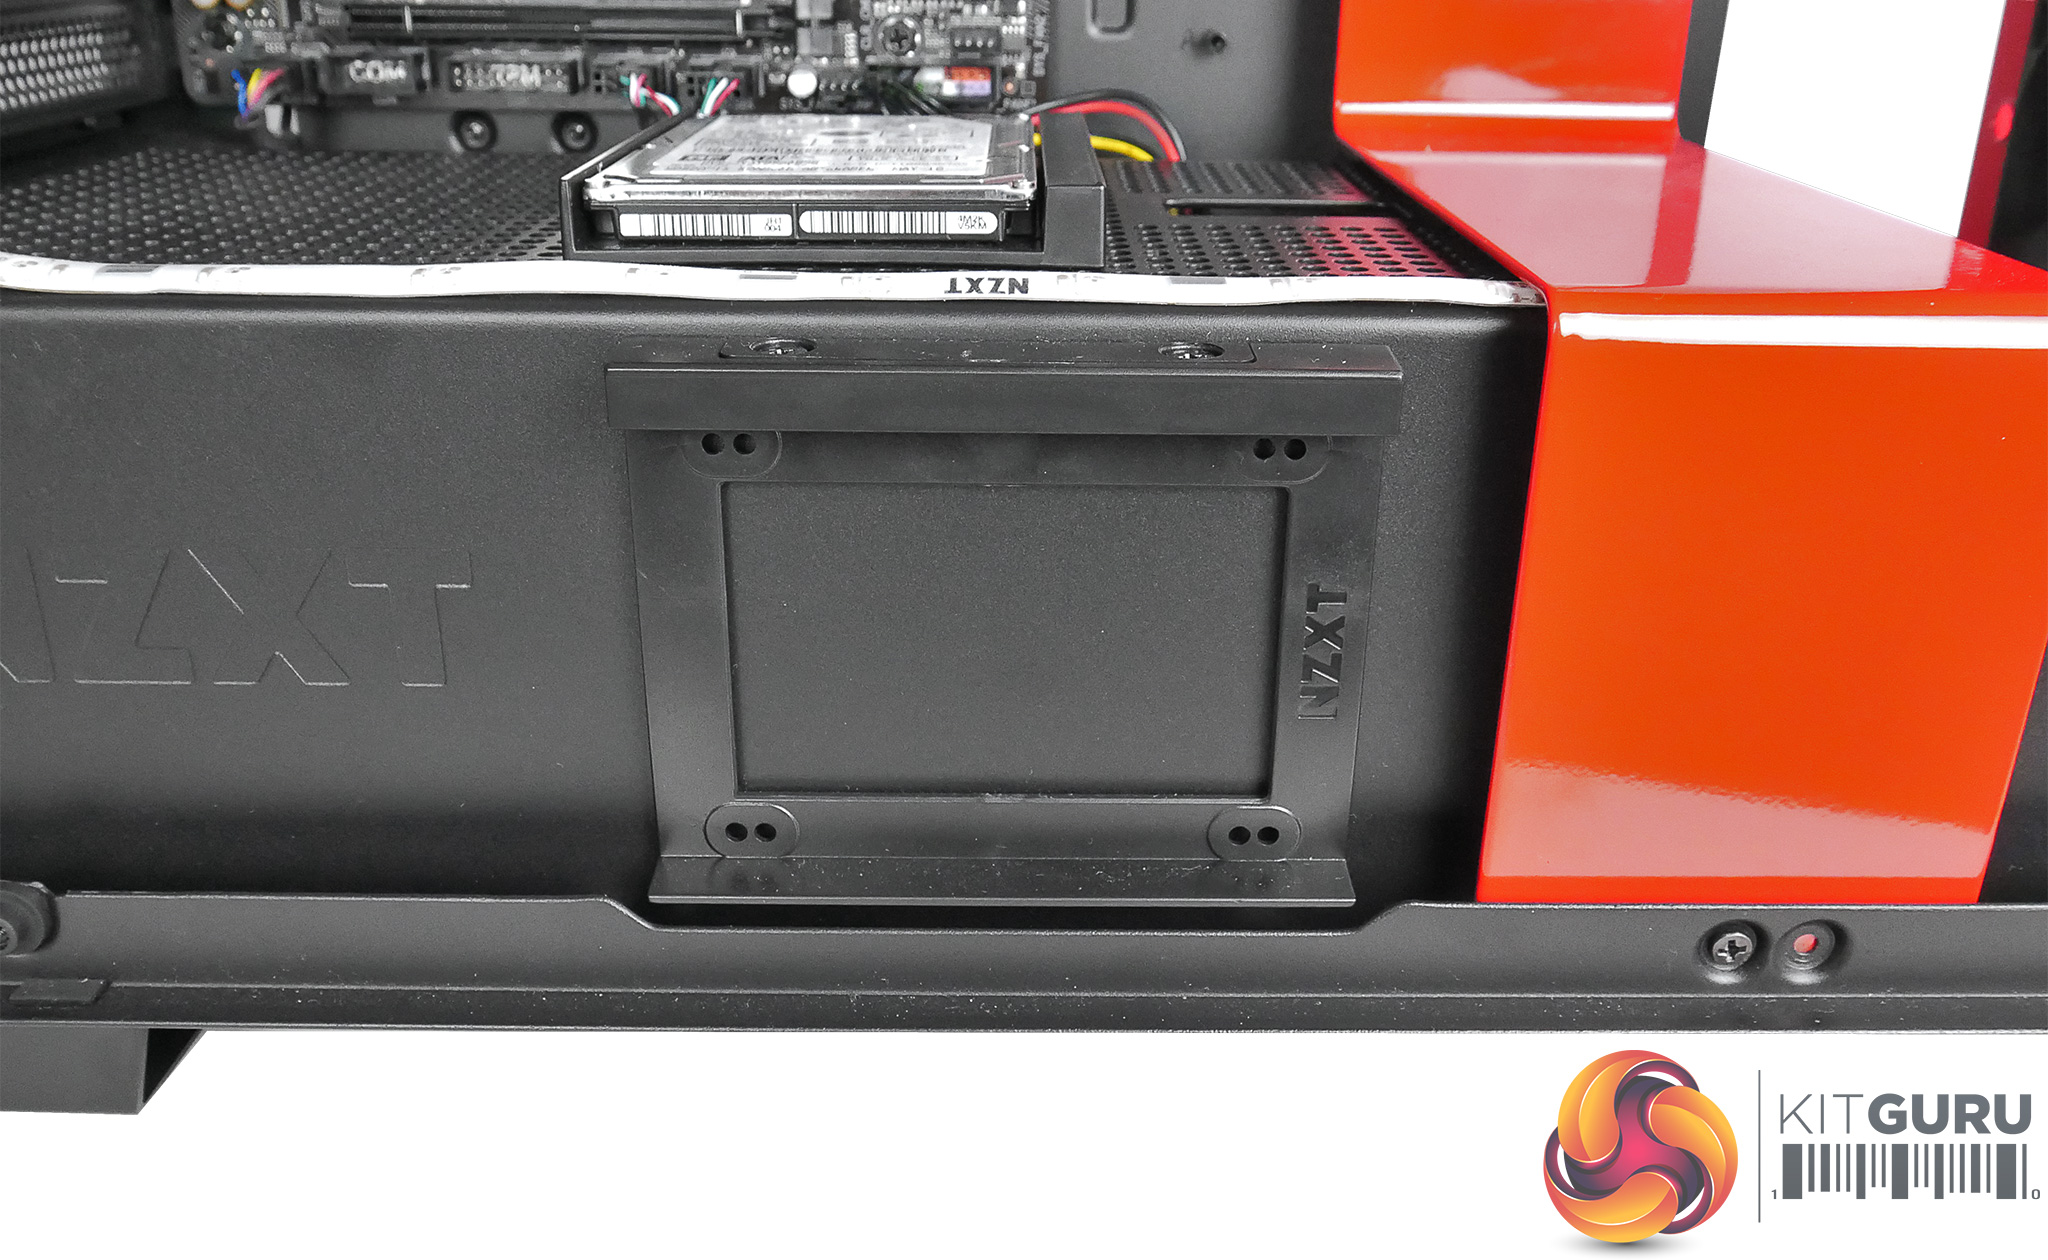
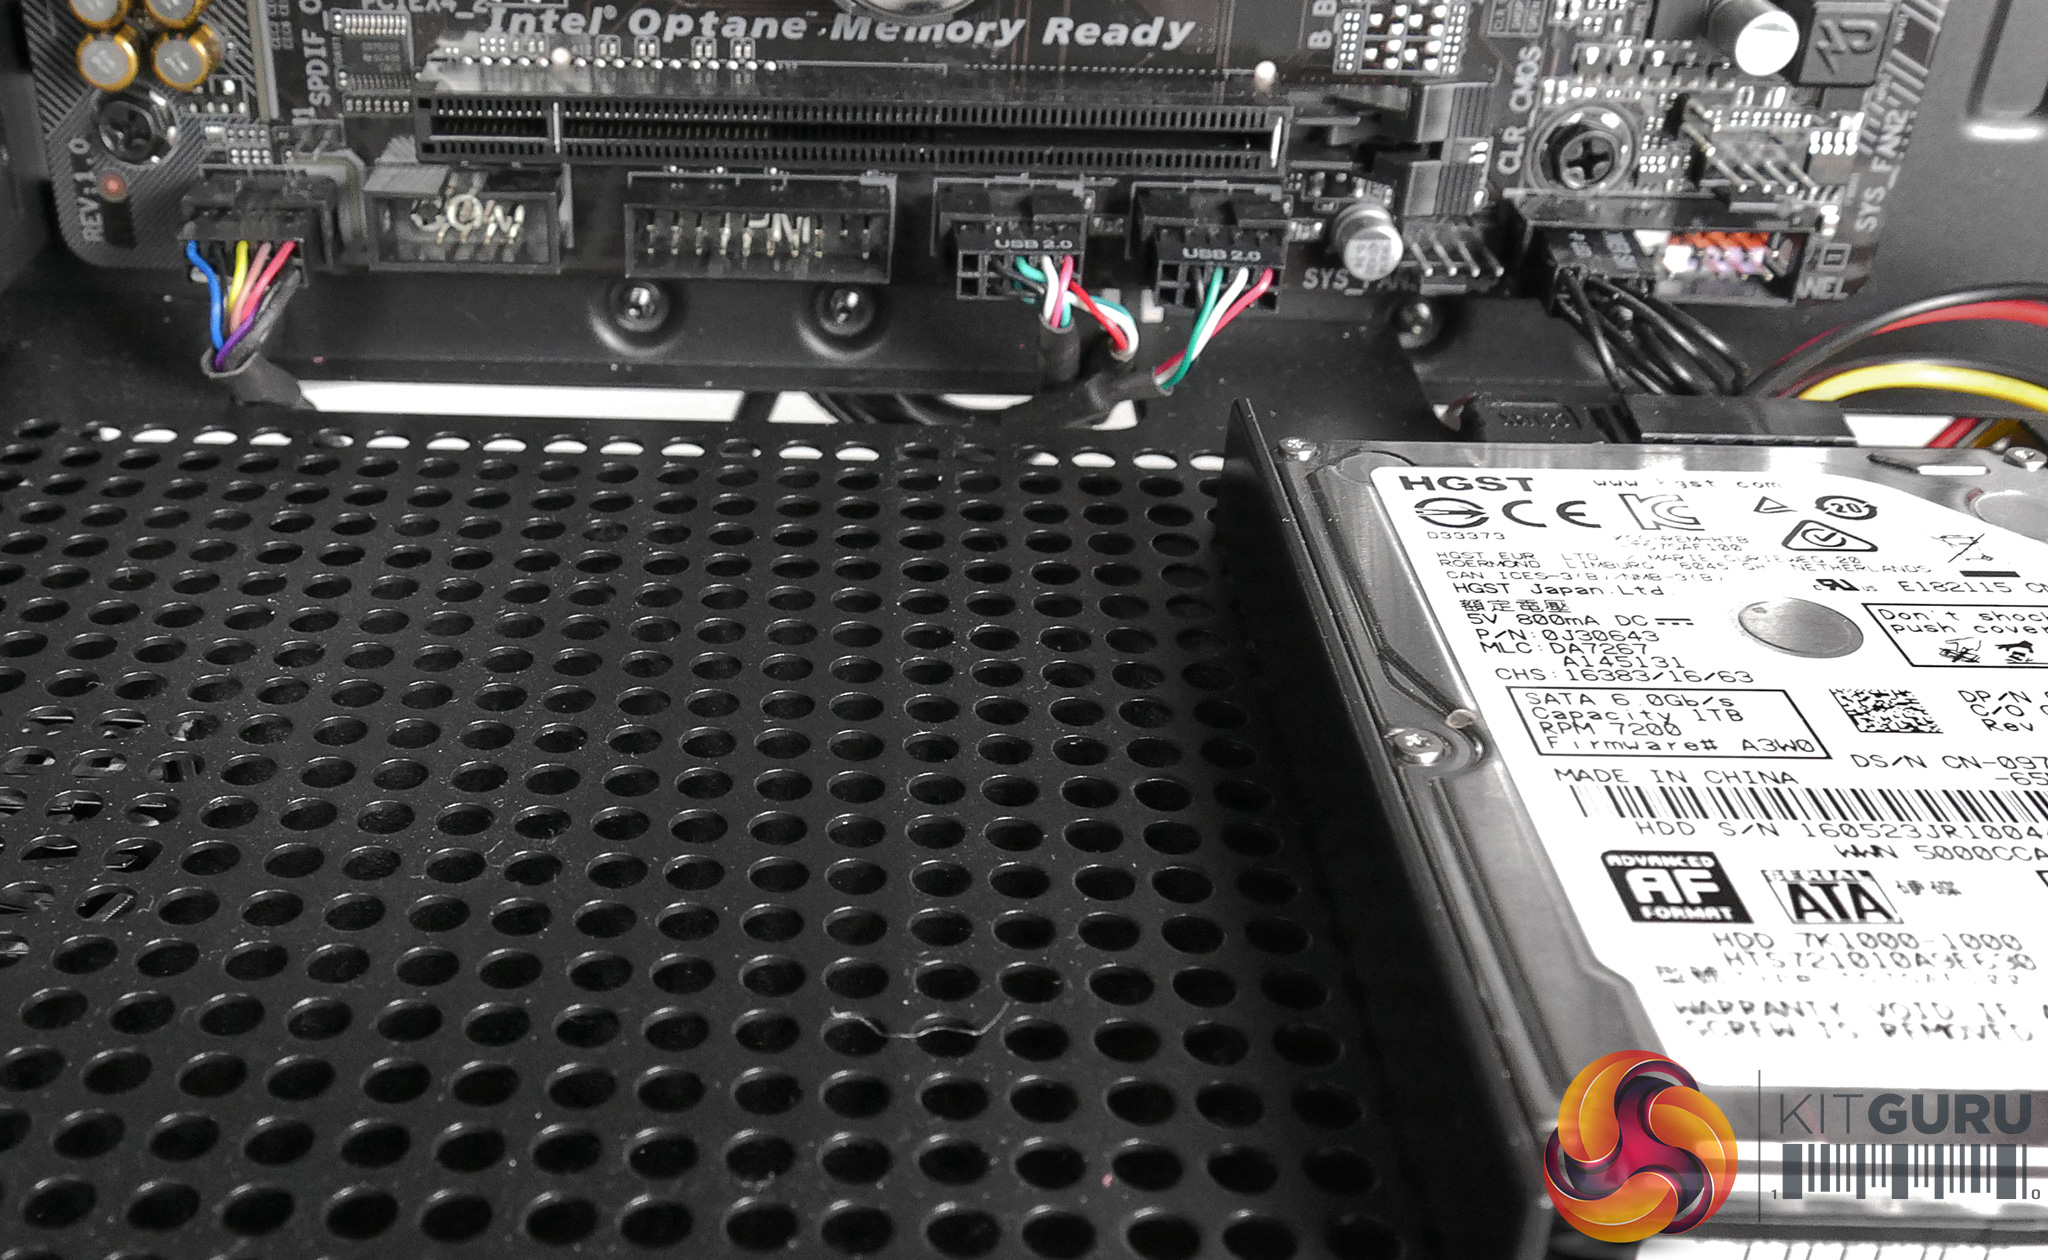
Drive mounting has been greatly improved when compared with the H440 – NZXT has ditched the long, front mounted hard drive cage in favour of more discrete mounting positions. In total, the case has space for 7 x 2.5-inch hard drives – two on top of the PSU shroud and one to the side of it, while there’s an additional two caddies behind the motherboard tray. A 3.5-inch drive cage has been placed underneath the PSU shroud at the back, and it can support 2 x 3.5-inch hard drives or alternatively another 2 x 2.5-inch. So, plenty of space in the storage department.
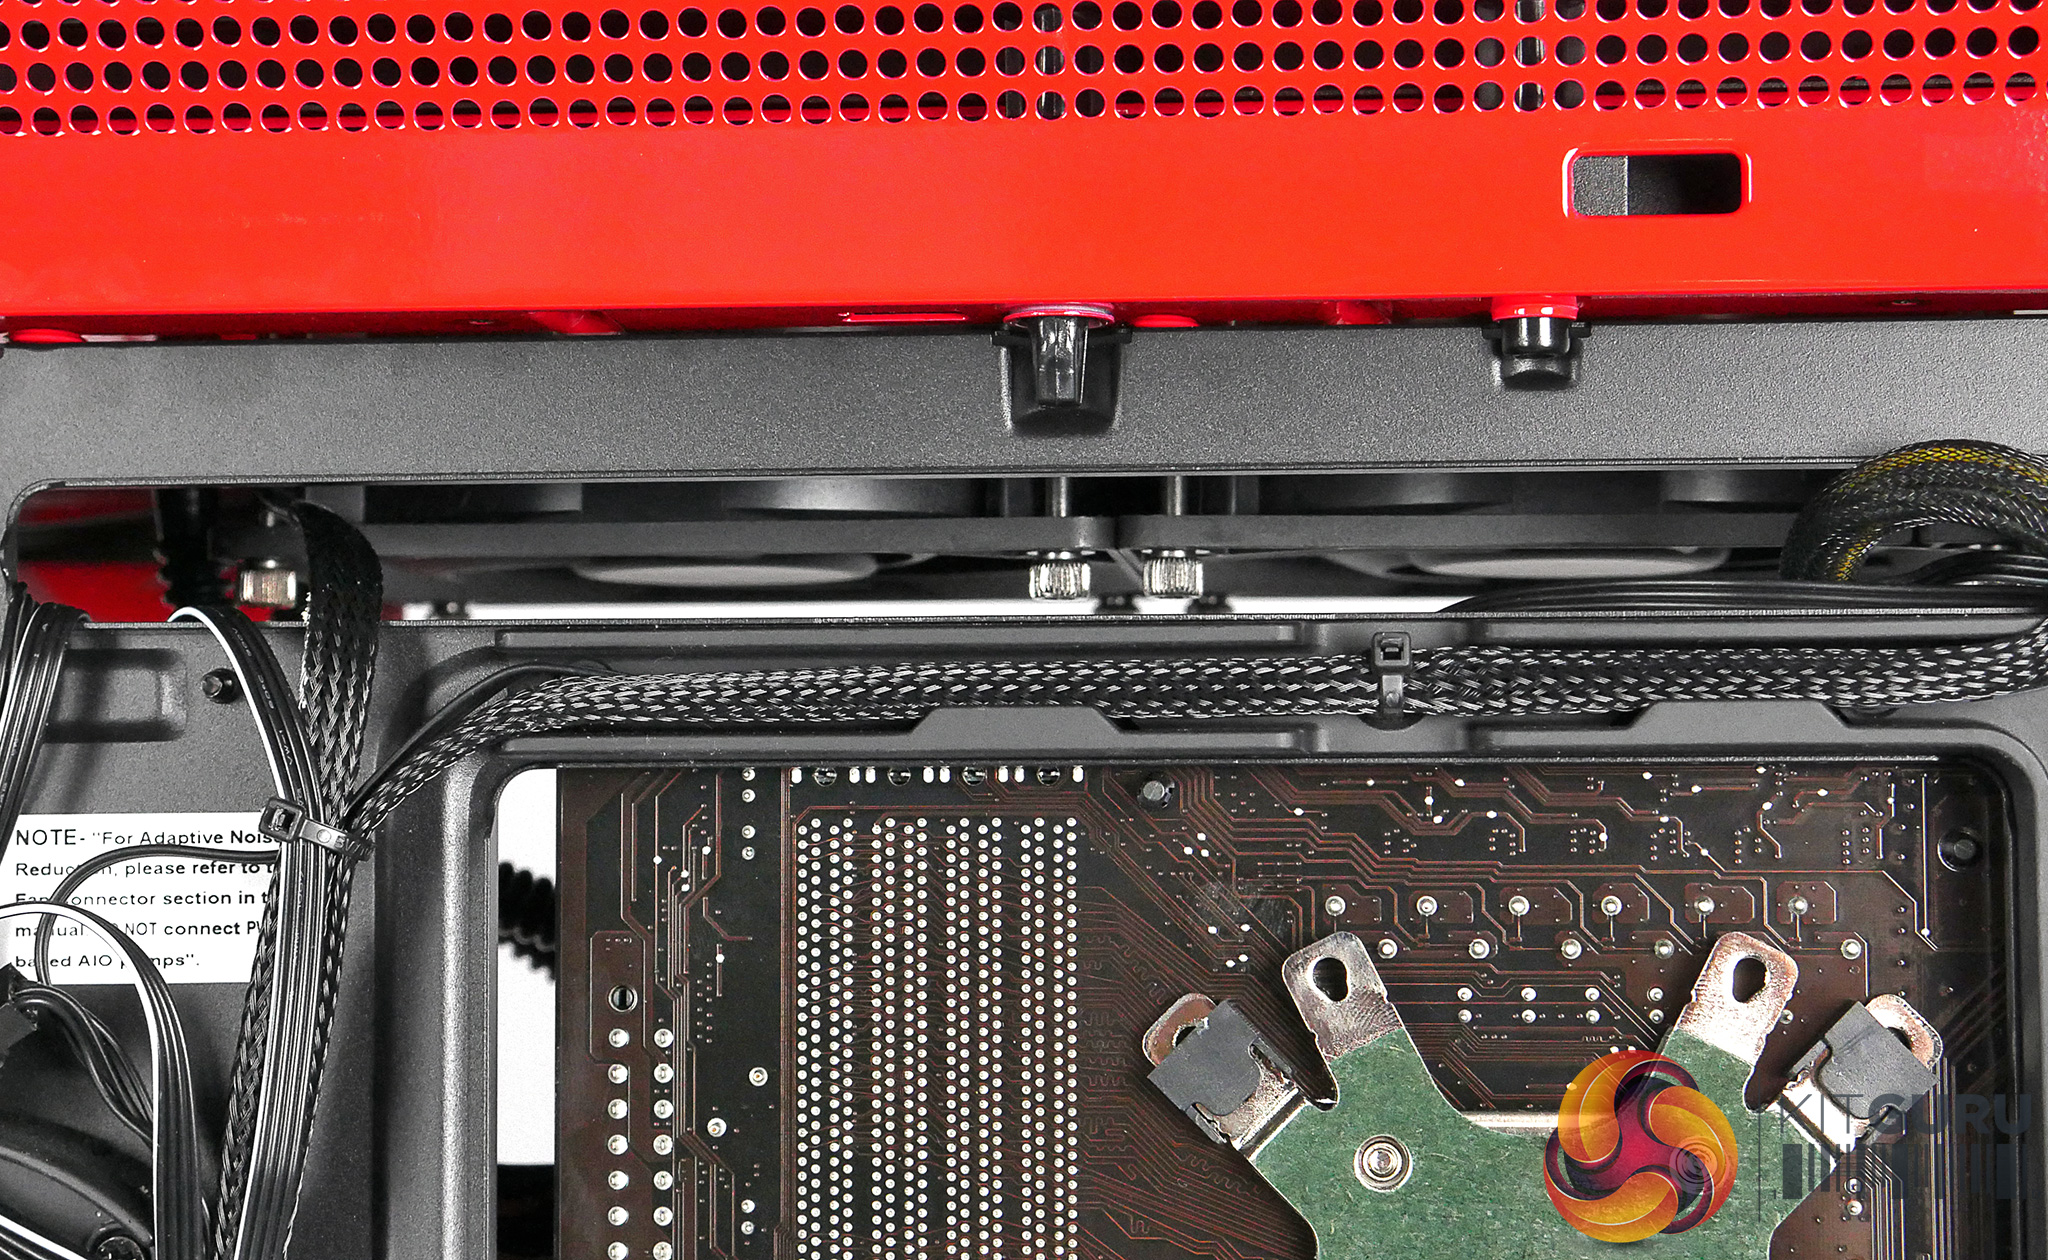
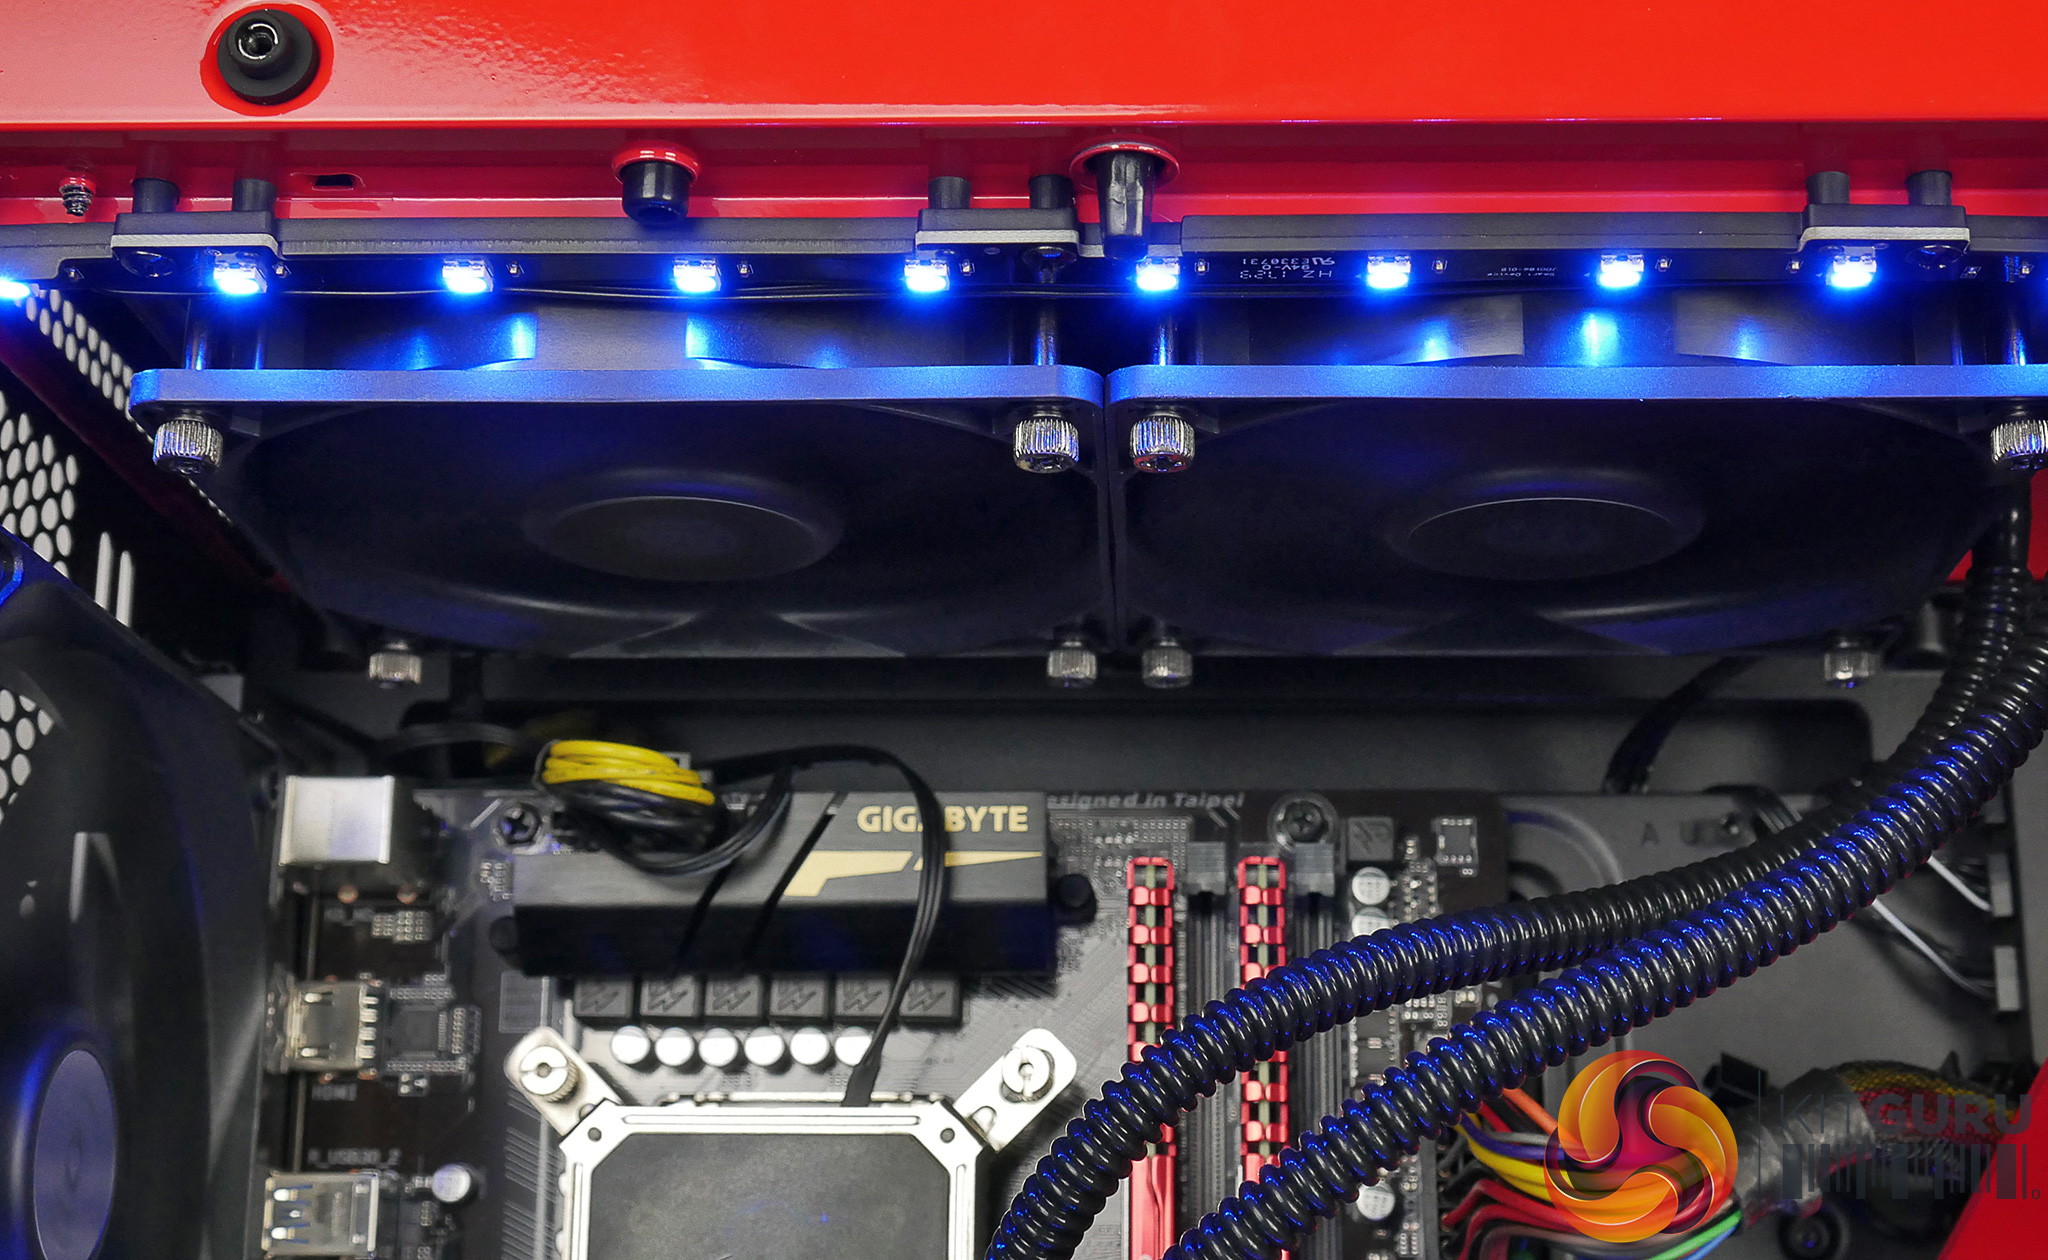
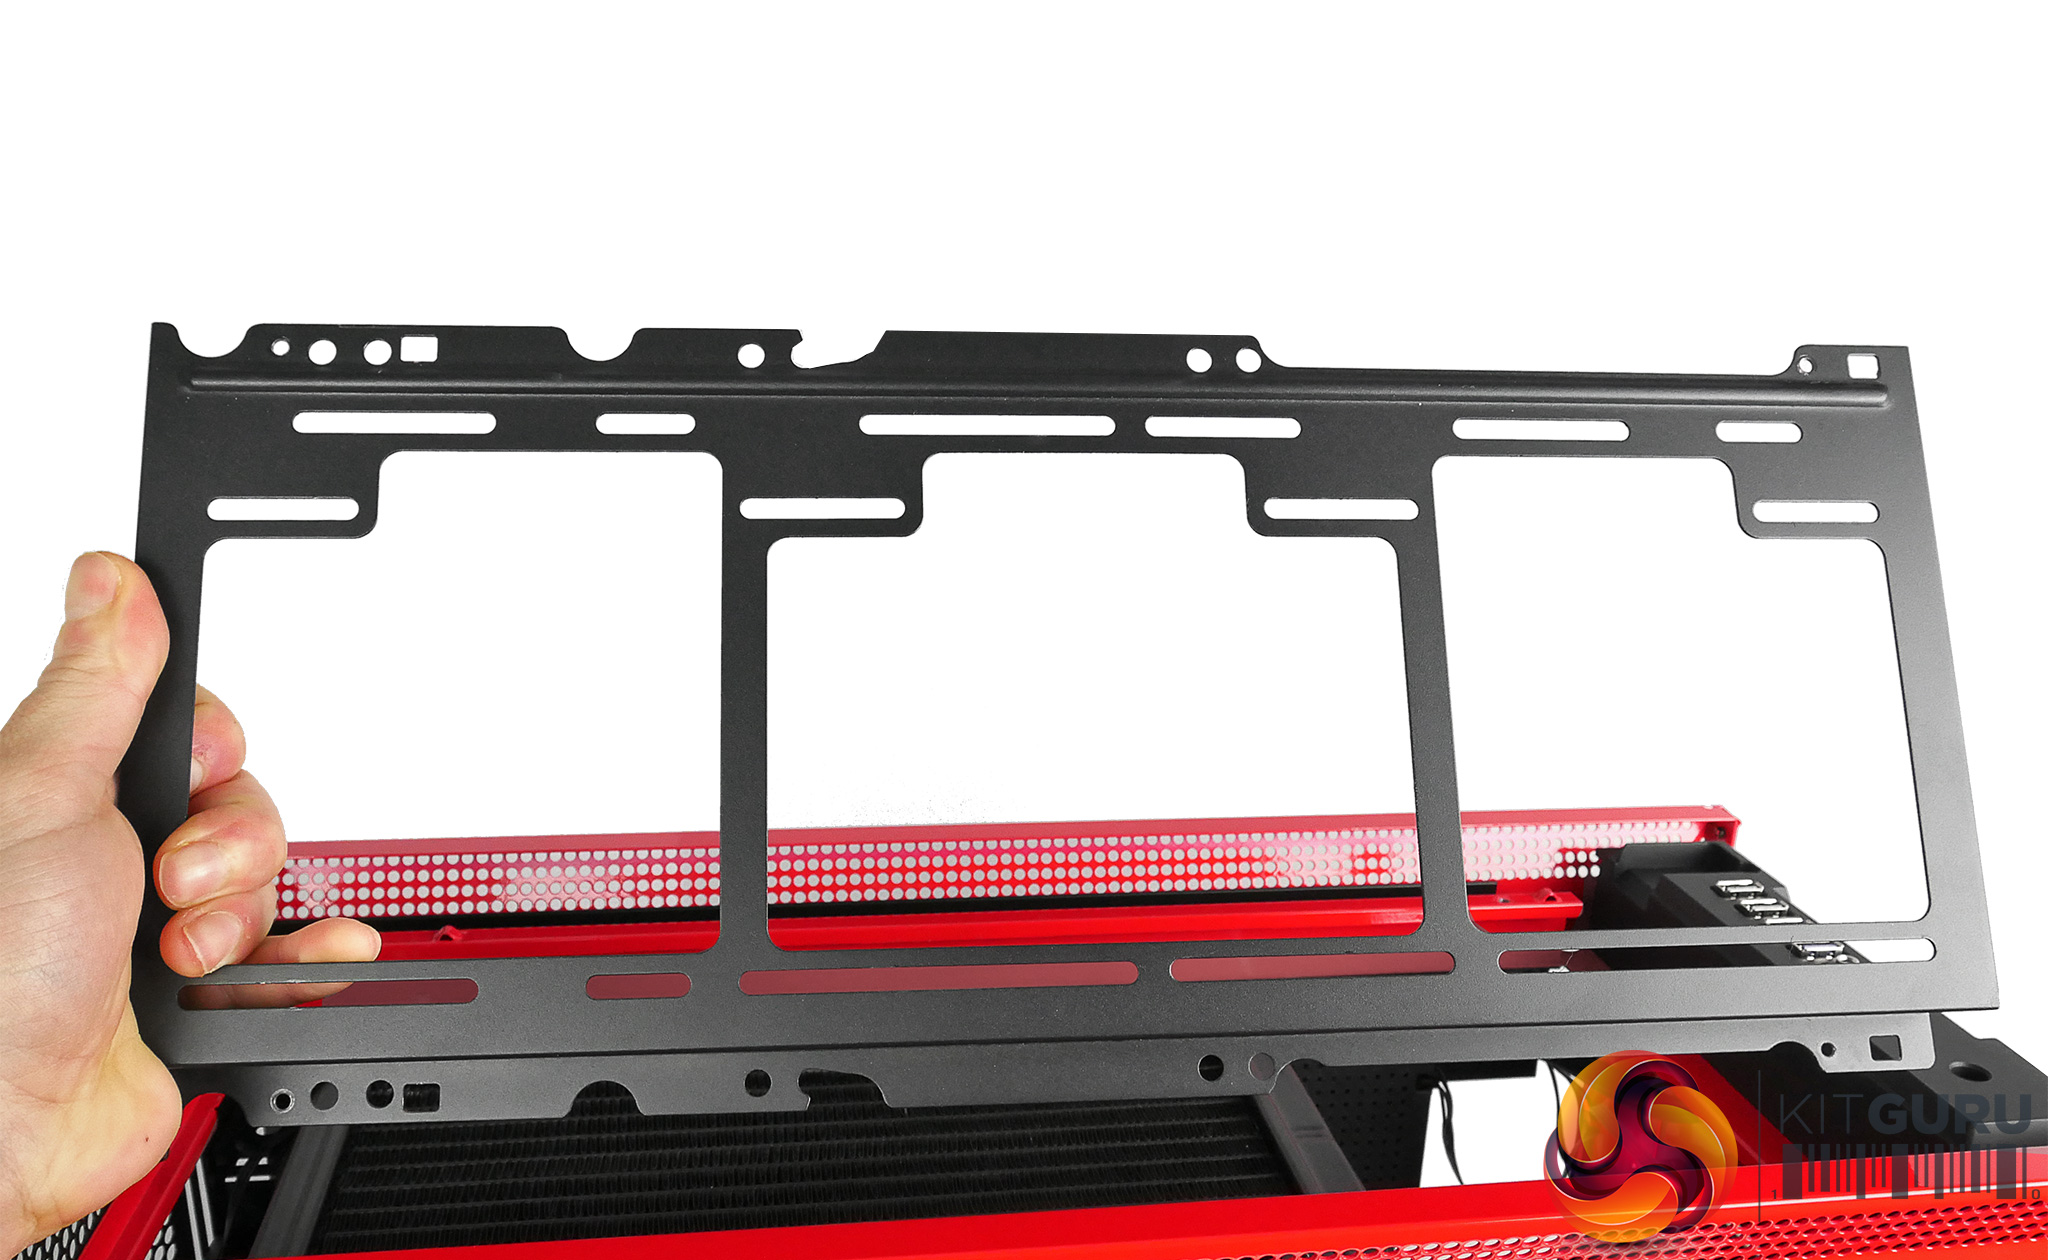
In terms of actually building in the chassis, the H700i is an absolute dream to work with. Removing the side panel is as simple as pressing a quick release button, so no more faffing around with thumbscrews. One of my favourite features is the removable mounting bracket for the top fans/radiator. This allows you to install any fans or radiators outside the case and then just re-mount the bracket to the roof of the case. It's a very nice addition.
Even mounting the 2.5 hard drives is a breeze; just attach the hard drive to the brackets then use the clips on the bracket to attach it to the top of the PSU shroud. There are no set positions for the caddies, so you can actually install them wherever you like which is certainly something new.
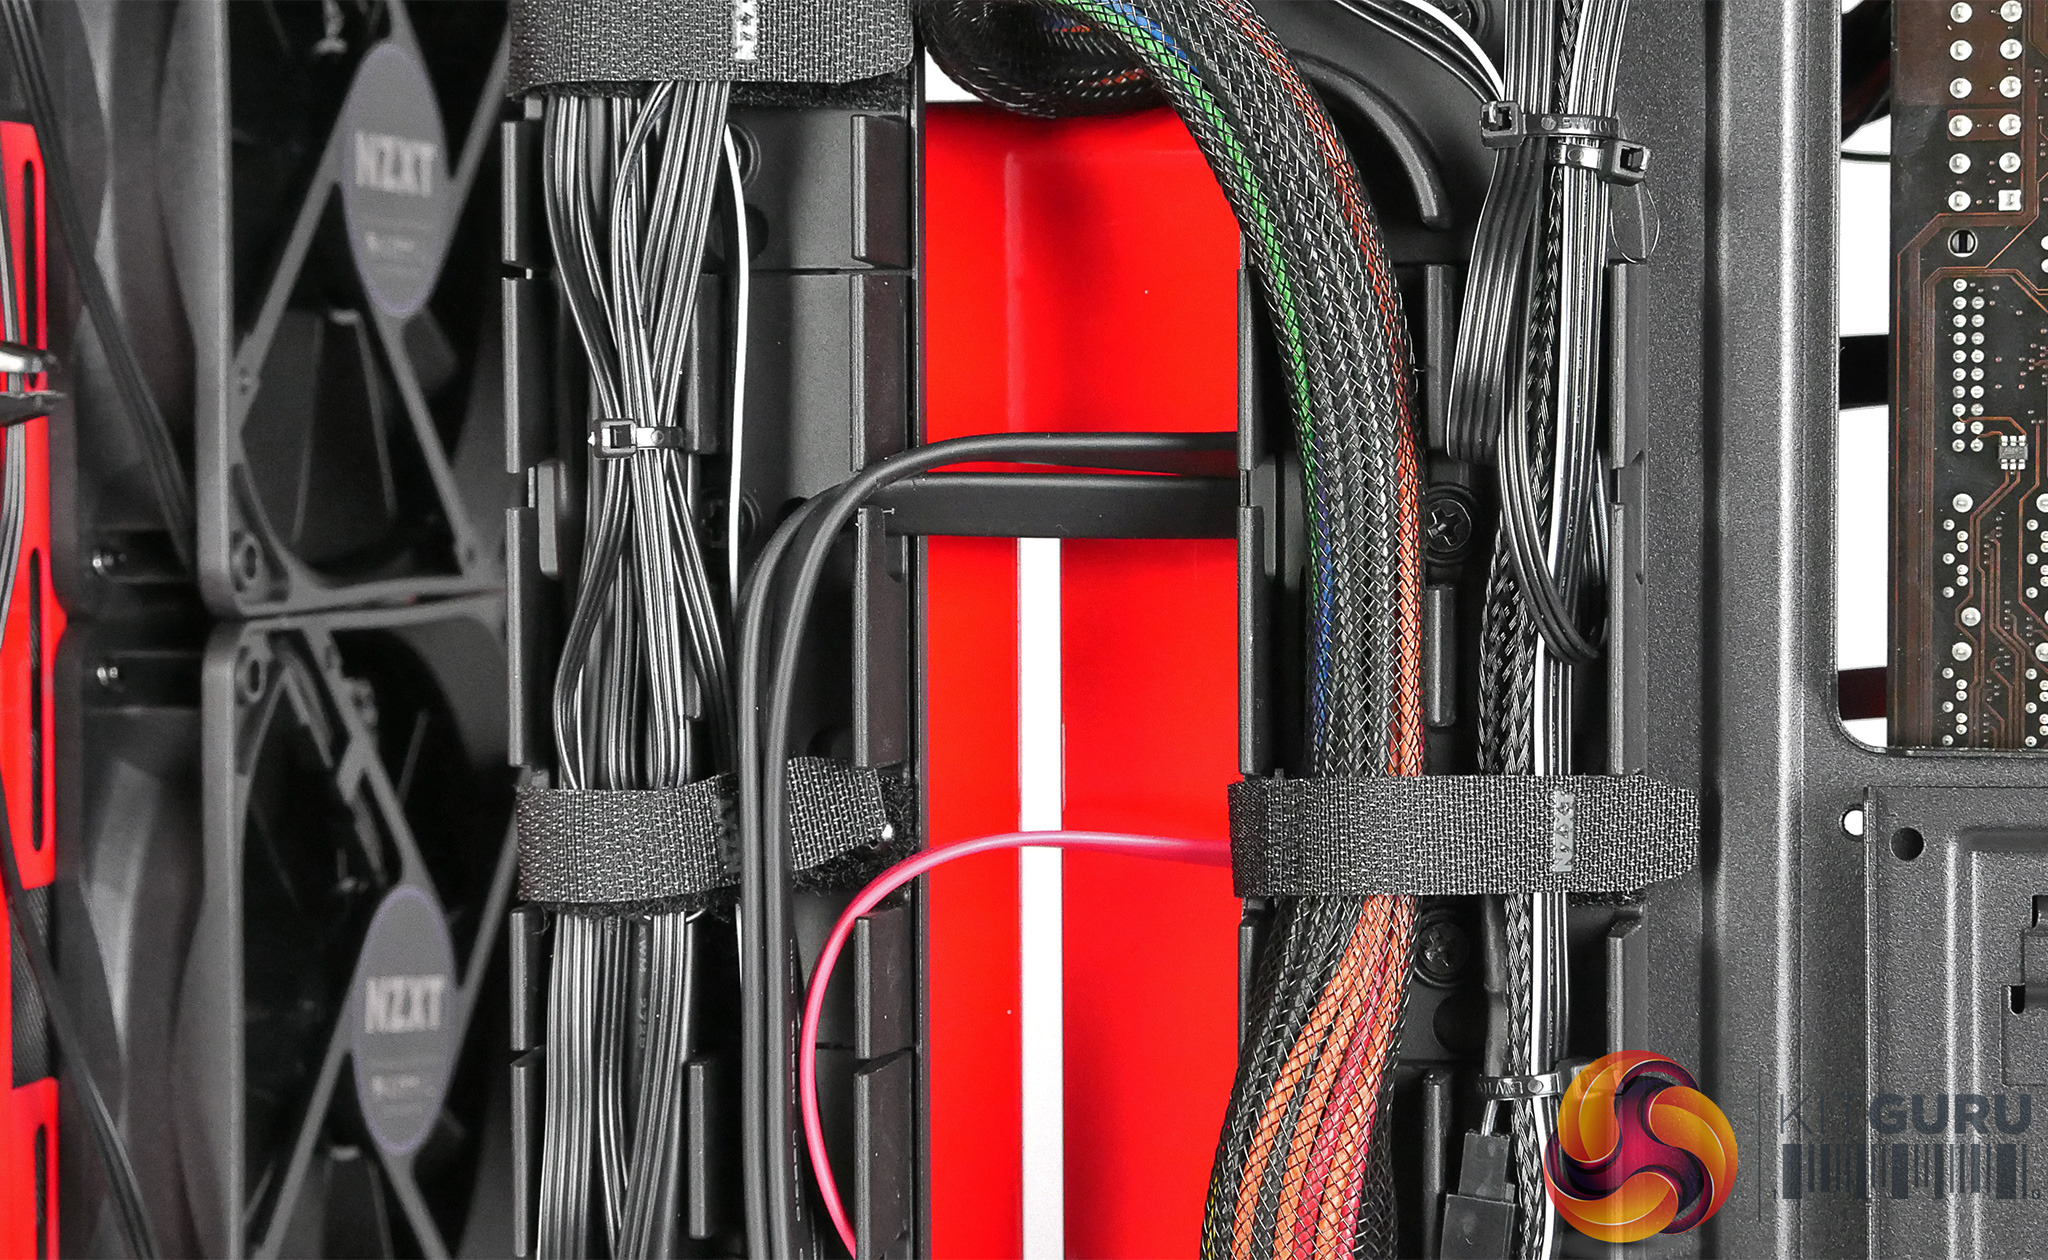
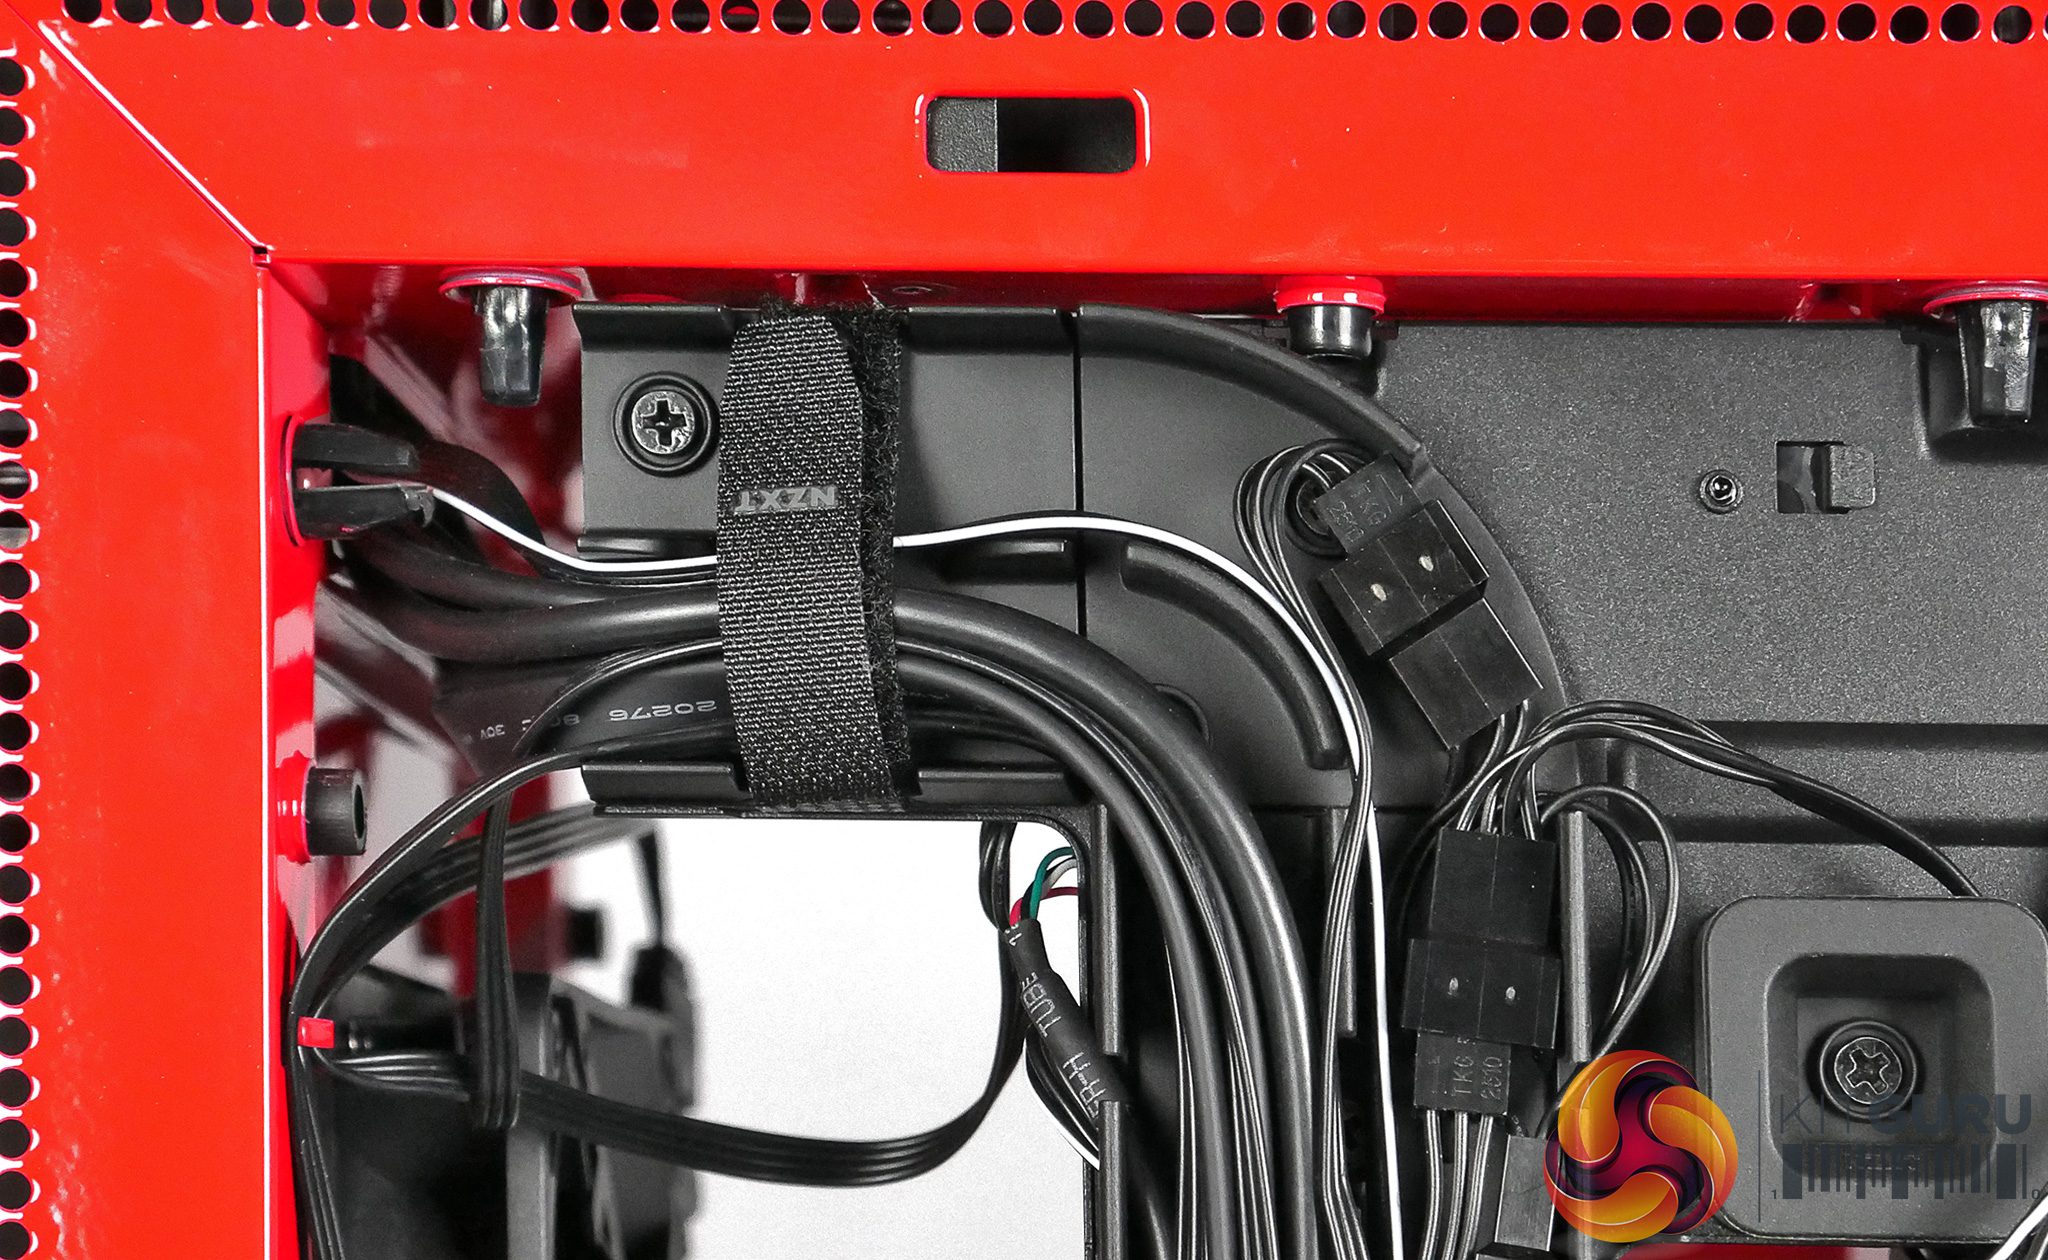
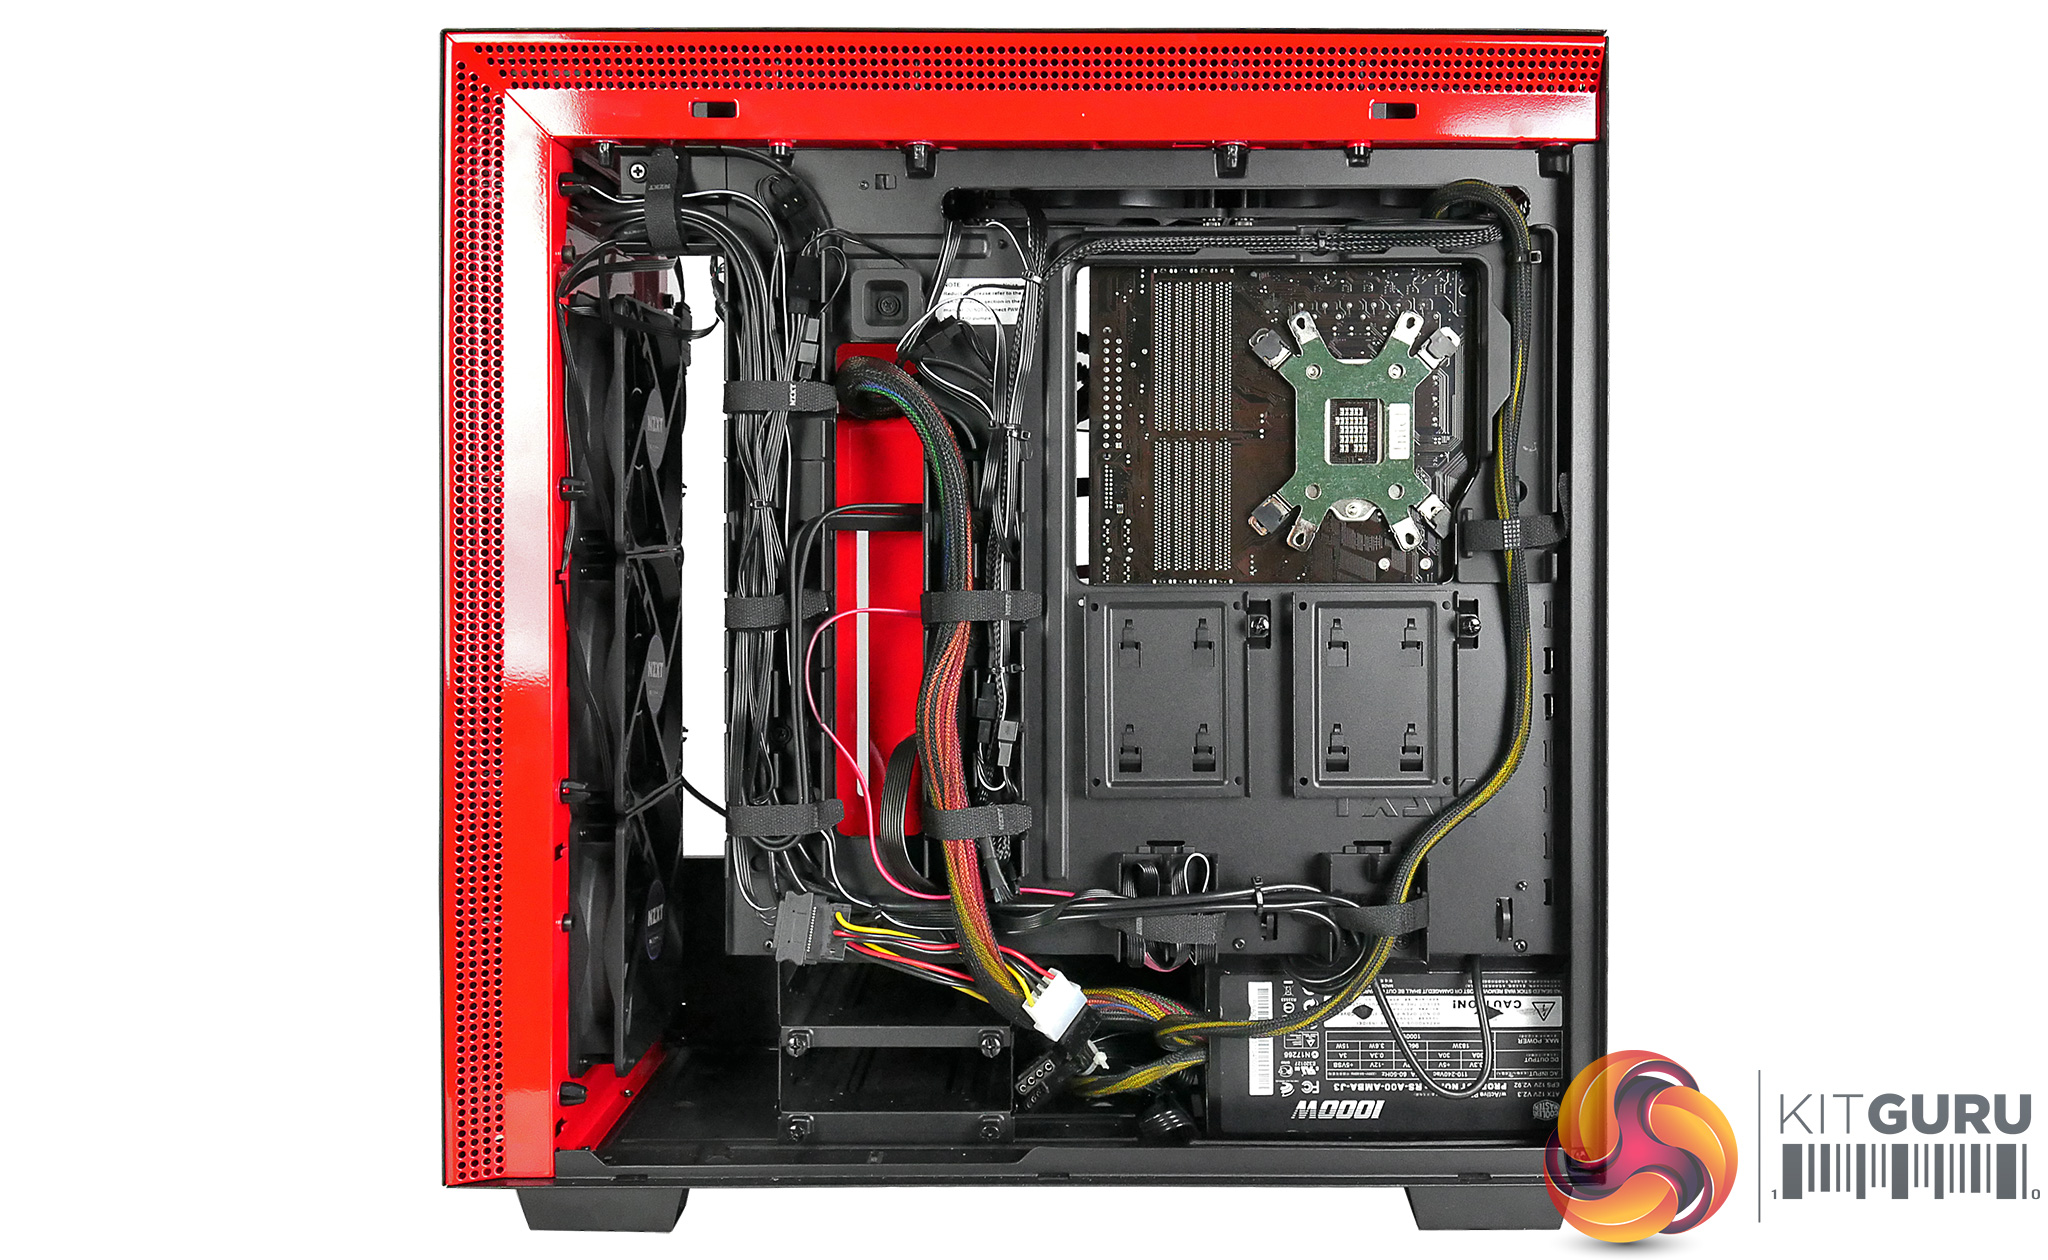
As for cable management, the H700i is very easy to work with. The case has plastic cable channels behind the motherboard tray, and these just help guide and secure the cables into place, while plenty of Velcro straps are provided as well. I barely had to use any other cables ties, which is excellent. The cable channels can even be removed if you decide you don't want the extra help. On the front of the case, the cable management bar also helps hide your thicker USB 3.0 and 24-pin cables, giving a nice clean look to your build. Overall, I can honestly say its one of the best cable management systems I’ve ever used, so thumbs up from me.
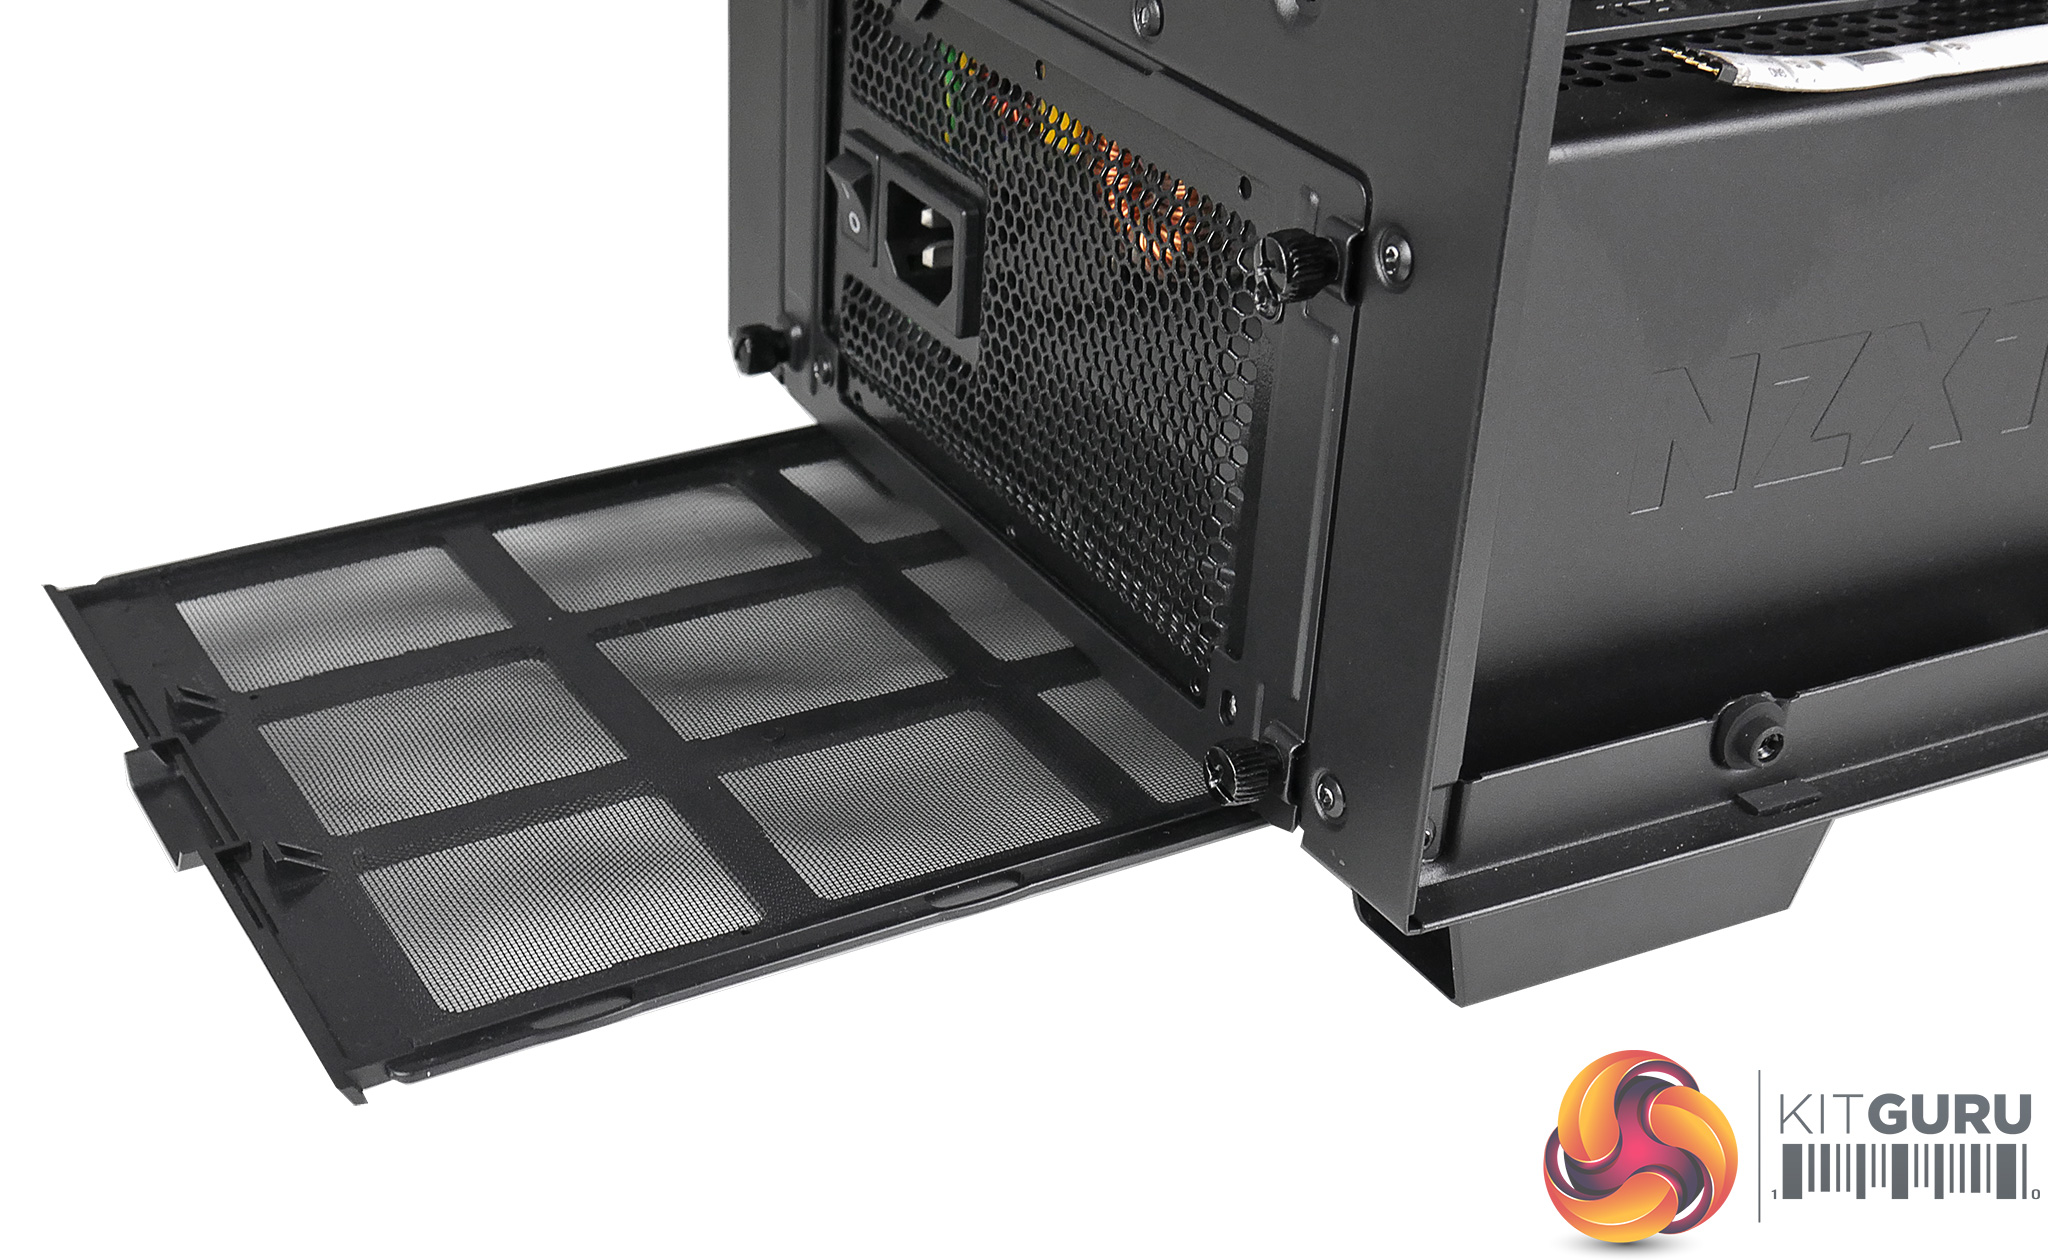
Rounding things off, we also get 3 x 120mm fans installed in the front and a single 140mm spinner at the back, all of which are NZXT AER-series models. If you had air cooling in mind, you’re essentially good to go straight out the box. There are also two removable dust filters included, one below the power supply and one behind the front panel. The case also includes a preinstalled RGB strip along the top panel, and there is even an additional strip included in the box which you can mount wherever you want.
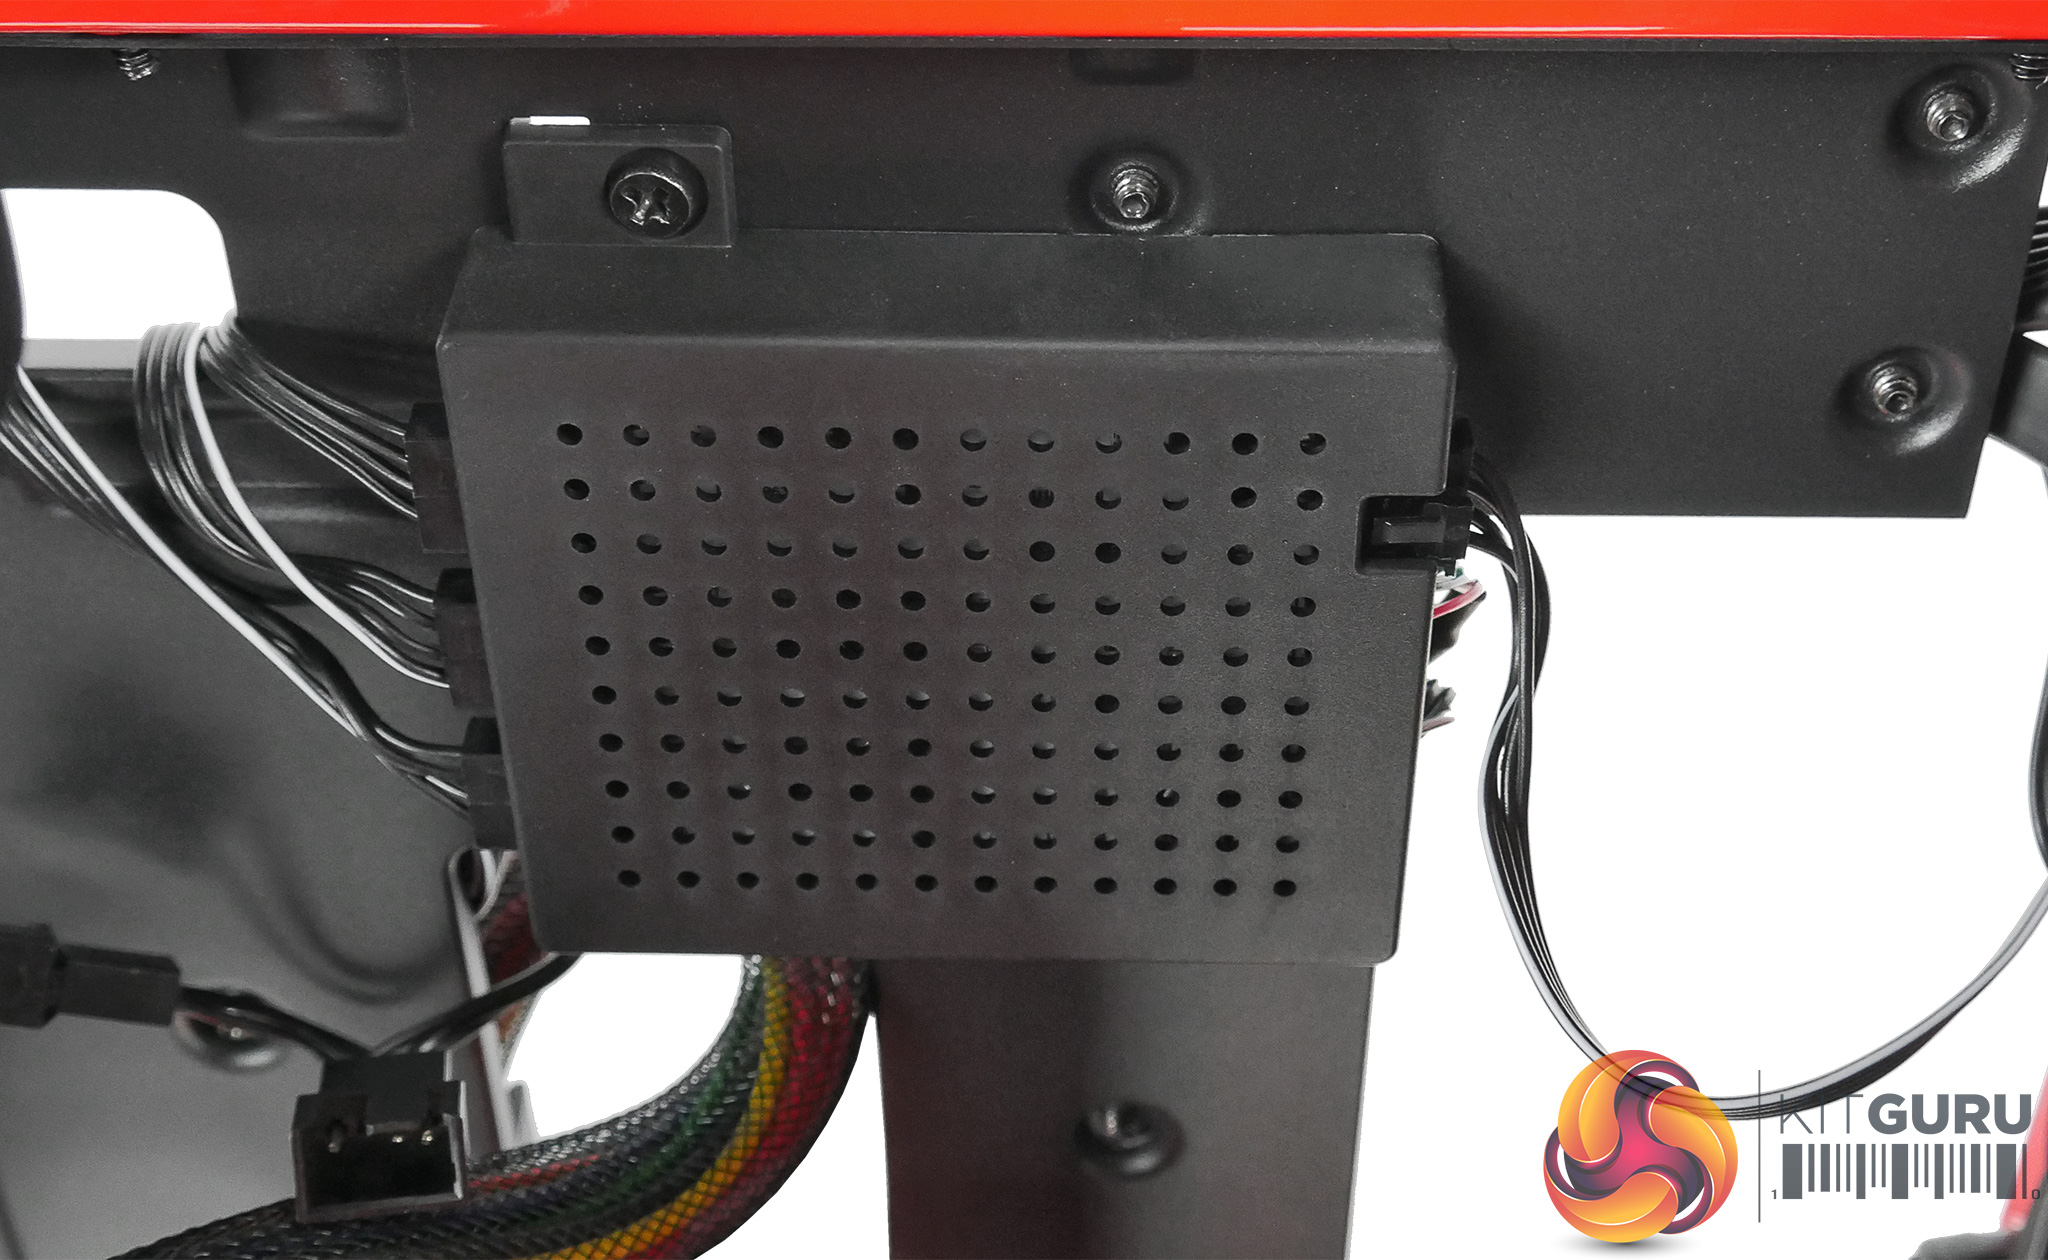
Last but not least, we come to one of the headline features of the H700i: the Smart Device controller.
Smart Device
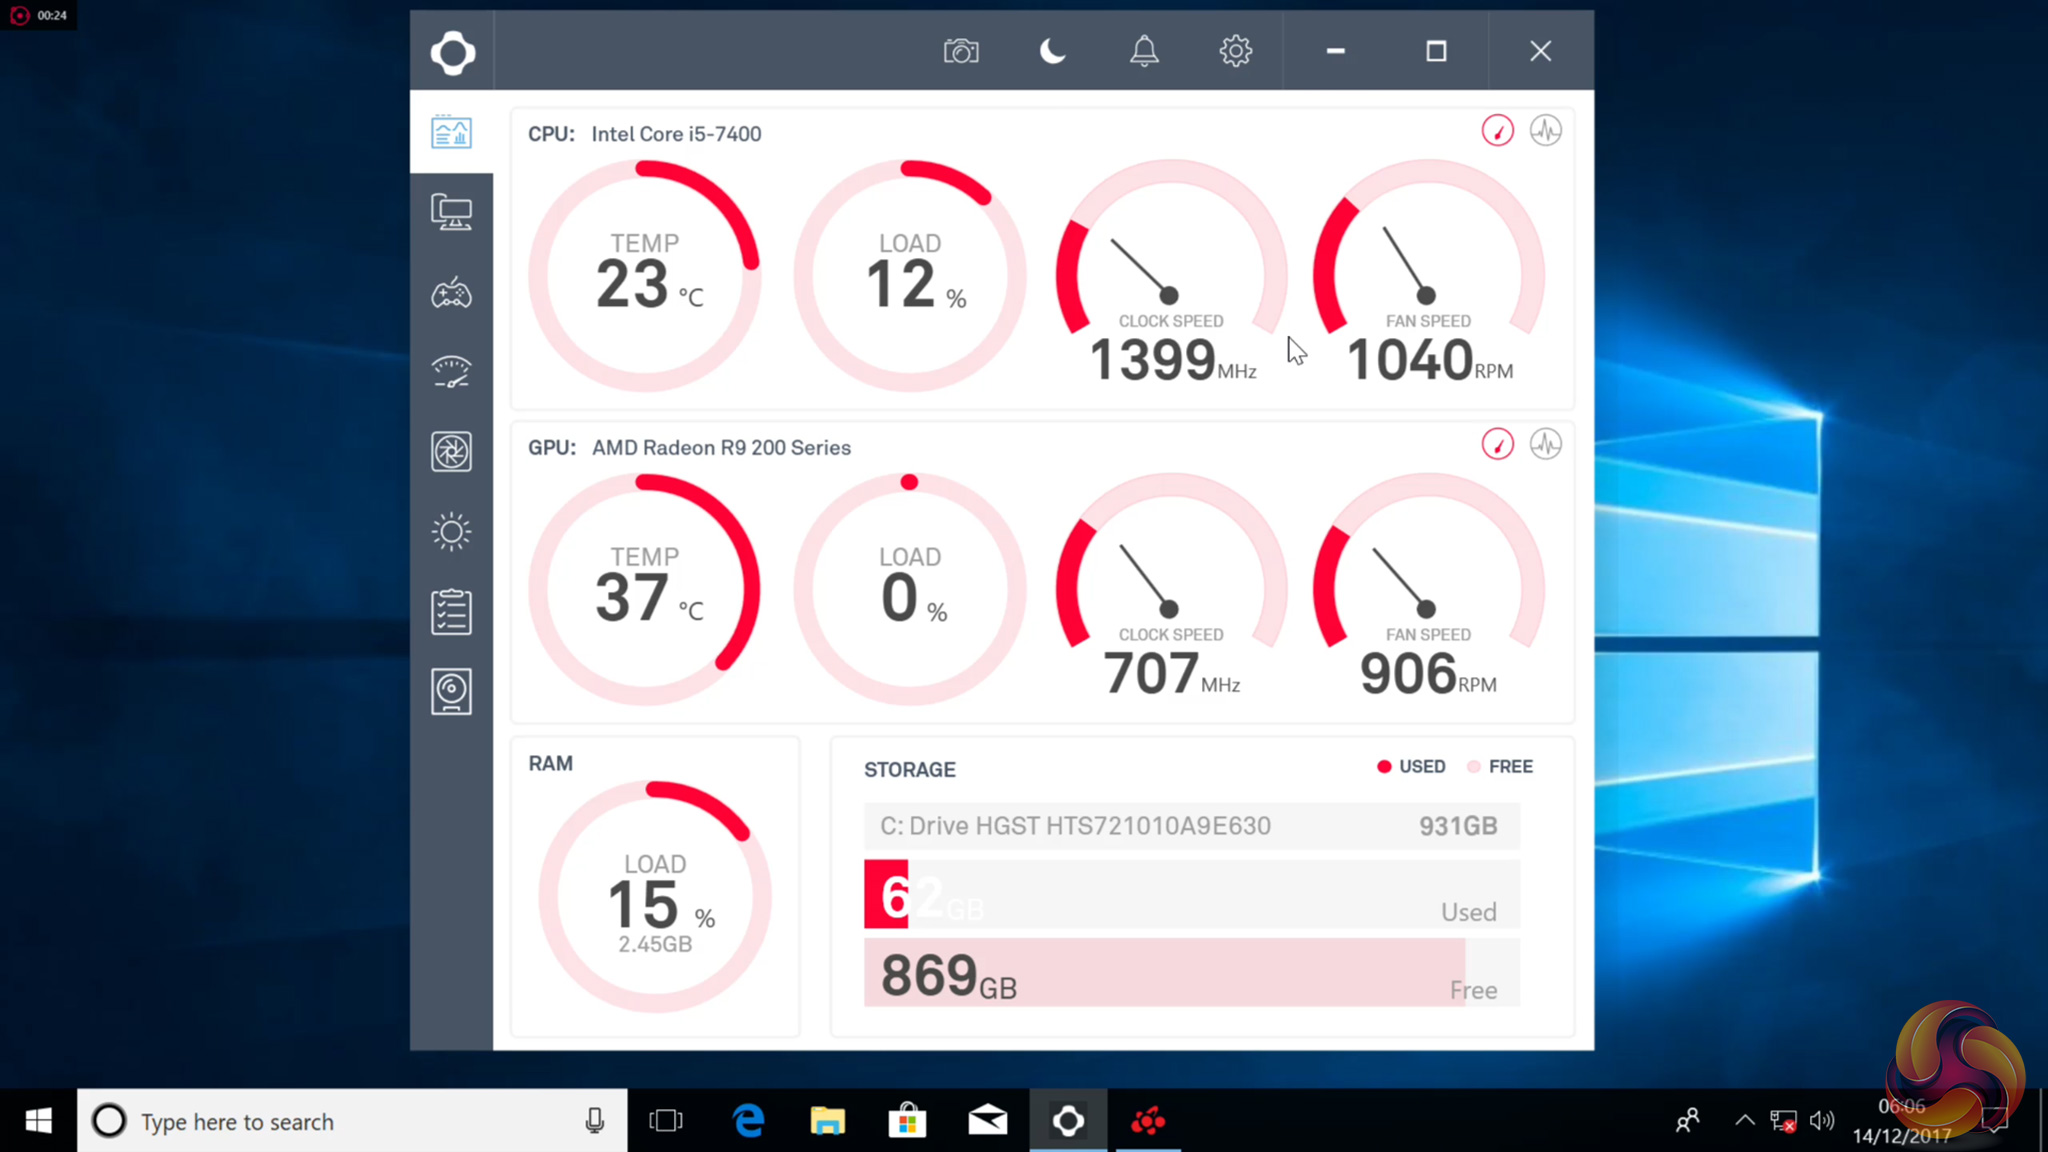
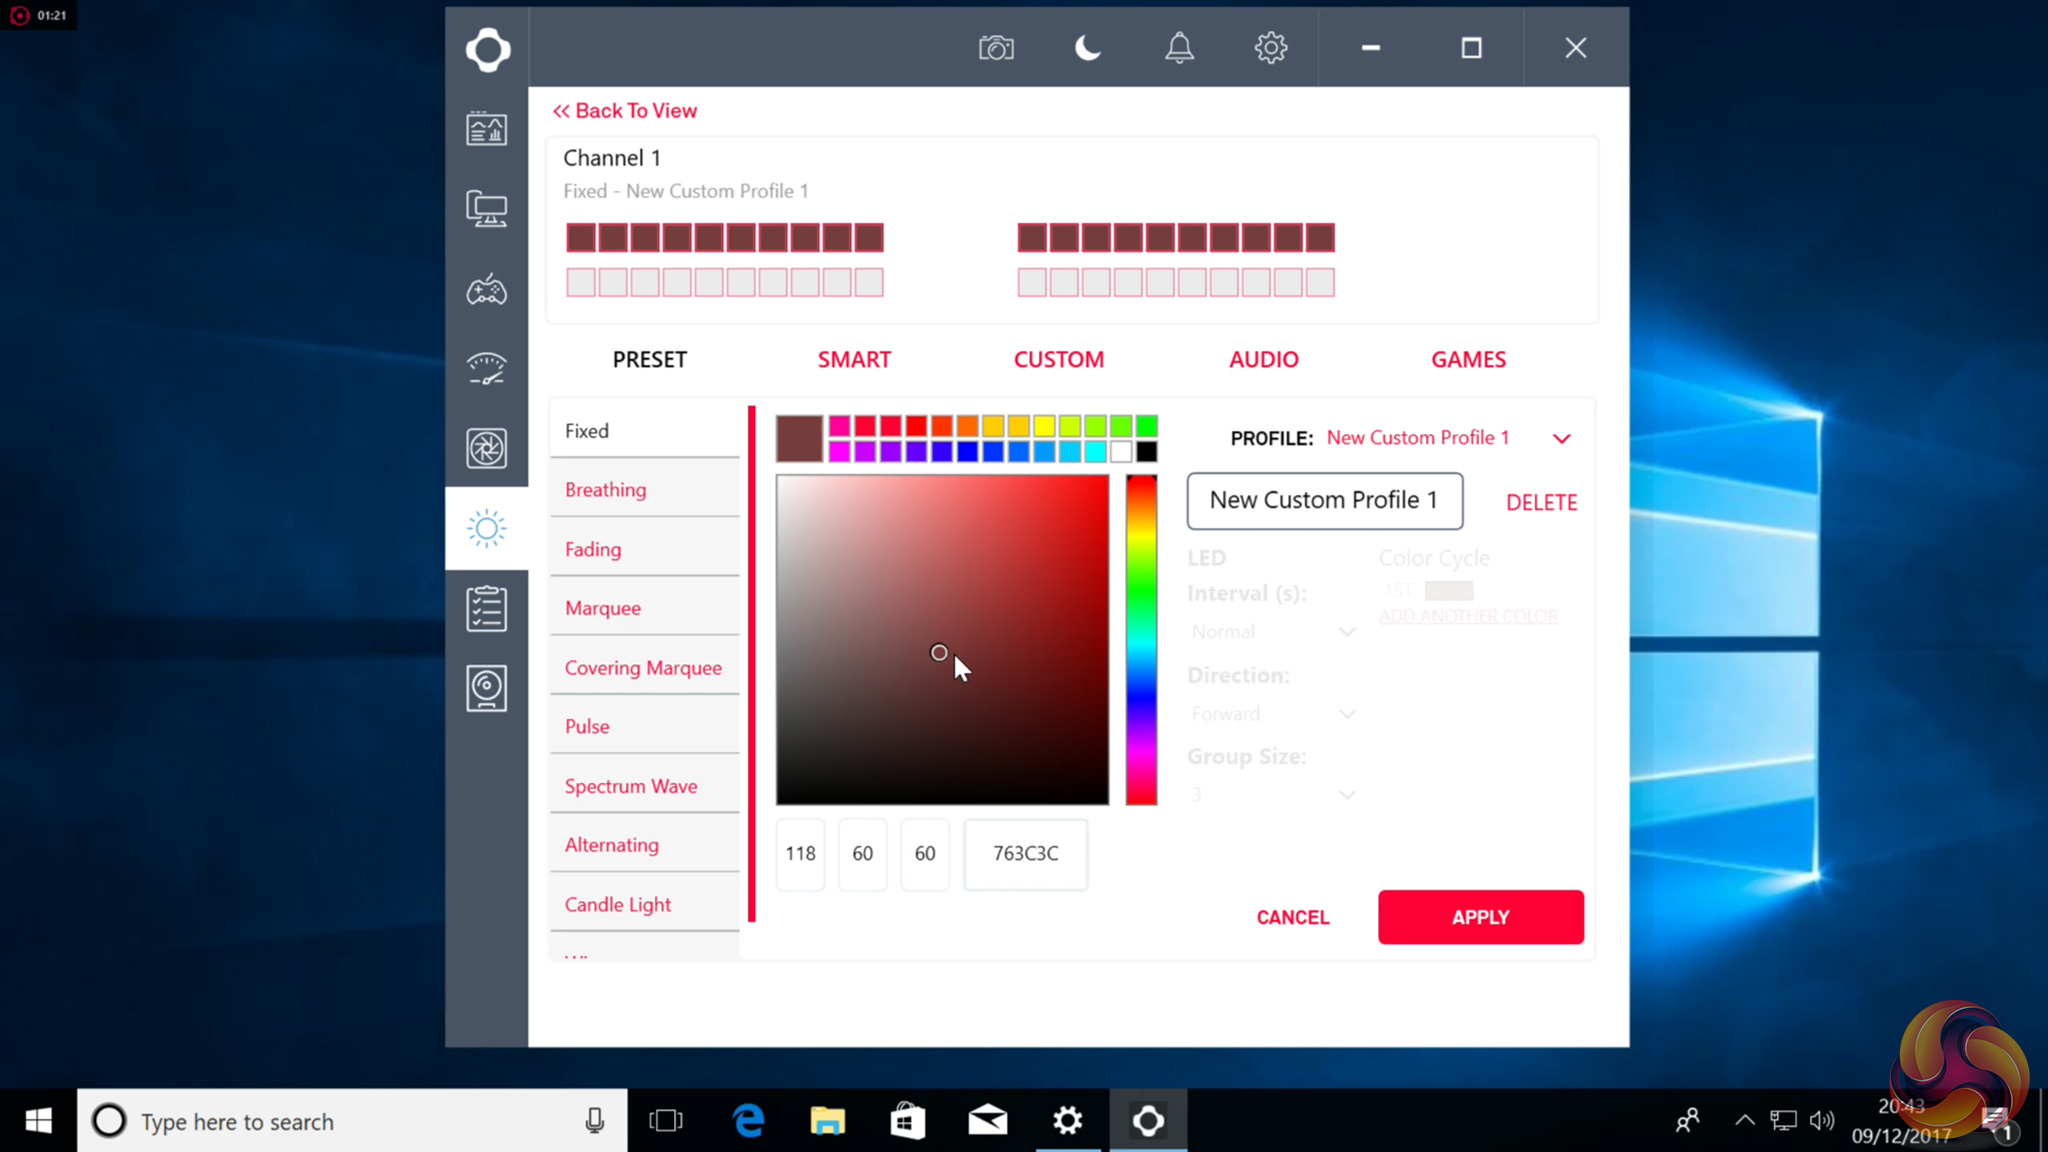
The Smart Device controller is essentially a Grid+ V3 and a HUE+ combined, allowing you to control up to 3 different fan channels and up to 5 HUE+ RGB strips. The controller itself is preinstalled at the top of the case and has all the included fans and even the RGB strip connected to it already, so you’re ready to go right out the box. I connected my CPU fans to this device as well, just to be able to control everything through the CAM software.
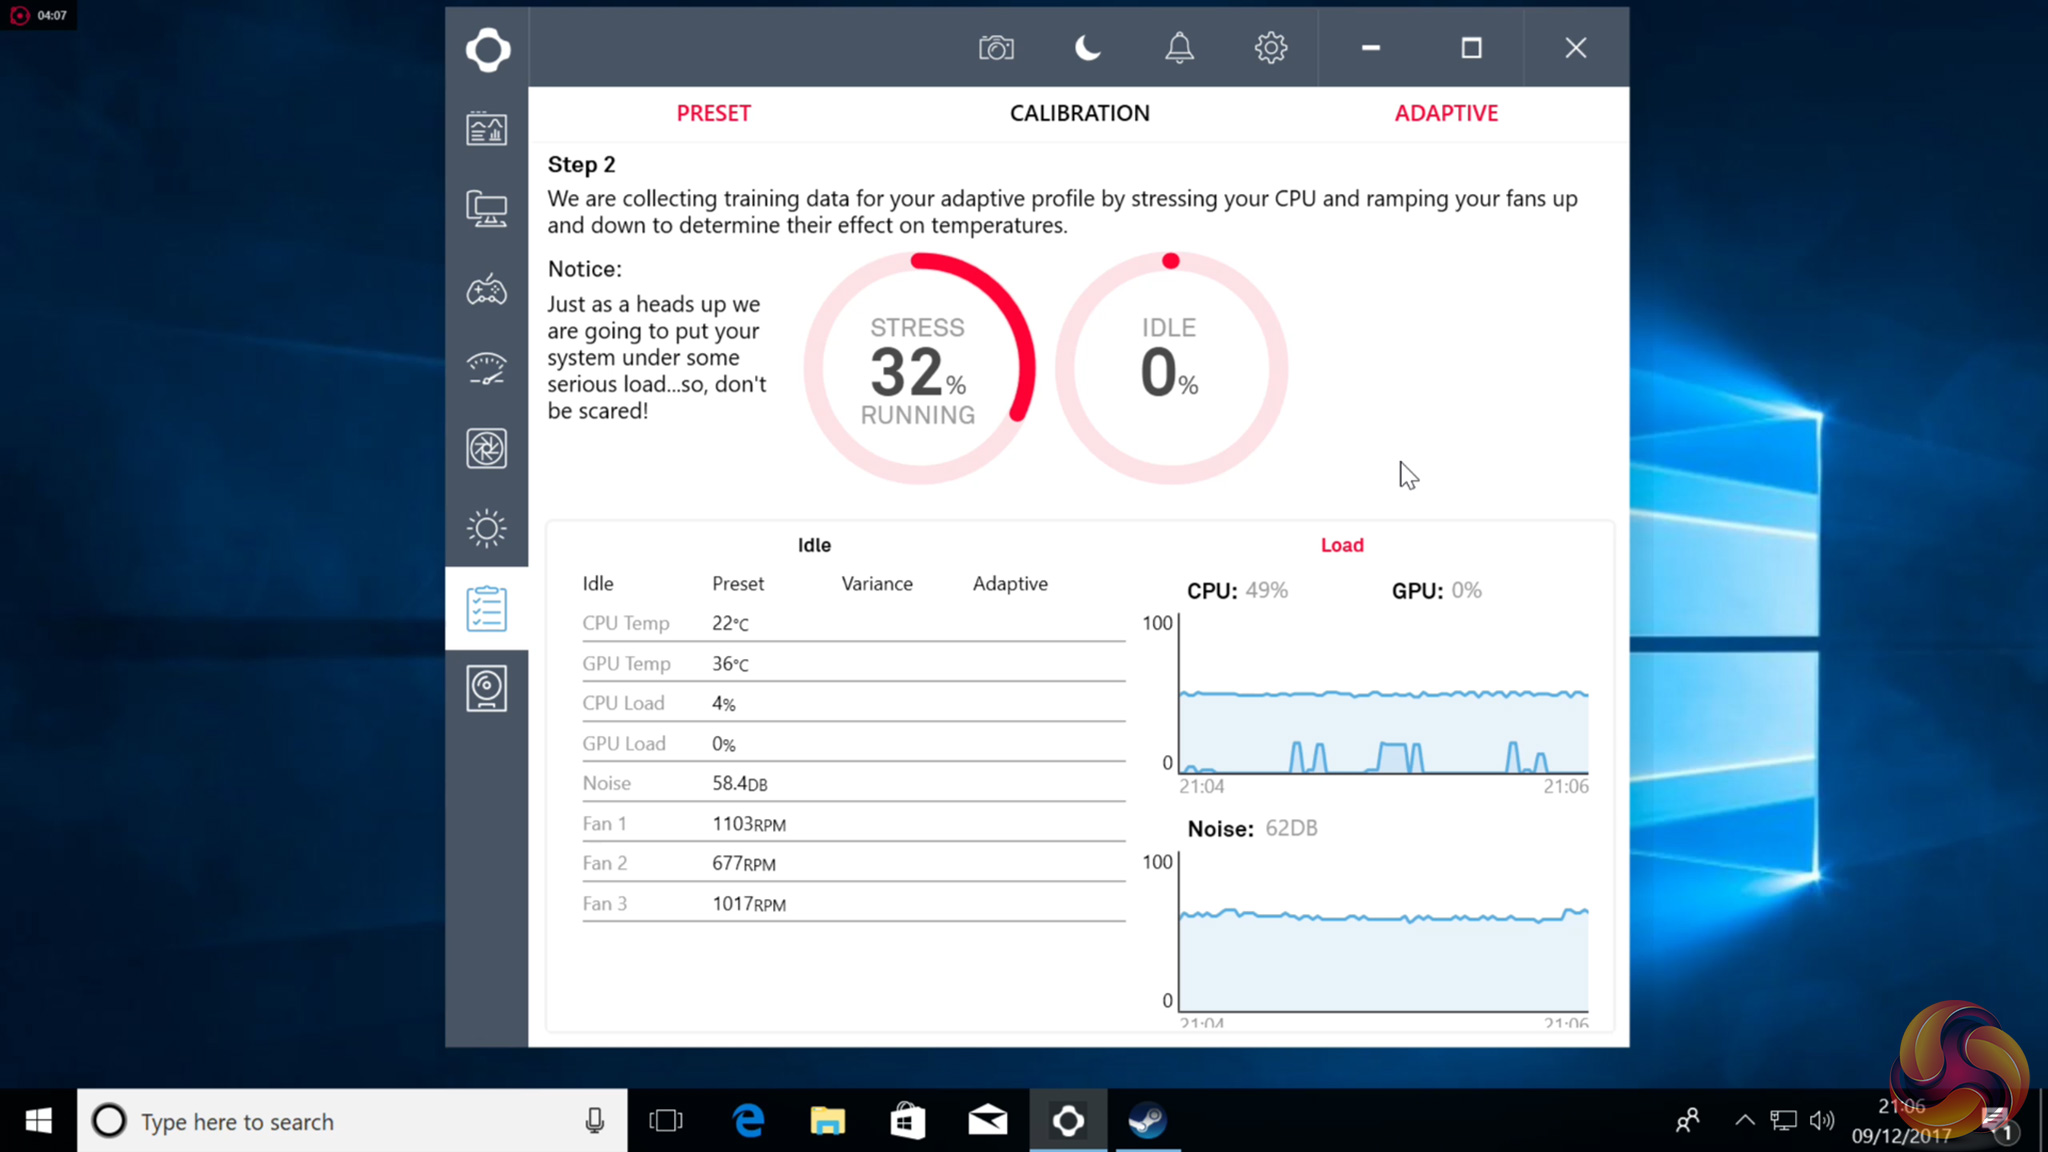
So, at this point, we're thinking there's an integrated fan and RGB controller – great. But what's so ‘smart' about it? Well, using machine learning, the Smart Device constantly monitors your system and can dynamically change the fans' speed to keep the case as quiet as possible while still keeping temperatures in check. This is all done through NZXT's CAM software, a free download. Once installed, you have to go through a one-hour calibration process, which is broken into 3 sections.
First is the ‘Preset’ stage, which is where the application gathers information from your system using whatever fan curve you had applied, so it can use the data as a baseline. Once that is done it will move to the next stage, which is ‘Calibration’. This involves CAM using its own internal stress test, and you do have to wait for an idle test to complete as well. The final stage is called ‘Adaptive’, where CAM tests the new preset which it has created for you. It does this by telling you to once again wait for an idle test to complete, followed by another stress test.
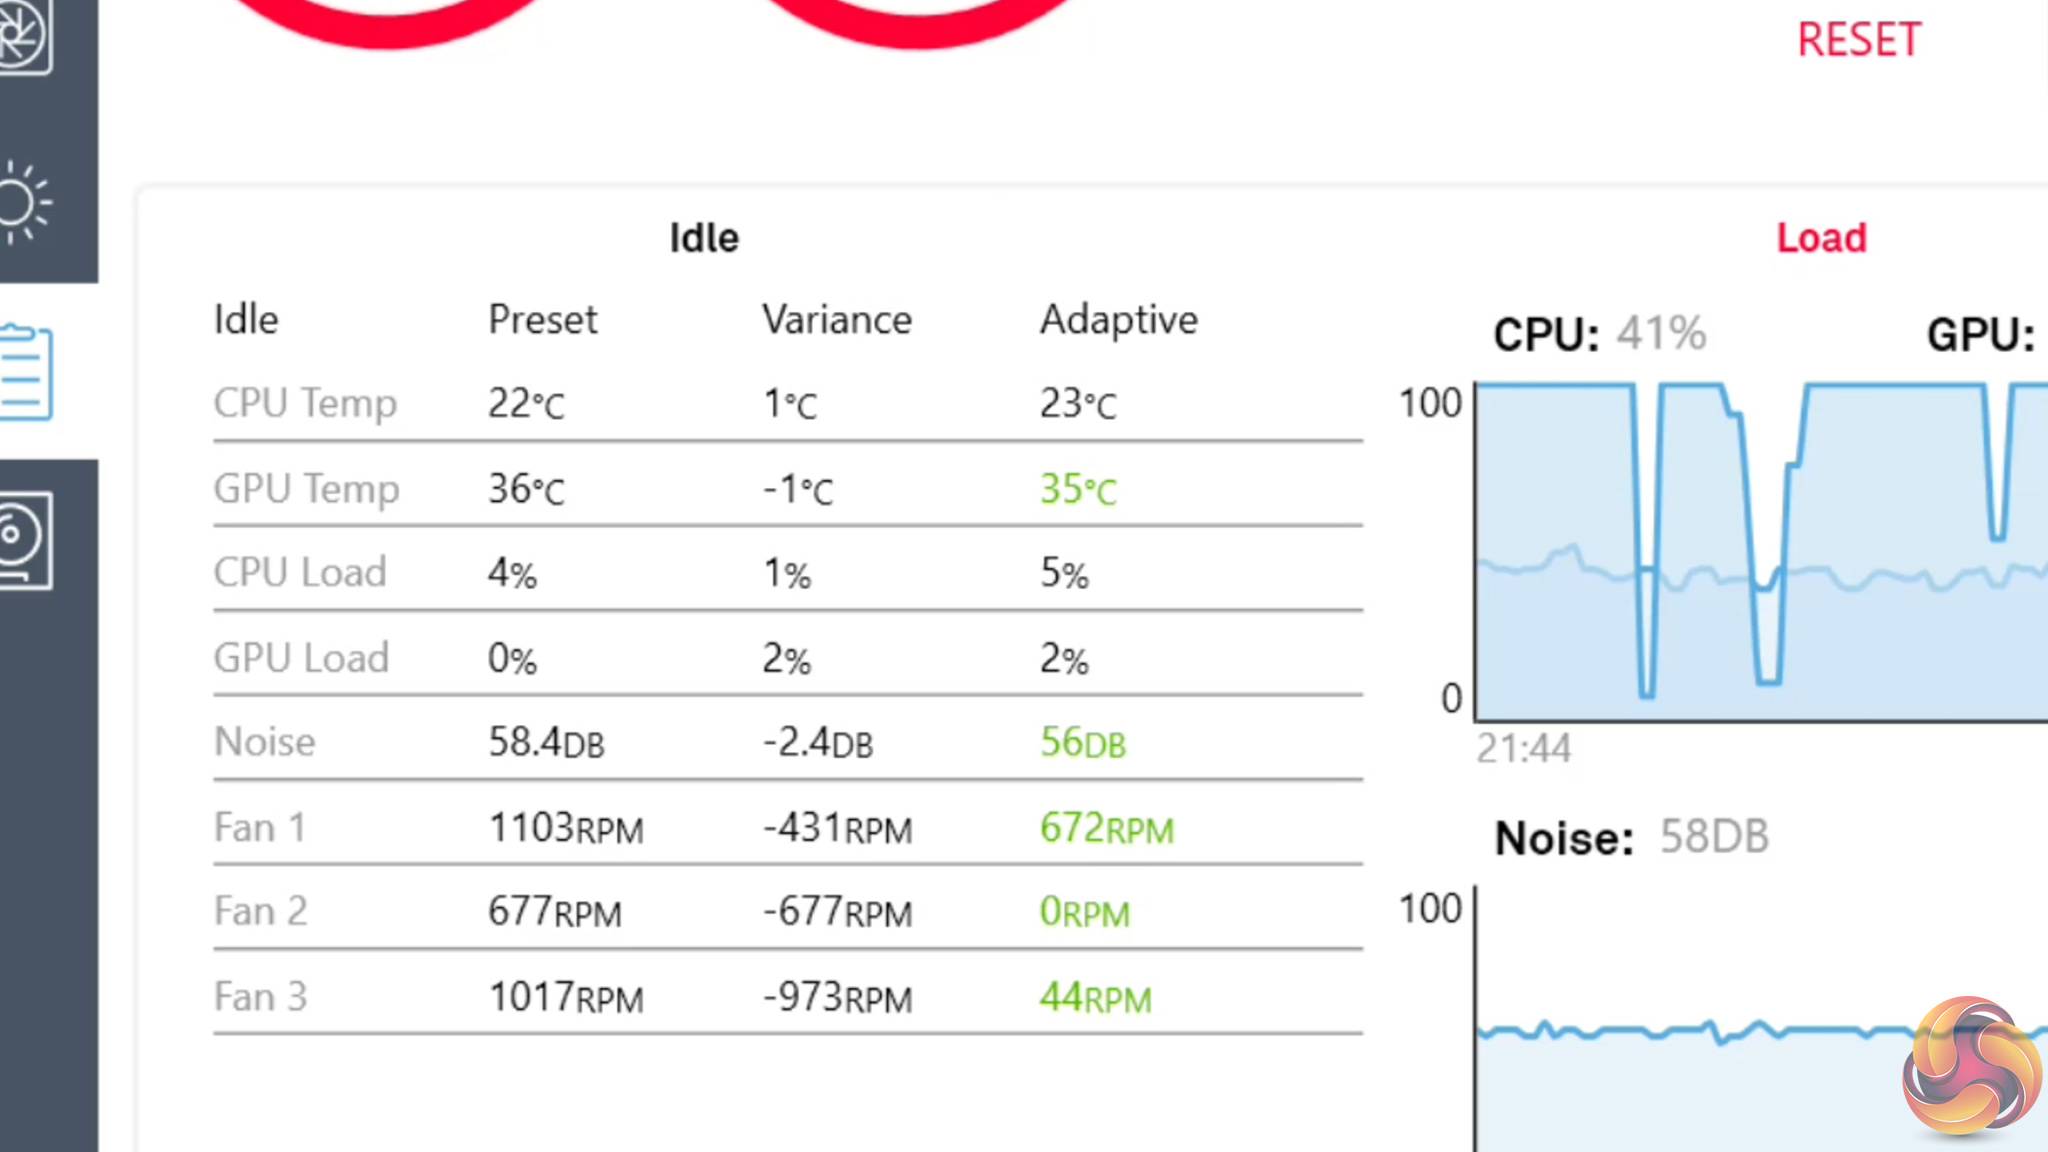
At the end of calibrating everything, the software will give you a breakdown of what changes it has made to fan speed and thermals, and it then allows you to apply that adaptive profile if you so wish.
Now, CAM is one of those programs has some great features, but it can also be quite irritating. That was certainly the case here, as I had a few issues with the calibration process.
First of all, during the idle test, if your CPU exceeds 10% load the process will refuse to continue. This is very annoying as Windows often decides to start installing things in the background which you can't control. CAM itself also places some load on the CPU which doesn't help matters. Other times the test will not progress and you won't even know why, forcing users to restart the whole procedure.
Other issues were also present, including CAM simply not opening until manually terminated and relaunched, while the RGB control section even disappeared completely a couple of times. Clearly, the software needs more work.
When it does work, however, it is very good. The lighting options are fantastic, giving you all the features of the standalone HUE+, while the fan control features also are very detailed and allow for completely custom fan curves if you don't want to use one of the preset options.
Temperatures
Moving onto temperatures testing, here I ran two different tests. The first was done using the ‘performance' preset from CAM, while the second test was ran using the adaptive profile it calibrated for me.
To stress the hardware, I ran AIDA64 and Unigine Heaven simultaneously for 10 minutes. The system consisted of the following components:
Processor: Intel i5-7400 (stock clocks)
Motherboard: Gigabyte GA-Z270P-D3
CPU cooler: Cooler Master Sedion 240V Liquid Cooler (roof mounted)
Memory: Corsair Vengeance 16GB LPX 2666MHz DD4
Graphics card: Sapphire R9 285 ITX Compact
Power supply: Cooler Master SIlent M Pro 1000W 80+ Bronze
Storage drive: 1TB 7200RPM HDD
OS: Windows 10
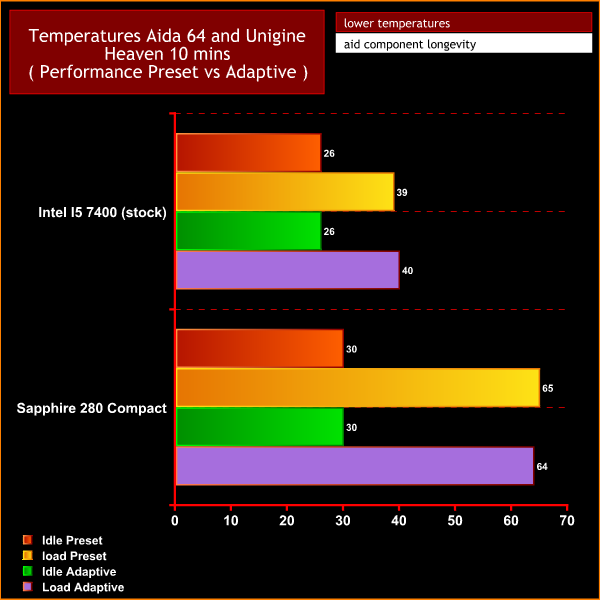
Now, CAM actually predicted that I would see similar temperatures between the ‘performance' preset and the adaptive profile, but the adaptive mode should give lower noise output. As you can see I did see similar temperatures between the two modes, but the trouble is I could not really tell if the adaptive mode was any quieter simply because the fan speeds were constantly changing. This is one of the problems with adaptive control – you can’t be as accurate because the variables (here, fan speed) are always changing.
Closing Thoughts
I opened this review with a question; is this case a worthy successor to the H440? As you can probably tell, I think it is.
It has a fantastically modern layout, great hardware compatibility, decent cooling (even without the aid of the Smart Device) and fantastic build quality – making it an absolute pleasure to work and build with.
NZXT has managed to take all the positive aspects from the H440 and make it better – new, custom drive mounting positions, excellent cable management options and the removable radiator bracket are just three areas which have been improved. The most appealing thing to me, however, is the stunning design – the H700i just looks fantastic, and it is available in different colours, too.
In terms of the Smart Device, I think it is definitely offering something new and unique, but the execution could have been better. After all, if the device is truly ‘smart' and configures a personalised fan curve through machine learning, why do users have to go through a 1-hour calibration process, which is frequently interrupted by various bugs and issues? If it was truly ‘smart', you should not have to do anything except use the PC and the device should calibrate itself.
That being said, you don’t actually have to use the smart features, and you are still getting fan and RGB control in one package which is obviously great to have. The controller does add cost, though, so if there was an option to buy the case standalone without the Smart Device – at perhaps £50-80 less – it would be an absolute steal. As it is, the buggy CAM software does take a bit of shine off the stellar chassis.
![]()
In terms of pricing, the H700i usually retails for £199.99 from Overclockers UK. We think that the premium chassis is well worth the cost, though we would love to see an even cheaper option available without the Smart Device, as that would offer the same excellent building experience without the sometimes stressful CAM integration.
Discuss on our Facebook page, over HERE
Pros:
- Great design.
- Good build quality.
- Decent temperatures.
- Excellent hardware compatibility.
- Grid+ and Hue+ functionality.
- One of the best cable management systems.
Cons:
- Smart hub relies on CAM which can be buggy at times.
- Long calibration process.
- Not cheap.
KitGuru says: The H700i is undoubtedly an excellent chassis. Its high price and frustrating ‘smarts' do take the shine off a bit, but those looking for a premium building experience will find a lot to like.

The mini-itx version looked interesting, it had just enough space to mount 2x 140mm fans, but it doesn’t fit a 280mm rad (need an extra inch or so for tube in/out), so no x62 kraken, and it also comes with that stupid smarthub. Had it been an inch taller and lacked that, I’d have used it for a small build, it had all the h700i’s design principles.