

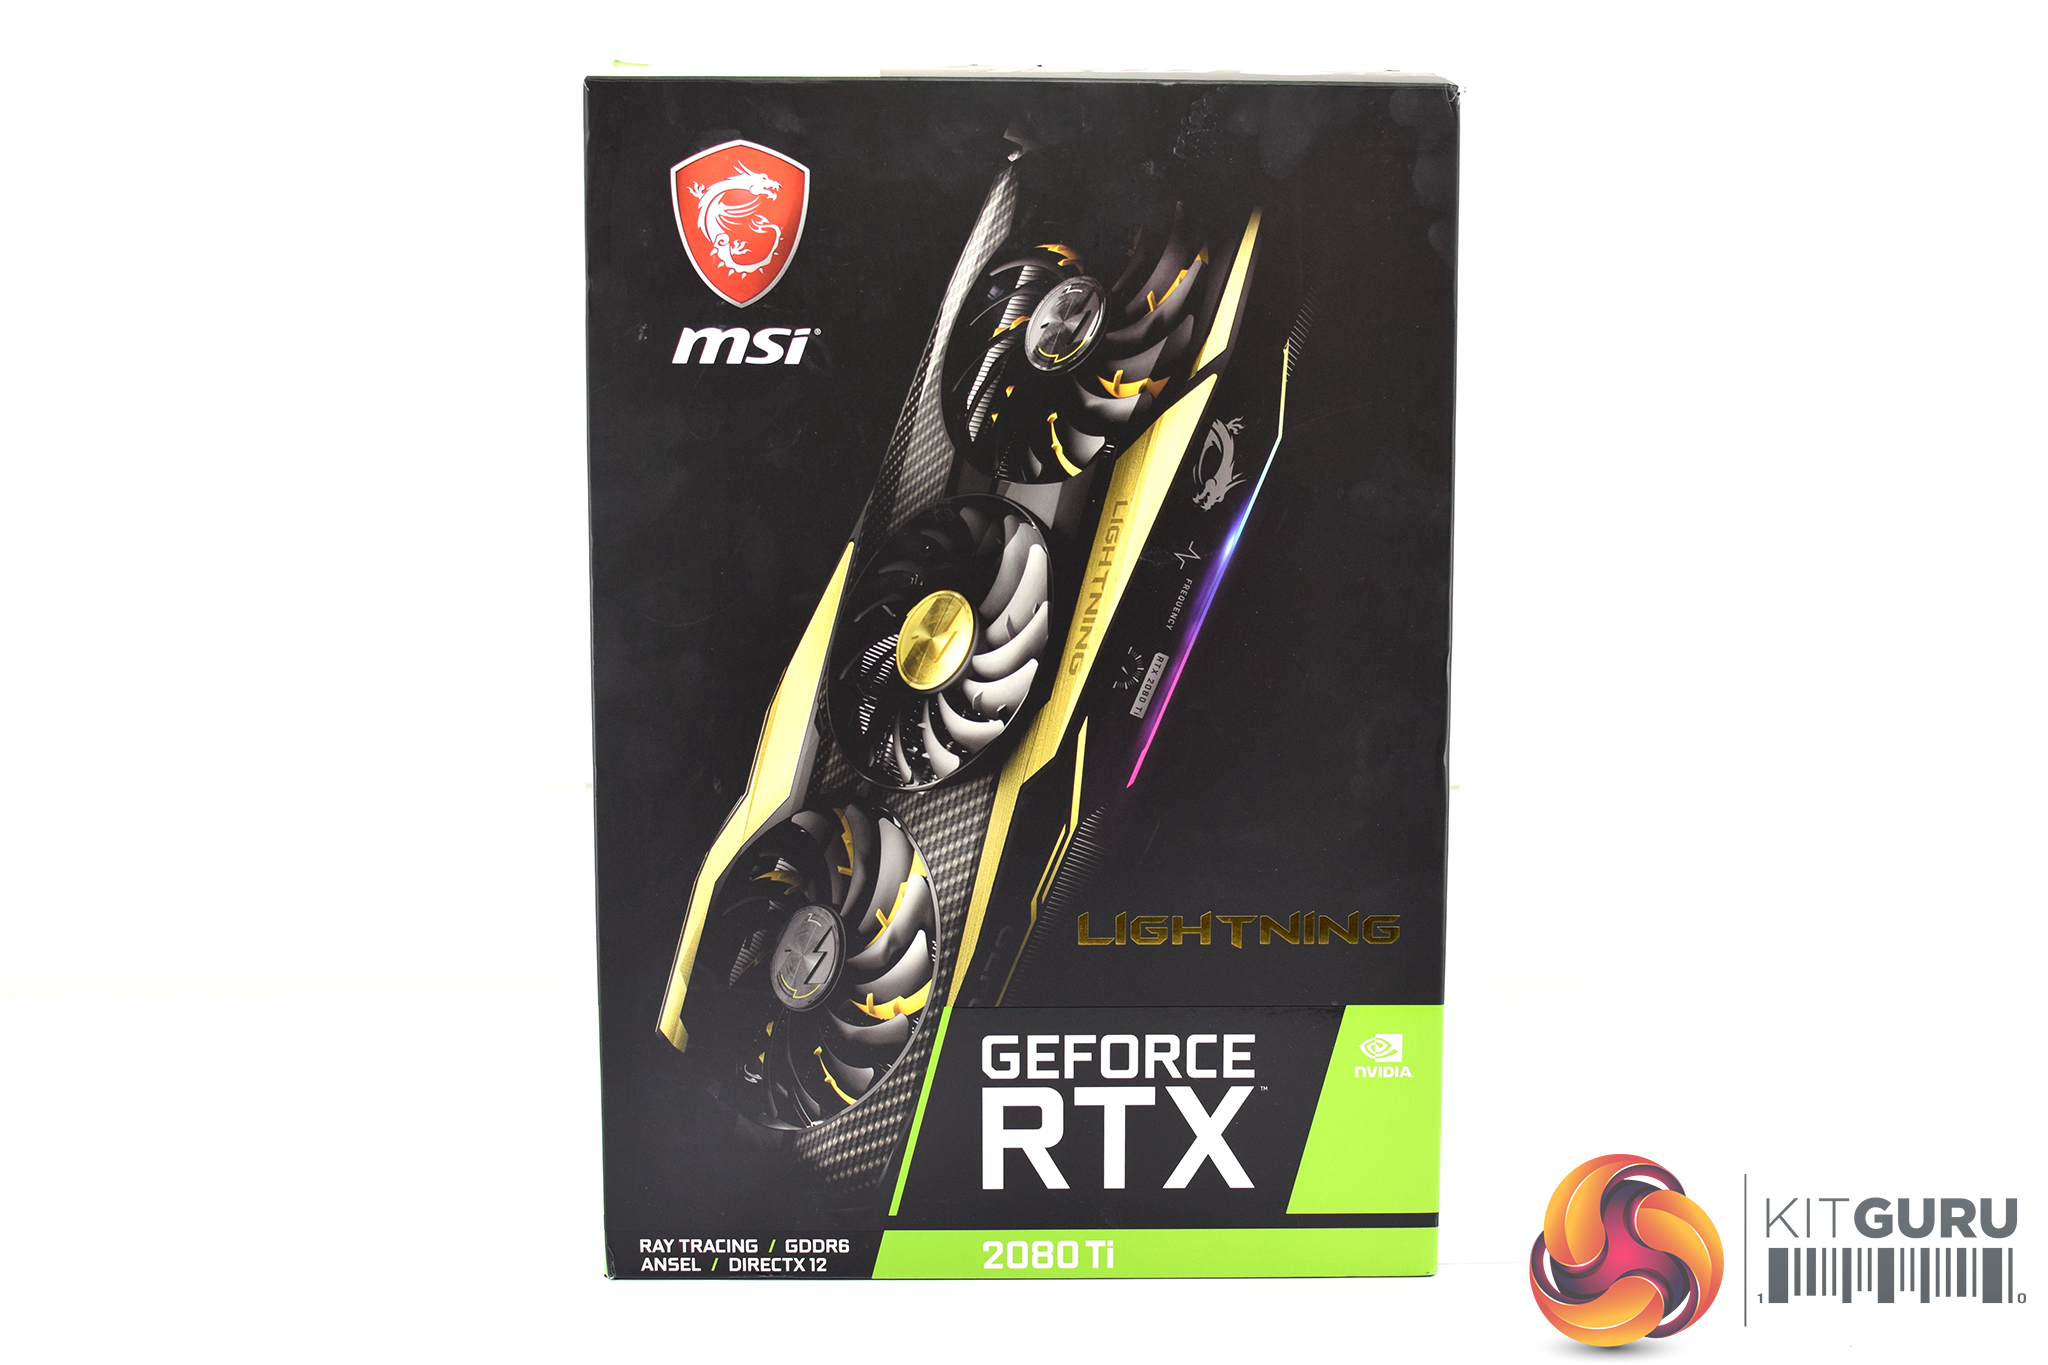
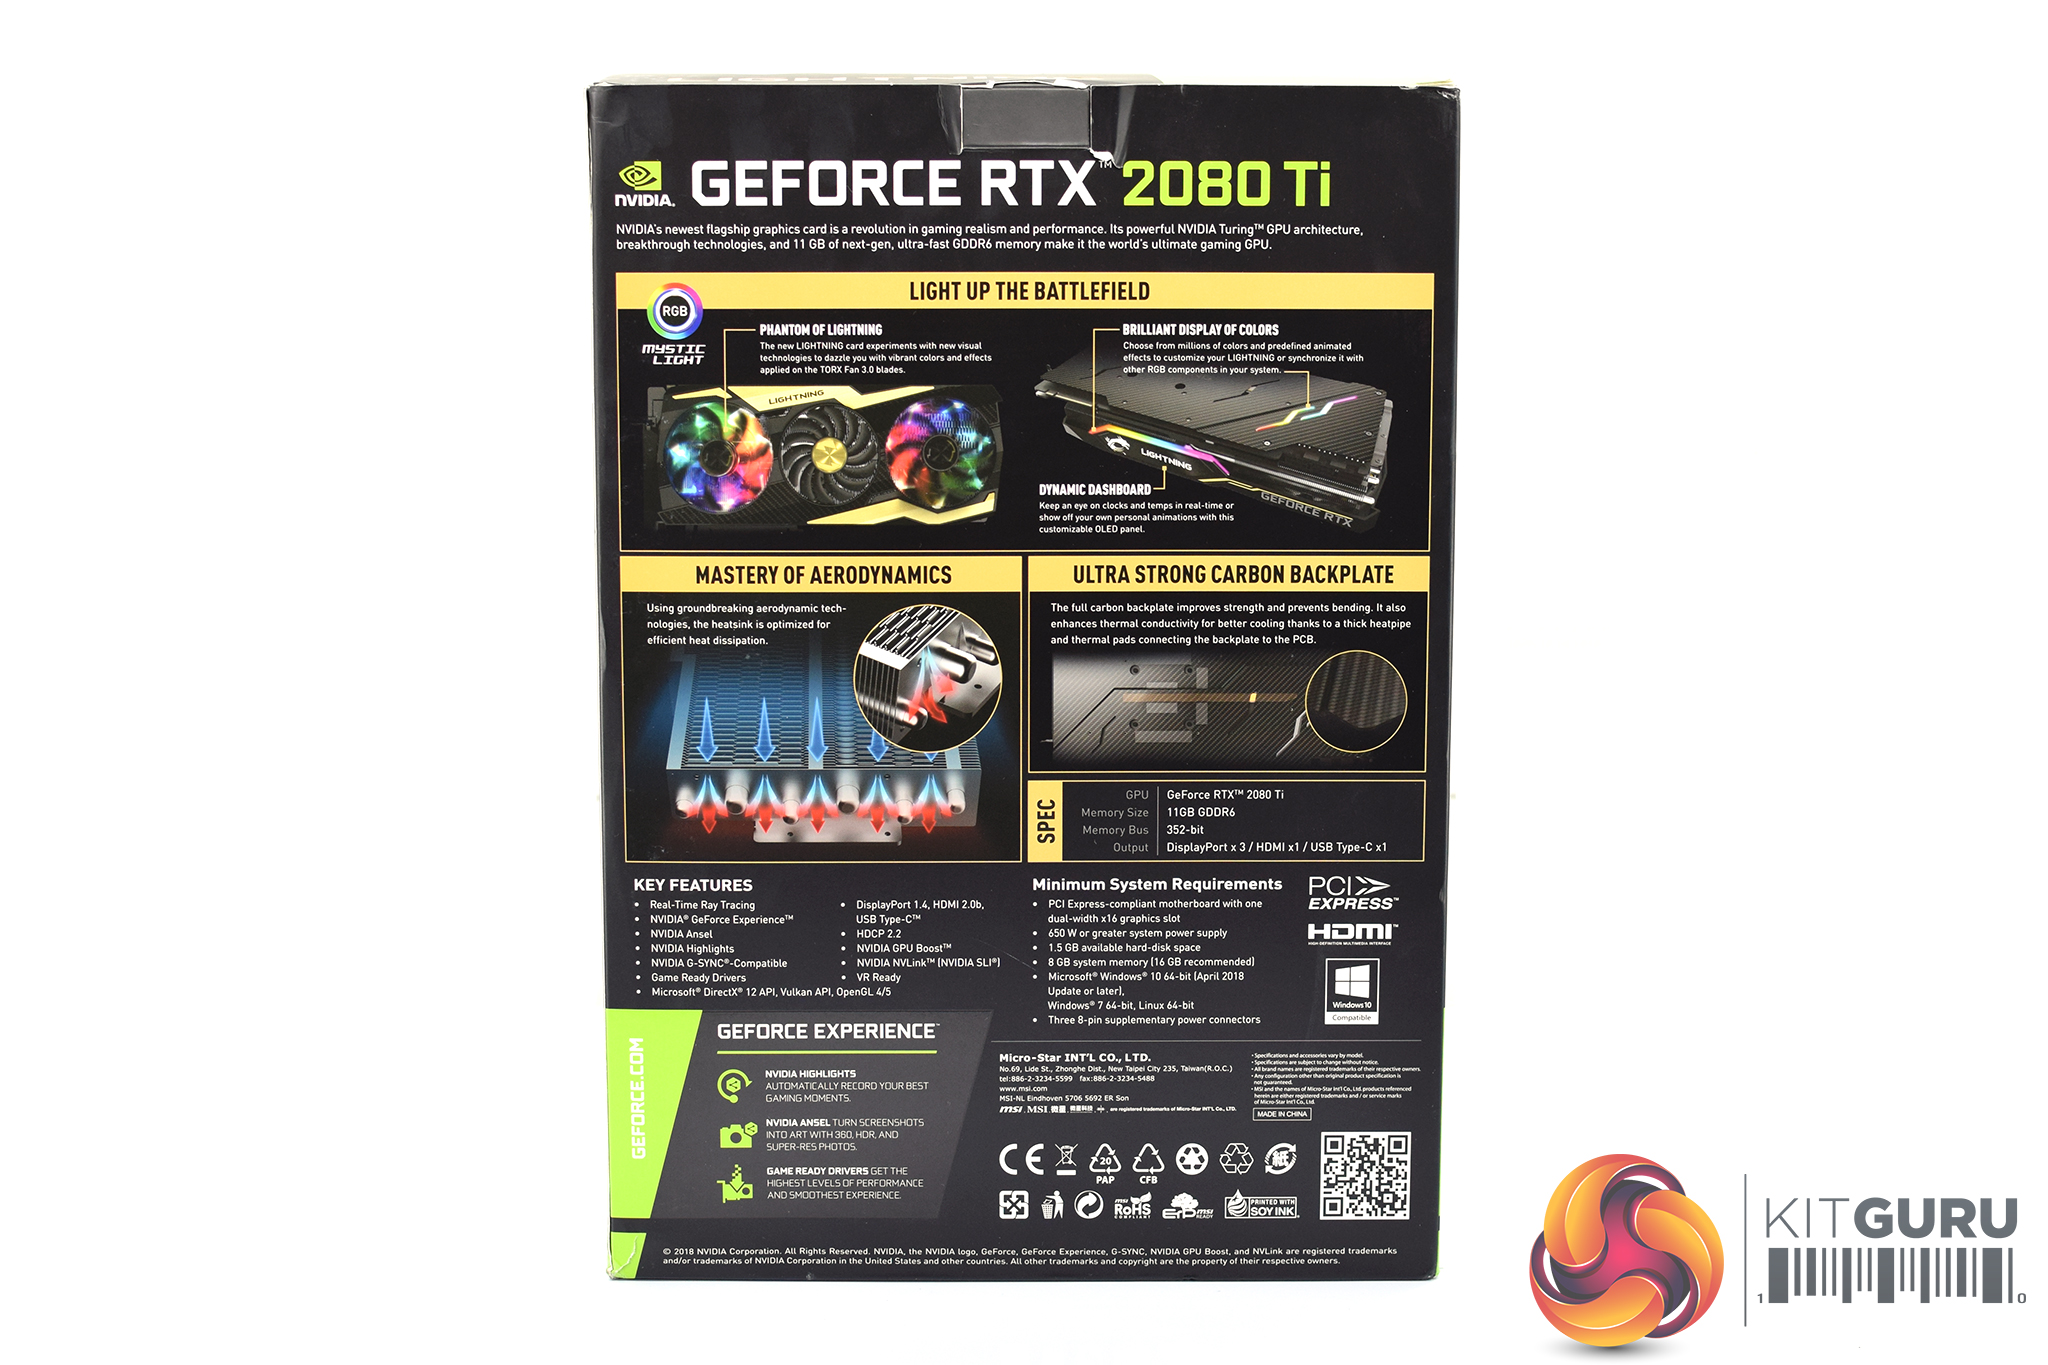
Unlike most graphics card boxes, the MSI RTX 2080 Ti Lightning Z is meant to be oriented vertically, not horizontally. The front of the box sports a large image of the graphics card itself, while four key features are highlighted on the back of the box.

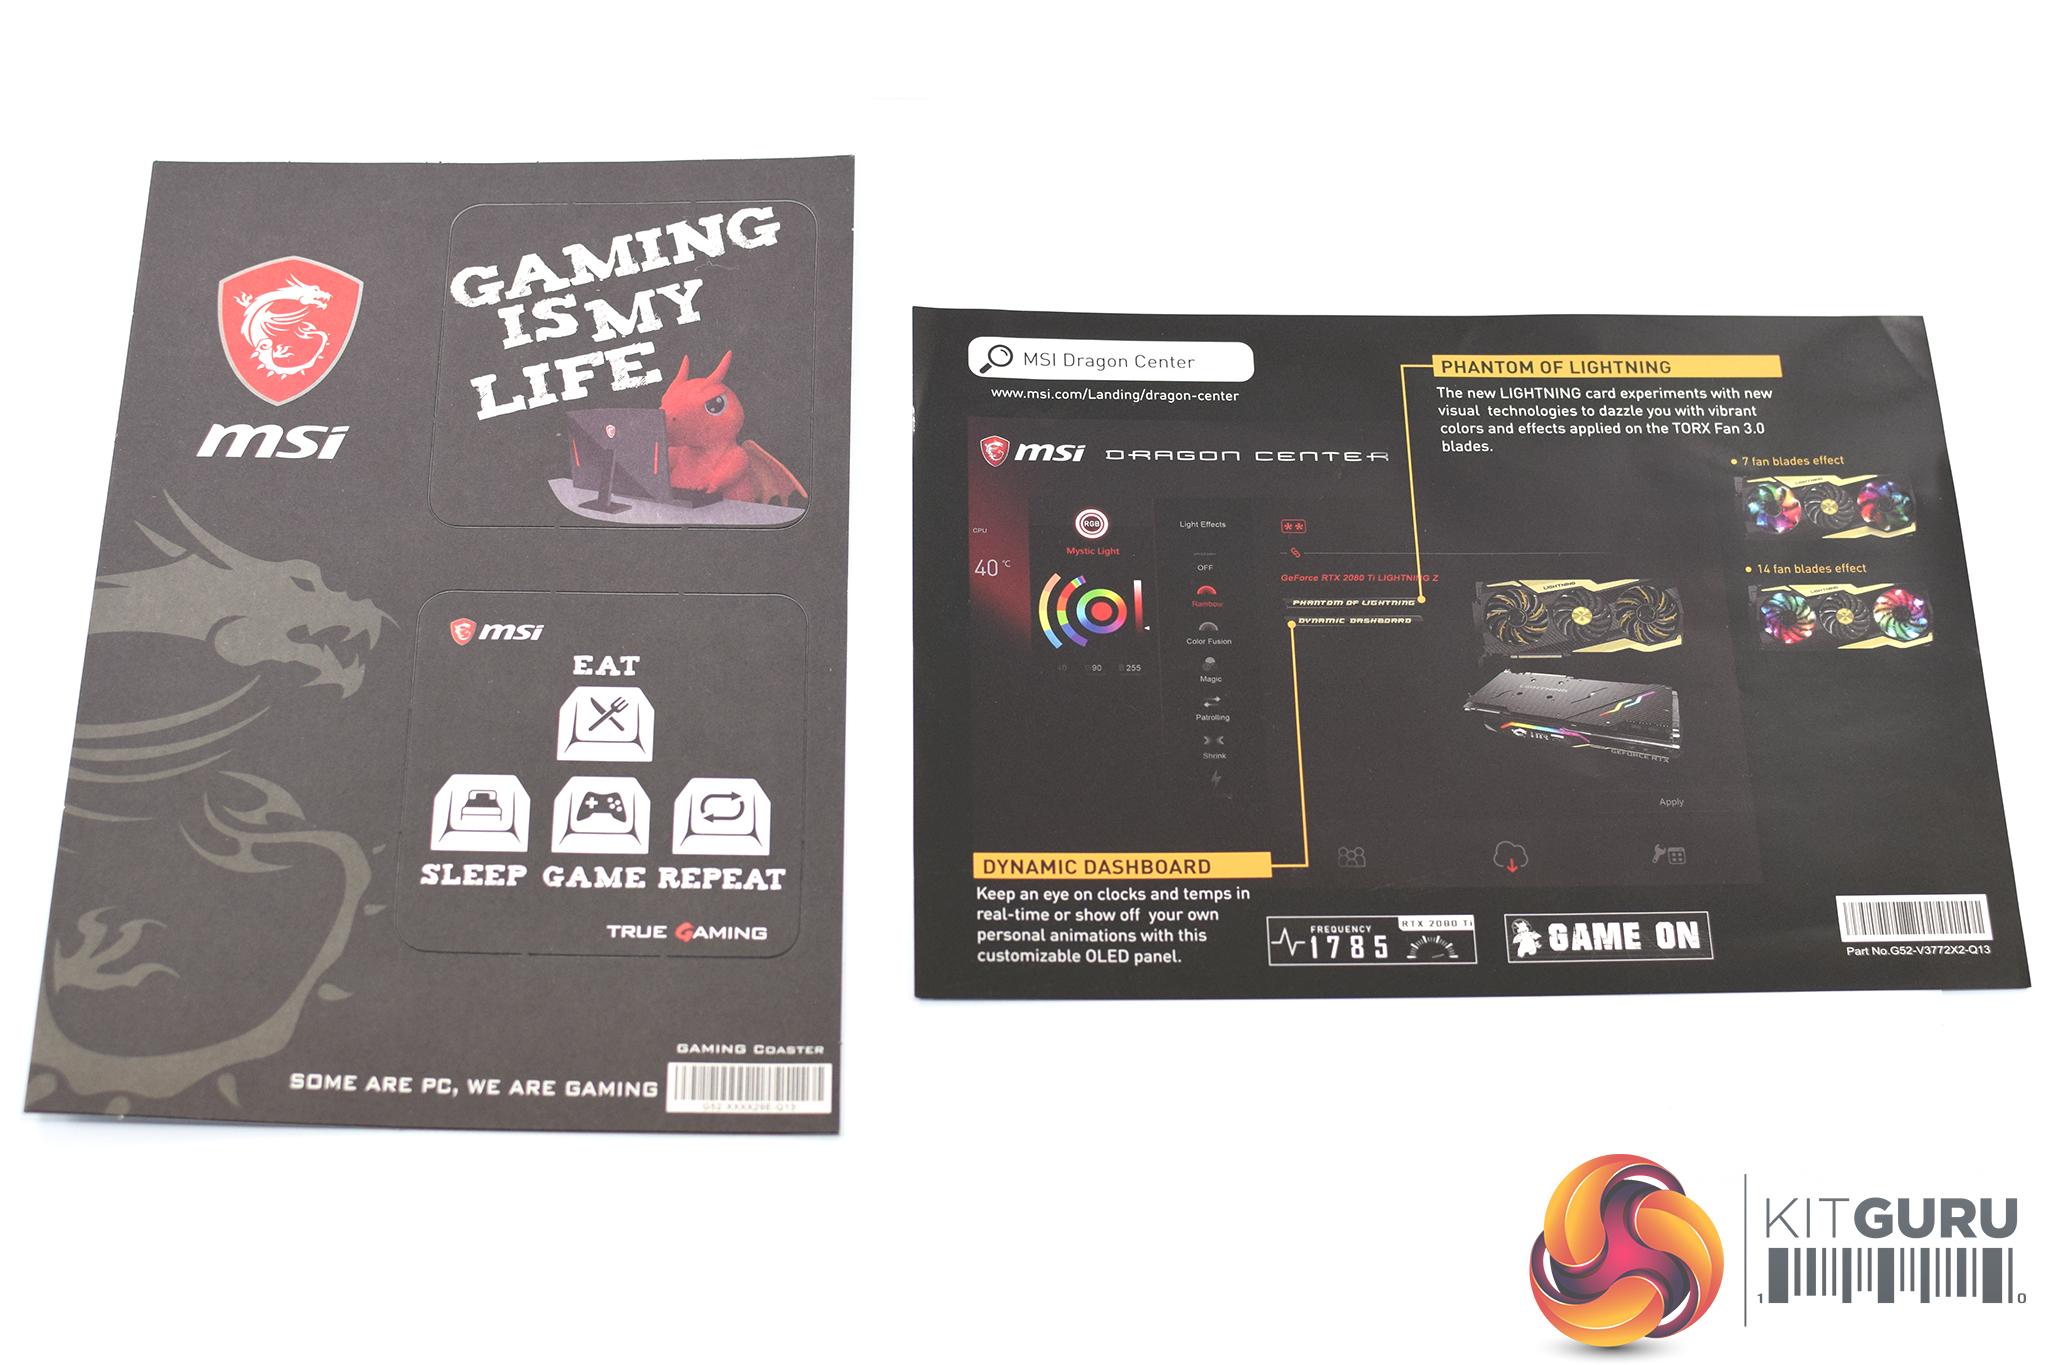
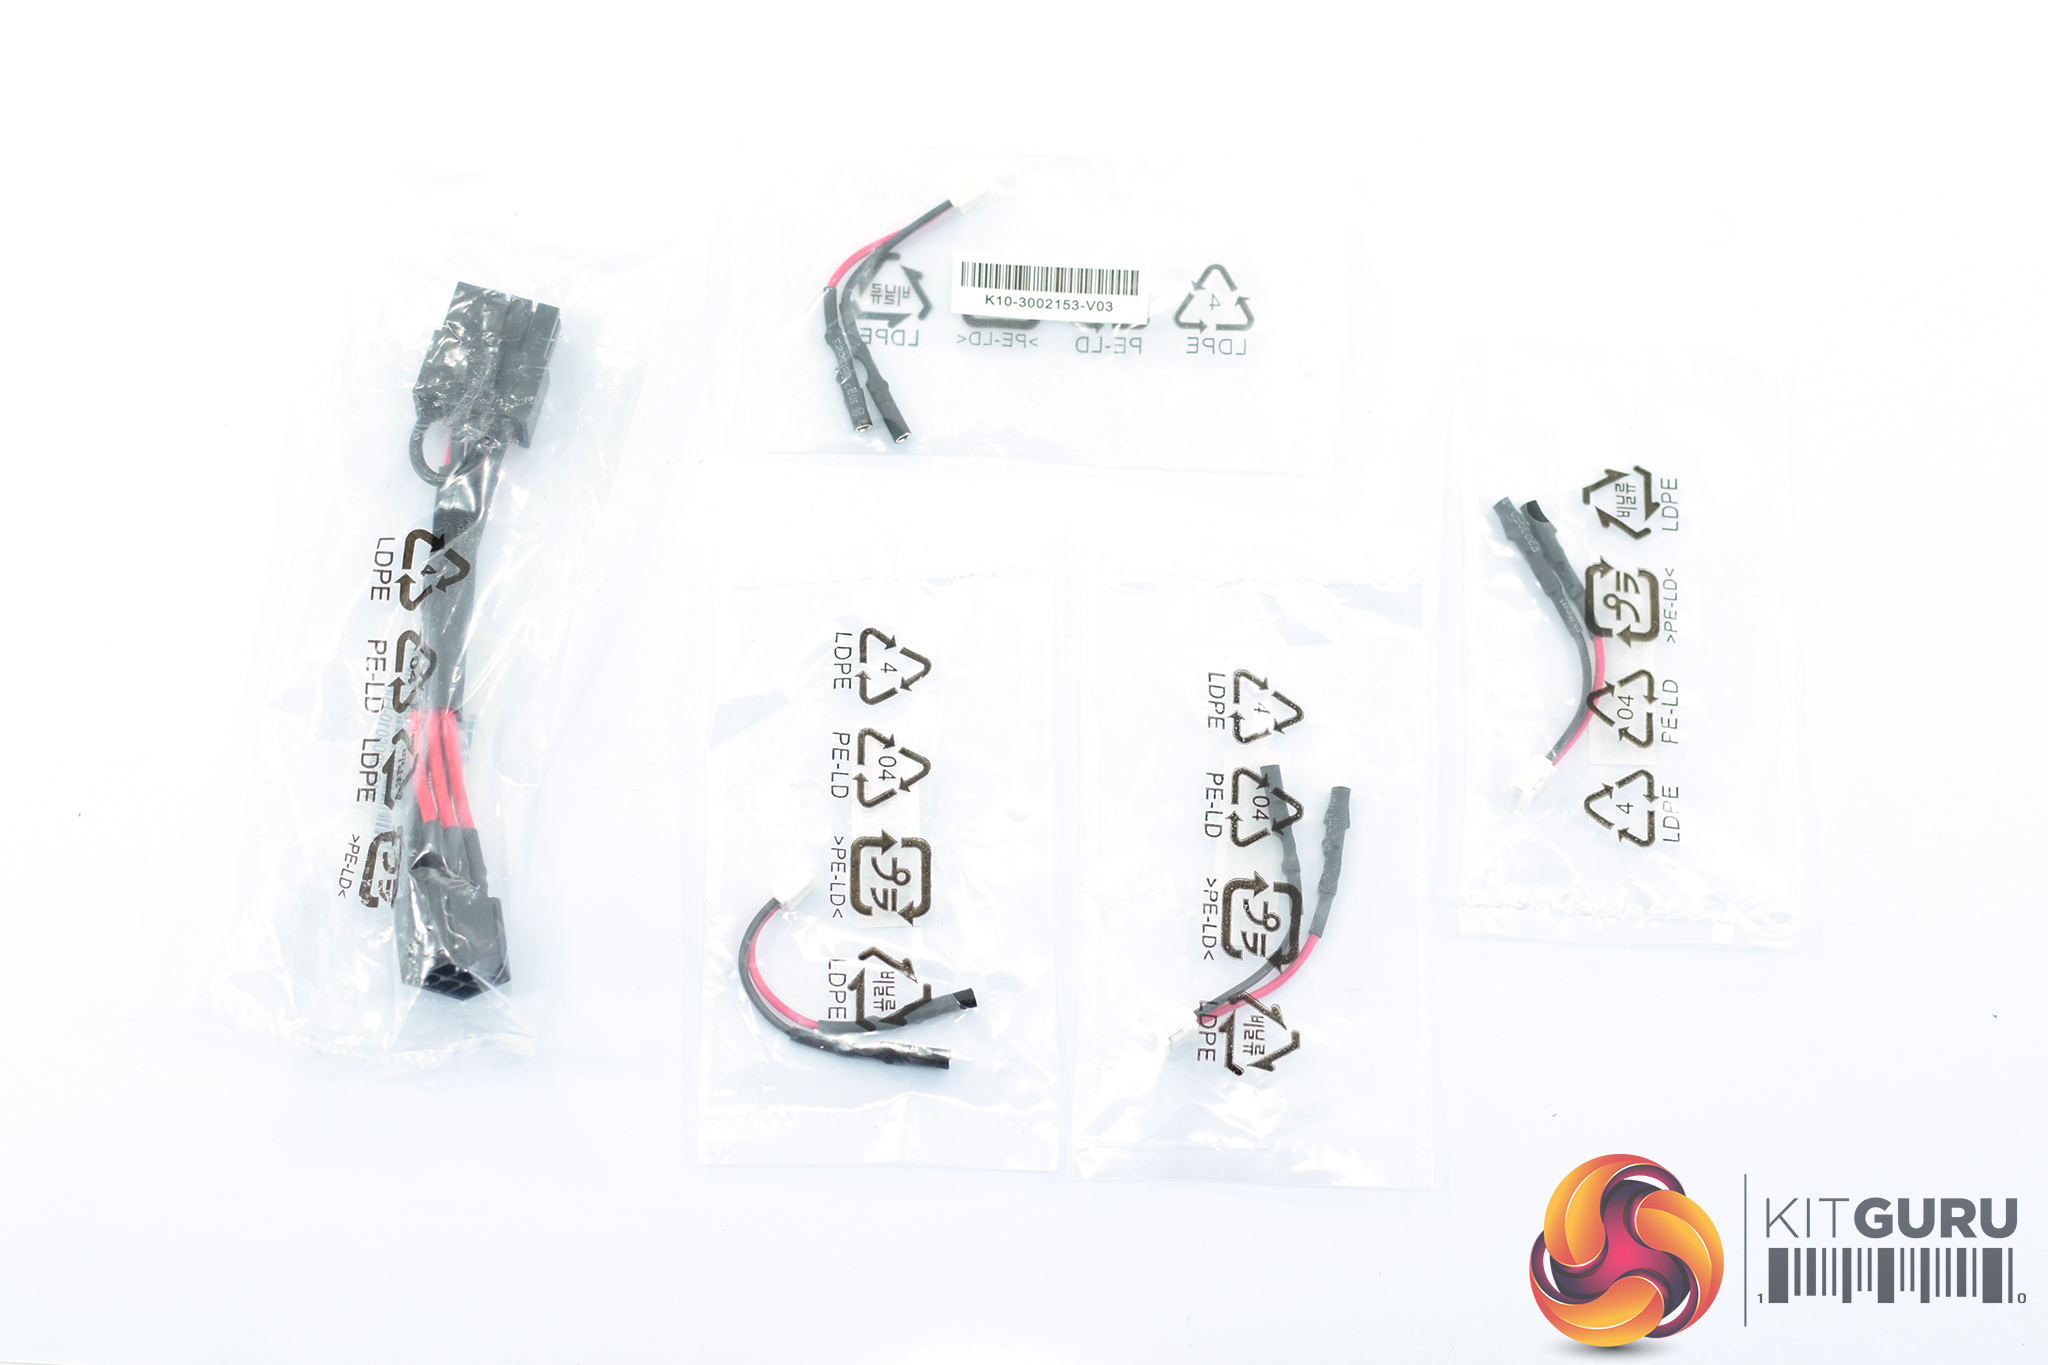
Inside, the accessory bundle is extensive. There are various pieces of documentation – including a quick start guide, thank you card and Lucky the Dragon cartoon – but most interesting are the small cables. These consist of 1x 6-pin to 8-pin PCIe power adapter, and then 4x voltage check cables which plug into the card's PCB directly (see below).
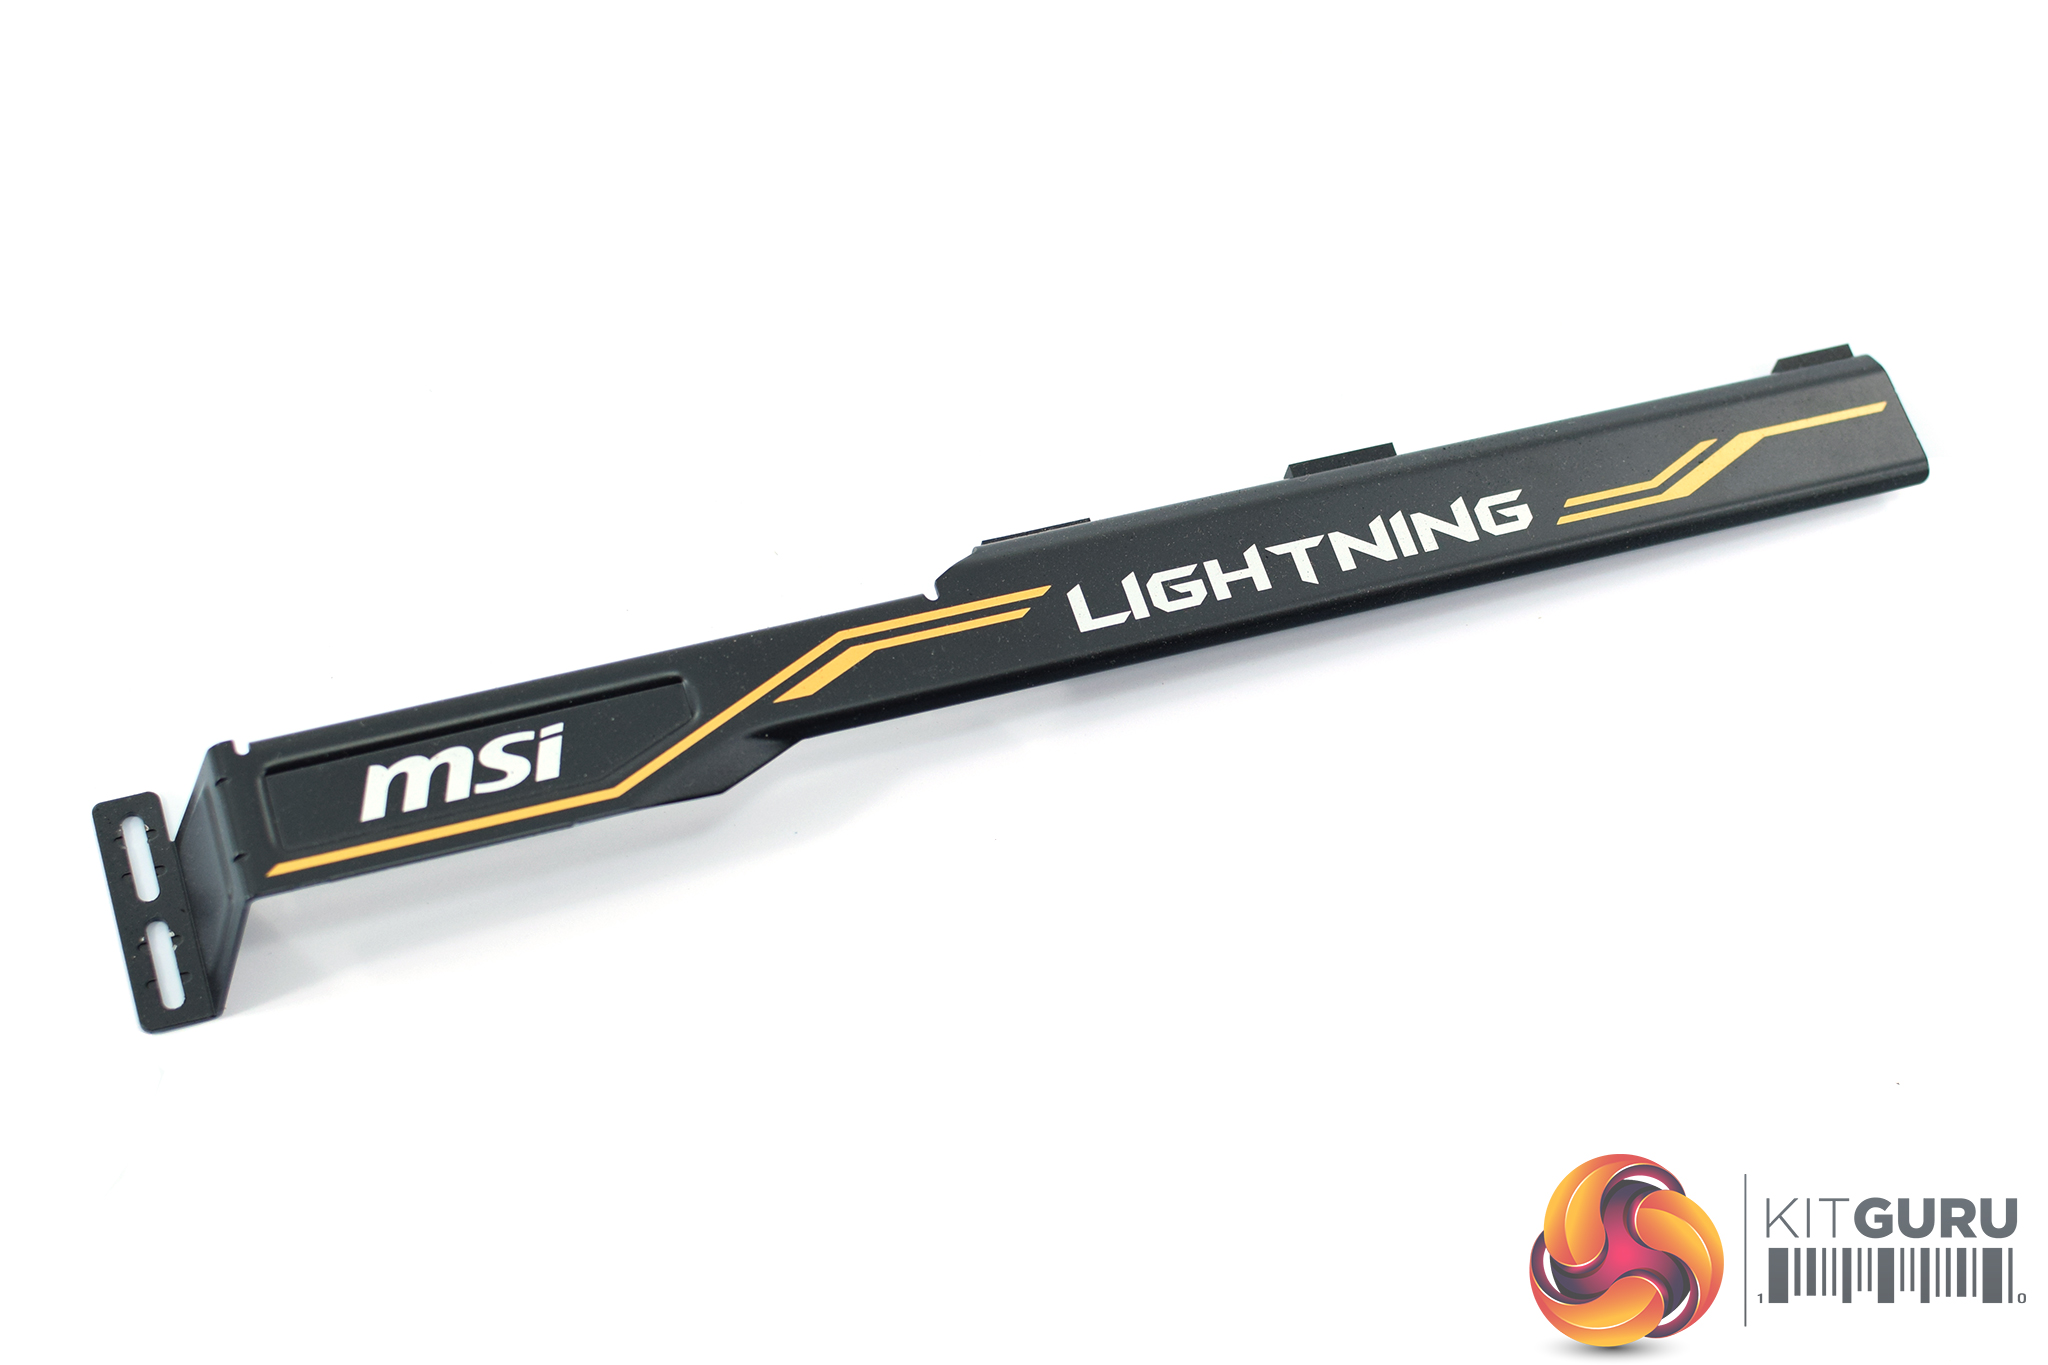
As the Lightning Z is also absolute monstrous in its proportions (full dimensions are again listed below) MSI wisely includes a dual-slot support bracket to help prevent any dreaded GPU sag.
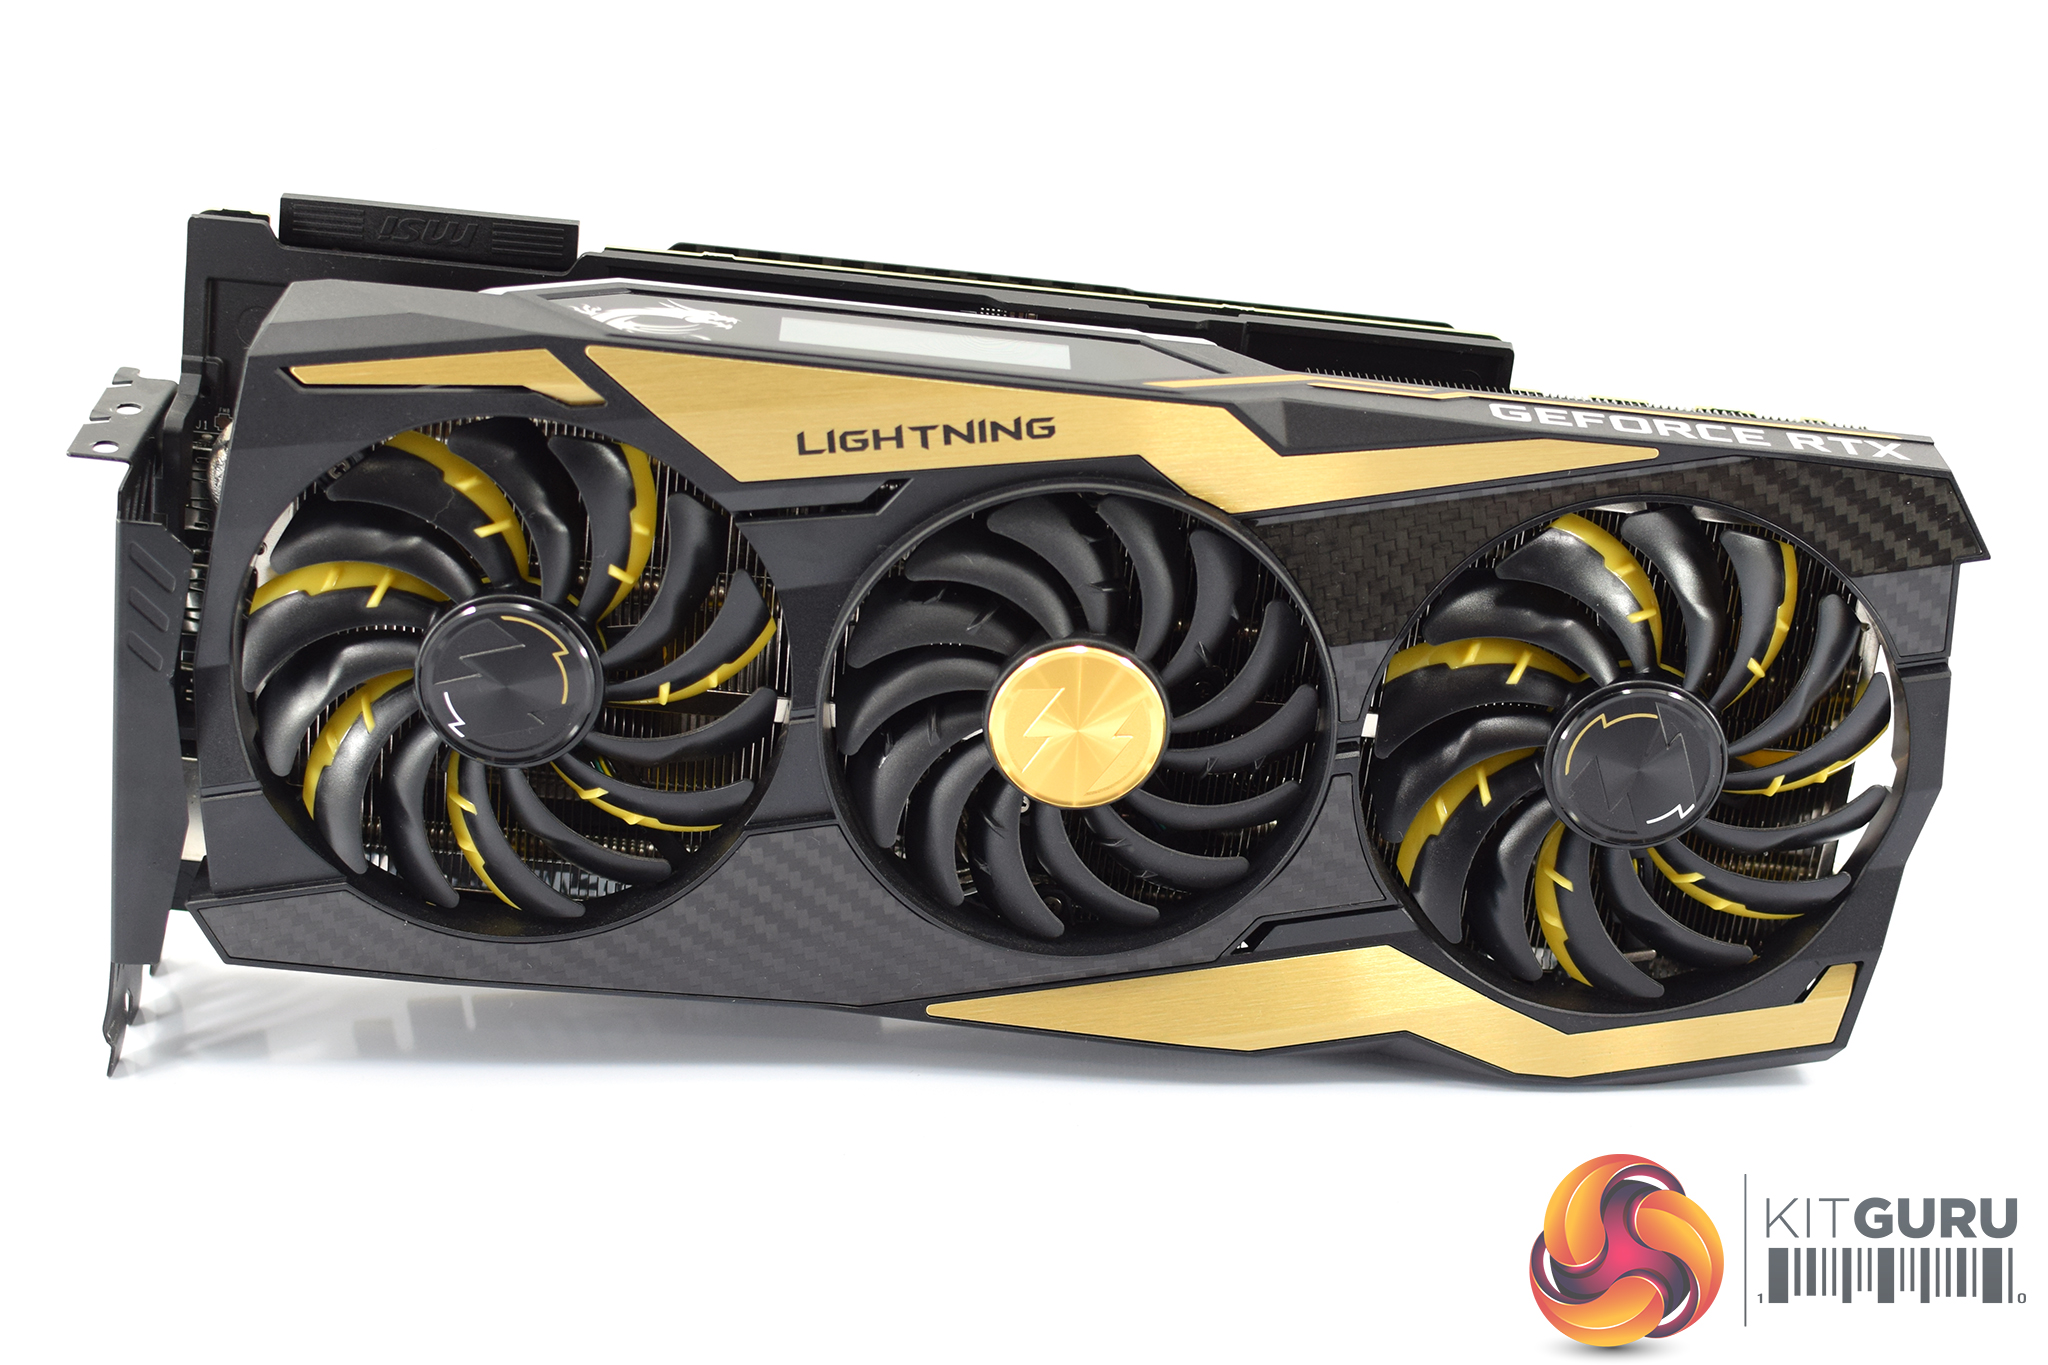
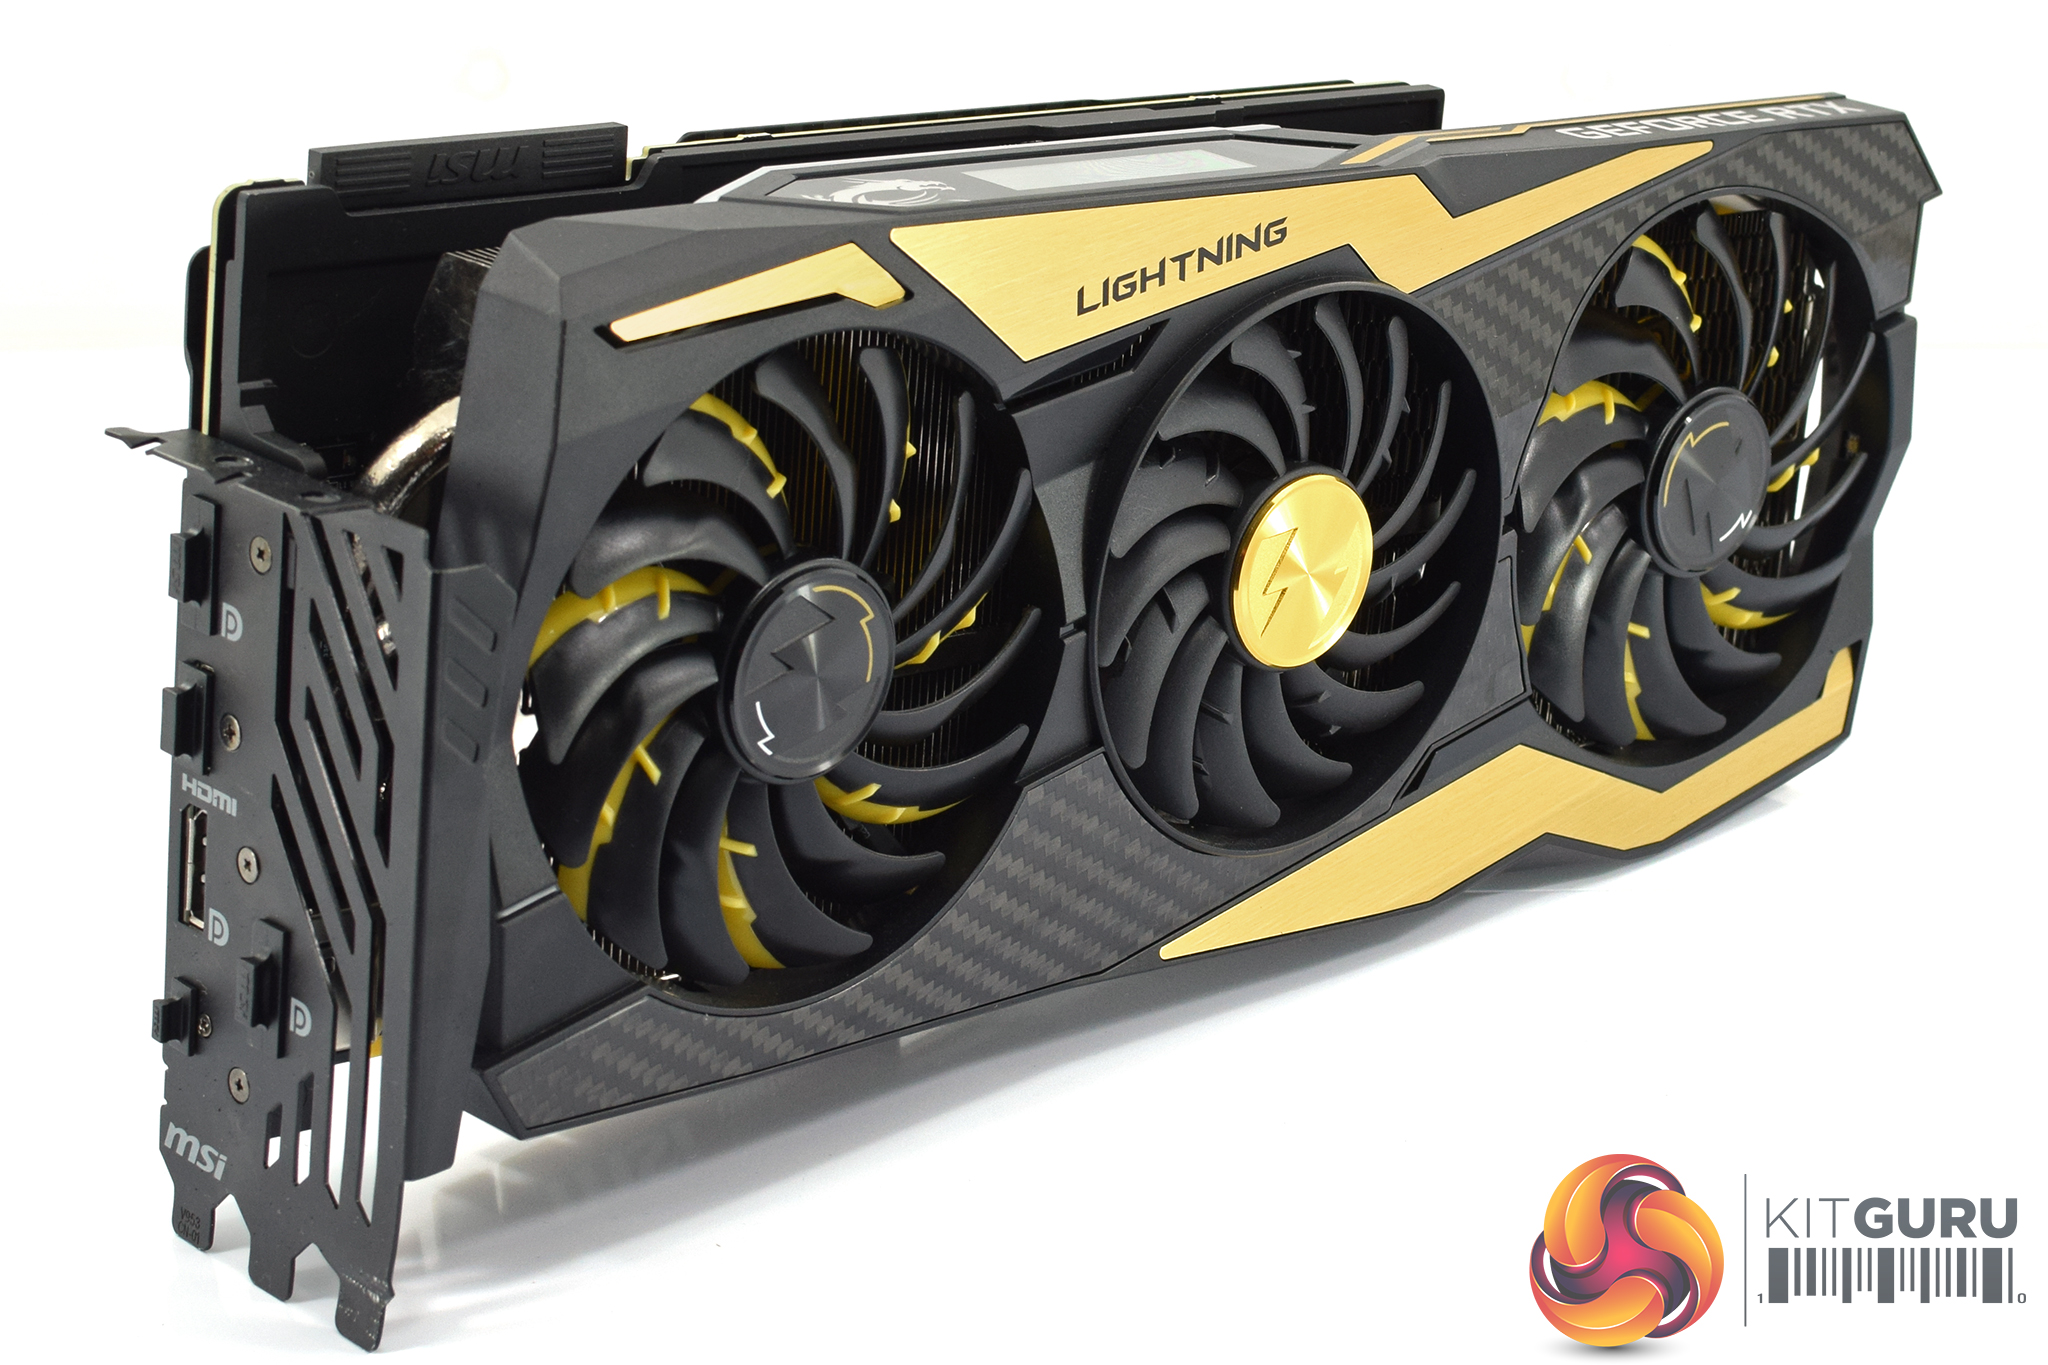
The card itself is immediately identifiable as a MSI Lightning model – thanks to the large, lightning-shaped gold accents on the front of the shroud. MSI did actually move away from this colour scheme with its Lightning 1080 Ti, but it has reversed the decision with its 2080 Ti card. The colour combination probably won't appeal to everyone, but unless you mount the card vertically you wouldn't be able to see much of the gold sections anyway. I personally quite like it, especially with the carbon fibre sections that slot in between the fans.
Speaking of the fans, these are MSI's Torx 3.0 models, and you can tell that the outer two fans are larger (100mm in diameter) versus the smaller 90mm fan in the middle. The outer two fans are also illuminated by RGB LEDs, but the central fan is not – a curious decision in my book, but again you're unlikely to actually see these LEDs unless you mount the card vertically.
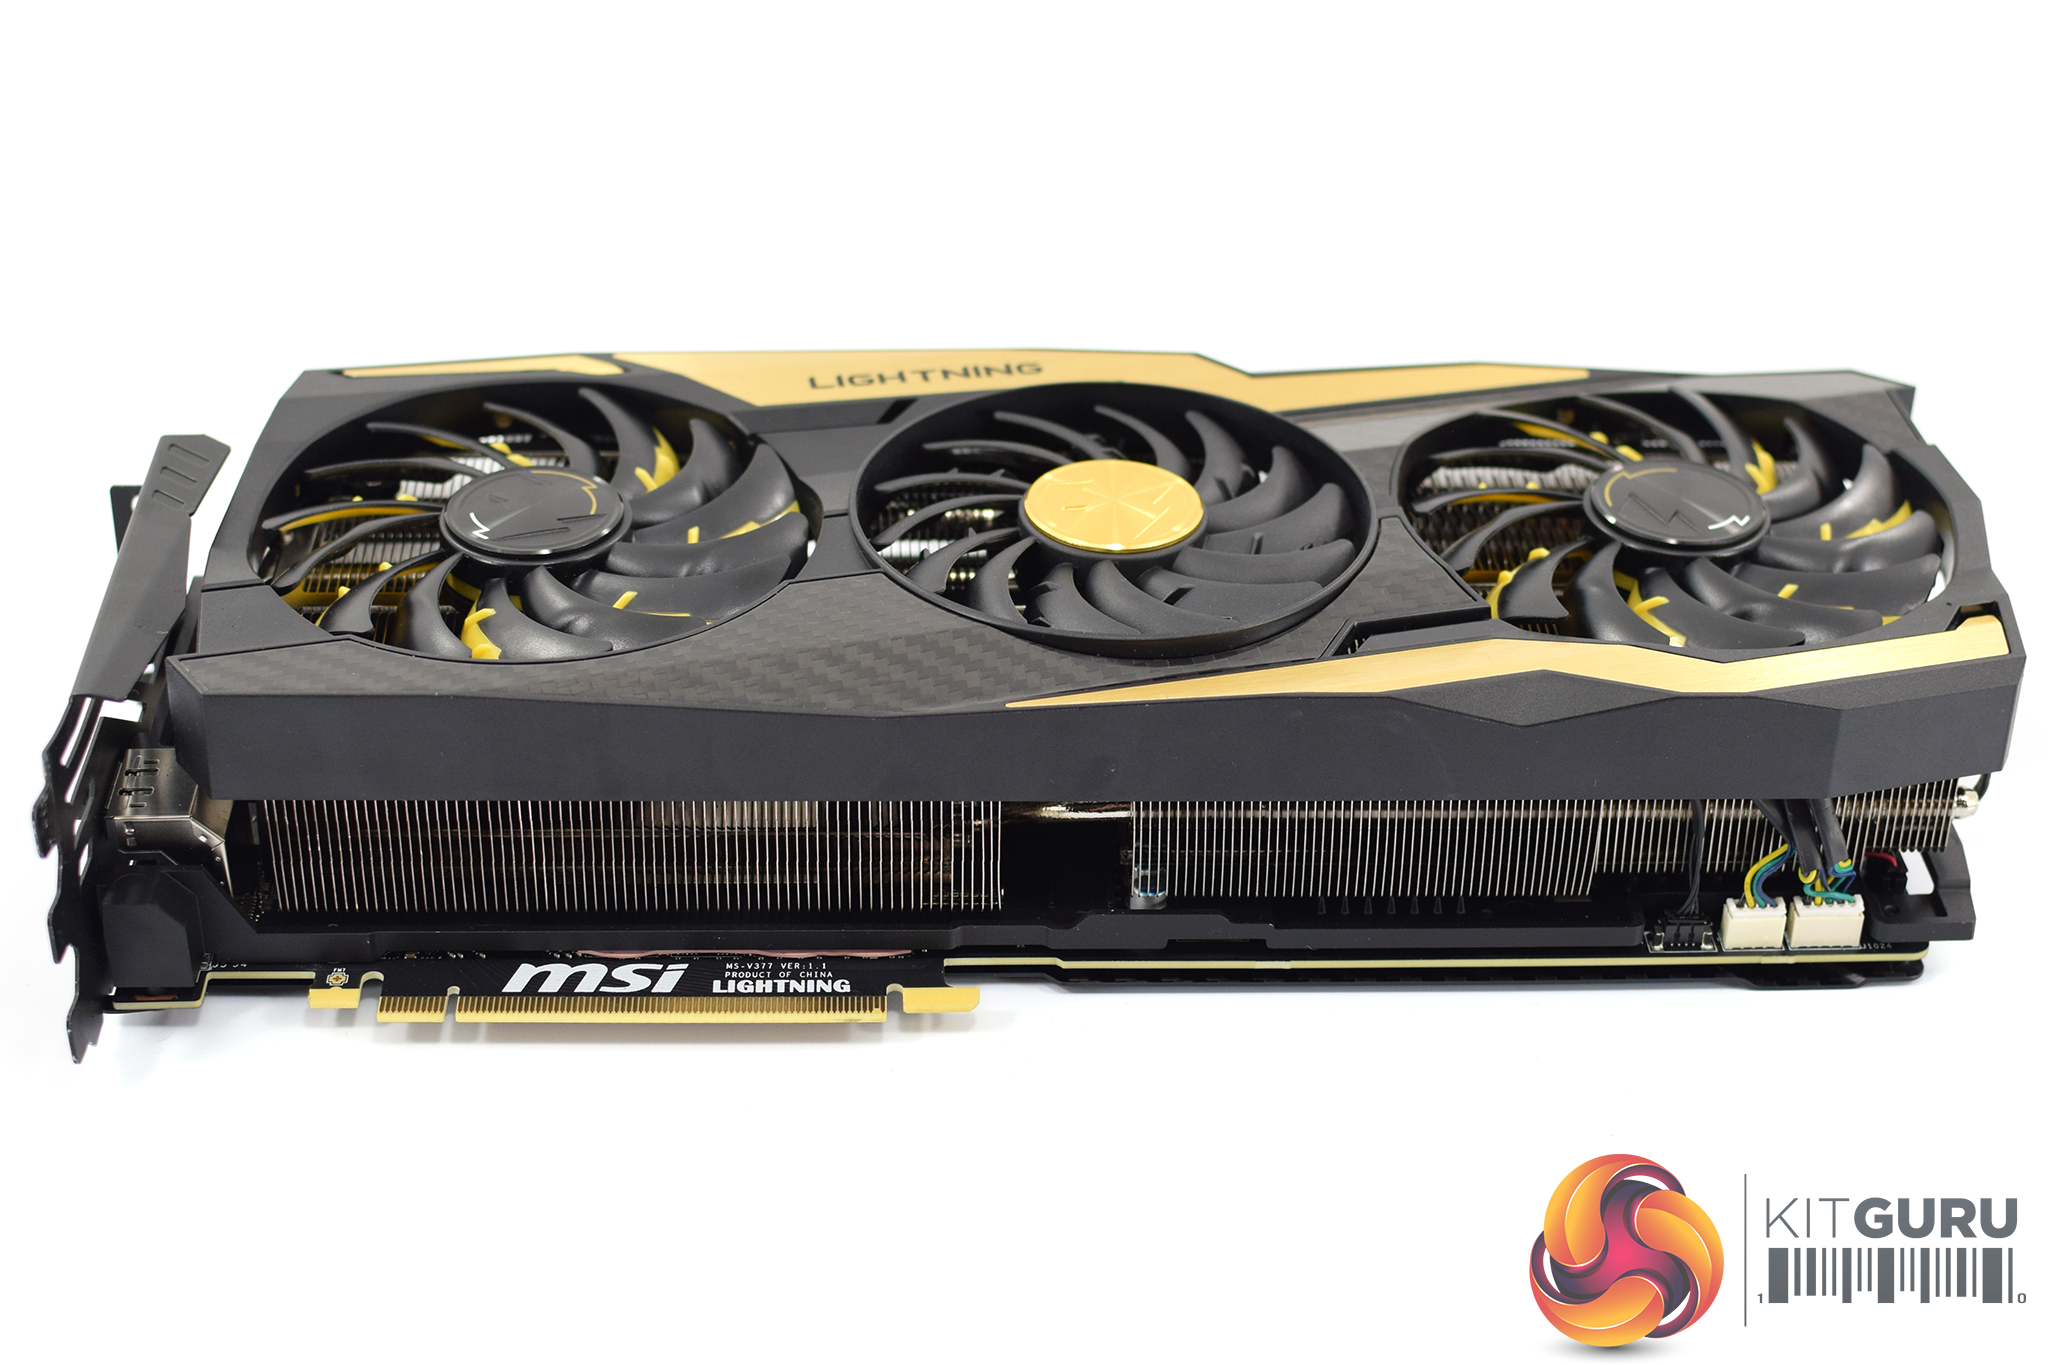
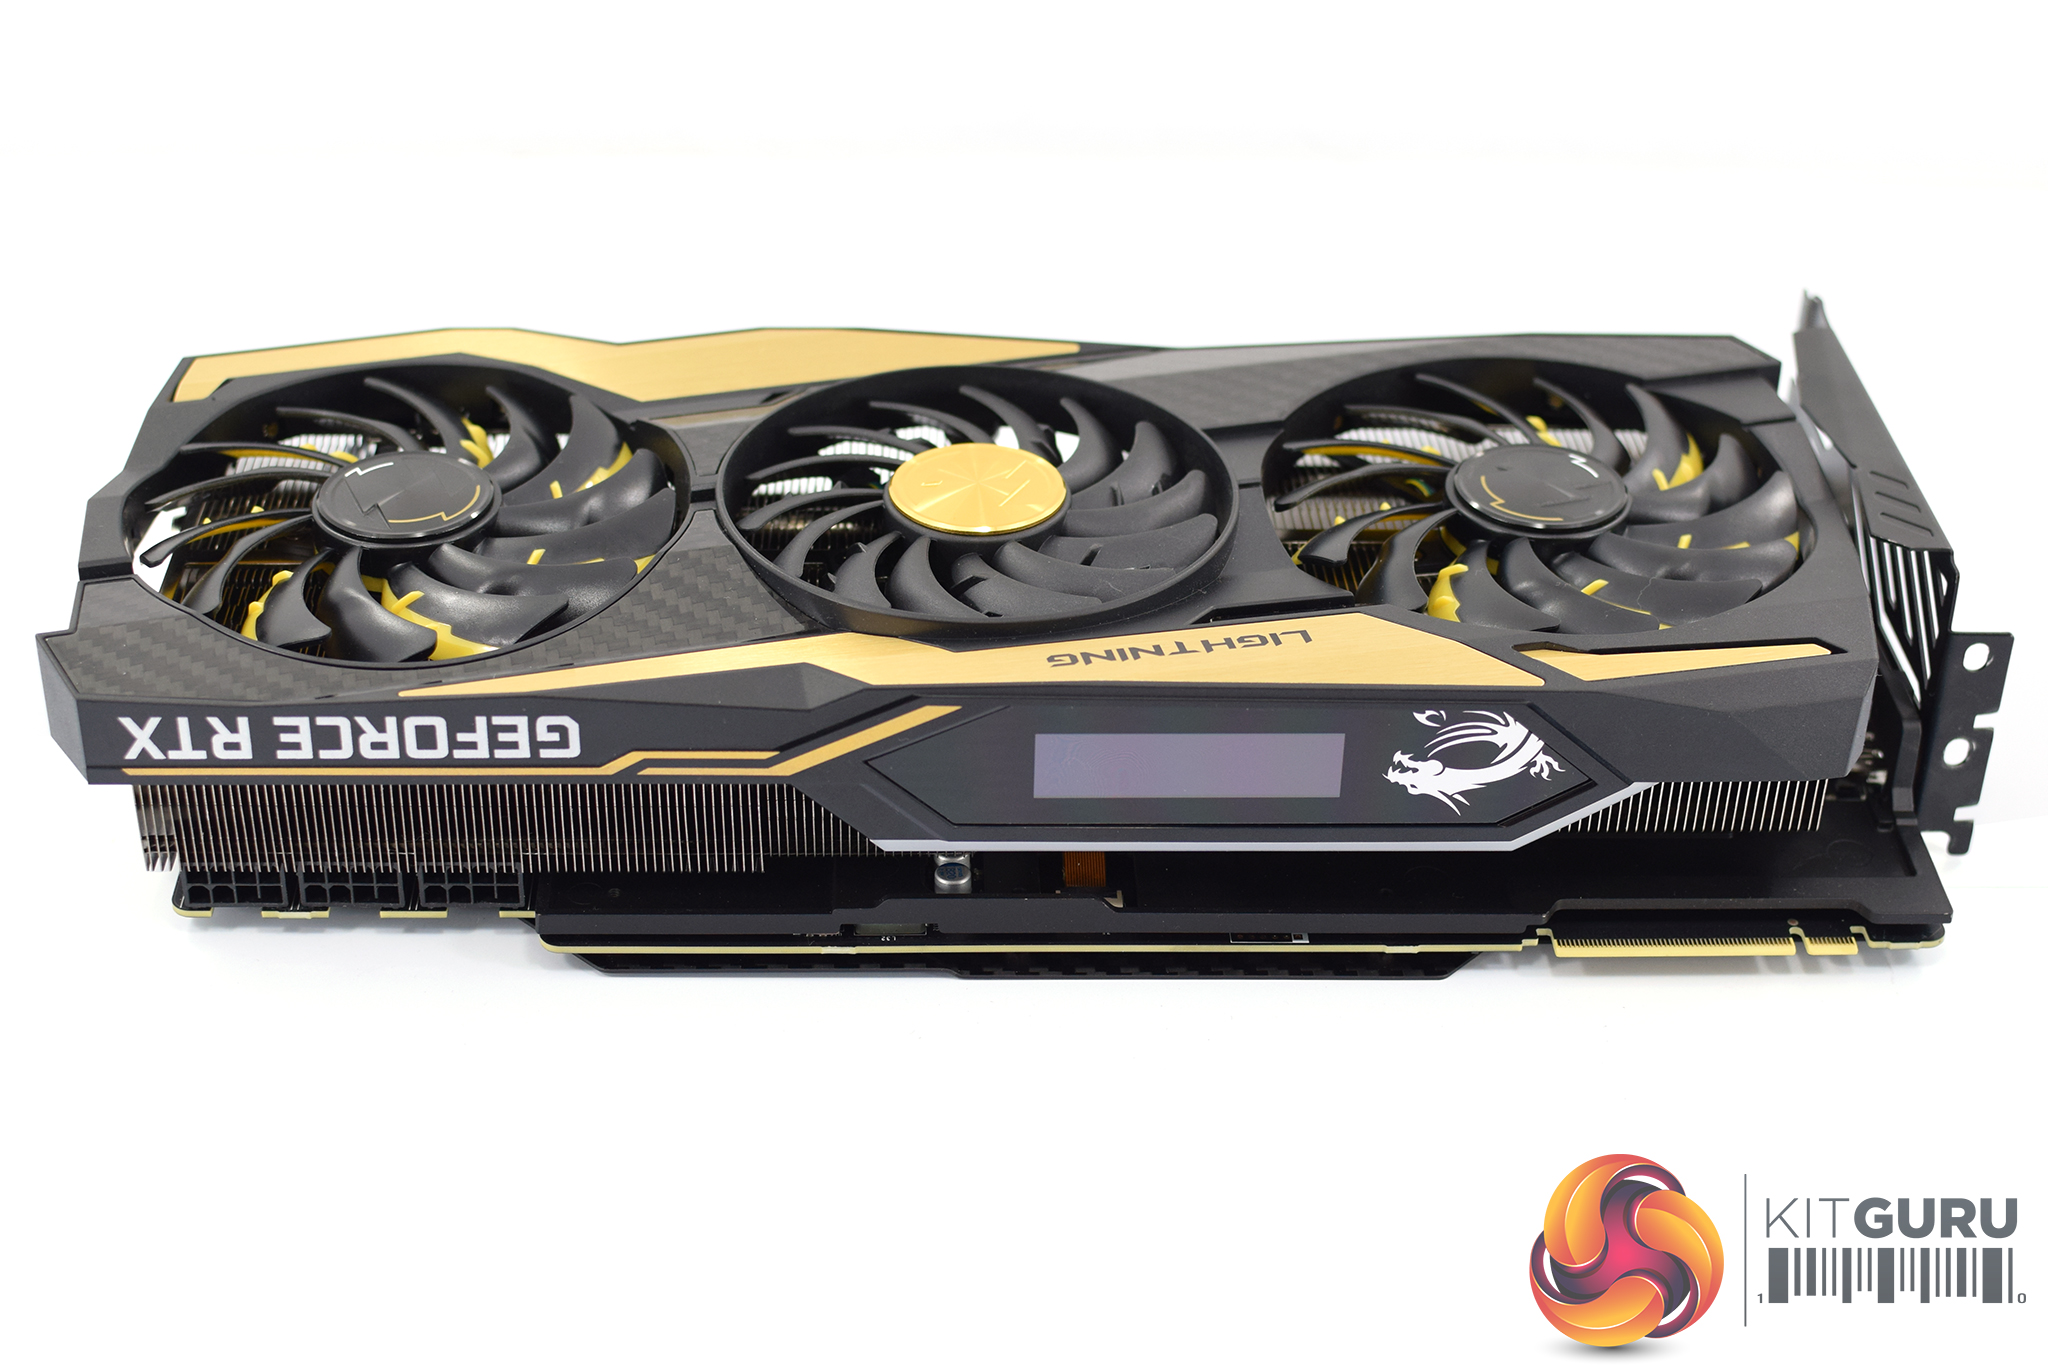
Now, we mentioned this is a big card – and certainly it is the biggest card I have ever seen in person. It measures 328 x 143 x 63mm, making it well over 30cm in length, and at 63mm thick it is a true triple-slot card. It also weighs 1.85KG which is bordering on ludicrous – but hopefully the extra weight will prove its worth when we get to thermals and overclocking. Now you begin to see why MSI included the dual-slot GPU support bracket!
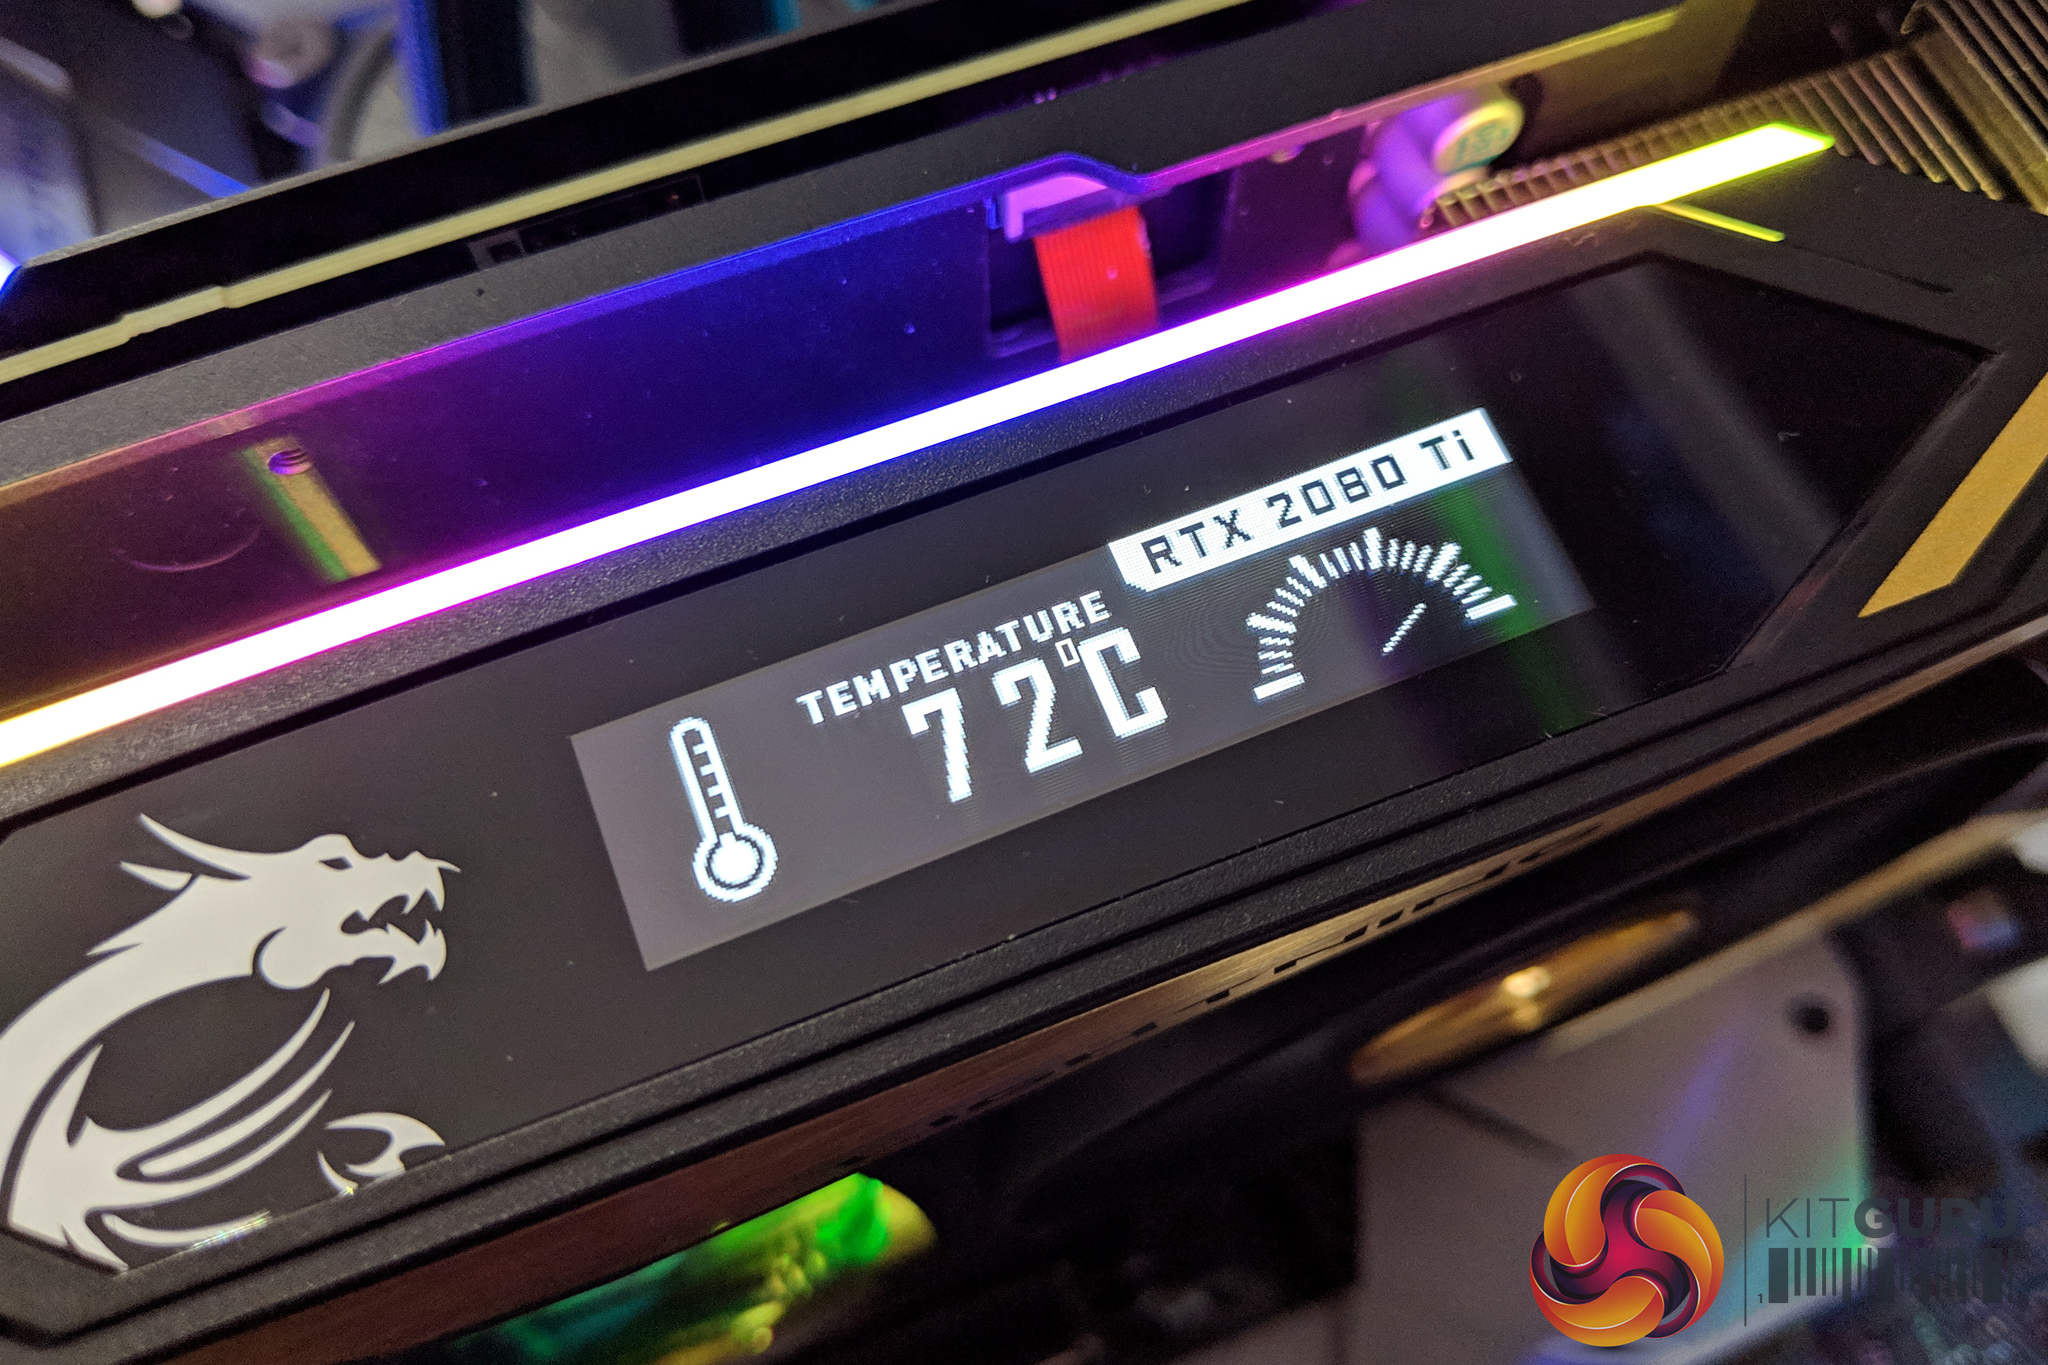
On the front side of the card, our attention is immediately drawn towards what appears to be a small screen – and yes, it is actually an OLED display on the side of the card. This is used to display various GPU metrics (like temperature, clock speed, fan speed etc) although you can use it to display custom GIFs if that appeals to you.
It's not very large or high-res (custom GIFs must be 256×64), and I can't help but feel you'd have to have your PC on your desk to be able to conveniently use the display. Even then, I still like it as a feature – it's just a cool little inclusion that adds value.
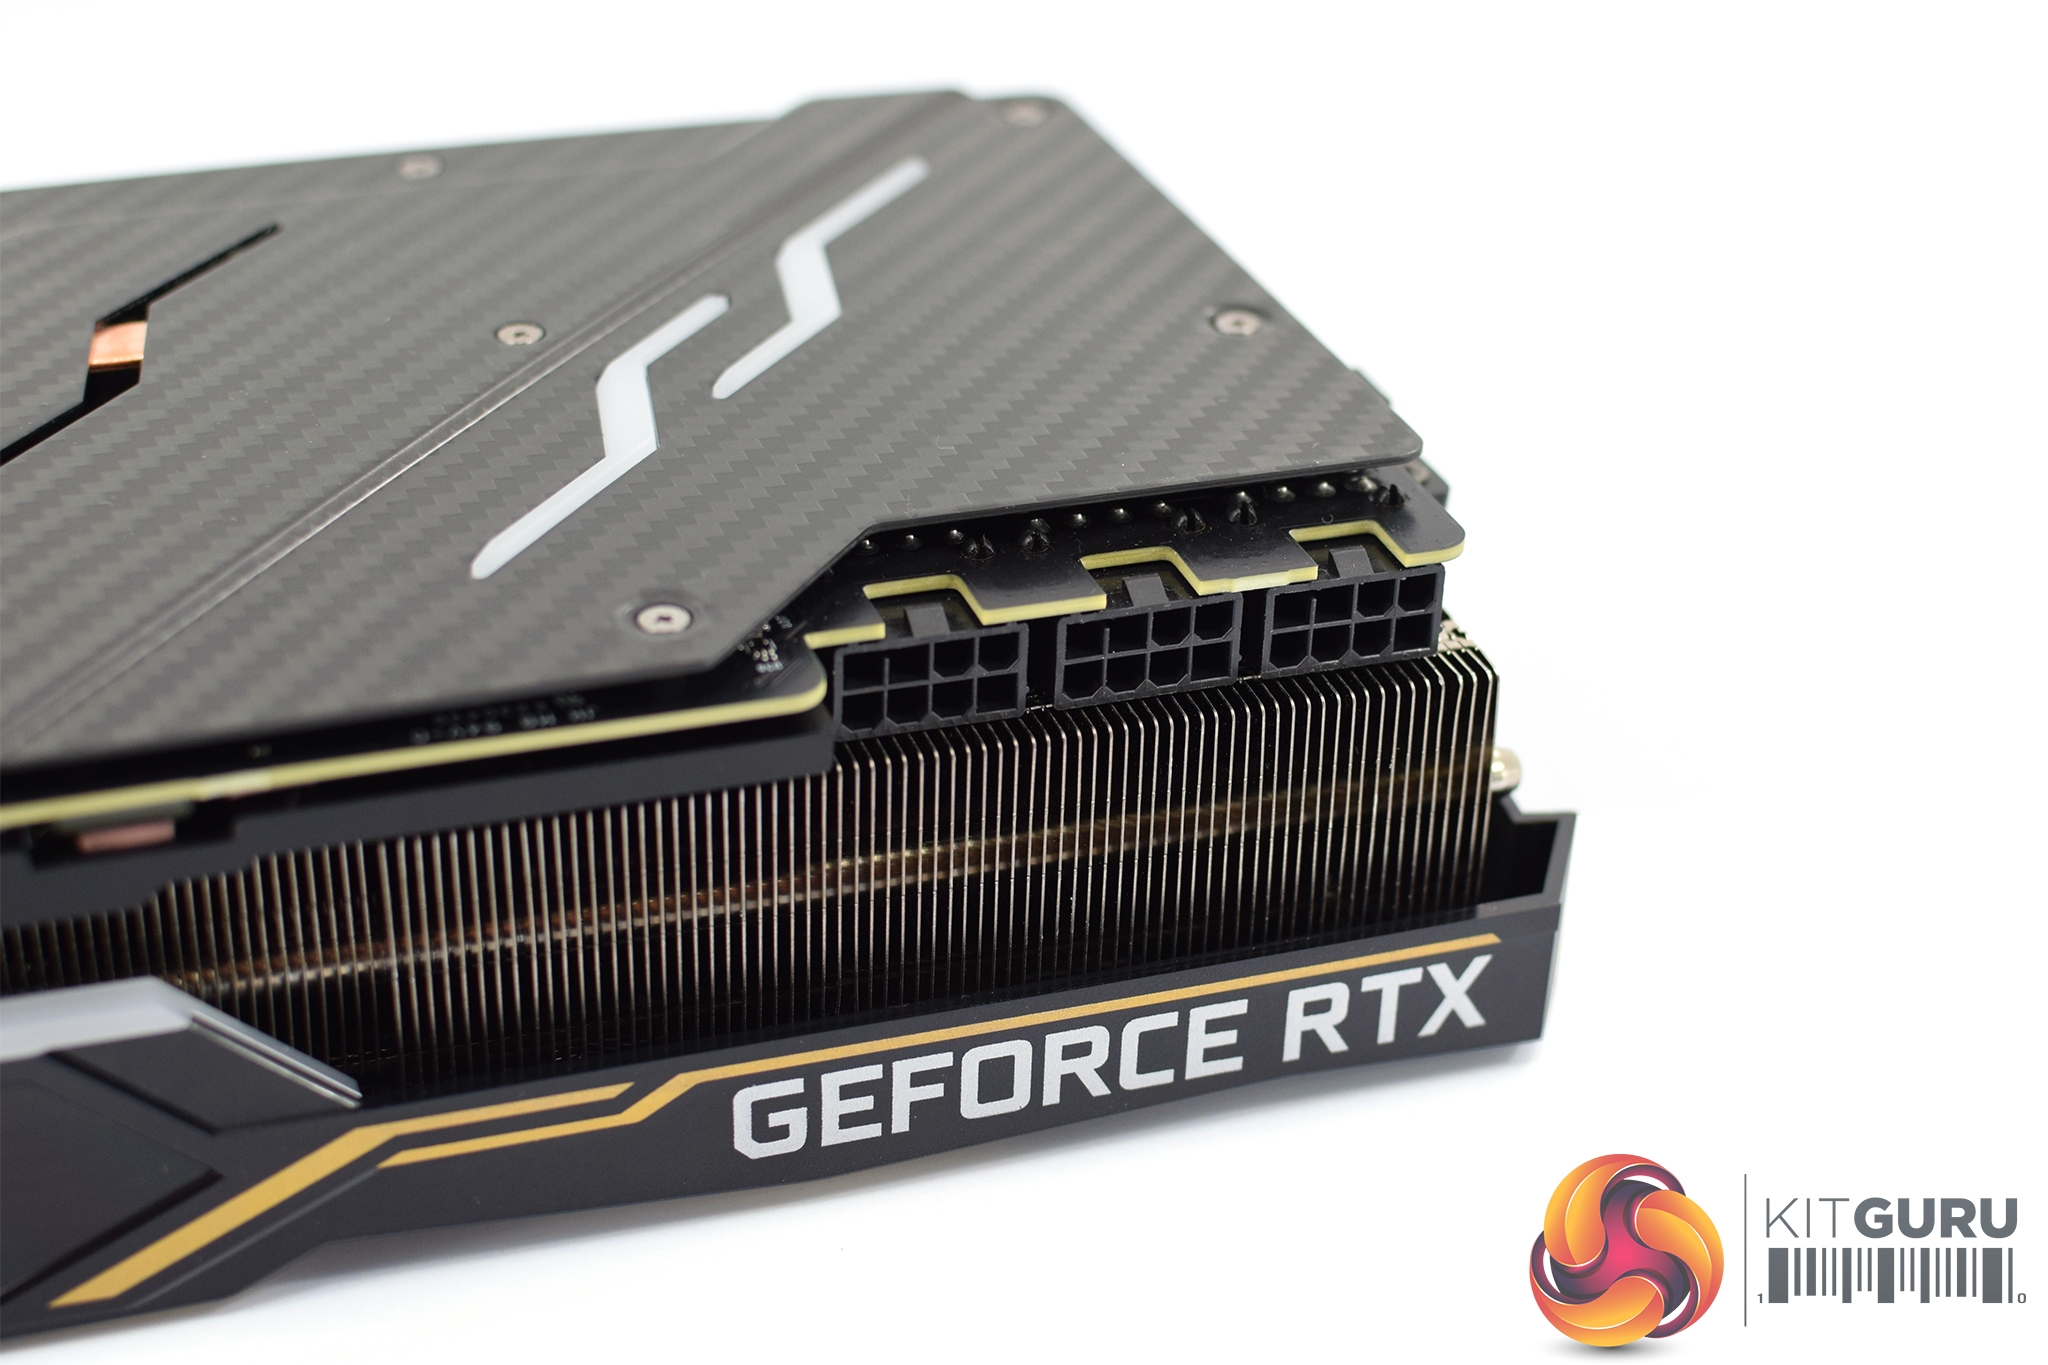
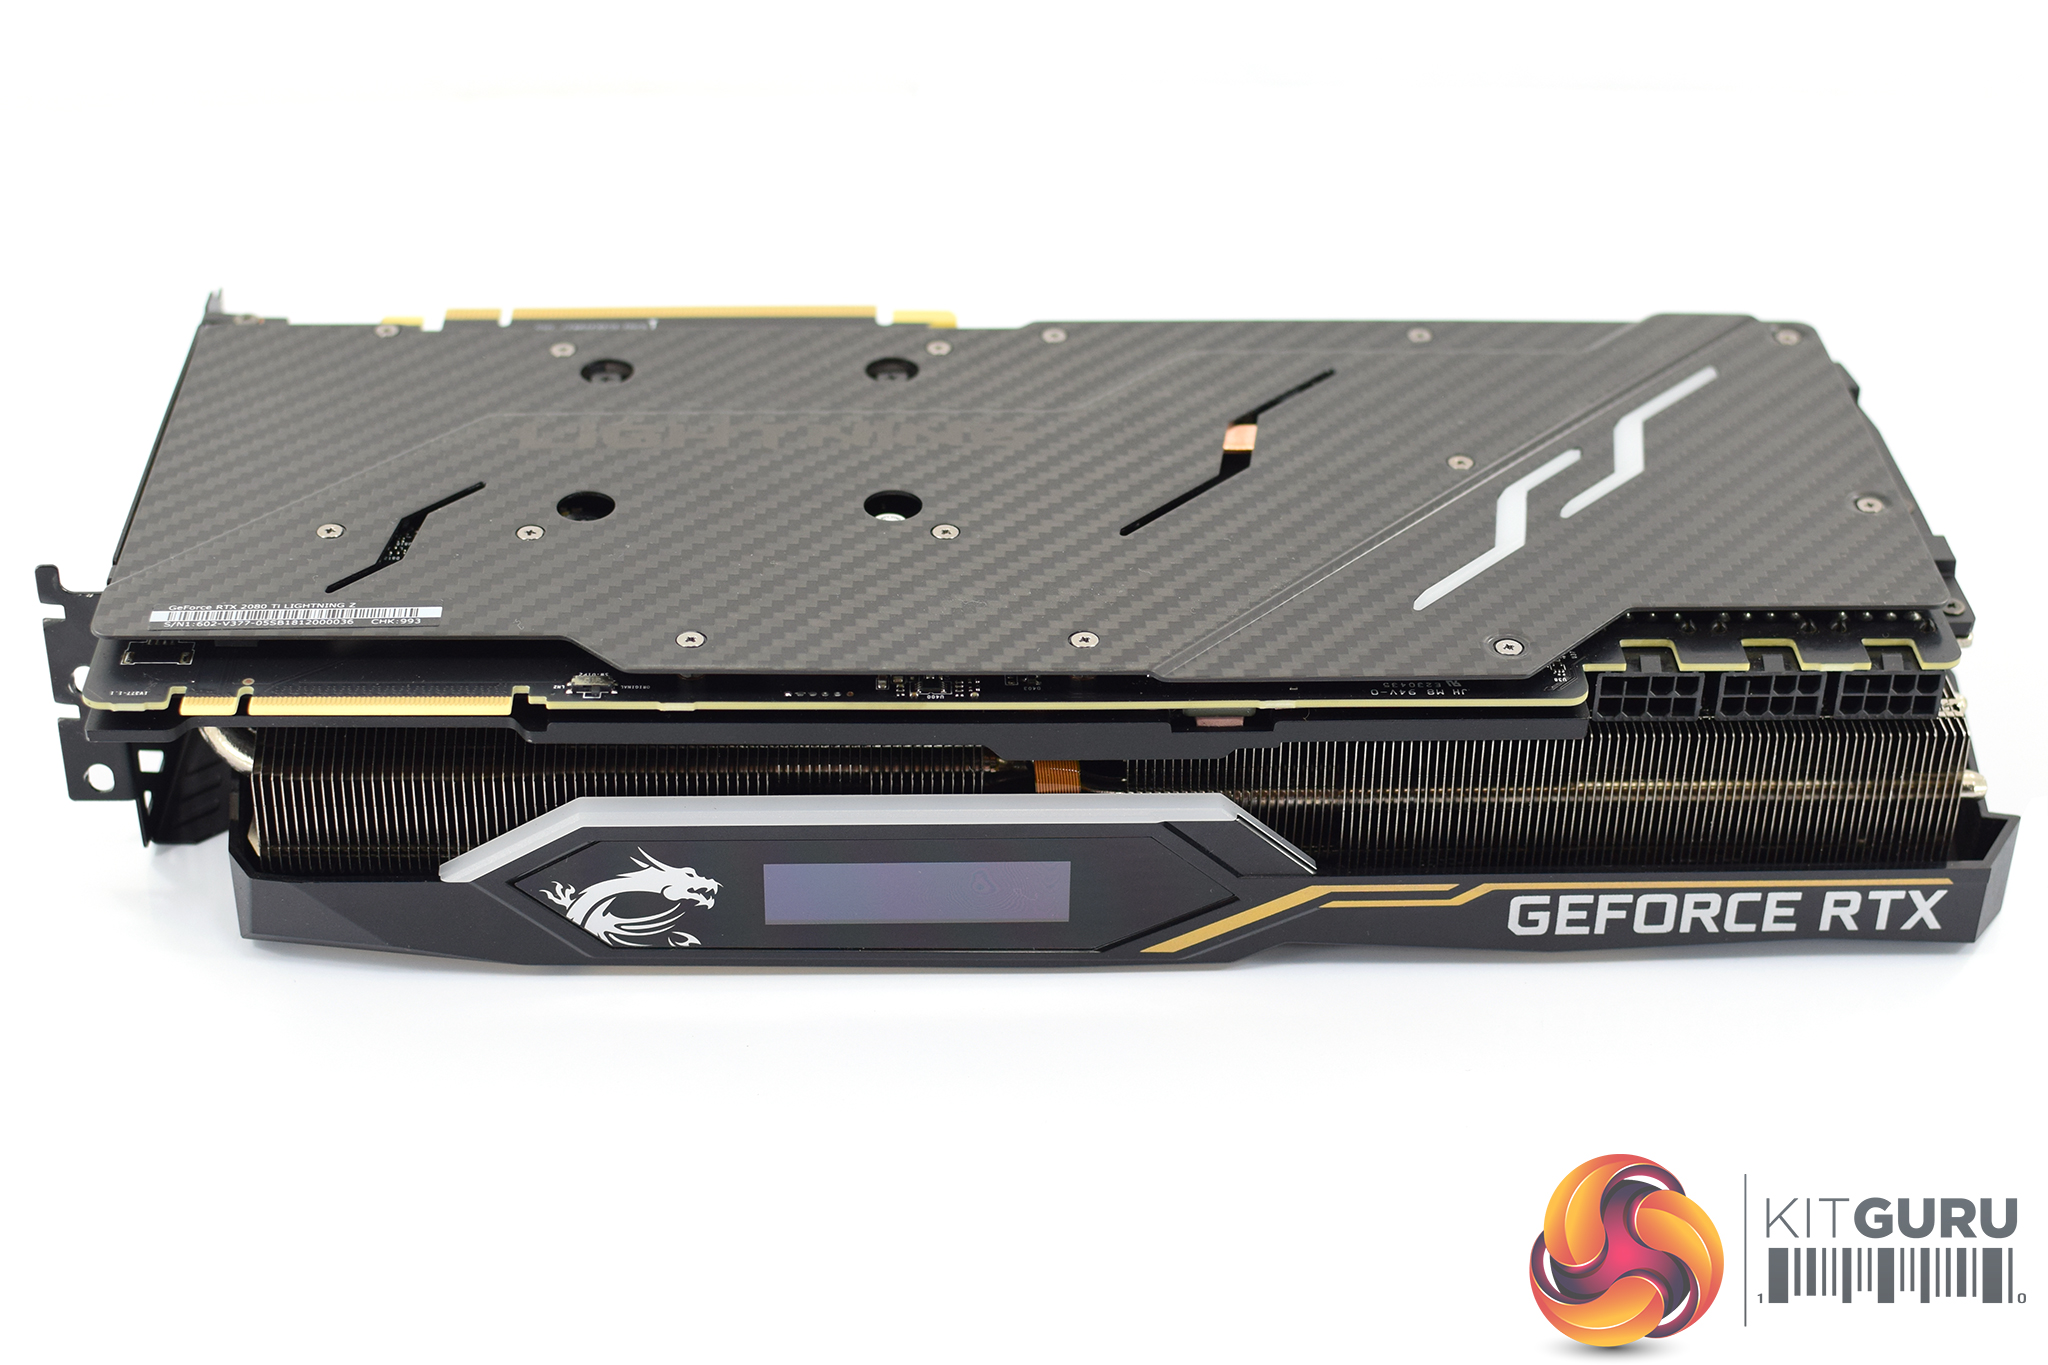
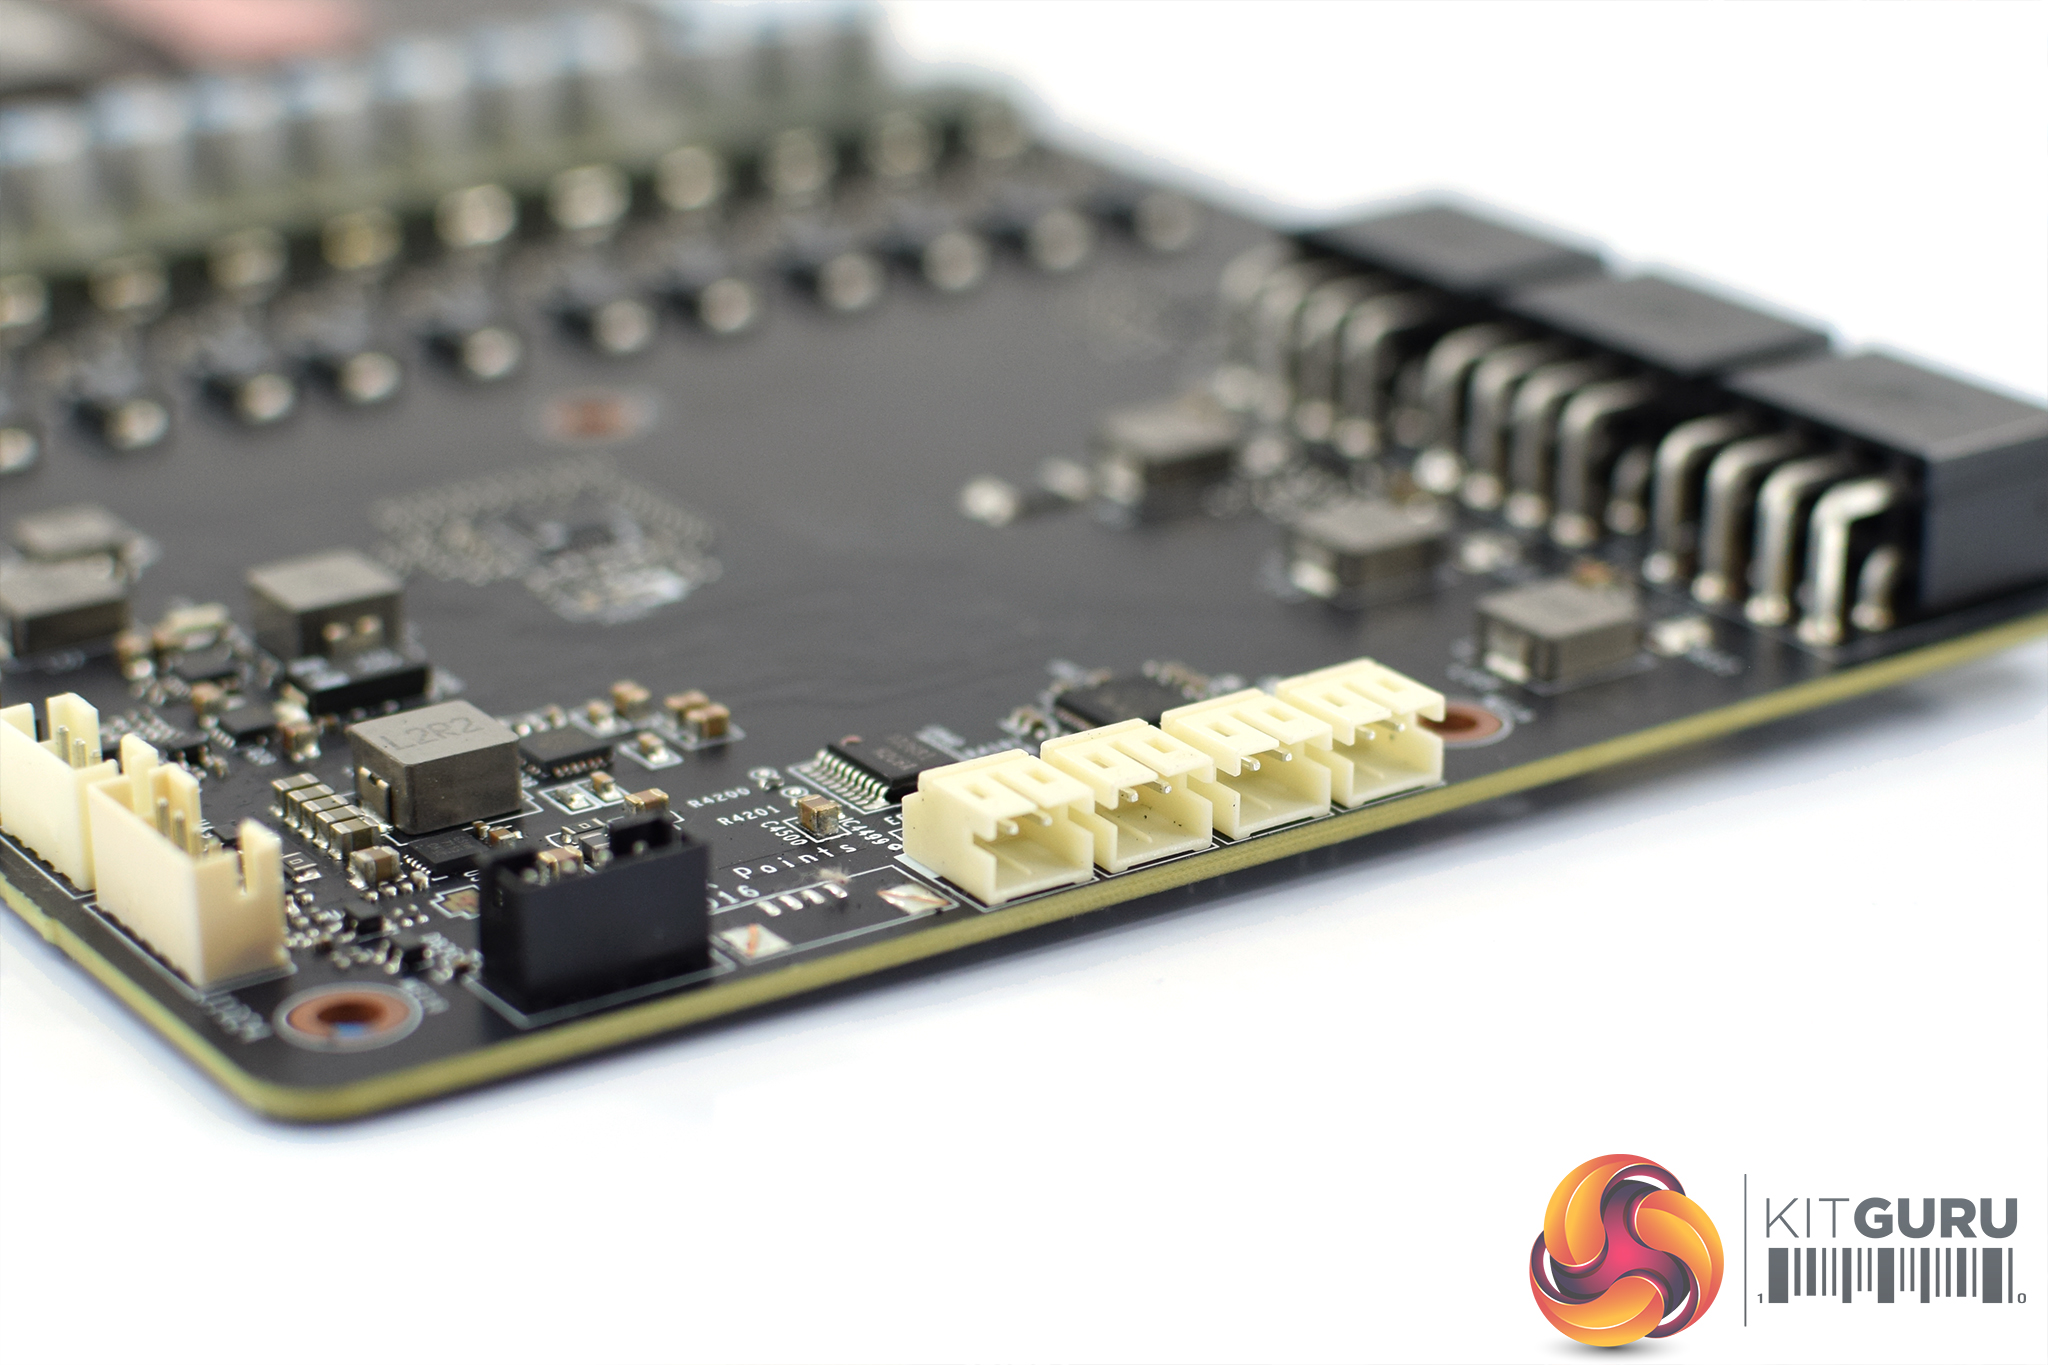
Elsewhere, we get a look at the three 8-pin PCIe power connectors that are required for this card. This means the card has up to 525W of power at its disposal, and MSI actually detailed what each of the connectors is for – the furthest left connector (closest to NVlink connector) delivers power for the GPU + Memory (4 Vcore phases + 3 memory phases), the middle connector delivers power to the GPU (6 Vcore phases), with the right-hand side plug also for the GPU (6 Vcore phases). The 12v PCIe slot provides the power for PEX, EV8 and Type-C.
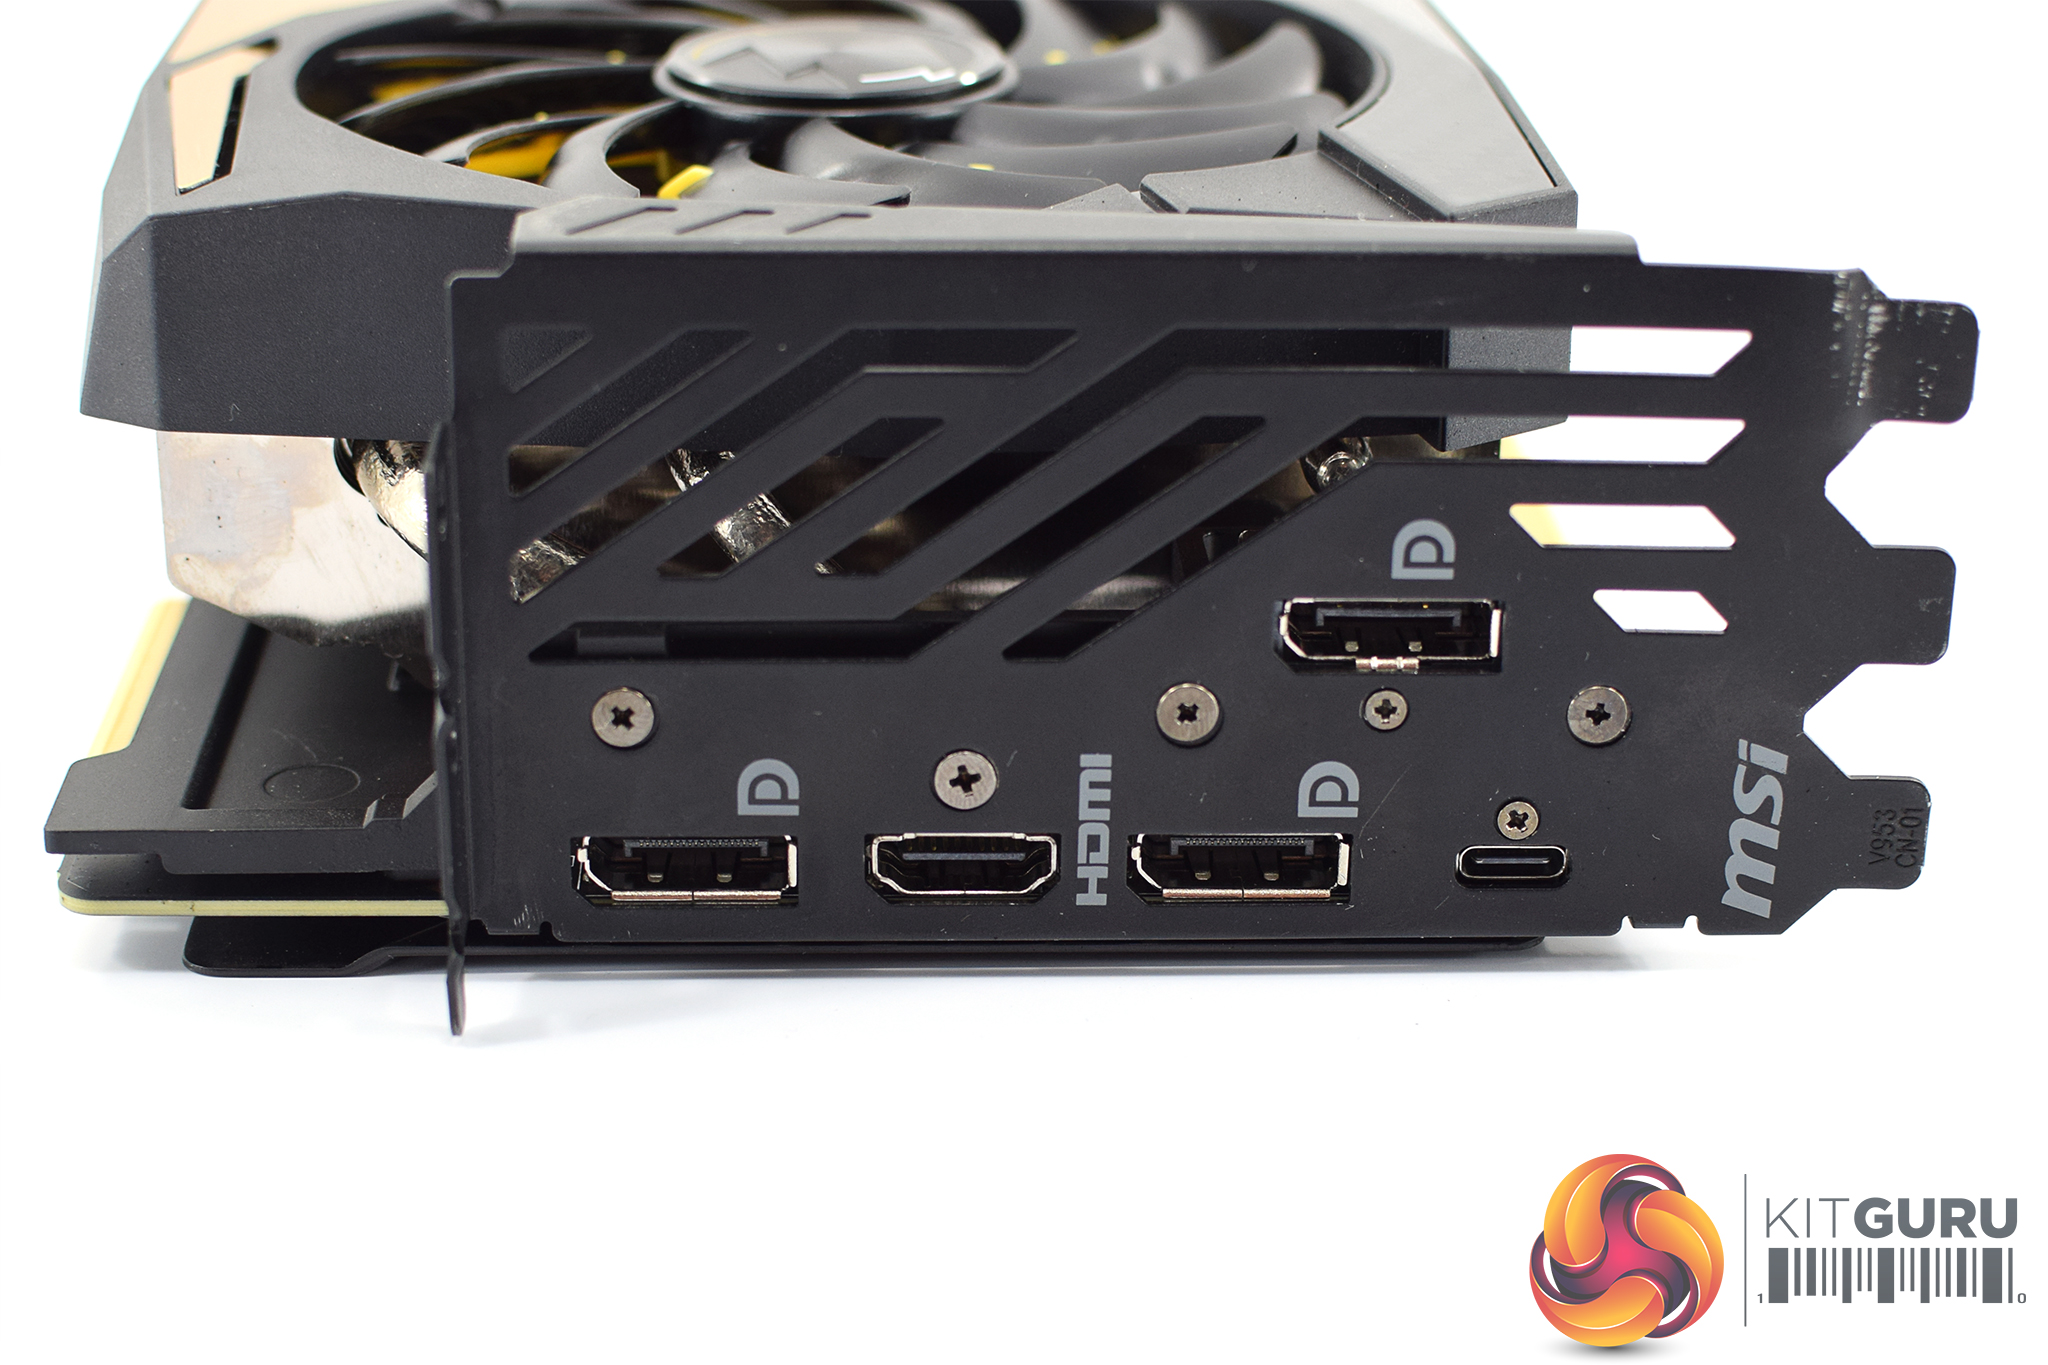
Display outputs are less exciting, with the reference I/O again provided here: 3x DisplayPort, 1x HDMI and 1x USB-C.
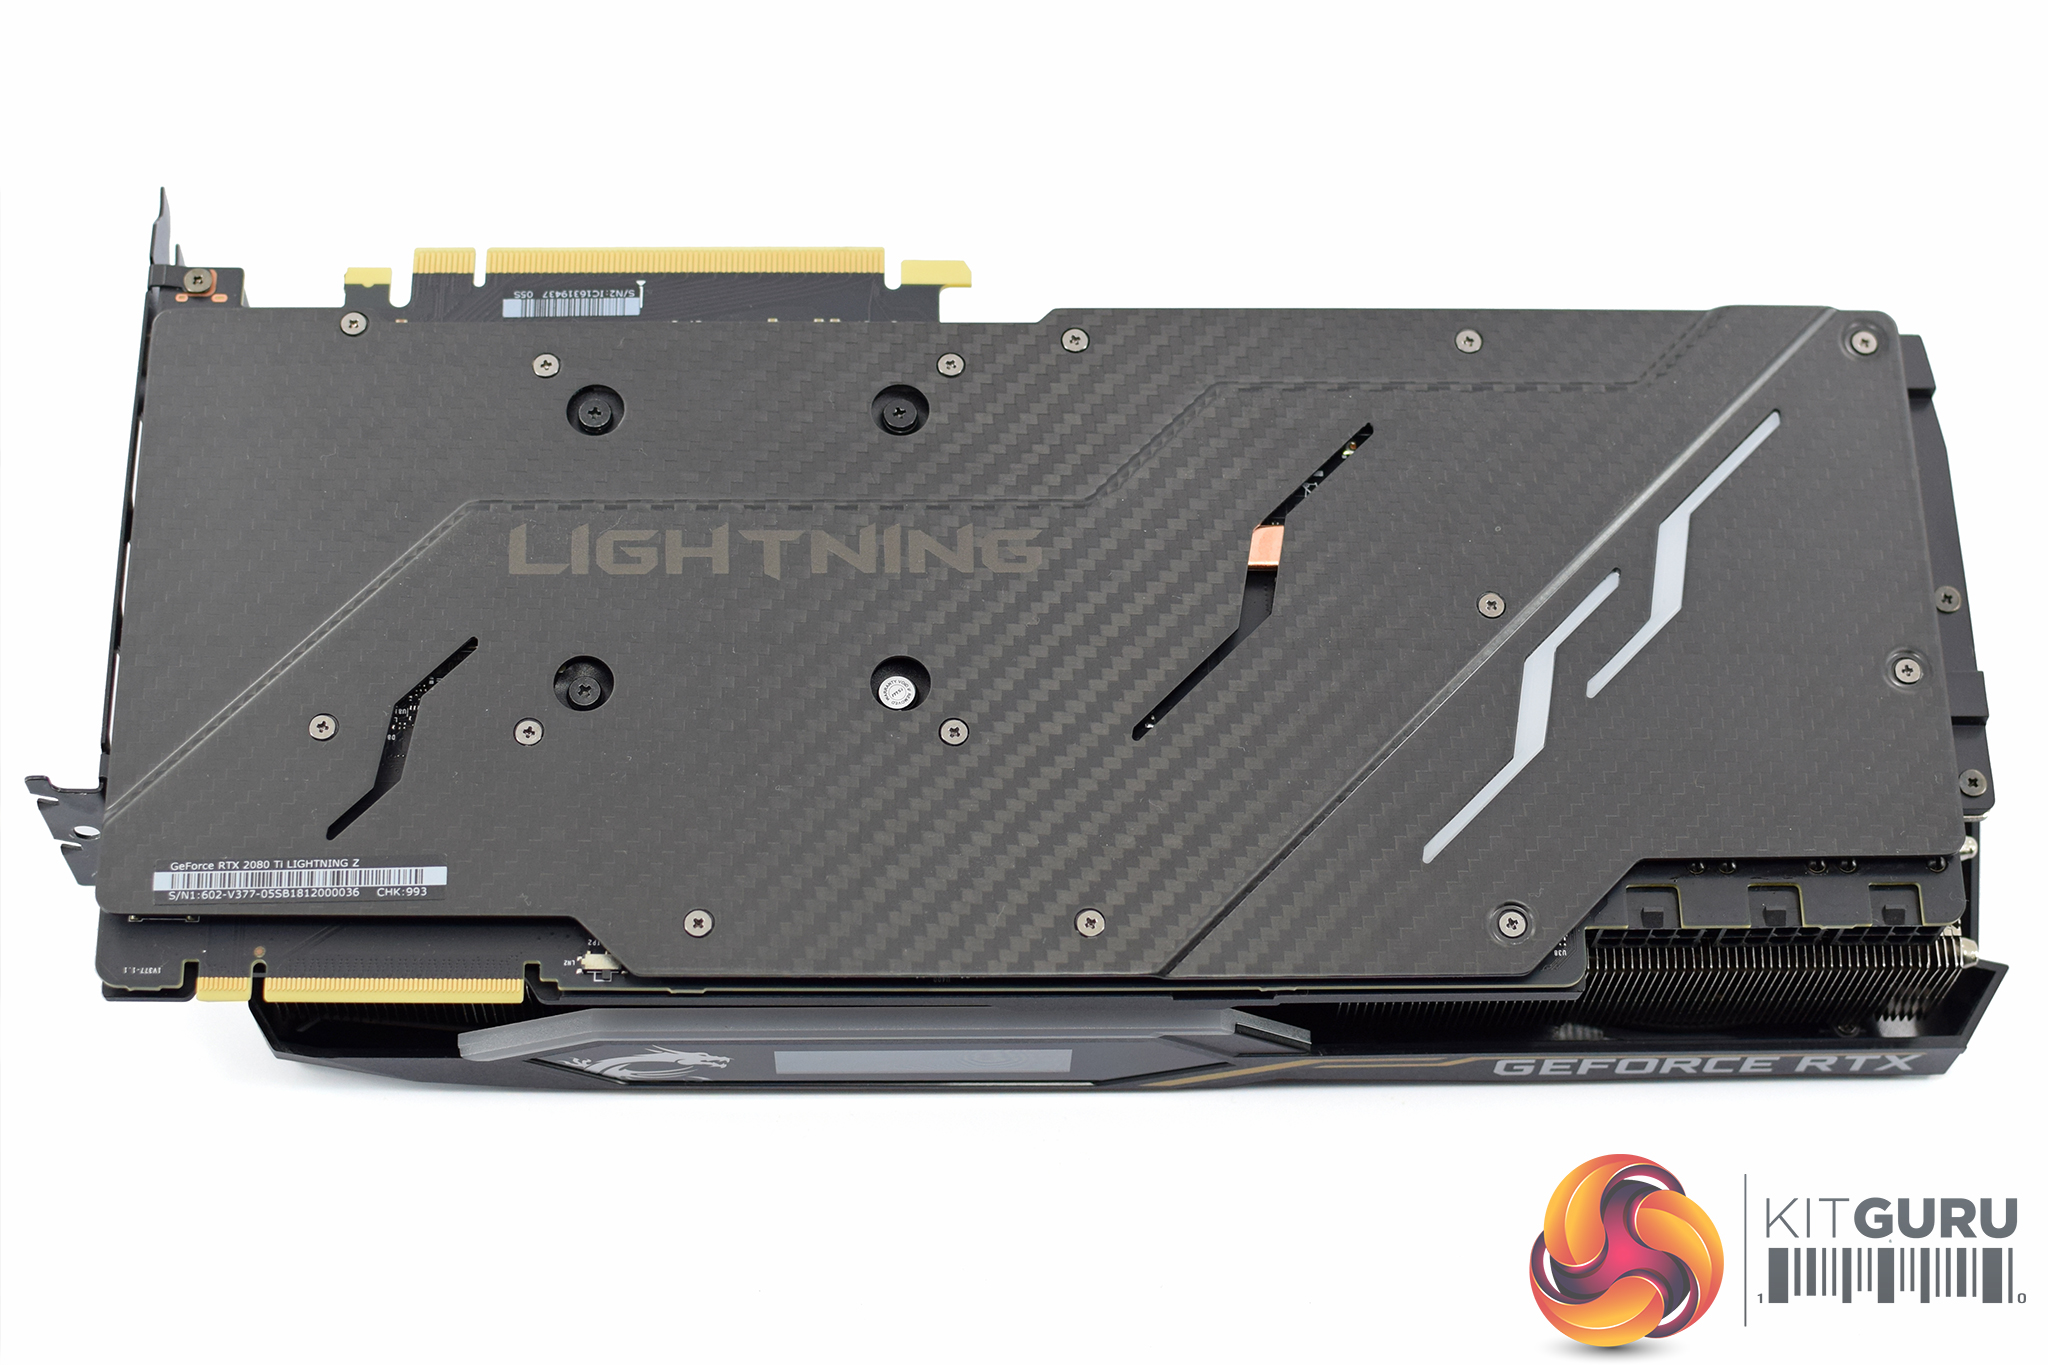
Starting the disassembly process, we need to first look at the backplate. This is actually constructed from actual carbon fibre – it's not just a ‘carbon fibre look' or anything like that, and it feels undeniably premium. There's also two LED strips on the right-hand of the backplate, while you can also just about see the subtle ‘Lightning' branding on the back.
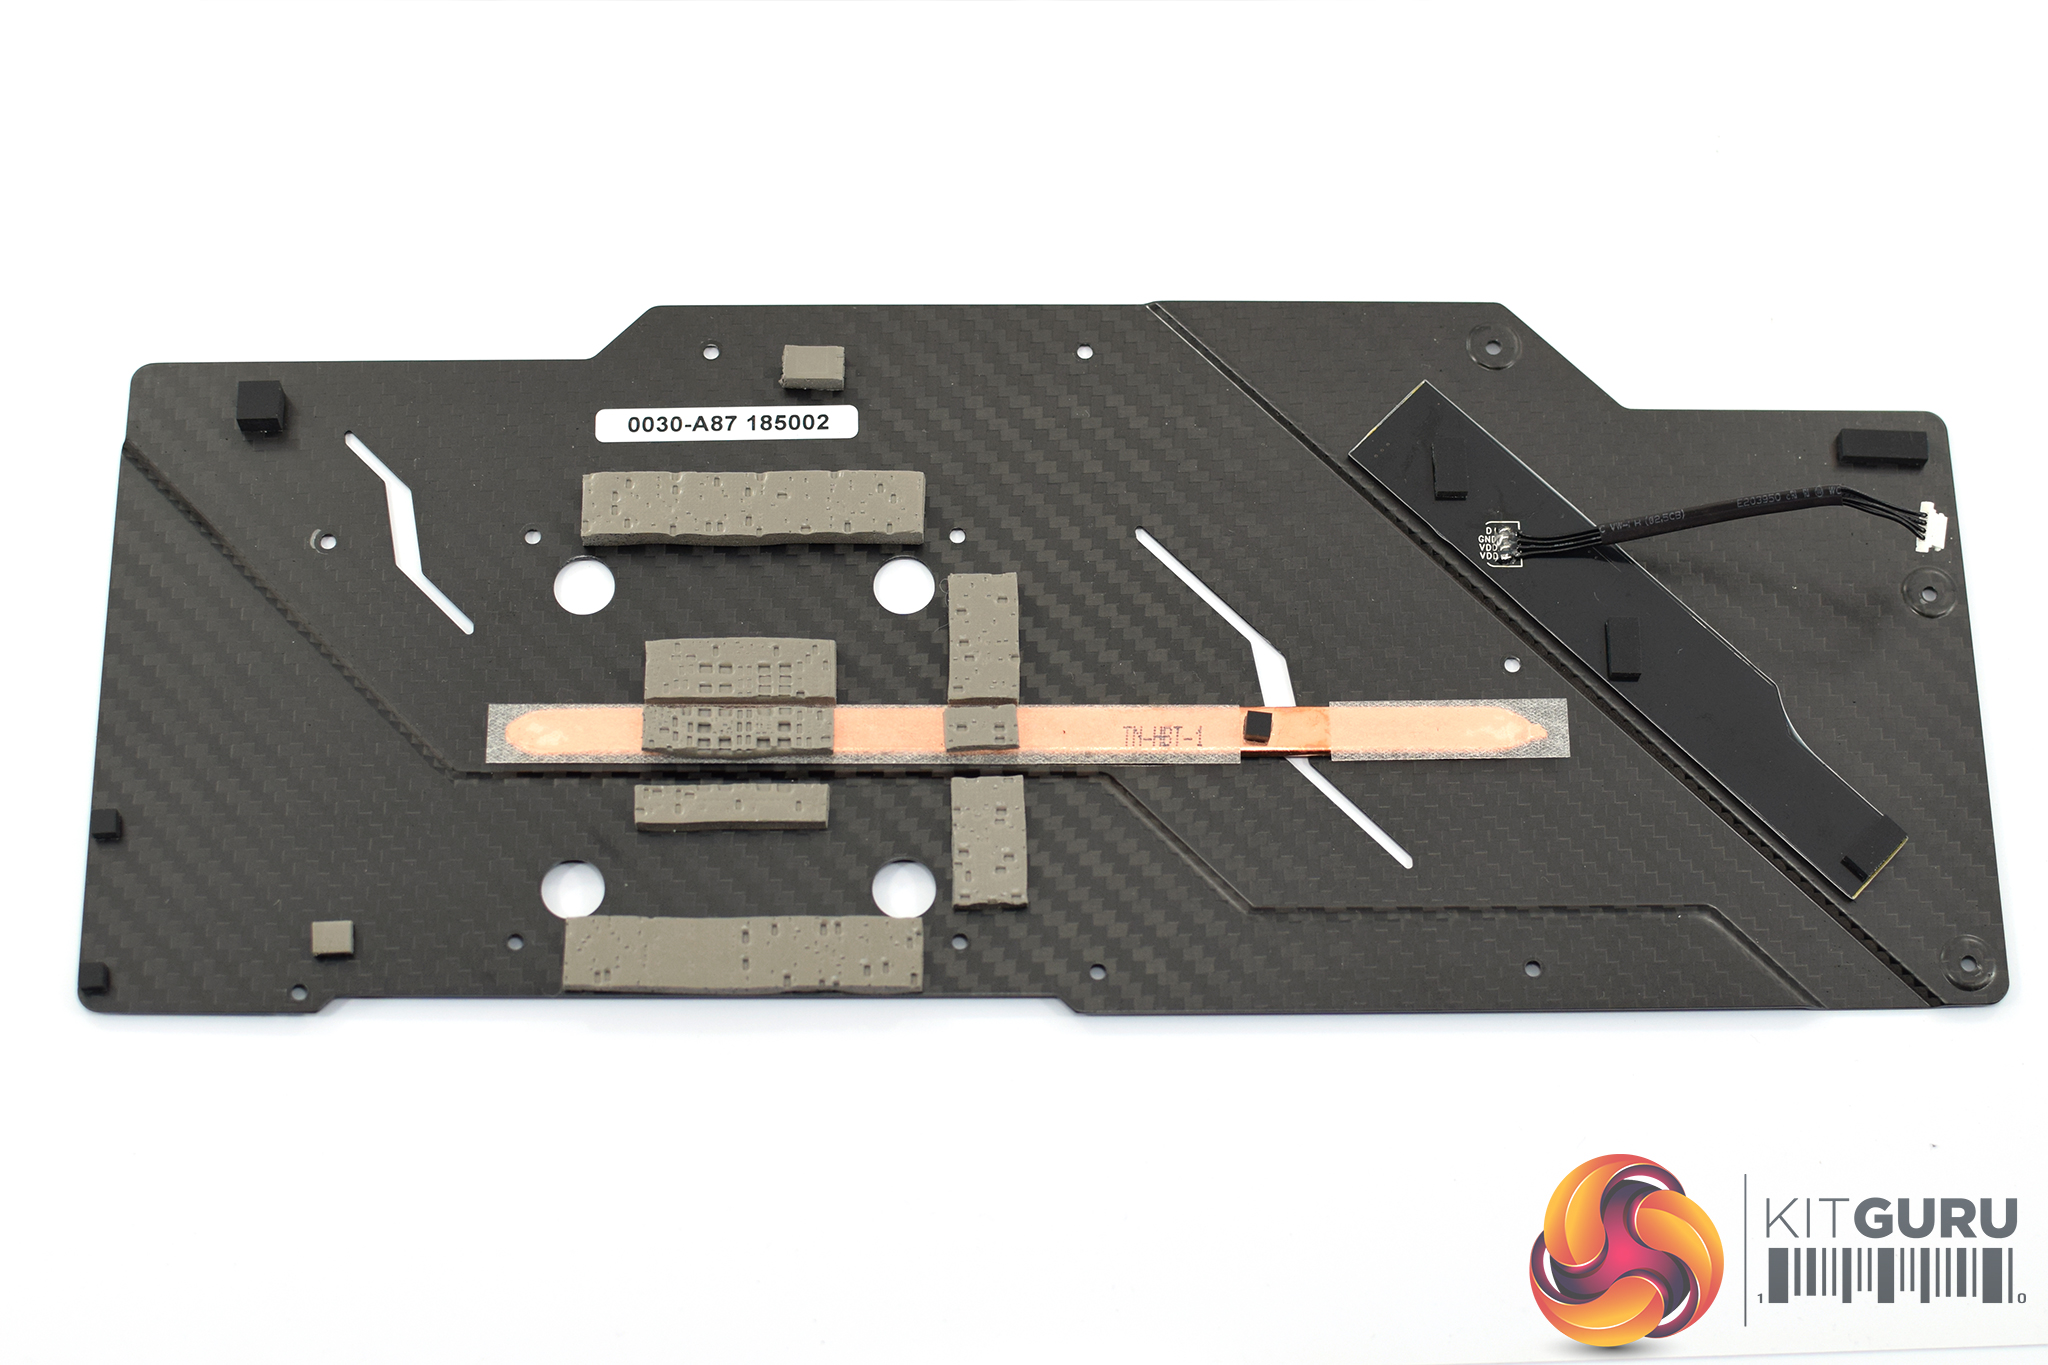
To take the backplate off, 14 small Phillips-head screws need to be removed, while be sure to disconnect the LED cable without breaking it! Then we can get a look at the underside of the backplate, and not only are there plenty of thermal pads, but even a copper heatpipe to help transfer the heat away from the back of the GPU.
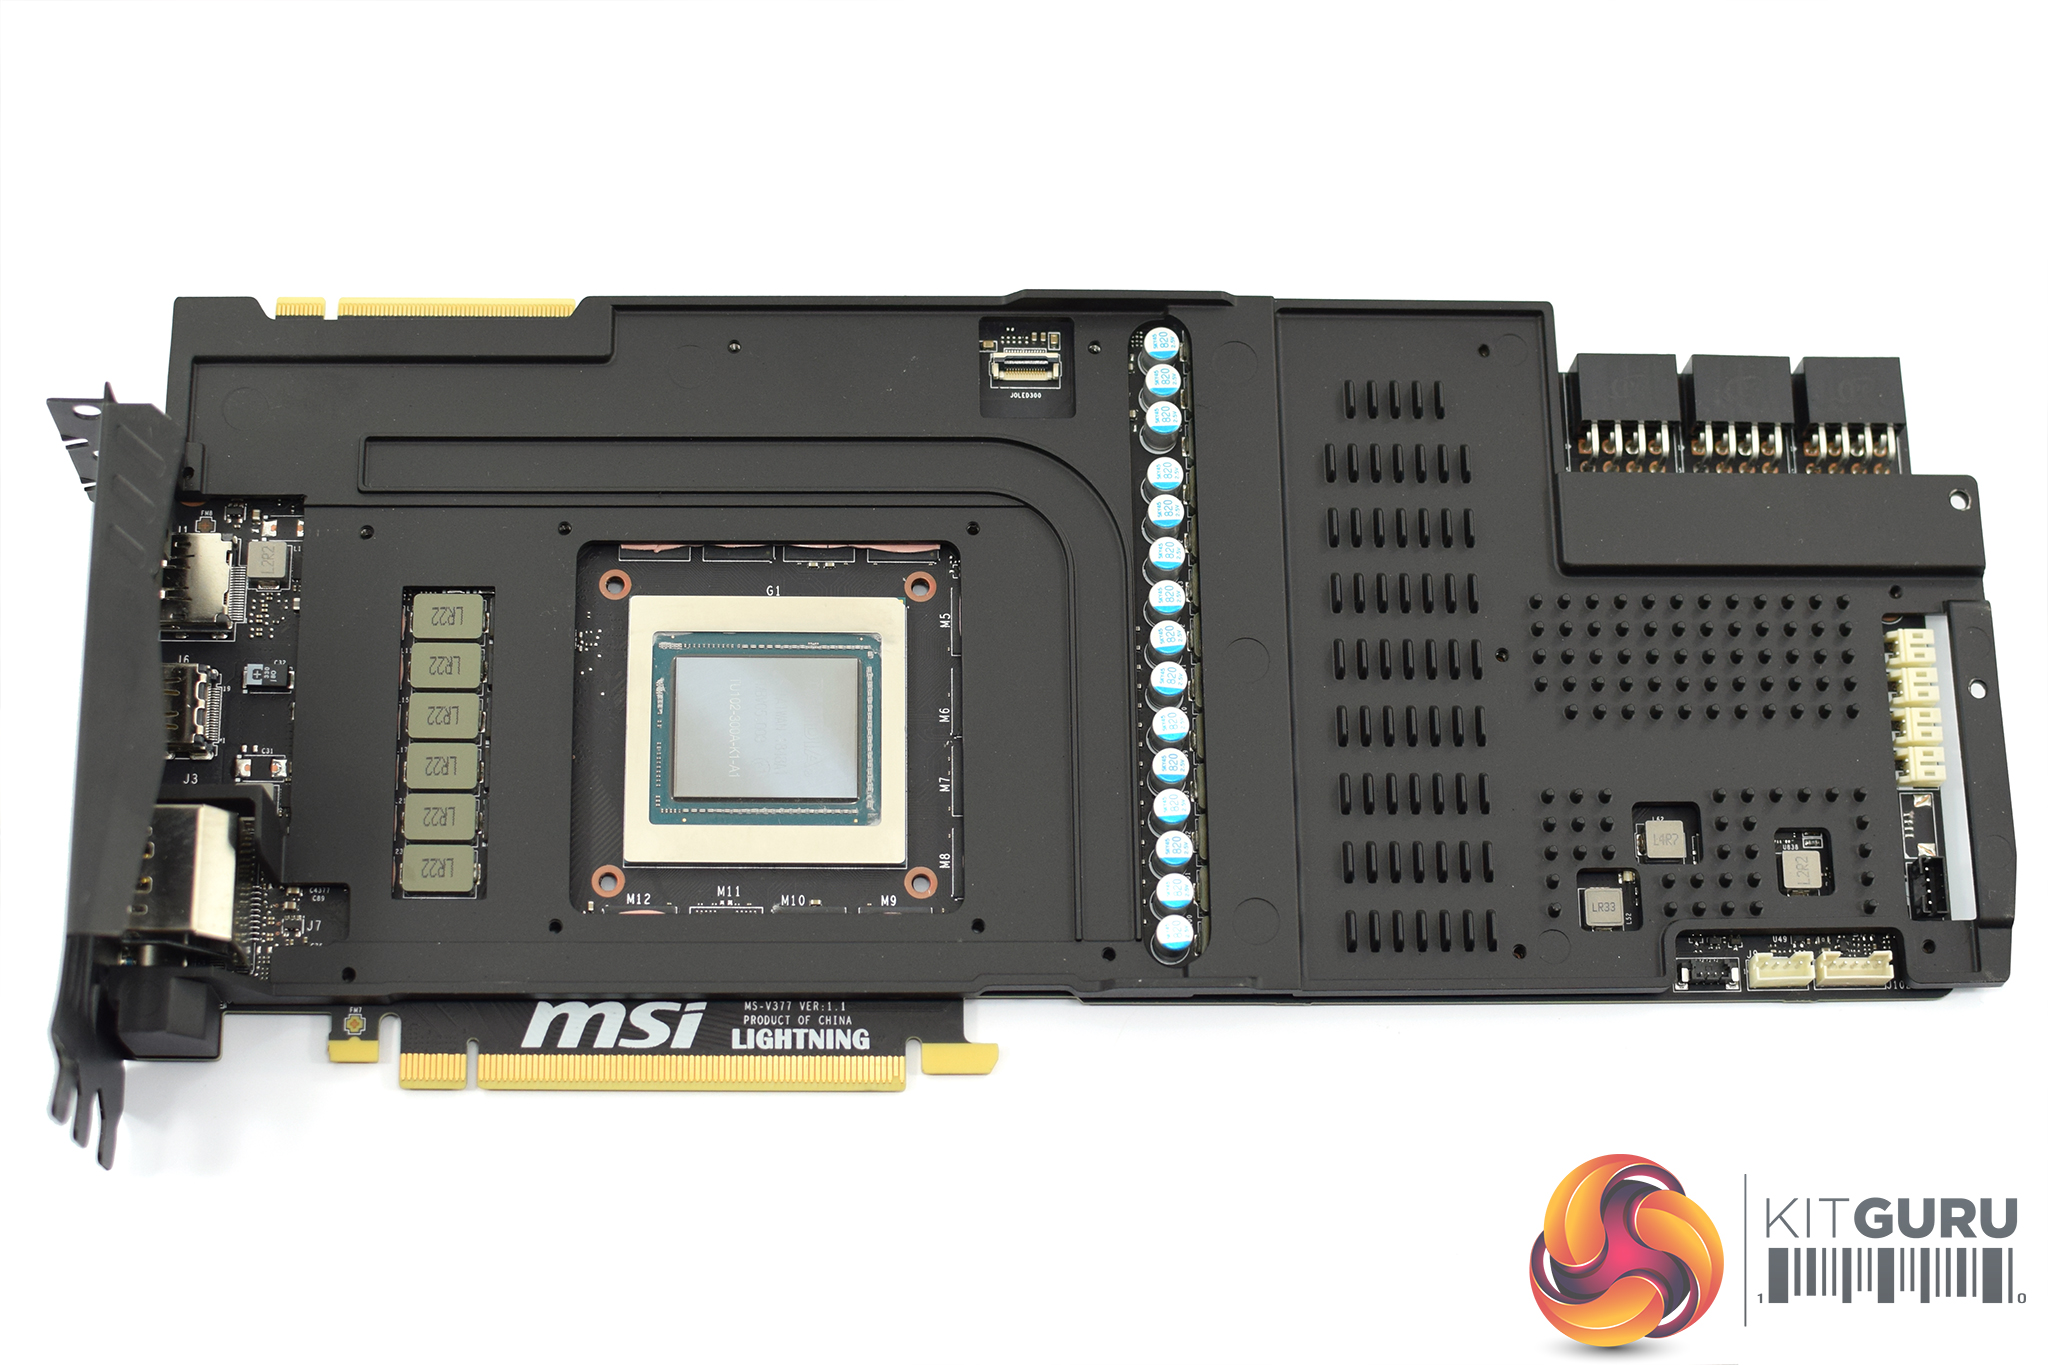
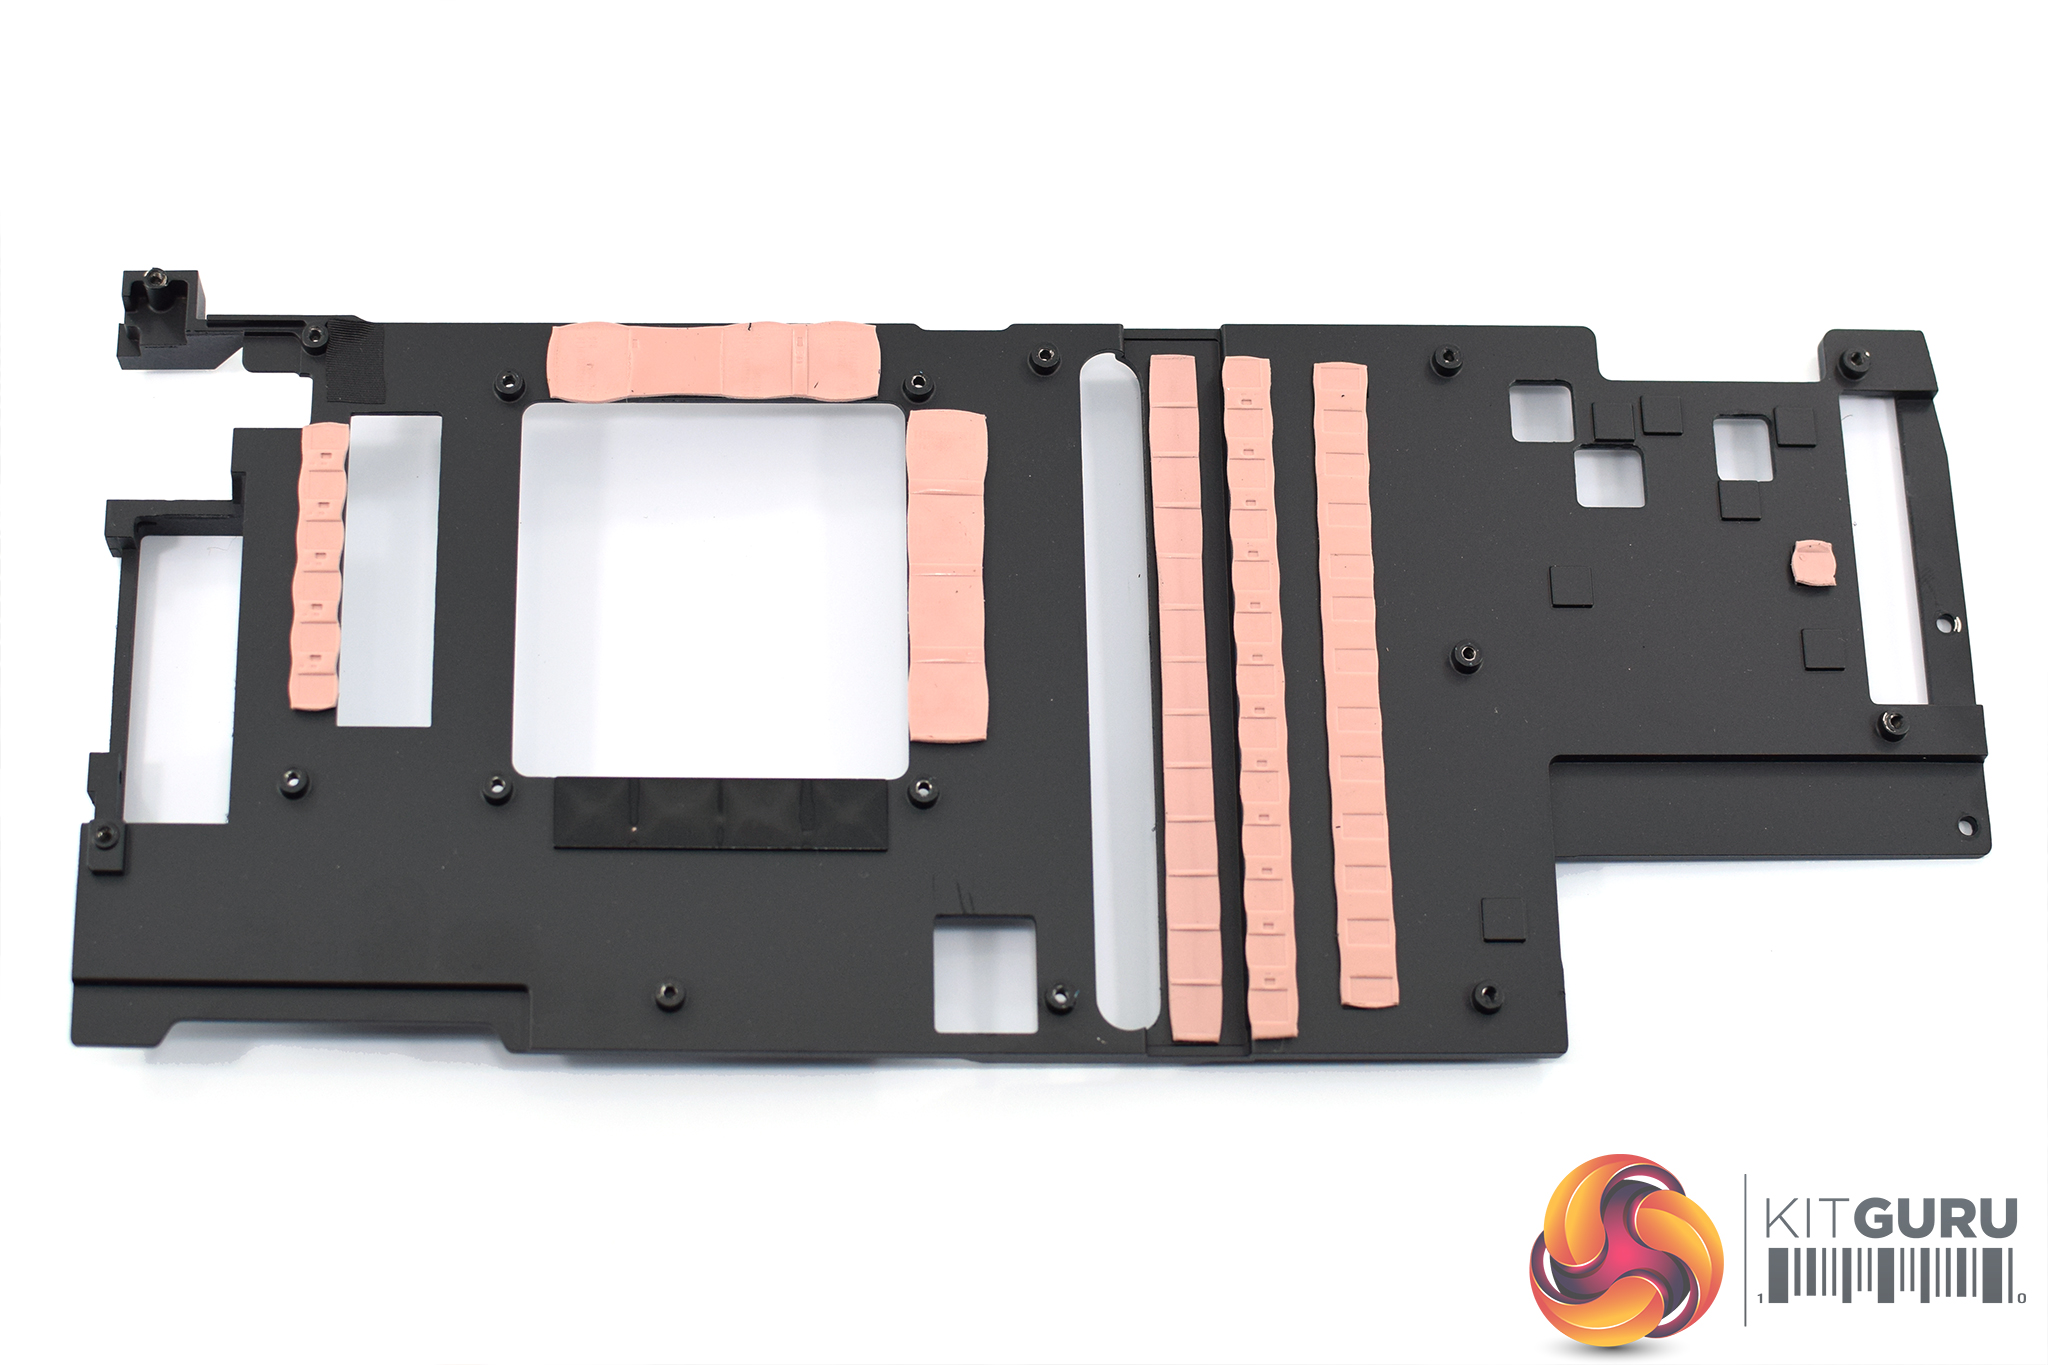
Six screws can then be removed from the rear of the PCB, and the heatsink will come free. The PCB is still almost entirely covered by the die-cast metal frame you can see above (MSI calls this a Close Quarters Heatsink), and this not only cools the VRAM and power circuitry, but it also adds some structural rigidity to the card to prevent sagging.
This frame is screwed on through the back of the PCB by hex screws – a total of 14. Of these 14, they're not all the same – 8 are 4mm hex screws, the other 6 are 4.5mm.
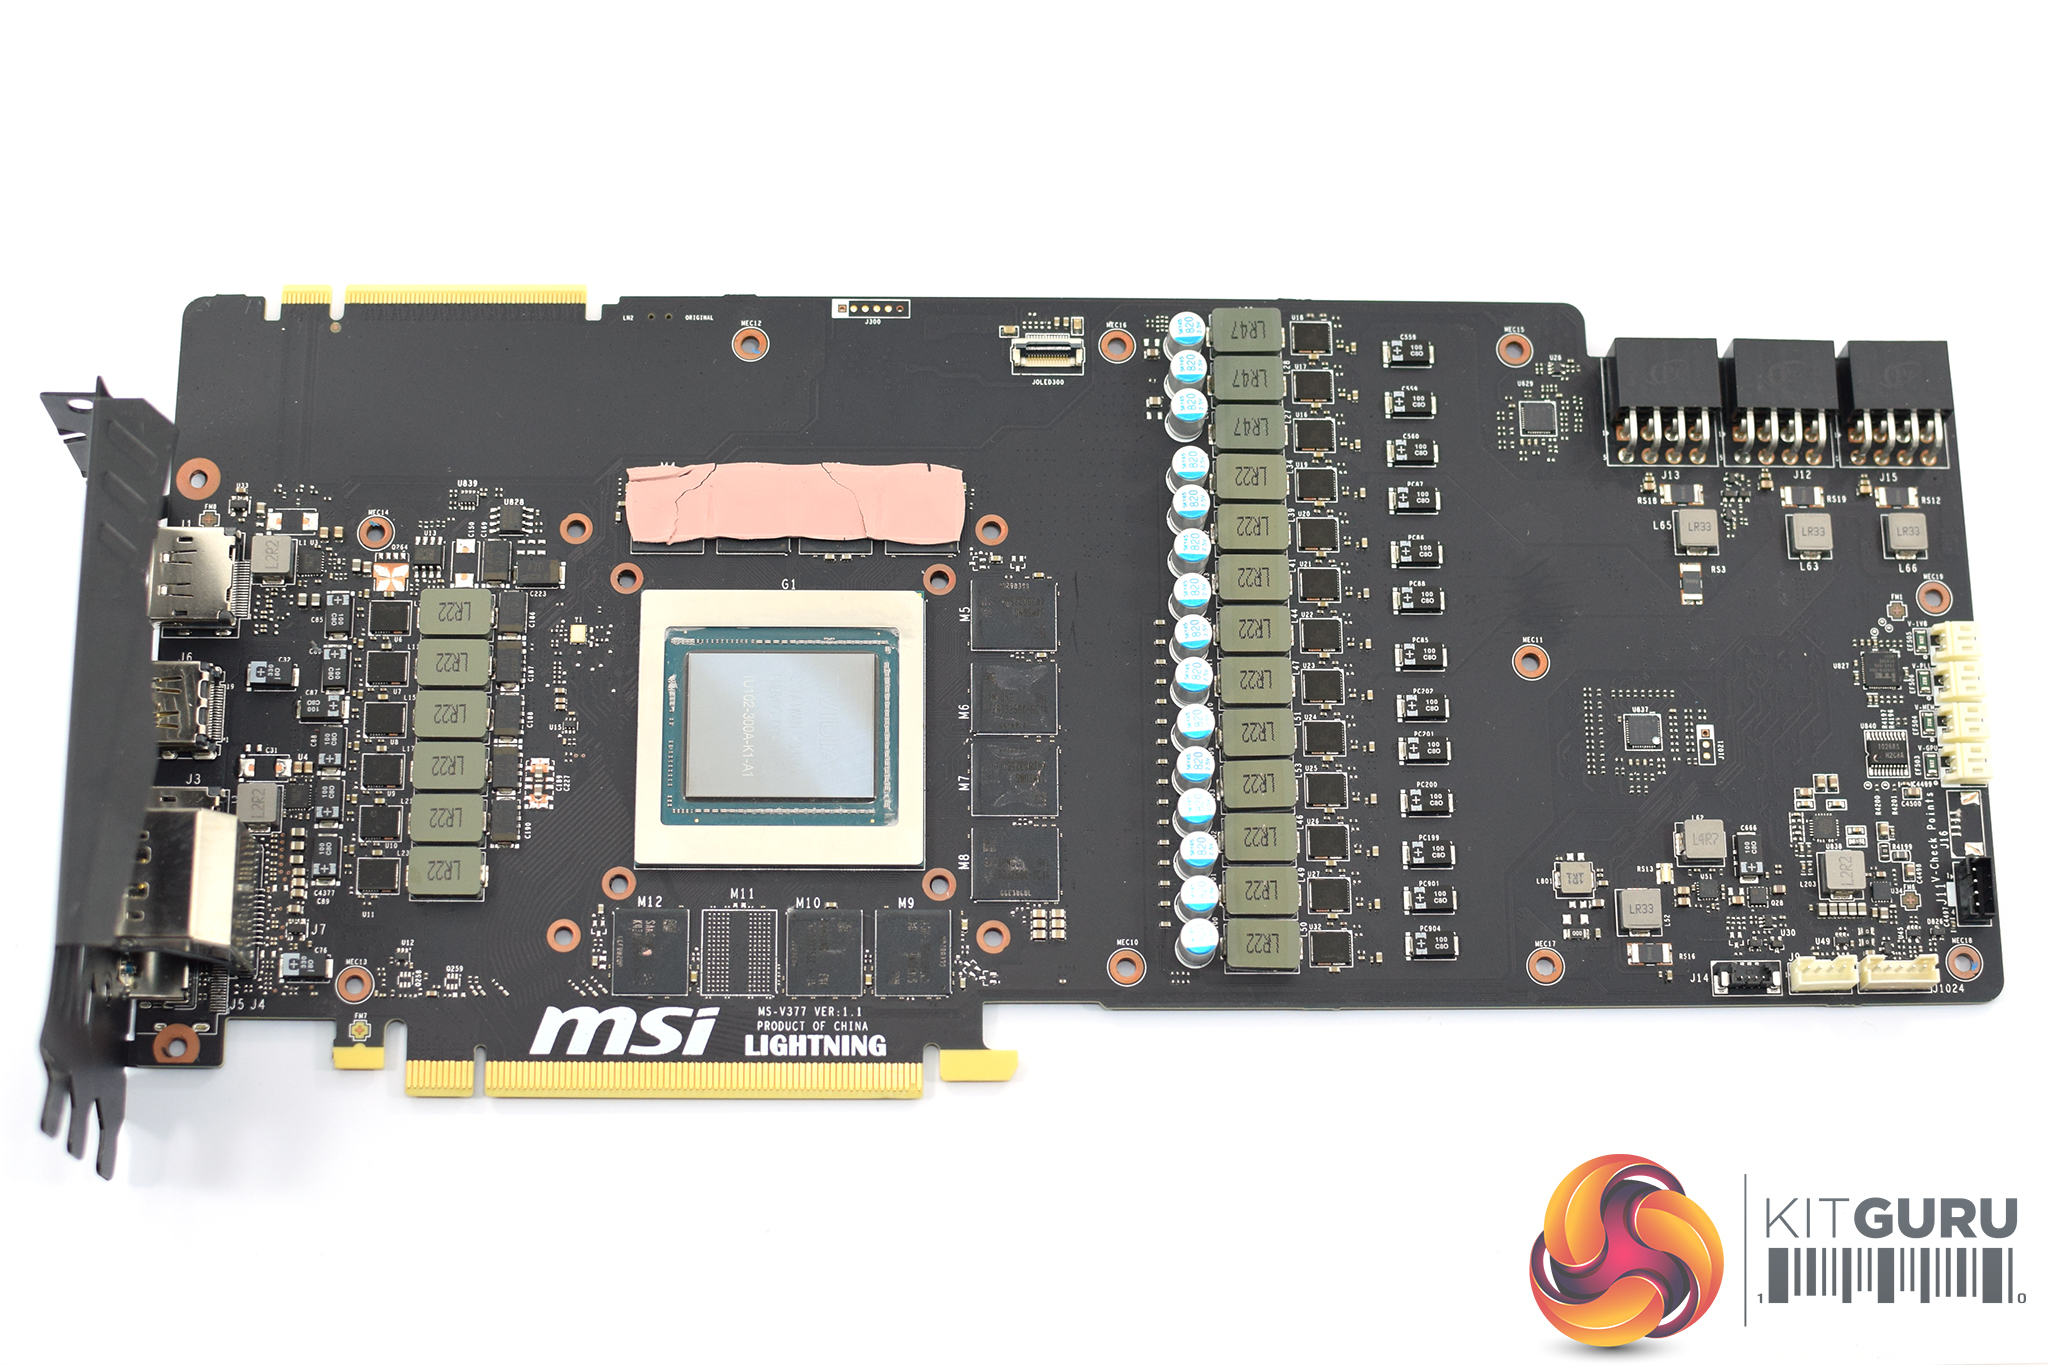
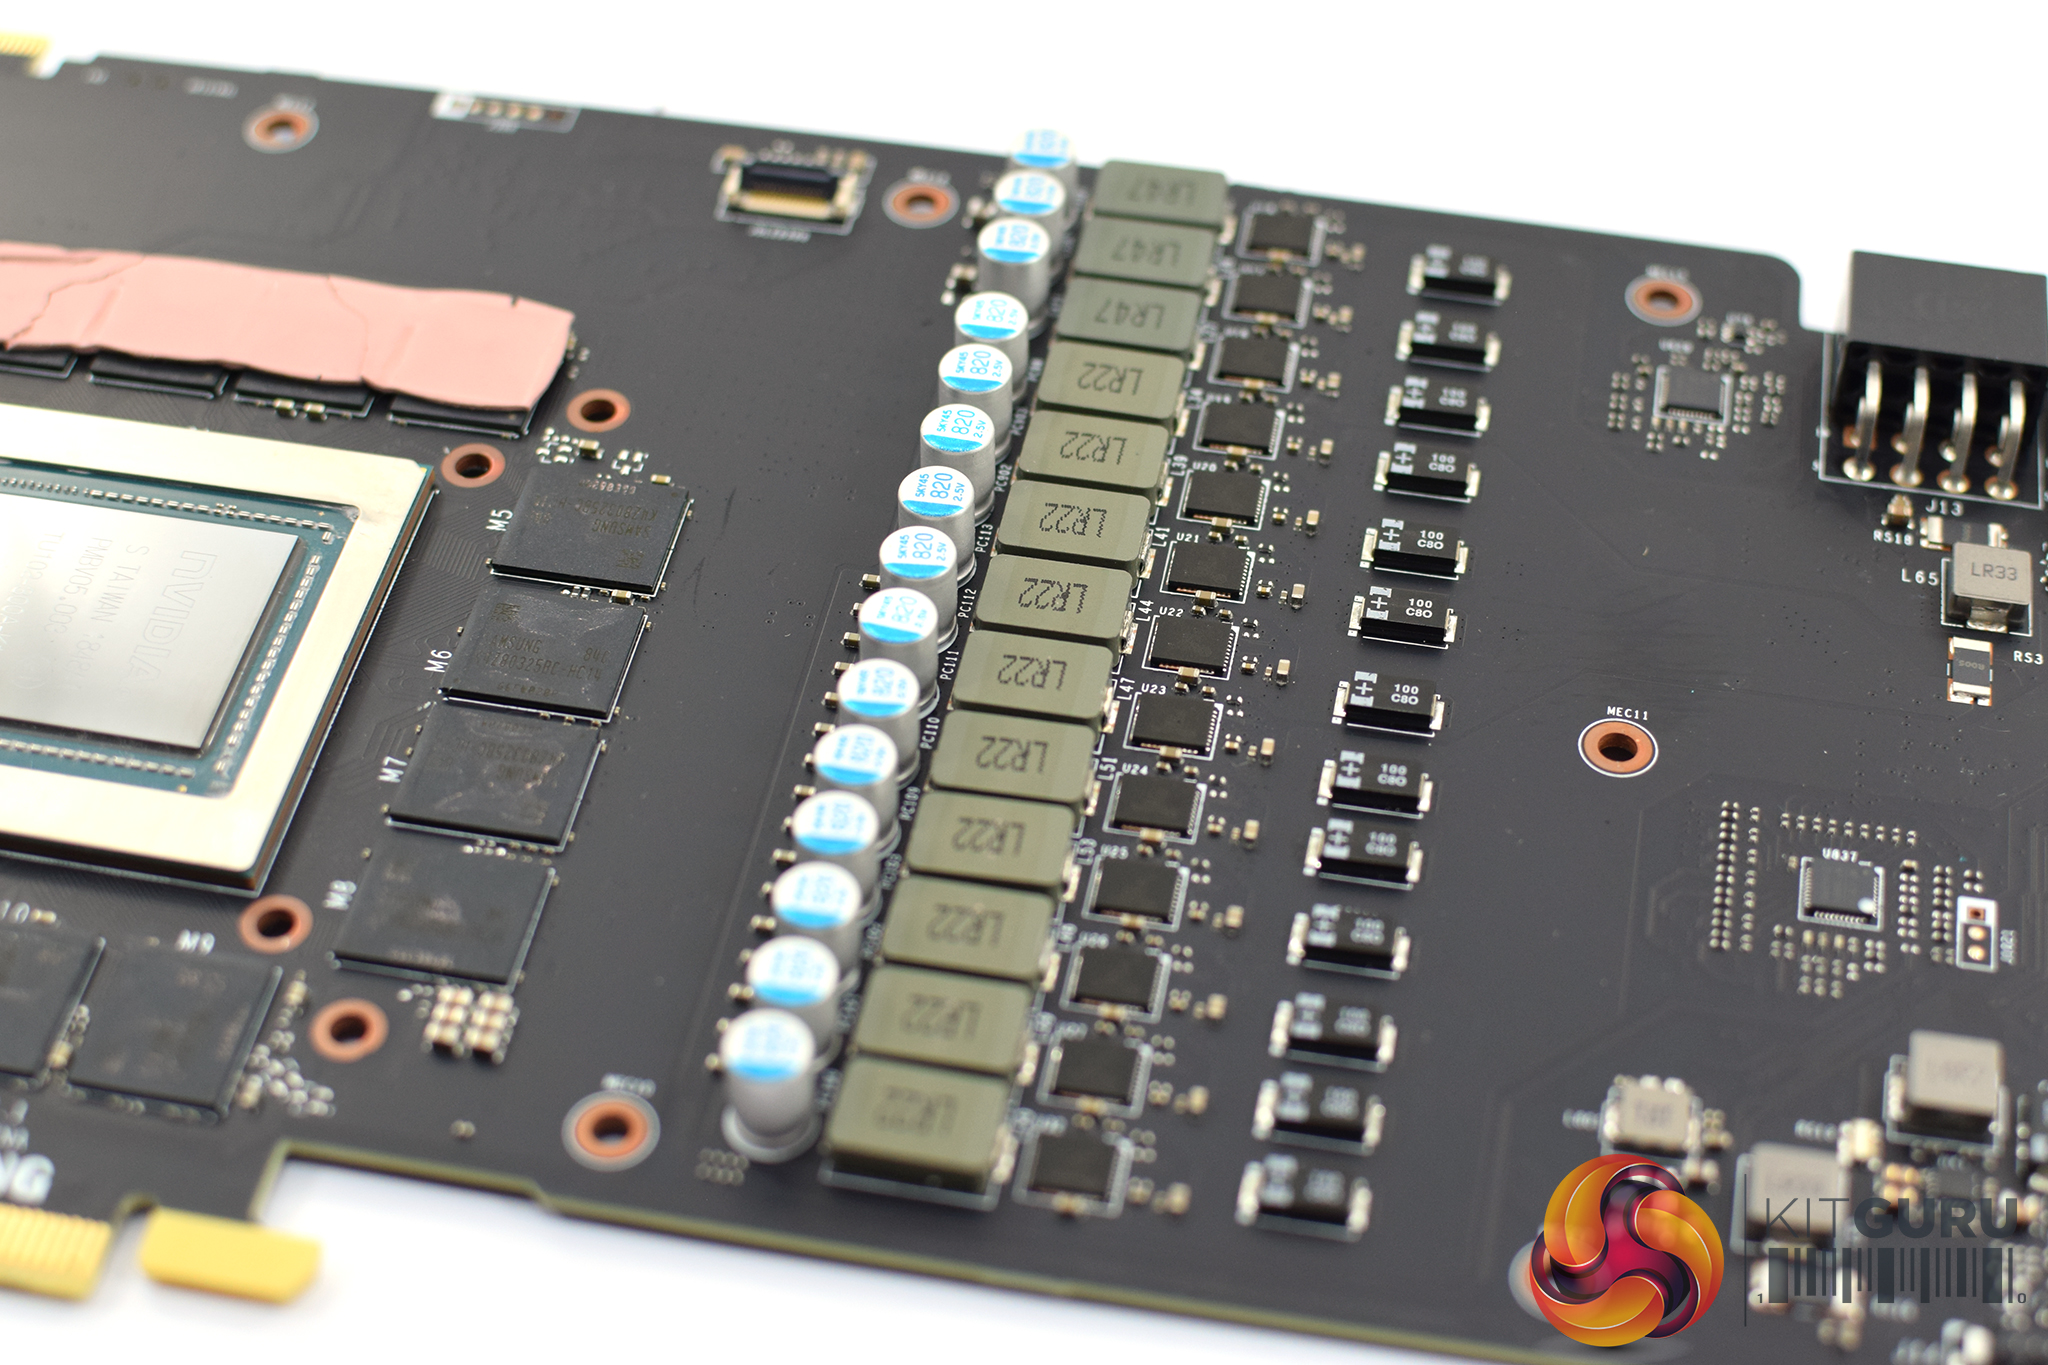
Once the frame is removed, we finally get a look at the bare PCB itself. There is a lot going on here but the most eye catching feature is the power delivery. We've already touched on this, but MSI is using a 16-phase solution for the GPU, and then another 3 phases for the memory. For reference, the Founders Edition utilises a 13+3 power delivery implementation.
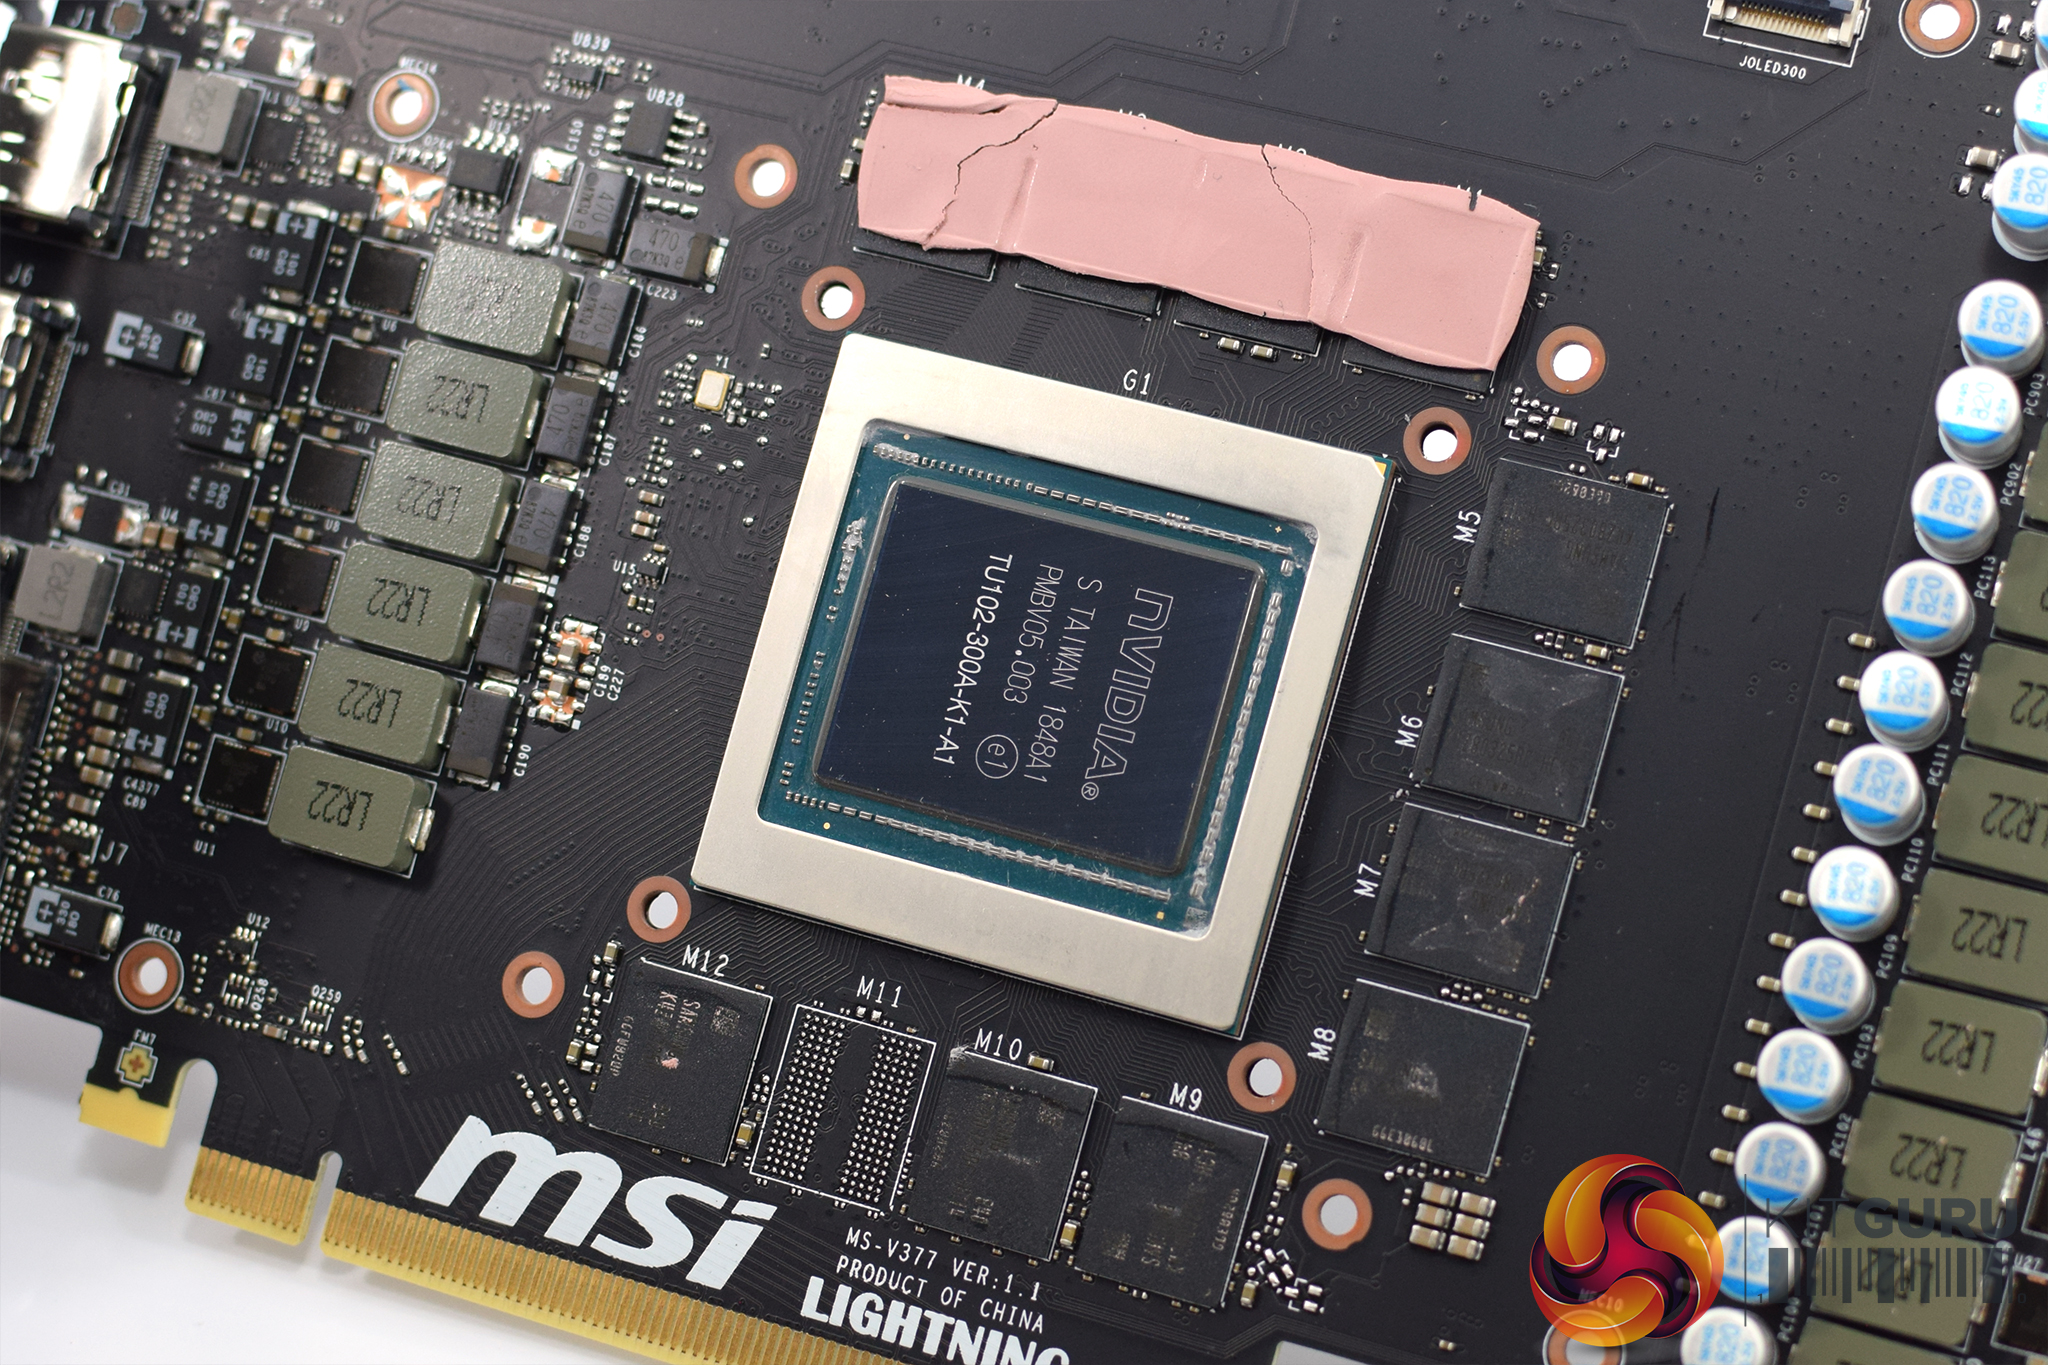
The GPU is of course labelled TU102-300A, meaning this is a binned chip suitable to be sold with a factory overclock – and it wouldn't surprise me if MSI specially selected the very best of these already-binned chips for its Lightning series.
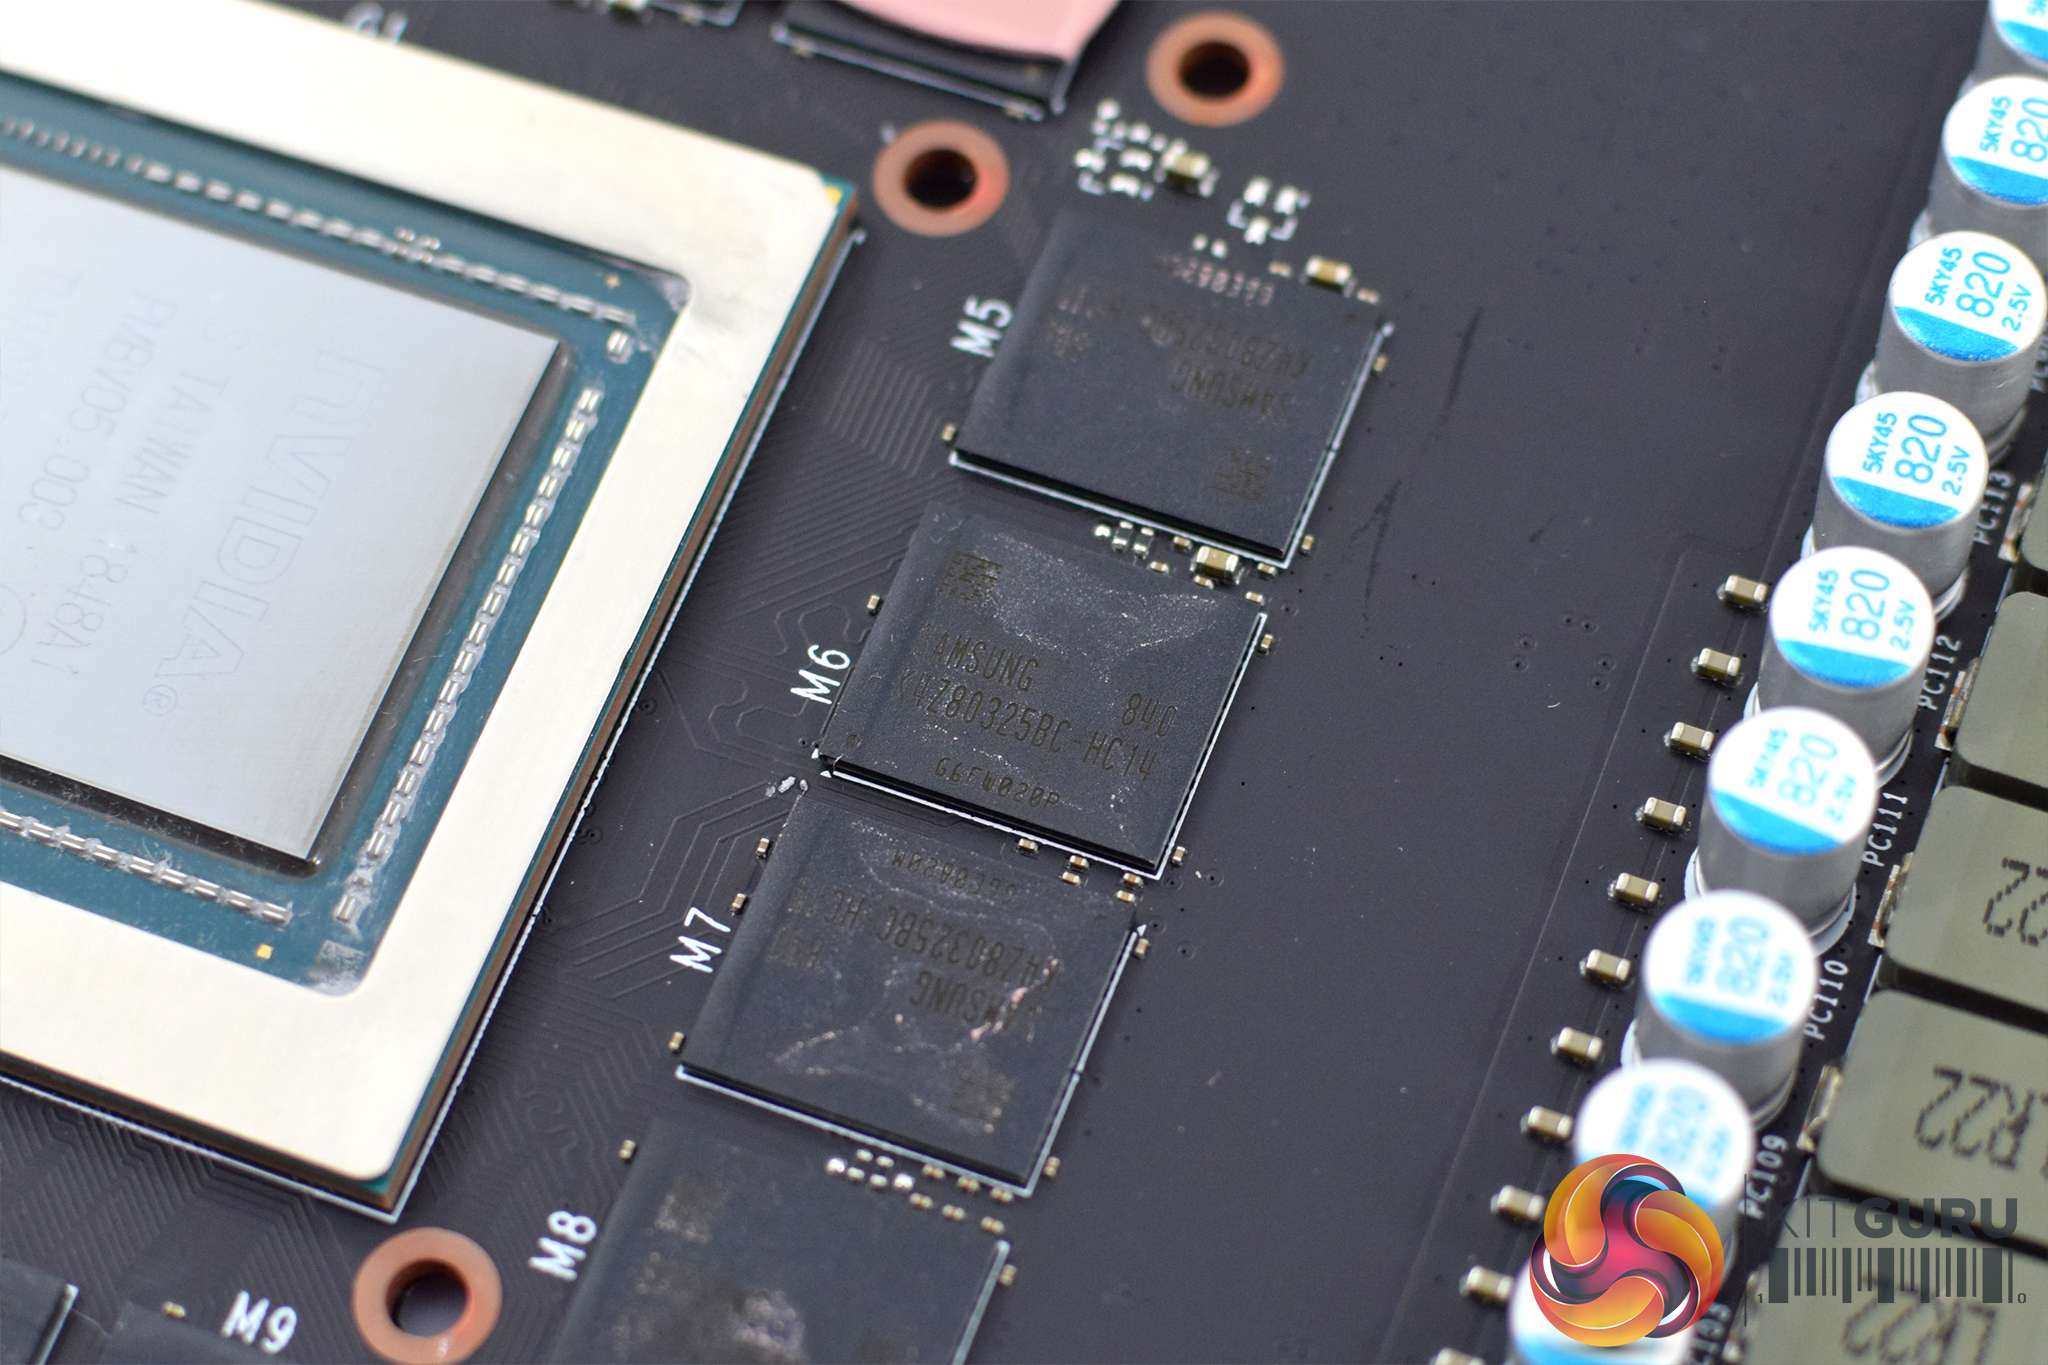
GDDR6 memory comes from Samsung – not Micron, who has supplied all the memory for every RTX card I have reviewed so far. The chips are labelled ‘K4Z80325BC-HC14'.
At the very end of the PCB, we find four 2-pin headers. These are voltage check points for the GPU, memory, PLL & 1V8 (from left to right), with the necessary voltage check cables already included in the box (as seen above).
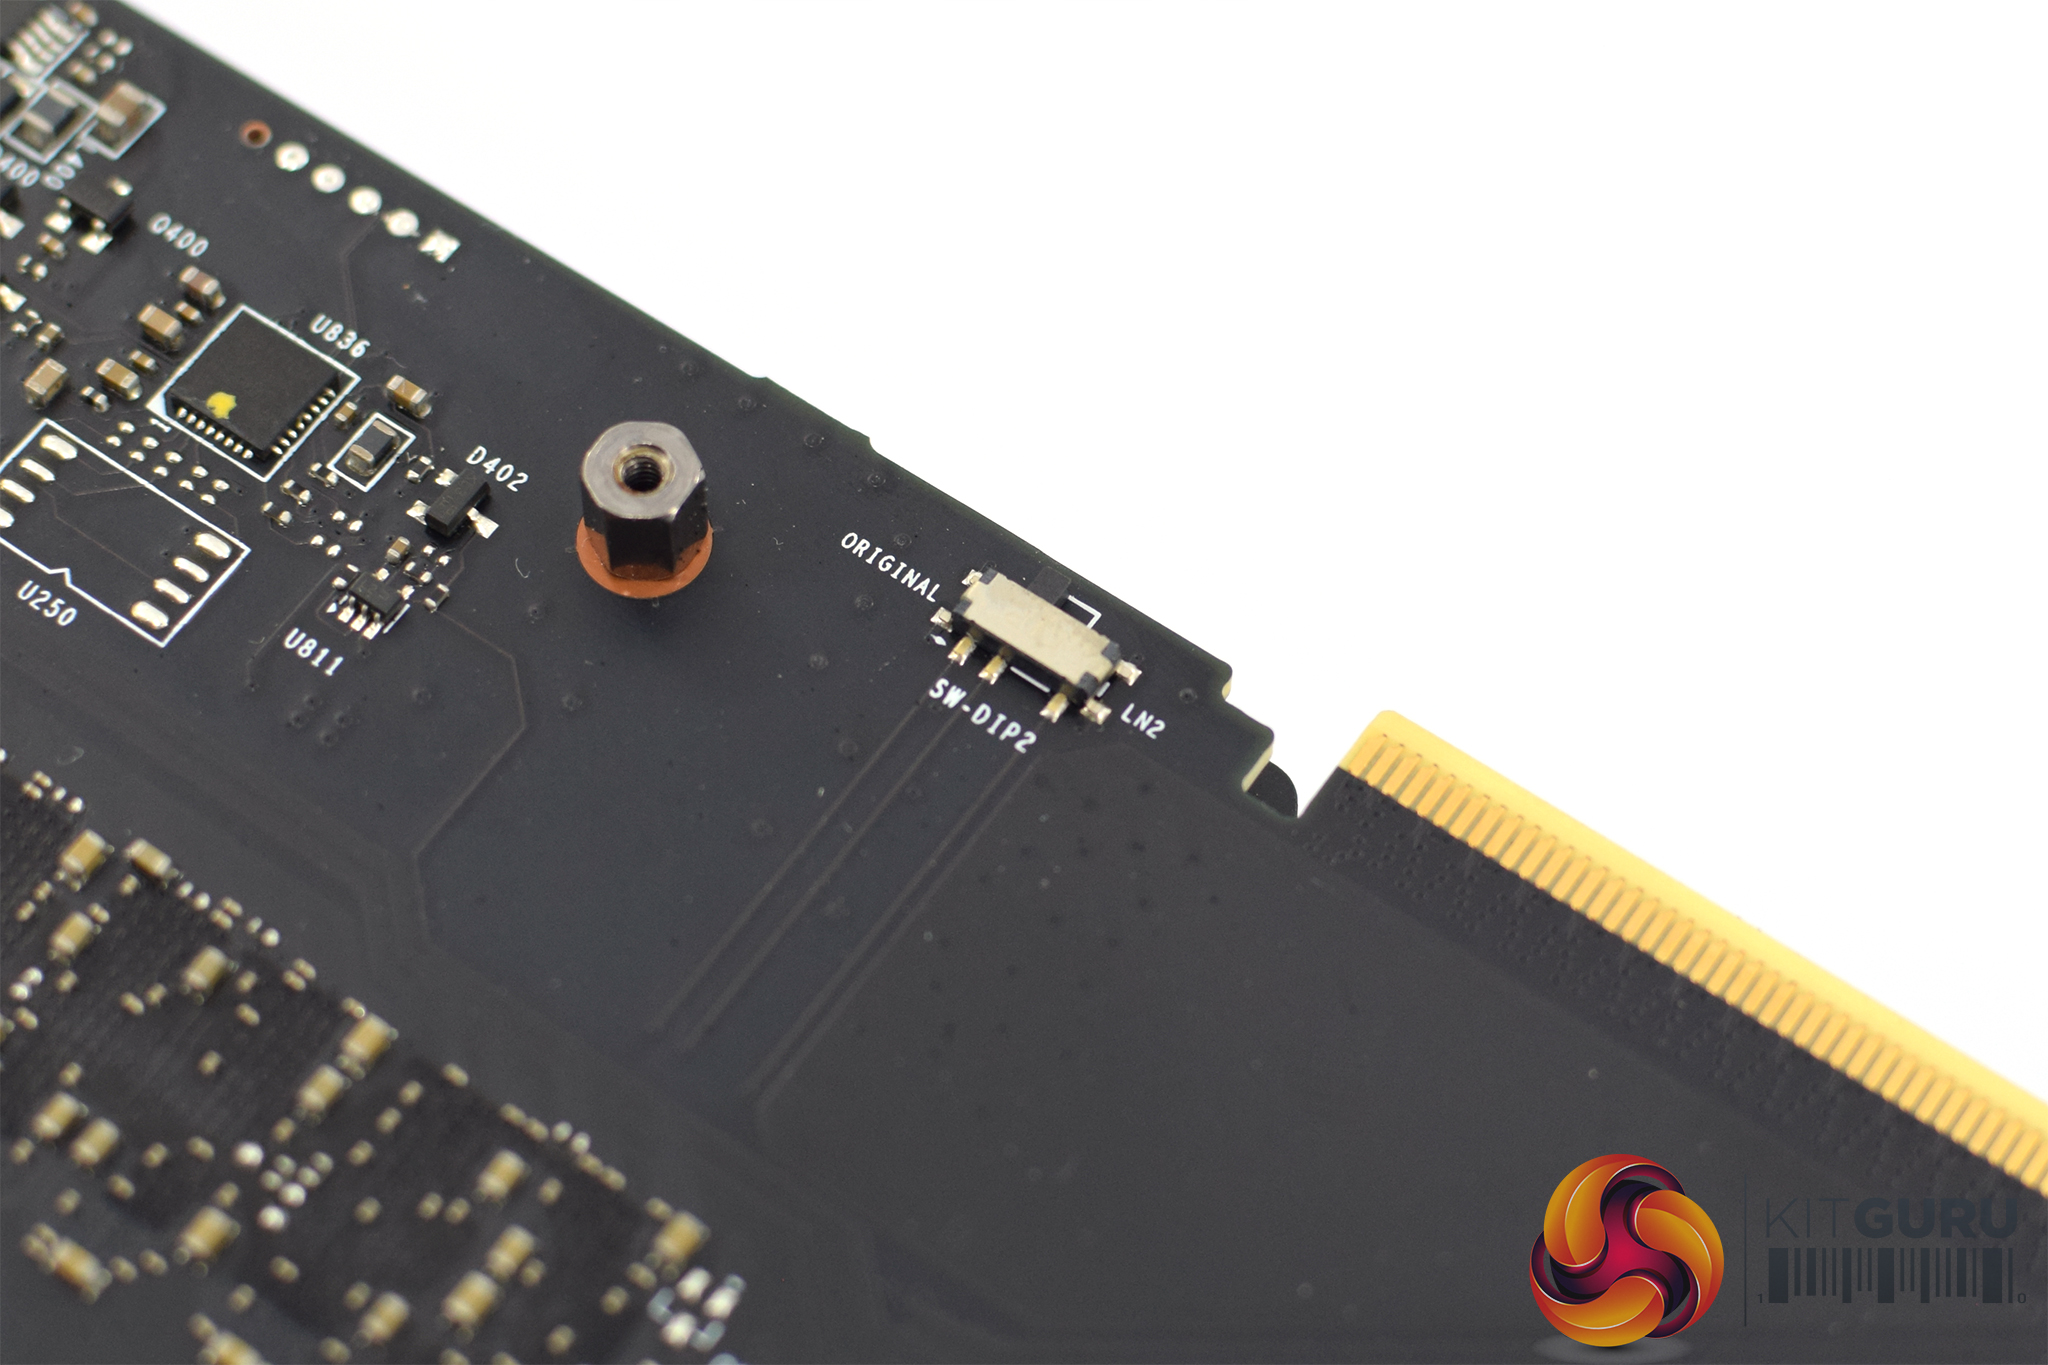
Lastly, on the top side of the PCB, just next to the NVLink connector, we find a dual-BIOS switch. One is the ‘original' BIOS which is selected by default, while the other is labelled ‘LN2'. This is the ‘hardcore overclocking' BIOS which bypasses power and thermal limits for use with liquid nitrogen – something I myself don't have experience with but this will certainly appeal to any serious enthusiasts out there.
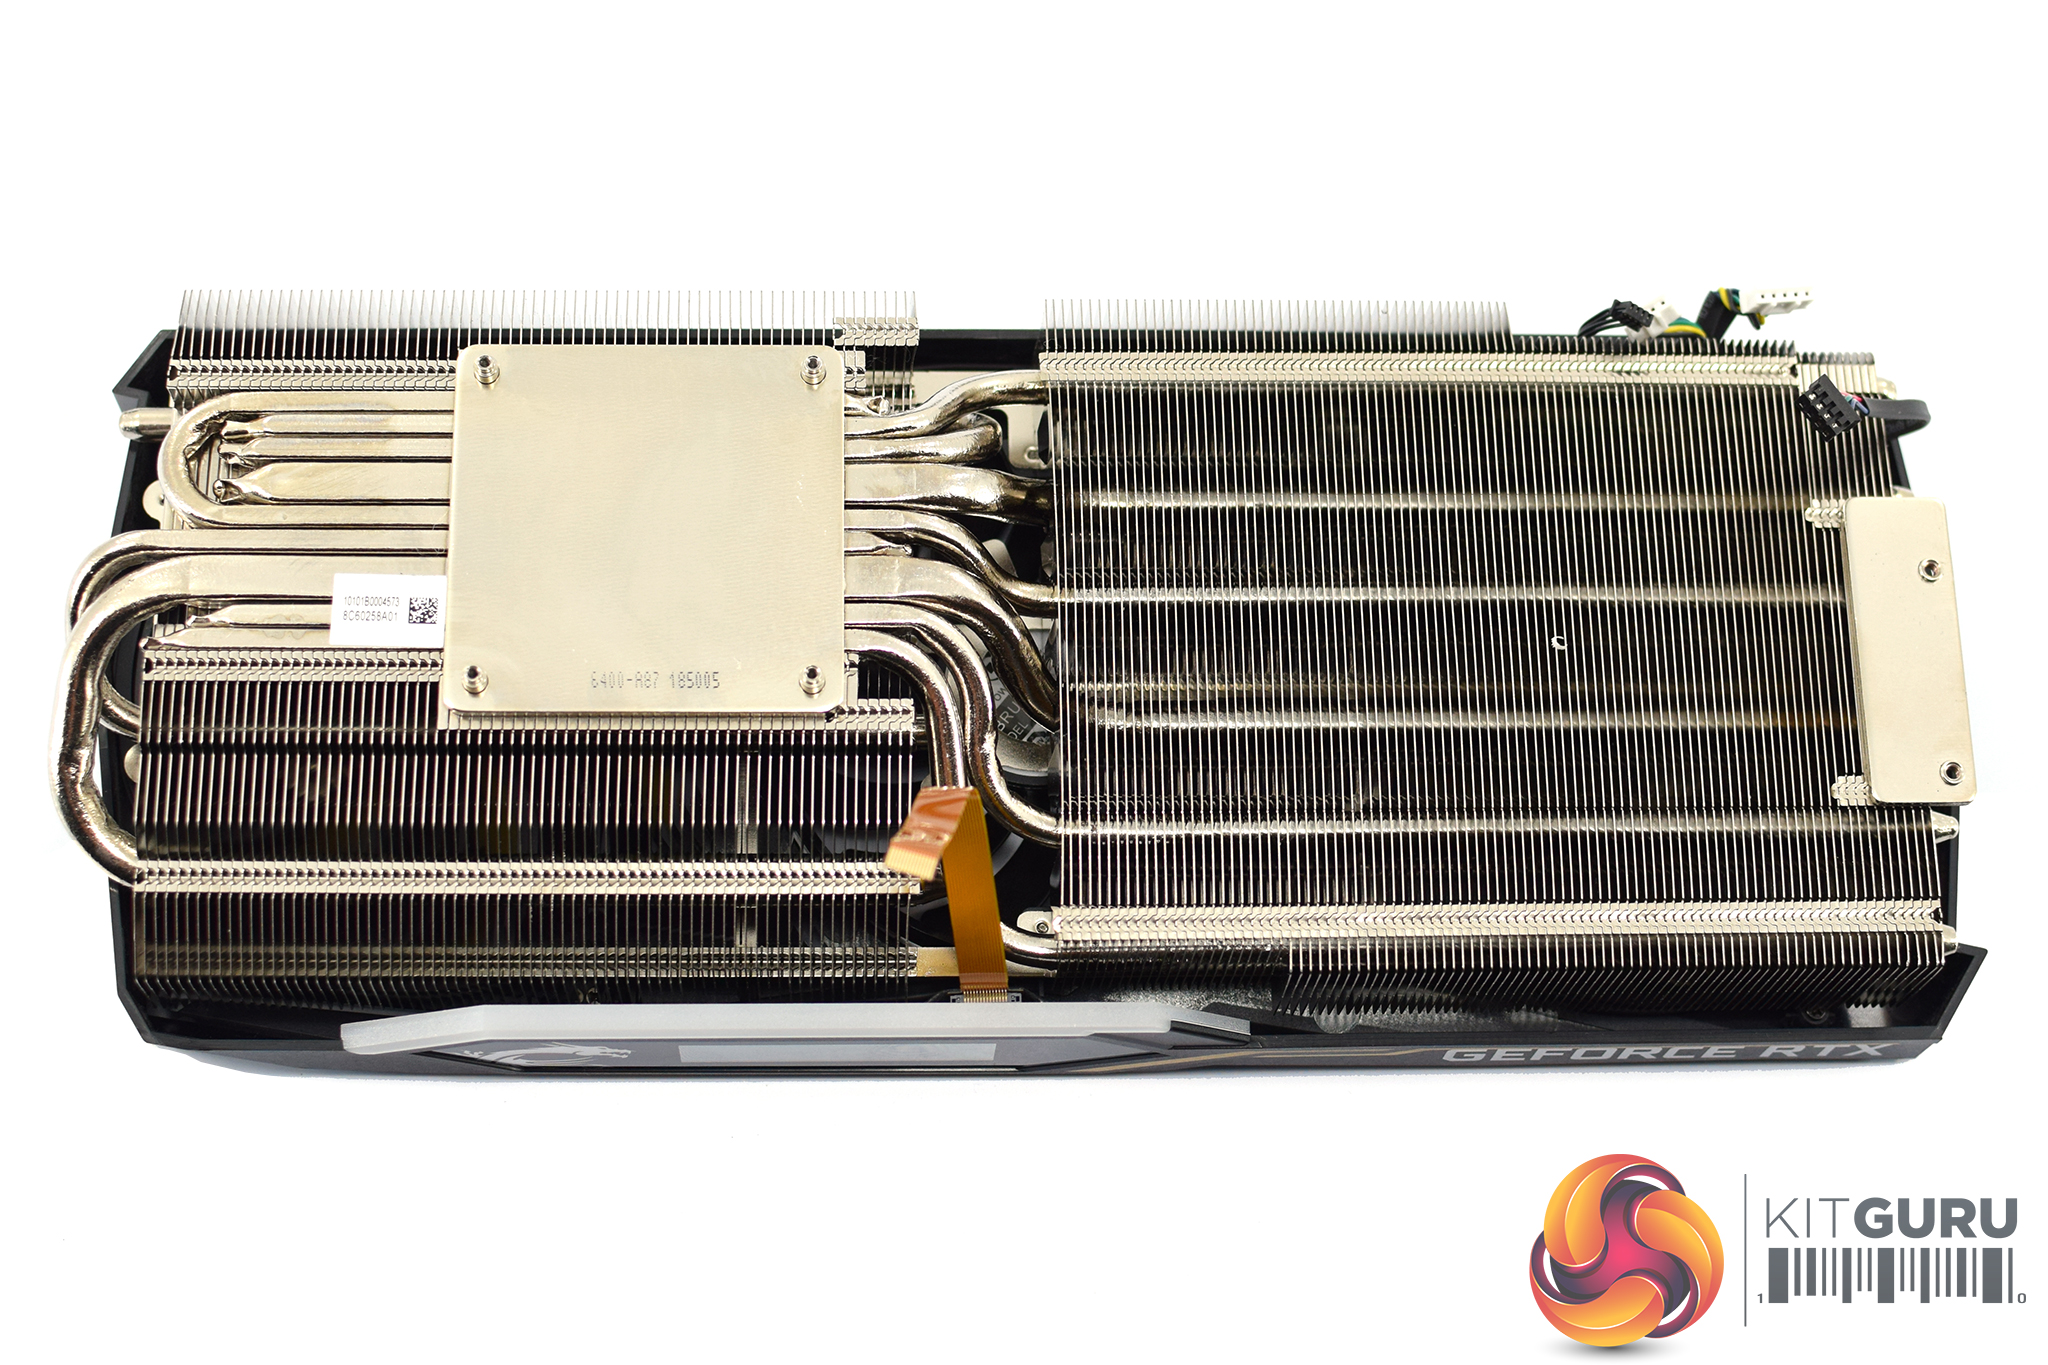
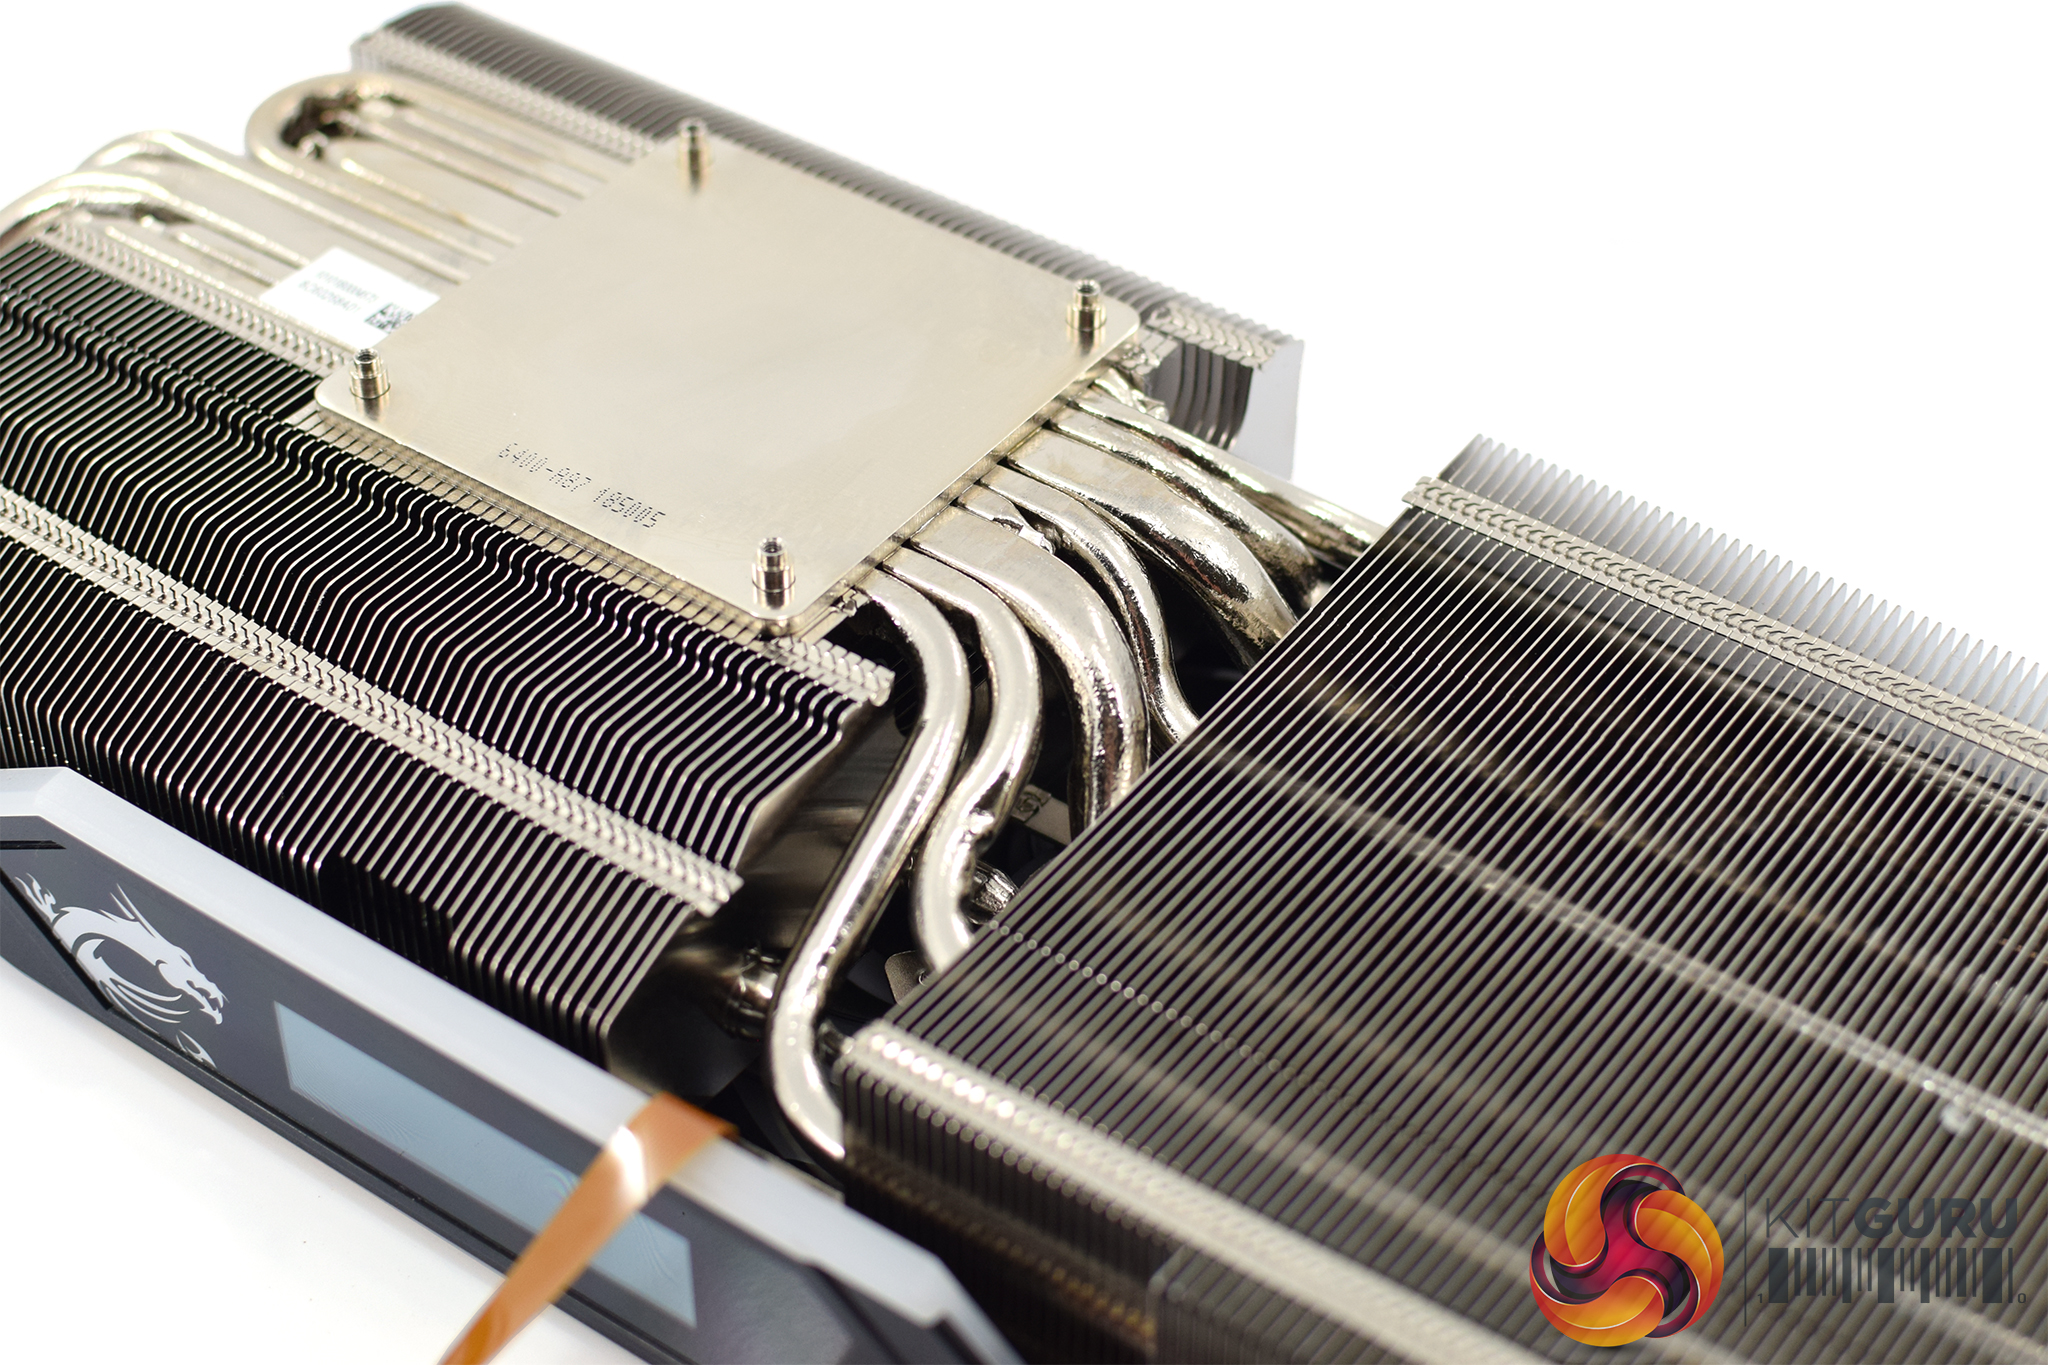
The very last thing to mention is the heatsink itself. Aside from its sheer size and heft, it utilises a total of 8 nickel-plated copper heatpipes. Two of these are 8mm in diameter, with the rest being 6mm units. The GPU die itself contacts with a coldplate, and MSI makes a point of its heatpipes being as concentrated as possible where the coldplate contacts with the GPU to aid thermal dissipation.
