


Like many of these products, if you are a completely inexperienced user then you will want to get help from a friend or family member who has at least some experience building and disassembling a system. We wouldn't say this was rocket science, but you need to have plenty of patience and at least a little grounding on graphics cards.

The first stage is to remove the reference cooler which only takes a complete of minutes. Not every card is held in place identically, so there may be some additional screws to remove to get the cooler away from the PCB. The first course of action should be to remove the thermal paste on the GPU core. The image above shows the ‘naked' GTX680 with the cooler removed.

Depending on the card you are using, there may be excessive left over materials on the GDDR5 memory. We strongly suggest you use an eraser to totally clean each of the memory surfaces. It only adds a few minutes to the build time and will ensure that the thermal glue adheres perfectly to each chip. There is no need to apply excessive pressure, just carefully clean the surfaces of all memory chips.


The next step is to install a layer of insulation tape over the circuit components close to the VRM's – this will negate any problem with short-circuiting (image above left – the area to protect highlighted in red. image above right – the clear protective tape in place).
I don't really feel there is any need for this protective tape if you are careful later when applying the heatsinks, but for the sake of being thorough in this review I will follow the ARCTIC instructions.


The next stage is to install three rubber pads over the base block of the card where the heat exchanger section will mount. This is to help stop vibration related audio emissions when the card is in operation and the liquid is pumping.


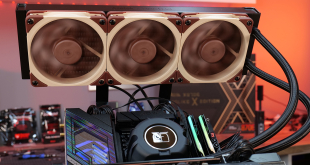
Above, the copper block heat exchanger head slotted into the cooler shroud.


The cabling should be run around this block as shown above, although I actually ignored this slightly and decided to apply my own routing. There isn't really a hard and fast rule here, the main concern is that the cable doesn't get tangled up in the cooling fan close by. I think ARCTIC overcomplicated this instruction phase a little, because as long as you apply a little common sense it is hard to go wrong here.


Four screws are needed to mount this block in place. Carefully line up the head with the four holes and bolt into place.

When this is in place, it should look like the above. This can take a few minutes, but if you are unsure just re-read the detailed guide and take some time.

This phase of the install may be a little confusing, so we will try to clarify. The Accelero Hybrid has basically ‘three lanes' for the liquid intake and out take cooling tubes. On the GTX680, the ‘outer' two lanes must be used. When the cooler is mounted later, this gives enough physical space underneath for the board components. It also ensures that the tubes can run past the PCI power connectors without issue.

As shown above, ARCTIC include black and white diagrams explaining this, however above we have highlighted the three ‘lanes' with red arrows. The two lanes to the right, outer part of the cooler must be used for the GTX680, leaving the inside lane (with the brighter red arrow in our photograph), free.


When these are in position, they are held in place with screws and a broad metal plate.

Above, both plates and screws holding the tubes securely in place. This means they can't slip out of the support lanes, subsequently causing issues later in the build. These mounting plates are also designed to not compress the tubes, reducing liquid flow.

We then attach the header cables together so the pump can get power later. There is a locking position for this cable header built into the plastic shroud.

On the other side of the card is a header plug, this is used to power the radiator fan. Just check everything is in the right place, but more on this later however.
Thats a great piece of engineering from ARCTIC. quite expensive, my last video card cost that.
I was wondering when these would come out for GPU’s. Looks like a decent bit of kit. For a little more money however, I’d go for an EK H30 Supreme 240 and an EK 680 block for even better performance and only £20 more.
You should’ve done some overclocking tests.
that was the plan, however it ended up rather dull as the overclocking headroom was limited to the gpu core on this specific card, not the cooler. And the temperature variable between reference and hybrid didn’t change. (still 30c+)
So the signature 2 by evga which is a dual fan solution stock clocked @ Core Clock: 1097MHz, Boost Clock: 1163MHz only costs $519 is a better choice in my opinion.
Hi Godrilla. absolutely, but we wanted a reference card with reference cooler this time. We used an ASUS GTX680 Direct CU II TOP for the last Accelero review and a few readers said that people aren’t likely to buy a overclocked card with enhanced cooler which costs extra, just to remove the cooler and use a third party cooling system like this.
This time we opted for a basic GTX680 to note the possible improvements from the Accelero Hybrid.
SLI ? Is this a 2 or 3 Slot sollution ?
Sli would he possible if your case can handle the two radiator positions.
Nice review, thanks guys. A very steep price though, especially when you can easily mod a CPU closed-loop cooler such as the Kuhler 620 onto a card. Much cheaper, at about £45.
Good rig, but pricey. I will look for cheaper item instead.
Will this cooler work with a GTX 680 SC with a backplate on it or will the backplate interfere with it?
Question:
Will This Work On ASUS 680 OC? [DC2O]
Some users say that Asus TOP & OC models cant use the hybrid.
Is this true?
Any clue if this would work to make a ASUS Direct CUII 2GB triple slot card fit in the two available slots on the Bitfenix Prodigy? I really want to use this cooler if it will fit in the two two slots available but I can’t seem to find any answers if there’s any overhang into a third slot. Seeing as the Prodigy doesn’t have a third slot available to overhang into this would be a potential issue. If it stays within the two slots available I’ll probably buy it for my GPU even if i have to mod the heat sinks a bit to make them fit. If someone could answer back that’d be awesome!