Unlike some menu systems, with the PA34VC, apart from the power button, the other buttons and joystick don't initially have different functions.
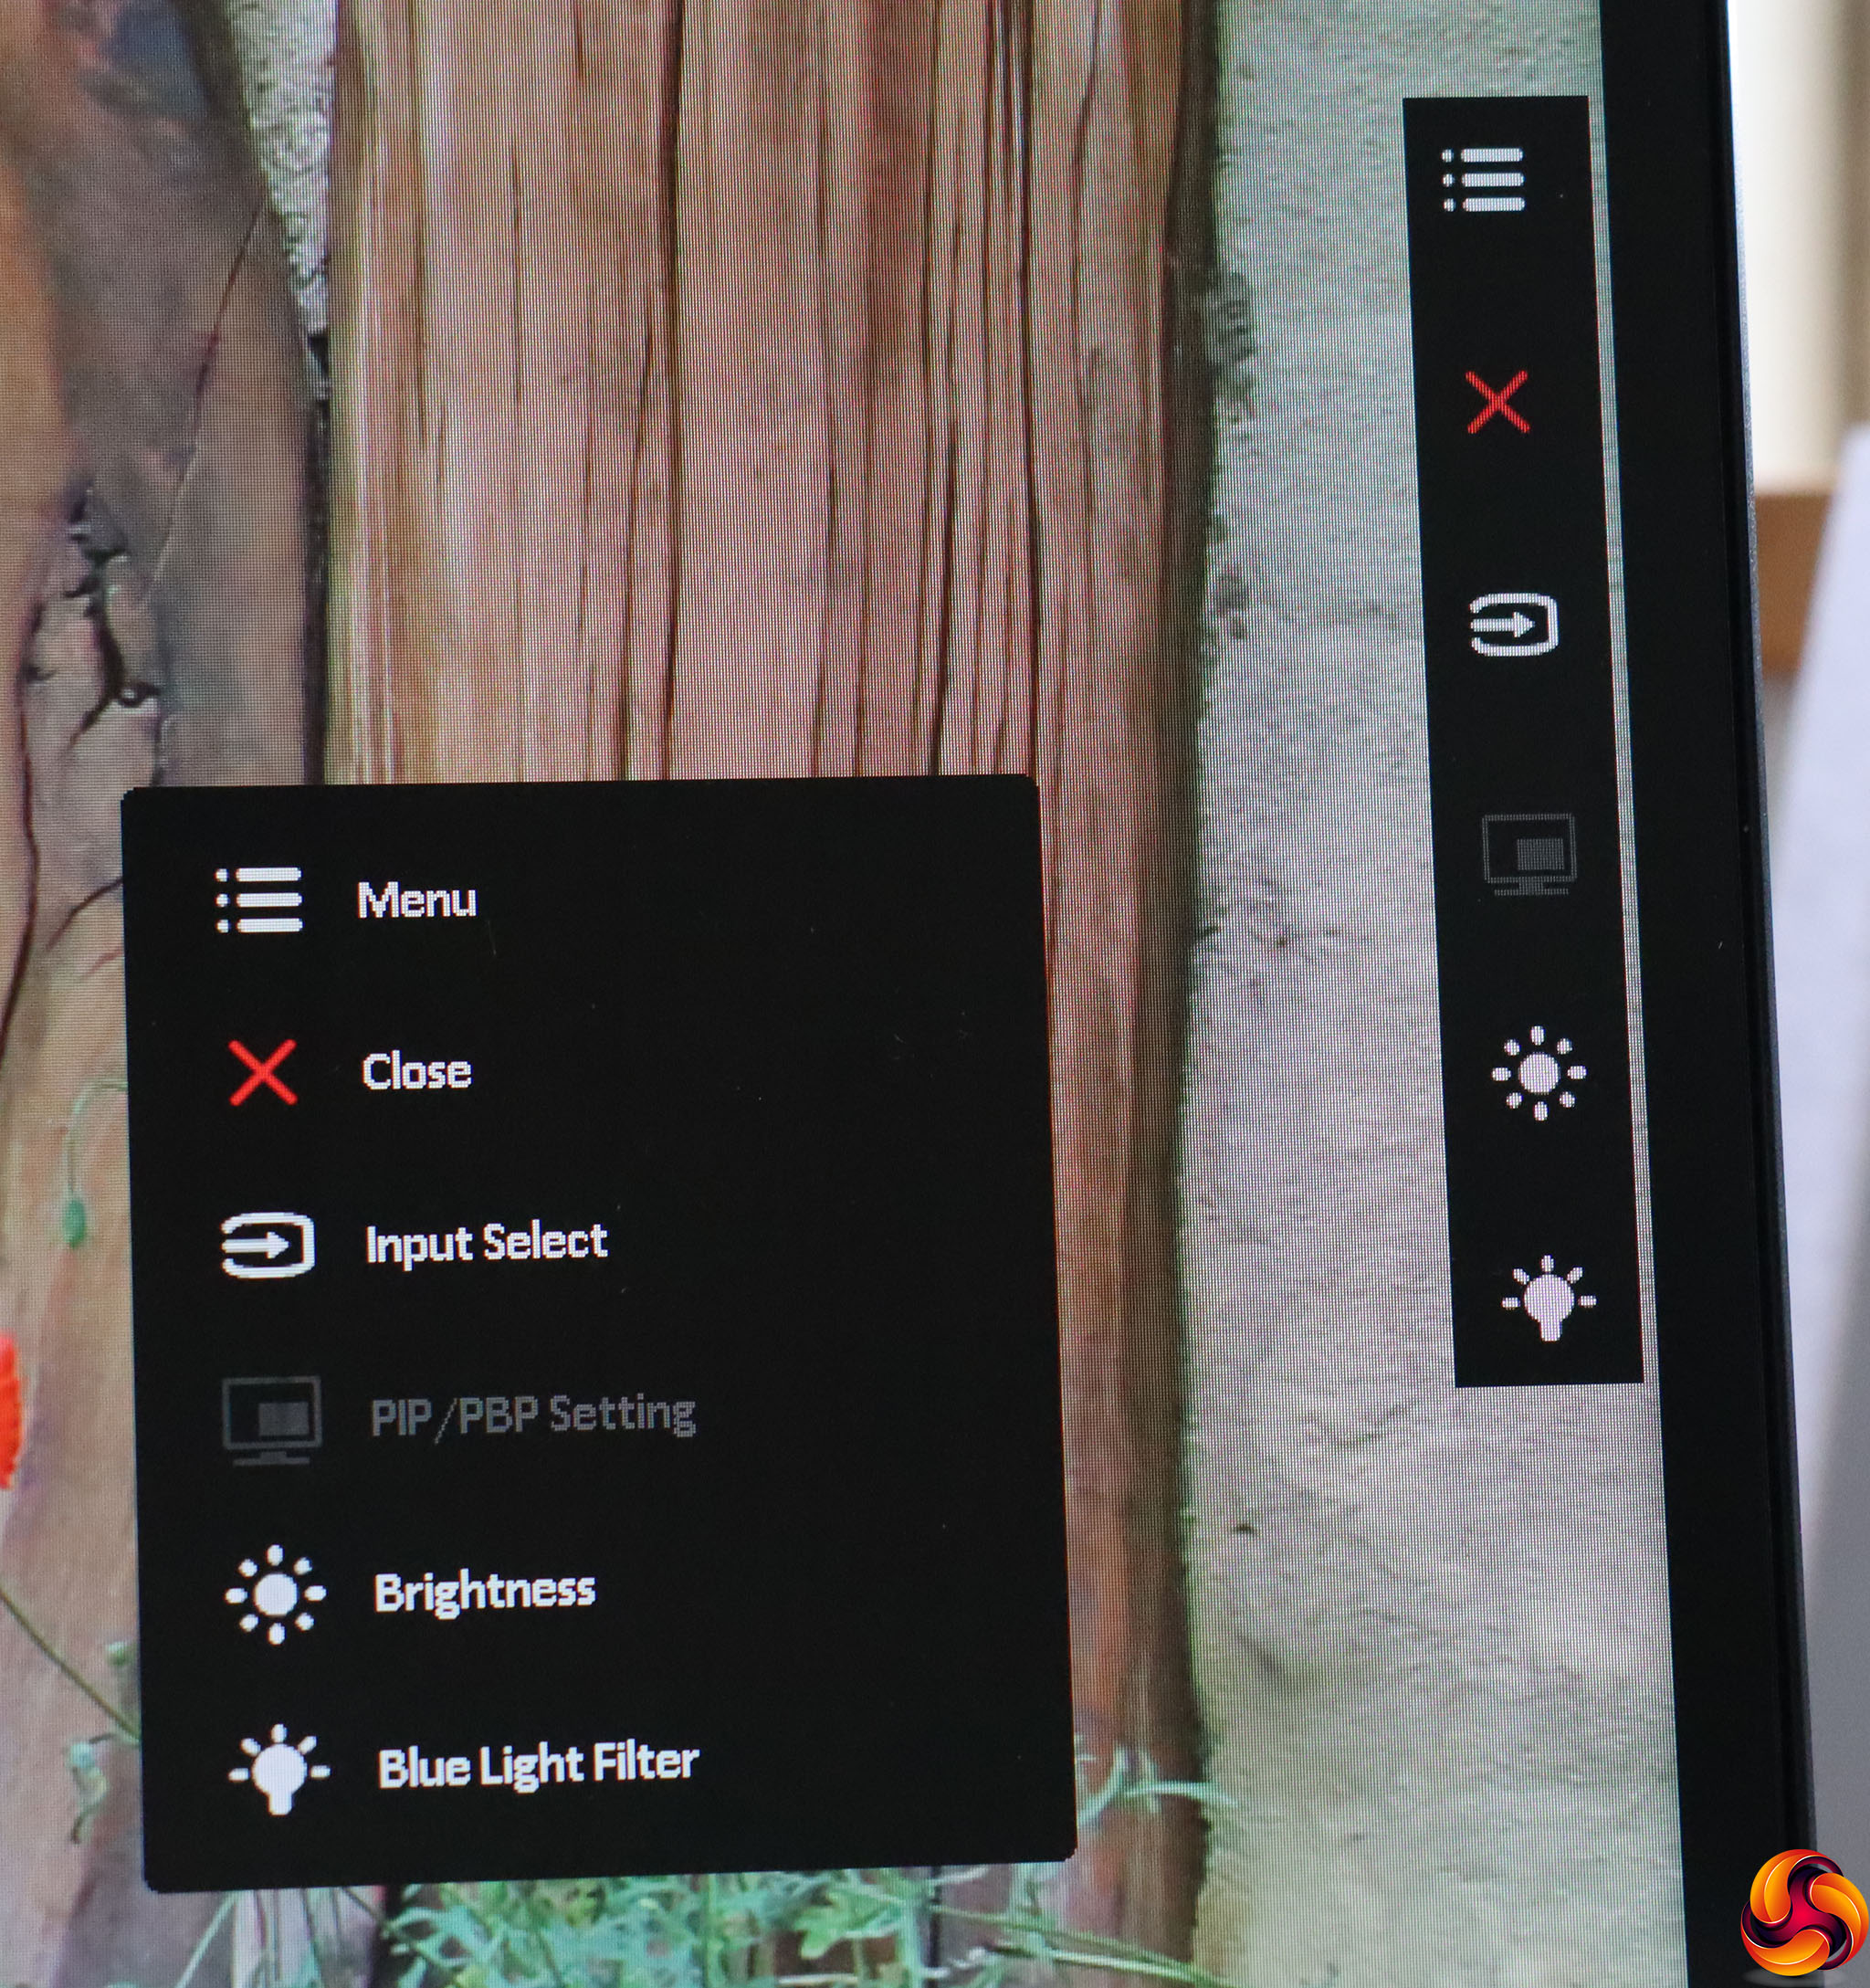
Press any one of them and you get the above, showing you what each one does. Pressing the joystick will get you to the main menu, of which more later, and the button just below the joystick closes the current menu.
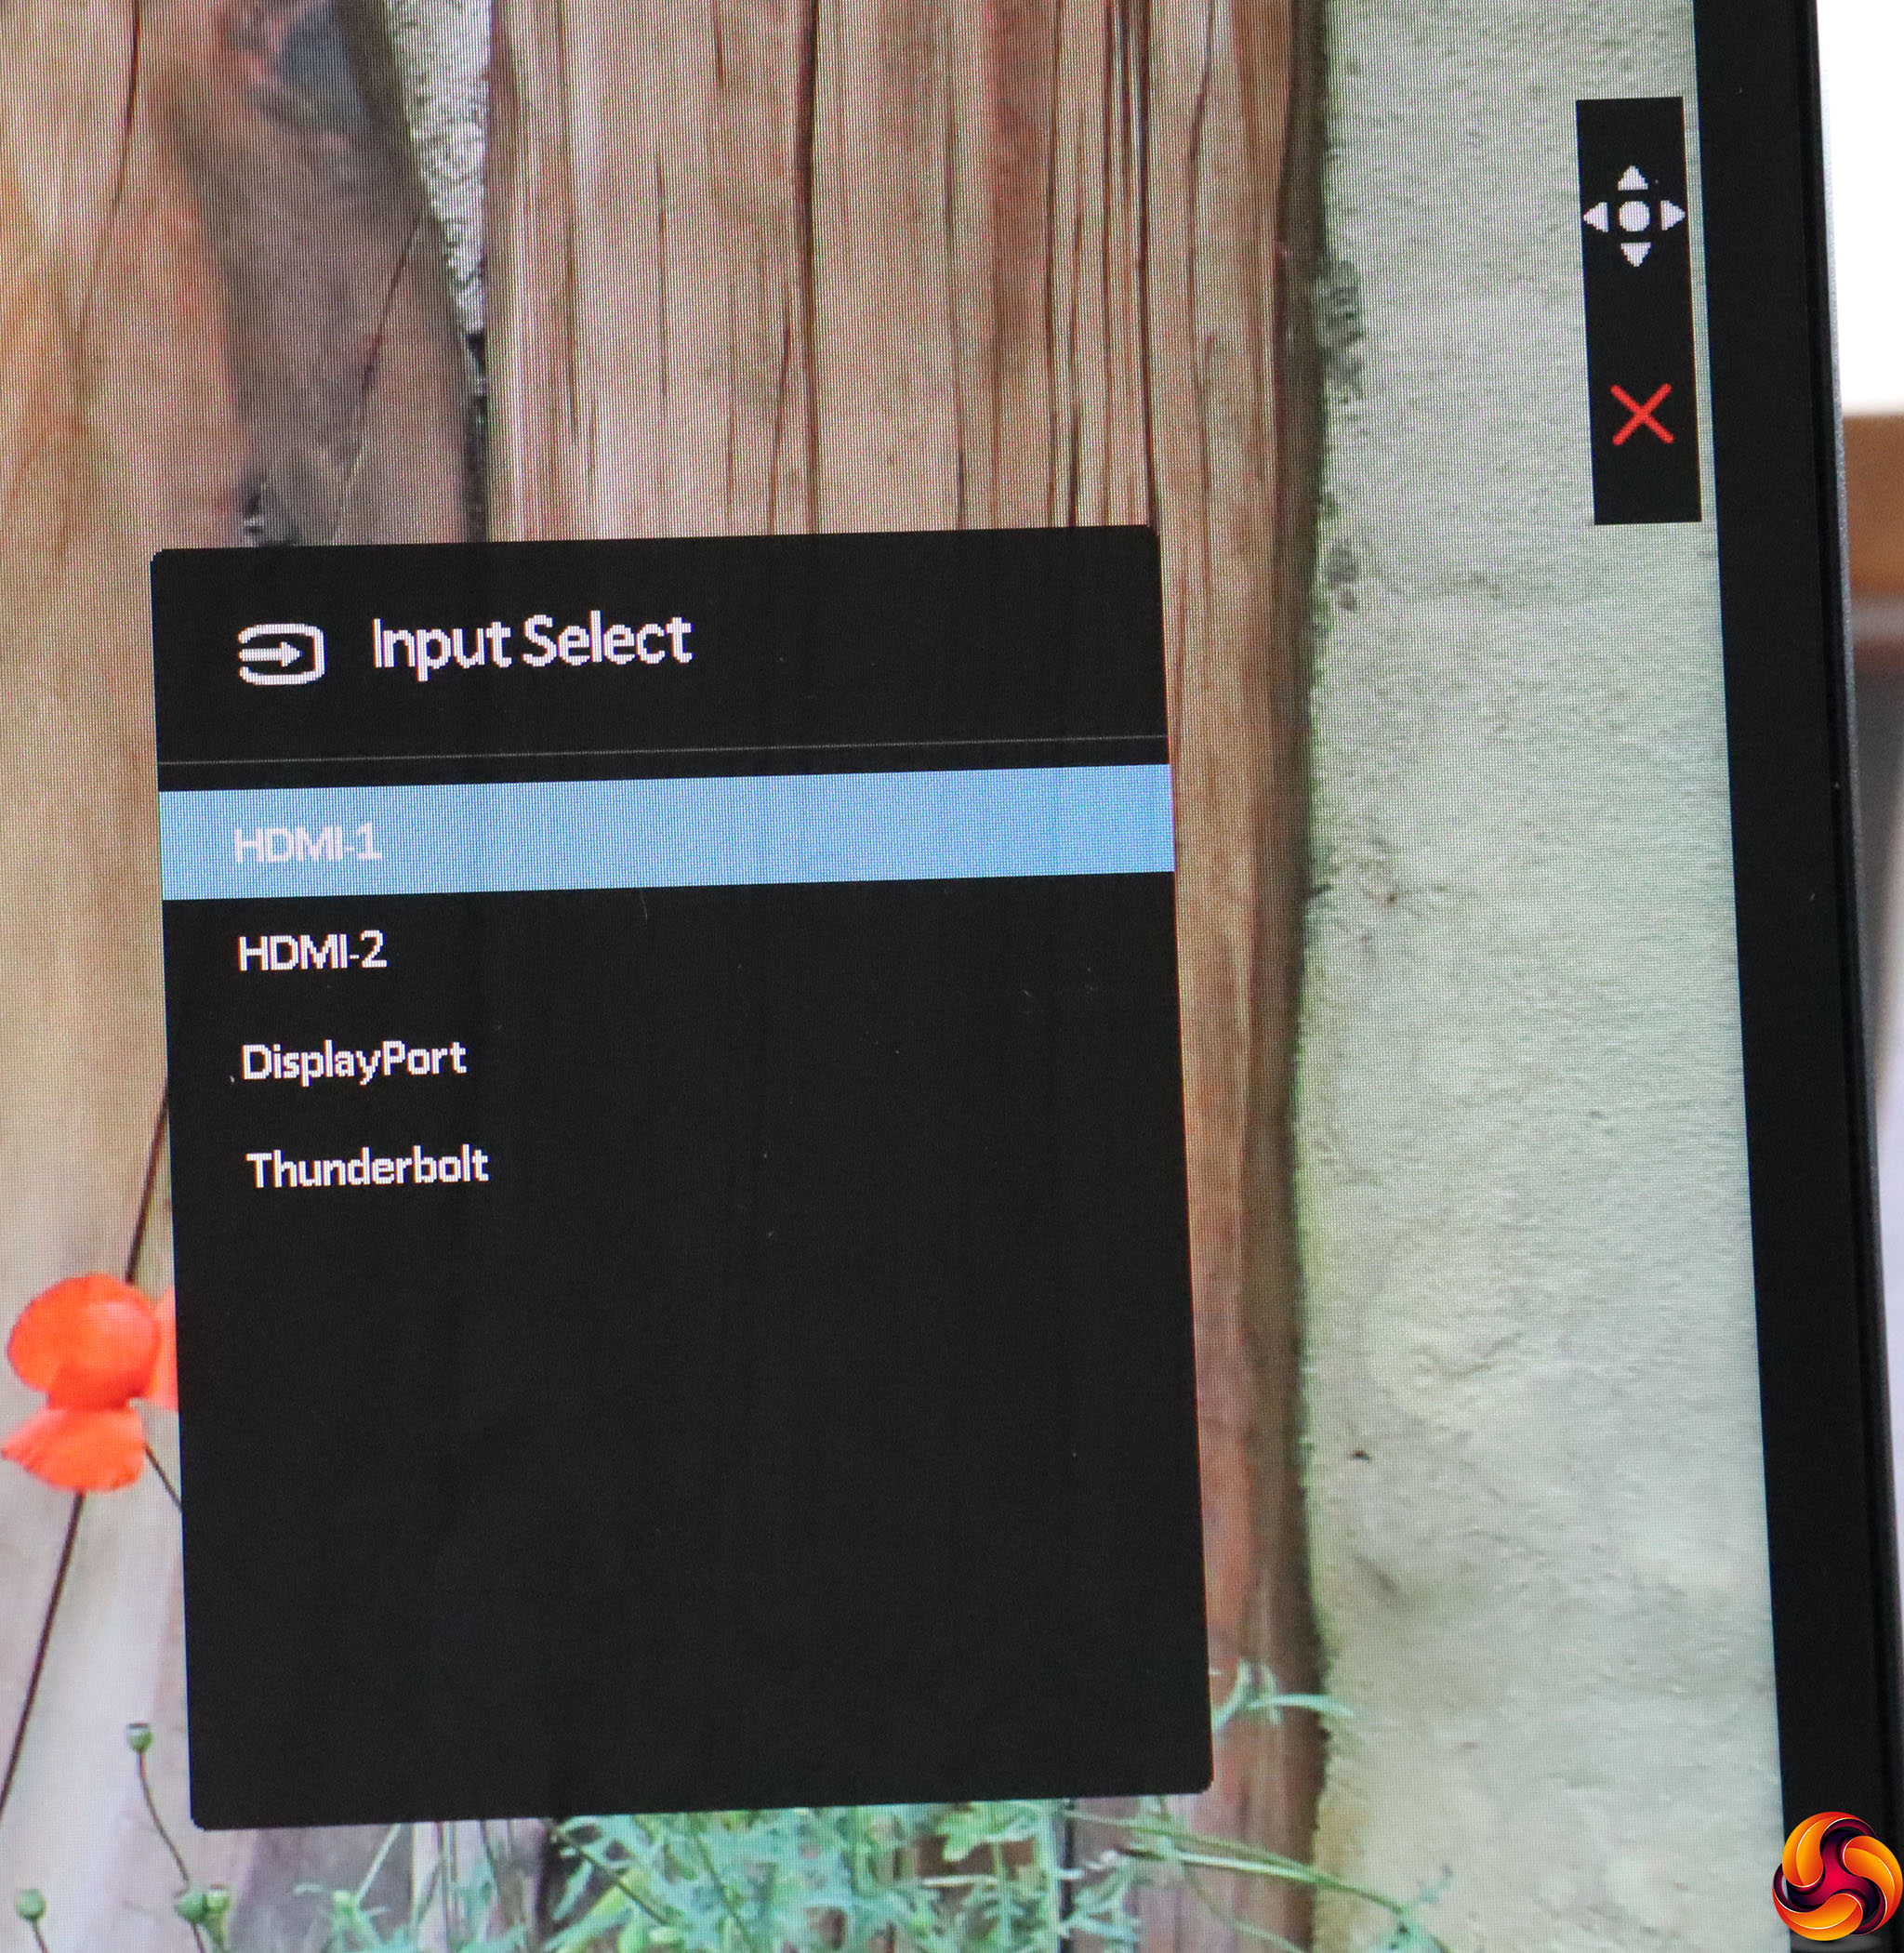
The second button down from the joystick calls up an input menu, so you can manually select which video signal to display on the screen.
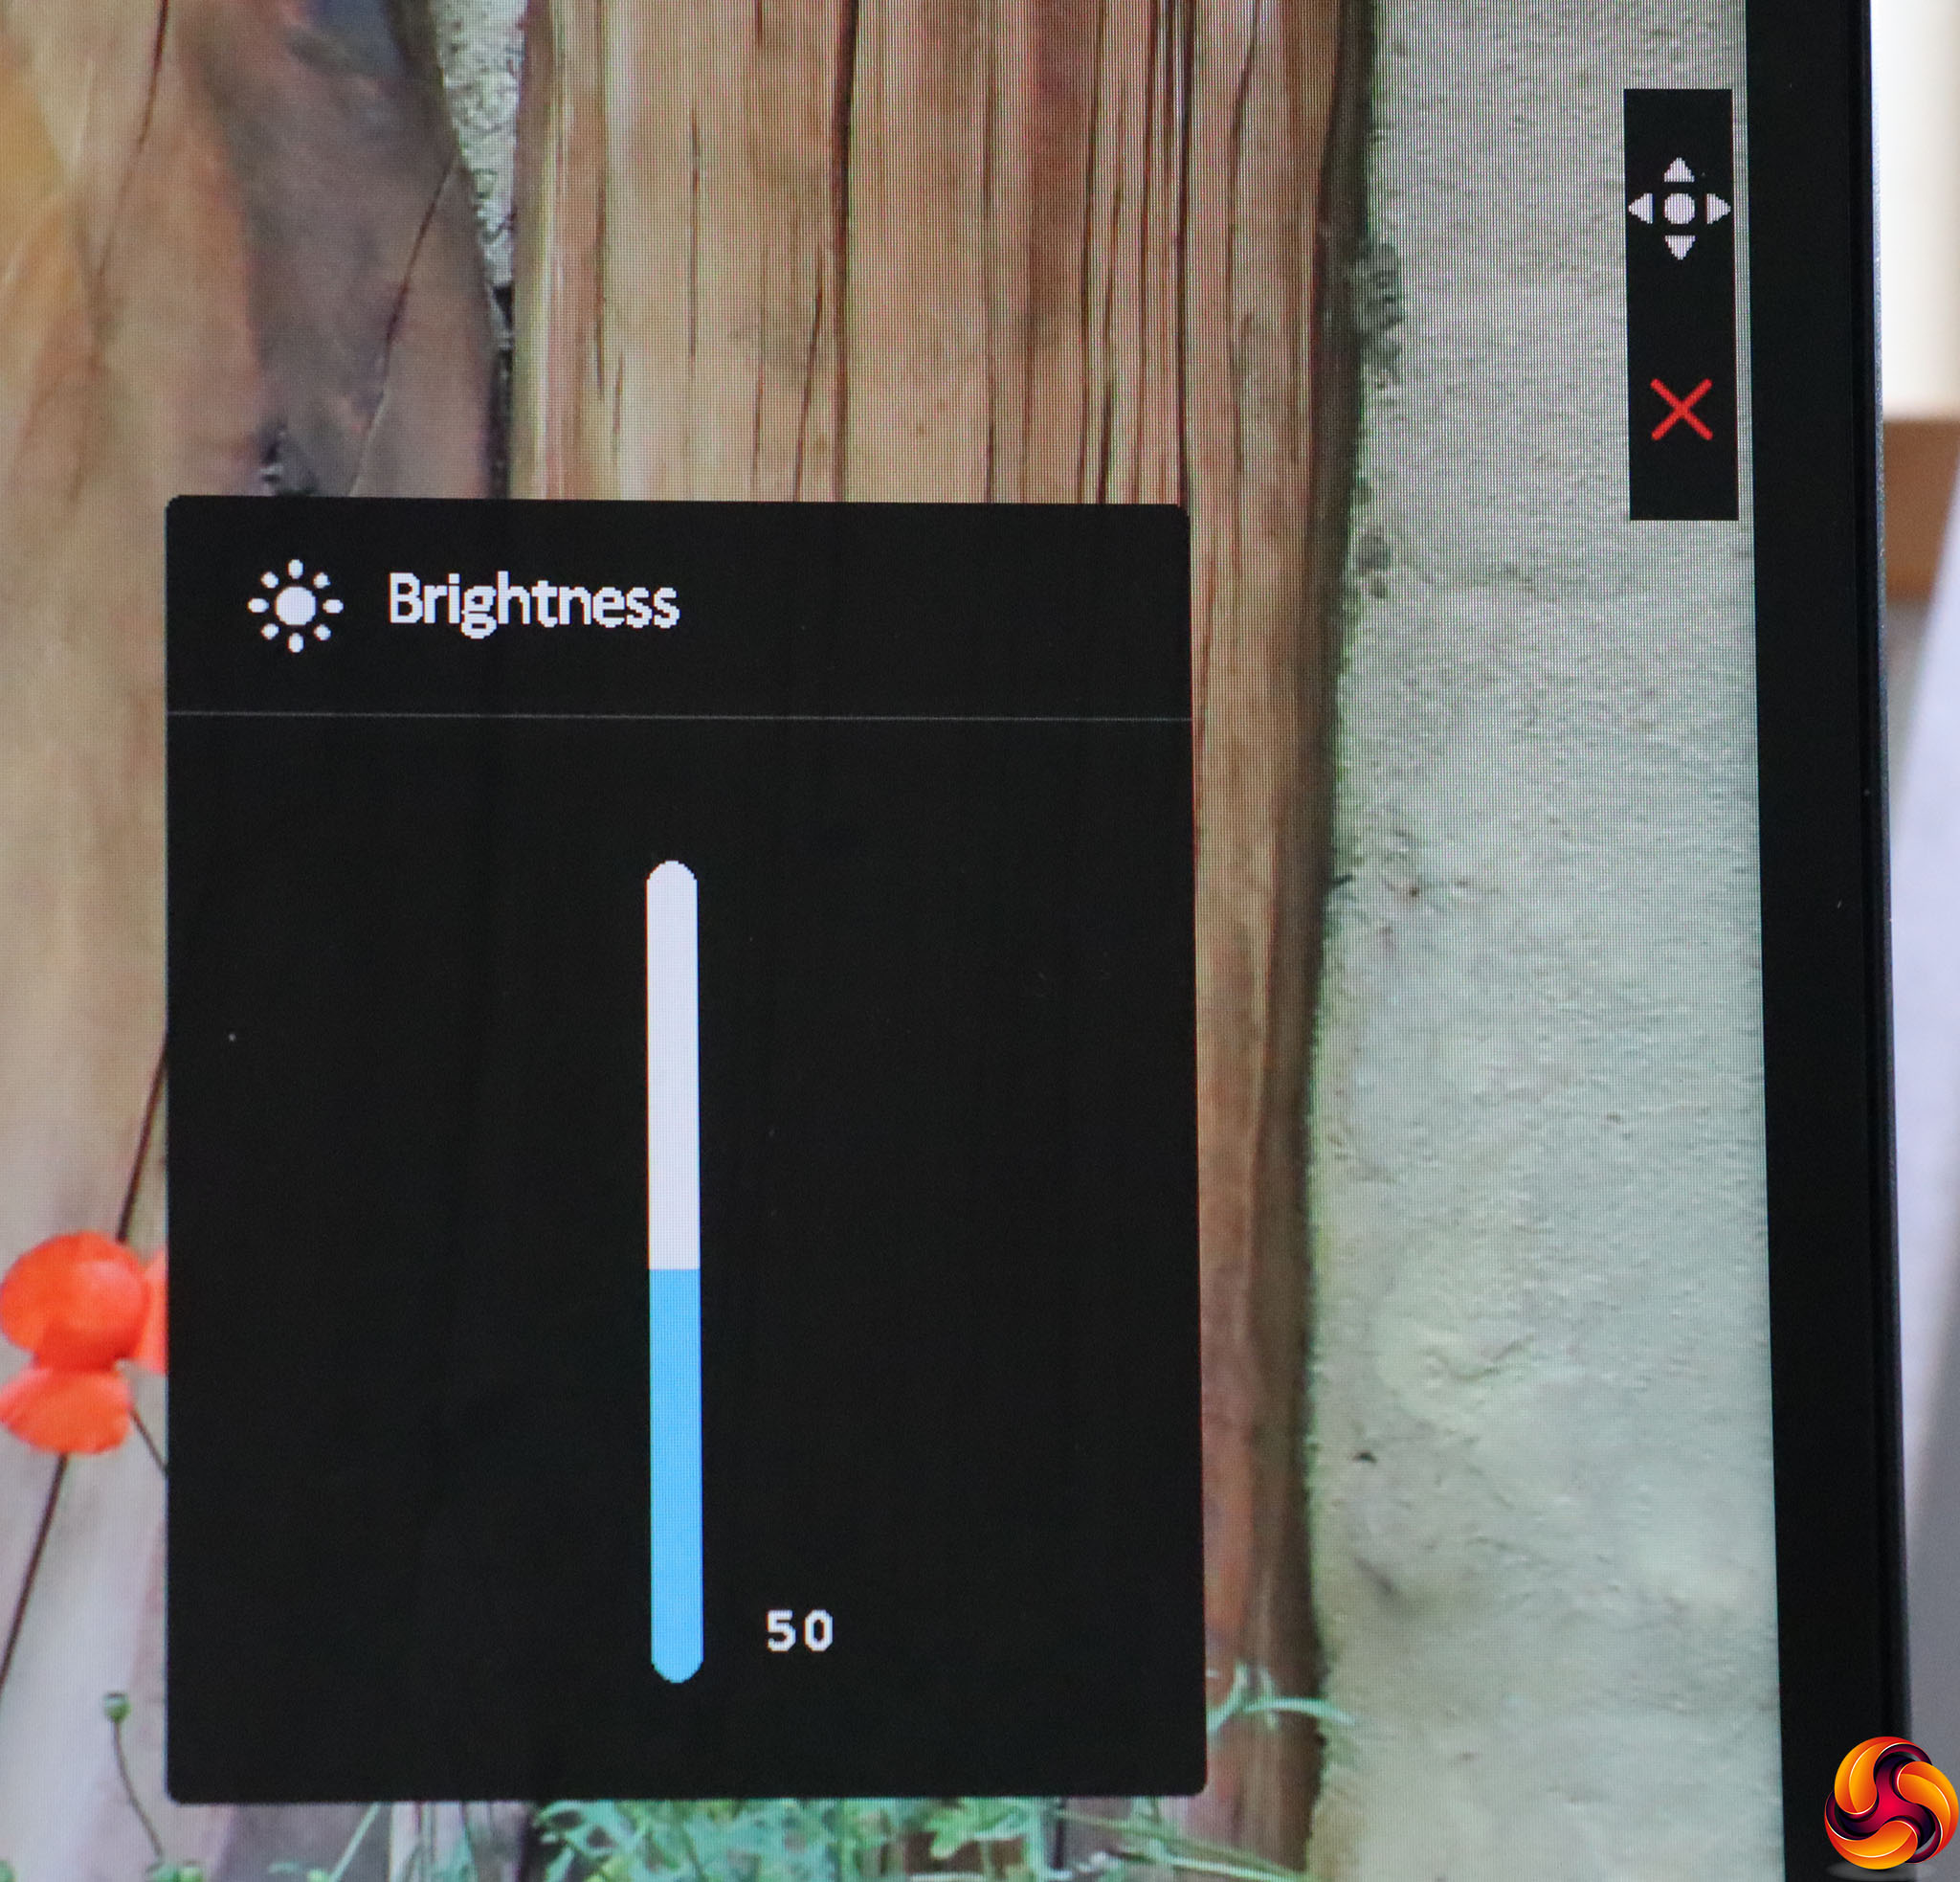
The third button down is for picture-in-picture and picture-by-picture, so is only enabled when you have multiple video inputs, which we didn't. So we shall move onto the fourth button, which by default provides rapid access to the brightness control.
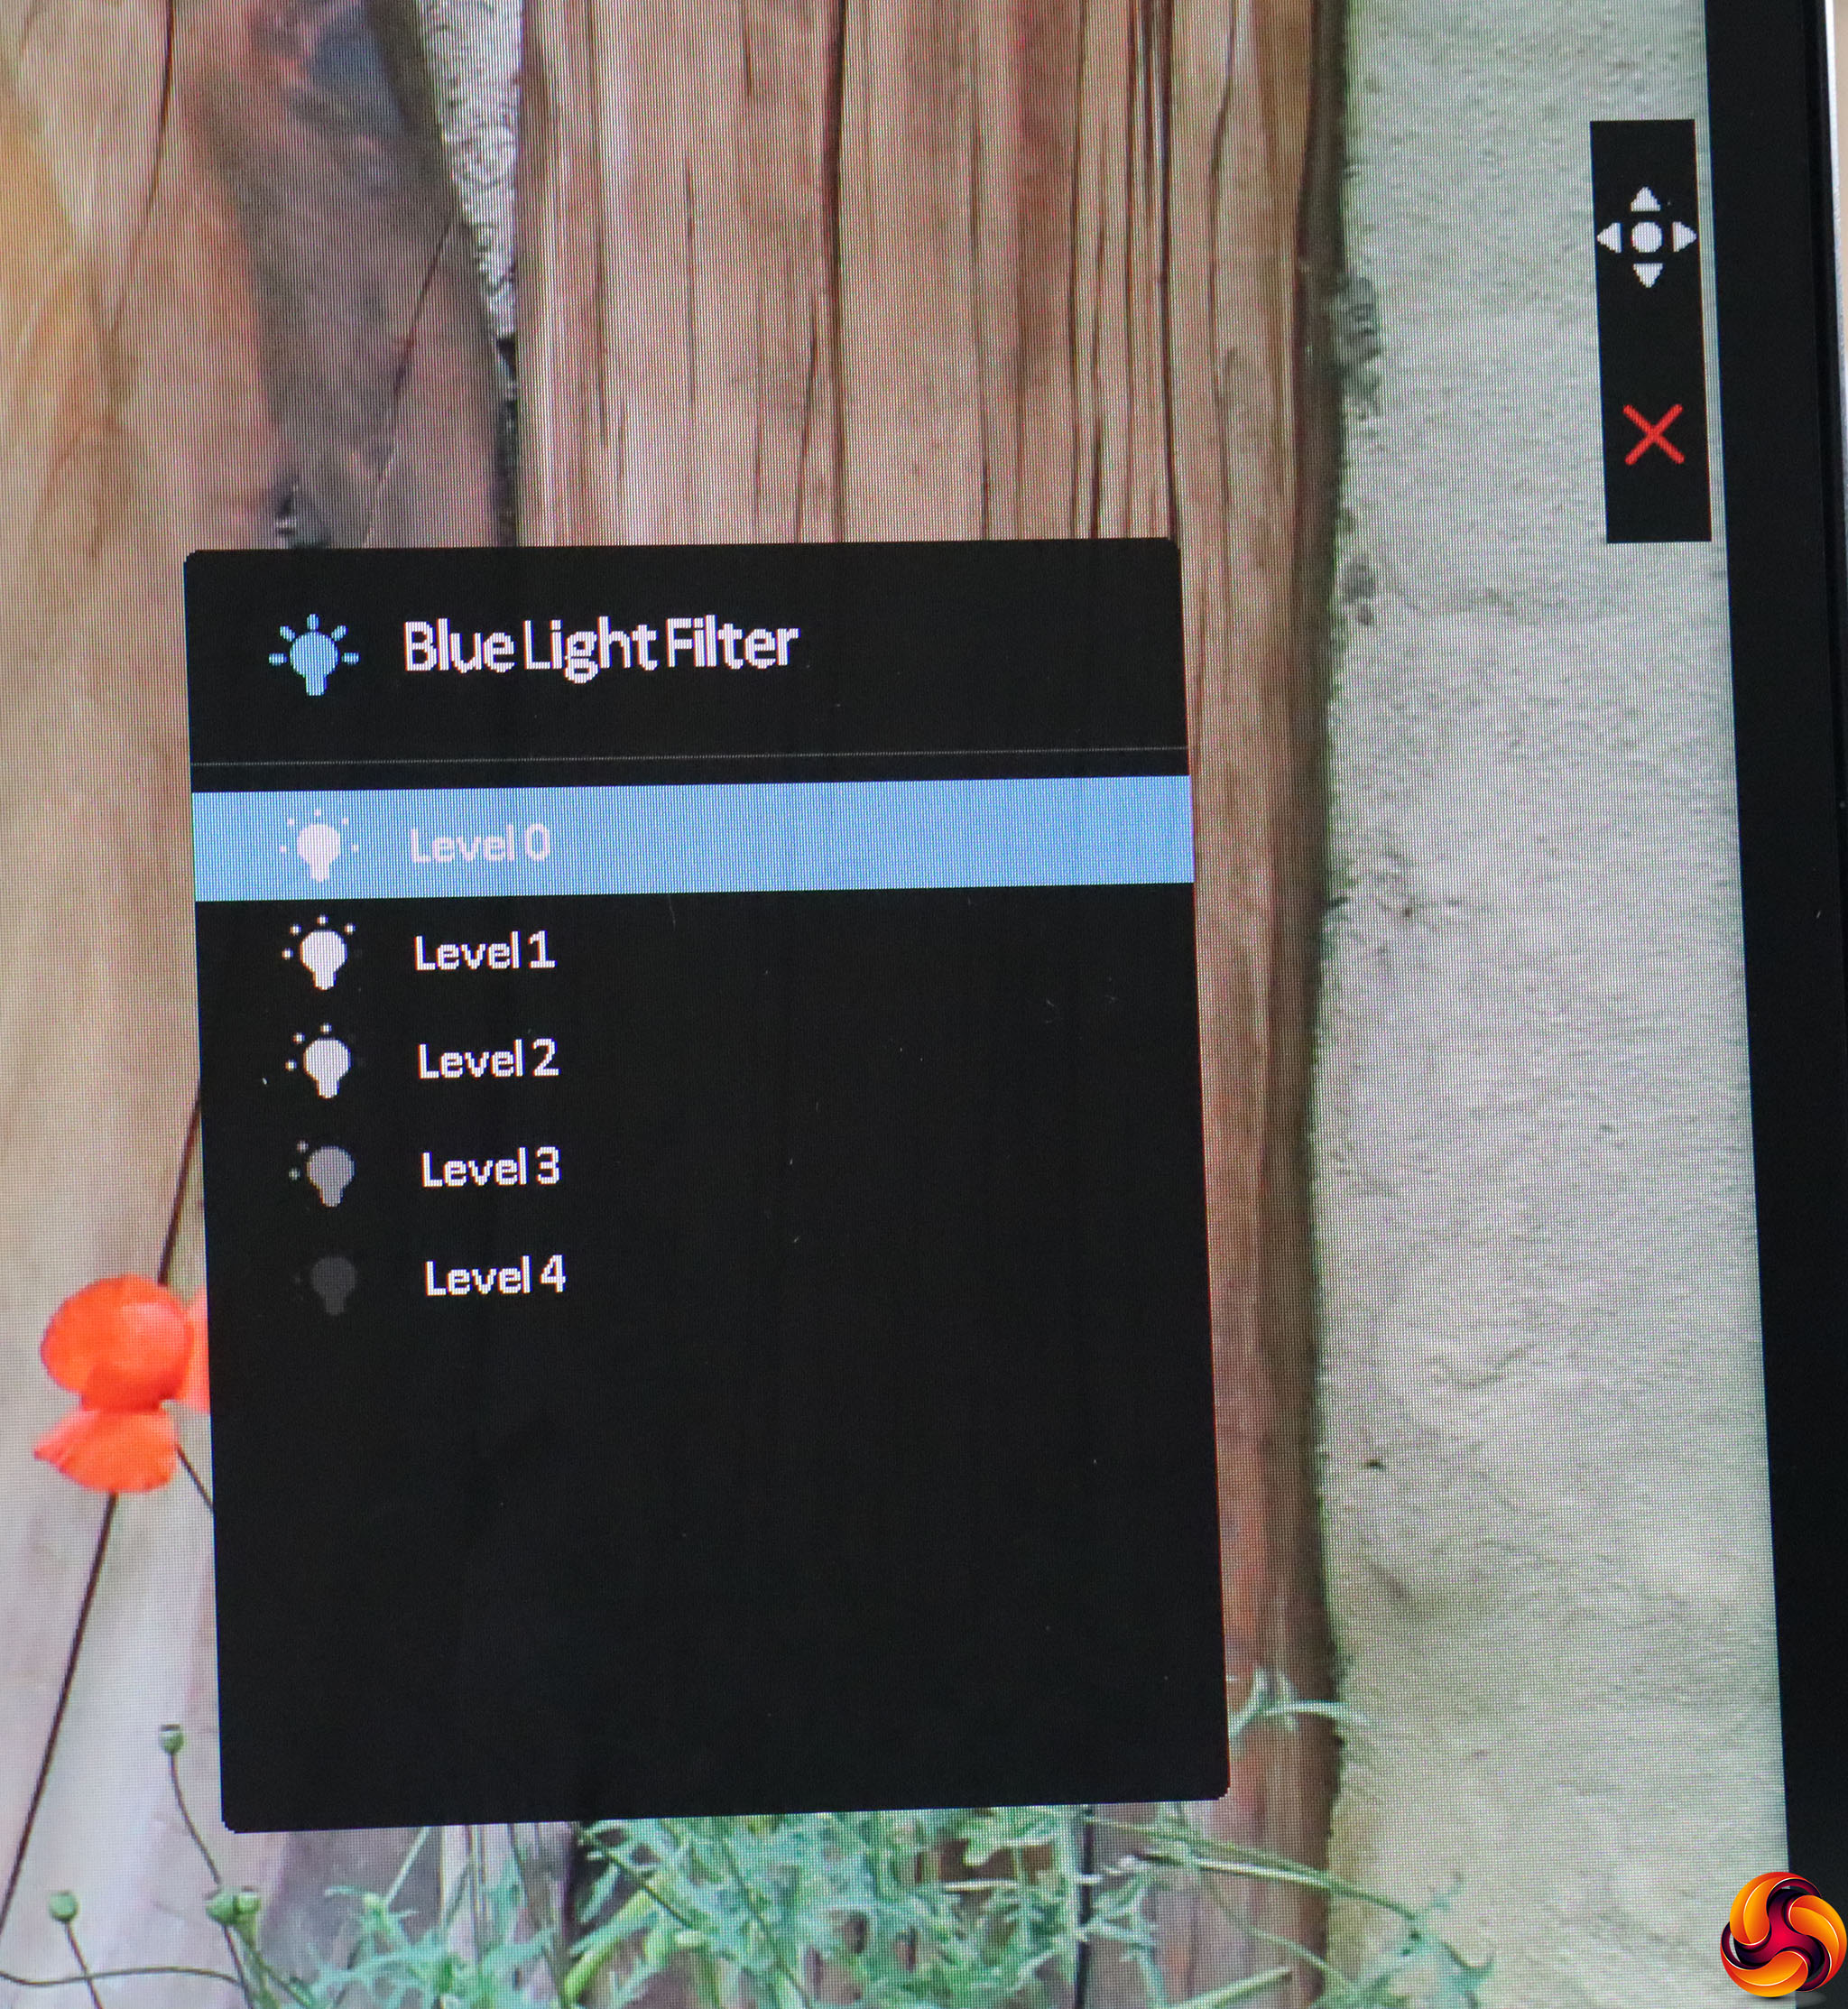
The fifth button down lets you turn on the Blue Light Filter, which has four levels of intensity. This is intended to reduce eyestrain from staring at a screen for too long.
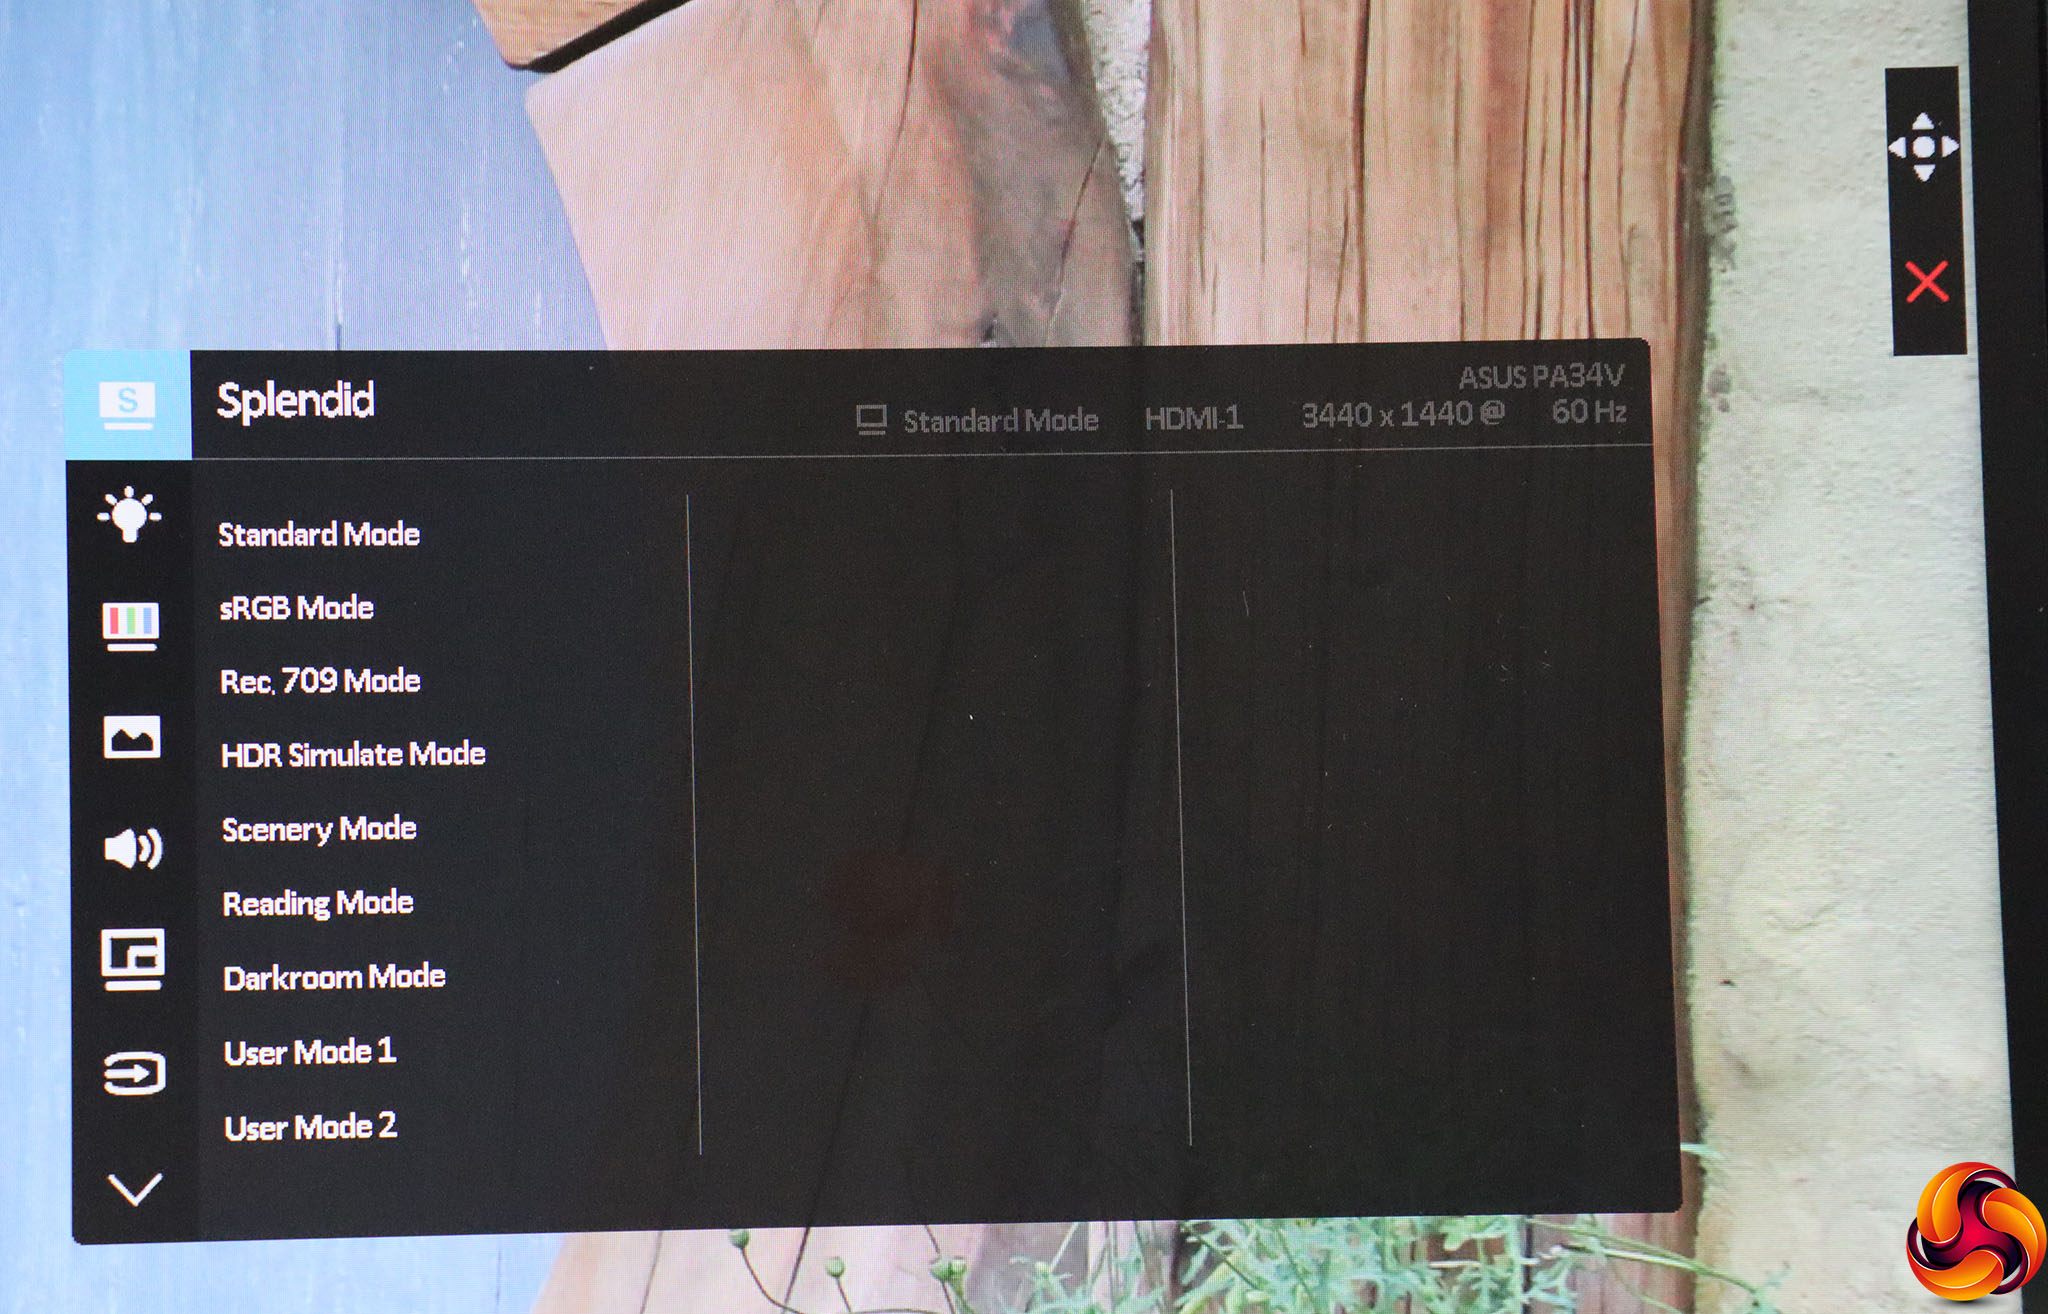
But if you want to get to the more detailed options, you have to press the joystick (or press it again if that was how you called up the quick menu system). The default submenu that appears is host to the Splendid modes, which are ASUS' presets. These include the default Standard option, plus sRGB, Rec. 709, HDR Simulate, Scenery, Reading, Darkroom, and two user-configurable options.
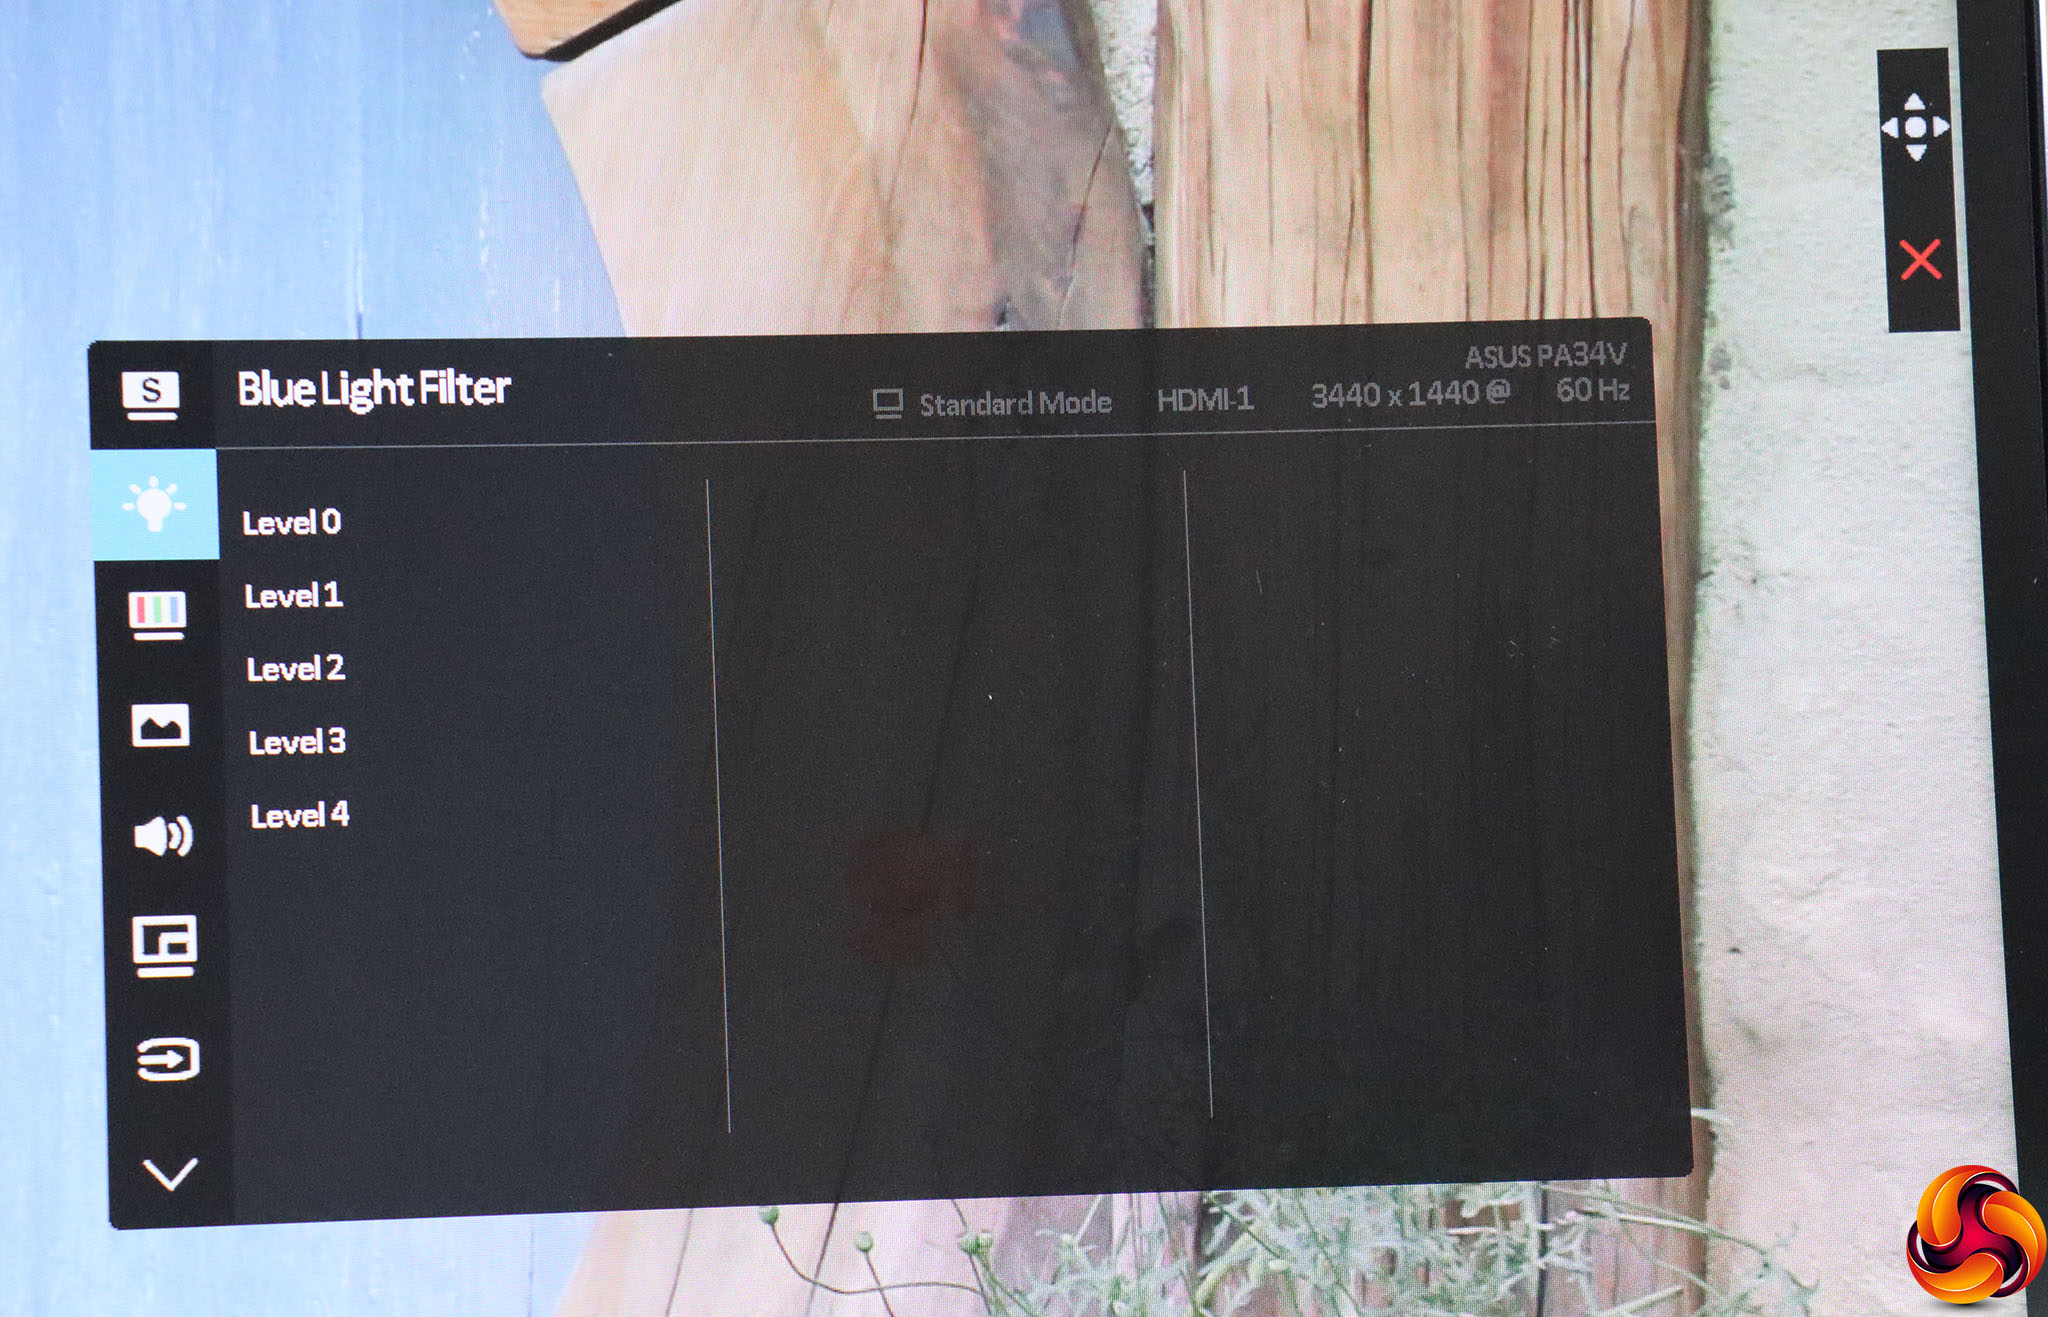
Using the joystick to go down to the next submenu reveals another route to the Blue Light Filter levels.
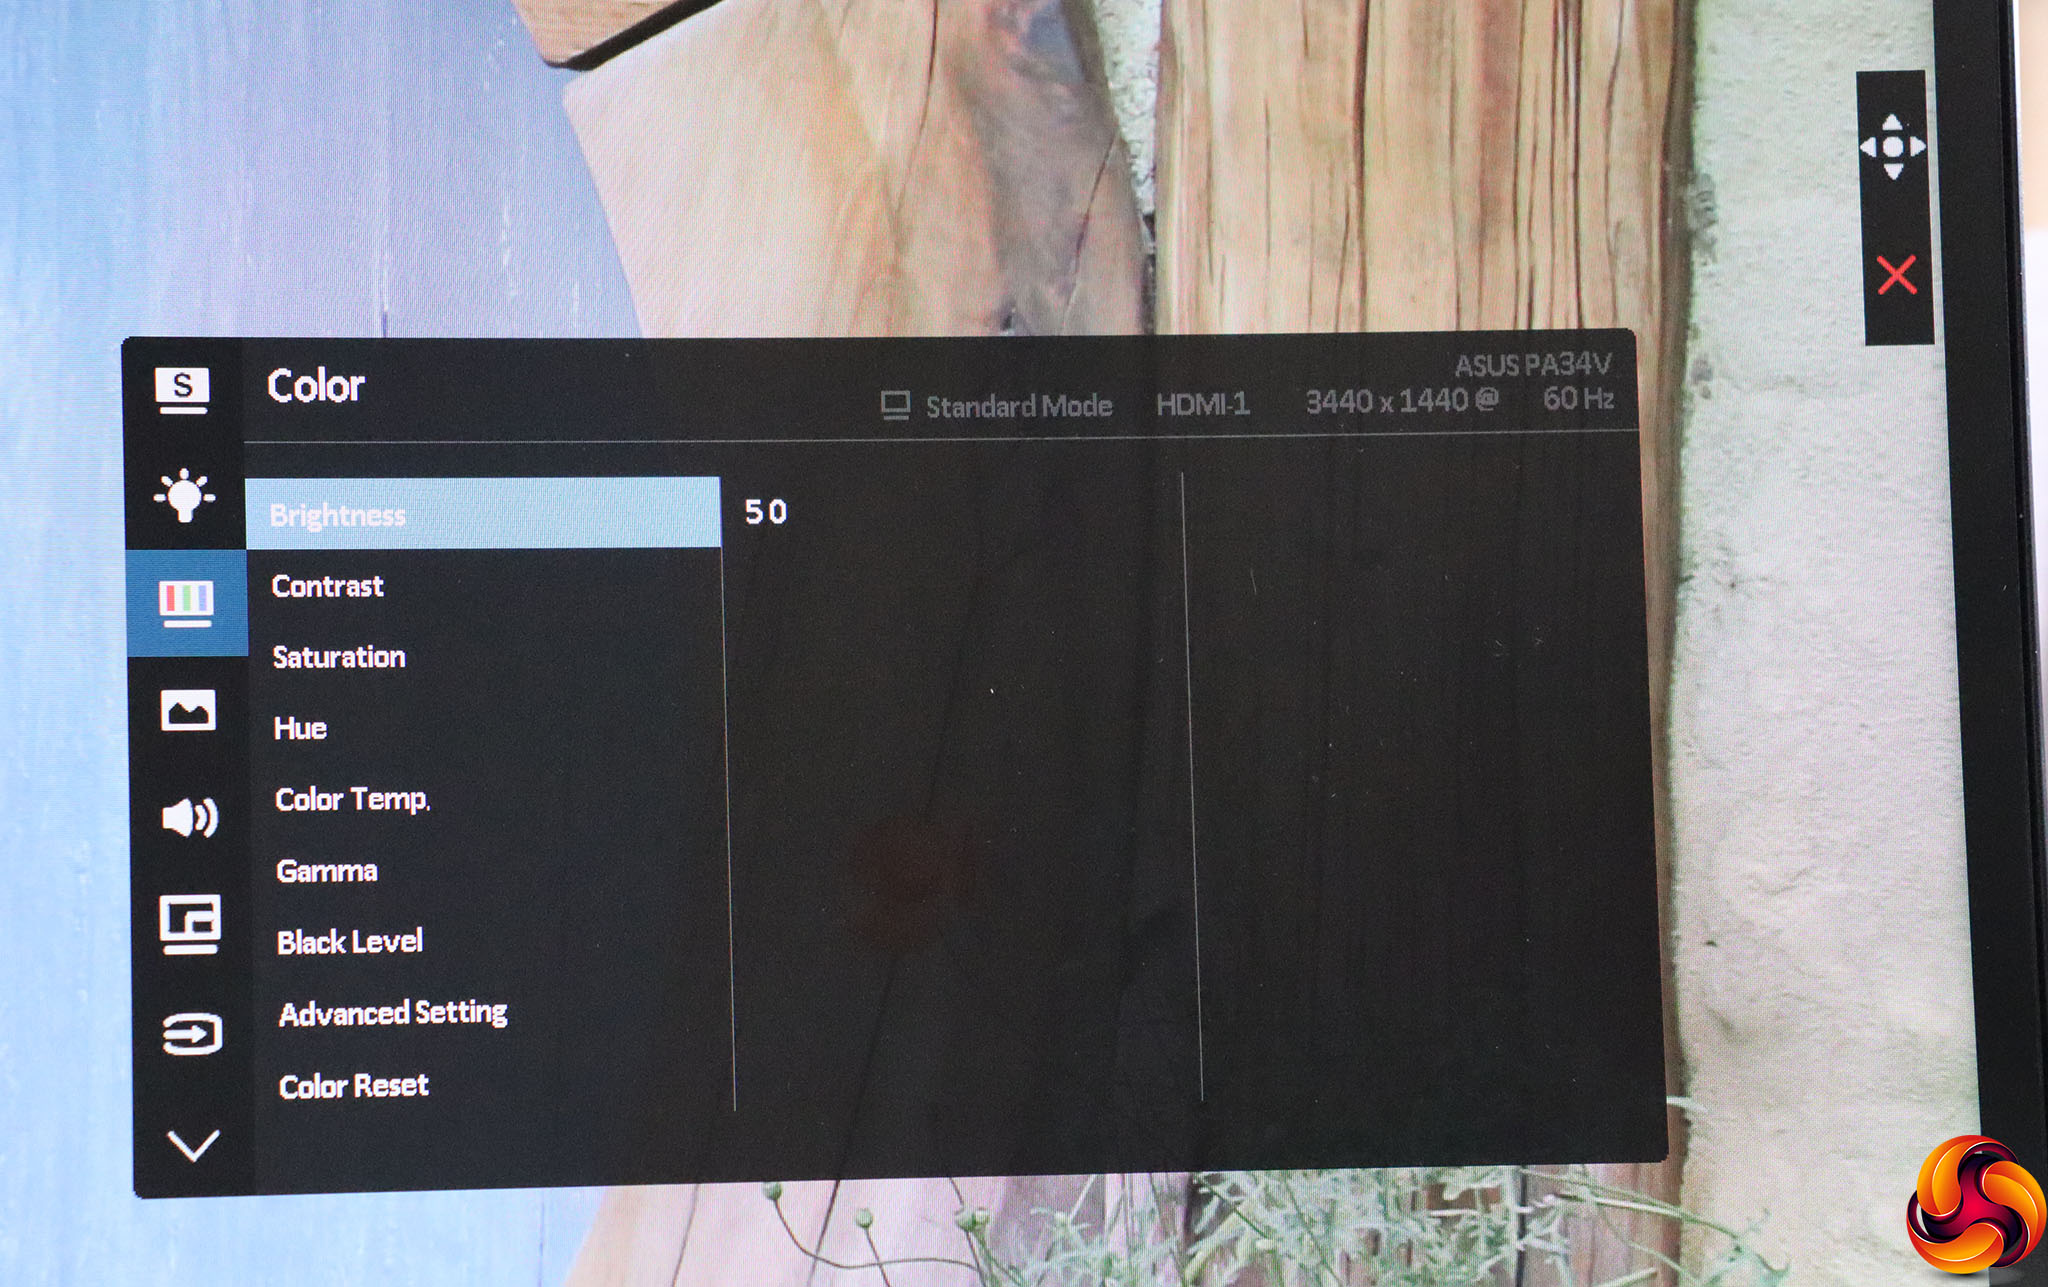
The Color menu is the next down, and much more full of options. You can adjust brightness, contrast, saturation and hue from 0 to 100. The Black Level has the same range. You can also select four Color Temperature presets – 9300K, 6500K, 5500K and 5000K. The five Gamma settings vary from 1.8 to 2.6 in increments of 0.2. Then there's even more under Advanced Setting, where you can find six-axis hue and six-axis saturation (RGBCMY), plus RGB controls under a Gain option and an Offset option, with the latter adding or subtracting from a preset level rather than replacing it. In all, a really comprehensive range of colour adjustment.
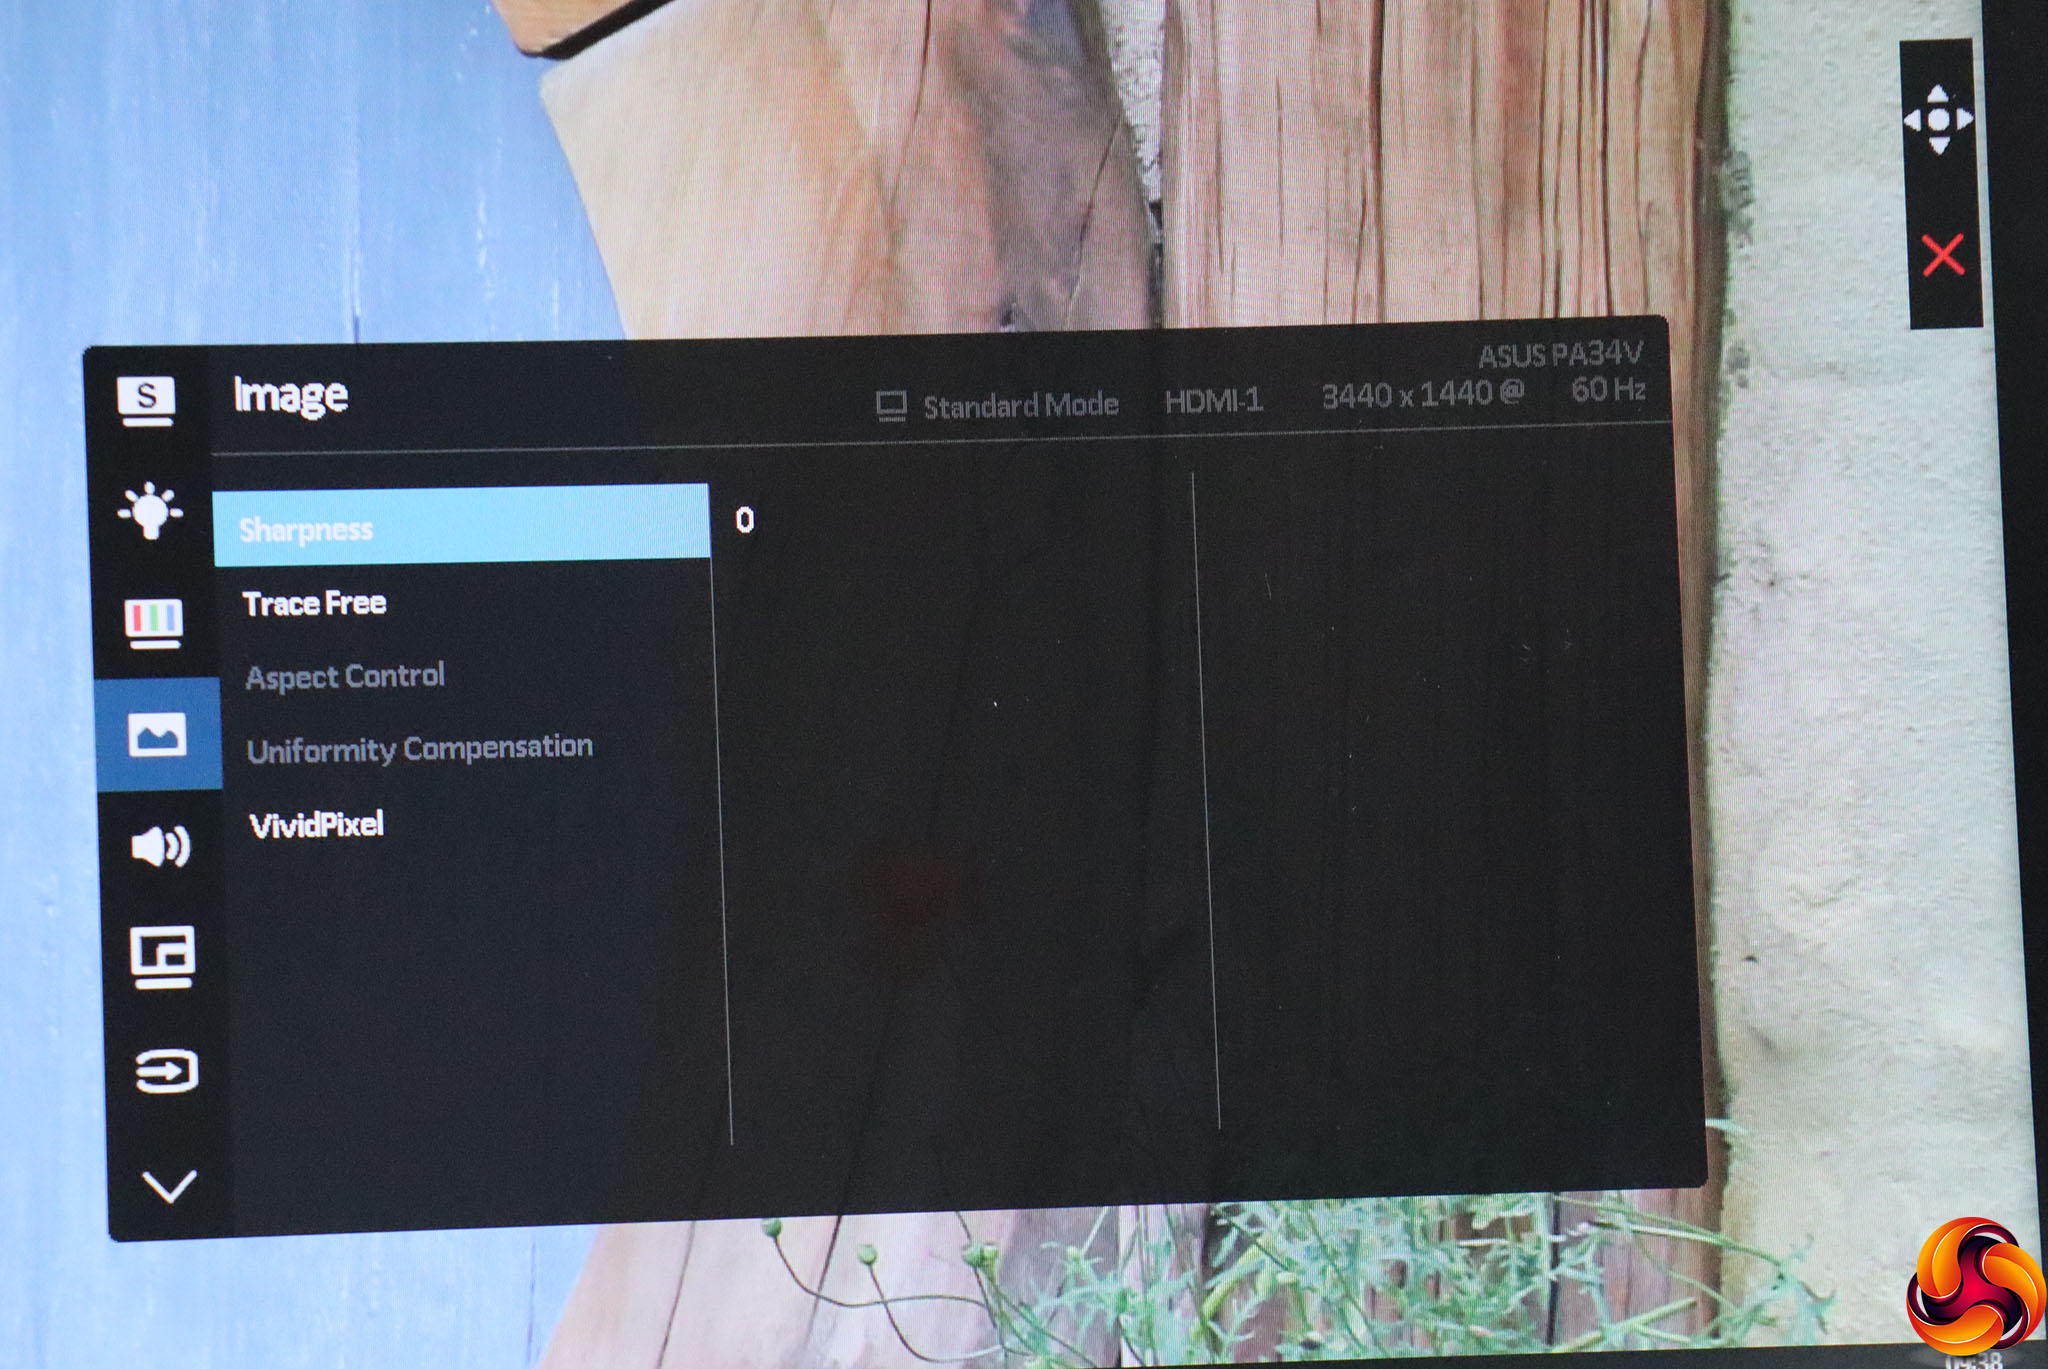
Next along is the Image Section, which includes a Sharpness setting with a range from 0 to 100. The Trace Free option is a pixel overdrive which also ranges from 0 to 100 and defaults to 60. With some sources, you can alter the viewed aspect ratio, and if you have Dynamic Dimming and HDR off you can enable uniformity compensation. Vivid Pixel is another type of edge sharpness control, with a range from 0 to 100 but in increments of 25.

The Sound section provides volume control, the ability to mute the audio, and to choose between sources if you are getting an audio signal from multiple video inputs.
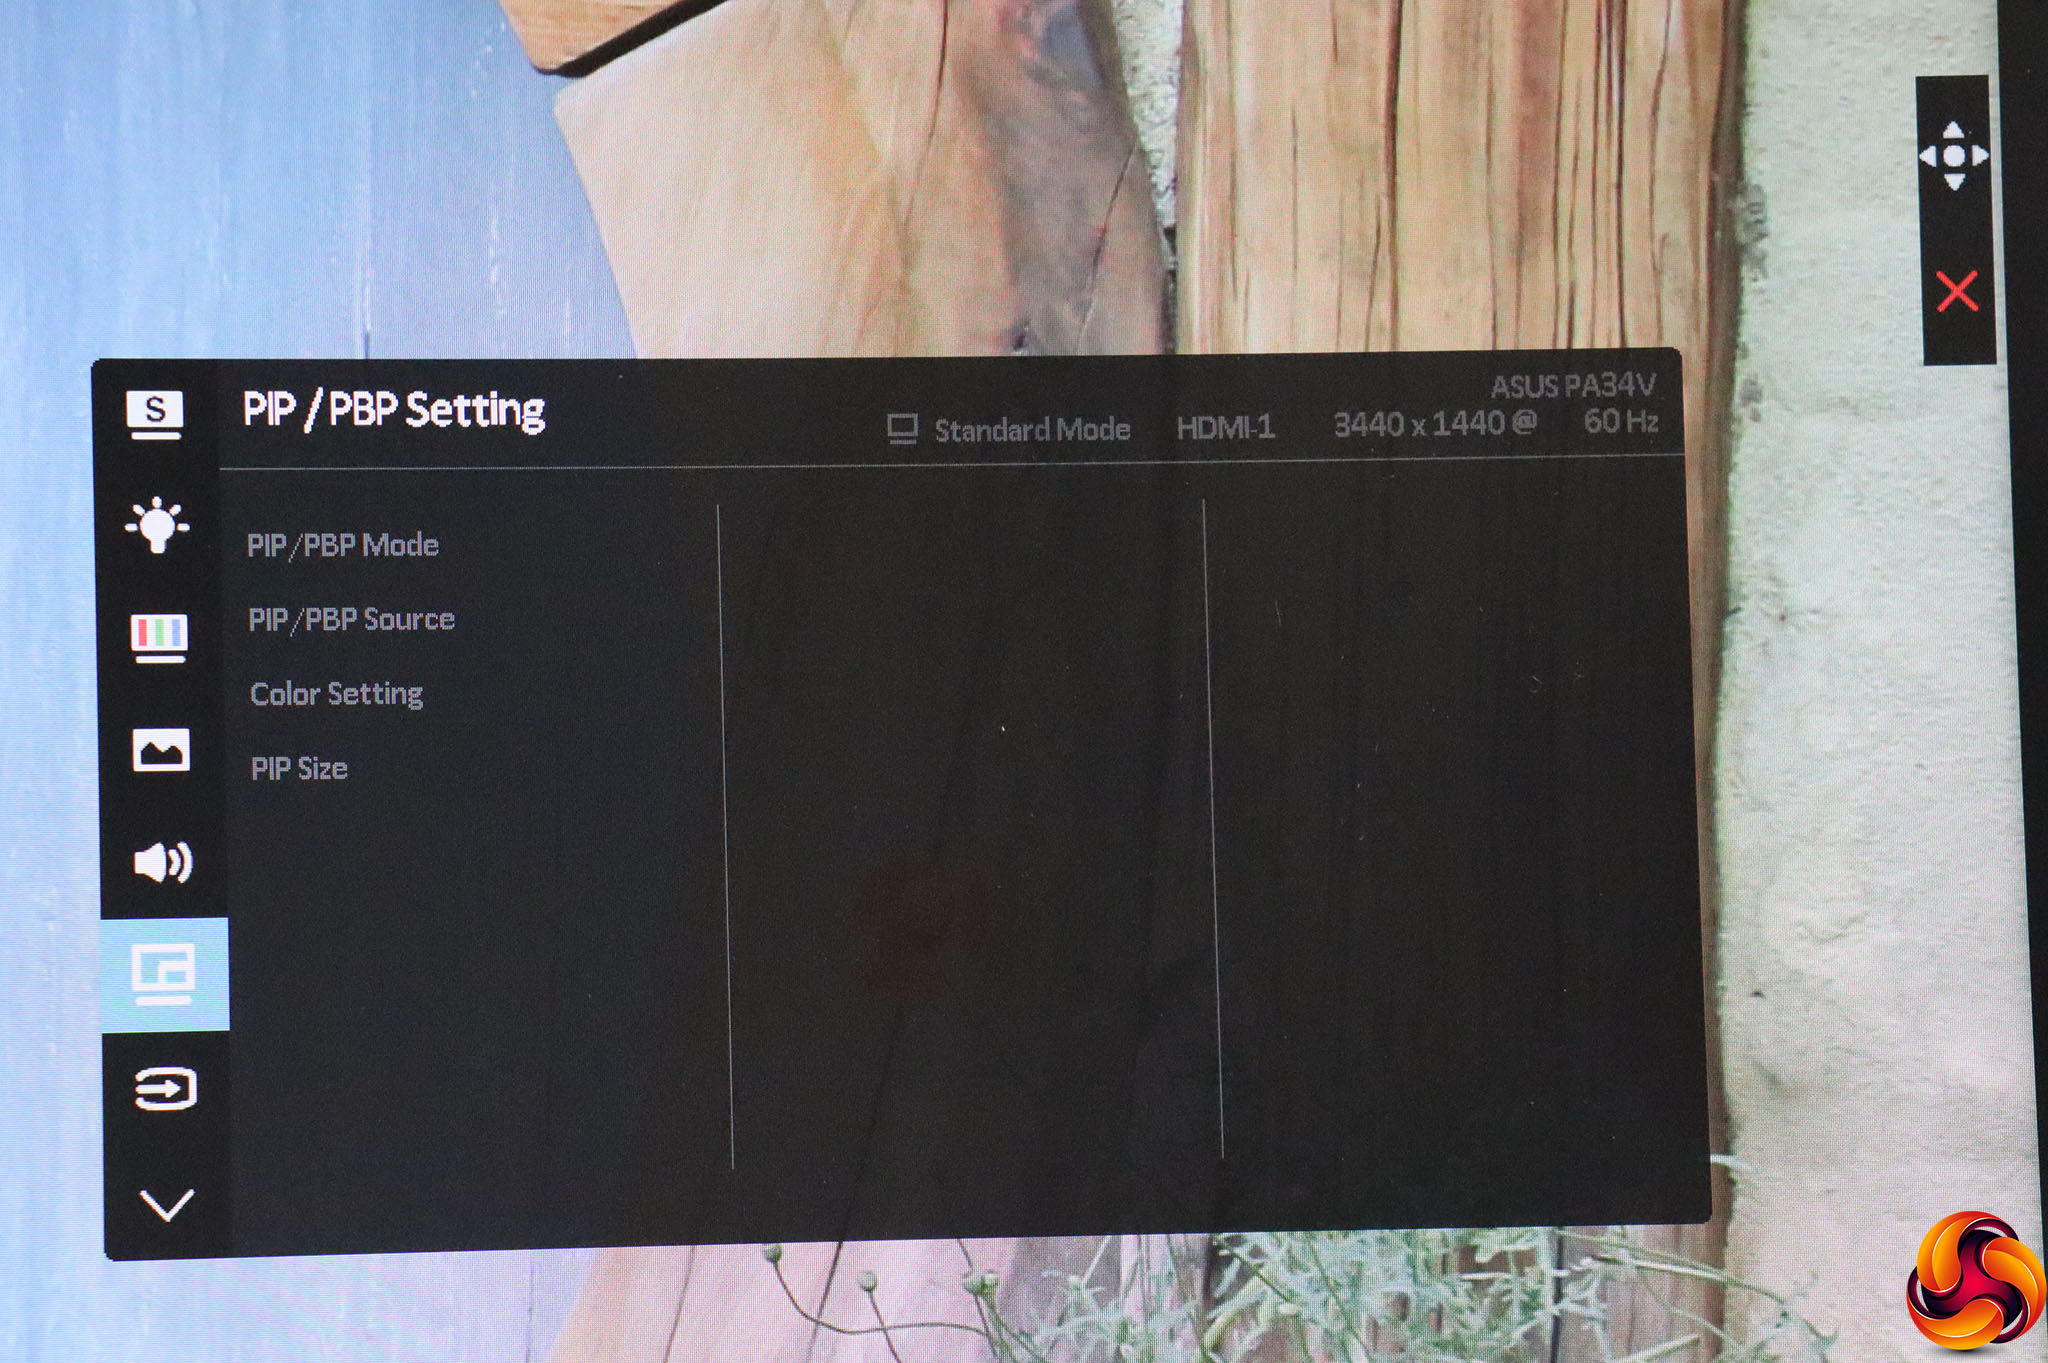
If you have multiple video sources connected, you can select a couple to have onscreen simultaneously here, and also adjust the colour differently for the secondary window. You can't display two HDMI sources at once, however, for some reason.

Next along is the same range of input options as the quick menu version.
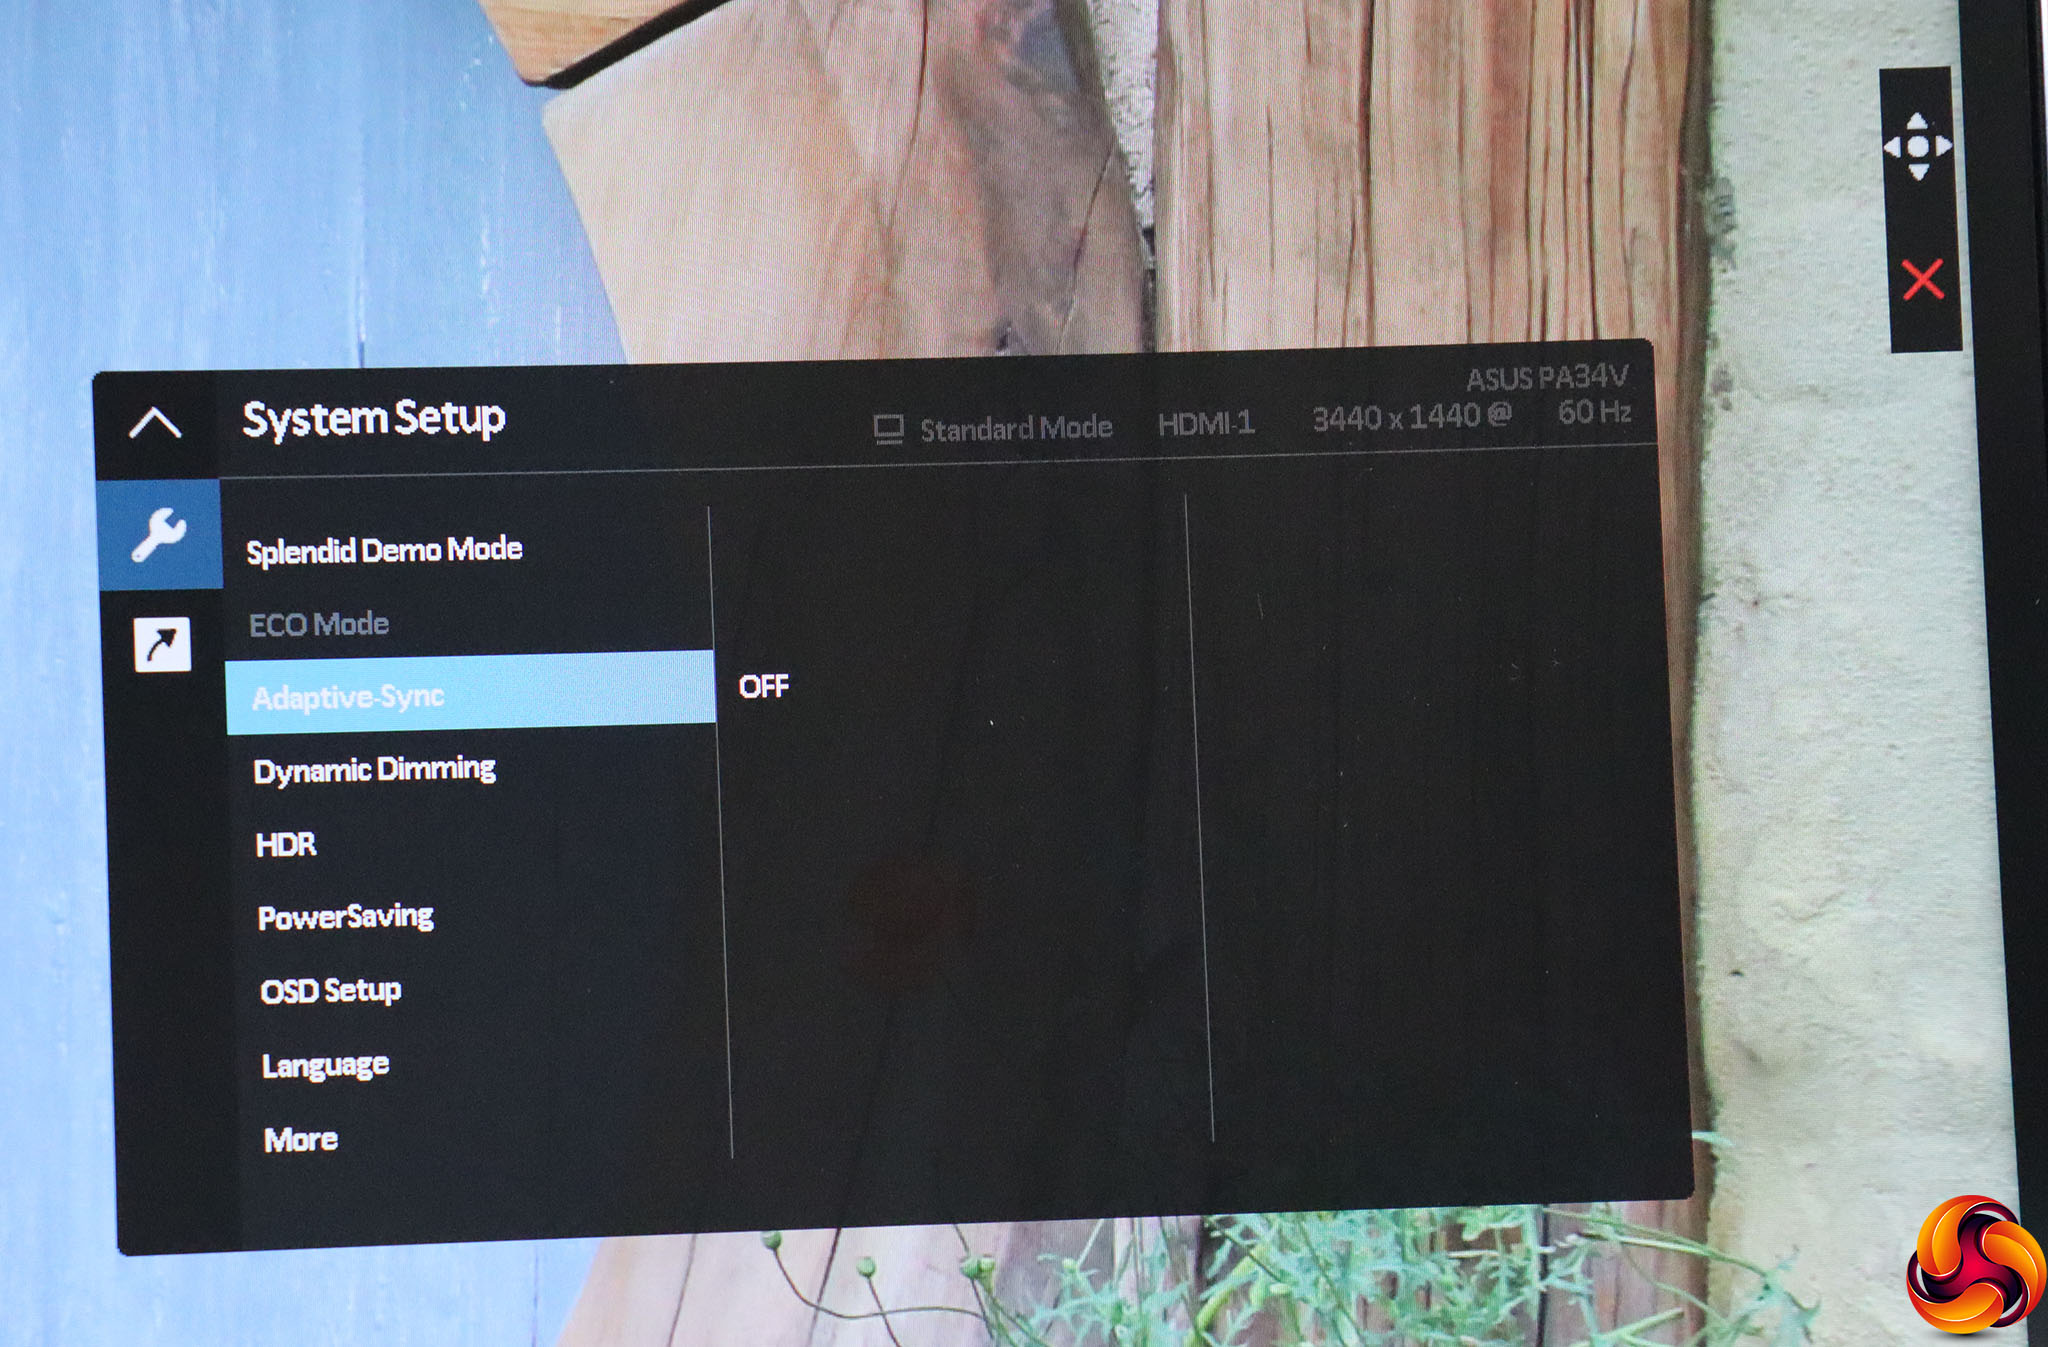
If you scroll beyond the last option on the main menu, you reveal a couple more categories. The System Setup option lets you turn on a mode to demo the Splendid presets, toggle FreeSync adaptive synchronisation, and Dynamic Dimming. You need the latter and HDR to be turned off to enable the ECO Mode for reduced power consumption, however.
The HDR options include an ASUS-exclusive setting or PQ300, which maps HDR brightnesses to the actual brightness the monitor can cope with up to the maximum (300cd/m2), then all values above that are set to this maximum.
The Power Saving mode revolves around whether you want the USB and Thunderbolt ports to supply power when the screen is in sleep mode. The OSD Setup section lets you choose timeout duration, whether DDC/CI is enabled, and how opaque the menu overlay is. You can switch between 21 different Languages for the menu, and if you scroll down to More, you can set a reminder for regular re-calibration, choose whether DisplayPort 1.2 or 1.1 is used, and lock the menu keys.
Lastly, you can toggle the power LED, call up more detailed information than is available on the top right-hand corner of the menu, and reset to defaults.
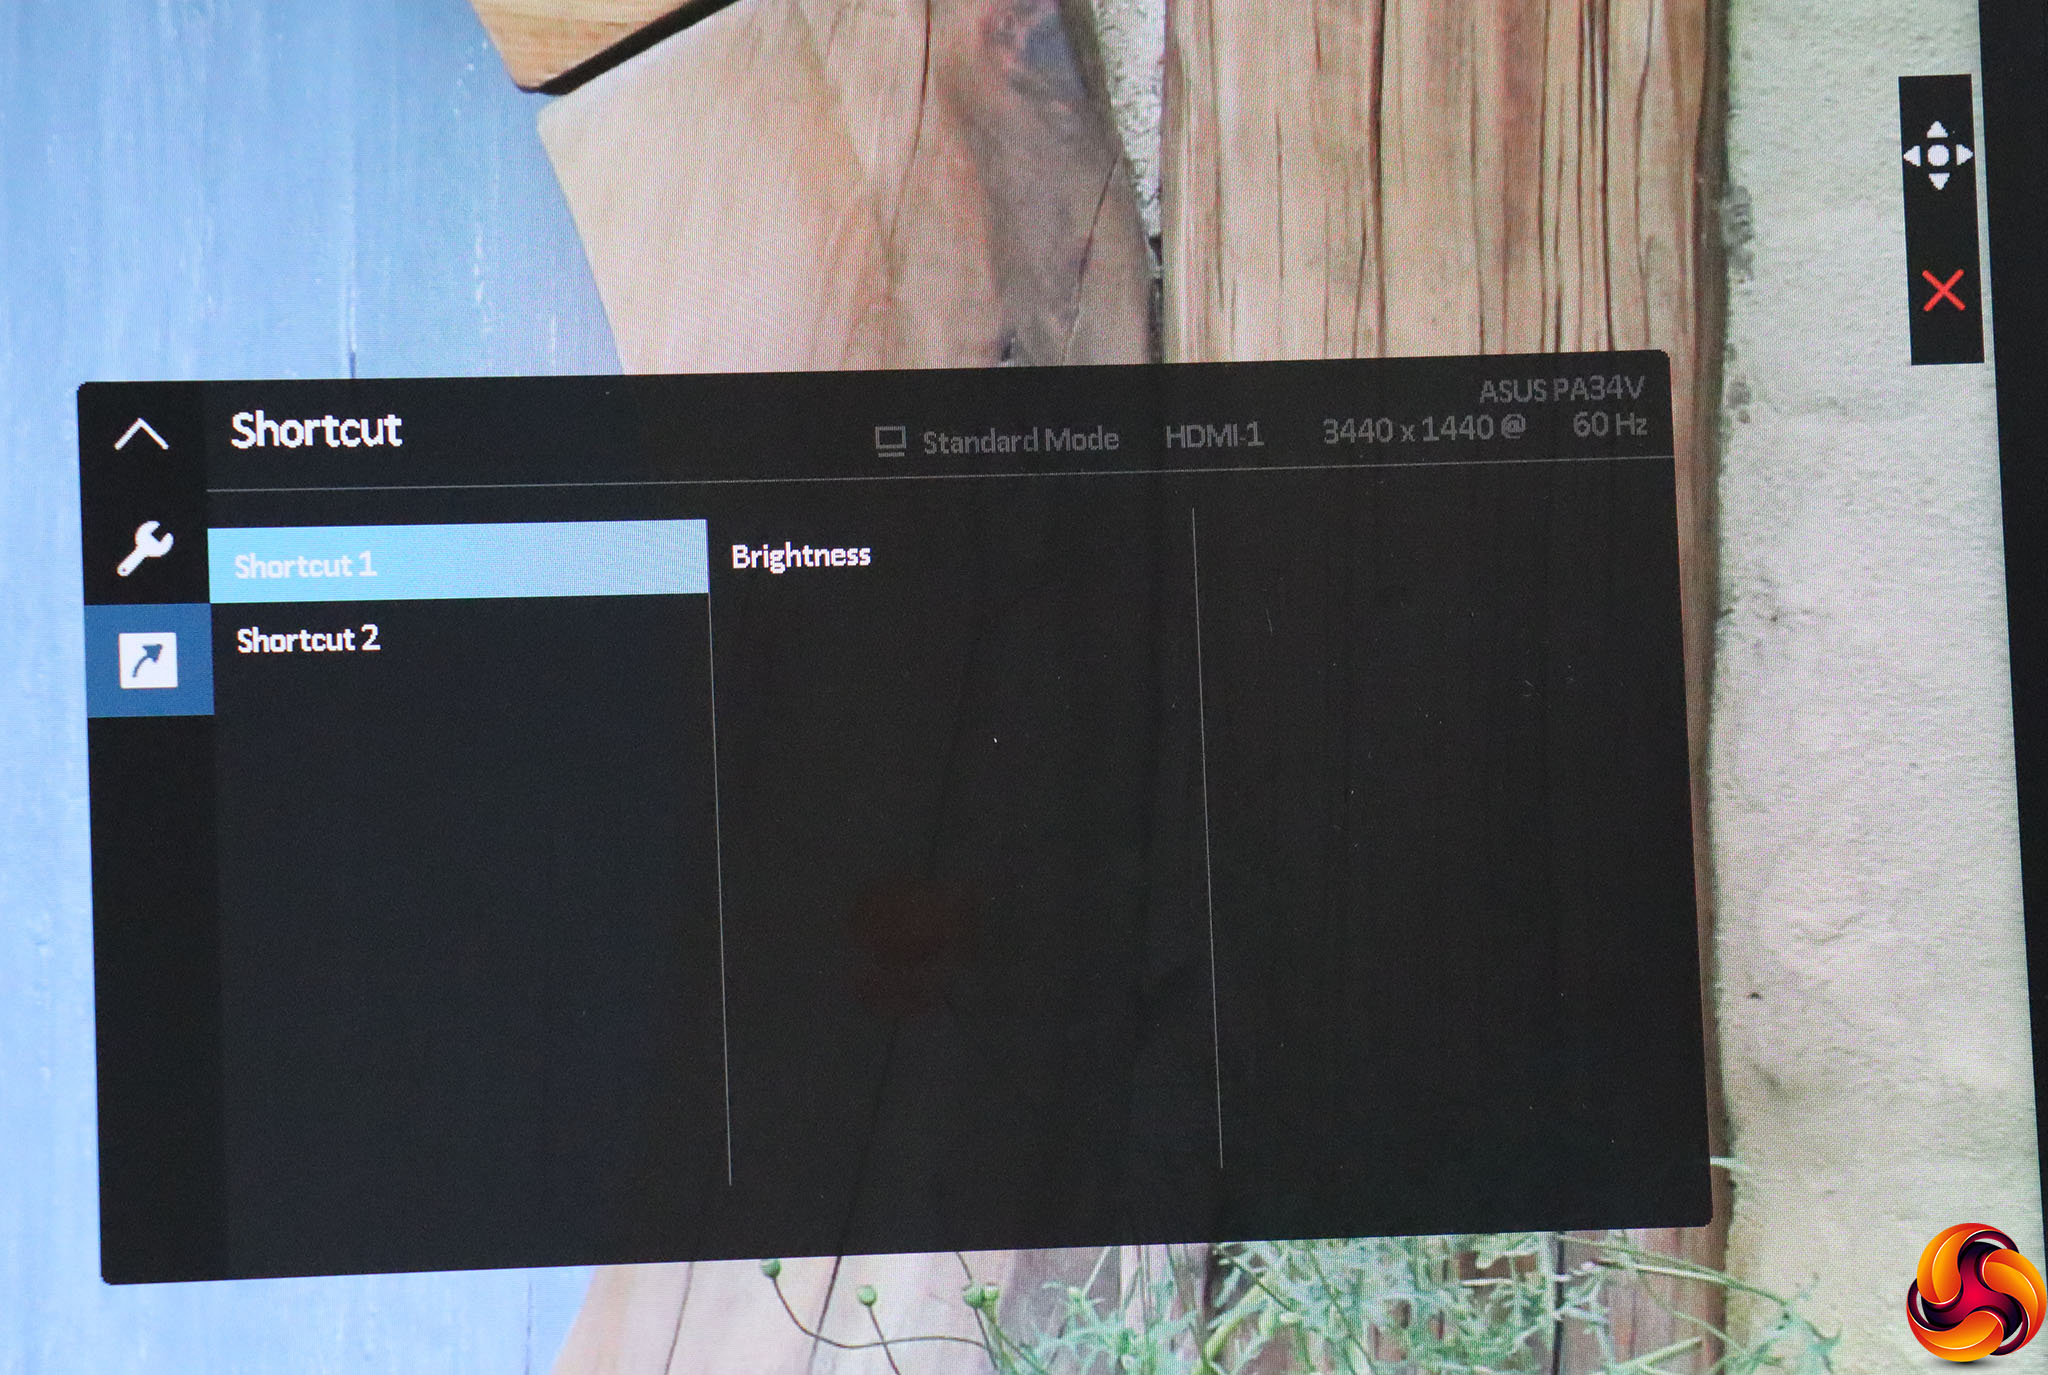
Finally, under Shortcut you can change what the bottom two quick menu options are. By default, they are Brightness and Low Blue Light, but you could also populate these with HDR mode, contrast, colour temperature, volume, or one of the two custom user preset Splendid modes. Unfortunately, the full list of Splendid presets can't be placed as a Shortcut, which would have been a very useful option.
Overall, though, there is a huge range of configurability here, as you would expect from a high-end professional screen. The ASUS ProArt menu has proven consistently comprehensive in all the models we have tested so far, which will please the intended user.