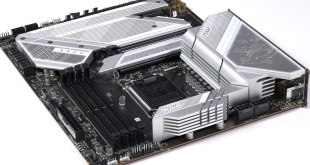
Firstly, we are pleased to report that our Leetgion Hellion mouse worked to its usual standard in the Gigabyte Z87-D3HP motherboard's UEFI BIOS. This is a positive point as we have experienced problems when using certain mice in the UEFI BIOS of other motherboards in the past.

The main page of Gigabyte's UEFI BIOS is packed with information regarding system speeds and voltages. Boot device priority can also be quickly edited from this page, although doing so requires a mouse that functions correctly in the interface.

Up to six profiles can be customised to suit an individual's preferences. The options that can be displayed include voltage, speed, and timings settings.


A memory multiplier of up to 29.33x can be set on the Z87-D3HP motherboard. Timings can also be configured in their own section.

Gigabyte includes a ‘memory upgrade' tool which allows specific RAM kits to be precision tweaked to pre-defined settings. One of the profiles is customised by professional overclocker HiCookie.

A performance boost can be applied to the system to provide a quick and easy speed increase. We will outline some of the automated overclocking settings later in the review.


Power control is given its own section of the interface. Settings such as load-line calibration and VRM switching frequency can be edited.
Voltage control has its own subsection, from which the settings can be easily changed. Gigabyte gives overclockers plenty of flexibility with the Z87-D3HP motherboard; a CPU VCore of up to 1.800V can be set, as well as 2.100V for the DRAM.


Fan settings can be accessed via the PC Health Status page. The Manual mode allows the fan speed response with temperature to be set, i.e. the gradient of a temperature against fan speed curve.

Up to eight specific overclocking profiles can be saved to the board. The profiles can be transferred to and from a USB flash drive.

SATA settings are accessible via the Peripherals section.

Hitting F2 allows users to revert to Gigabyte's old style of BIOS. This is a thoughtful addition to its motherboards by Gigabyte, as it allows users who are experienced with the company's old style of BIOS to once again use their skills rather than learn the new interface.
Overall, we were very impressed by the attractiveness of Gigabyte's UEFI BIOS. The interface features a fresh, high-resolution design which brings it in line with the modern day.
Unfortunately, the interface can be awkward to use and feels a little muddled at times. As proven by the screenshot of the interface's Home page, a feeling of information overload is quickly instilled in many users, let alone an entry-level buyer who wants to conduct some simple overclocking. Moving swiftly over to the performance page will help to ease the burden of a screen full of unknown readouts and options.
Thankfully, the parameters and settings that the Home page displays can be selected and removed by the editor tool.