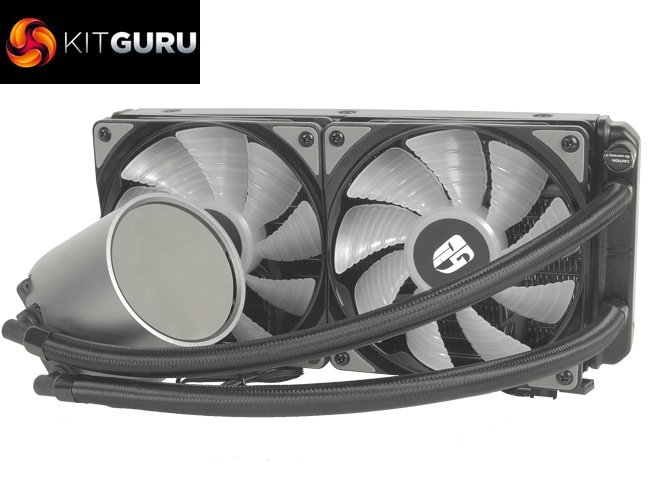
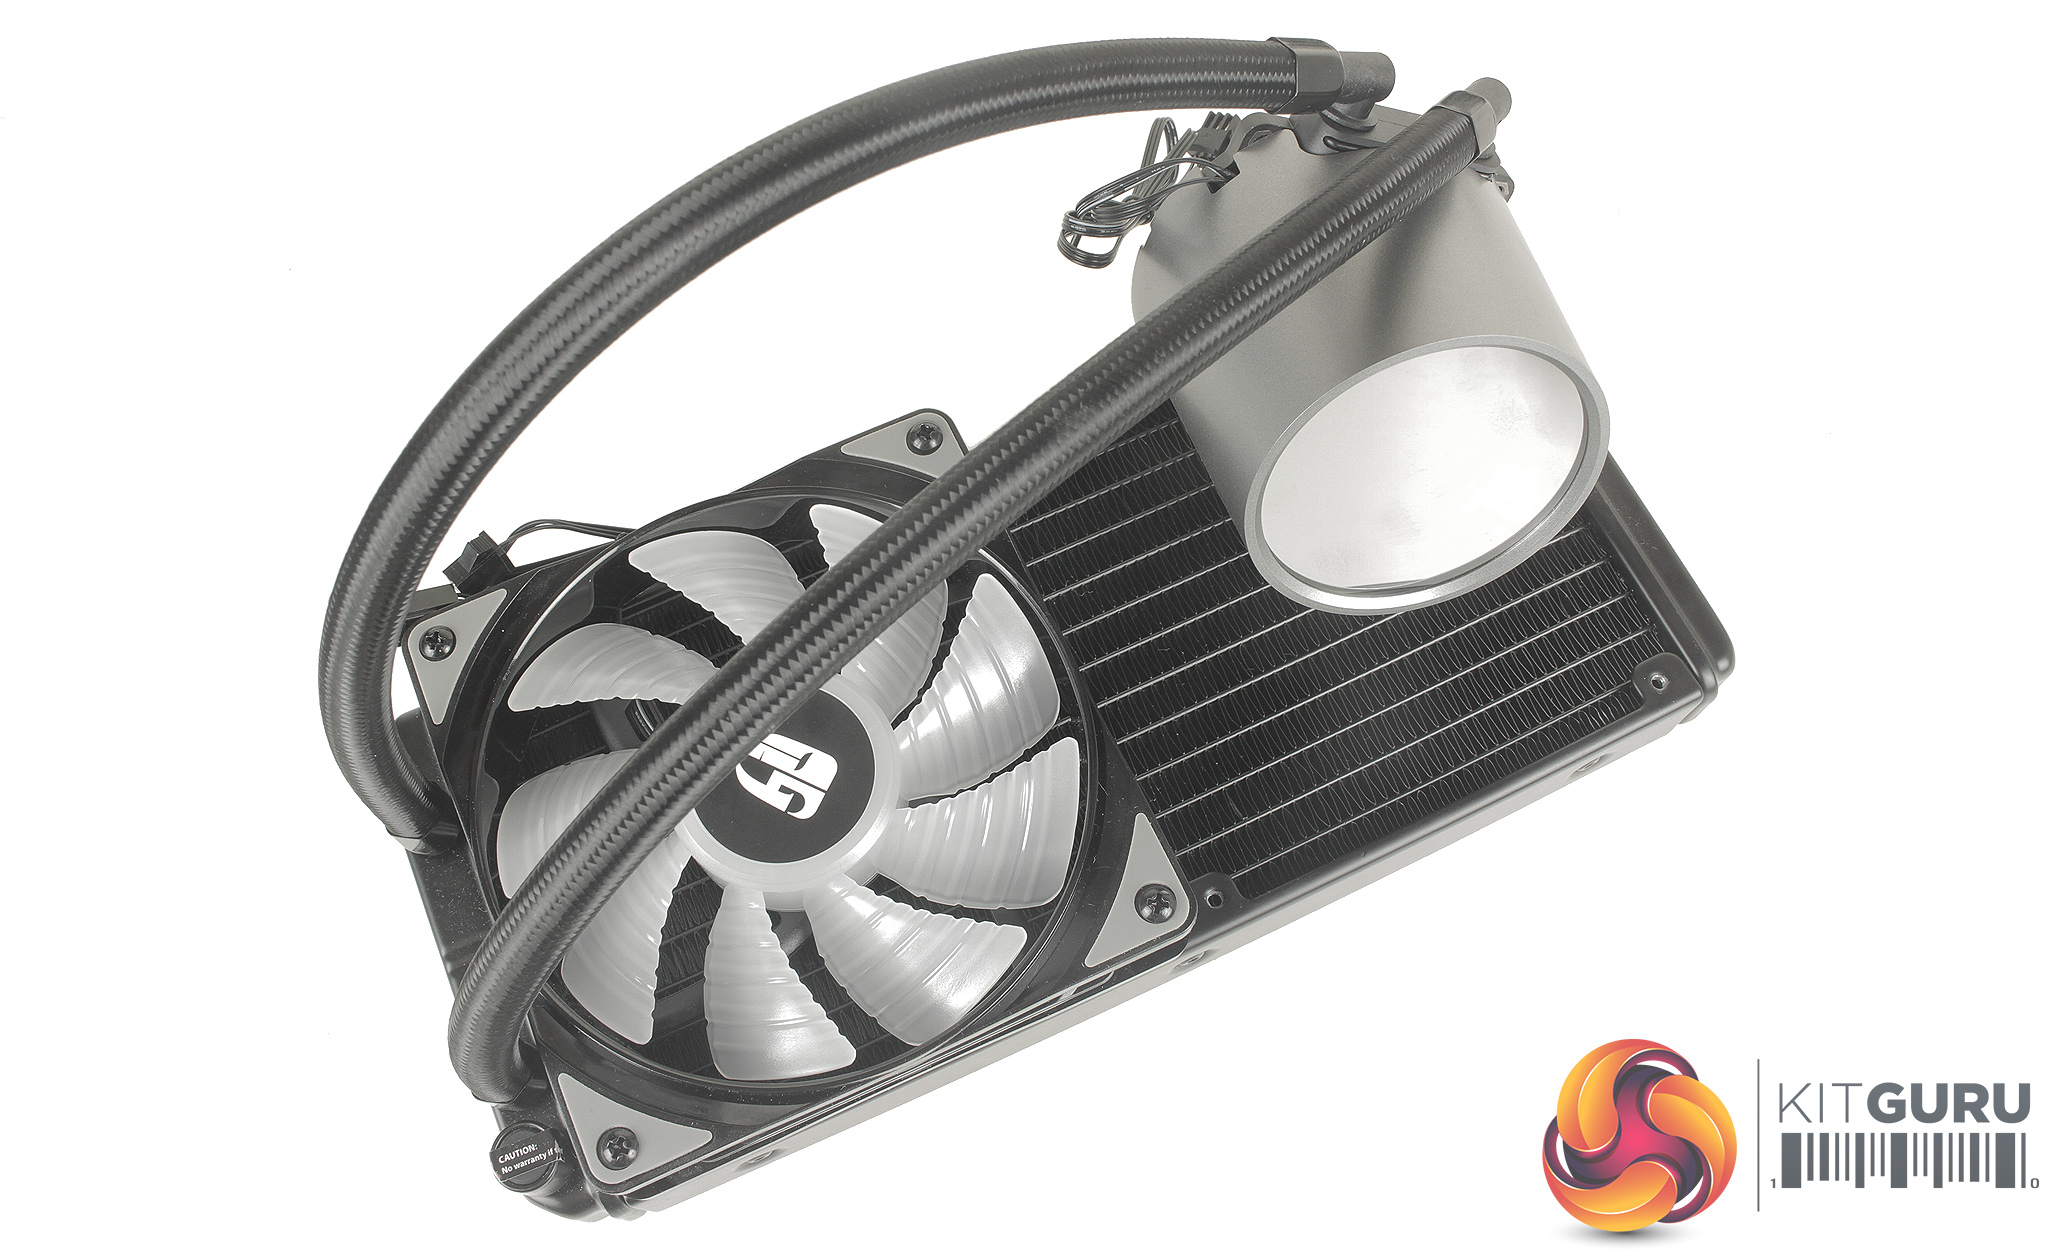
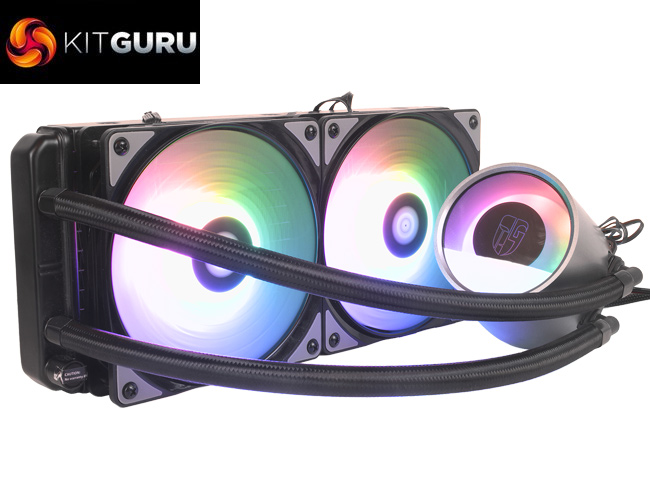
With so many AIO liquid coolers currently available, both in 120mm and 140mm dimensions it can be difficult to separate yourself from the competition. The new Gamer Storm Castle 240 RGB cooler looks relatively standard in terms of specification with a 27mm thick 240mm radiator, and two fans included as standard. Where it differs is the inclusion of addressable RGB lighting throughout and this includes the rather good looking CPU block/pump.
With a UK launch price of £109.99 (we have seen it on sale for £95.99) there is a lot of competition for a 240mm liquid cooling solution, but does the addressable LED lighting offer enough of an aesthetic boost to make the Castle 240 RGB the next cooler for your CPU?
Specification:
- Model: Castle 240 RGB
- Radiator Material: Aluminum
- Radiator Dimensions: 274 × 120 x 27mm
- Fan Dimensions: 120 x 120 x 25 mm
- Fan Speed: 500 ± 200 – 1,800 RPM (PWM) ± 10%
- Fan Air Flow: 69.34 CFM (Max)
- Fan Air Pressure: 2.42 mmH2O (Max)
- Fan Noise Level: 17.8 – 30 dBA
- Fan Connector: 4-Pin (PWM)
- Pump Connector: 3-Pin
- Pump Speed: 2550 ± 10% RPM
- Pump Dimensions: 91 × 79 × 71mm
- Intel socket compatibility: Intel LGA 20XX, 1366, 115X
- AMD socket compatibility: AMD TR4, AM4, AM3+, AM3, AM+, AM2, FM2+, FM2, FM1
- Net Weight: 1318g ± 10g
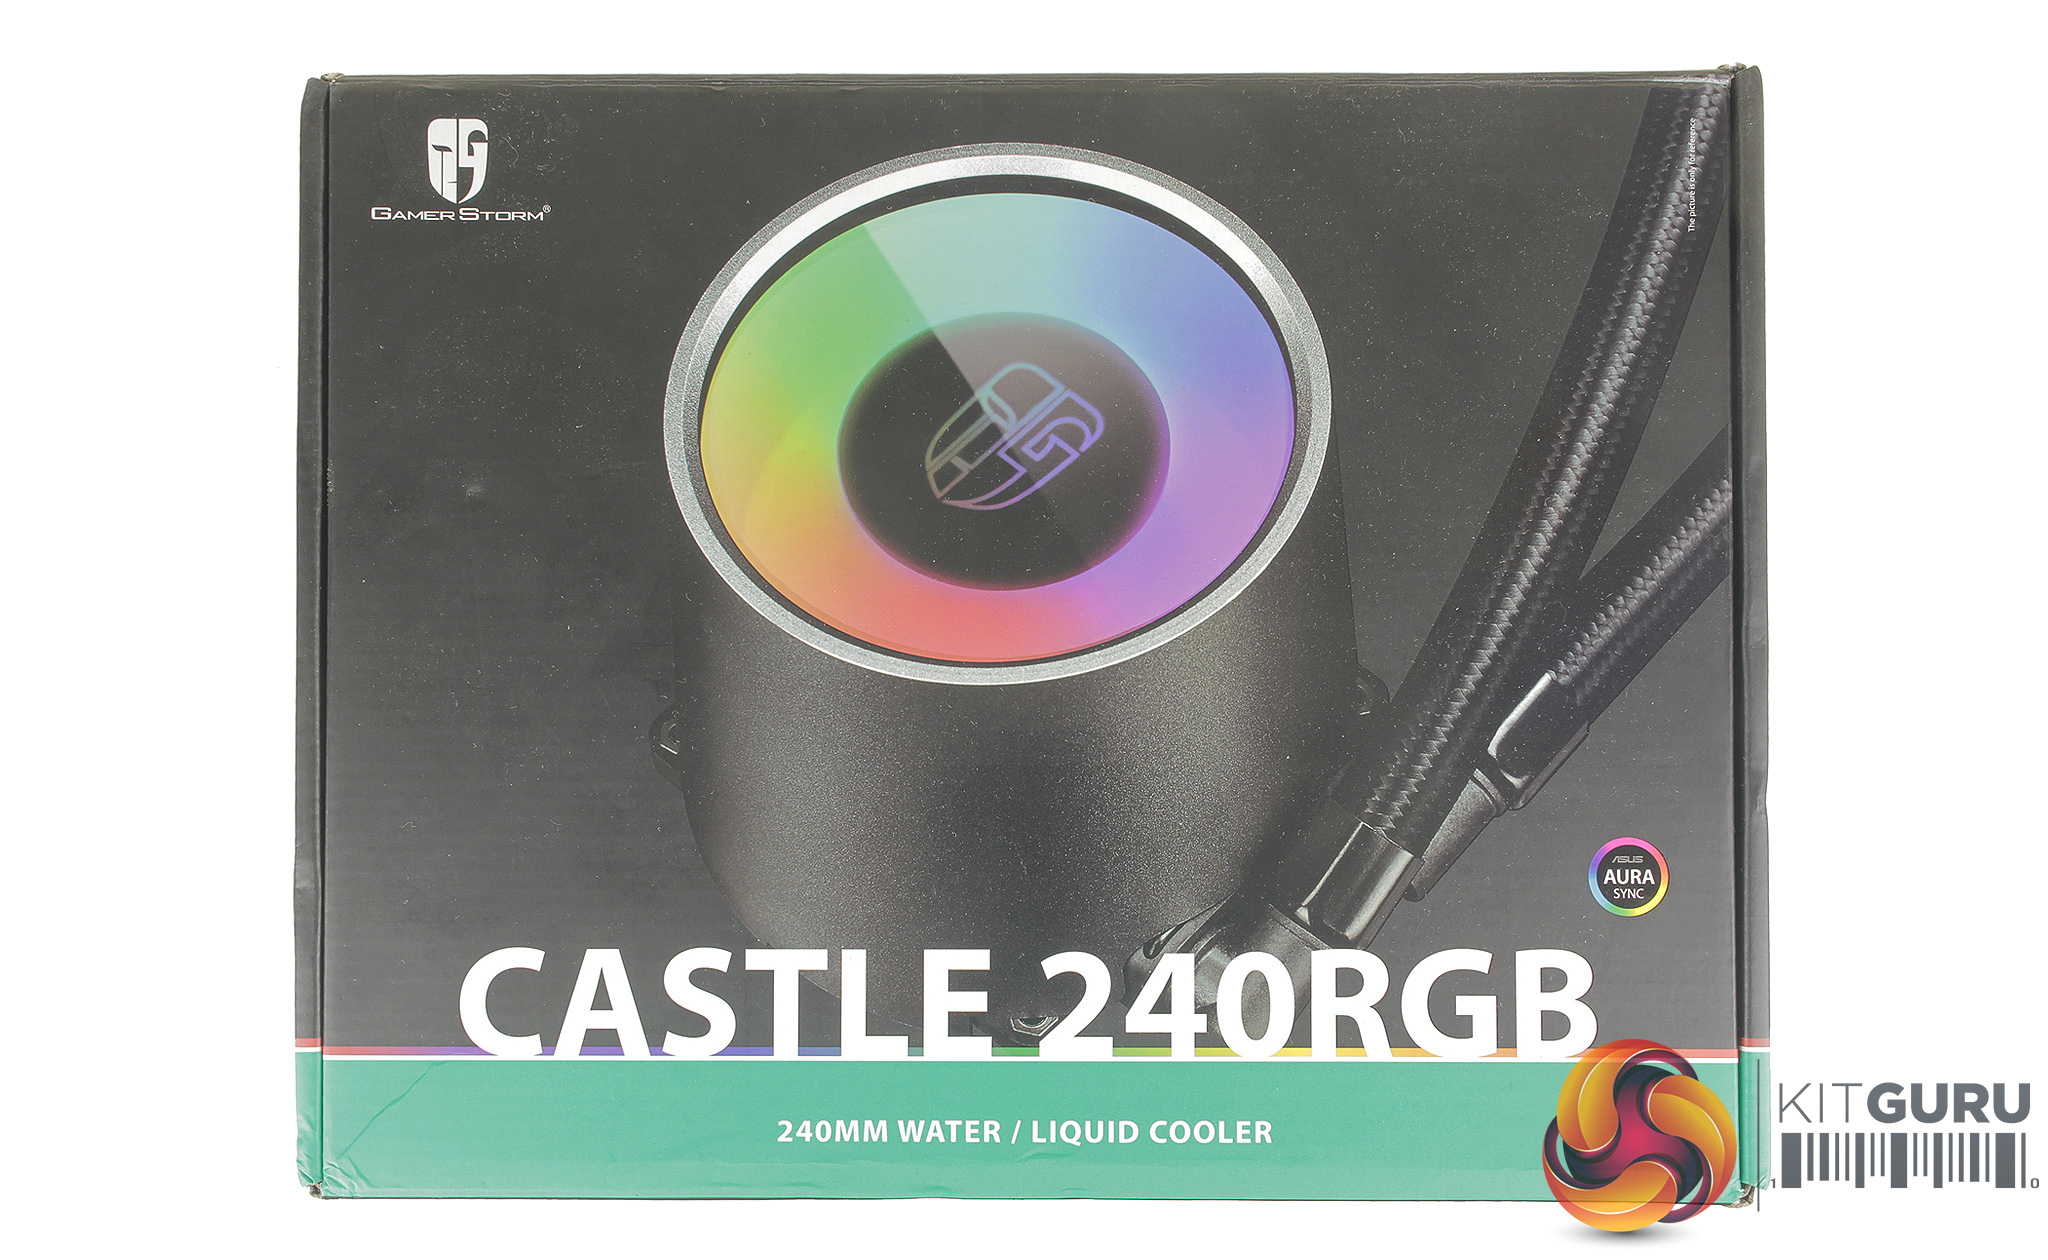
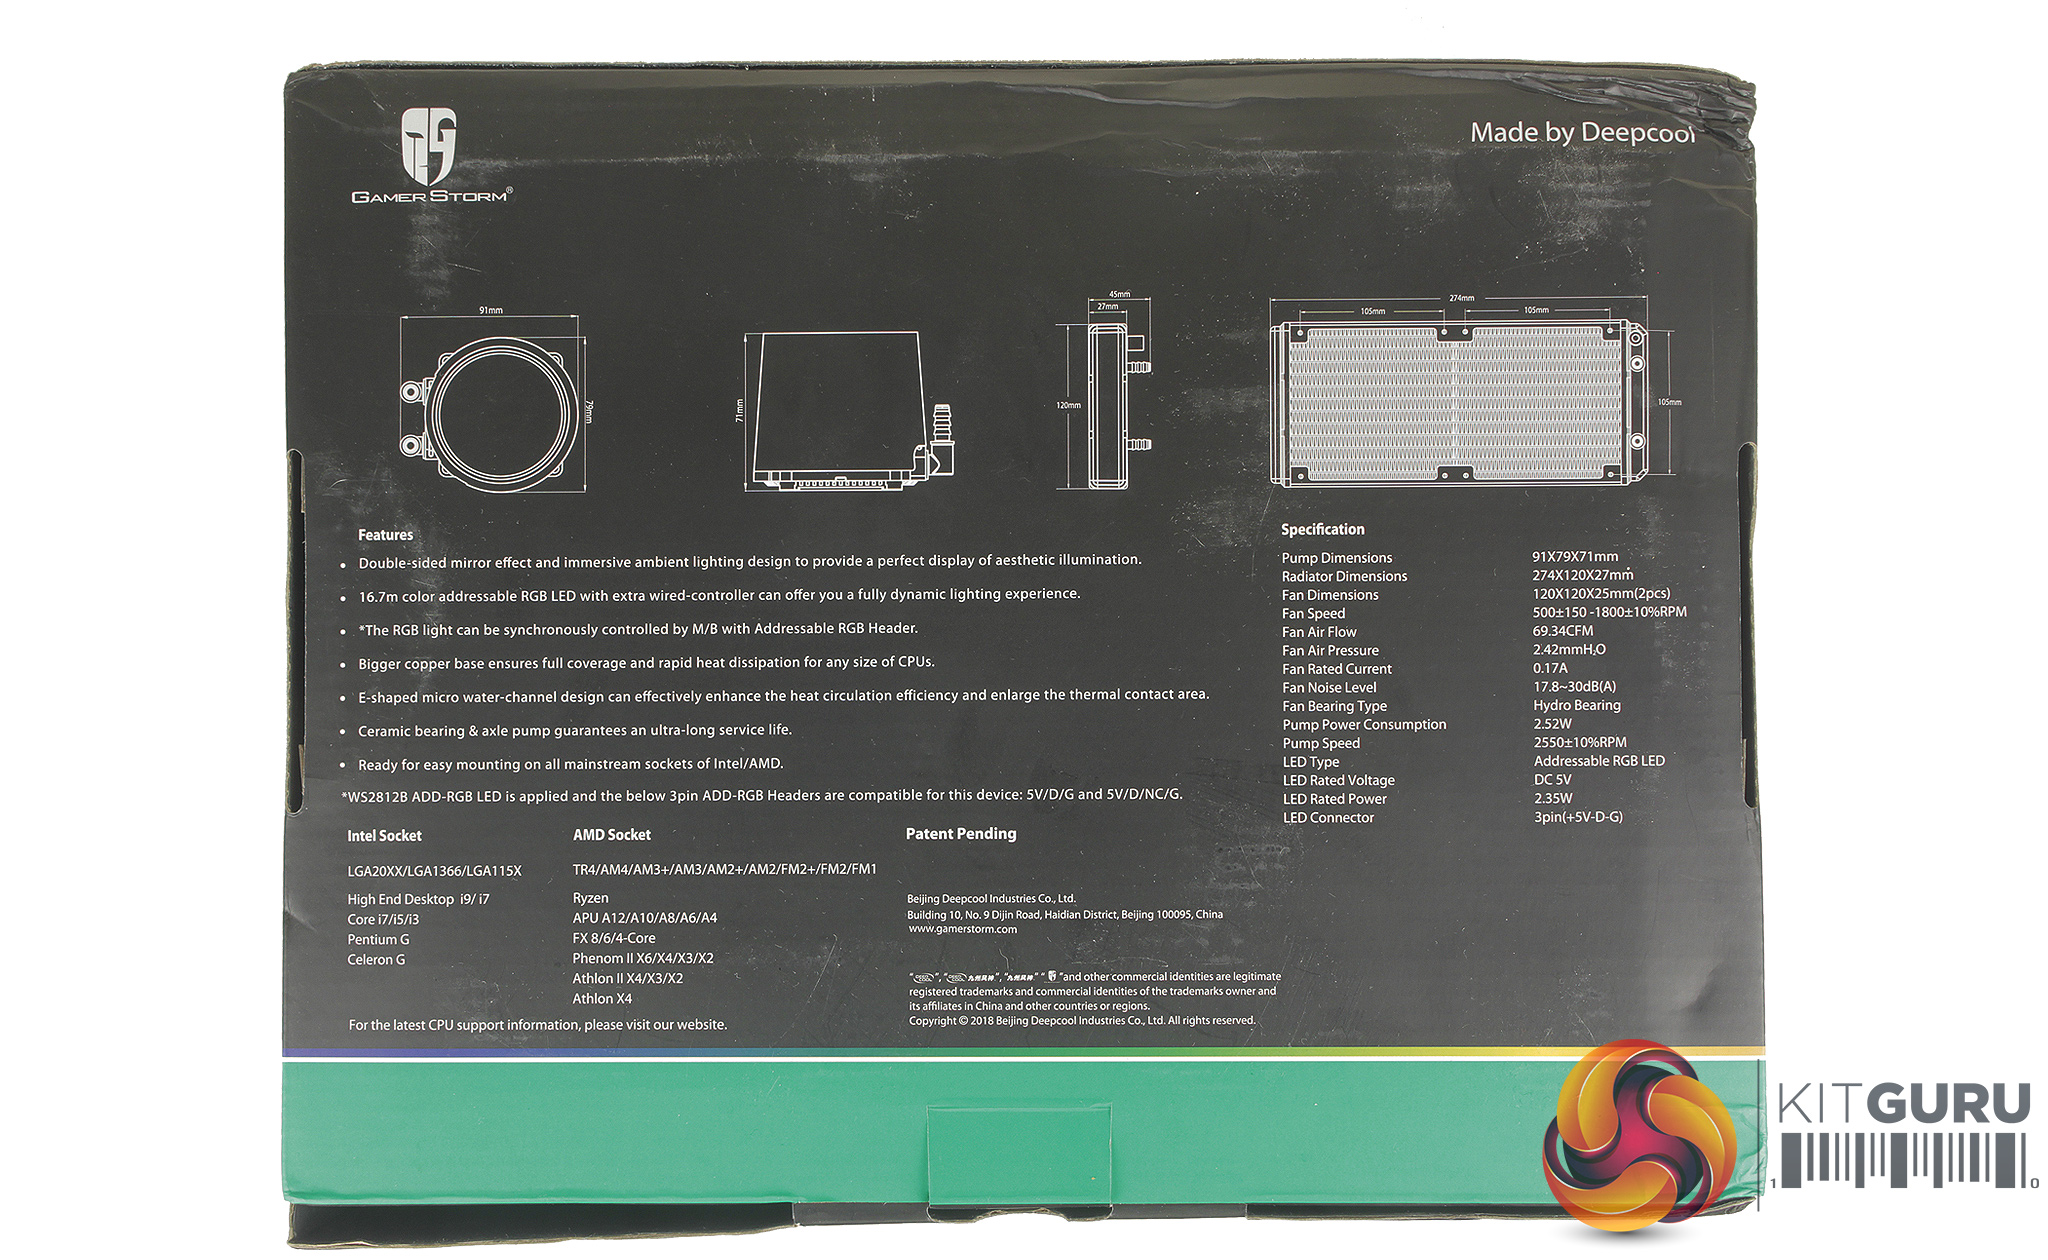
Packaging for the Castle 240 RGB shows off the quite large, but impressive looking CPU block on the front, and details of the dimensions of the cooler, included mounting options and connections on the rear. In the box, we find the cooler, an accessories box as well as two 120mm 4PIN PWM fans.
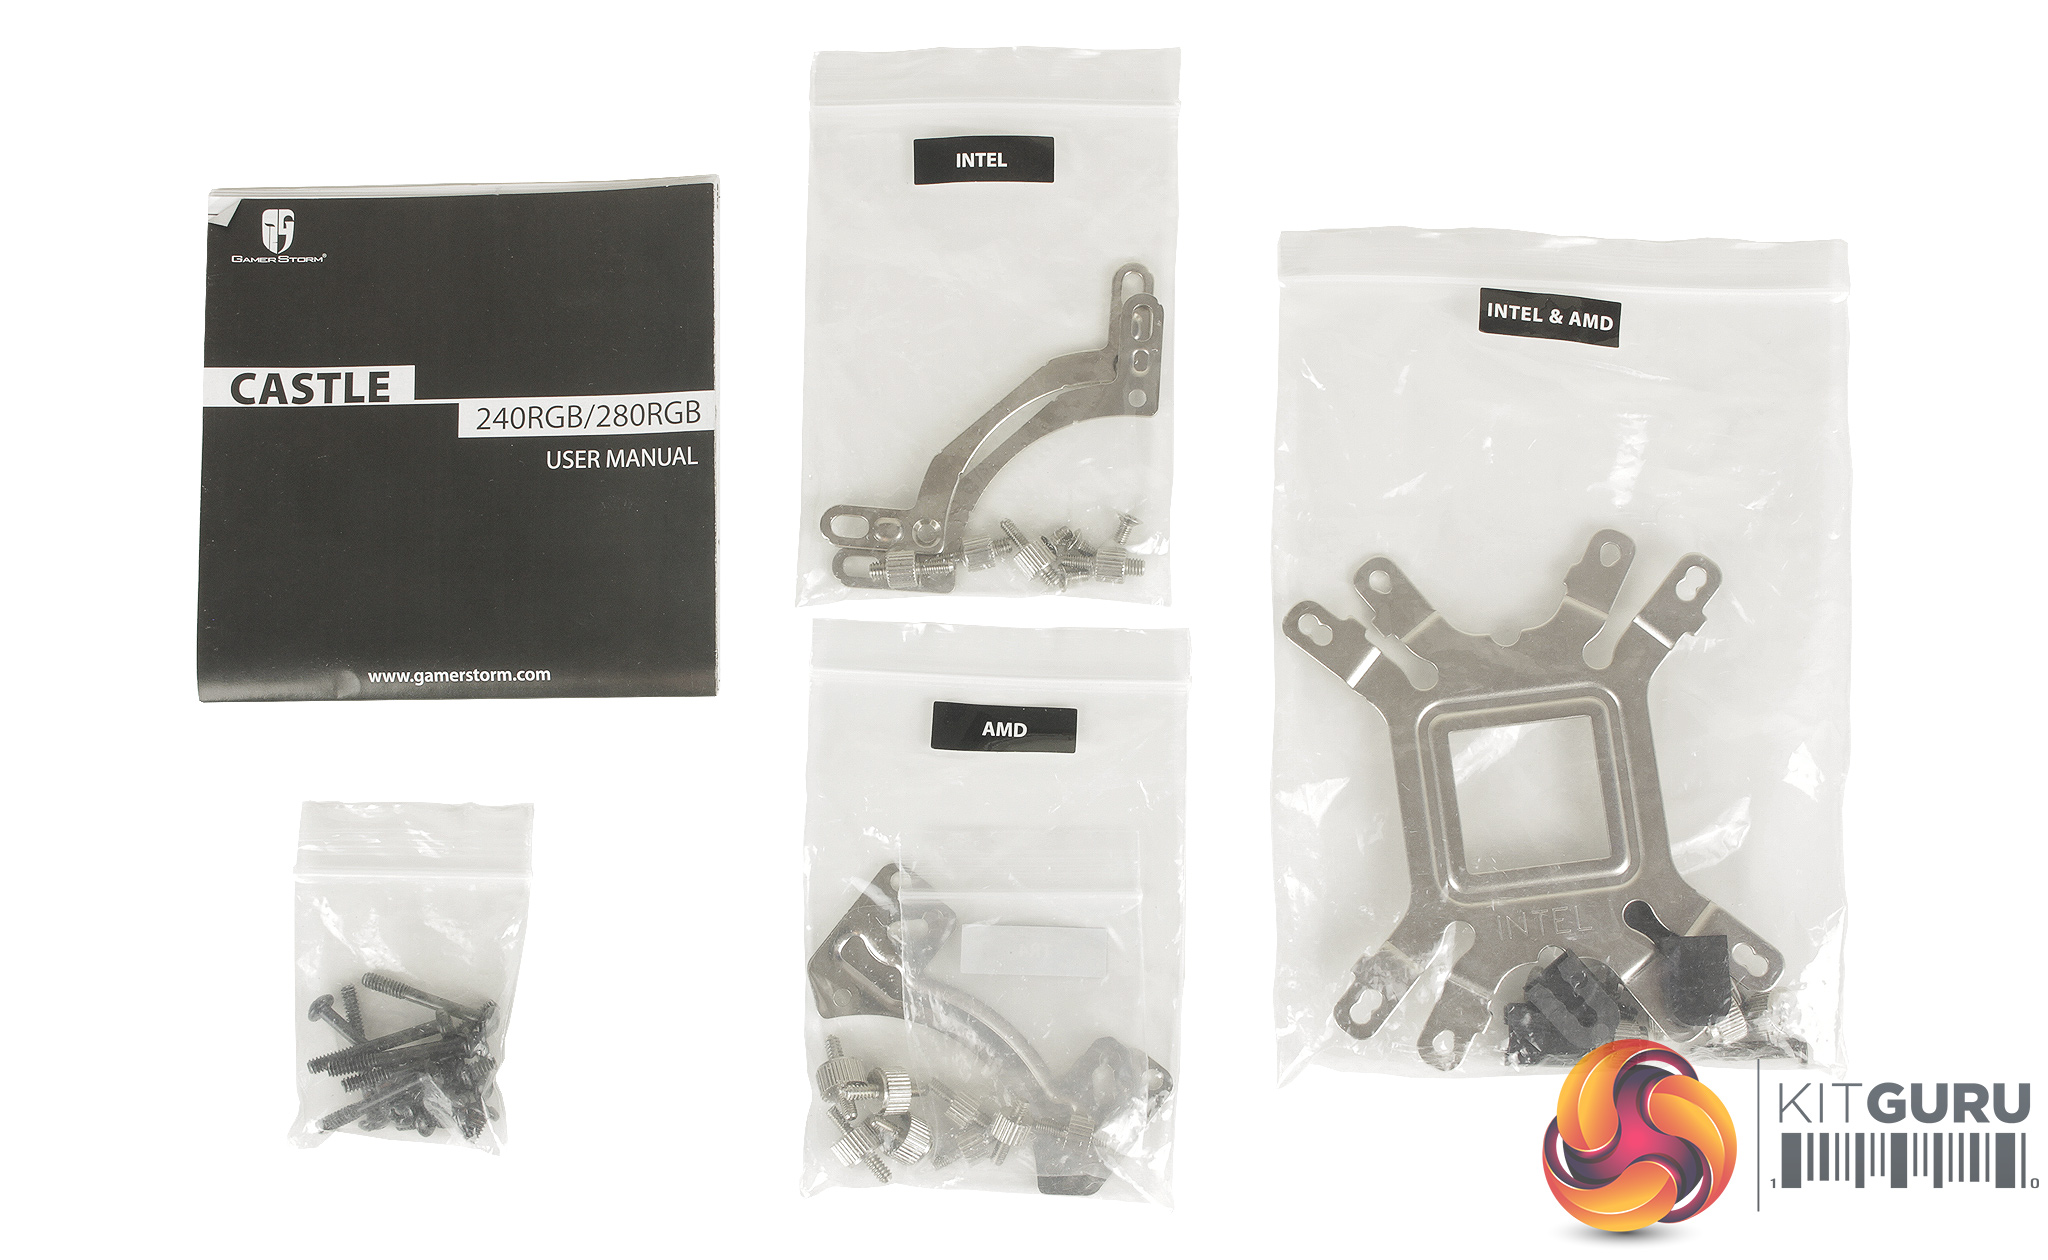
Installation instructions are included, as well as mounting hardware for current Intel and AMD sockets, as well as a number of older sockets.
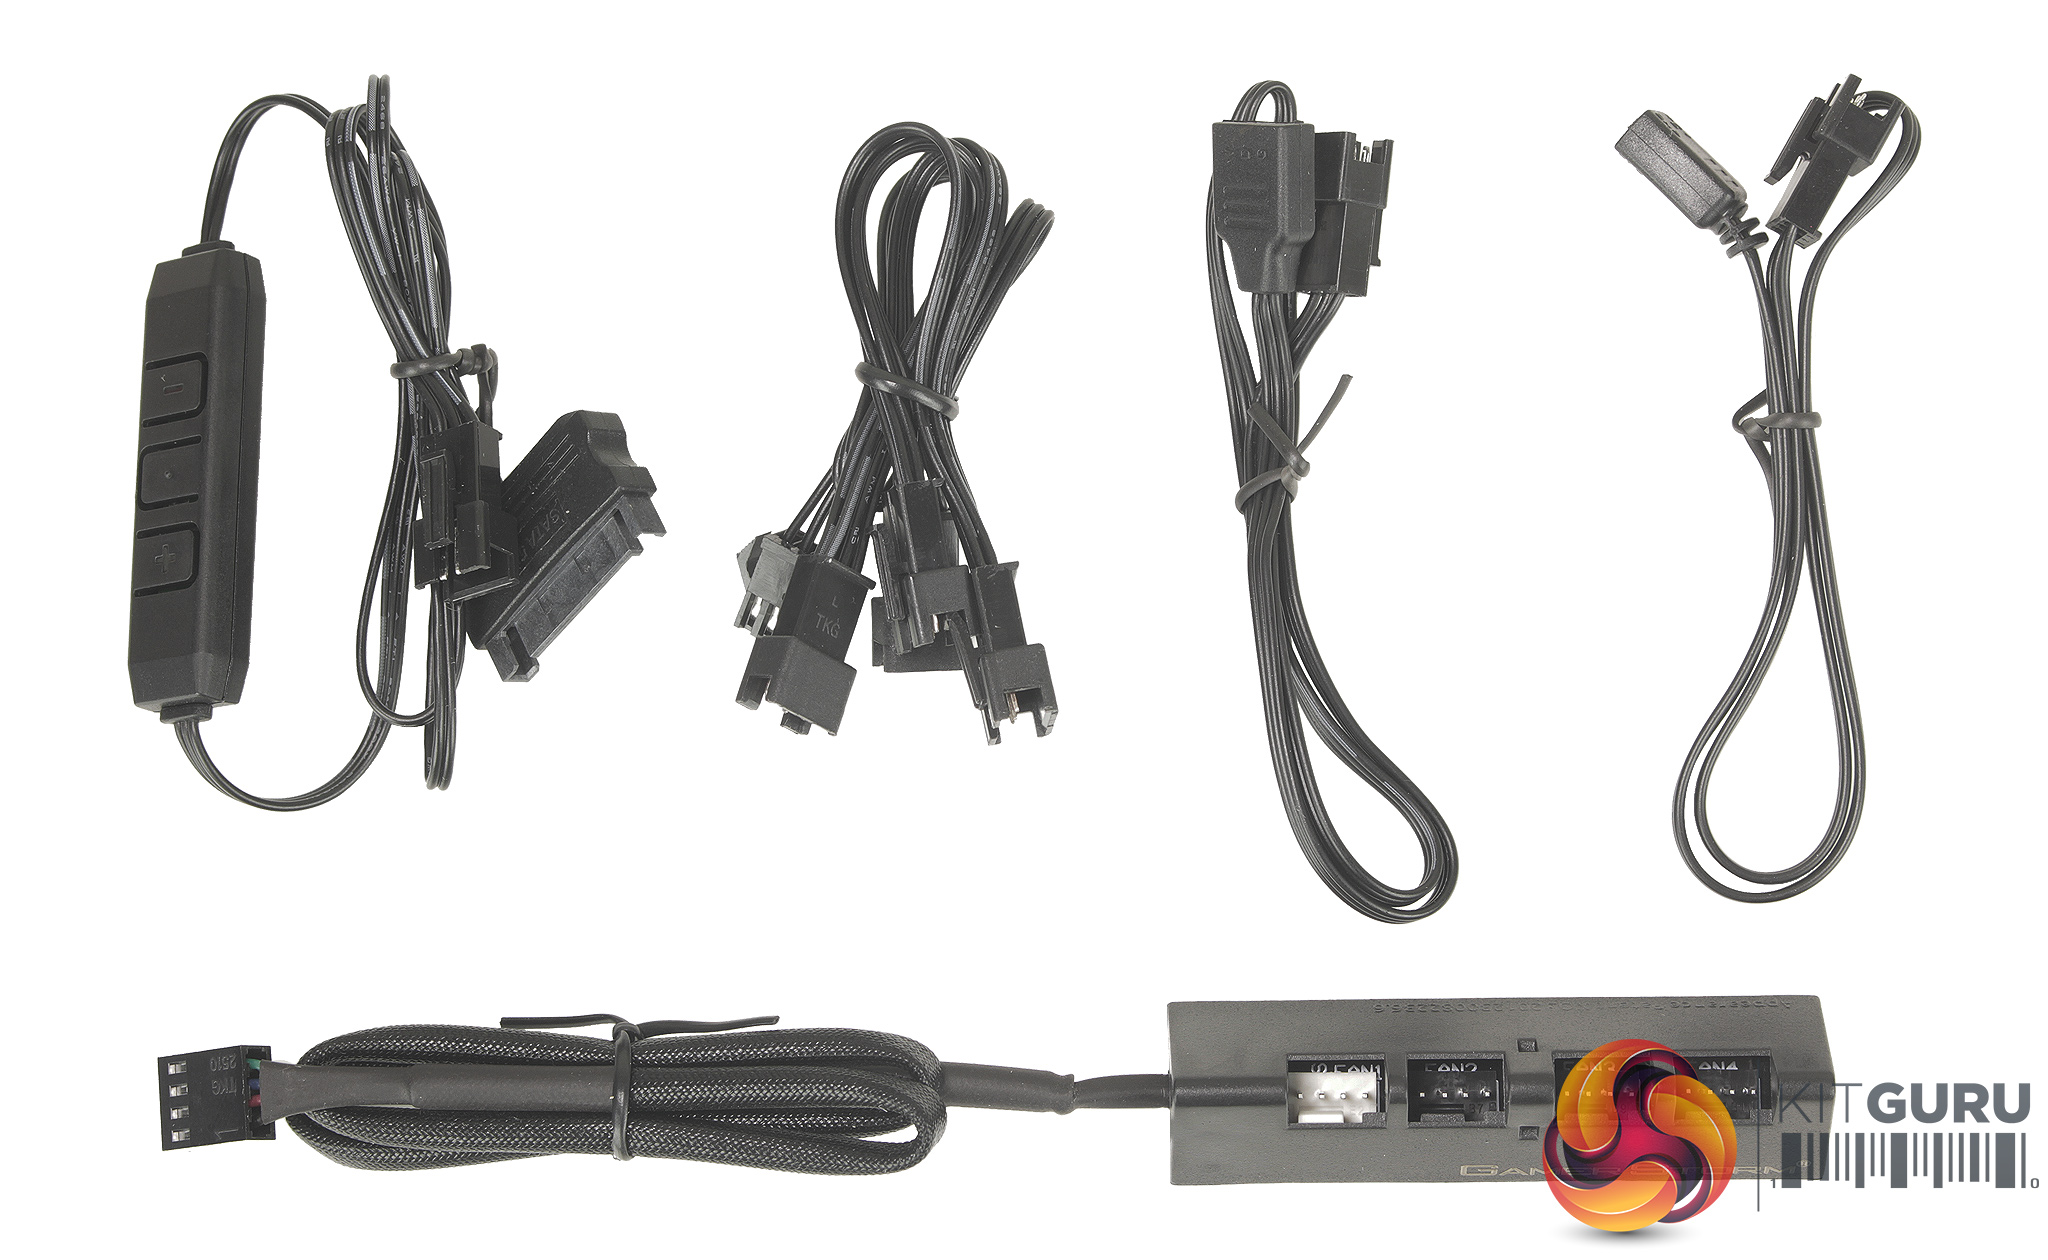
There are quite a few cables for connecting and controlling the fans, and CPU blocks LEDs. The core cable is a proprietary 3 pin RGB connection splitter for connecting all the aforementioned LEDs, as well as adapter cables for connecting the cooler to your motherboards addressable RGB header.
The Castle 240 also boasts support for all major motherboard lighting software packs, Asus Aura Sync, Gigabyte RGB fusion, MSI’s Mystic lighting Sync, and ASRock's Polychrome Sync. A SATA powered RGB controller is also included if your motherboard doesn’t support this header. You also get a PWM fan hub for connecting up to four fans.
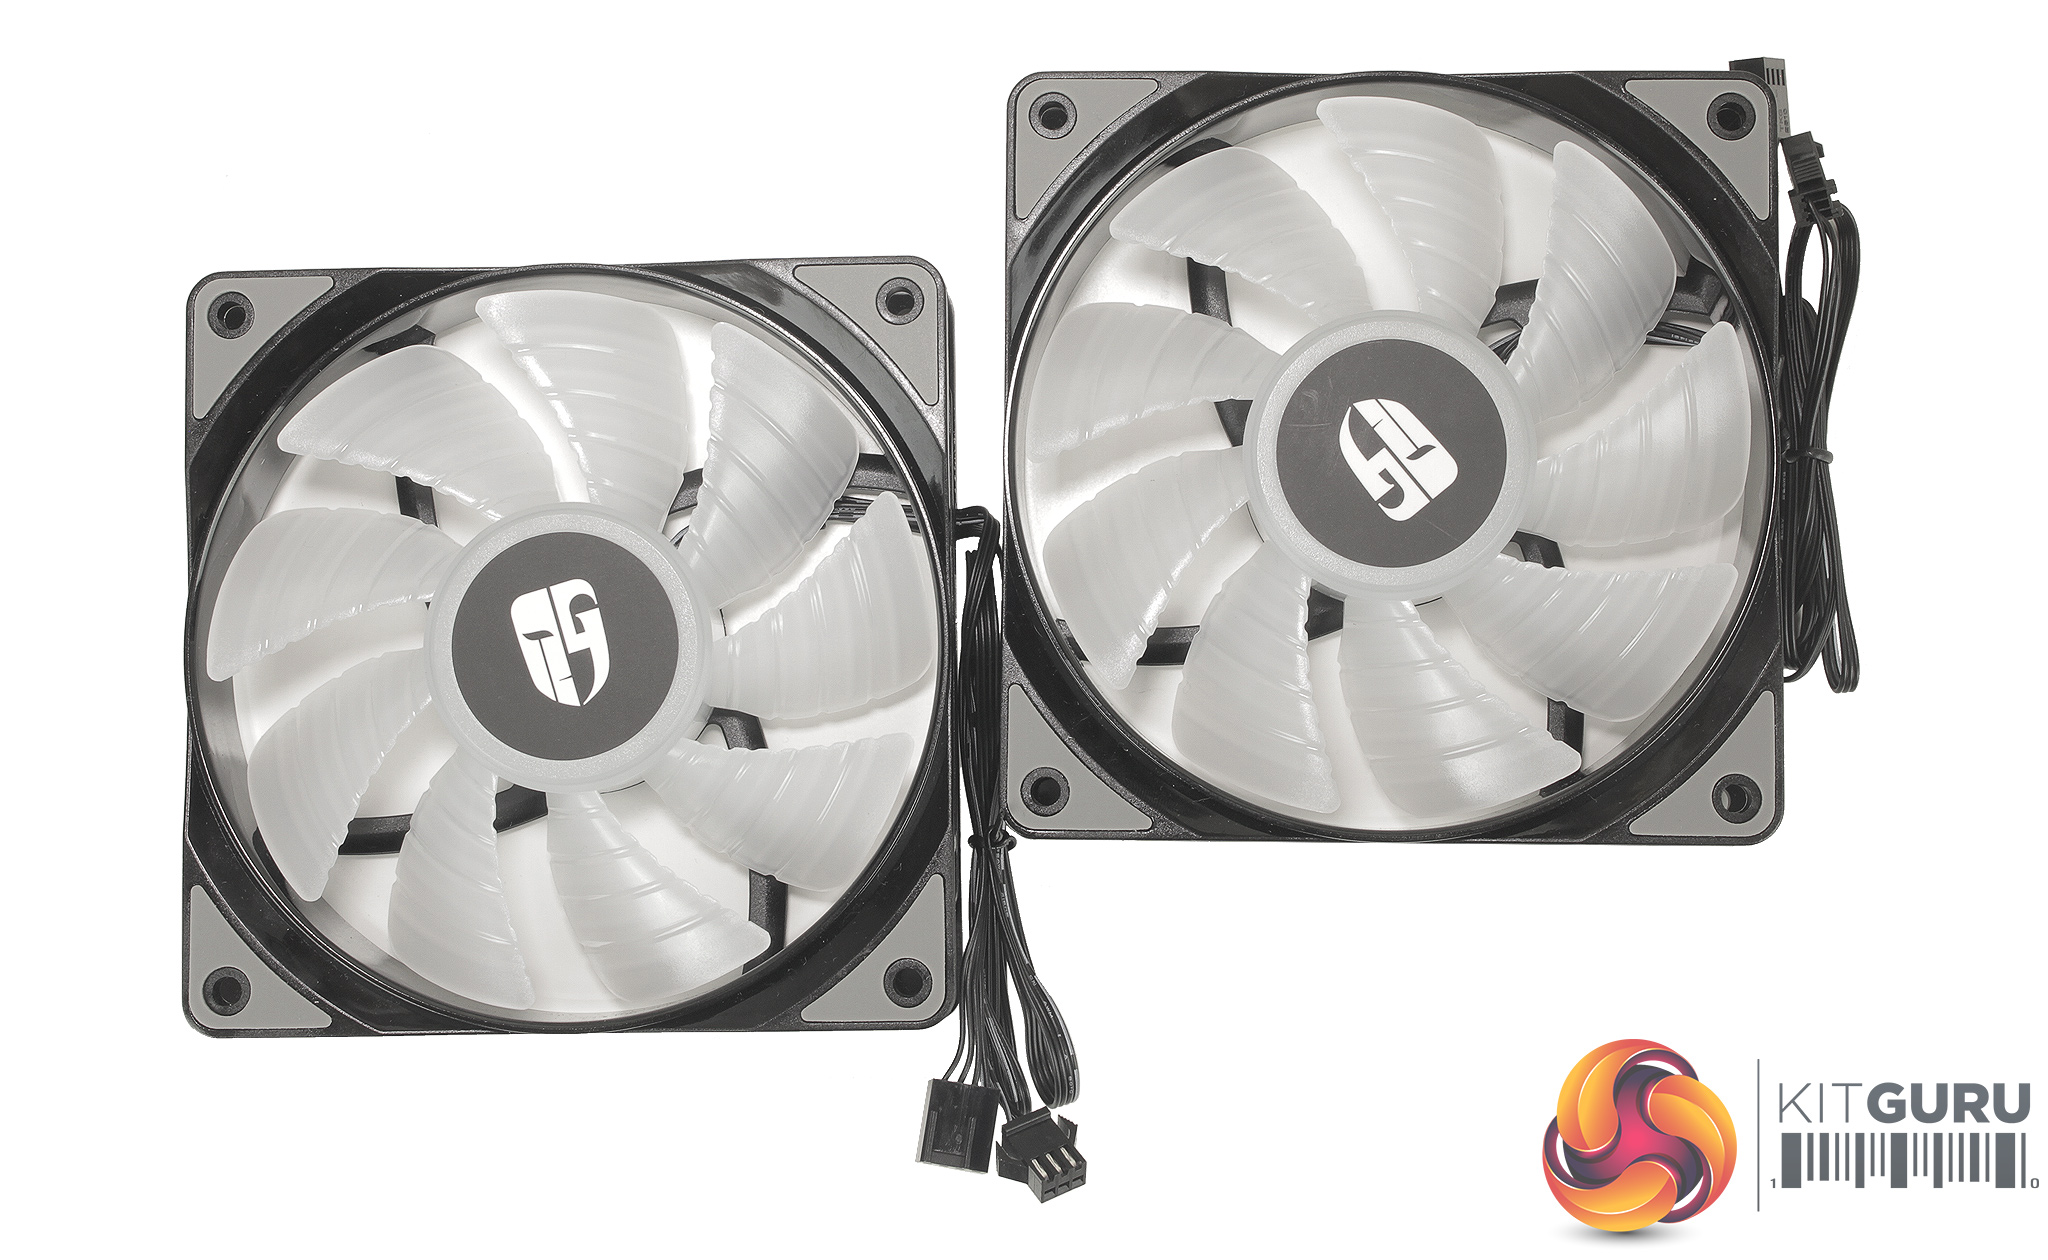
The two 4 pin PWM 120mm RGB fans included with the castle 240 which have a wider, static pressure optimised blade design which suits the radiator application, and small rubber isolation pads are present around all of the mounting spots which should help a little with vibration dampening.
Installation is pretty simple and helped hugely by the large image-heavy instructions which break the process down into easy stages. The first stage requires setting up the cooler's backplate based on your motherboard's socket. As we now test using a Z170 motherboard socket LGA1151, the installation process below reflects this.
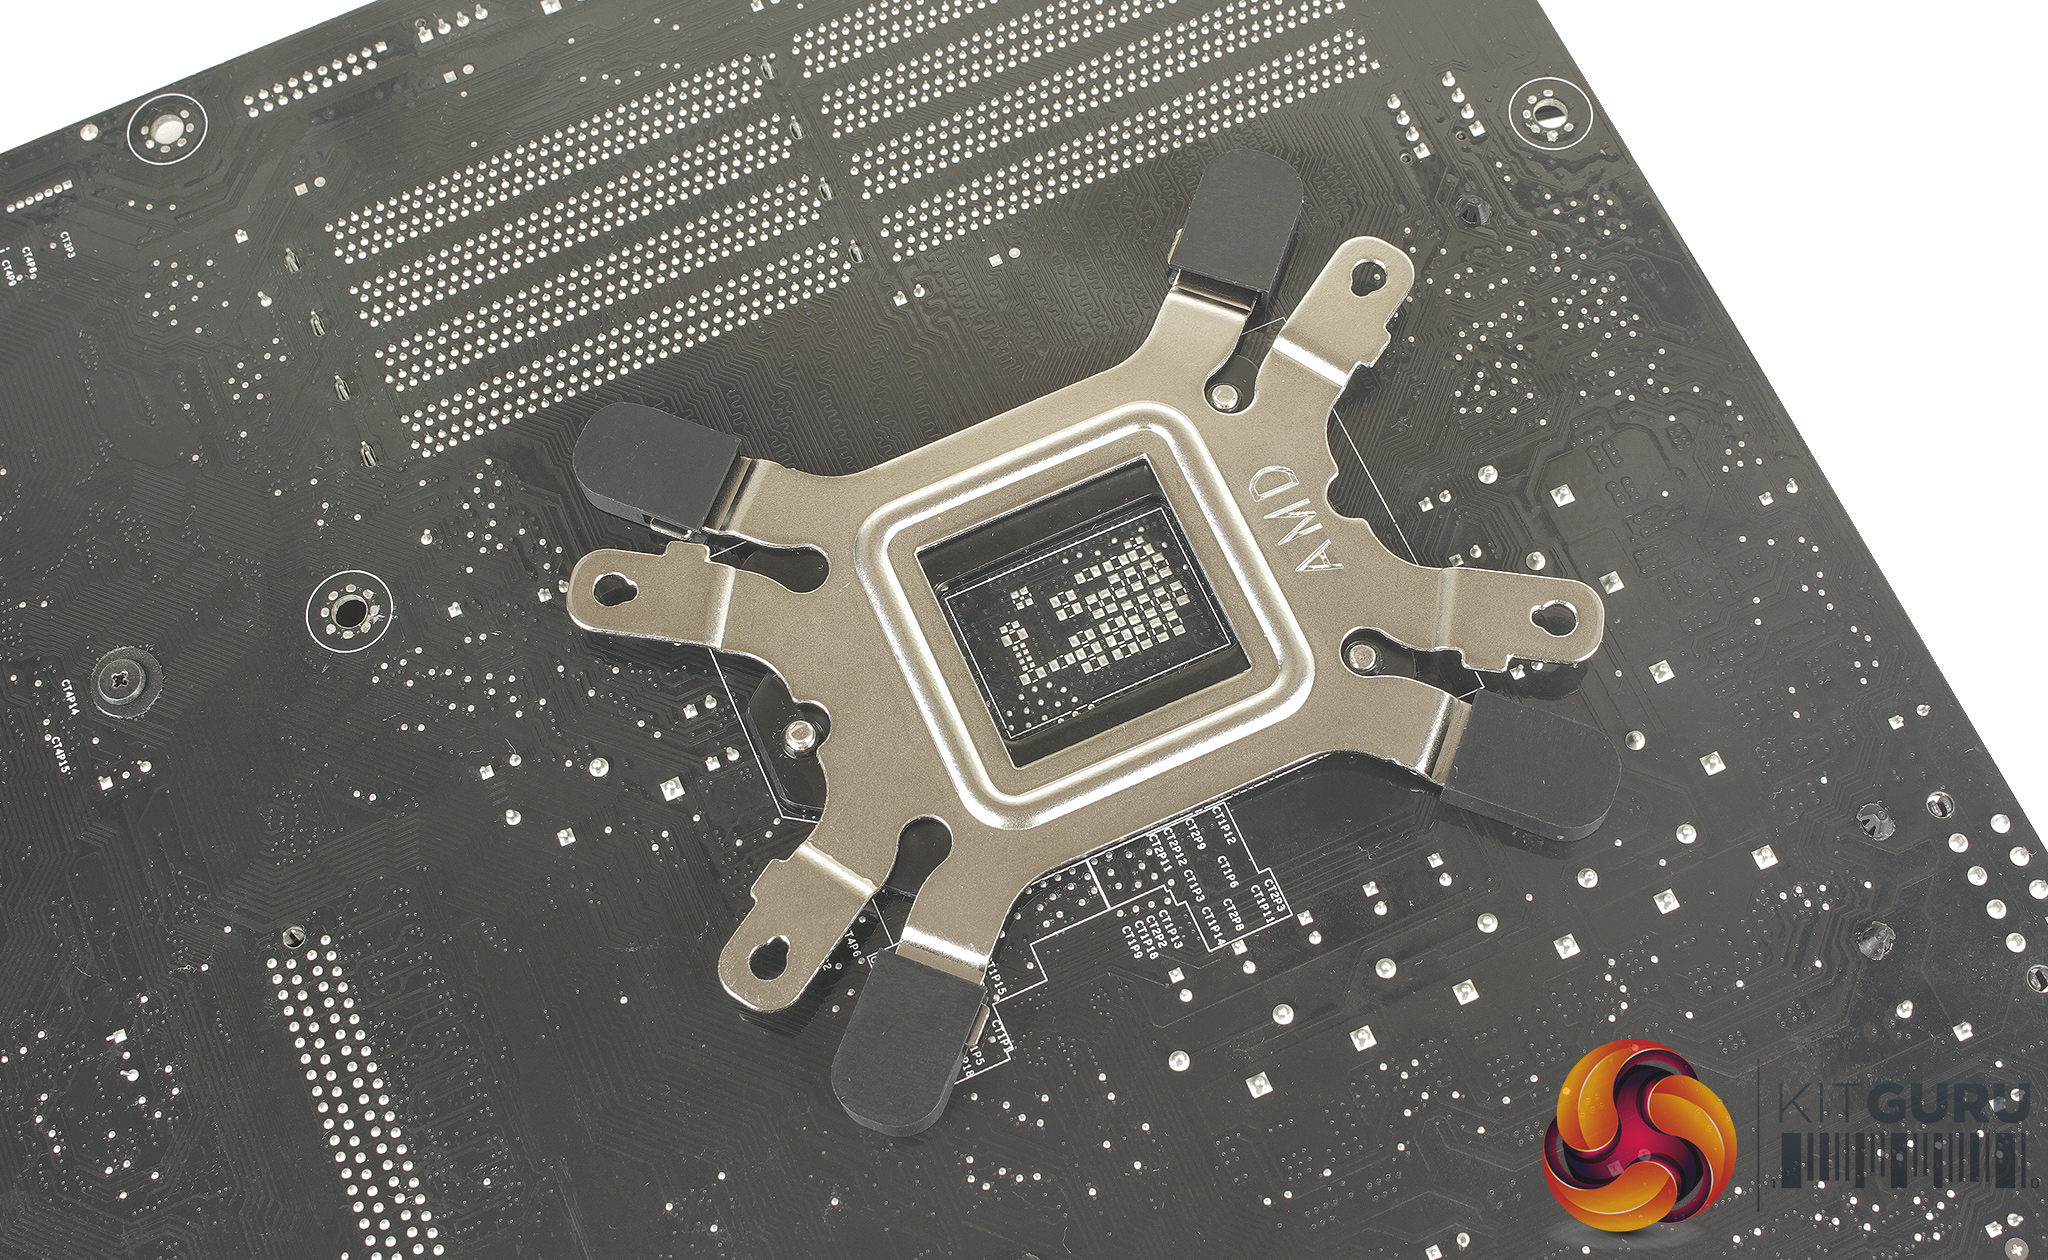
You use the longer included screws, which are set in place based on your socket, and then held to the backplate using four plastic clips. These are essential to prevent the metal of the backplate contacting the back of your motherboard. The backplate can then be fitted with the screws passing through the motherboard. It is worth noting that there are no additional standoffs to hold the backplate in place.
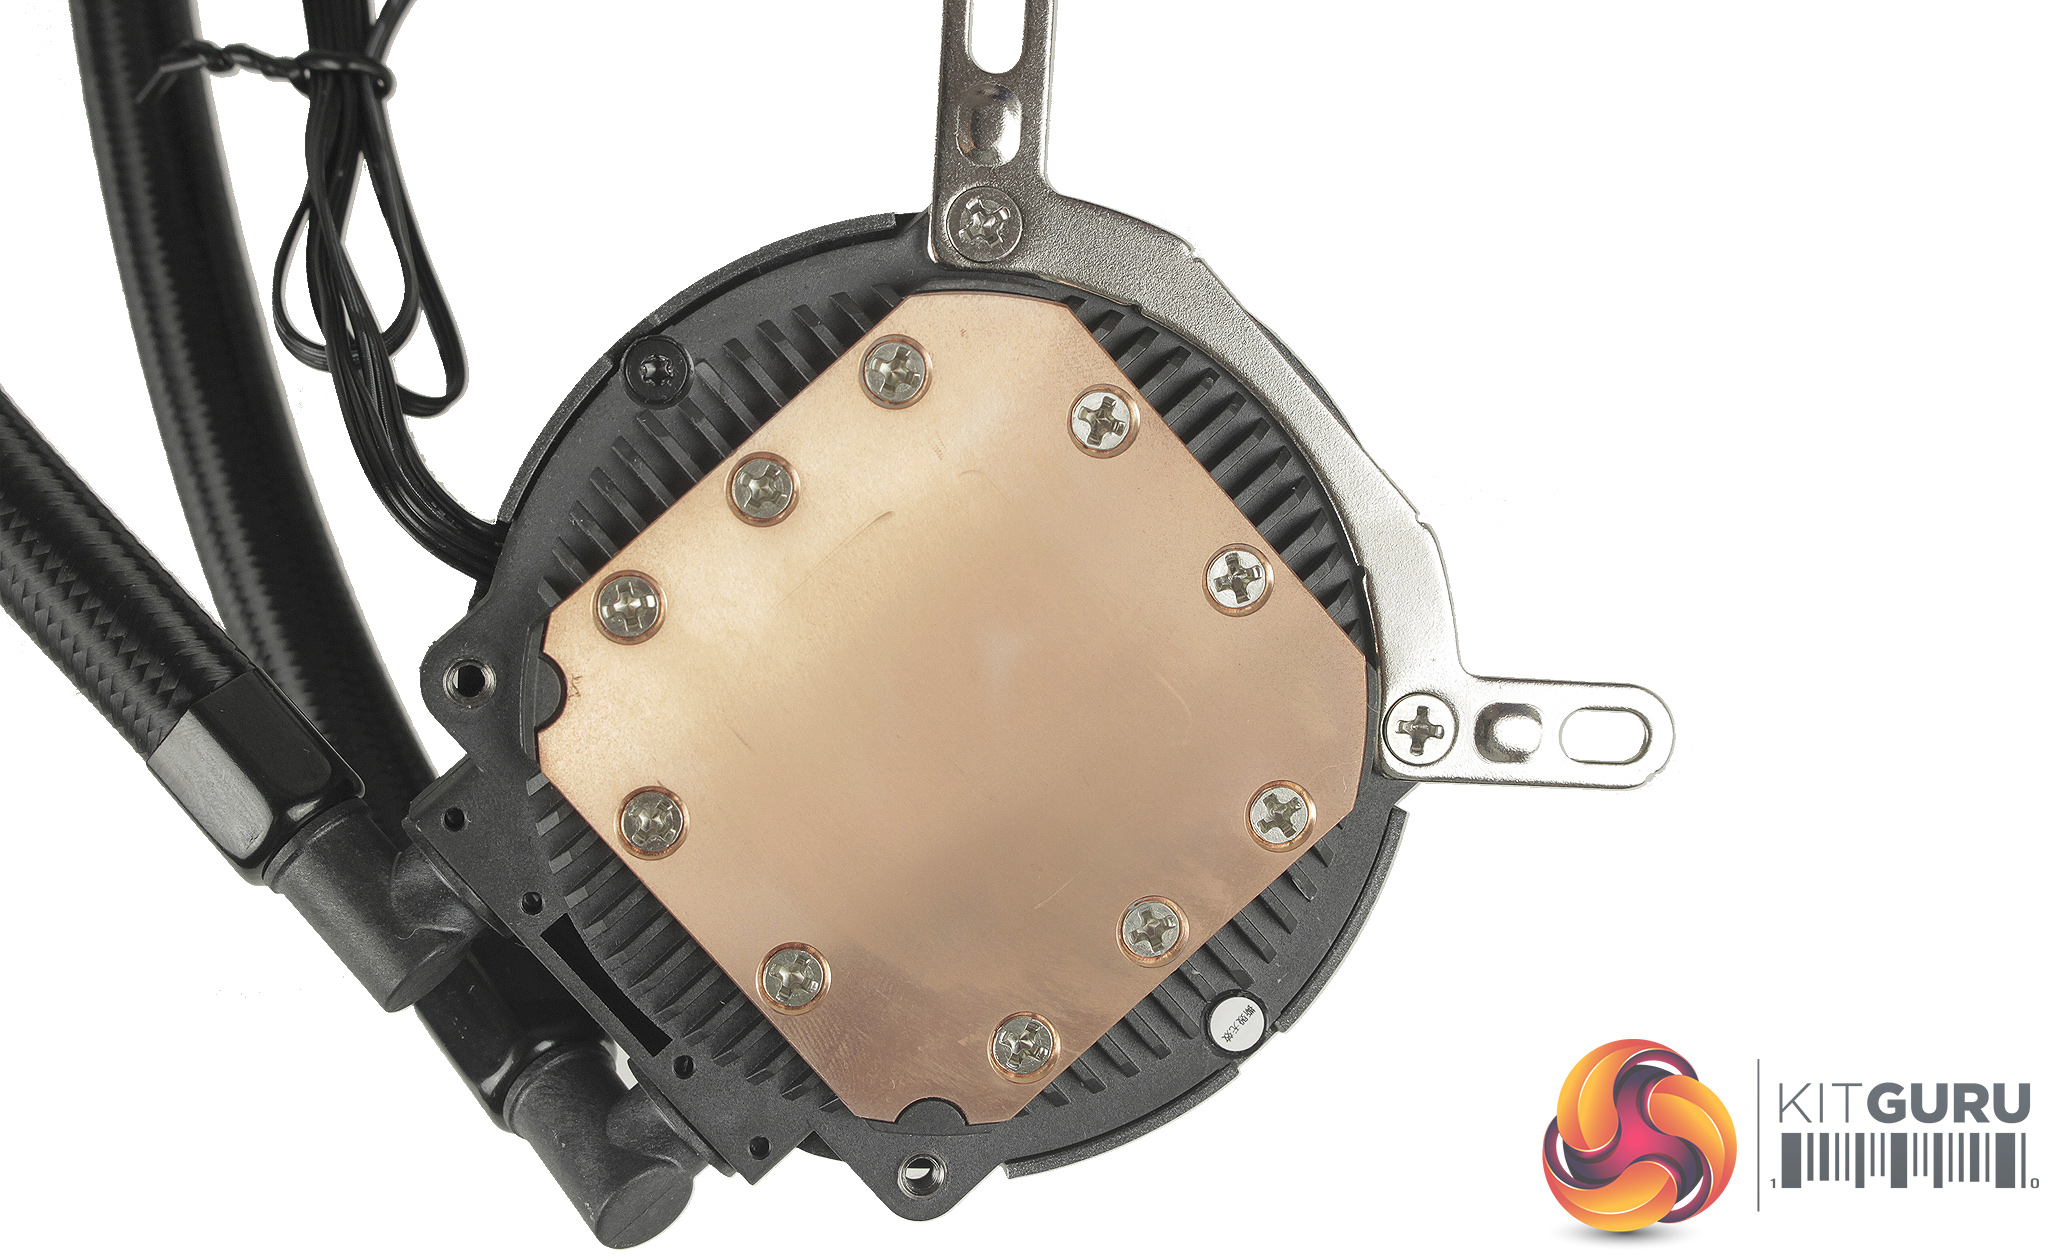
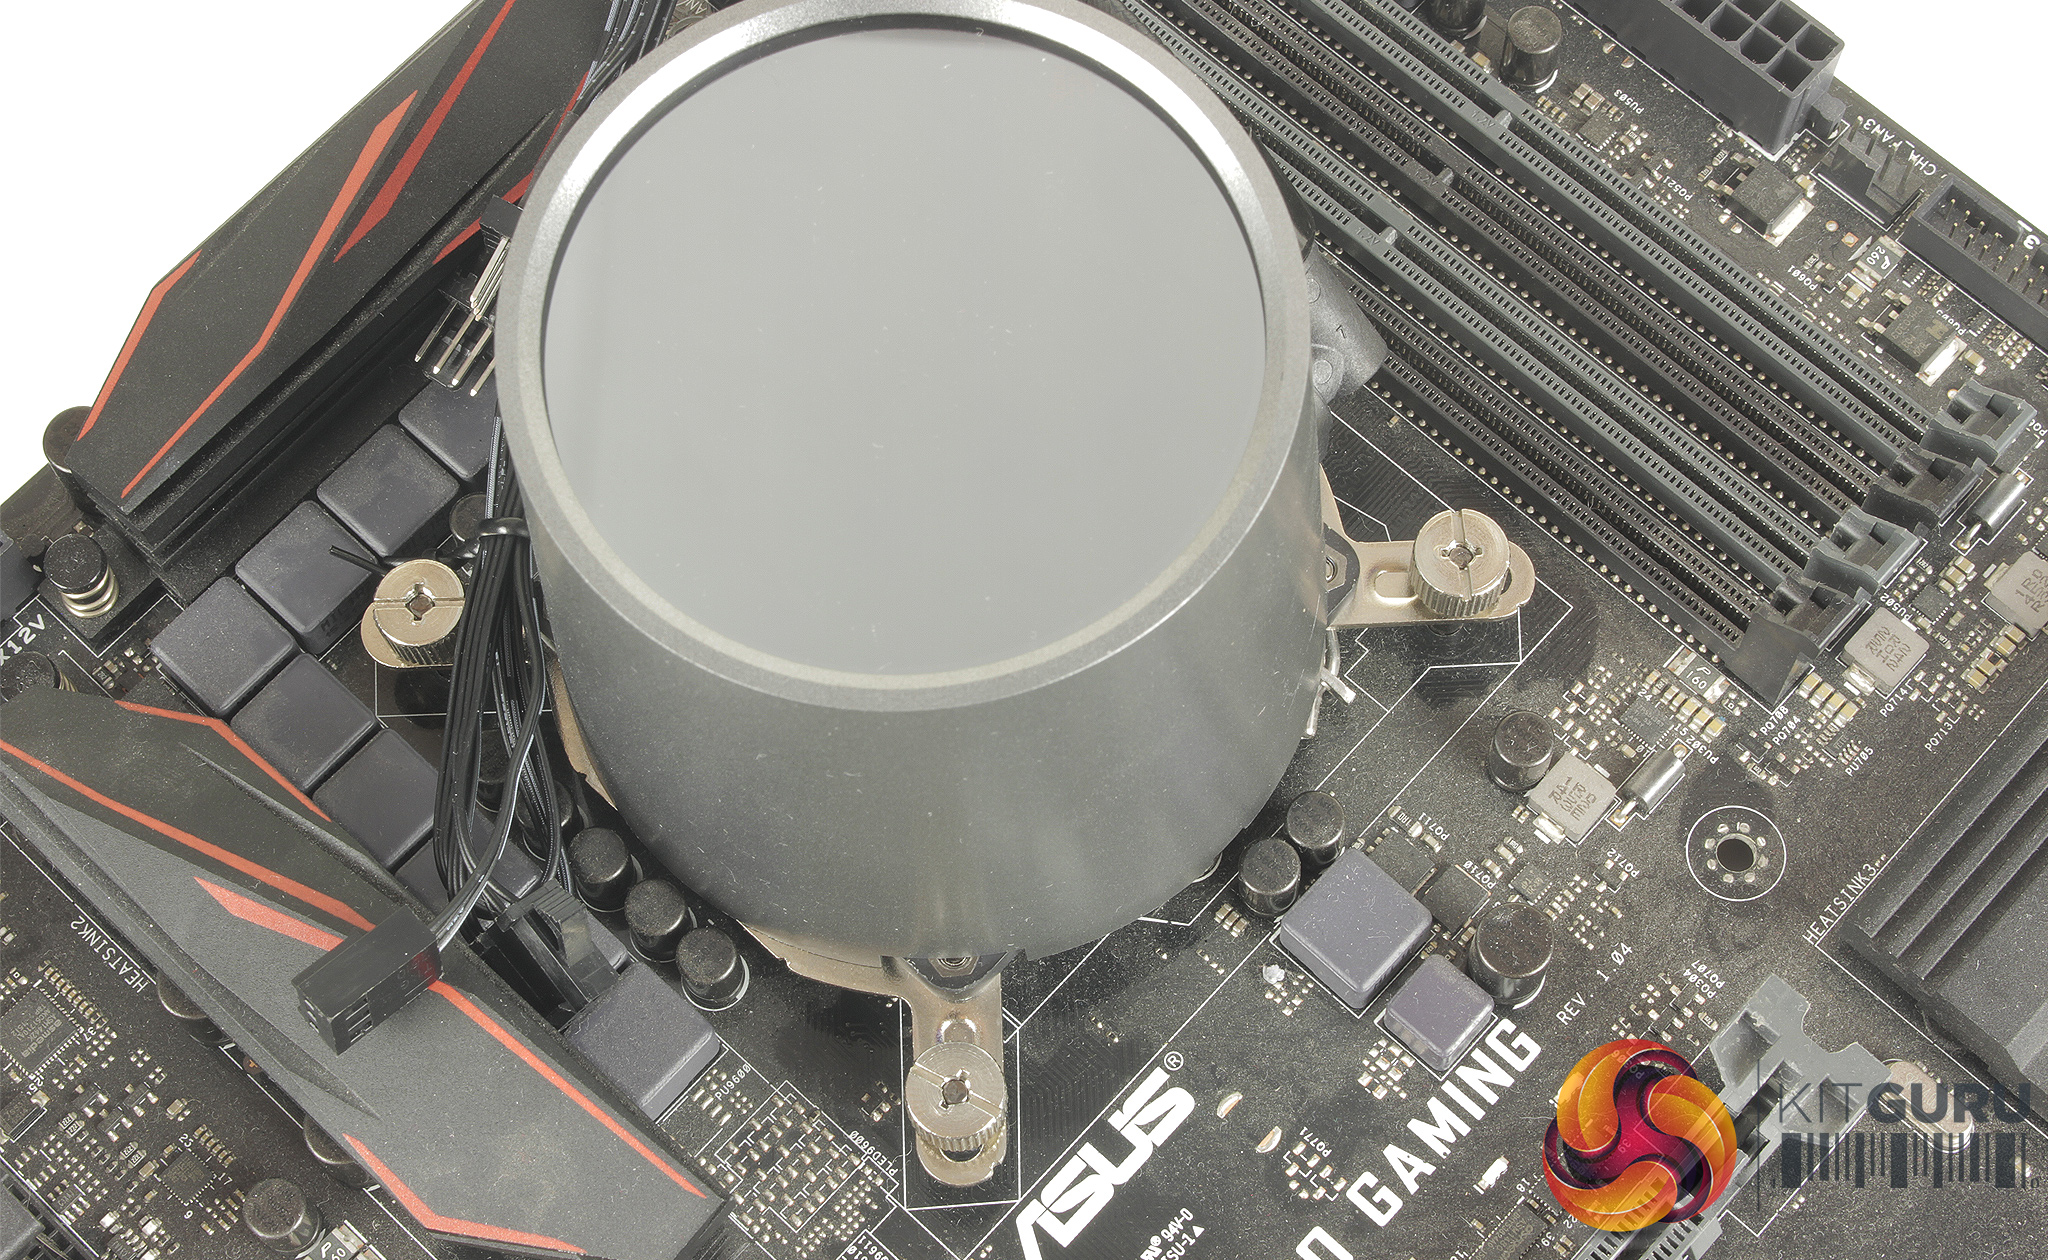
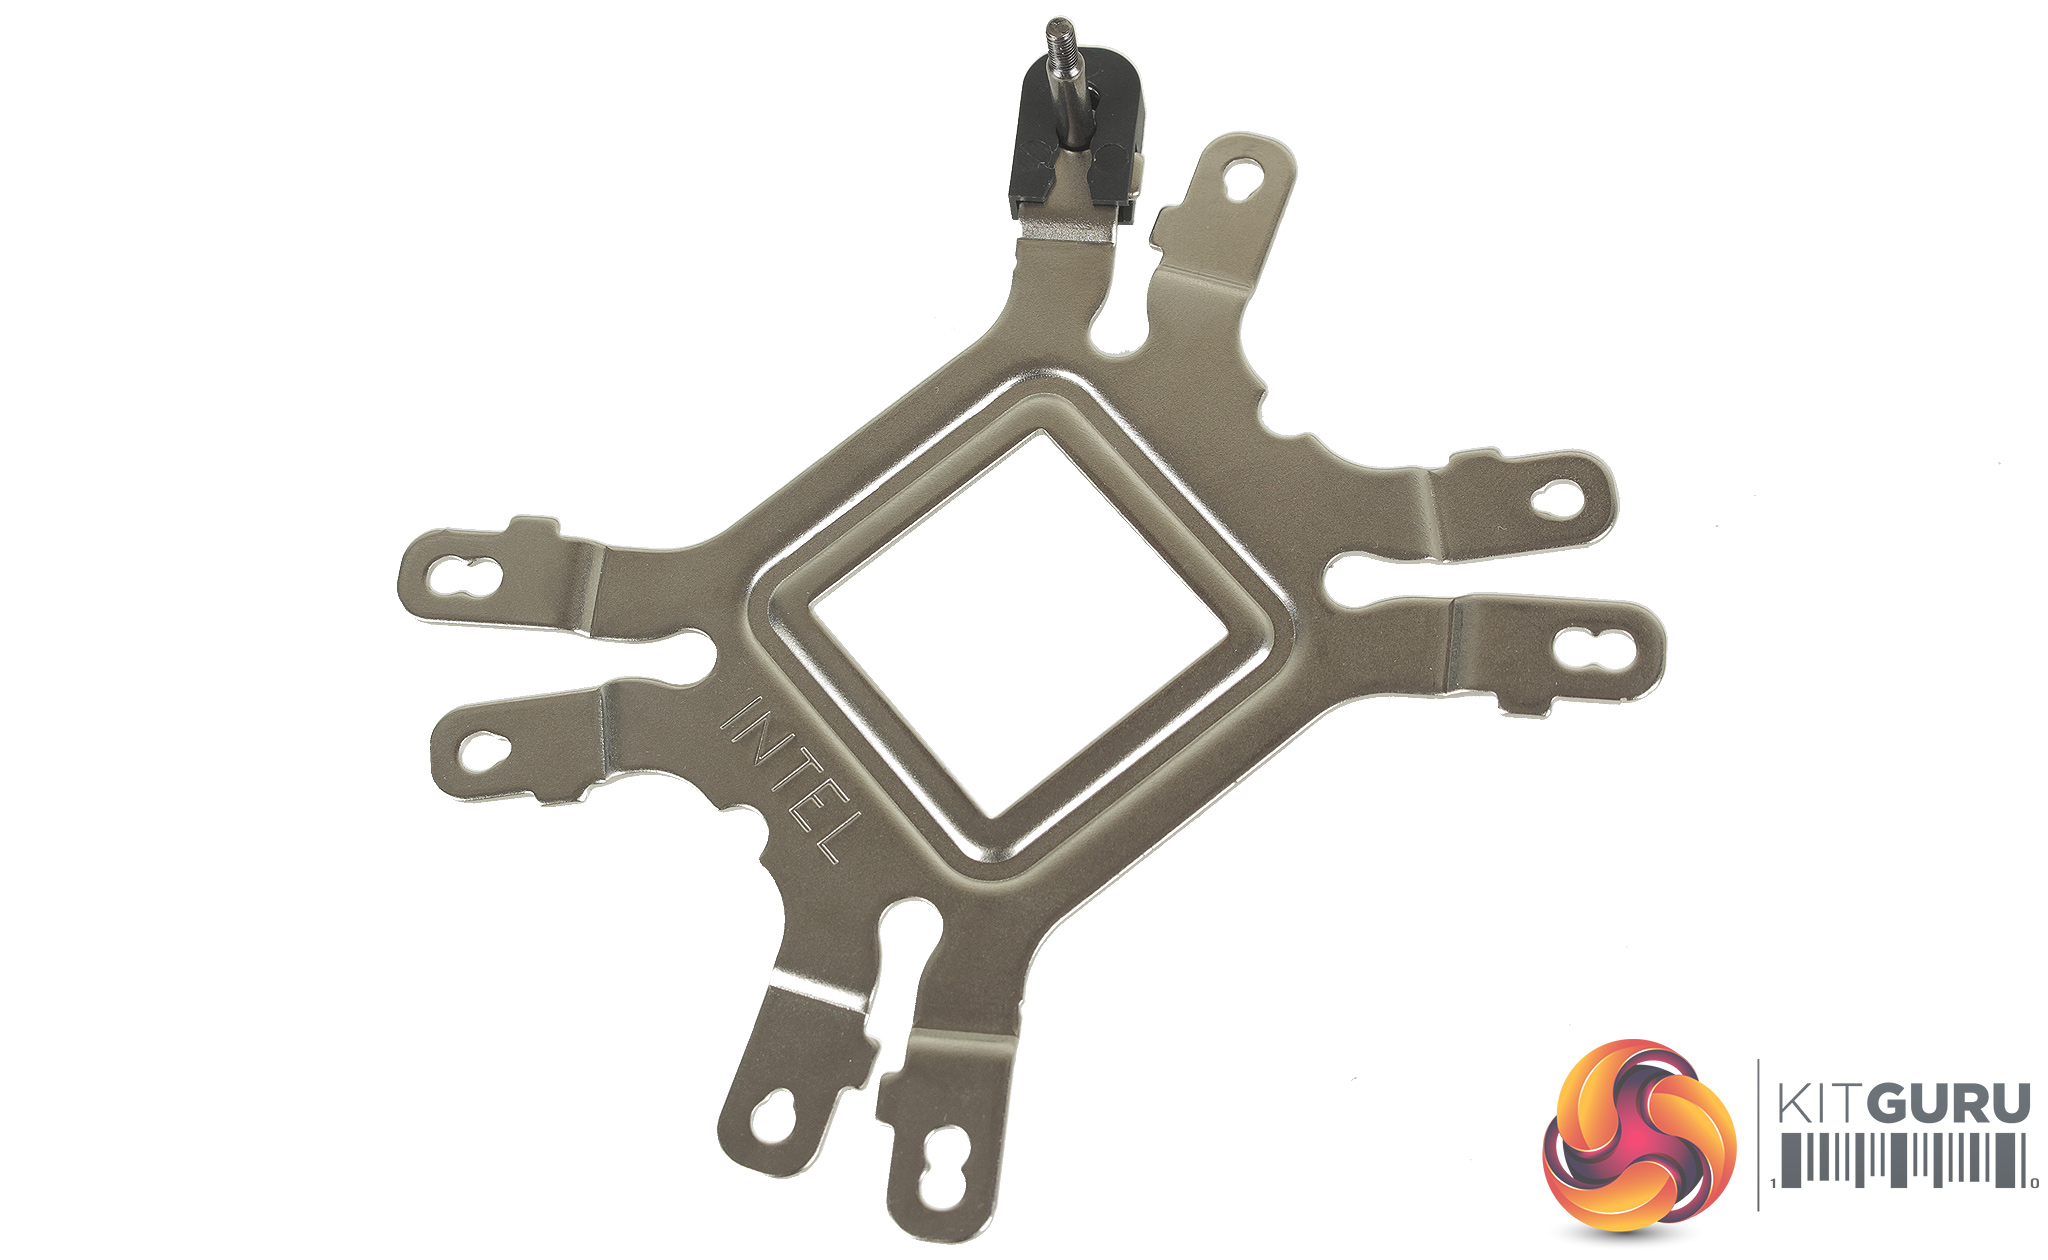
Setting up the CPU block requires screwing your sockets mounting brackets to the base of the block. It is definitely worth looking over the manual to ensure for best performance, as there is recommended orientation for the CPU block depending on whether you’re installing in an ATX or E-ATX system. Thermal paste can then be applied and the block is held in place using four thumbscrews.
For mounting the radiator and fans, Deepcool has included both long fan screws and shorter case screws depending on your mounting preferences. Once physically installed in your case, you can plug in the fans, using the included fan splitter hub, and choose the correct adapter for connecting the RGB LEDs.
As mentioned I used SATA powered RGB controller adapter, as our testing board doesn’t feature an RGB header. Installation does require a little more work than some coolers I have used before from brands like Corsair, but with the instructions in hand, the process only took around 10 minutes.
With the cooler's LEDs powered up, you get a much better idea of why the addressable RGB LEDs are something to shout about.
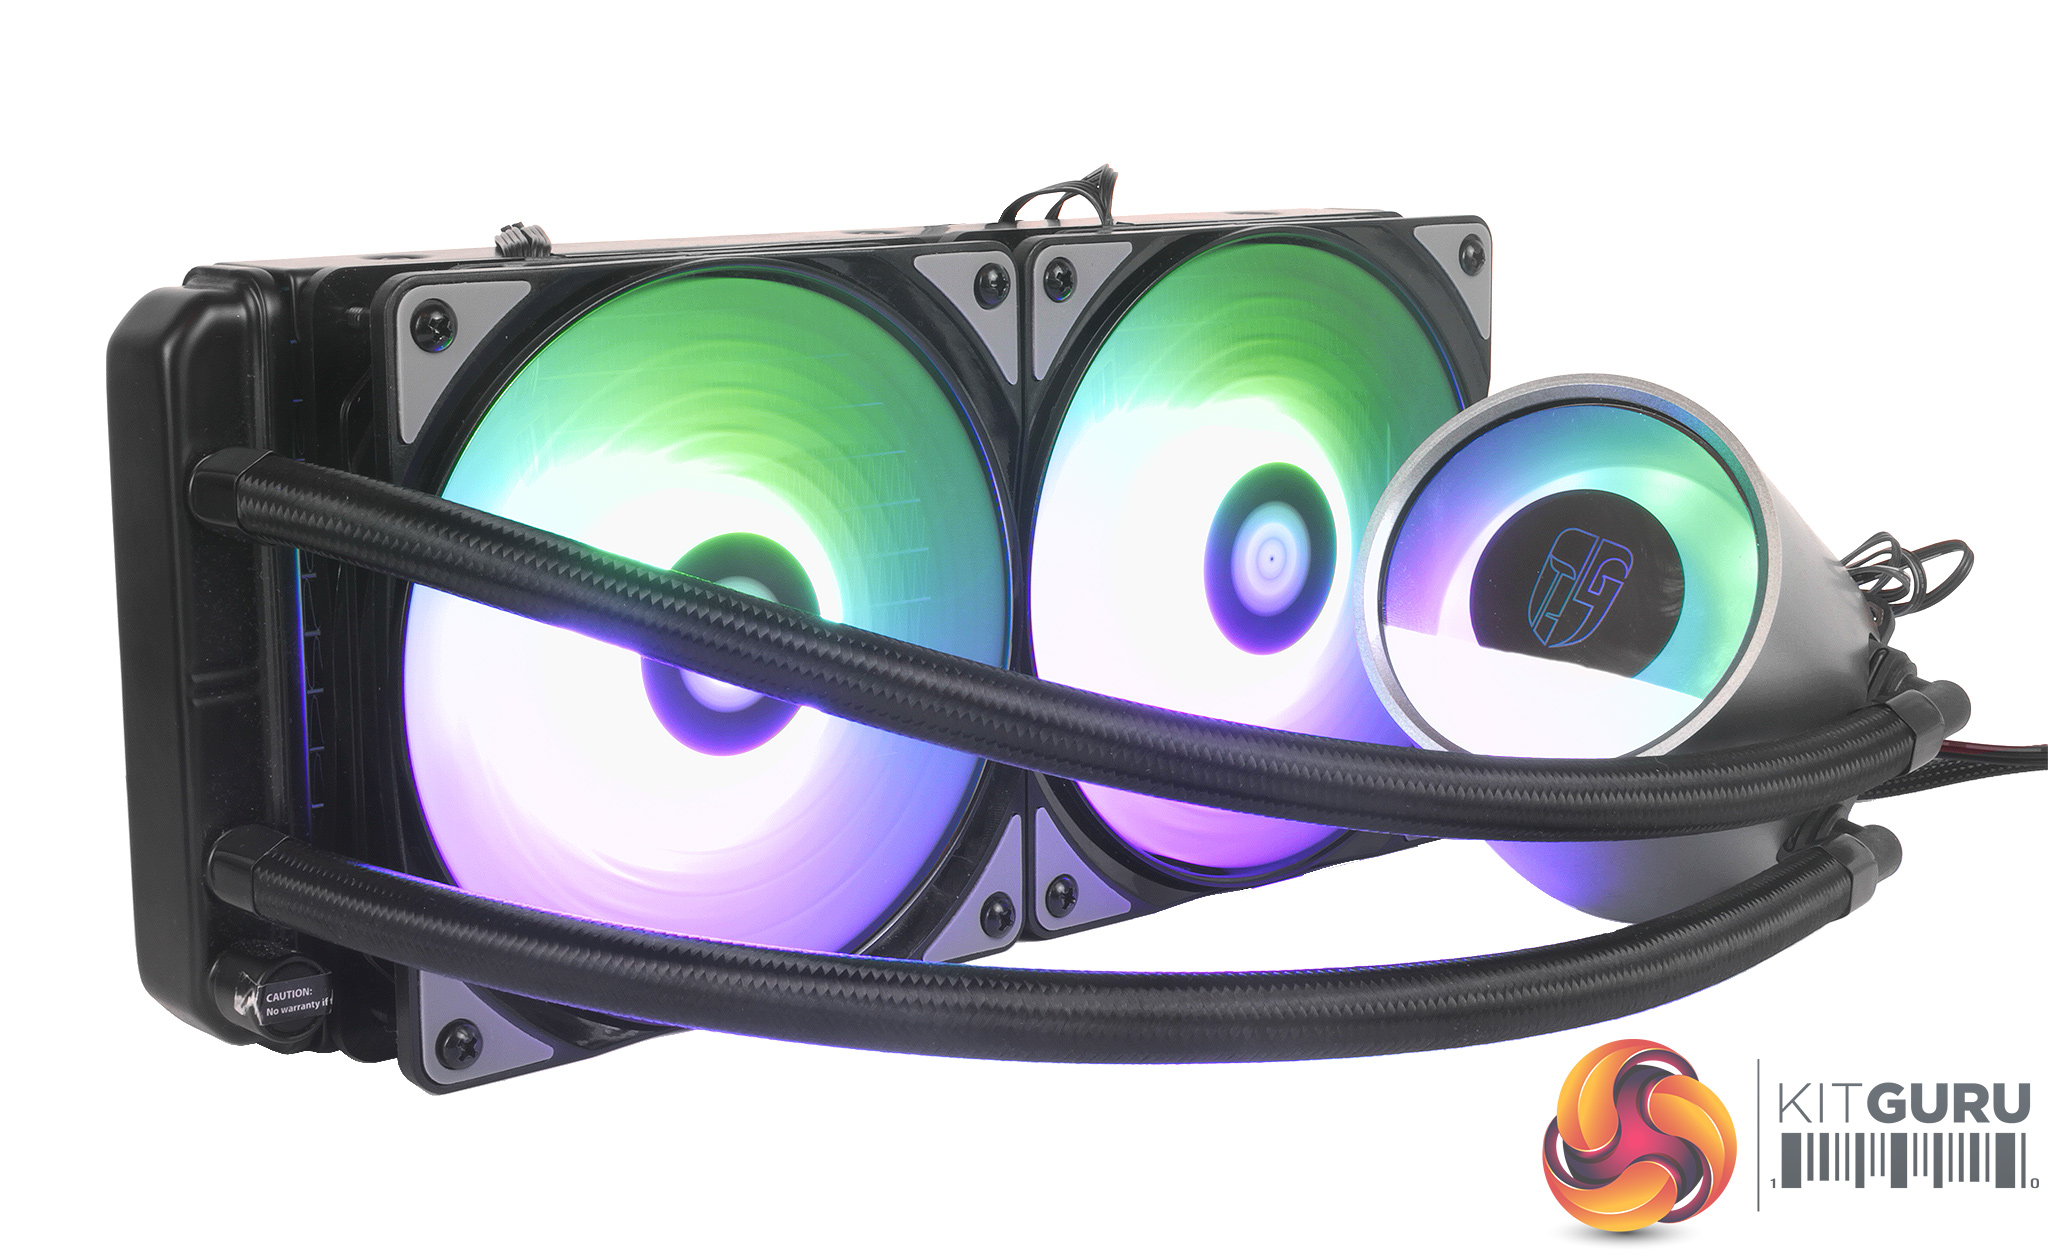
The modes accessible through the controller are relatively standard spiralling and breathing modes, but a really unique touch is the spiralling colour effect which matches complementary colours.
Standard pulsing on and off, and static colour modes are also available through the controller, but one of the better-looking options is the rainbow spiral effect which transitions through colours incredibly smoothly.
Using the included motherboard header adapters would offer much more flexibility through programming if there is a particular pattern or set of colours that you prefer as well.
To test all CPU coolers, we devised an easily repeatable test with no variables other than the coolers themselves. This ensures that figures from every cooler we test are comparable with each other.
Test rig
At KitGuru we have recently updated our testing setup, and now test temperatures on the Z170 platform. For the CPU we are testing with the Intel Core i7-7700K installed in a ASUS Z170 Pro Gaming motherboard. For RAM we have a single 8GB stick of Geil EVO X RGB for some added bling running at 3200MHz, and storage is handled by a 120GB SanDisk SSD Plus. Powering our bench is a Seasonic Prime Platinum 650W PSU.
The test process
For testing, we run a number of tests including 4 separate temperature readings per cooler. We first measure the idle temperature of the i7-7700K locked in at 4.0GHz before measuring its temperature under load at the same frequency.
For a representation of overclocks, we run the i7- 7700K at 4.5GHz with a 1.275 Vcore applied both at idle and load. The temperatures we present are temperature deltas, where the ambient temperature of the testing environment is deducted from the temperature taken from the CPU for both idle and load. We are aware that a 4.5GHz overclock with a 1.275 Vcore applied is not representative of the best setting possible for the i7-7700k, but this does allow us to simulate performance of coolers whether you are using a less powerful CPU such as an i3 or i5 processor, or a more powerful hotter CPU like our overclocked i7-7700k.
An idle reading comes from leaving Windows on the desktop for 15 minutes. A load reading comes from running Prime95’s (version 26.6) Small FFTs test for 15 minutes – enough time for temperatures to plateau. We use HWInfo64 v5.82 to measure temperatures.
Noise output
We measure noise levels with our sound meter positioned 1 foot away from the test bench. The peak noise level is presented. We have measured the noise floor (i.e. ambient noise levels of the room) to be 34 dBa, and when tested at stock clocks, the vast majority of coolers do not emit noise levels above this figure. Thus, we present one chart with noise levels taken during our overclocked CPU test run.
Temperatures
All temperature charts are sorted with lowest load temperatures at the top.
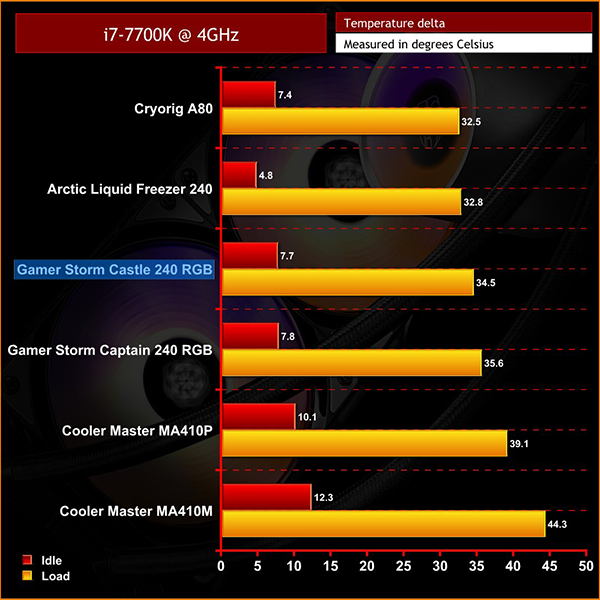
Testing results look pretty good with the Castle 240 RGB sitting above the Gamer Storm Captain 240 RGB EX, but just below the Arctic Liquid Freezer 240 and the Cryorig A80 which is unsurprising as the A80 has a slightly larger 280mm radiator.
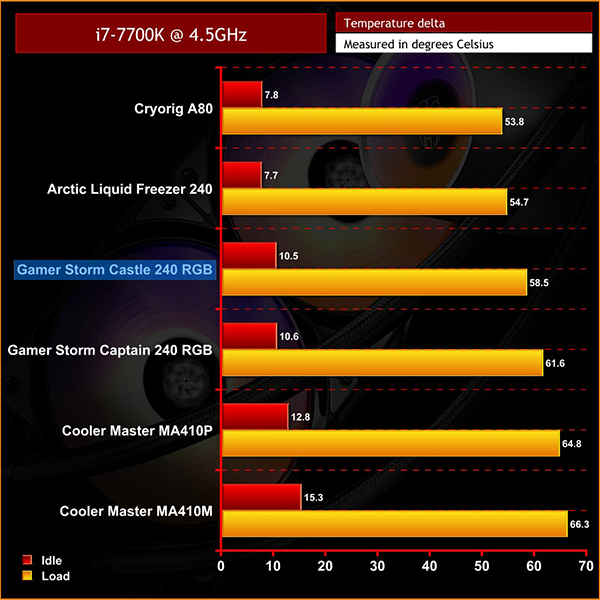
When overclocked, it is nice to see a temperature drop from the older Gamer Storm Captain 240 RGB EX, so not only, in my opinion, a better-looking option but also better performing than the older Captain 240 RGB.

The Castle 240 did turn out to be slightly louder than the Captain 240, but only by one decibel or so, but during our testing the PWM fan controller included with the Castle 240 wasn’t put to use so there is the potential to set up a more silence-optimised fan profile through software, if this is your preference.
Overall I was pretty impressed with Deepcool's Gamer Storm Castle 240. Cooling performance isn't class leading but it does a good job by both cooling the CPU and keeping noise in check, even under heavy load. It’s not the absolute best cooler by any means, but for £95.99 it does a very capable job.
Aesthetically I would say it's hard to beat, it is certainly one of the better-looking coolers I have seen to date, and the lighting effects available with just the included controller are some of the best I have seen. This is largely due to the LED's addressable nature, and if your motherboard supports an addressable RGB header its unlikely to disappoint.
The package is also well thought out, with relatively quick and easy installation, and the inclusion of lots of varied connecting cables is also a big tick in the Castle 240's favour. Although not the best option for performance, if you are looking for an AIO liquid cooler with a bit more wow factor the Castle 240 is definitely one to consider.
The Castle 240 is currently available from SCAN for £95.99 inc. VAT HERE.
Pros
- Great looking RGB LEDs on both the fans and the very clean looking CPU block.
- The included controller offers loads of effects to choose from and some really standout effects like the spiralling colour way effects.
- Compatible with all current motherboard manufacturers software suits for further LED customisation through software.
Cons
- No smart software support for fan profiles or modes.
- Pretty middle of the road for performance when compared to other 240mm AIO liquid coolers.
KitGuru says: If you’re looking for a more unique cooler which stands out from the hoards of single colour, or outright non LED coolers available, then the Deepcool Gamer Storm Castle 240 RGB will not disappoint. It’s definitely worth considering a motherboard with an Addressable RGB header, however, if you are planning on building the Castle 240 into a new system to make full use of the gorgeous LED lighting.