First we attach the Ying backplate, which supports both Intel and AMD motherboards. Four long screws are passed through from the rear.

Our ASRock motherboard has two sets of mounting holes, for 1156 and 1366 slot coolers.

Both fans need to be removed at this stage to make the installation possible. Both fans simply unclip and is the best heatsink connection method we have seen.


Above we can see the INTEL T mounting brackets, which slot into the four rear mounted screws.

Four large screw heads are then bolted onto the T mount brackets. While this can be tightened by finger it is advisable to use a screwdriver for a final turn.


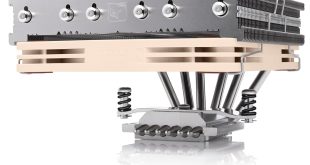
A cooler installation bracket is then screwed into each side of the base (above left) and these screws bolt into the two installed T mounts on the motherboard. The fans are then reattached and positioned to allow air flow from right to left, or vertically upwards, depending on your case design.

The cooler, pictured above, installed in a vertical air flow position. As you can see the colour scheme stands out a mile.