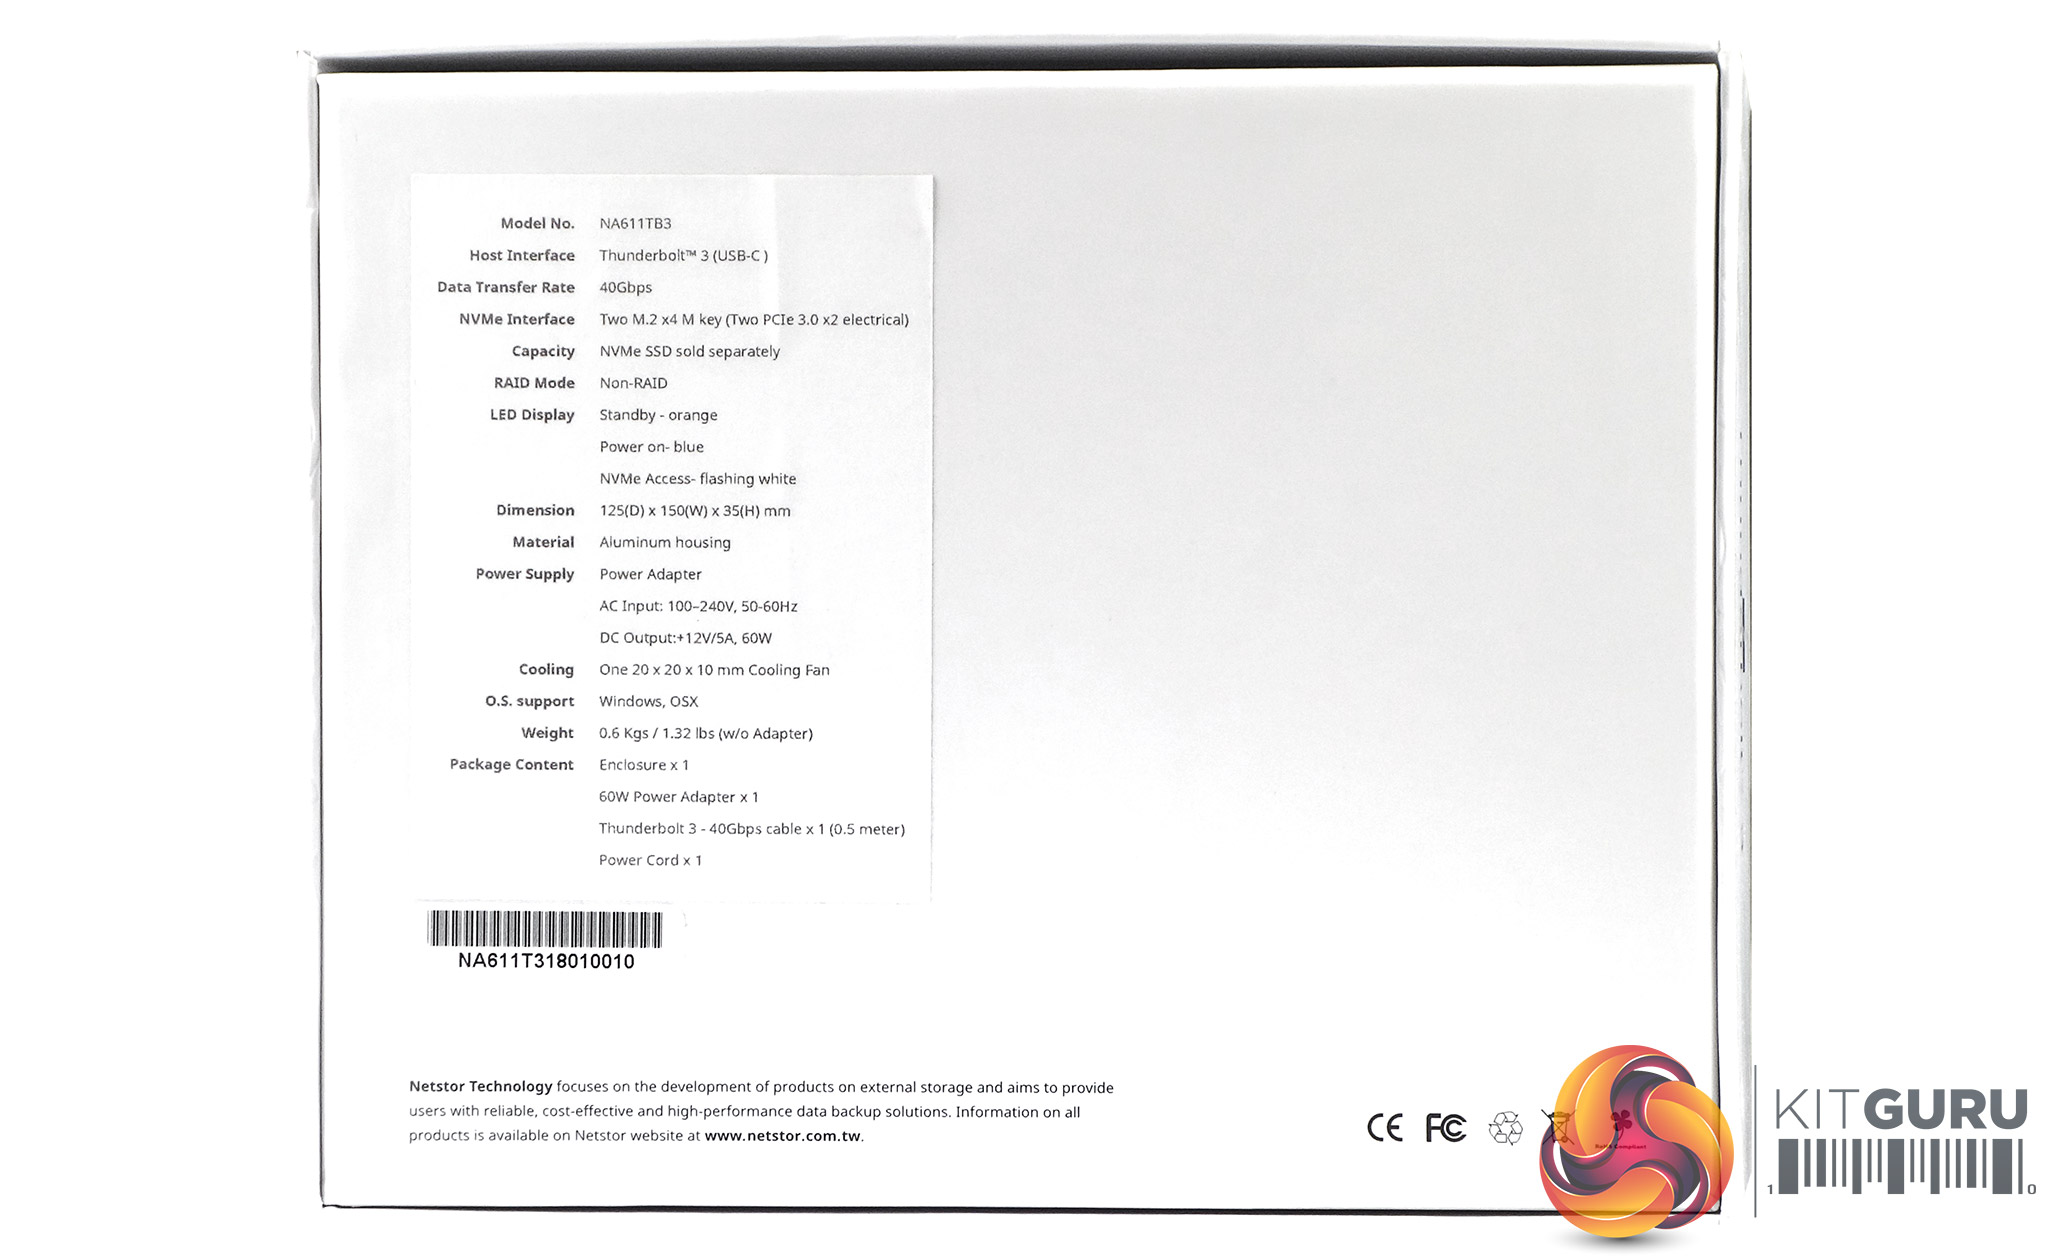
The drive comes in a sturdy box with a large image of the drive on the front. The rear of the box has a comprehensive specification panel on it.
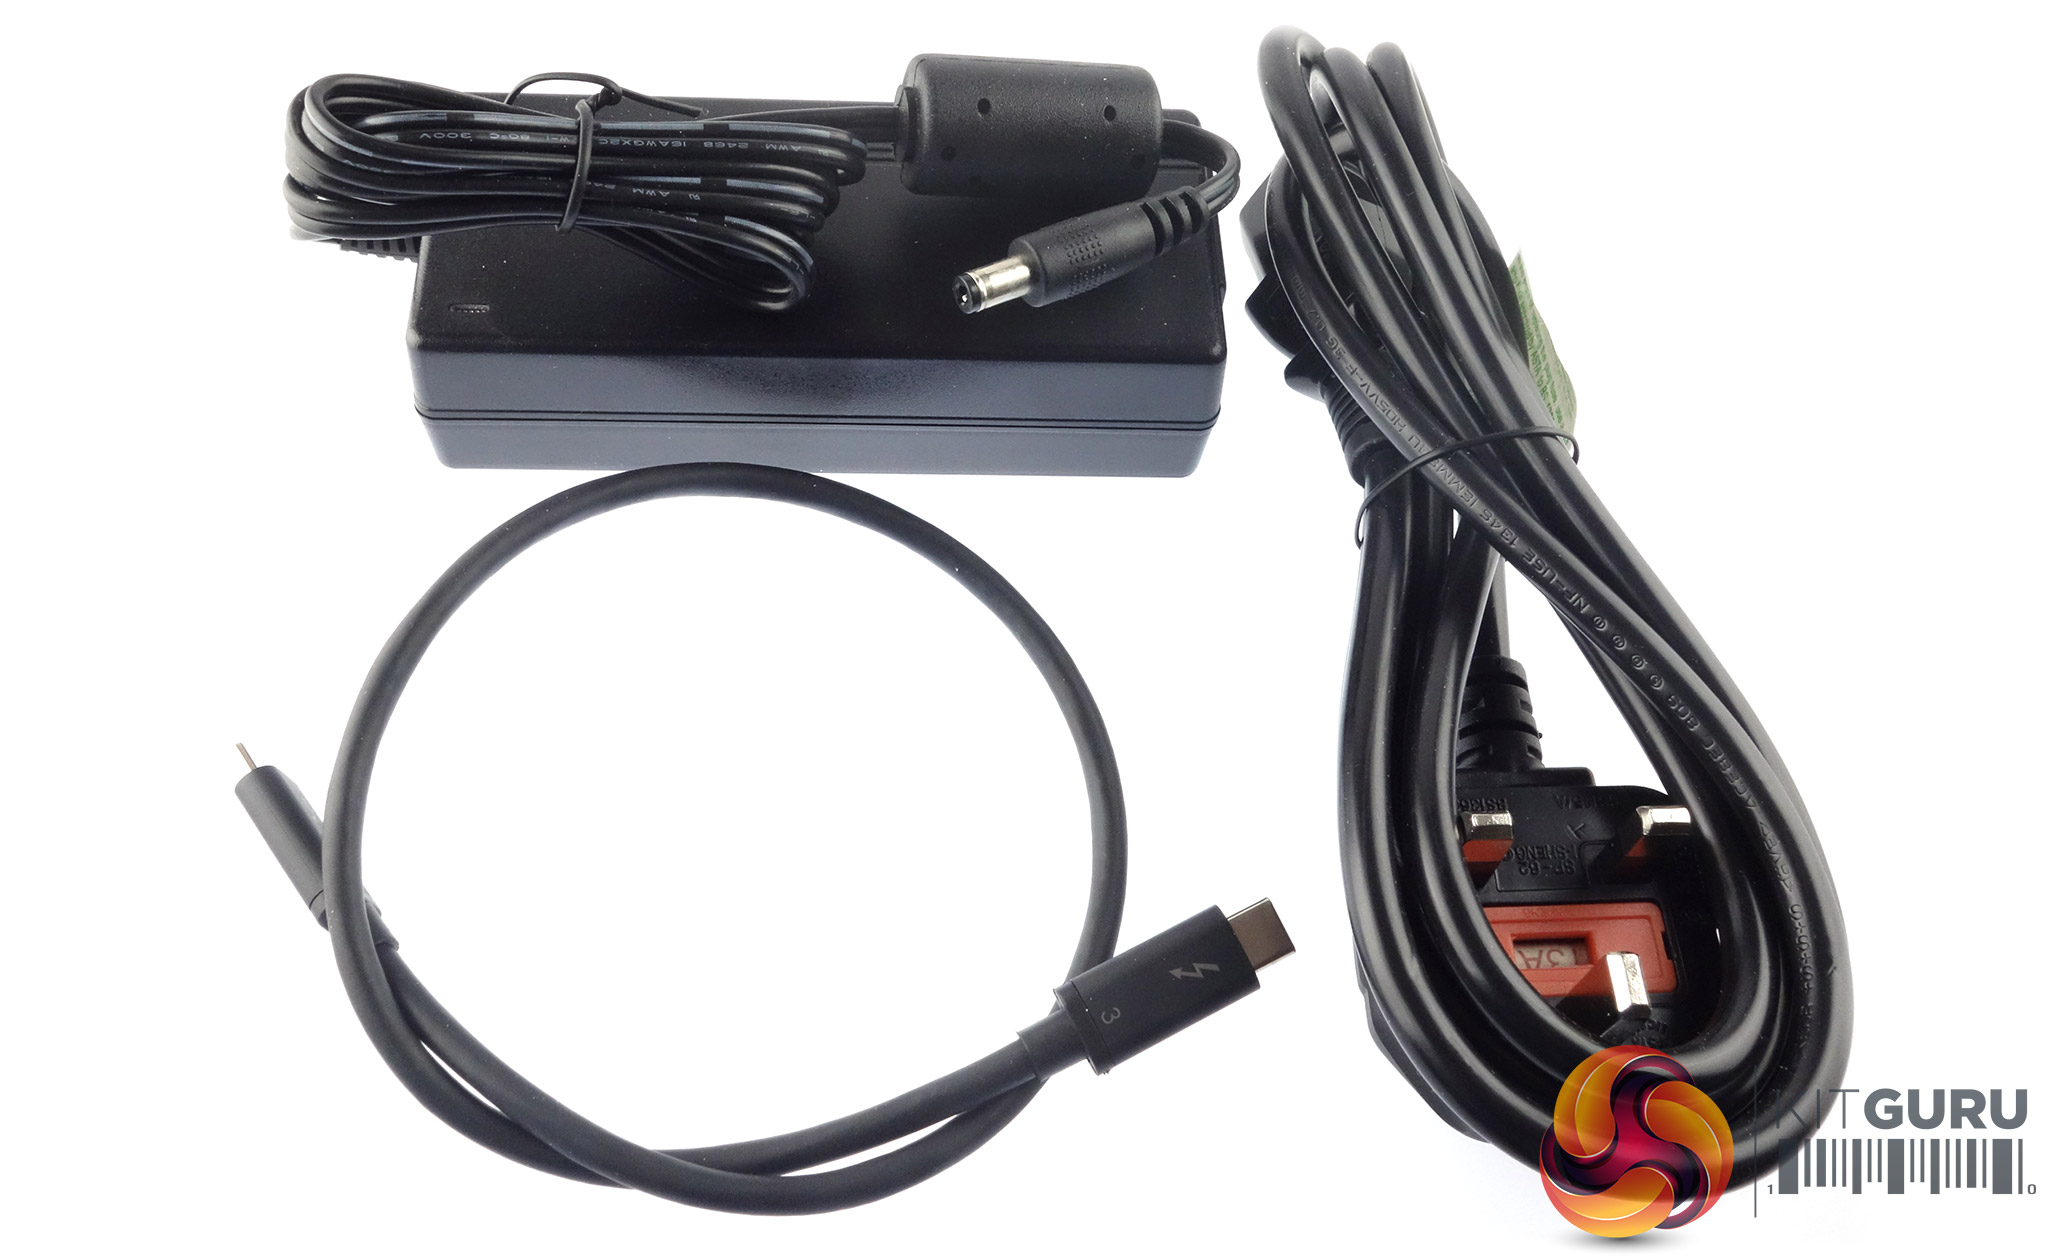
The box bundle comprises a 60W power adaptor (Seasonic SSA-0601HE-12), a 0.5m Thunderbolt 3 cable and a mains cable. It would be nice to have a slightly longer Thunderbolt cable as the one supplied is fine for notebook use, but some PC users might find the length a little restrictive.
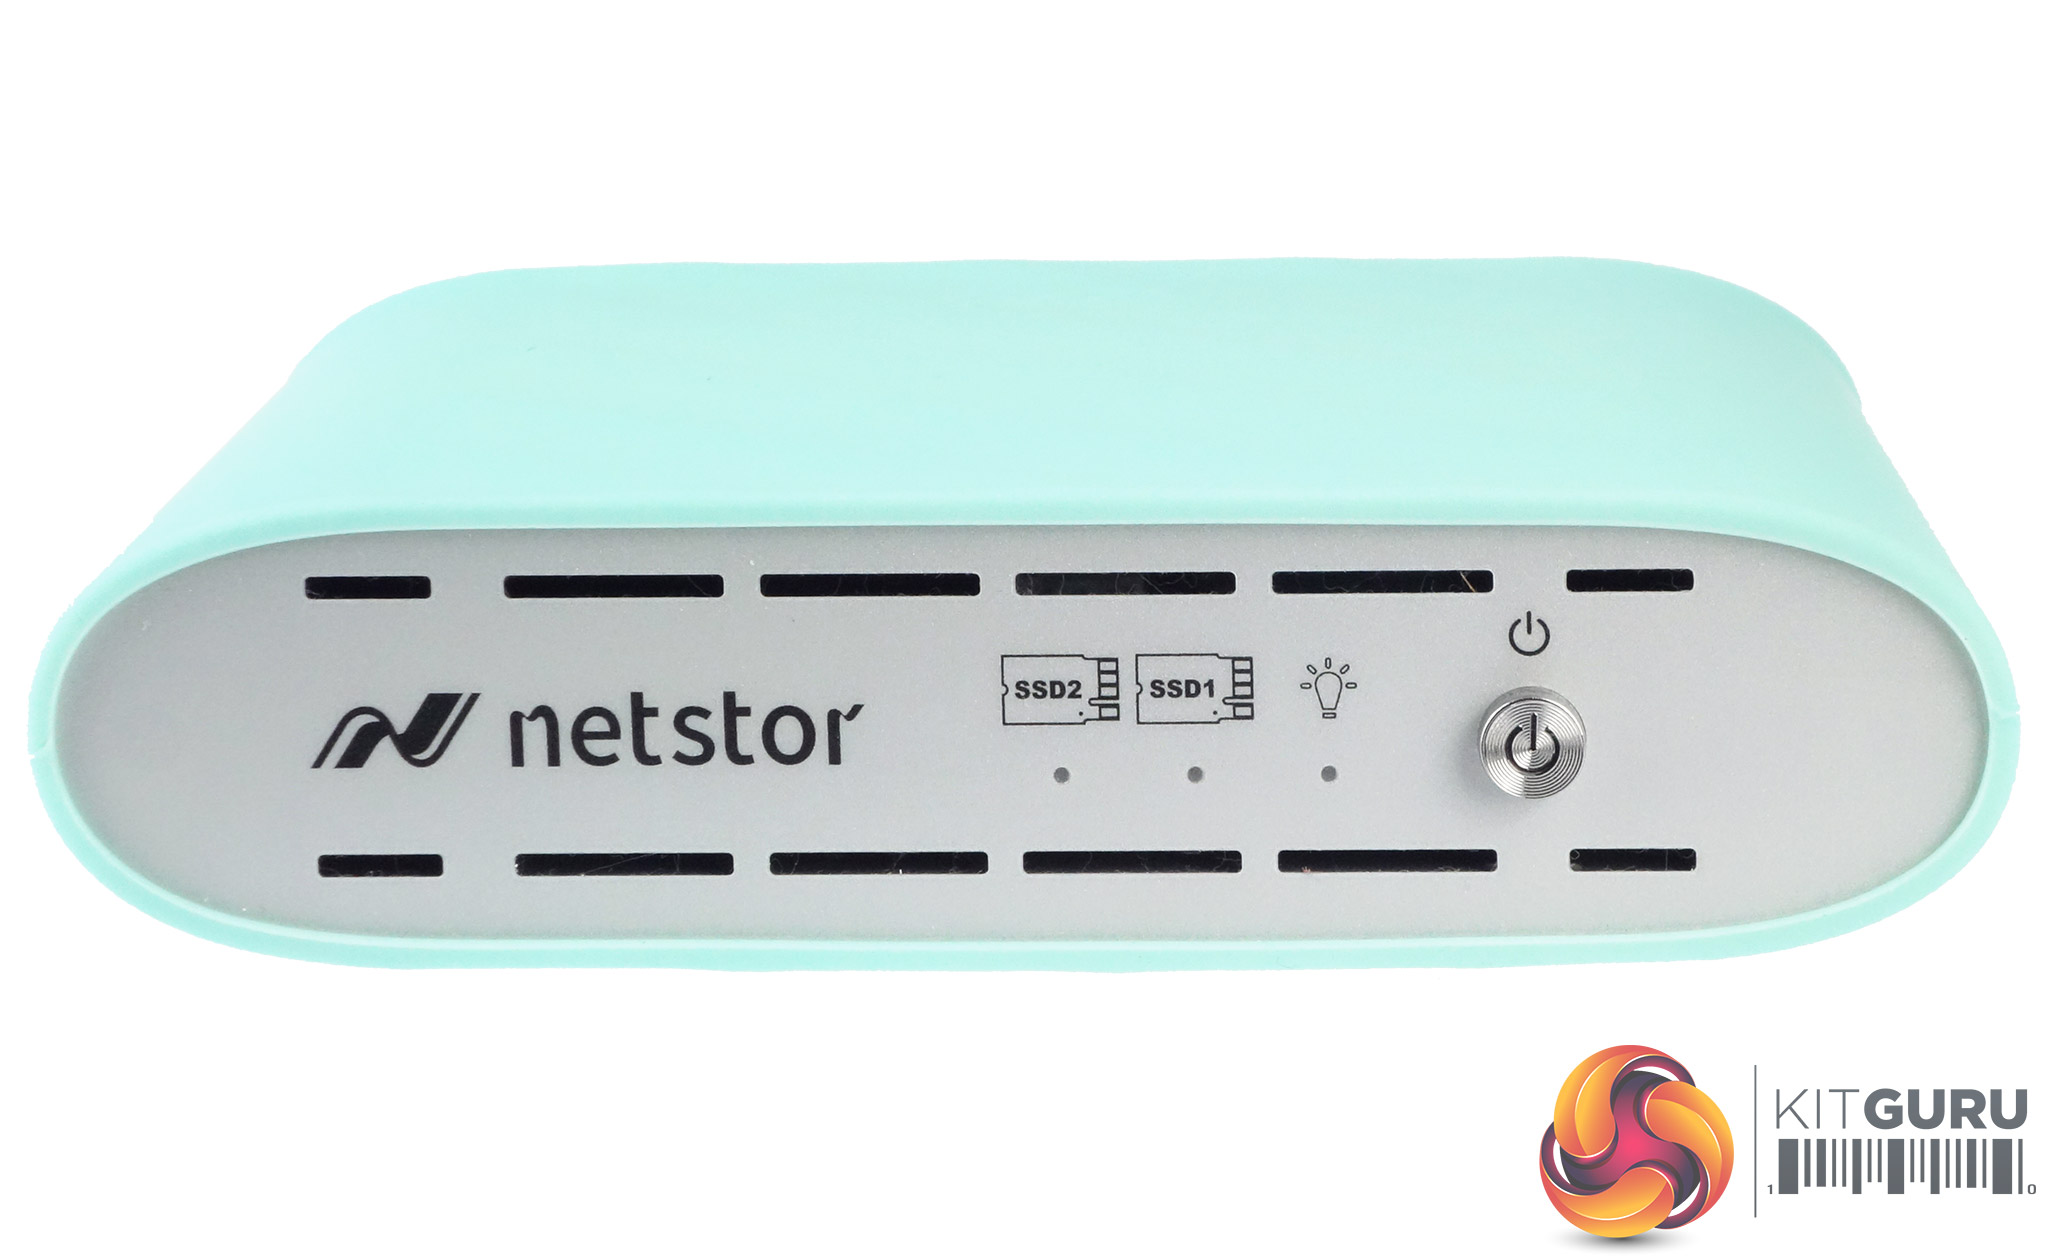
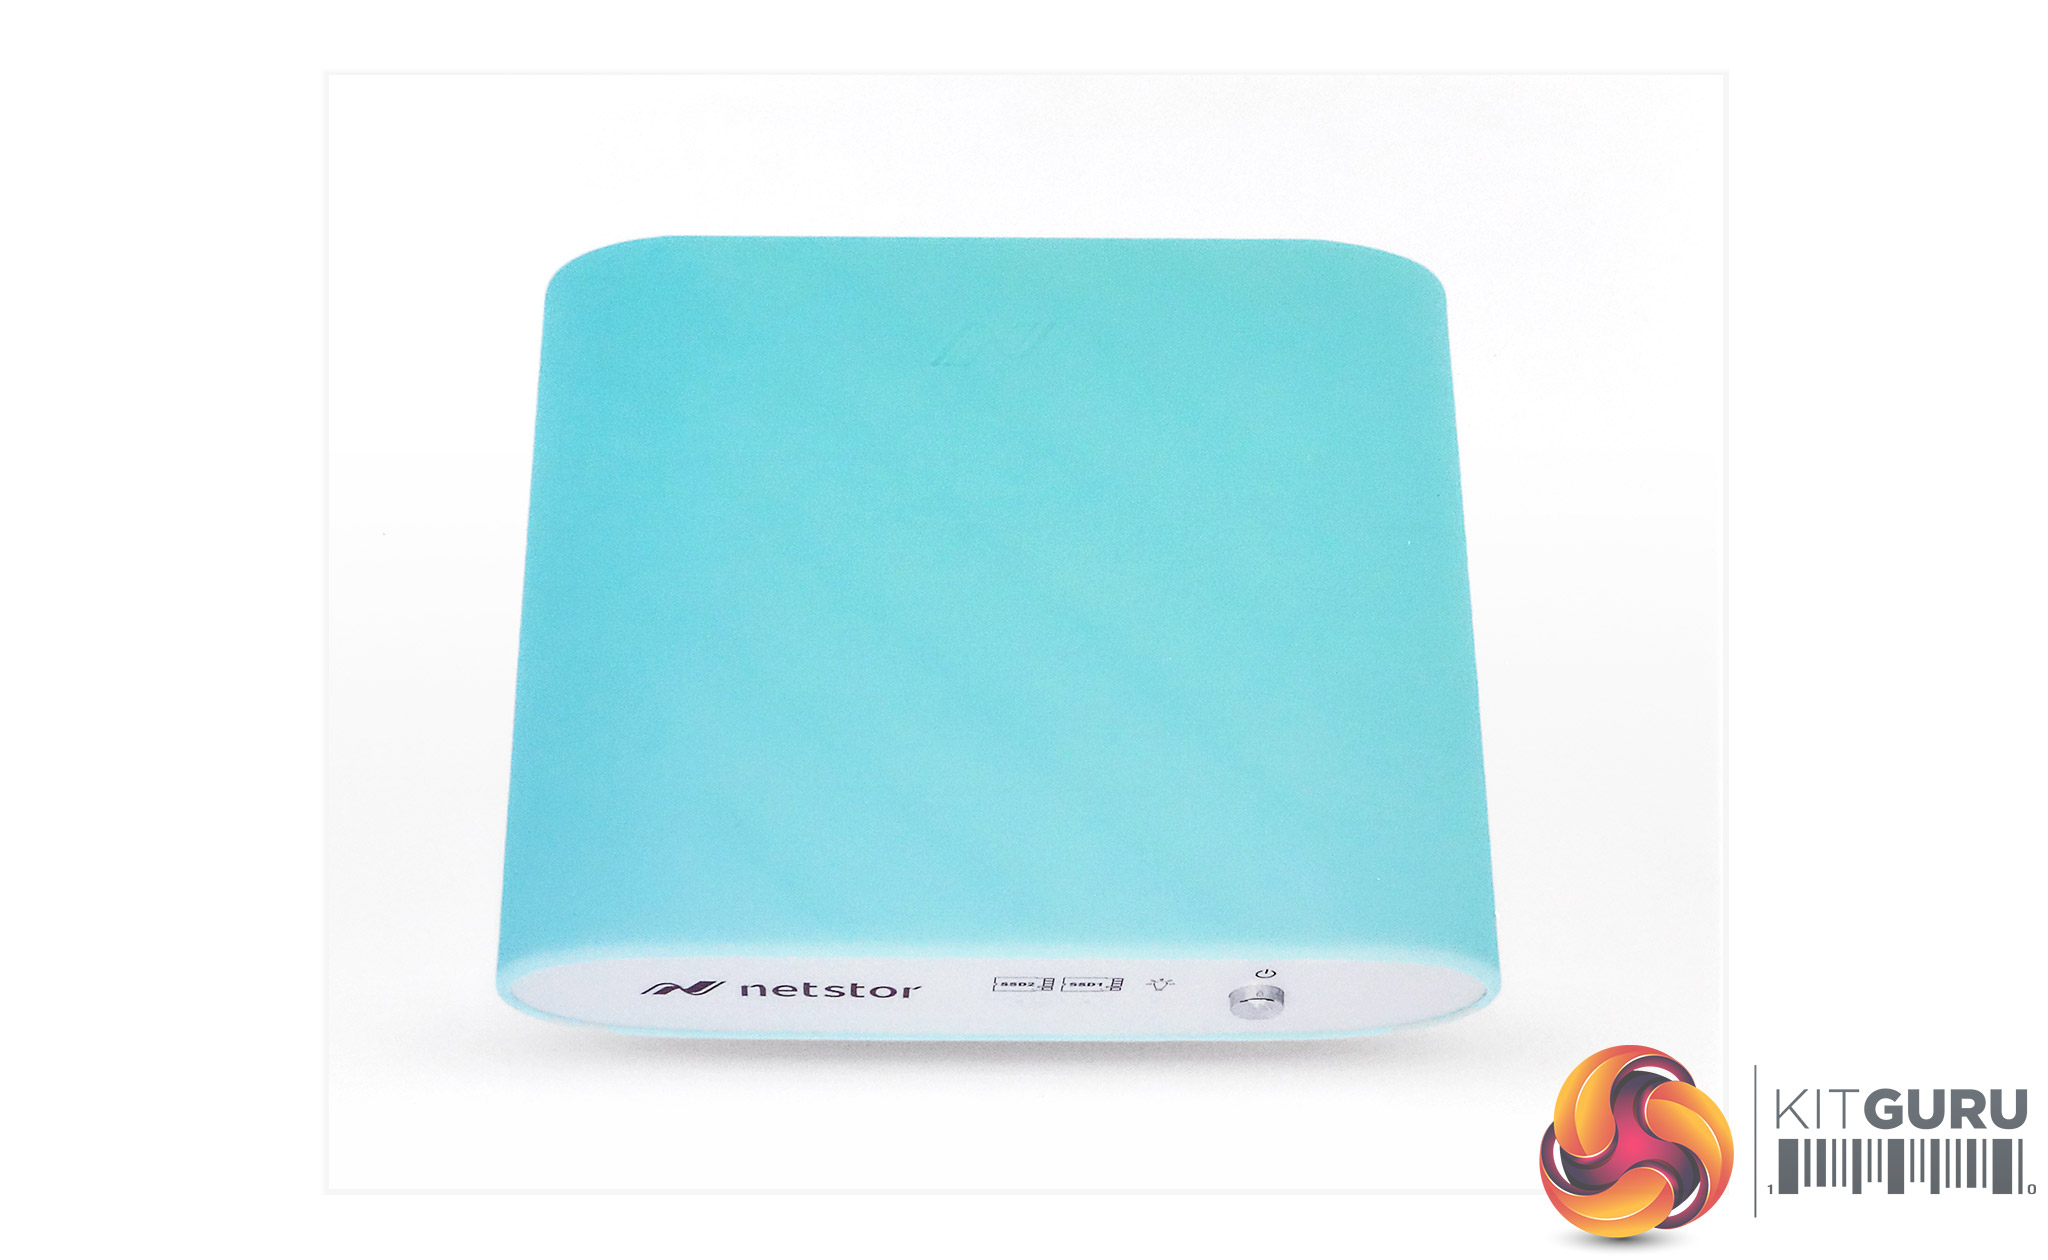
Along with the power button on the front bezel, there is also three indicator LEDs; one for power that glows blue for power on and amber for standby, and then two white drive activity LEDs. Above the two drive activity LEDs are two little M.2 icons, so if there is a problem when you are using two drives, at least you know which one is causing the problem. Above and below these LEDs and across the whole front bezel are rows of cooling vents.
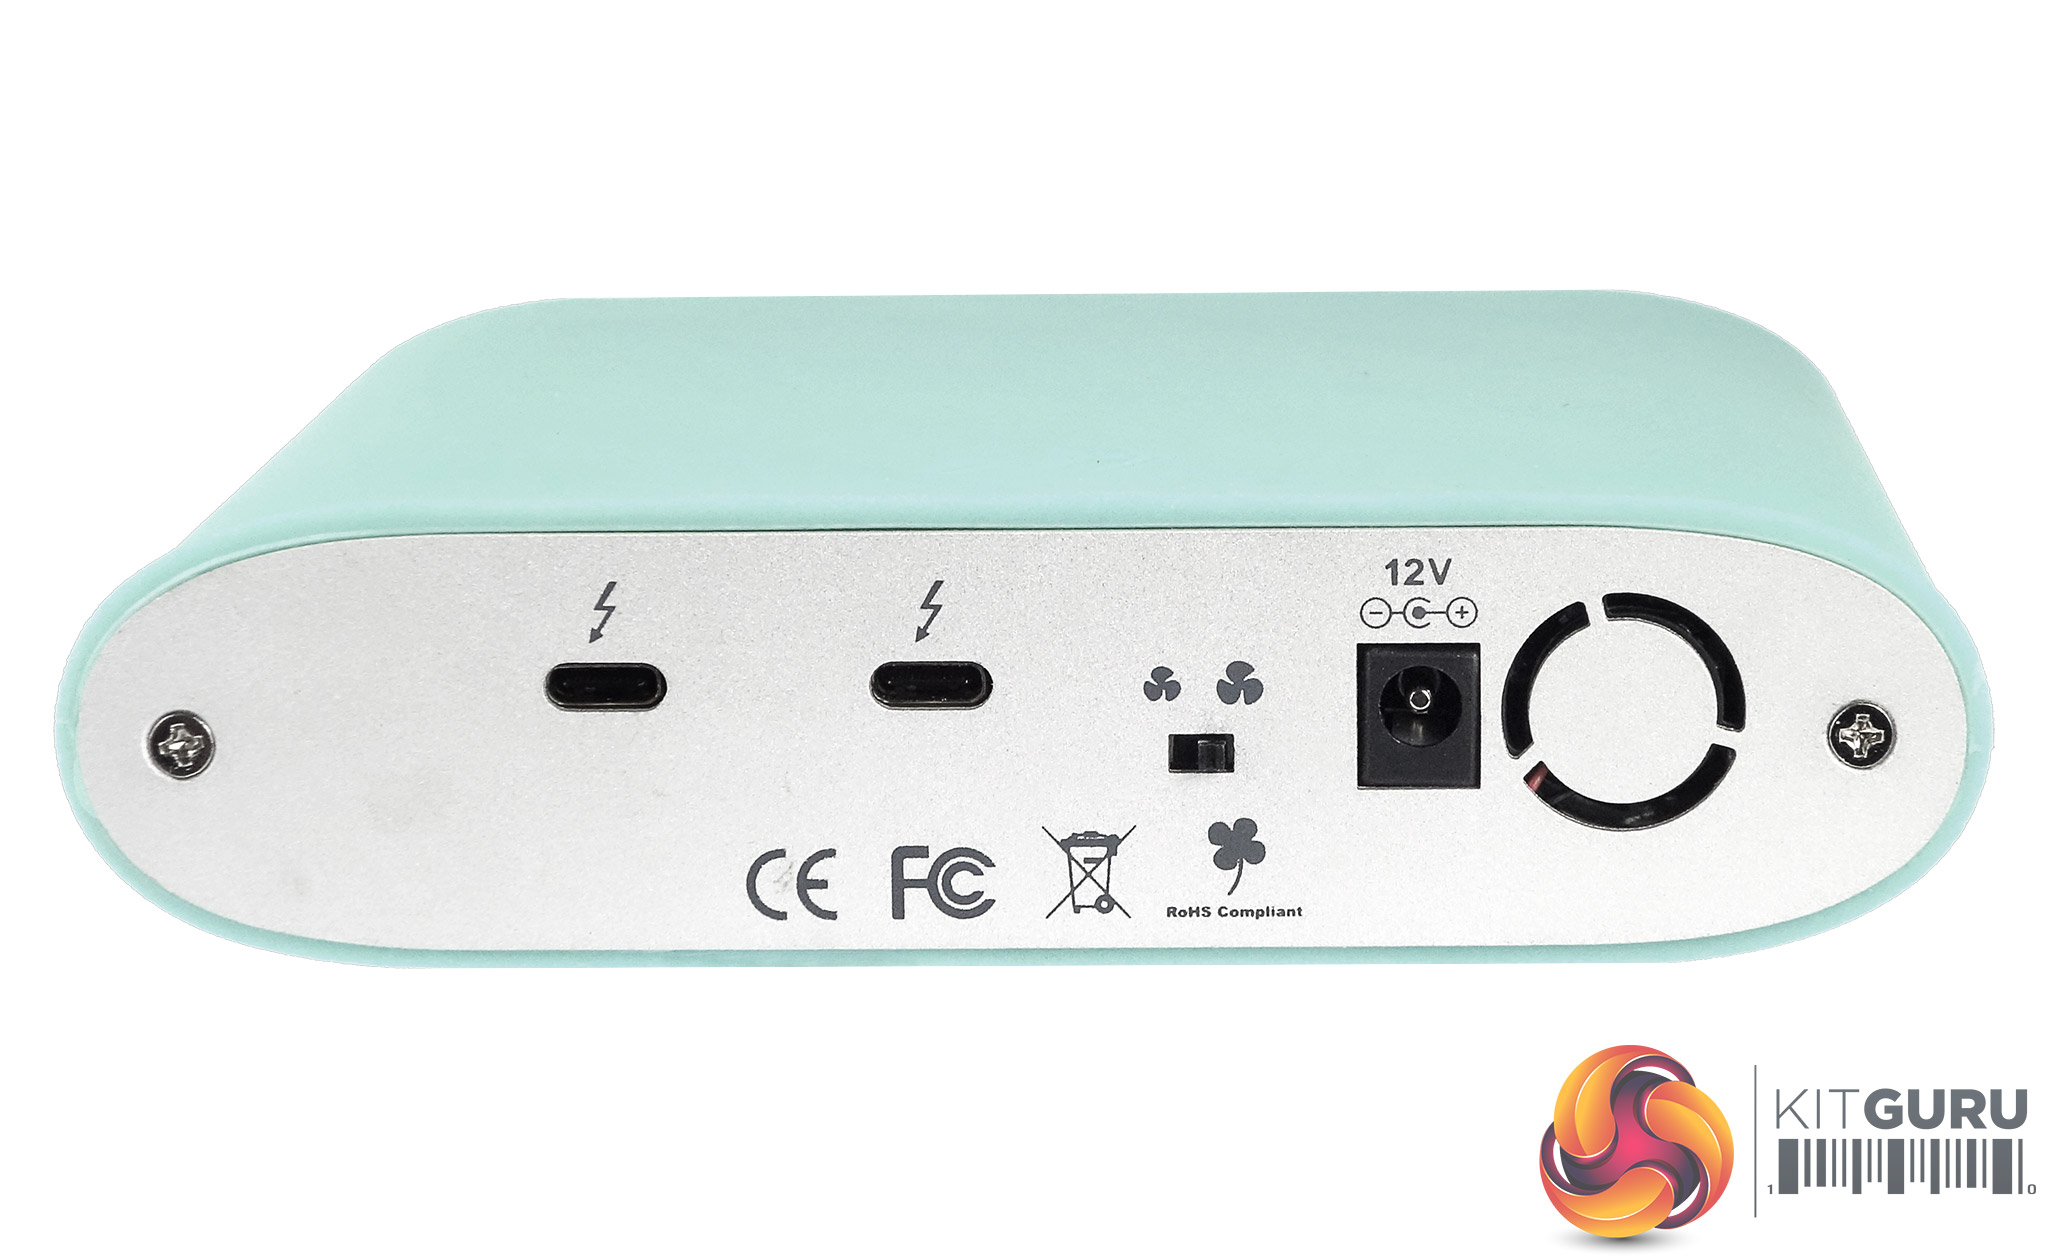
The rear panel has the two Thunderbolt ports, two-way fan switch (more on that in a minute), the power in port and the cover for the fan. The two way fan switch controls a tiny 20mm ADDA AD2012LB-G70 fan. The AD2012LB-G70 has a rated spin speed of 9,000 rpm, shifting 0.5CFM of air.
As you can imagine, a tiny fan spinning at maximum speed is not that quiet and we could certainly hear it during our tests. To be fair though, using it on a day to day basis you could probably be fine using lower of the two fan speeds as it it's doubtful you will be taxing the drive as much as we were or as long as we were in testing.
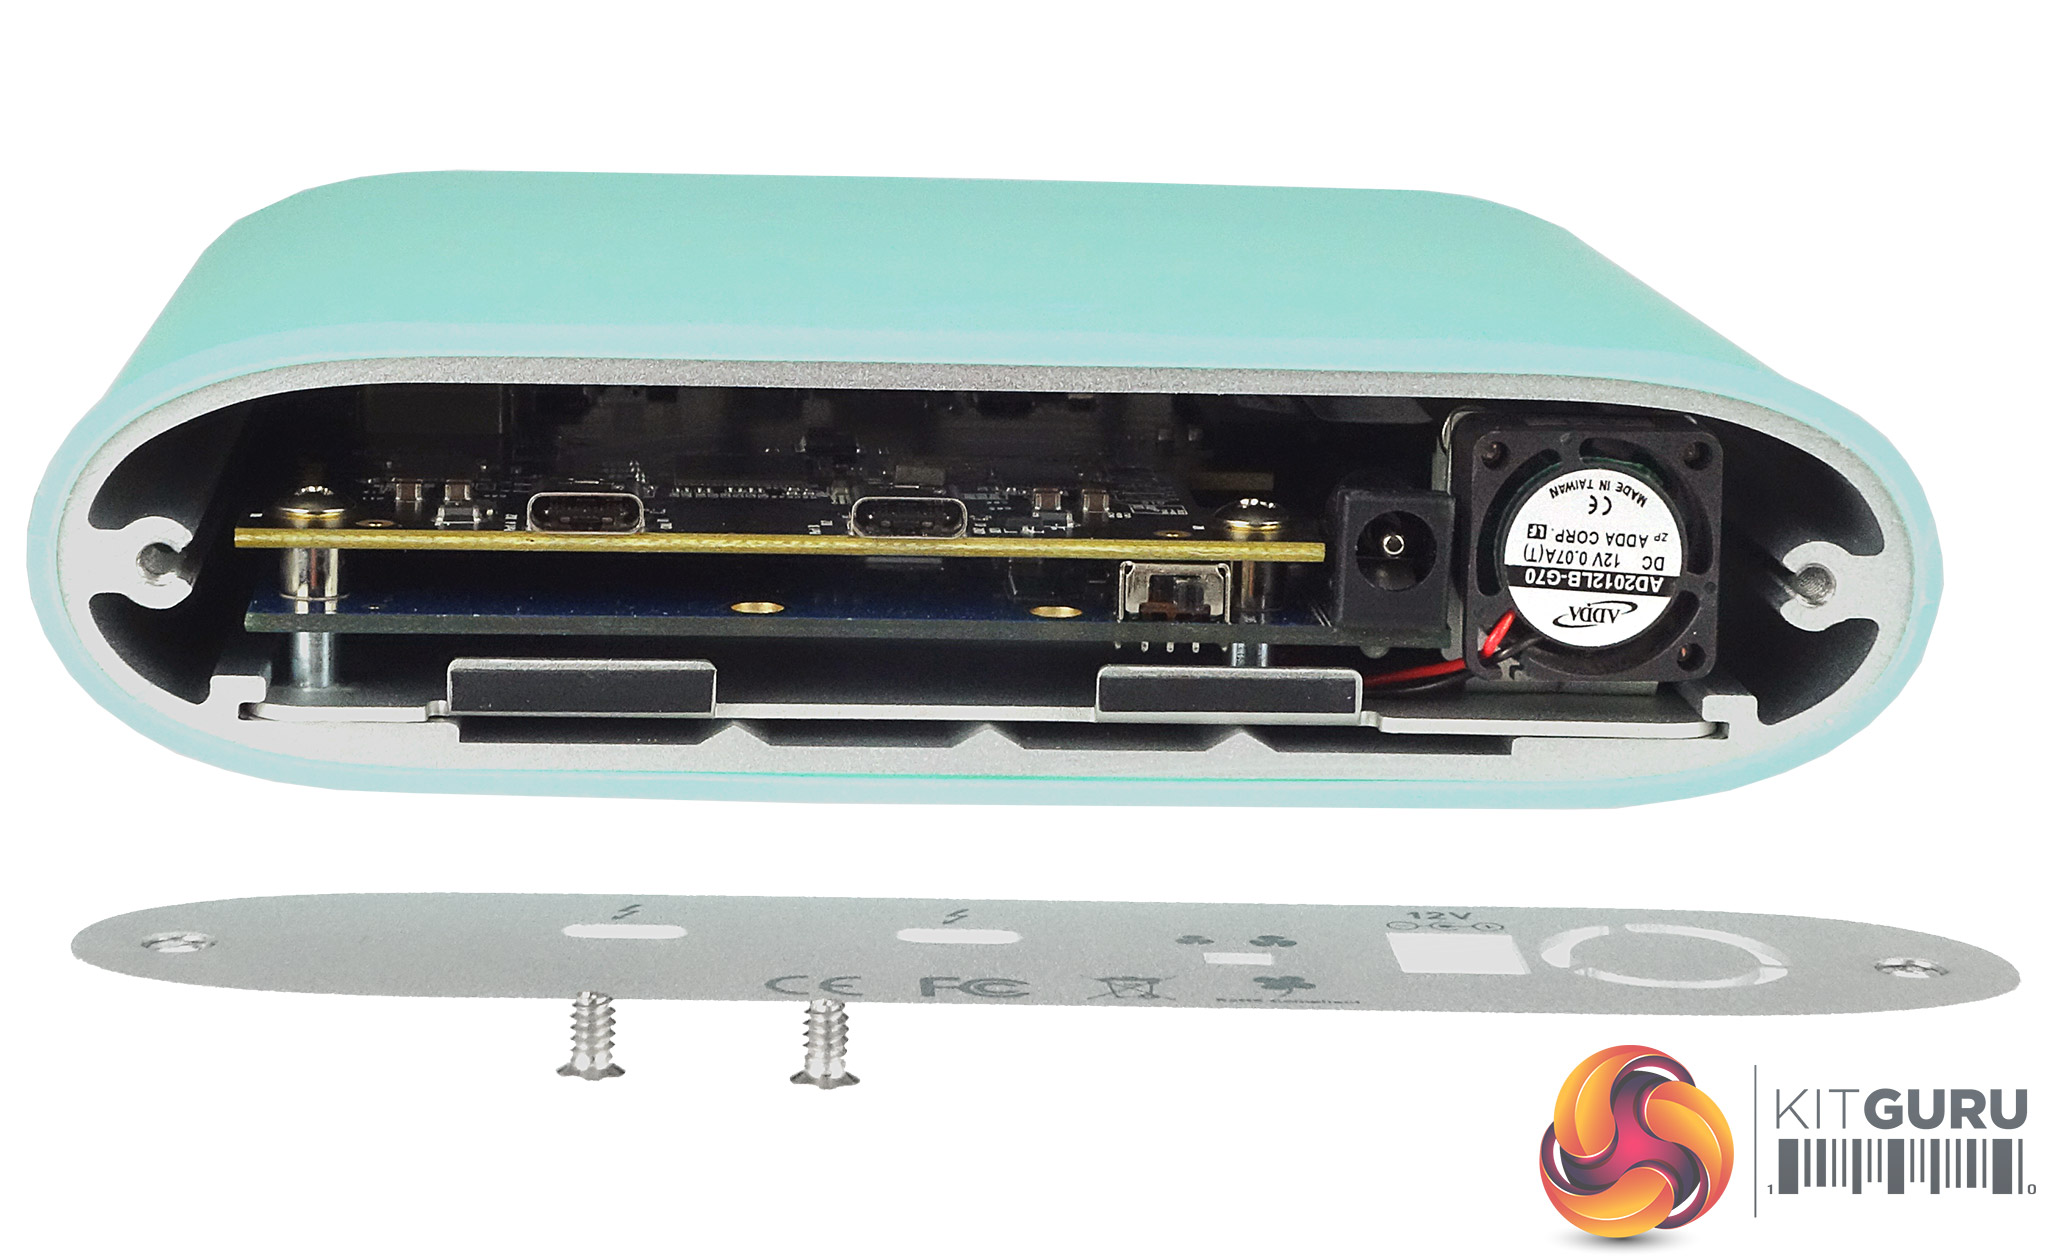
To install drives you first have to undo the two screws holding the rear panel in place. Once that is done the business end of the NA611TB3 slides out.
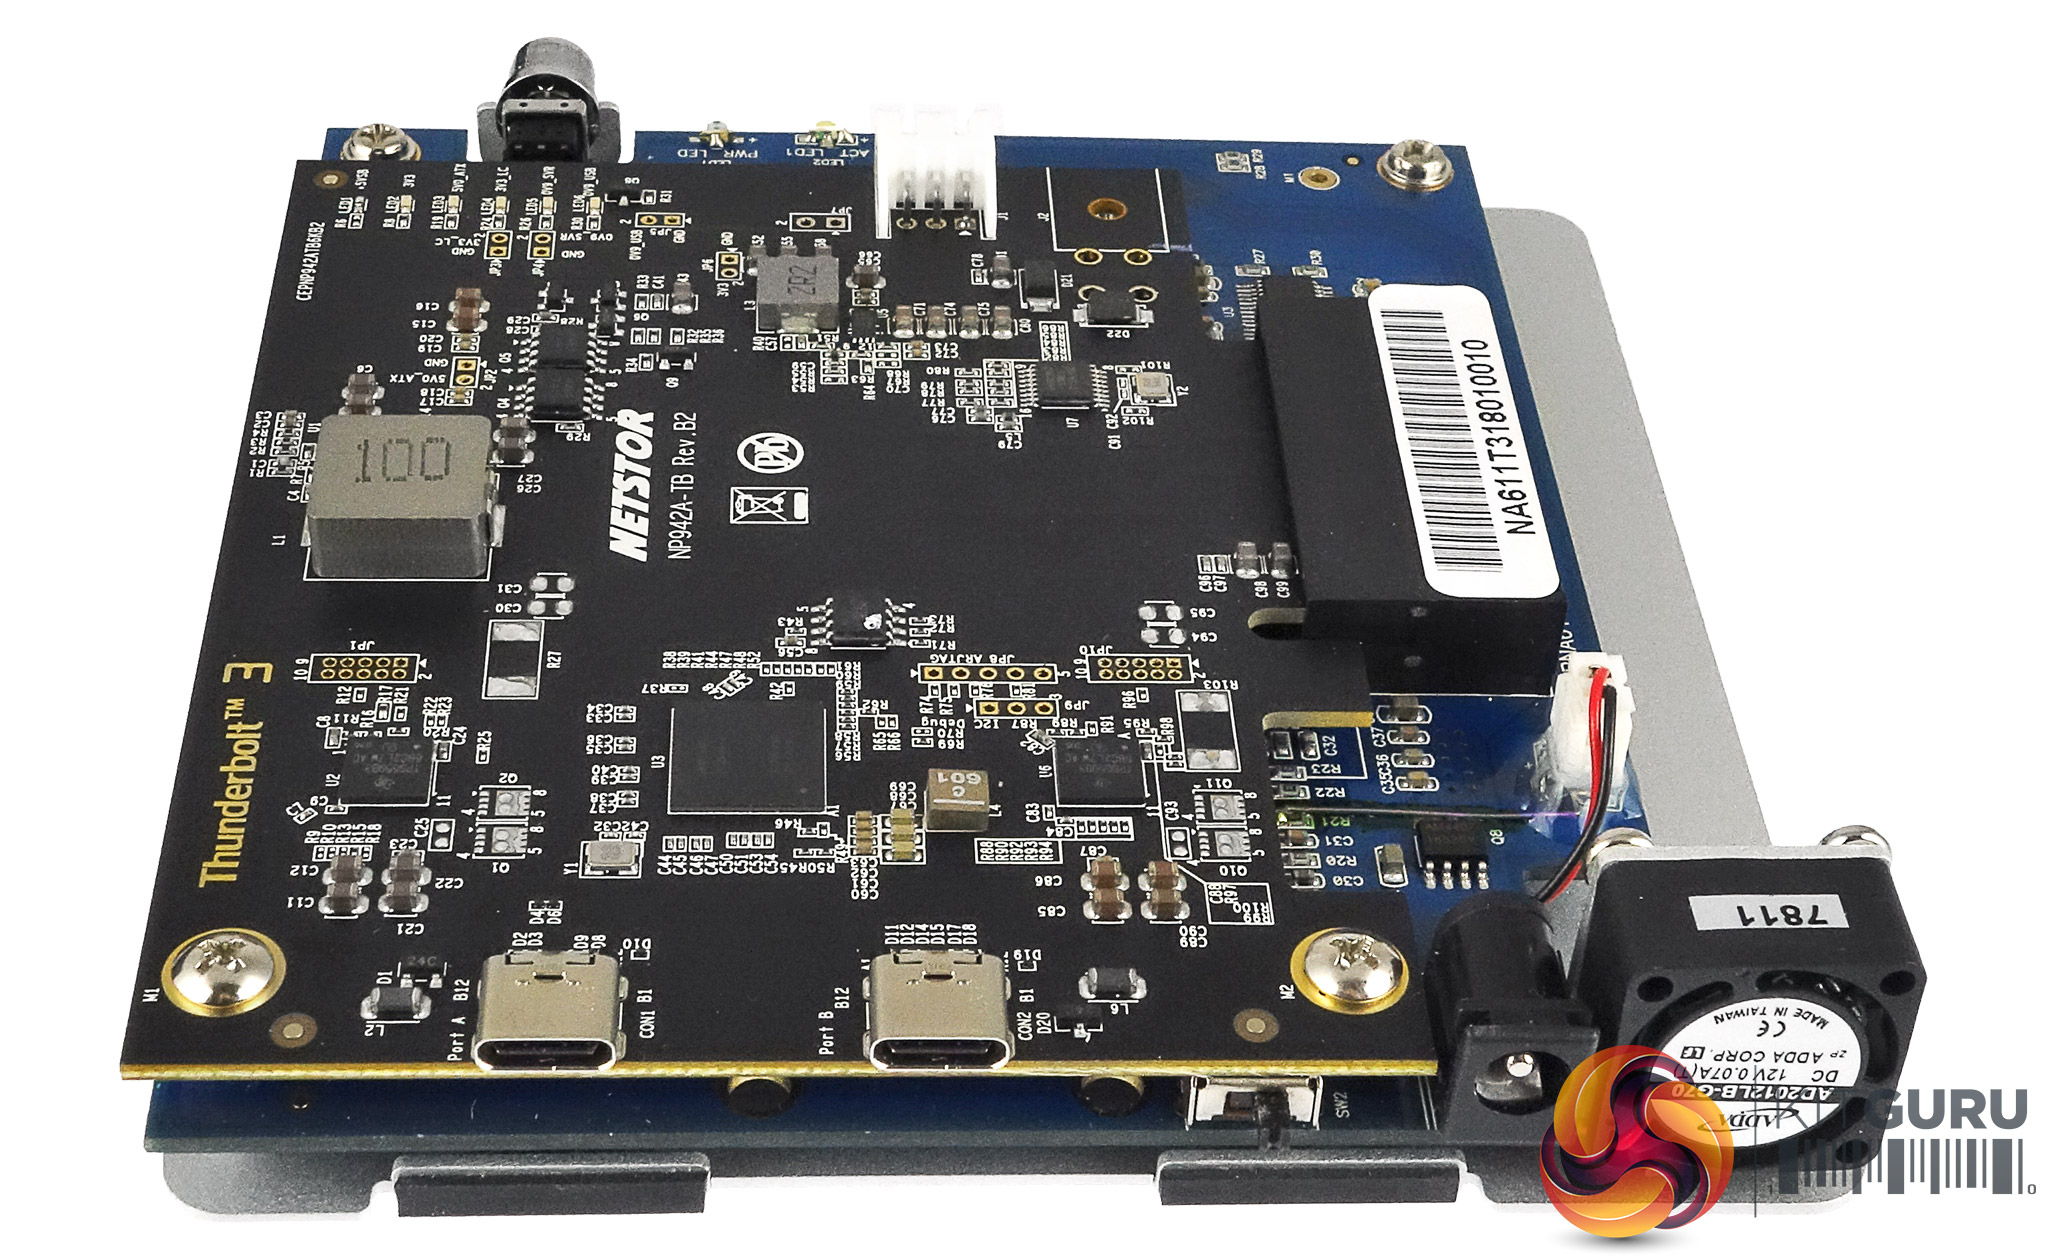
There are two PCB s fixed to an aluminium base plate that slides in and out of the enclosure. This base plate also acts as a heatsink.
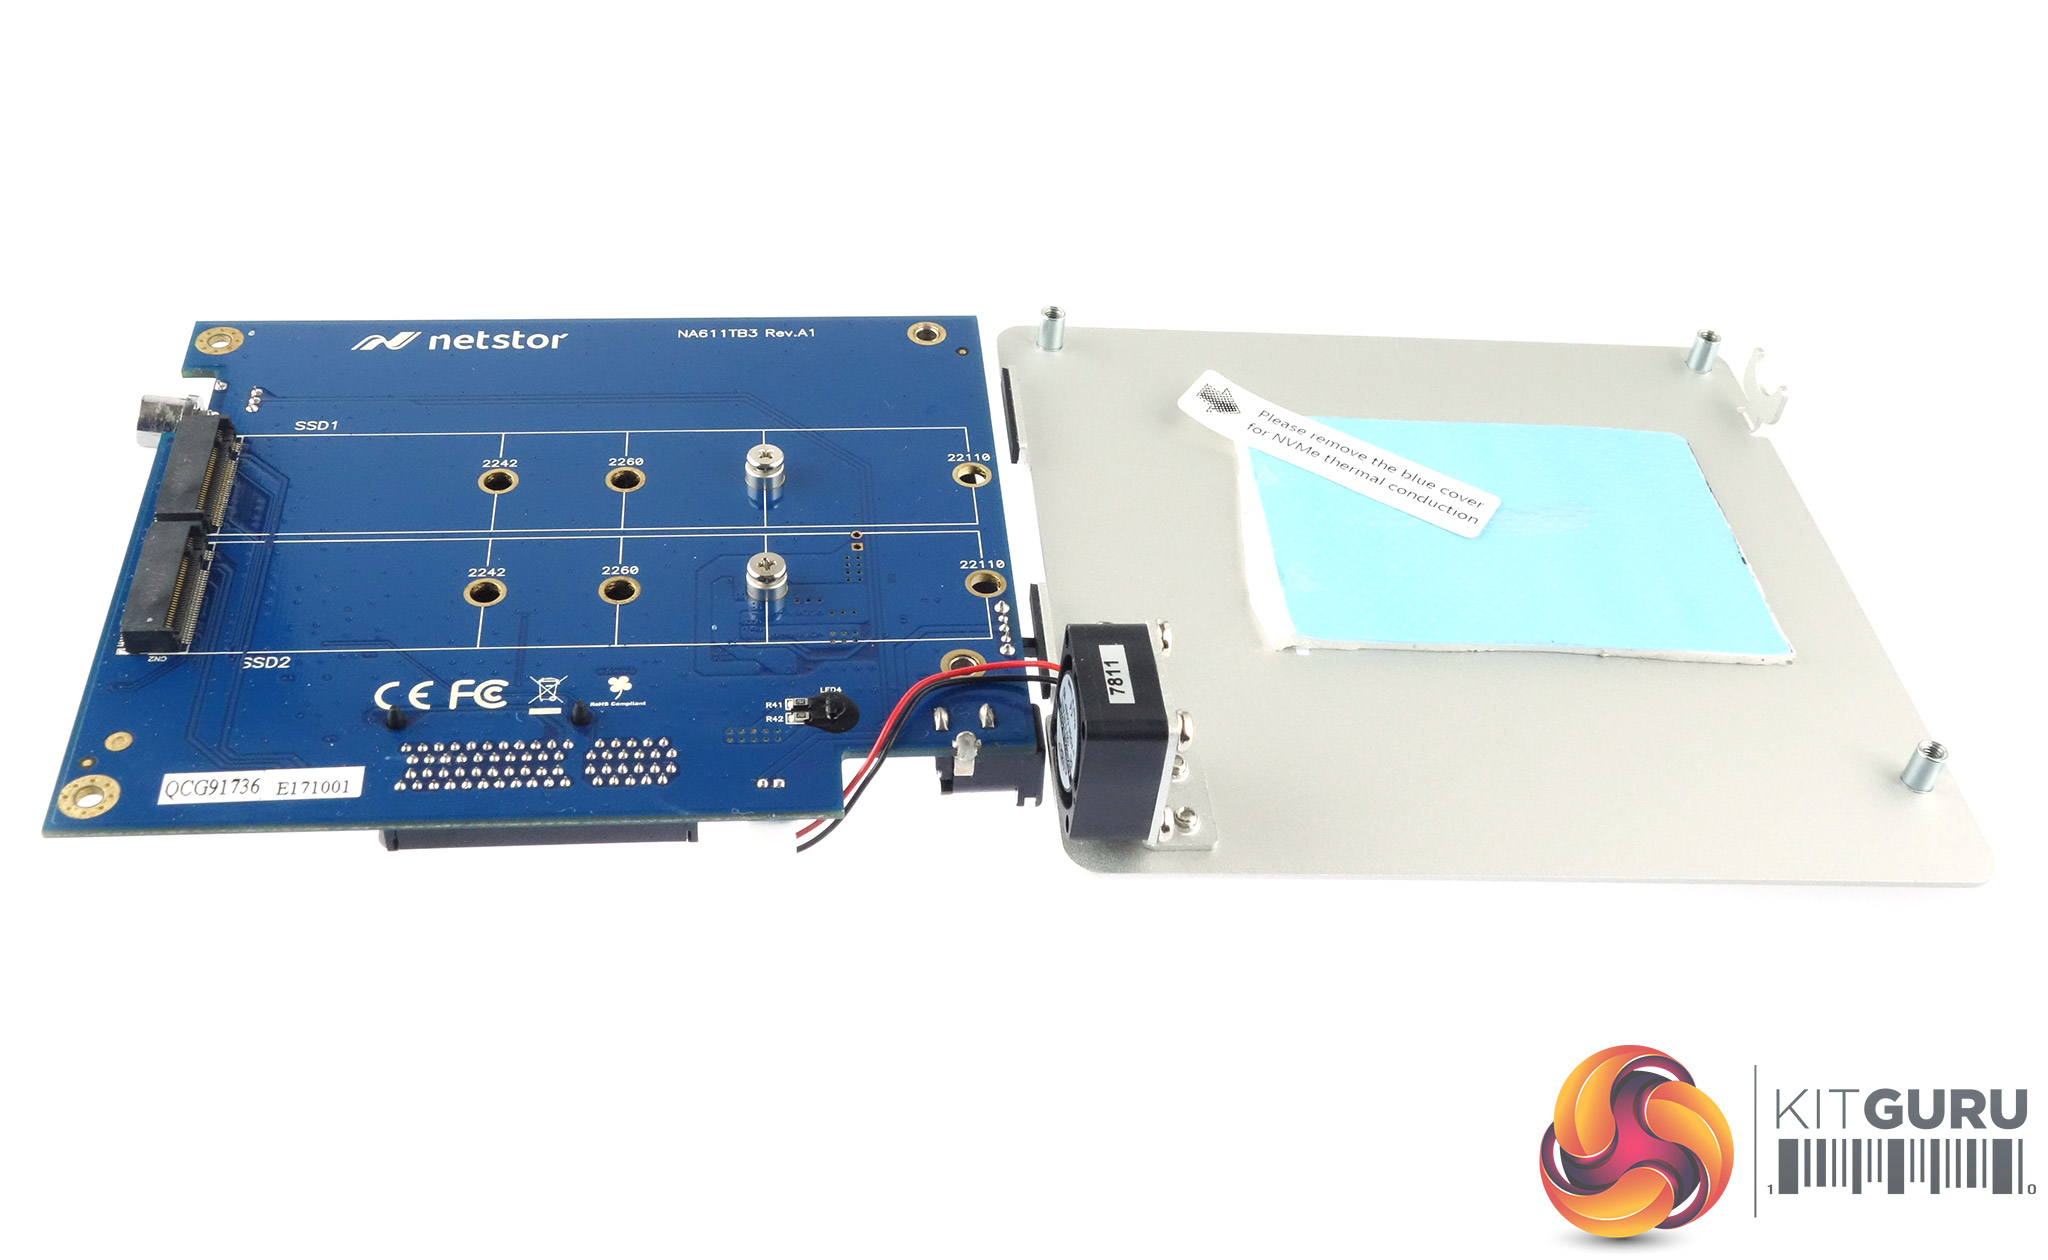
Four screws hold the PCBs to the base plate. Two short screws fix the bottom PCB which has the two M.2 connectors on the back of it. These two connectors support 2242 / 2260 / 2280 / 22110 format M.2 drives. Two longer screws go through both top and bottom PCBs into the base plate.
When you first take the drive apart you will see that the large thermal pad has a covering on that has to be removed. This pad works well and holds on to the drives very tightly. In fact it's so good that if you go to change or remove the drives after its been used, you will find yourself having to use quite a bit more pressure to separate the base plate from the PCB than you originally thought you might have needed.