Today we are back with our latest custom project – this time it’s a sponsored Fractal Design build featuring case mods galore. With this build we focus our attention on modding the Fractal Meshify 2, to flip the motherboard orientation, reverse airflow and fit both front and rear 280mm radiators, as well as many more customisations. But will it all go as planned? Let’s find out…
Timestamps:
00:00 Start
00:20 Introduction
00:44 Core Components / System concept
04:59 EKWB hardware
06:30 James plans with this system
11:28 Modding so far
15:11 Timelapse modding
25:44 Progress so far — and in the next episode
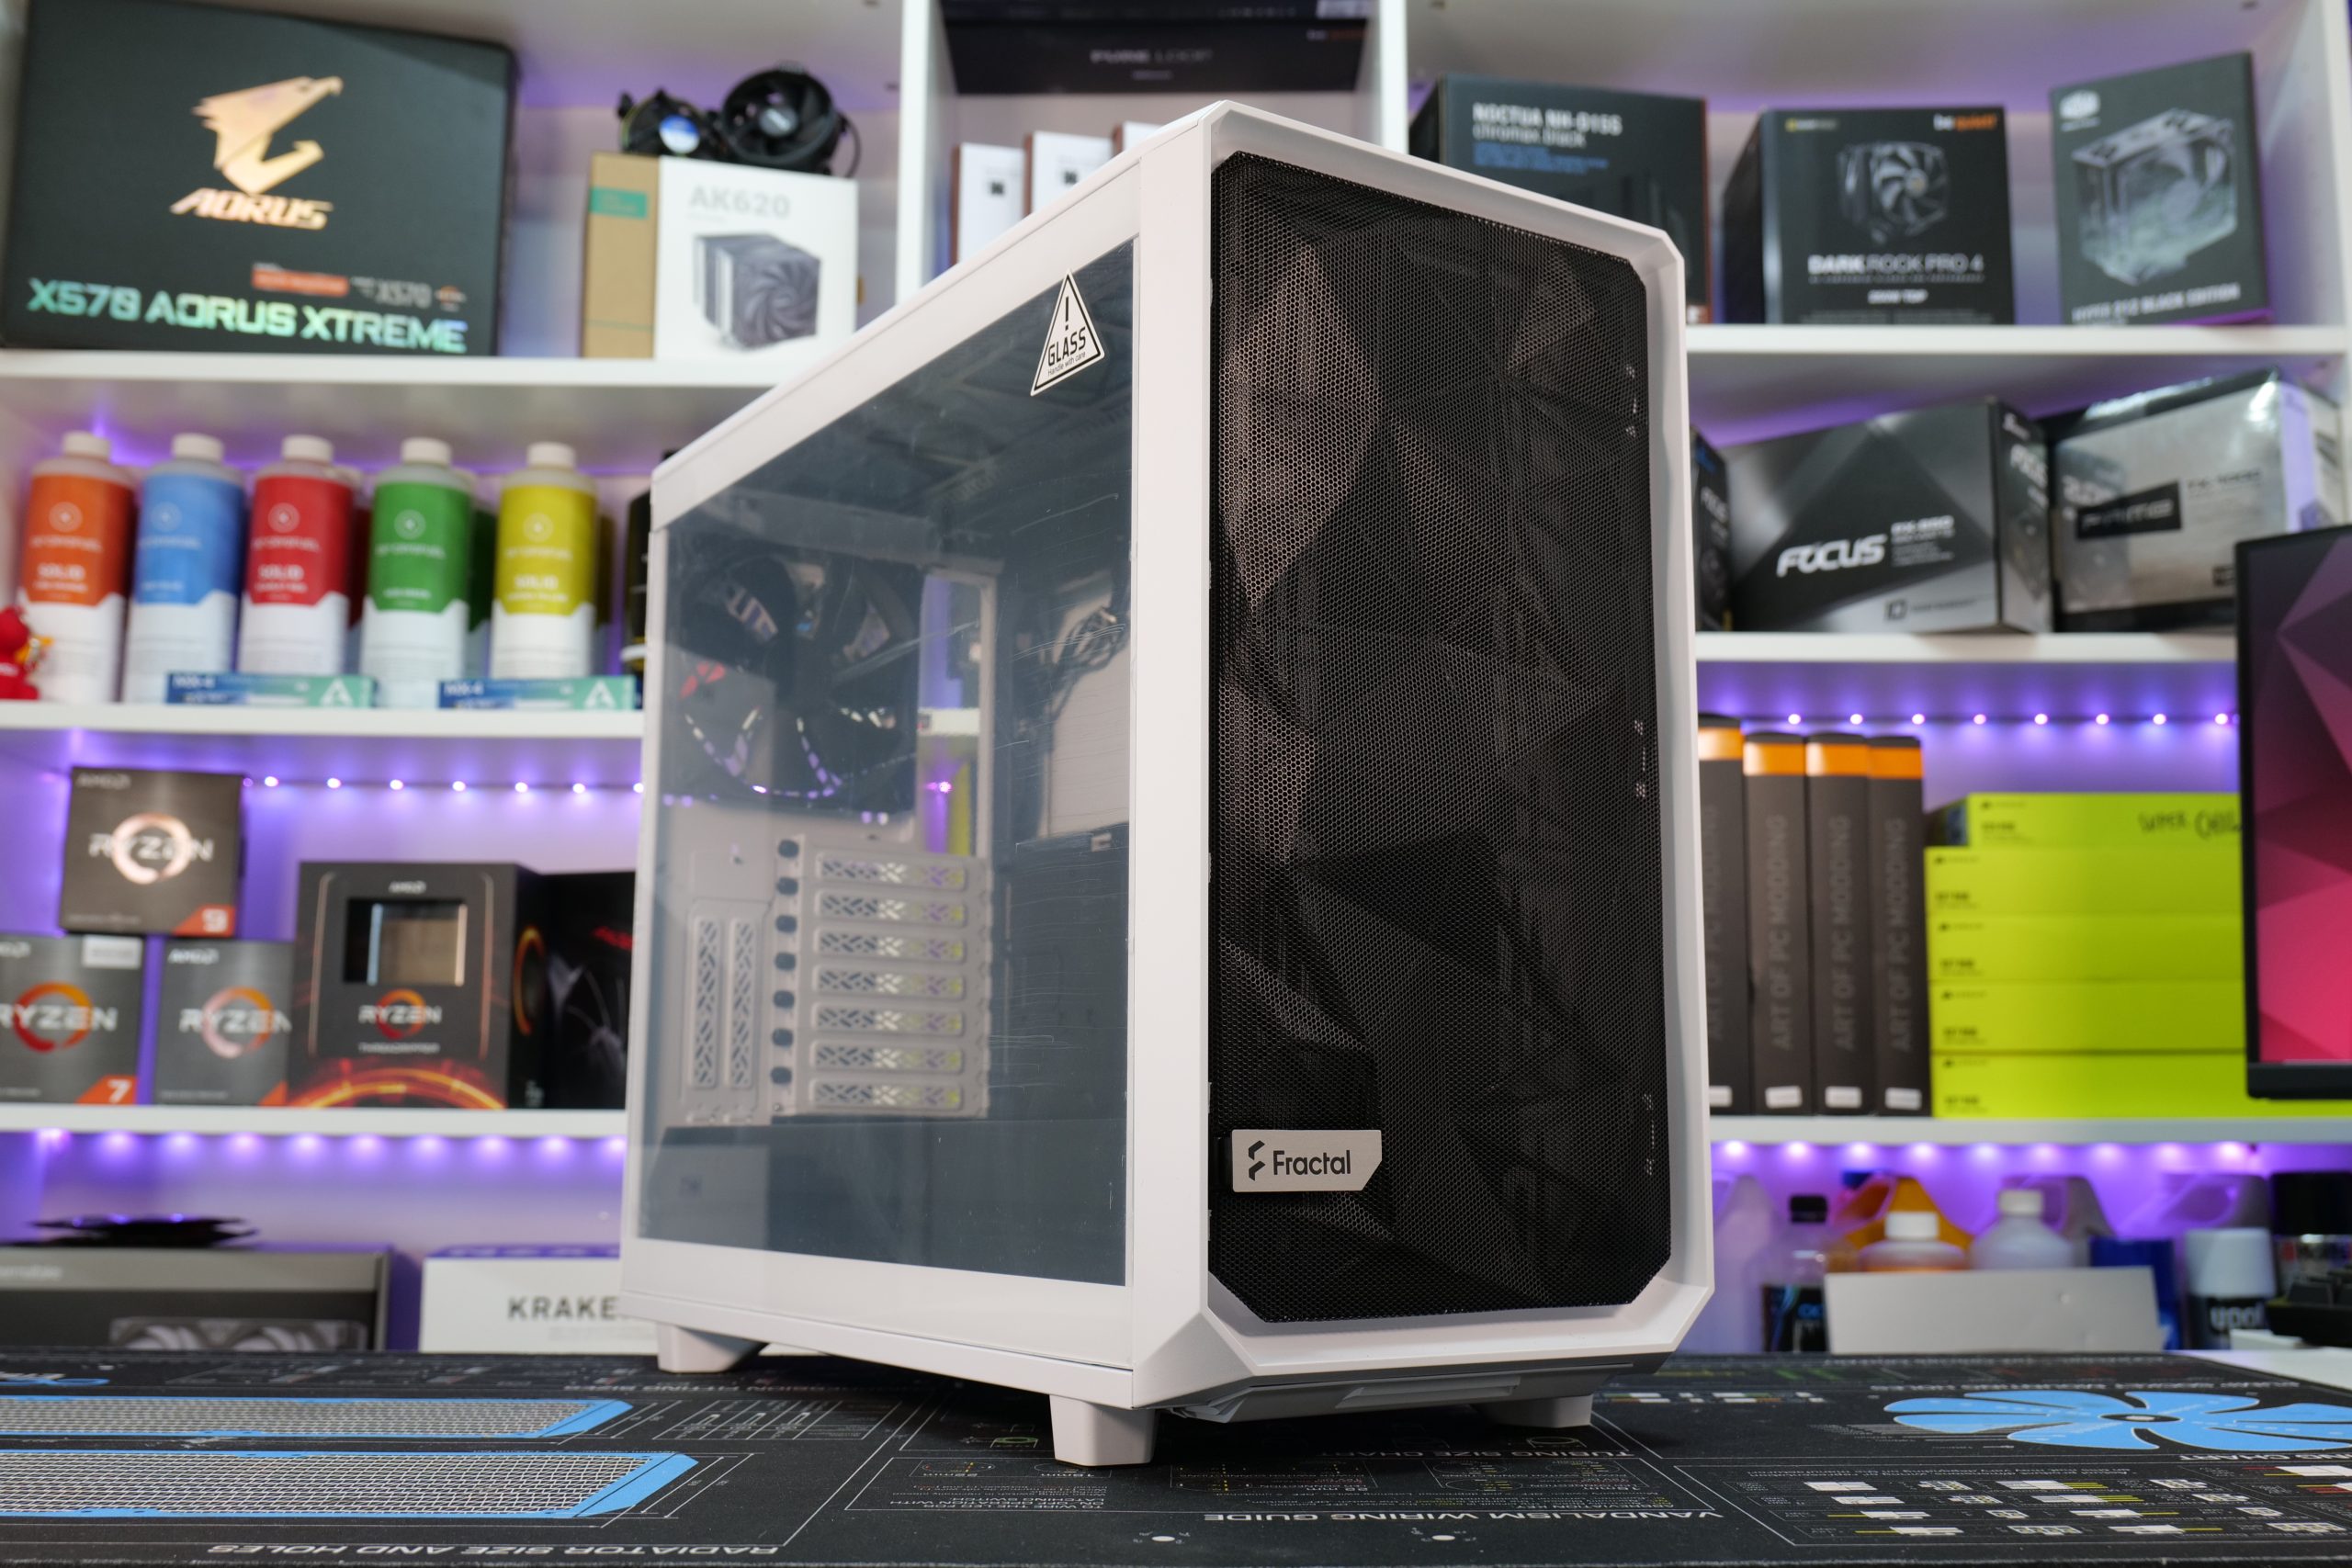
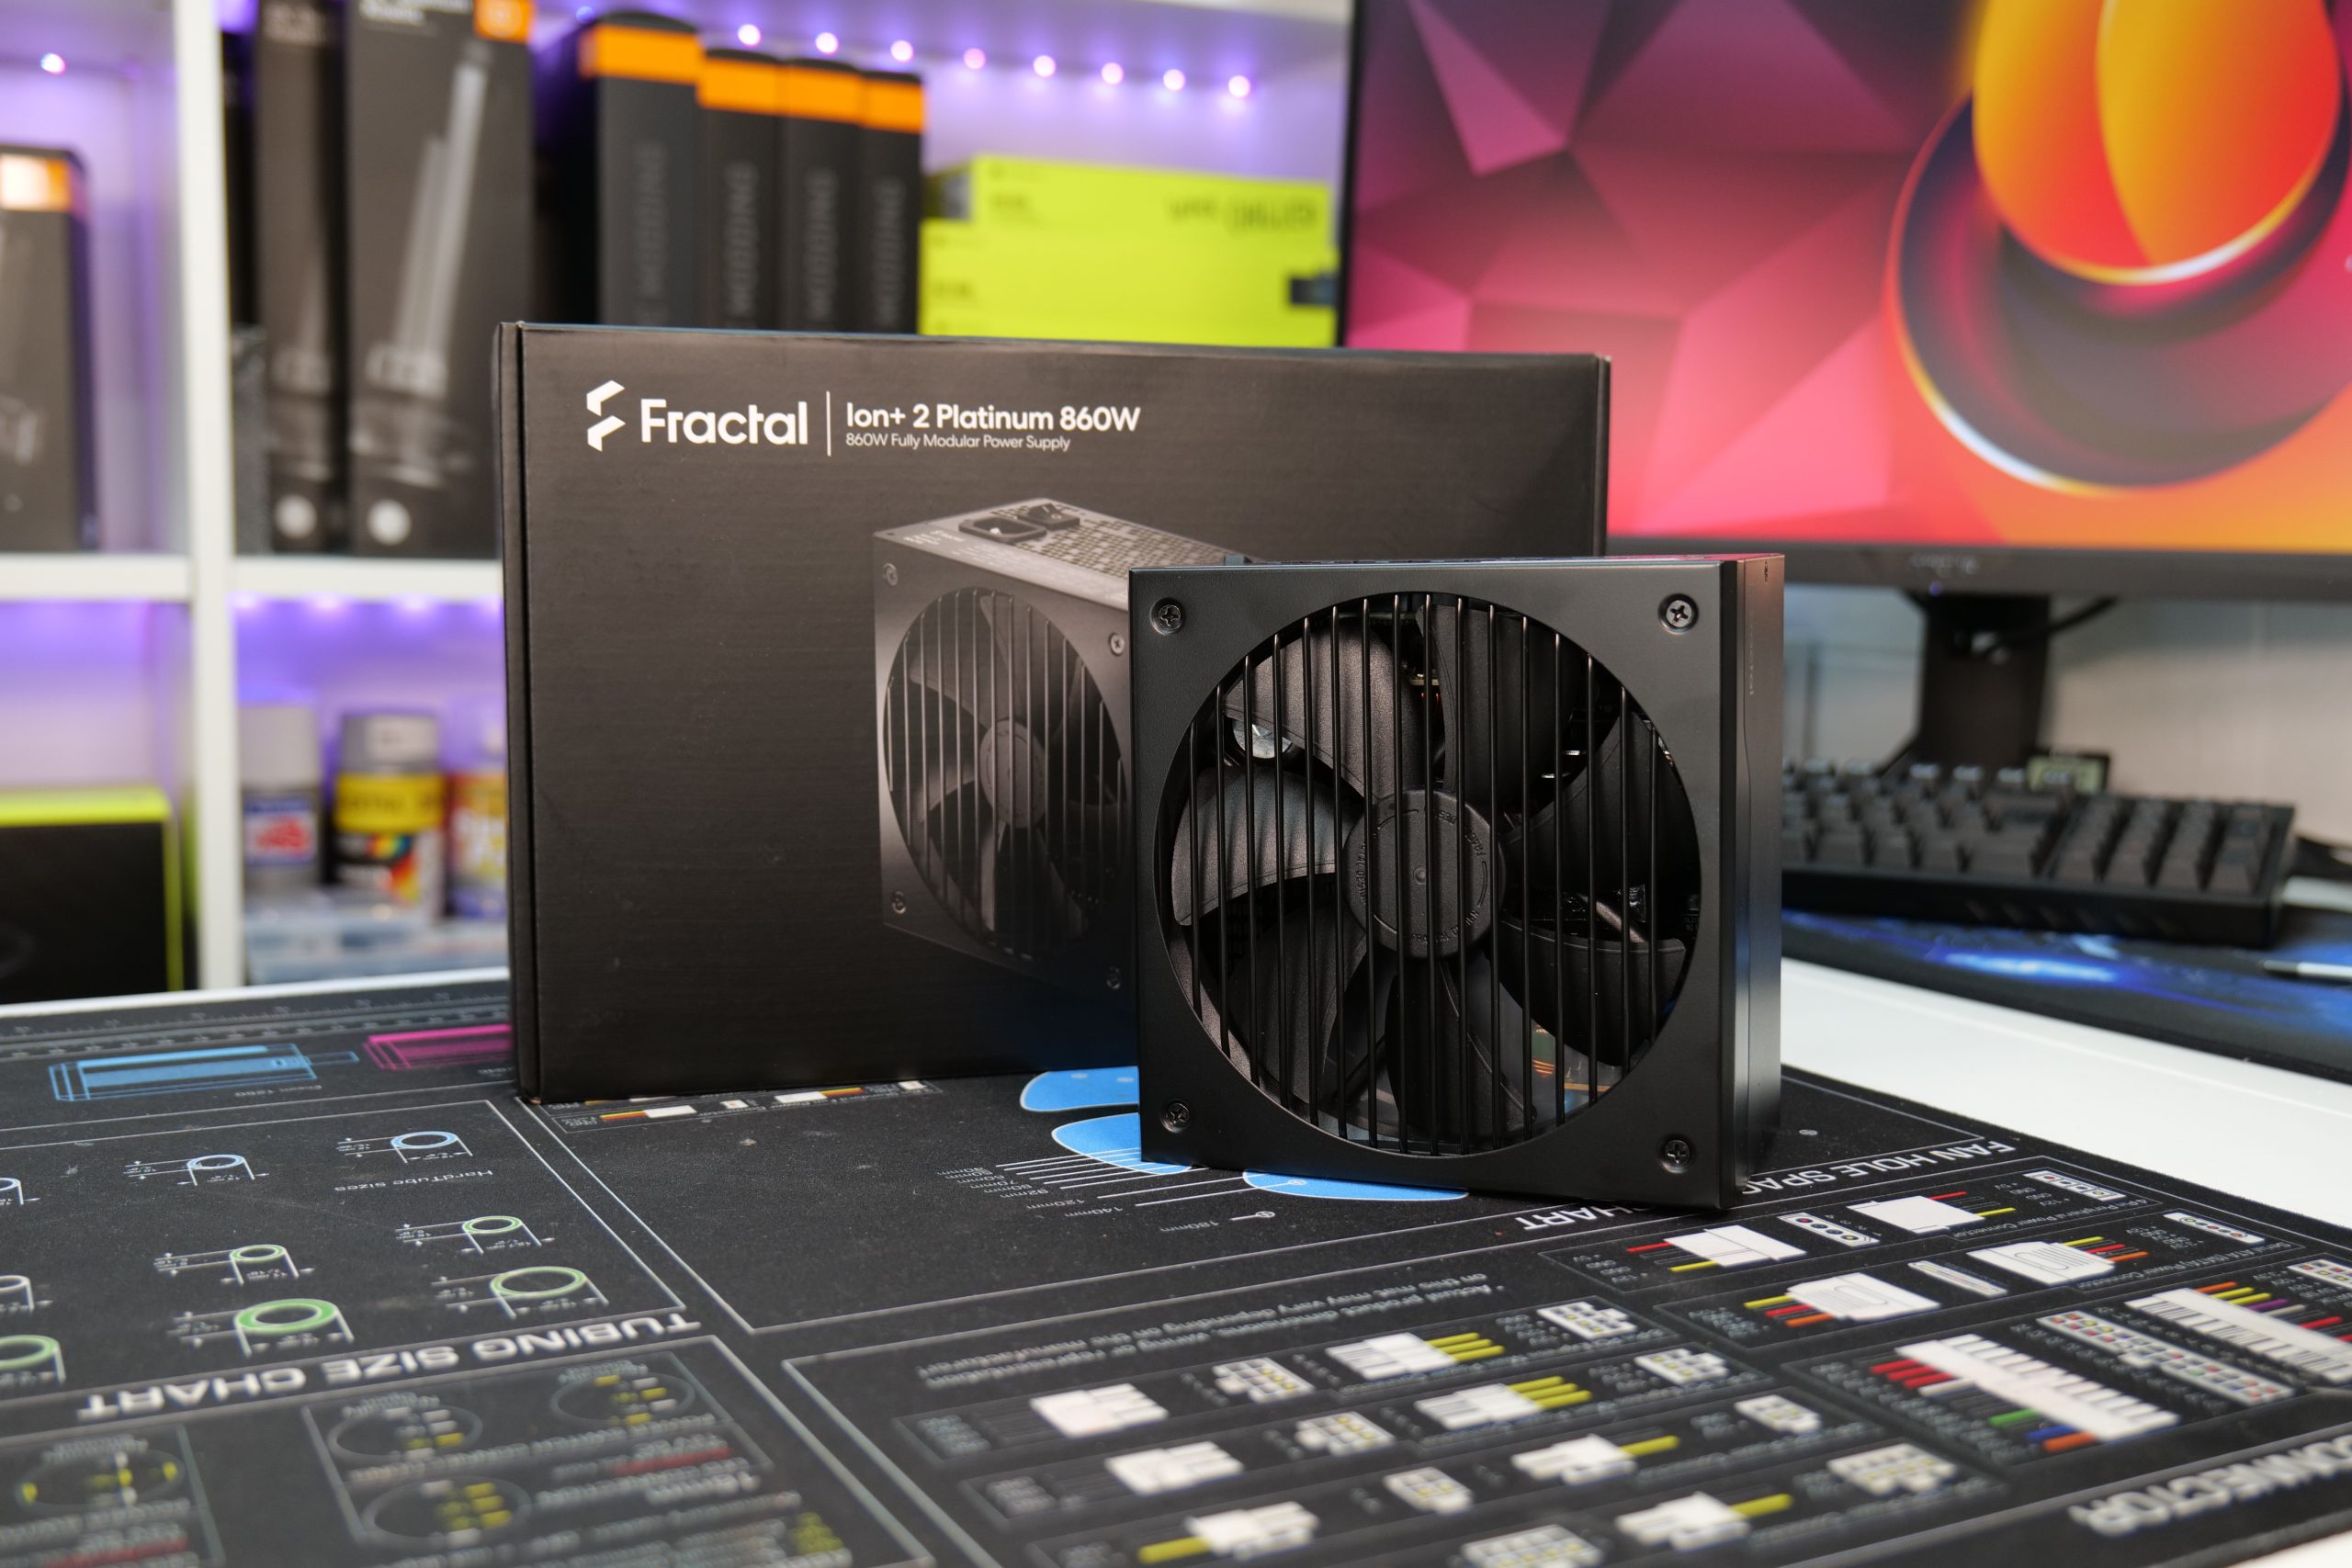
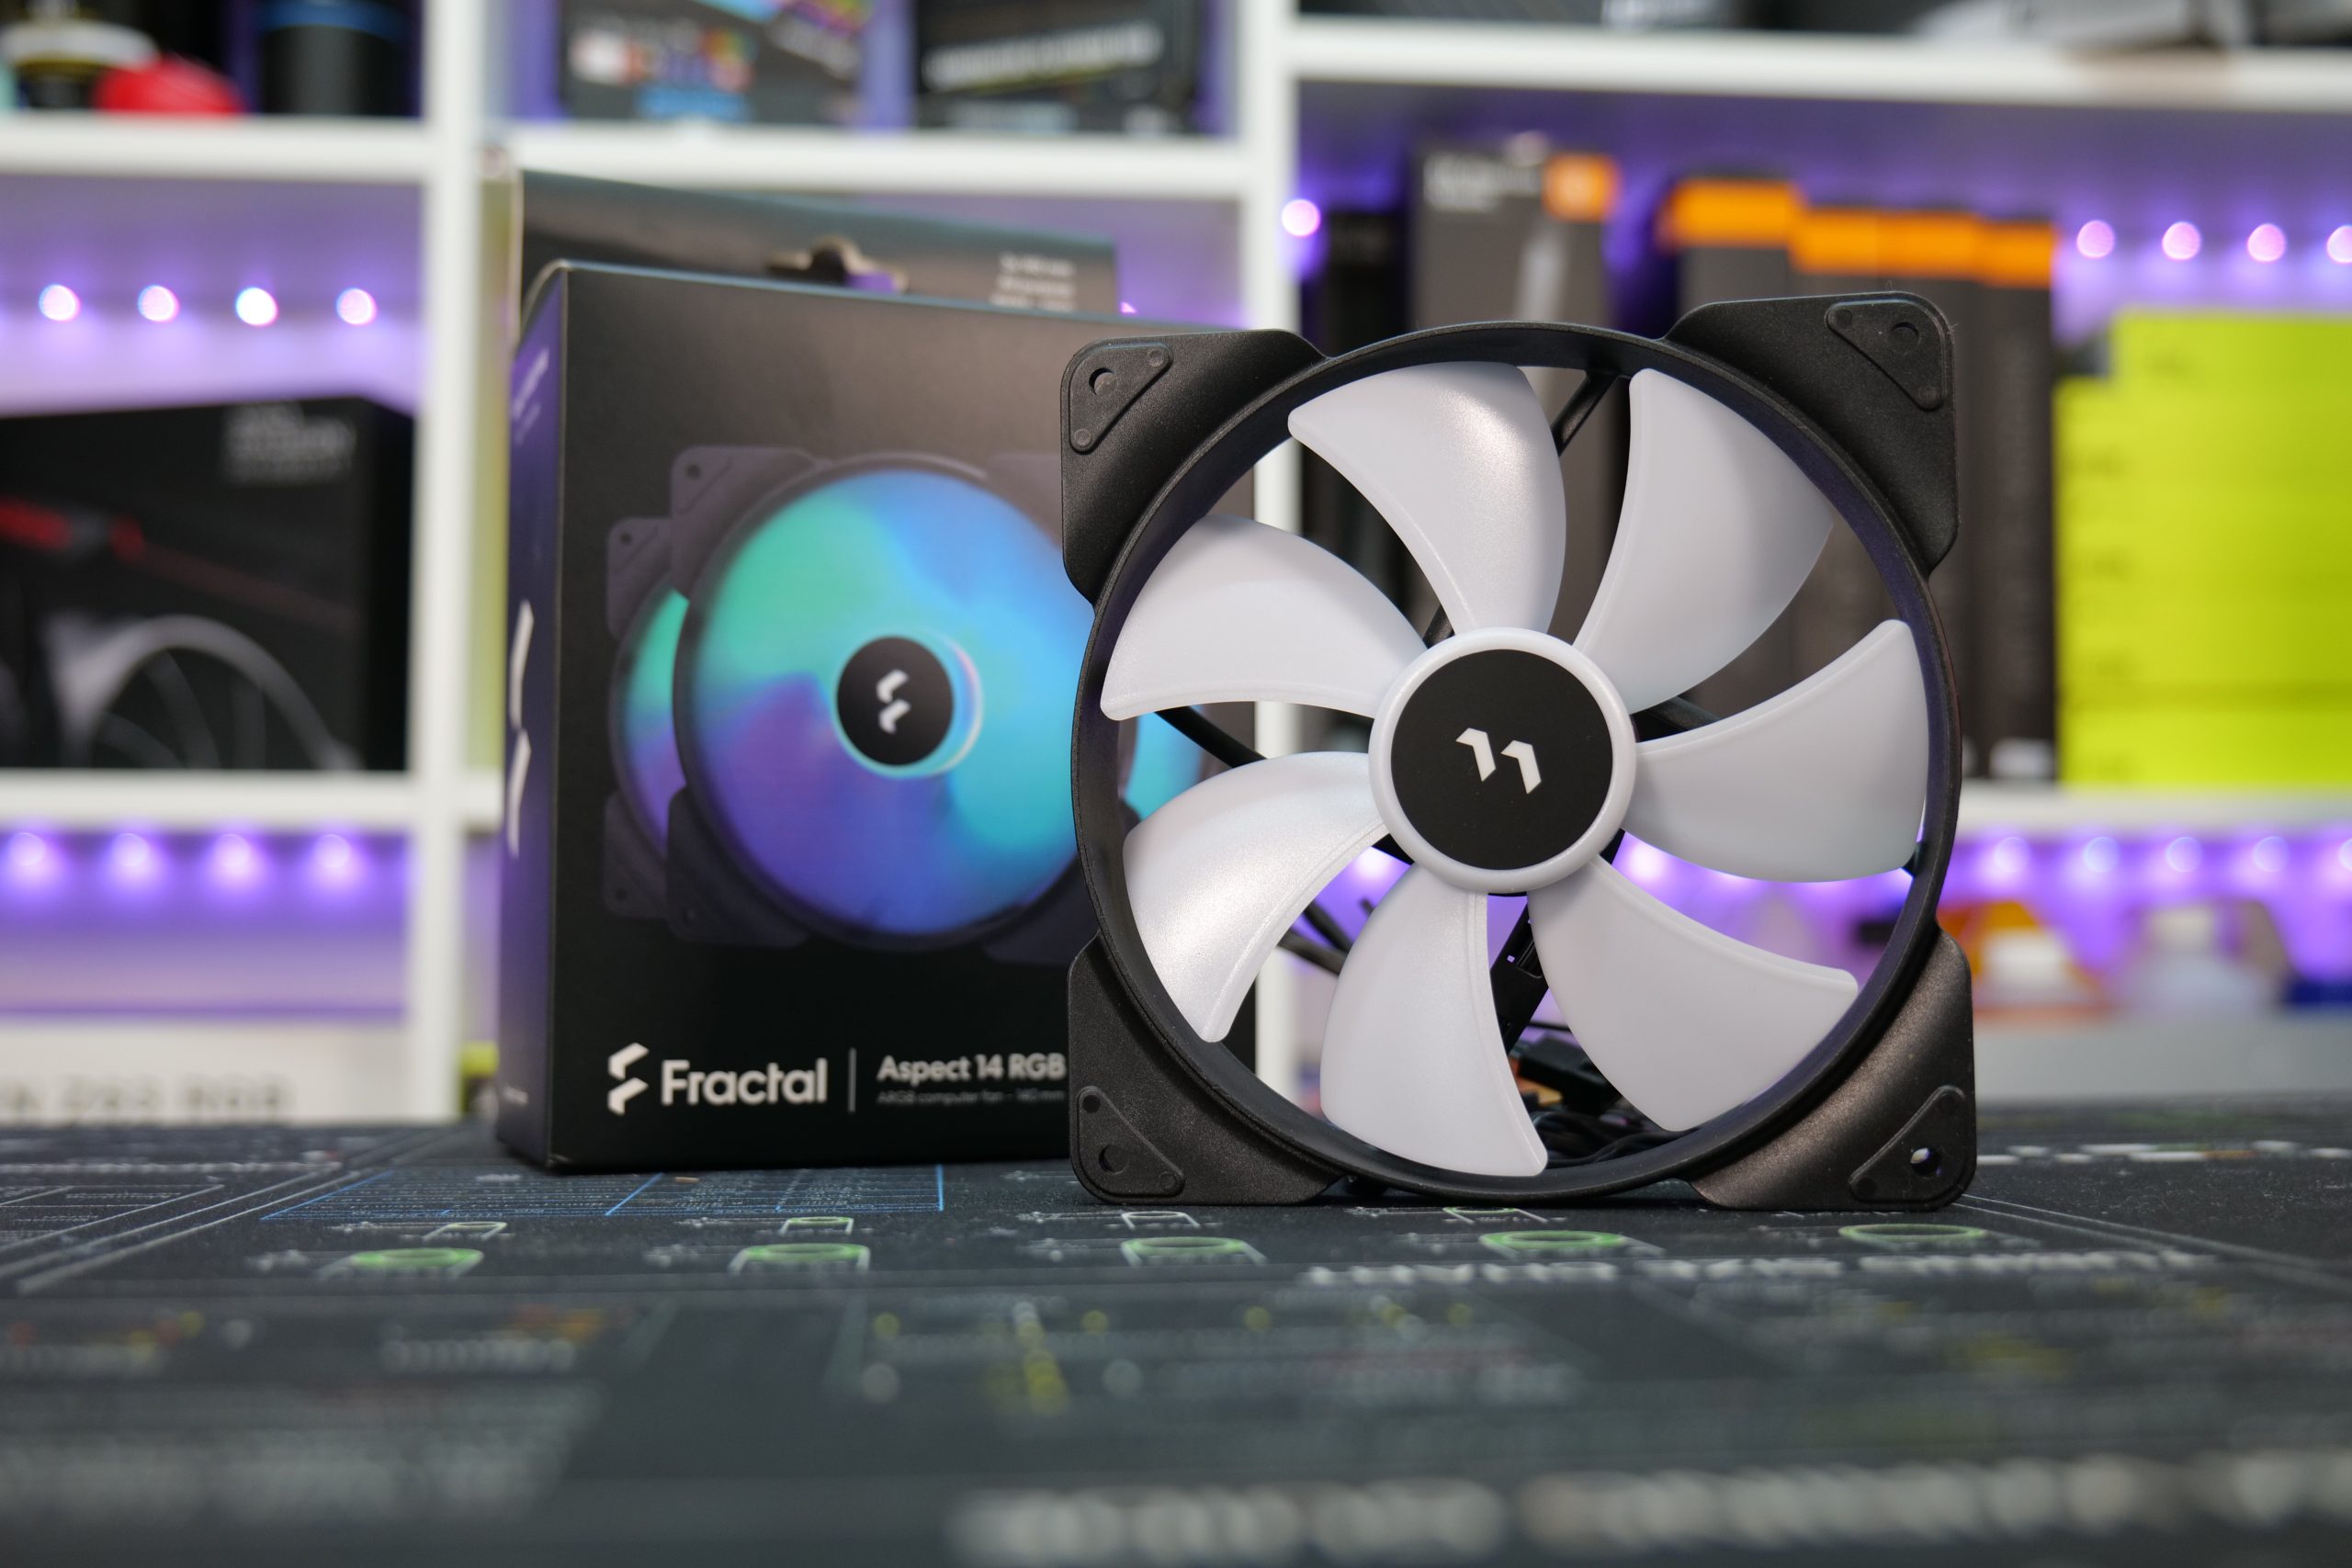
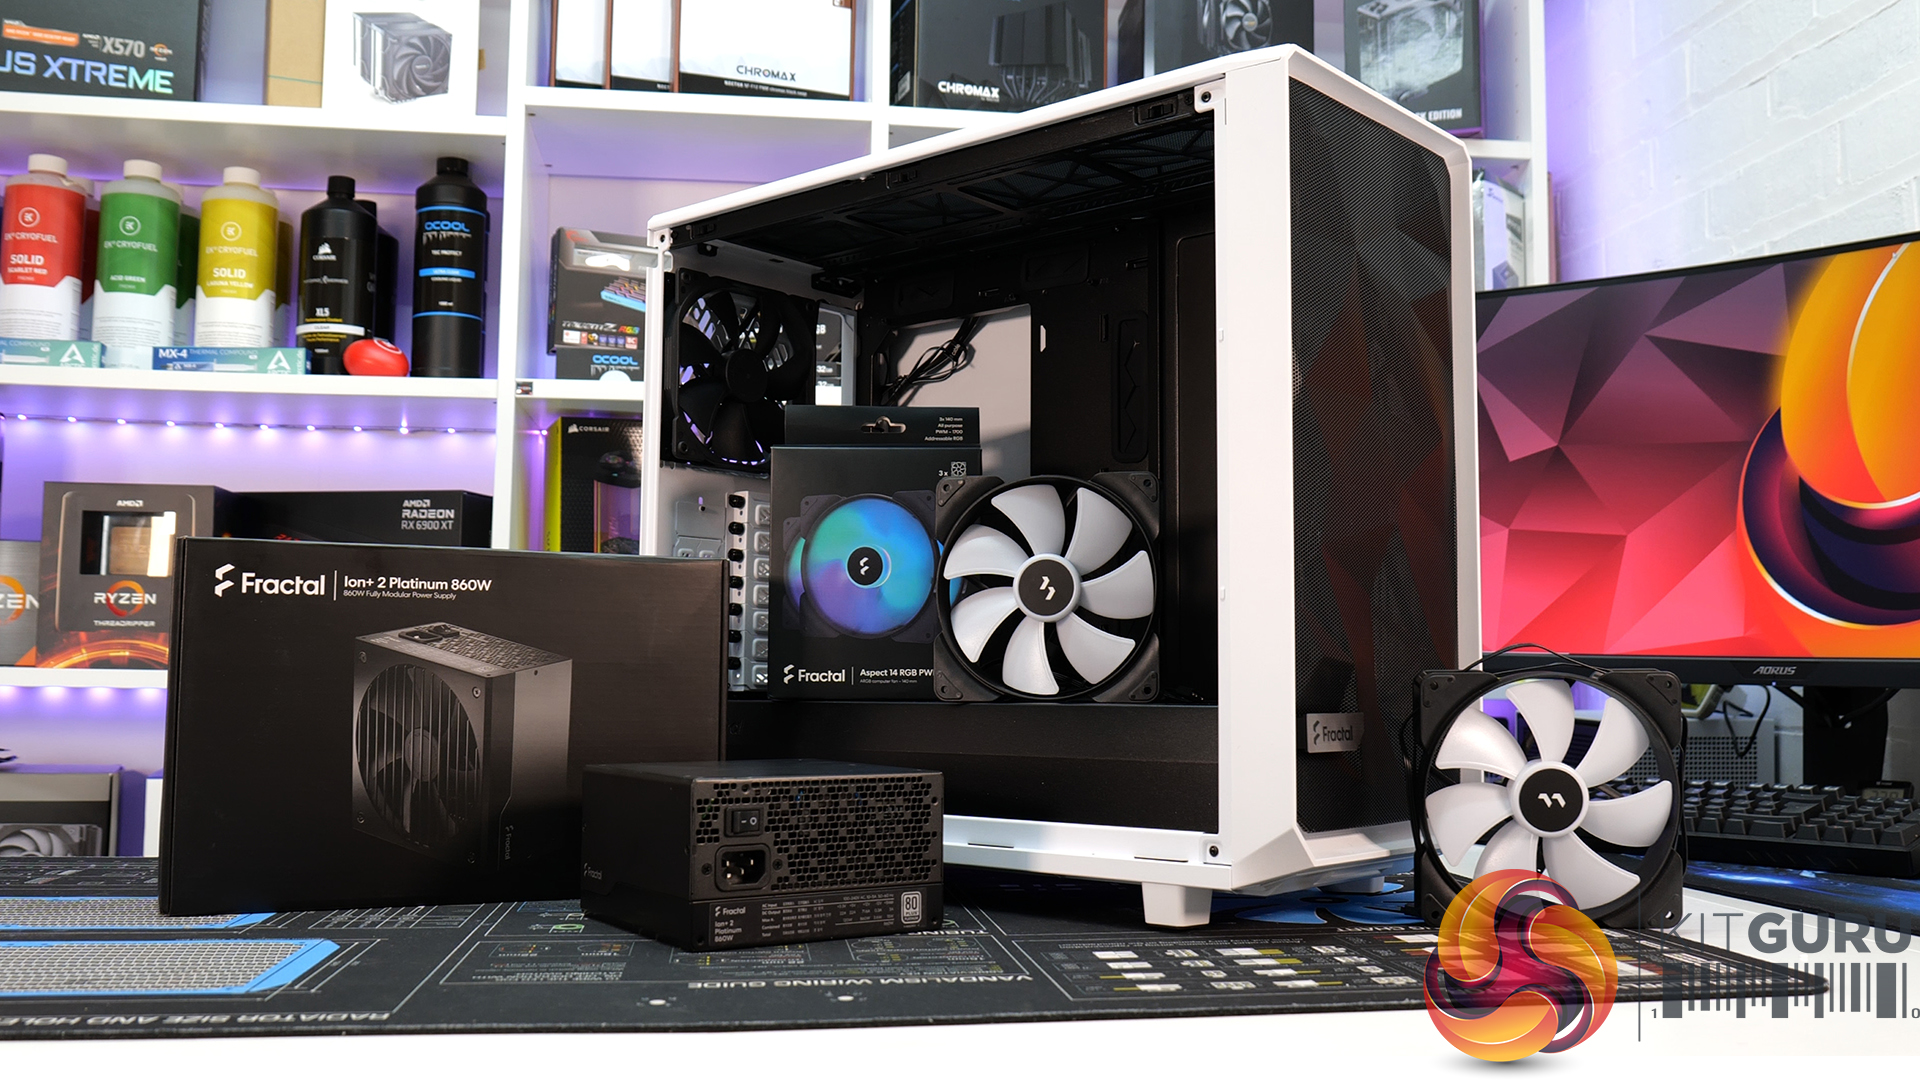
Today is the first video in the Fractal Design High Contrast modded build series and naturally, because this build is sponsored by Fractal Design, we have been given some Fractal parts to get us going. As well as the Meshify 2 case, ION+ 2 platinum 860W power supply and Fractal Aspect 14 RGB PWM fans, we have some more pretty high-end spec parts to build the core system with thanks to the folks at Scan.co.uk. The motherboard, CPU, graphics card, memory and storage for this build have all been provided by Scan and we also have a complete custom loop cooling system from EK Water Blocks.
The main focus of this build will be to modify the Fractal Meshify 2 chassis, allowing the motherboard to be rotated by 90 degrees, facing the rear I/O and PCIe slots towards the power supply shroud and mounting the graphics card vertically, which will in turn make space for two 280mm radiators, one at the front and one at the rear of the case. Part of the plan is to fit a distro plate or converted EKWB flat reservoir in the roof of the chassis with all tubing for the custom cooling running vertically to the graphics card, CPU, Pump and radiators.
An EK-Quantum Inertia D5 standalone pump will be installed under the PSU shroud with tubing passing through the shroud. Radiators will be two EK-CoolStream CE 280 45mm units, which should provide ample heat transfer for this system. Corsair 14mm XT Hardline Satin Transparent tubing will be used as I prefer the satin look recently. The rest of the system will feature a combination of black interior mixed with high contrast highlights and custom made power supply cables while the exterior of the chassis will get a custom paint job.
Core System Specification:
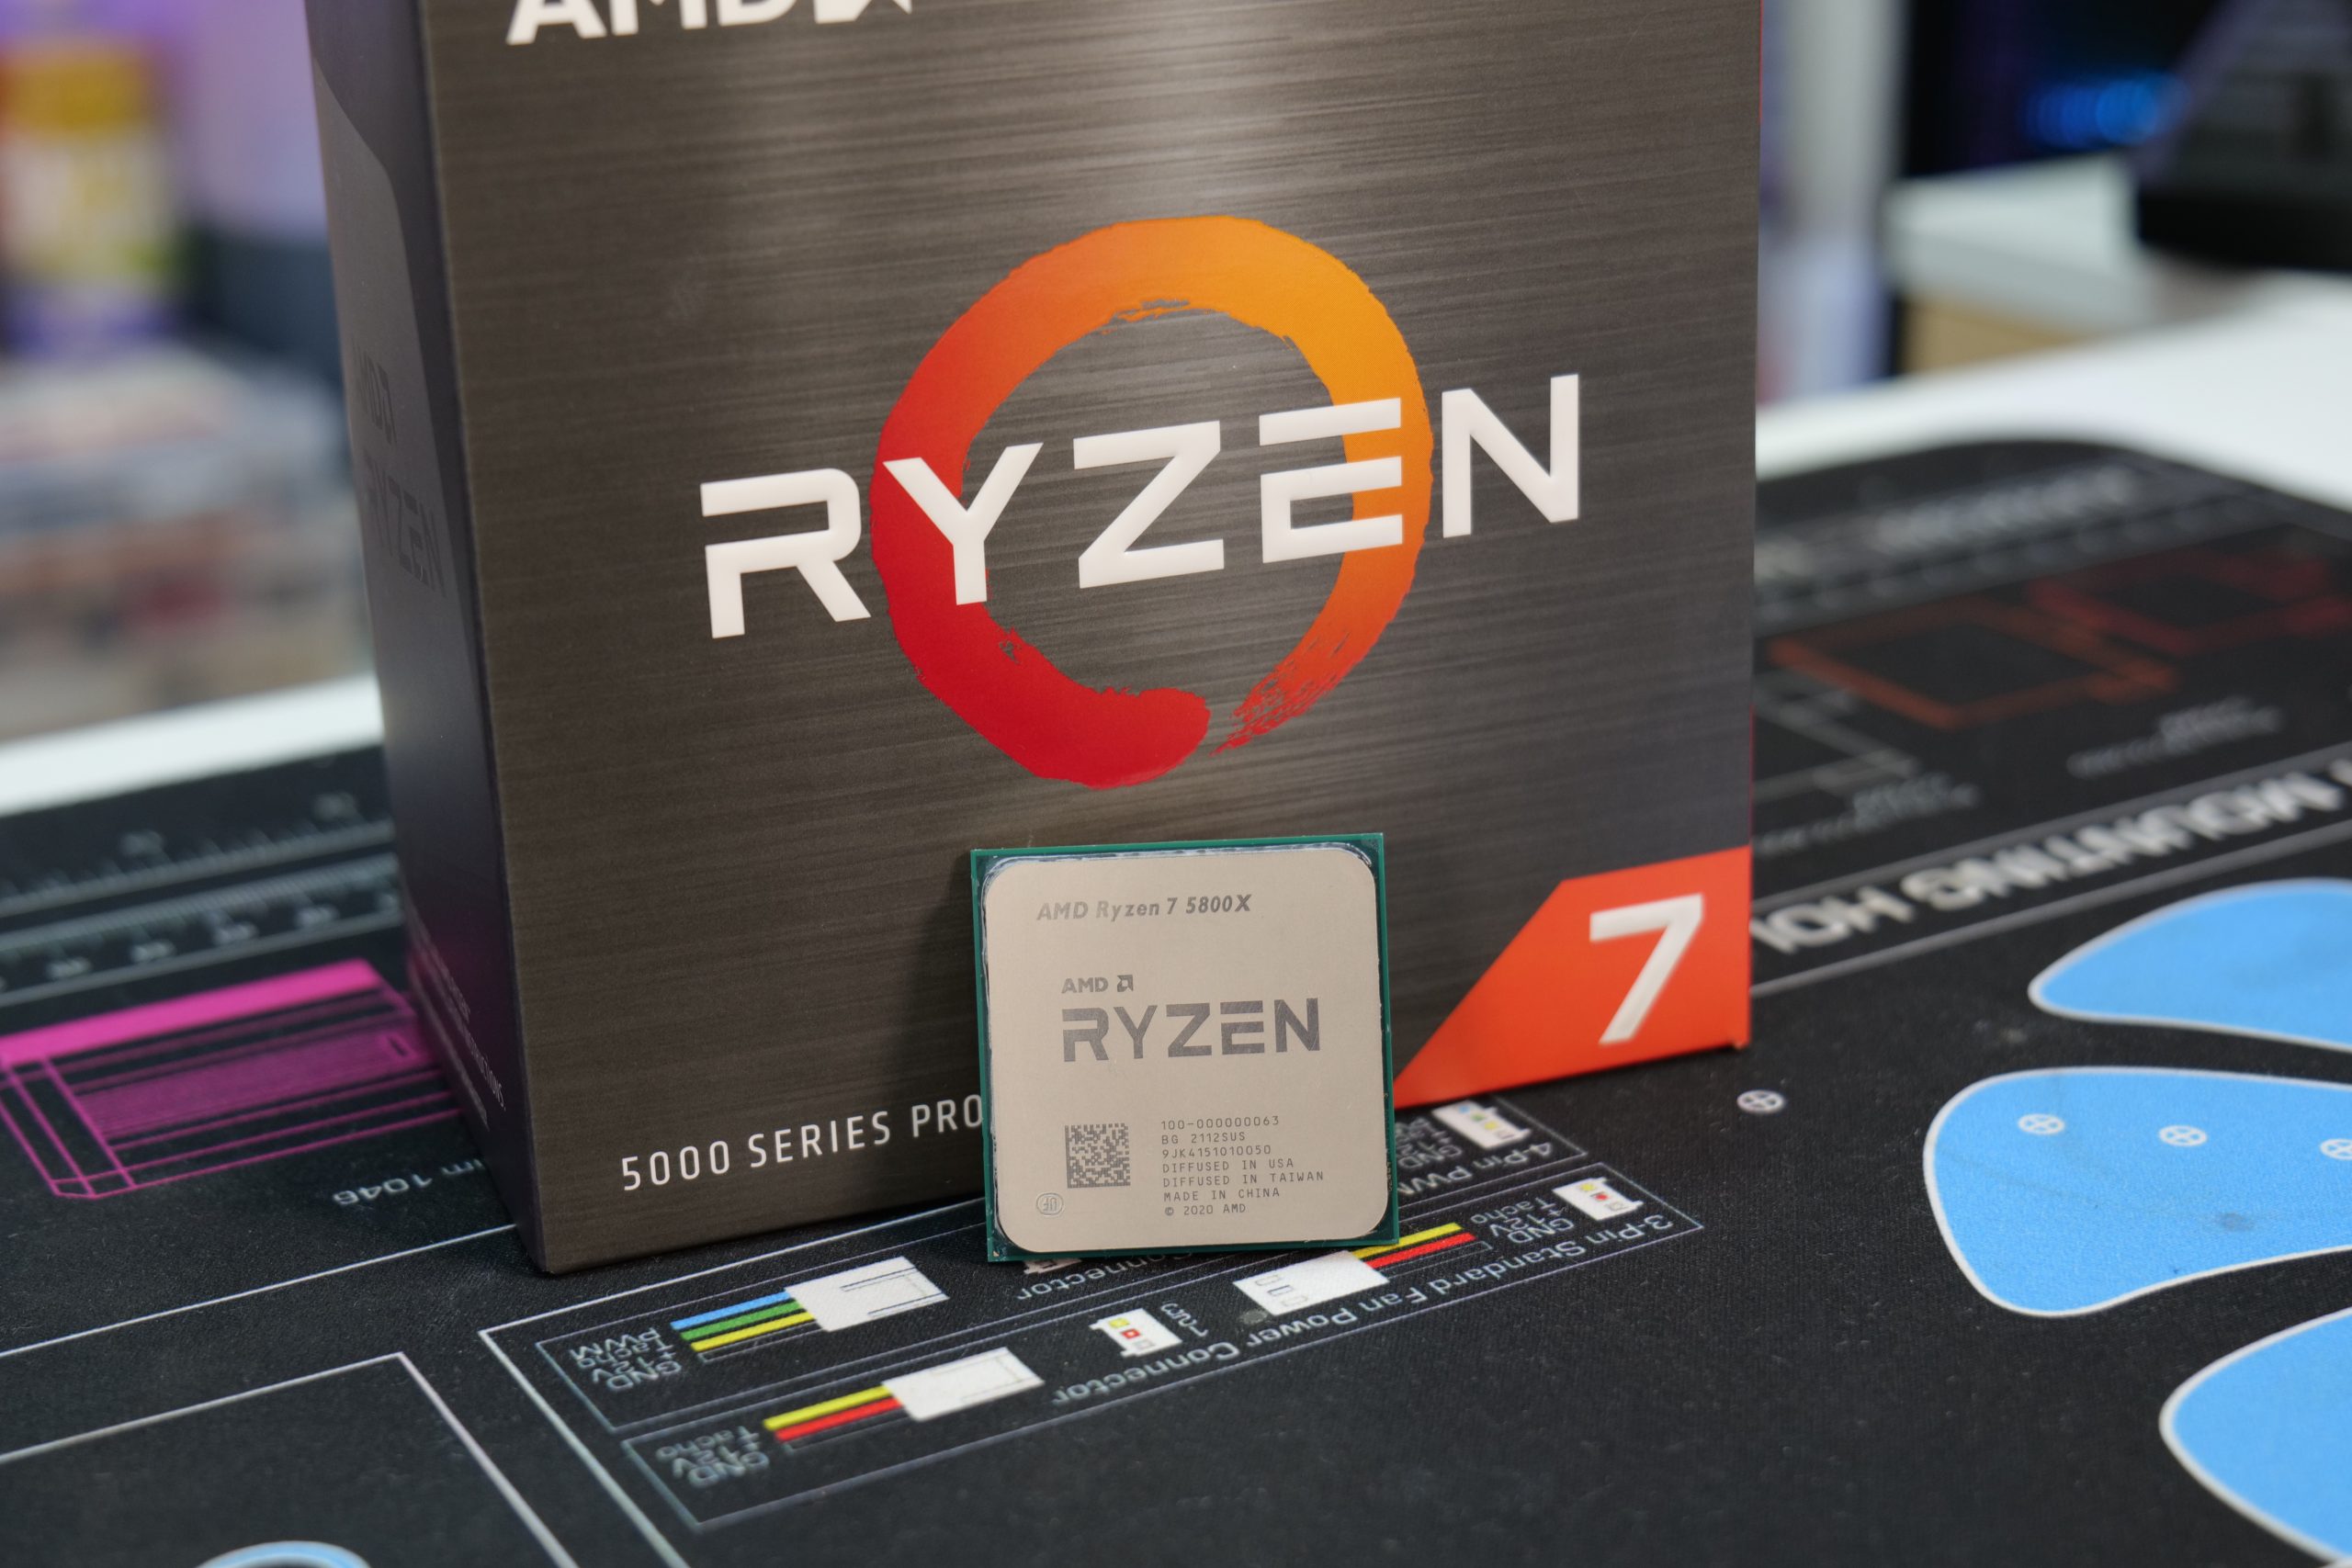
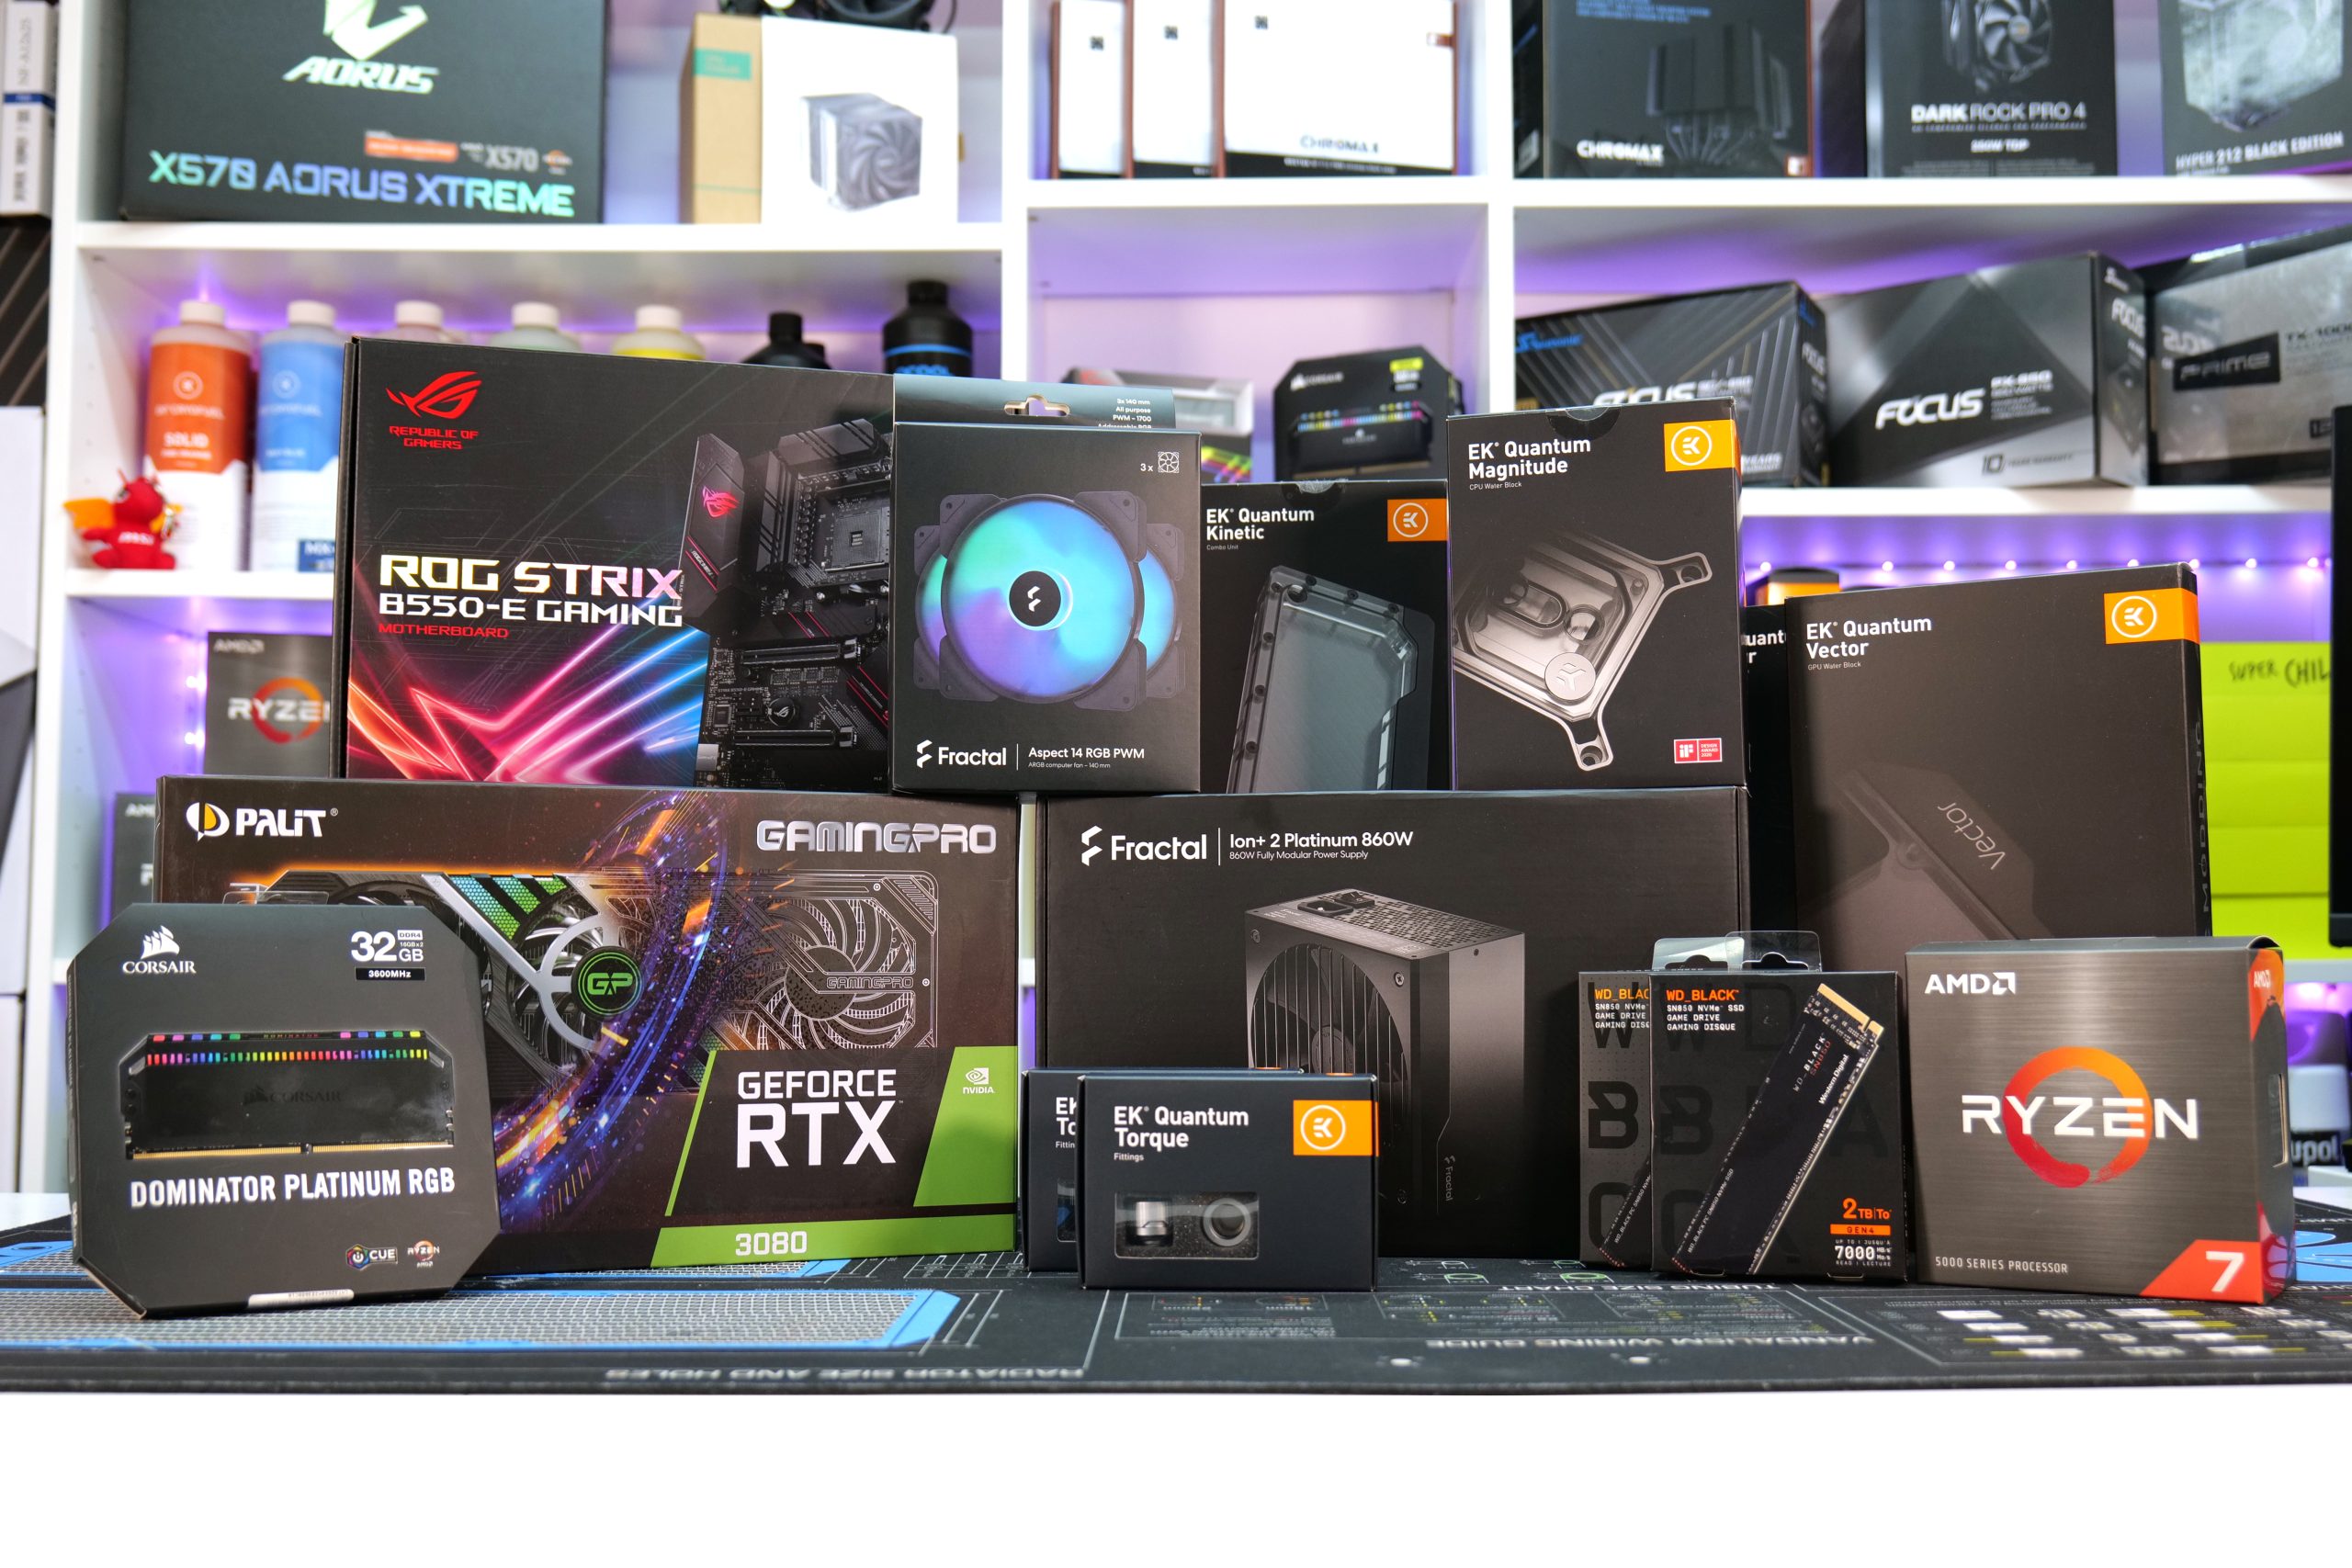
- CPU – AMD Ryzen 7 5800X
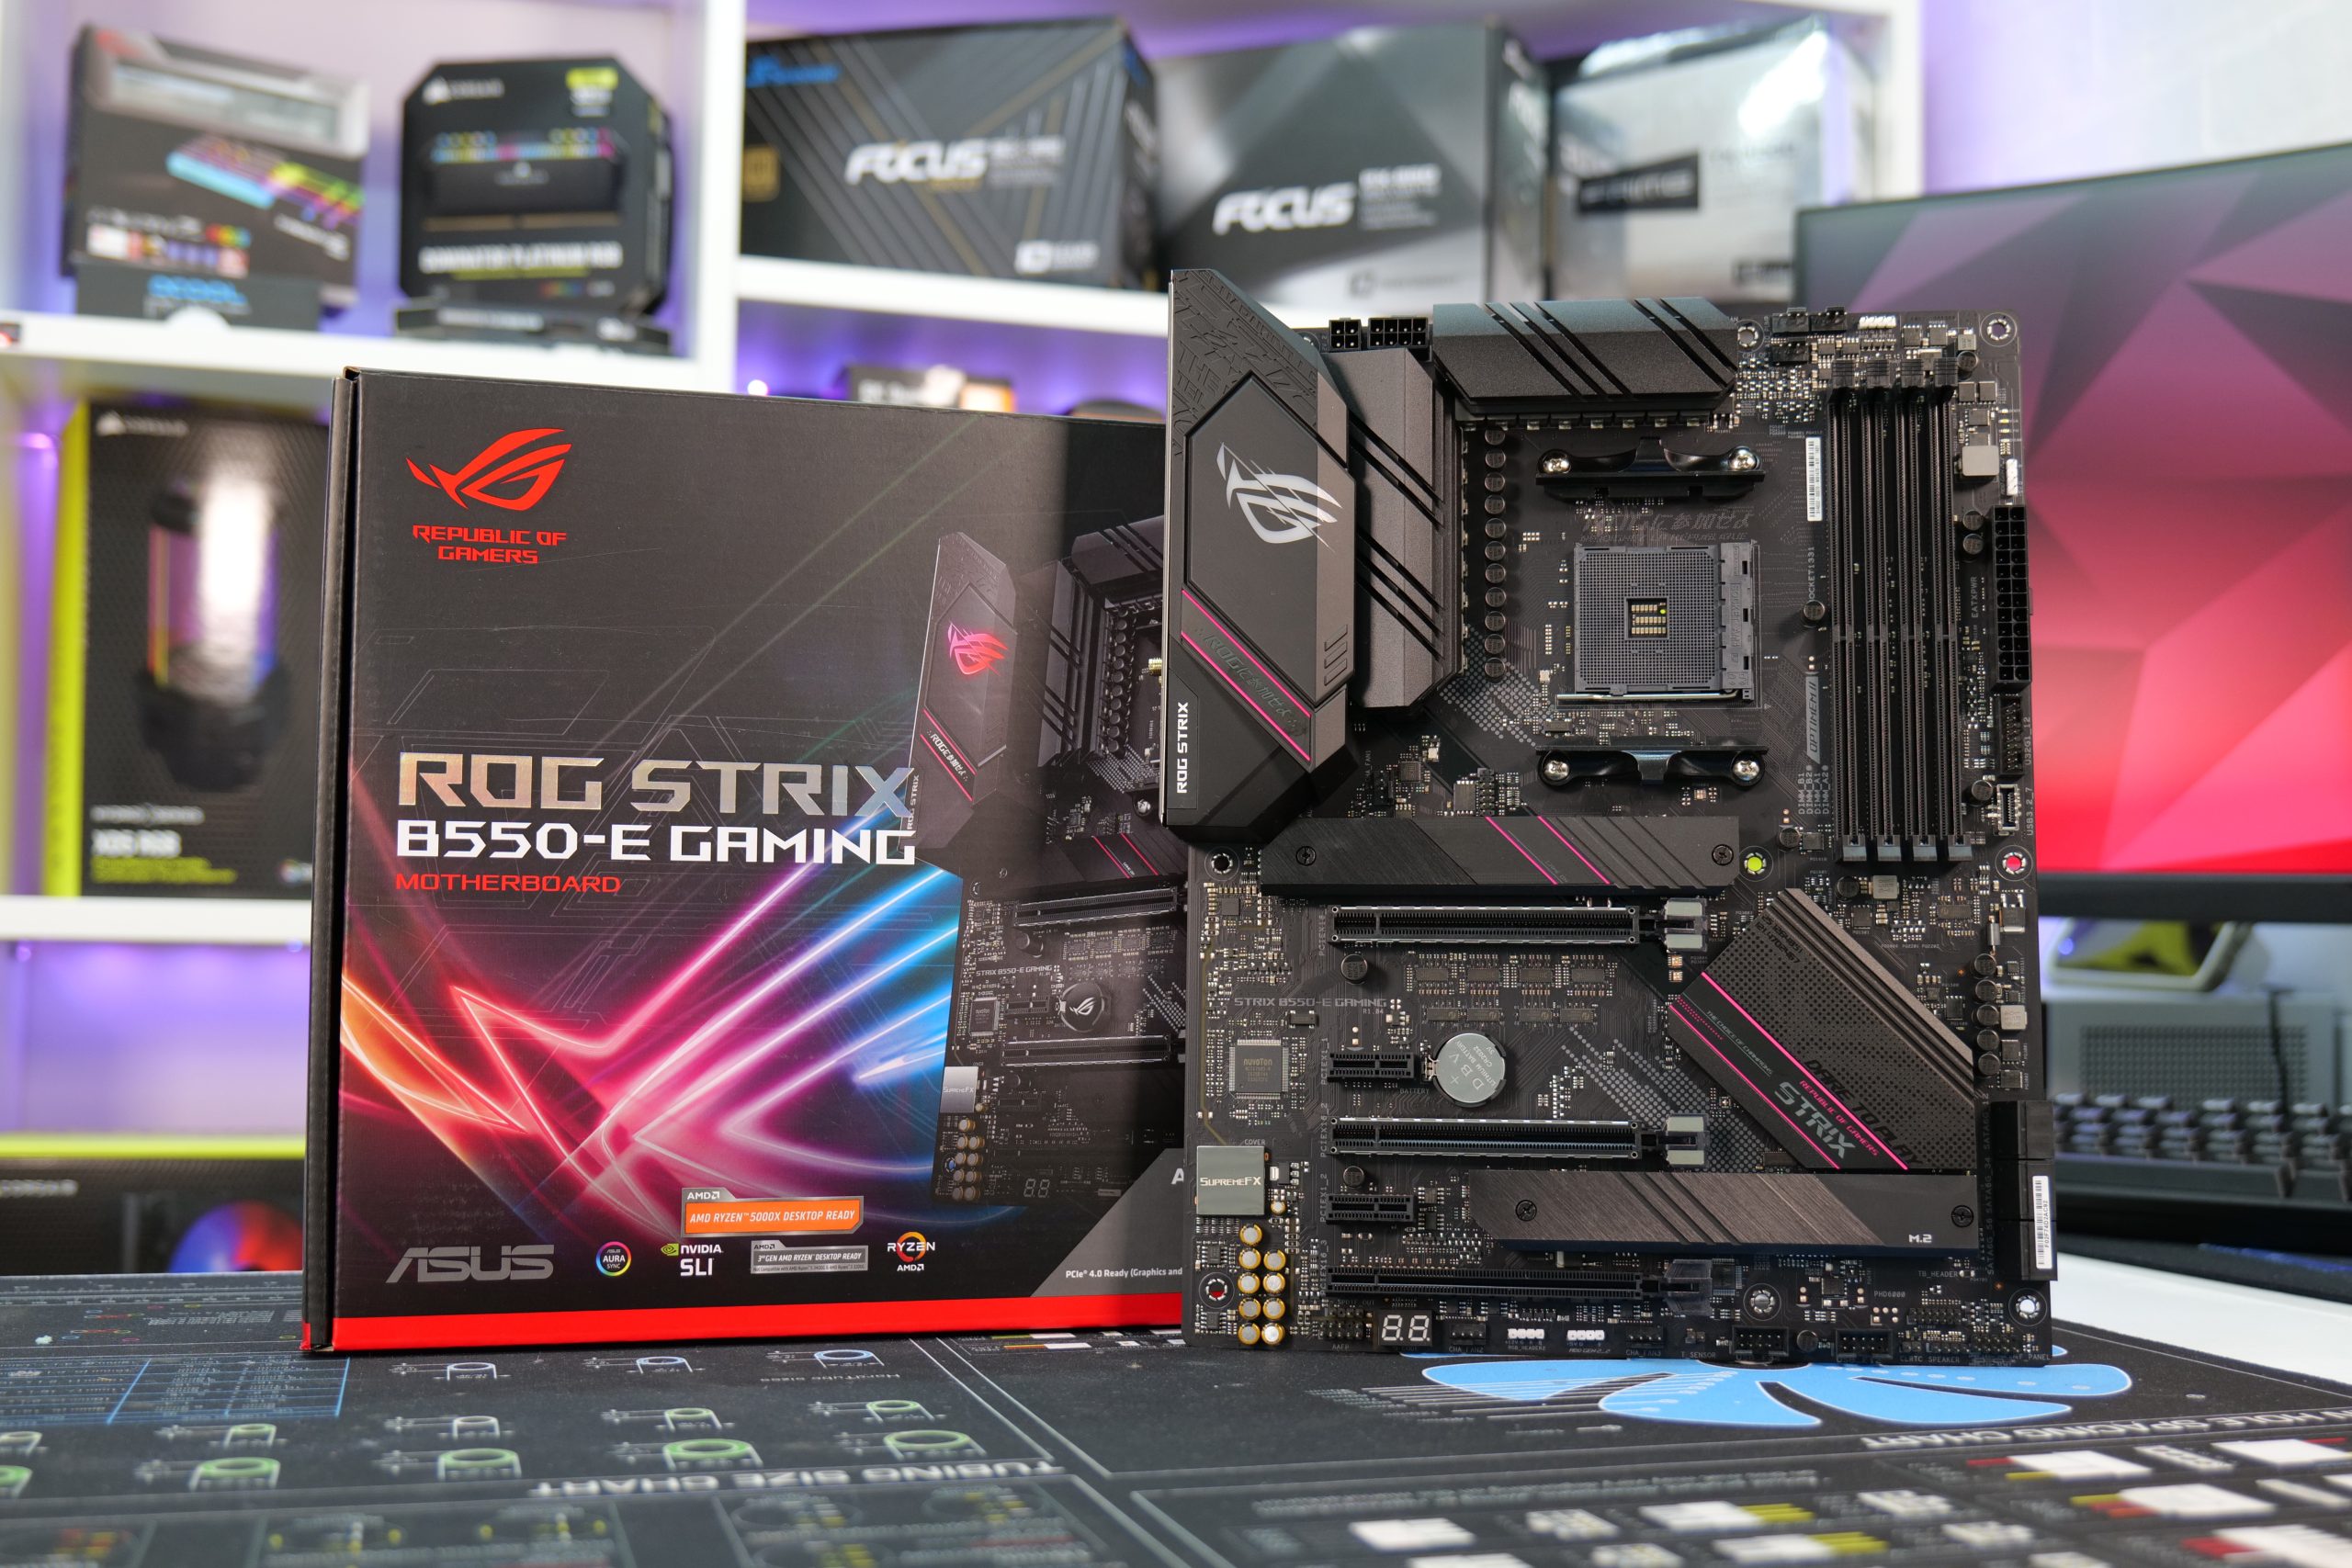
- Motherboard – Asus Strix B550-E Gaming
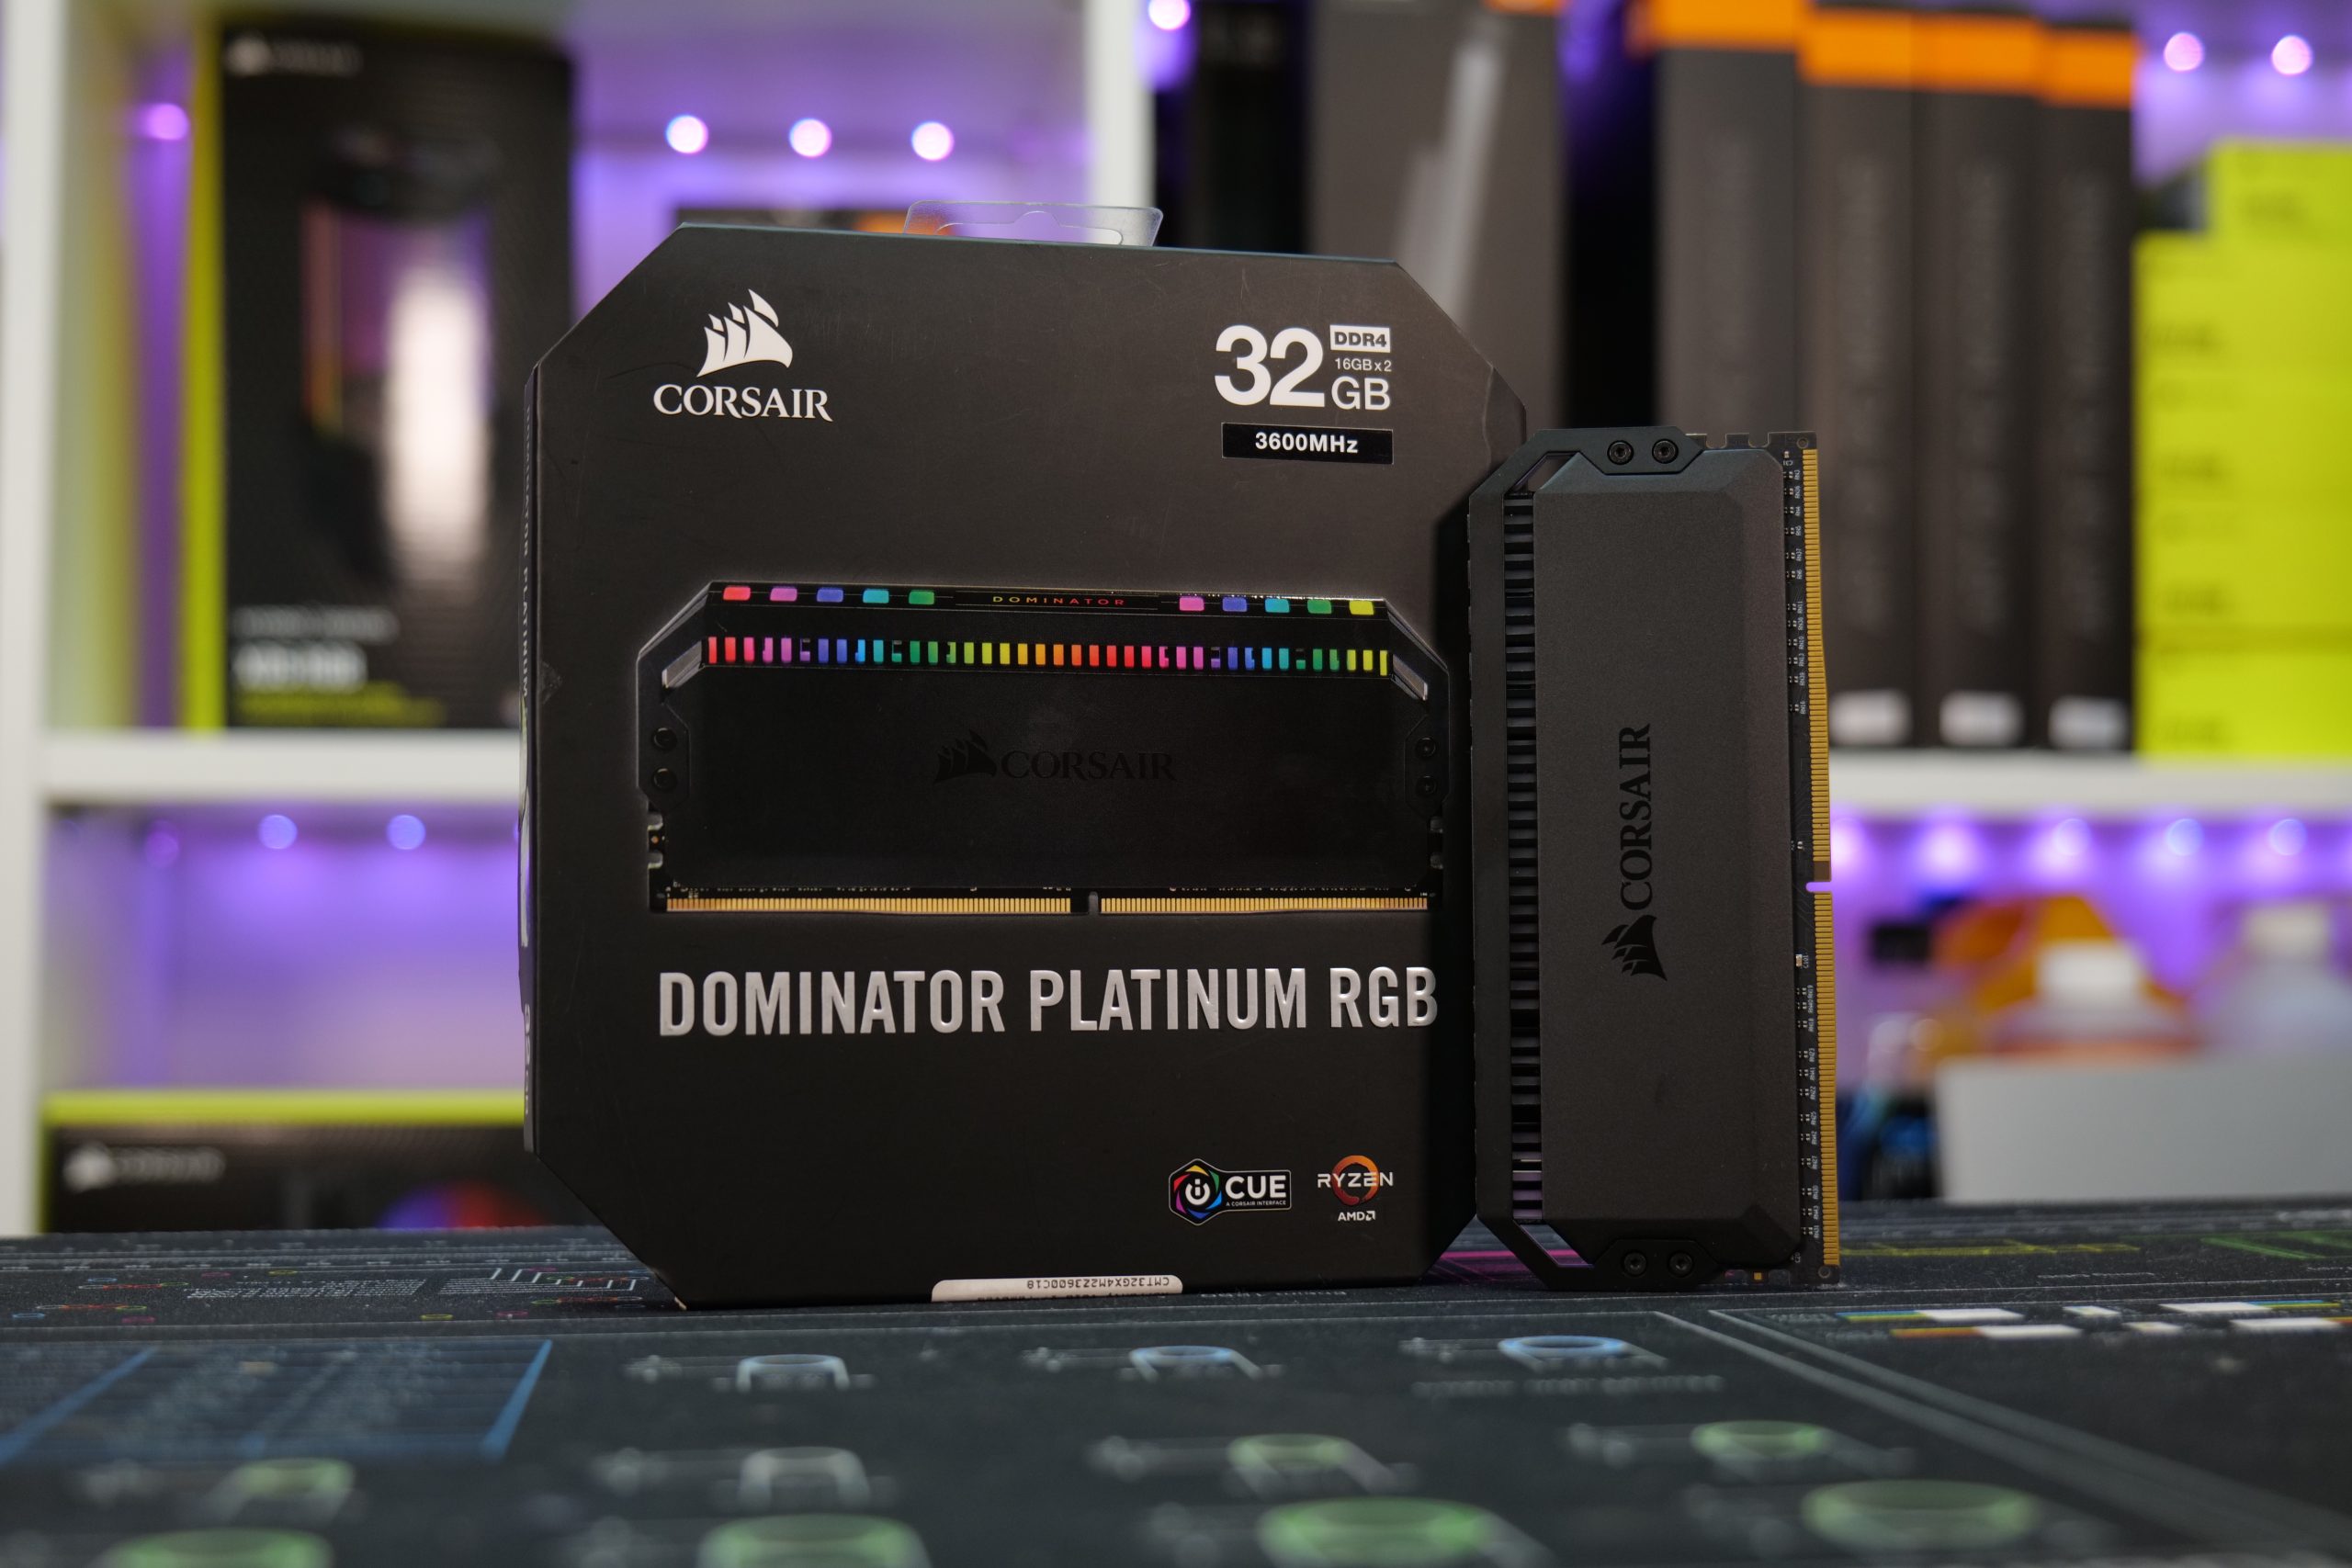
- Memory – 32 GB (2 x 16GB Modules) Corsair Dominator Platinum RGB DDR4-3600
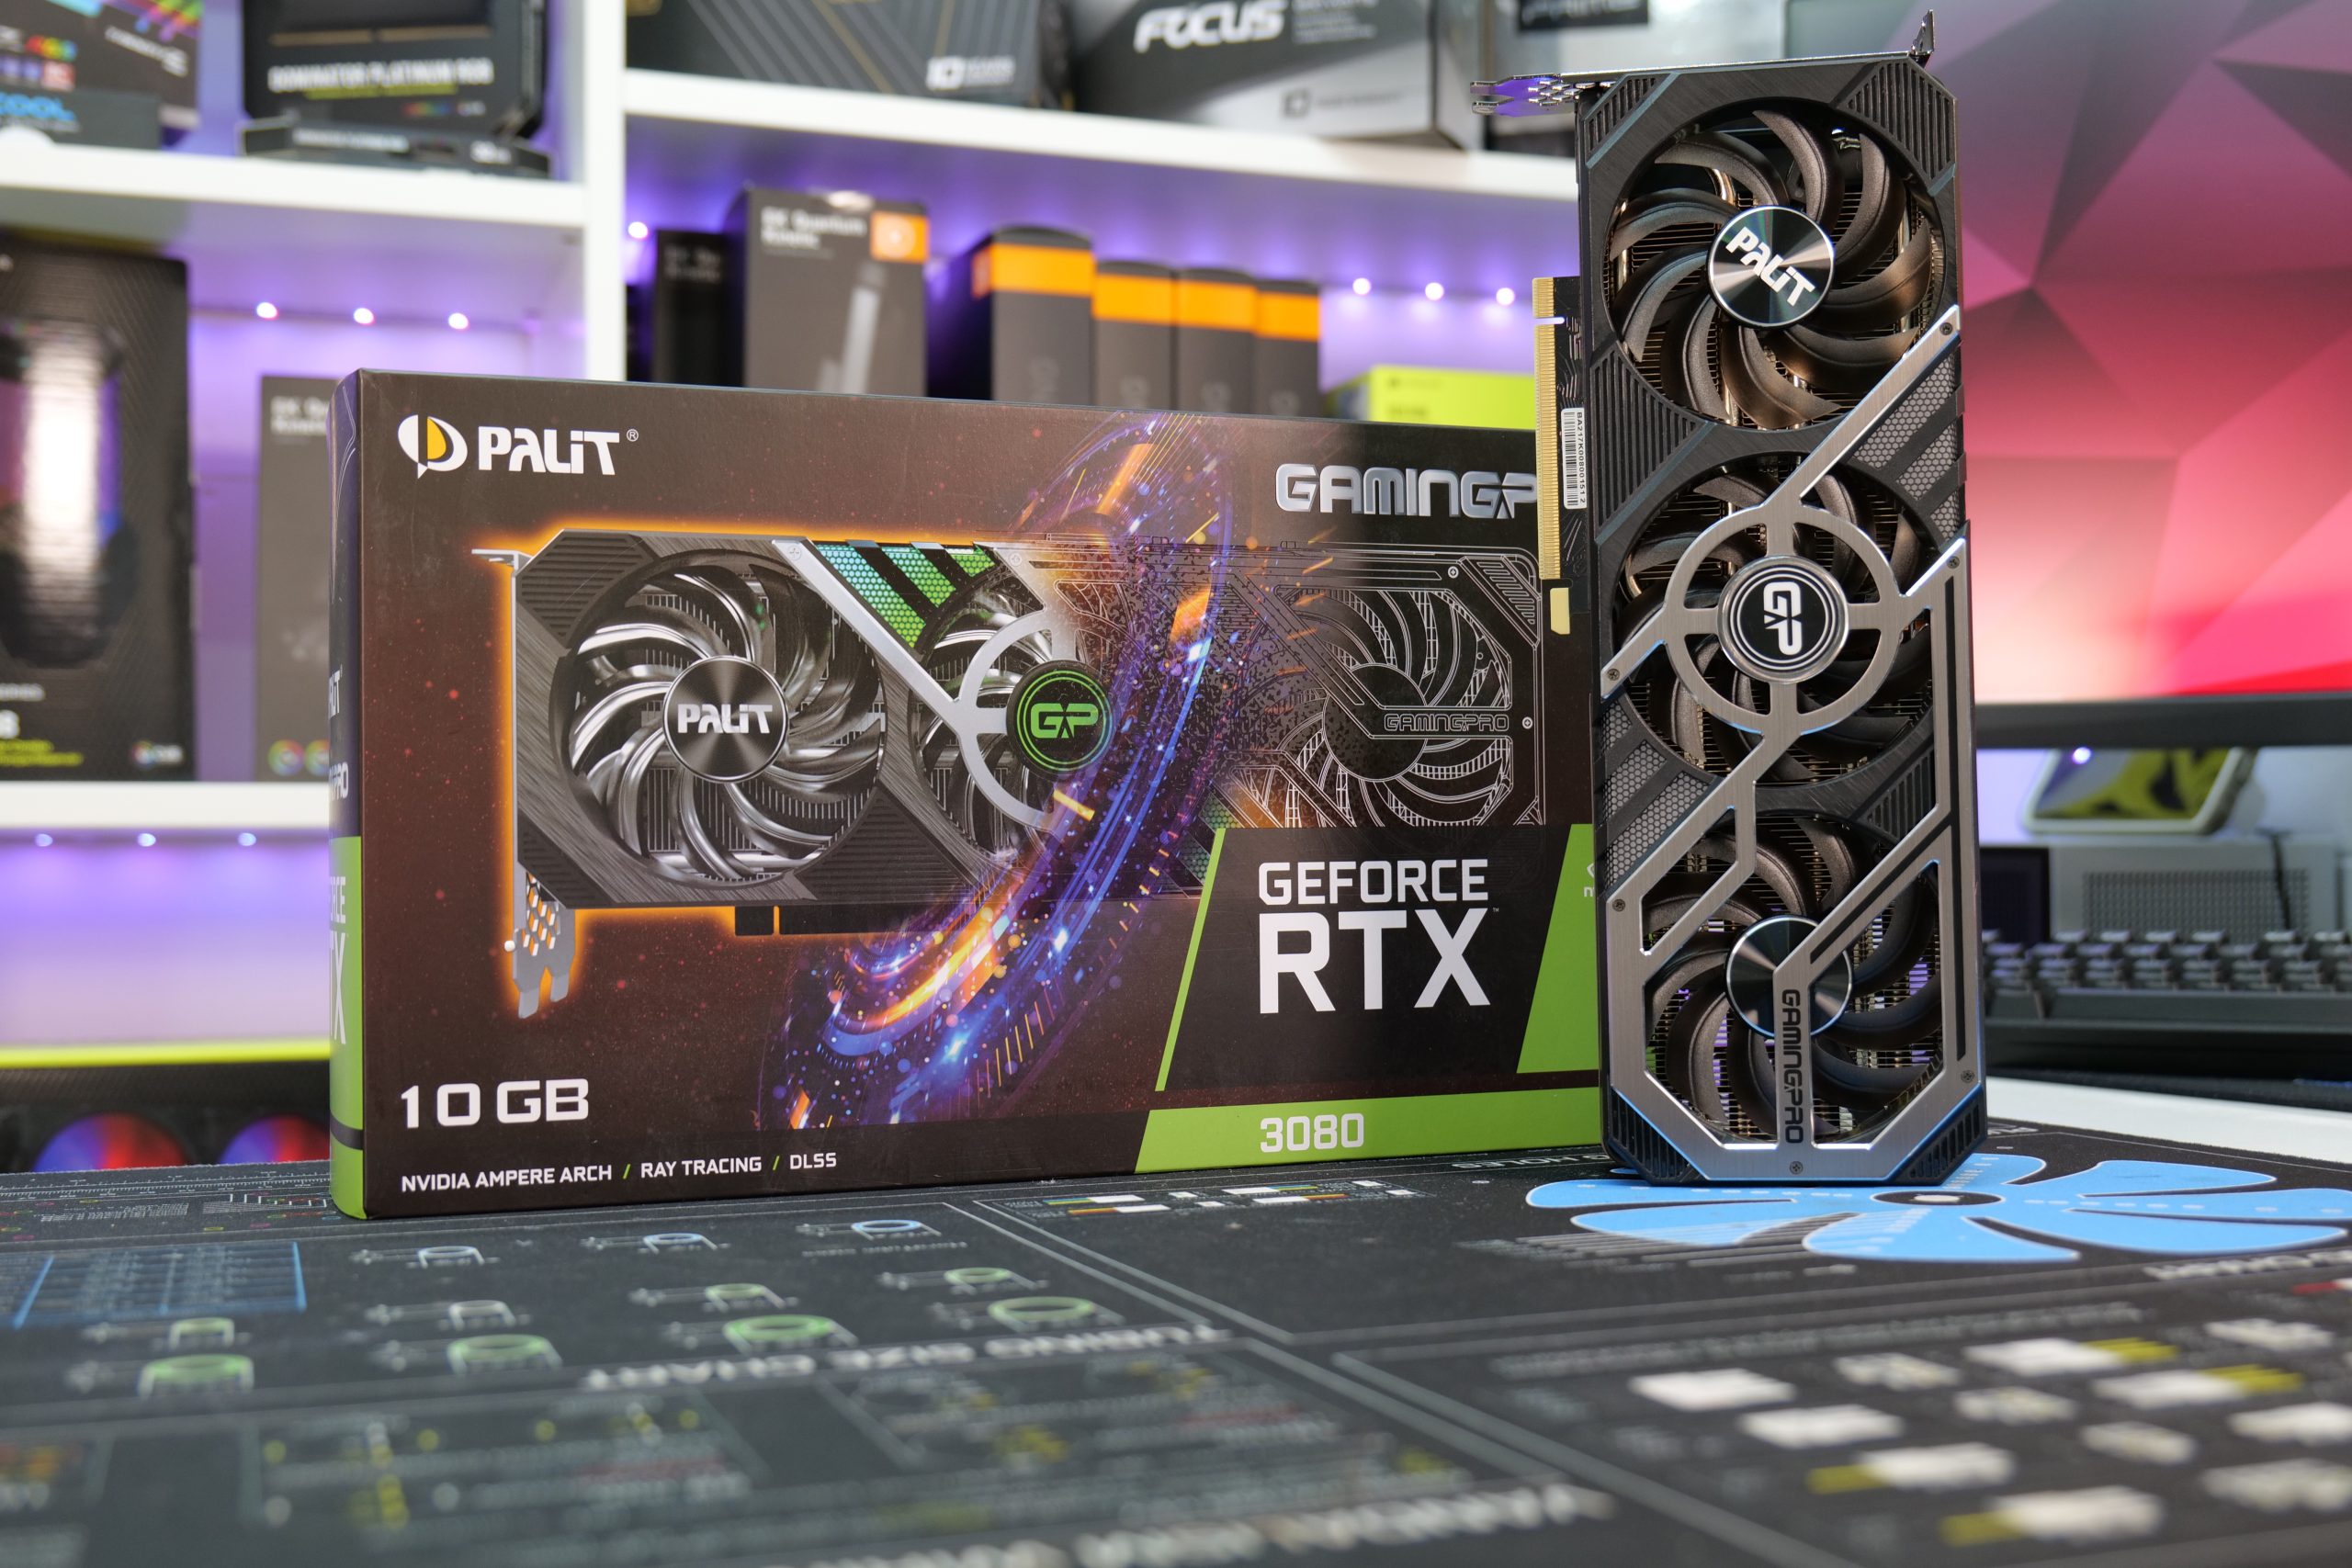
- Graphics Card – Palit RTX 3080 Gaming Pro
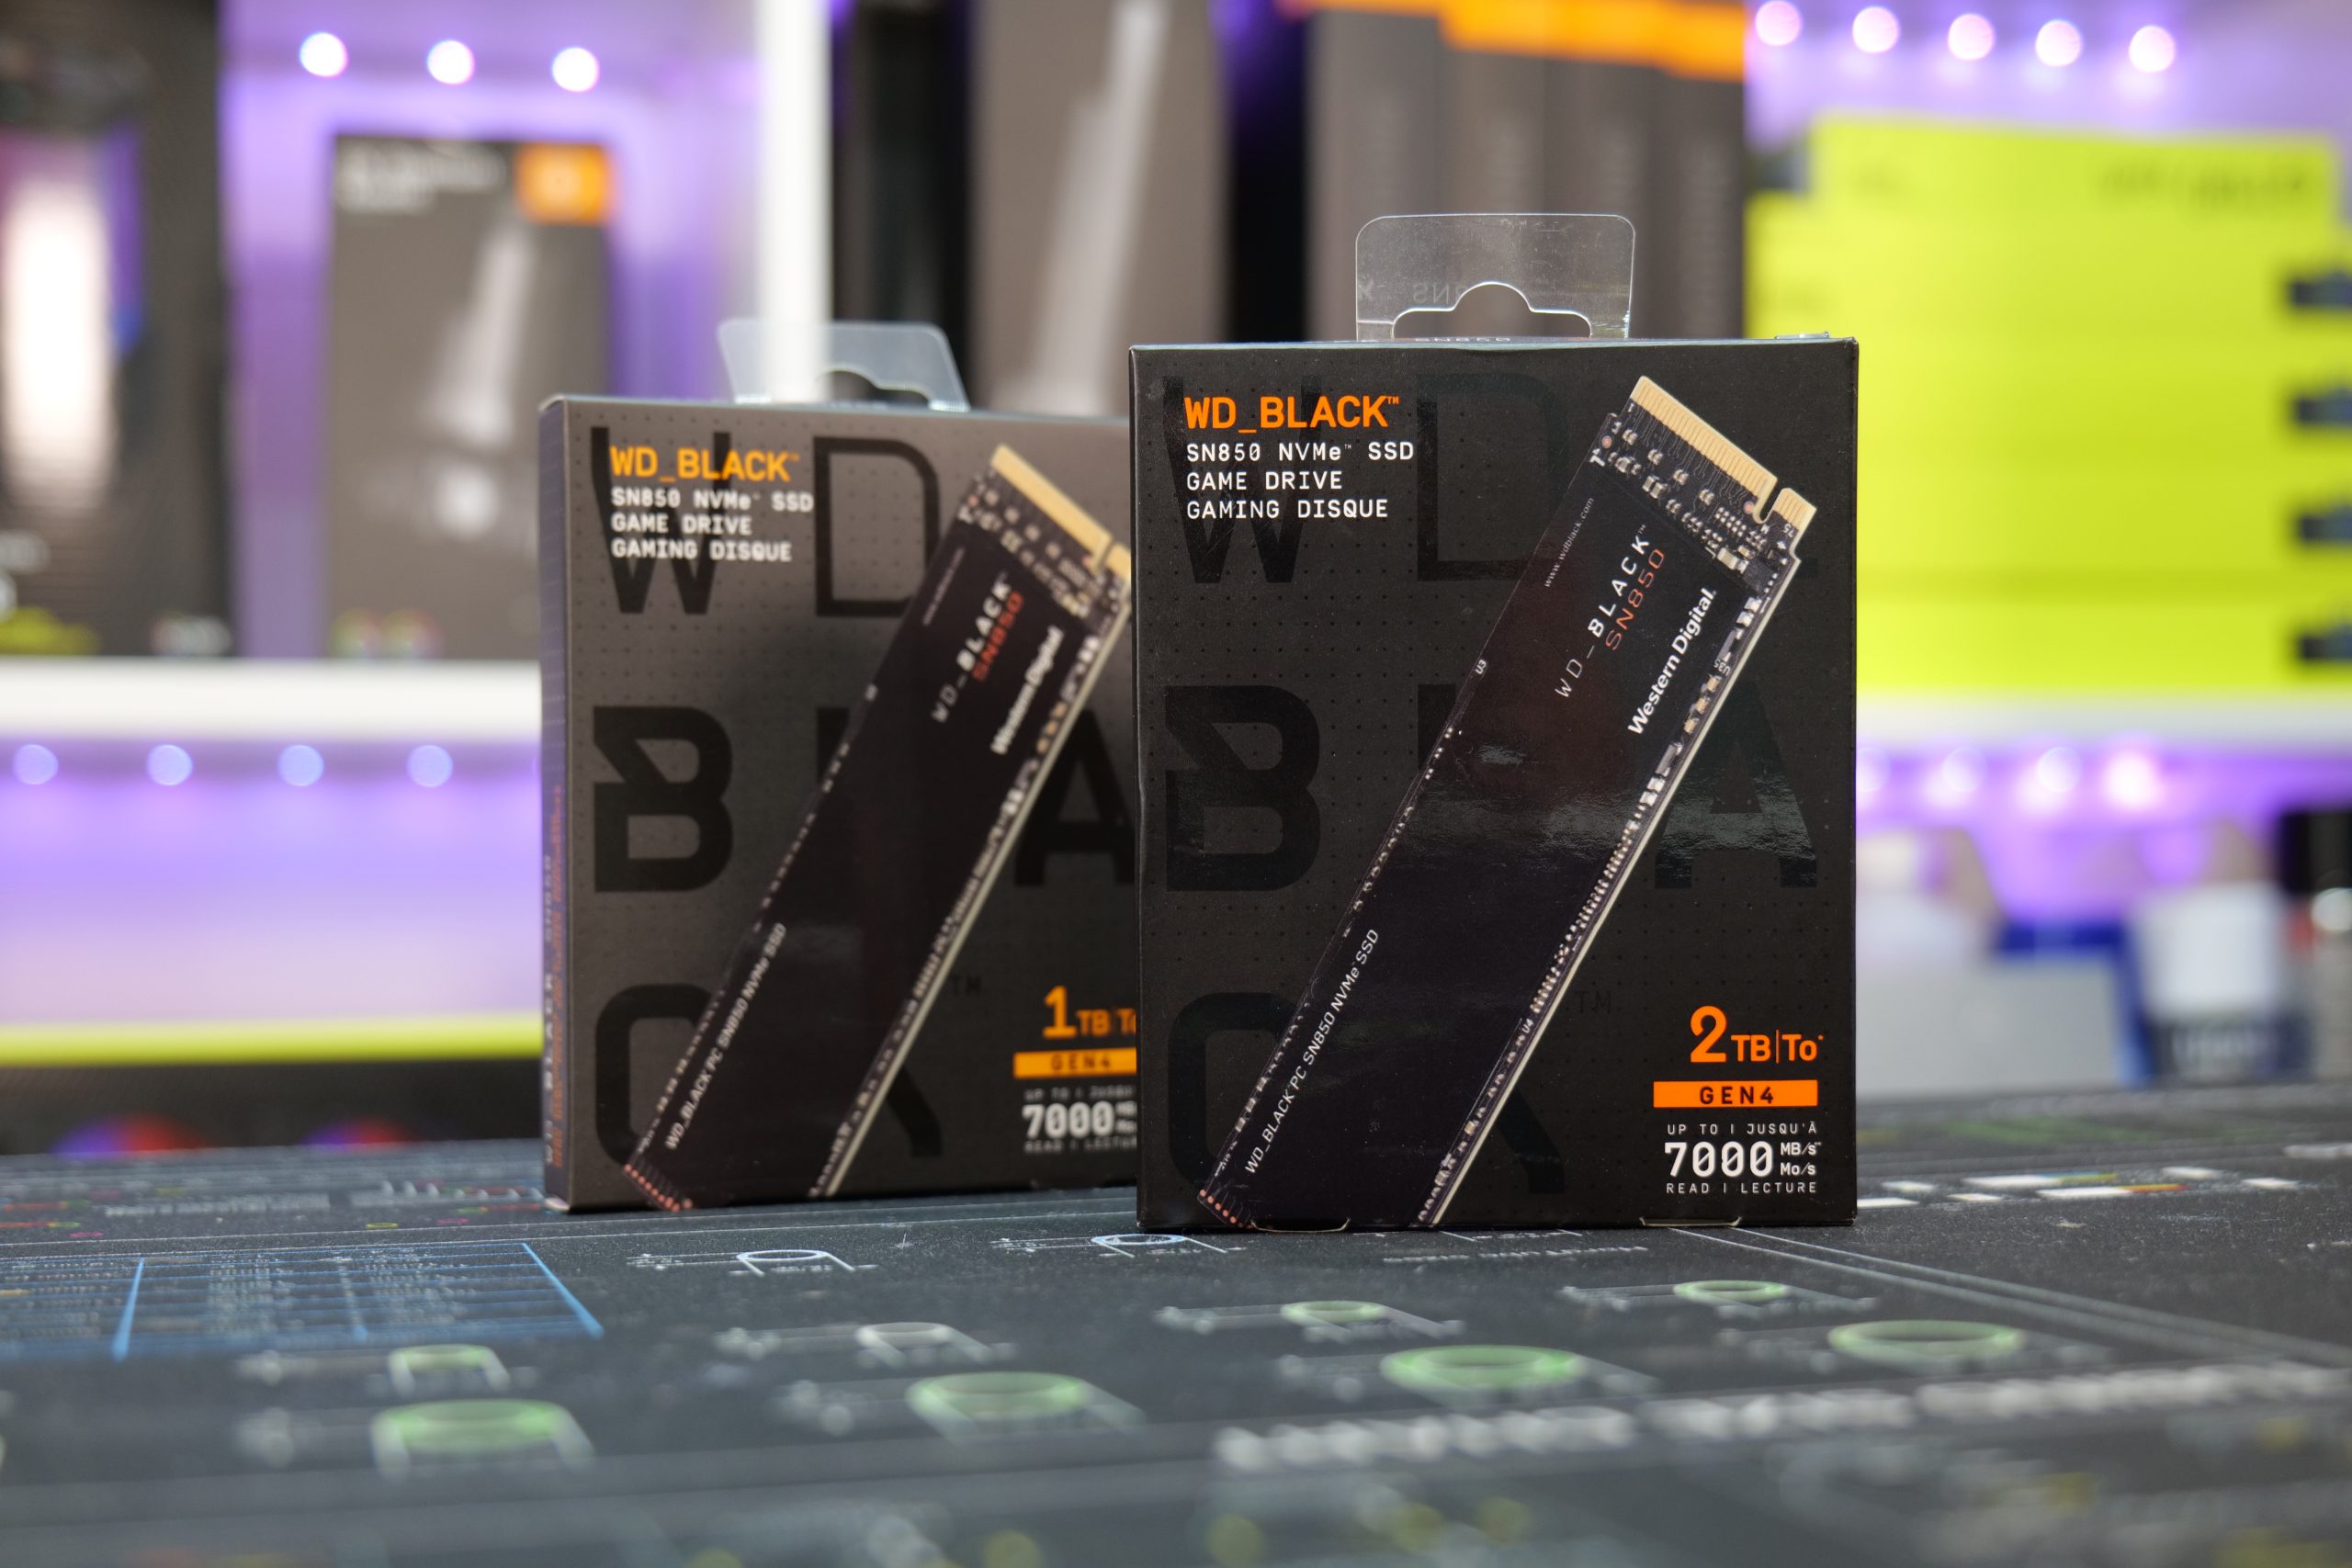
- Main Storage – 1TB WD_Black SN850 PCIe Gen4 M.2 NVME SSD
- Additional Storage – 2TB WD_Black SN850 PCIe Gen4 M.2 NVME SSD
- Chassis – Fractal Design Meshify 2
- CPU Cooling – EKWB Custom Loop
- Power Supply – Fractal Design Ion+ 2 Platinum 860W 80+ Platinum
- Fans – 4 x Fractal Design Aspect 14 RGB PWM
Cooling Hardware
- CPU Water Block: EK-Quantum Magnitude D-RGB – AM4 Nickel + Acetal
- GPU Water Block: EK-Quantum Vector RE RTX 3080/3090 D-RGB – Nickel + Acetal
- Pump: EK-Quantum Inertia D5 PWM D-RGB – Acetal
- Reservoir: EK-Quantum Volume FLT 360 D-RGB – Plexi
- Radiators: 2x EK-CoolStream CE 280 Dual Radiator
- Fittings: EK-Quantum Torque HDC 14 – Satin Titanium
- Tubing: Corsair Hydro X Series XT Hardline 14mm Tubing — Satin Transparent

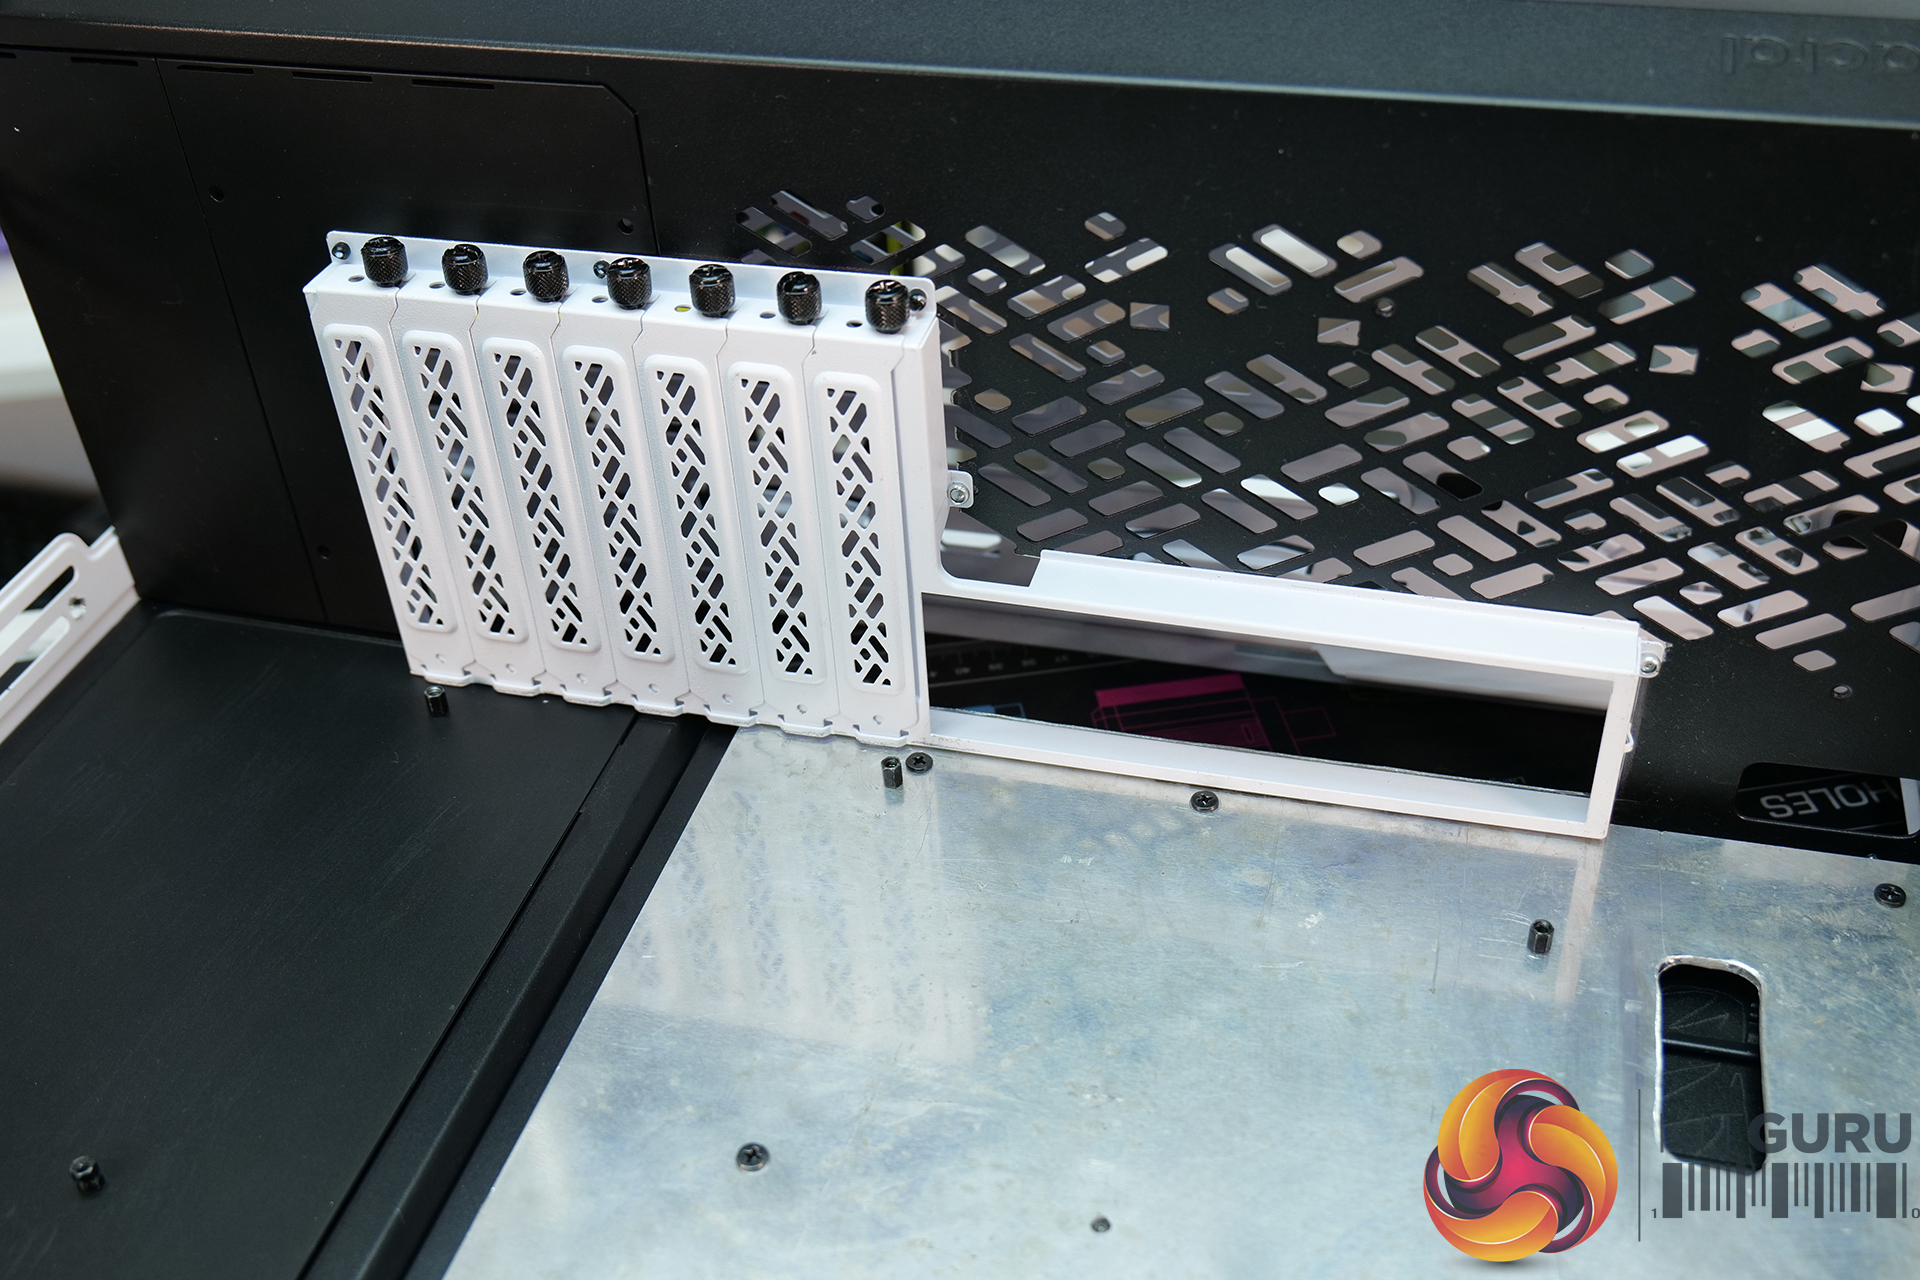
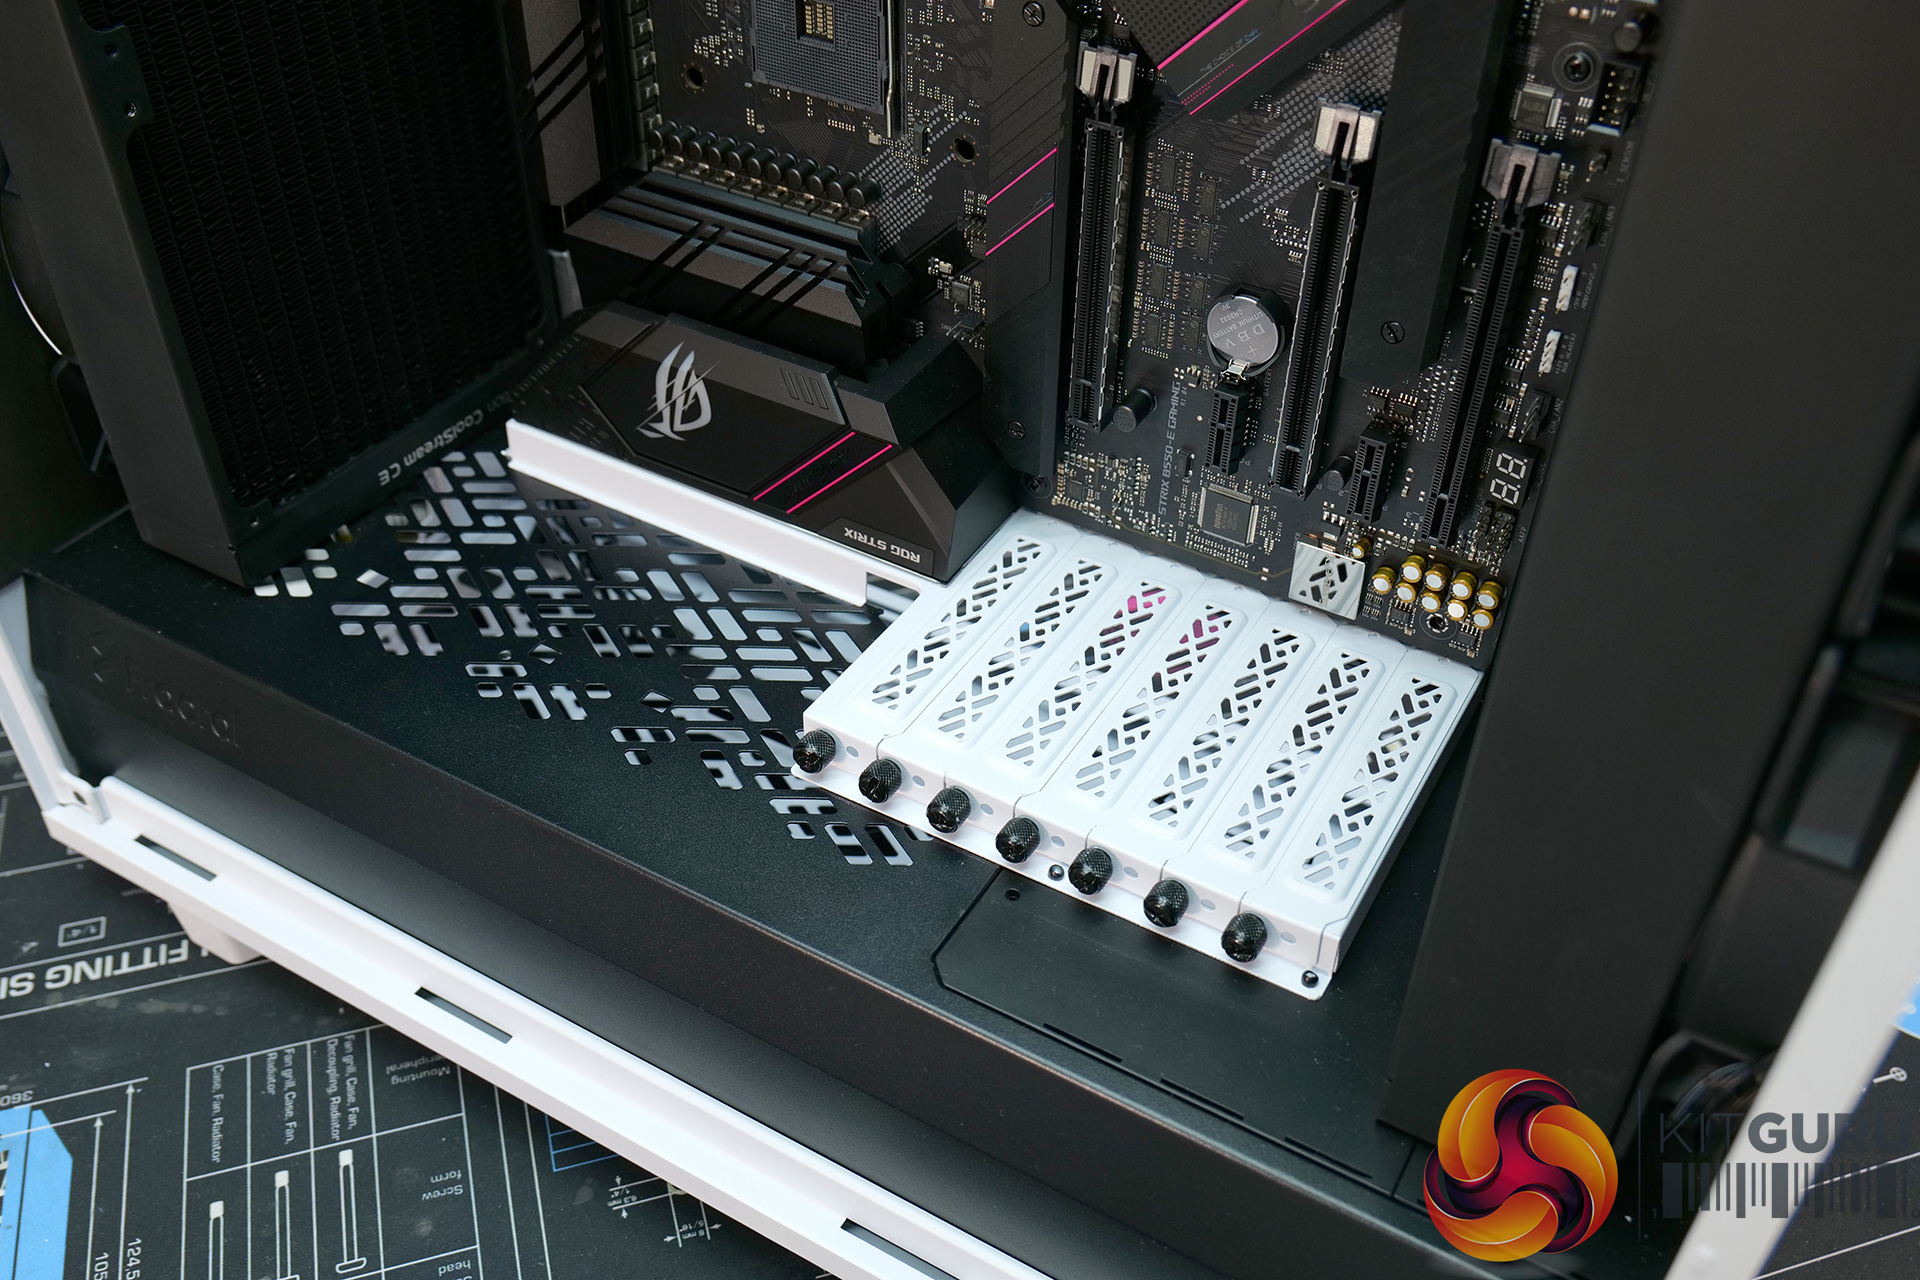
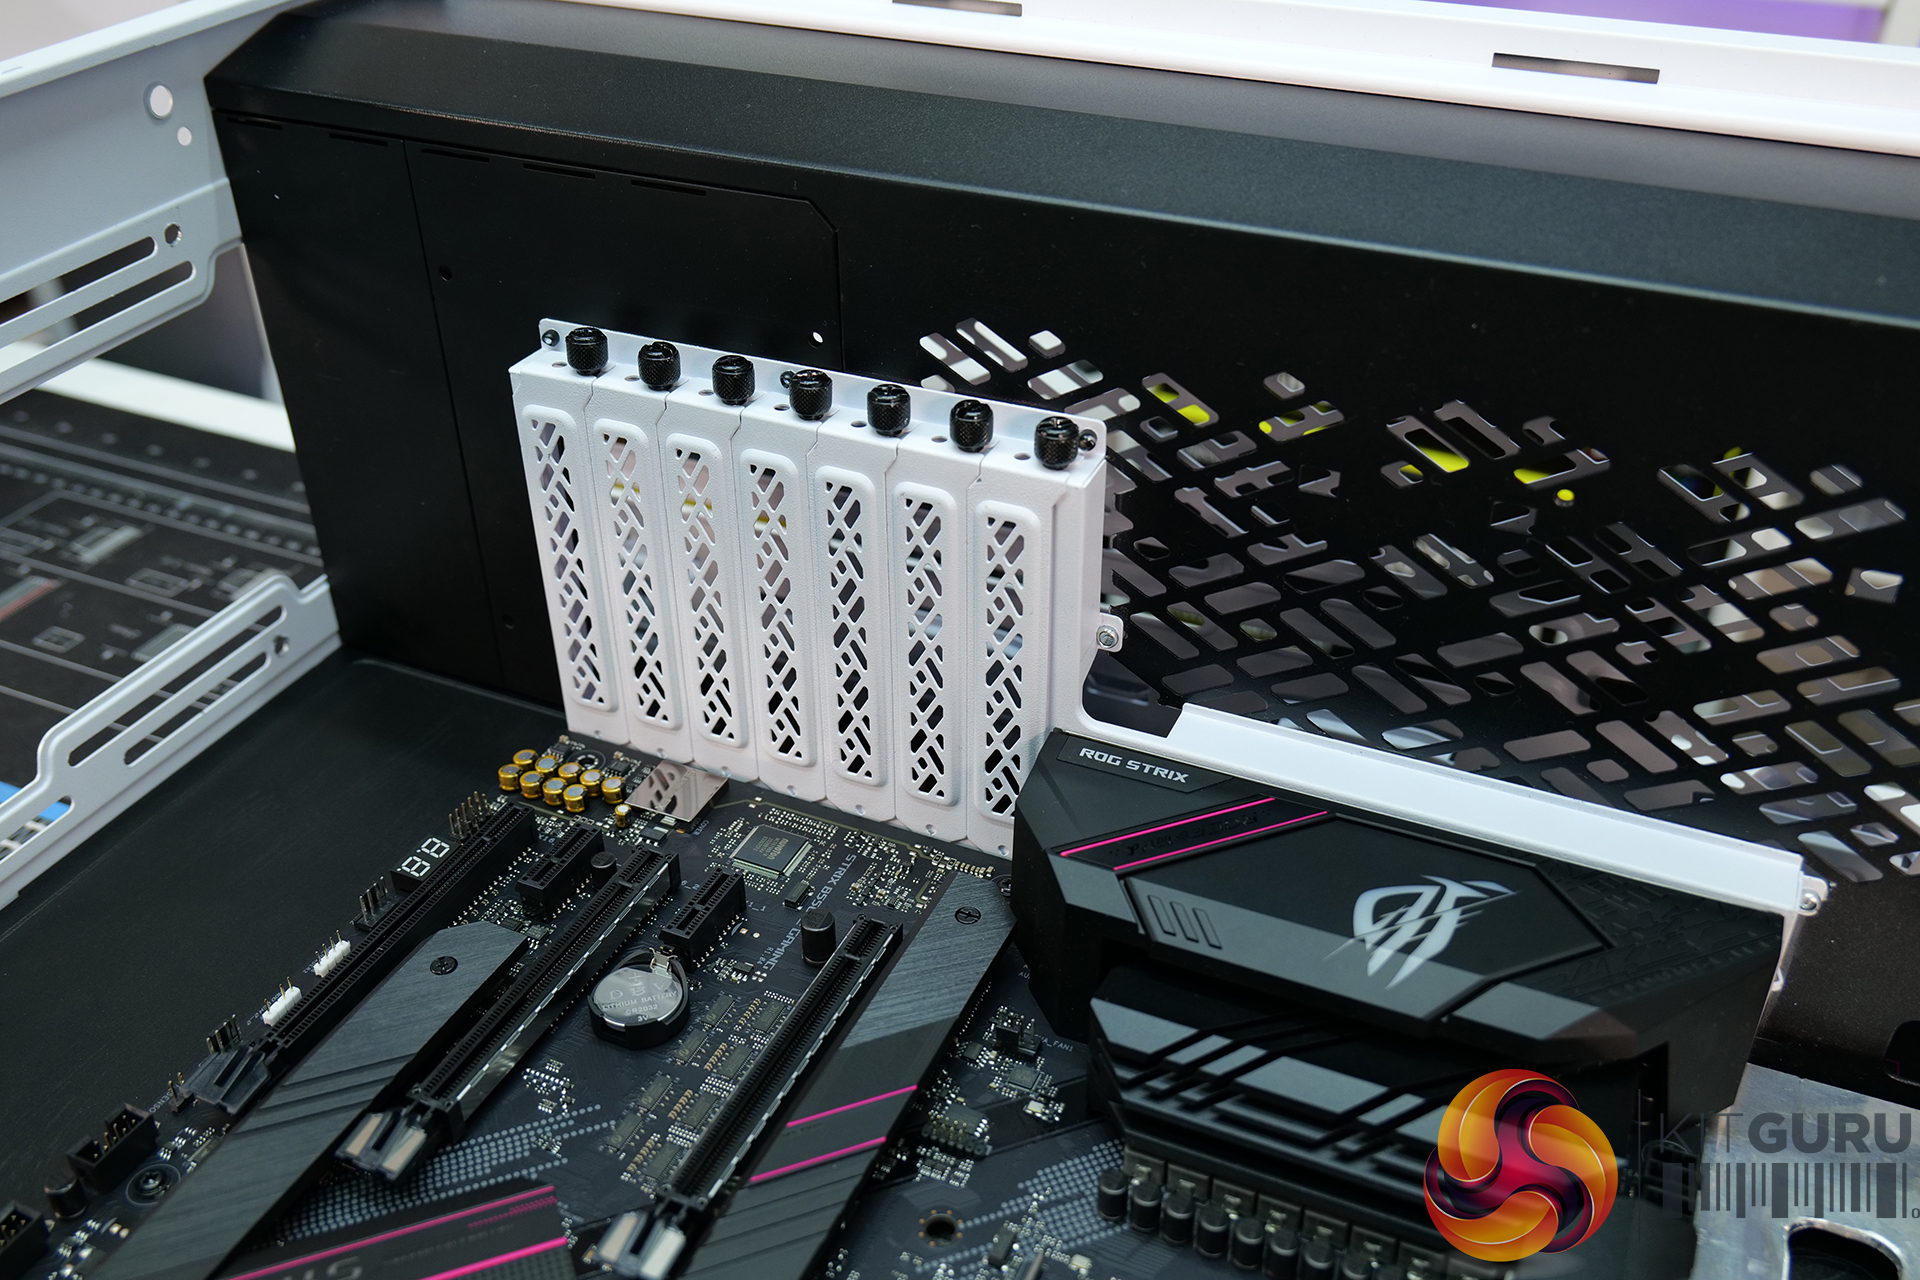
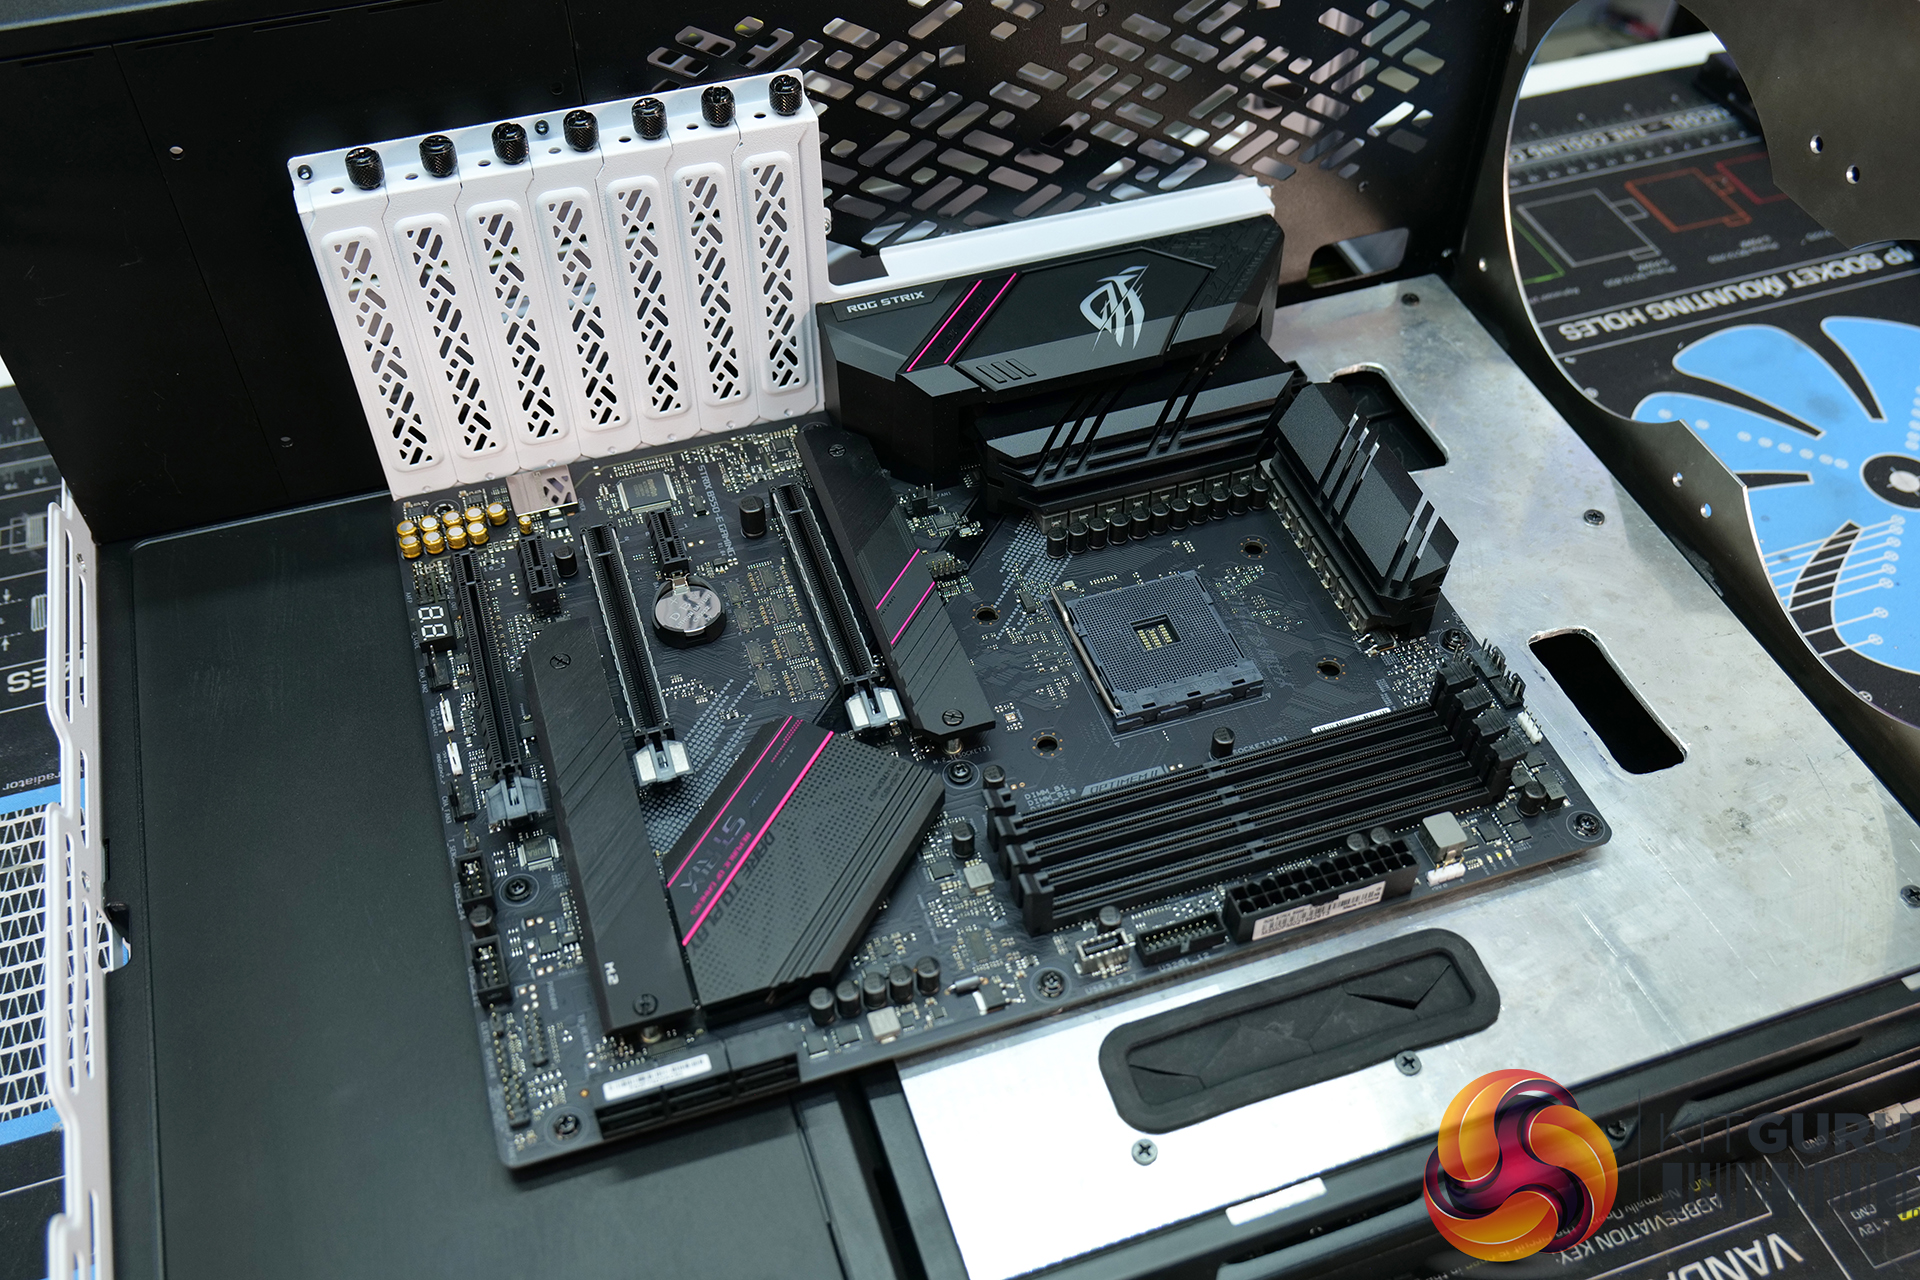
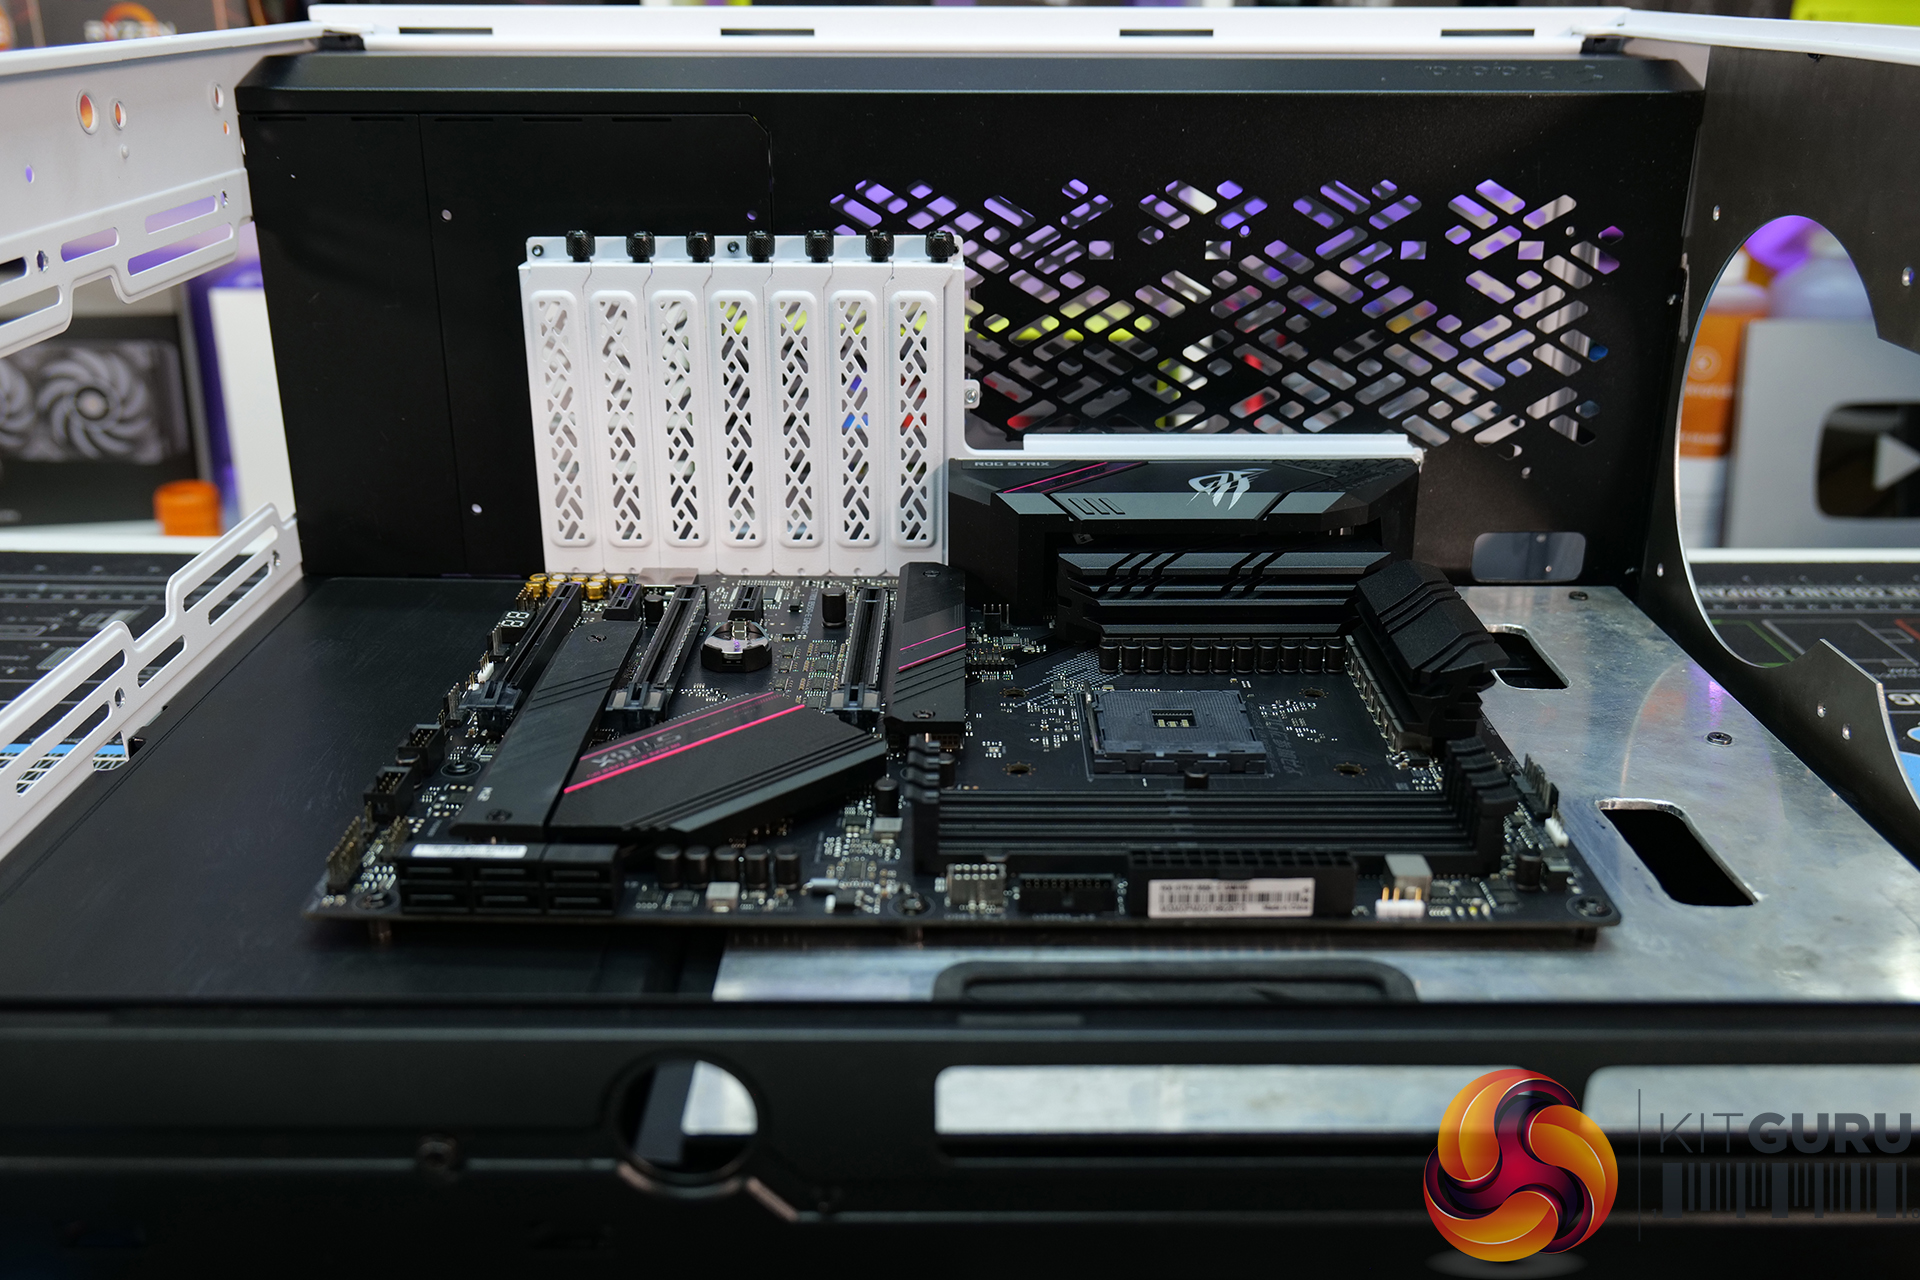
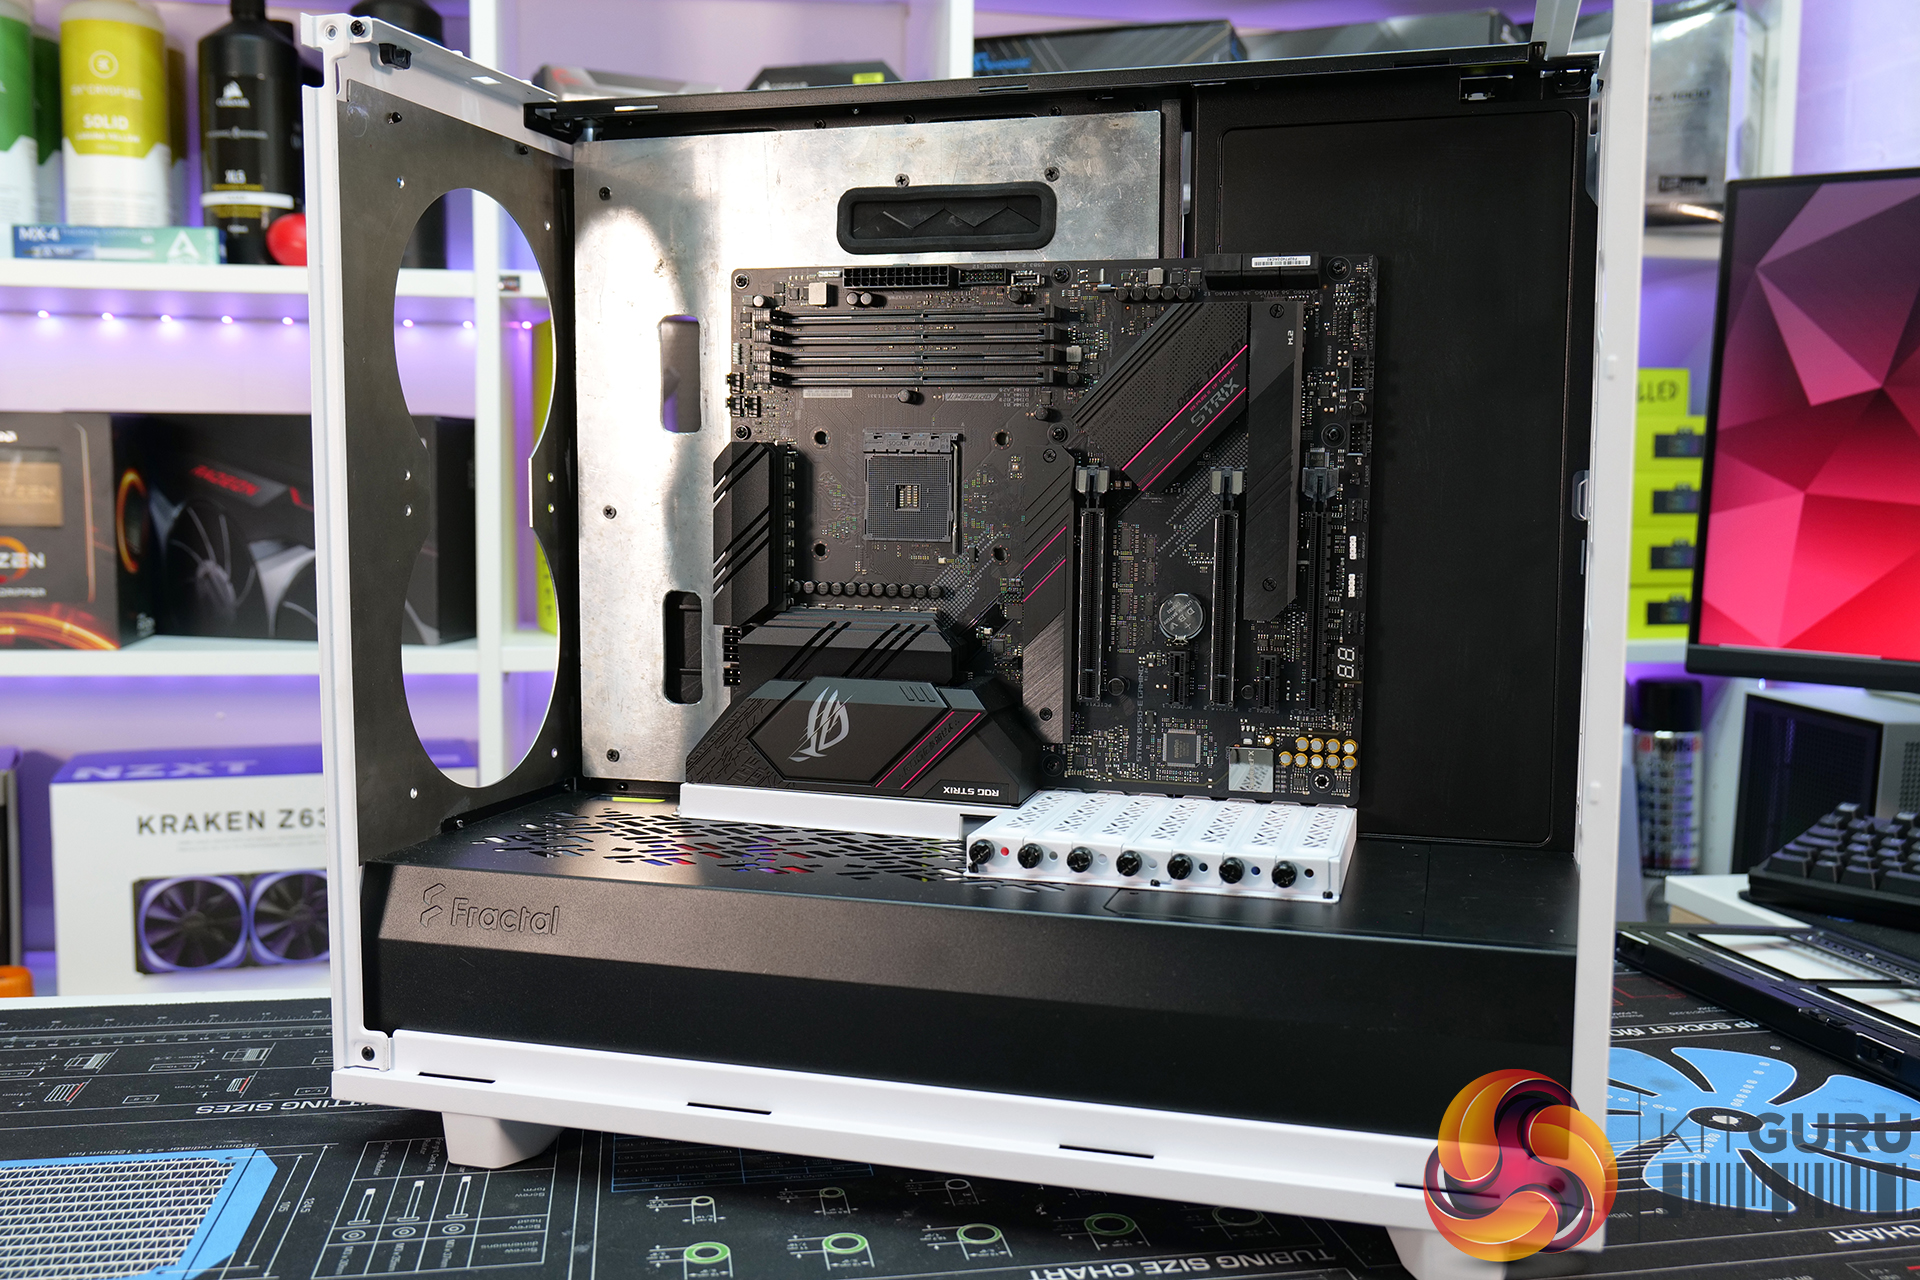
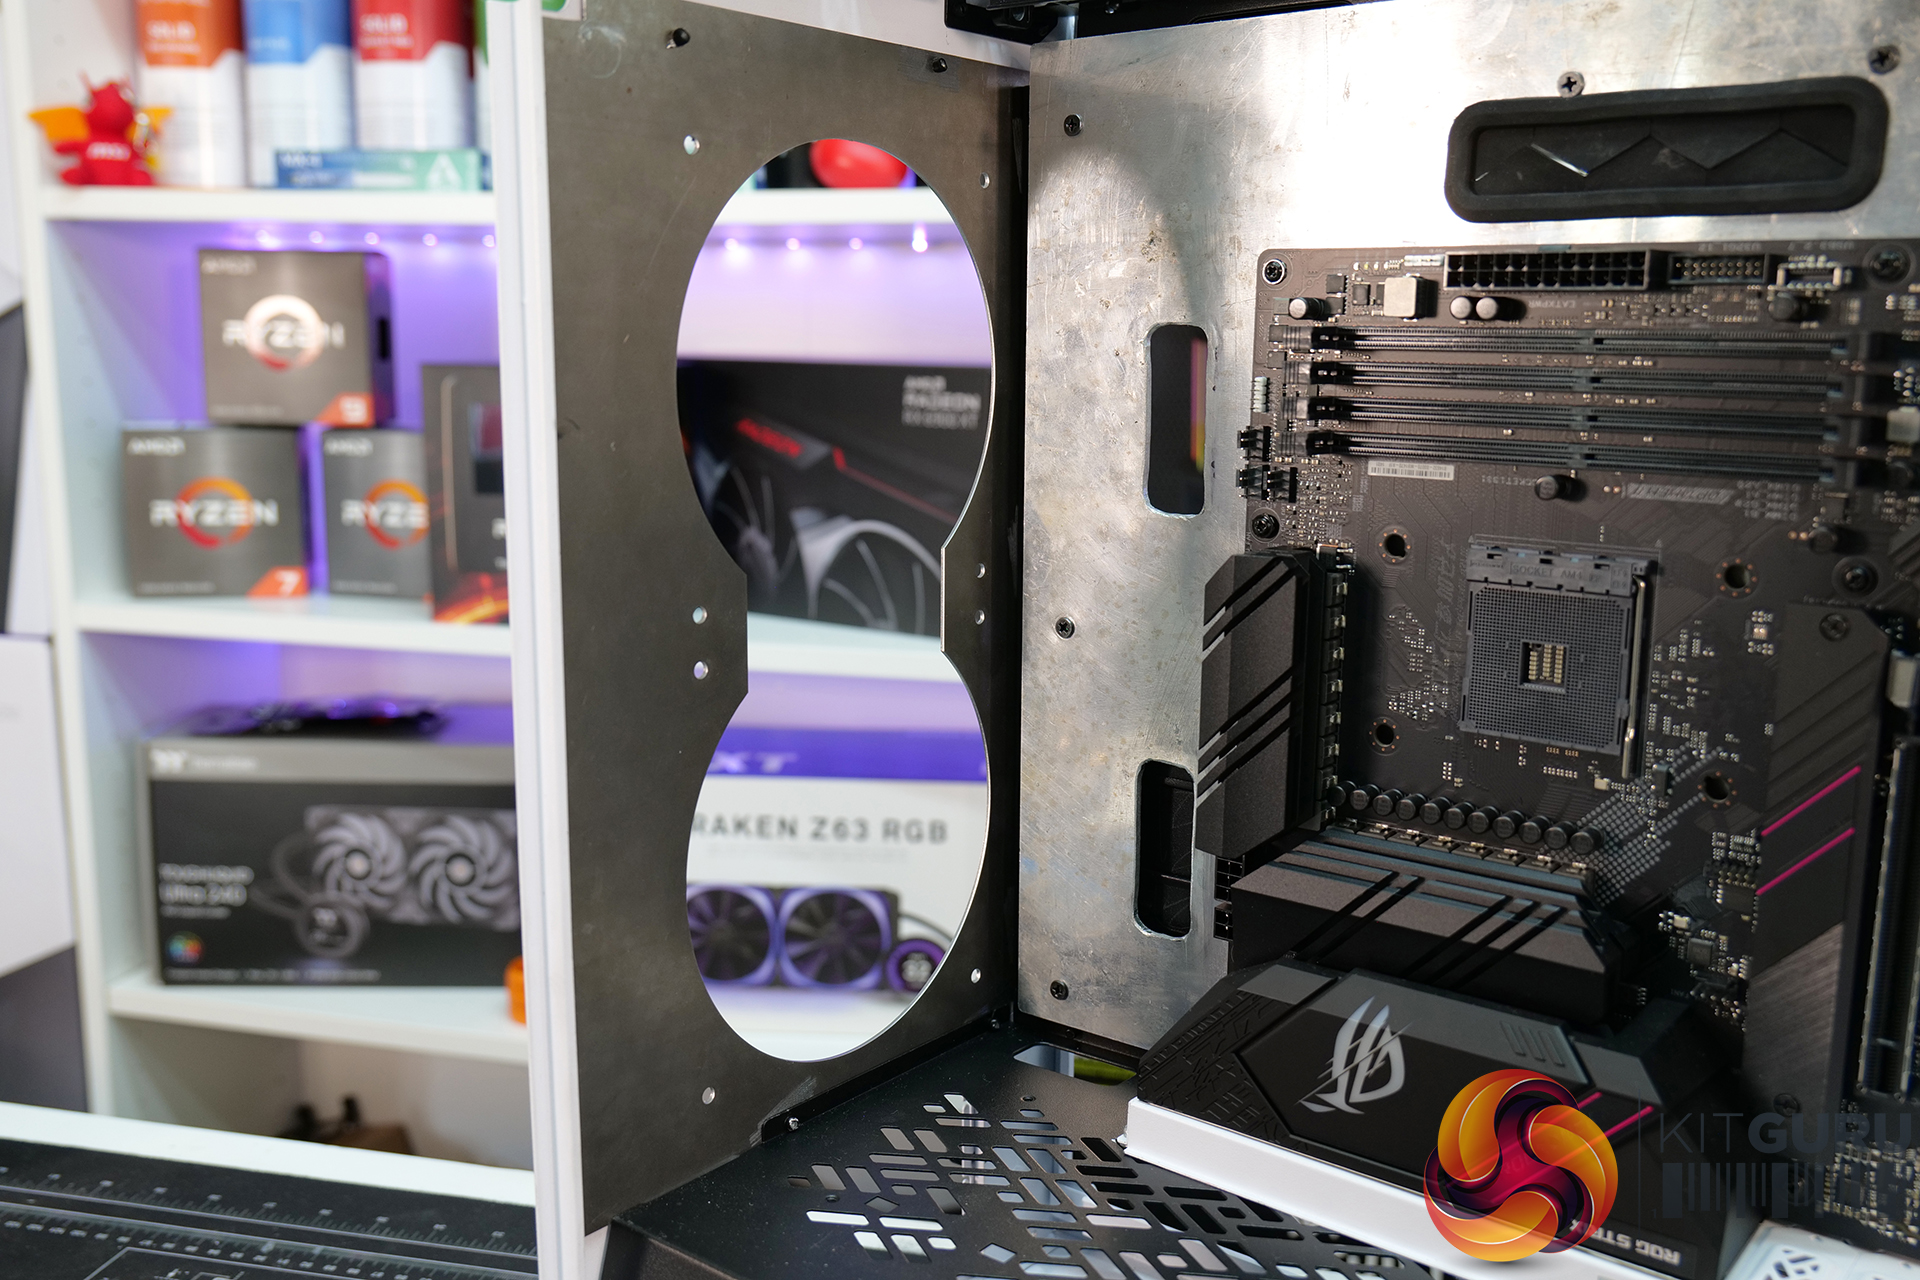

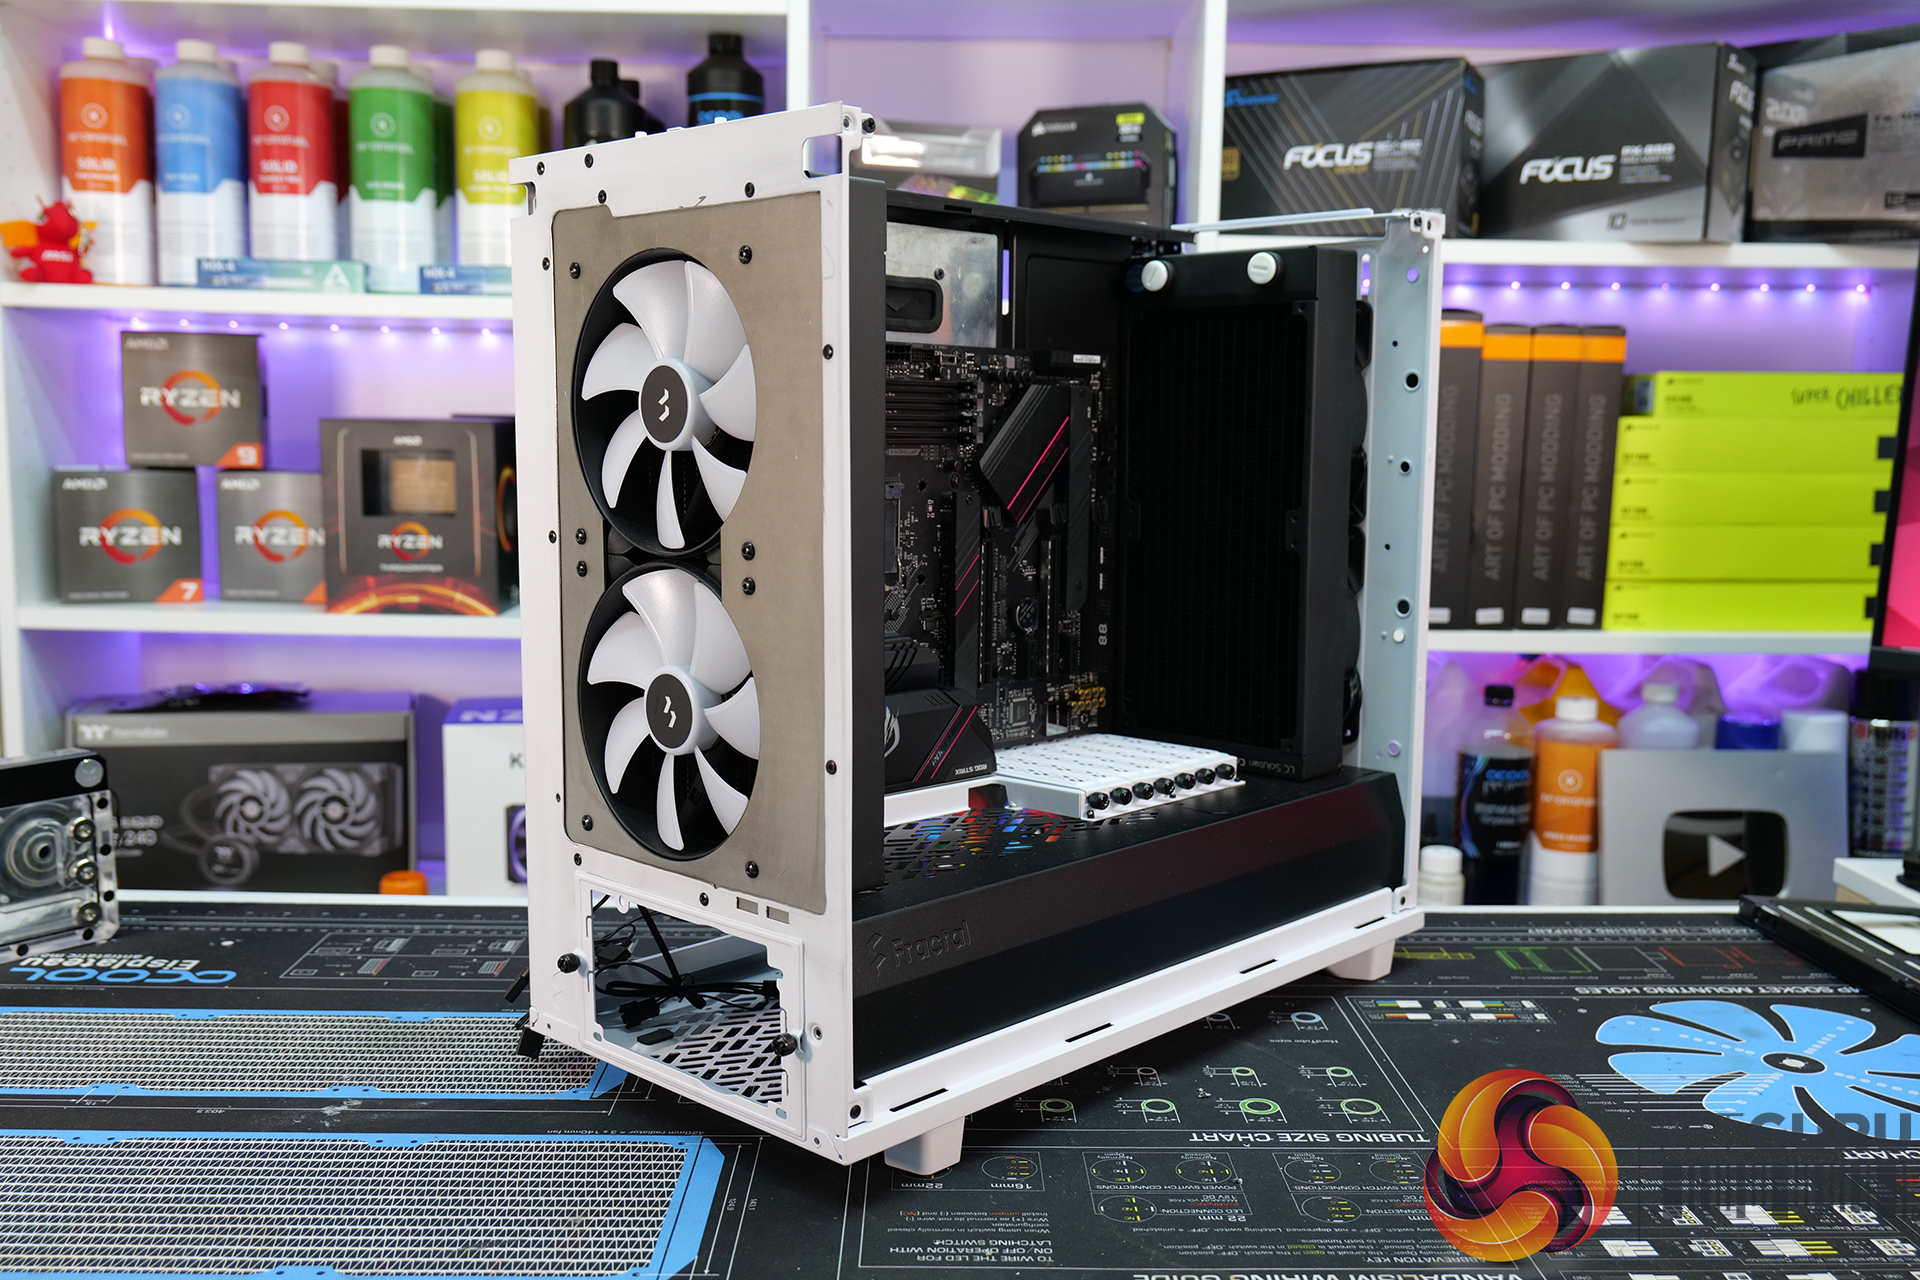
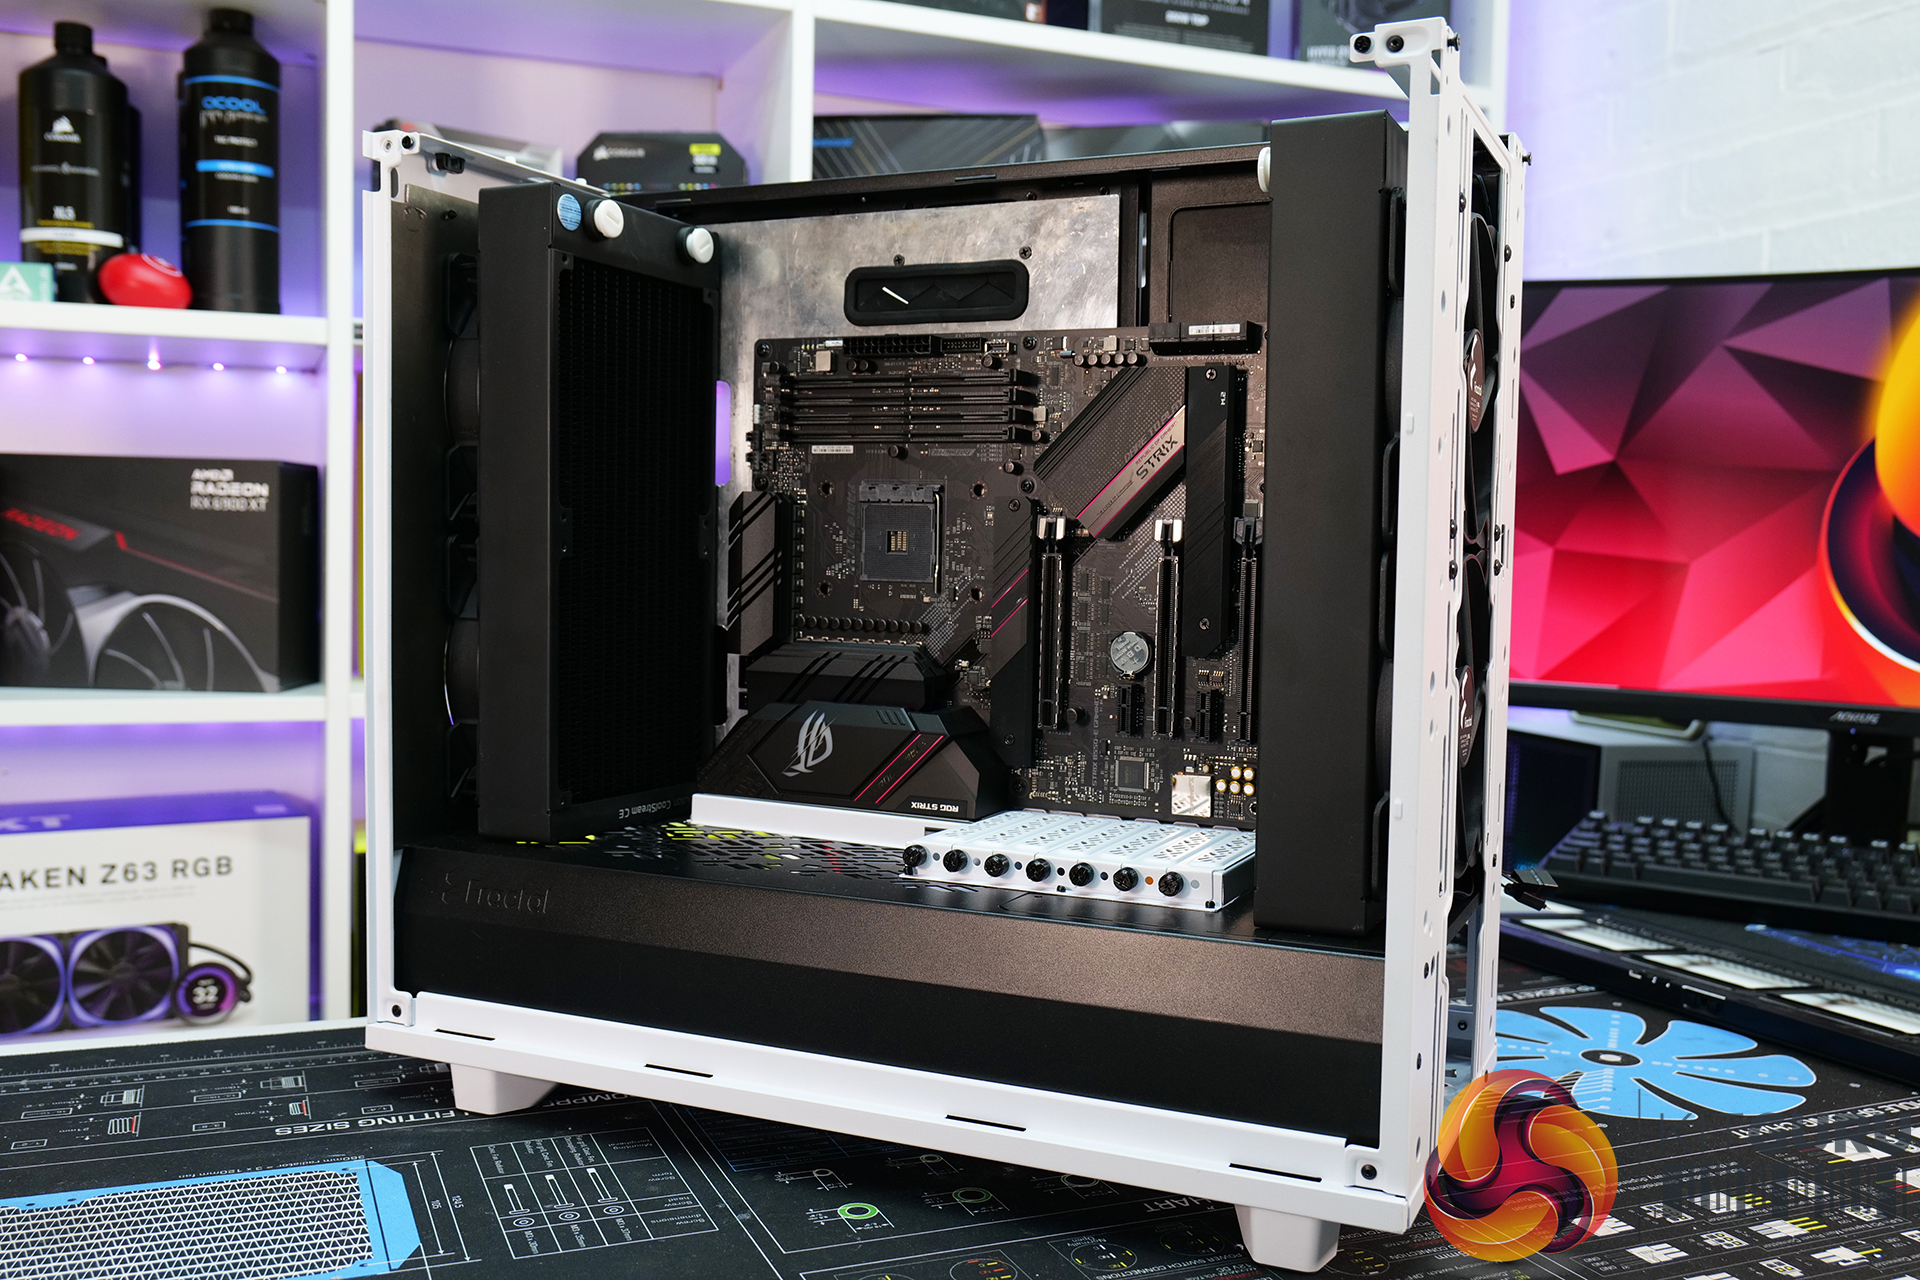
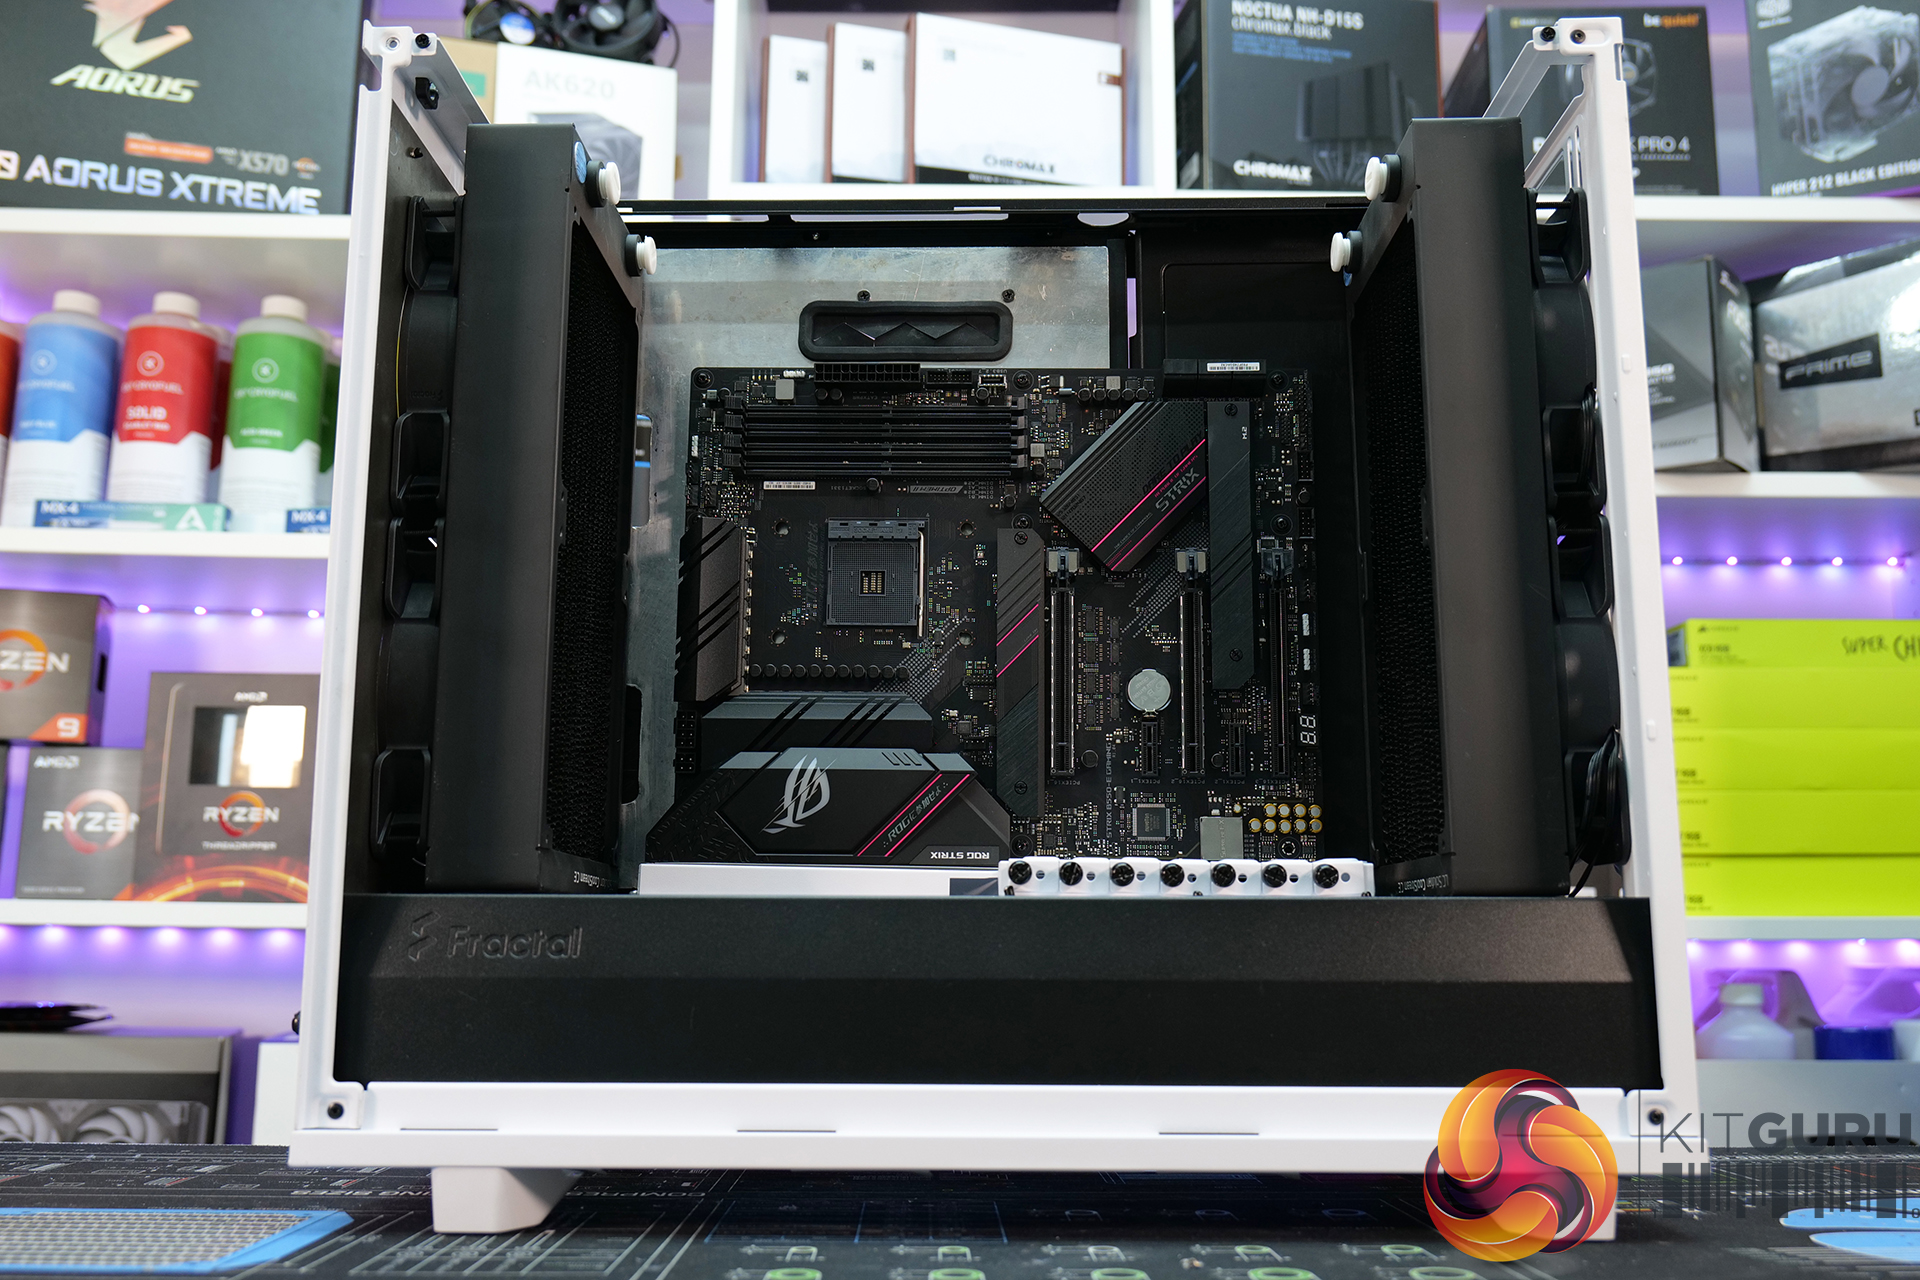
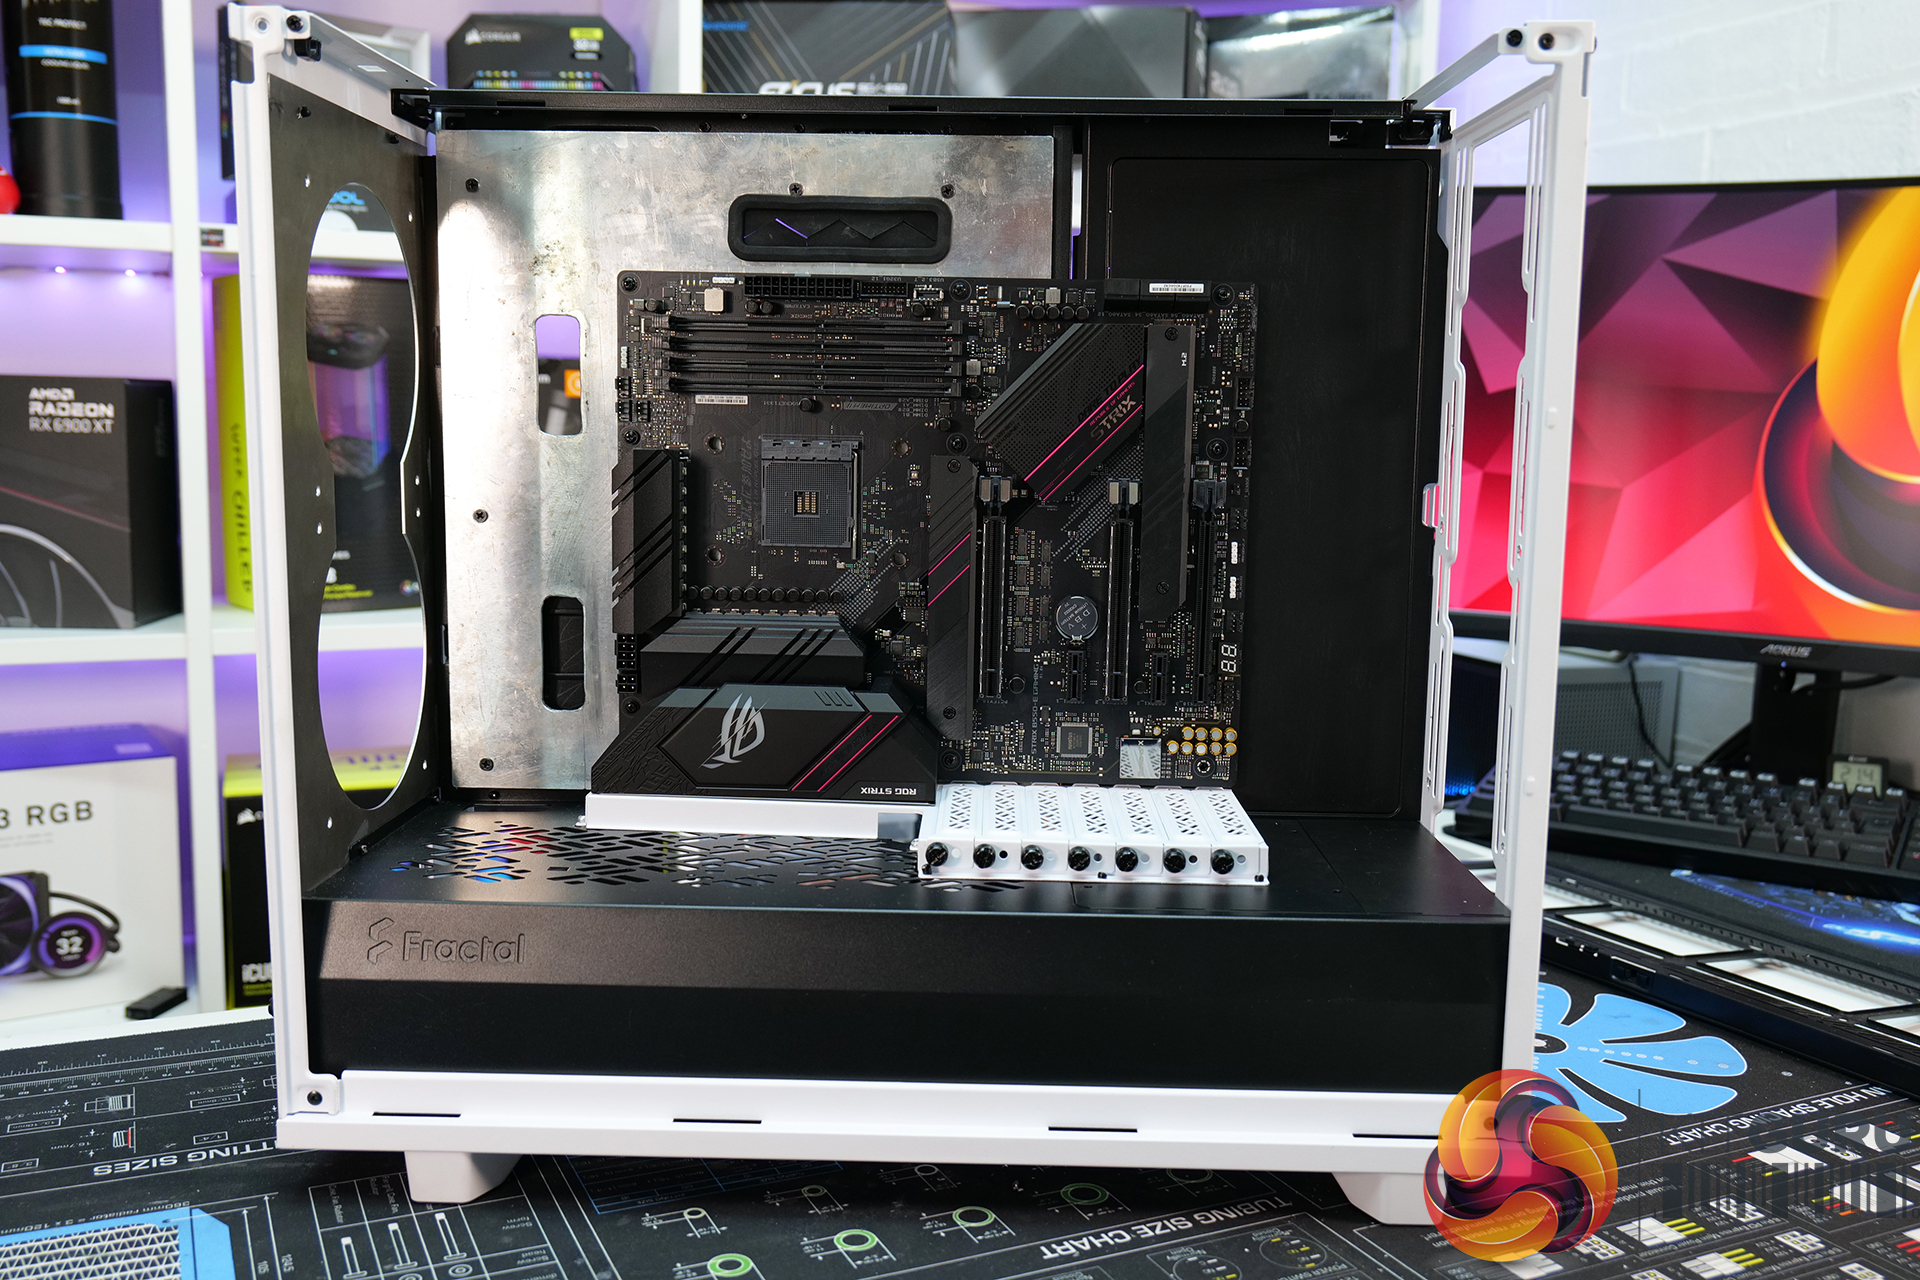
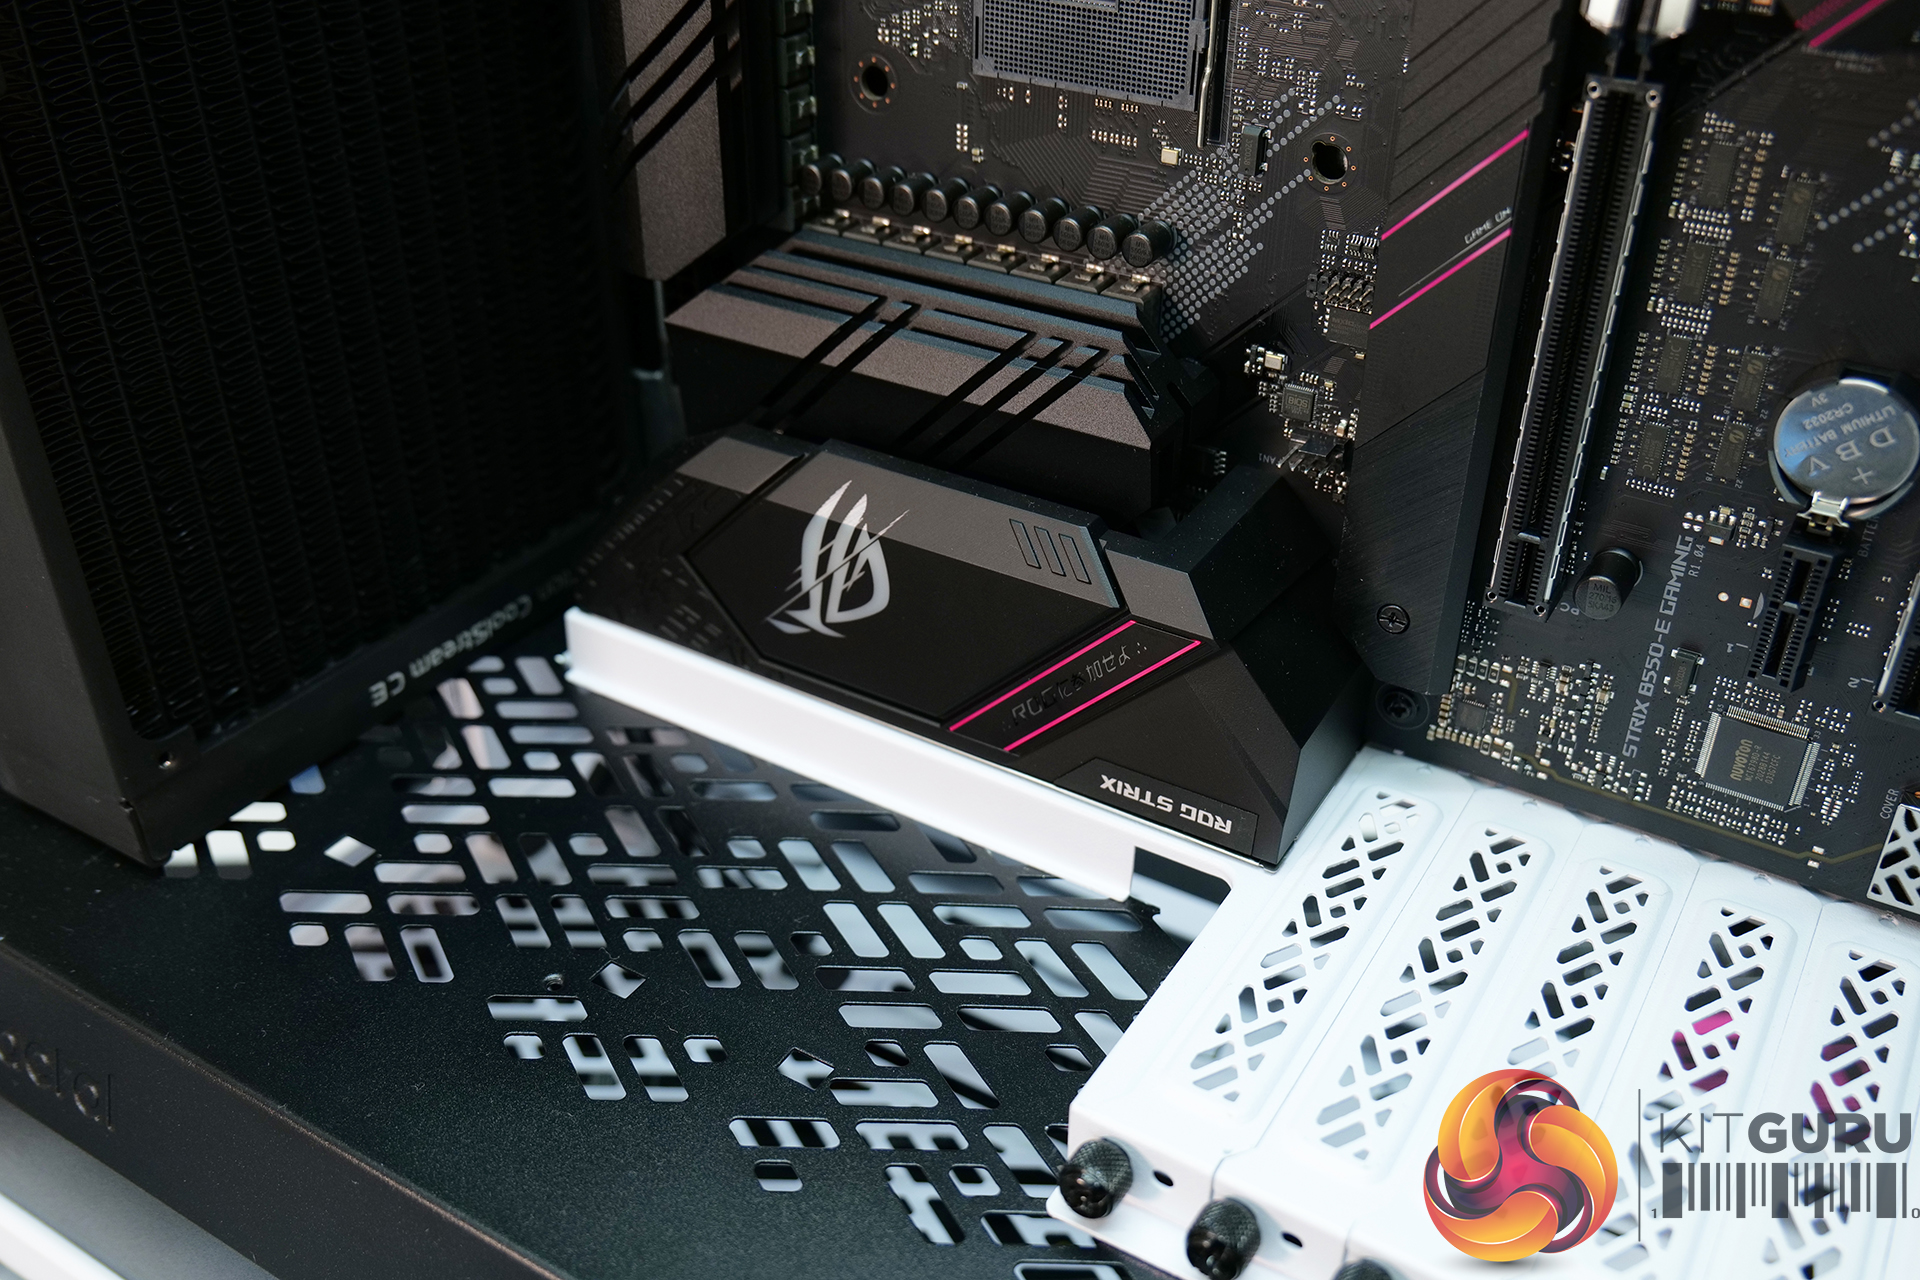
We kick off the first video by concentrating on modding the Meshify 2 case to allow the motherboard to be rotated and make space for an additional 280mm radiator mounted on the rear panel of the case. To do this a motherboard adaptor plate is laser cut from 3mm thick aluminium sheet. The adaptor plate brings the new motherboard tray up to a continuous height so that it can be rotated by 90 degrees and fixed to the original motherboard tray standoffs.
The case is partially disassembled by drilling out rivets and broken down into its components panels. The original rear I/O port and PCIe slot panel can be removed in one section and repurposed as the new I/O and PCIe slot cover and relocated. A section of the shroud is cut out to allow cables to be connected to the motherboard/graphics card and the original PCIe slot cover and I/O panel are riveted in position on top of the PSU shroud.
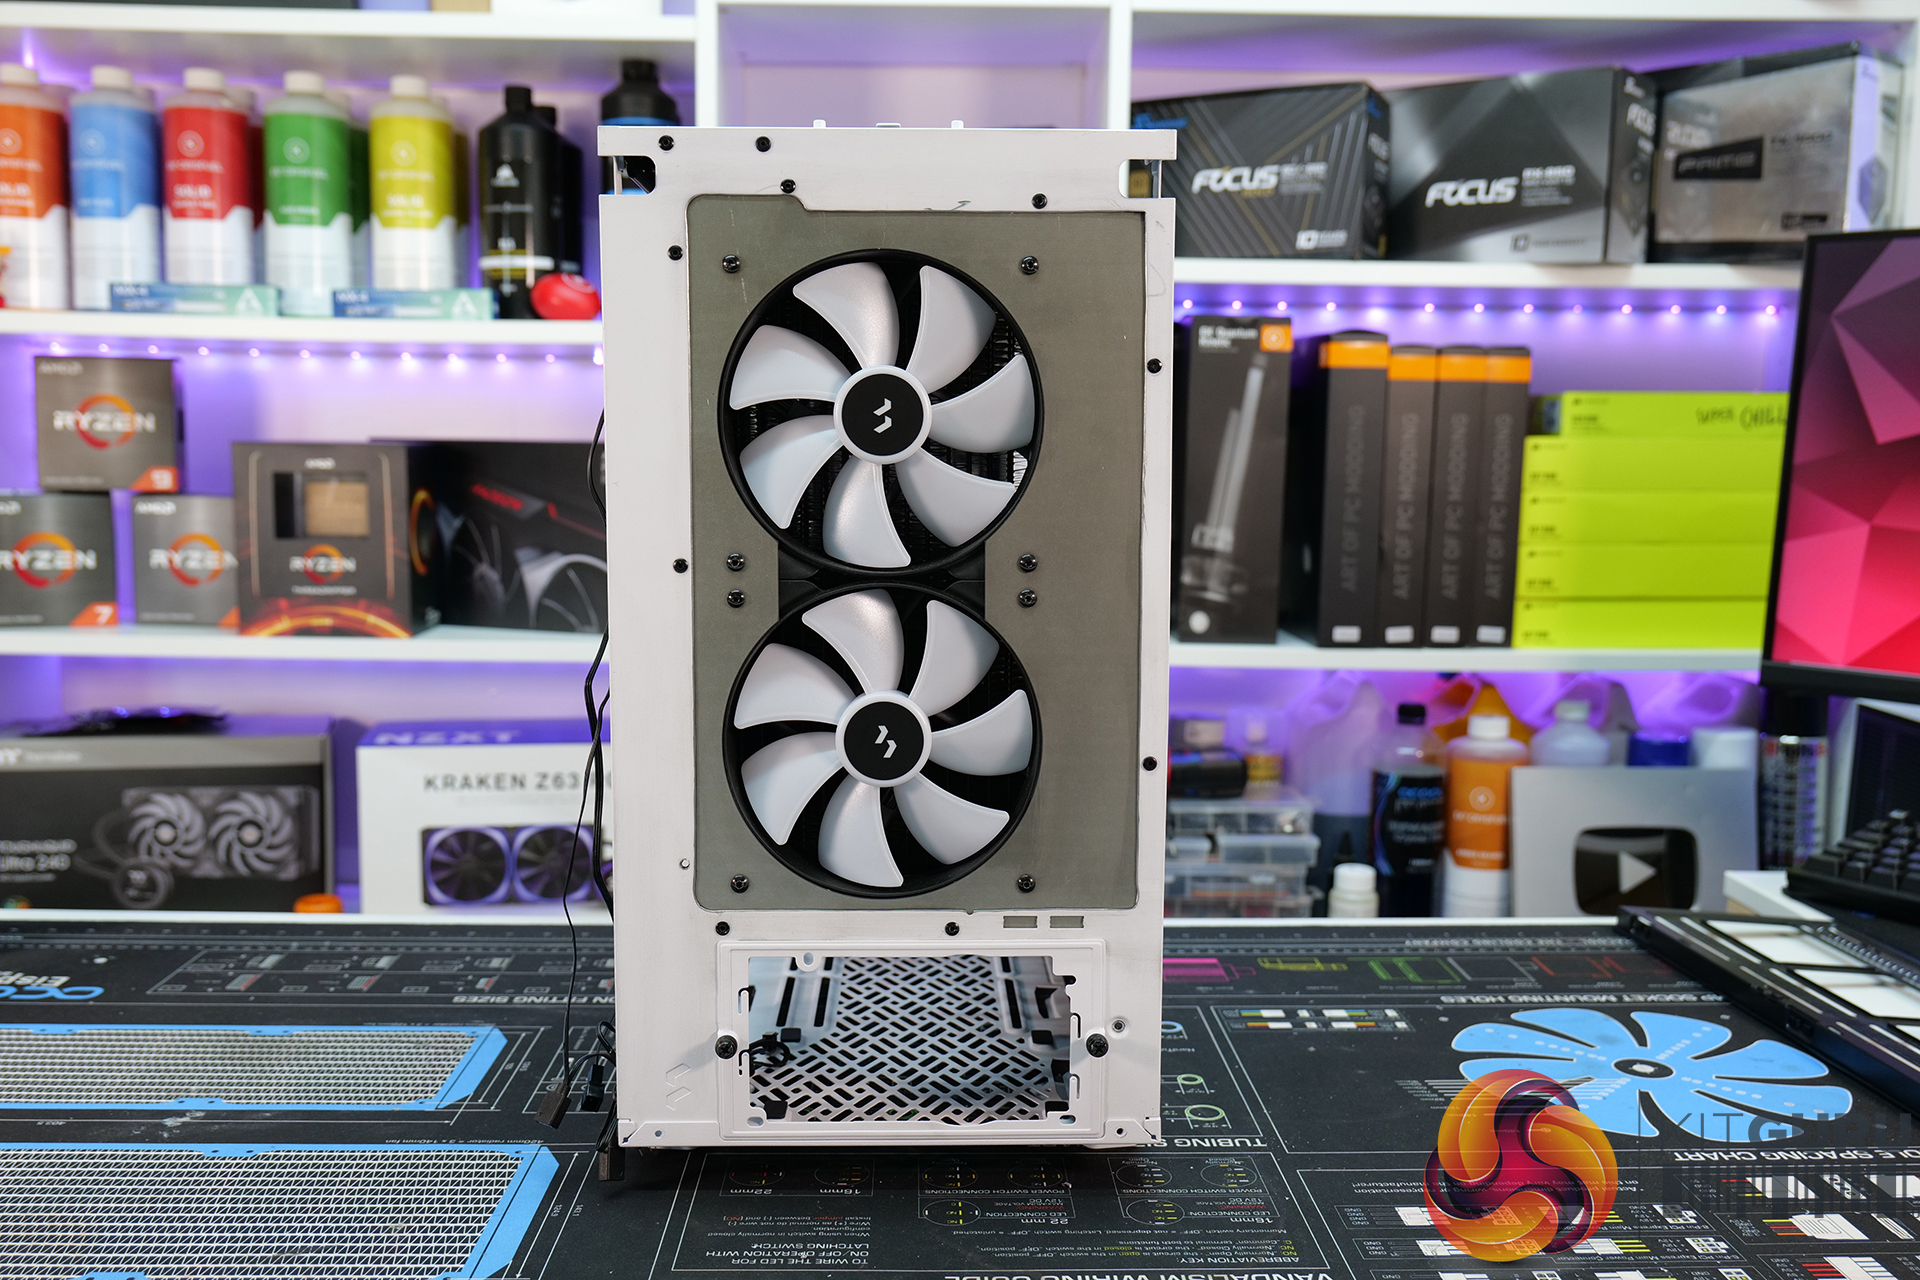
A large section of the rear Meshify 2 panel is also cut away ready to create a mount for the rear 280mm radiator. A new rear panel is designed with 140mm fan cut-outs and screw mounts, laser-cut from 1.5mm mild steel and riveted in position on the original rear case panel. The case is then temporarily reassembled to check that everything fits together as intended. Some additional cable pass-through holes are cut out of the motherboard adaptor plate to allow 24-pin ATX, EPS and fan cables to be connected.
So far things are looking good, the case went back together easily with some temporary rivets, the new panels lined up with the corresponding components and the motherboard adaptor plate lines up perfectly with the ATX standoffs and new bottom I/O and PCIe slots. The case can now be disassembled again ready for a custom paint job which is one of the mods we will see in the next video of this series.
KitGuru says: Make sure you stay tuned for updates and progress on the Fractal High Contrast build in the coming months as it should be a very interesting project. We are always looking for viewer and reader input on these mod builds too so please let us know your thoughts!