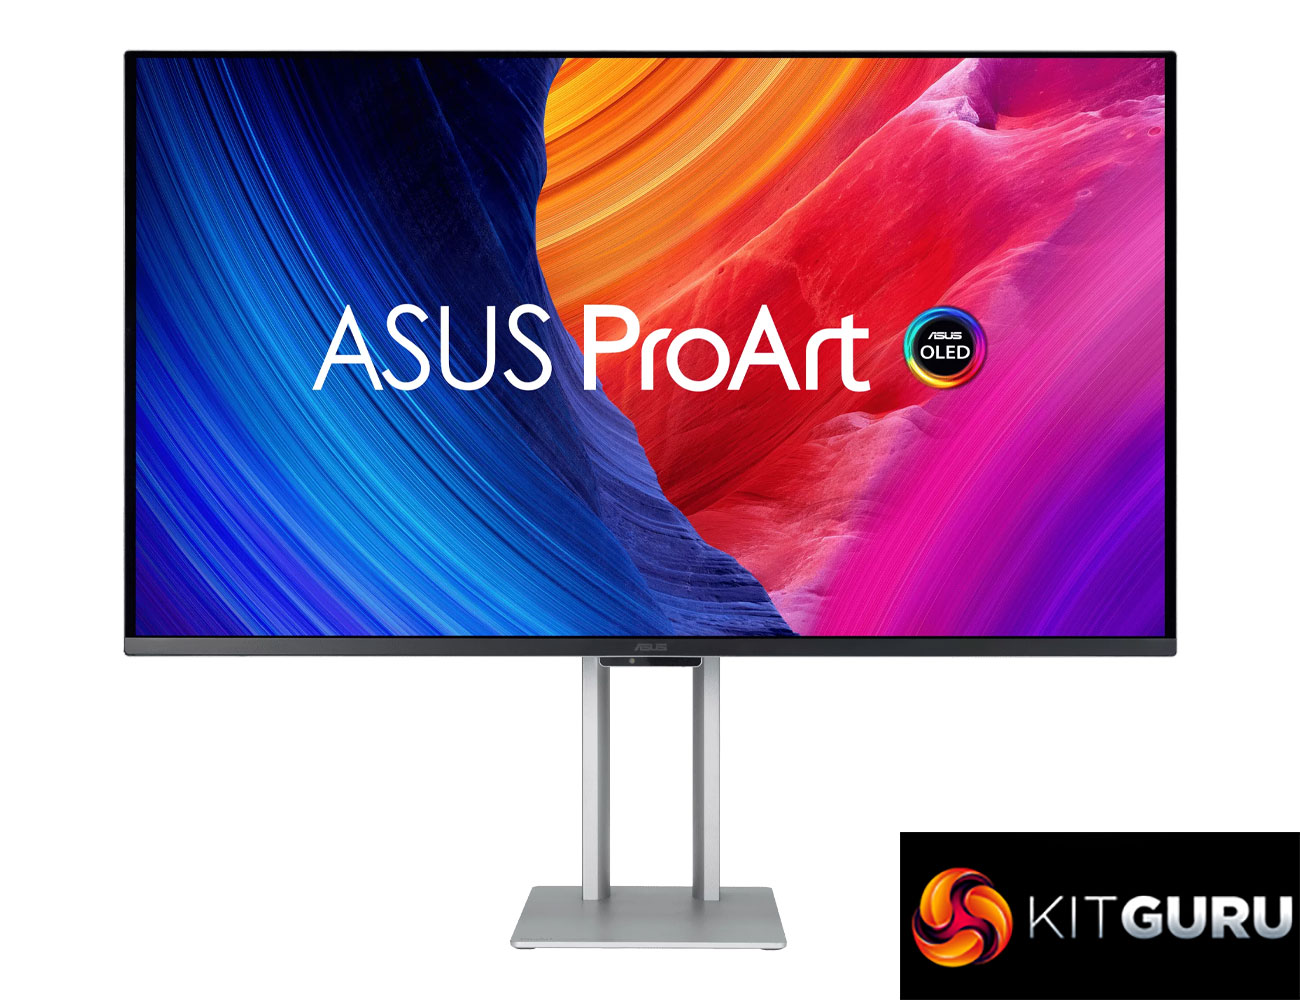
After the success of ASUS' ProArt PA27JCV that we reviewed last November, today we are back with another look at a Pro-grade screen from the Taiwanese manufacturer. This one is a bit different, however, given it is using a 4K QD-OLED panel with a 240Hz refresh rate – a spec we are more used to seeing on gaming displays. Still, ASUS claims ‘world-leading ∆E < 1 color performance', while the screen also supports hardware calibration, alongside multiple HDR formats and Thunderbolt 4. Let's see what it can do.
The ASUS ProArt PA32UCDM is certainly packed with a range of features, all geared towards the professional user. It's a true 10-bit panel, and thanks to the QD-OLED technology, it boasts a super wide gamut, with ASUS claiming 99% DCI-P3 coverage. You also get true blacks due to the per-pixel dimming nature of the OLED panel, and up to 1000 nits peak brightness in HDR.
All of that doesn't come cheap, and the PA32UCDM retails for £1600 here in the UK, available now from Scan. Gaming screens using the same exact Samsung 4K/240Hz QD-OLED panel are available for considerably less money, with ASUS' own PG32UCDM currently on sale for little over £900 – so is the price premium justified? We find out today.
Specification:
- Panel Size (inch) : 31.5
- Pixels Per Inch (PPI) : 140
- Aspect Ratio : 16:9
- Display Viewing Area (H x V) : 699.48 x 394.73 mm
- Display Surface : Anti-Reflection
- Panel Type : QD-OLED
- Viewing Angle (CR≧10, H/V) : 178°/ 178°
- Pixel Pitch : 0.182mm
- Resolution : 3840×2160
- Color Space (sRGB) : 100%
- Color Space (DCI-P3) : 99%
- Brightness (HDR, Peak) : 1,000 cd/㎡
- Brightness (Typ.) : 250cd/㎡
- Contrast Ratio (HDR, Max) : 1,500,000:1
- Contrast Ratio (Typ.) : 1,500,000:1
- Display Colors : 1073.7M (10 bit)
- Response Time : 0.1ms(GTG)
- Refresh Rate (Max) : 240Hz
- HDR (High Dynamic Range) Support : HDR10
- HDR (High Dynamic Range) Support : HLG
- HDR (High Dynamic Range) Support : Dolby Vision
- Flicker-free : Yes
- ASUS OLED Care : Yes
- I/O:
- Thunderbolt 4 x 2 (Daisy Chain)
- HDMI(v2.1) x 1
- USB Hub : 1x USB 3.2 Gen 2 Type-A
- USB Hub : 1x USB 3.2 Gen 2 Type-C
- USB-C Power Delivery : 96W
- Mechanical Design:
- Tilt : Yes (+20° ~ -5°)
- Pivot : Yes (+90° ~ -90°)
- Height Adjustment : 0~130mm
- Ambient Light Sensor : Yes
- Proximity Sensor : Yes
- VESA Wall Mounting : 100x100mm
- Kensington Lock : Yes
- Warranty: 3 years (including panel burn-in)
Firmware tested: MCM103
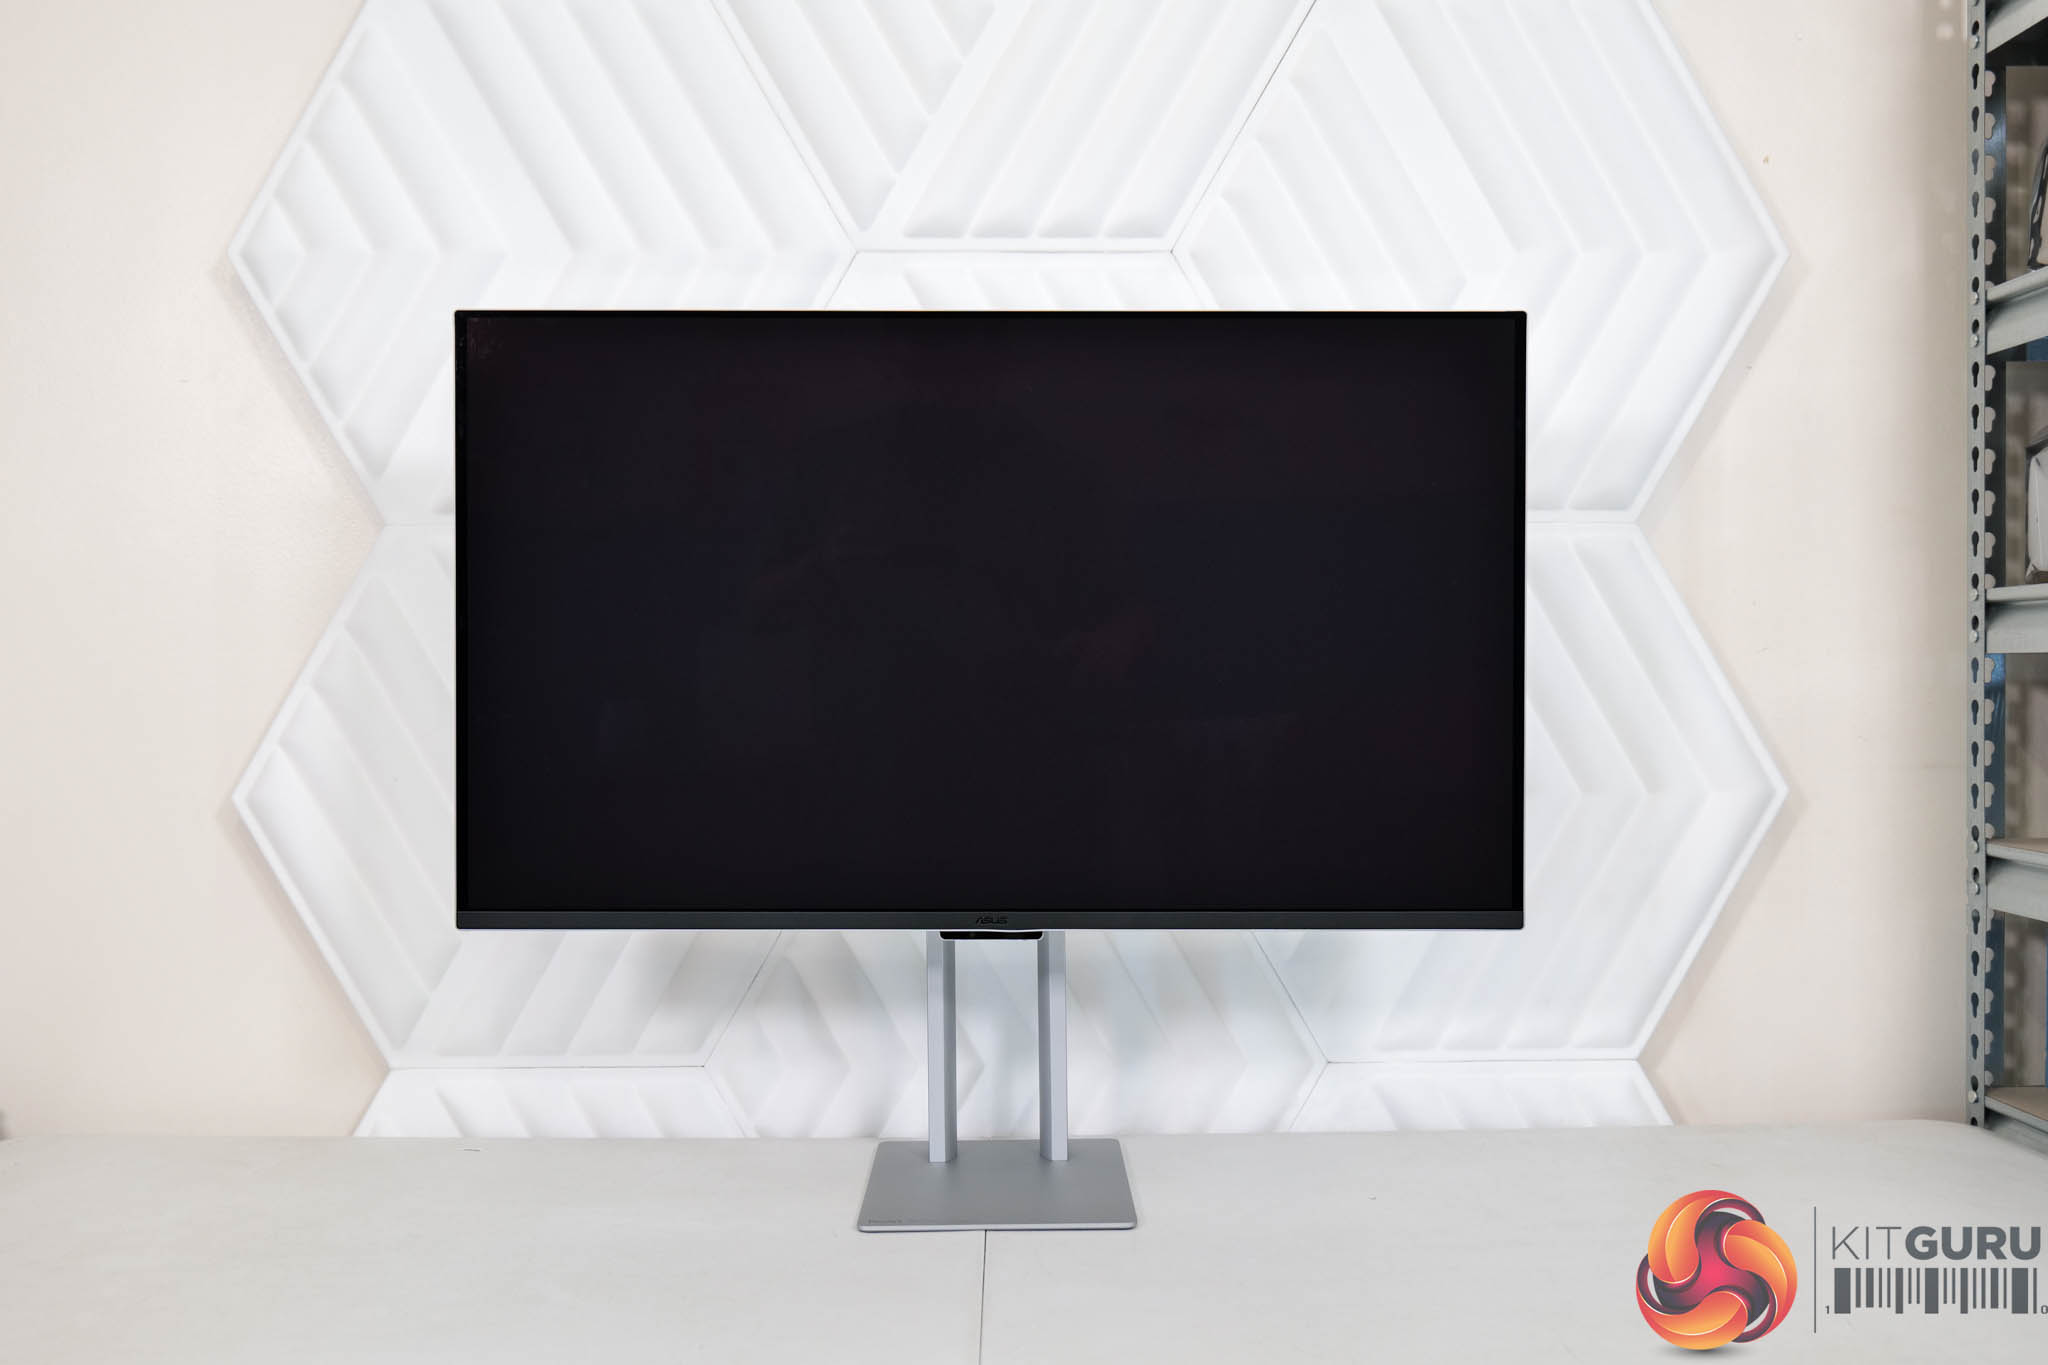
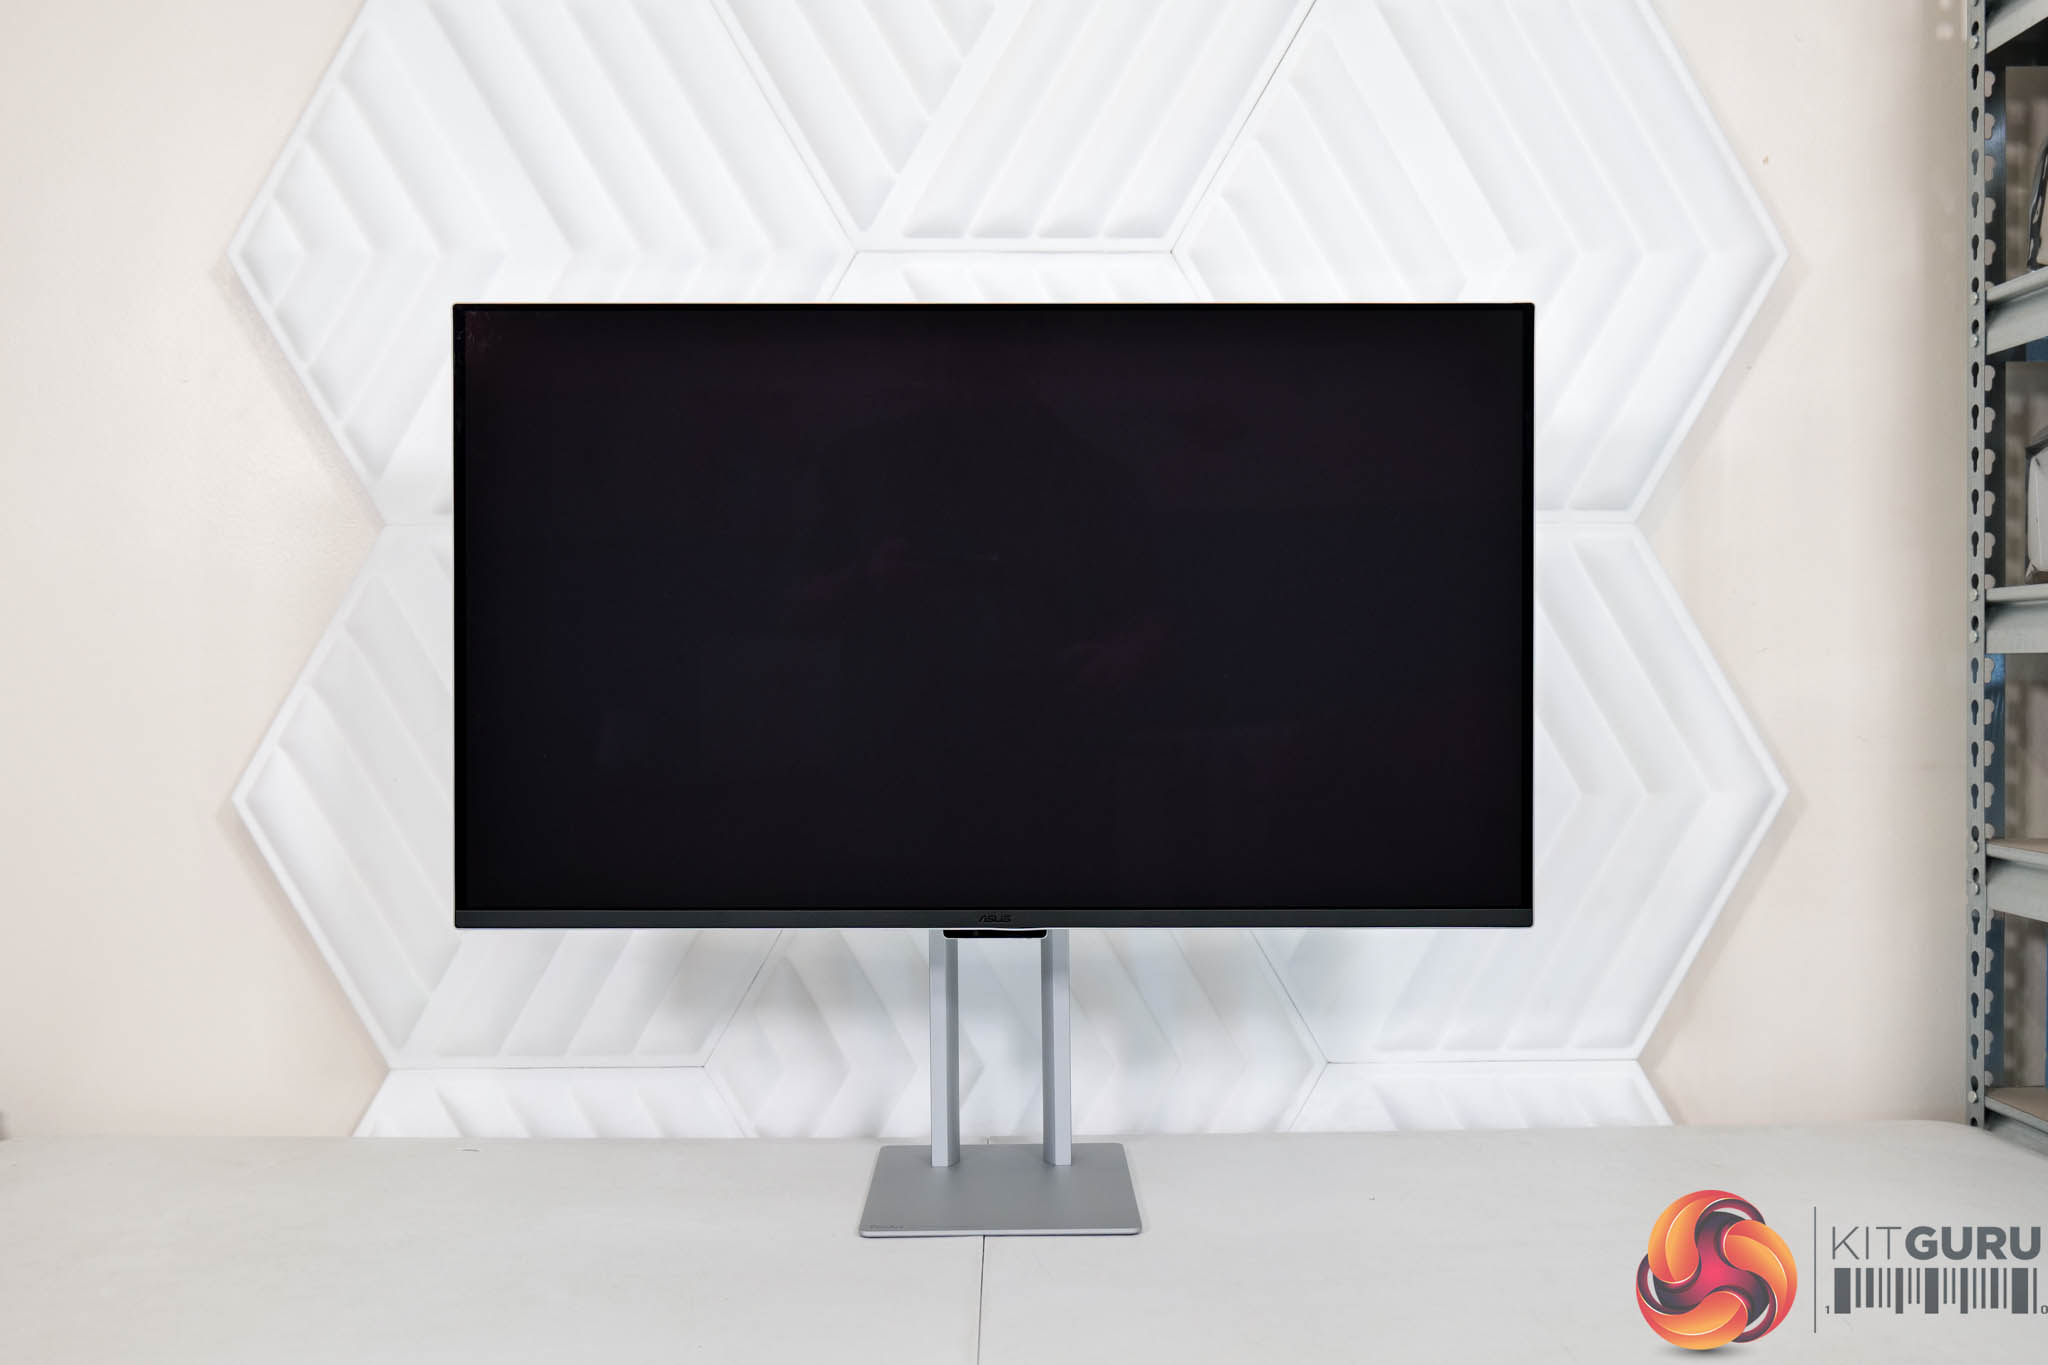
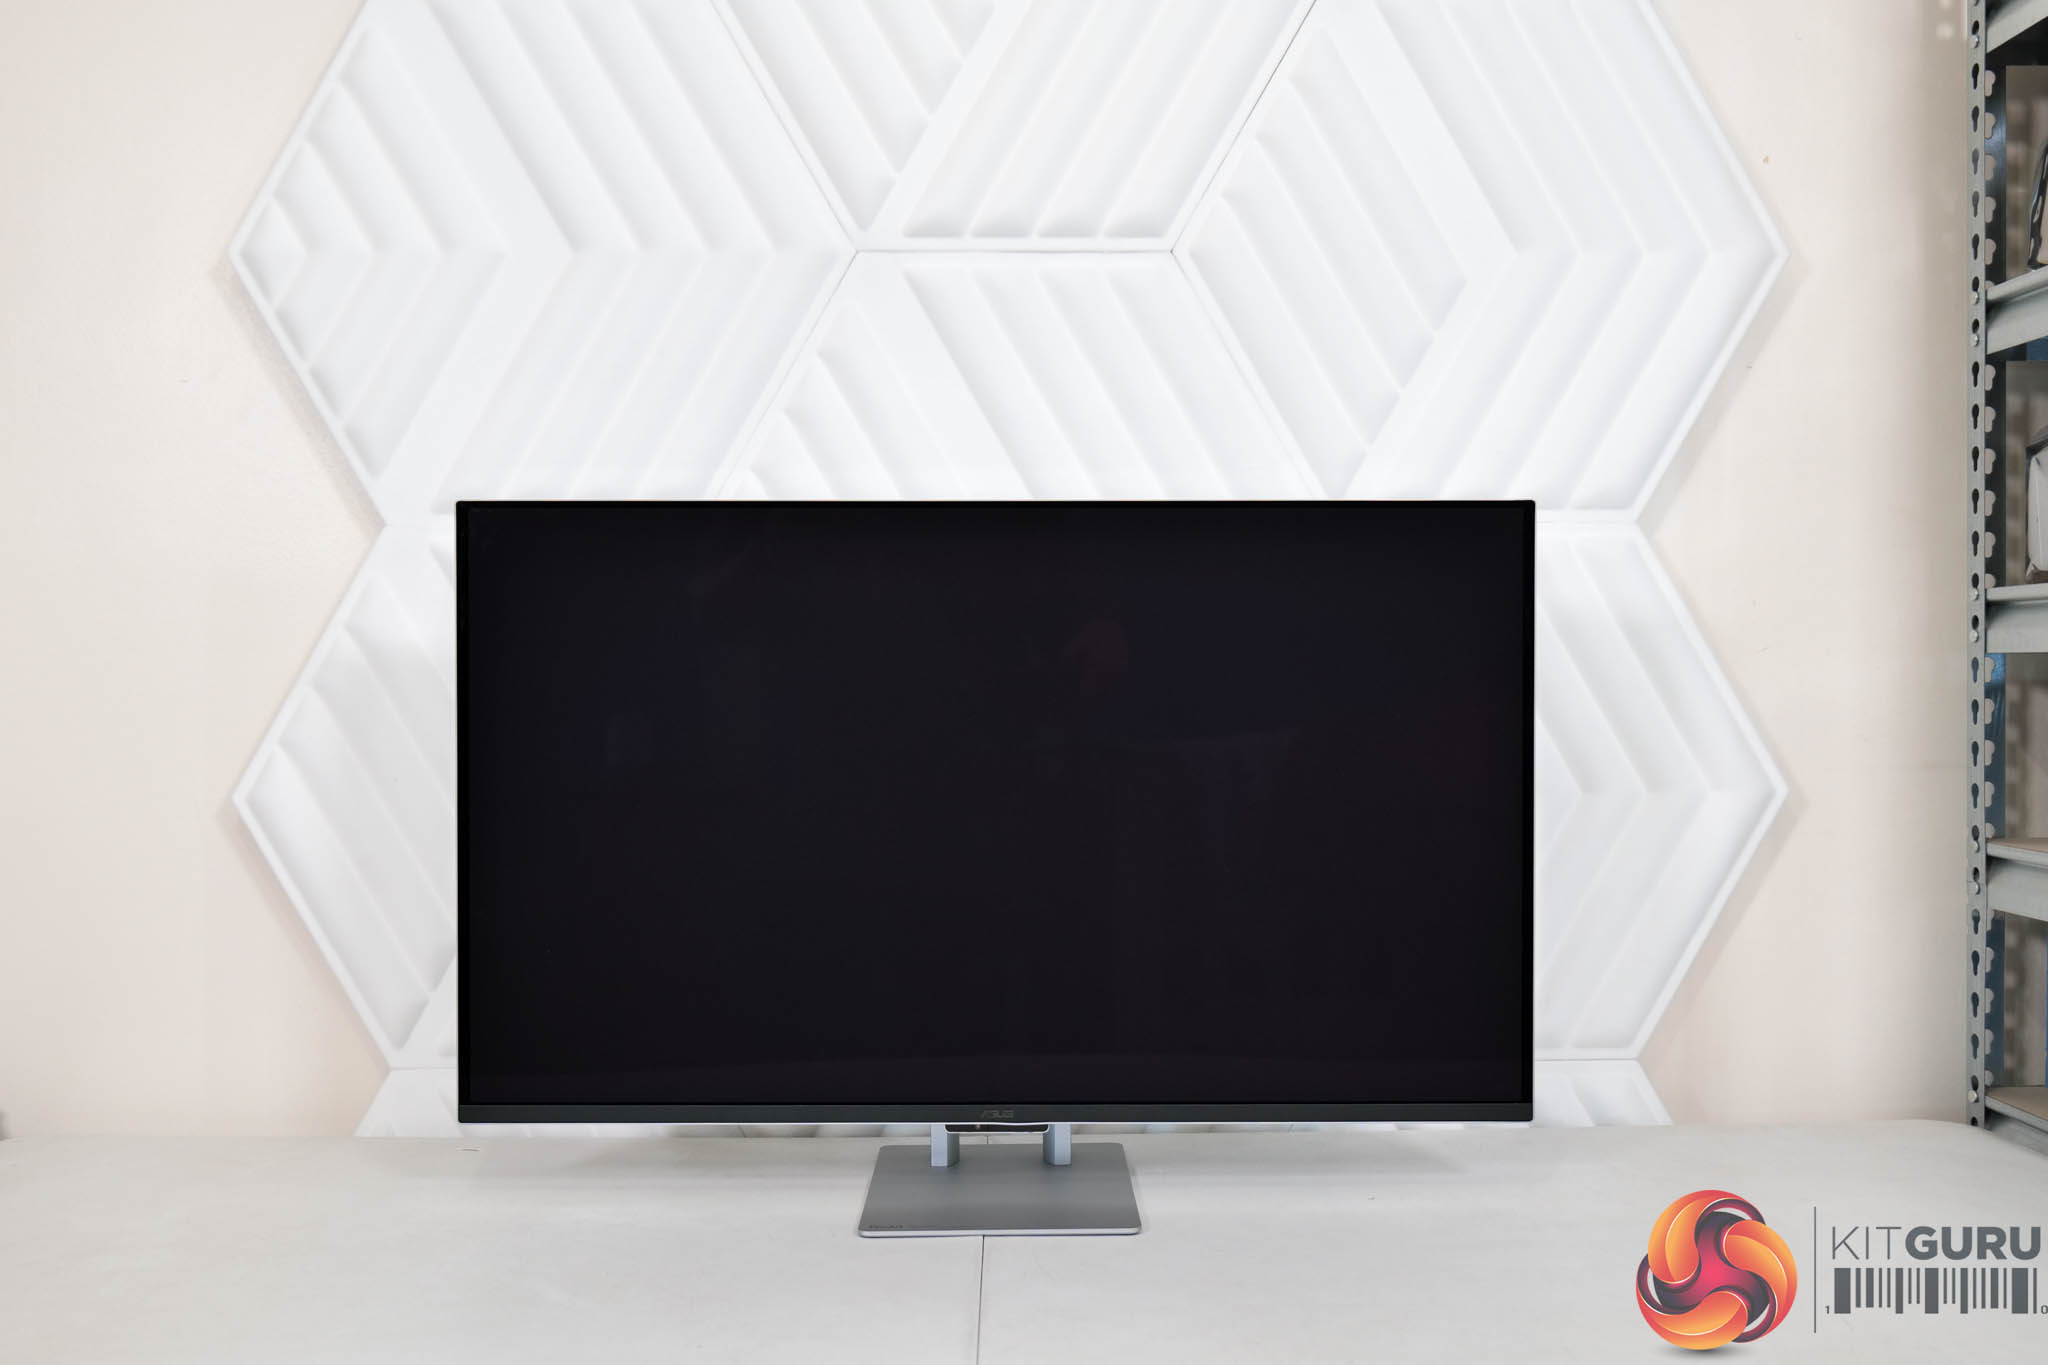
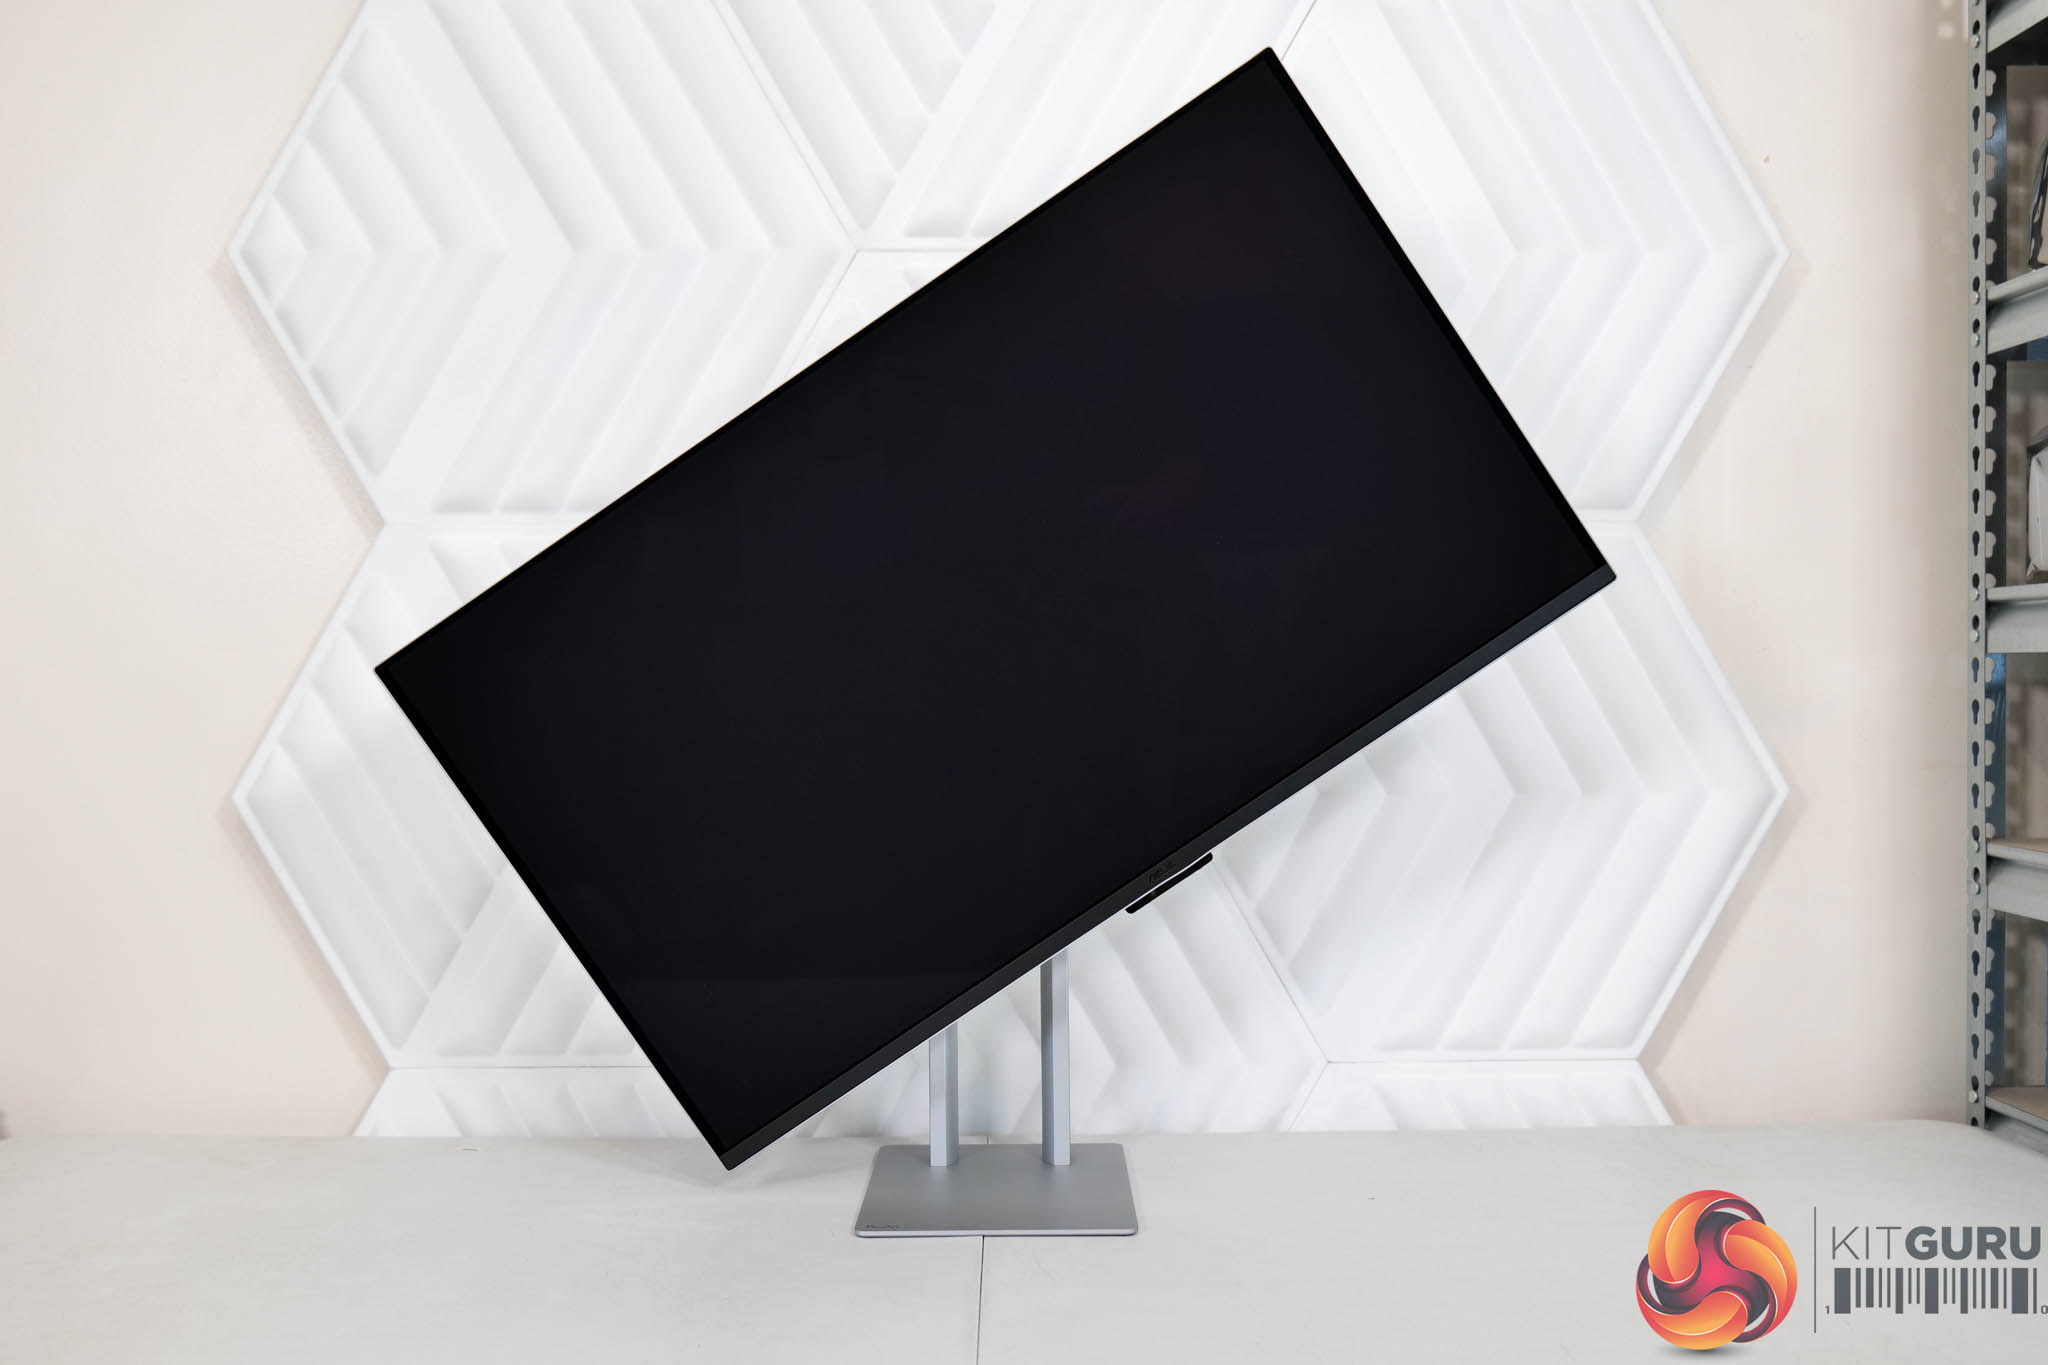
Kicking things off with a look at the design of the monitor, I have to say ASUS has done a fantastic job here. The front features a 3-side frameless design, along with a bottom chin which measures approximately 11mm thick.
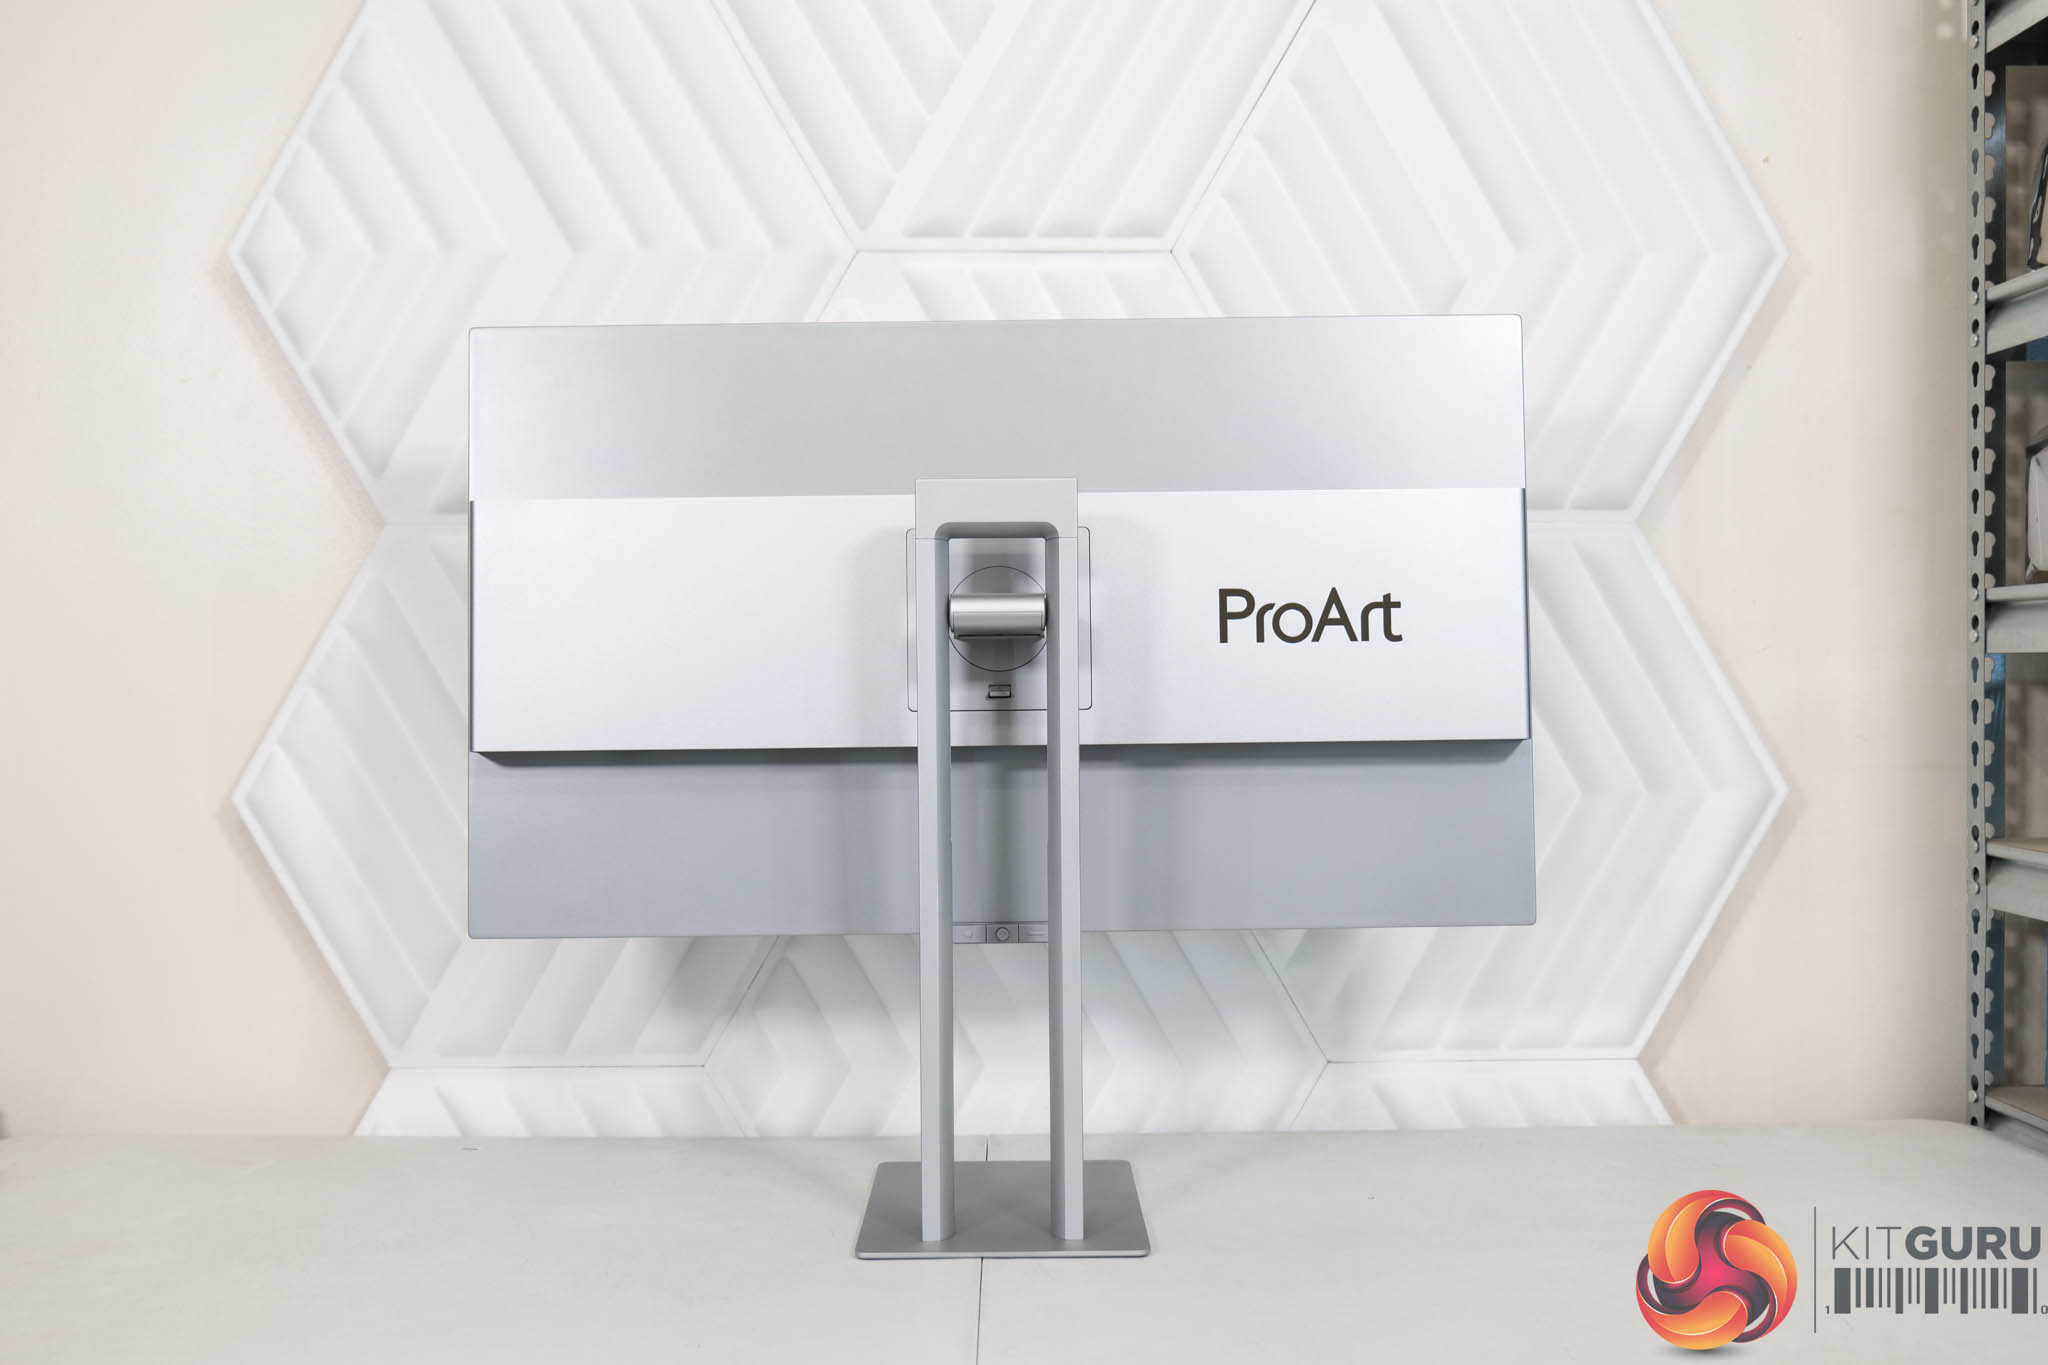
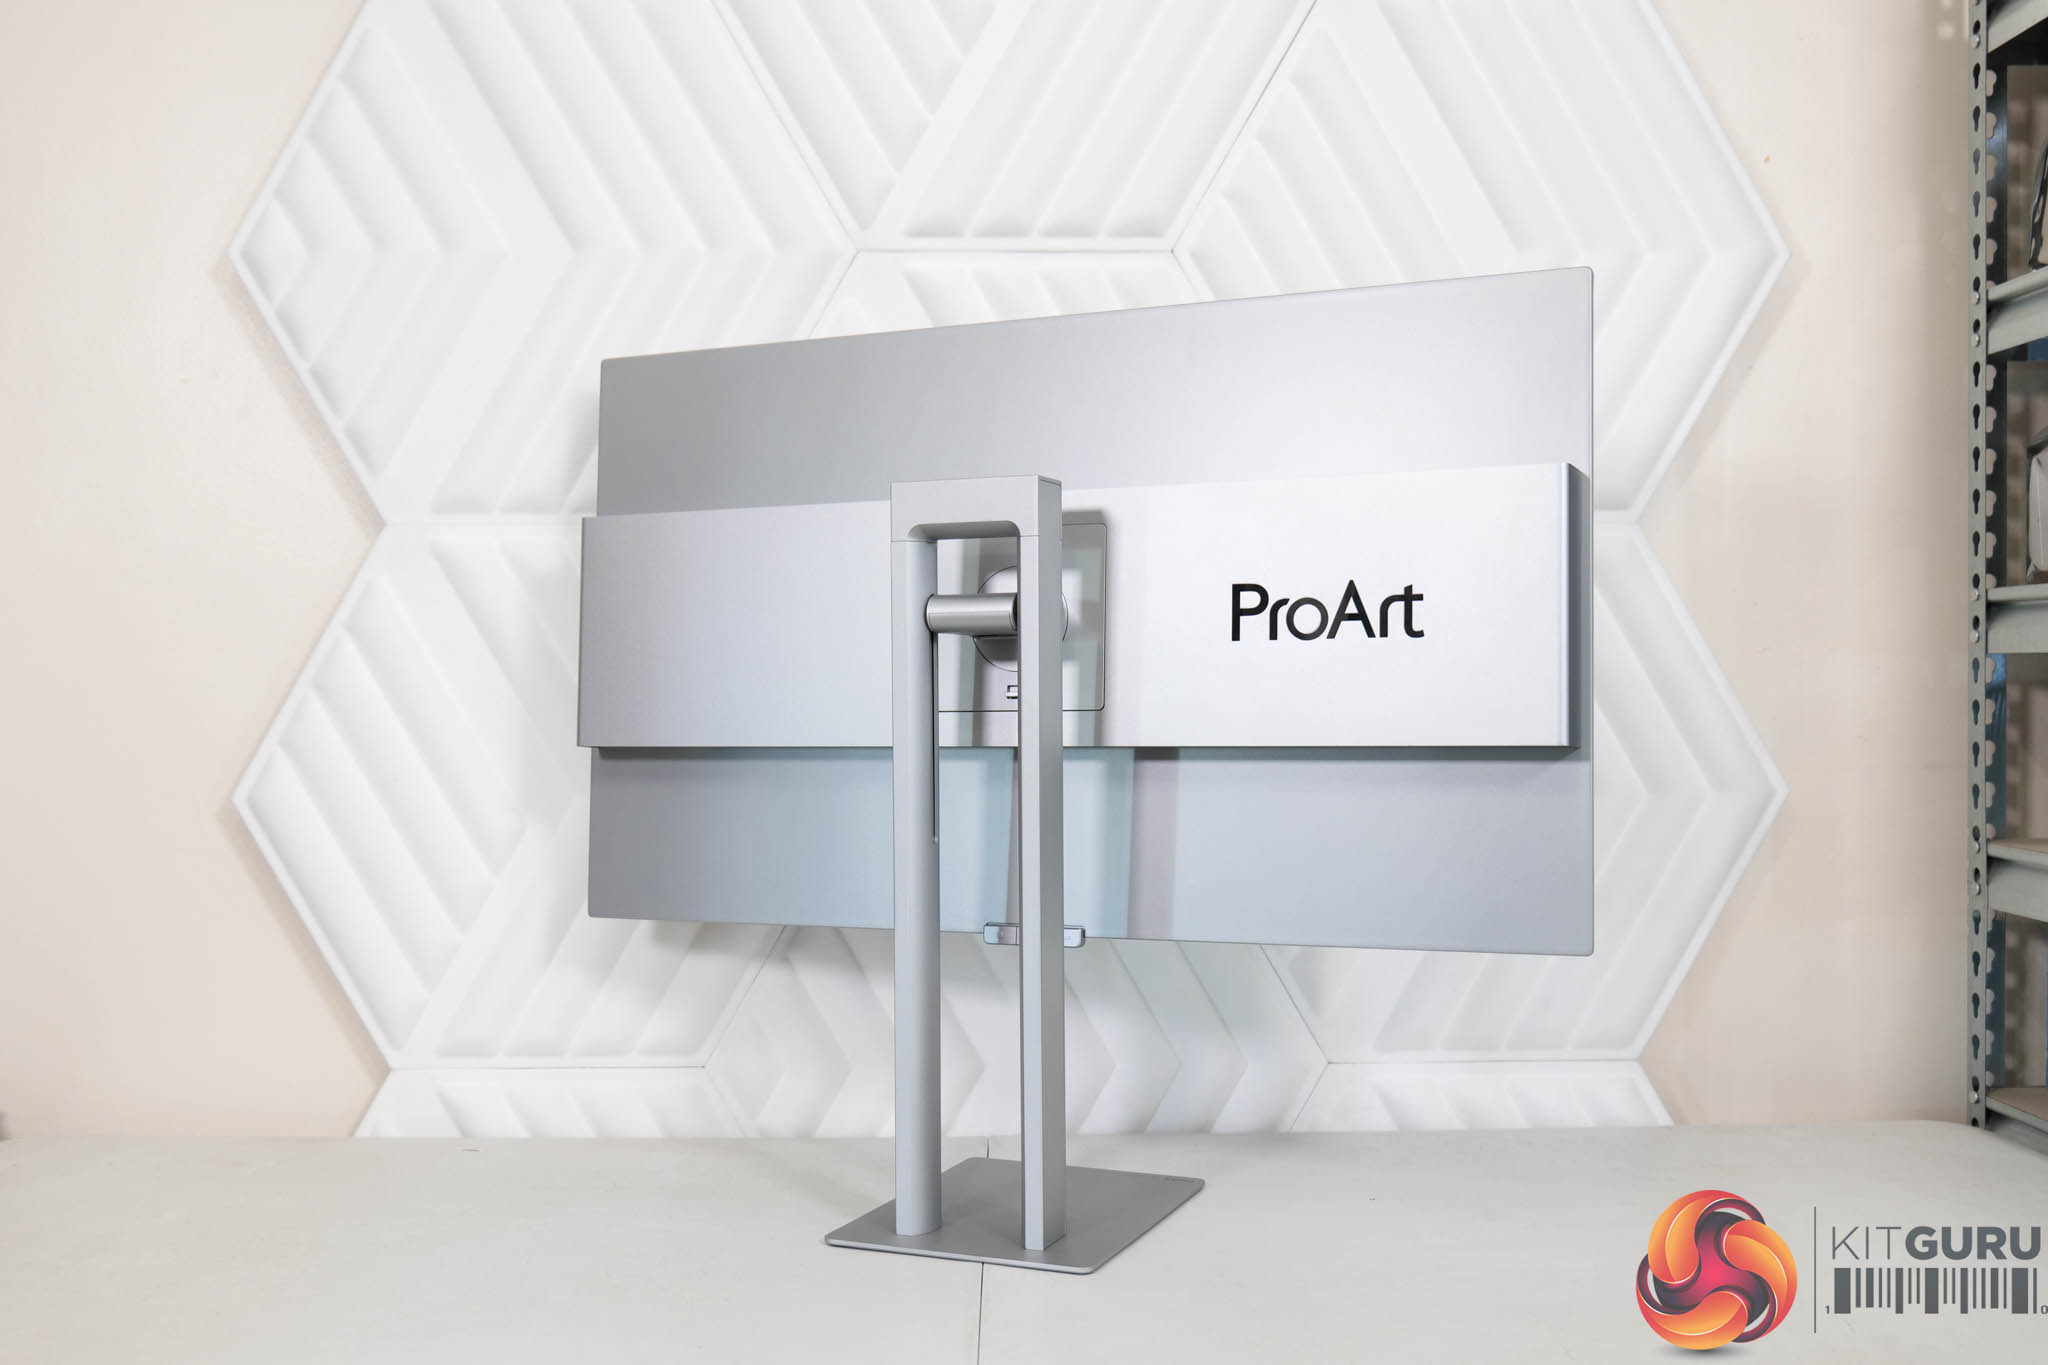
The stand and rear of the display are silver however, creating a gorgeous two-tone aesthetic that still looks sleek and professional. I love the fact that the stand is made entirely from metal – the plastic stand was one of my key criticisms of the PA27JCV we reviewed last November. The rear is also made of metal, and here there's some ProArt branding.
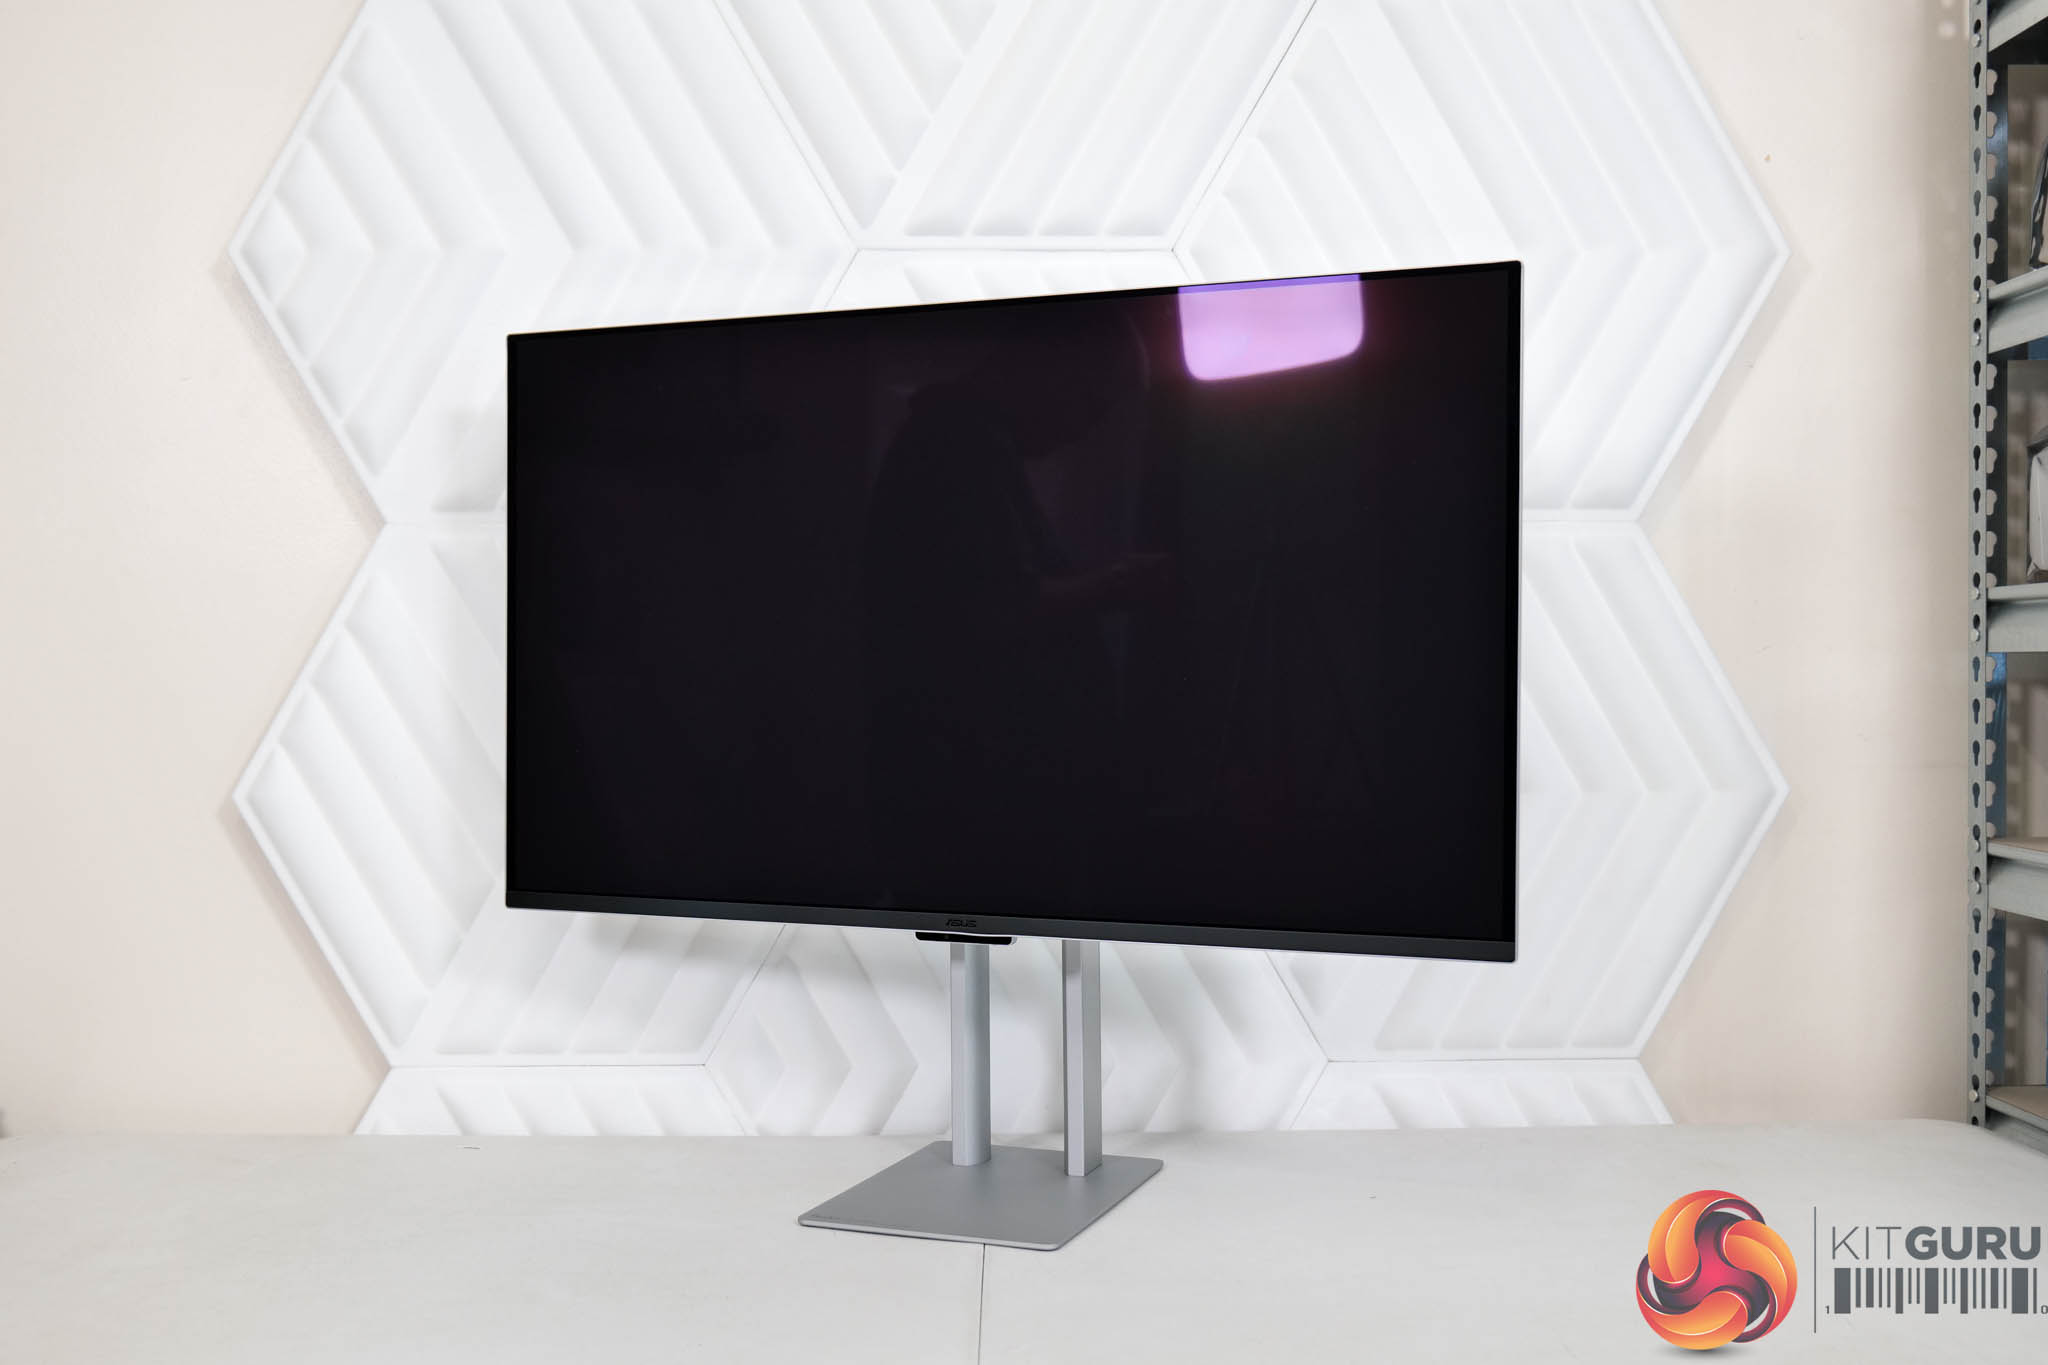
The stand uses a rectangular foot, and this measures approximately 22.9cm x 17.8cm, so it's very compact really and a huge improvement over a v-shaped foot, in my opinion.
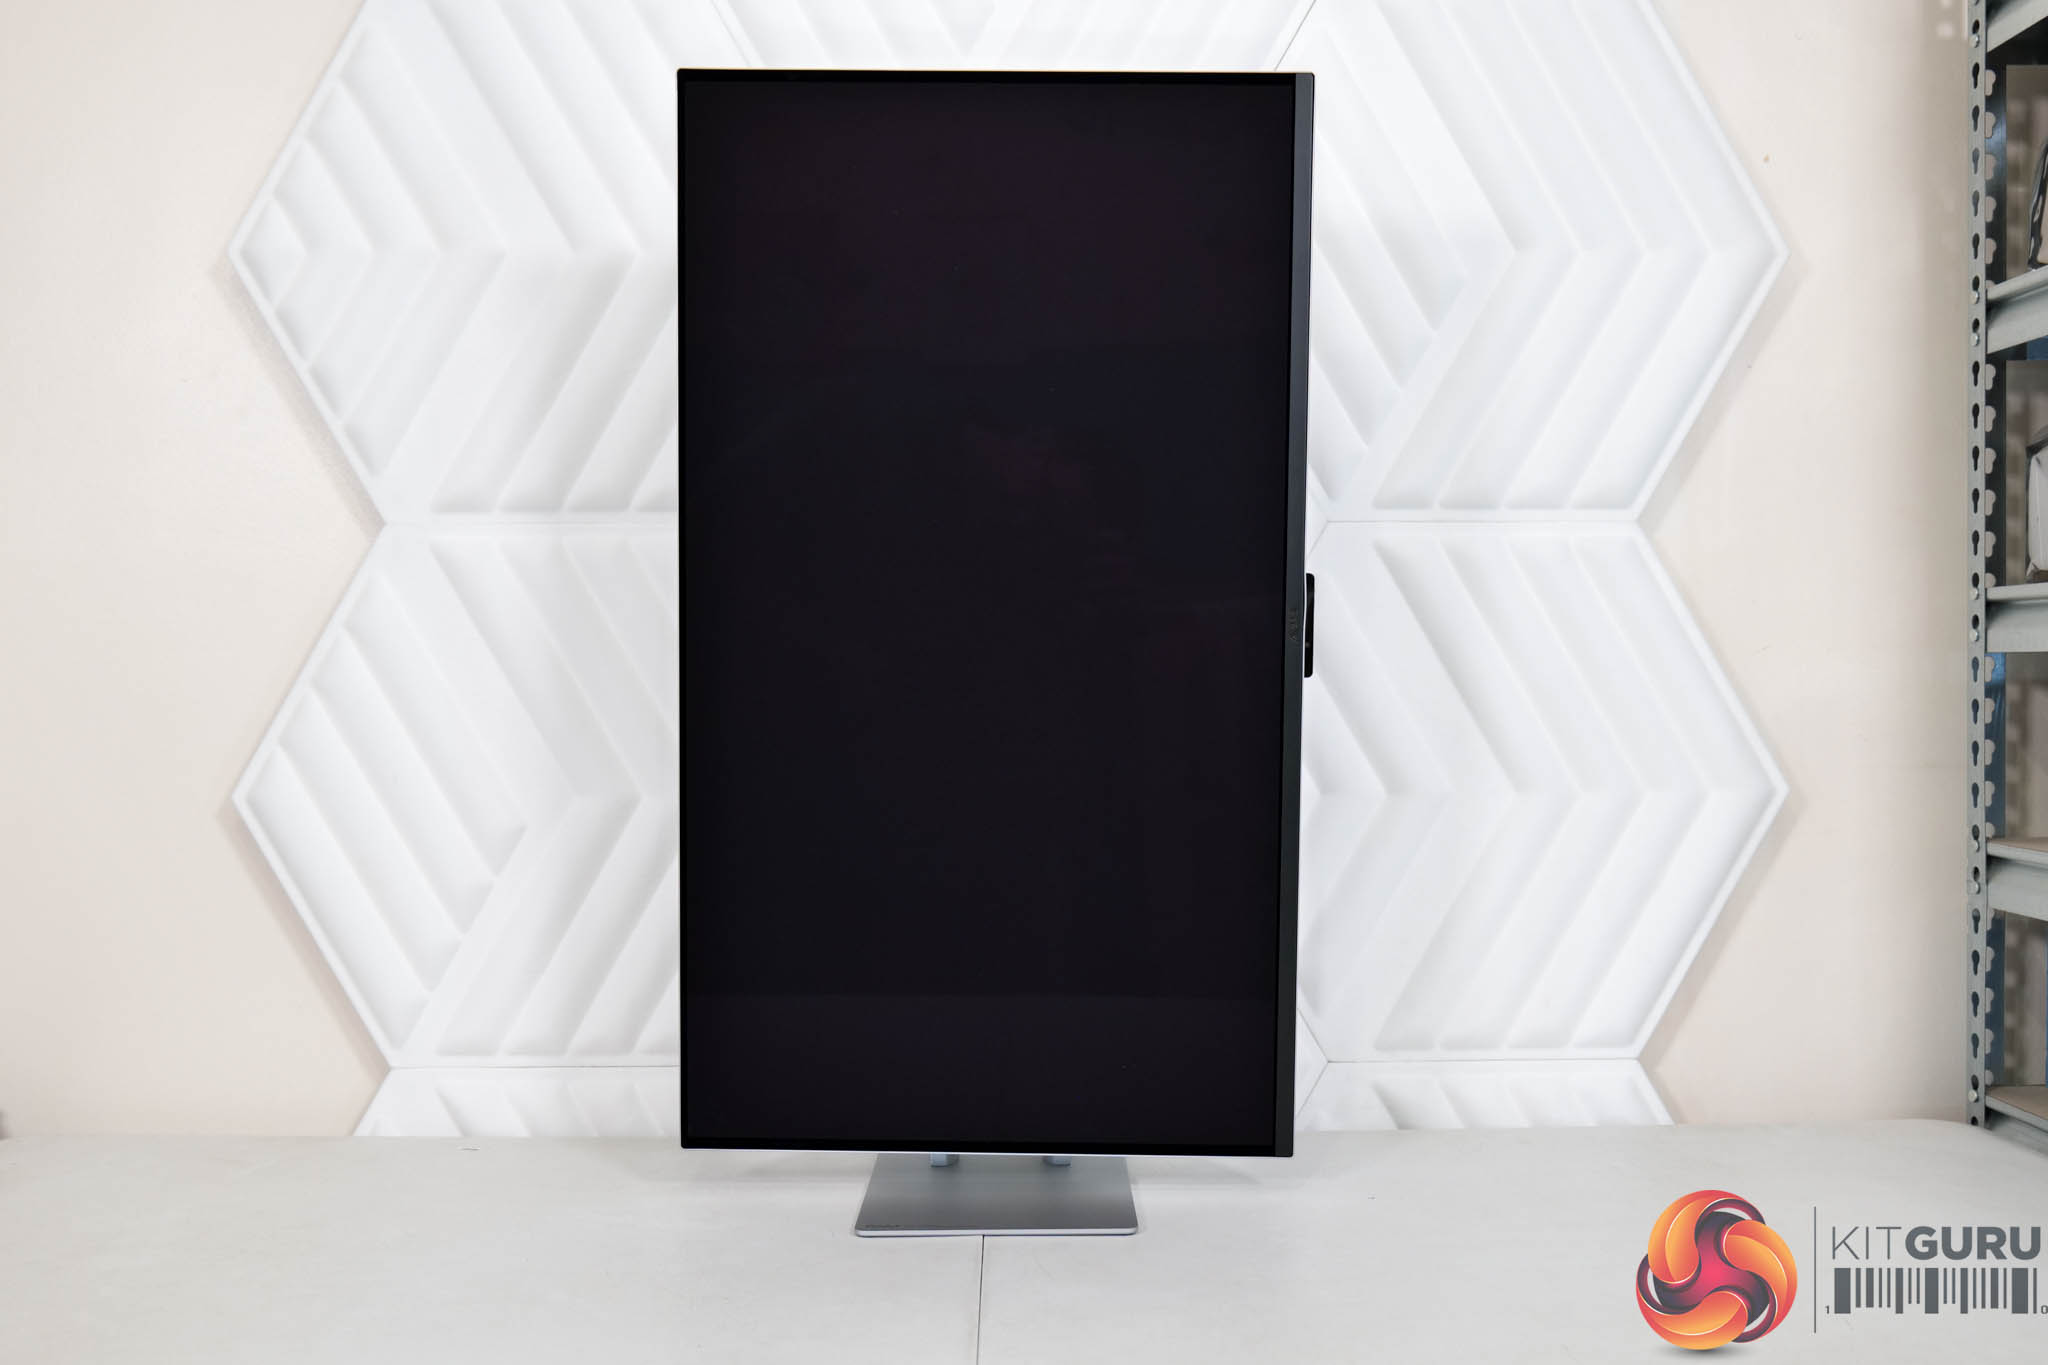
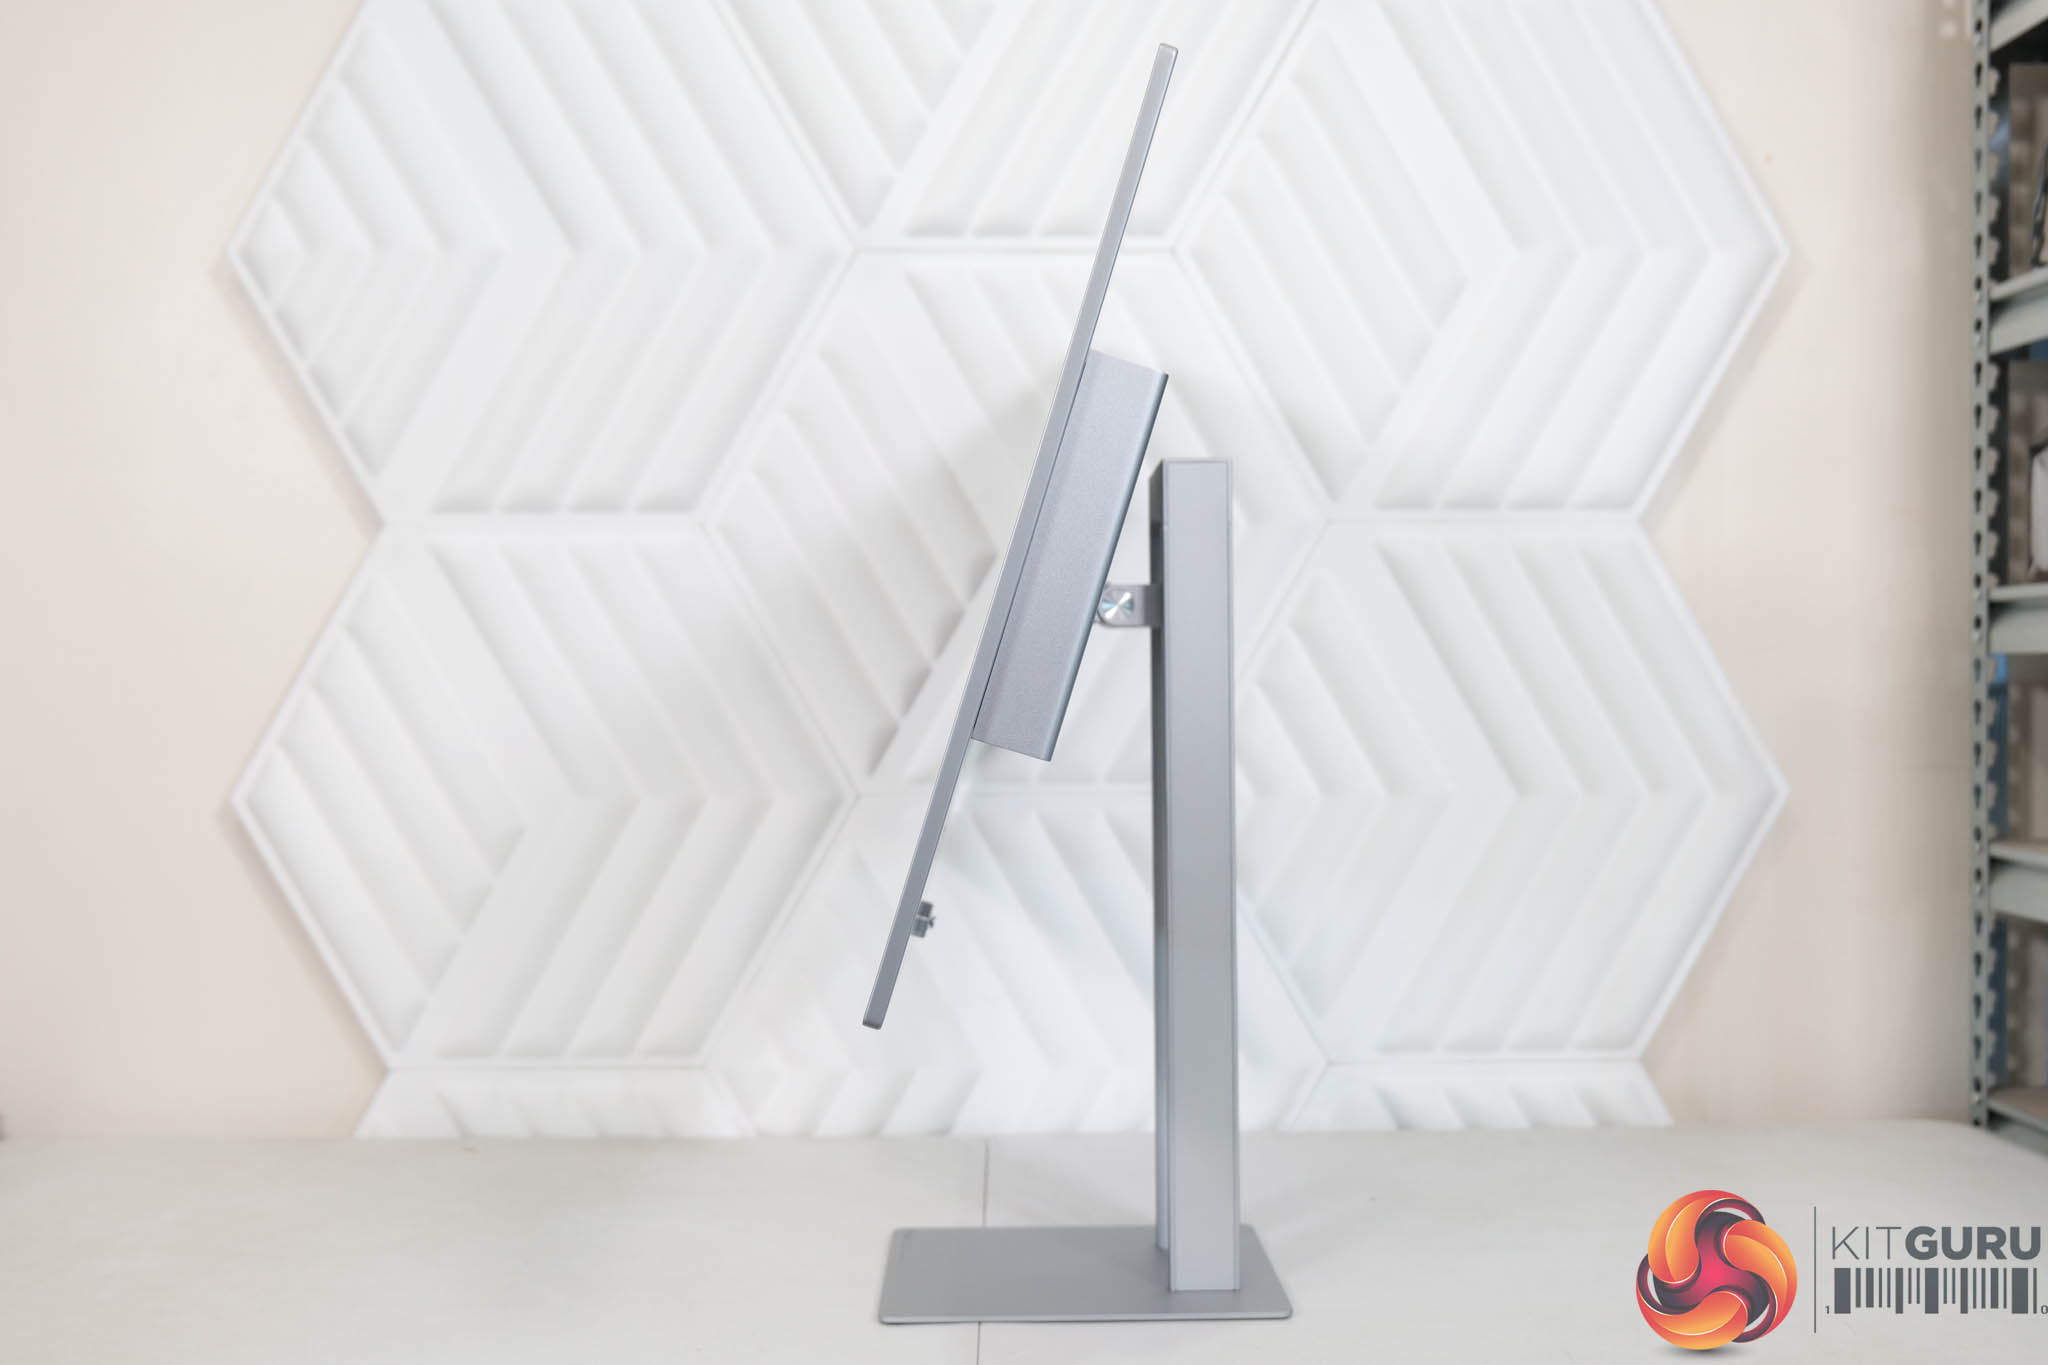

The stand also offers a good variety of ergonomic adjustments, including up to 130mm of height adjustment, full 90 degree pivot functionality, and then tilt from -5 to +20 degrees. That does mean there's no swivel built in, but third-party VESA 100×100 mounts are supported.
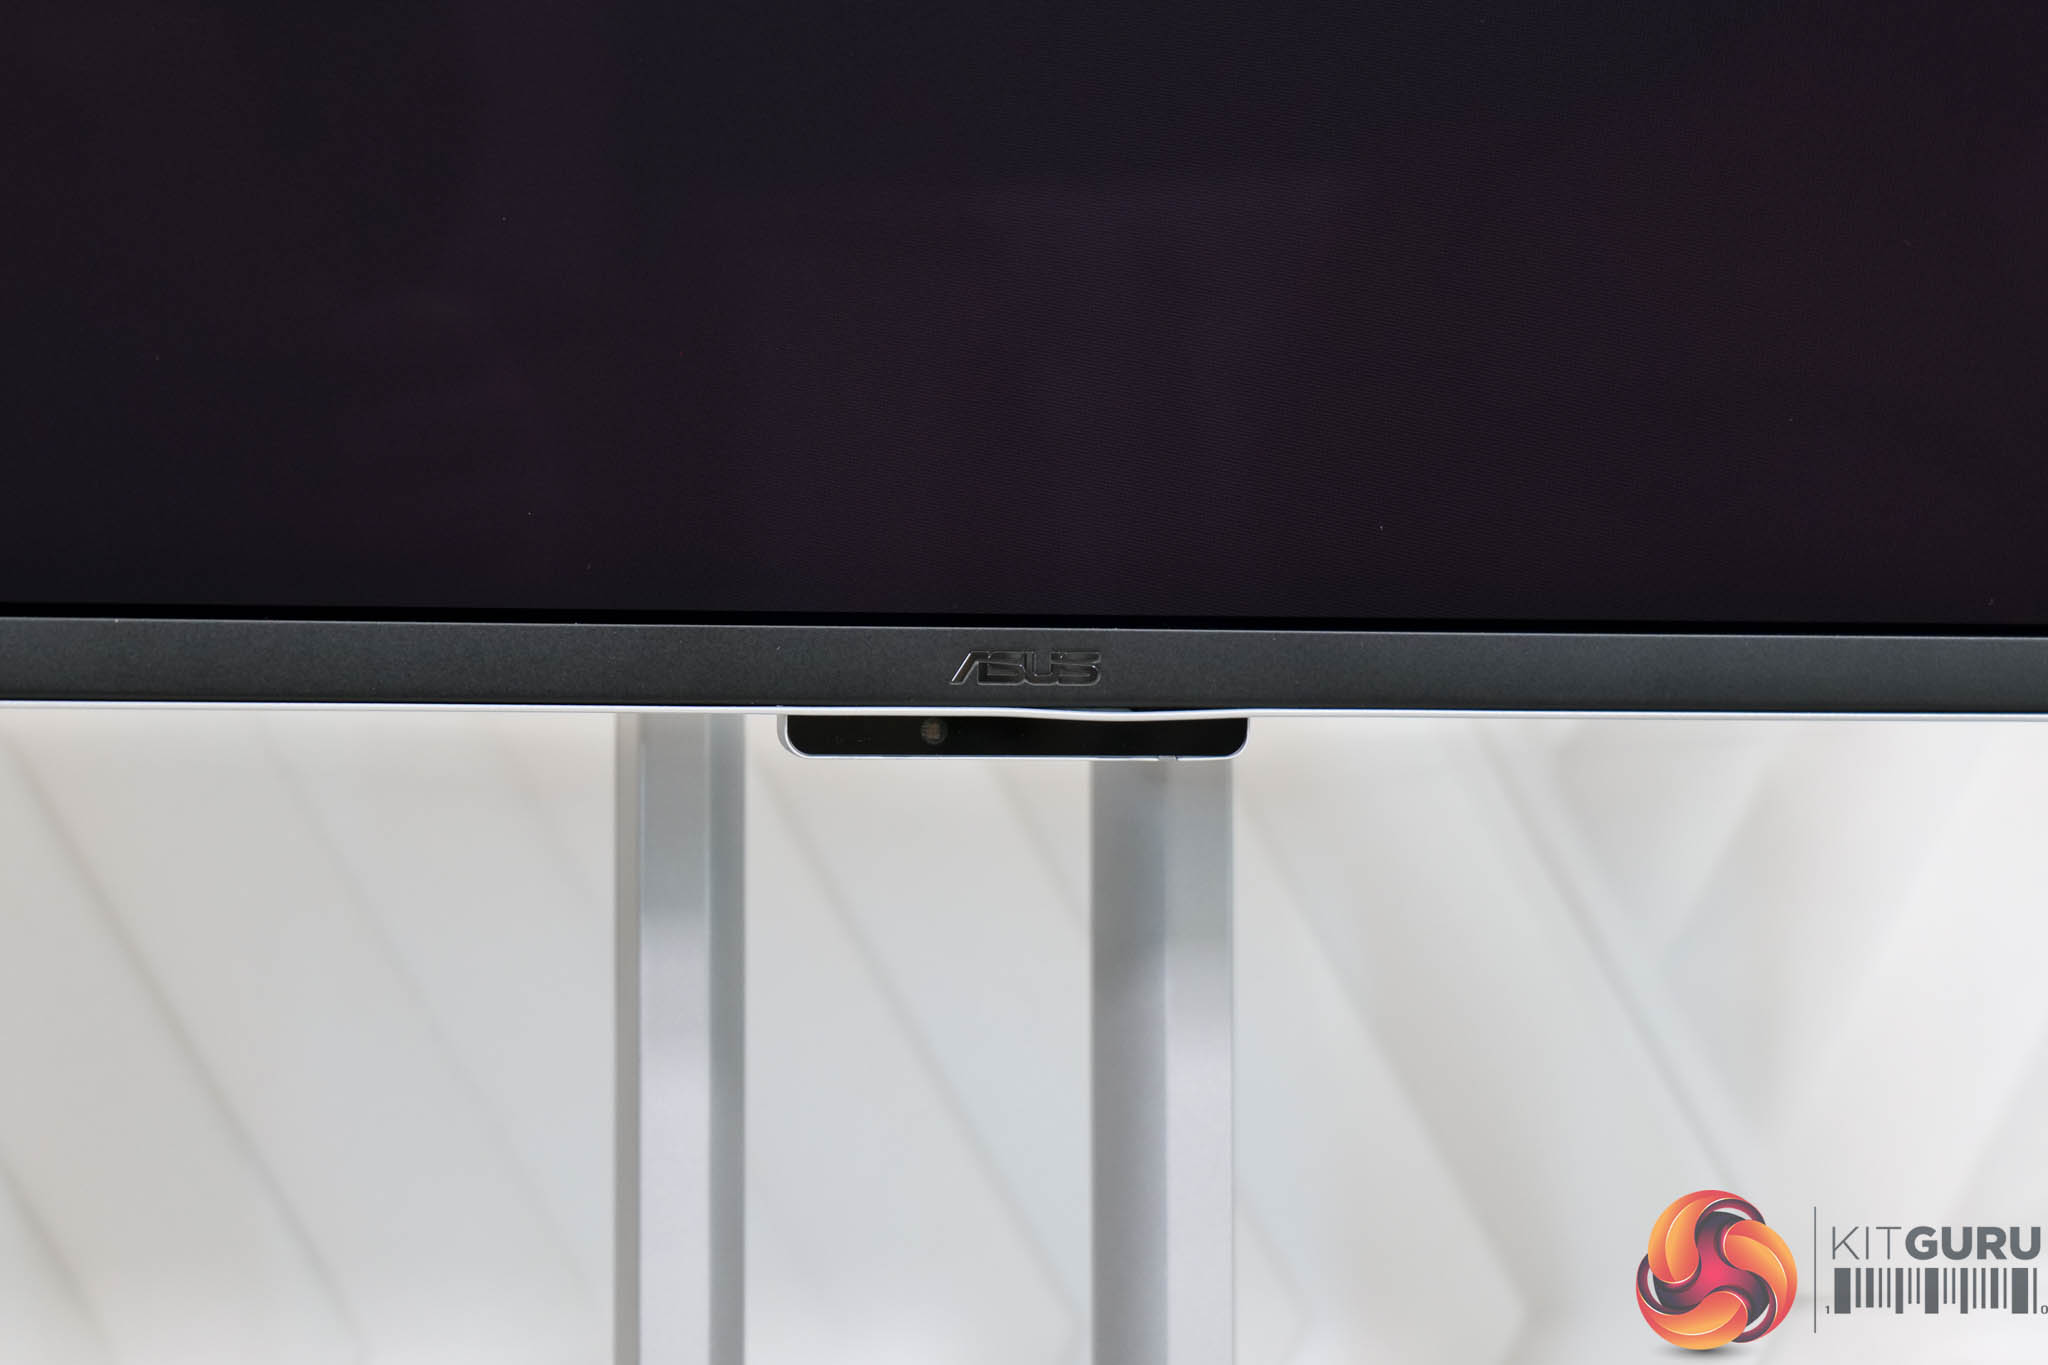
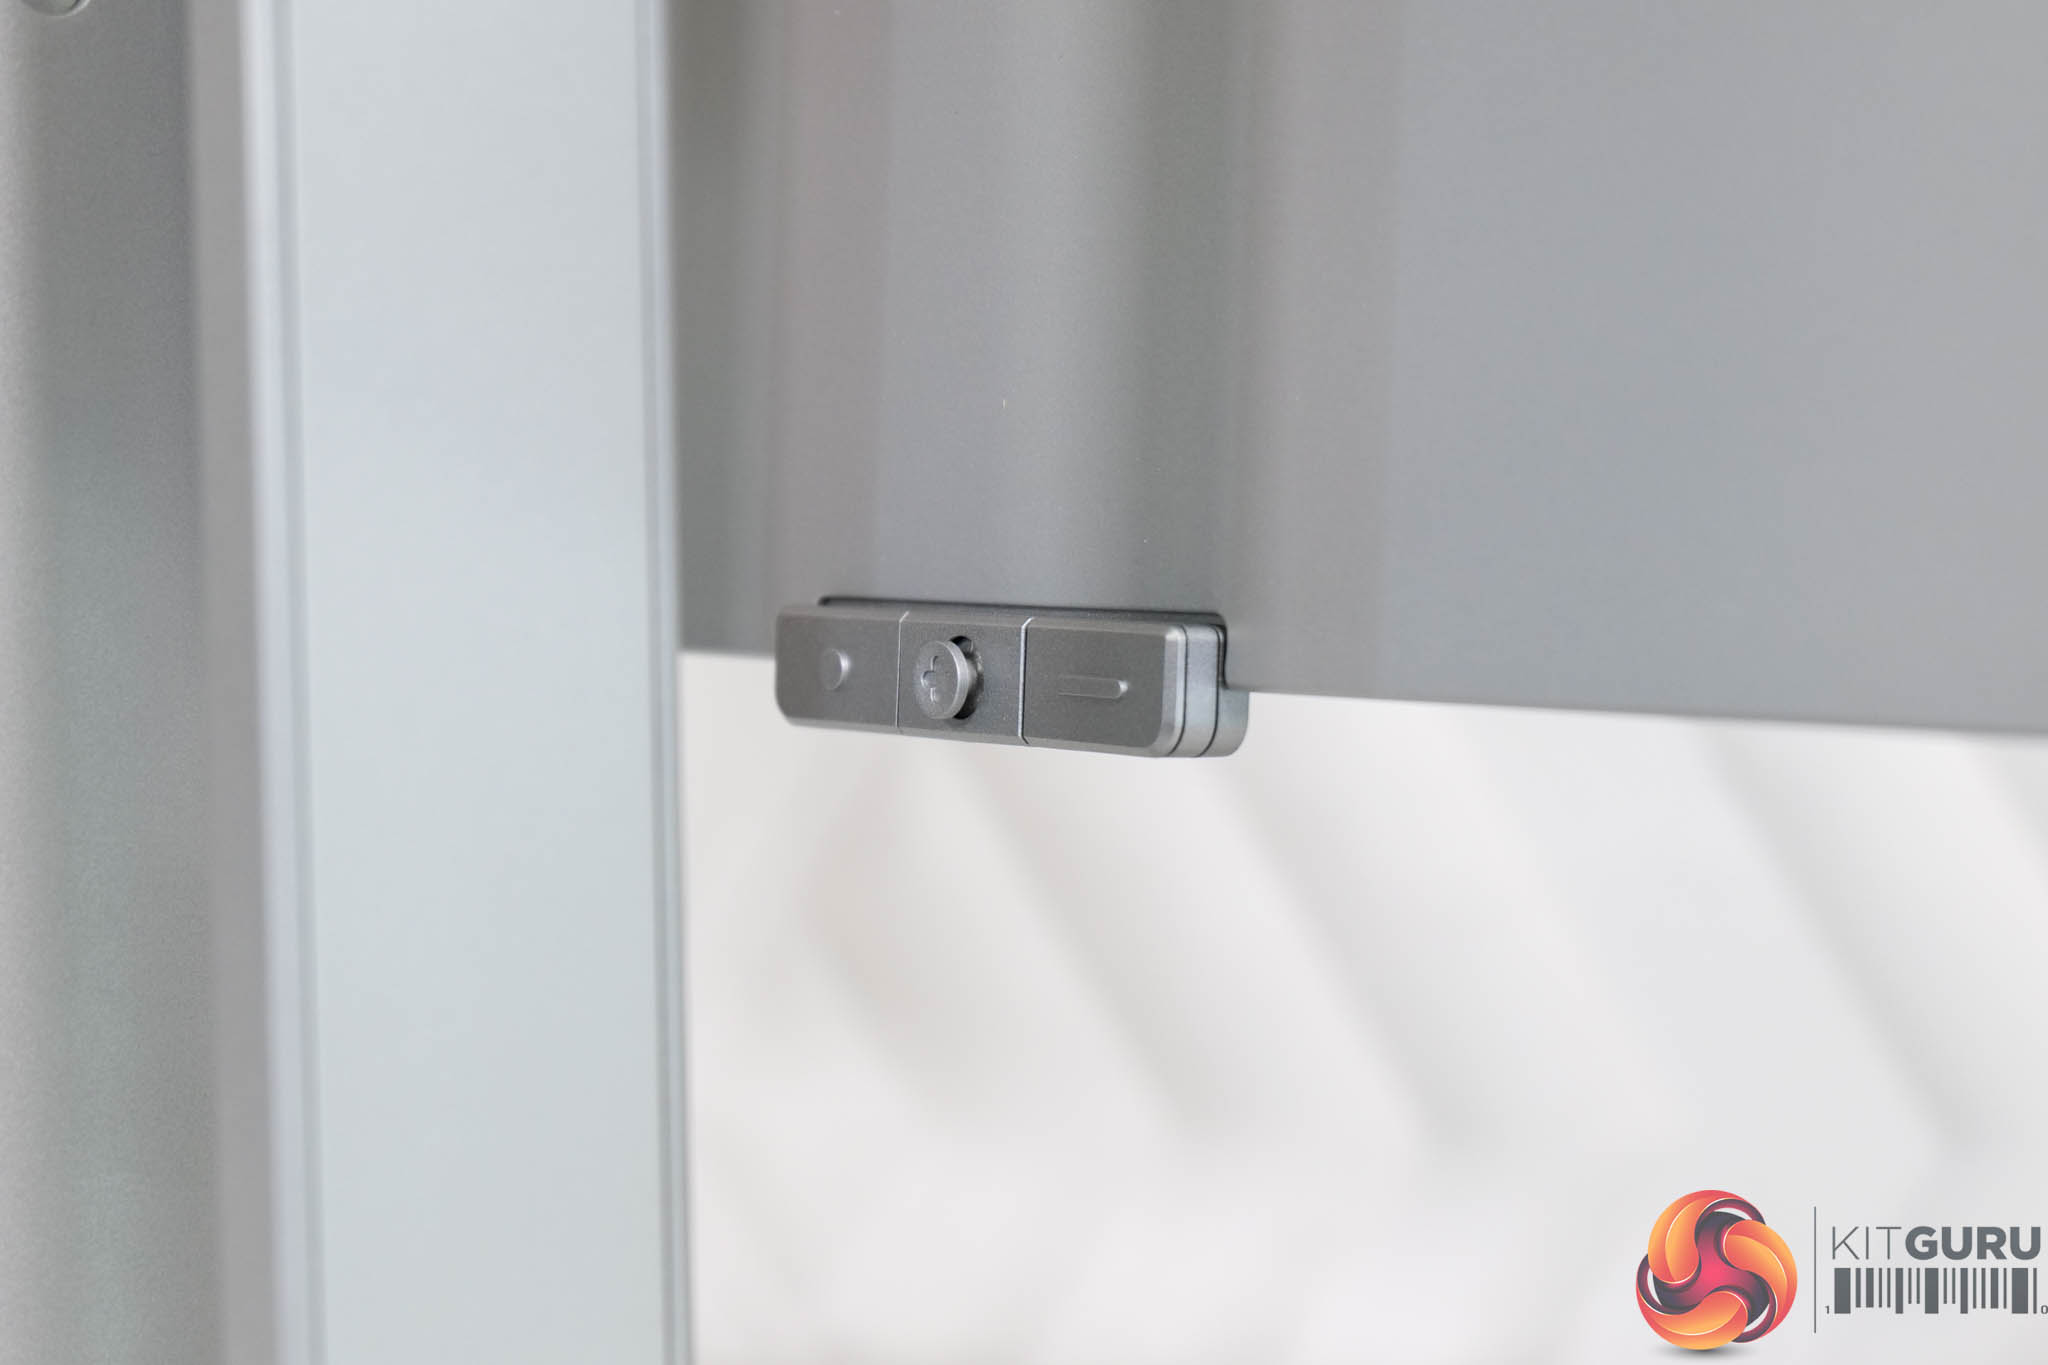
Just underneath the front bezel, we find a small section which actually houses a proximity sensor, and this is one of the ‘ASUS OLED Care' features, as the monitor detects when you are not at your desk and dims the screen, before turning it off after a short period of time – it works fantastically well in practice.
Behind that, ASUS has positioned the 5-way joystick control, and that's flanked by a button either side.
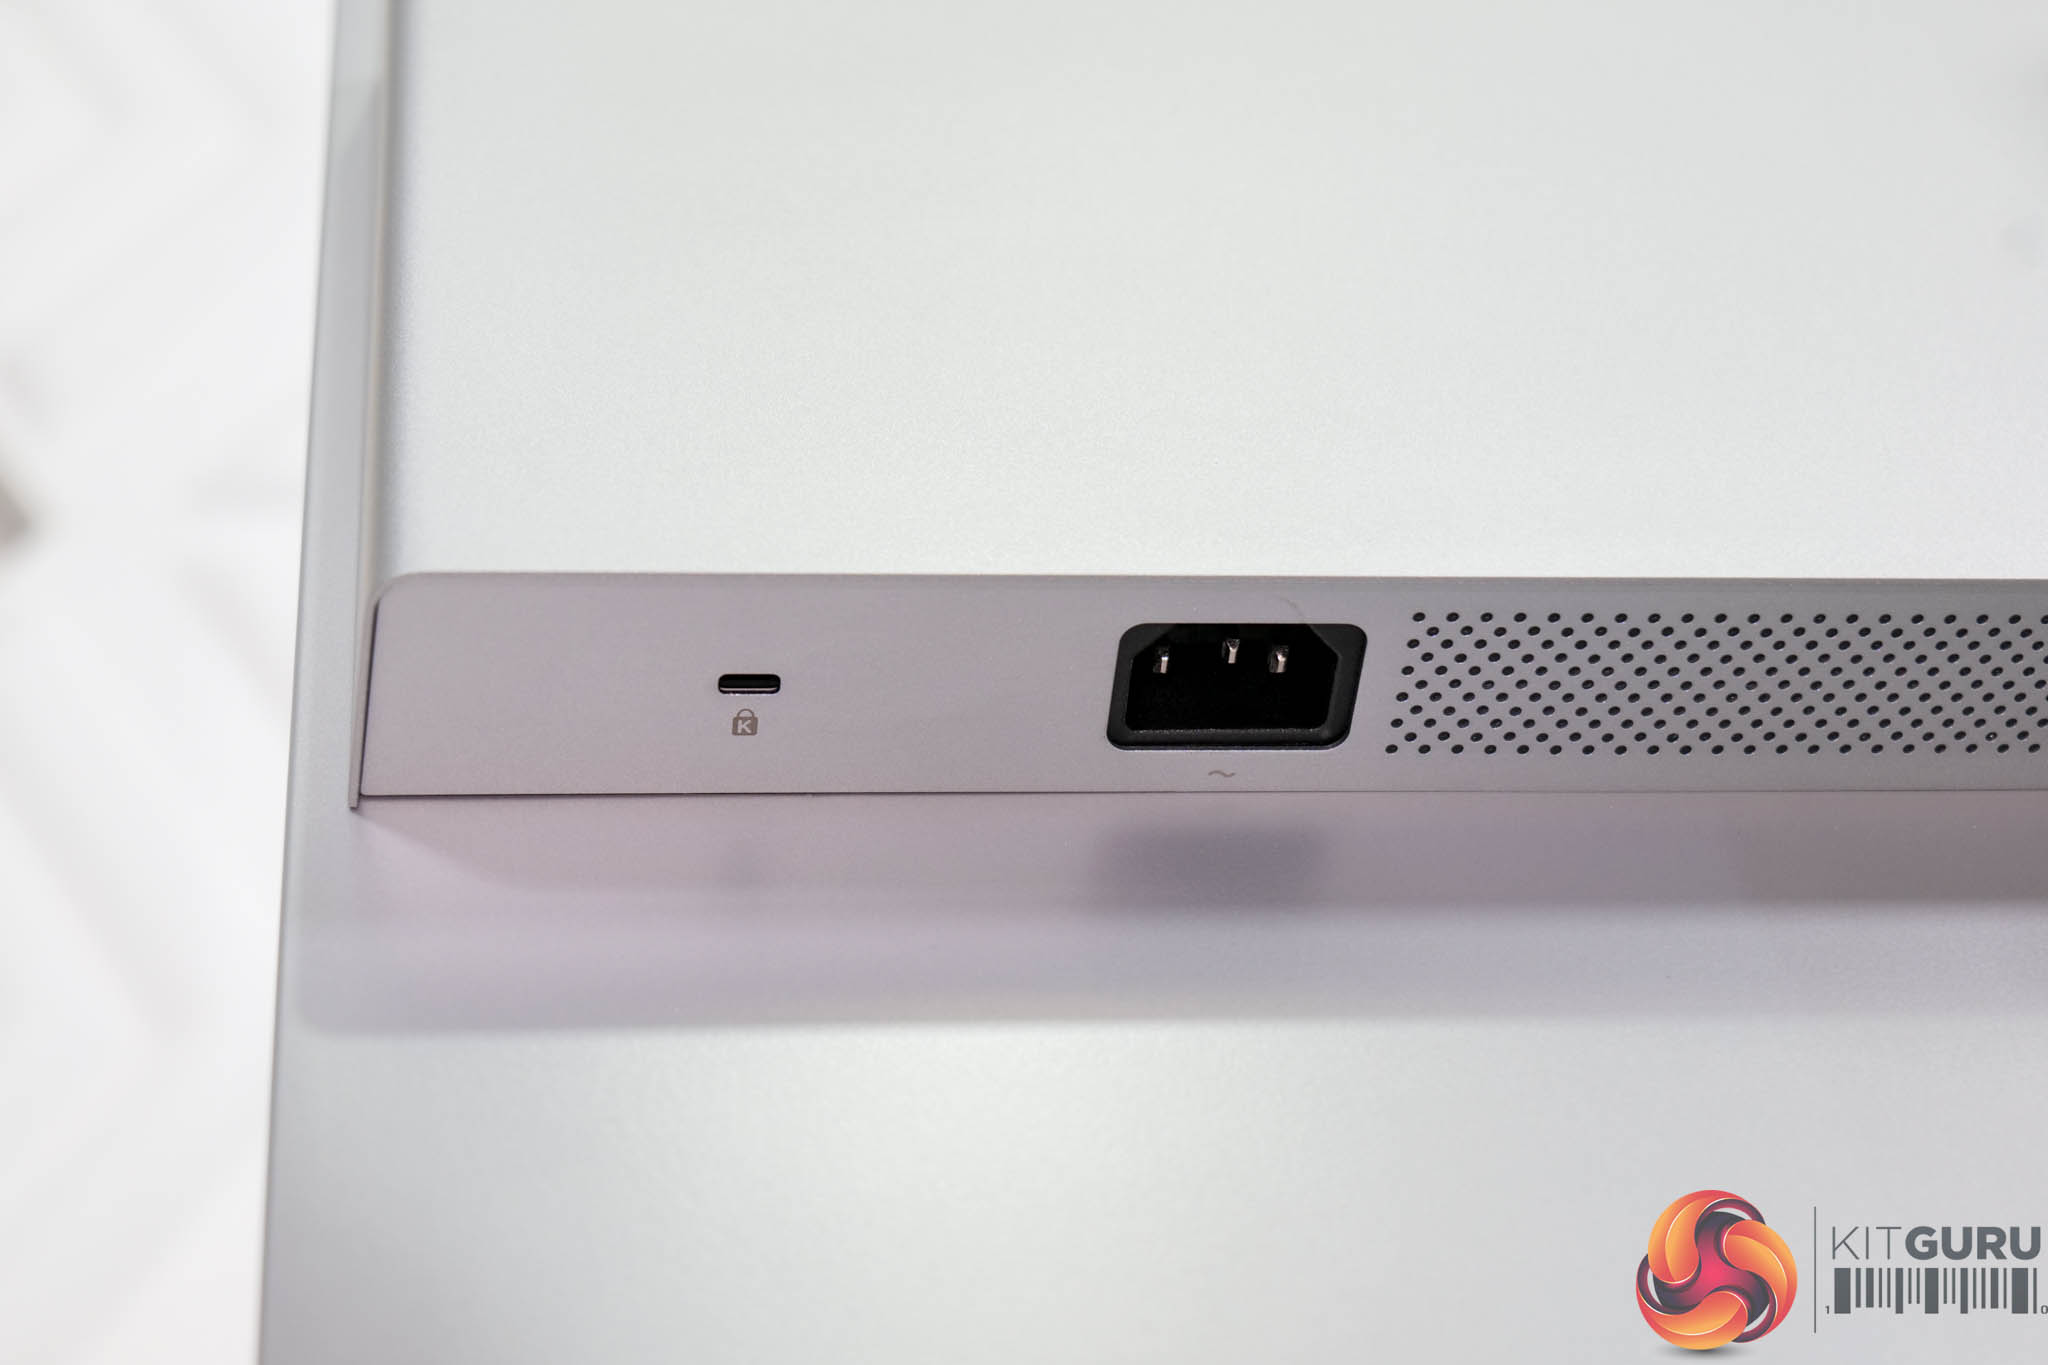

As for the I/O, there's a Kensington Lock and power input on the left hand side, while all the rest is on the right hand side. Here we find one HDMI 2.1, then two Thunderbolt 4 USB-C ports, one of which support 96W power delivery with the other at 15W. Then there's a small USB hub, offering one USB 3.2 Gen 2 Type-A and another USB 3.2 Gen 2 Type-C.
That does mean no DisplayPort, which I personally find a little odd. After all, if you're connecting this to a typical graphics card, you've only got one native connection point, being the HDMI 2.1 port. It may not be an issue for everyone, but to me it just feels like a needless corner to cut considering the price of the screen.
Preset settings

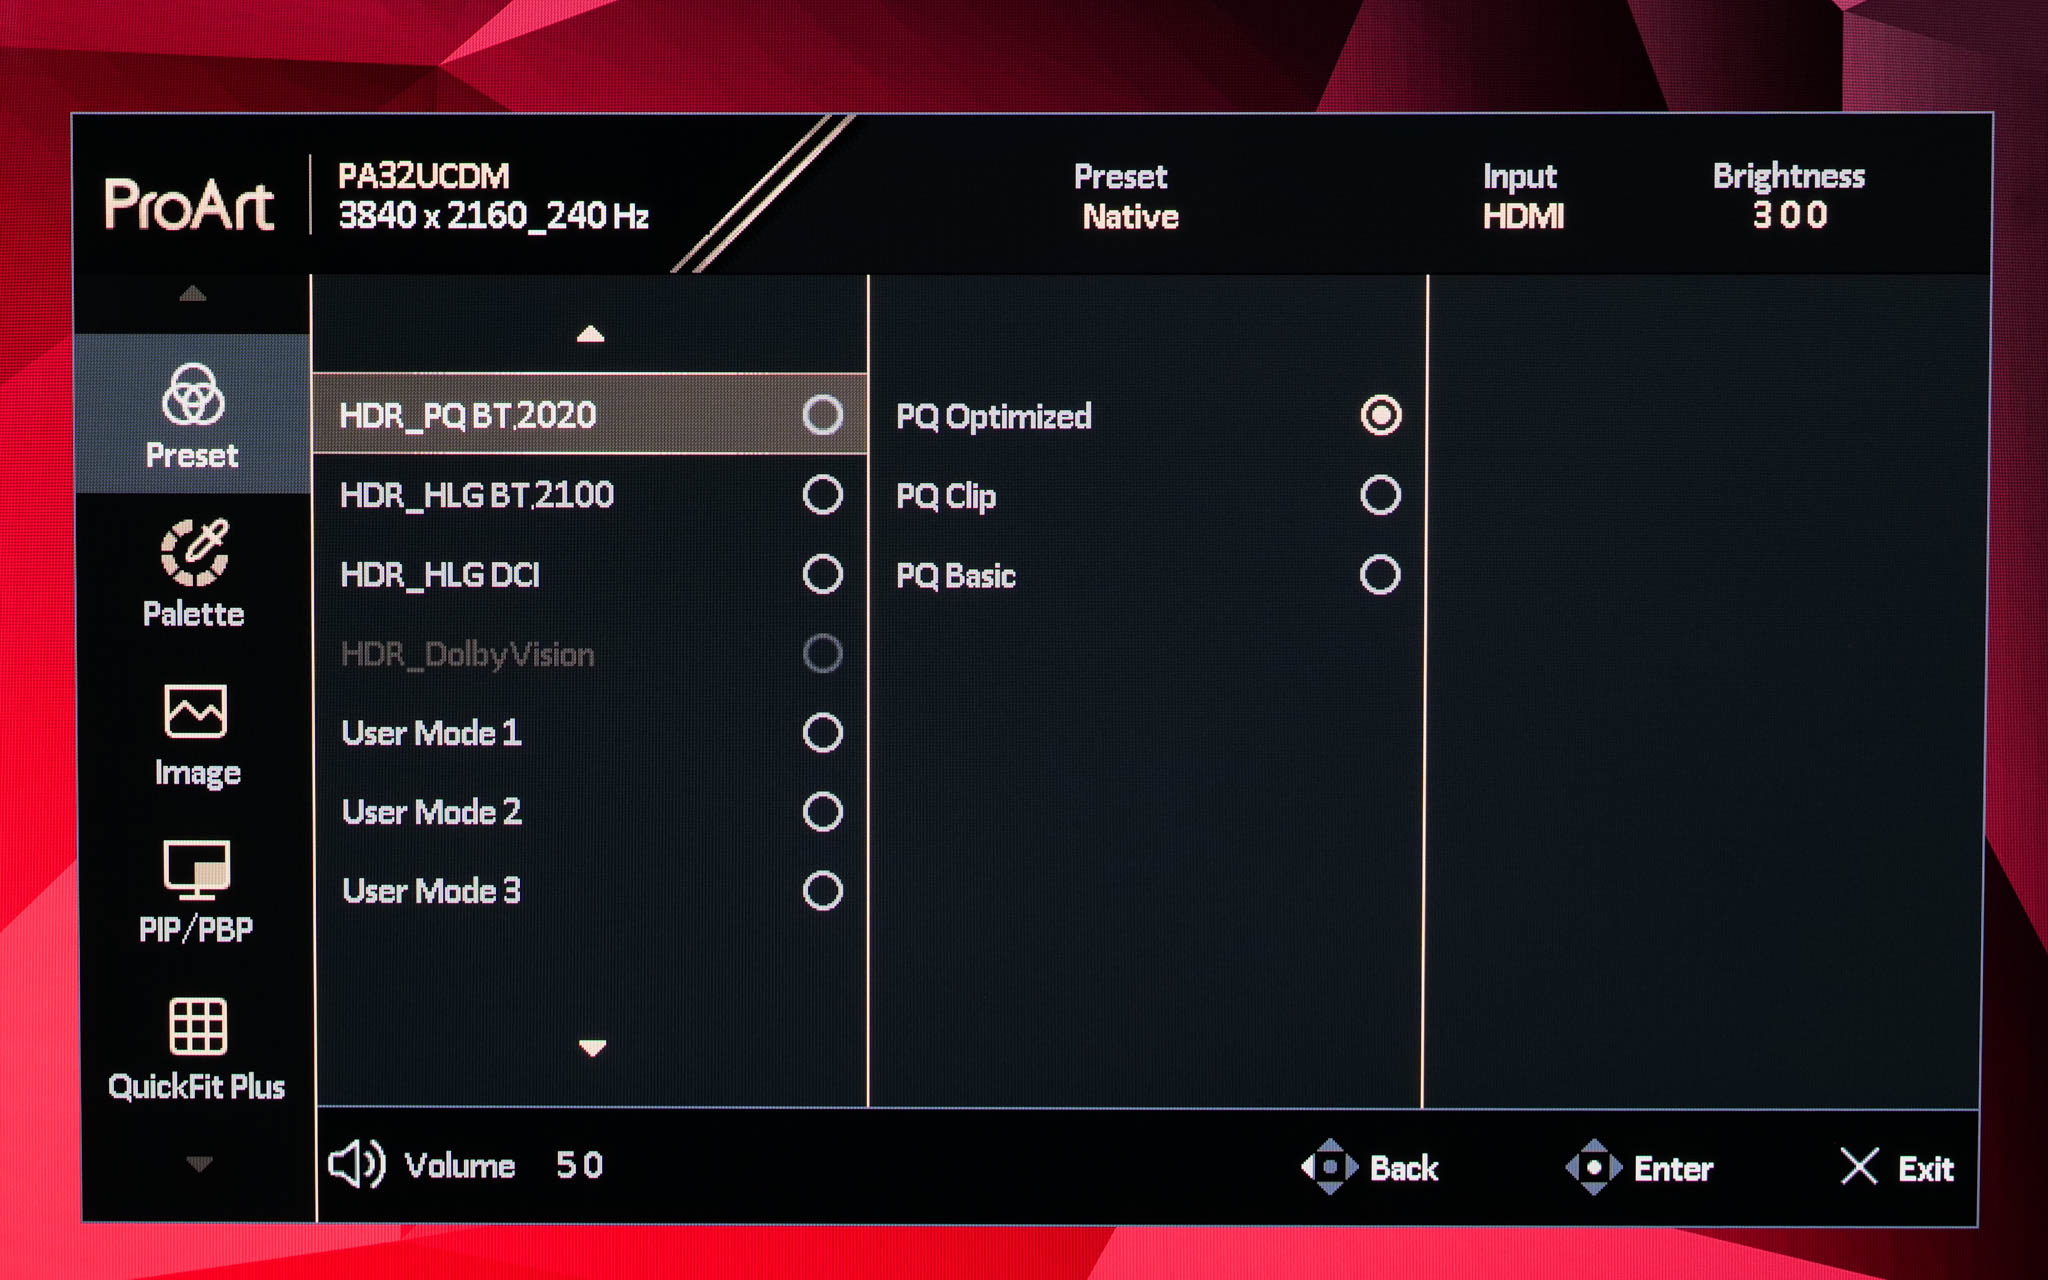
Clicking in the joystick brings up the main menu, with the first tab being the Preset settings, where you can choose between various colour space modes. Unlike the PA27JCV, there isn't a shortcut menu – you just go straight into the main menu.
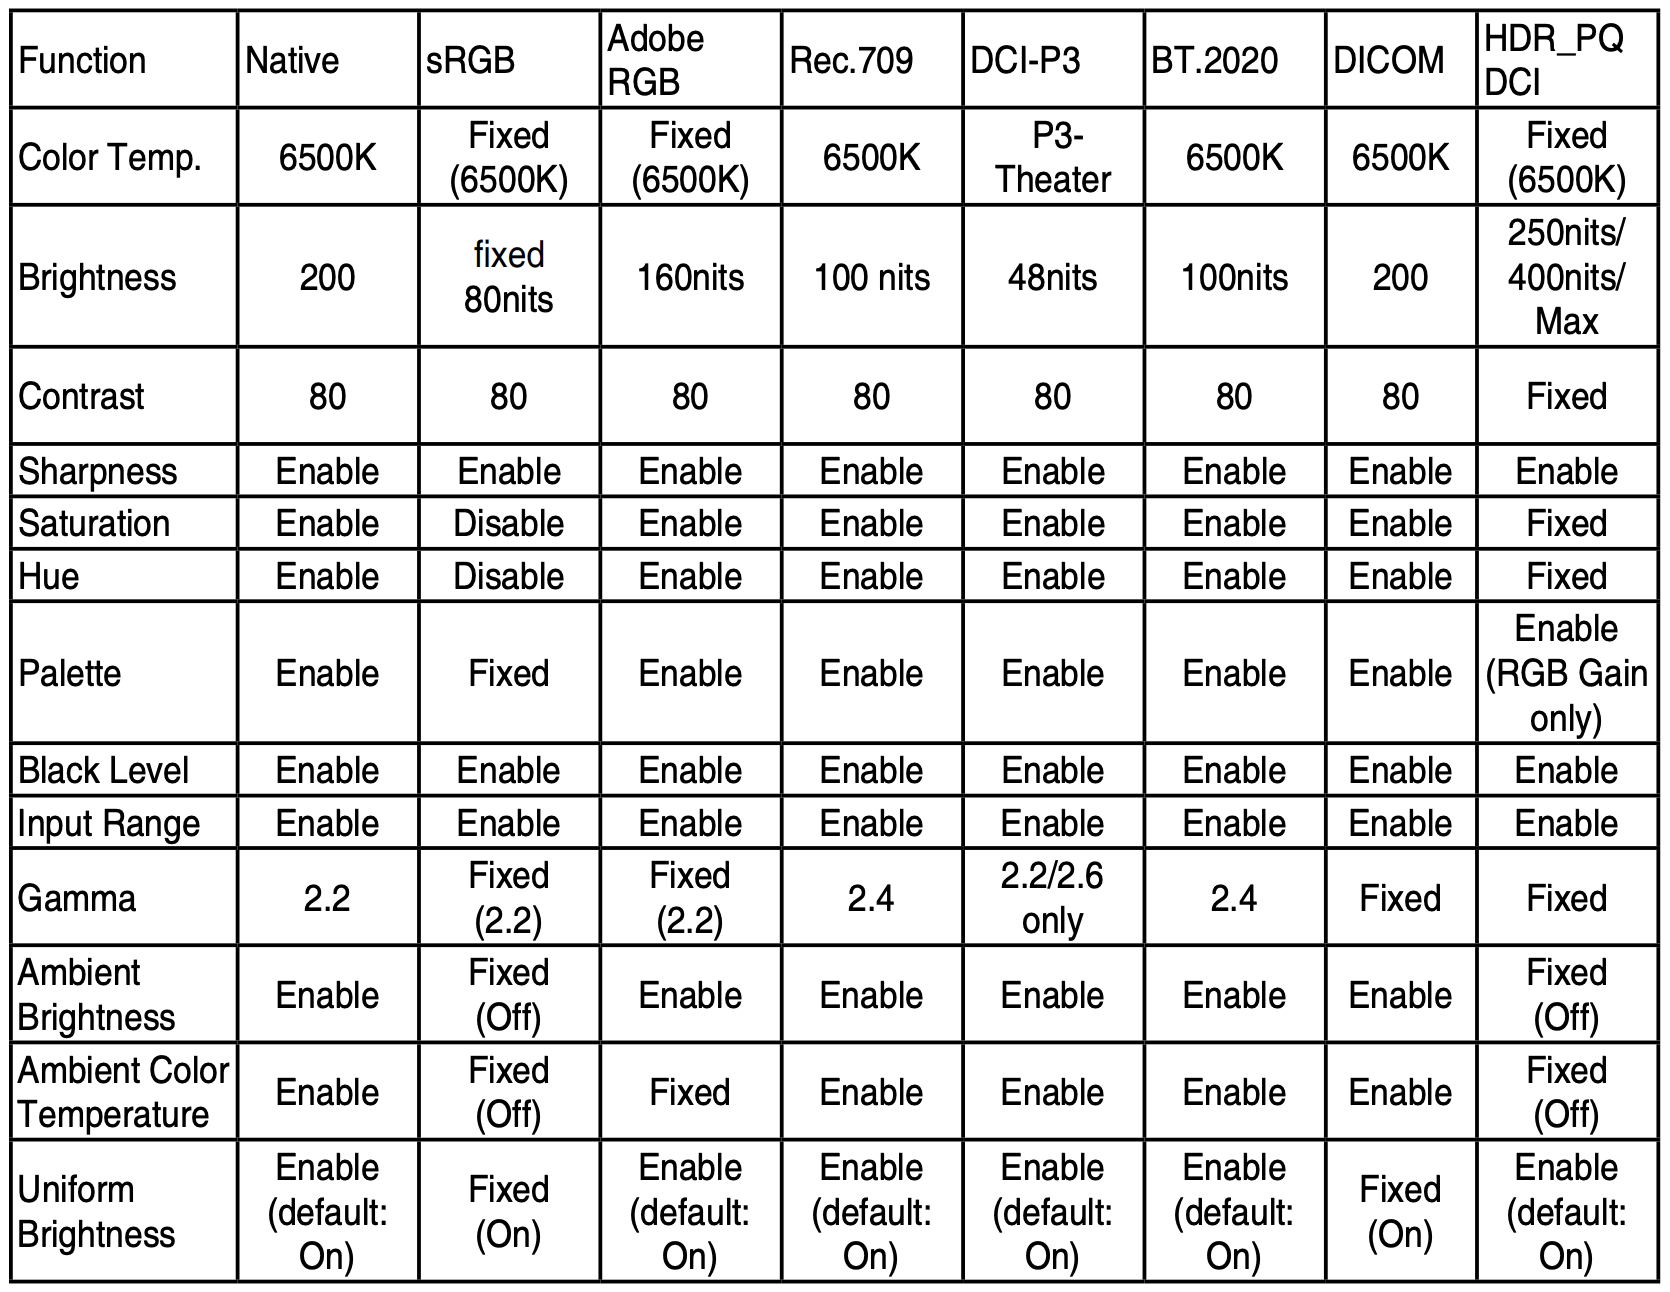
Above is a screenshot from the PA32UCDM manual which outlines the exact settings used for each of the colour space modes.
Palette
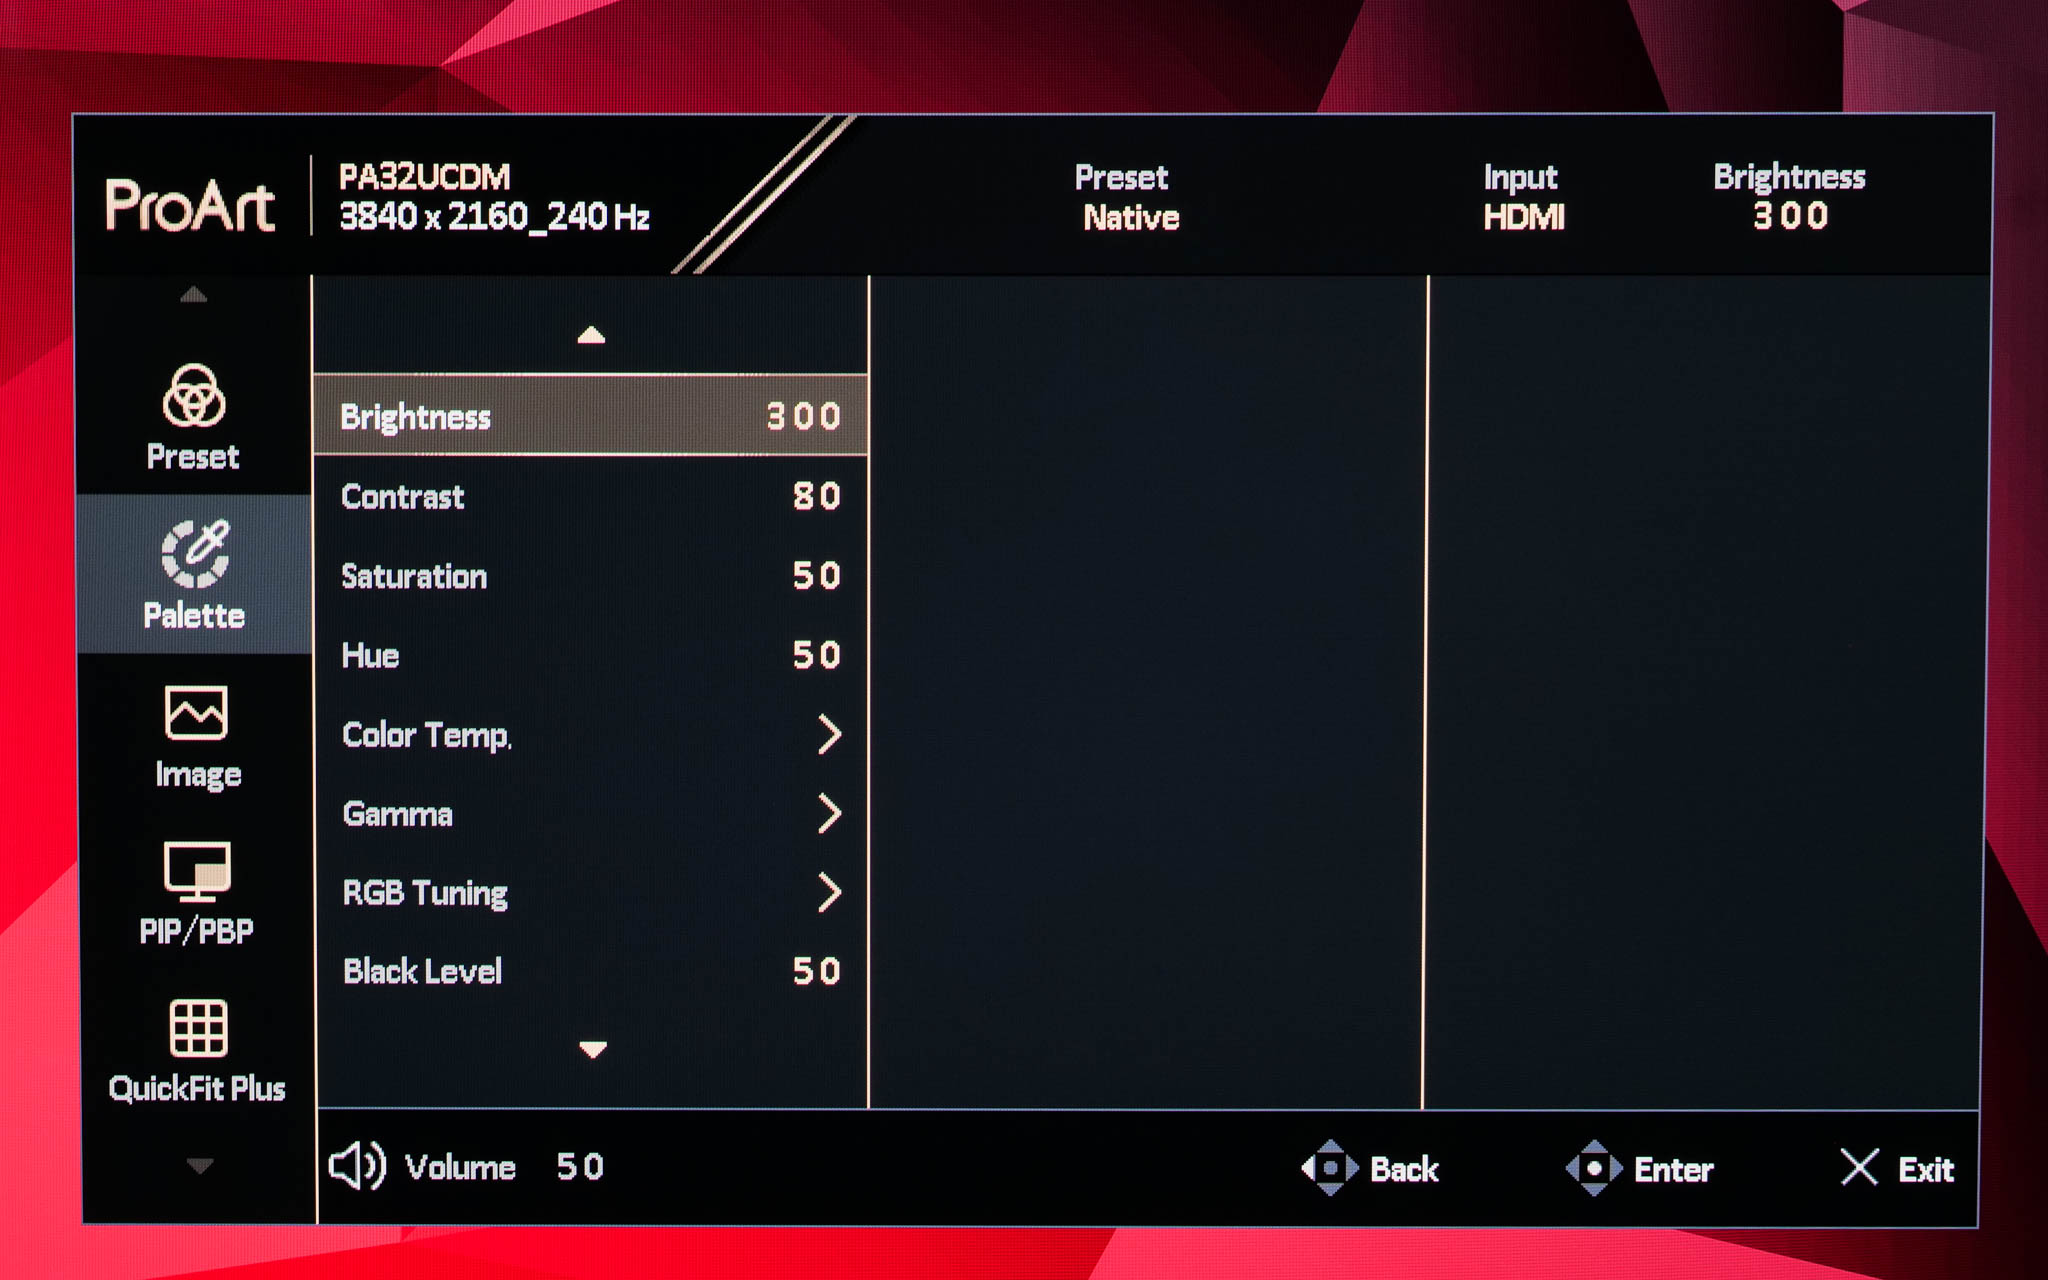
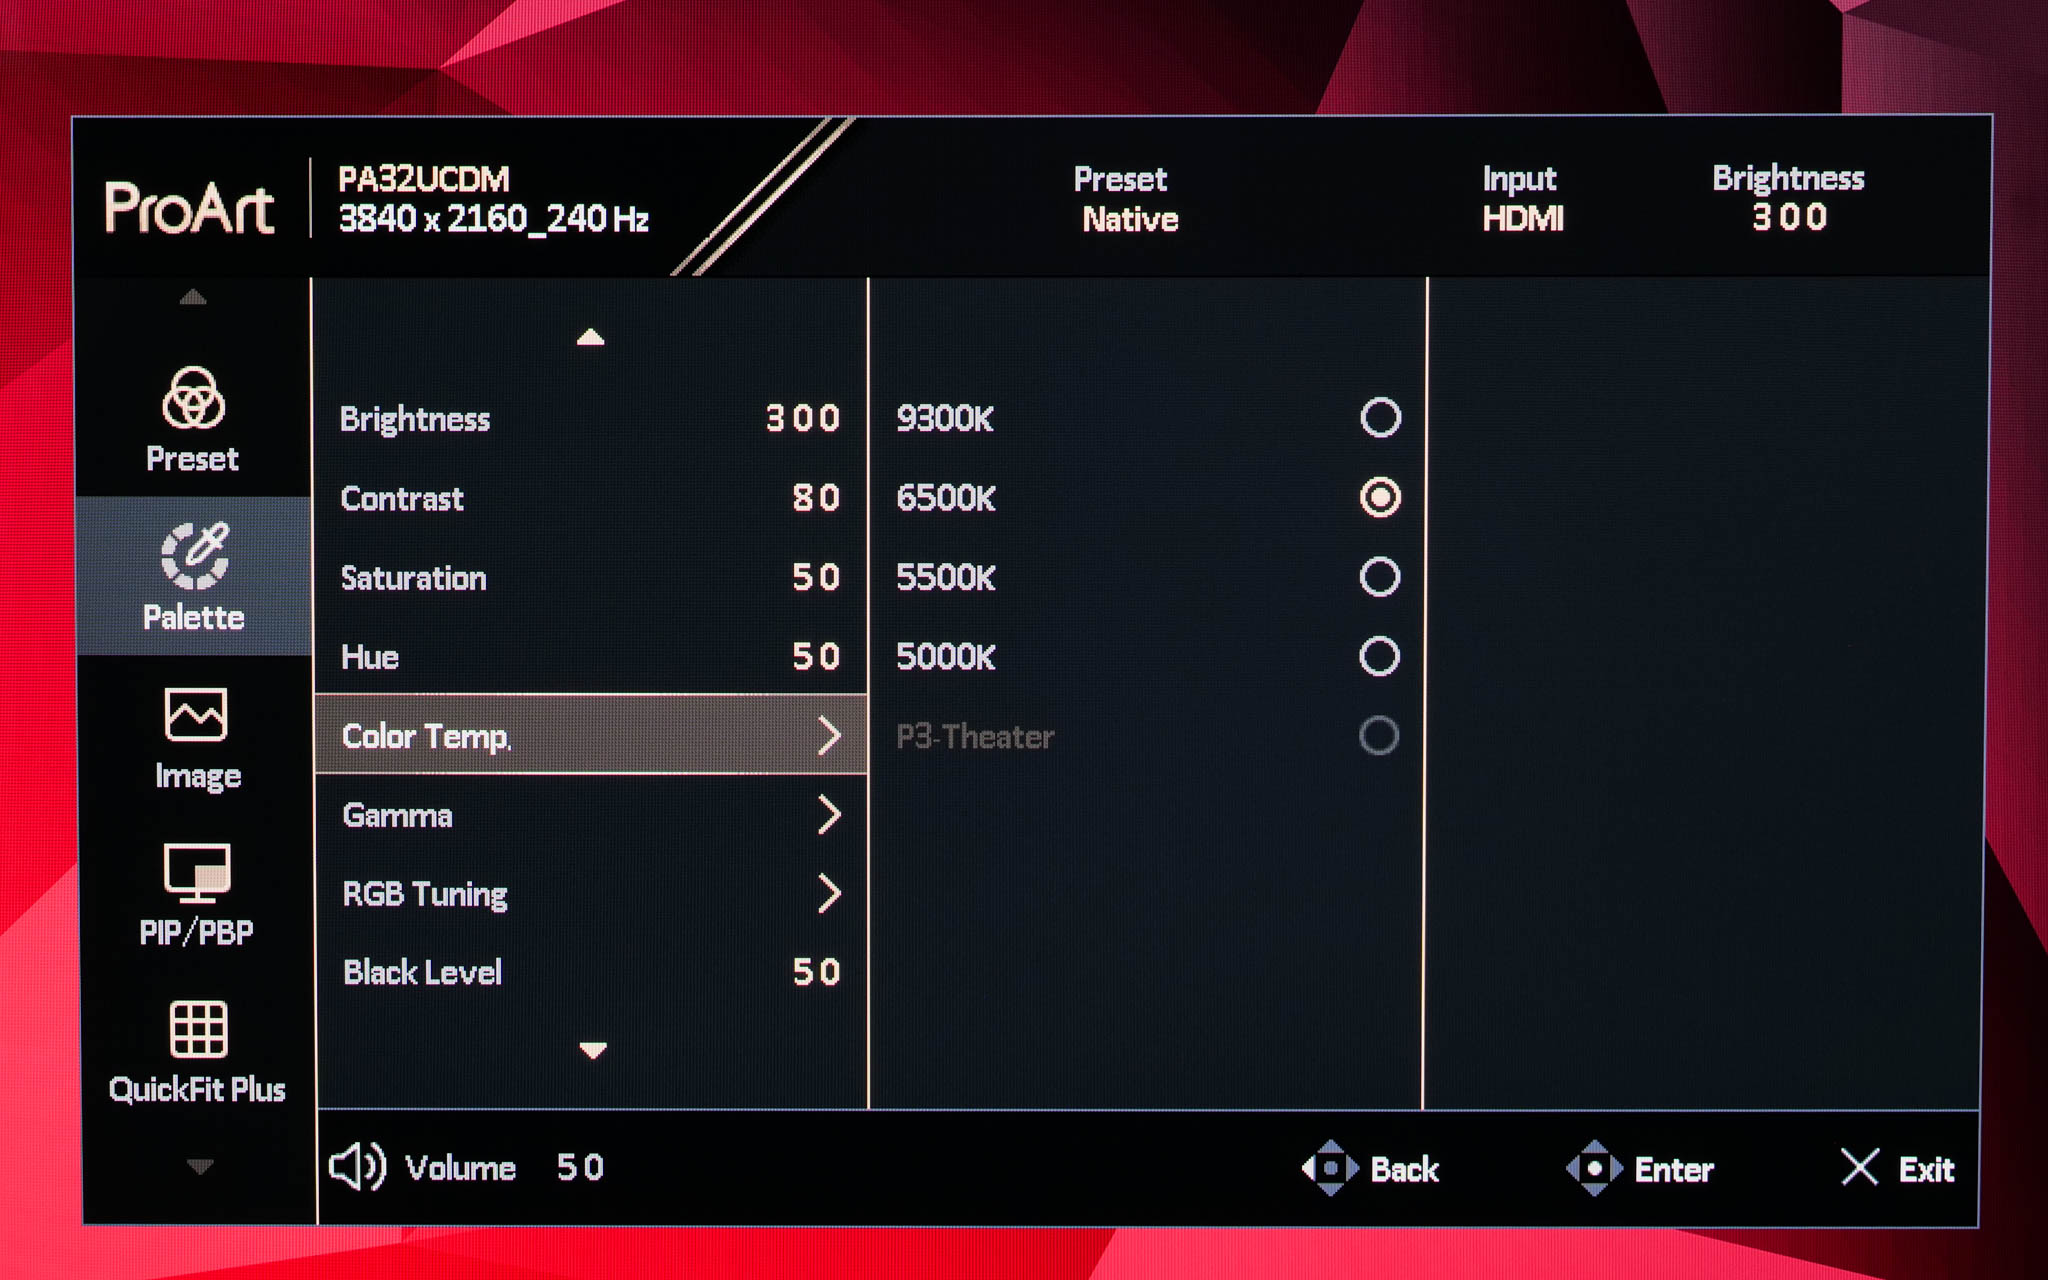
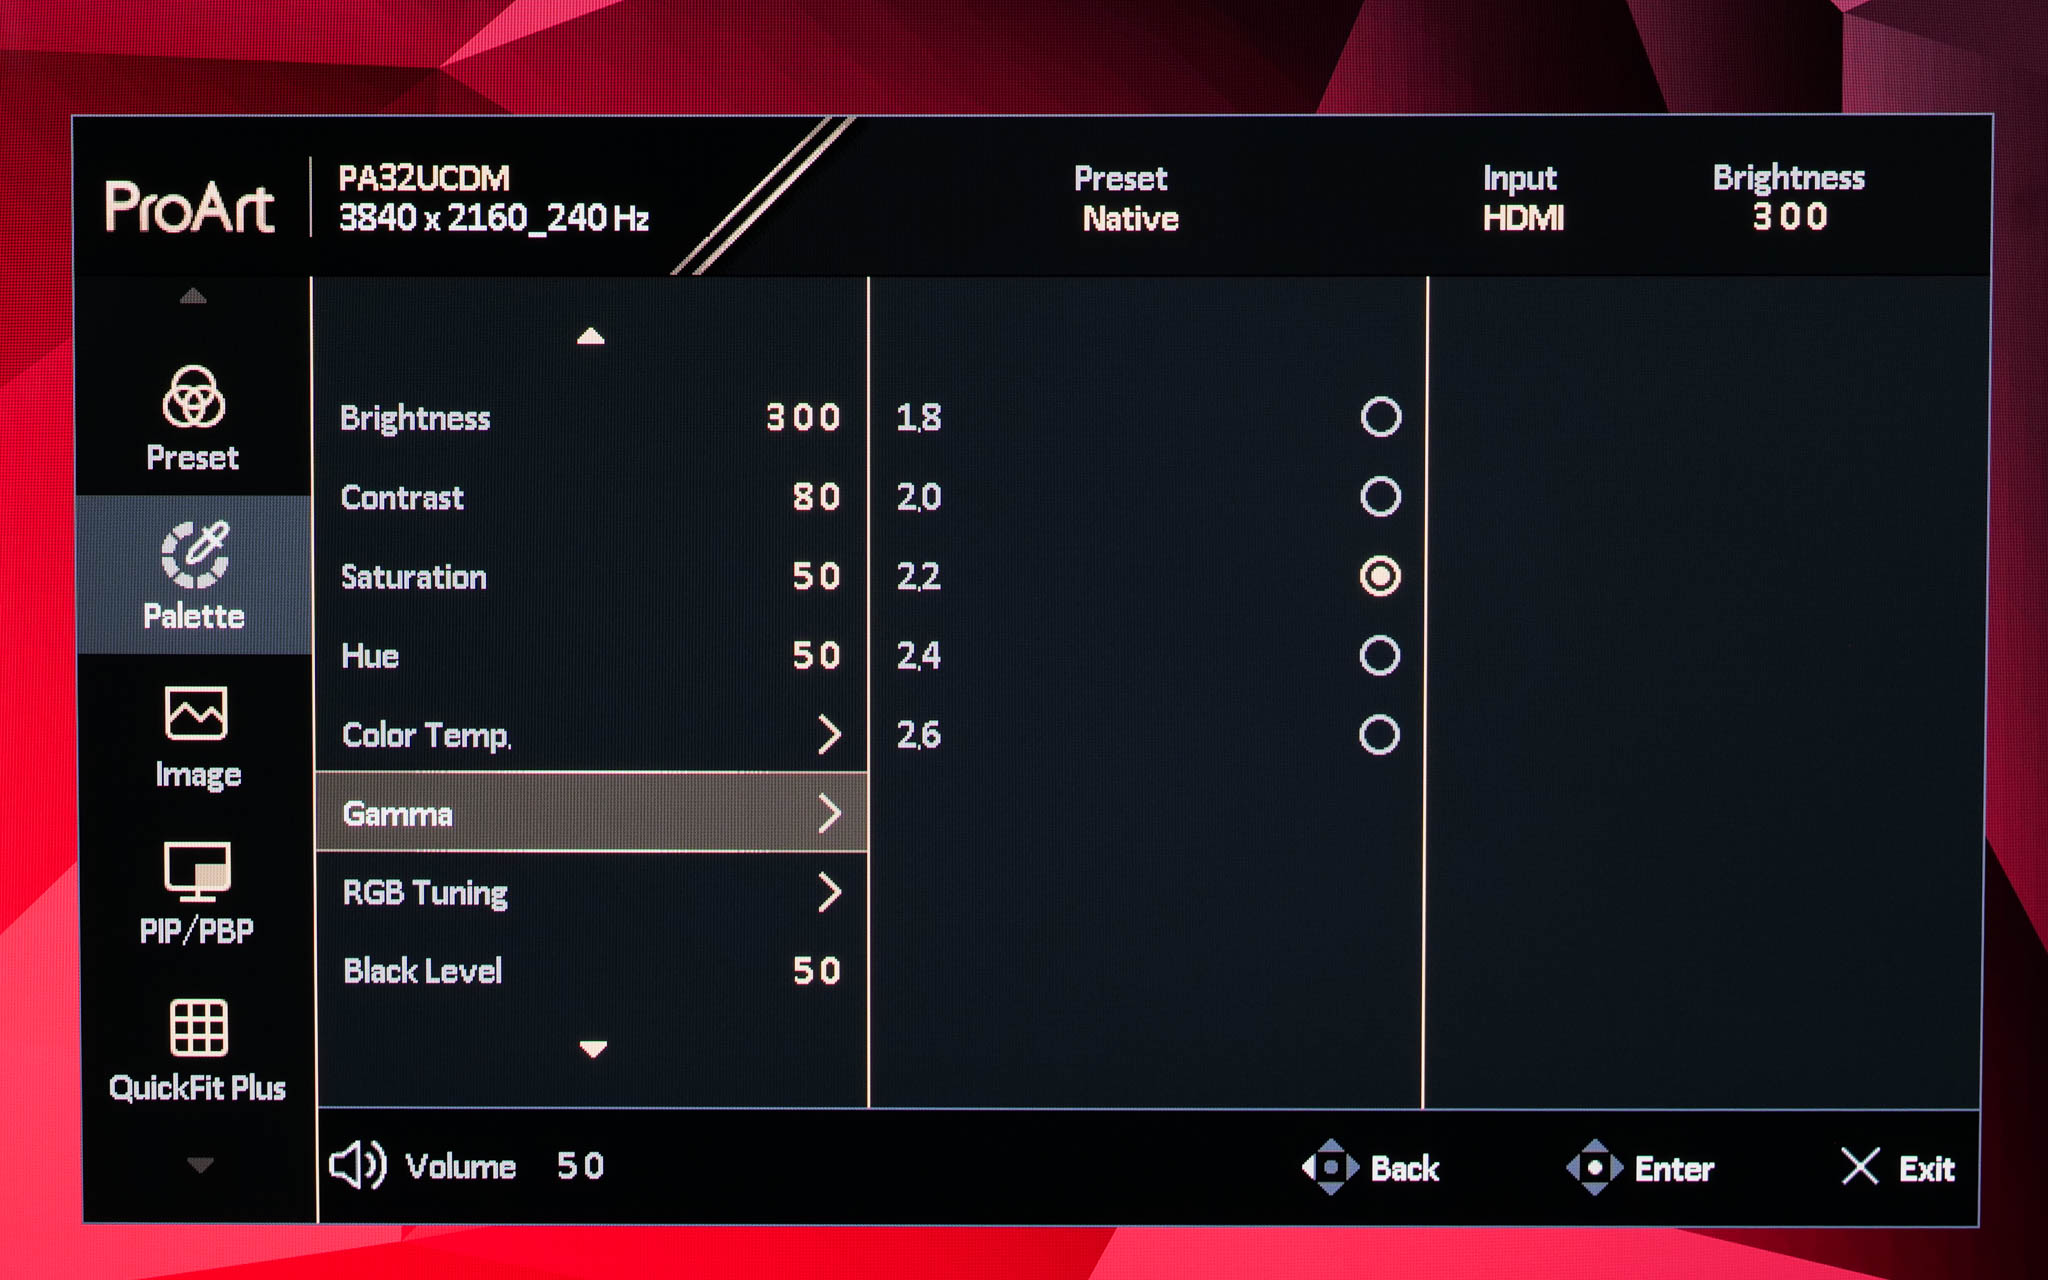
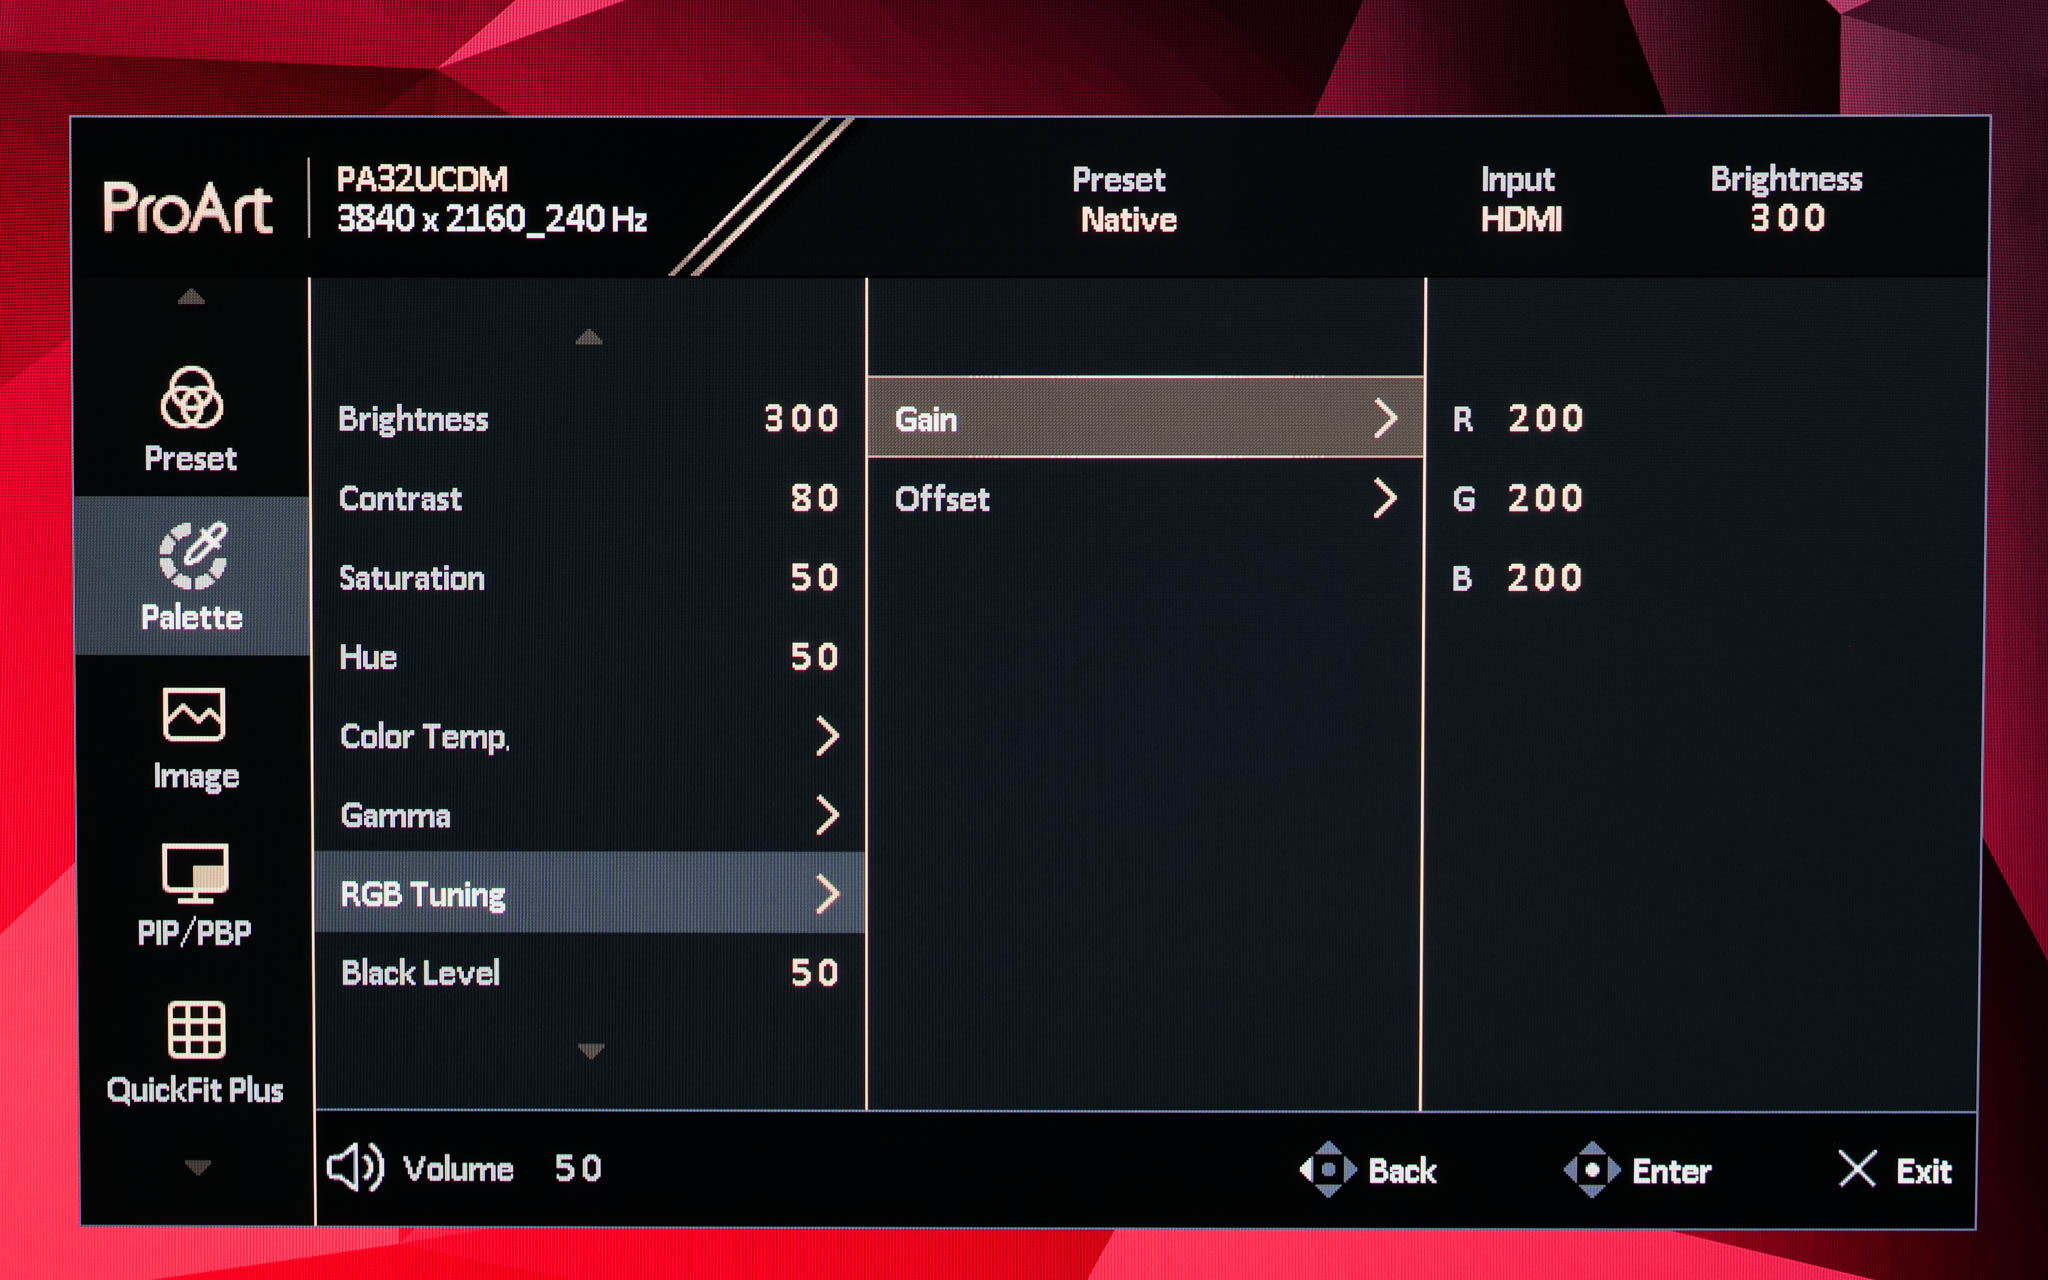

The next tab is called Palette, offering control over brightness and contrast, alongside gamma and RGB controls to manually adjust the colour balance.
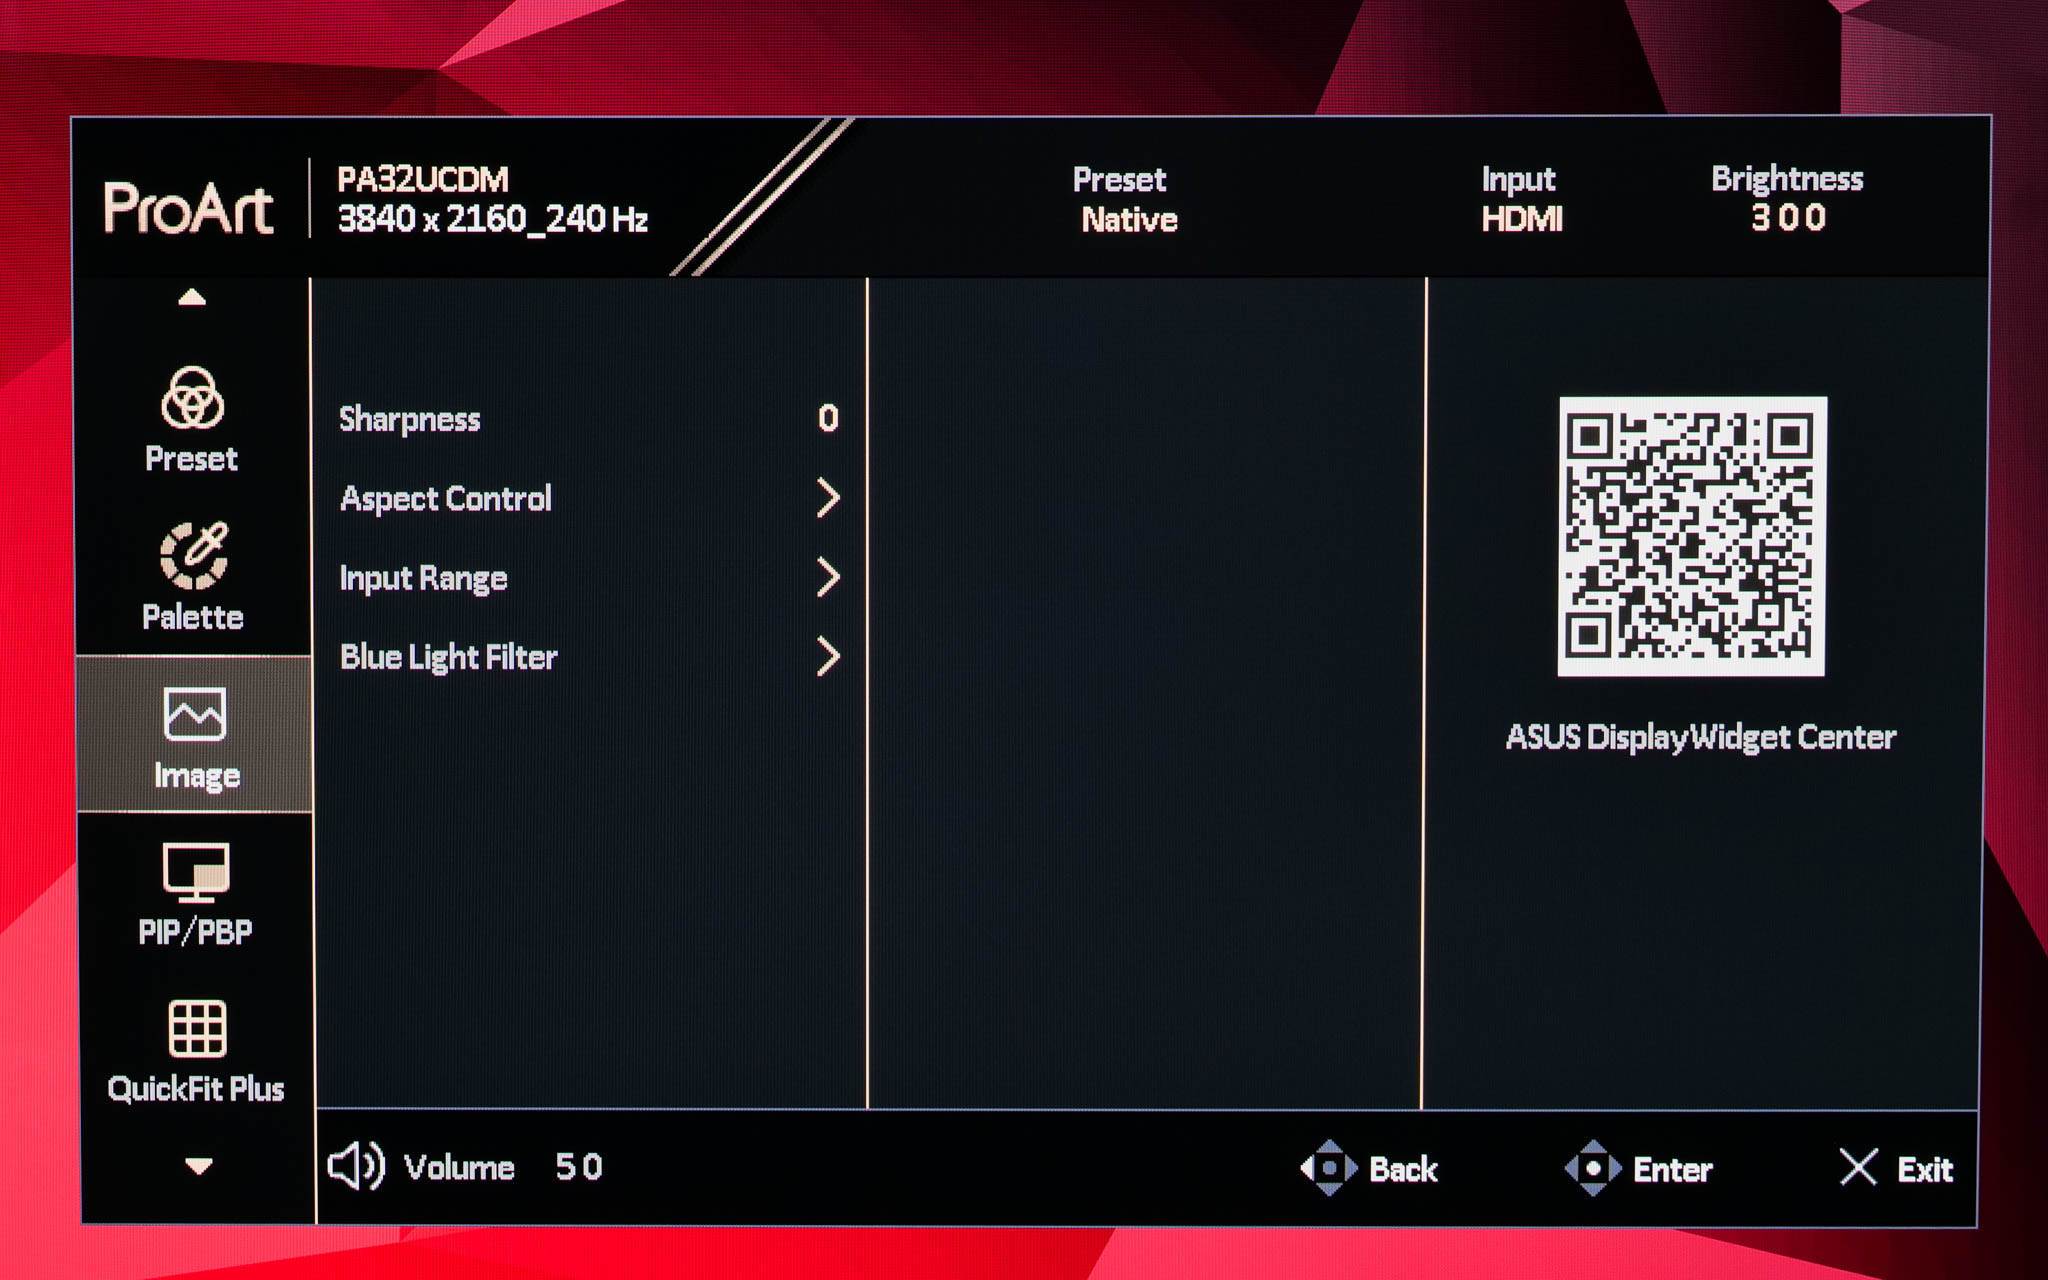
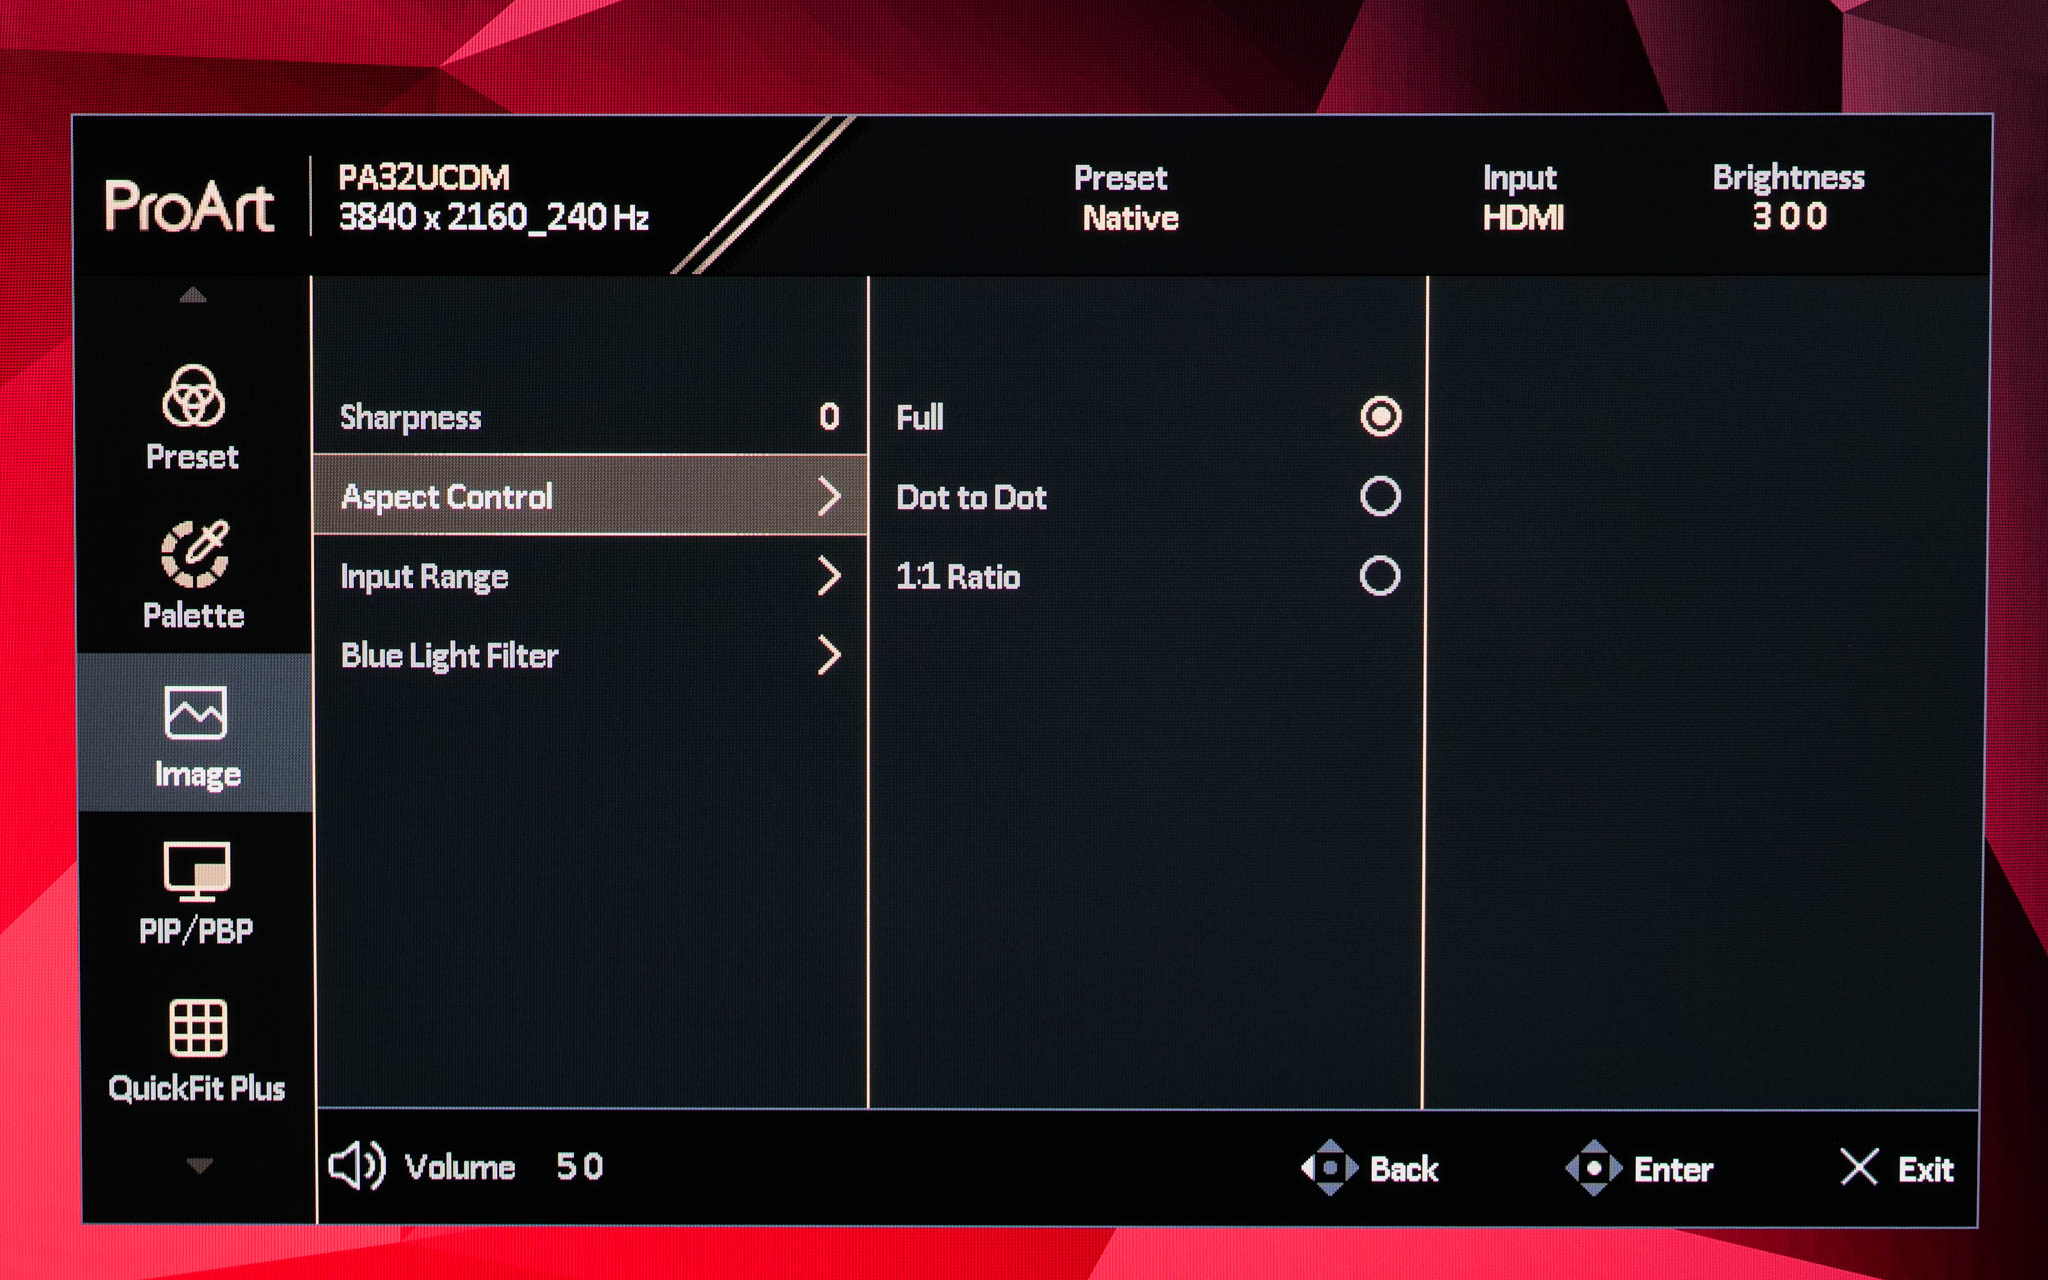
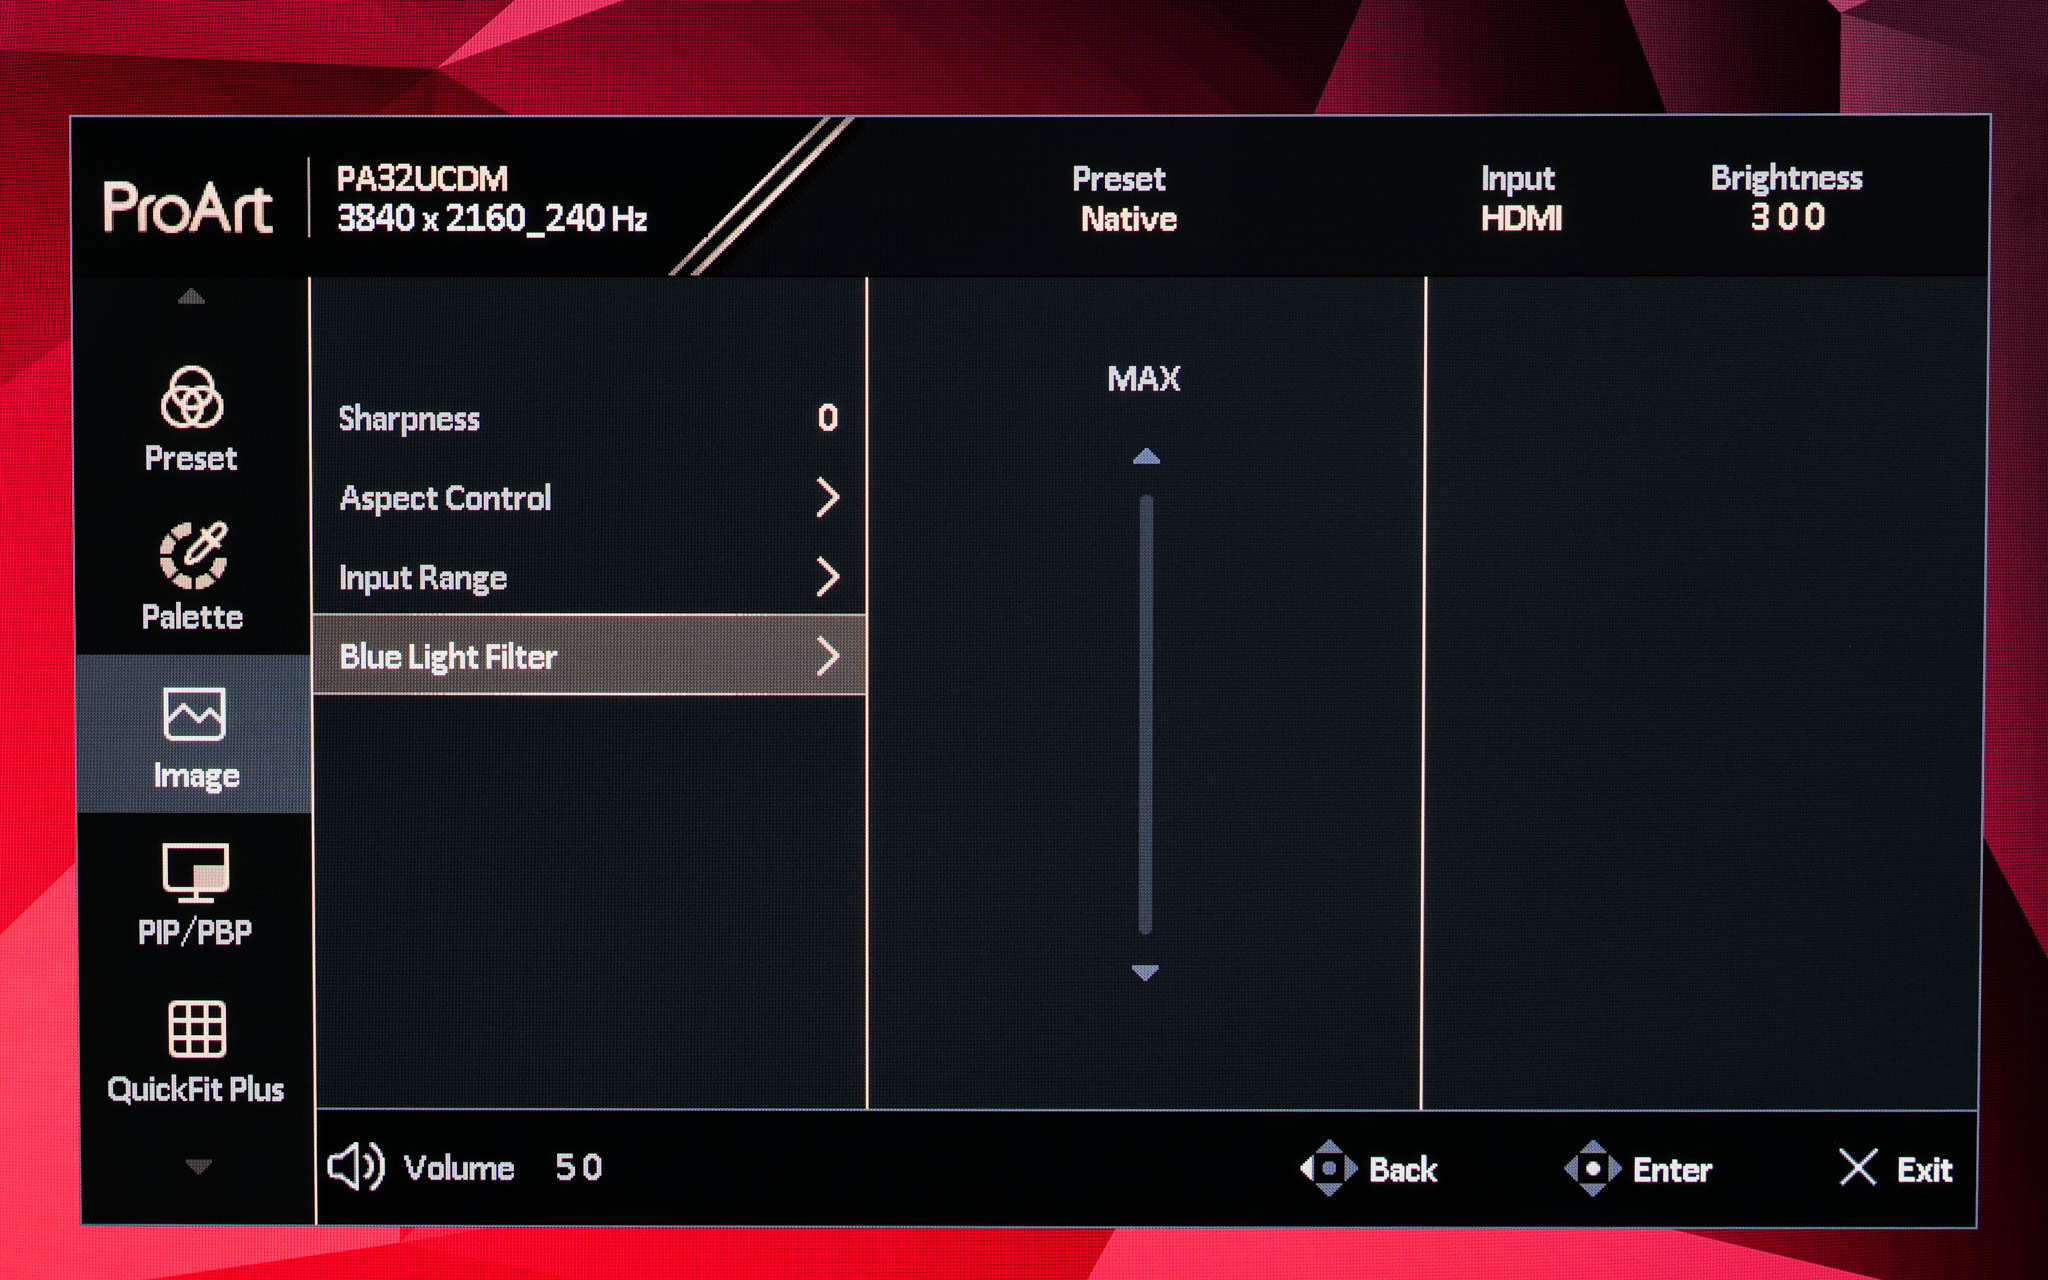
Image
Then there are the Image settings, which includes sharpness, aspect ratio adjustment, input range control, alongside a blue light filter.

PIP/PBP
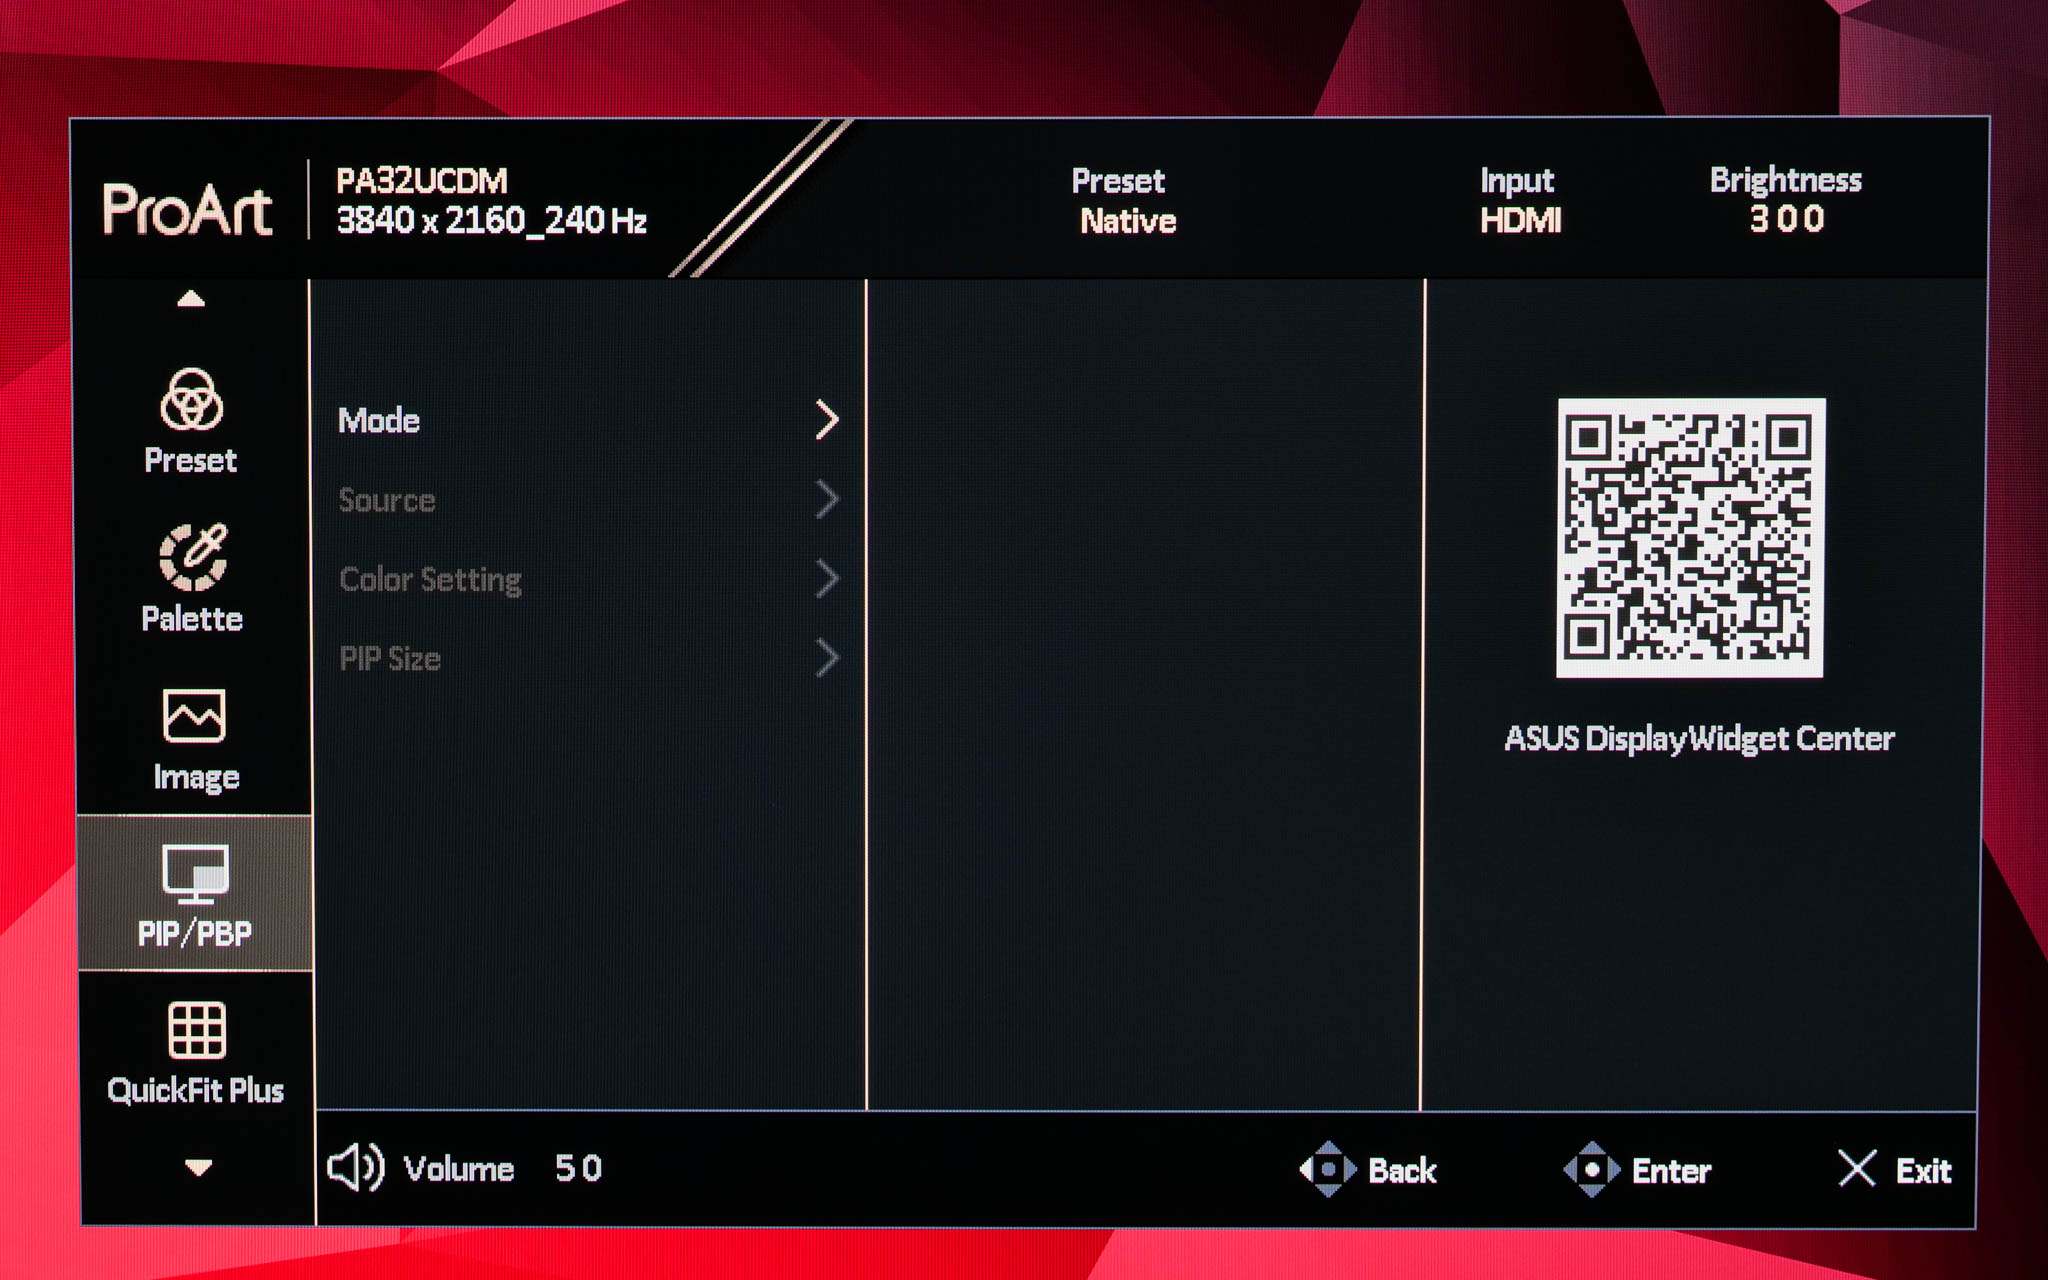
The next tab is quite self-explanatory, offering PIP/PBP settings if you have a second source connected to the monitor.
QuickFit Plus
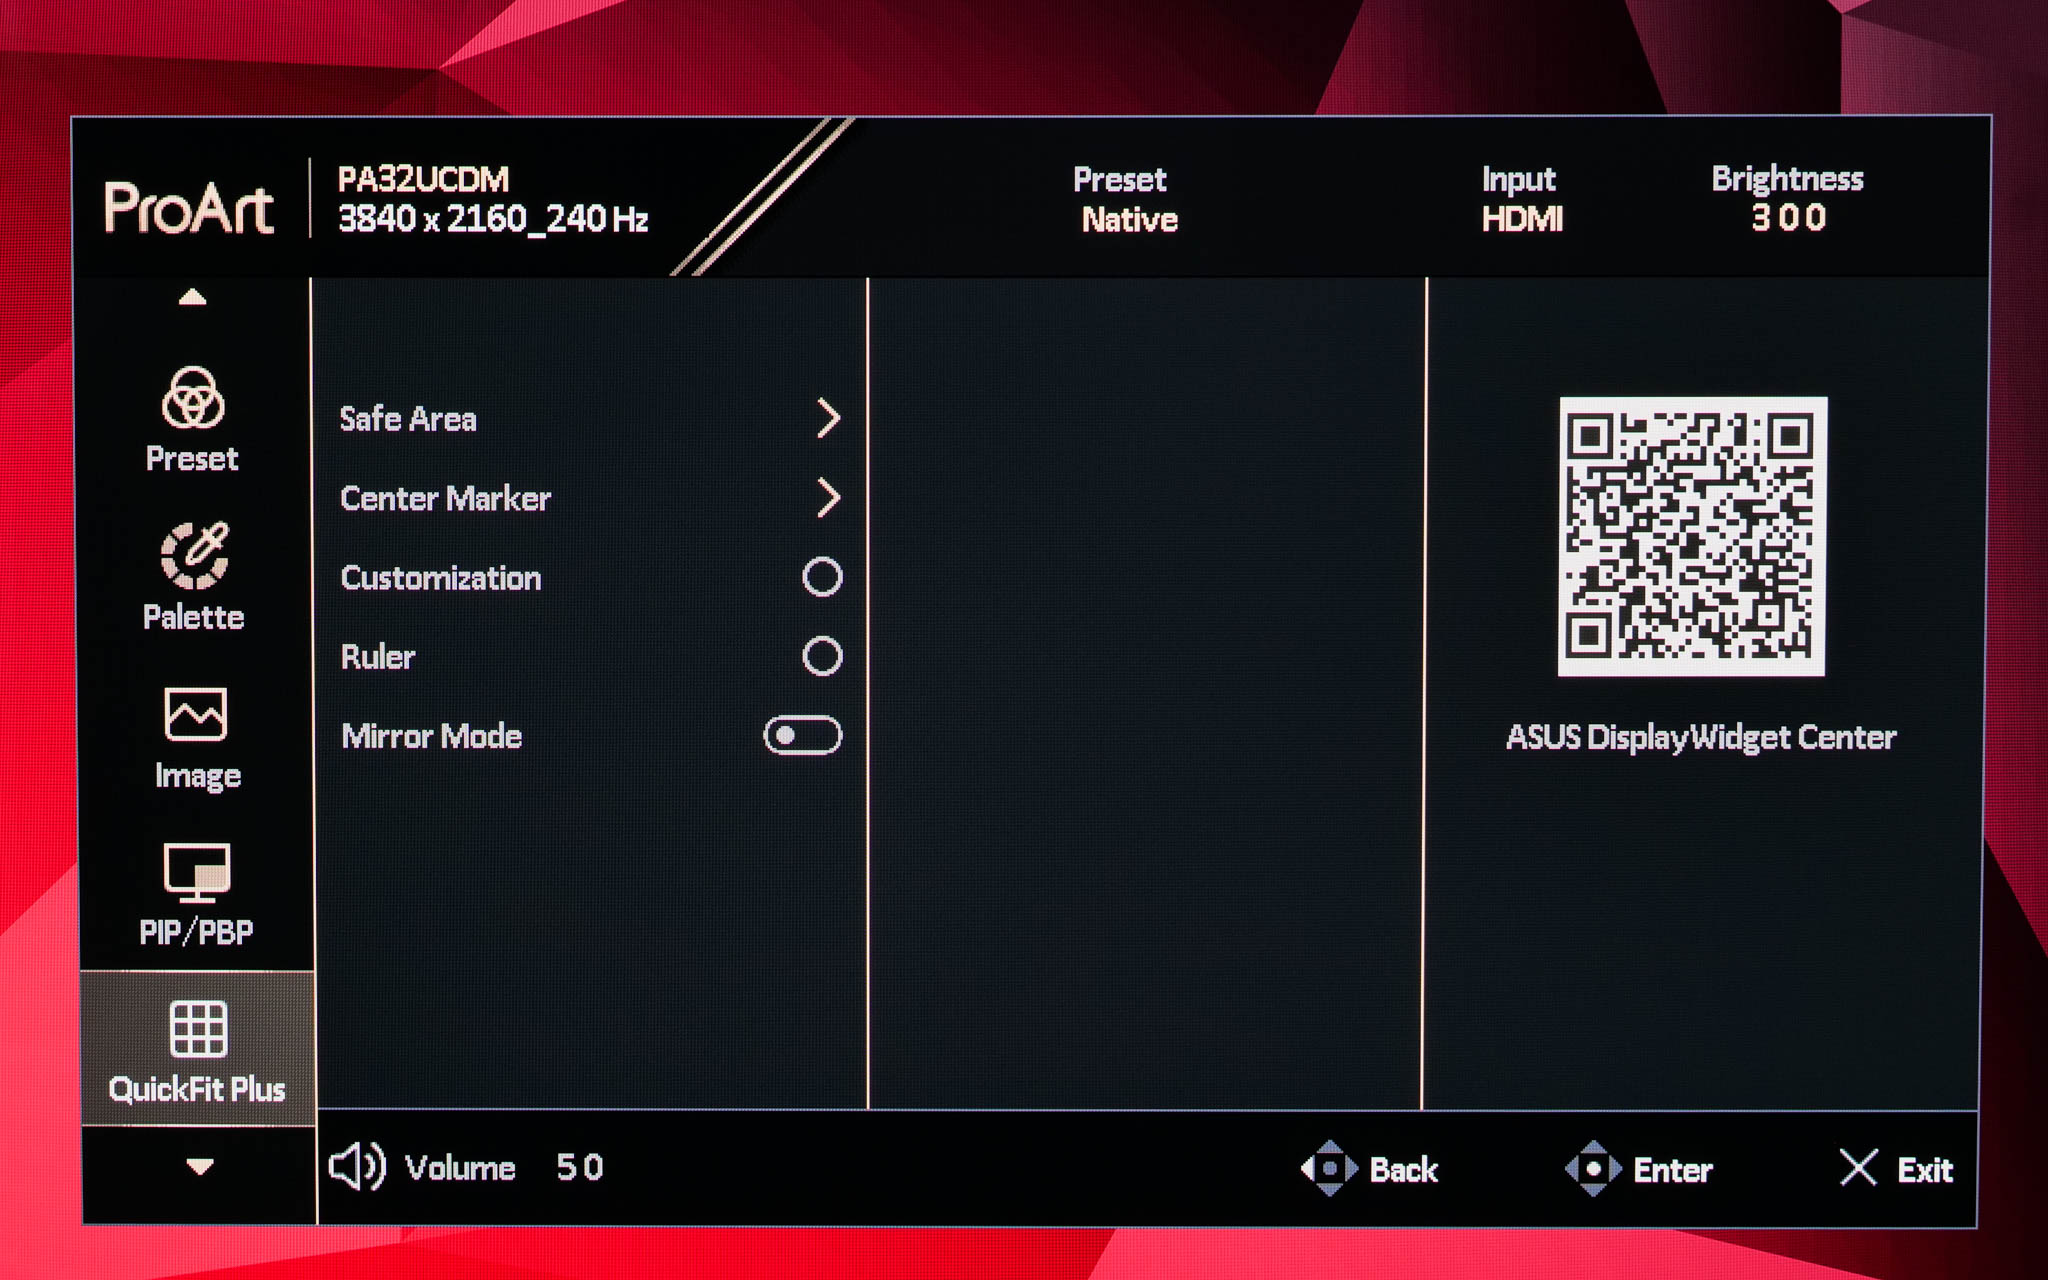
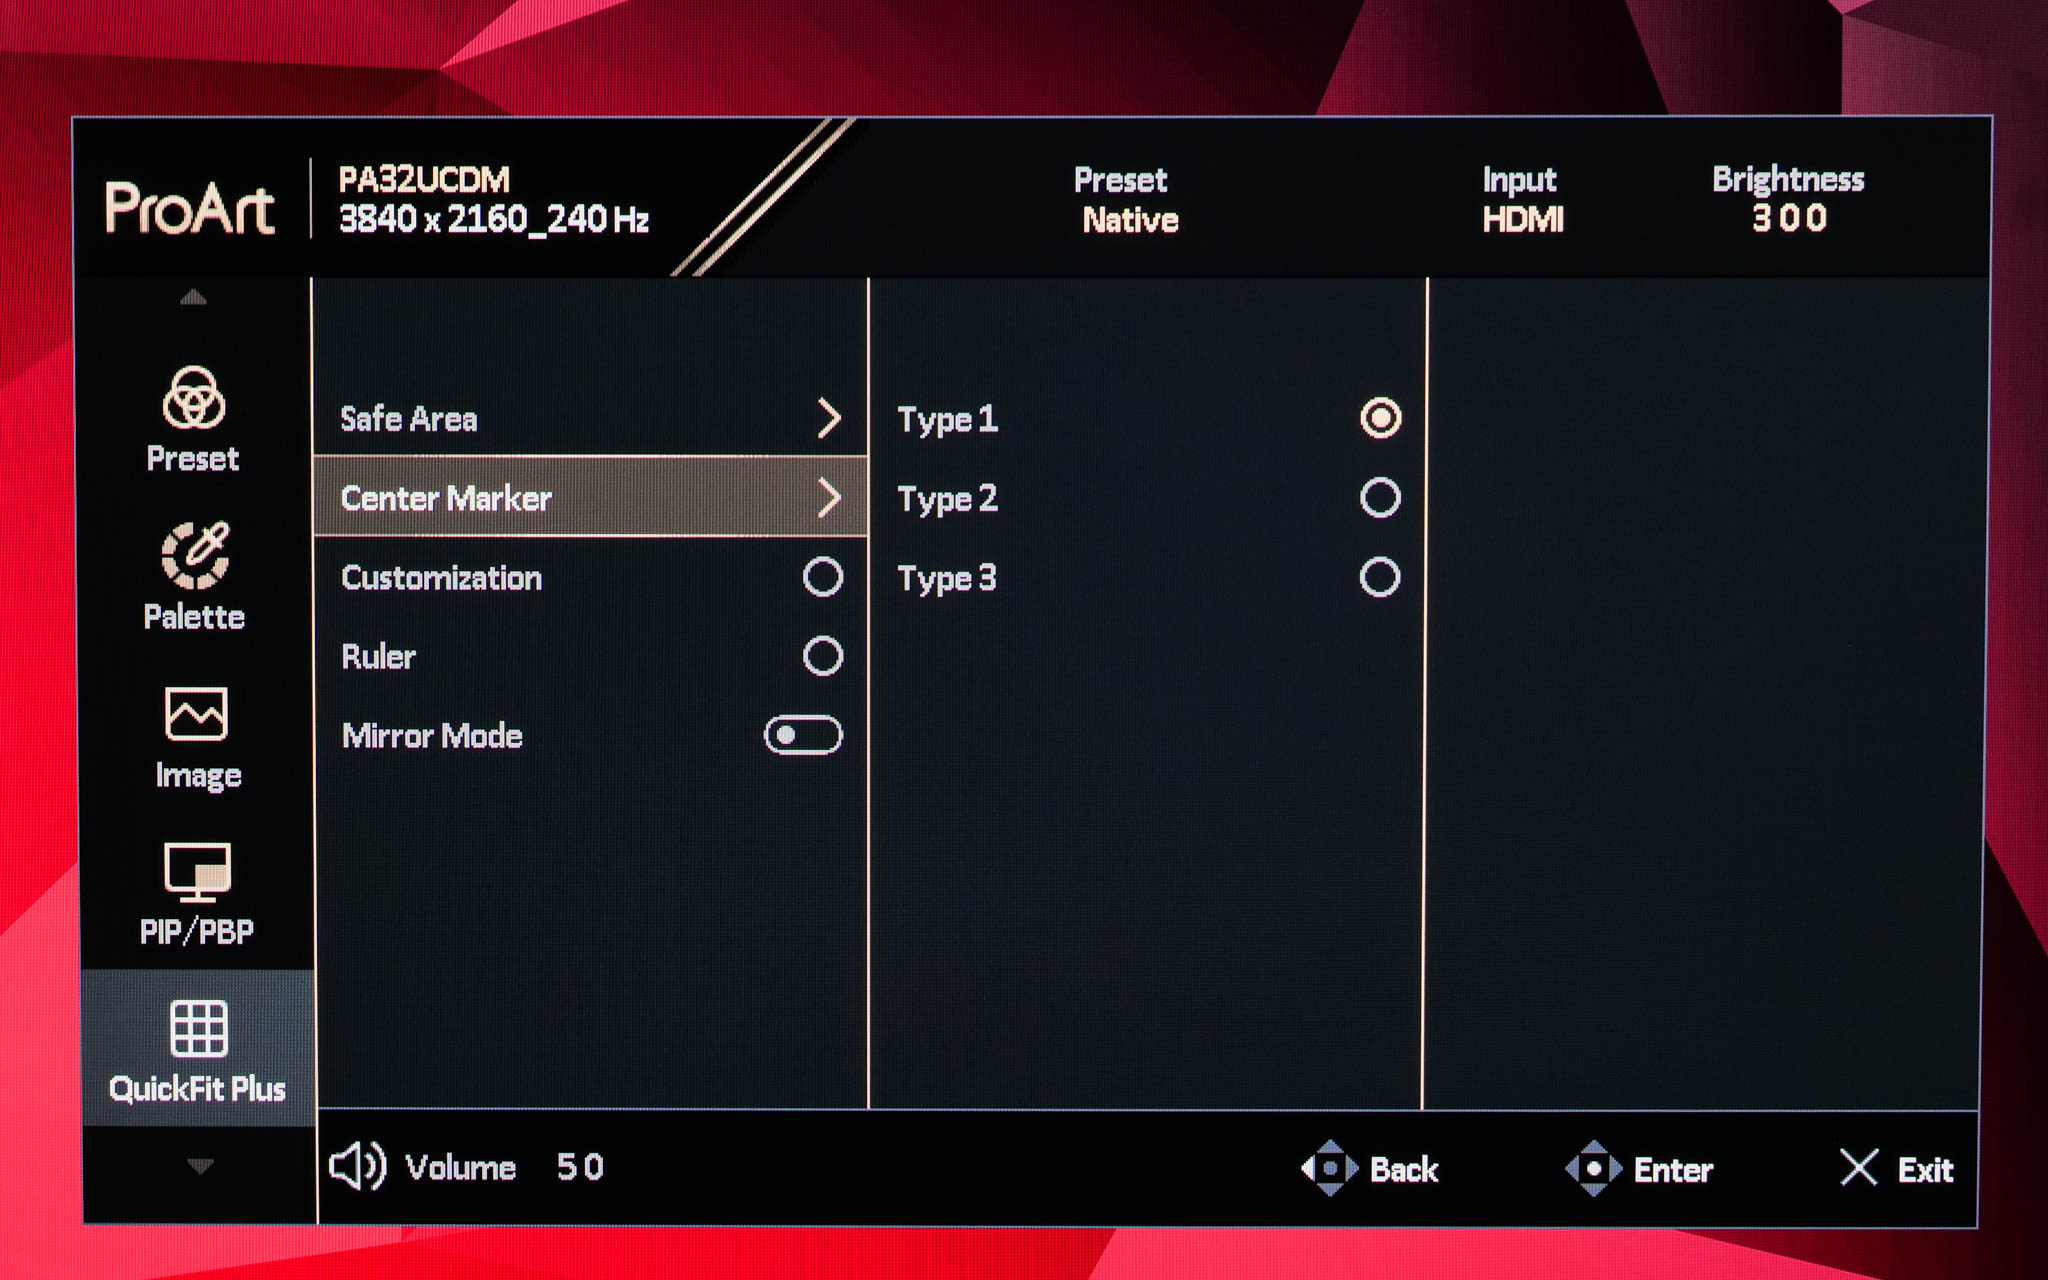
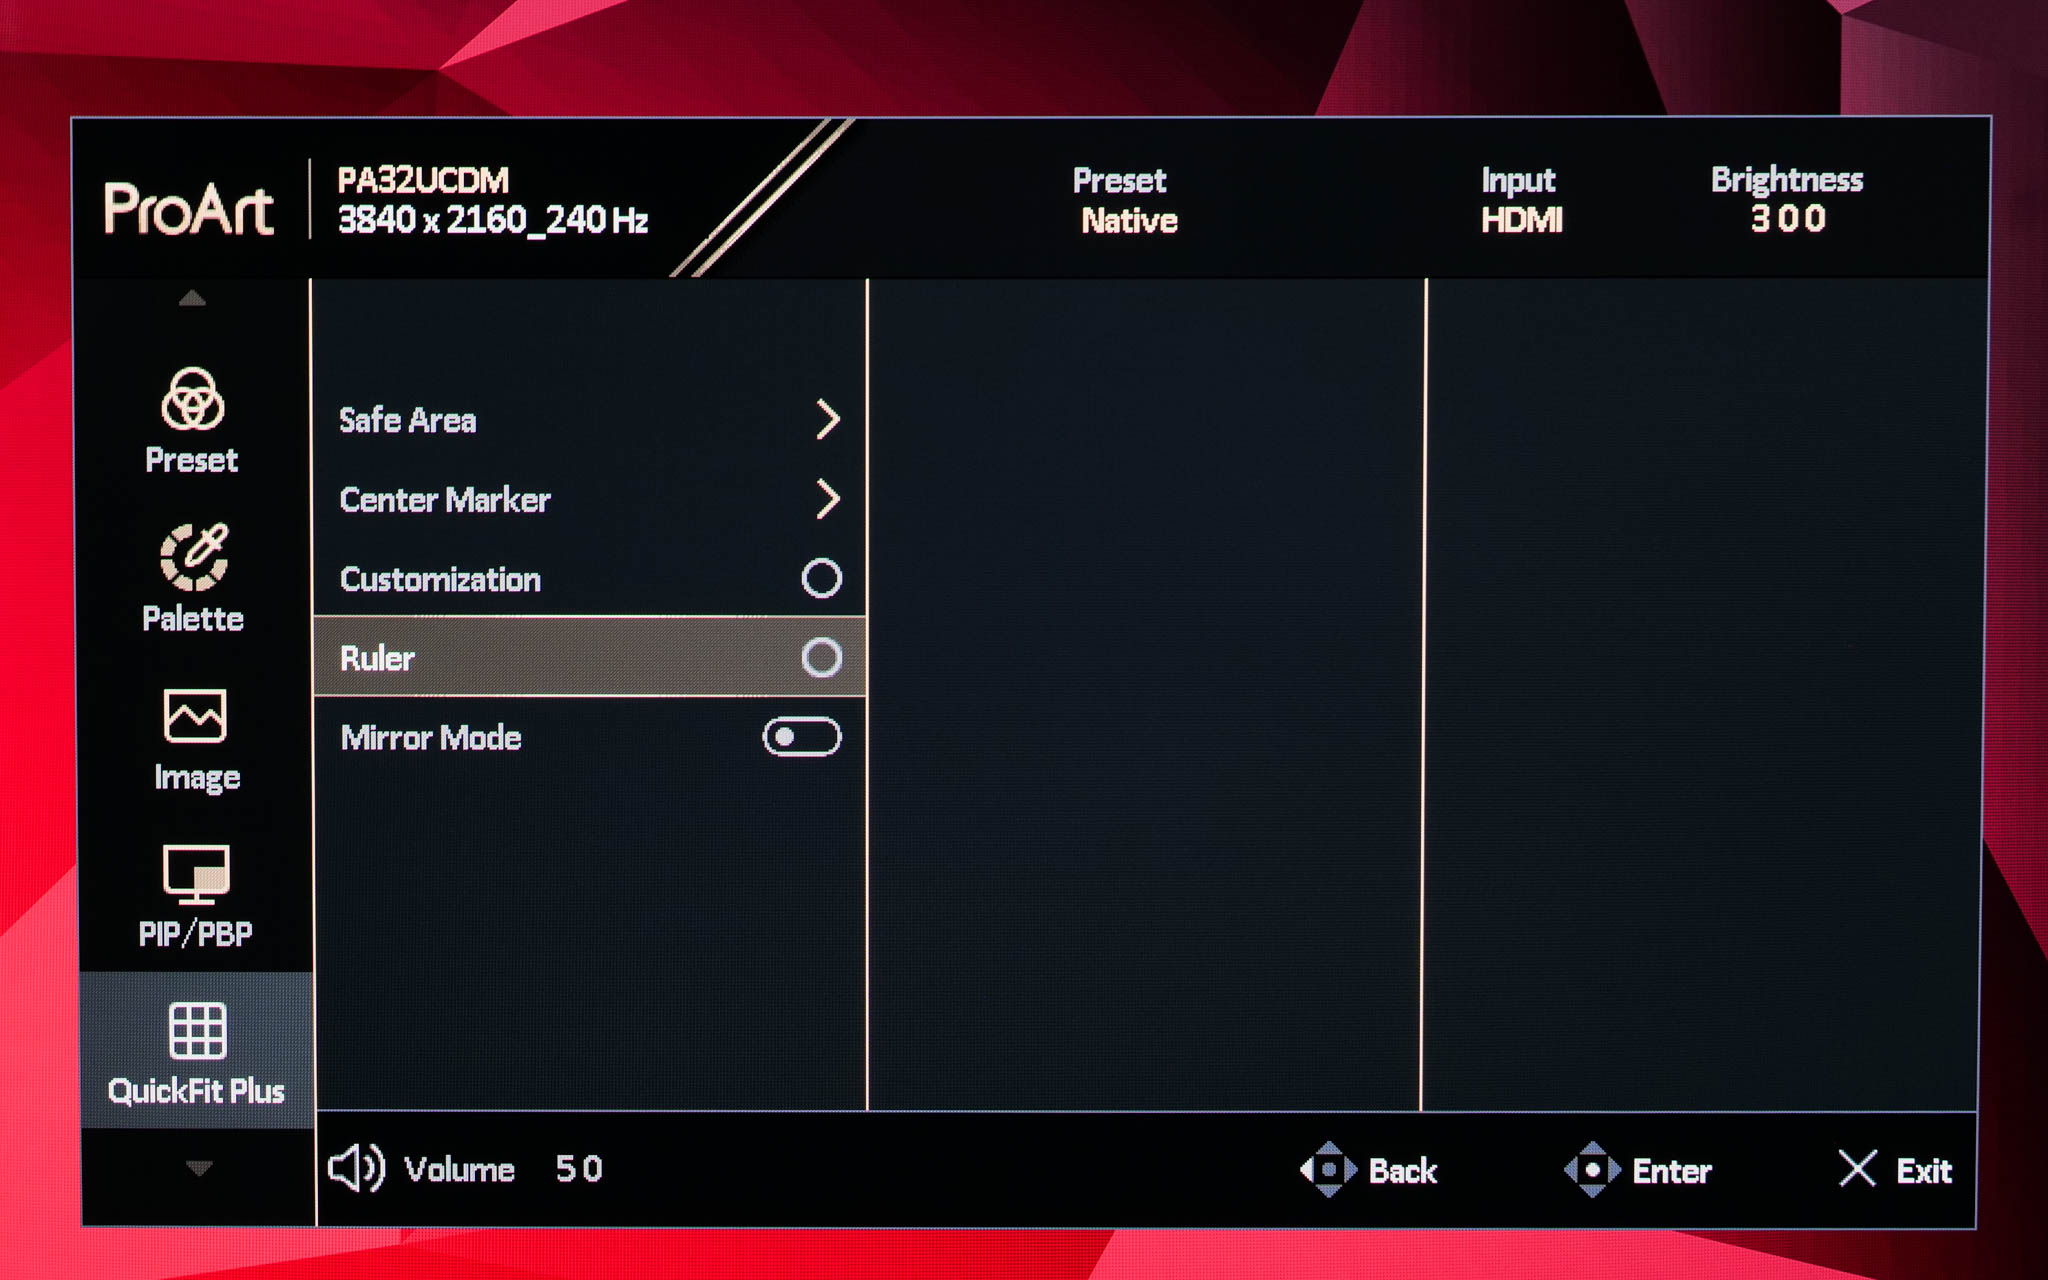
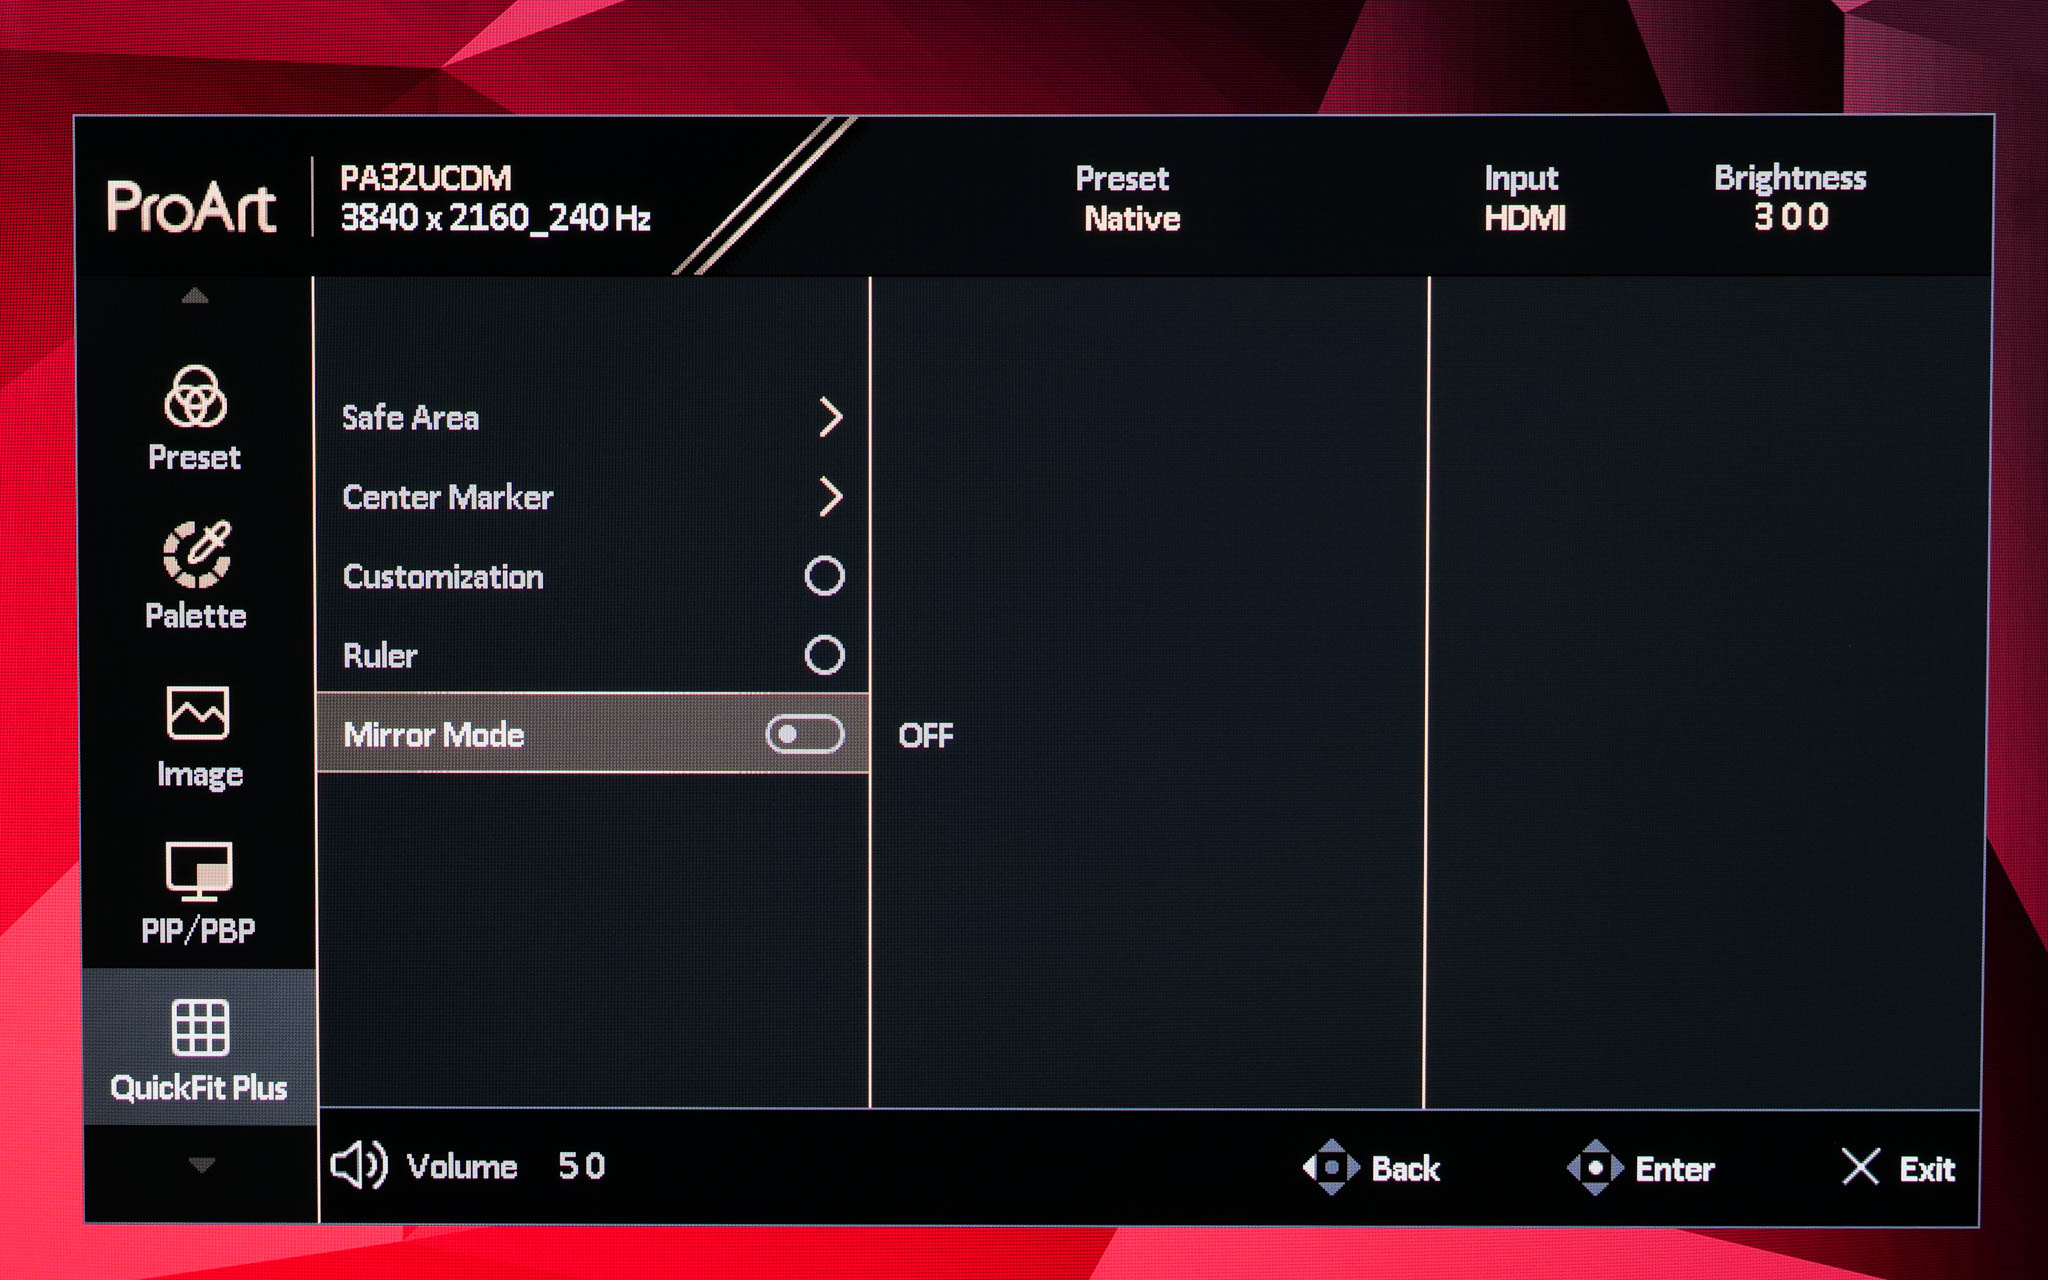
QuickFit Plus offers a range of settings that might help with certain design tasks. You can configure a centre marker to appear on screen, or have a ruler run alongside the edges of the monitor. It's even possible to mirror the entire contents of your screen if you wish.
Input
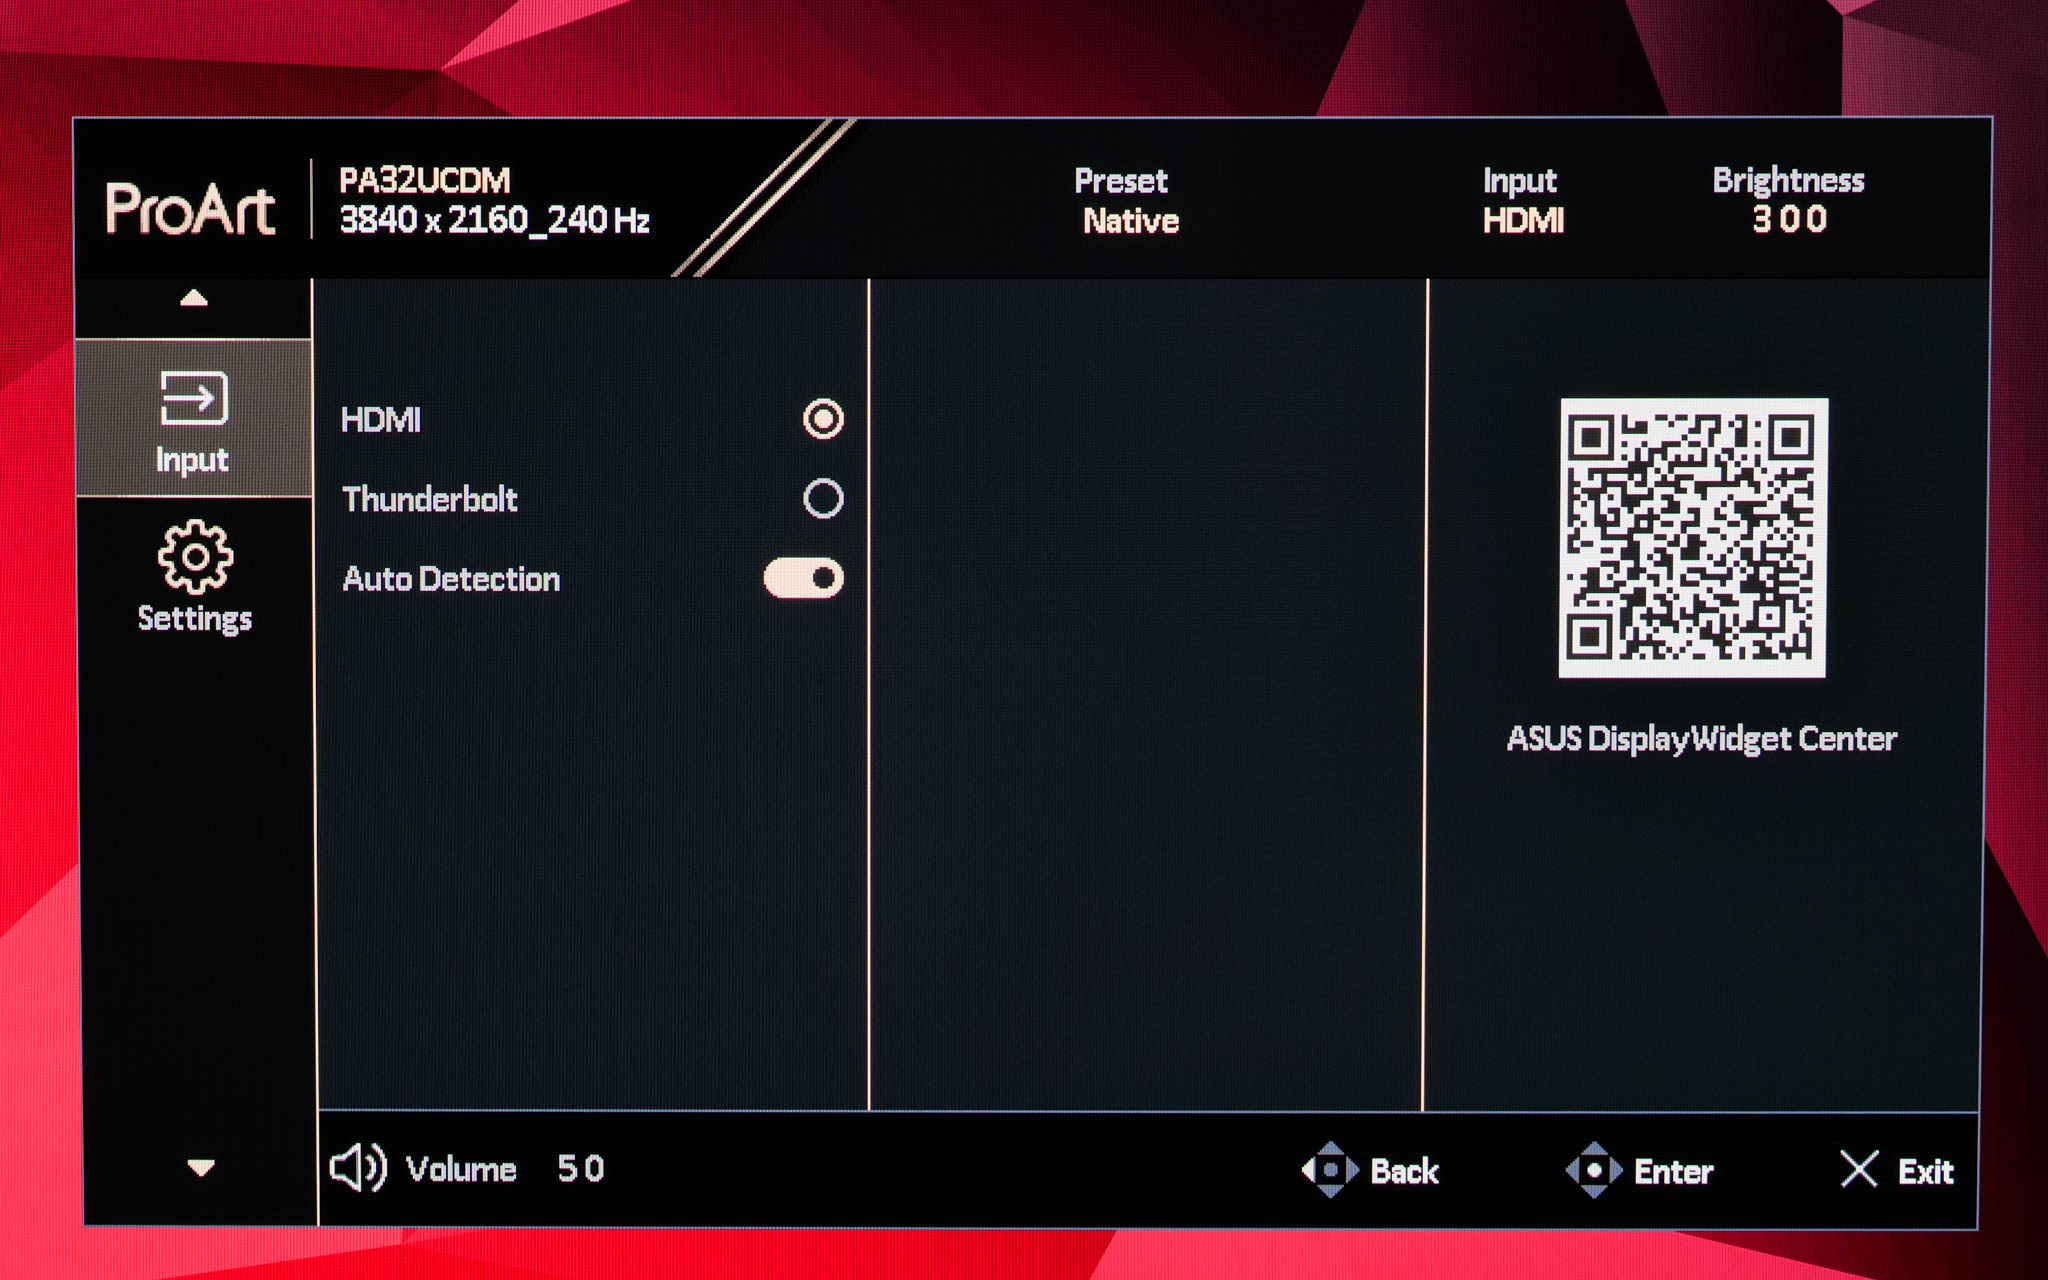
Input is also pretty self-explanatory, giving you the choice between the two video inputs, or an Auto Detection option.
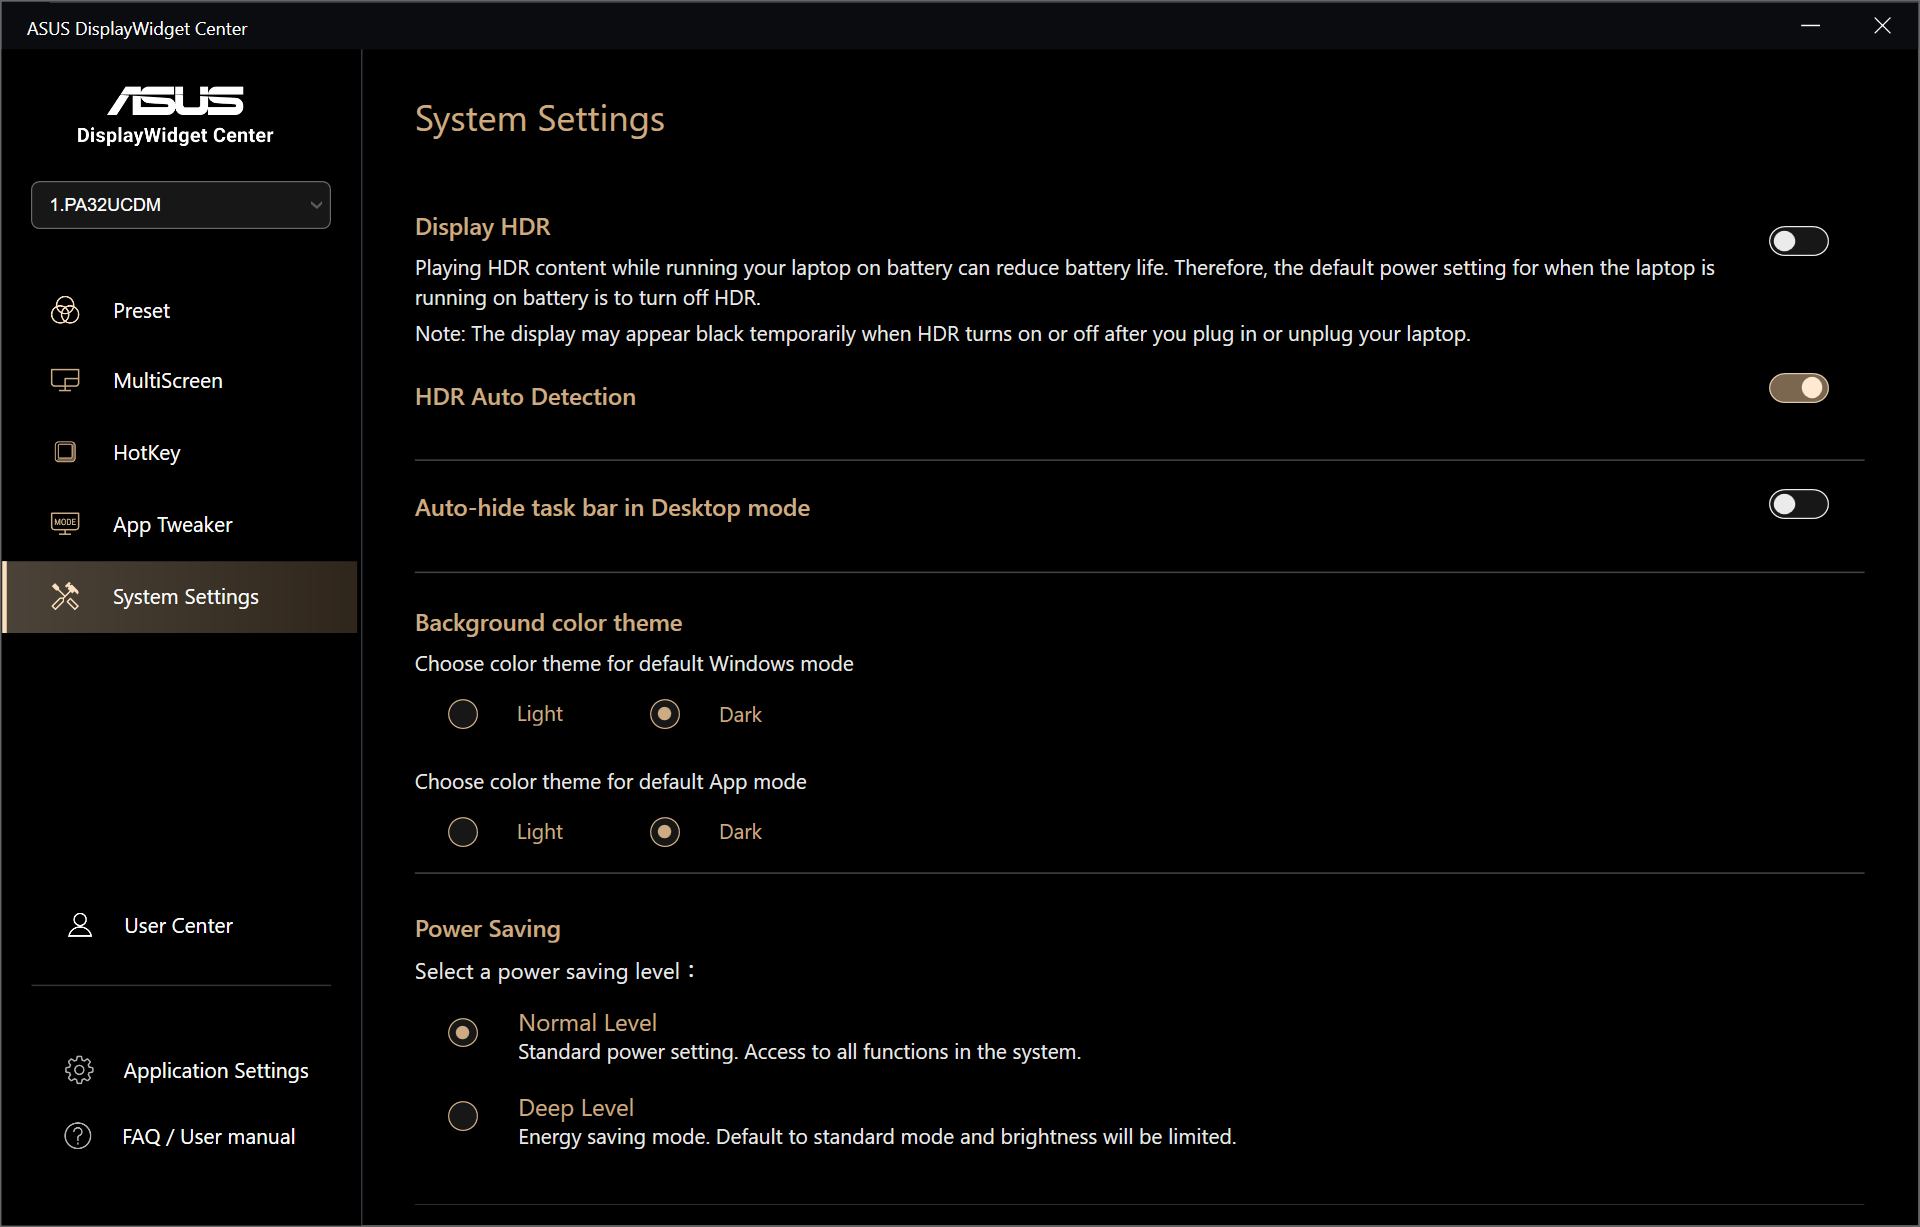
Settings
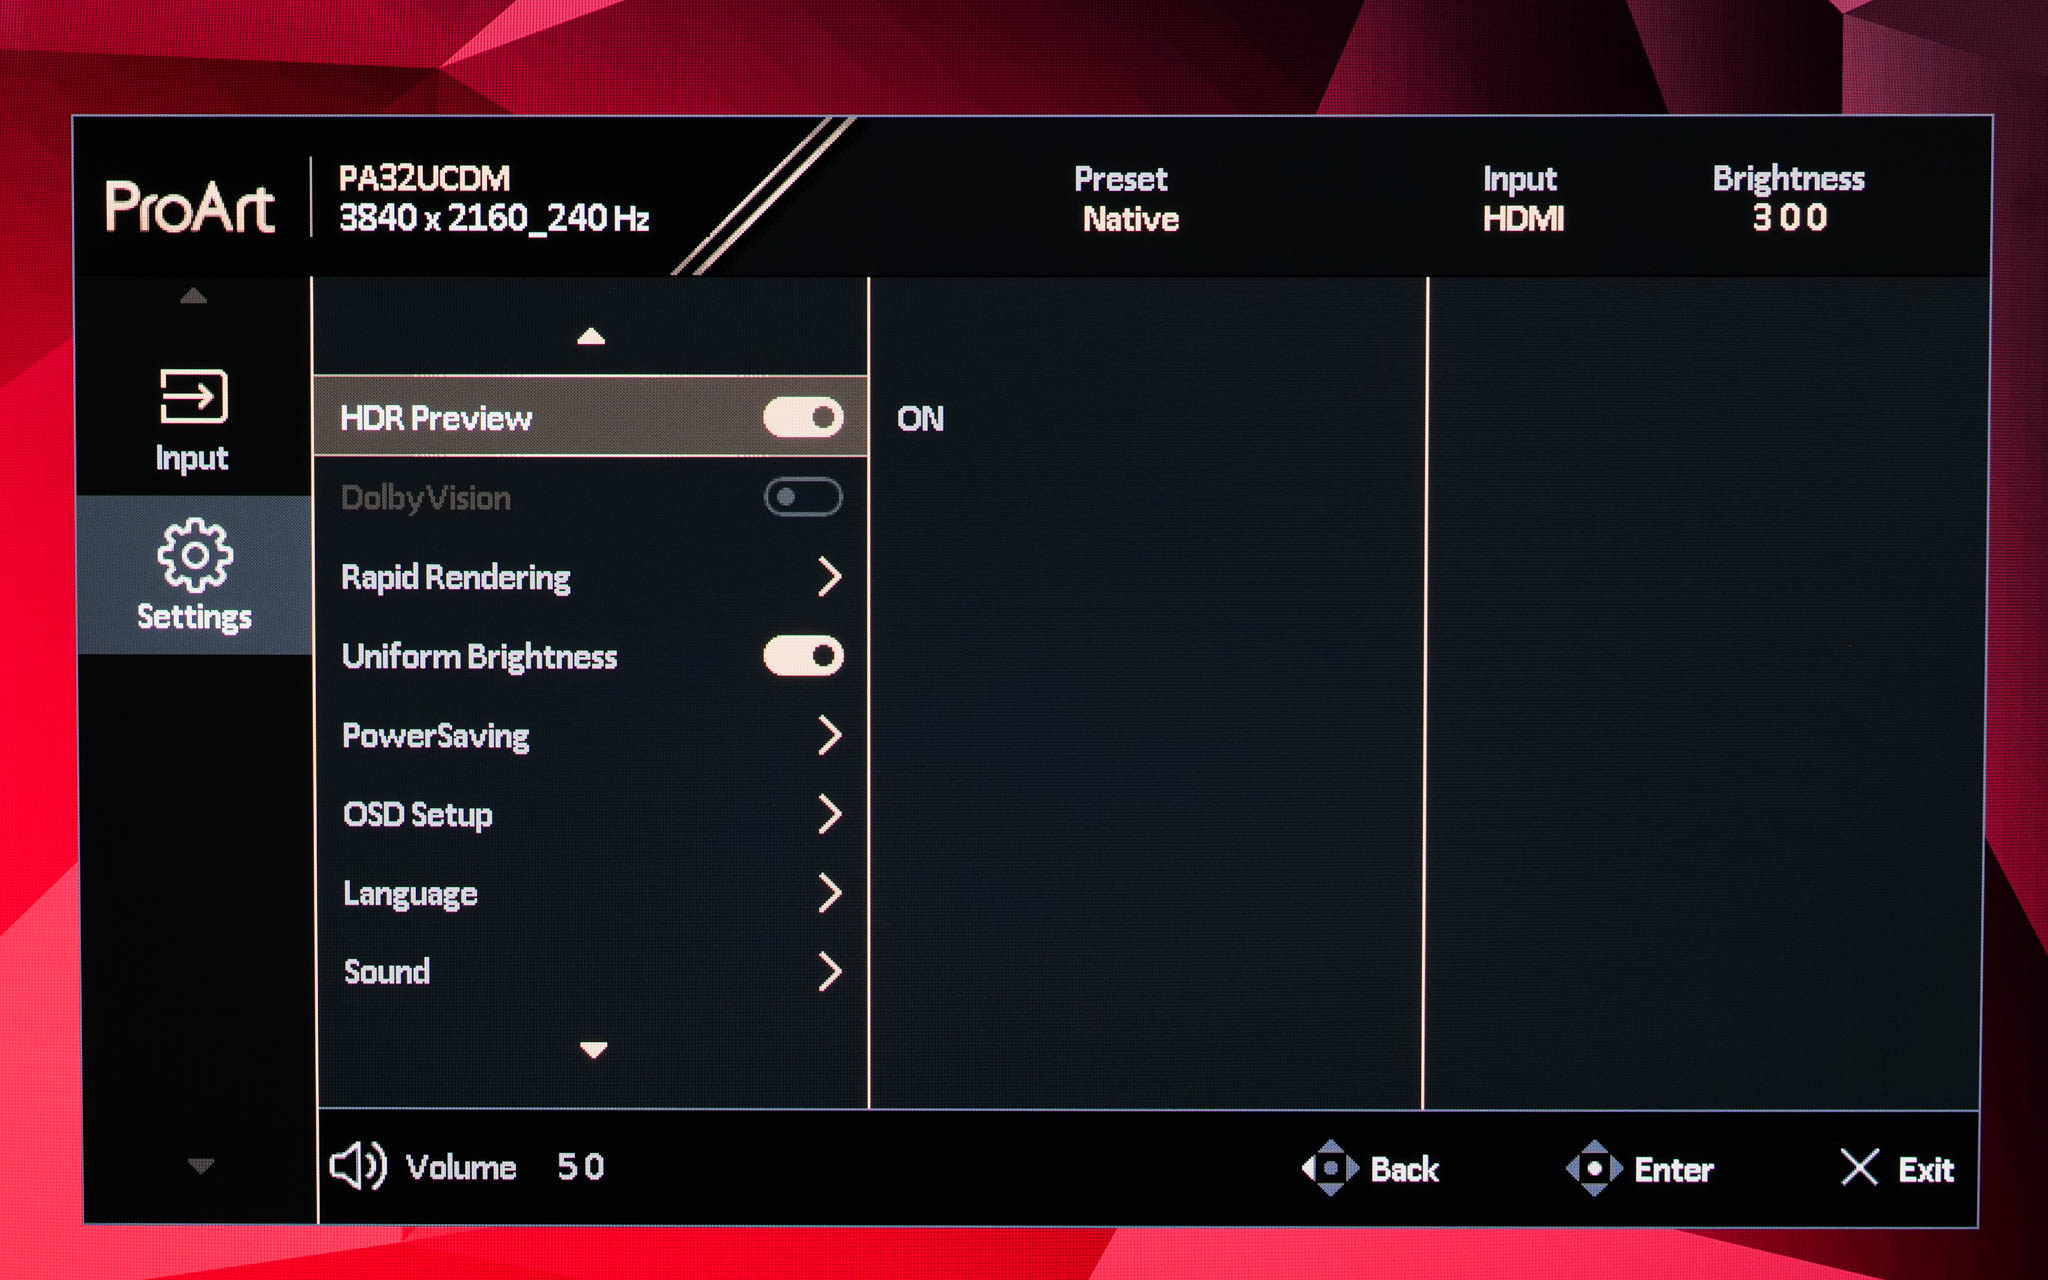
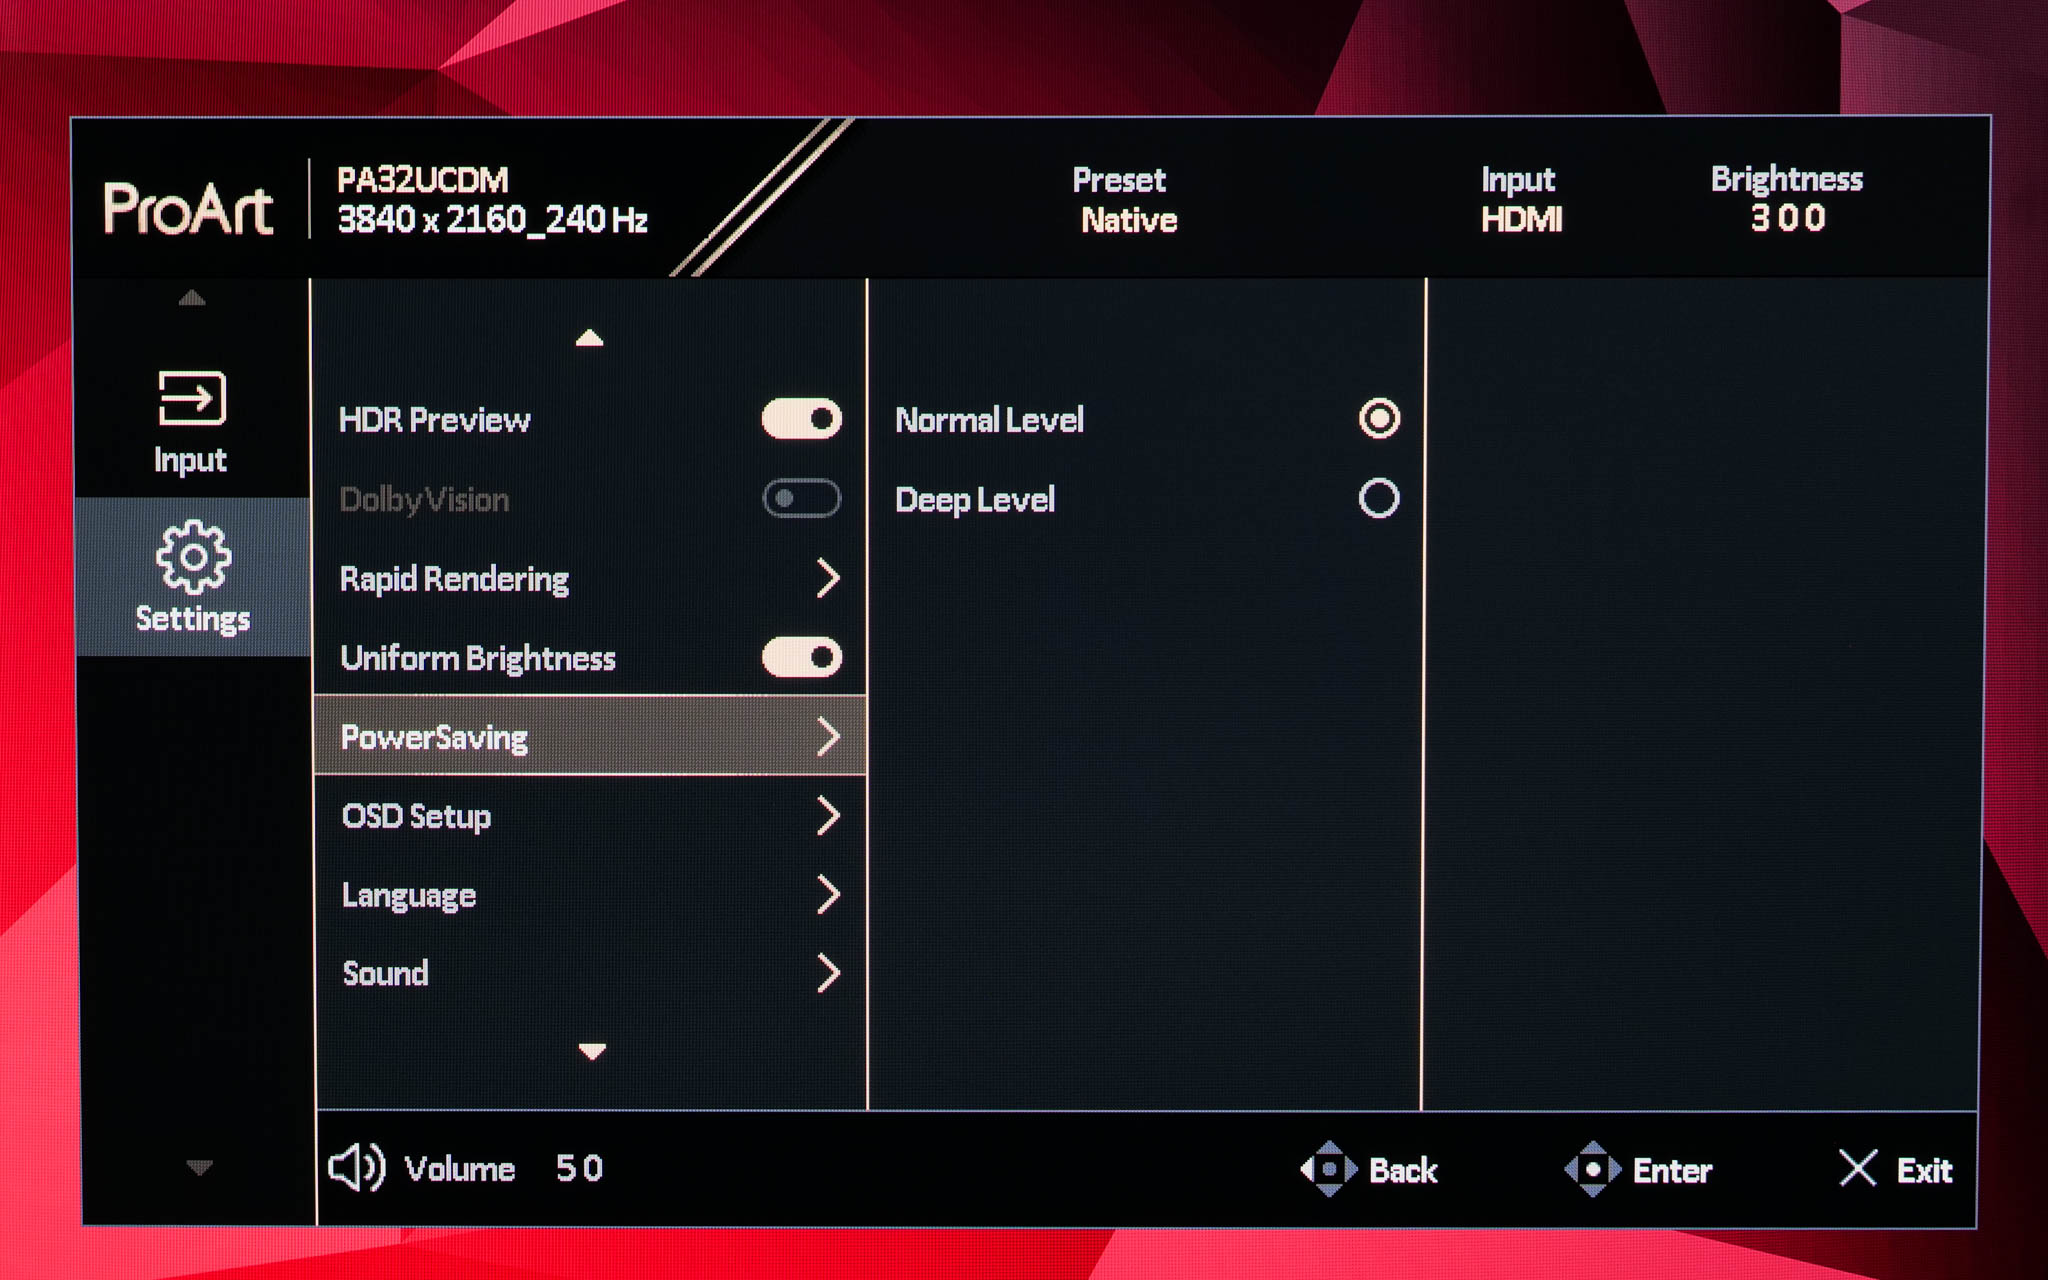
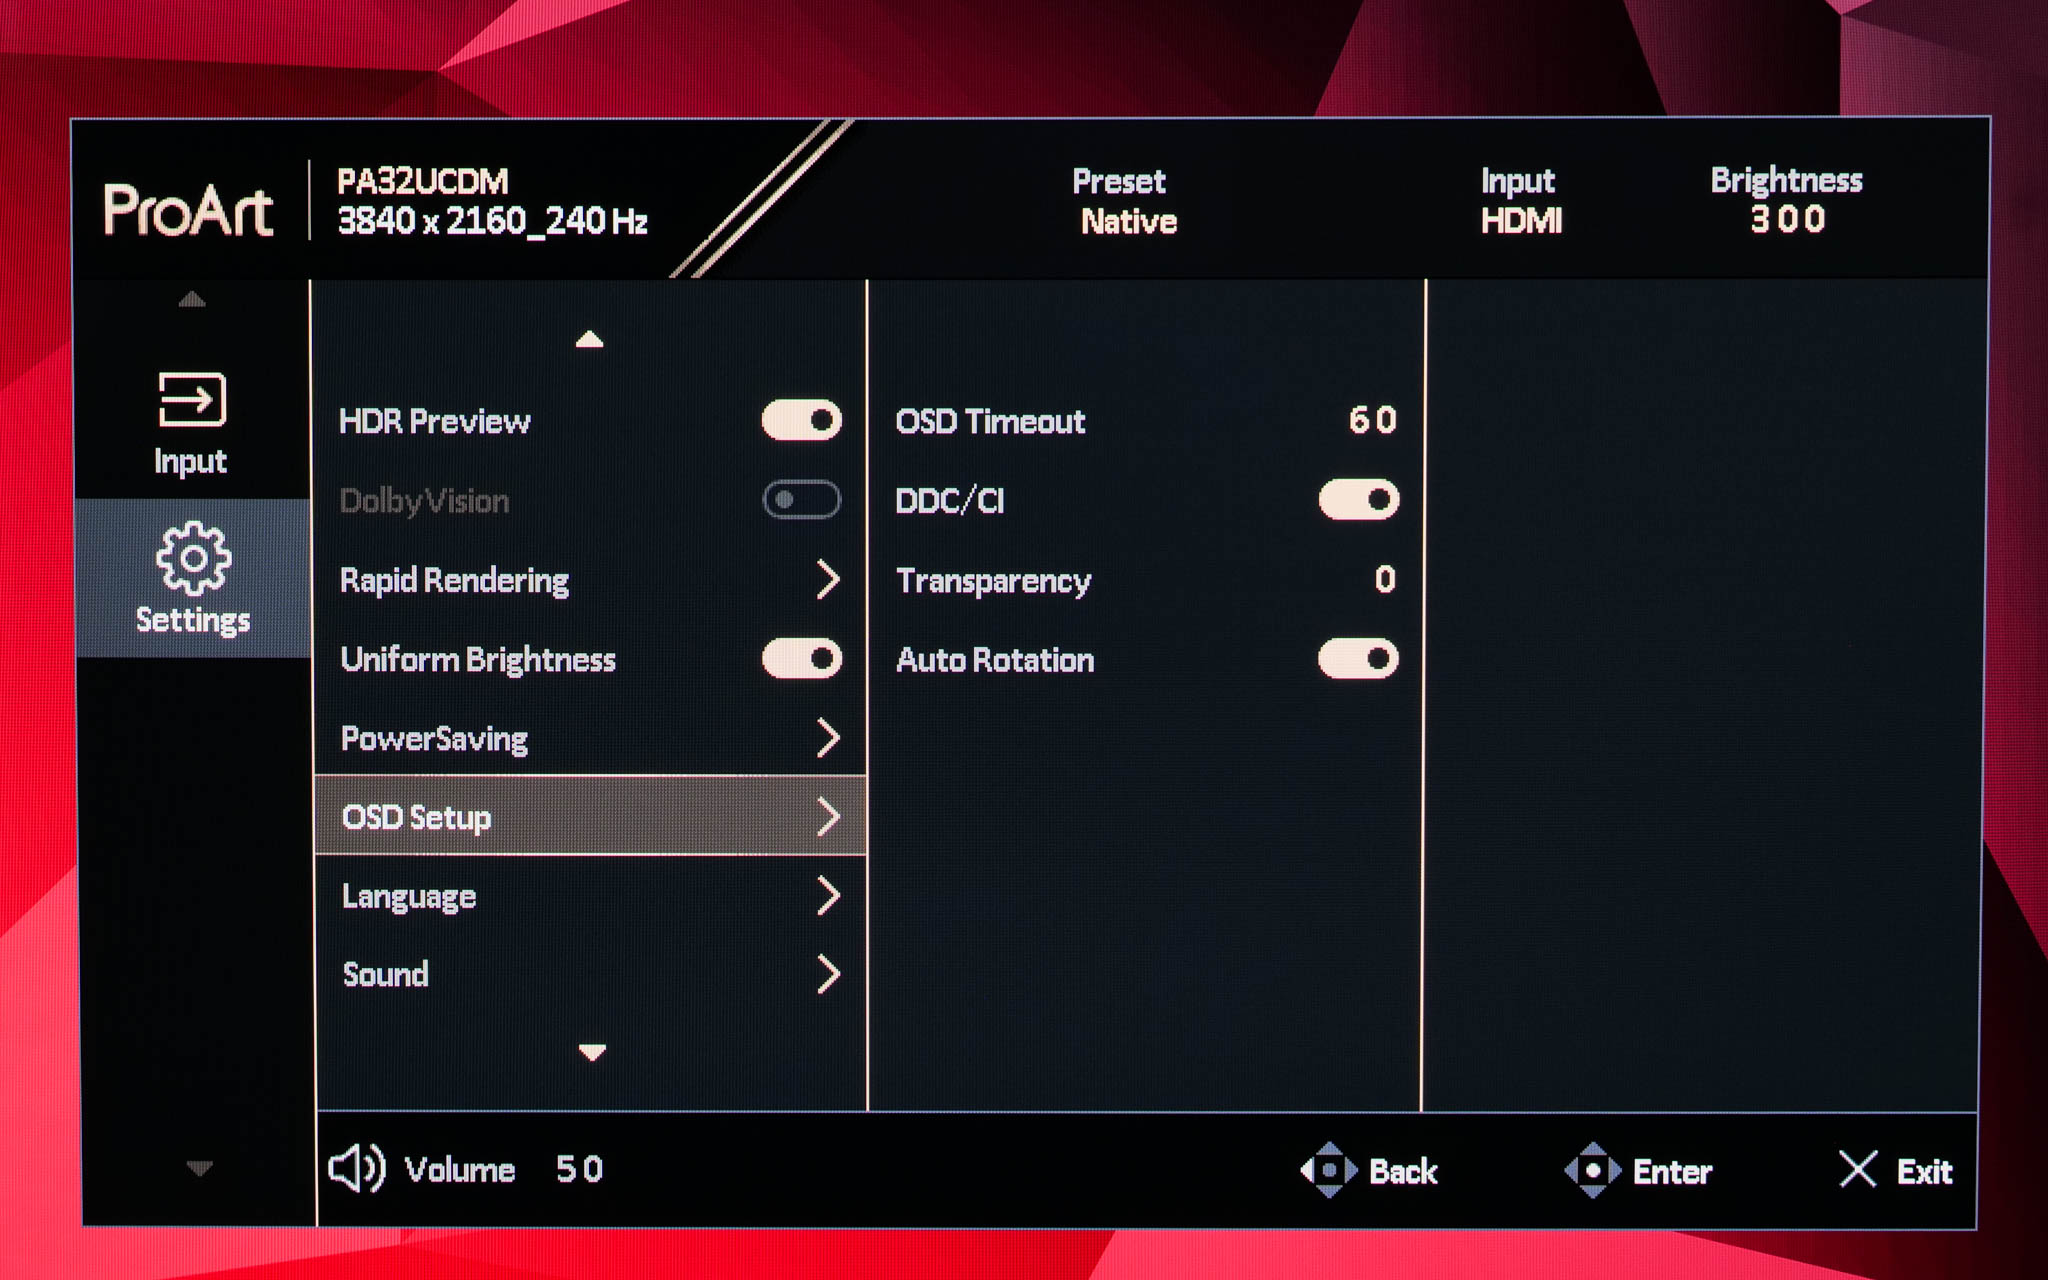
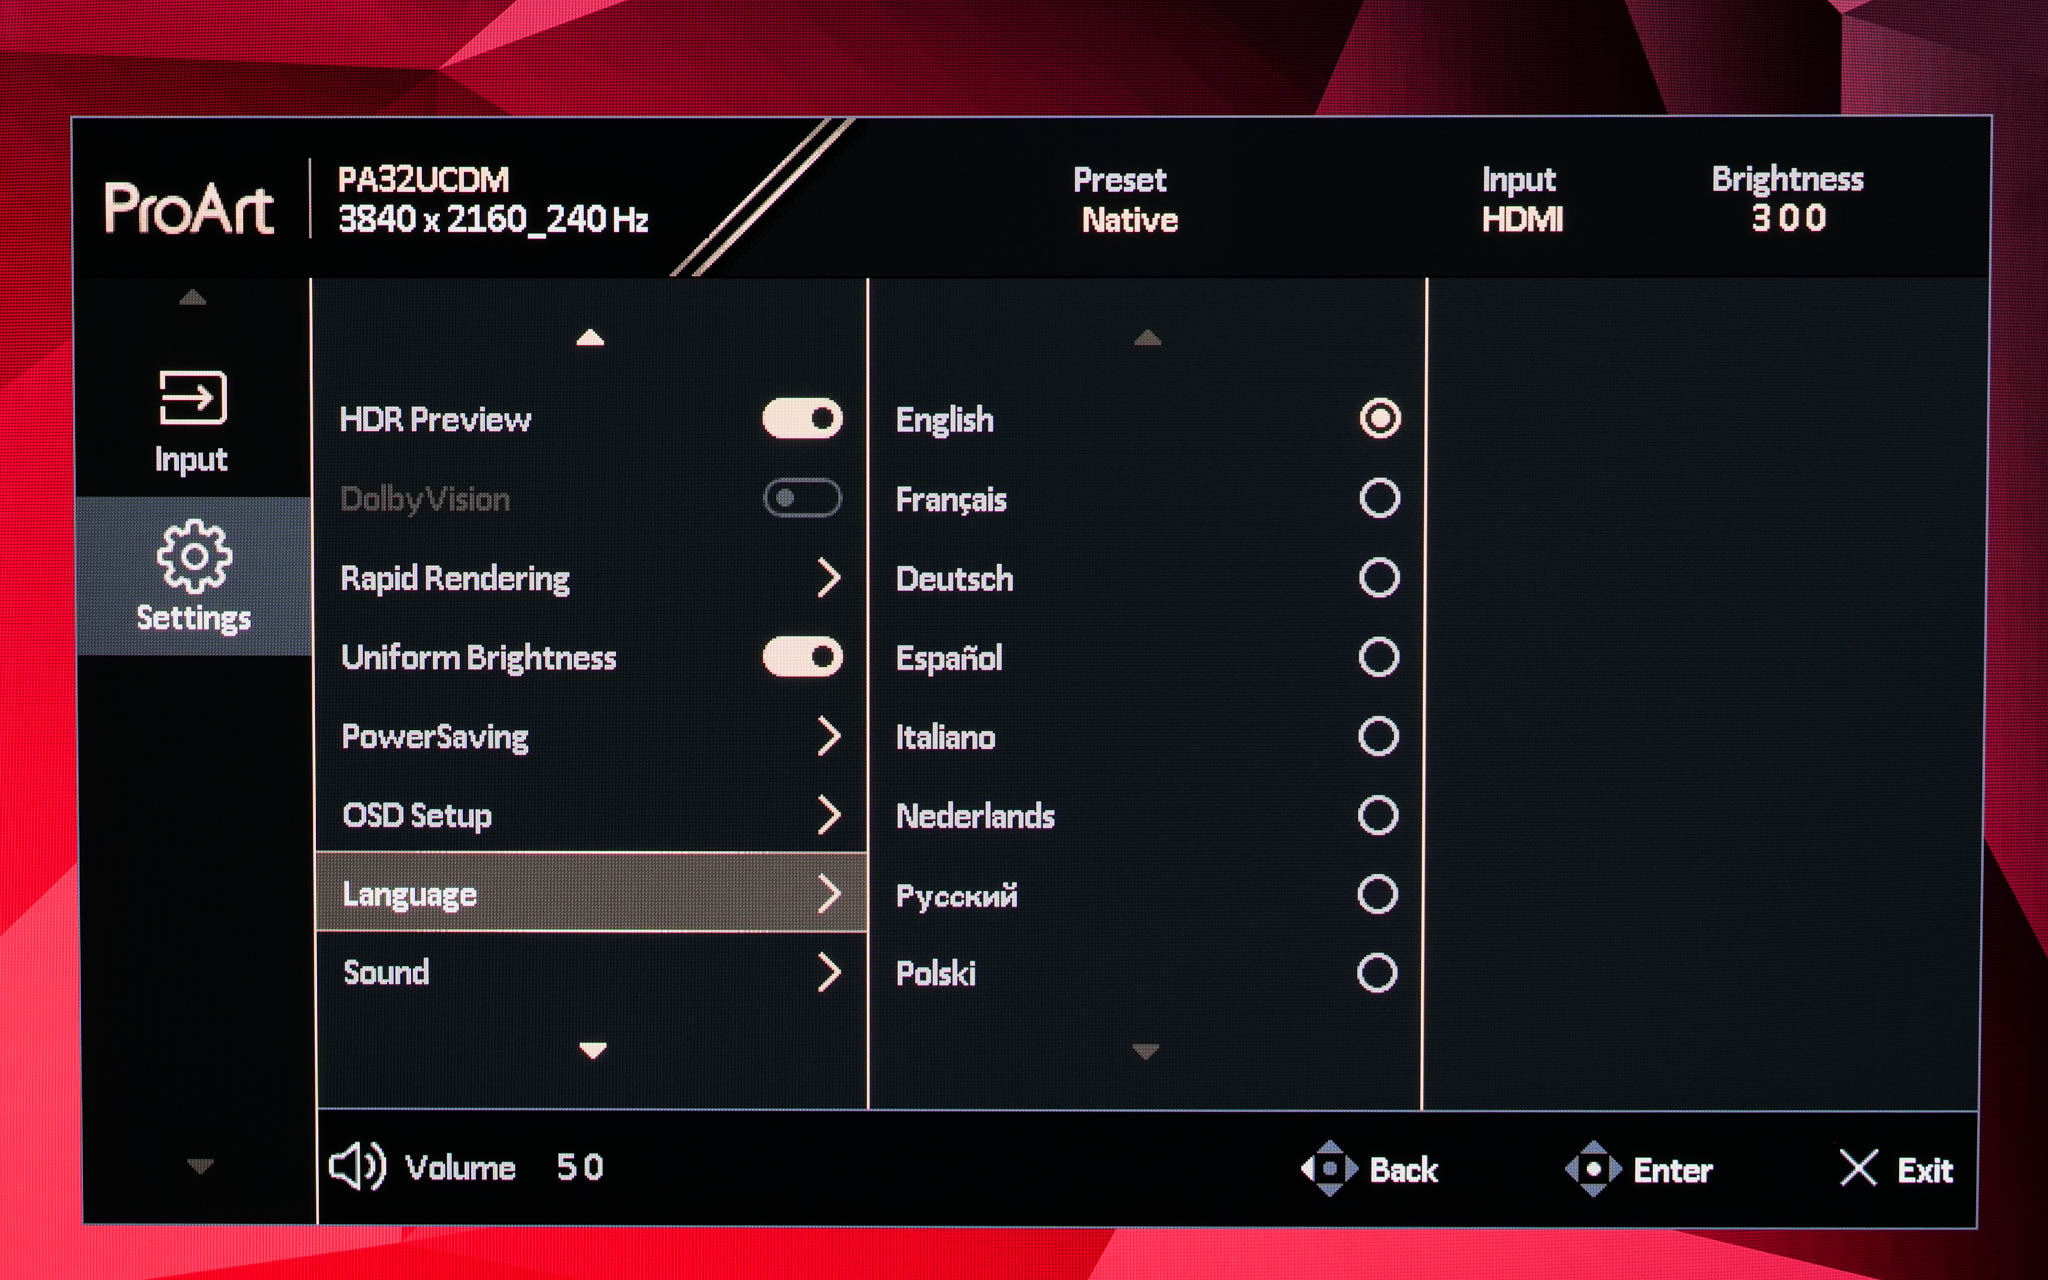
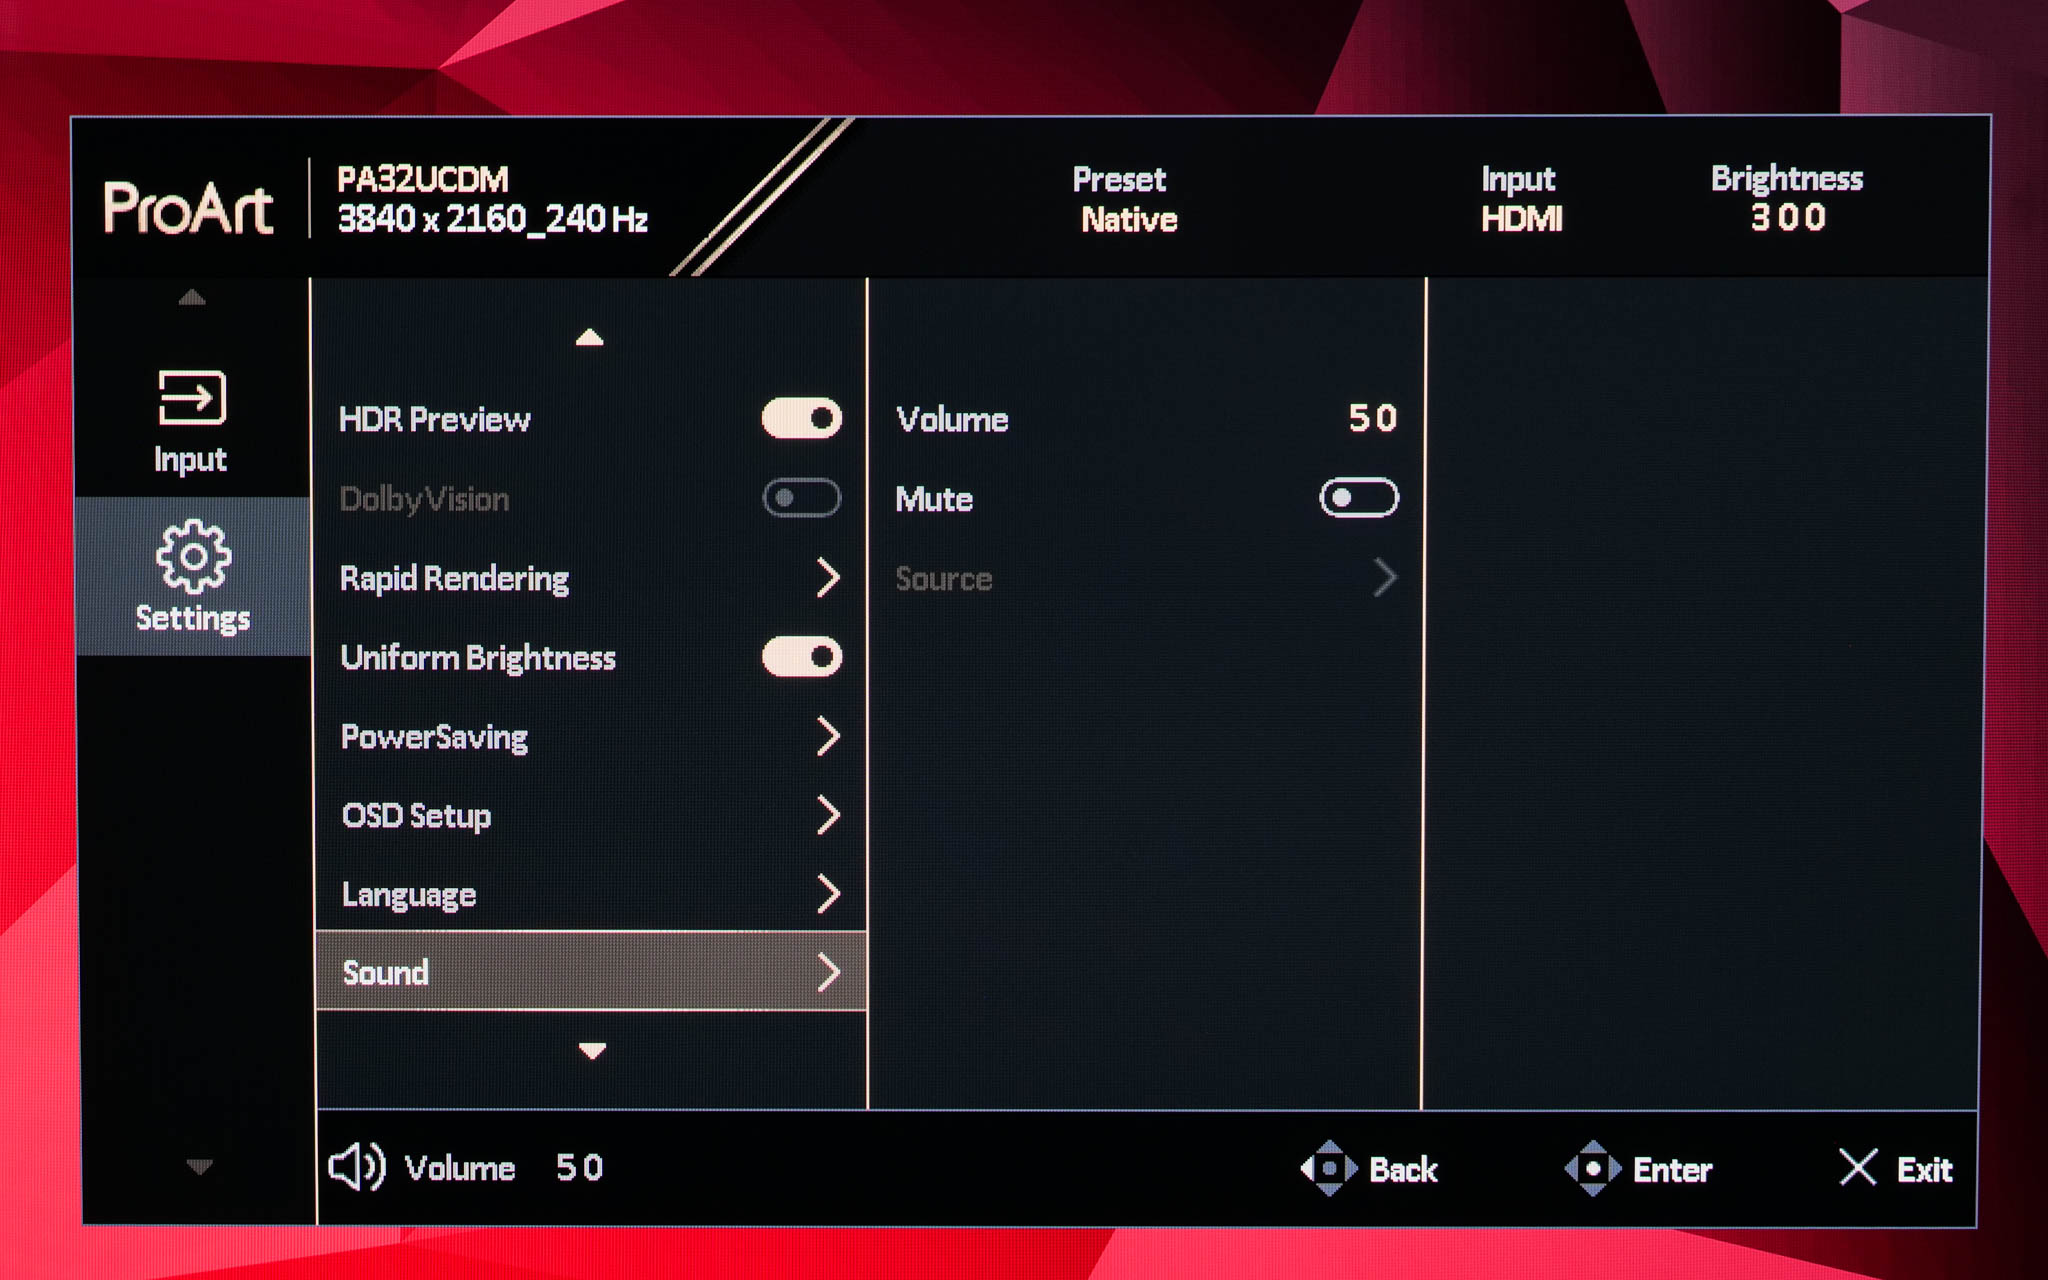
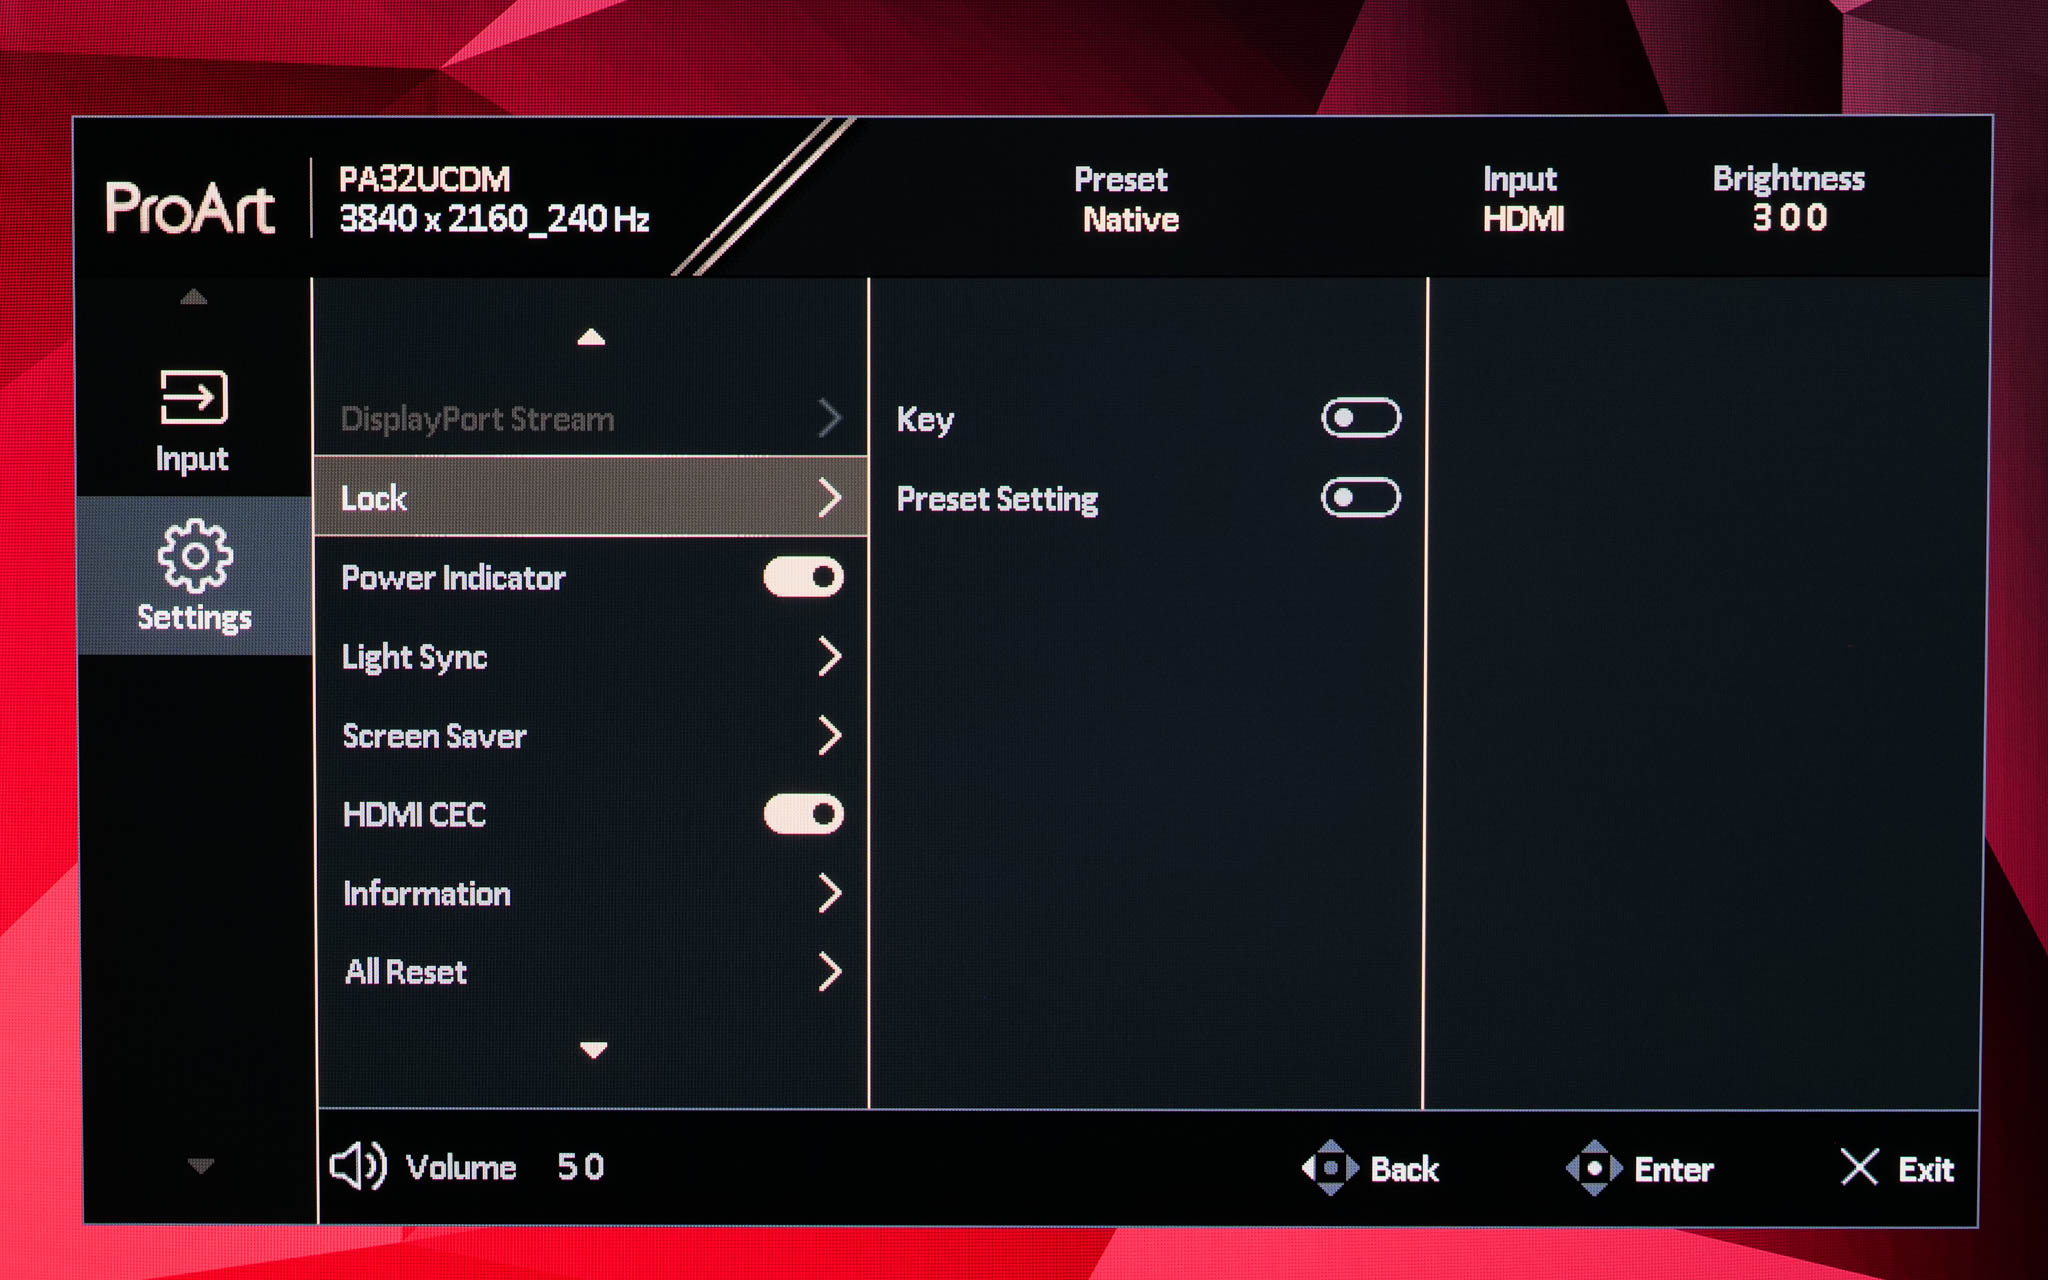
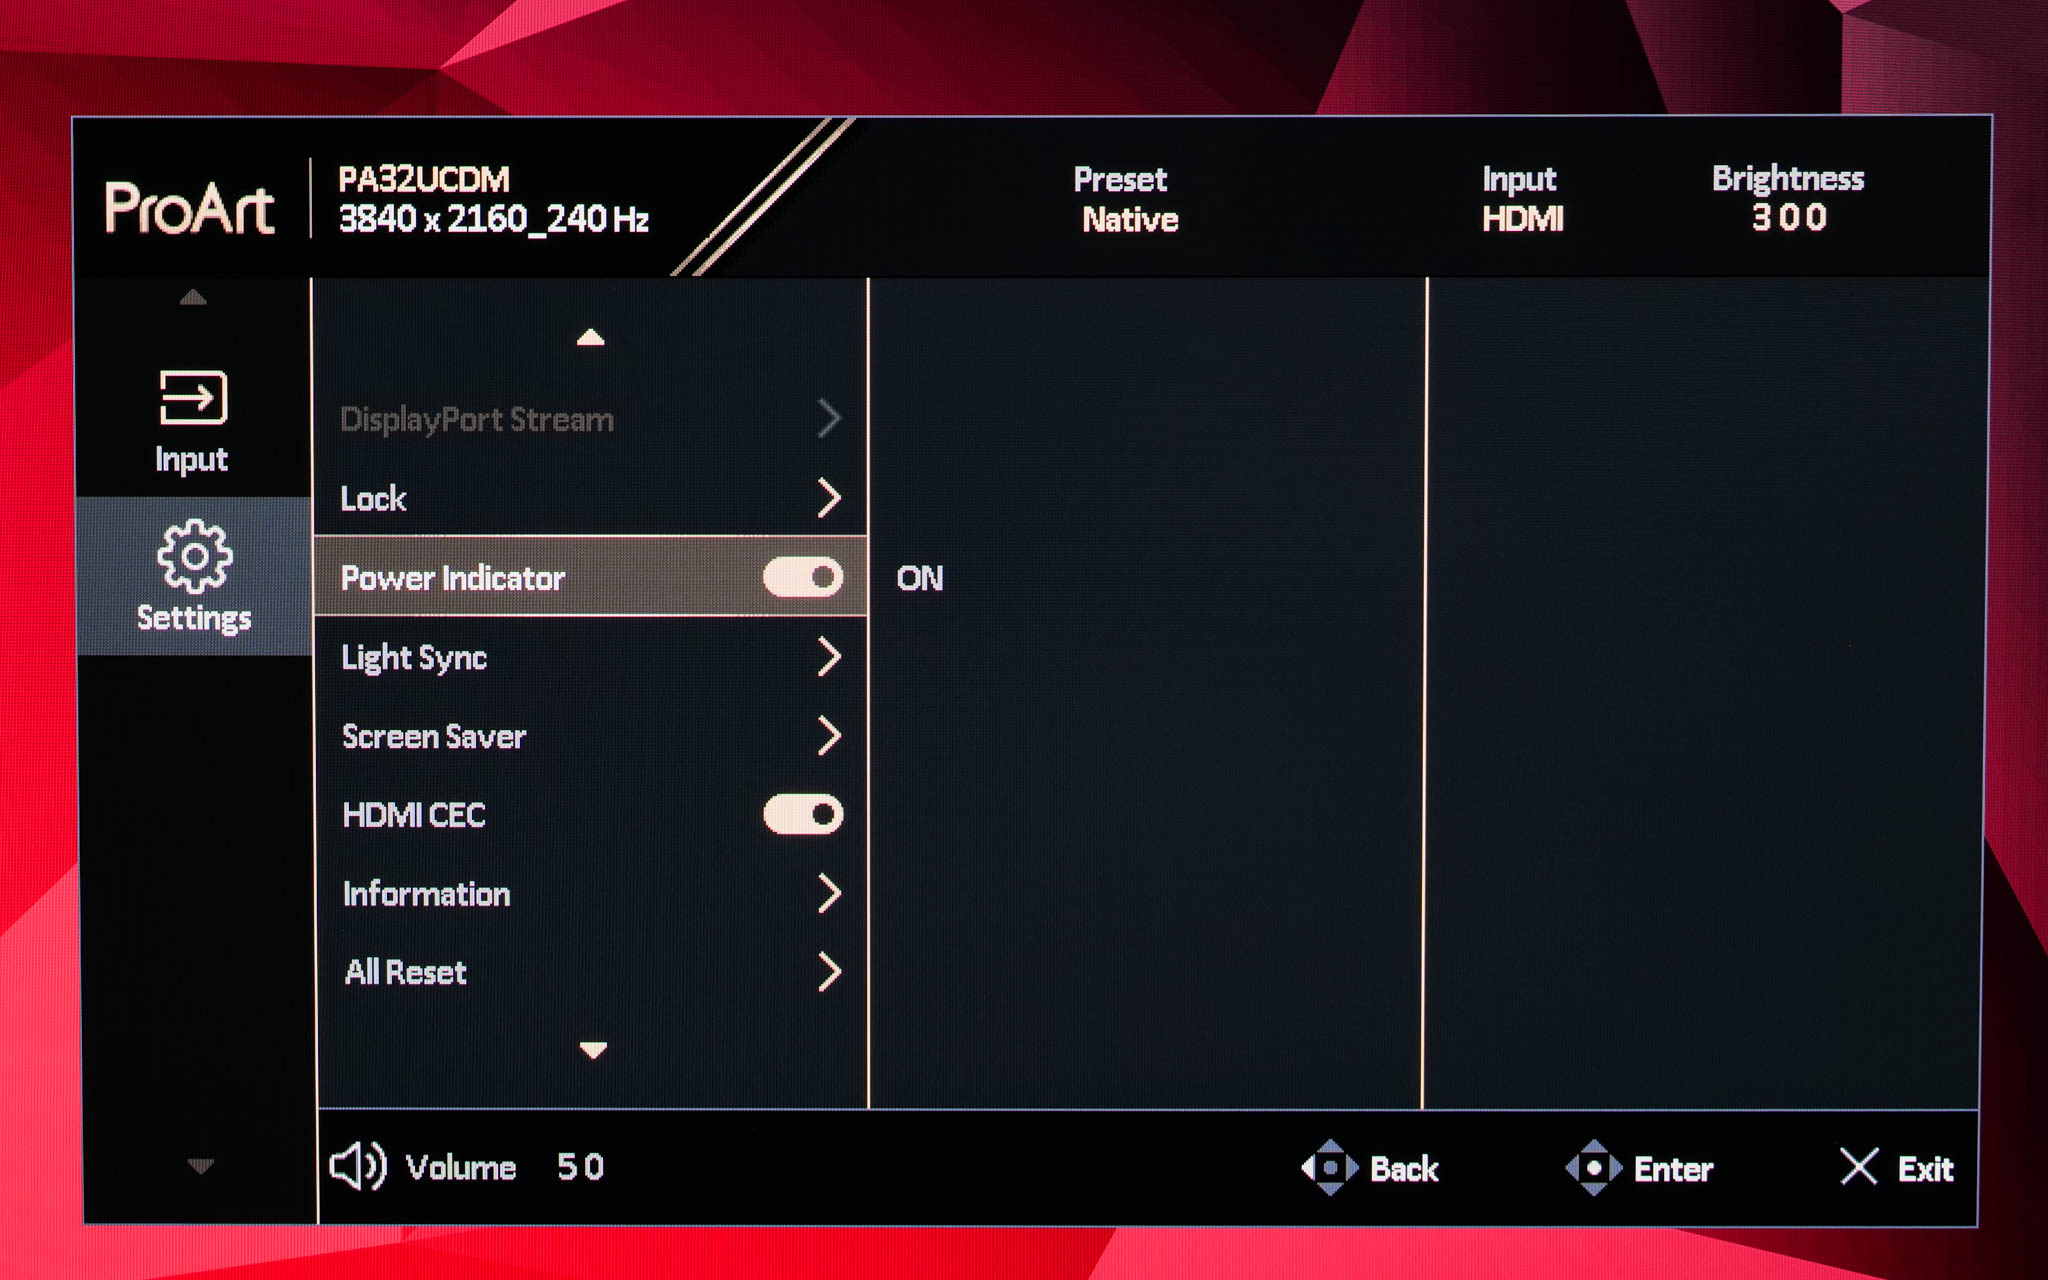
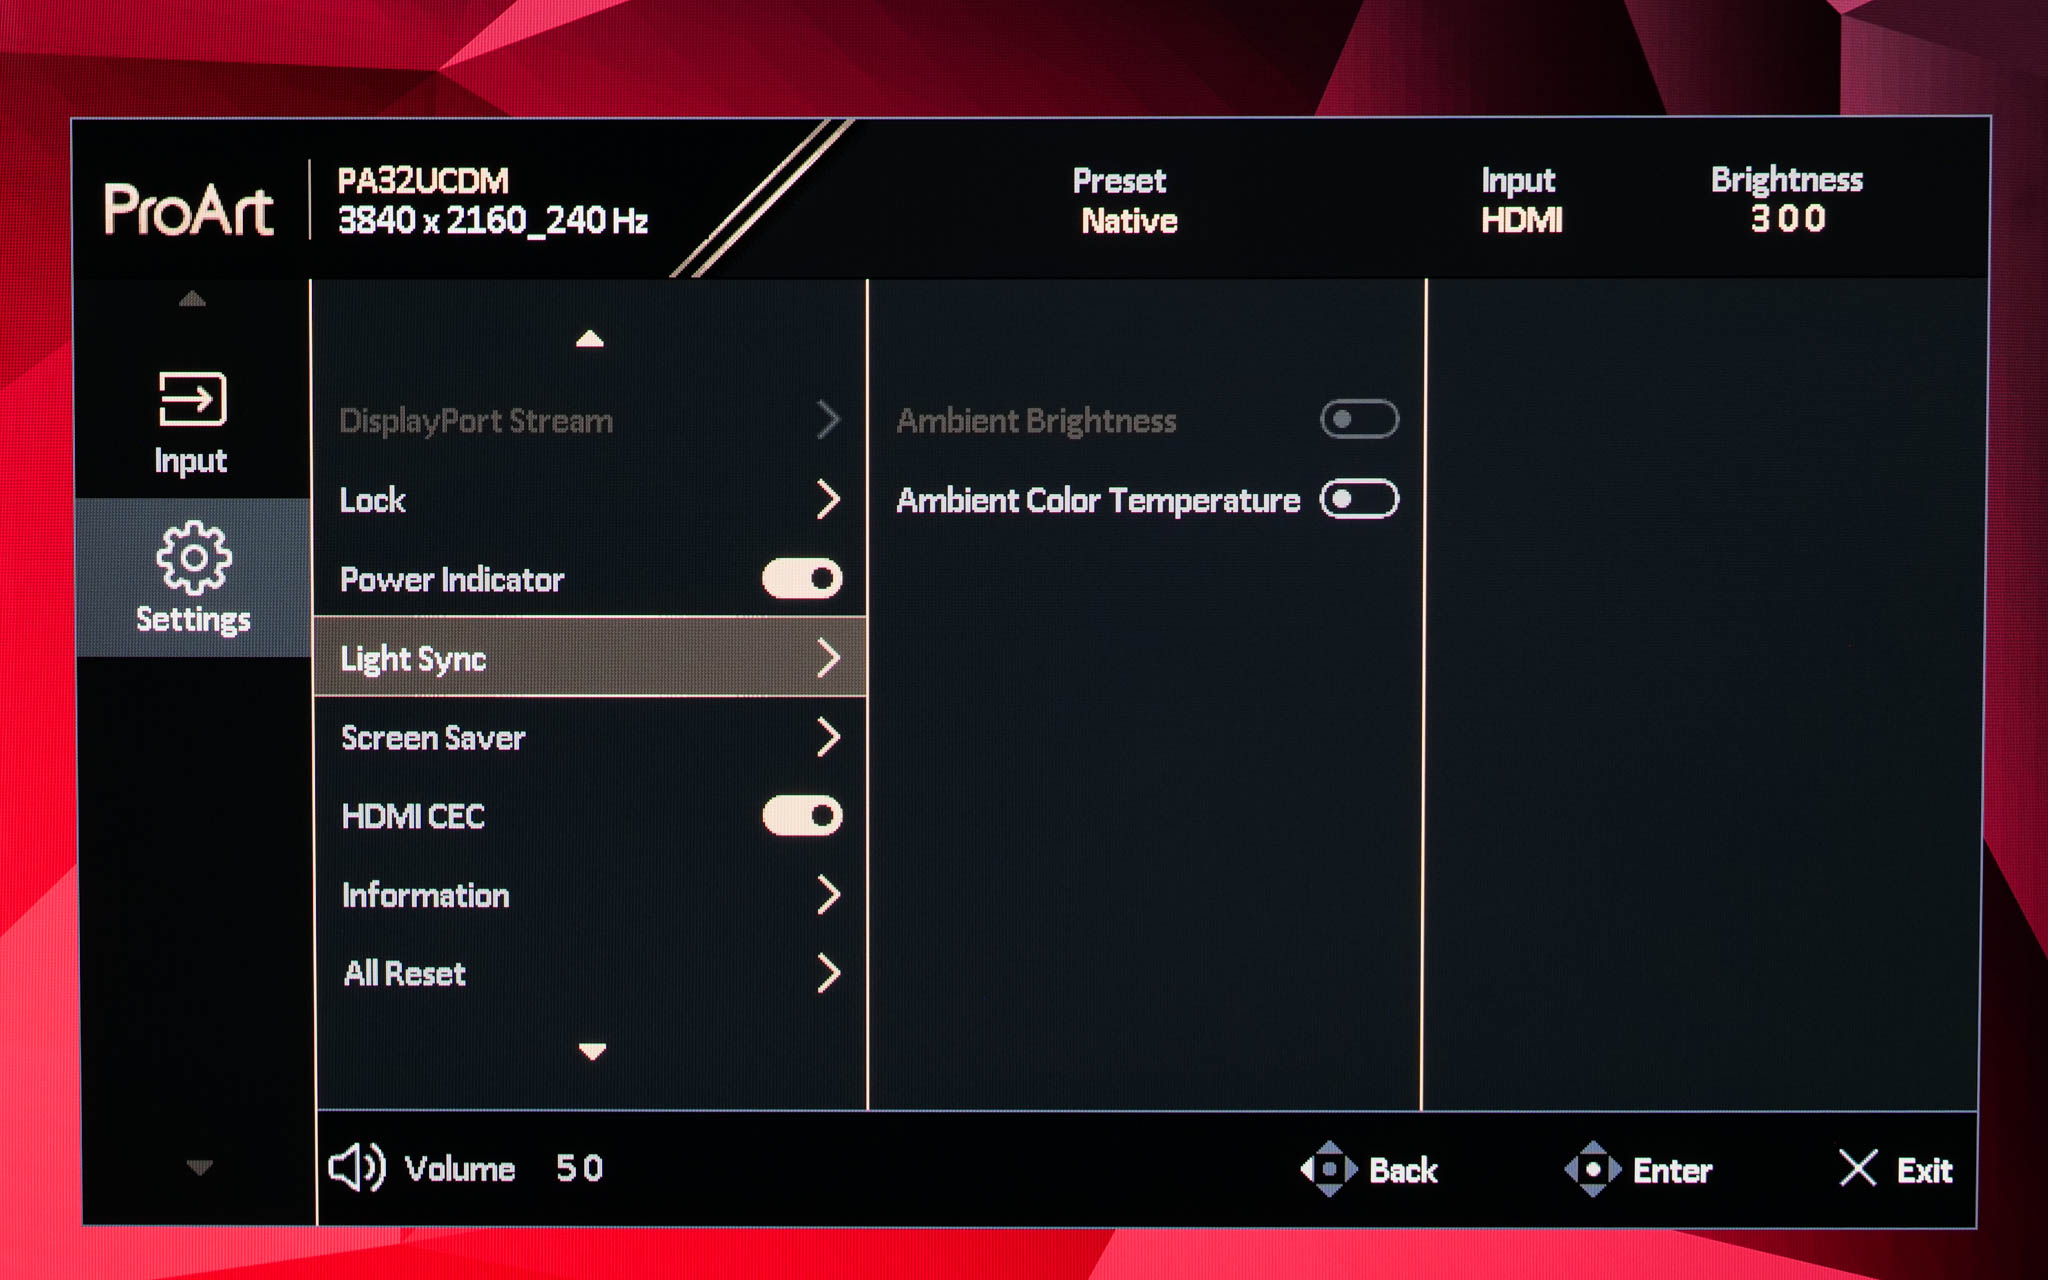
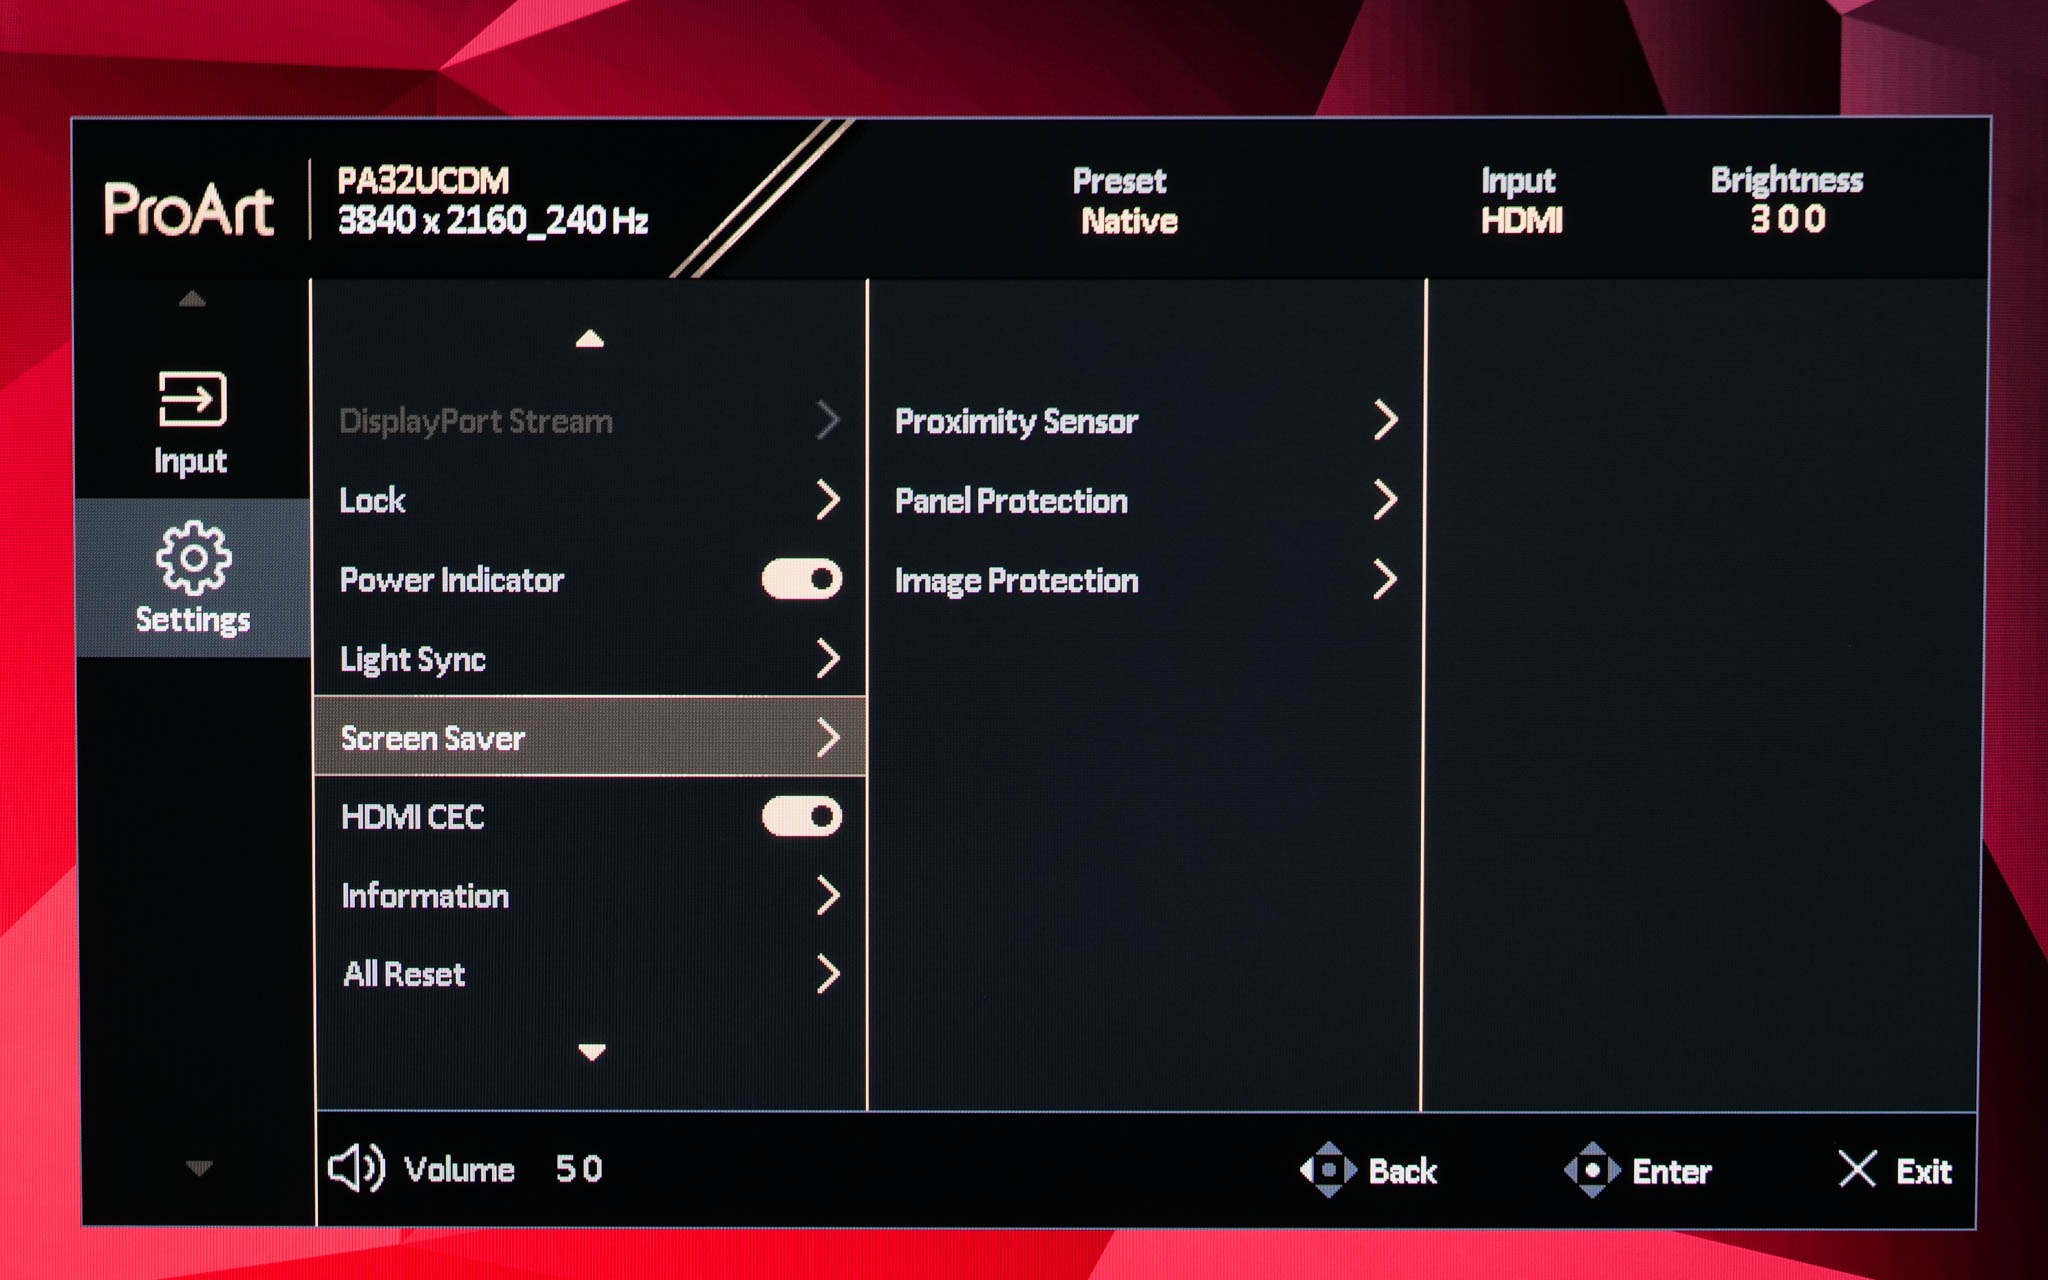

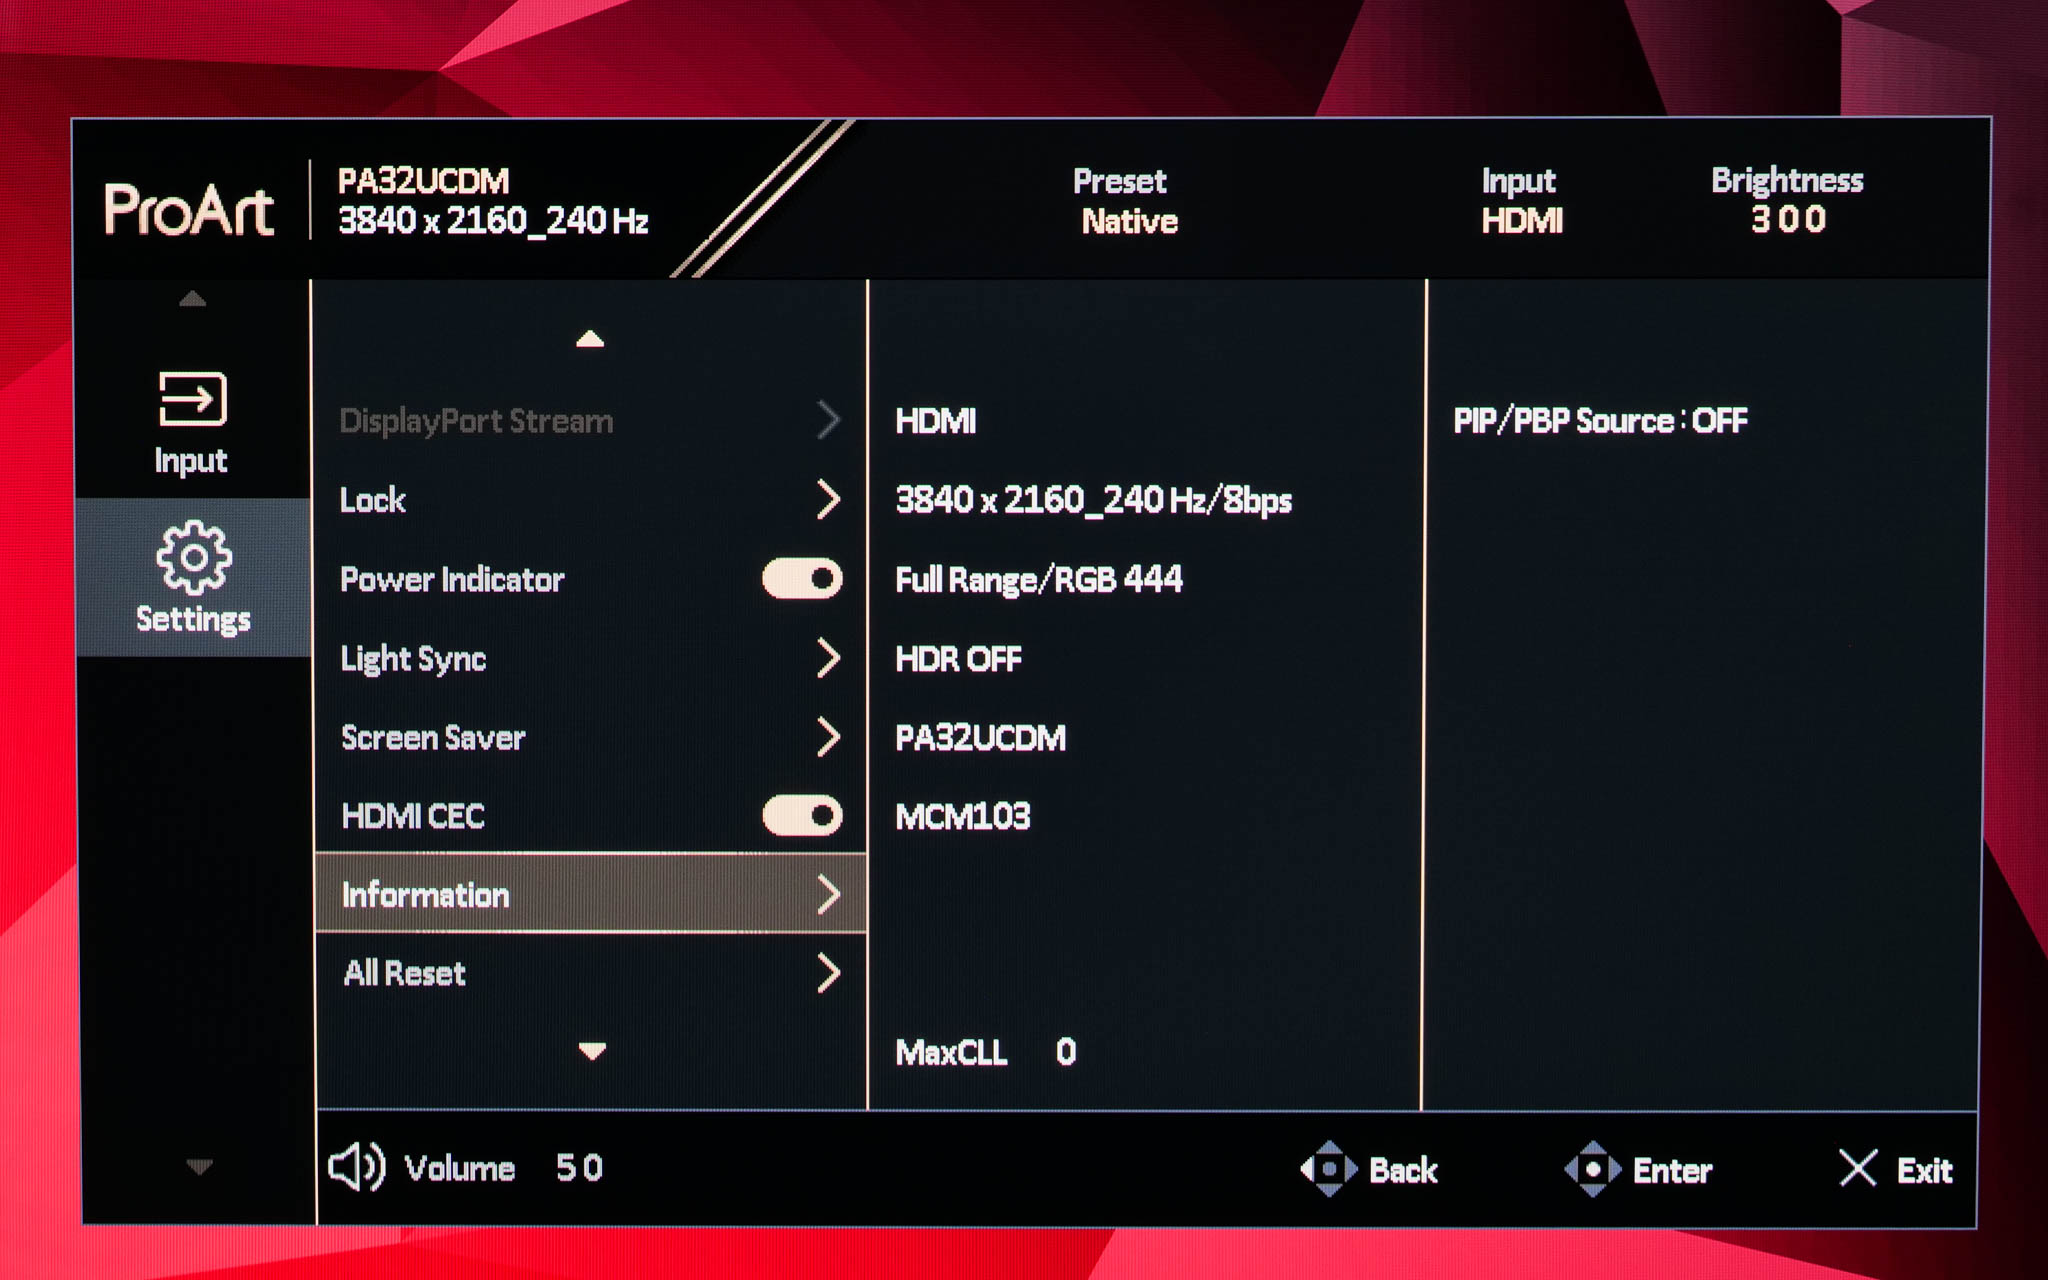
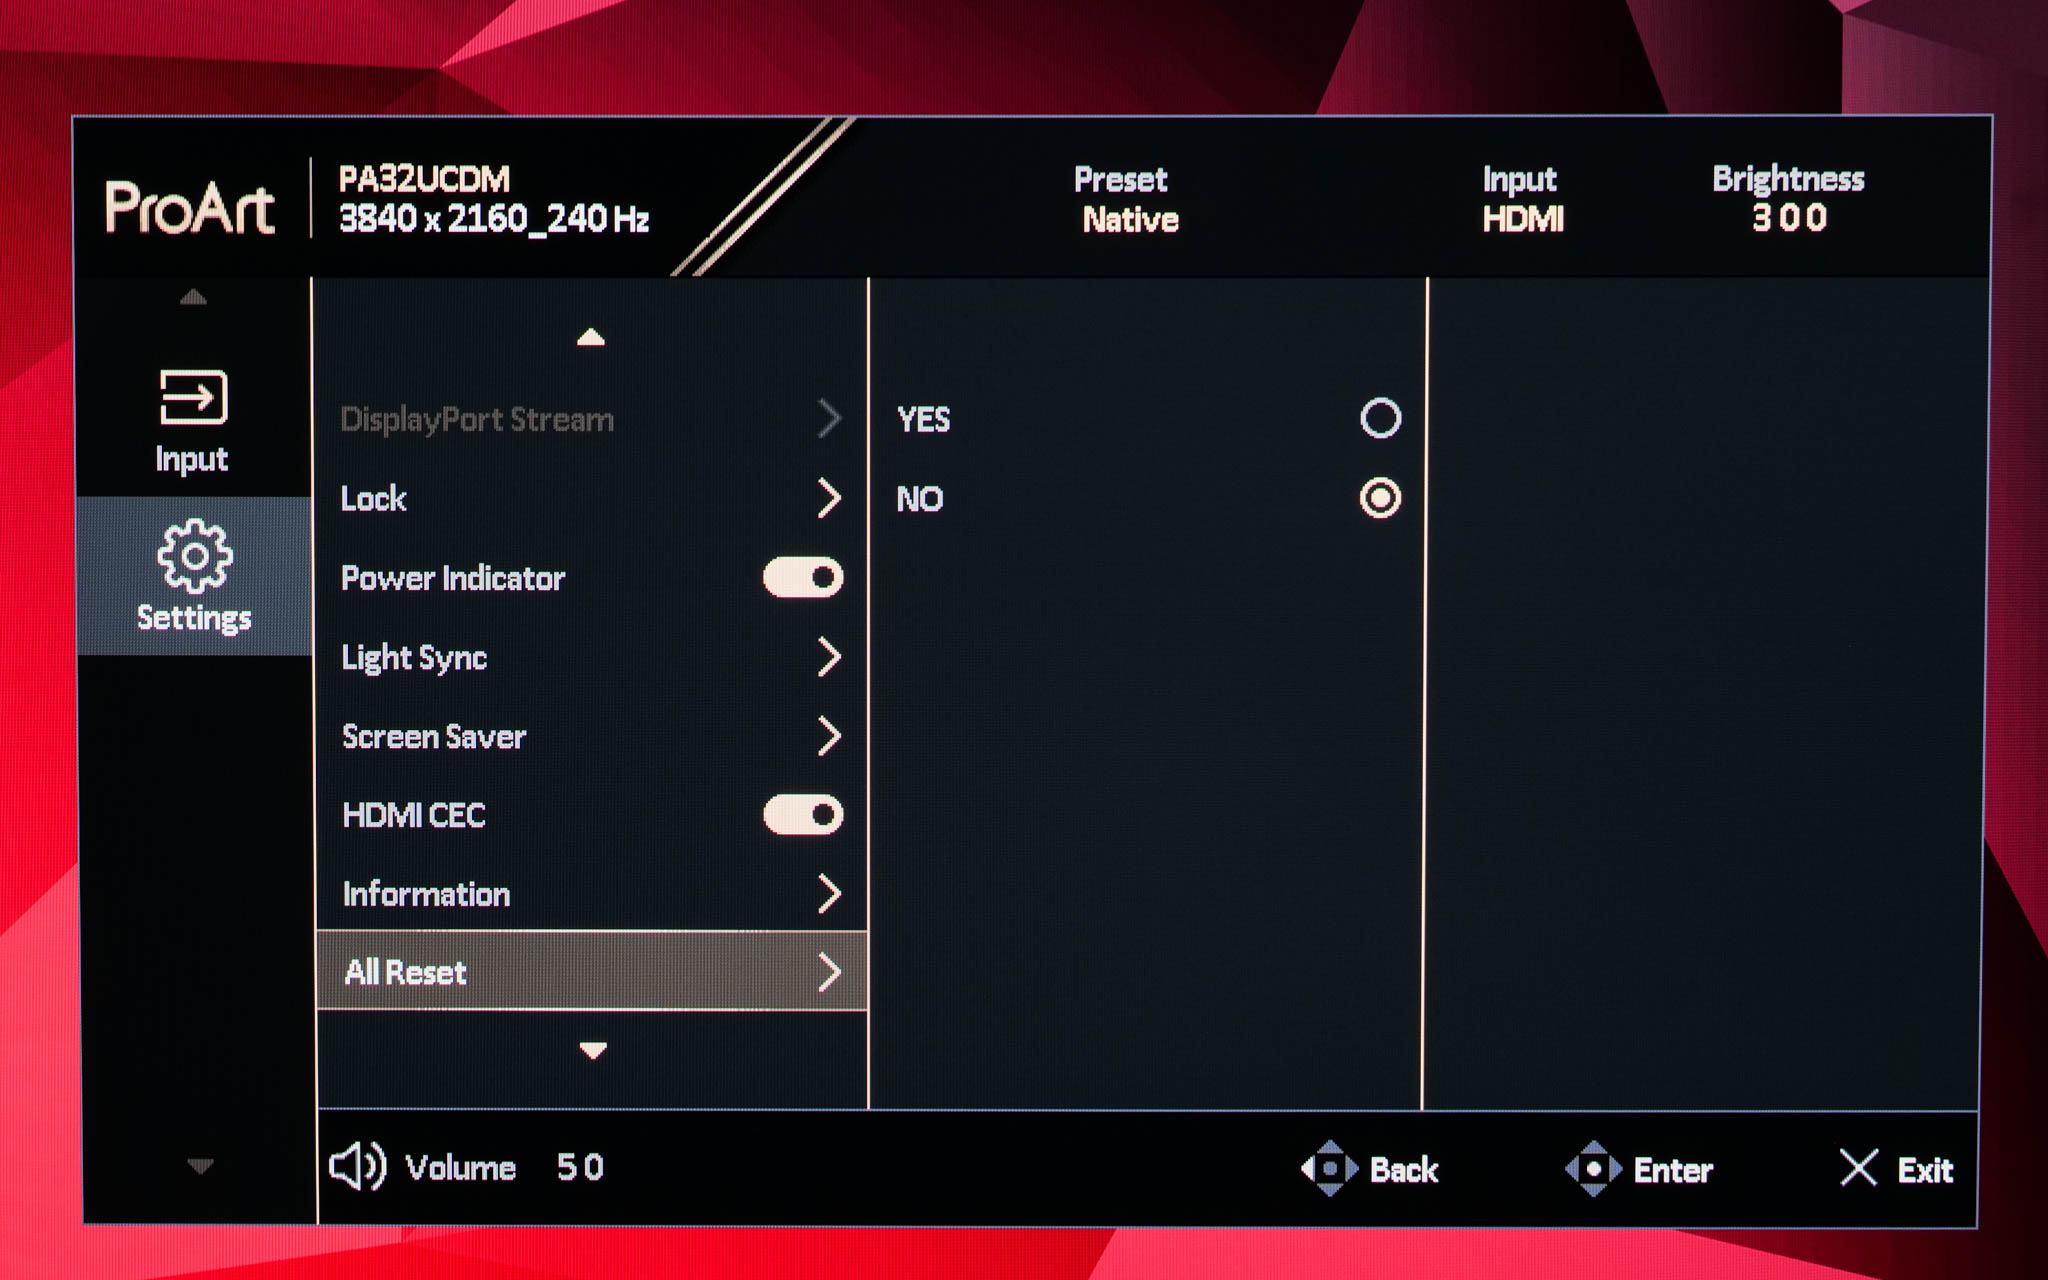
Settings has the most, erm, settings to adjust and it's quite a varied spread. There are basic things like OSD timeout options, but also more advanced features including HDR Preview, which according to ASUS, ‘allows you to preview non-HDR content performance with HDR and HLG mapping'. All of the OLED Care settings can be found here too, along with ASUS Light Sync, an interesting feature which leverages ambient light and backlight sensors to automatically fine-tune gamut and white balance (if you want that). You can also get an overview of the monitor's information and firmware version, or reset everything to factory defaults.
Shortcuts?
The keen eyed among you may have noticed one tab that was present on the PA27JCV is missing from the PA32UCDM – shortcuts. For the PA27JCV, this let you customise an initial pop-up menu that appeared before the main settings menu itself. This has been removed from the PA32UCDM's OSD system, and I'm not sure why as I find it really useful to be able to quickly adjust things like brightness, change presets etc without having to dig into the main menu. Hopefully that can be remedied with a firmware update.
ASUS DisplayWidget Center
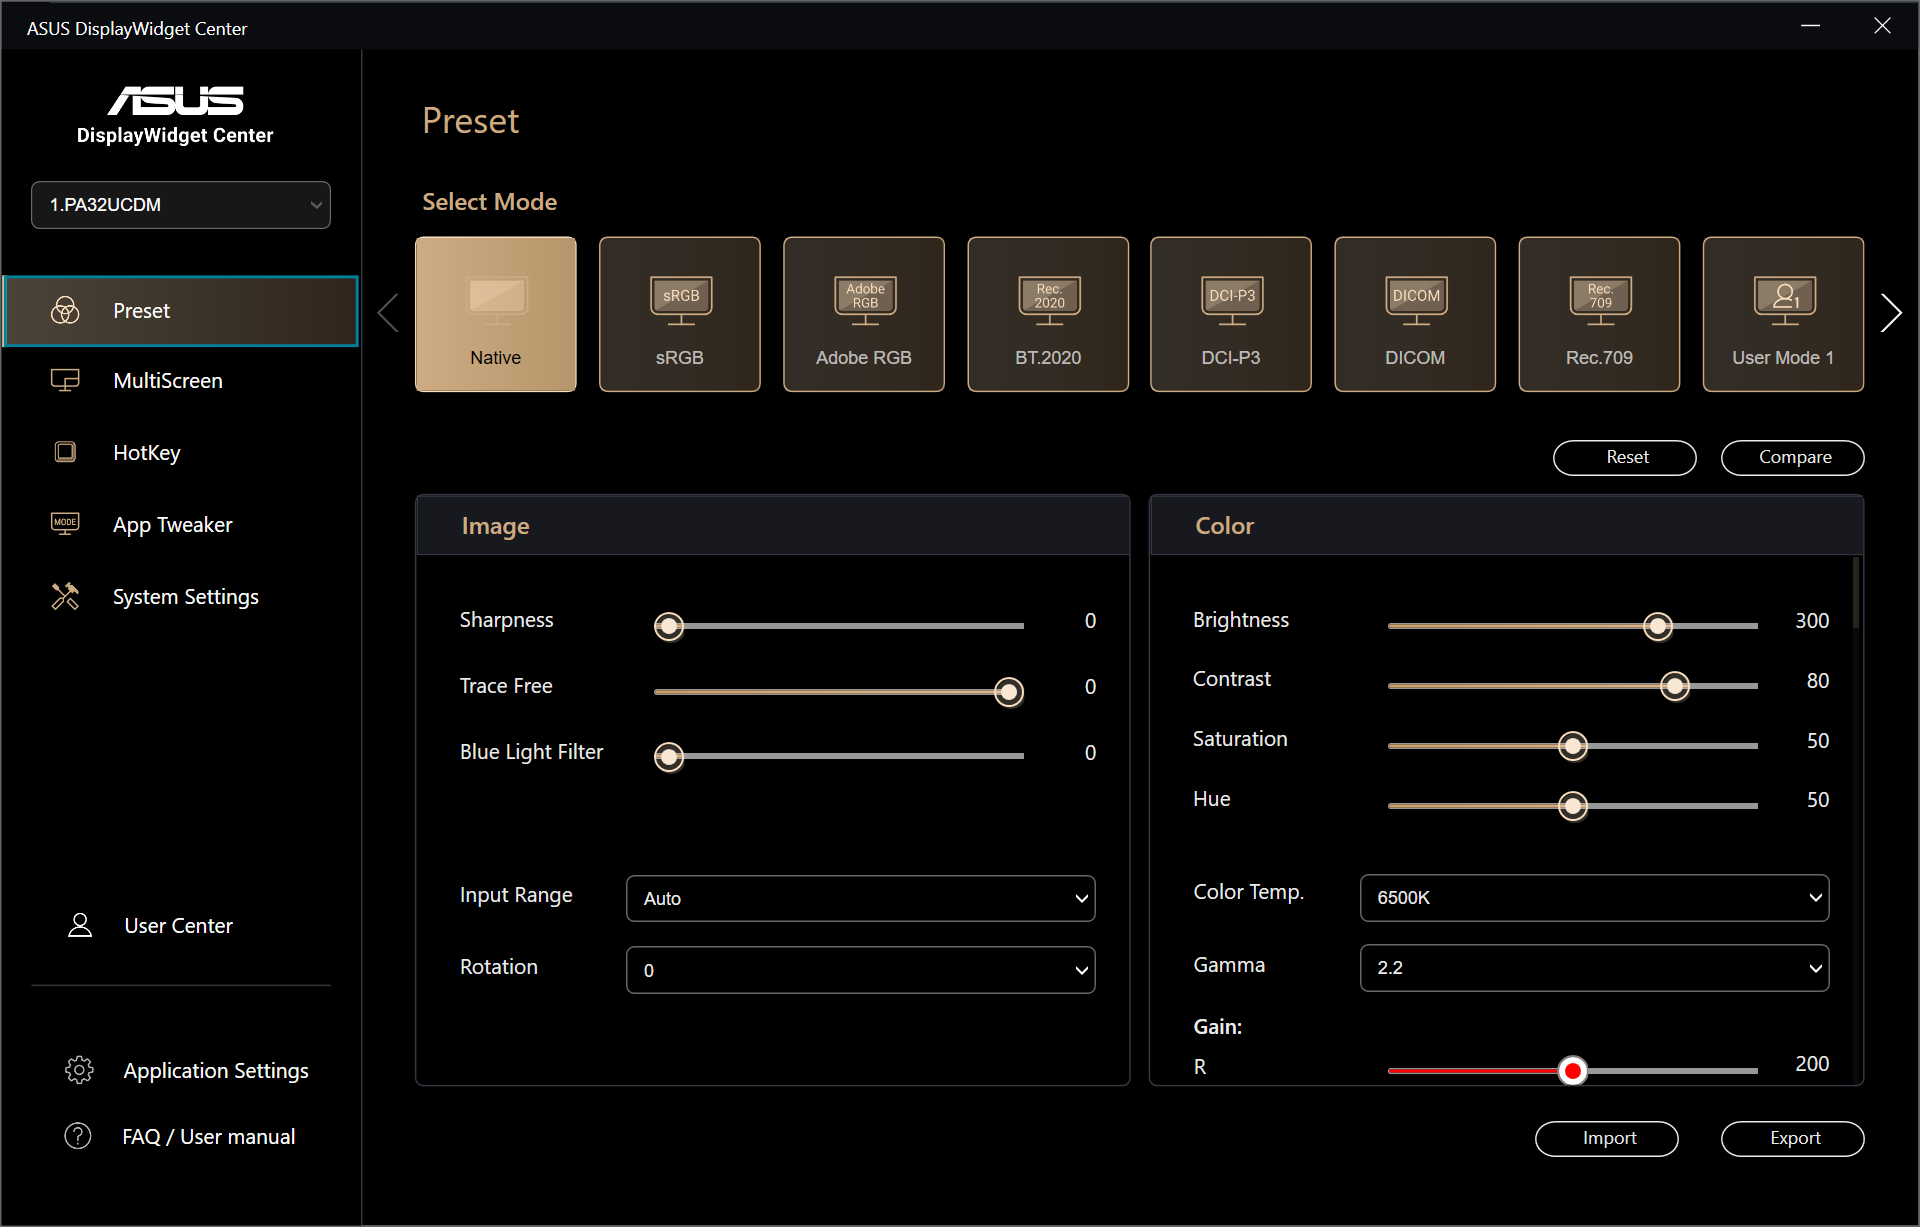
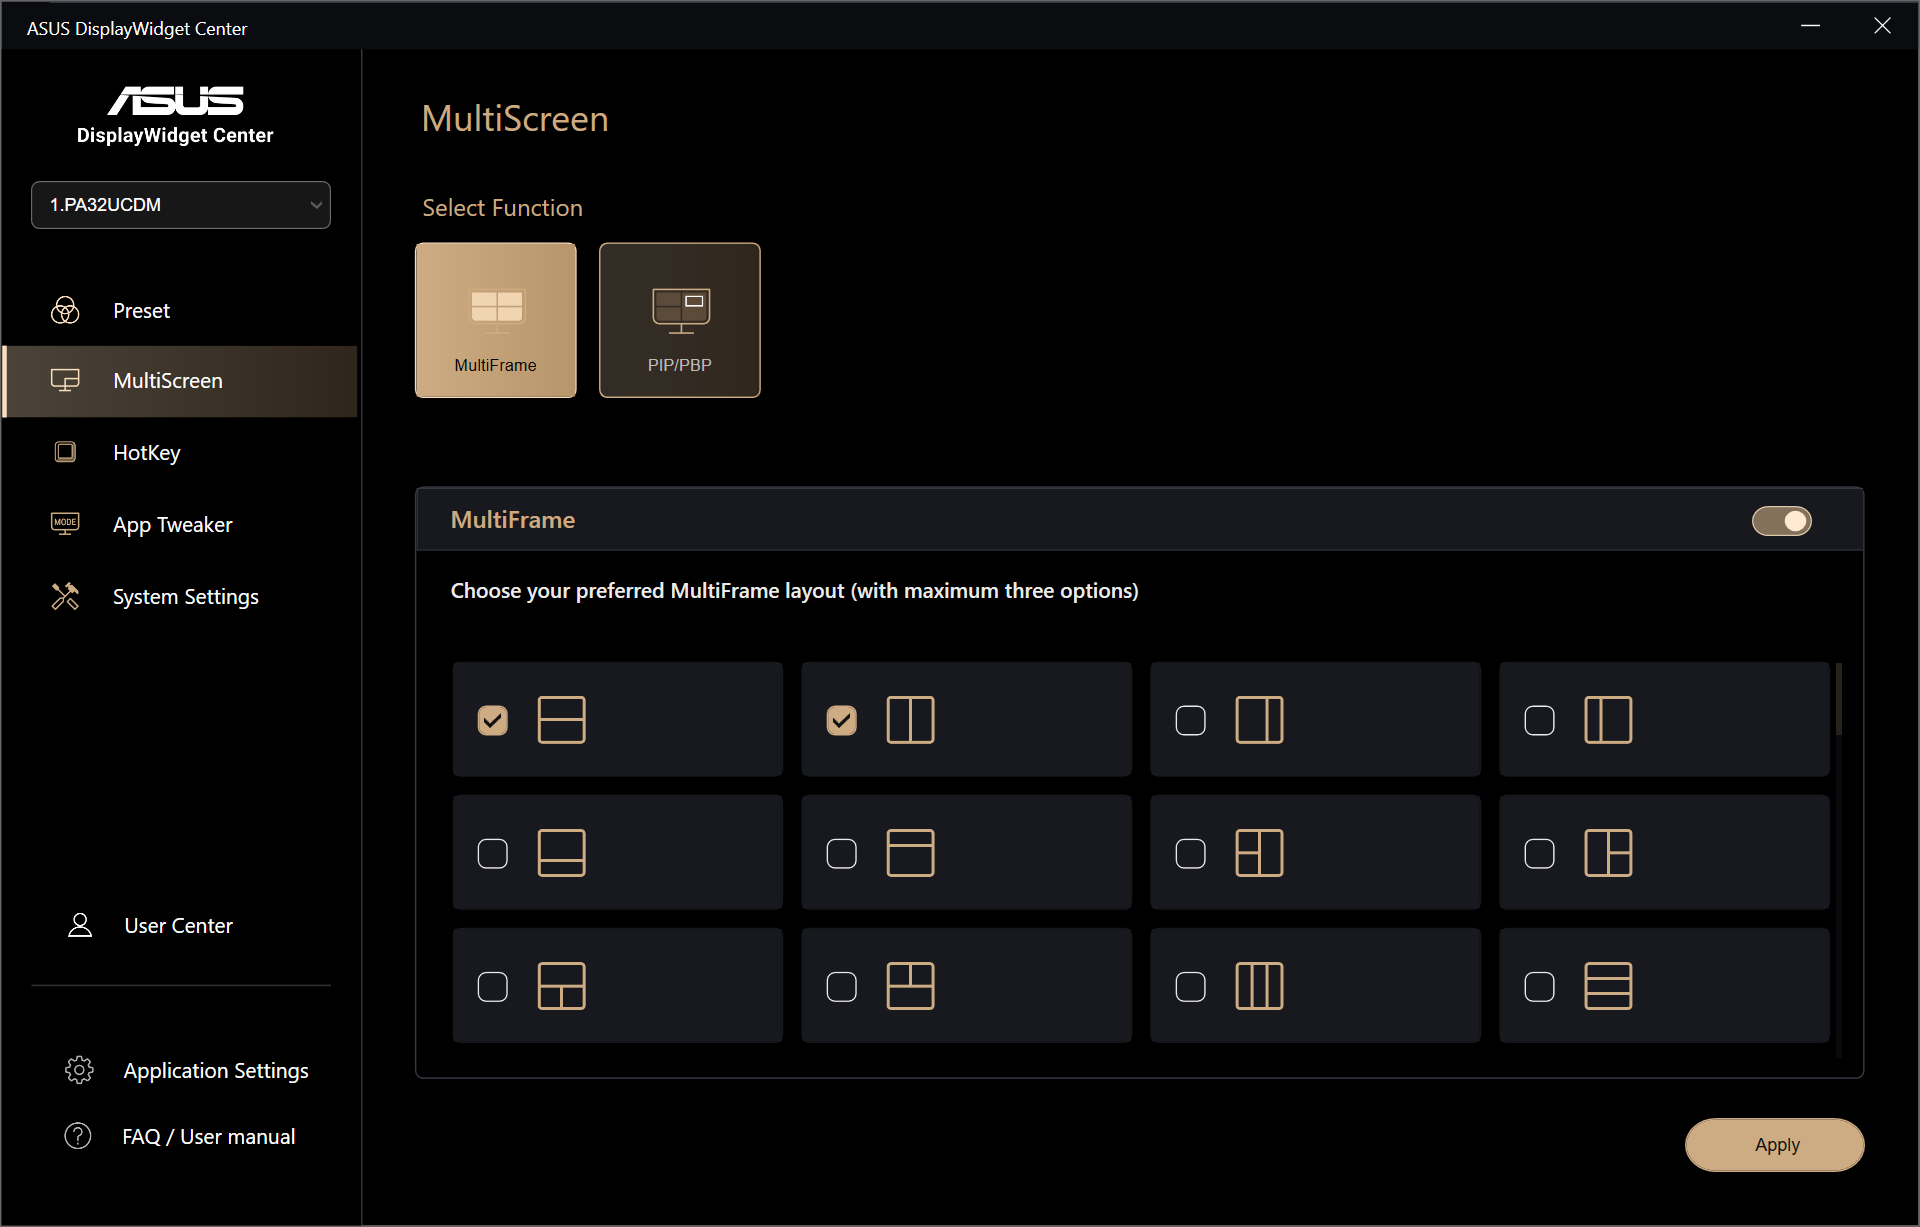
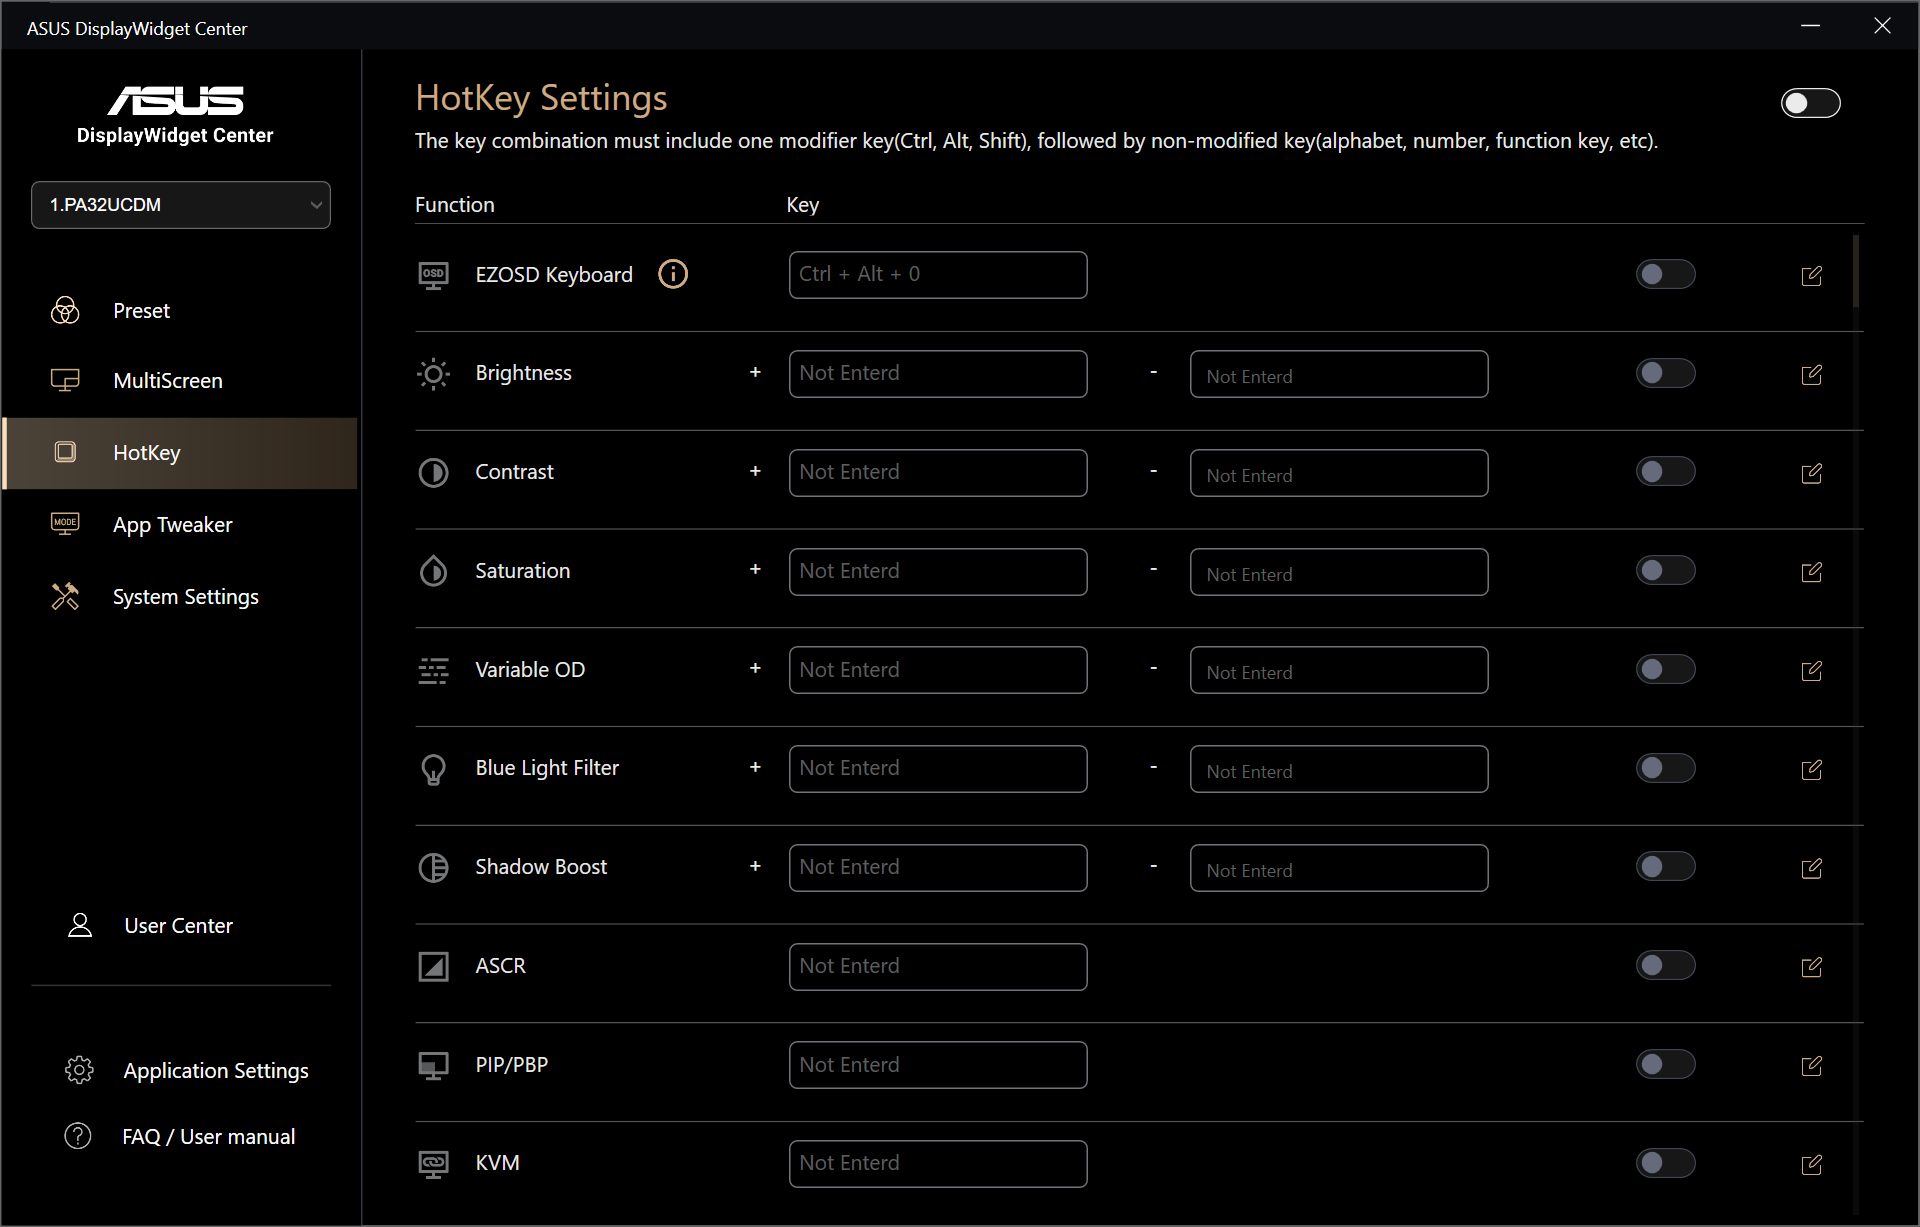

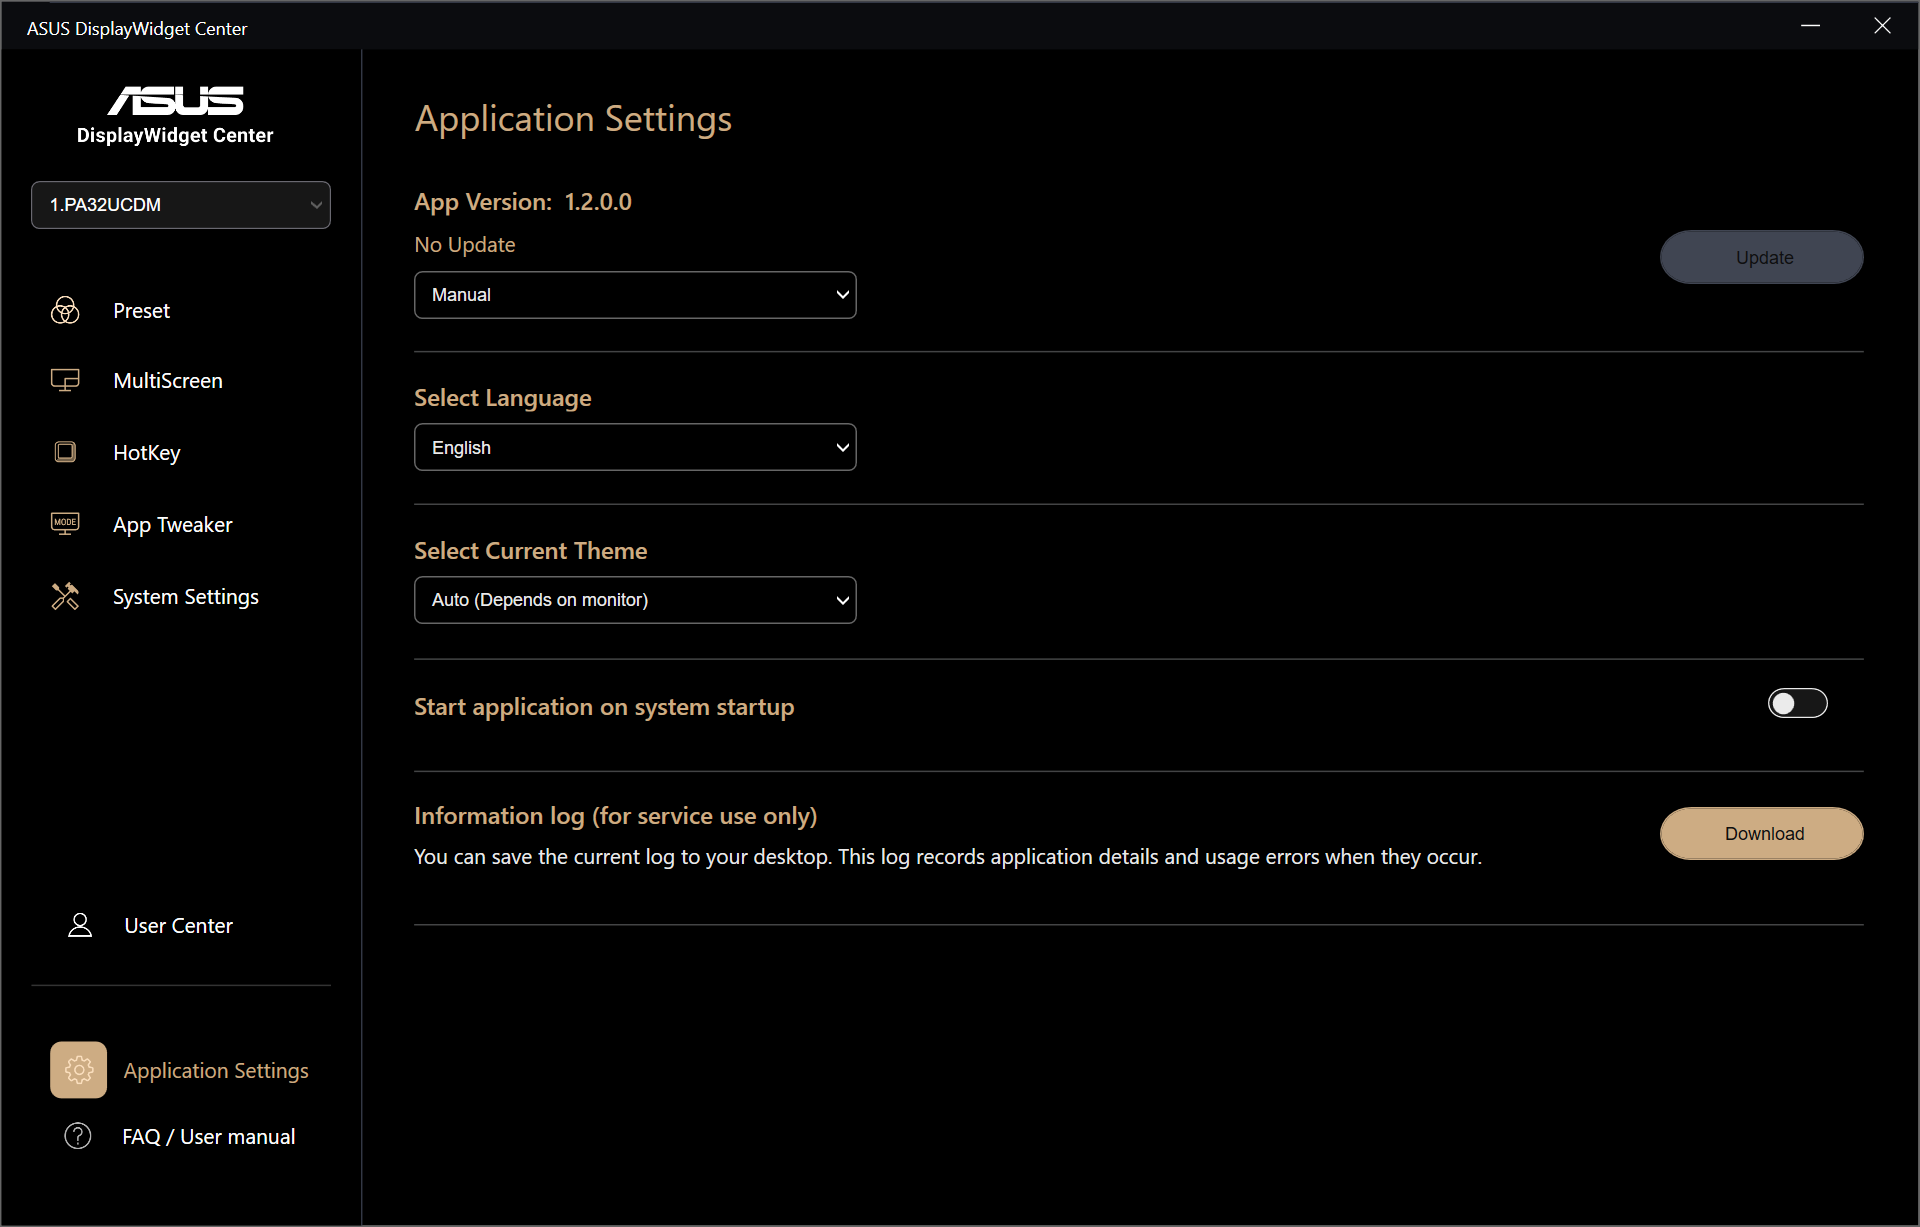
For those interested, ASUS also provides support for its DisplayWidget Center software. This simply gives you control over the key monitor settings from your PC, so you don't have to fiddle with the OSD to quickly adjust brightness or choose a different colour mode.
Our main test involves using an X-Rite i1 Display Pro Plus colorimeter and utilising Portrait Display's Calman Ultimate software. The device sits on top of the screen while the software generates colour tones and patterns, which it compares against predetermined values to work out how accurate the screen is.
The results show:
- A monitor’s maximum brightness in candelas or cd/m2 at various levels set in the OSD.
- A monitor’s contrast ratio at various brightness levels in the OSD.
- Gamut coverage, primarily focusing on sRGB and DCI-P3 colour spaces.
- Greyscale accuracy, measured across 20 shades, with an average colour balance reported.
- The exact gamma levels, with a comparison against preset settings in the OSD.
- The colour accuracy, expressed as a Delta E ratio, with a result under 3 being fine for normal use, and under 2 being great for colour-accurate design work.
We first run these tests with the display in its out-of-the-box state, with all settings on default. If there is an sRGB emulation option or other useful mode then we may test that too. We then calibrate the screen using the Calman Ultimate software and run the tests again.
You can read more about our test methodology HERE.
Default settings
Brightness and Contrast (Full Screen)
| OSD Brightness | White Luminance (cd/m2) | Black Luminance (cd/m2) | Contrast Ratio |
| 0% | 6.3 | 0.00 | ~Infinite |
| 25% | 86.9 | 0.00 | ~Infinite |
| 50% | 168.9 | 0.00 | ~Infinite |
| 75% | 206.7 | 0.00 | ~Infinite |
| 100% | 242.5 | 0.00 | ~Infinite |
Starting our testing with brightness, things are typical of a QD-OLED monitor, with a peak of just below 250 nits for a full screen white. ASUS has enabled ‘Uniform Brightness' by default, meaning the panel does not dim depending on what's on screen (based on the APL), but you could enable this setting if you prefer that behaviour.
The screen also gets pleasingly dim, with just 6.3 nits registered with the brightness as its minimum setting. And as it's an OLED, contrast is effectively infinite given the pixels turn off to display black.
Gamut (CIE 1976)
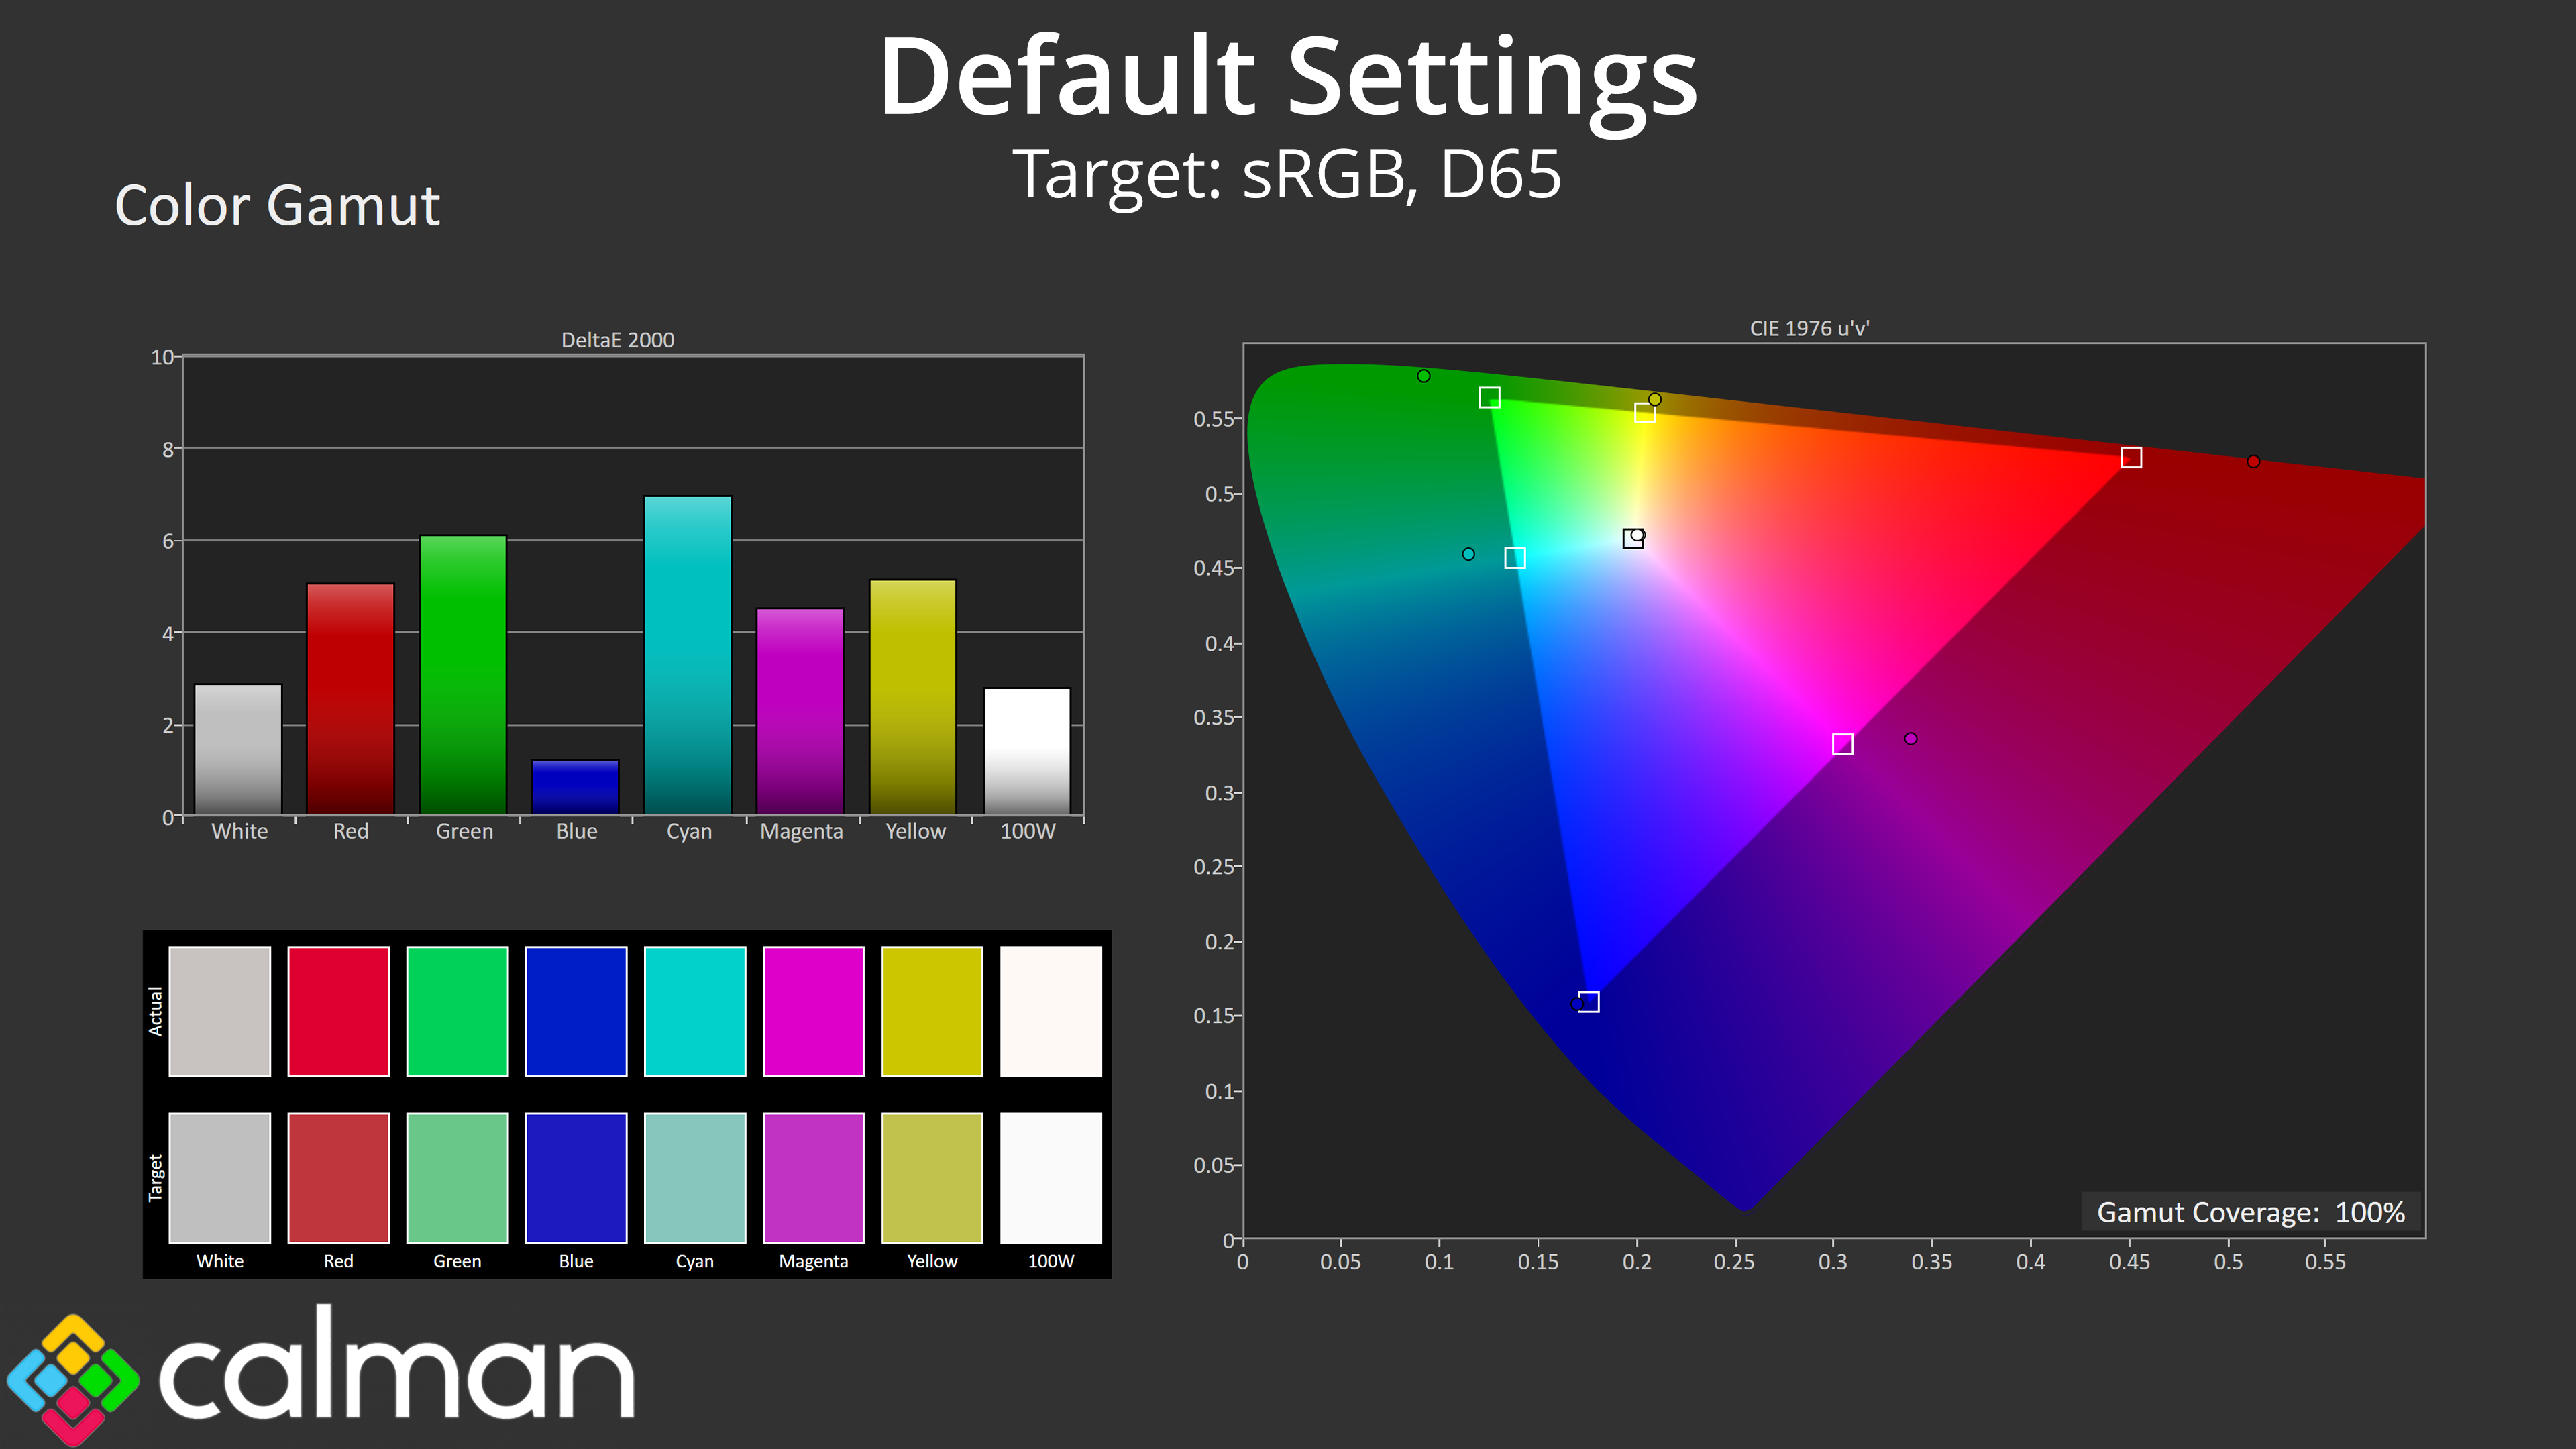
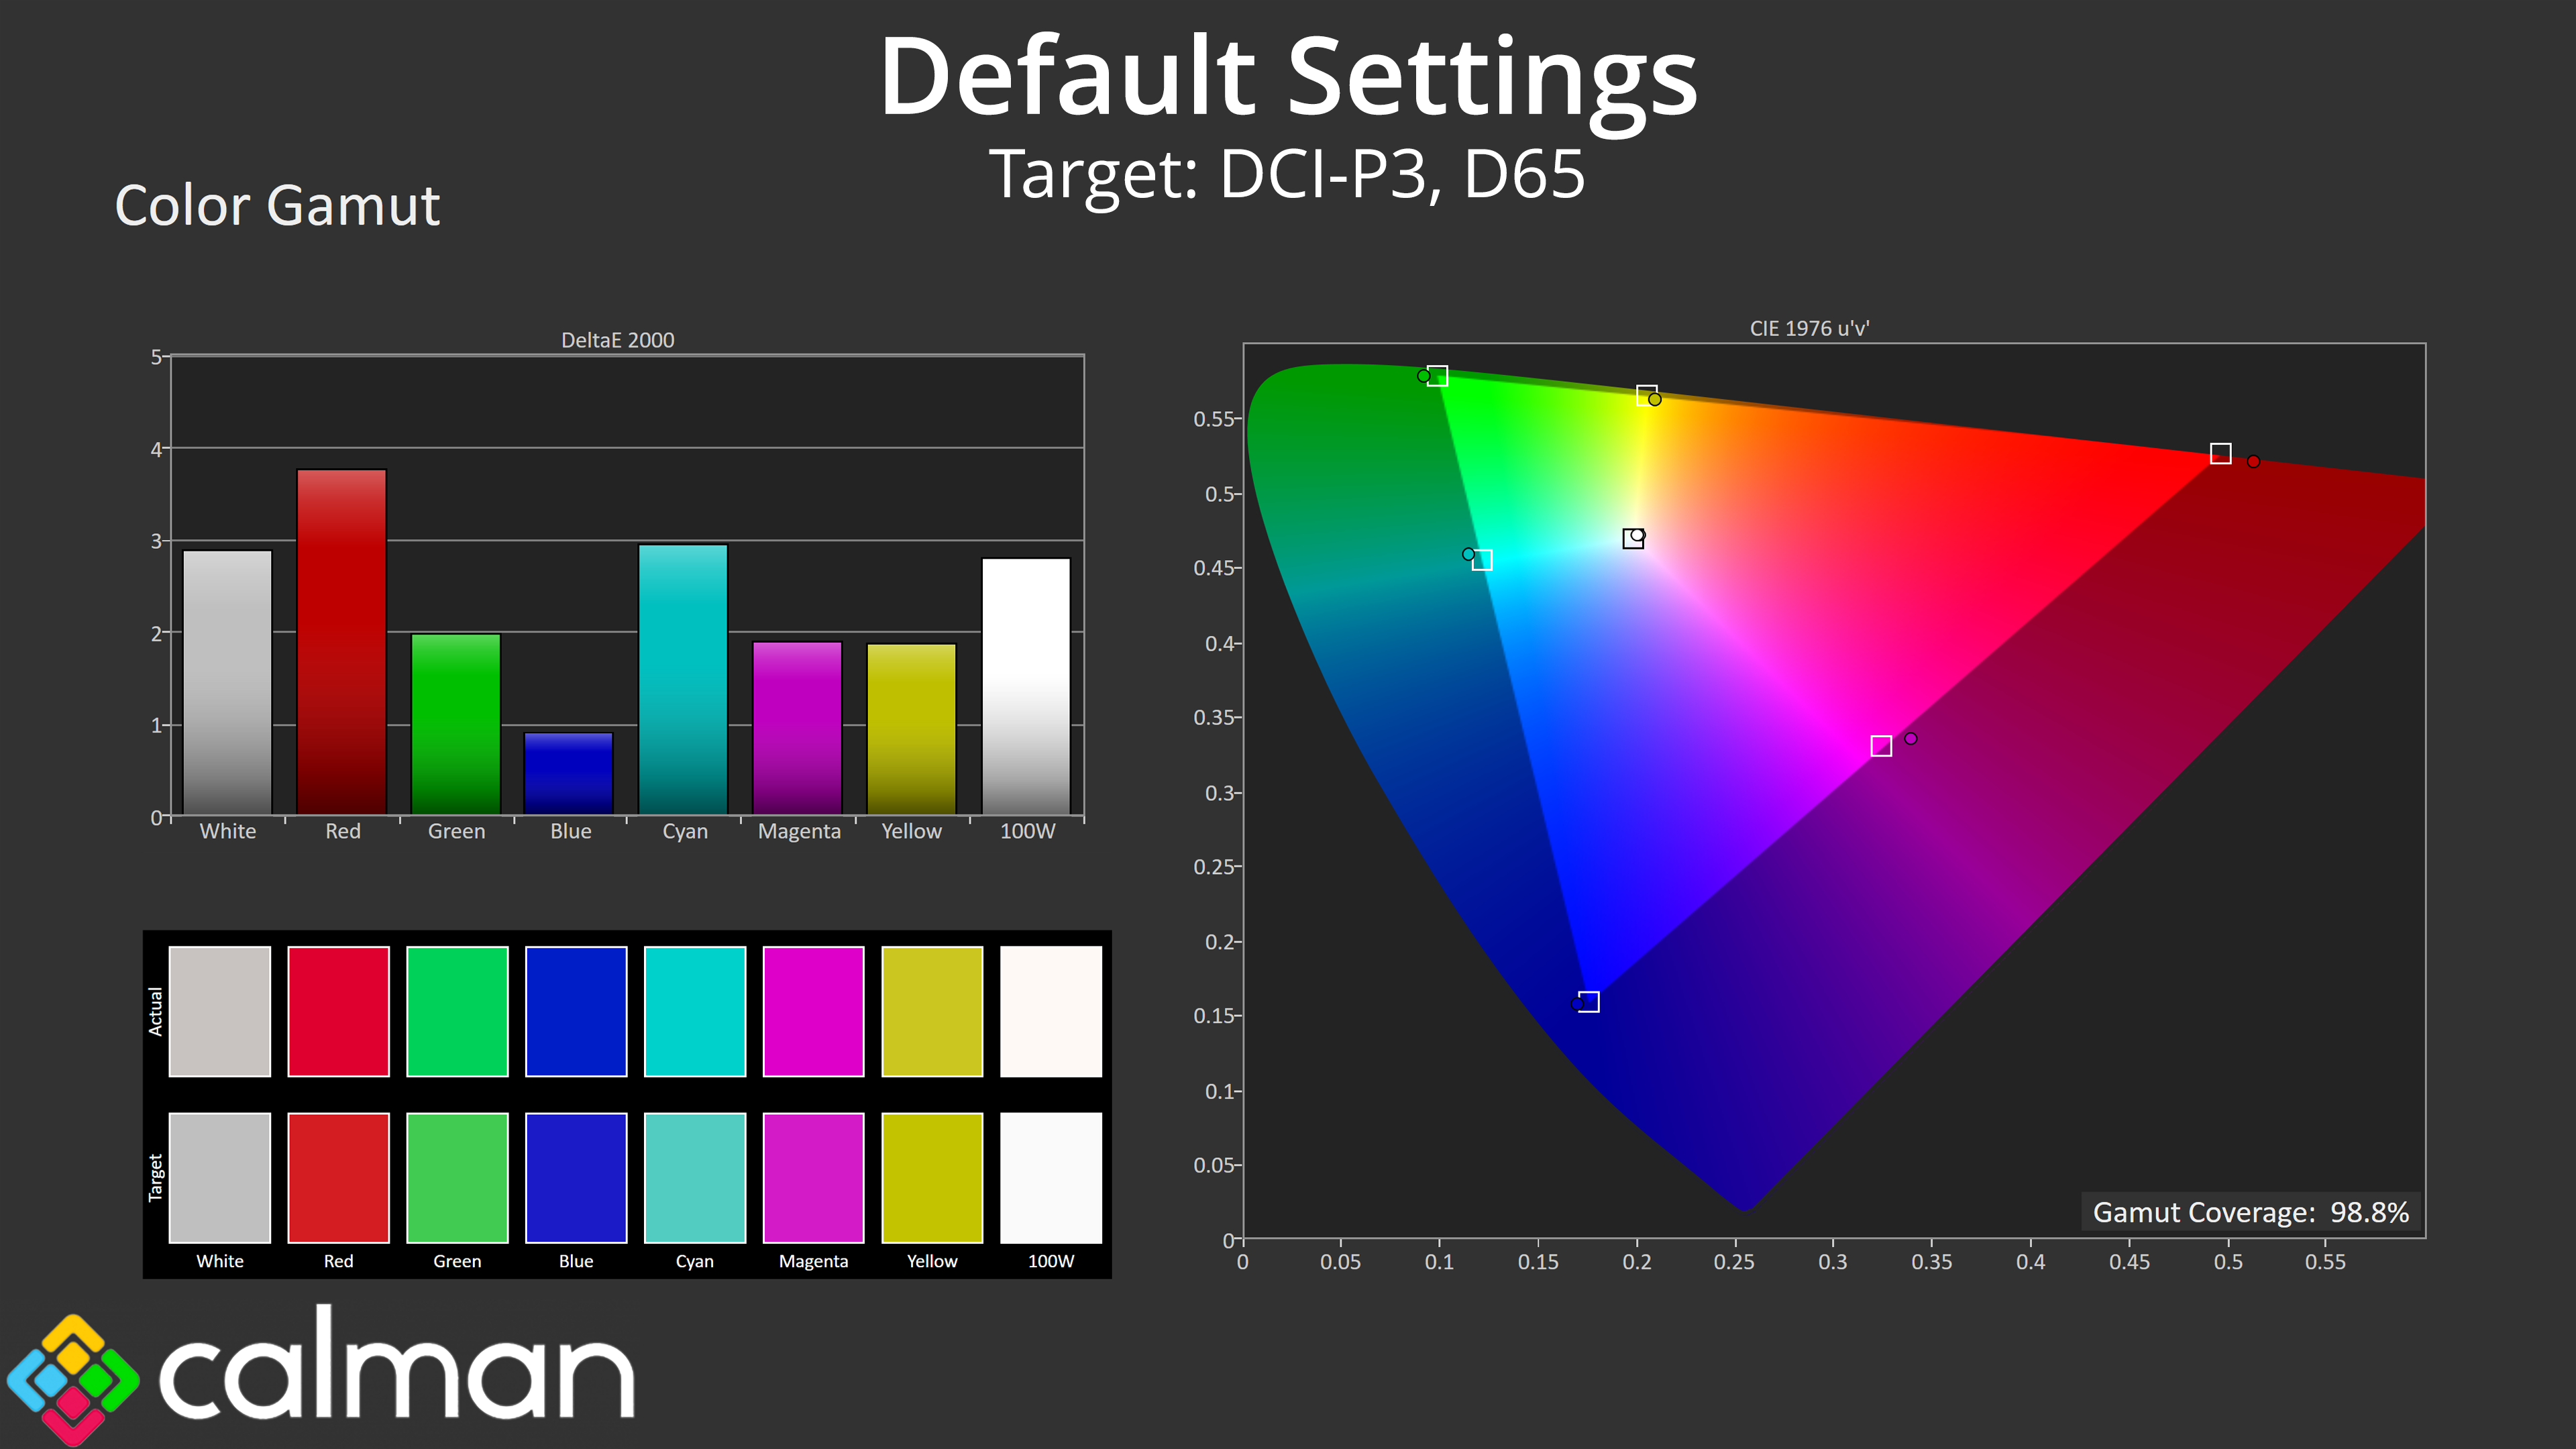
| Colour space | Coverage (%) |
| sRGB | 100 |
| DCI-P3 | 98.8 |
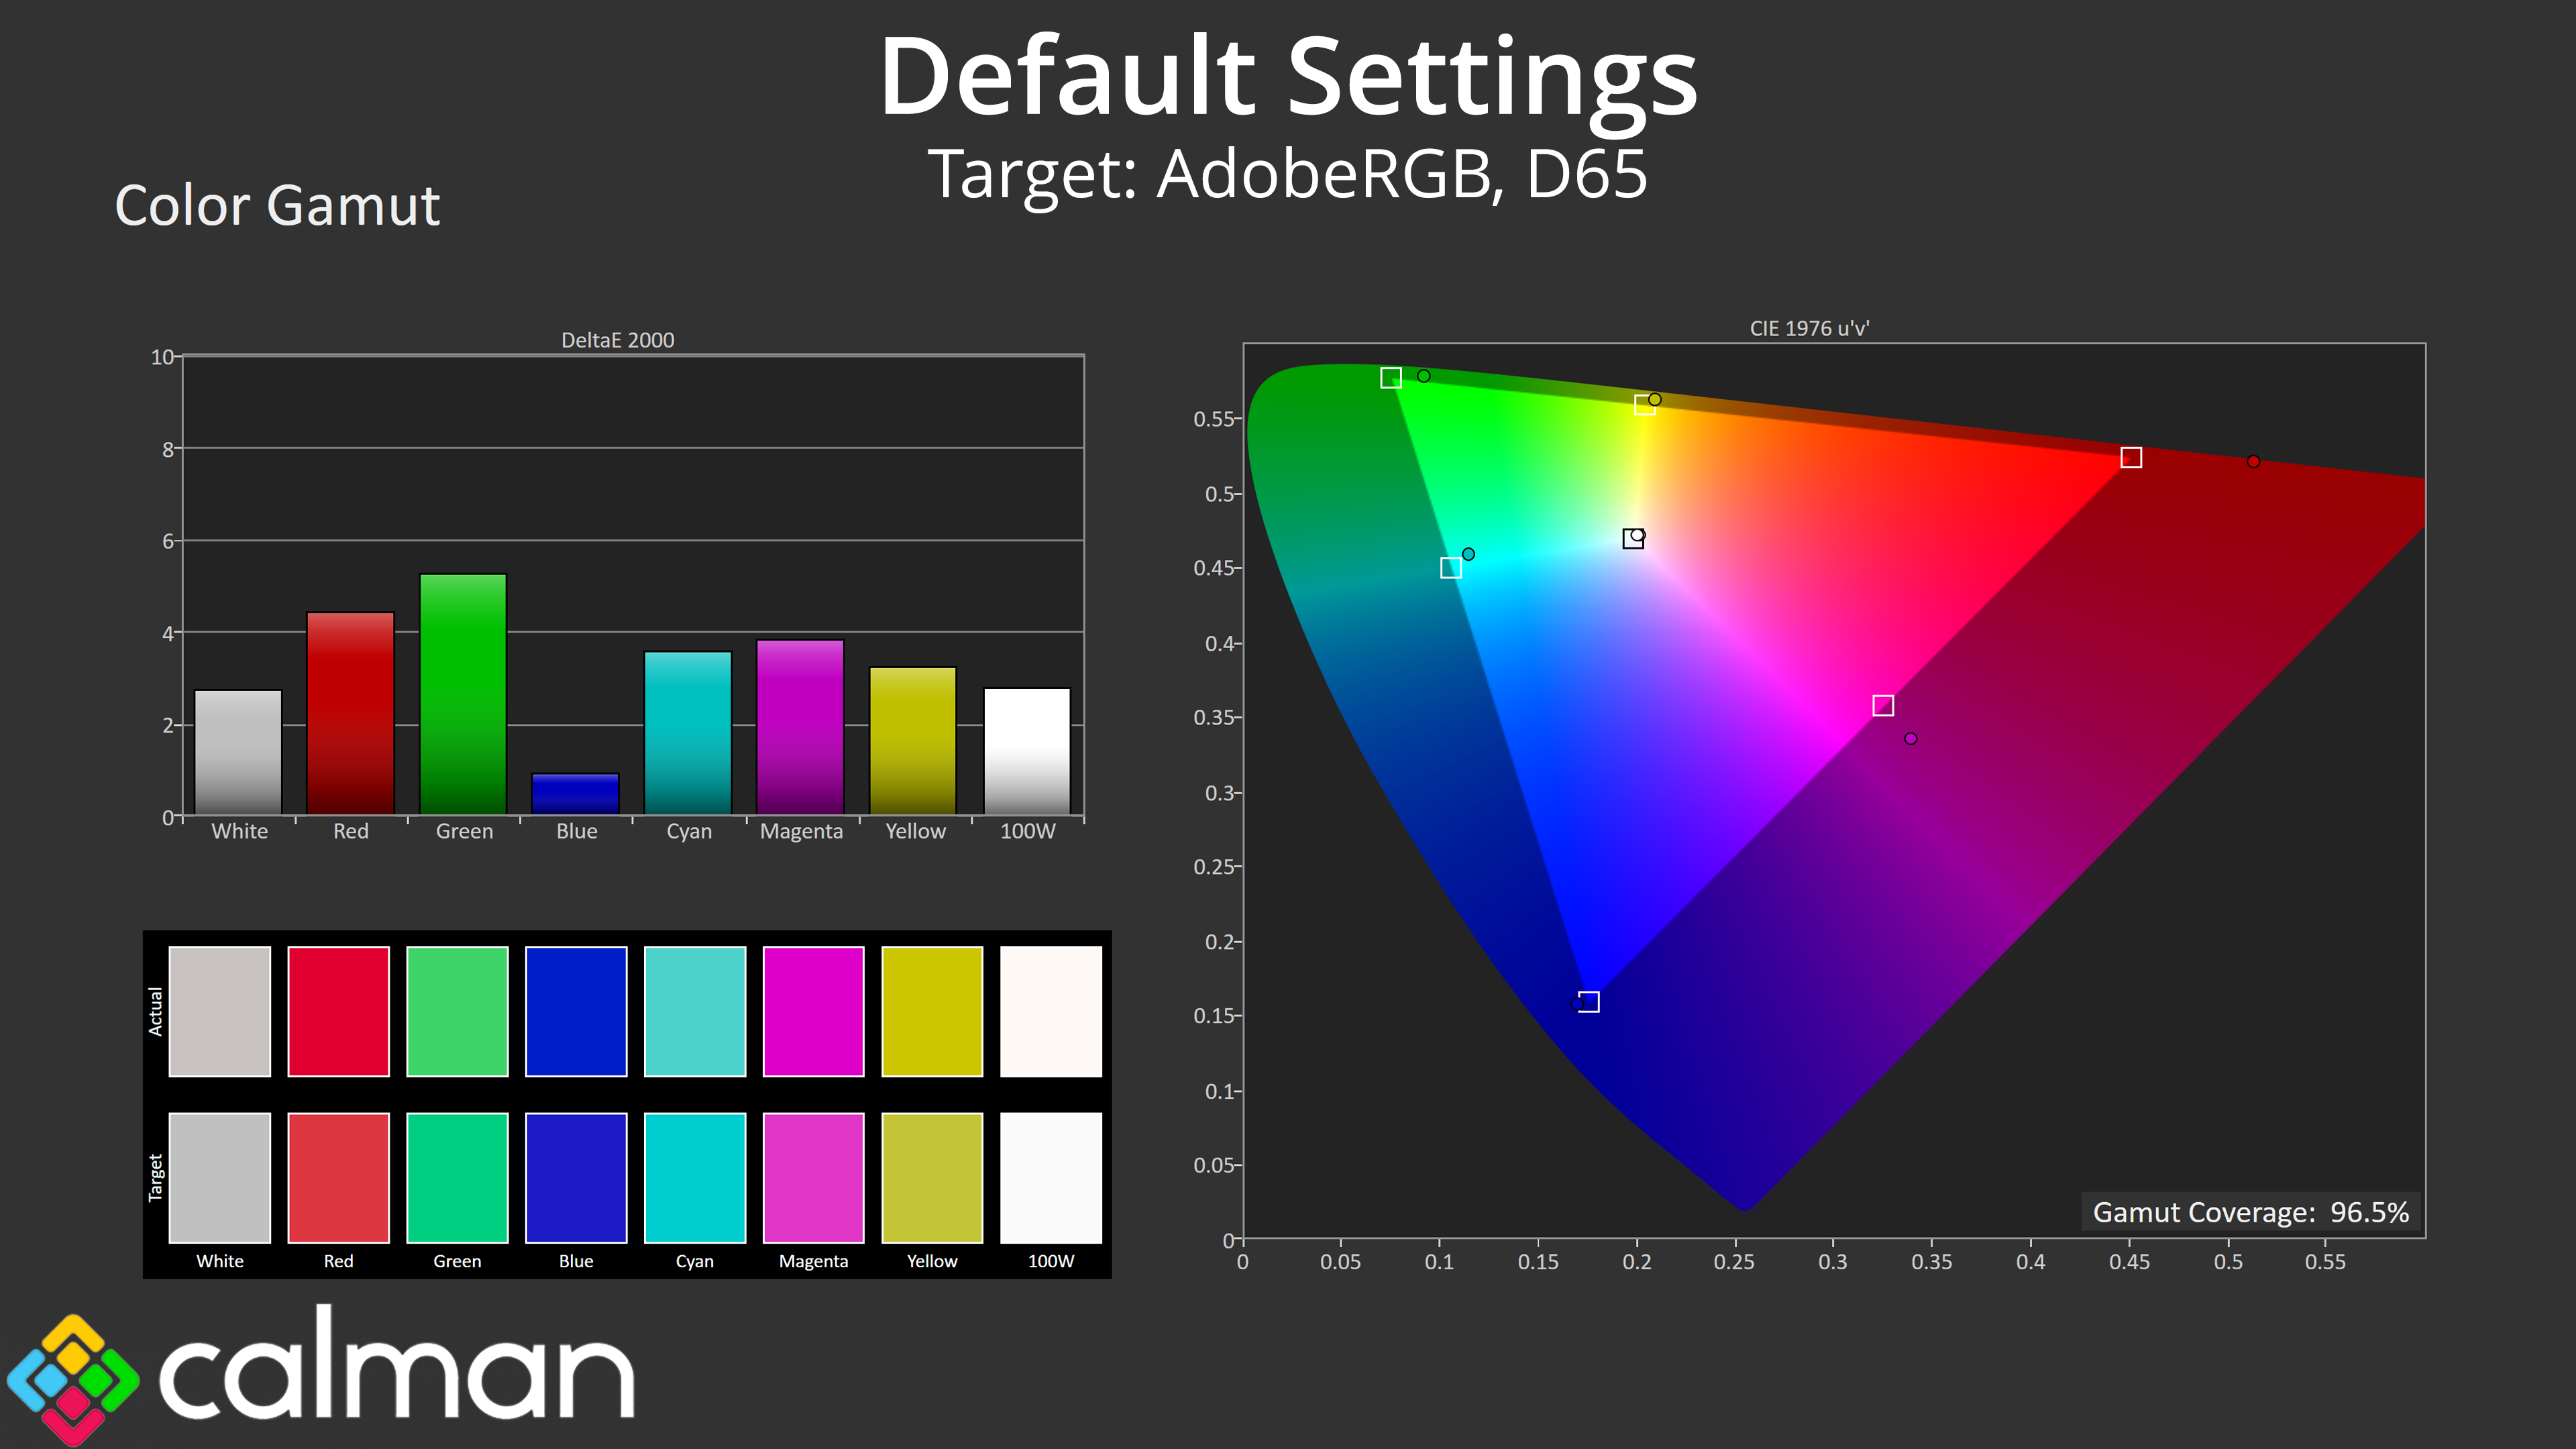
| Adobe RGB | 96.5 |
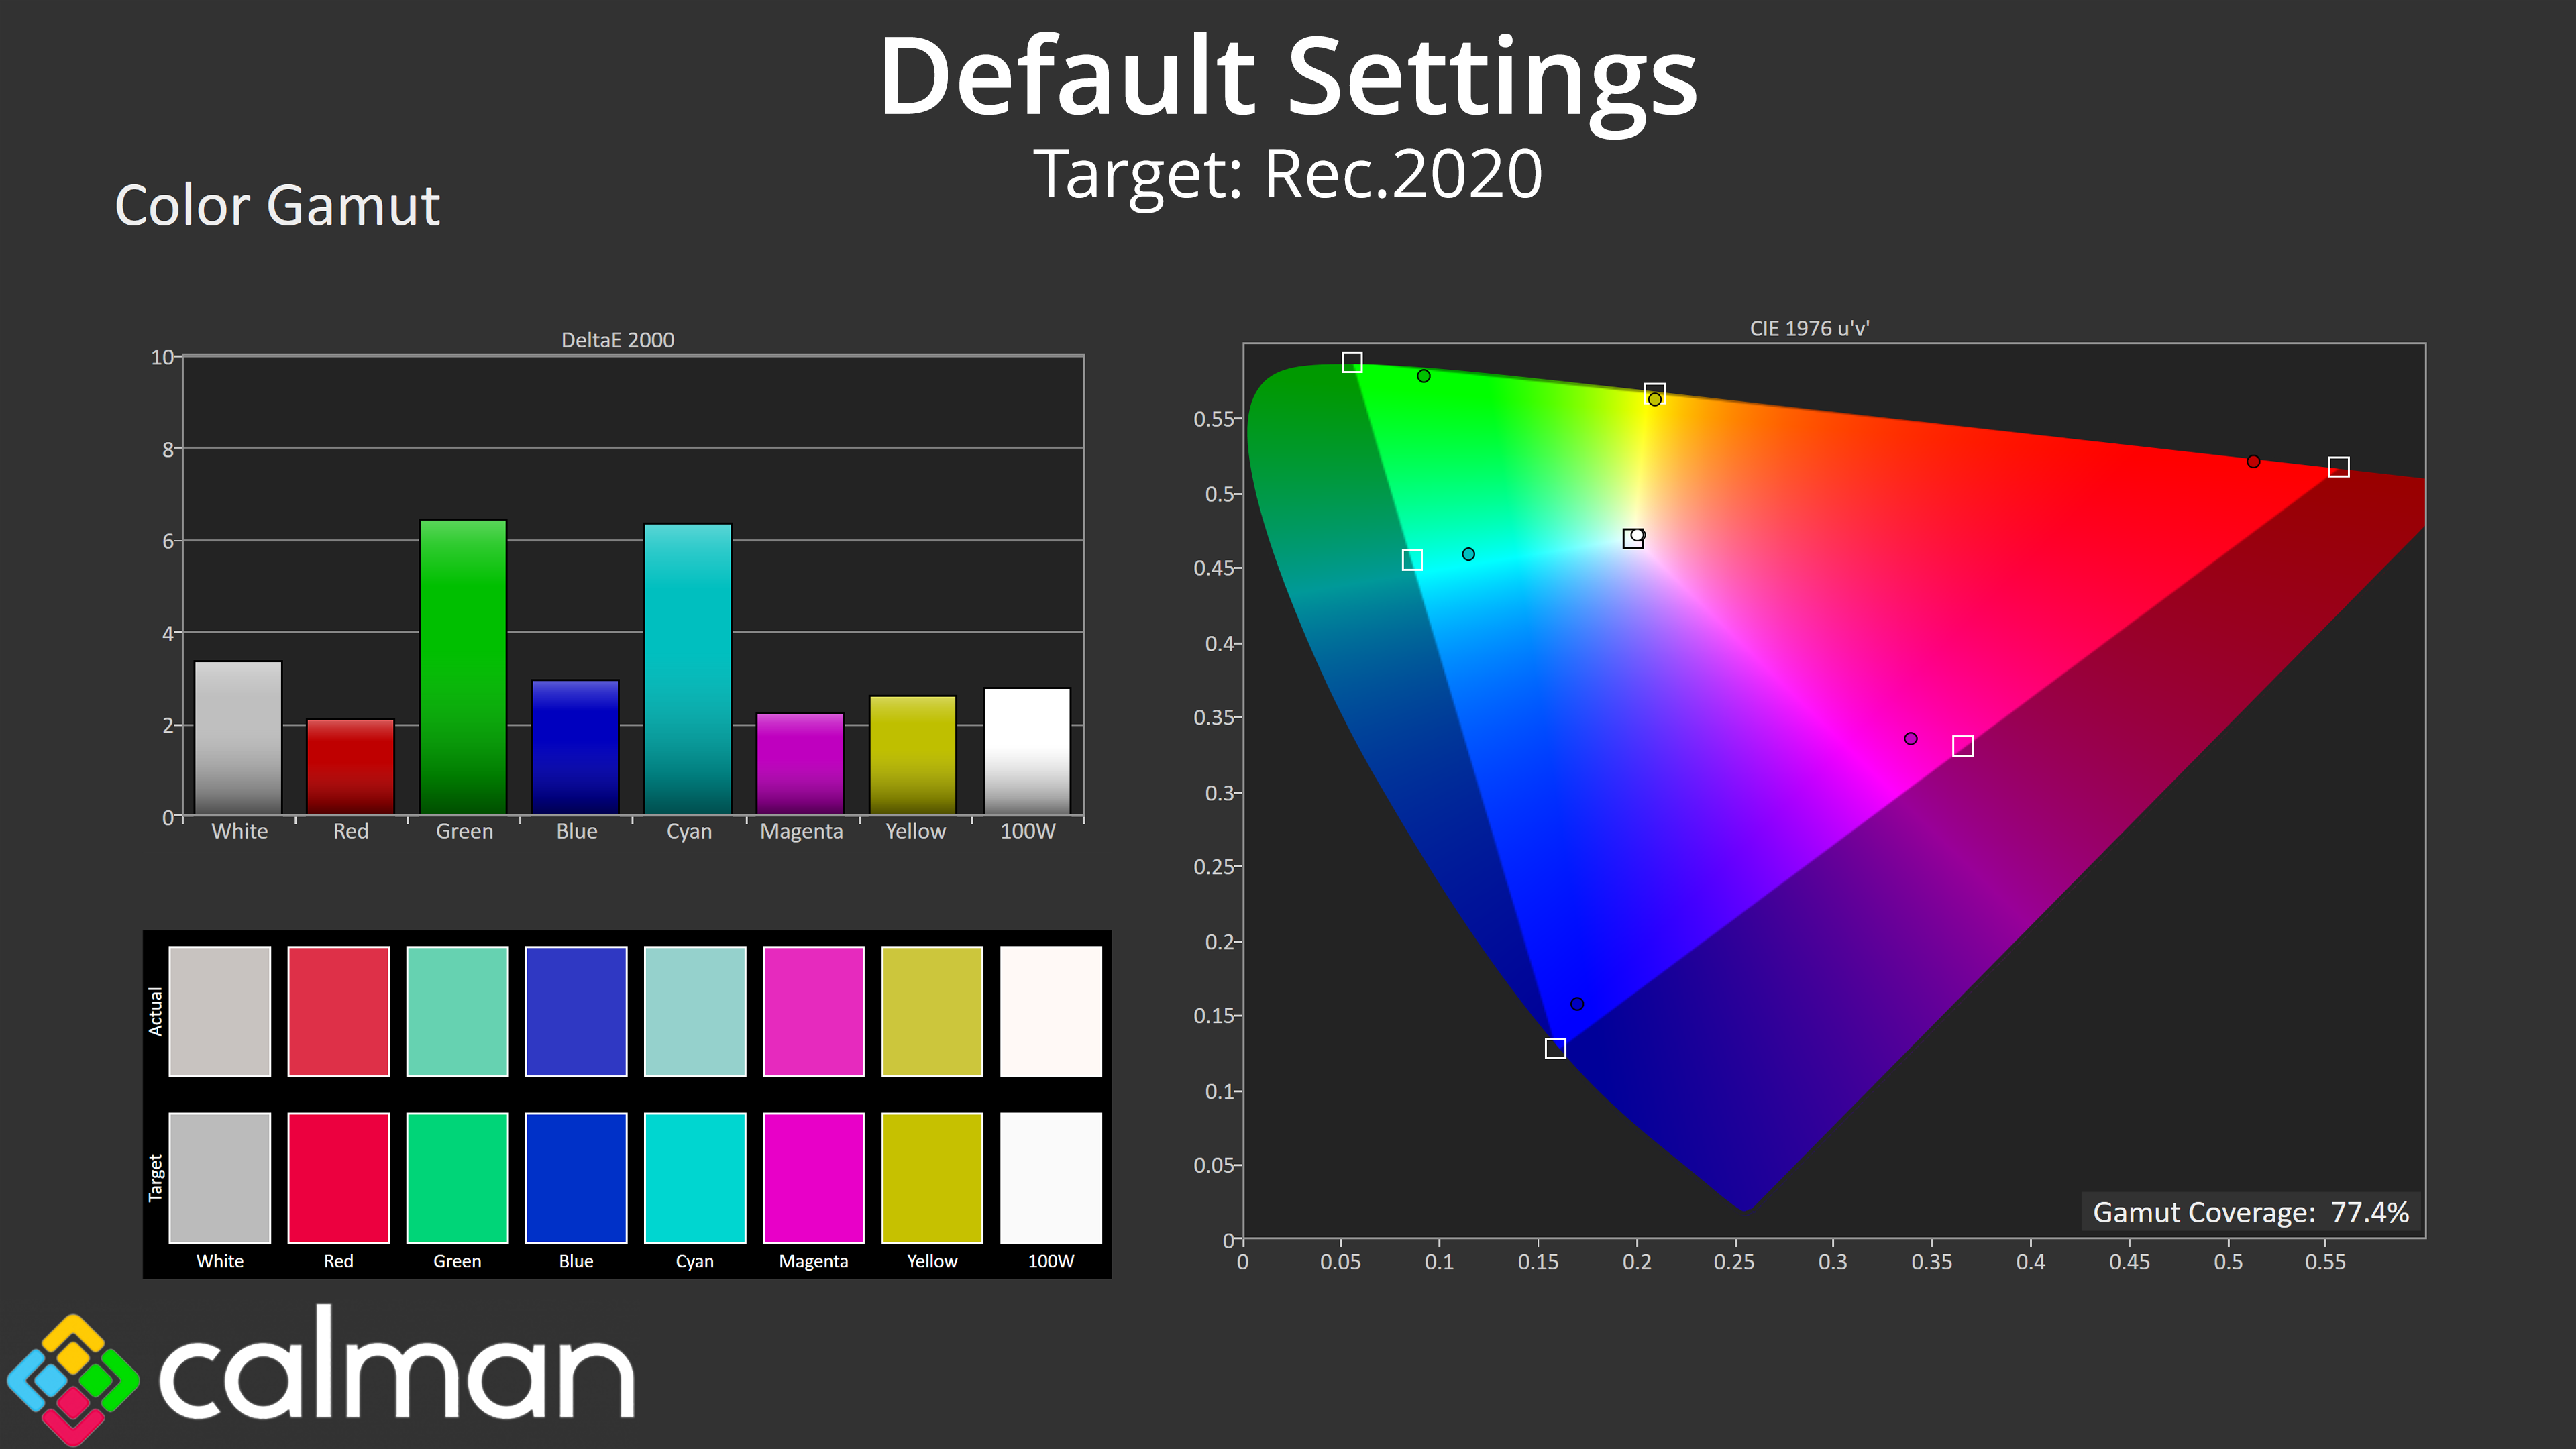
| Rec.2020 | 77.4 |
As for gamut, it's as wide as we'd expect from a QD-OLED. That means coverage far surpasses the sRGB space and offers 98.8% DCI-P3, 96.5% Adobe RGB and then 77.4% Rec.2020 coverage.
Greyscale
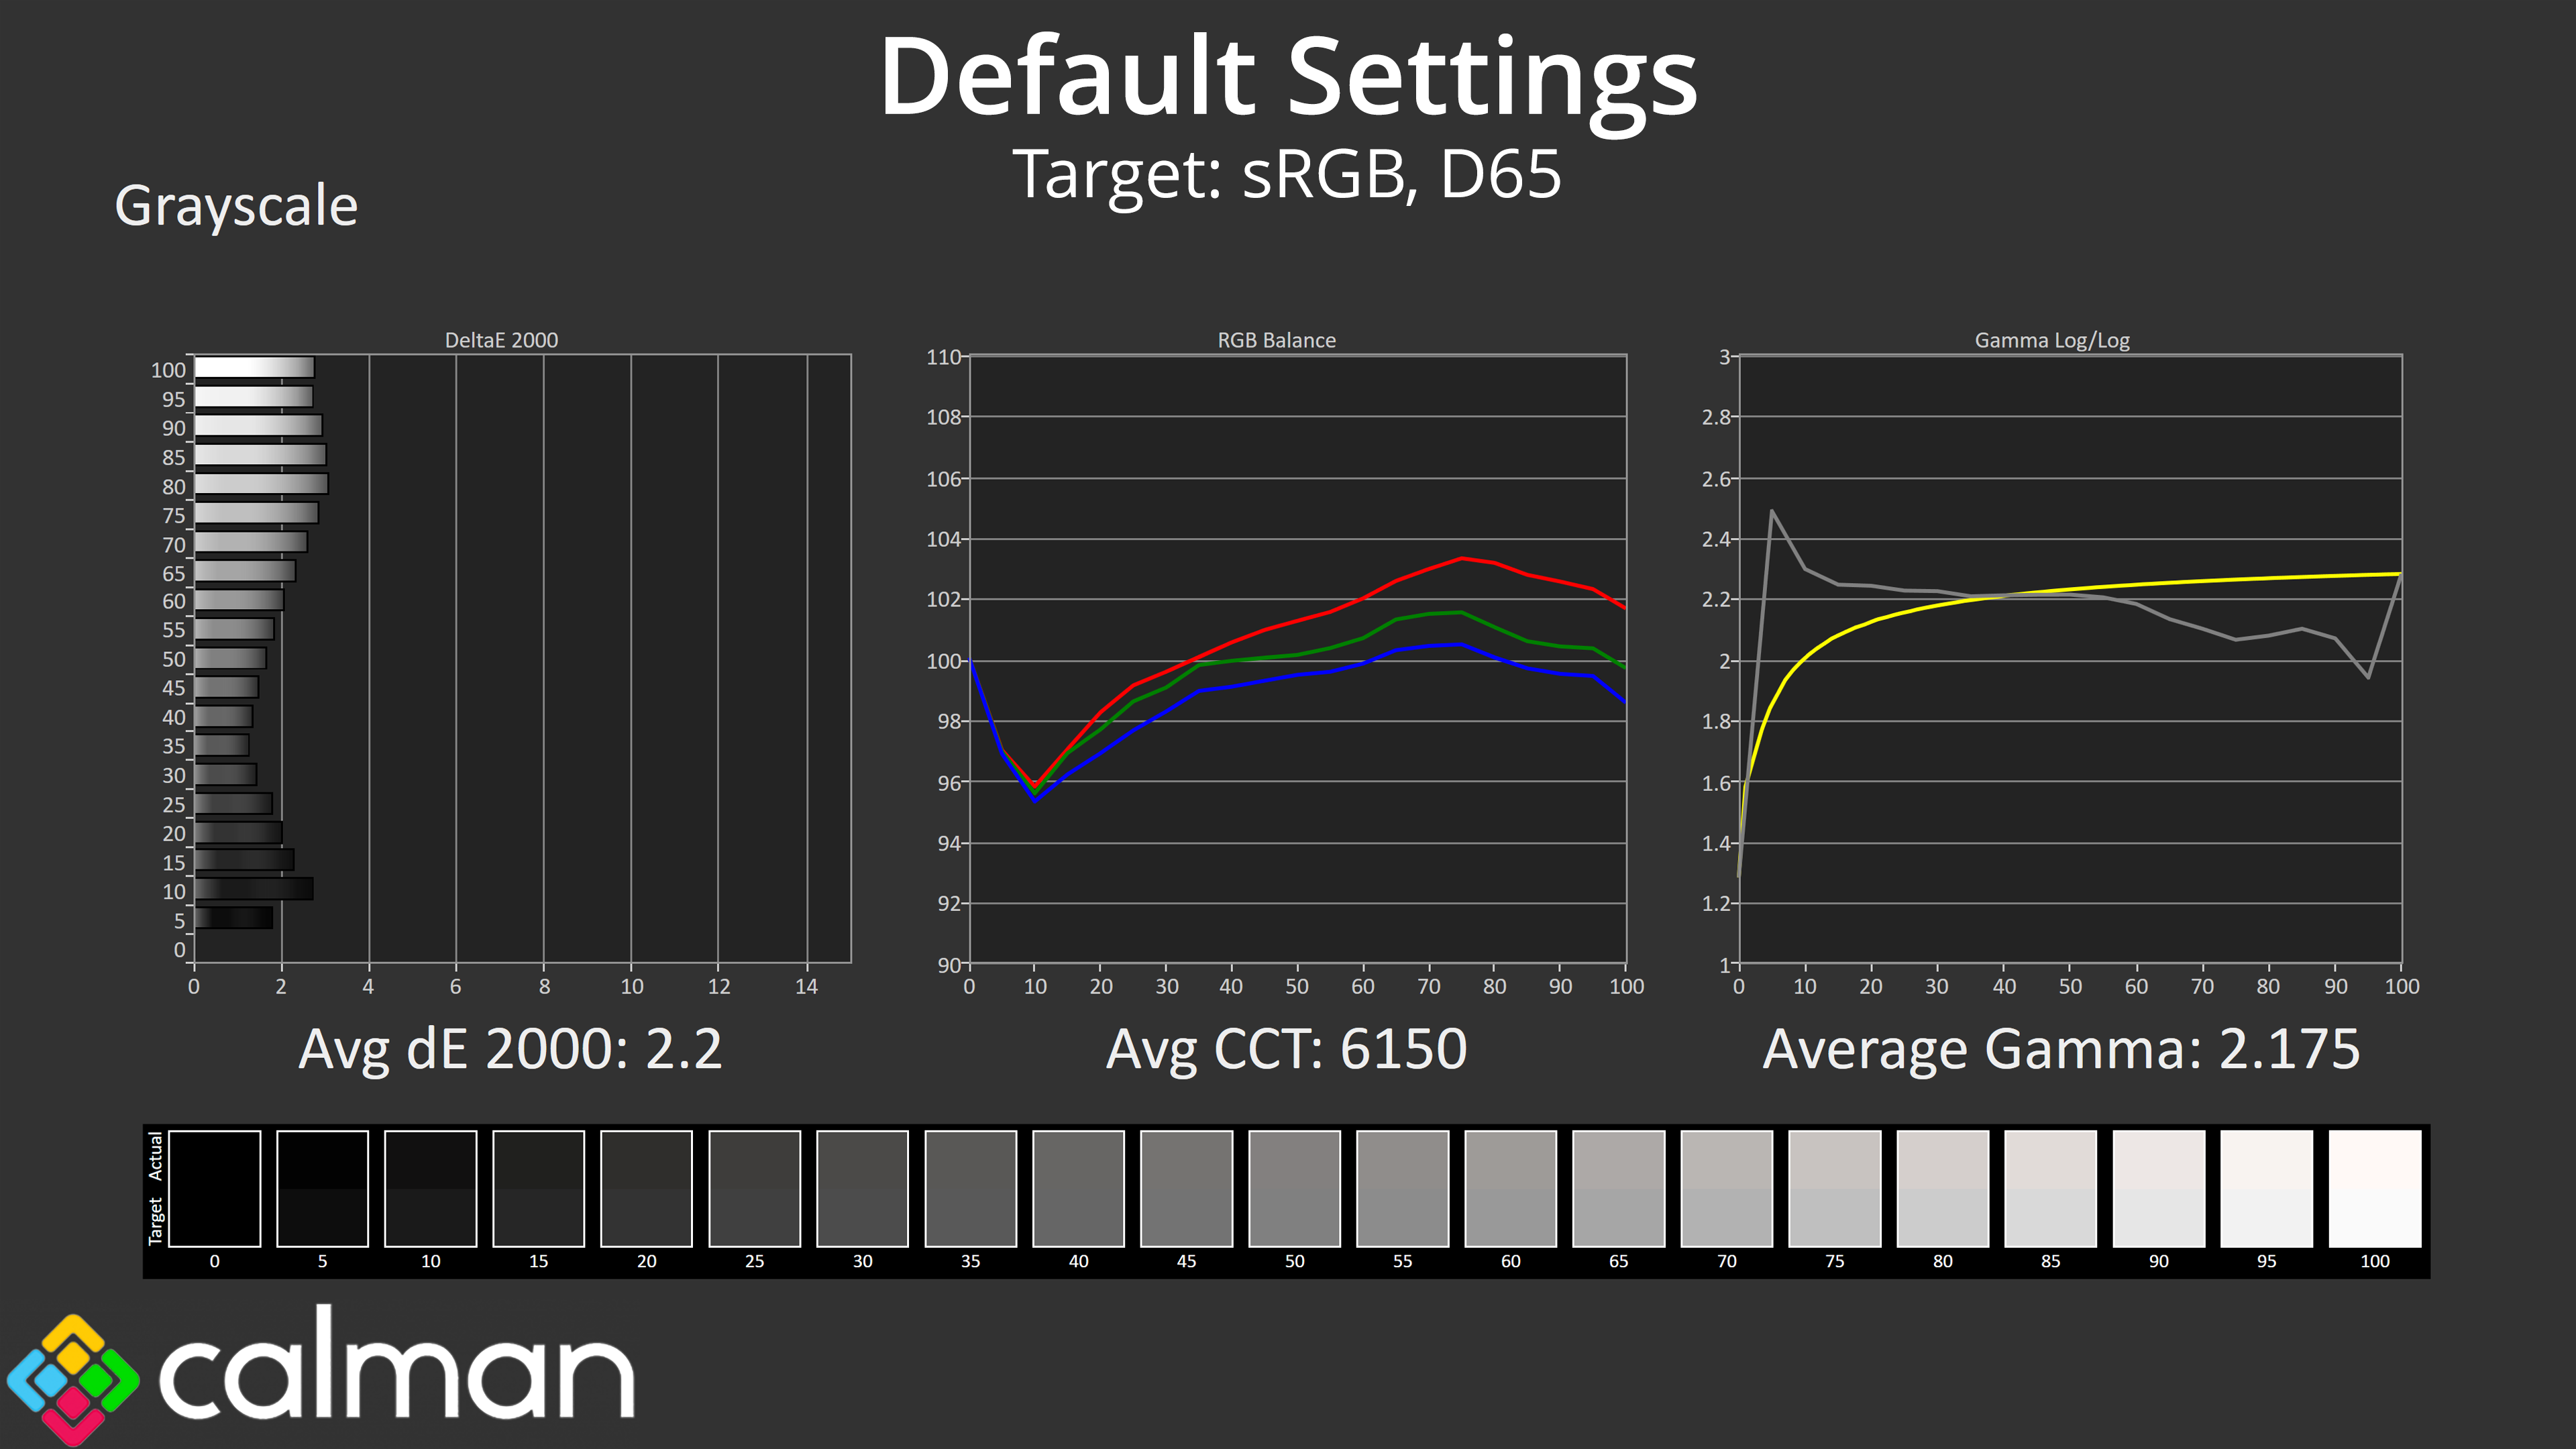
Default greyscale performance is generally solid, but has a couple of quirks. Overall colour balance is slightly on the warm side, as we've typically found with this QD-OLED panel, although nothing terrible given the average correlated colour temperature (CCT) of 6150K is only a 5% deviation from the 6500K target.
There is a slight gamma spike early in the curve though, where measured gamma hit just over 2.4 before settling back down, and indeed dipping slightly too low at the end of the curve. The overall average of 2.175 is pretty close to the 2.2 target, but the tracking could be improved, though it's far from terrible.
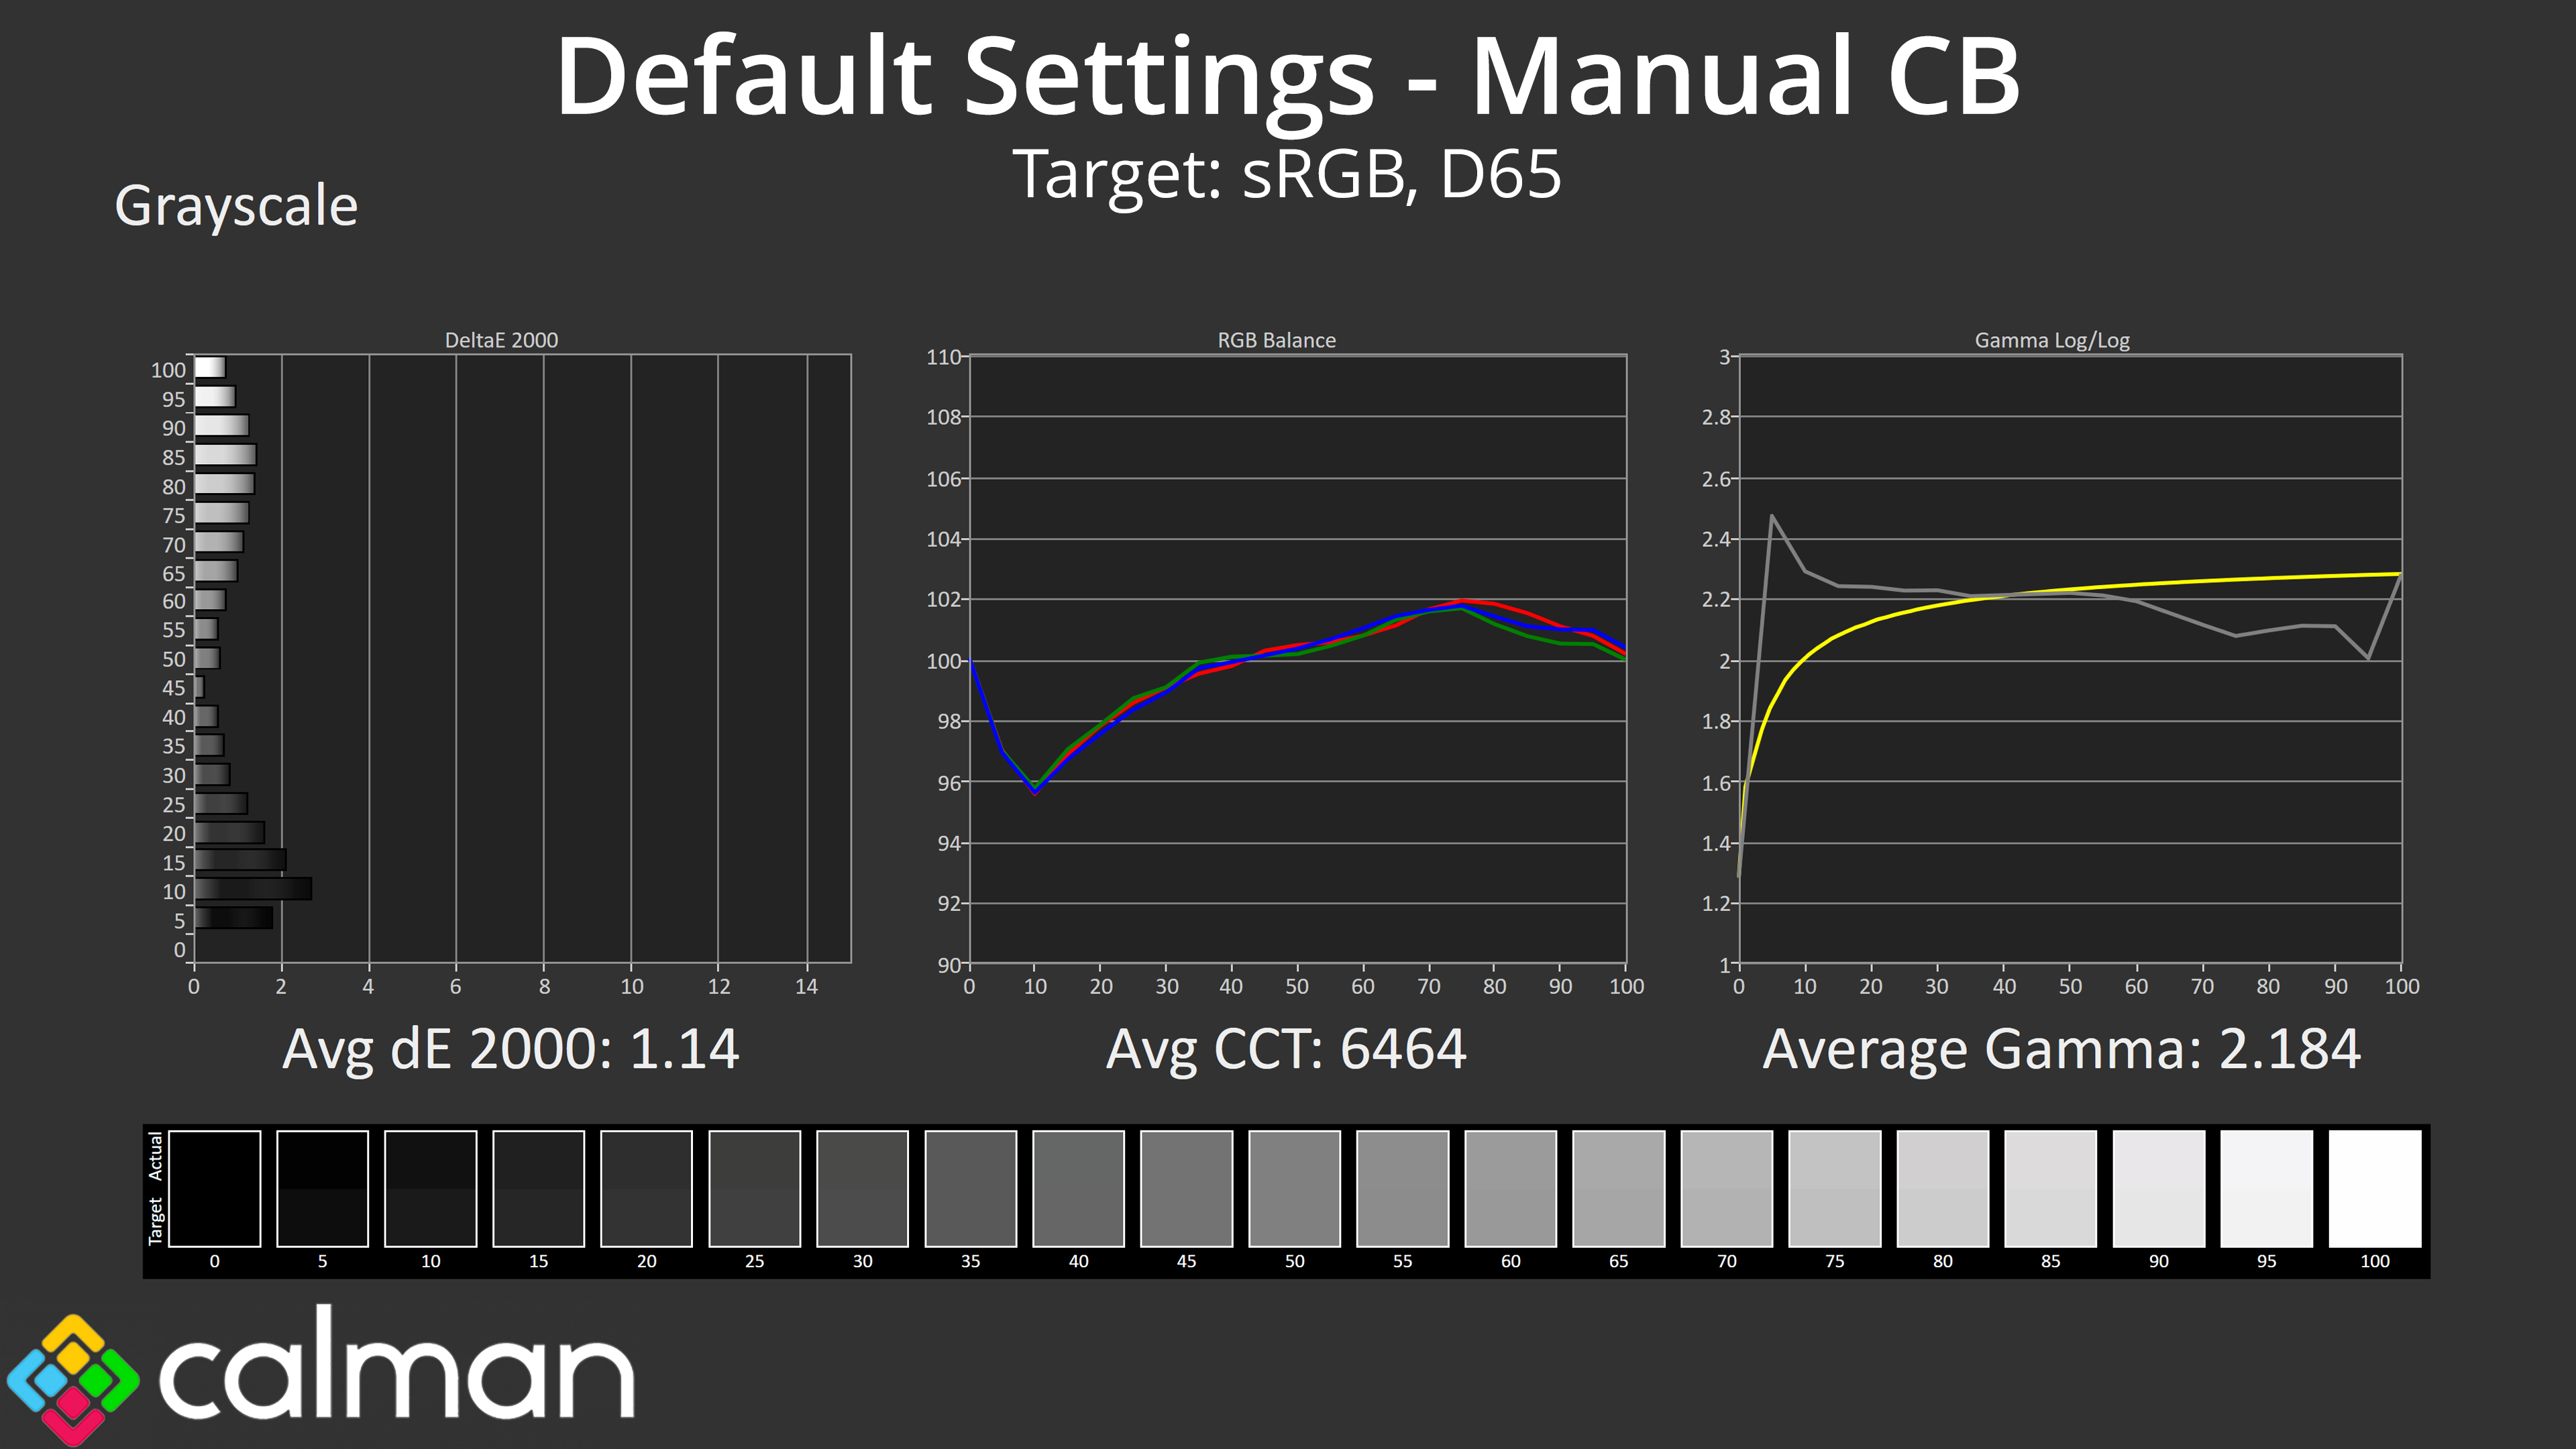
Just to illustrate the point about colour balance, with just two simple tweaks in the OSD I was able to improve colour balance significantly. By simply reducing the Red channel gain to 185 and the Green channel gain to 192, I achieved an average CCT of 6464K – basically perfect, and that helped improve the average greyscale deltaE to 1.14.
Saturation
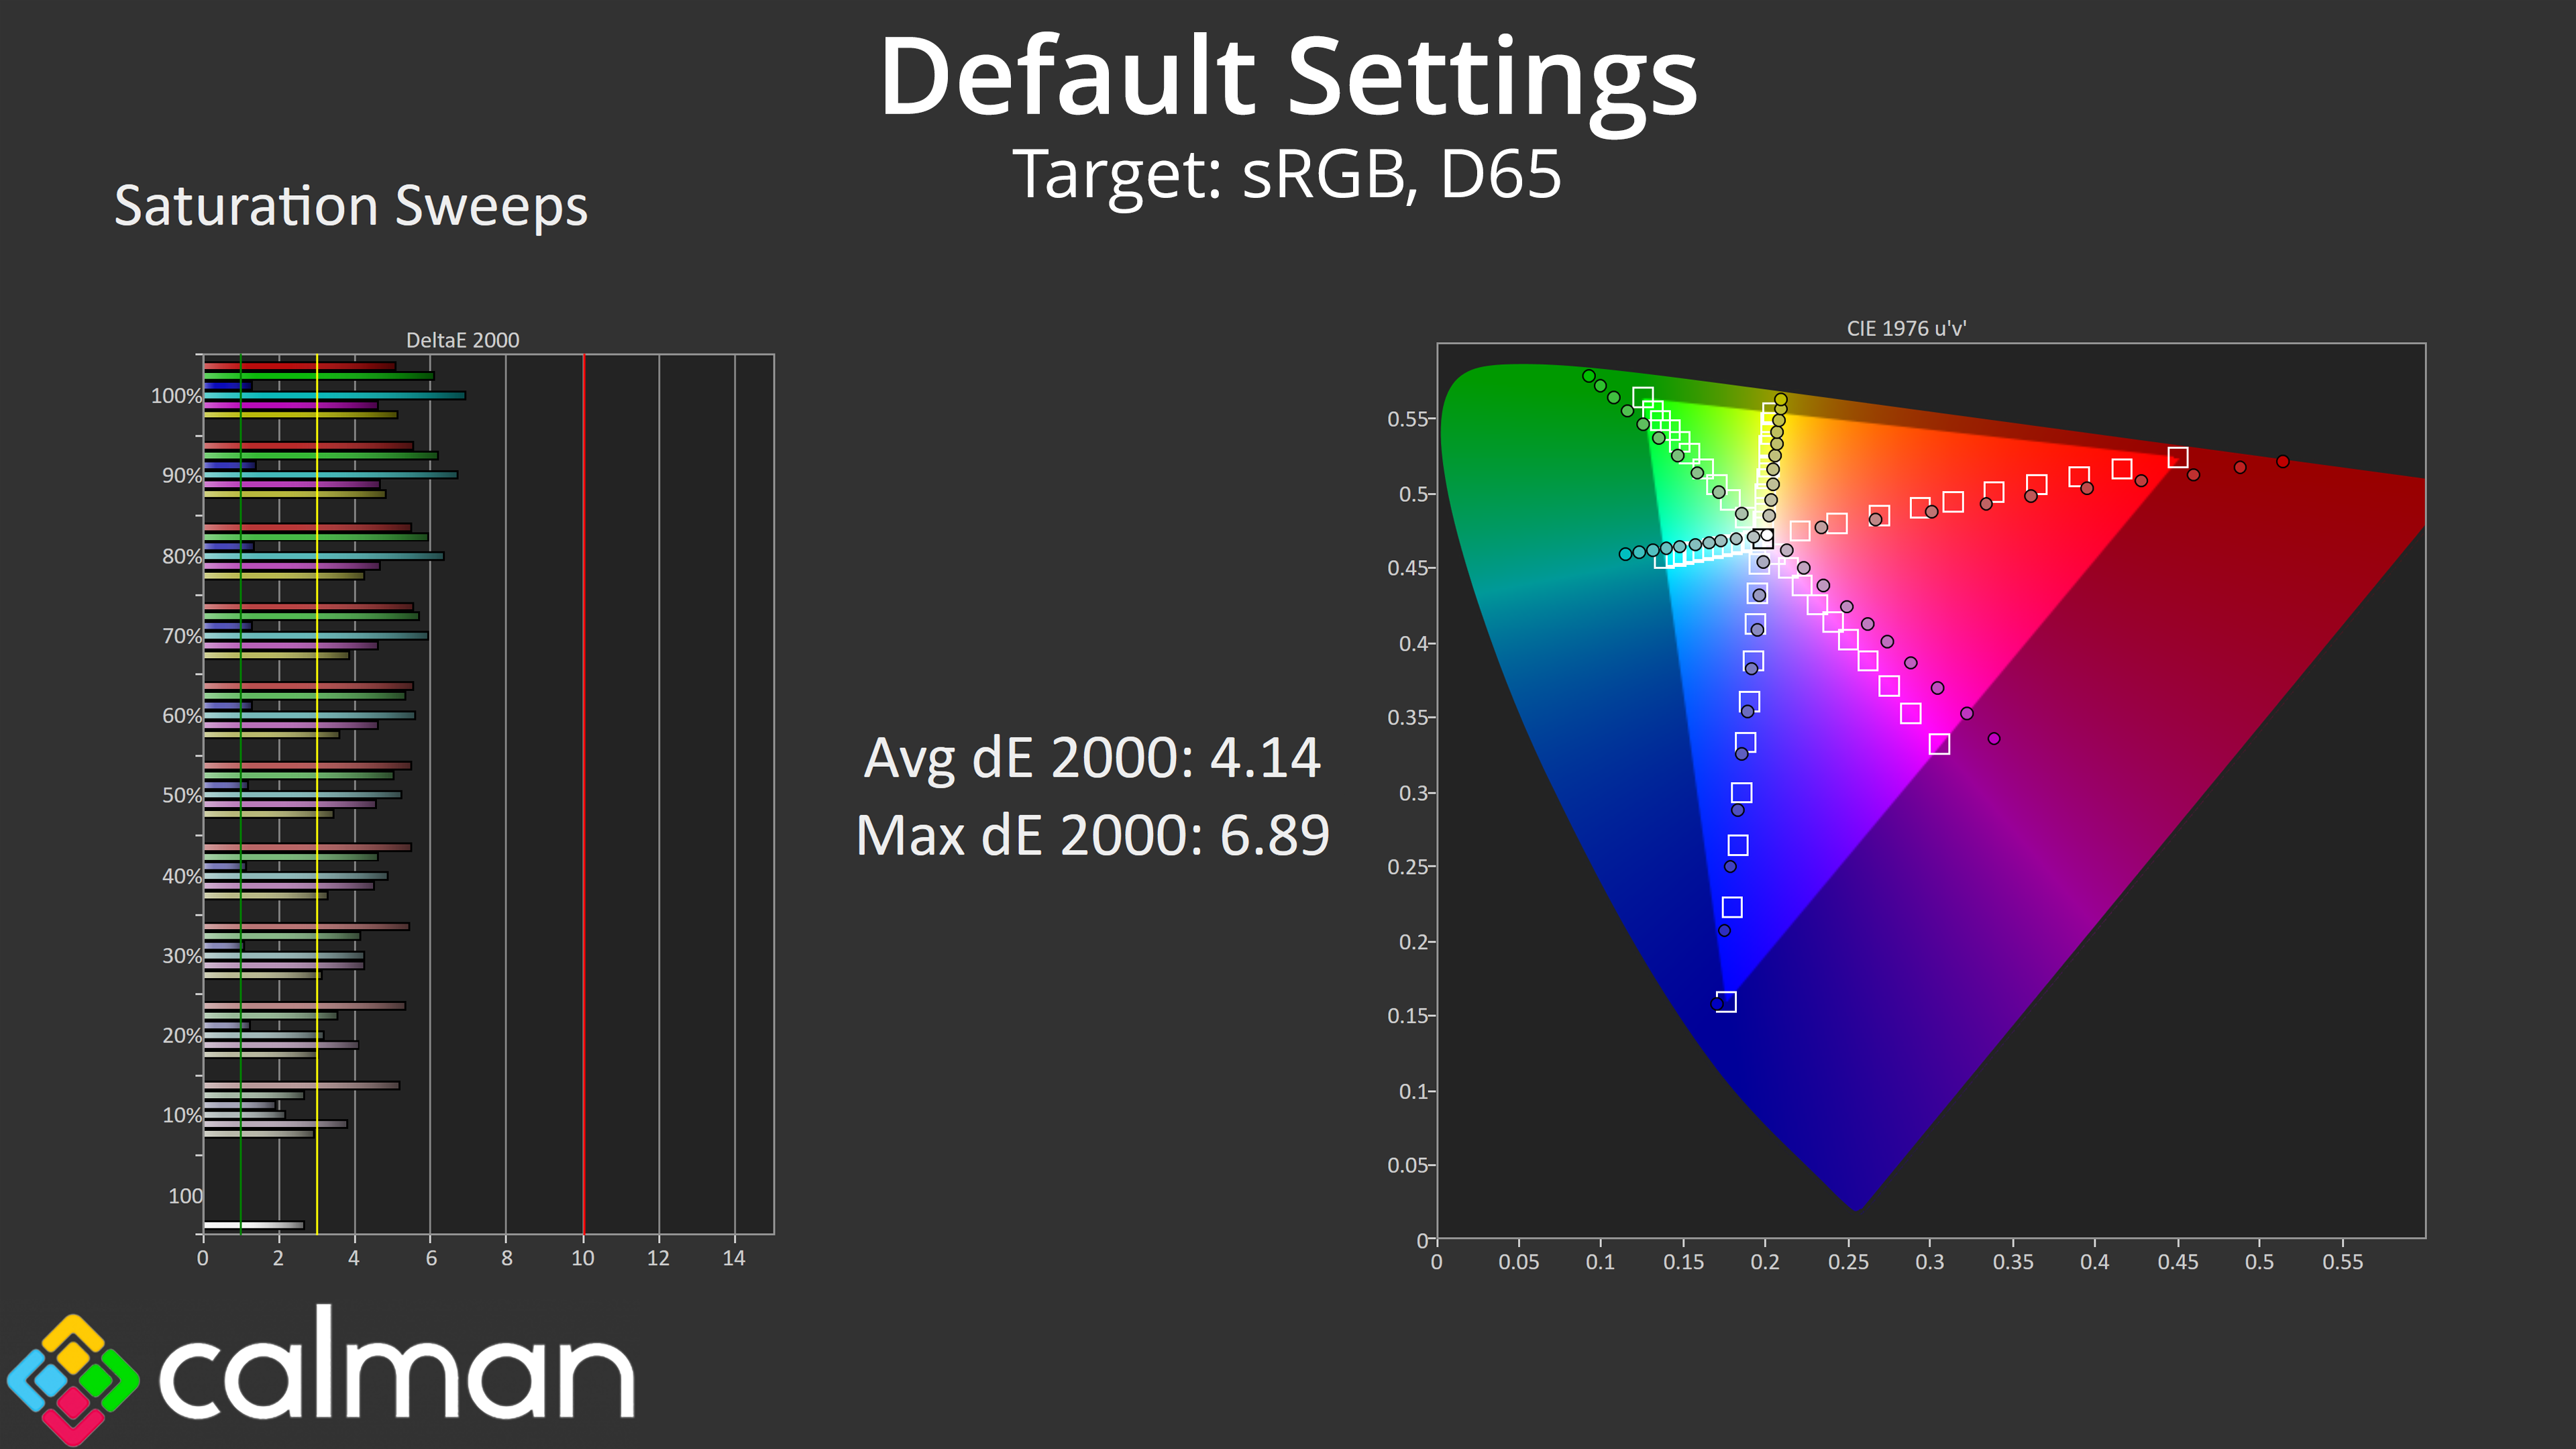
Given how wide the gamut is, it's understandable that our saturation sweeps show a fair amount of inaccuracy relative to the sRGB, with an average dE 2000 of 4.14.
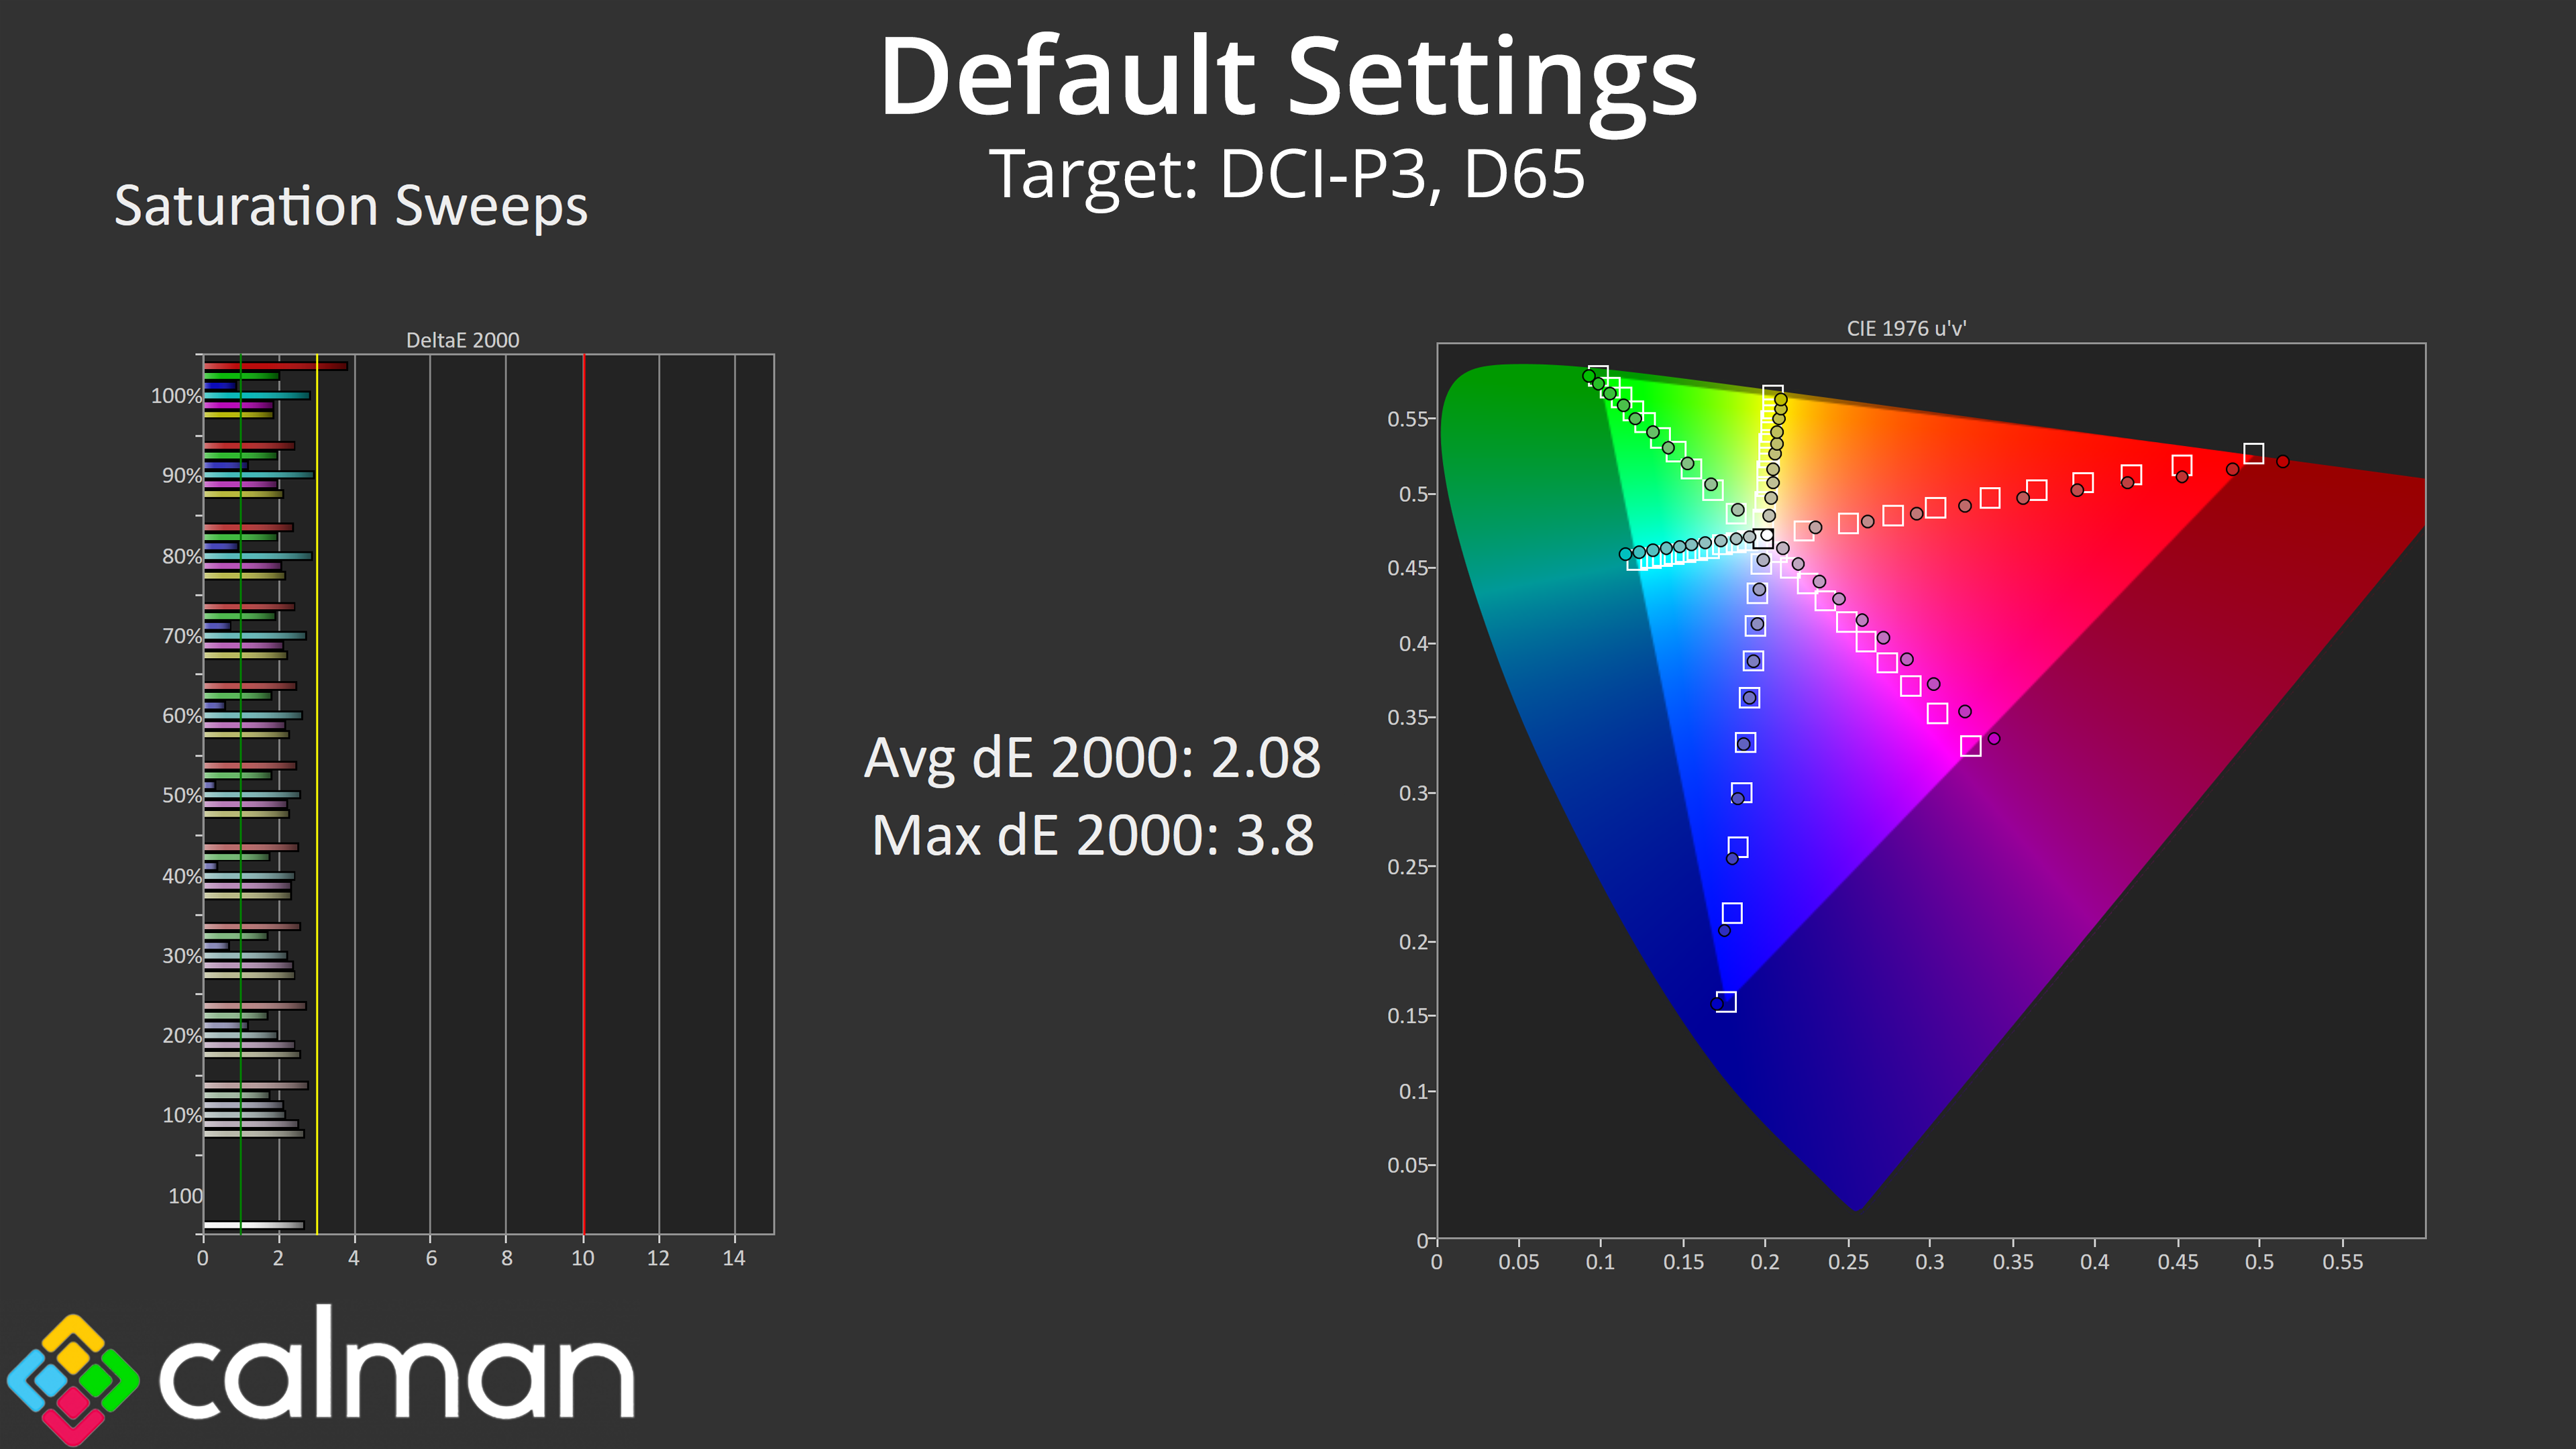
Relative to the DCI-P3 space however, things are more accurate with an average dE of 2.08.
Colour Accuracy
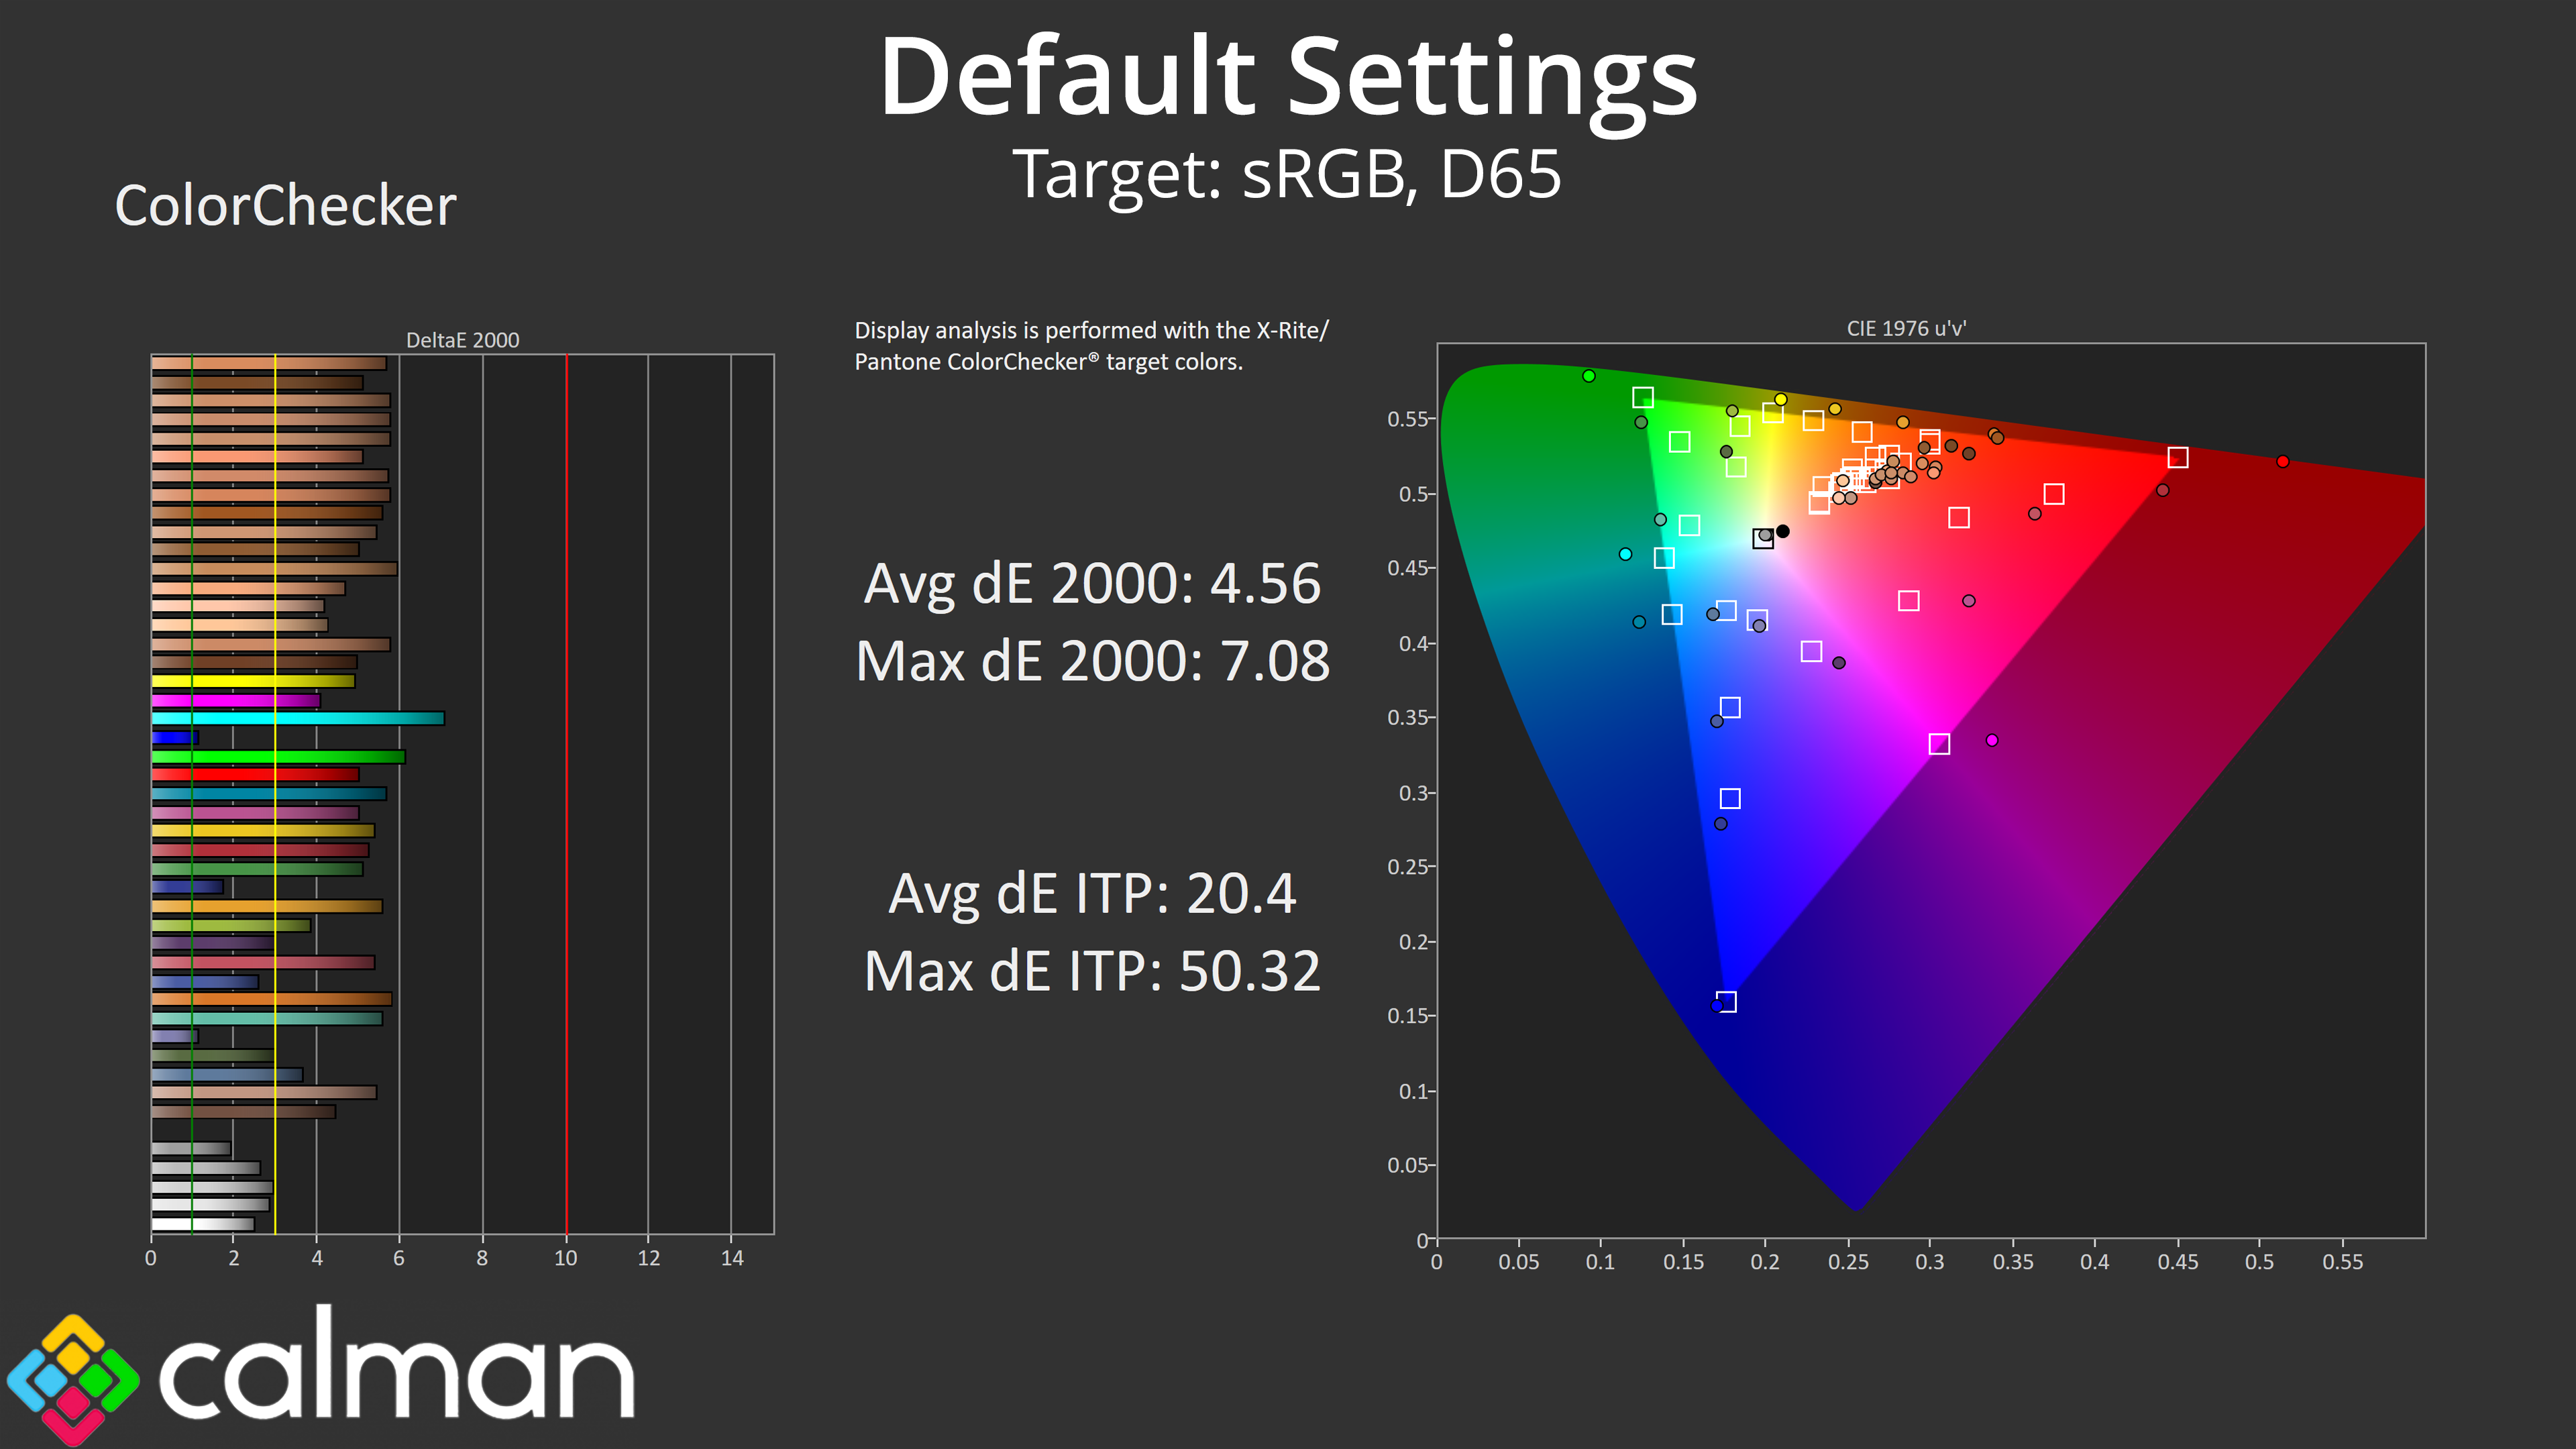
As suspected, high levels of over-saturation mean colour accuracy isn't great when tracking against the sRGB space. Remember, this is with out-of-the-box settings using the native preset – we test again with the sRGB mode below.
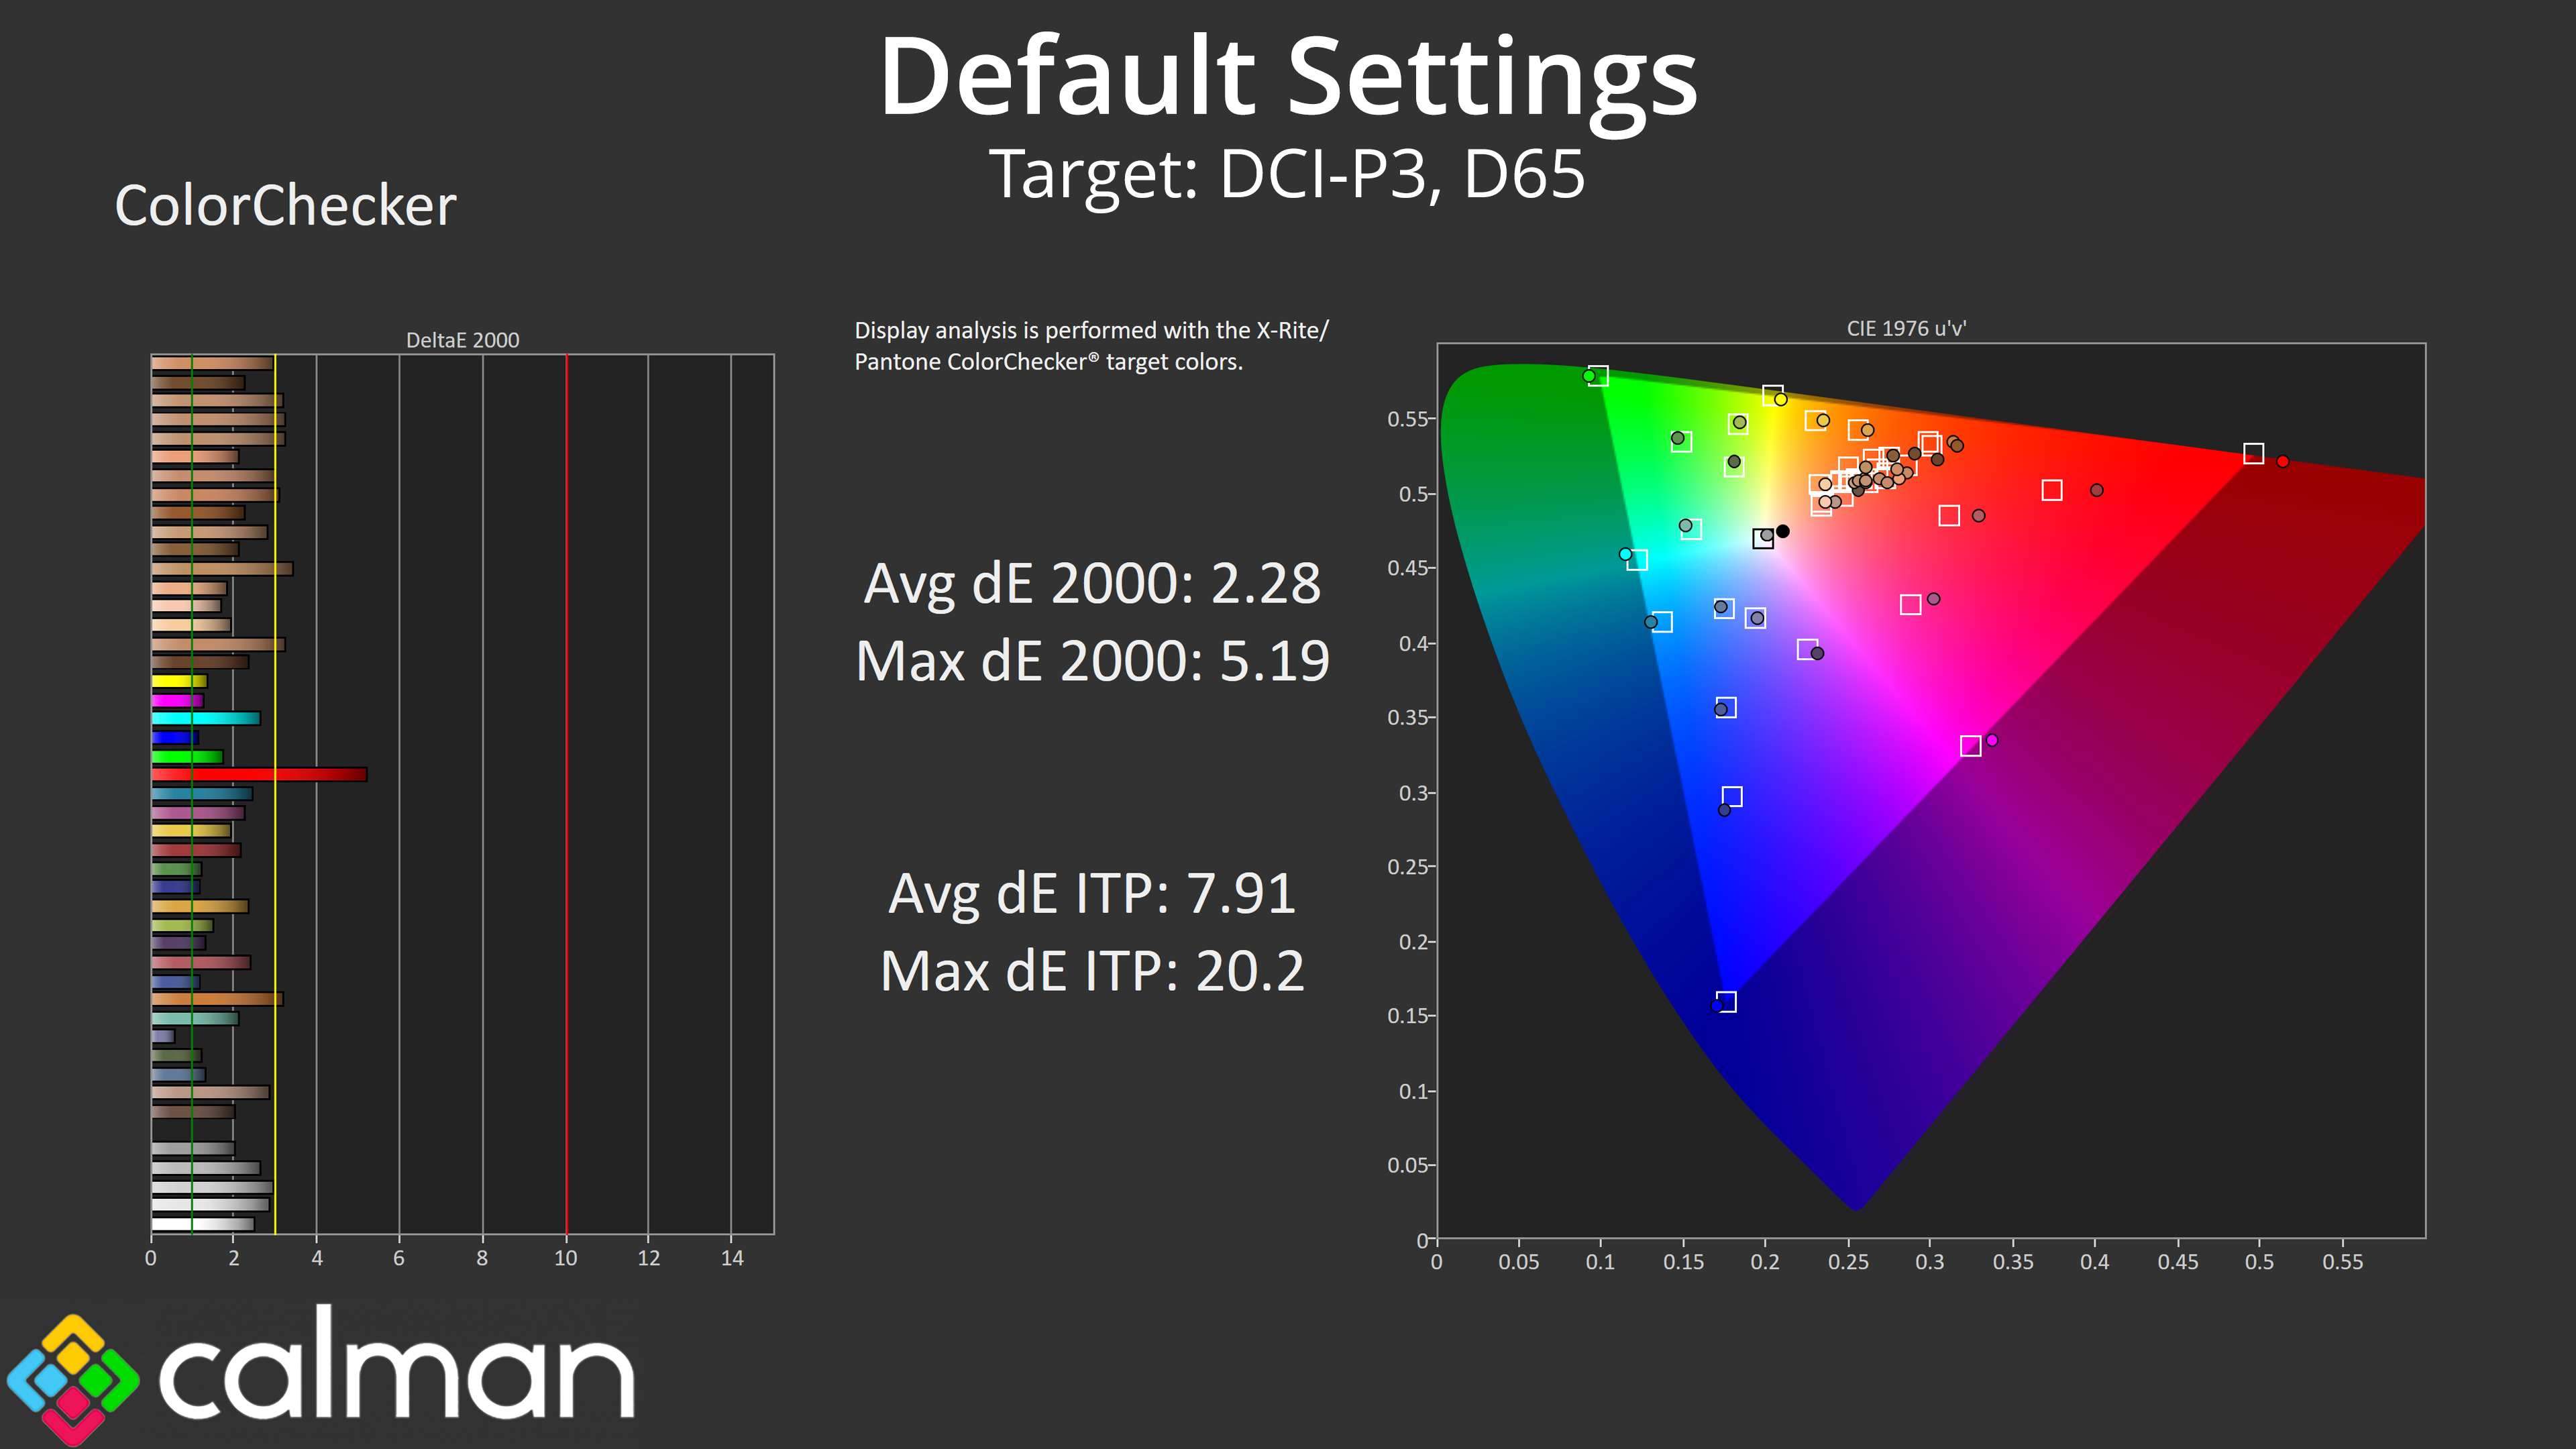
That said, colour accuracy is better for the DCI-P3 space, with an average dE 2000 of 2.28, with the 100% red channel being the worst offender.
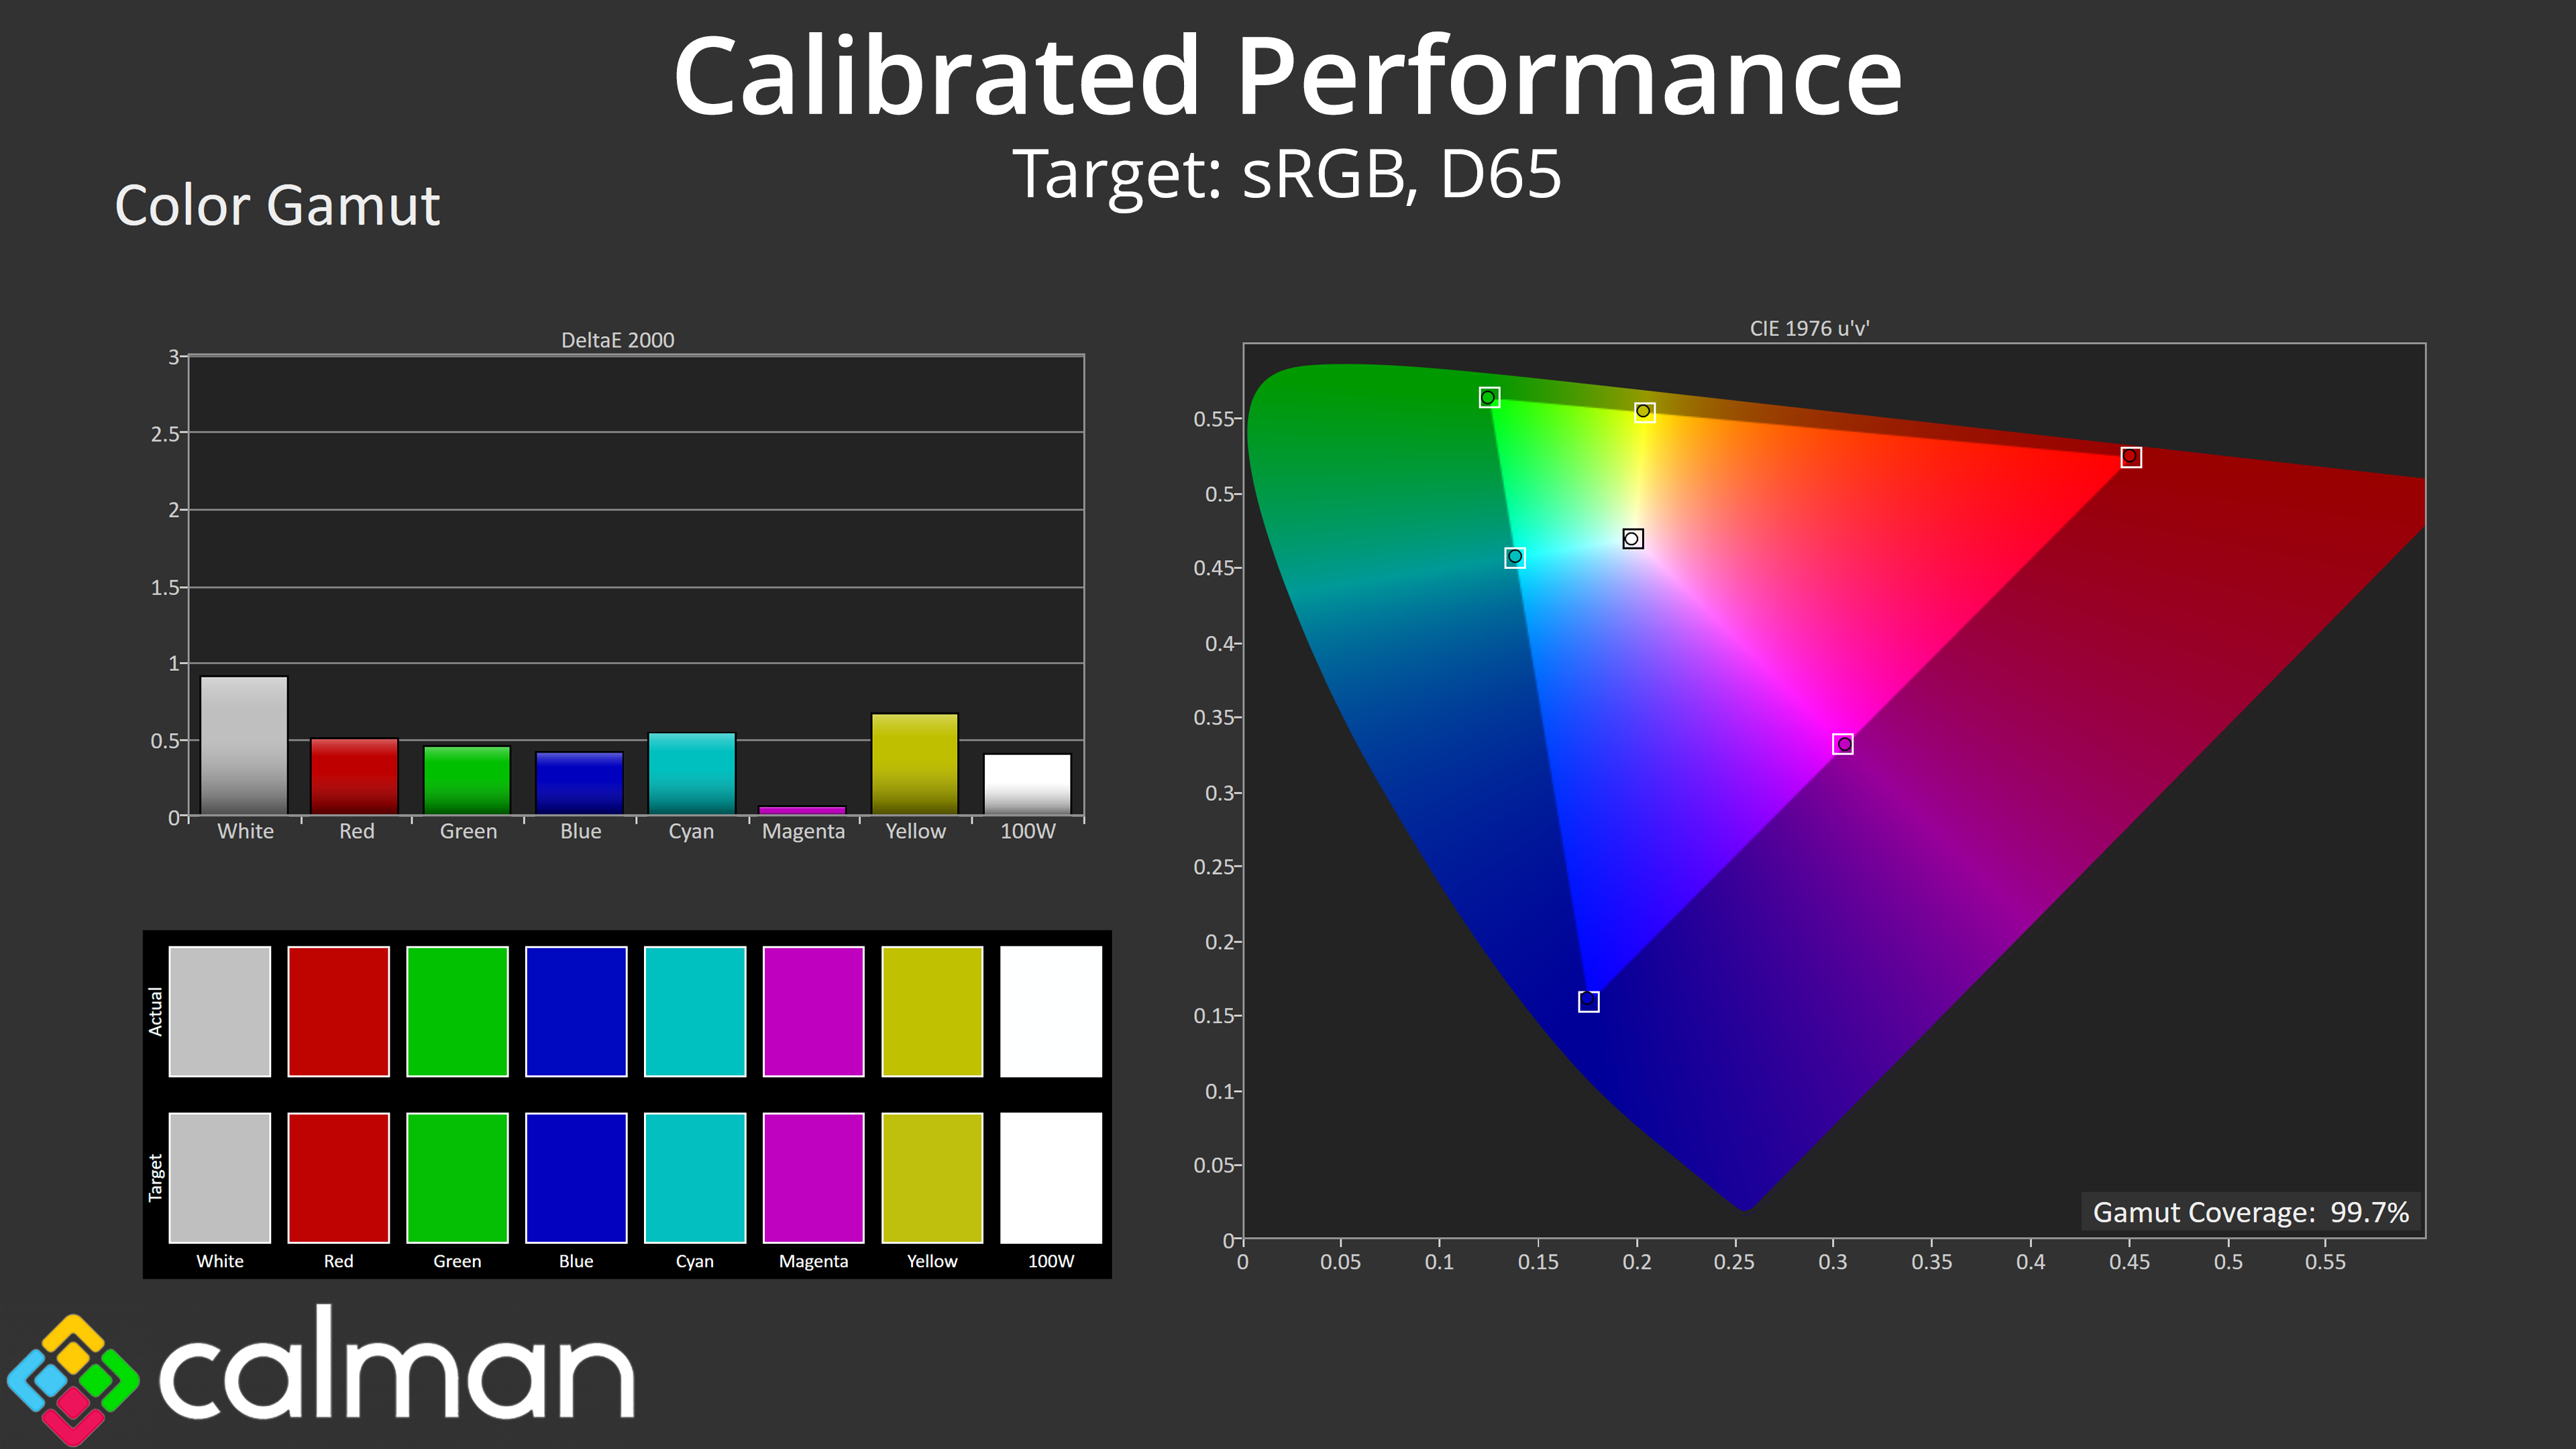
sRGB Emulation Mode
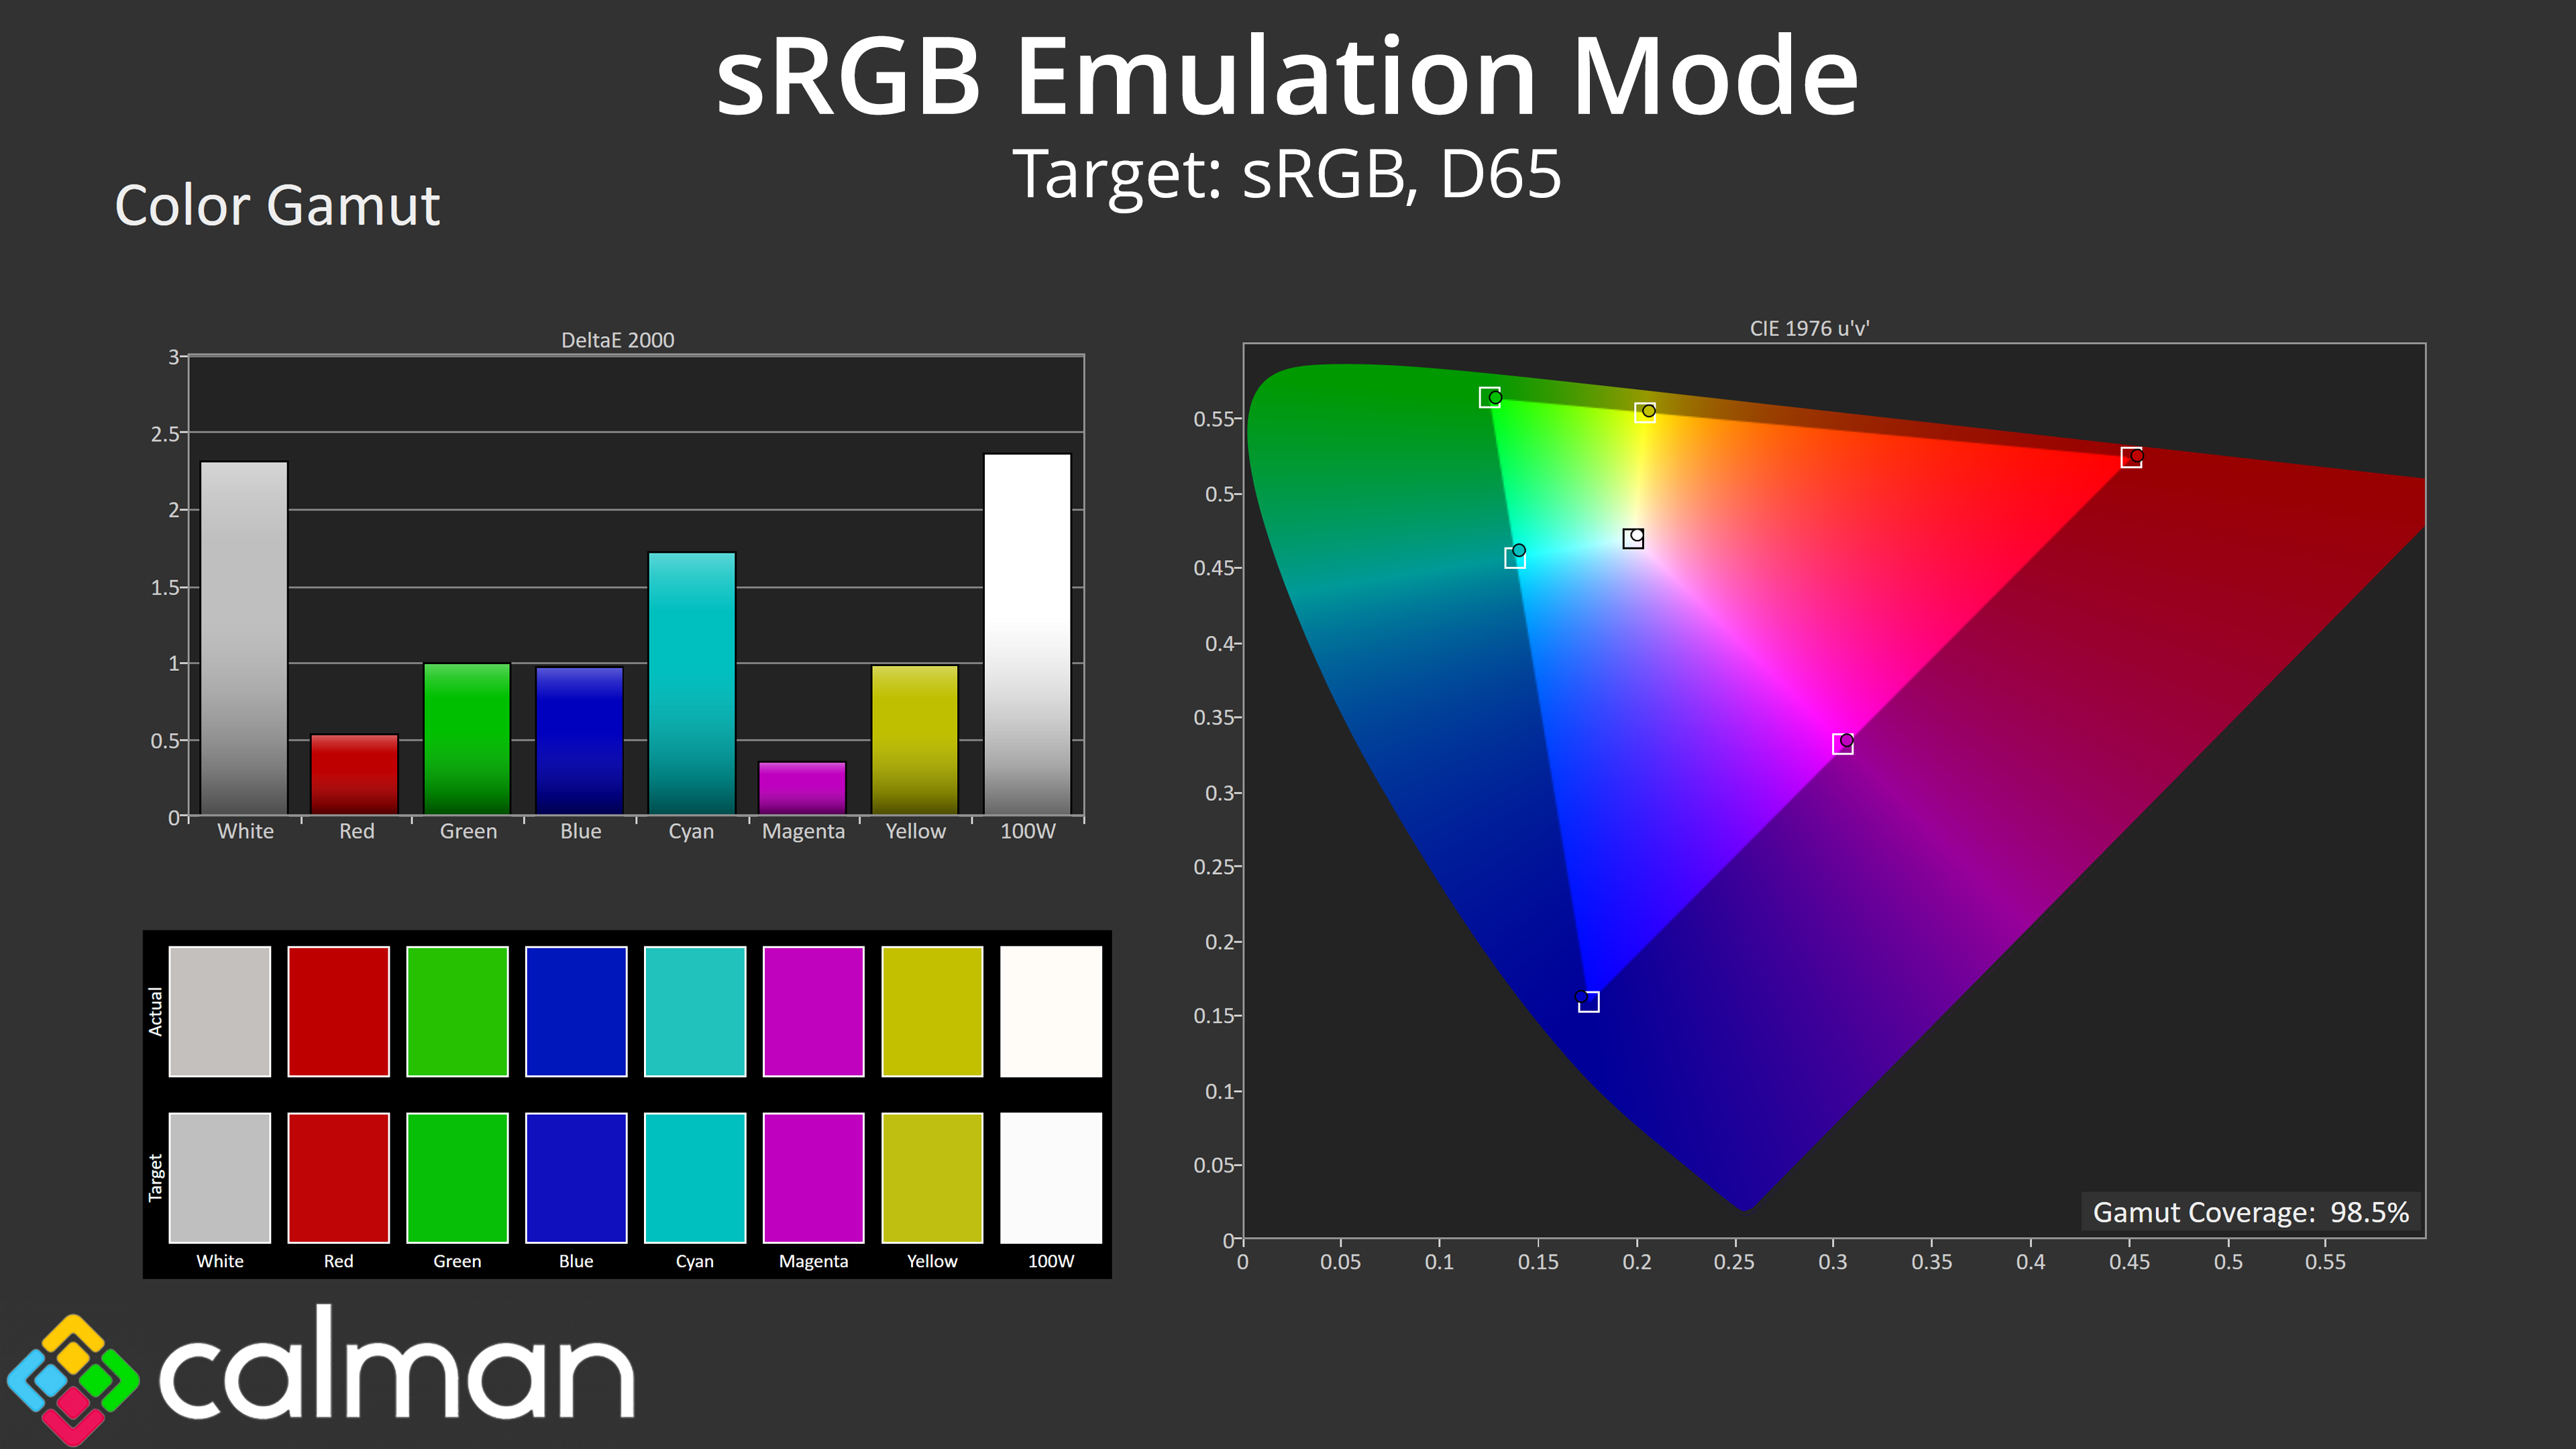
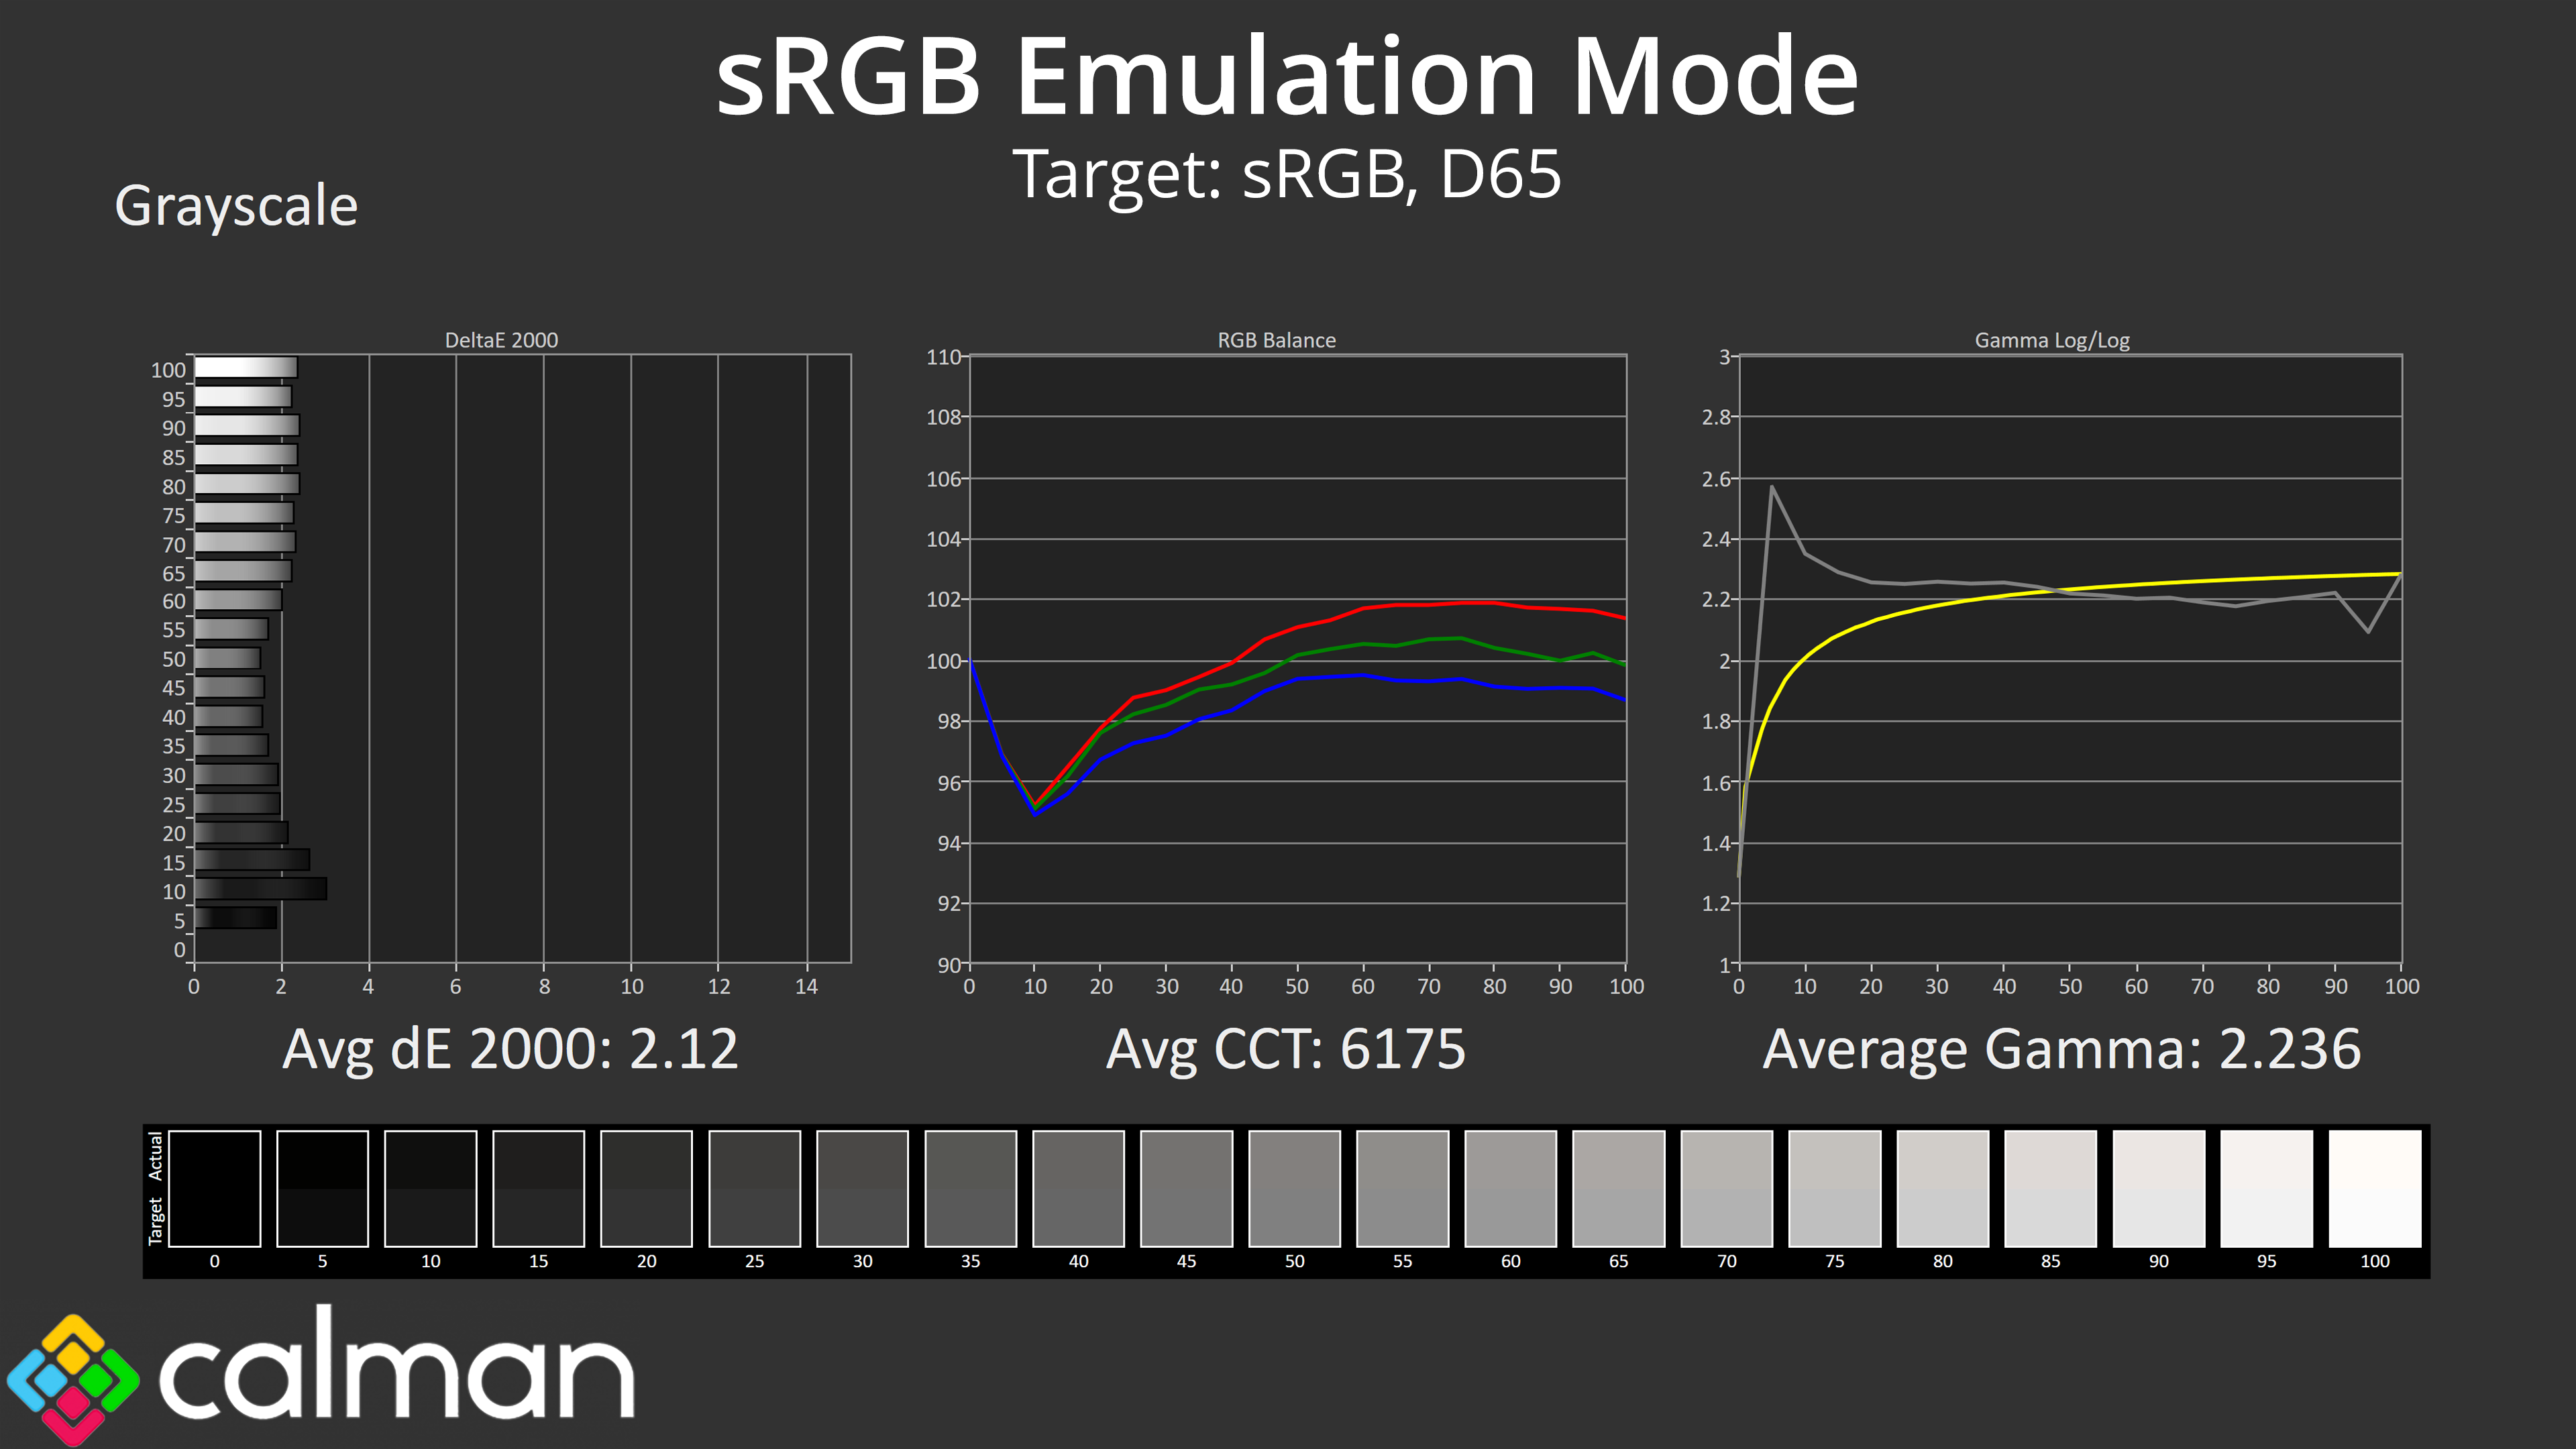


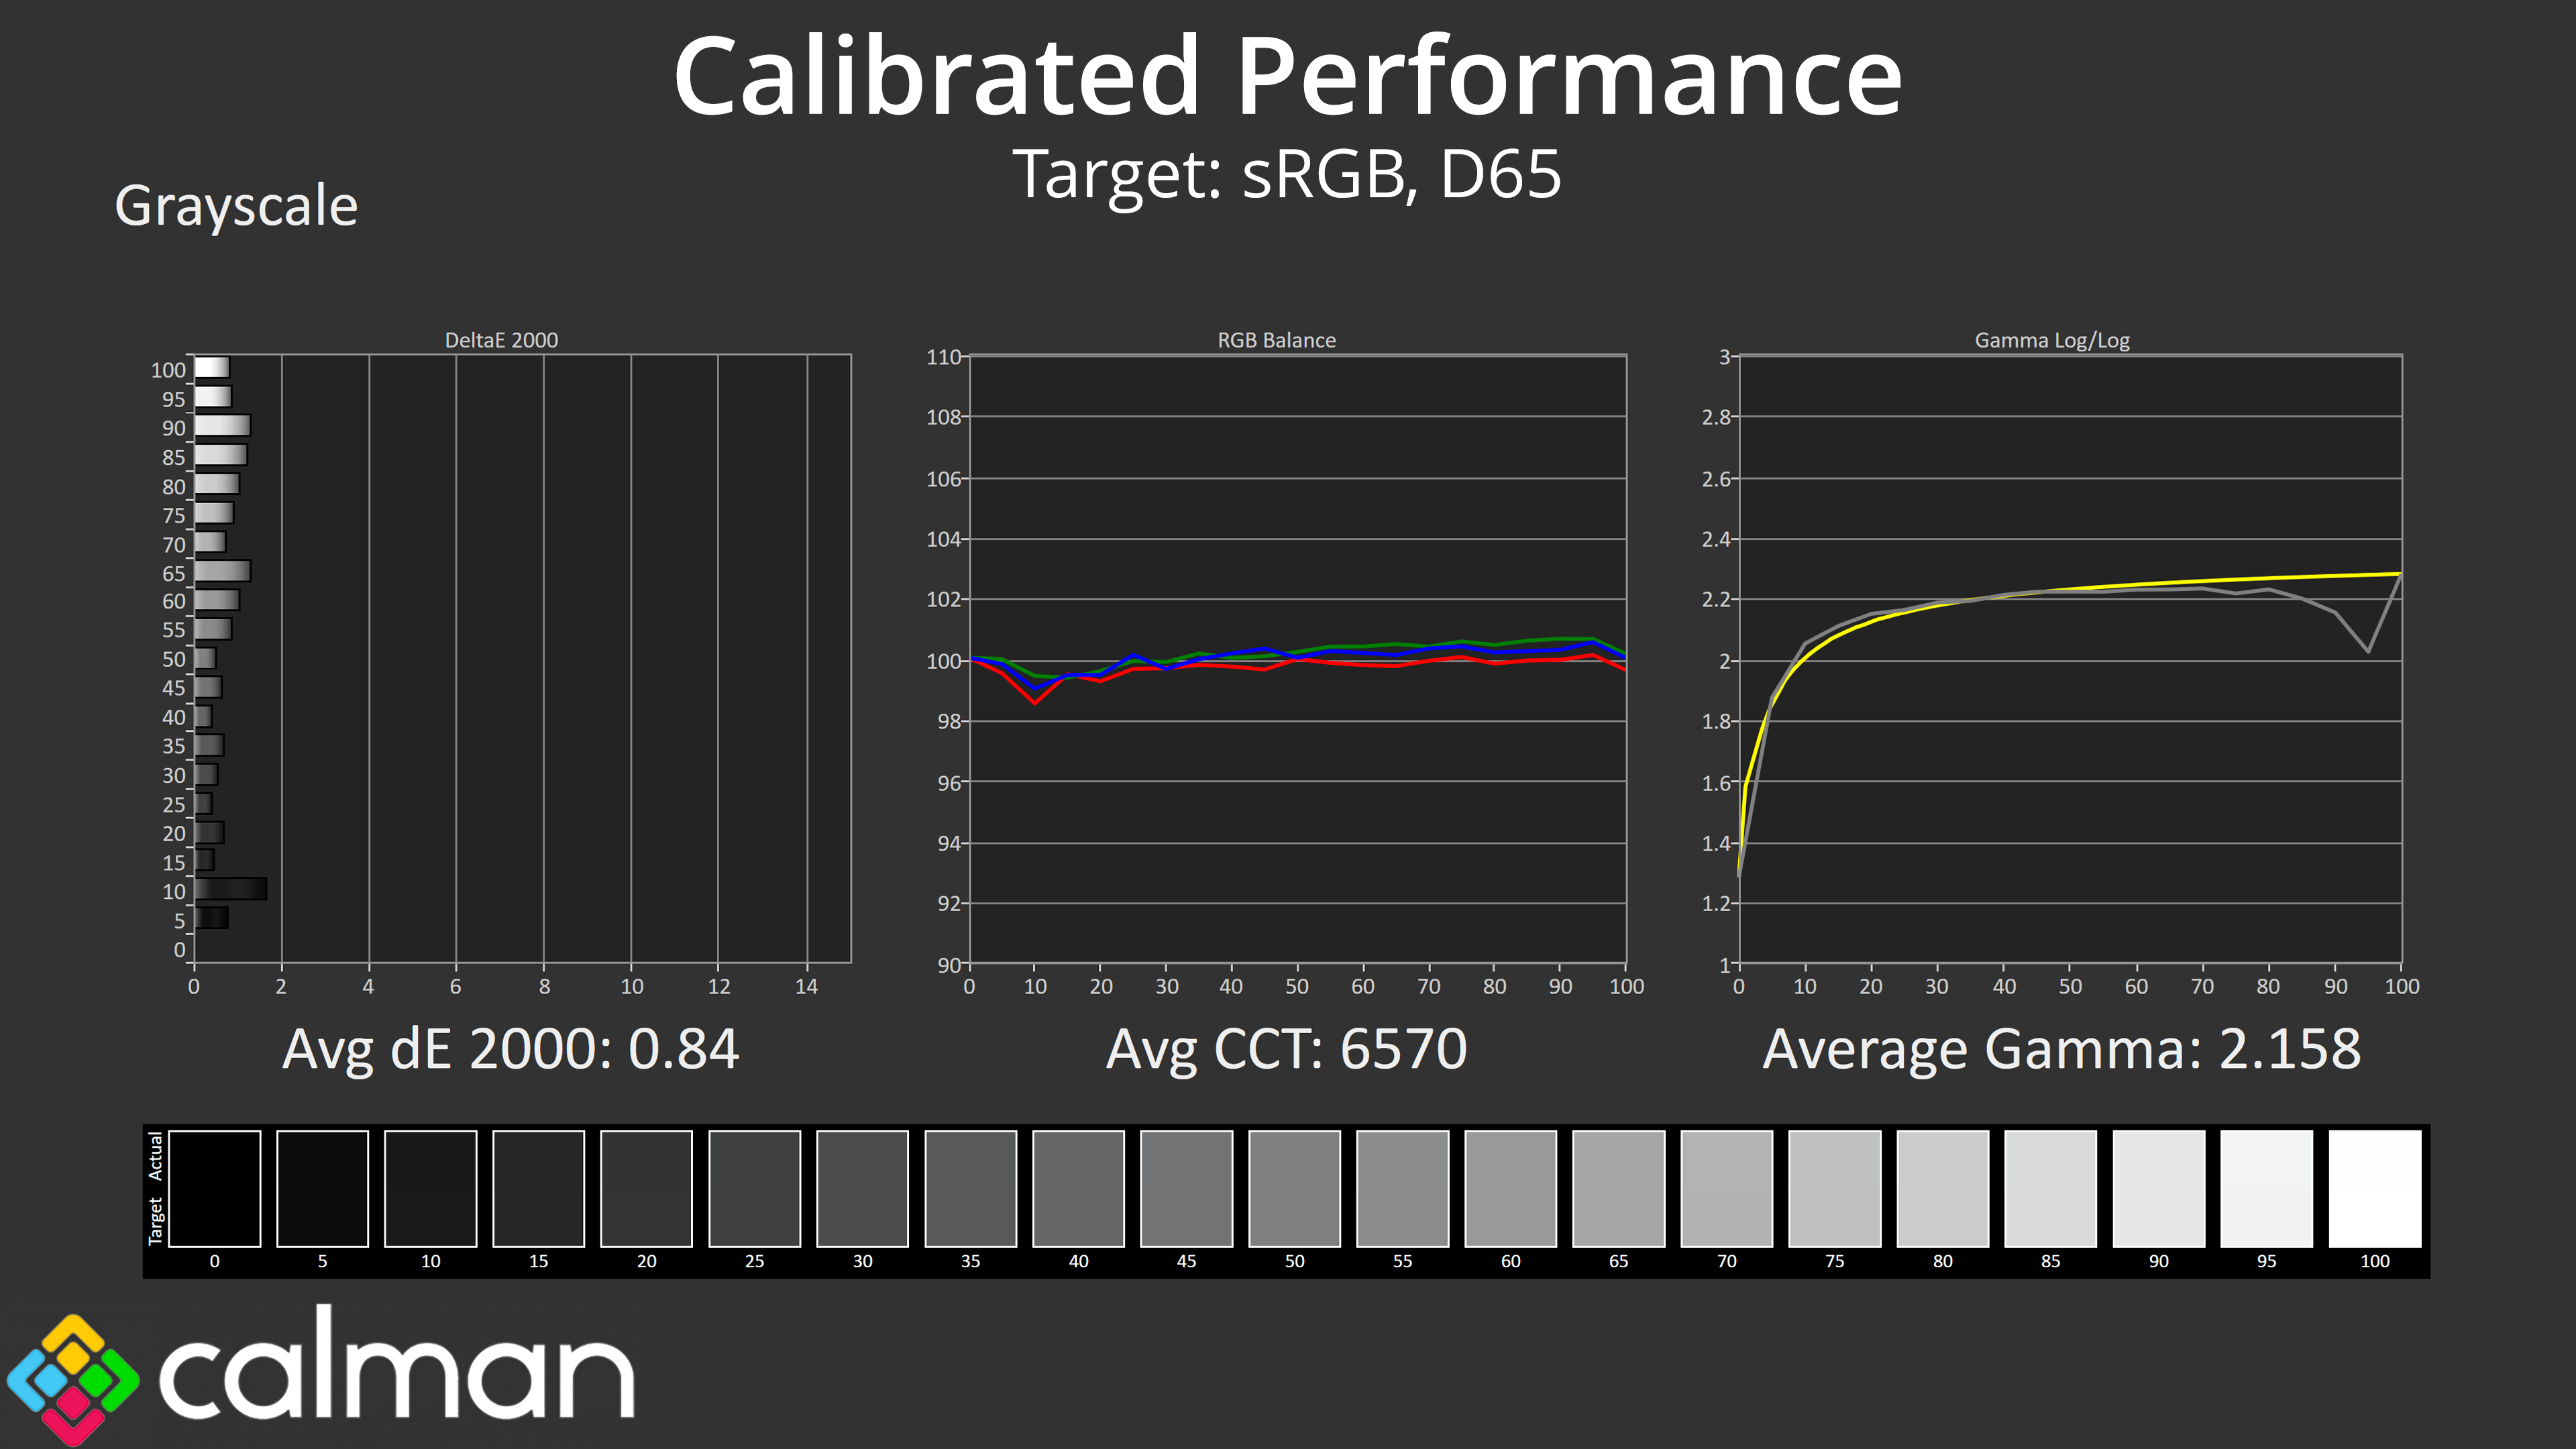
ASUS' sRGB emulation mode continues to impress. It doesn't nail everything, in particular I am looking at the gamma curve, which is certainly better for the latter half of the curve, but still features that odd spike early on, resulting in loss of dark detail.
However, the gamut is clamped very effectively, with highly impressive saturation and colour performance, the latter boasting an average deltaE 2000 of just 1.28.
DCI-P3 Emulation Mode
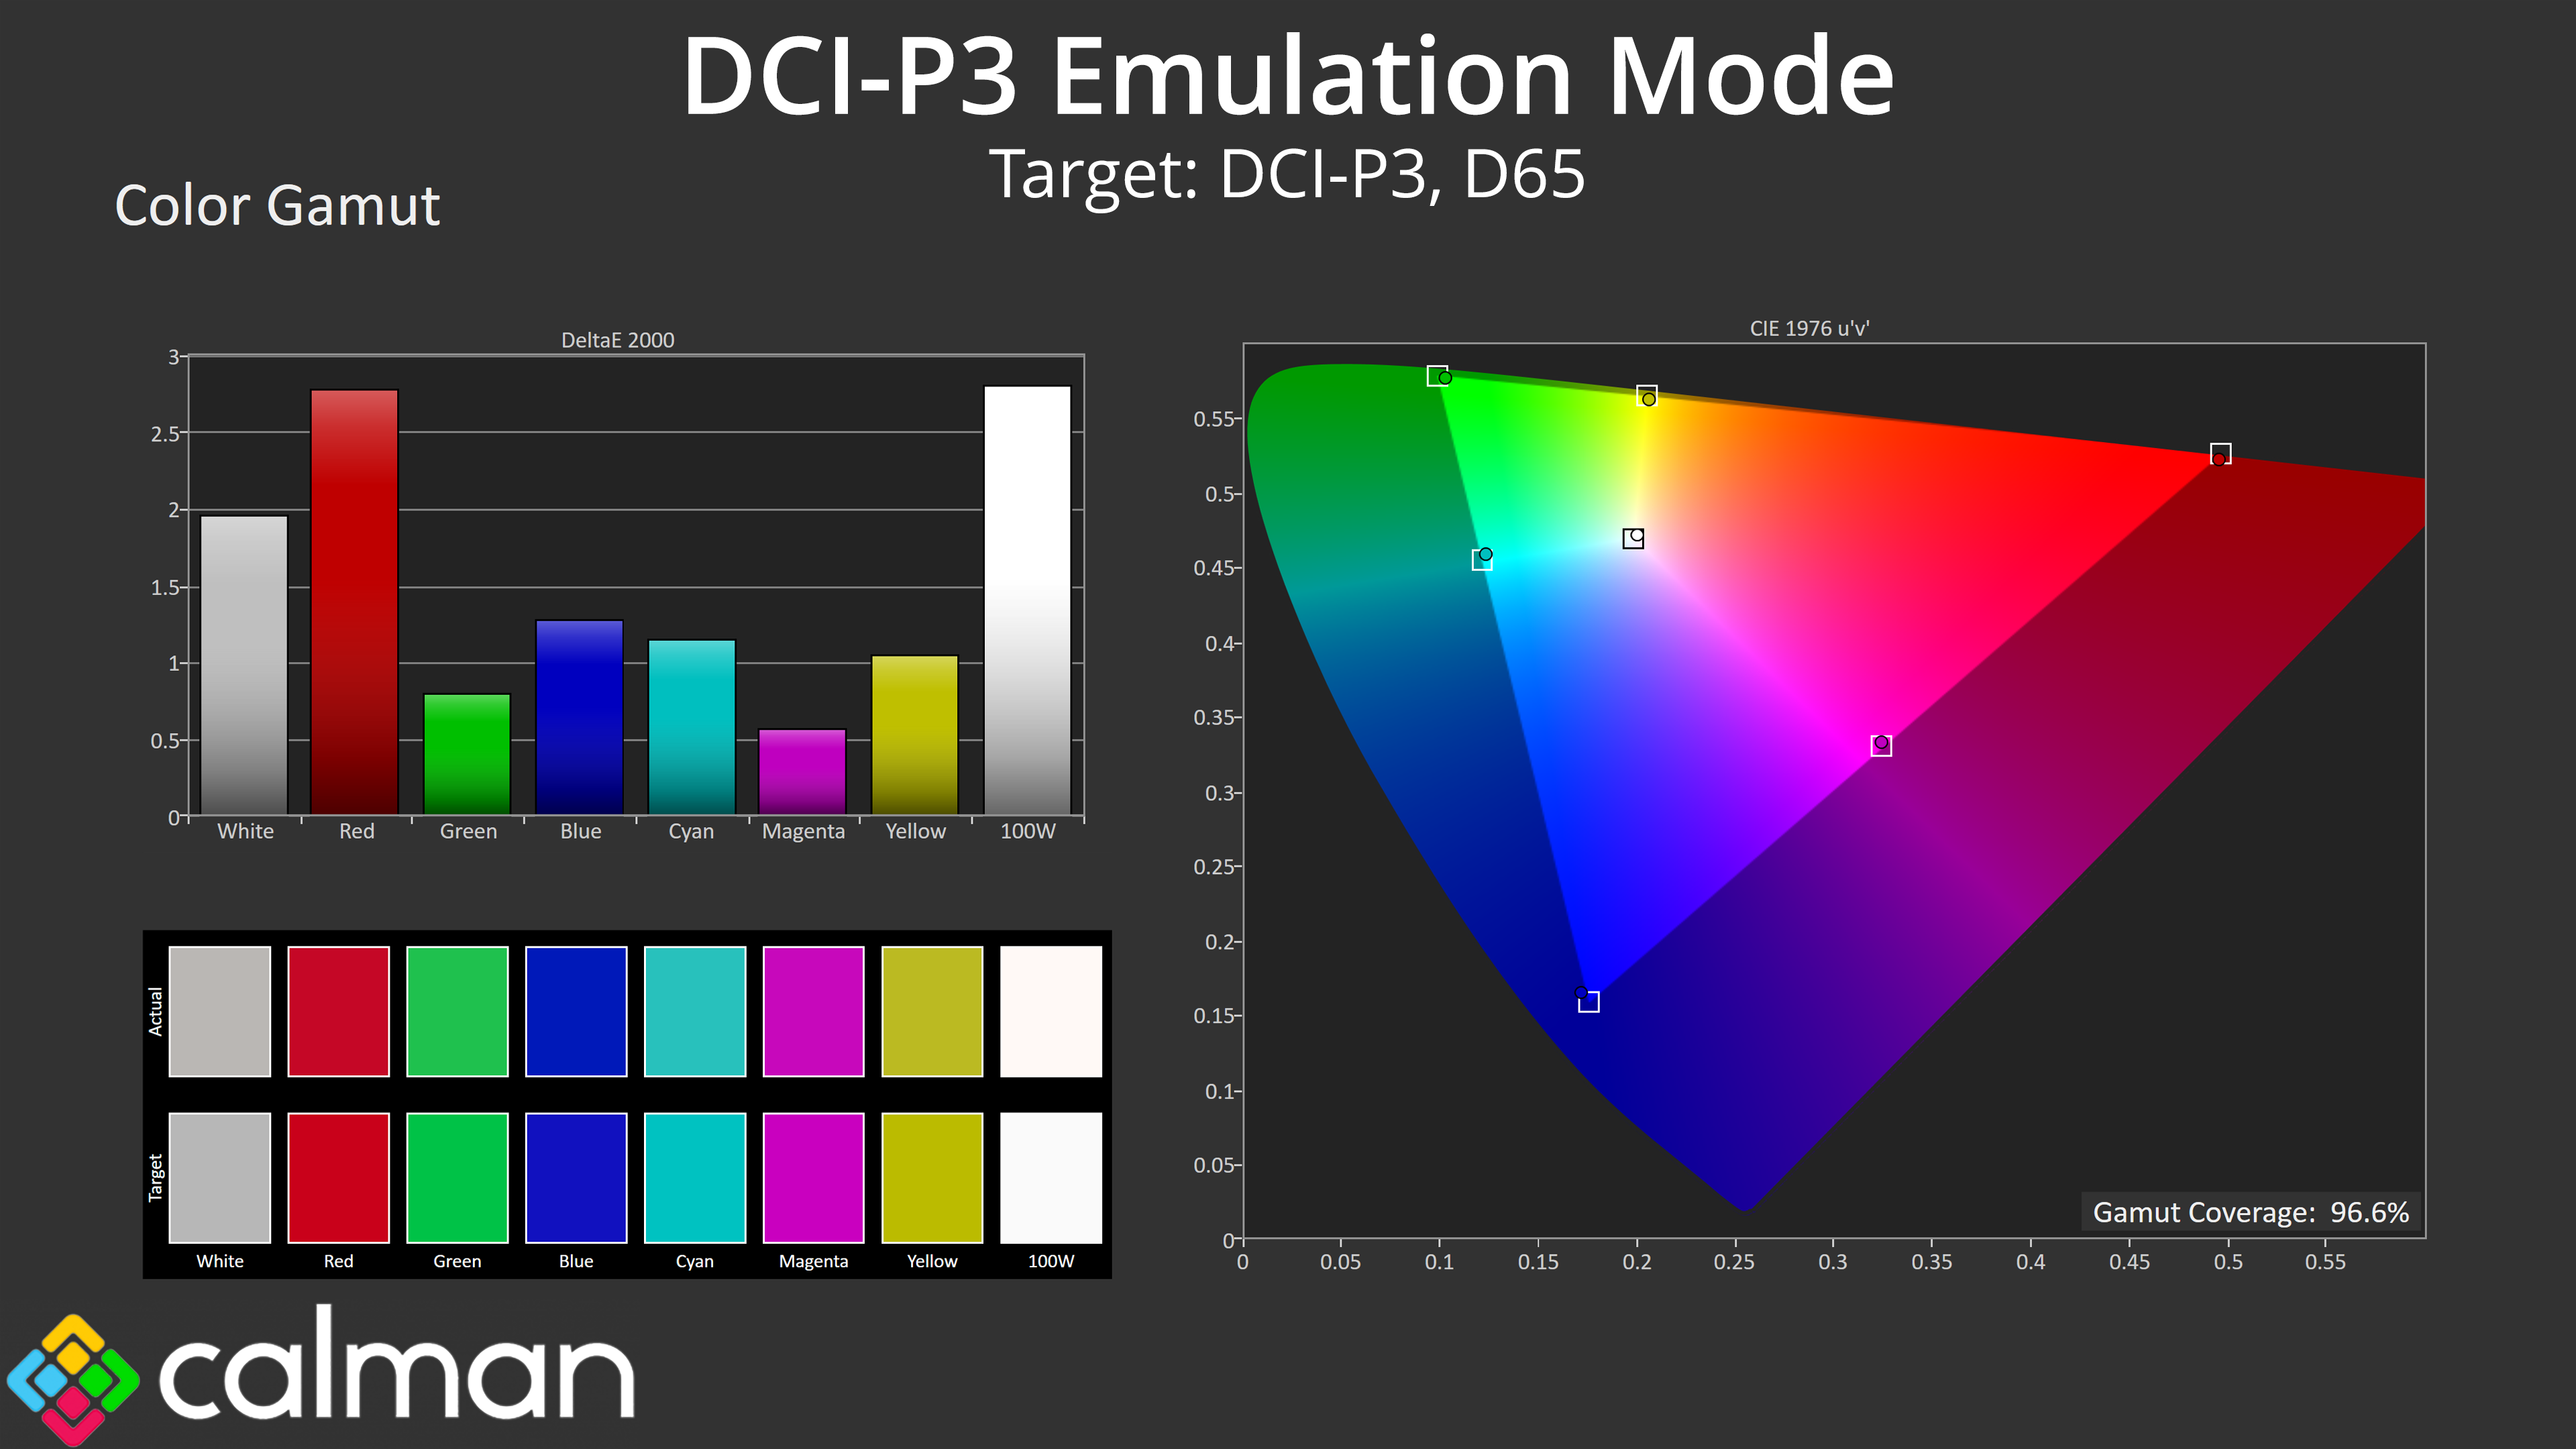
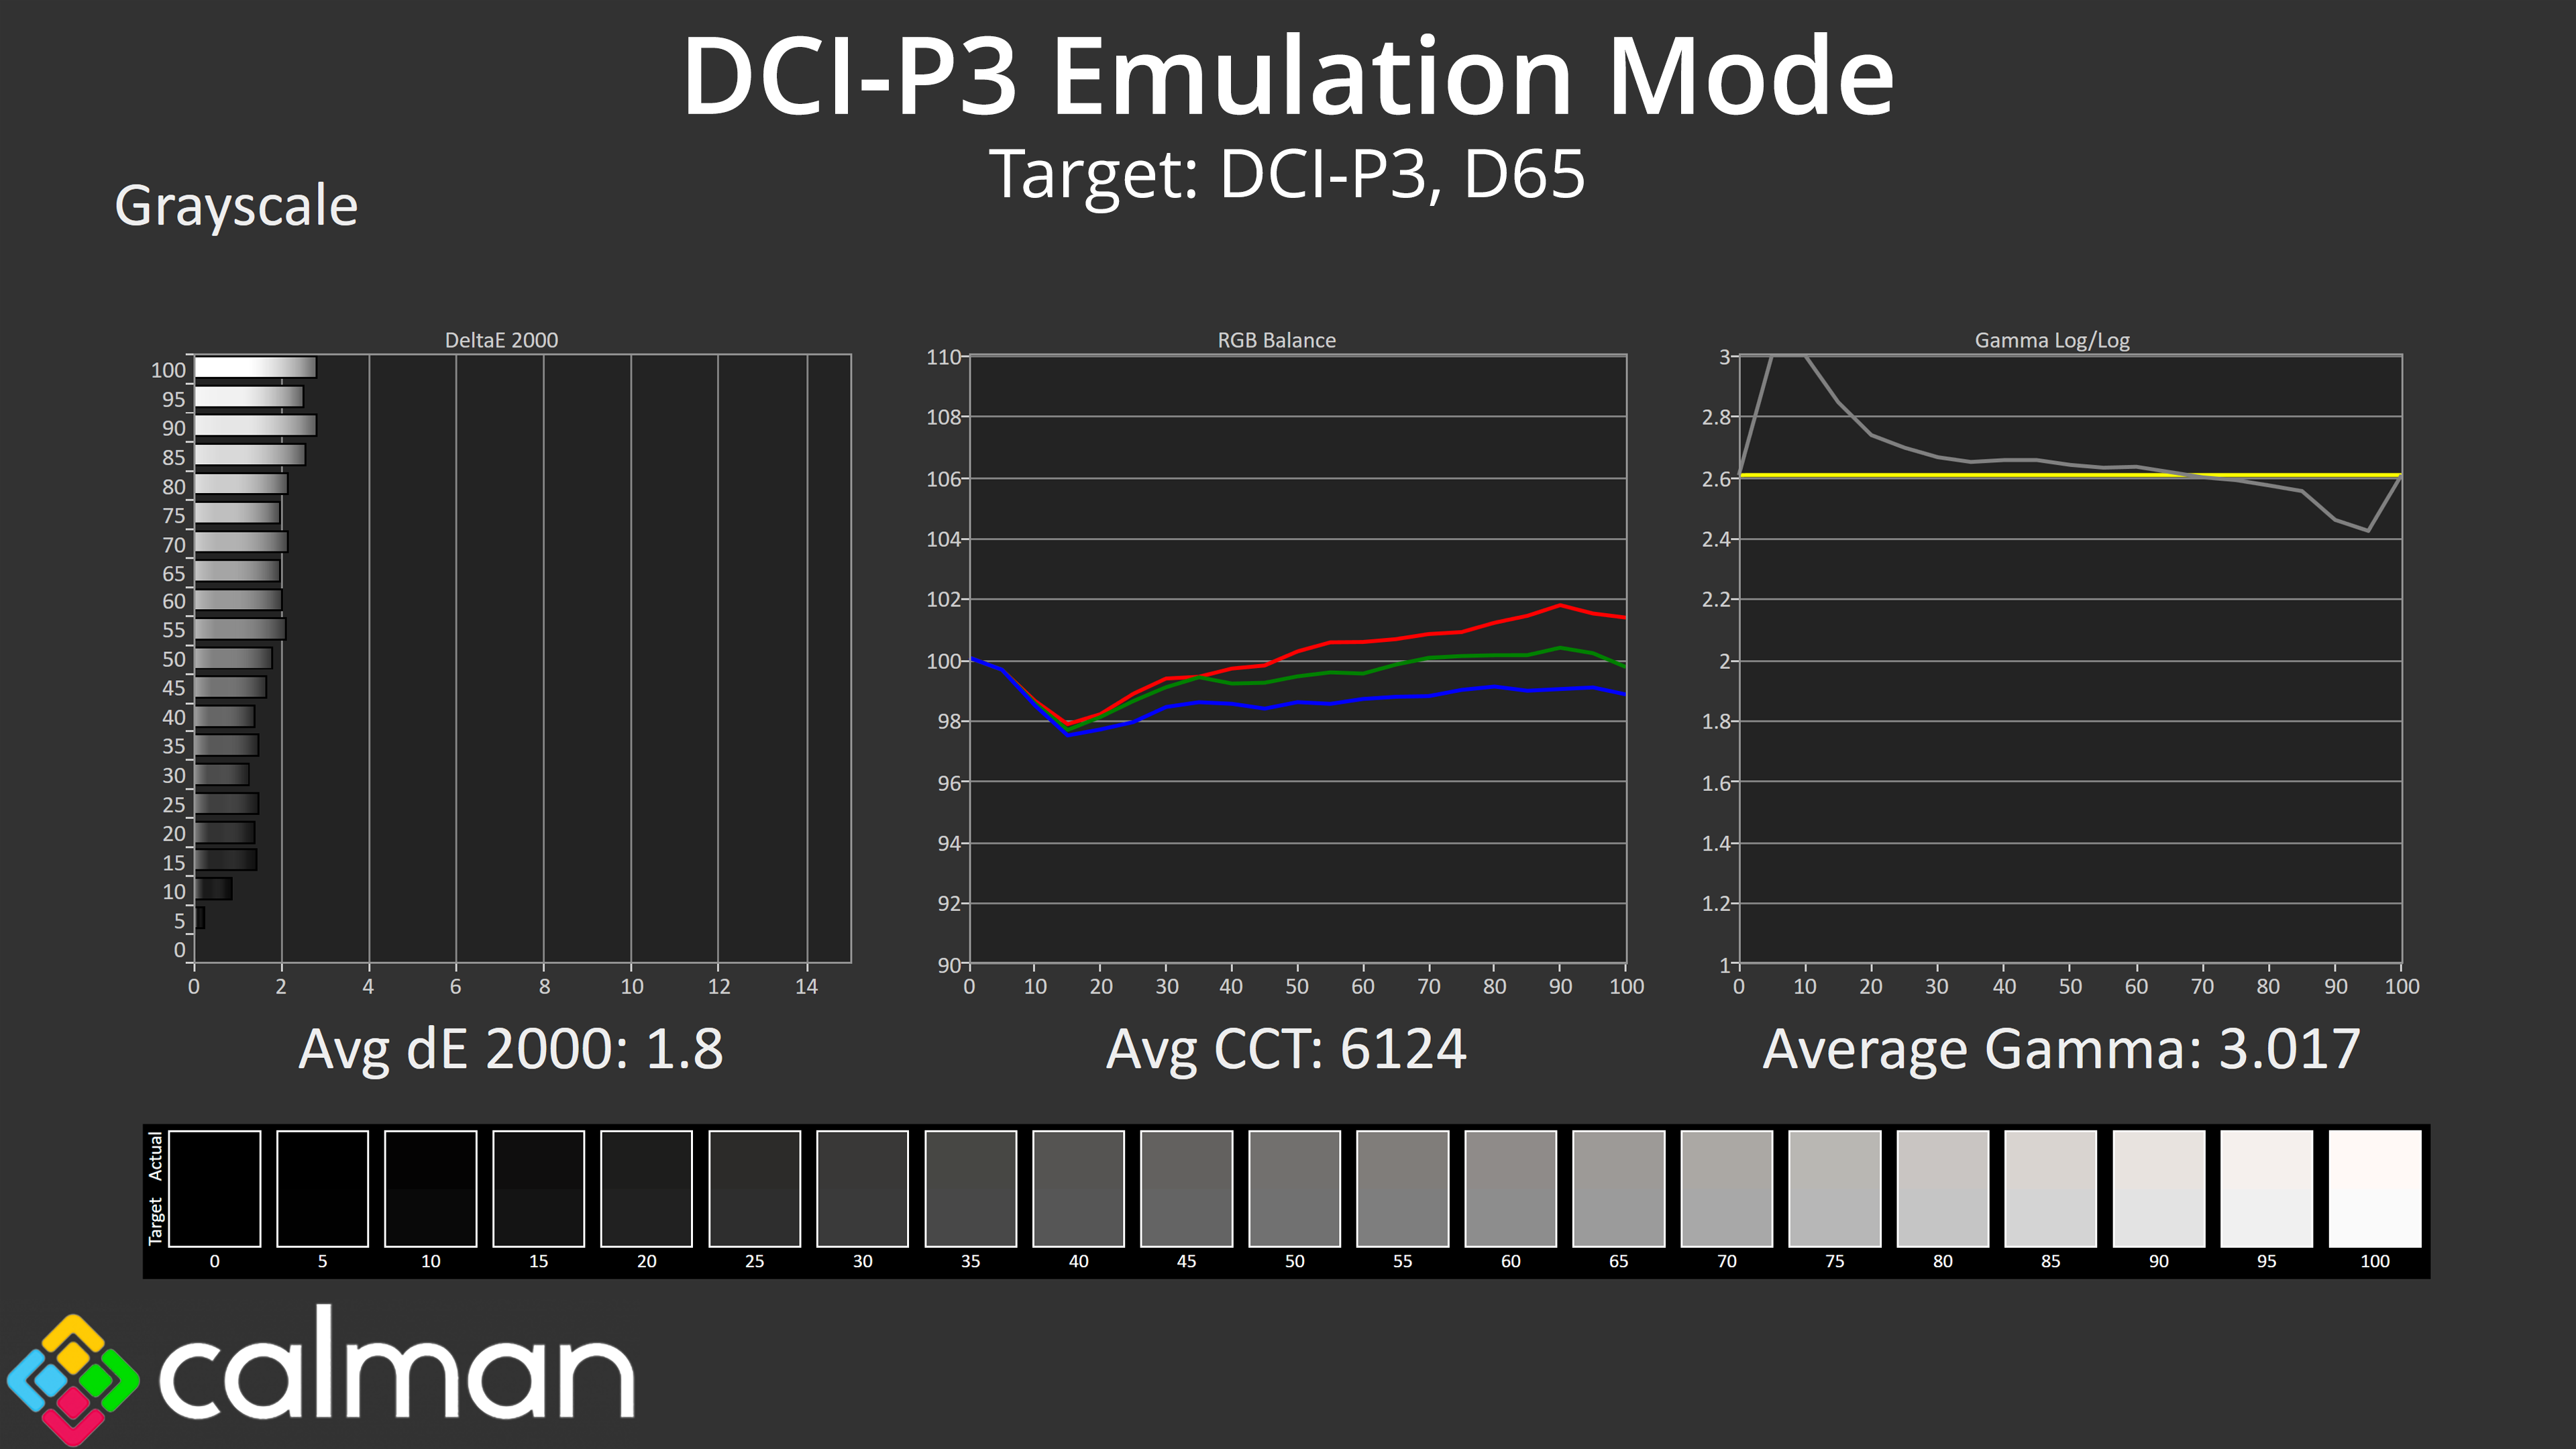
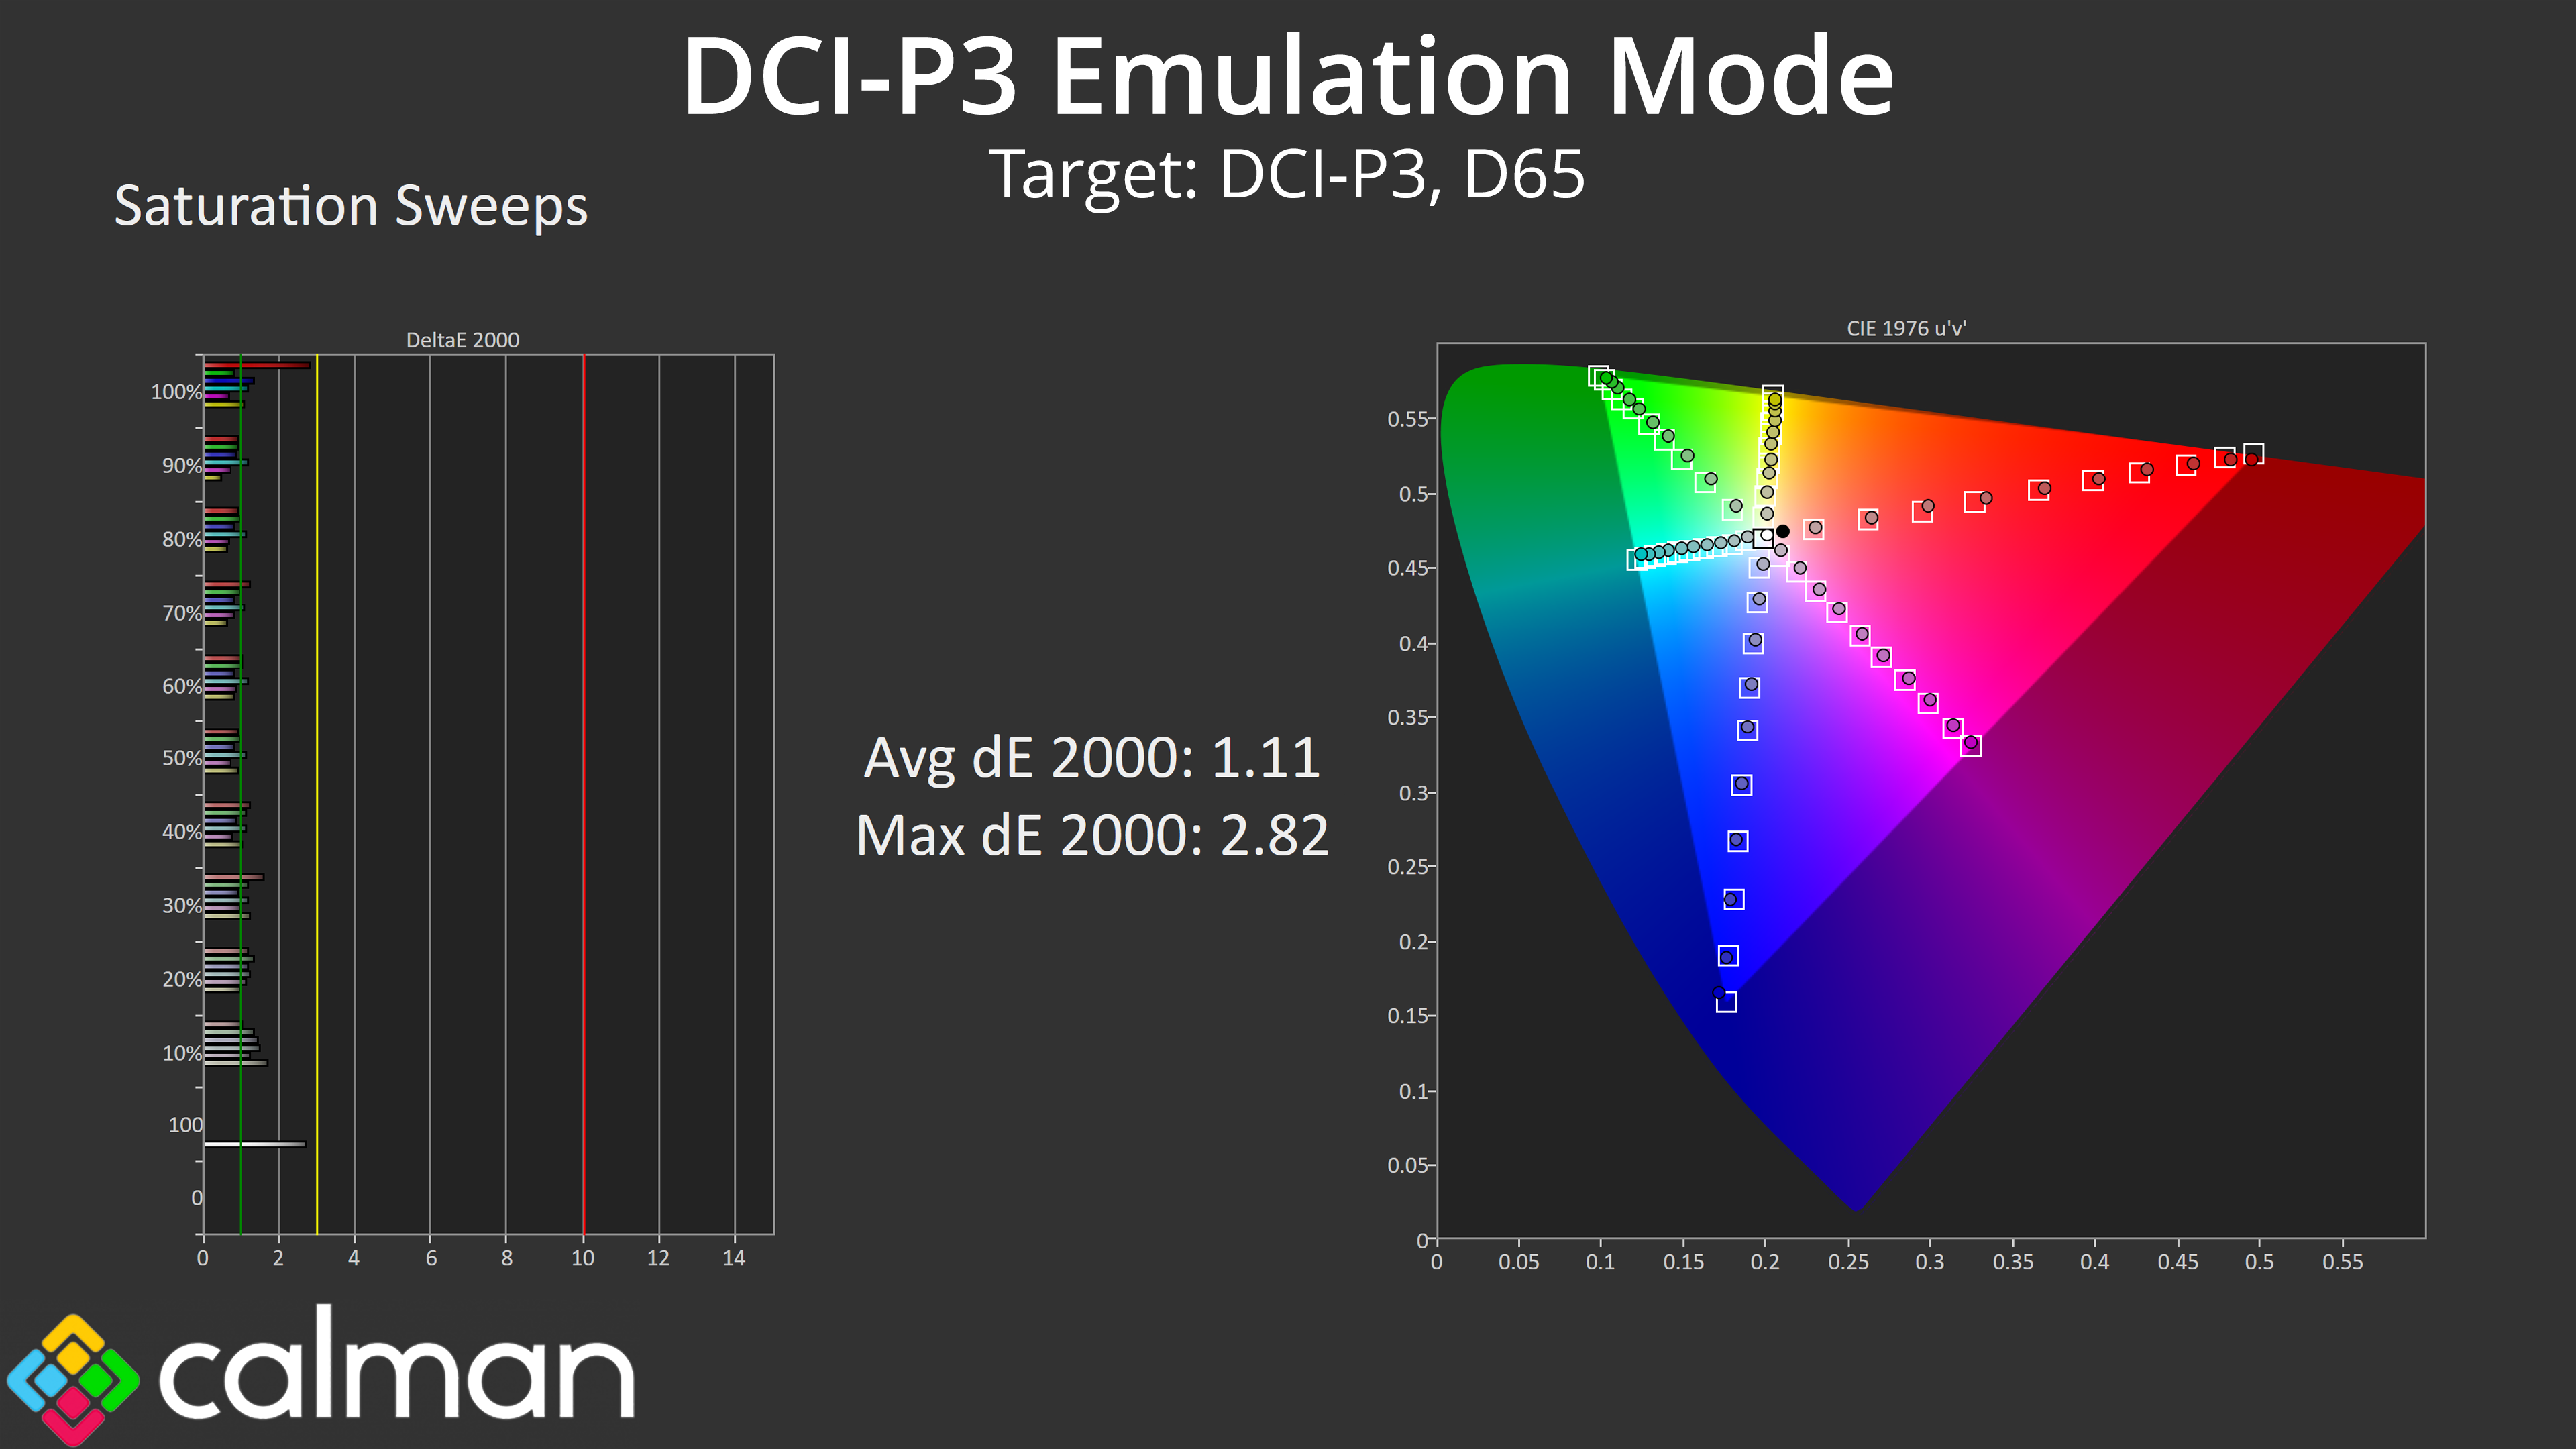

The DCI-P3 mode is quite similar. Gamma remains too high across the range, where this colour space targets a gamma of 2.6, but saturation and colour accuracy are still highly impressive, clocking average deltaE 2000 results of 1.11 and 1.22, respectively.
AdobeRGB Emulation Mode
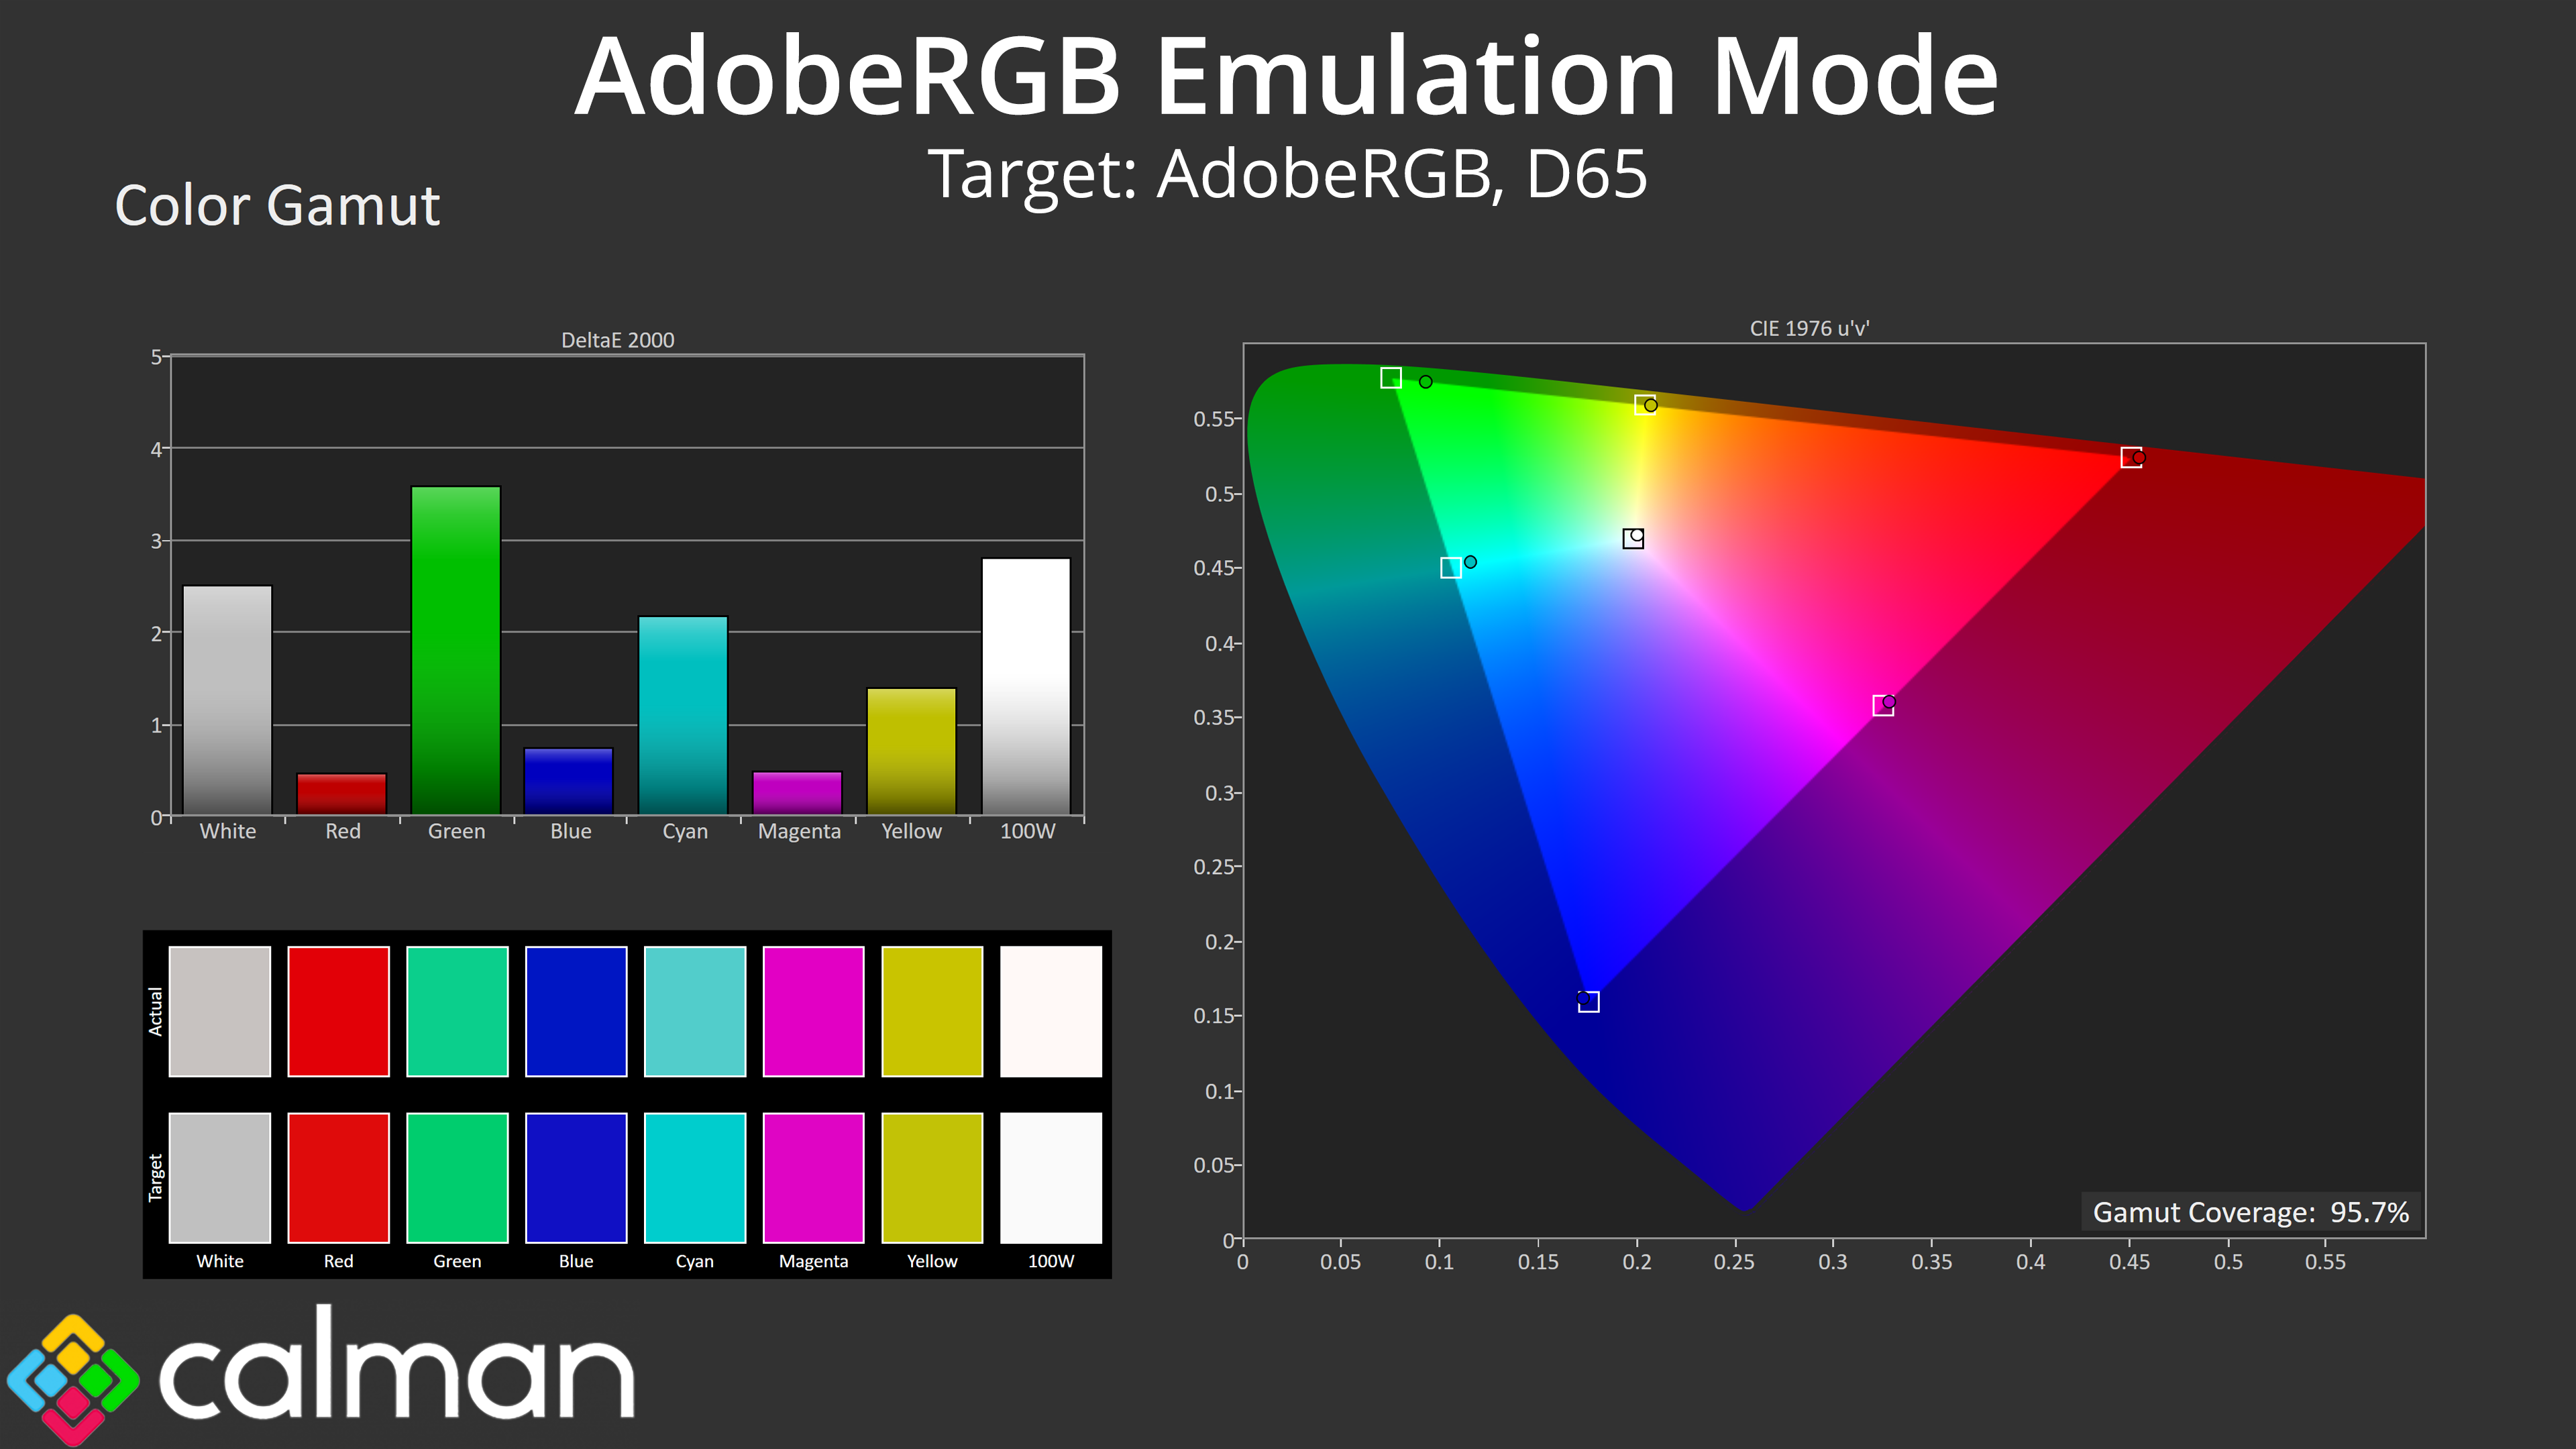

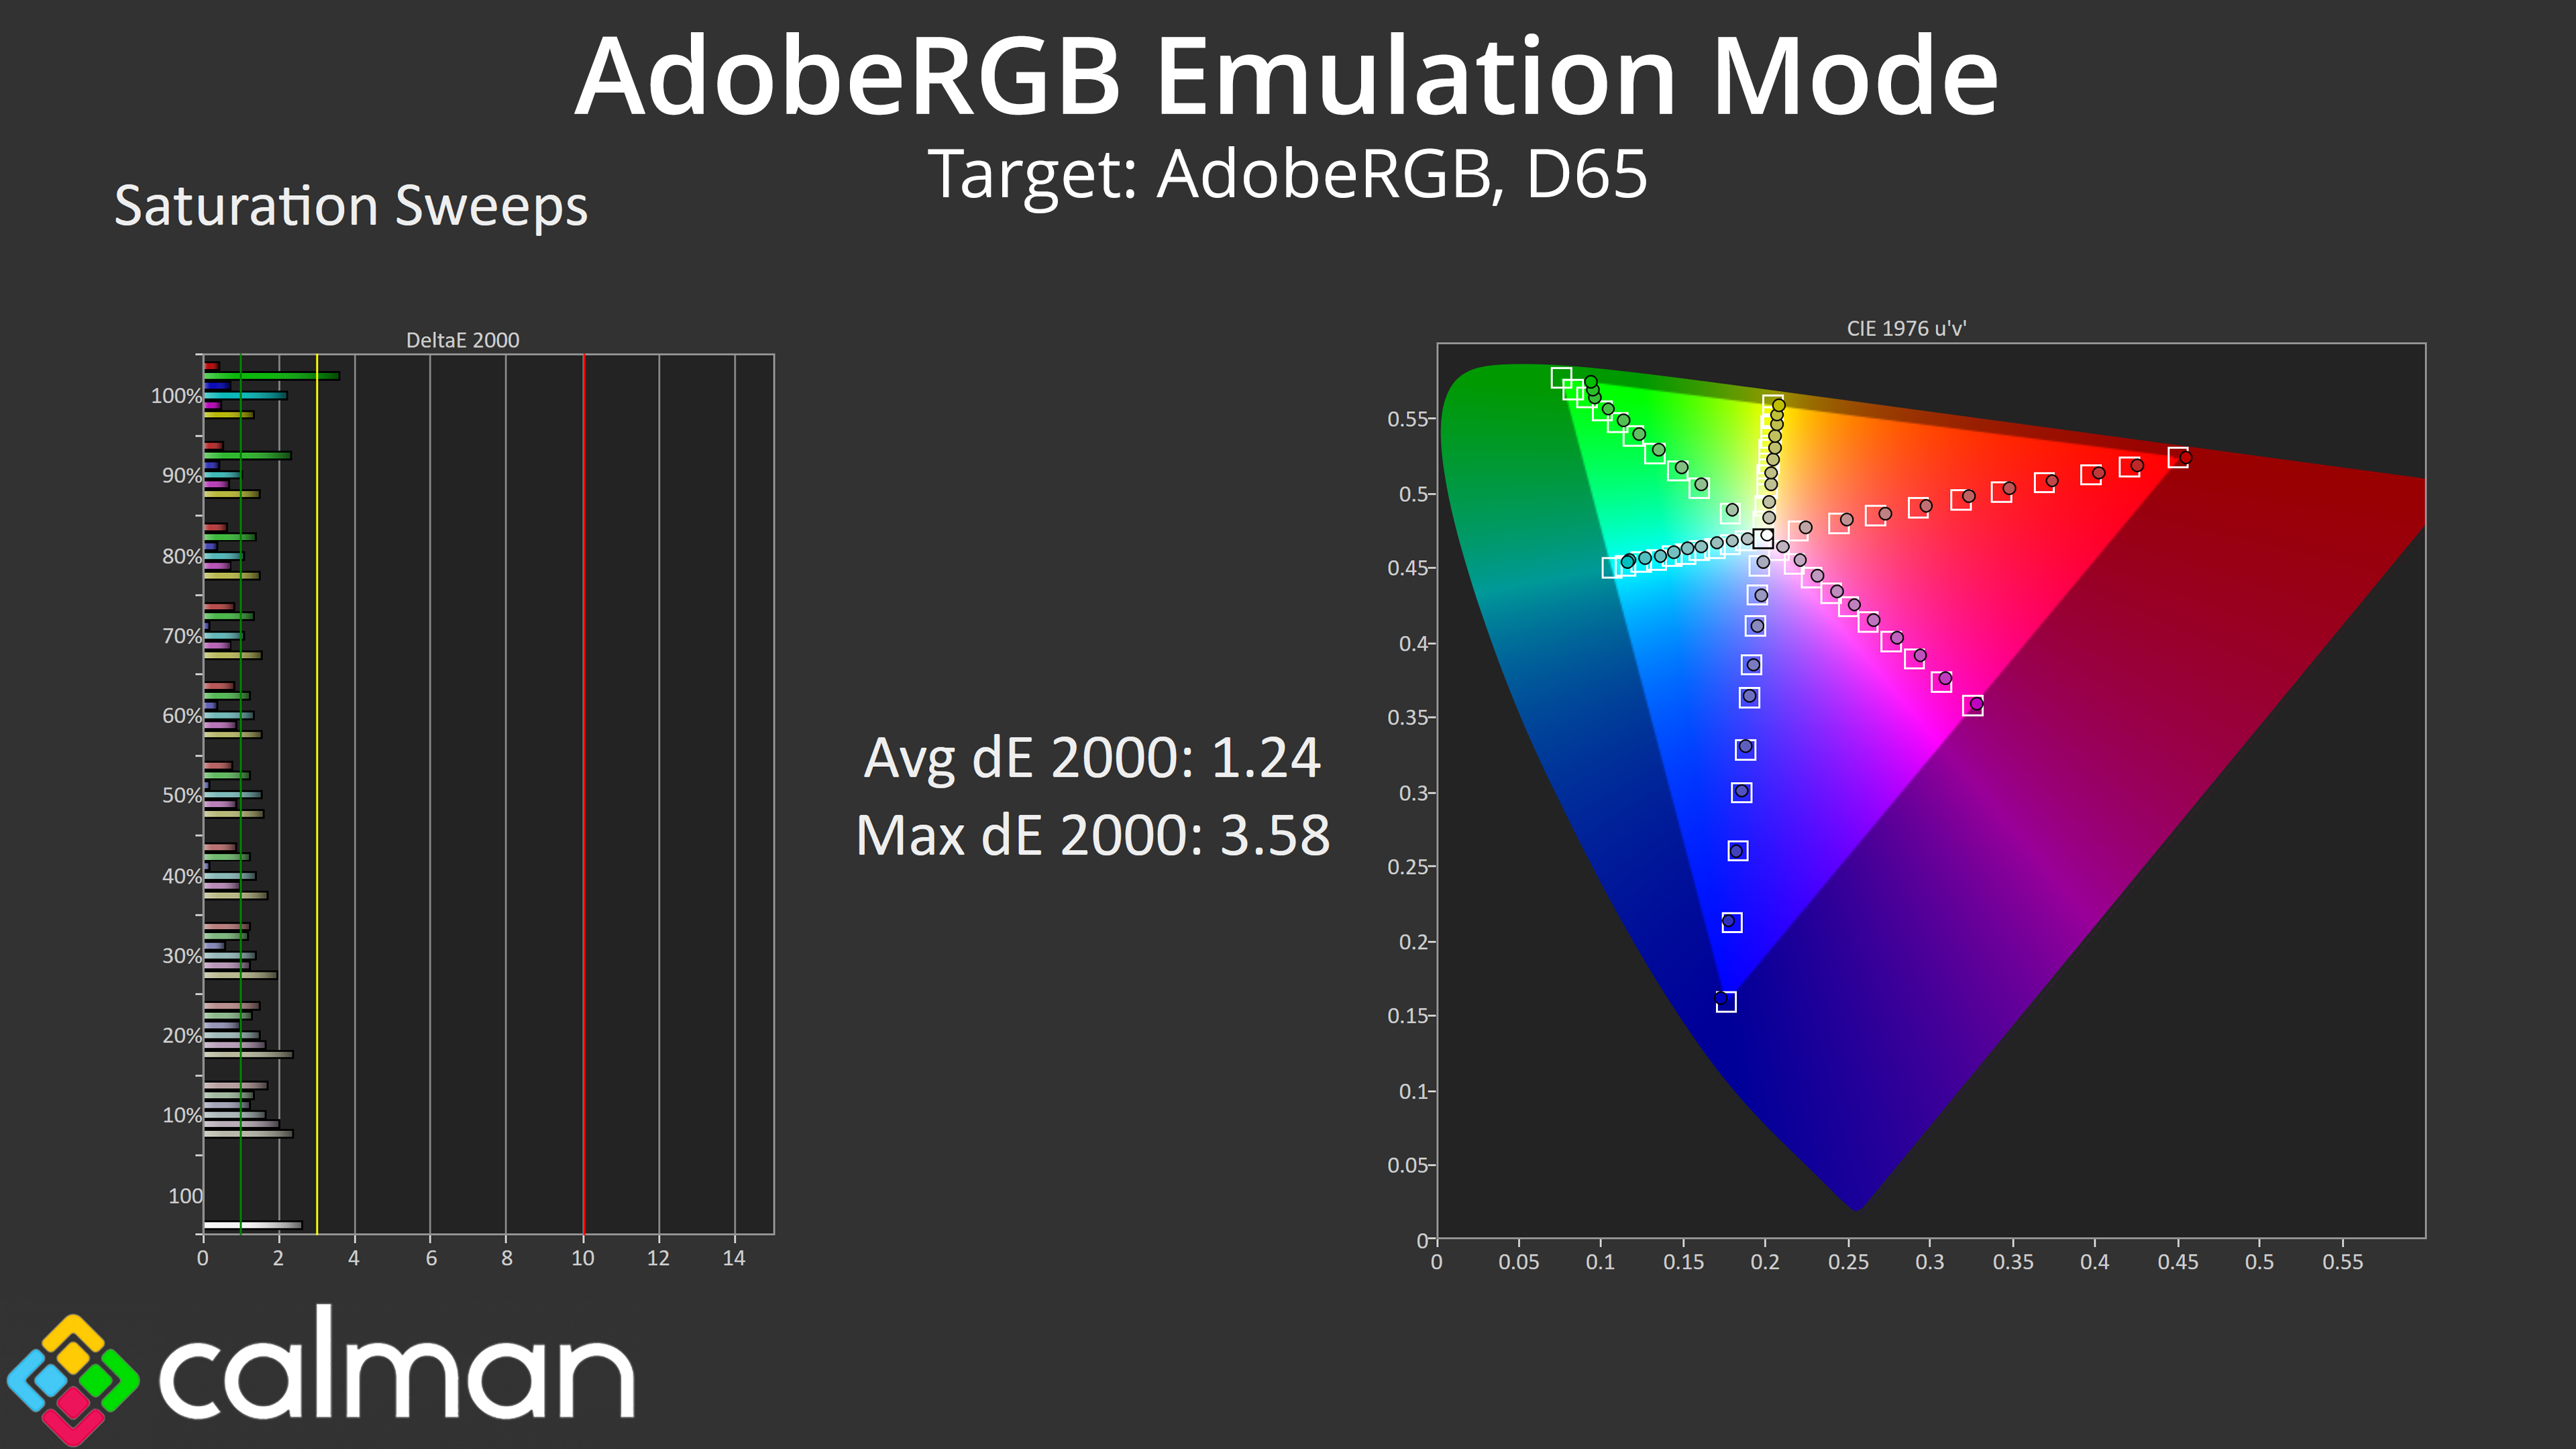
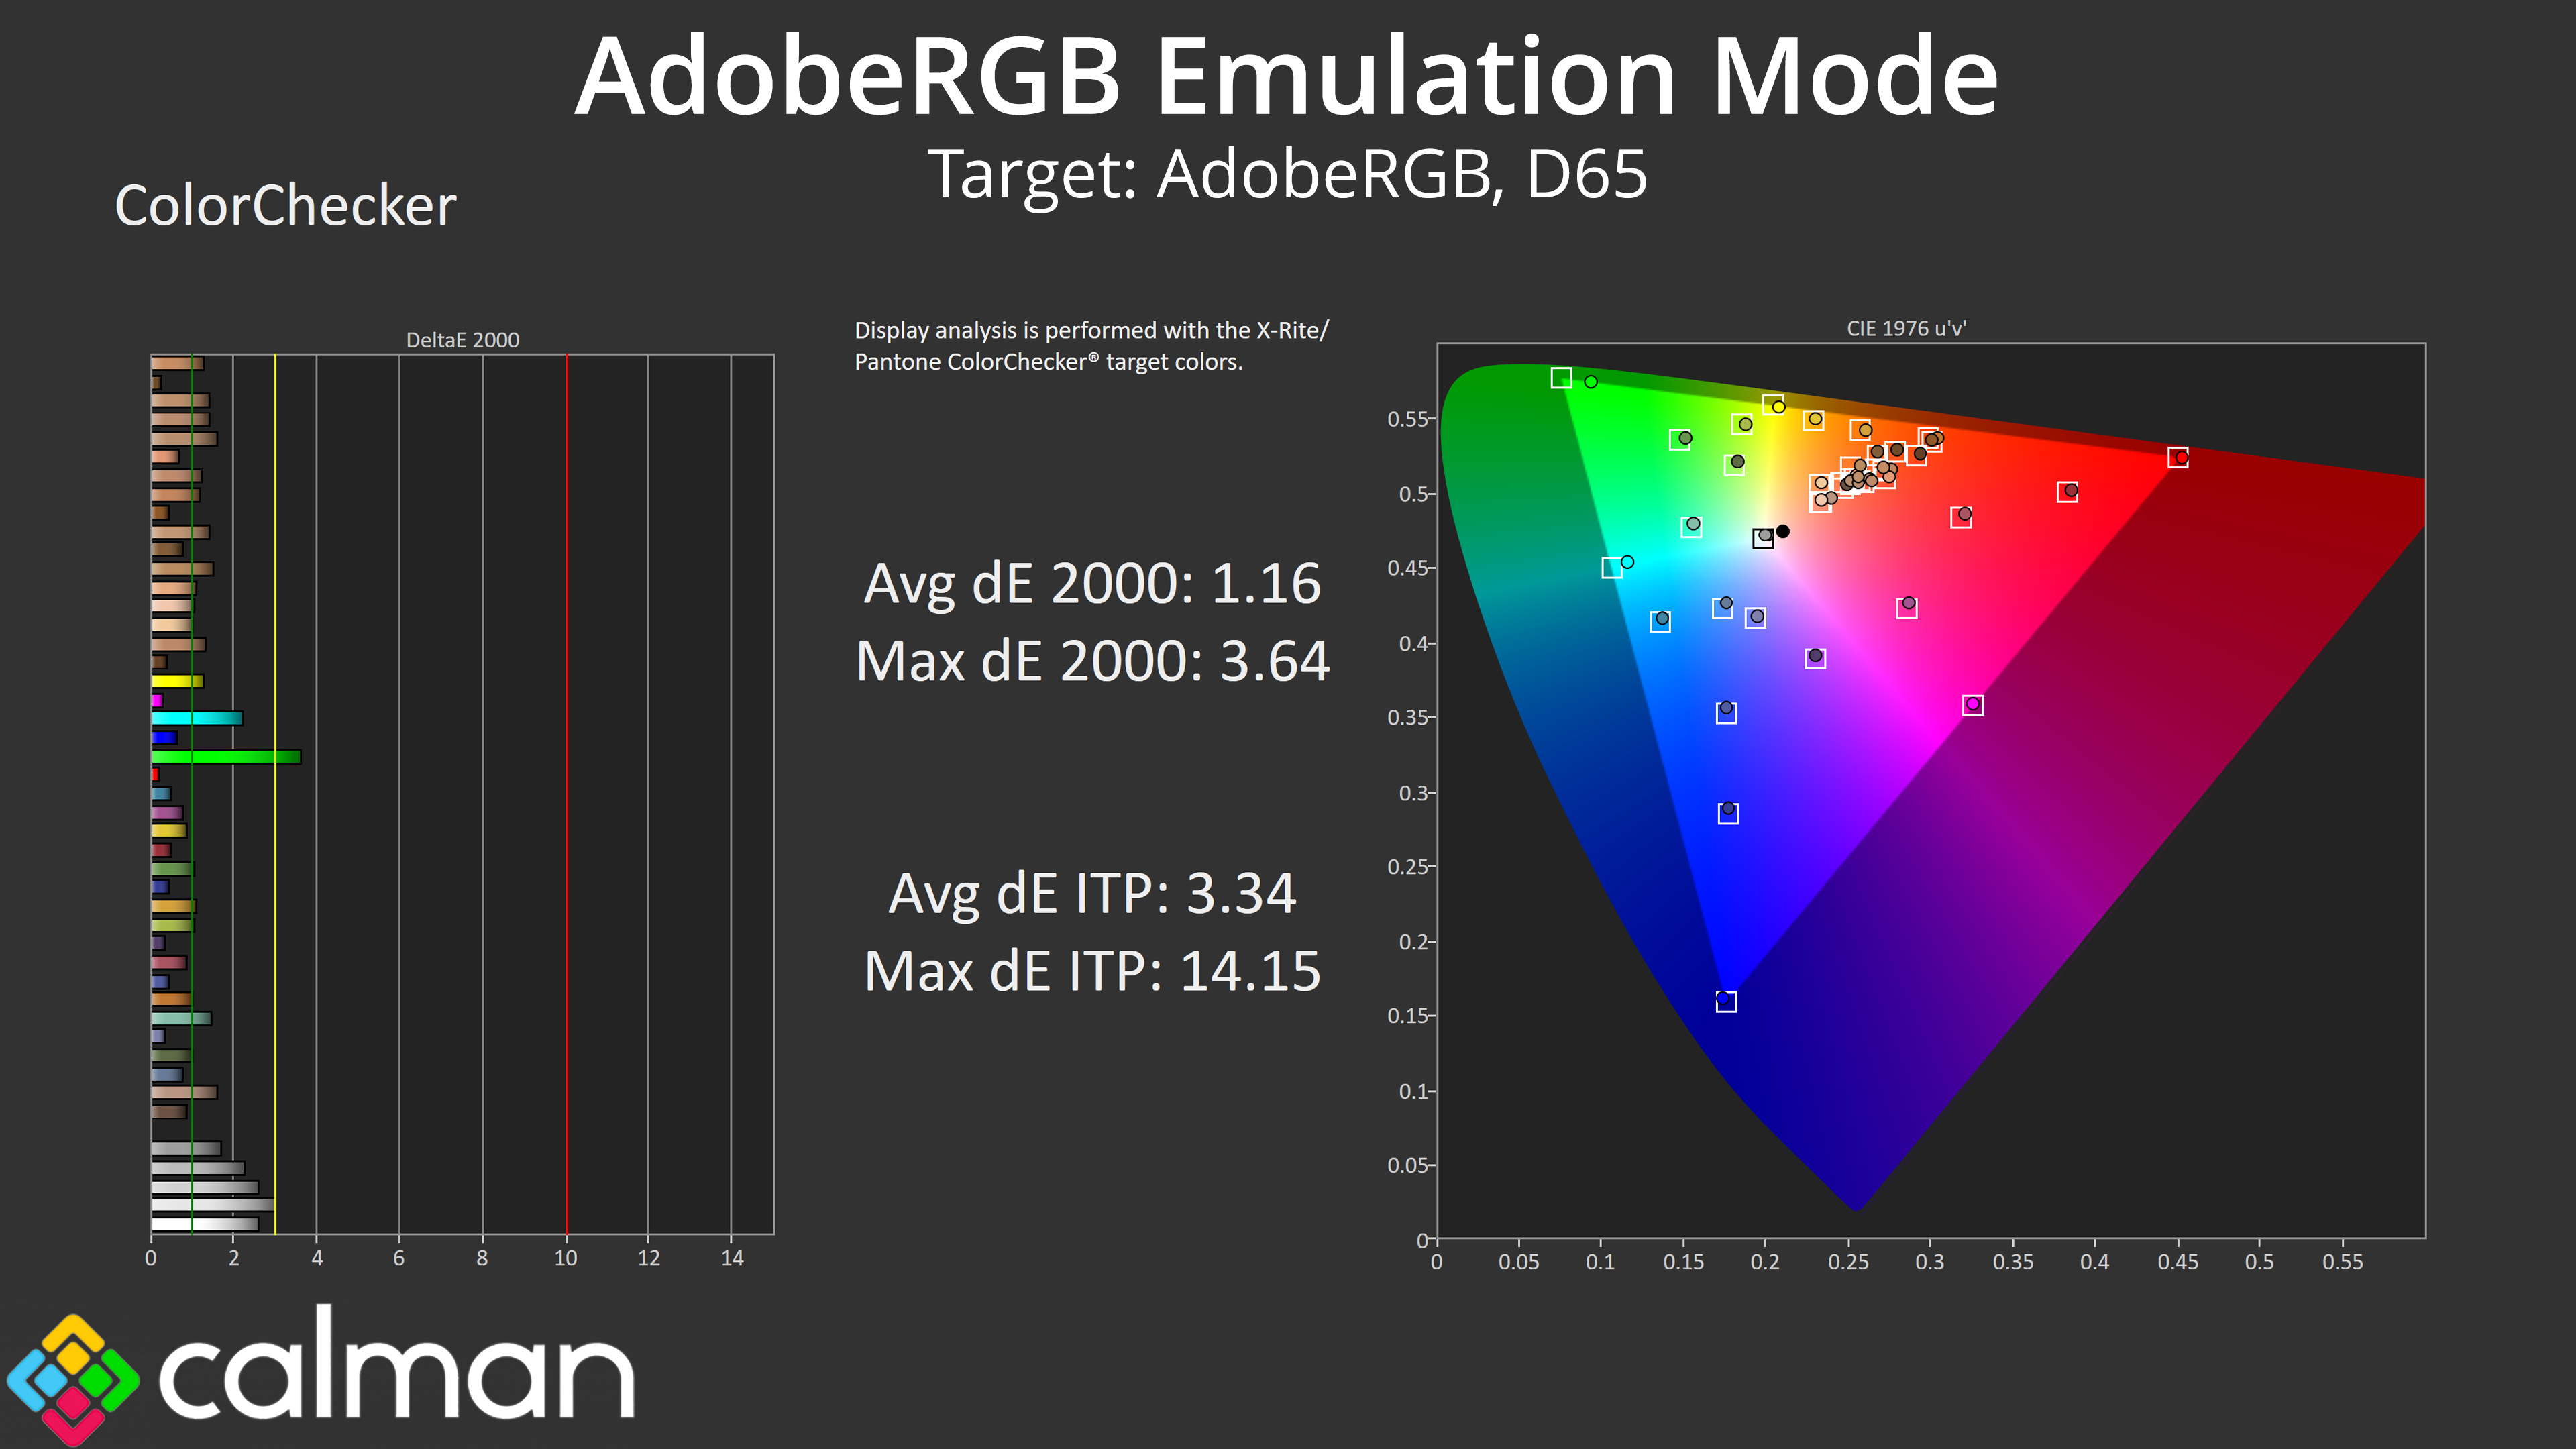
It is the AdobeRGB mode that I found to be the most impressive, however. This does improve gamma performance and it is much more accurate to the 2.2 target, while the gamut is clamped effectively. The panel can't quite reach full coverage though, resulting in small errors in the cyan and green channels, but the average results are still highly impressive.
Calibrated Results


Of course, you'll get the most from the screen once it is calibrated, and as a reminder, the PA32UCDM does support hardware calibration via the internal LUT. It's Calman Ready, so we used the same software as above, and achieved phenomenal results – the final colour accuracy average deltaE 2000 of just 0.44 has to be one of the best results I have ever seen.
HDR Testing
Following on from the SDR results on the previous page, here we re-test the relevant areas of the display with HDR enabled.
Modes Available
It's worth pointing out that there are a few different HDR modes available, including Dolby Vision support should you connect a suitable source. Connected to our test PC, we have the choice of two modes – HDR_PQ DCI and HDR_PQ BT.2020. We tested both, but also made sure to disable ‘Uniform Brightness', and ensured brightness was at the maximum level for both modes.
Brightness
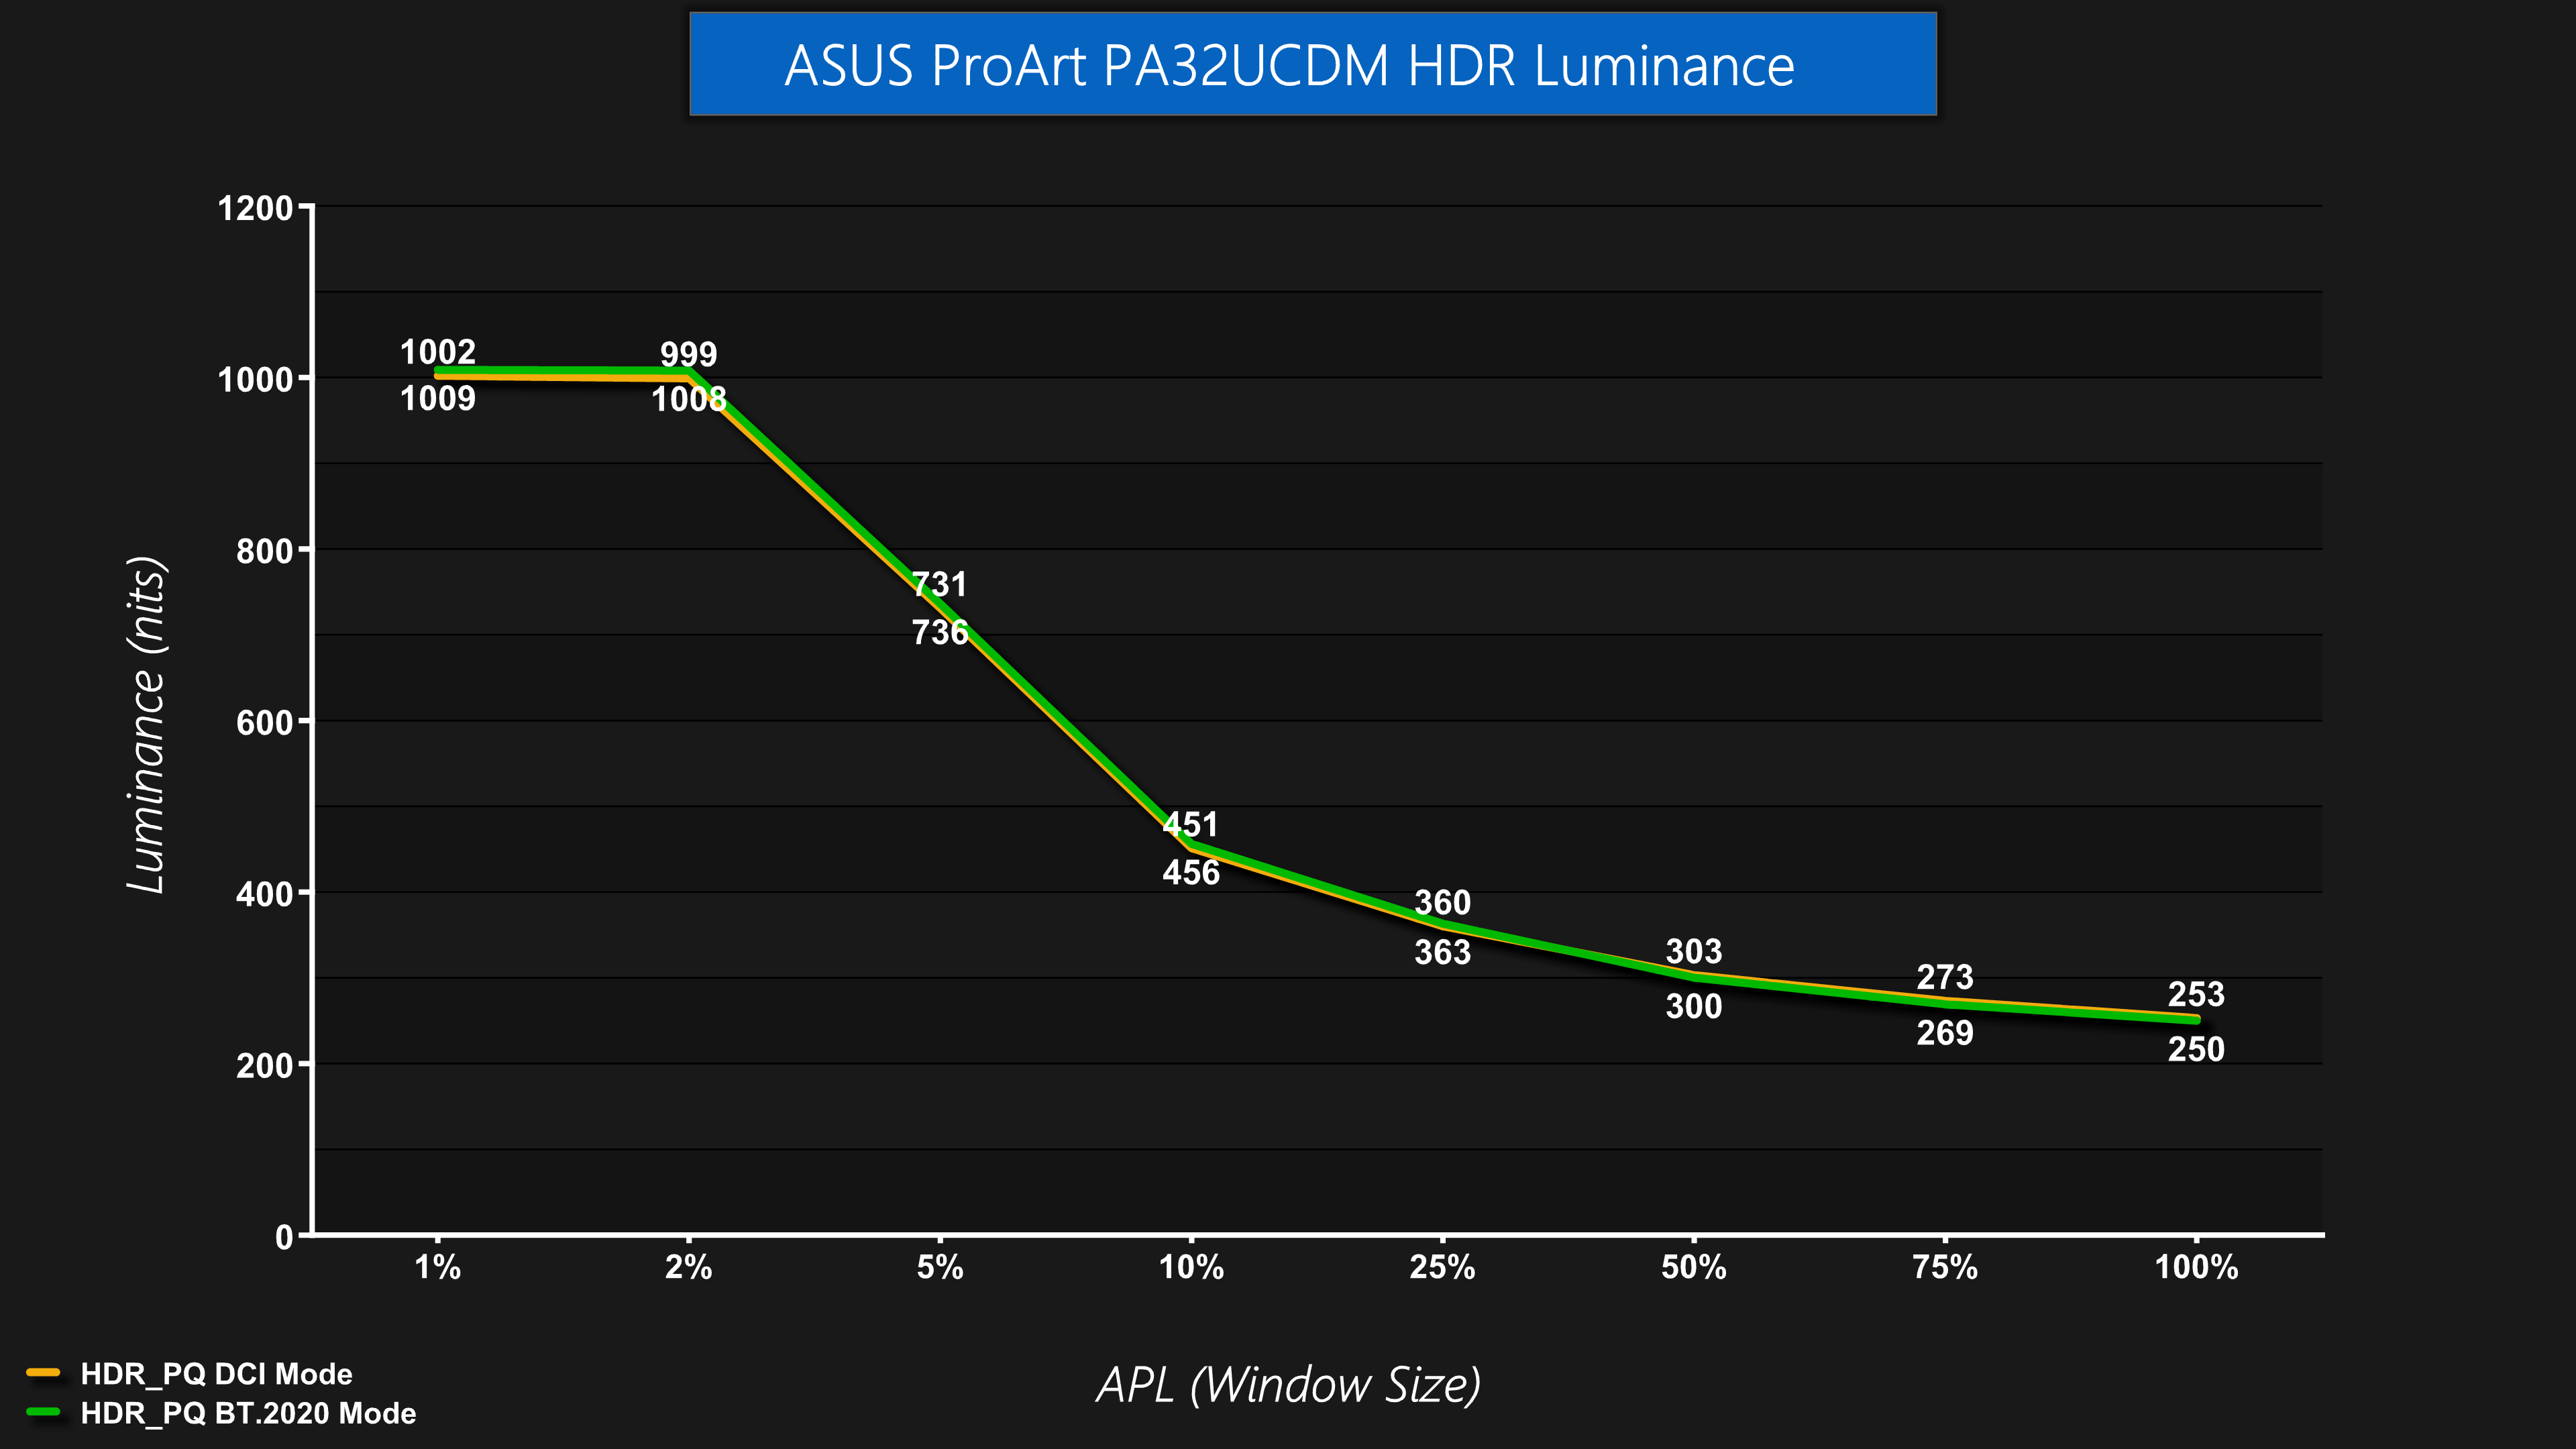
First of all, testing both the DCI and BT.2020 modes for overall brightness reveals basically identical behaviour – it peaks at 1000 nits for the 1% and 2% APLs, before dimming as the window size increases. This behaviour is equivalent to the ‘Peak 1000 nits' modes we see from other QD-OLED gaming monitors.
Greyscale
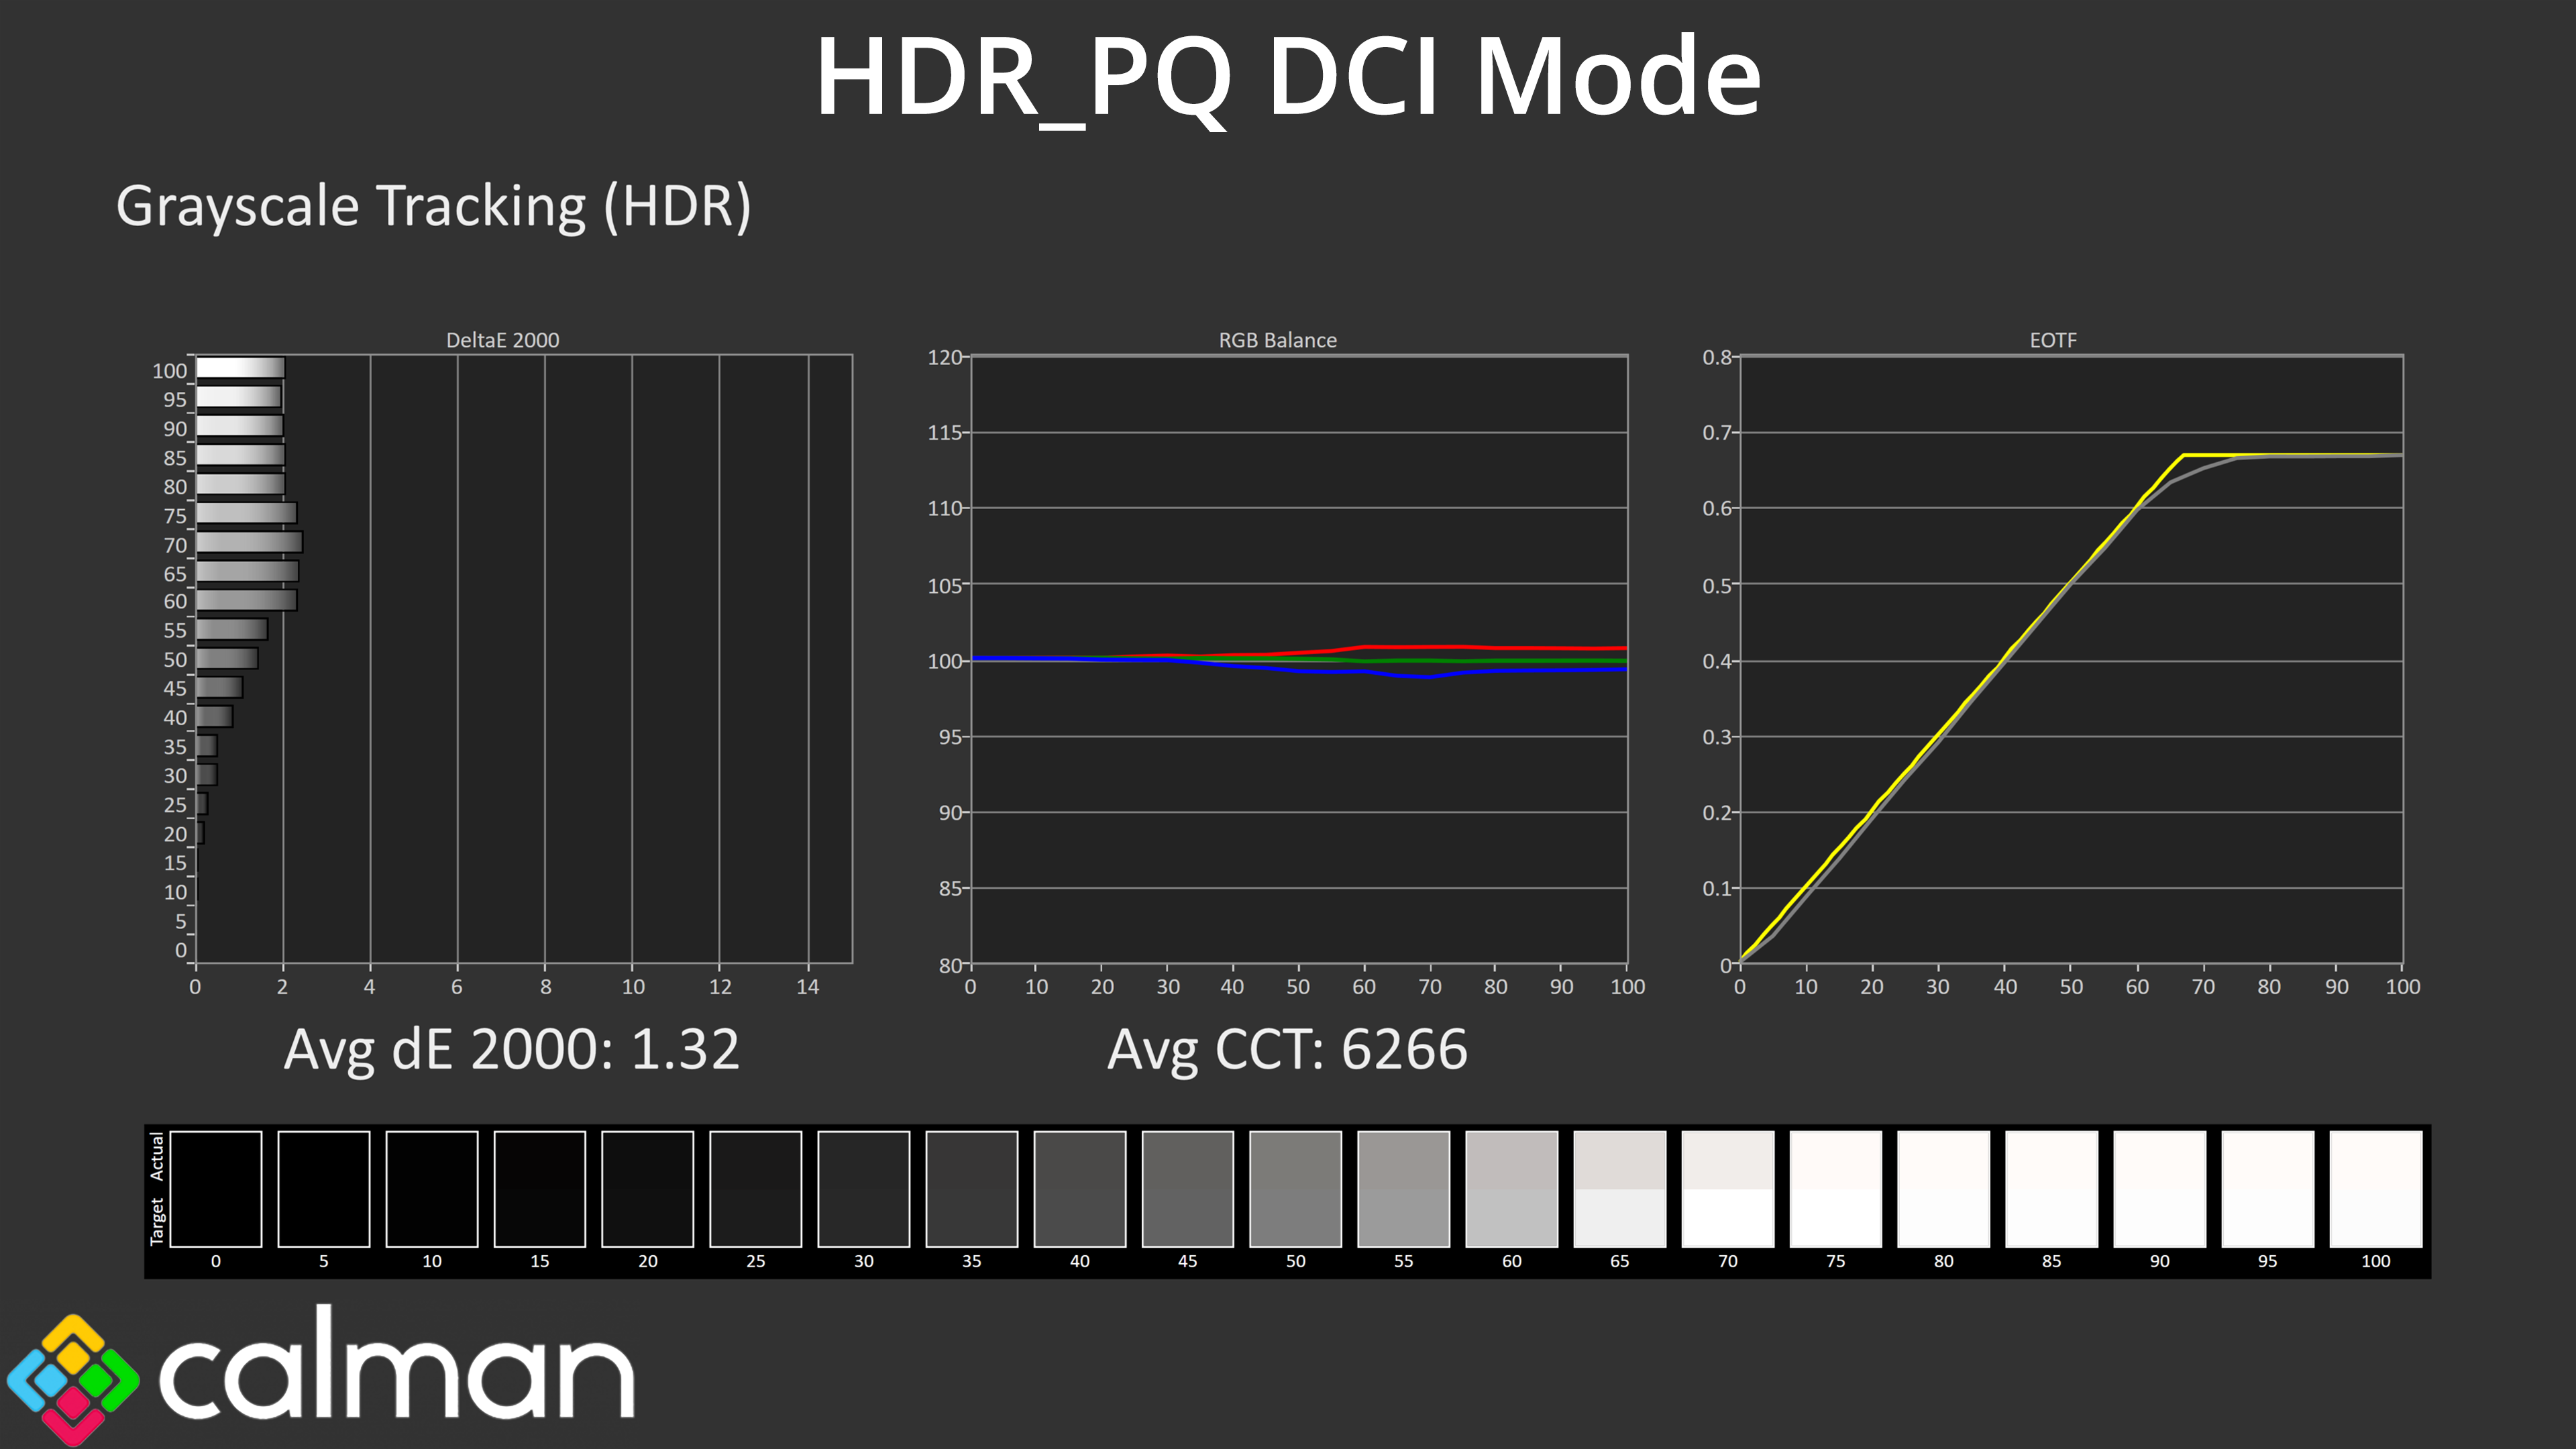
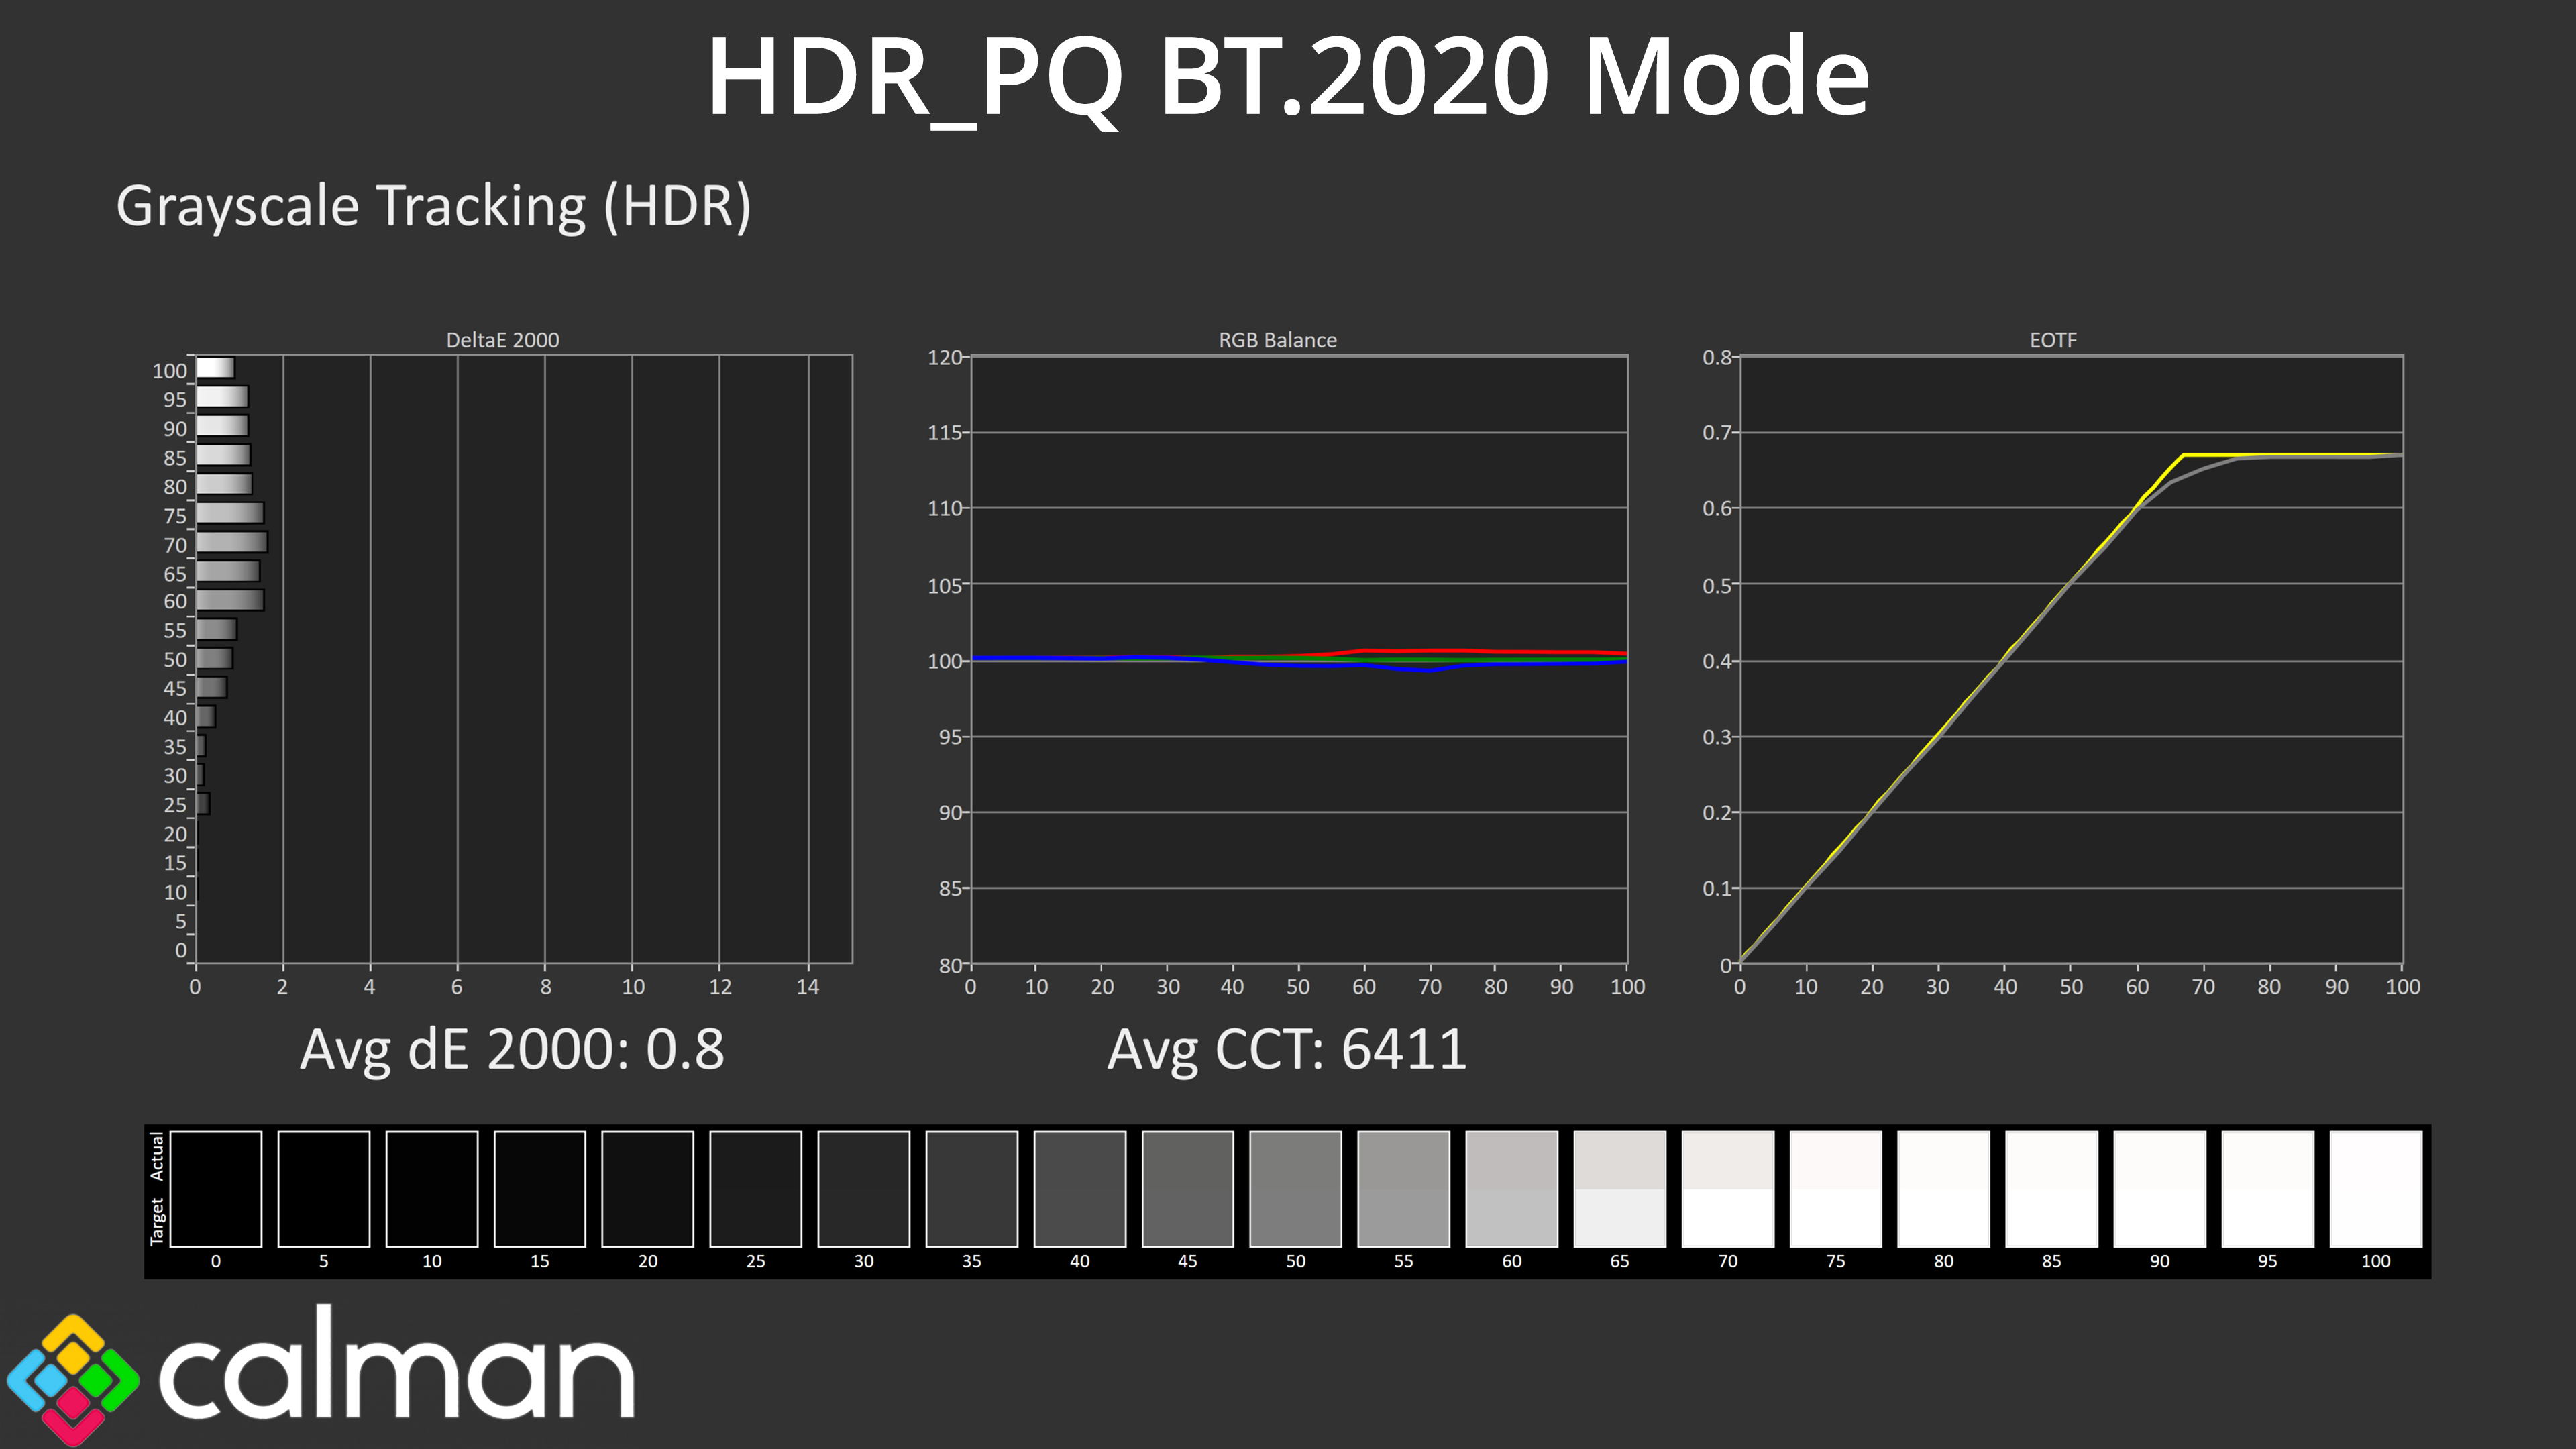
Both modes are very similar in regards to their accuracy when using our standard 10% APL – both track the EOTF curve very well with just a small amount of roll off at the end.
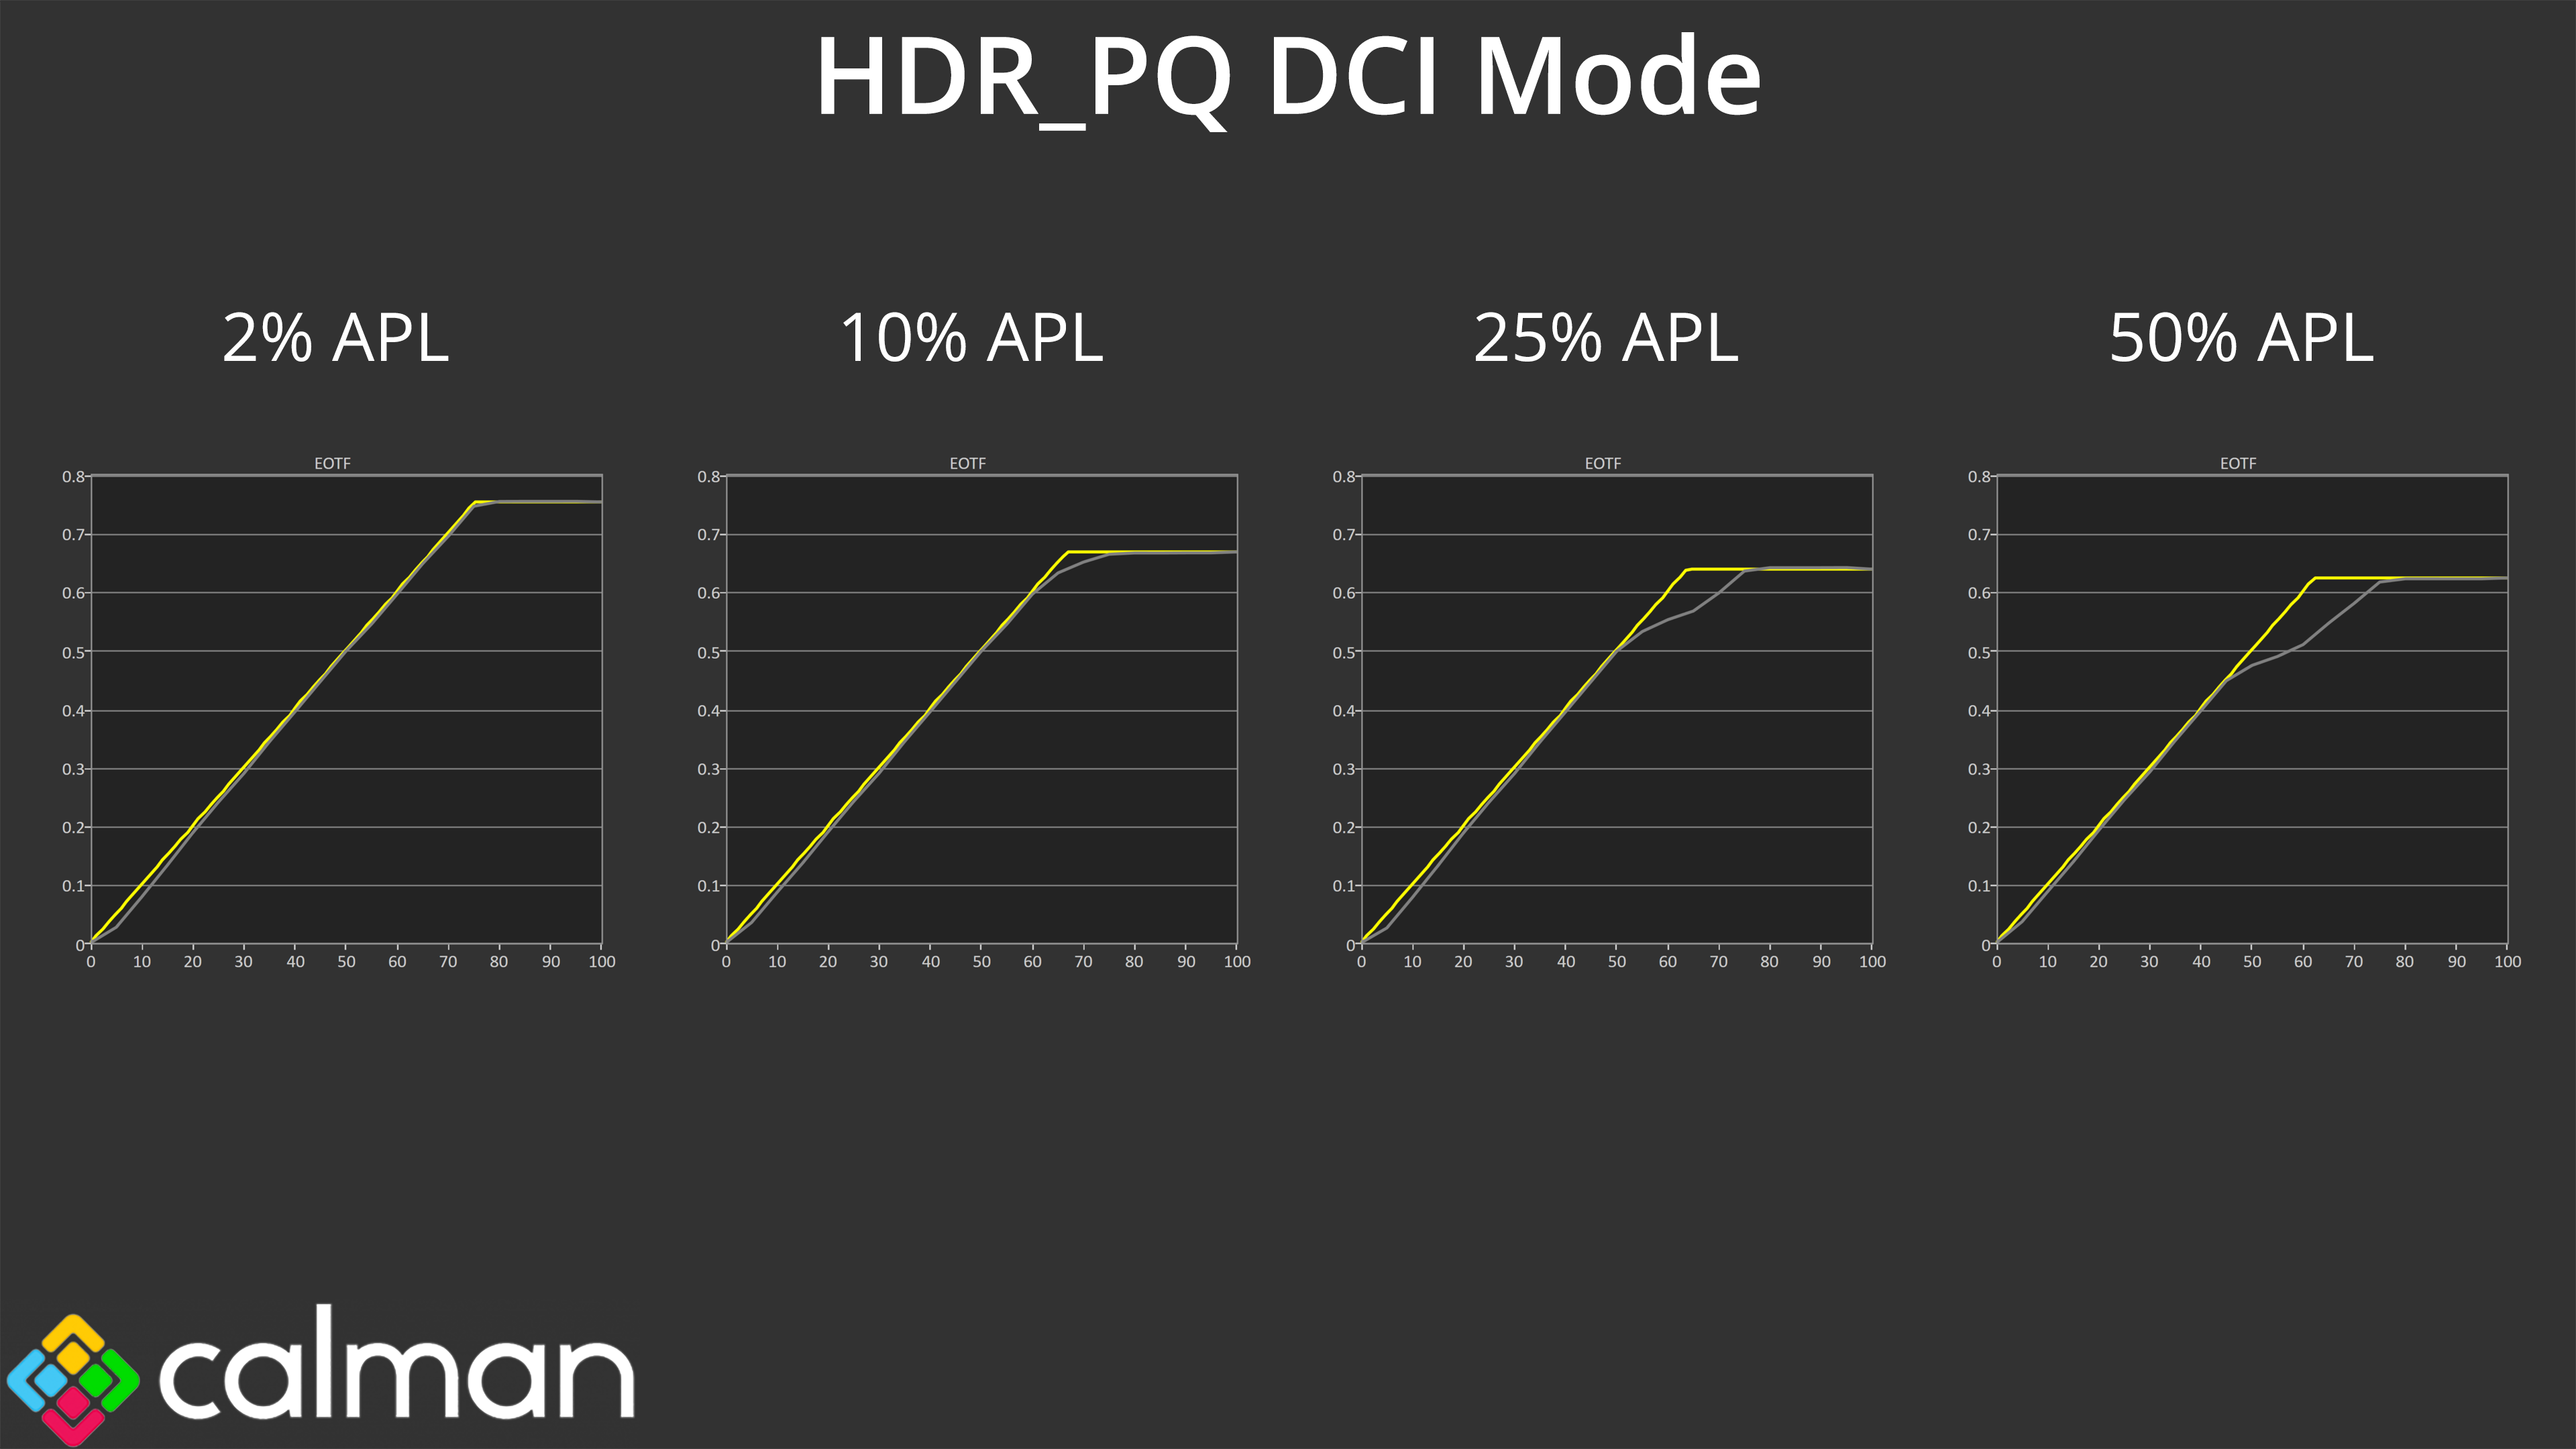
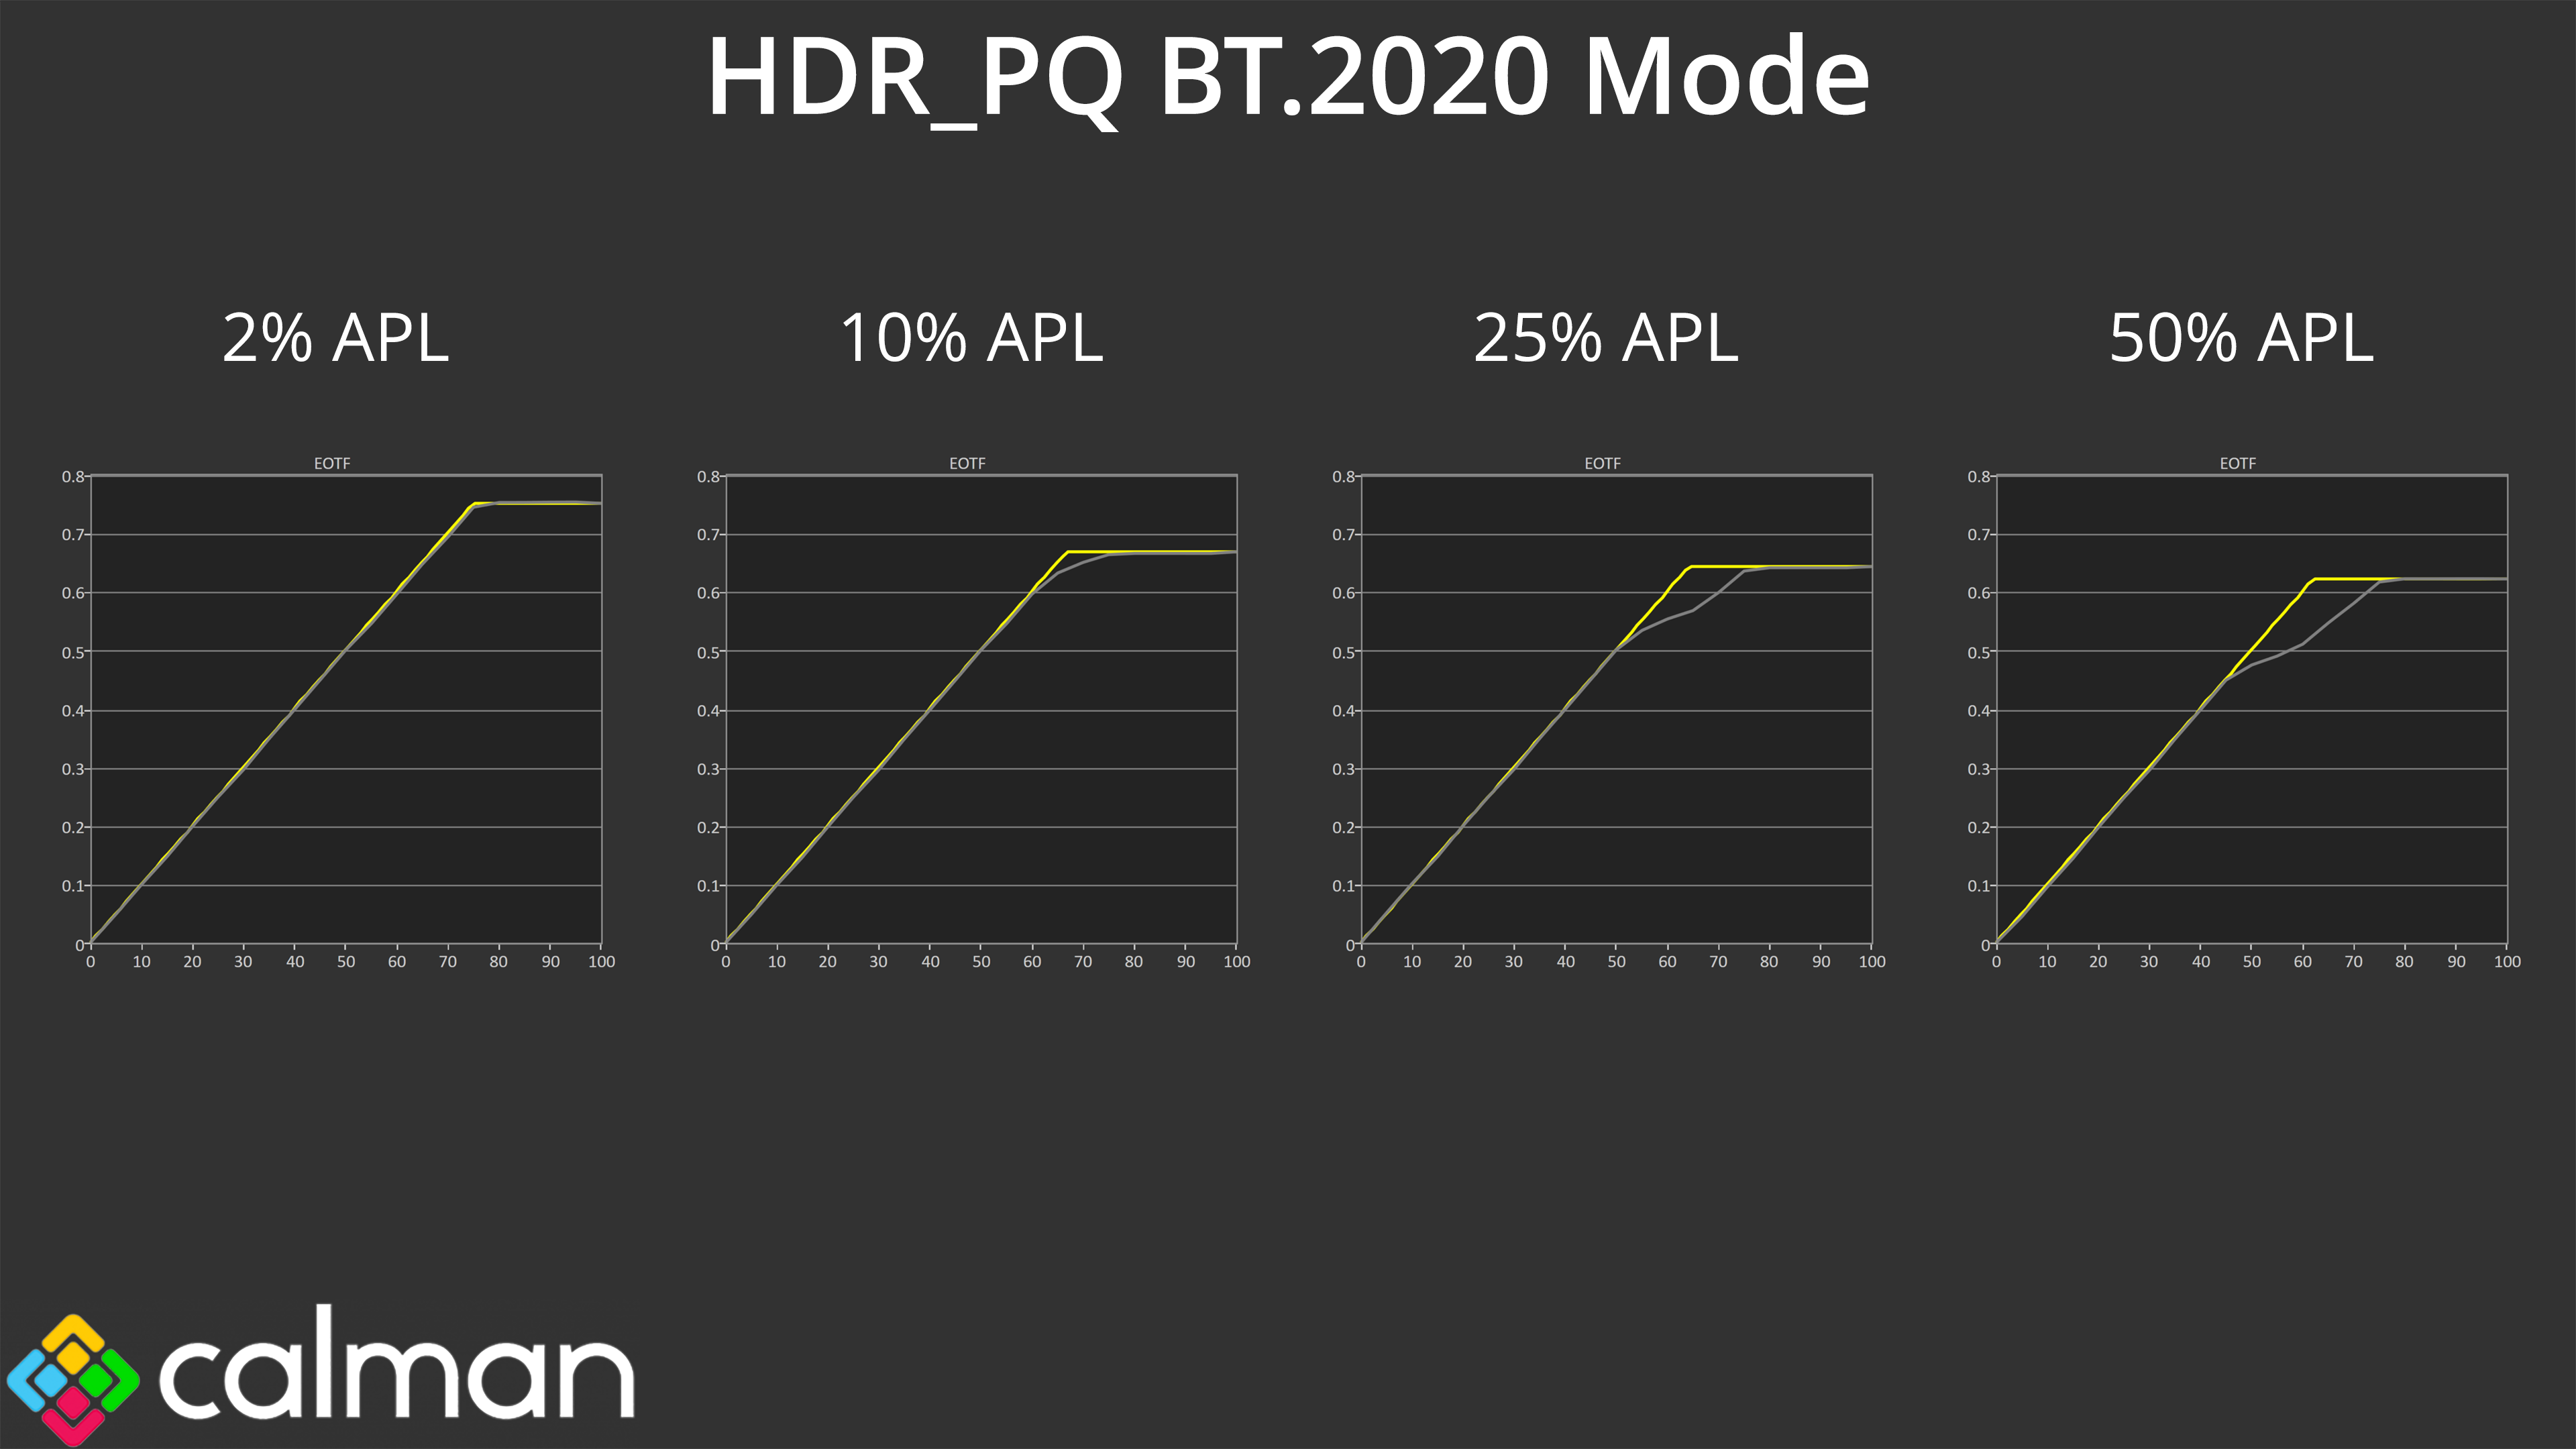
However, as we've come to expect from QD-OLEDs, the EOTF curve continues to roll off early at an increasing rate as we increase the window size. The bigger the APL, the more it rolls off, resulting in an overly dark image, and this was consistent across both HDR modes tested.
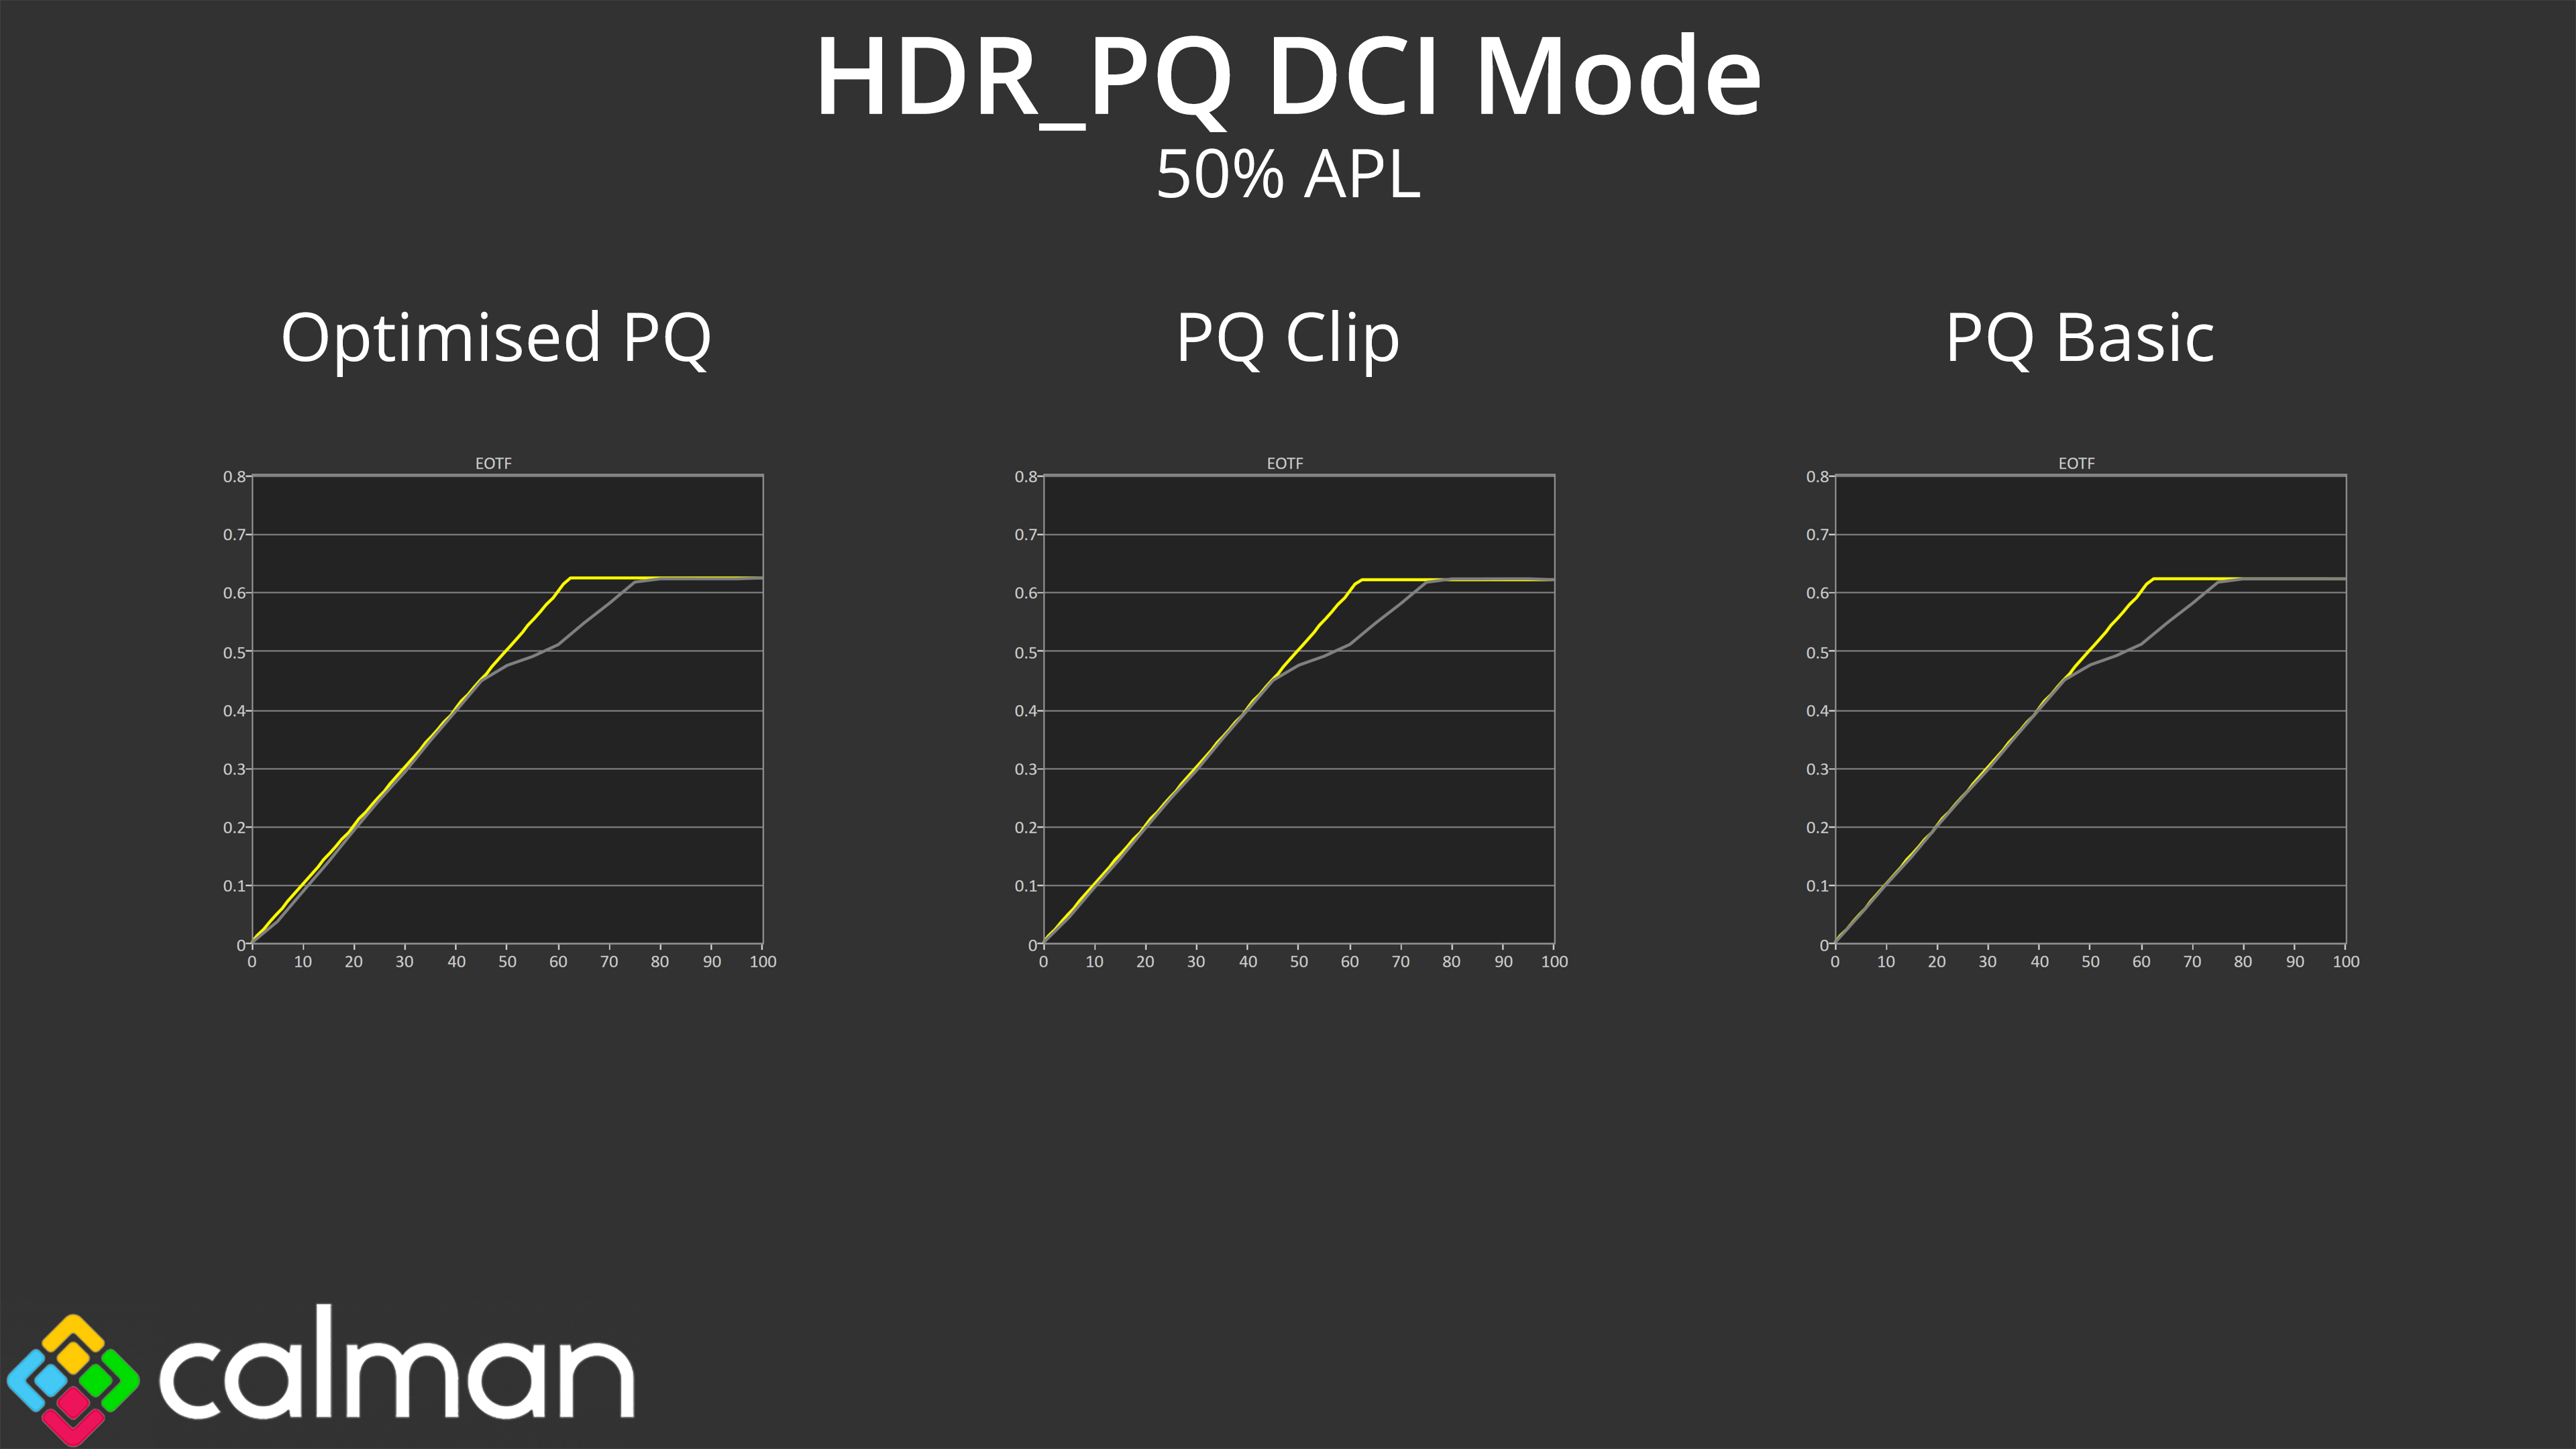
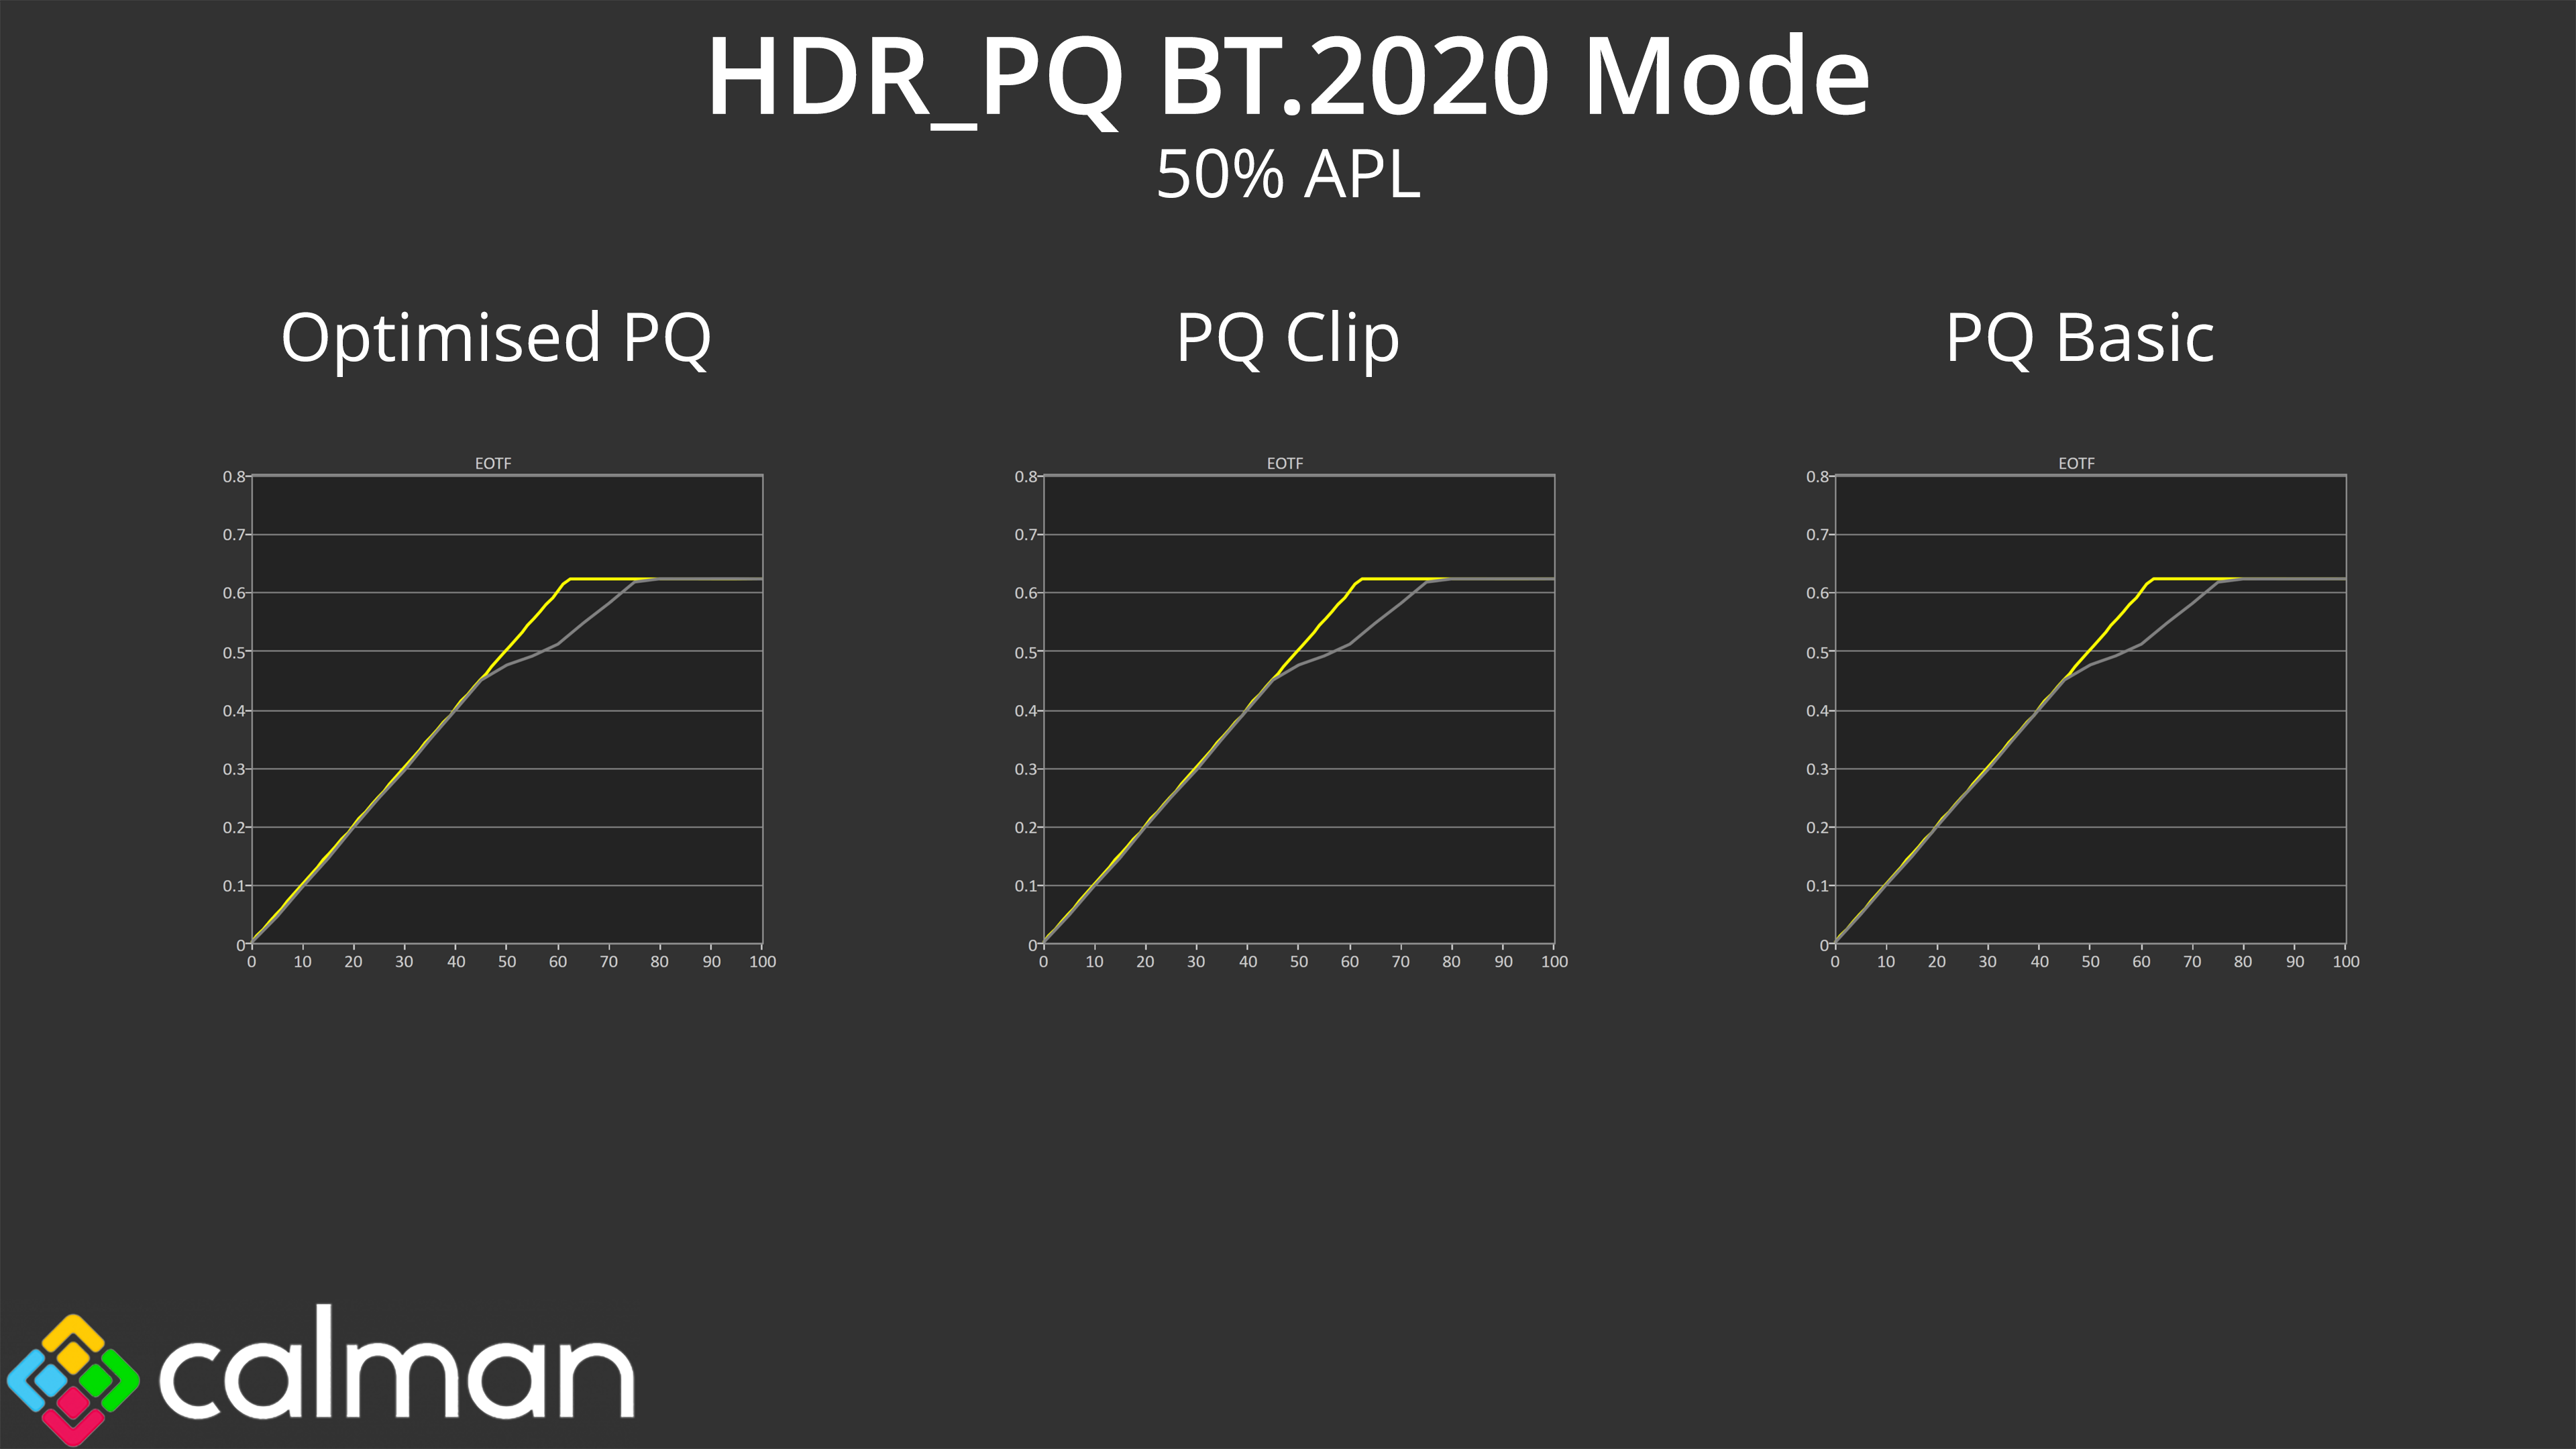
As a final test, ASUS does also include three specific ‘sub-modes' within the OSD for each HDR mode – PQ Optimised, PQ Clip, and PQ Basic. The description for each is given in the manual:
- ‘PQ Optimized: Delivers the optimized HDR performance of this display with as much accuracy as with ST2084 in terms of display luminance capability.'
- ‘PQ Clip: Preserves PQ curve till displaying maximum luminance with accuracy. ST2084 code value with higher than display maximum will be mapped to the maximum luminance.'
- ‘PQ Basic: Presents HDR performance of general HDR supported displays'
I tried each of these options at a 50% APL, using both HDR_PQ DCI and HDR_PQ BT.2020 modes – for a total of six tests. However, the EOTF tracking behaviour is identical as far as I can see.
Colour Accuracy
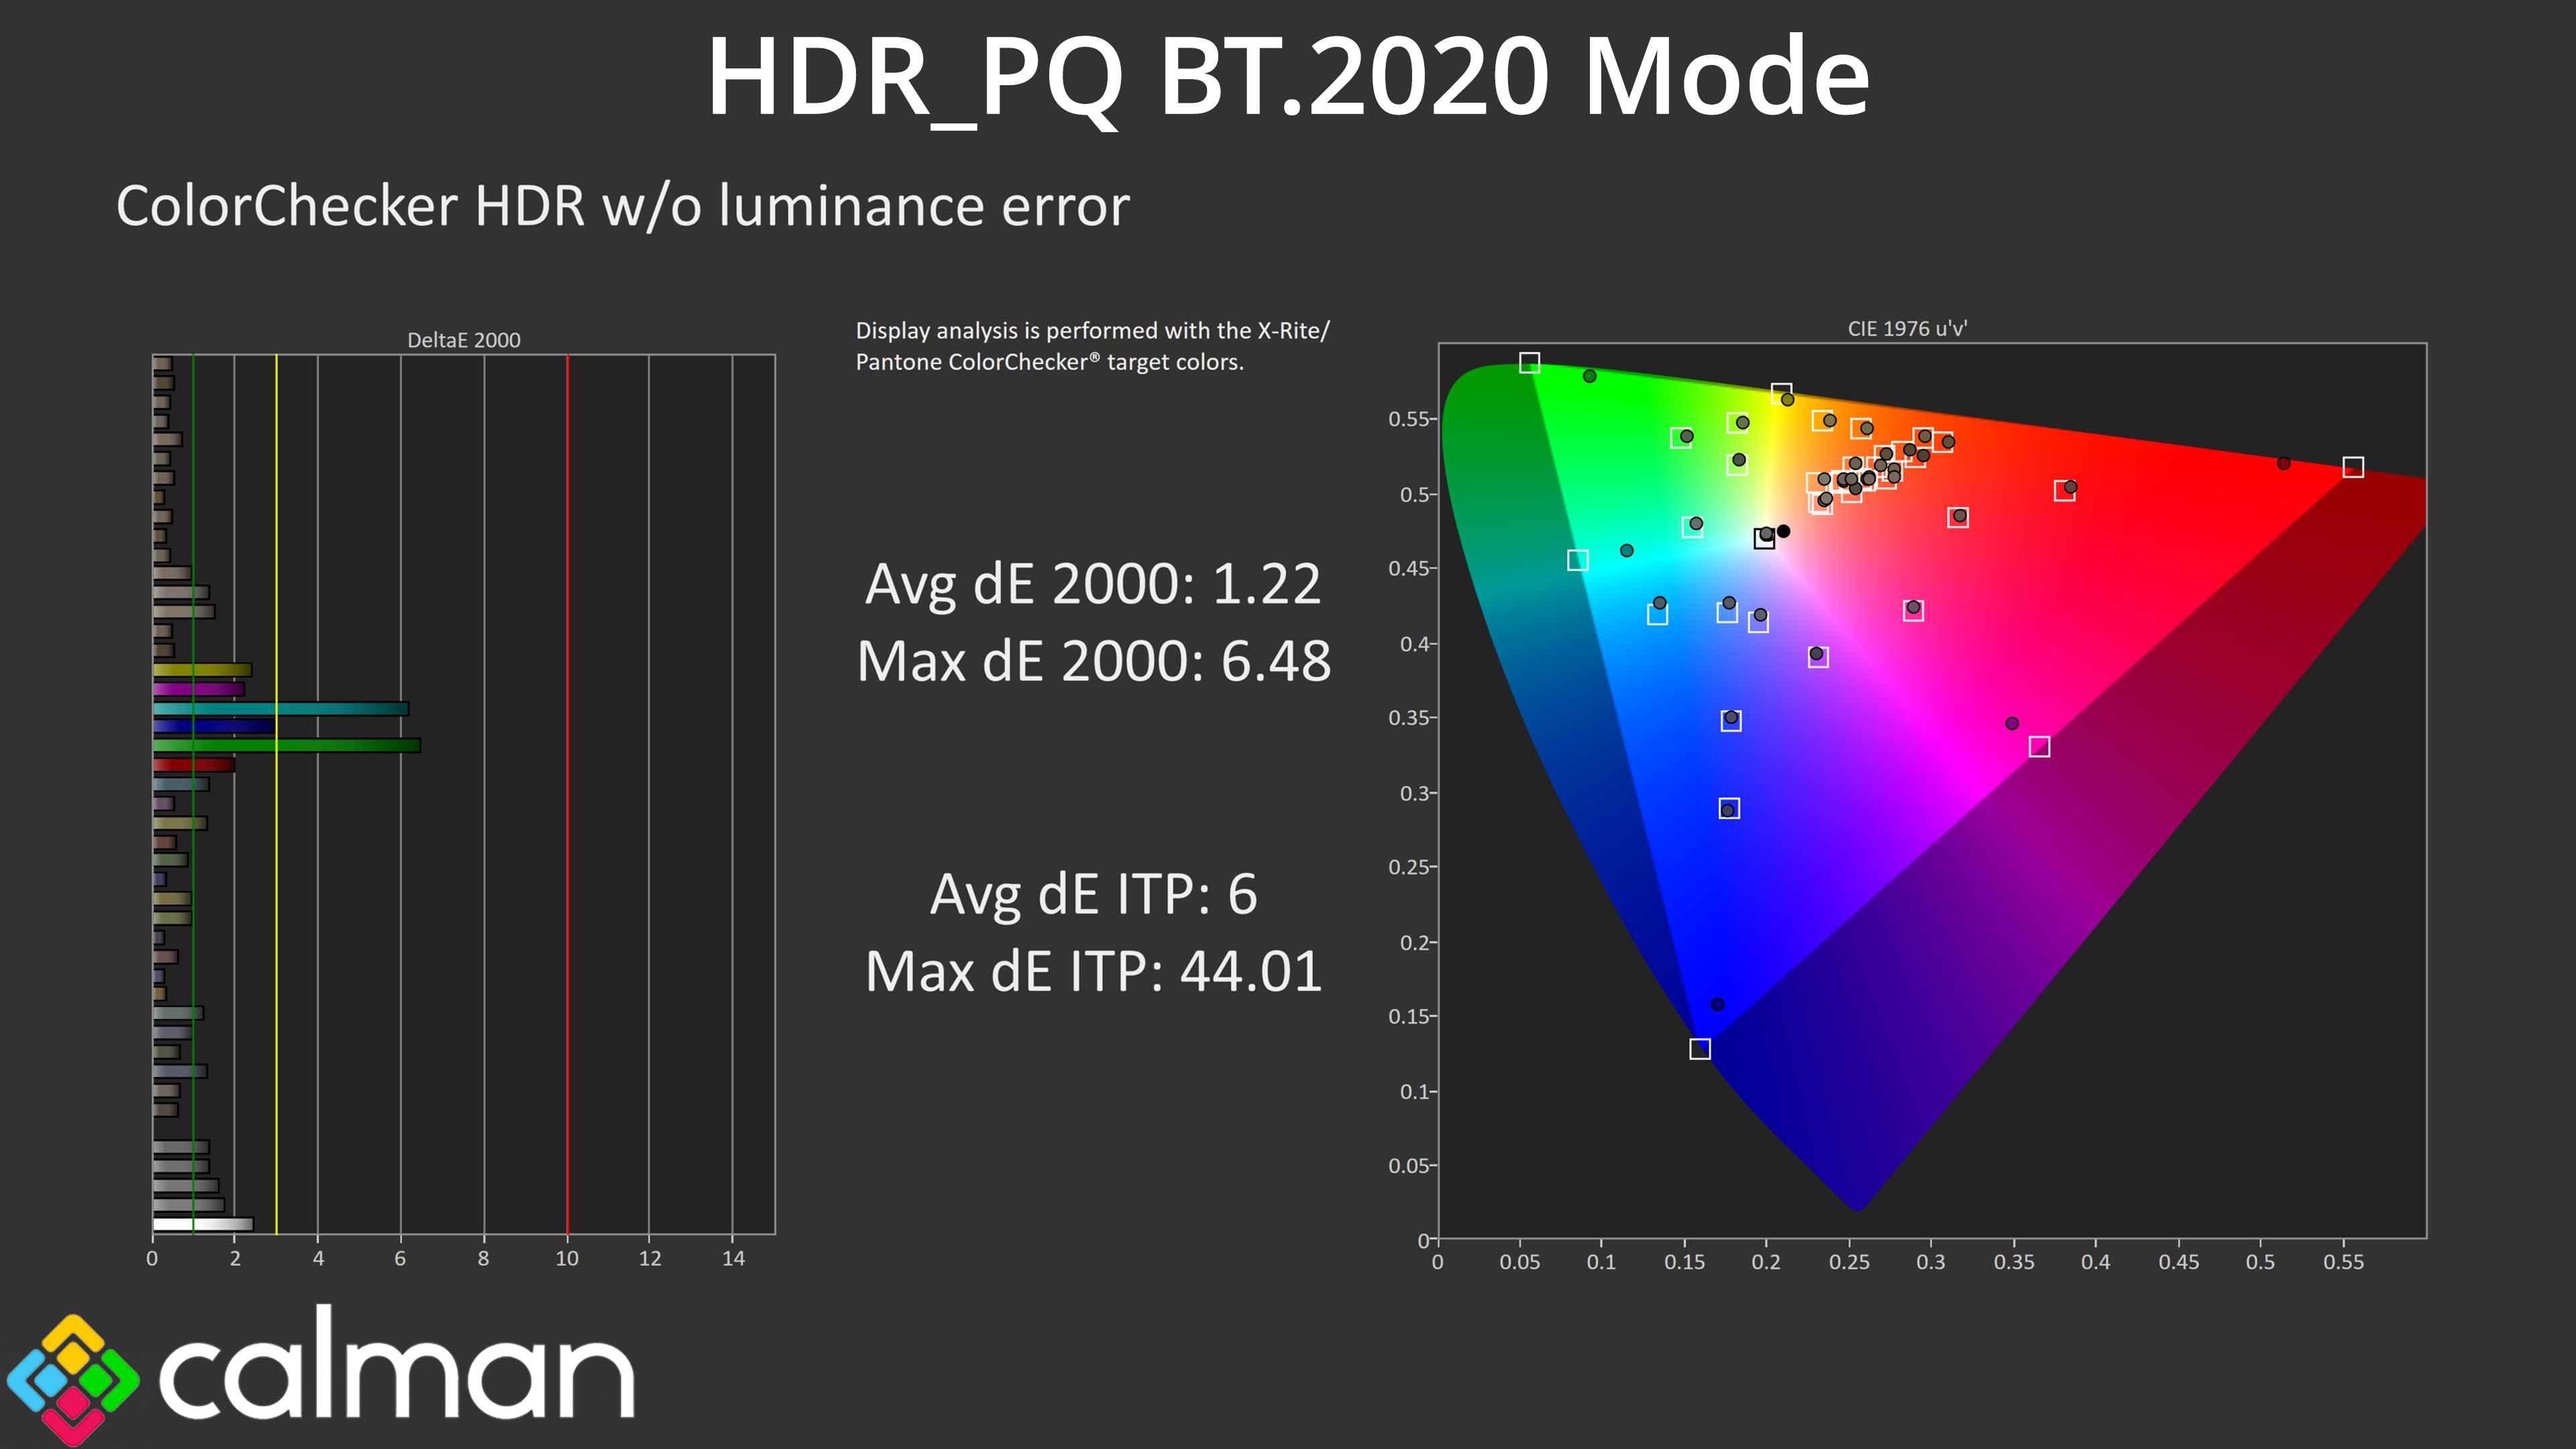
Colour accuracy is very solid, though. The main culprits are the 100% cyan and 100% green channels, which the monitor is never going to be able to replicate accurately as it does not cover the whole Rec.2020 space.
We use the Open Source Response Time Tool (OSRTT), developed by TechTeamGB, for our response time testing. This measures grey-to-grey response times and presents the results in a series of heatmaps, the style of which you may be familiar with from other reviews.
Initial Response Time is the time taken for the panel to transition from one colour to another, where lower values are better. We present the initial response time, so overshoot is not taken into account and is measured separately. We use a fixed RGB 5 tolerance for each transition.
Overshoot is the term given for when a monitor's transition exceeds or goes beyond its target value. So if a monitor was meant to transition from RGB 0 to RGB 55, but it hits RGB 60 before settling back down at RGB 55, that is overshoot. This is presented as RGB values in the heatmaps – i.e. how many RGB values past the intended target were measured.
Visual Response Rating is a metric designed to ‘score' a panel's visual performance, incorporating both response times and overdrive. Fast response times with little to no overshoot will score well, while slow response times or those with significant overshoot will score poorly.
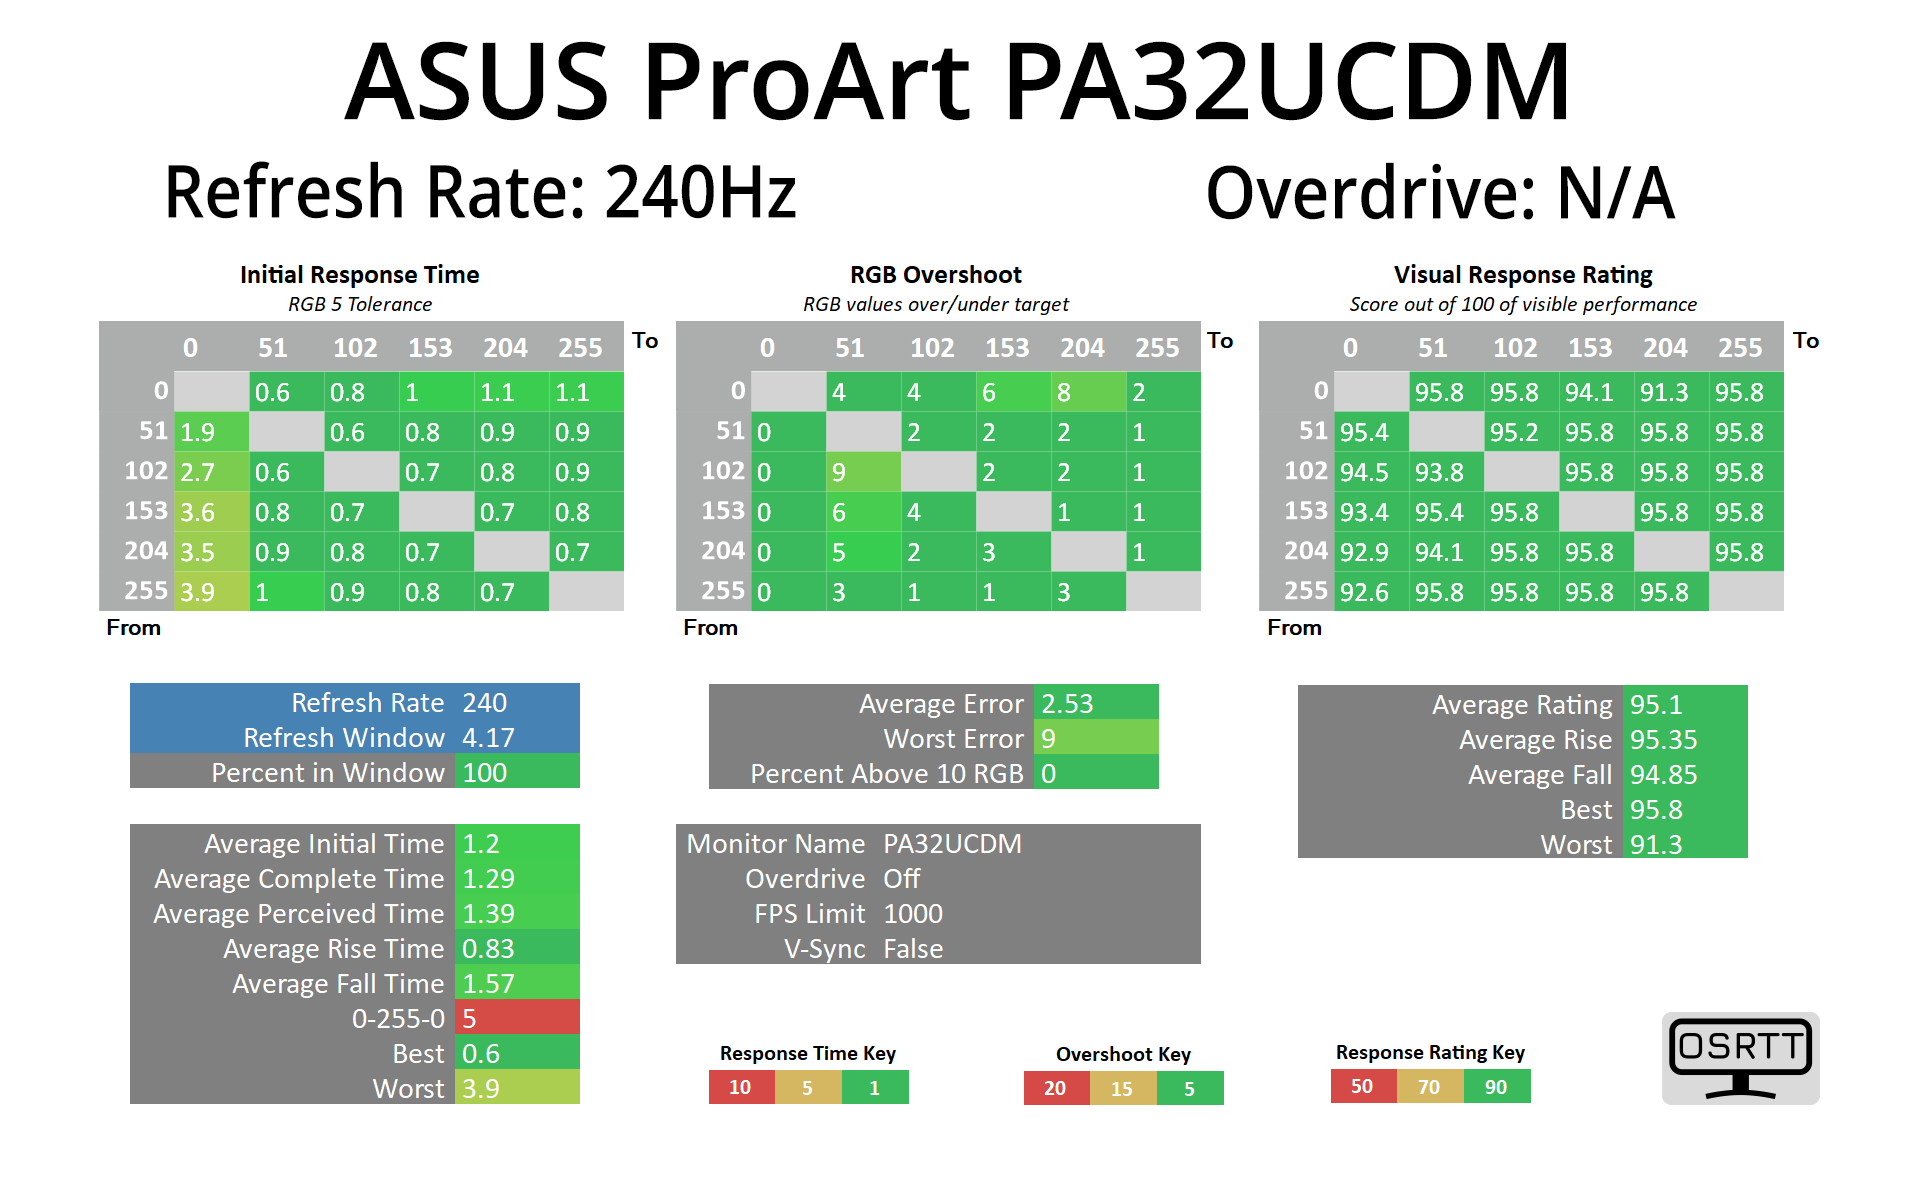
We're not focusing on the response times overly here given this is a ProArt monitor, but equally it is a 240Hz OLED so I have no doubt many a game will be played on such a screen! The good news is that, as an OLED, response times are lightning quick across the range, right around the 1ms mark – just like the MSI MPG 321URX gaming monitor that uses the same panel.
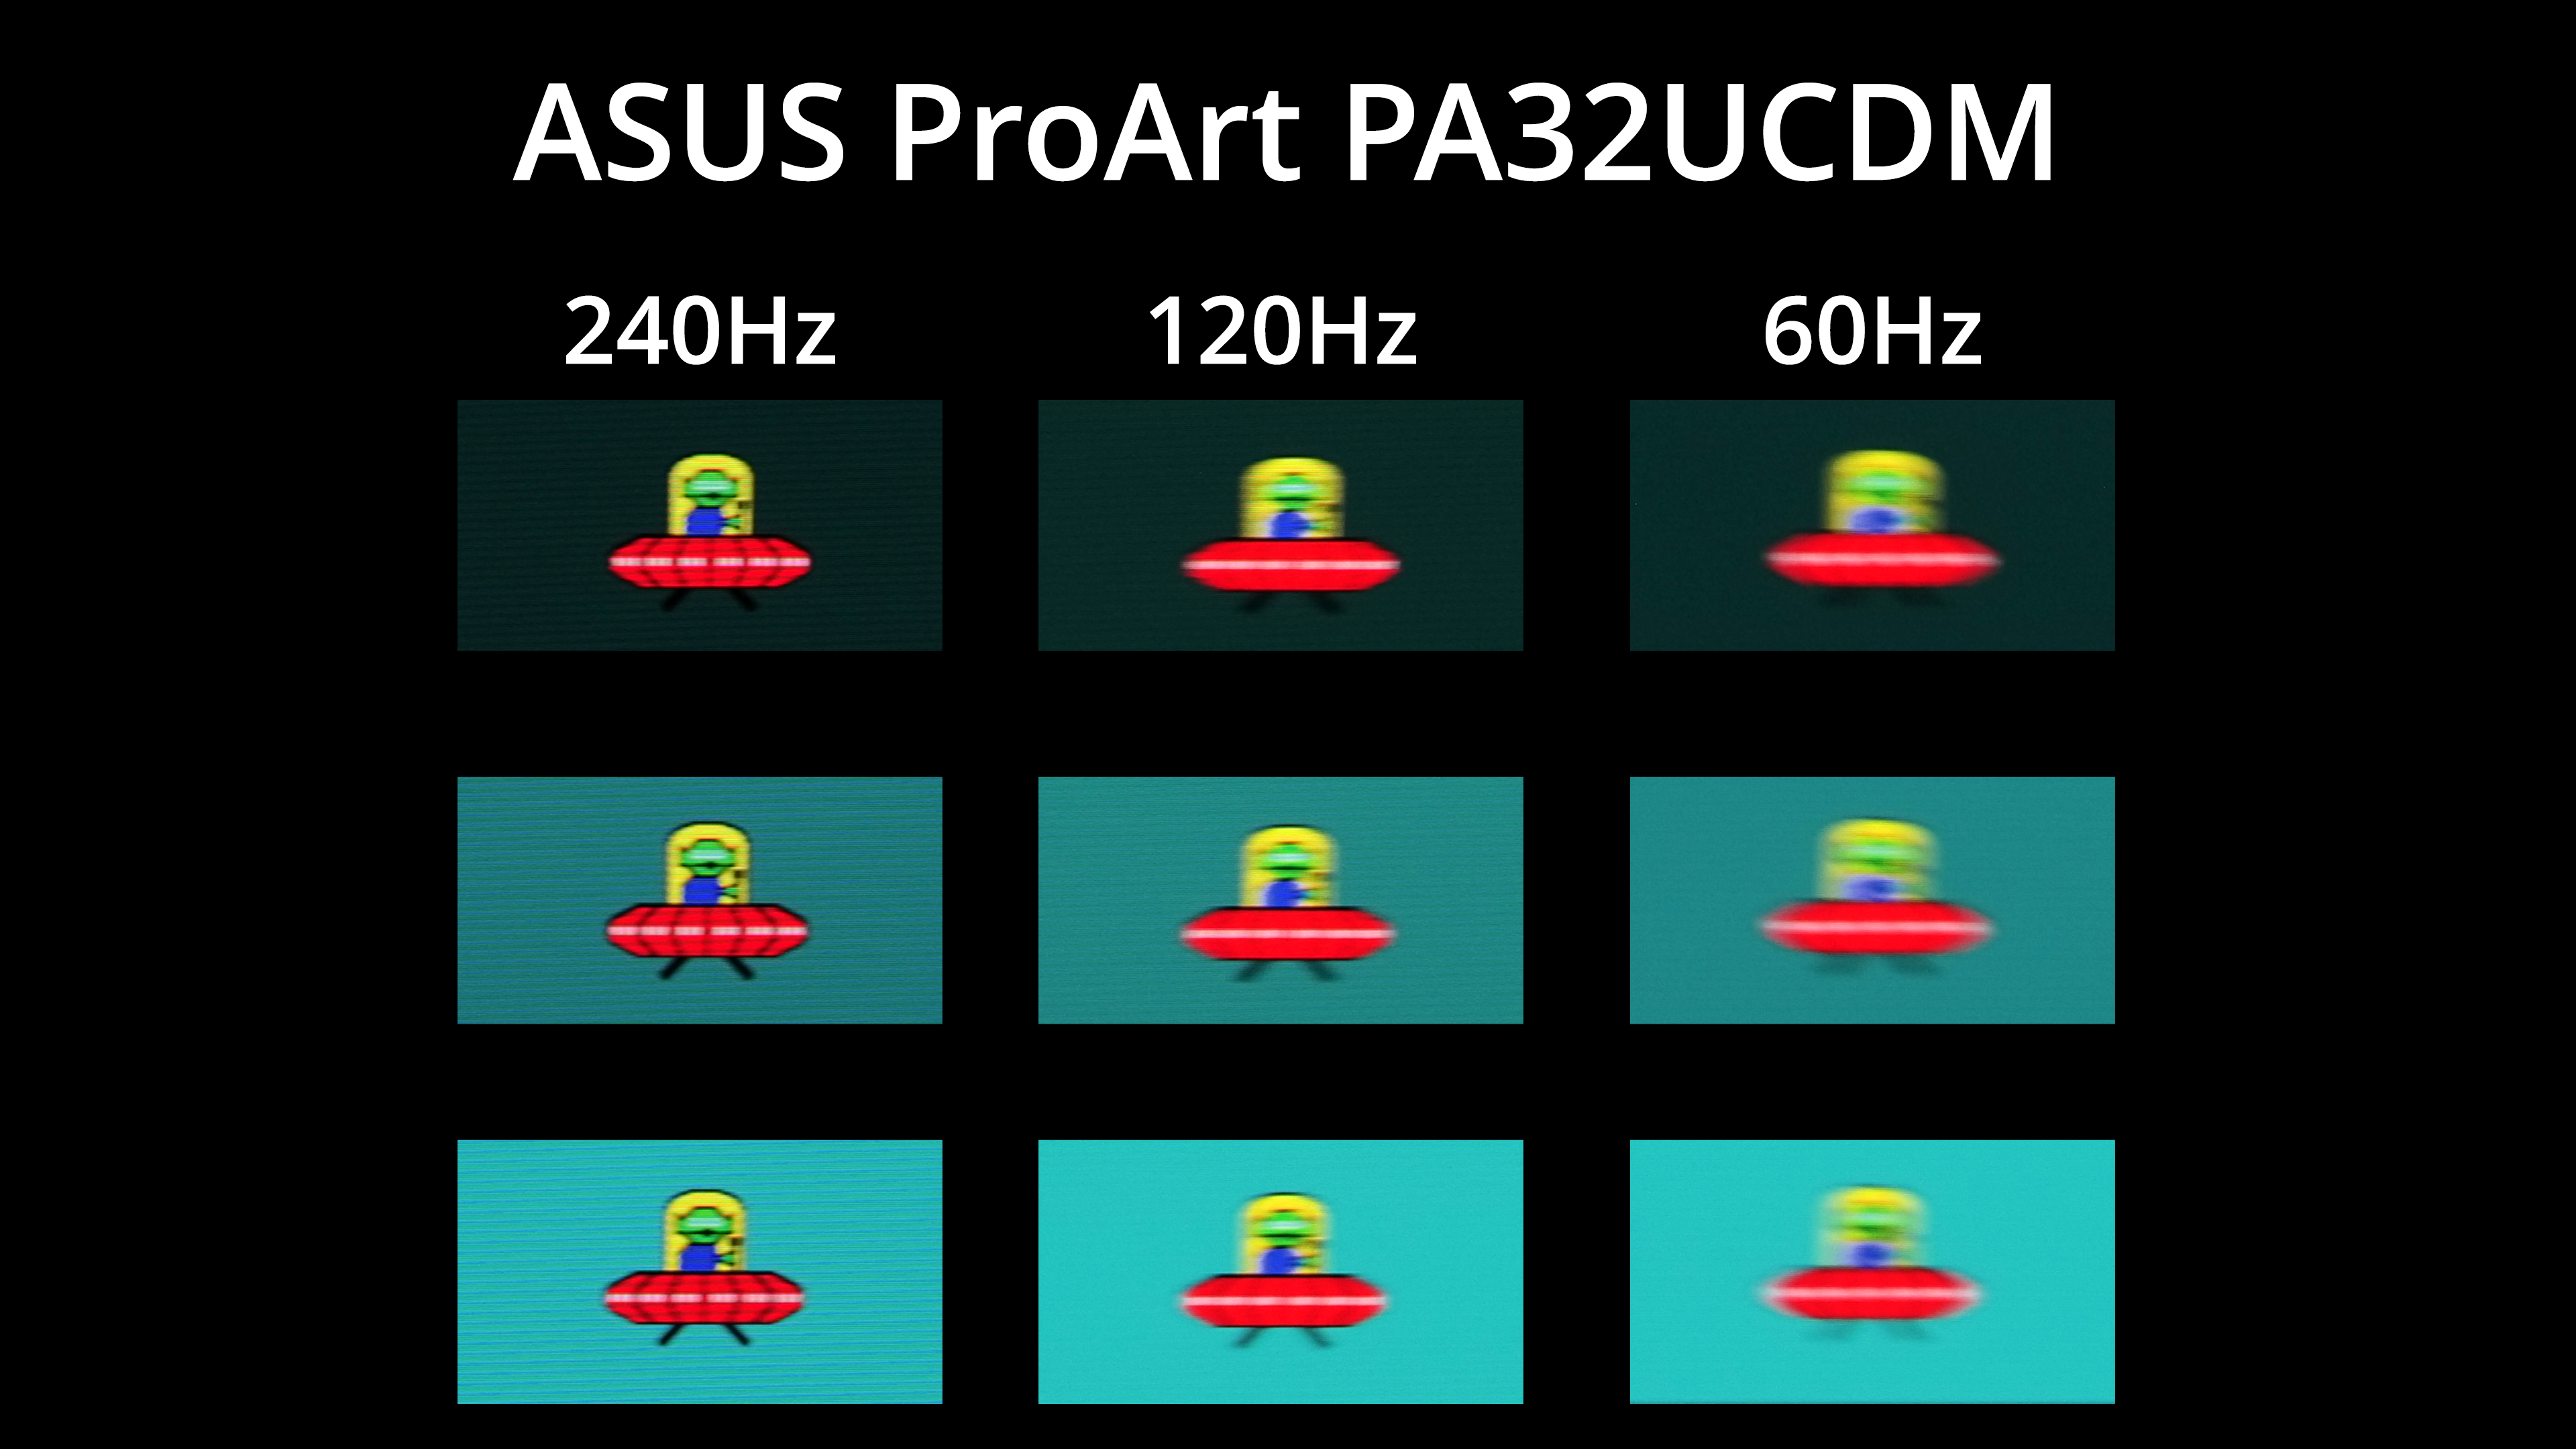
Motion clarity is also fantastic thanks to the 240Hz refresh rate. Of course, the lower the refresh rate goes, the more blur is introduced, but as pro-grade screens go, if you can utilise it at 240Hz, you'll get excellent clarity.
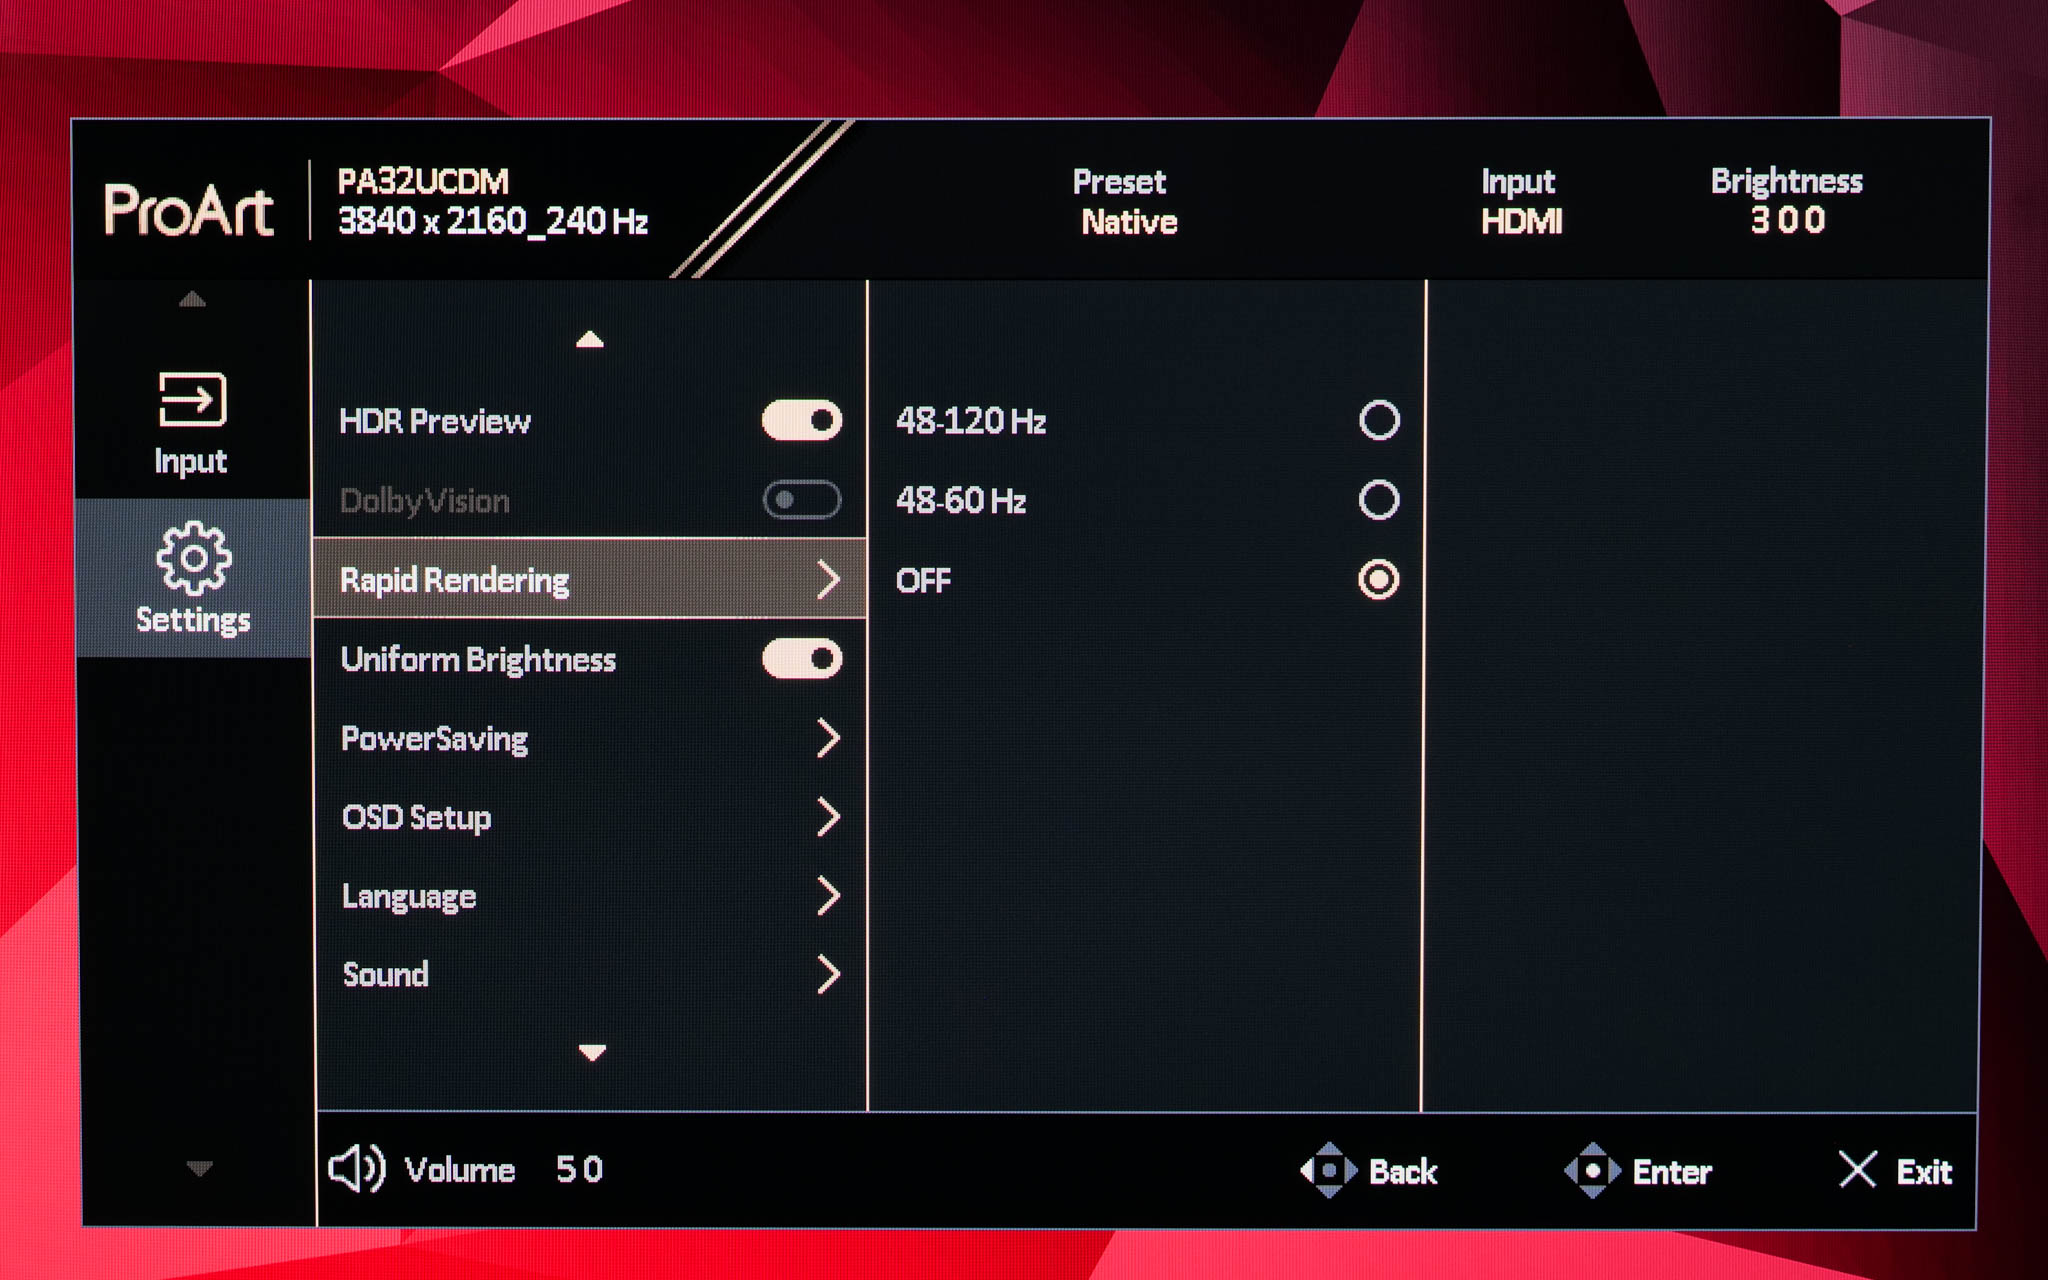
The snag is that the PA32UCDM does not support adaptive sync at 240Hz. Instead this feature – named Rapid Rendering in the OSD – has a range of 48-120Hz maximum, or 48-60Hz if you prefer. I don't understand this myself given the 240Hz panel is the same as we have seen on plenty of other gaming monitors, and those do support adaptive sync at up to 240Hz.
I wouldn't say it was a dealbreaker, but for anyone who wanted to use the screen for gaming, it's certainly something to be aware of. We did reach out to ASUS about this during the review period and were told a firmware update is coming to unlock 240Hz adaptive sync support, due ‘mid to end of May'.
That's better than nothing, but it does leave me wondering why it wasn't included at launch. We will have to keep an eye out when the firmware update lands.
We again use the Open Source Response Time Tool (OSRTT), developed by TechTeamGB, to report monitor input latency.
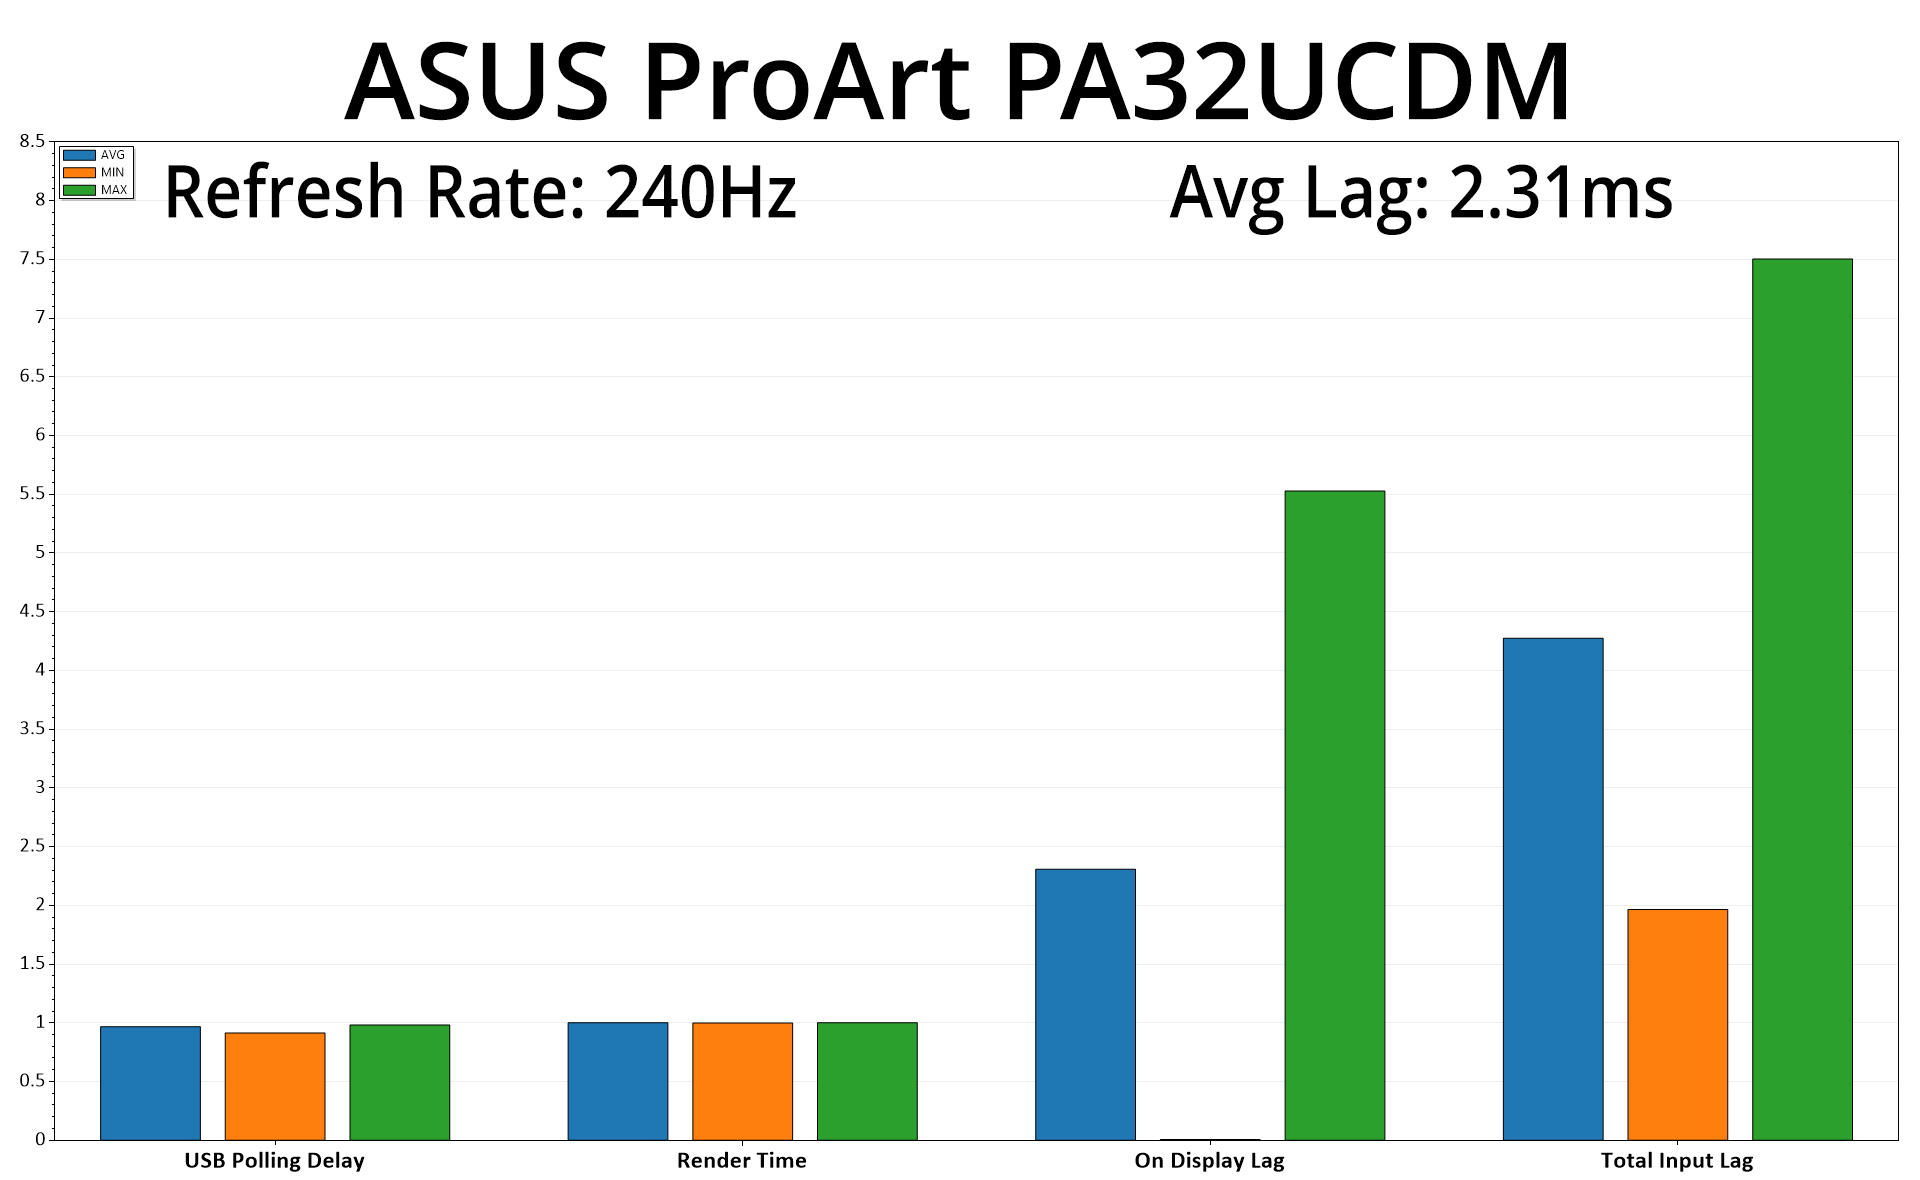
Given this is a professional display, latency isn't a huge concern, but even so, the average lag of 2.31ms is barely half a frame at 240Hz, so it's absolutely nothing to worry about.
Having reviewed the excellent ProArt PA27JCV back in November, today our attention has turned to another pro-grade screen from ASUS – the ProArt PA32UCDM. While still very much aimed at the professional user, I think this display will have more appeal to the typical KitGuru reader, given its 4K/240Hz spec also makes it a potent gaming screen – but more on that later.
Offering a QD-OLED panel – the same as in the likes of MSI's MPG 321URX, or indeed, ASUS' own ROG Swift PG32UCDM – it's no surprise that the PA32UCDM offers an incredibly wide gamut and generally excellent image quality. Now, it's not perfect, with the gamma tracking being slightly uneven, but overall greyscale and colour accuracy is very good out of the box.
ASUS has included a range of tuned colour space modes though, and these take things up a notch, with all three of the sRGB, DCI-P3 and AdobeRGB modes that I tested offering average colour accuracy deltaEs of between 1.1-1.3. Those are highly impressive results and mean you could absolutely get away without calibrating the display if you work with one of those colour spaces.
Of course, I would imagine most pro-users who buy a screen like this will be calibrating, and the results after doing so with Calman Ultimate were nothing short of terrific. The screen supports hardware calibration too, enabling a higher degree of accuracy than would be possible by only relying on your average ICC profile.
It's a proper HDR monitor, too, supporting up to 1000 nits peak brightness. Just like other QD-OLED gaming displays, that figure only applies to small highlights, with the screen dimming as the APL increases. Overall behaviour is also the same as we've seen previously in terms of the EOTF tracking, meaning that the brightness does roll off as APL increases – just like the ‘peak 1000 nit' modes we are used to seeing on gaming screens. It's just inherent to the panel itself, and you'd likely have to pay far more than the PA32UCDM's asking price to correct that.
Speaking of gaming, the 240Hz refresh rate does make this a very capable monitor for anyone wanting a screen for work by day and gaming by night. That said, there are a couple of drawbacks that will be worth considering. The first is there's only one full-size video input connector, being the HDMI 2.1 port, as there's no DisplayPort or even a second HDMI input. There are two Thunderbolt 4 inputs, so I guess you could use an adapter, but at this price that feels a bit stingy to me.
ASUS also made the strange decision to limit adaptive sync to a maximum of 120Hz. Now, they have since told me that adaptive sync at 240Hz will be supported in a firmware update due ‘mid to end of May', so hopefully that will all go according to plan. Until then, as I've tested the screen, you're locked out at 120Hz if you enable VRR, with ASUS not giving me any reason as to why.
The price is also worth some discussion, and it's here where you will really need to evaluate what it is you want from a monitor. At £1600, the ProArt PA32UCDM is a good £700 more expensive than the ROG Swift PG32UCDM, and remember, they both use the exact same Samsung QD-OLED 4K/240Hz panel. In theory that means, if you were going to calibrate regardless, you could save a hefty chunk of change by going with the gaming model instead – and you'd get more full-size video inputs and unlocked adaptive sync support to boot.
However, there are quite a number of ‘pro-grade' features baked into the ProArt PA32UCDM. I made a point of showing every single page and setting within the OSD menu as ASUS has done a really good job at catering to the needs of professional and creative types with just how feature-rich the OSD is, not to mention the 96W PD on offer from the pair of Thunderbolt 4 ports. We also can't forget the support for multiple HDR formats, hardware calibration and the excellent colour space modes. It also has a much classier design in my opinion, with a beautifully compact metal stand and foot.
For me, those features are enough where I could clearly see why a pro user would want to spend the extra cash on the ASUS ProArt PA32UCDM over one of its gaming rivals. I don't think it's perfect, but if you want a feature-rich monitor with an incredibly high-quality panel, this is well worth buying.
We've found it listed on Scan for £1600 HERE.
Pros
- Well-configured colour modes (sRGB, DCI-P3, AdobeRGB).
- Infinite contrast from the QD-OLED panel.
- Very wide colour gamut.
- 1000 nit peak brightness.
- Feature-rich OSD.
- Supports hardware calibration and is Calman Ready.
- Dual Thunderbolt 4 inputs that support daisy-chaining and 96W PD.
- 240Hz refresh is great for gaming and offers excellent motion clarity.
- Beautiful design with excellent build quality.
Cons
- OLED may not be suitable for all professional work.
- EOTF tracking rolls off in HDR as APL increases.
- Just one full-size video input.
- Adaptive sync is limited to 120Hz, though ASUS has promised a firmware update for ‘mid to end of May'.
- Lacks shortcut functionality that is present on the PA27JCV.
- Significantly more expensive than gaming-grade screens which use the same panel.
KitGuru says: If you're looking for a new OLED monitor, the PA32UCDM is well worth buying. Other options that use the same panel are available for significantly less cash, but the ProArt offers enough extra features to justify the outlay.