At the KitGuru modding workshop today, we begin to take a look at some of the processes and procedures that we think will come in handy to you guys when modding your own systems at home. We delve into the ins and outs of DIY electroplating and show you how you can jazz up your components for very little cost, using many of the things you may already have around the house.
Disclaimer: Be sure to take all necessary safety measures when working with chemicals, including wearing gloves and eye protection. Always follow the guidance given on the product packaging. KitGuru takes no responsibility for any injury or damage caused by following the procedures in this guide.
I have always been fond of electroplating. Back in the days of modding cars and rebuilding engines, I found electroplating to be a great way of making old and rusty parts look like new again, and a bit of elbow grease and know-how is all it takes to electroplate metal parts at home. It is also much easier and cheaper to set up your own little plating rig than you might think. In this beginner’s guide to electroplating, most of what you need to get going might already be in your home, or you can find the parts at a small cost at either the supermarket or the major online retailers.
To set up your own electroplating rig at home, you will need the following:
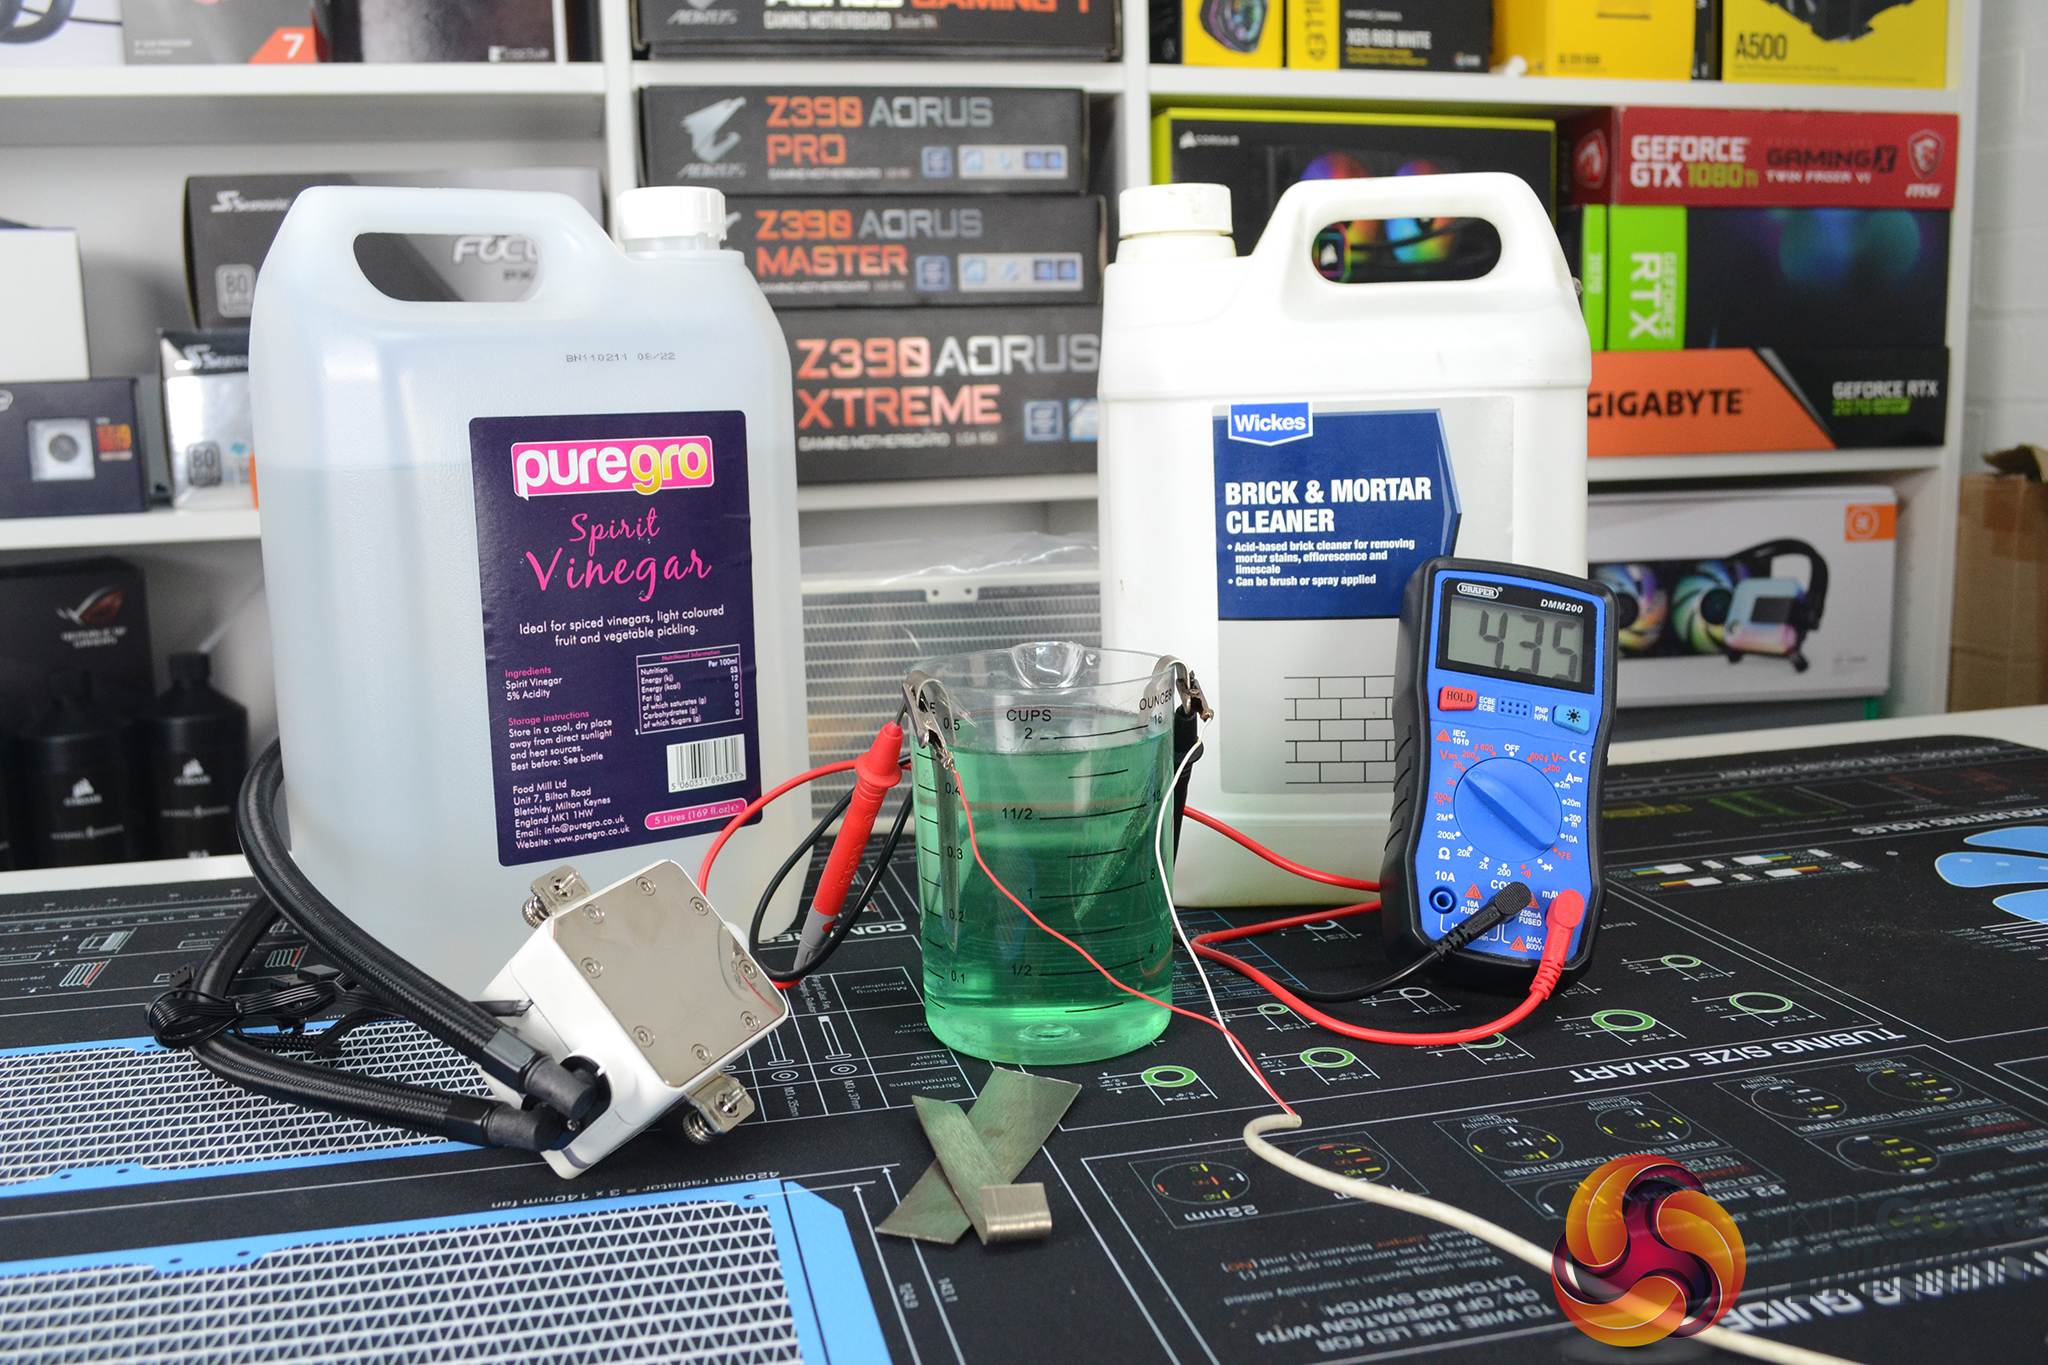
- White/Spirit vinegar
- Table salt
- A metal anode such as Nickel, Copper or Zinc
- Power supply – an old phone charger will work (around 5v 500mA)
- Glass or plastic beaker/container
- Hydrochloric acid (optional)
The list above is the bare minimum you will need to set up your own electroplating rig at home, some tools will also help with the process such as tin snips, soldering equipment, pliers/wire cutters, sandpaper abrasives and metal cleaning supplies, a digital multimeter will also be useful but not essential. Once you have gathered everything on the list, you are ready to begin making the electrolyte and start electroplating.
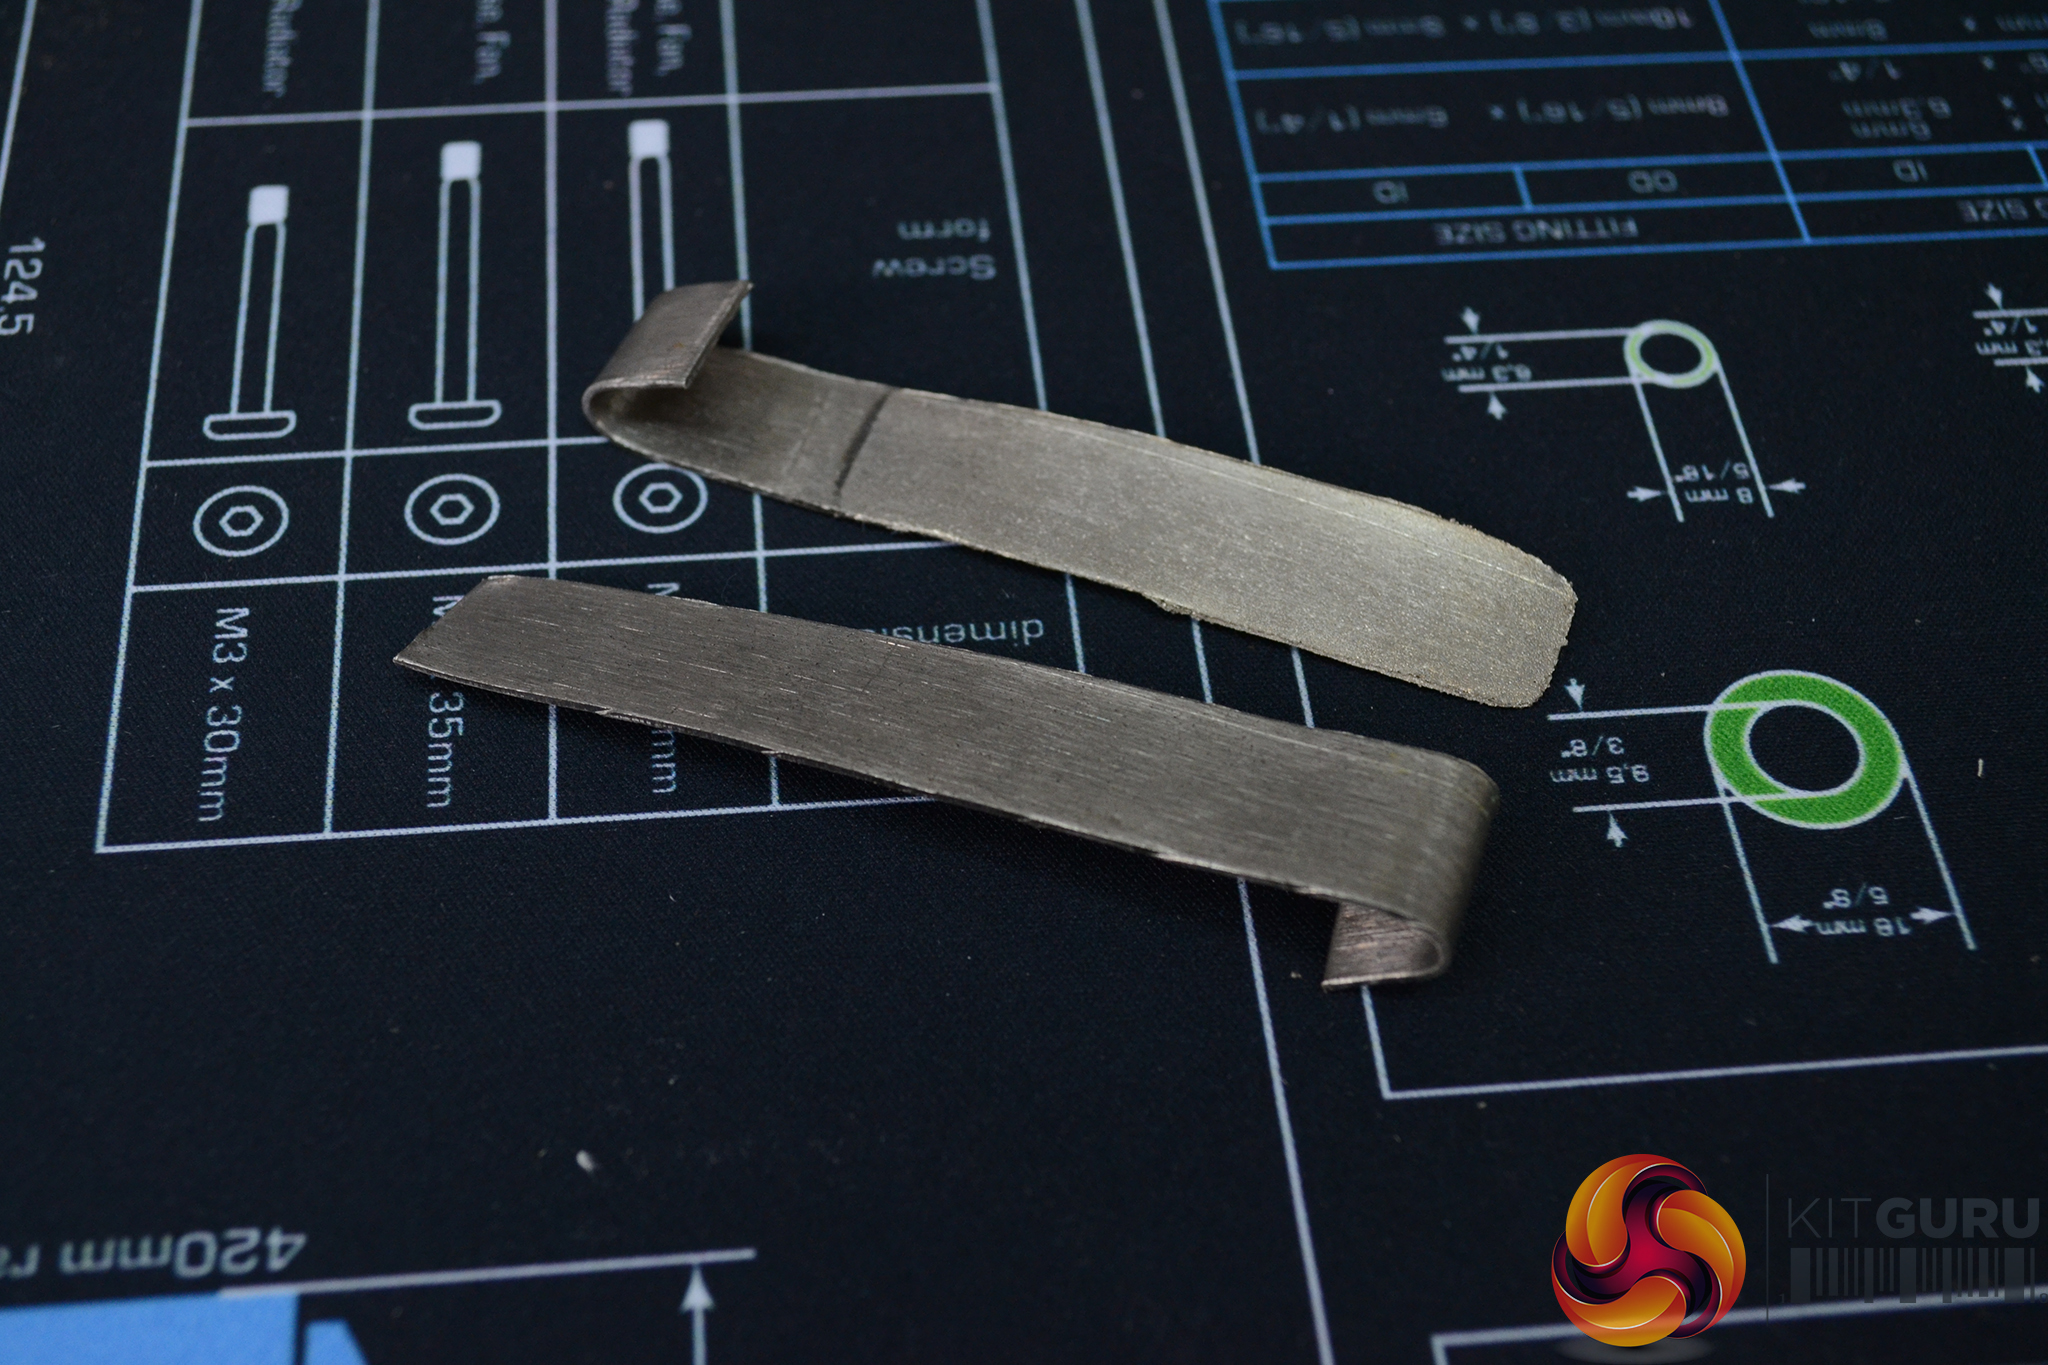
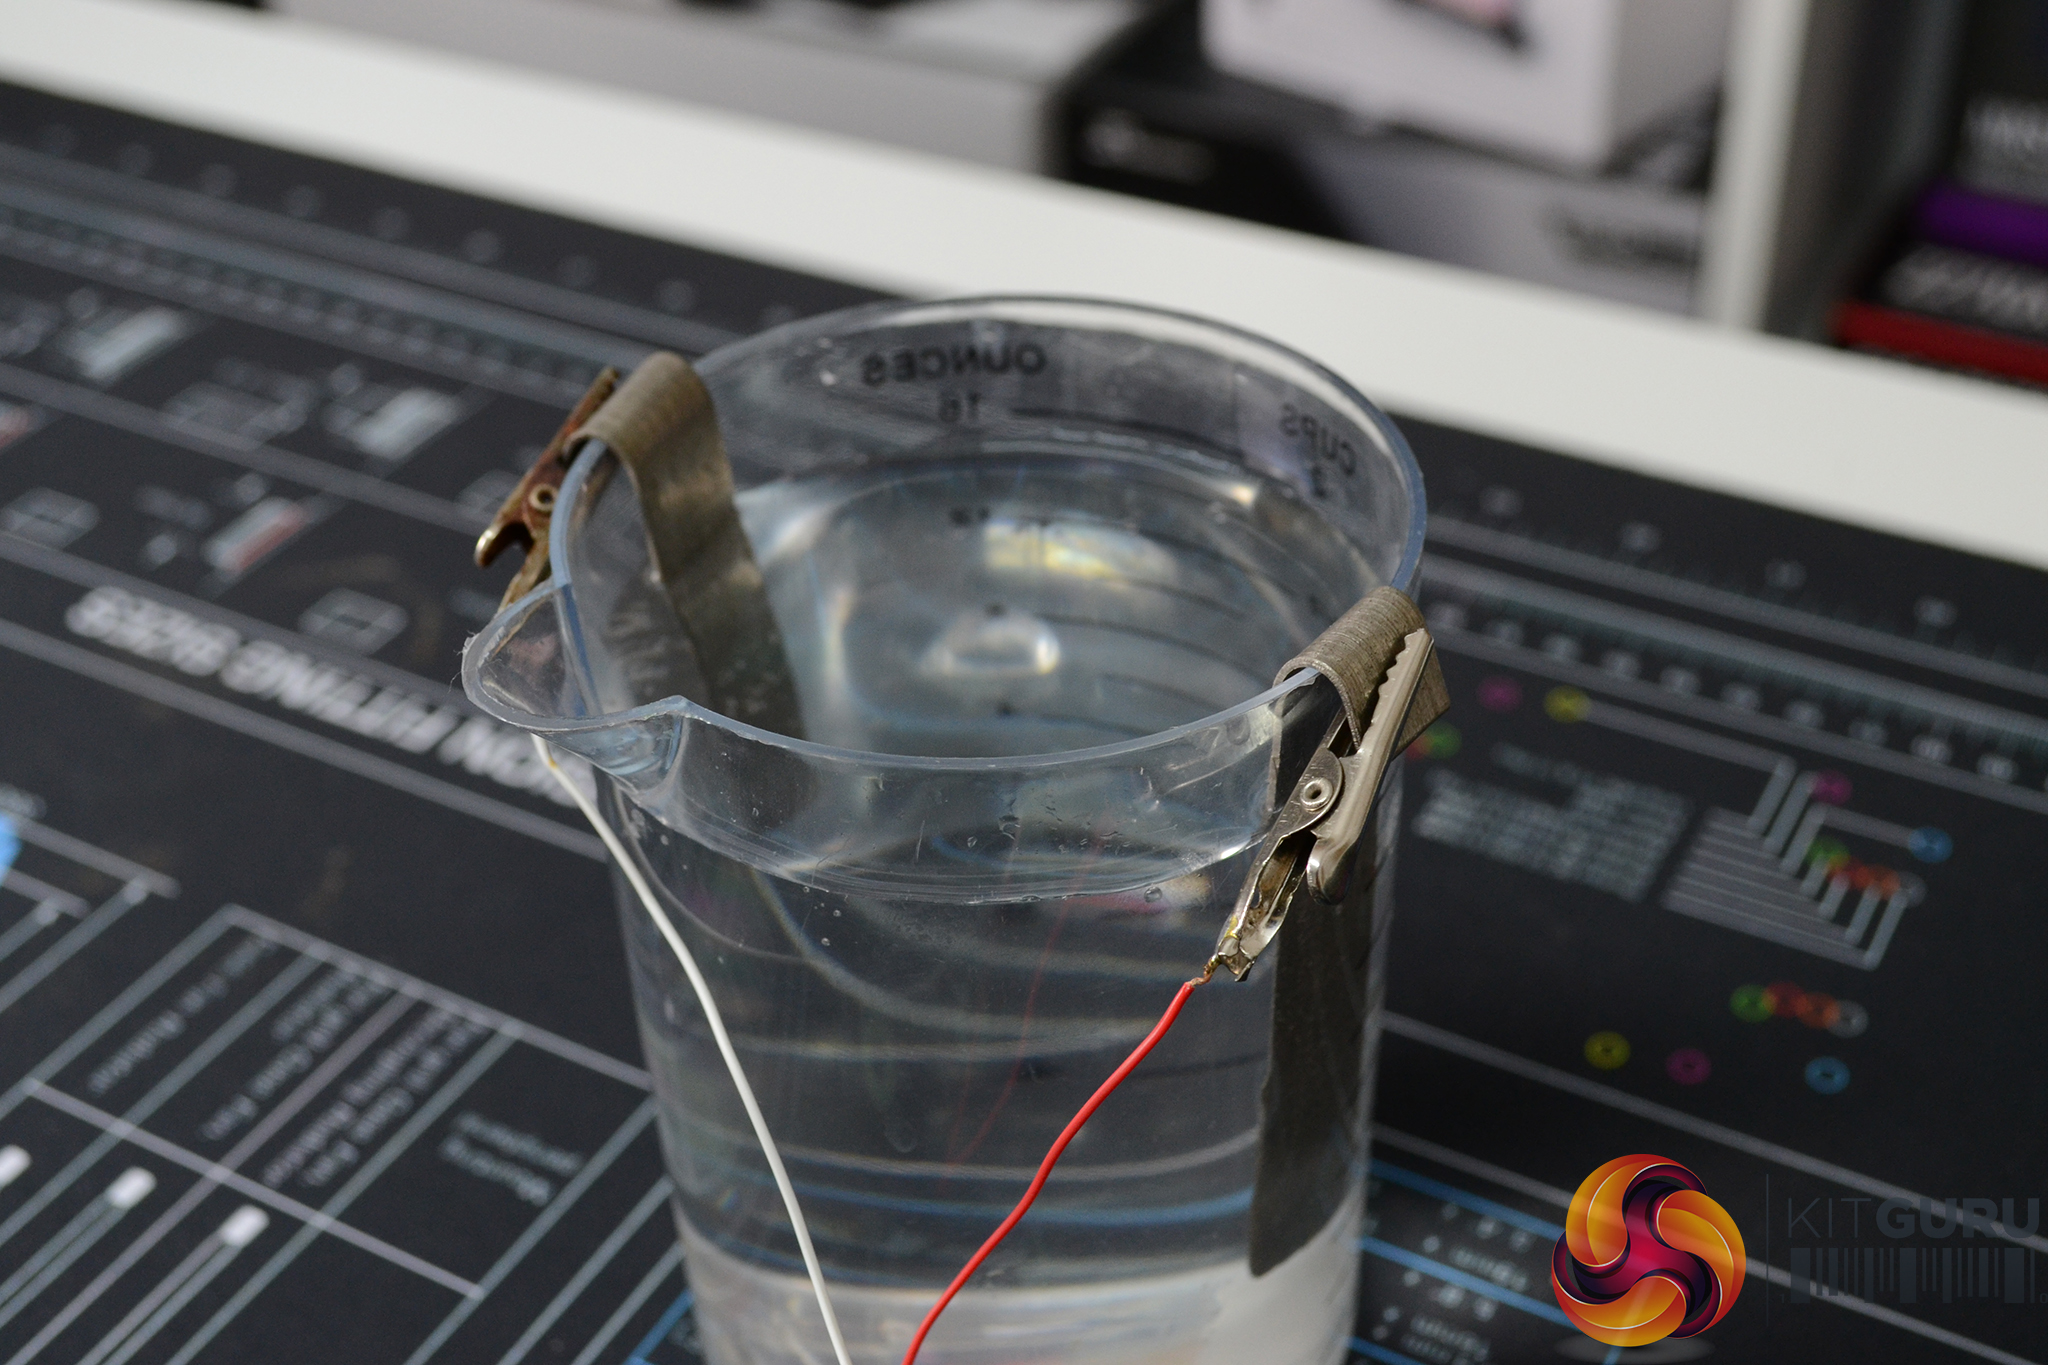
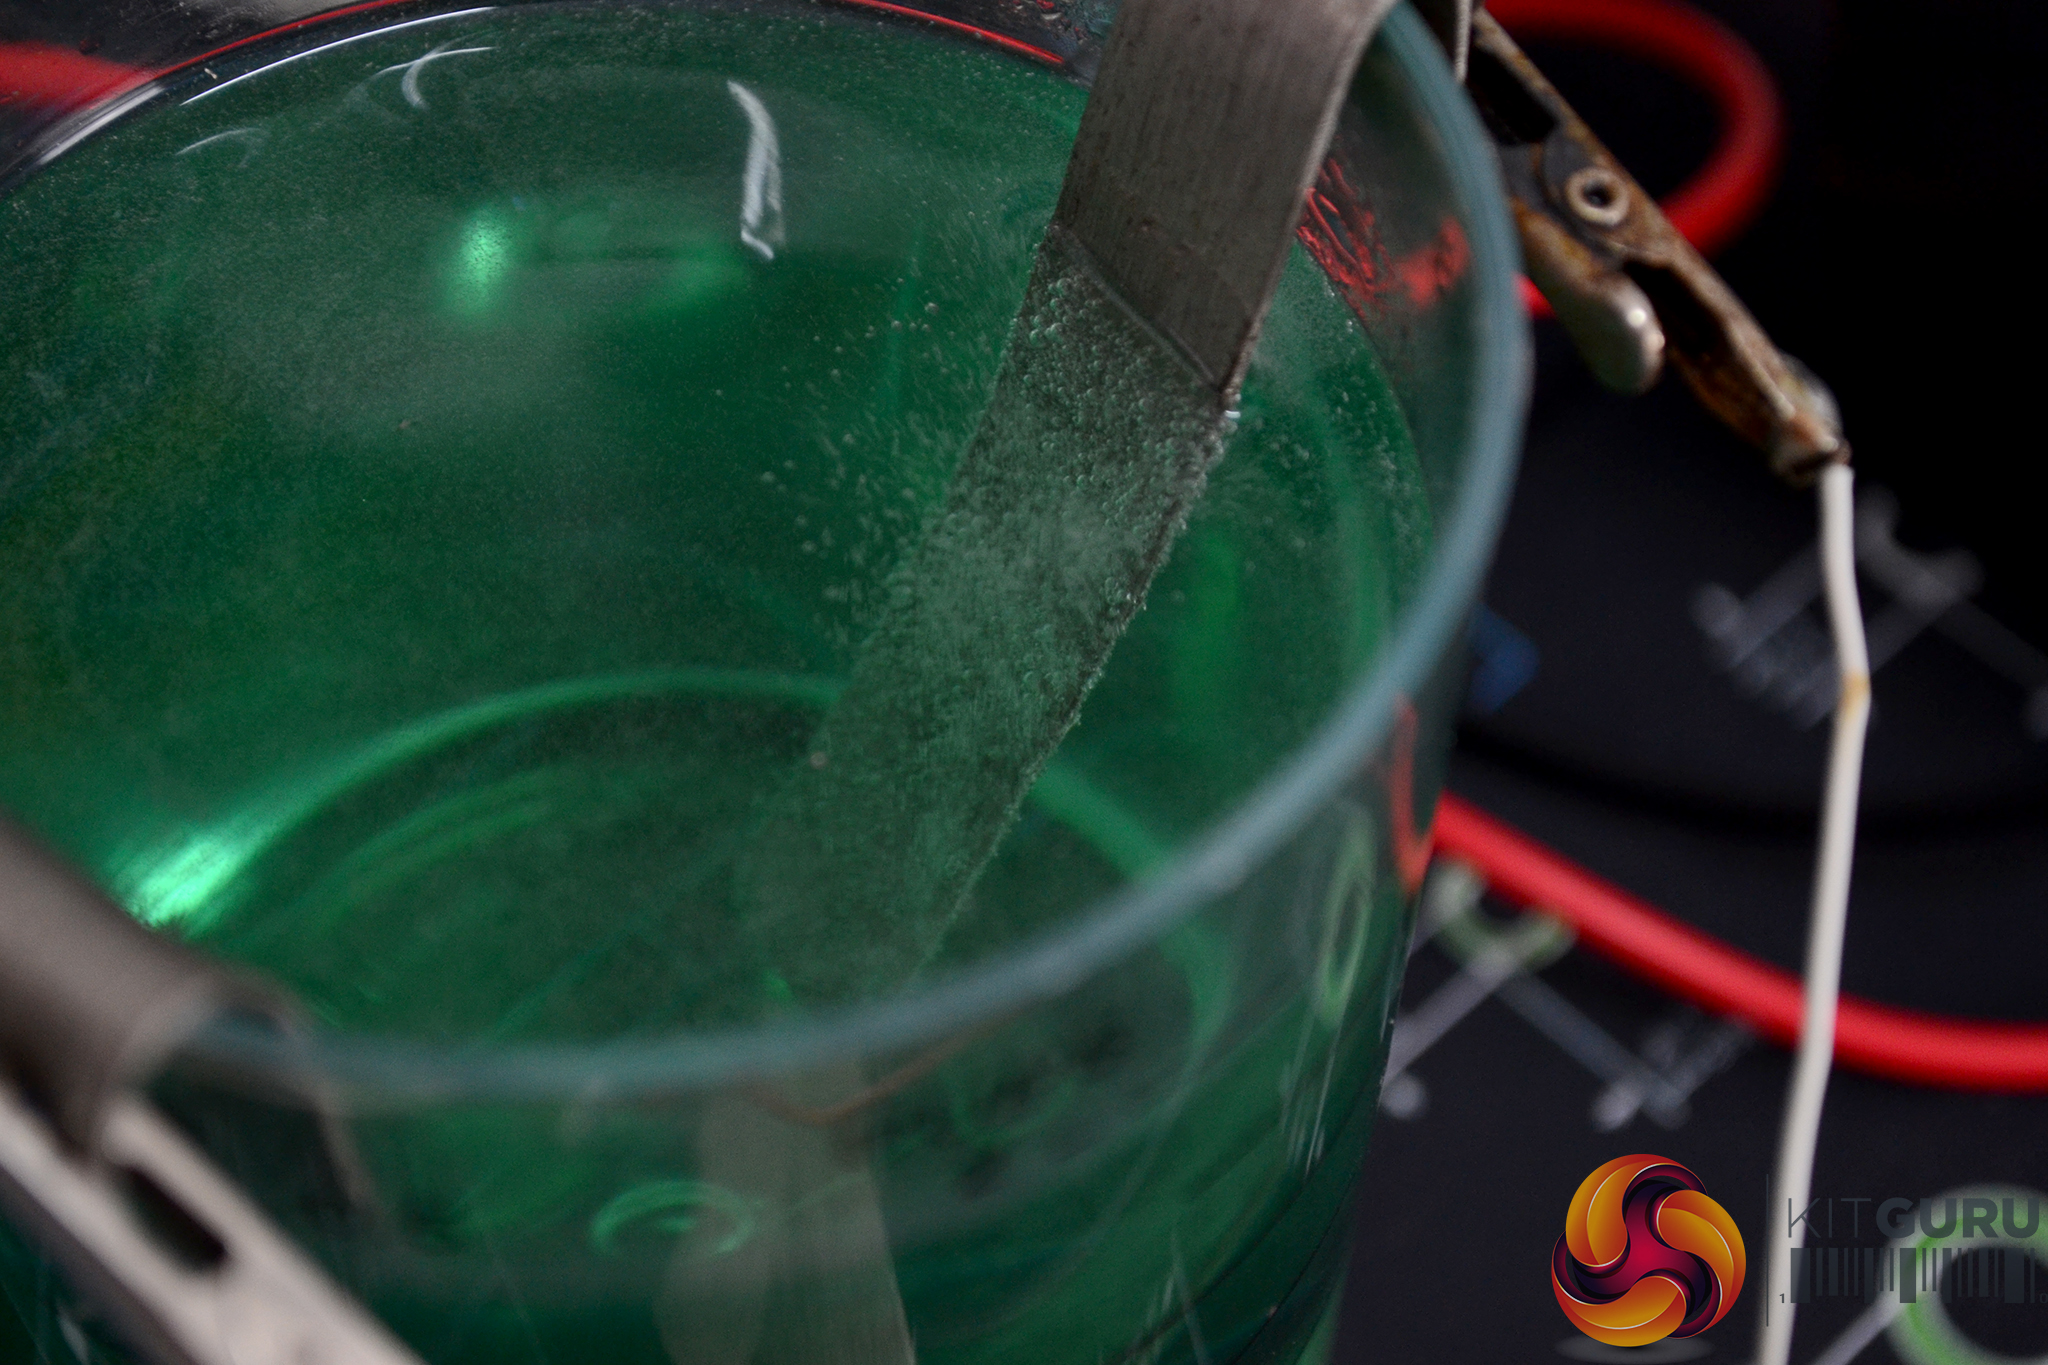
In the video, we focus on nickel electroplating. It is also possible to electroplate using other metals such as copper and zinc, however, nickel is usually my preferred finish. For the first step, you need to cut your Nickel anode into two strips or if its already prepared, place the strips in your container at opposite sides. We cut two strips approximately 10mm wide from the Nickel plate, bent over the top edges and hang them over the rim of the container.
Next, fill up the container with white/spirit vinegar and add the salt, the amount of salt needed isn’t critical, we added approximately a tablespoon of salt to 400ml of vinegar. The salt is added to the vinegar to reduce the electrical resistance of the solution and raise the conductivity, this helps accelerate the production of nickel electrolyte which is the solution we are making to electroplate parts with.
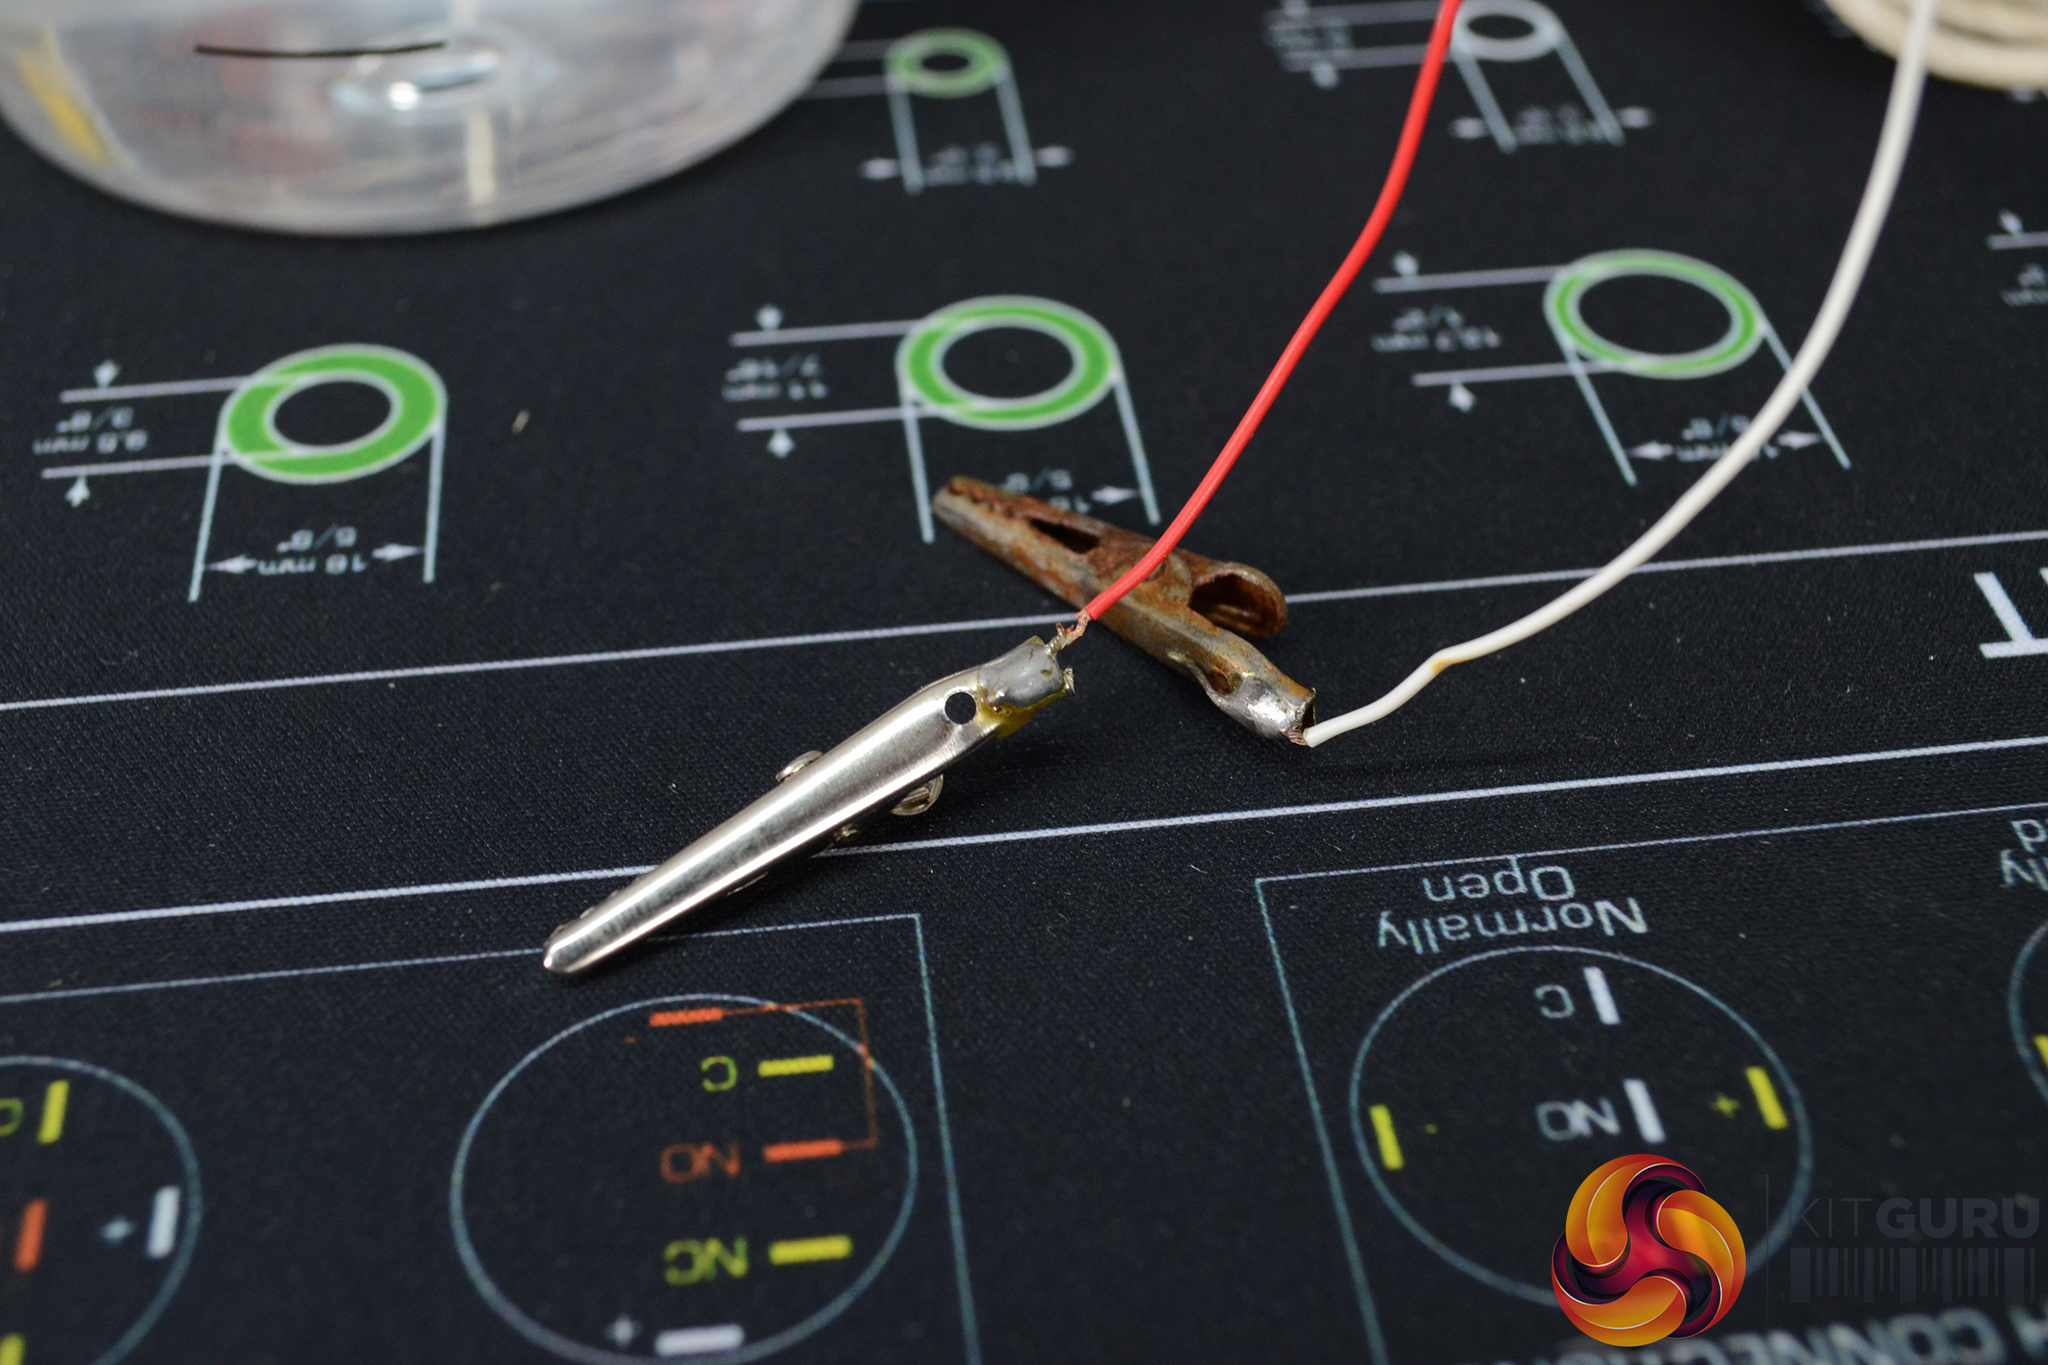
We now have everything set up and ready to start making nickel electrolyte, the original connector on the power supply (old phone charger) needs to be chopped off and the positive and negative cables connected to the top of the nickel strips, for this we soldered alligator clips to the ends of the wires. Plug the power supply into the mains and away we go, we are now making nickel electrolyte. We would suggest leaving the solution for approximately two hours to make a high concentration of nickel electrolyte with a lovely shade of green to it.
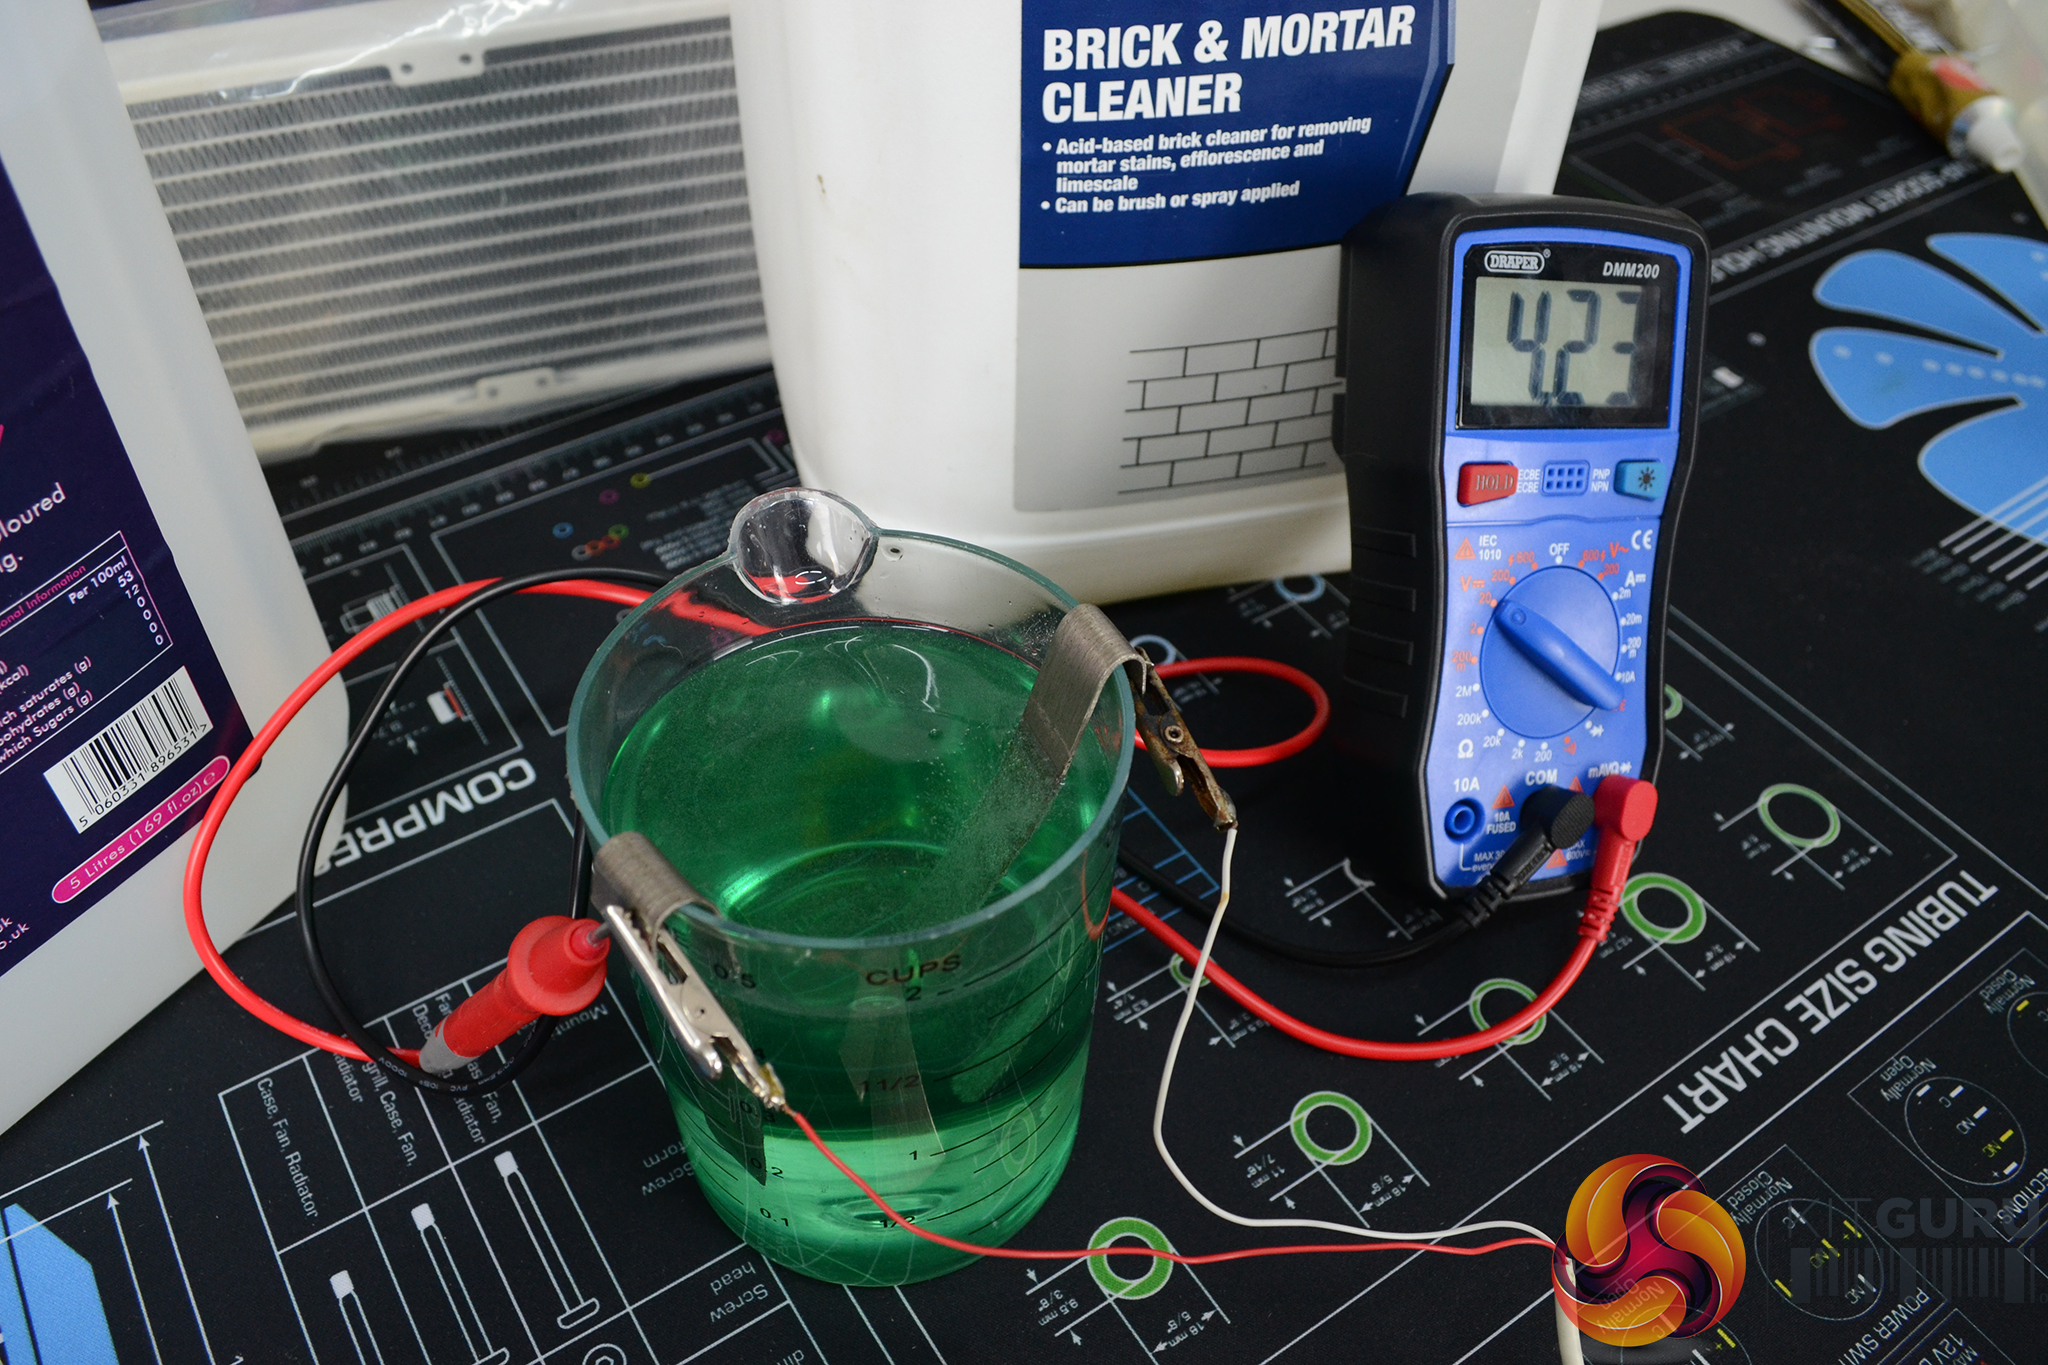
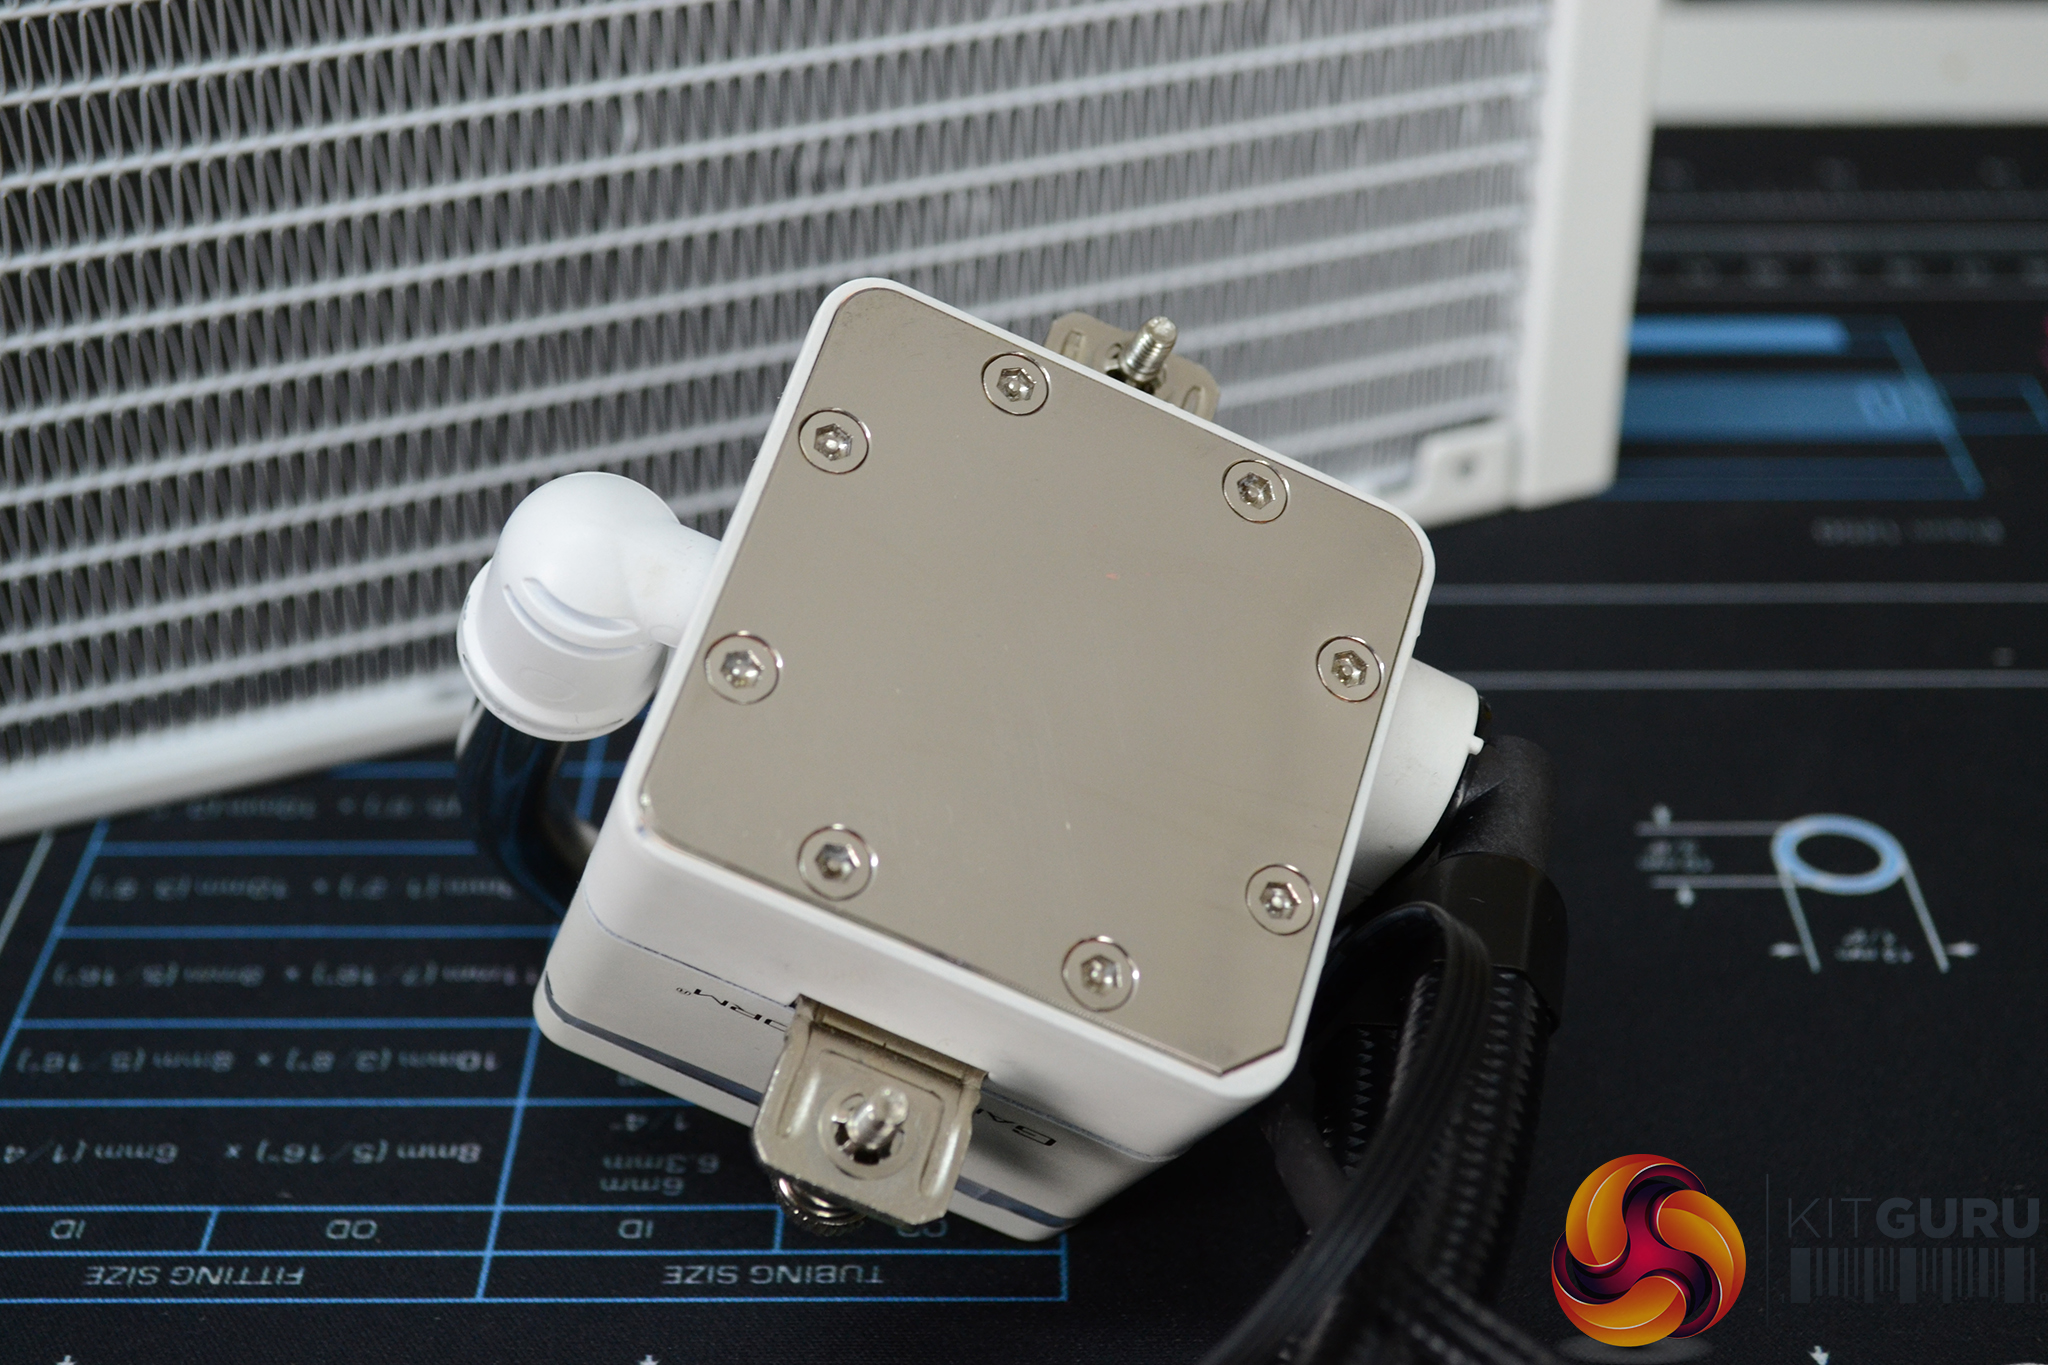
After approximately two hours, turn off the power and disconnect the power supply from the nickel anodes, at this point we are ready to electroplate our parts. For this, we have chosen to nickel electroplate an old AIO CPU block copper cold plate. To achieve the best end result, the part must be immaculately clean and free from any corrosion, so the more time spent cleaning up the part now the better. Any imperfections found on the metal surface before will show up after electroplating so if you want an immaculate finish, the part must be perfectly clean and free from any rust, oil, or dirt.
Before electroplating we prefer to etch the surface of the metal that is being electroplated by soaking the part in a diluted Hydrochloric acid bath, this is where the brick cleaner comes in. This step primes the surface of the metal for the best possible adhesion of the nickel plating. However, this is optional and can be skipped if access to hydrochloric acid isn’t possible, brick cleaner is a good substitute as it is hydrochloric acid based.
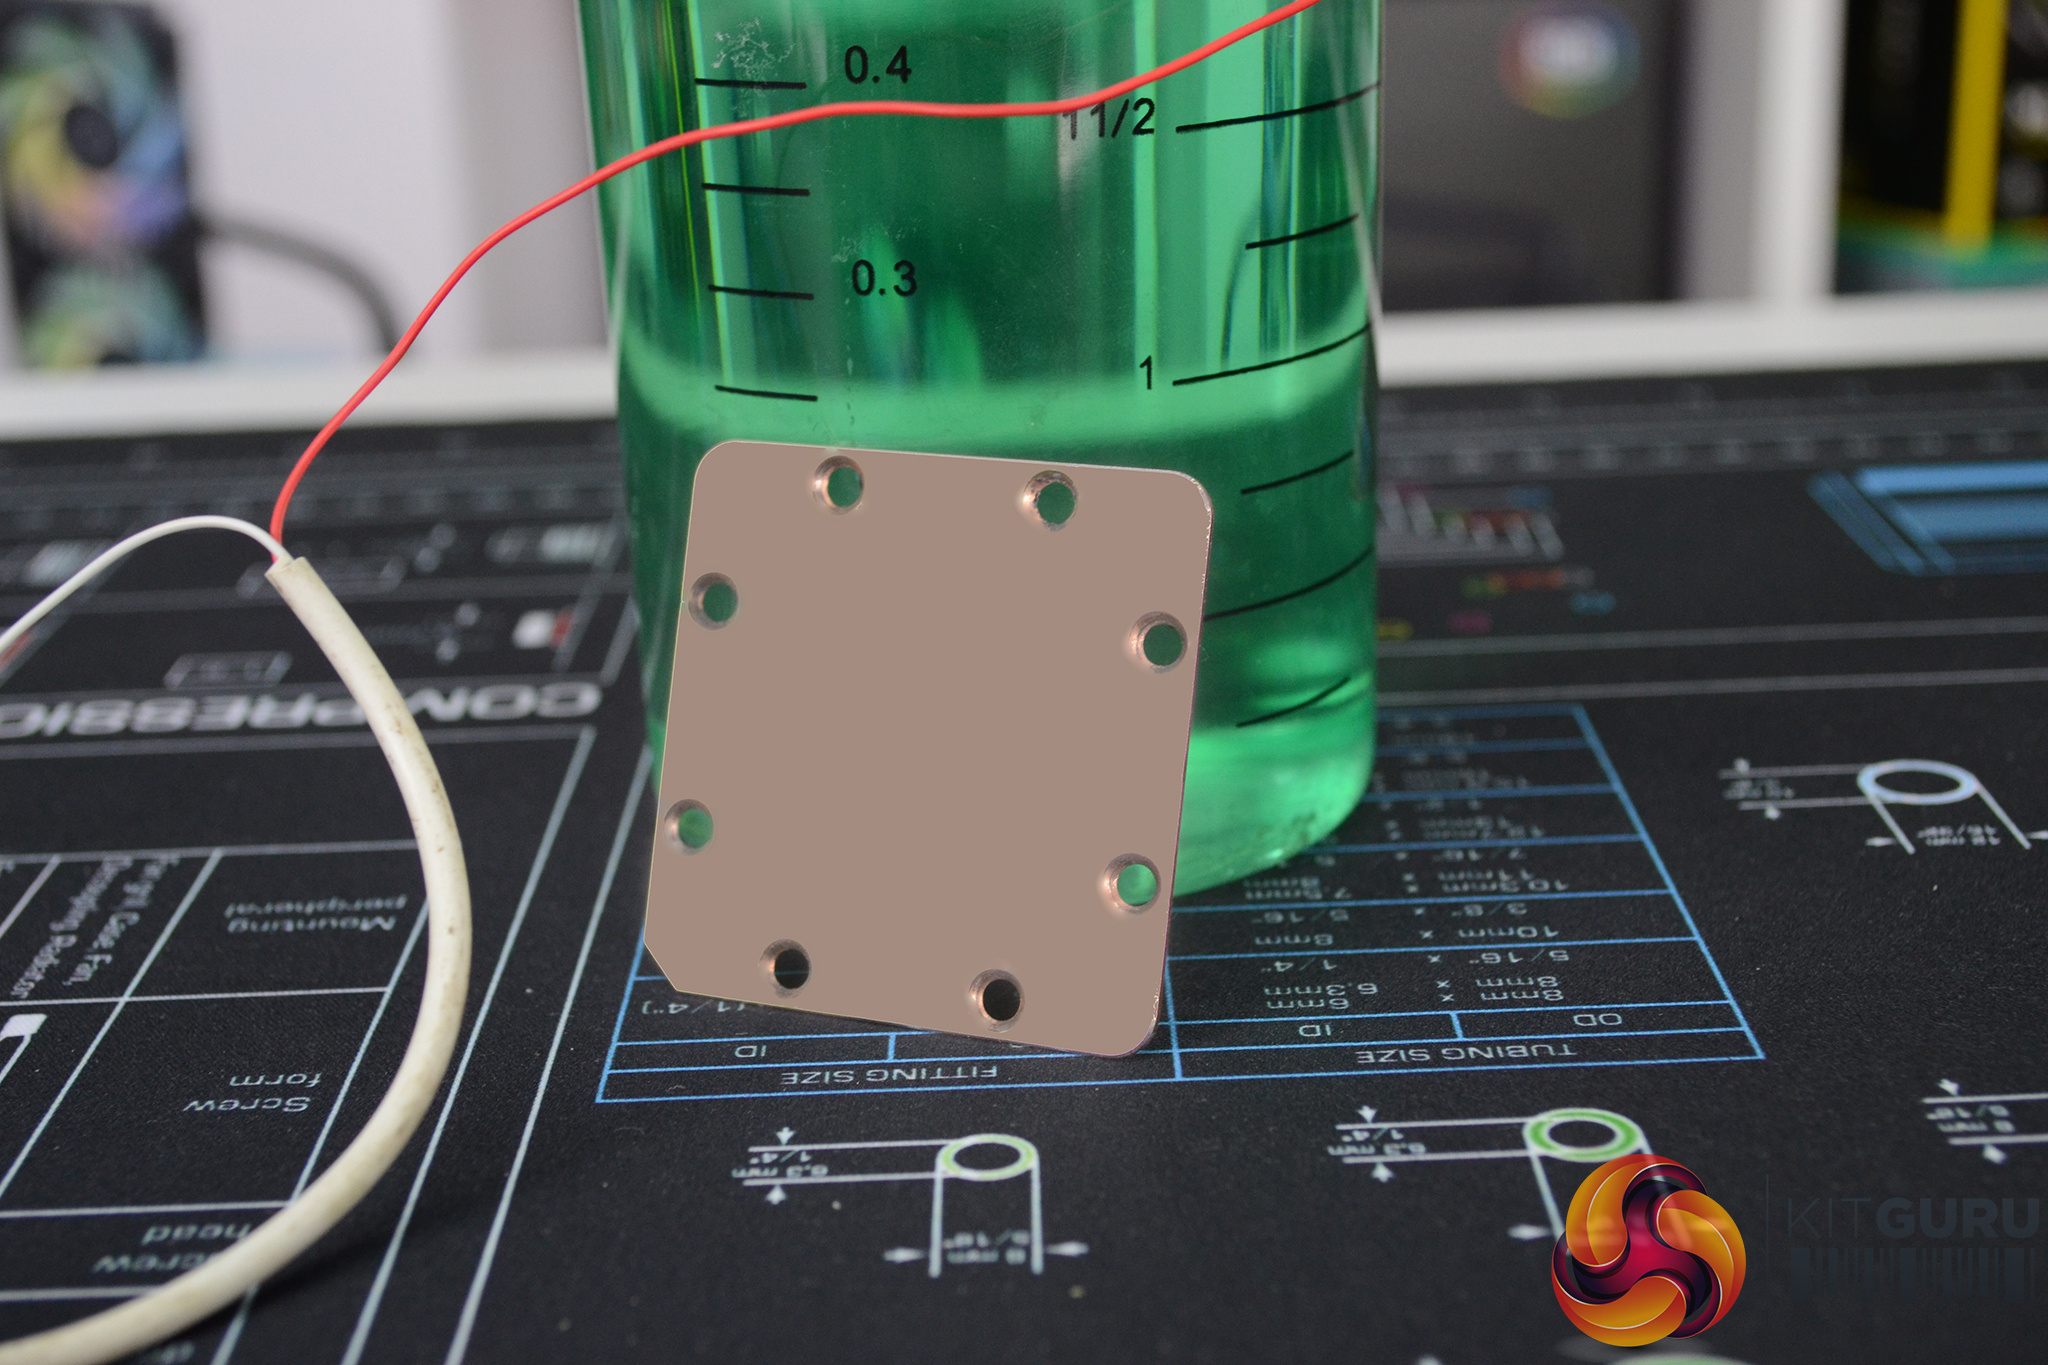
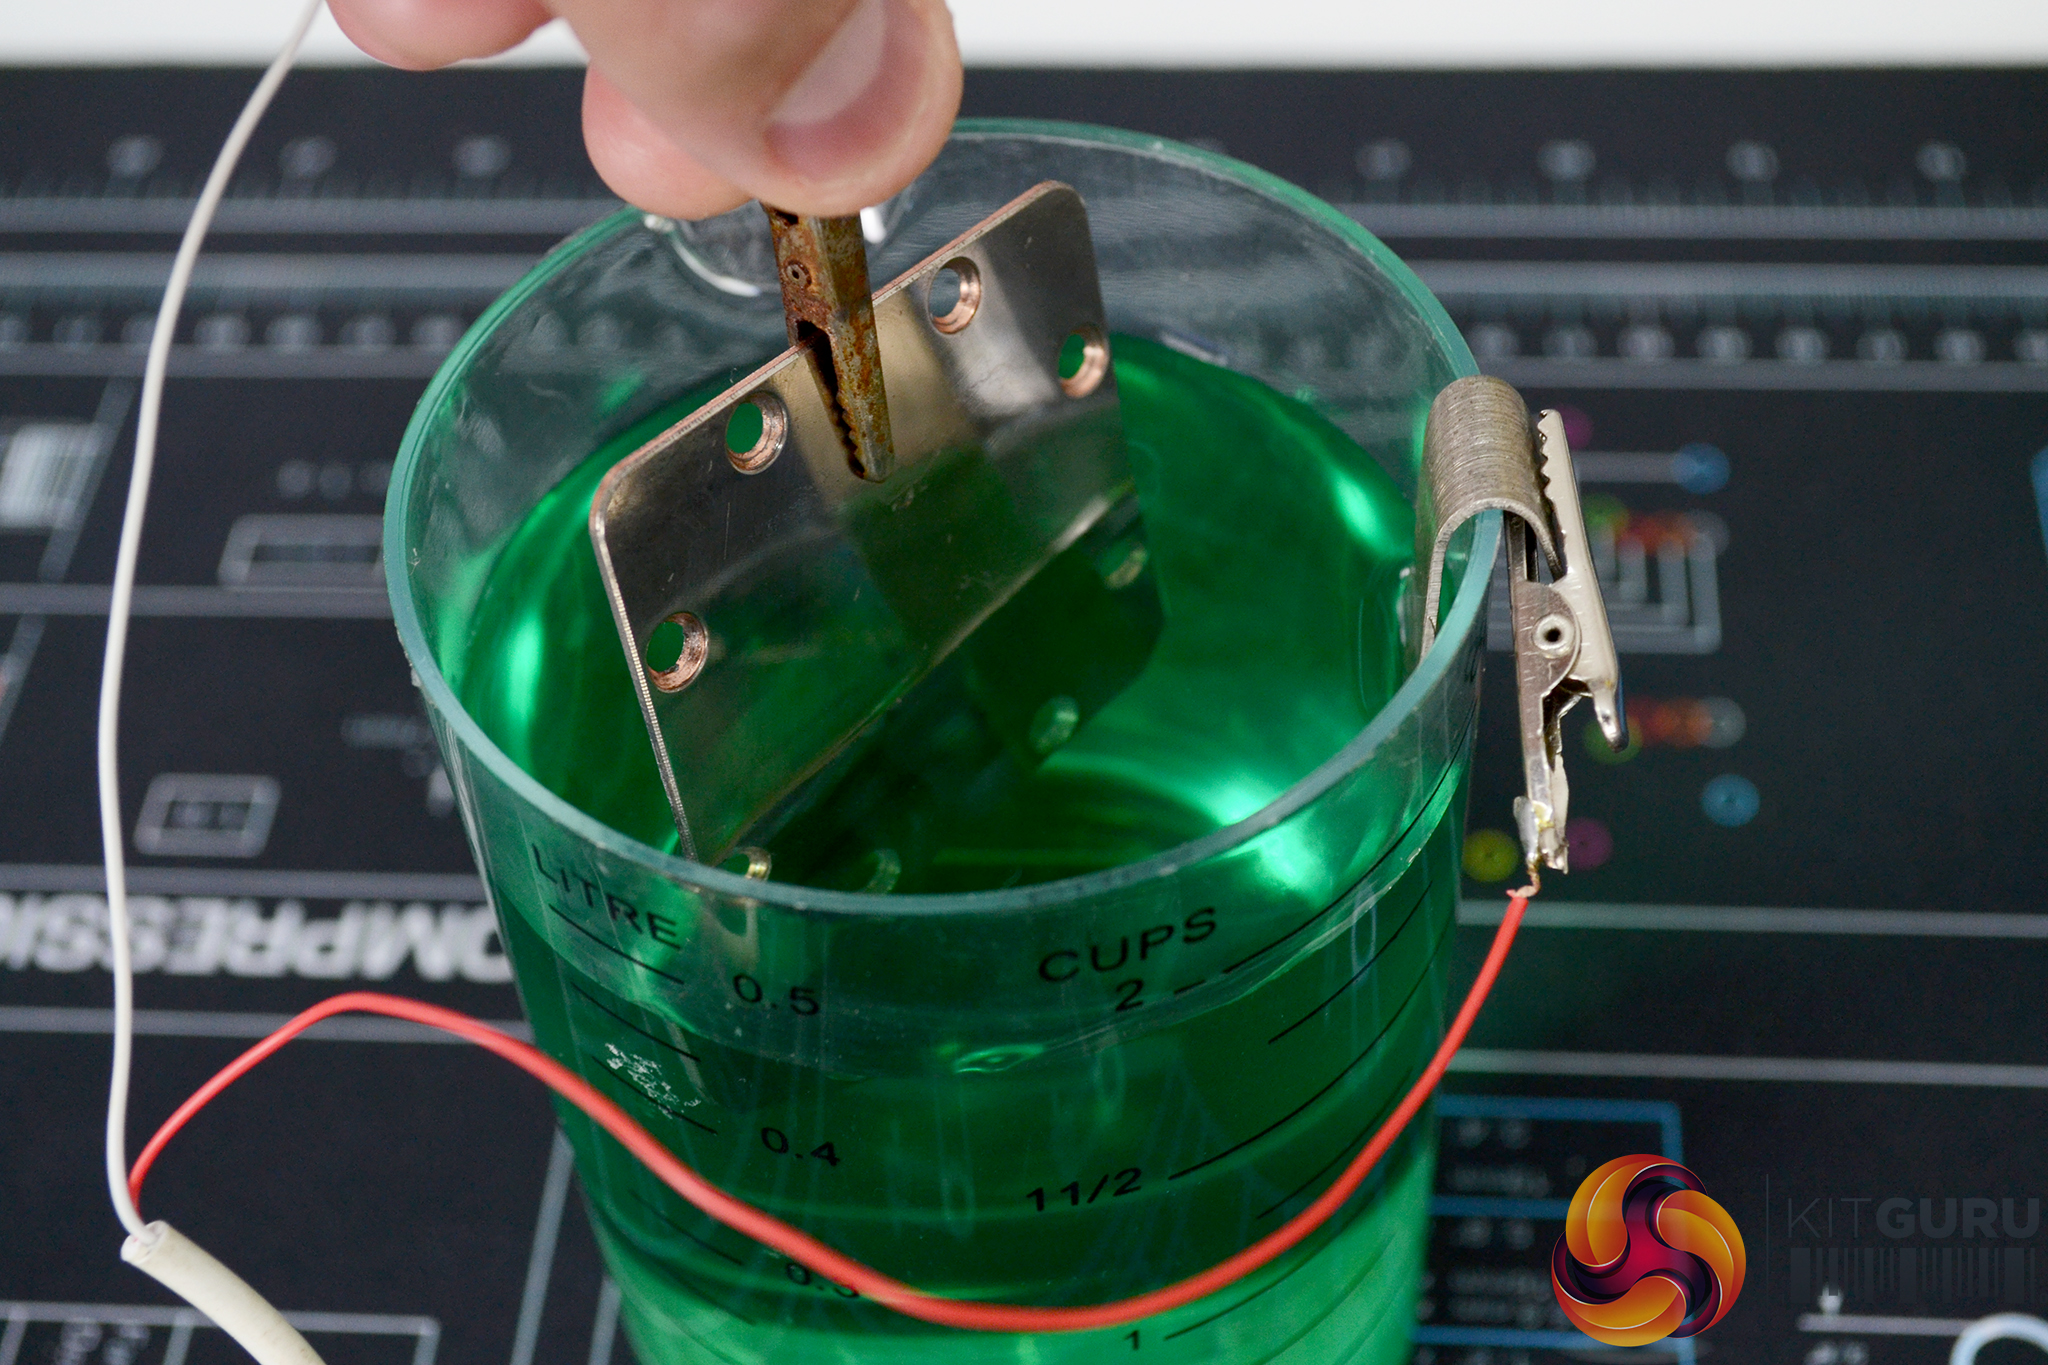
With the part clean and etched, we are now ready to begin electroplating, just like the process of making the nickel electrolyte, this stage isn’t difficult. Using one of the nickel anodes from earlier, place this back into the beaker containing the nickel electrolyte and connect up the positive wire from the power supply to the nickel anode again and connect the negative wire to the part you are electroplating.
Suspend the part in the nickel electrolyte and turn on the power. Ideally, we like to keep the part moving by hand in the solution while electroplating, to stop bubbles sticking to the surface of the part for too long and potentially affecting the finish. The other option is to keep the solution moving by using a stirring device or a fish tank aerator.
The nickel plating should be visible on the part quite quickly, even after 10-15 seconds in the solution you should see the processes taking effect. The longer you leave the part in the solution the better, we recommend around 40 minutes for a good quality durable finish. Once 40 minutes is up, turn off the power and remove the part from the electrolyte, rinse it off in clean water and admire your work. If required, you can polish the nickel plating with some metal polish for a mirror-like finish.
Discuss on our Facebook page HERE.
KitGuru says: Electroplating transforms the appearance as well as offering protection to certain metals, making them more durable and more resistant to corrosion. The electroplating process isn't as difficult as it may seem and can easily be set up at home. We hope you guys find this guide gives you guys the confidence to try out electroplating your own parts, it really is great fun.