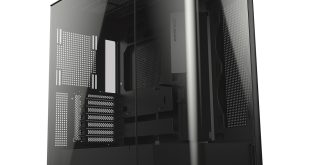
The case itself is divided into three main sections. At the rear, down at the bottom is a position for the power supply. The section between the top and bottom areas has a ‘trap door' system for cabling routing.
One of the two hard drive caddies is also here and we are pleased to see that Antec removed the dual PSU mount, replacing it with a single unit mount instead.
Above this are the rest of the drive bays, including the 5.25 inch bays. The removal of the drives is a simple system as each of these bays is easily removed from the case by an ‘unscrew and pull system'. As they are removed parallel to the chassis this alleviates any potential issues with oversized graphics cards.
The top bay can house two 3.5 inch devices while the lower one can fit a further four hard drives which bolt directly to the casing rather than having their own removable trays – it is also good to see rubber grommets at all the screw in points which will help eliminate any vibration. Antec have not fitted any intake fans at the front which is a rather unusual decision. We would like to see at least one fan fitted here as standard because while the 200mm side fan will compensate for air flow, the front section of the chassis will not receive any directly over the drive areas.
The main area is spacious and allows for the fitting of EATX motherboards. There are also holes cut at the top of the chassis to make wiring easier, especially as the fans in this area all require a molex power connector.
The 200mm side panel features a removable dust filter, which sits outside the case. It moves a significant amount of air, so this will need to be cleaned on a fairly regular basis.
The rear of the chassis features mounted plastic cable ties to ensure wiring issues are kept to a minimum.
Most of the cabling is directed through one area at the front, which means routing does not need manual intervention until you reach the rear of the case.
Antec supply a plethora of screws, drive mounts and extras to ensure the system build is as smooth as possible.
Attaching our Thermaltake ToughPower XT 675W PSU took literally a minute and the cables can be routed up through a hole between the lower and upper sections. The PSU rests on rubber stoppers to make sure no vibration passes through the chassis.
The HIS 5870 iCooler Turbo fitted along with the ASRock Extreme 4 motherboard and Coolink Corator DS. We unfortunately found that the Corator DS pressed against the internal 200mm Fan housing – it is 155mm in length. The door would shut, but it was a little bit of a struggle to get it closed with the screws. The fan thankfully was still spinning, but we would like to see a little more space here, even if it has been improved from the P190 design.
This main chamber is big enough to fit two large graphics cards such as nVidia GTX 295's with the big side fan ensuring they get good airflow directly over the PCB's.
The rear delivers many options for routing cables out of sight, but with all the fans requiring molex connectors there can be quite a mess on this side. Taking a little bit of time reaps dividends later as the door will sometimes not shut correctly if a molex connector is in the wrong place.
 KitGuru KitGuru.net – Tech News | Hardware News | Hardware Reviews | IOS | Mobile | Gaming | Graphics Cards


