To test all AIO coolers, we devised an easily repeatable test with no variables other than the coolers themselves. This ensures that figures from every cooler we test are comparable with each other.
Test rig
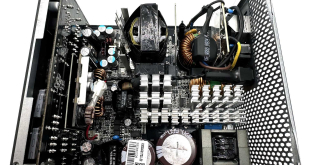
Using an open-air test bench, we deploy an Intel Core i7-4790K plugged into a Gigabyte Z97X-SOC Force motherboard. Alongside this is 16GB of 2400MHz Corsair Vengeance DDR3, as well as a 120GB OCZ Trion 150 SSD. Powering everything is a Corsair RM750x PSU.
The test process
Testing coolers involves taking a total of 4 temperature readings per cooler. First, we measure the idle temperature of the i7-4790K at stock speeds (turbo boost disabled), before measuring its temperature under load at stock speeds. Next, we overclock the CPU to 4.5GHz using a 1.3 Vcore, ensuring greater heat output. In its overclocked state we then measure the idle and load temperatures of the CPU again.
To ward off potential comments or questions, we know 4.5GHz using a 1.3 Vcore is not the ‘best' overclock – this particular CPU could reach that frequency at closer to 1.25 on the Vcore, which is more efficient. That is not the point, however. We are trying to stress the coolers to see how they deal with excess heat … hence the higher than necessary Vcore.
Where possible, each cooler’s fans are plugged directly into the motherboard using the CPU_Fan or CPU_Opt headers. Some AIOs, however, ship with their own fan controllers or PWM hubs. If we are unable to plug the fans directly into the motherboard, it is specified in the performance section of the review.
An idle reading comes from leaving Windows on the desktop for 15 minutes. A load reading comes from running Prime95’s (version 26.6) Small FFTs test for 15 minutes – enough time for temperatures to plateau.
Noise output
Unfortunately I am unable to properly measure the sound output of AIO coolers using a digital sound meter. This is because I am based alongside a busy road (with high ambient noise levels). Using a sound meter is, as such, not possible as there are variables out of my control. However, I will try my best to subjectively describe the noise output in a helpful manner.
 KitGuru KitGuru.net – Tech News | Hardware News | Hardware Reviews | IOS | Mobile | Gaming | Graphics Cards


How many watts does the test PC and/or CPU consume at 4.5 GHz under load?
Good question Rob. Next time I get a cooler in for review I will find out and get back to you. I don’t use a GPU, so I can’t imagine much more than 200W – maybe 250.
Wow this sounds great. I just hope I can get all 4 fans to fit into my case!
If it doesn’t fit in your case just put two fans outside and then the radiator and 2 fans inside the case
Also, be sure to have then sucking cooler air from outside rather than the other way around and then fit removable mesh filters to the intakes to cut down on dust being sucked in, this also creates positive pressure in the case so you don’t have to worry about dust being sucked in through every gap and vent hole the case has
If you want to take it a step further get some Perspex or plastic and create a wind tunnel to the rear exhaust fan at the back on most cases. This works like a PSU then taking cooler air from outside but not allowing it once its taken heat from the radiator into the main volume of the case itself as its instantly vented straight out of the back. Modern PSU/case combos do this too by the PSU sucking air through a (normally dust filtered) hole on the bottom and venting straight out of the back. You can even forgo the rear exhaust fan if you want as with 4 fans already sucking the air in I doubt a 5th one at the rear would do much and could be forced to spin faster than it wants by the airflow from the cooler anyway
If you do that however make sure to compensate for the main volume of the cases air flow though by using all other available fan locations as intakes
With a bit of imagination and not that much extra work you can get some excellent results and temps. I’ve been doing it this way for well over 2 decades on desktops and servers, and have even done similar with air coolers using a duct from one intake fan to the intake (push) on an air cooler then another duct from the exhaust (pull) fan on the cooler to an exhaust fan on the case. This makes even the relatively cheap evo 212 work amazingly well especially if you swap out the fans for something like corsair or arctic fans (2z92mm on the cooler and 2×120/140mm as the case intake and exhaust)
I really don’t find a 15 minutes stress test enough for an AIO cooler. Water temperatures don’t equalize in such short time. You should leave it at least 45 minutes under stress to get an accurate measurement. I consider these results invalid.