

Priced at £26.99, Raijintek's Leto cooler is squarely aimed at PC builders on a tight budget. Given the entry-level air cooling market is fiercely competitive, and we have already seen a few proficient coolers in recent months, the Leto definitely has its work cut-out to prove it is worth buying.
Currently, we recommend the Cryorig H7 as the go-to cooler if you are on a budget. Raijintek will certainly hope that its Leto cooler, boasting 3 heatpipes, an LED fan and compatibility with all modern CPUs, is up to the task.
Specification:
- Dimensions: 122(W) x 76(D) x 157(H) mm
Heatsink
- Base Material: CPU Direct Contact [C.D.C.]
- Fin Material: Aluminium Alloy; Solder-free fins assembly
Heat-pipe
- Spec: 8mm
- Quantity: 3pcs
Fan
- Dimension: 120(W) x 120(H) x 25(D) mm
- Voltage Rating: 12V (Range: 10.8 – 13.2V)
- Starting Voltage: 7V (Max.)
- Rate Current: 0.28Amp (Max. 0.32 Amp)
- Speed: 800 ~ 1800 R.P.M. (PWM)
- Bearing Type: Sleeve bearing
- Air Flow: 65.5 CFM (Max.)
- Air Pressure: 1.14 mmH2O (Max.)
- LEDs: 8
- Life Expectance: 40,000 hrs
- Noise Level: 28.5 dBA (Max.)
- Weight: 570g (Heat Sink & fan Only)
- Thermal Resistance: 0.13?/W
Socket Compatibility:
- All Intel® Socket: LGA 775 , 115x , 1366 , 201x , 2066
- All AMD Socket: AM4, AM3+, AM3, AM2+, AM2, FM2+, FM2, FM1
The Raijintek Leto ships in a pretty small box, while there is a large image of the cooler itself on the front.
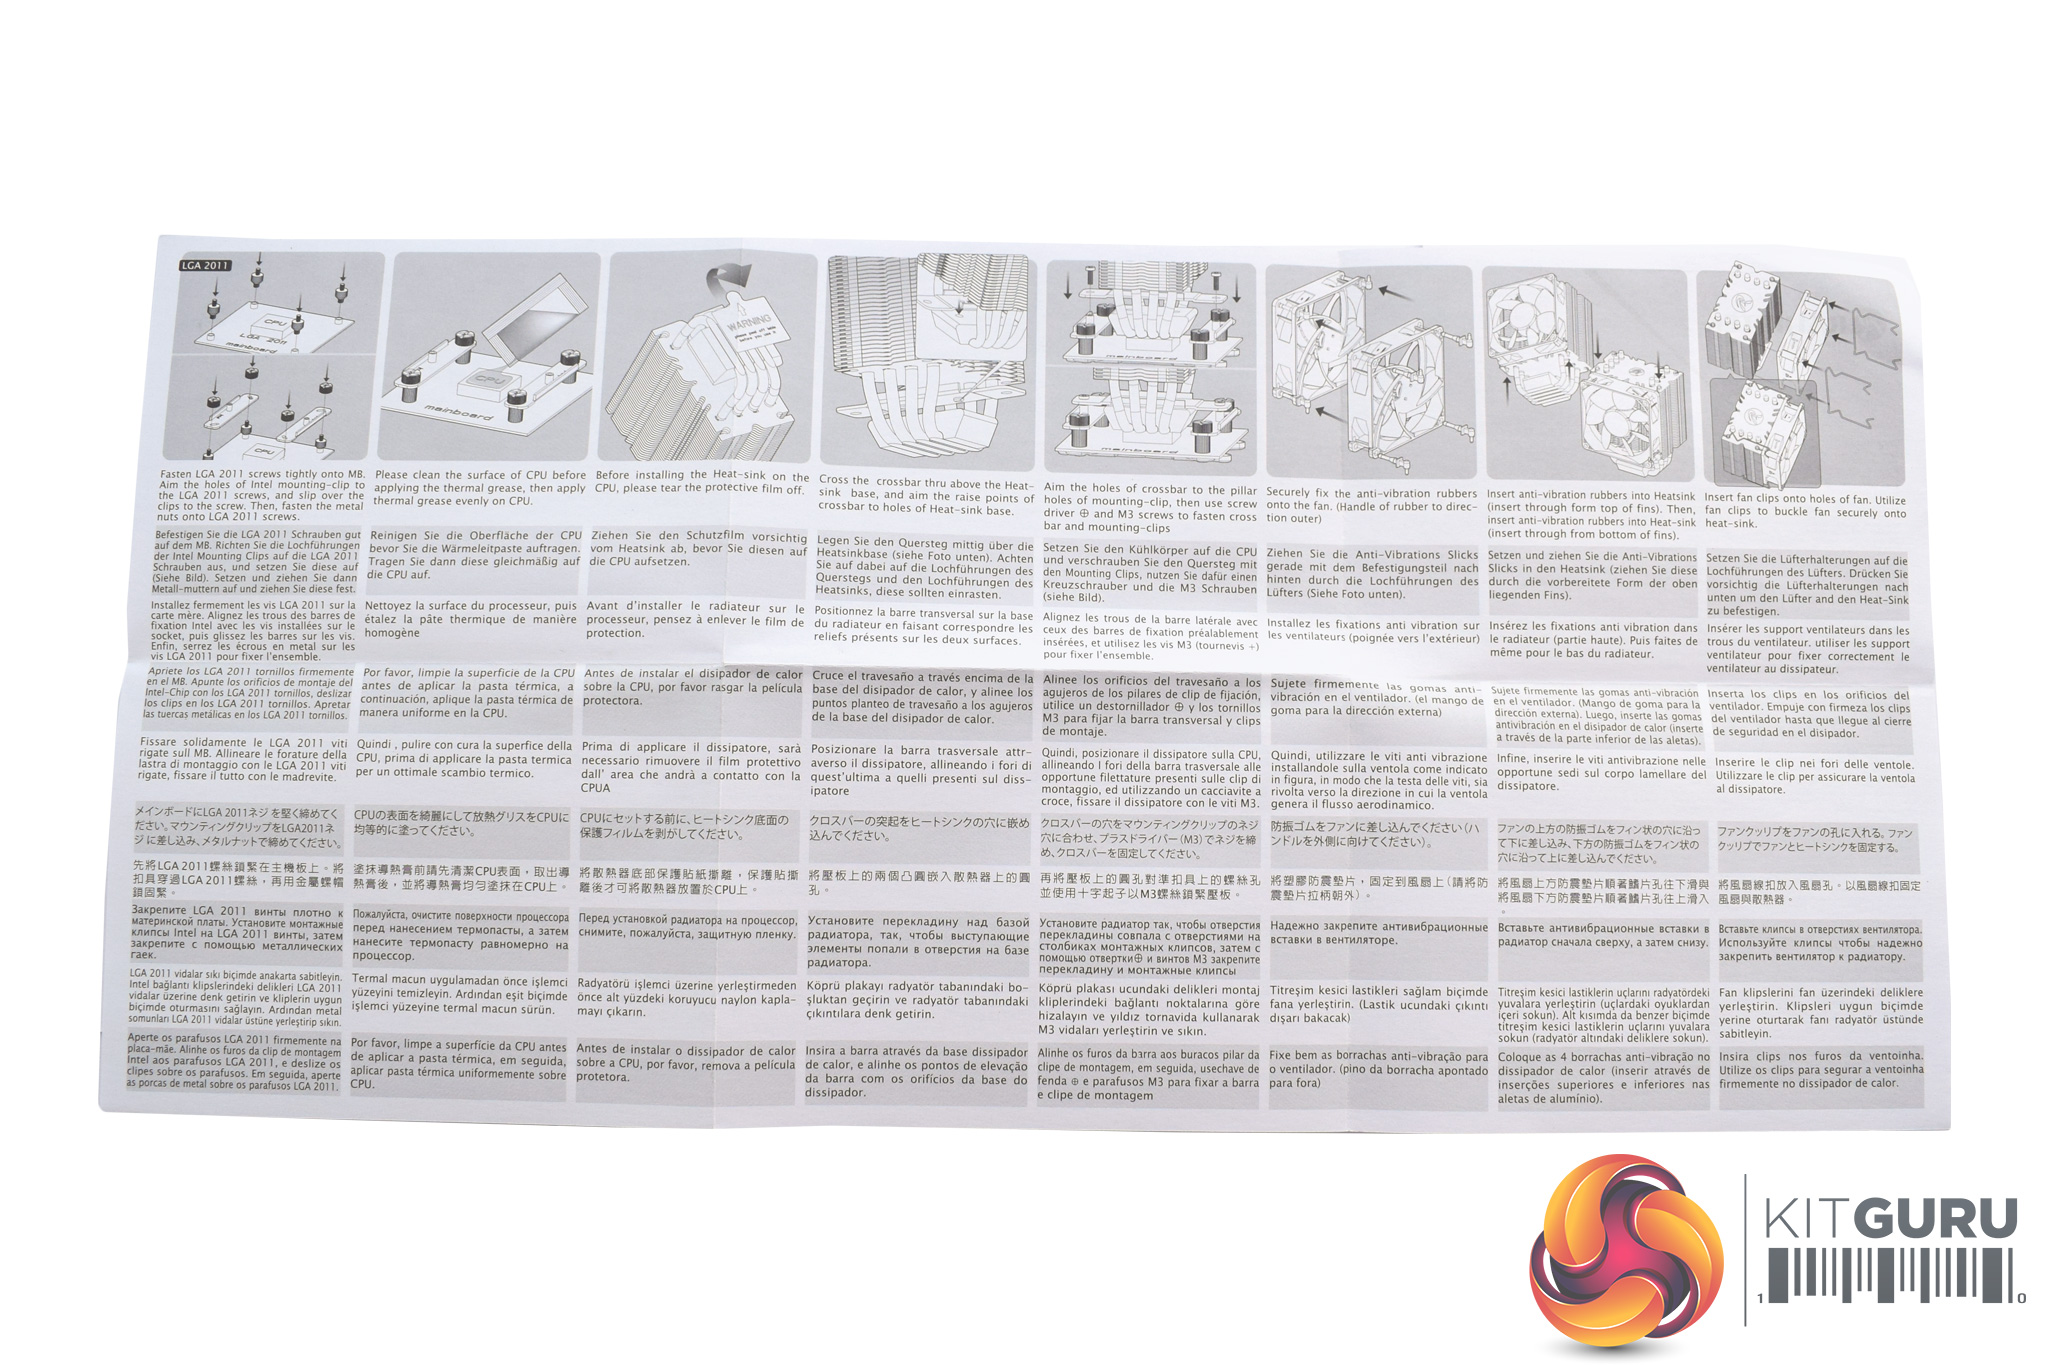
Inside, the first thing we find is the multi-lingual user manual – it is nothing special but it gets the job done.
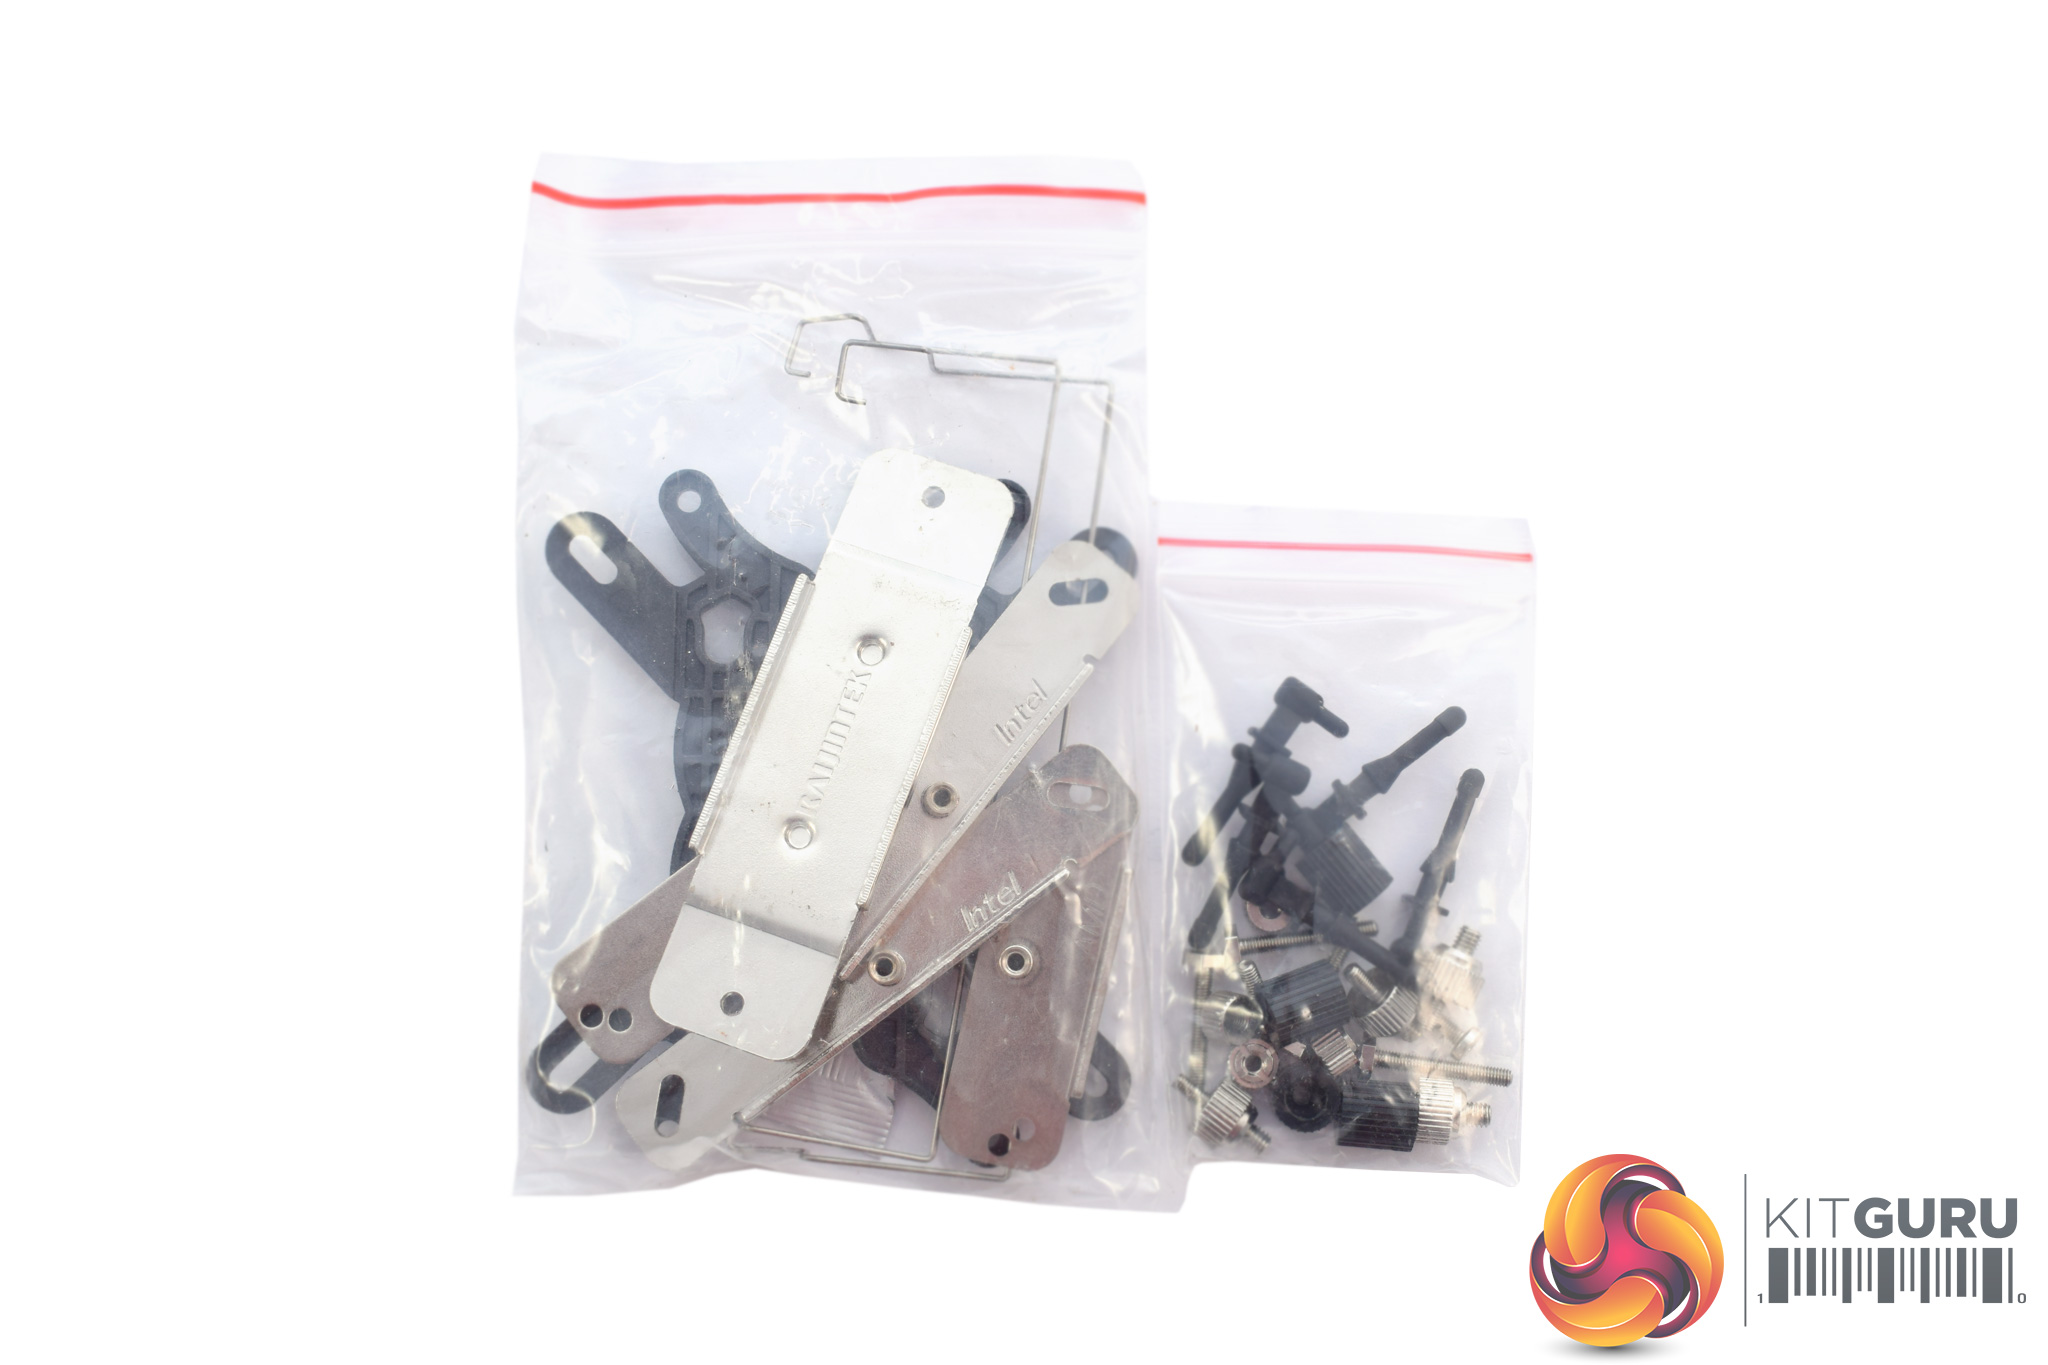
All of the mounting hardware comes into two separate bags which are not labelled for specific AMD/Intel sockets, something which is not ideal.
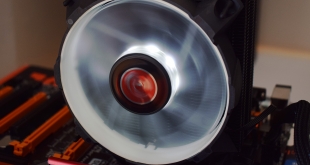
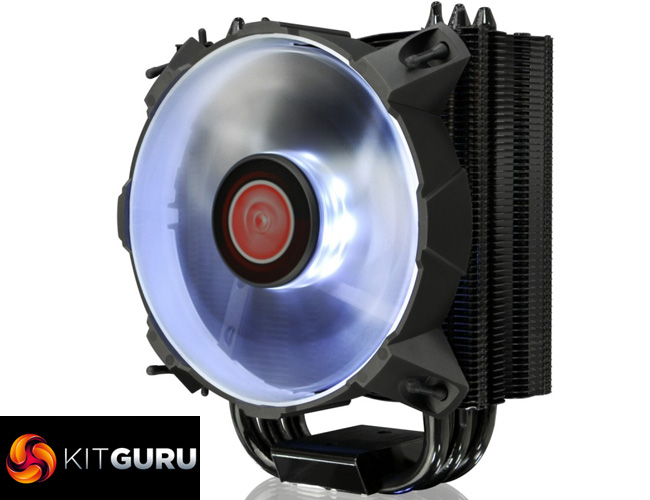
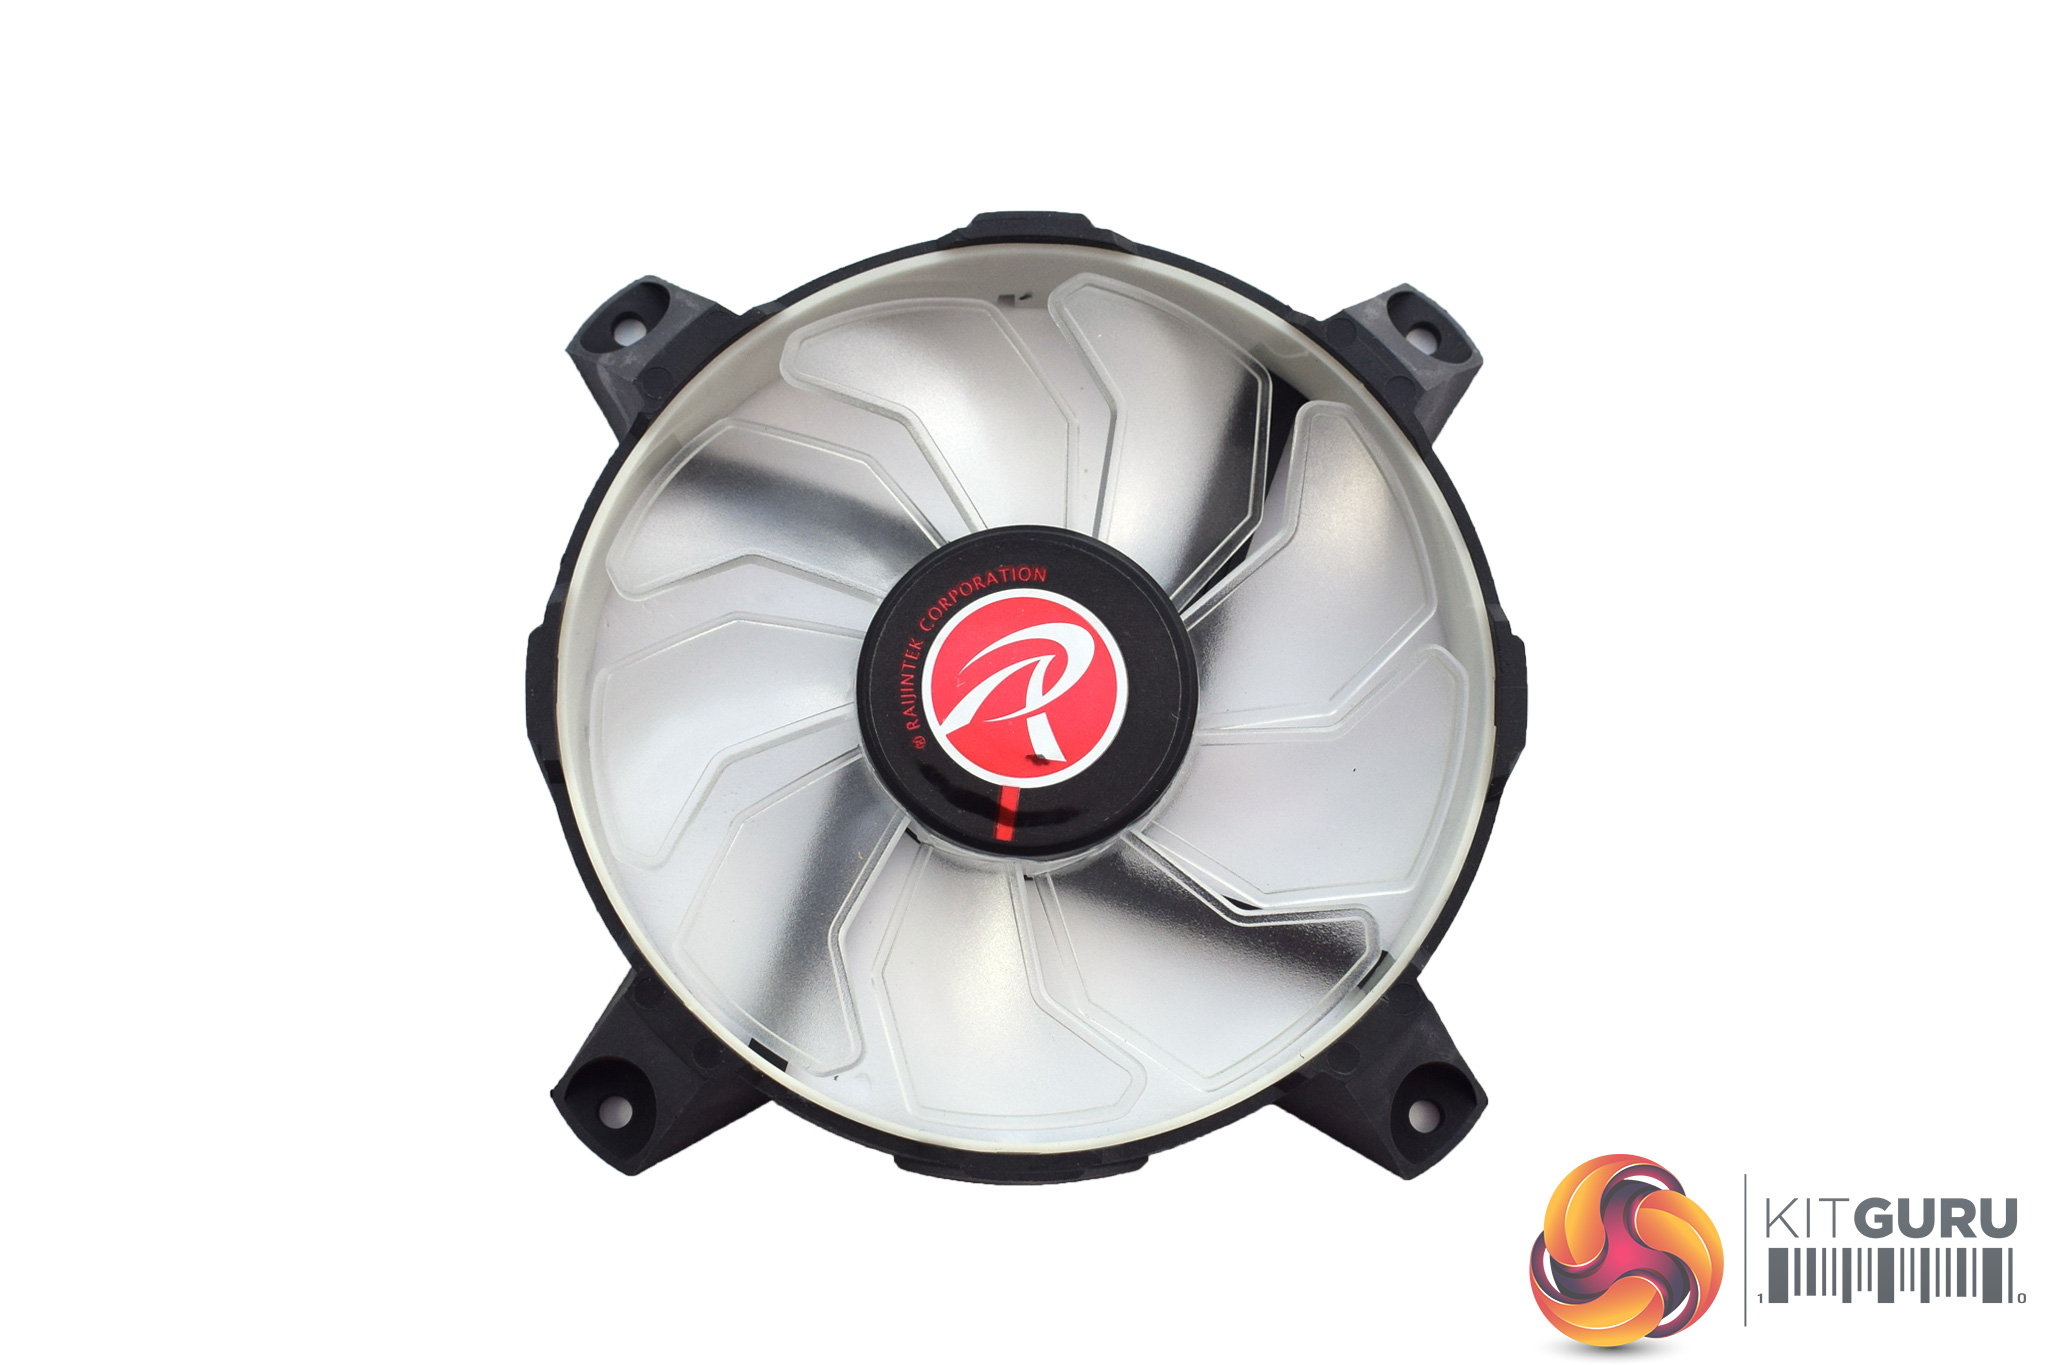
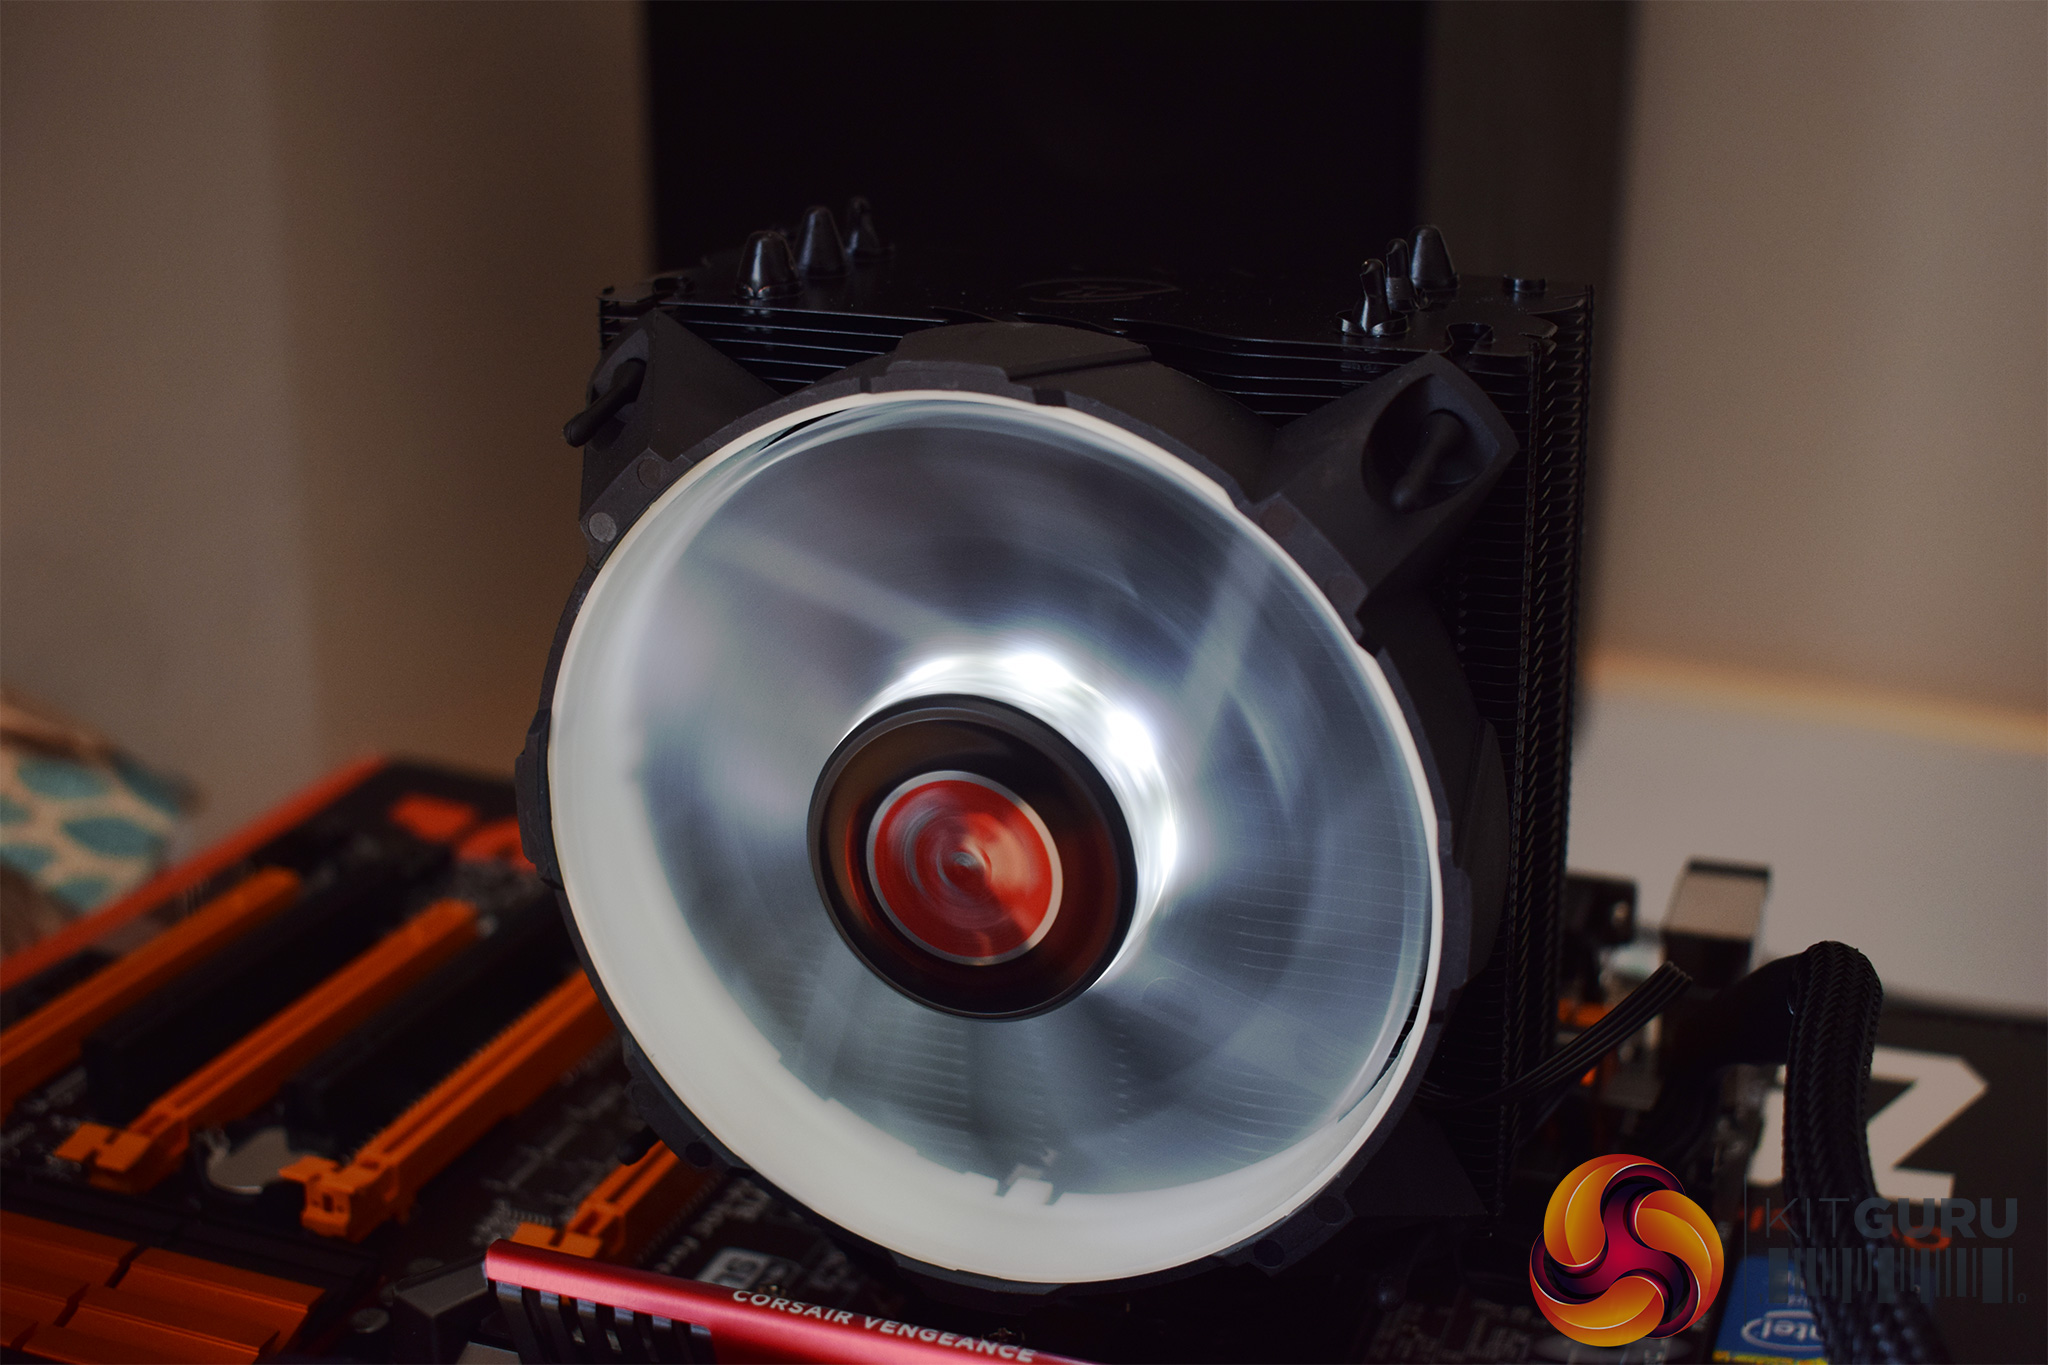
The included 120mm fan is notable as it sports 8 LEDs around its central hub – rather than being in the corners – and my sample is the white LED model. There are blue or red options, too, so the choice is there.
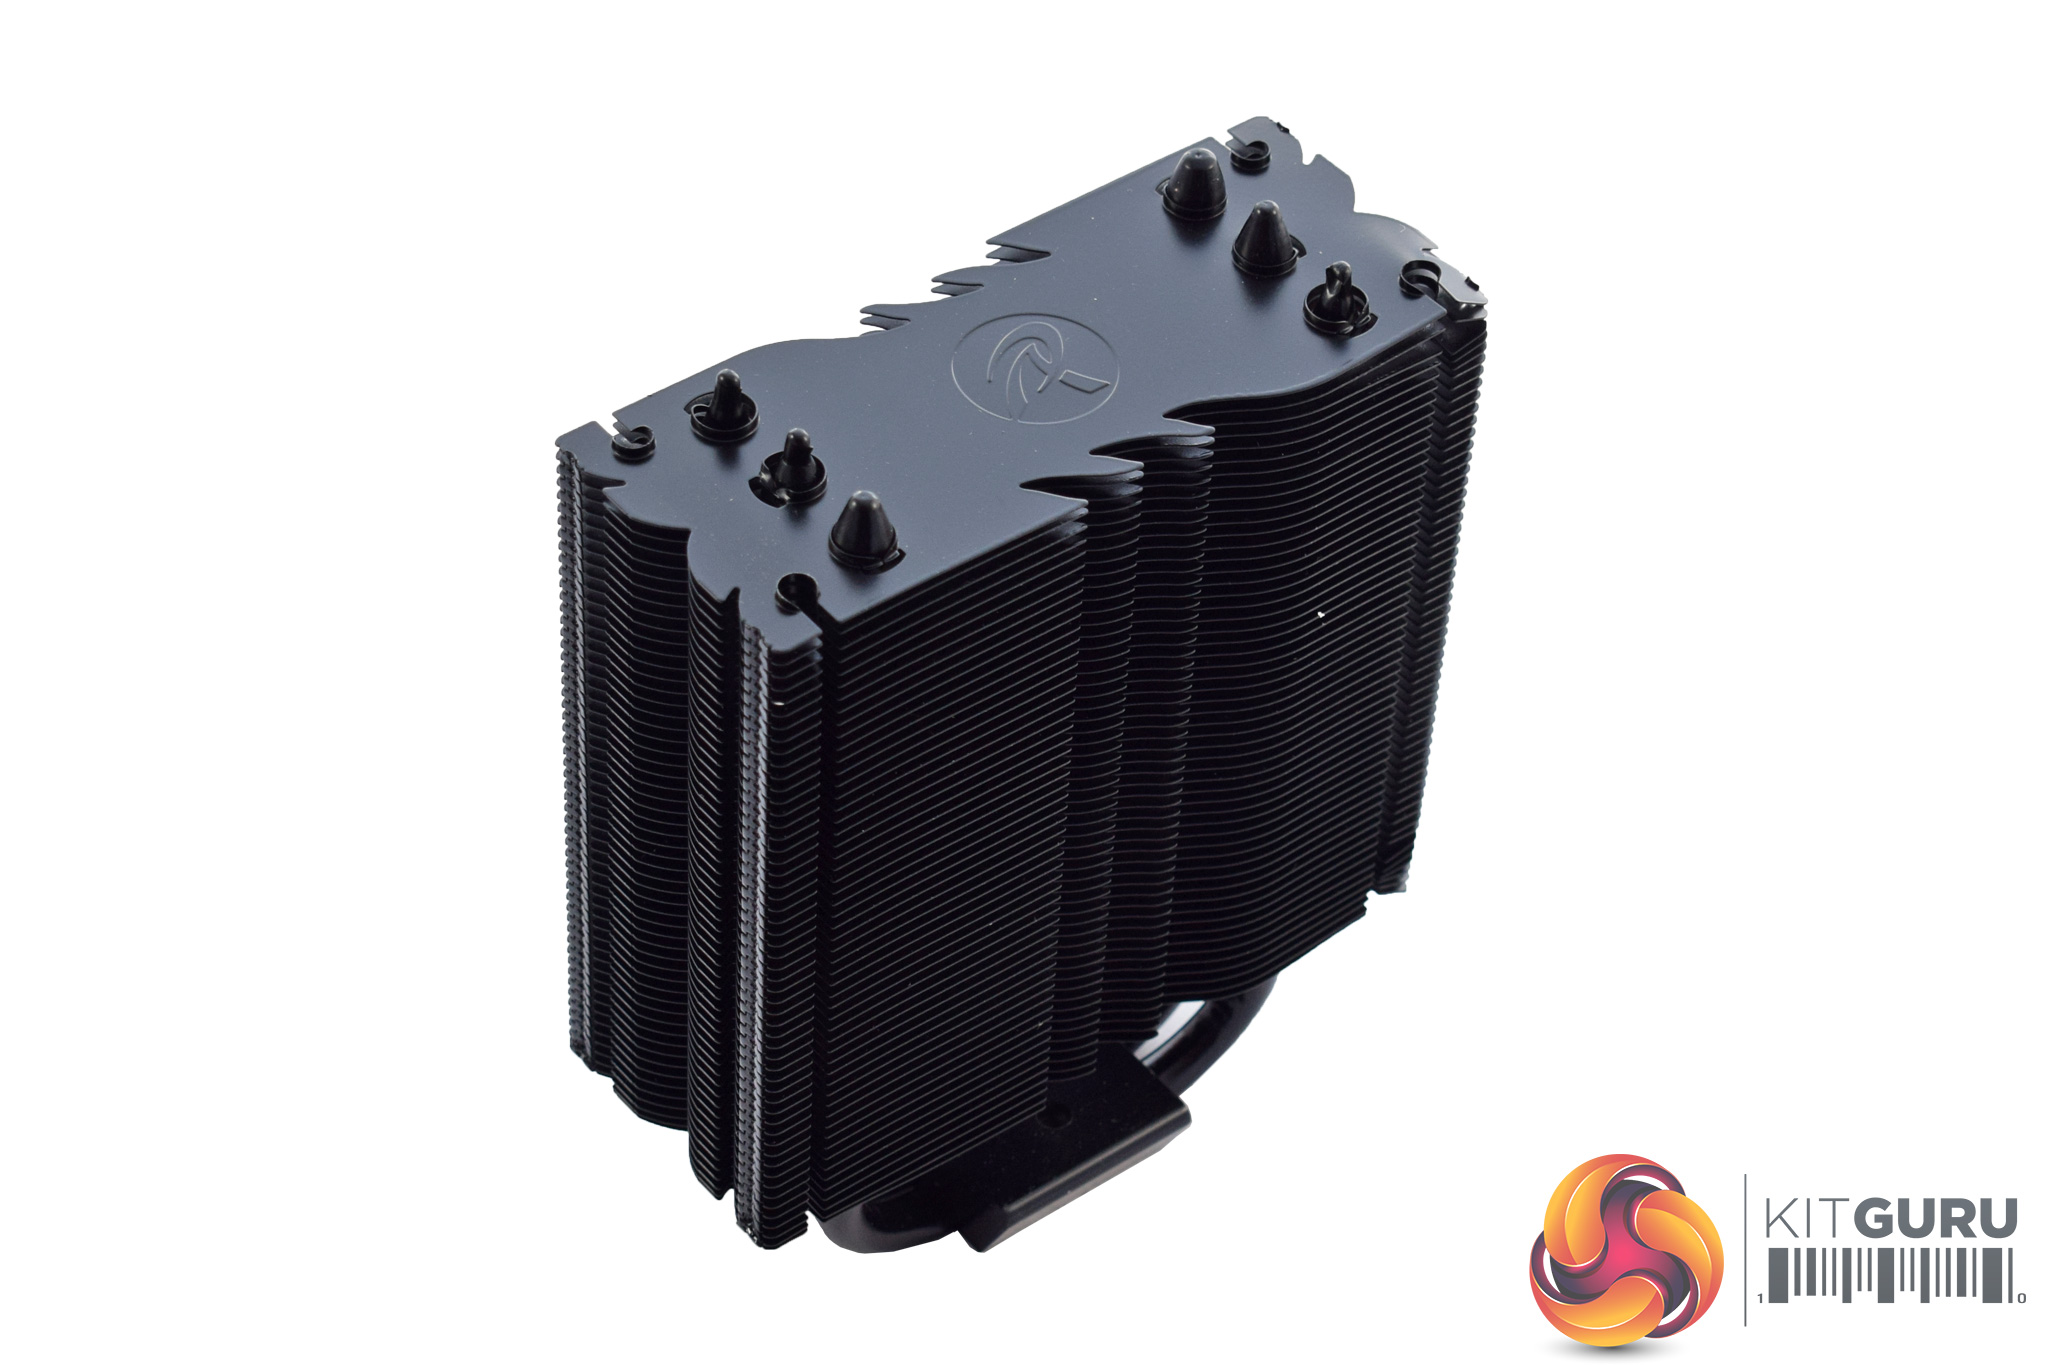
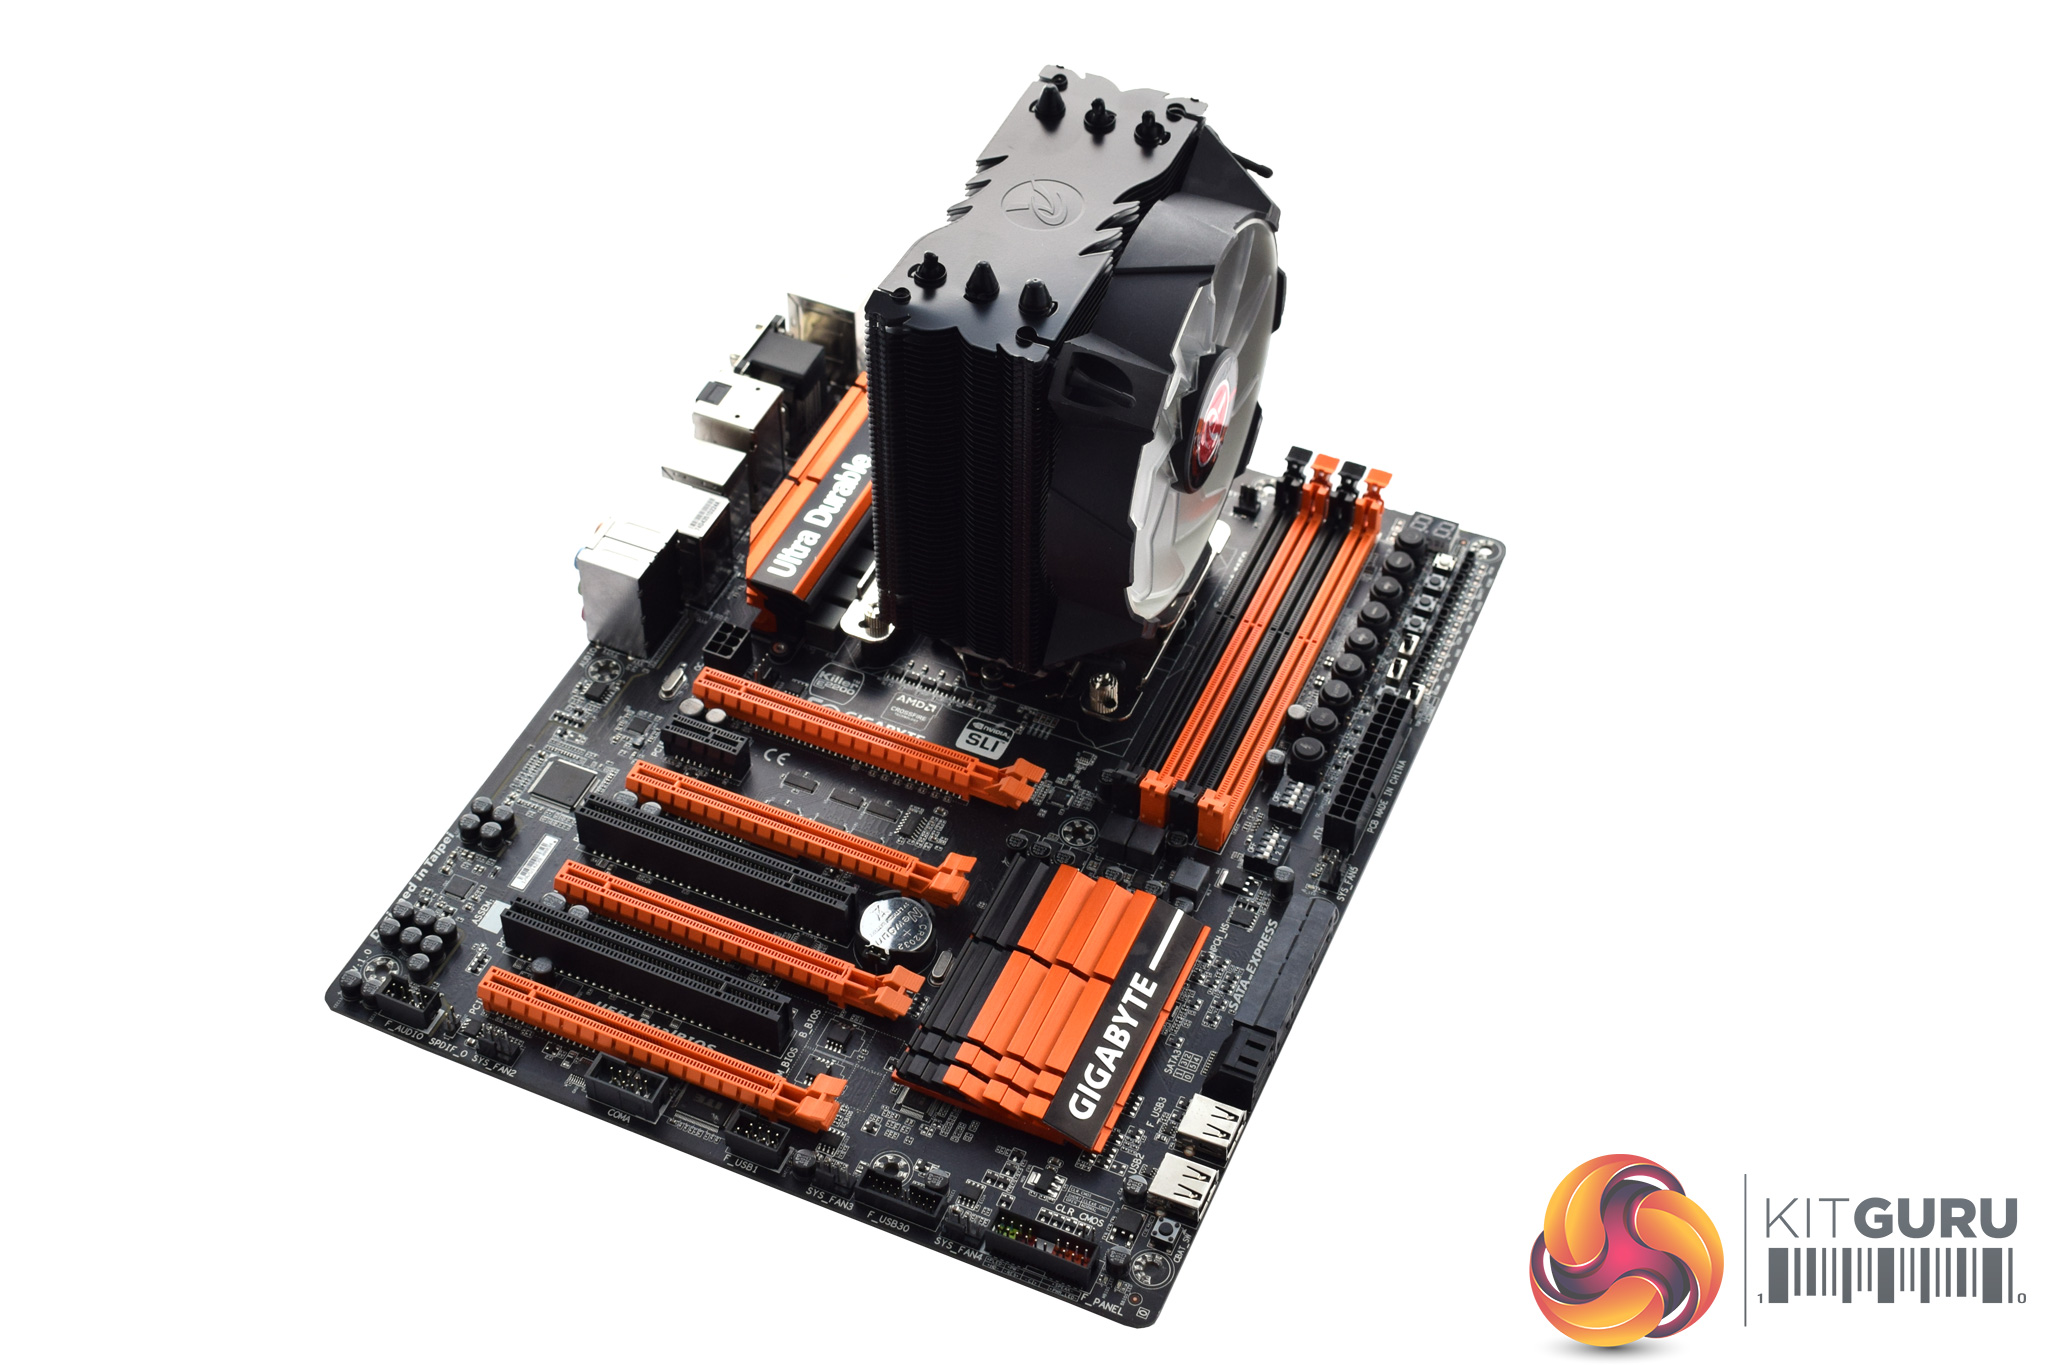
Lastly, we come to the heatsink itself. It does not look like anything special – and I honestly wouldn't expect it to be special at this price – but the all-black aesthetic is appealing and there are a few other things to touch on.
For one, the size of the cooler is worth talking about – the Leto measures 122(W) x 76(D) x 157(H)mm so while it is definitely small, it is not on quite the same level as the miniscule Antec A40 Pro or the be quiet! Pure Rock Slim. Most cases should be able to fit it just fine, though, but we always advise checking first.
After that, it is worth stating that the Leto uses 3x 8mm copper heatpipes, though the heatsink itself is aluminium.Here I will walk you through the installation process. It is worth noting we test using a Z97 motherboard – socket LGA 1150. The process below reflects that.

![]()
The first thing to do is get the backplate ready – four long screws go through the mounting arms, and then through the socket holes on the motherboard.
However, this is much easier said than done as the four screws do not lock in-place to the backplate at all, so they constantly fall out. I don't know if they are actually meant to stay in place – in which case it is a QC issue – but if they aren't, it is certainly a poor design decision on Raijintek's part. It makes getting the backplate in unnecessarily fiddly and I would certainly have expected better.
Once you finally get everything positioned, four black spacers need to be placed over the screws to keep them from wobbling around.
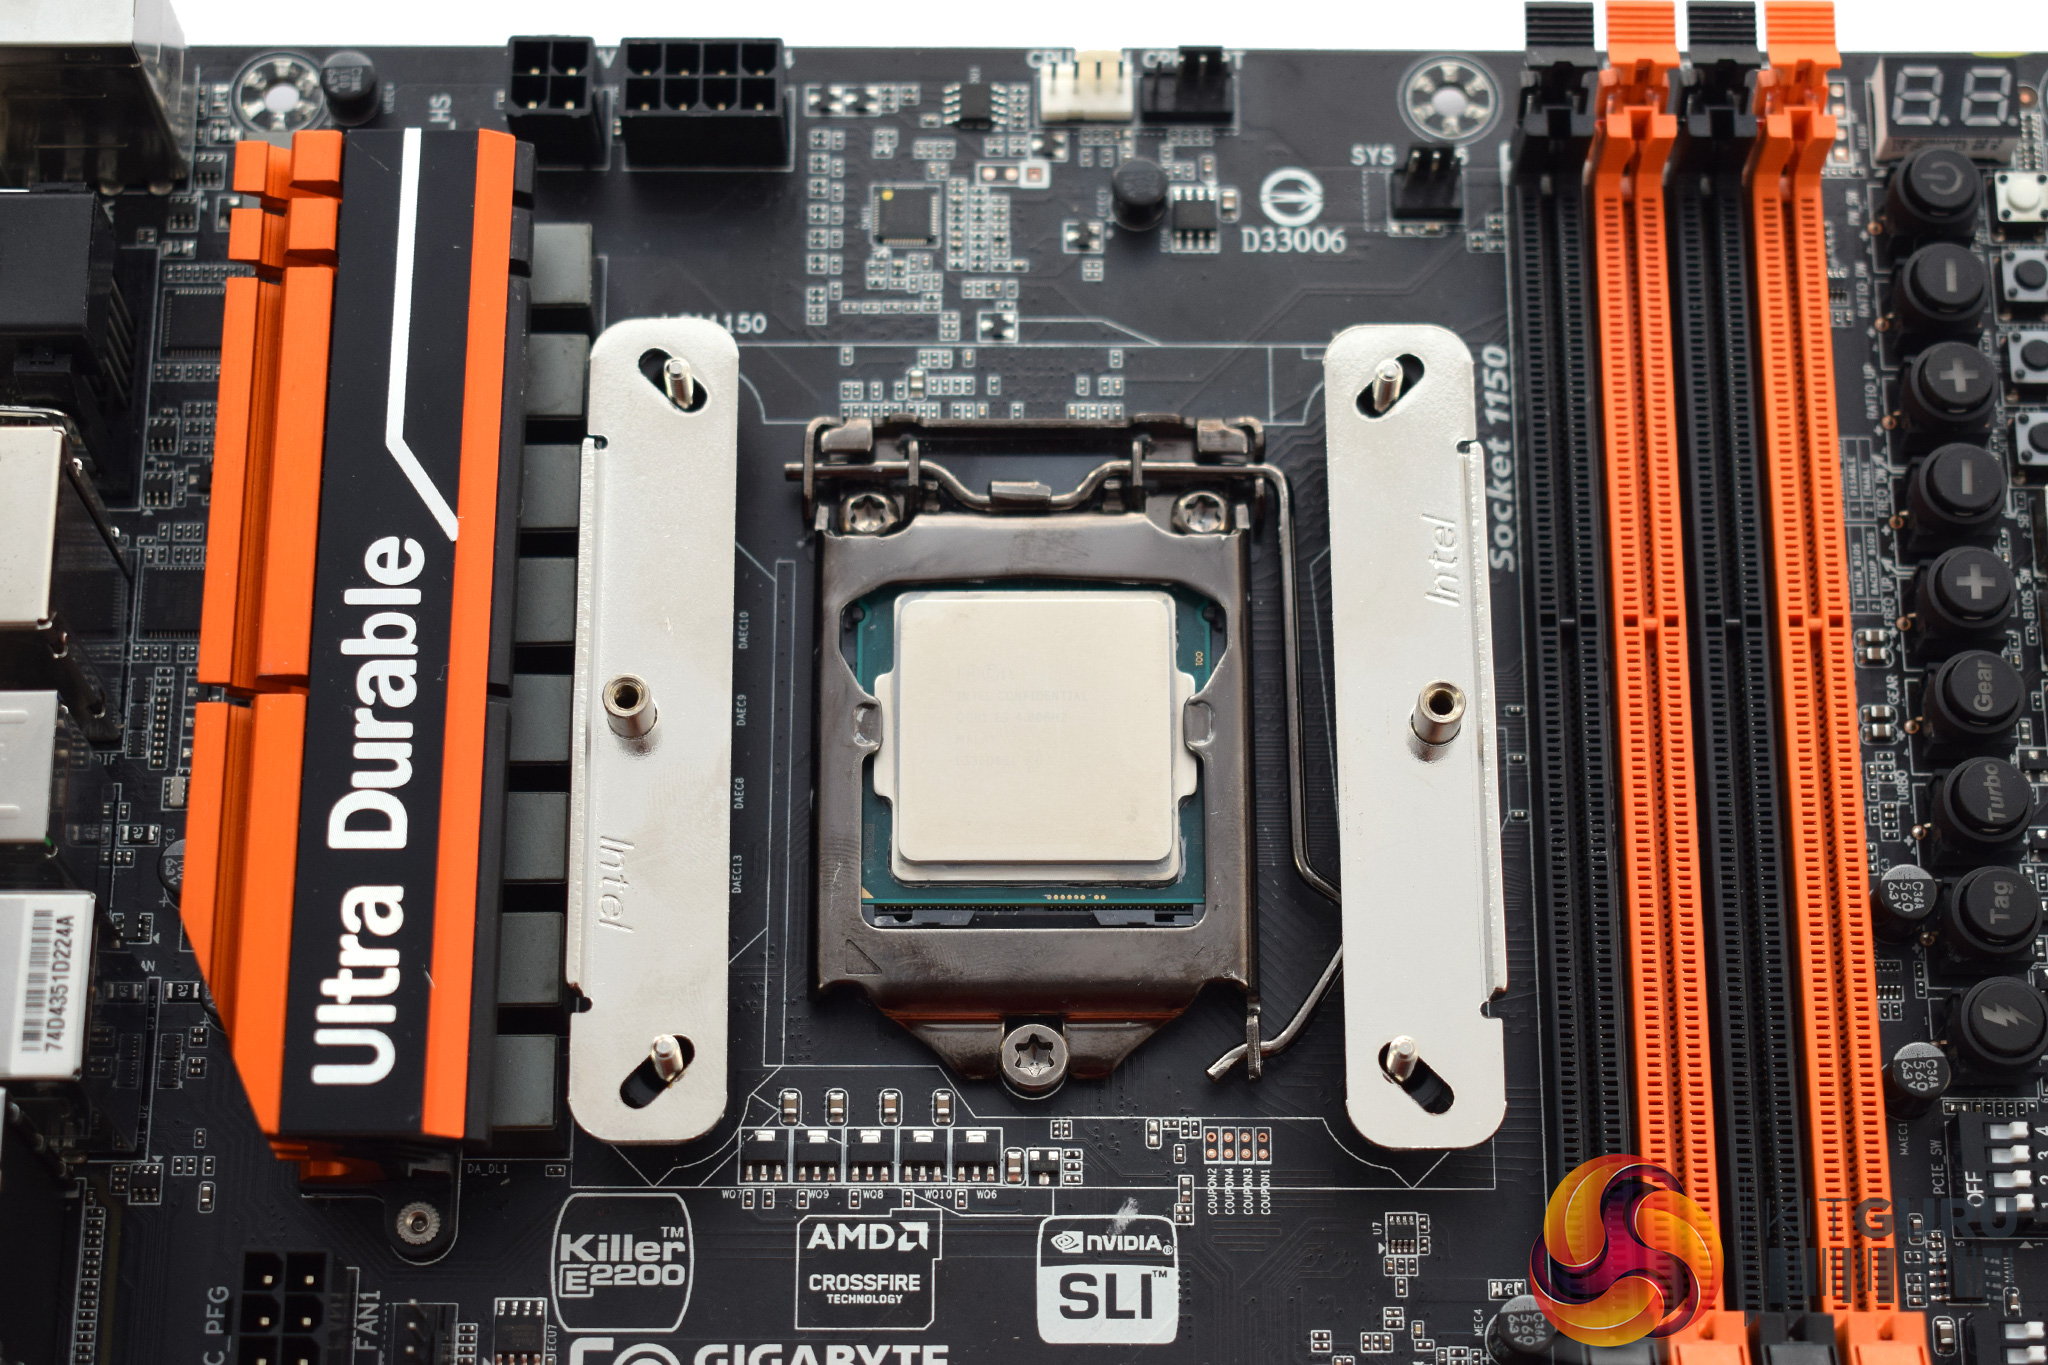
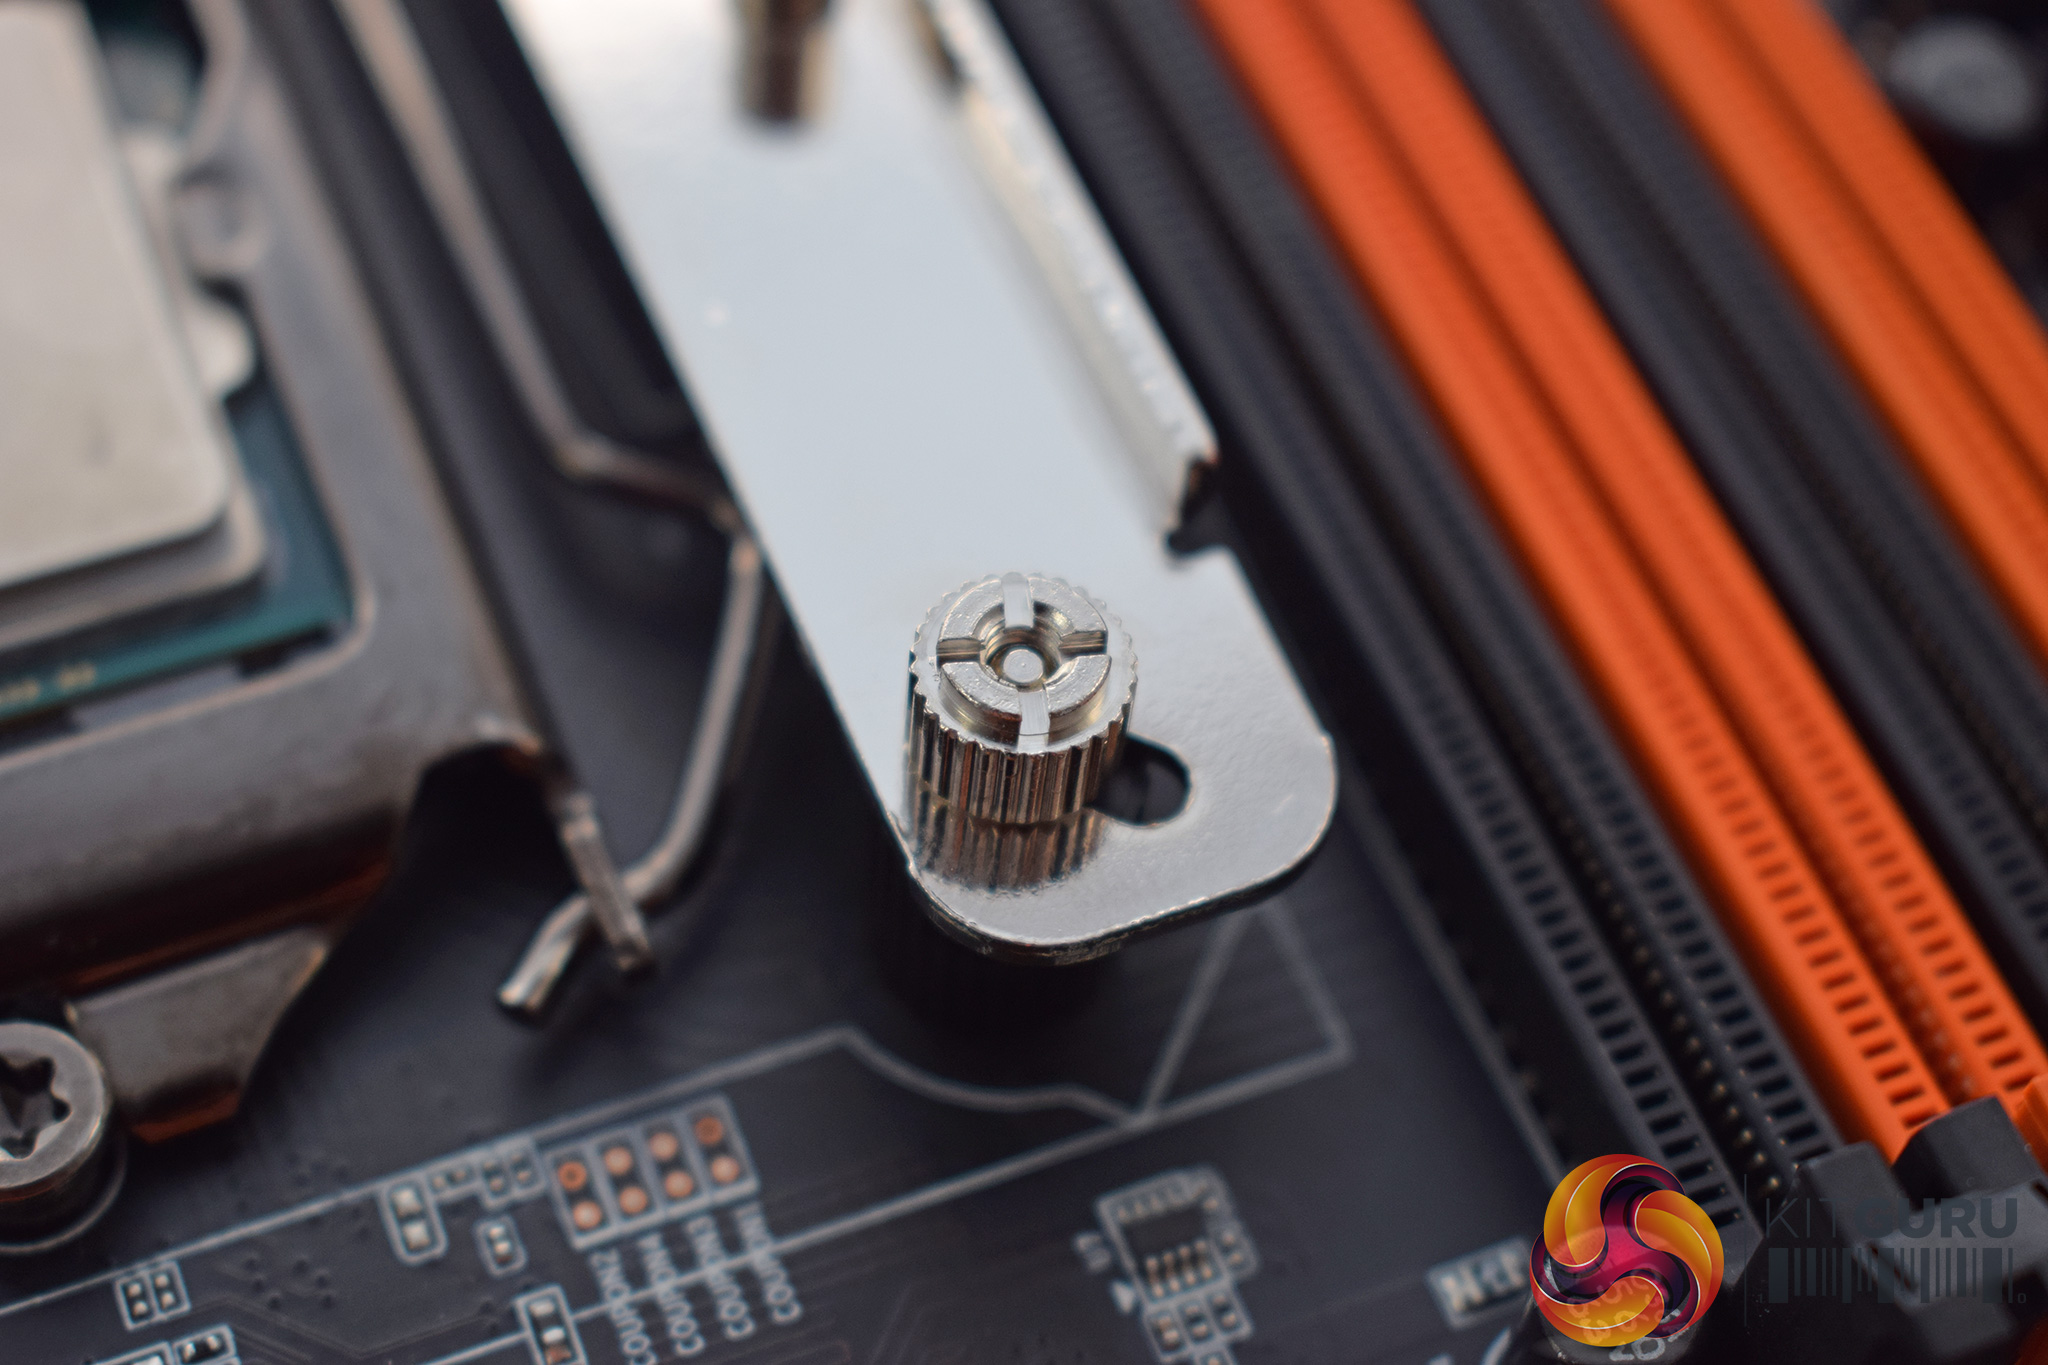
Next, two rails should be placed vertically (as pictured, assuming you want the cooler mounted vertically) and then secured with four small studs.
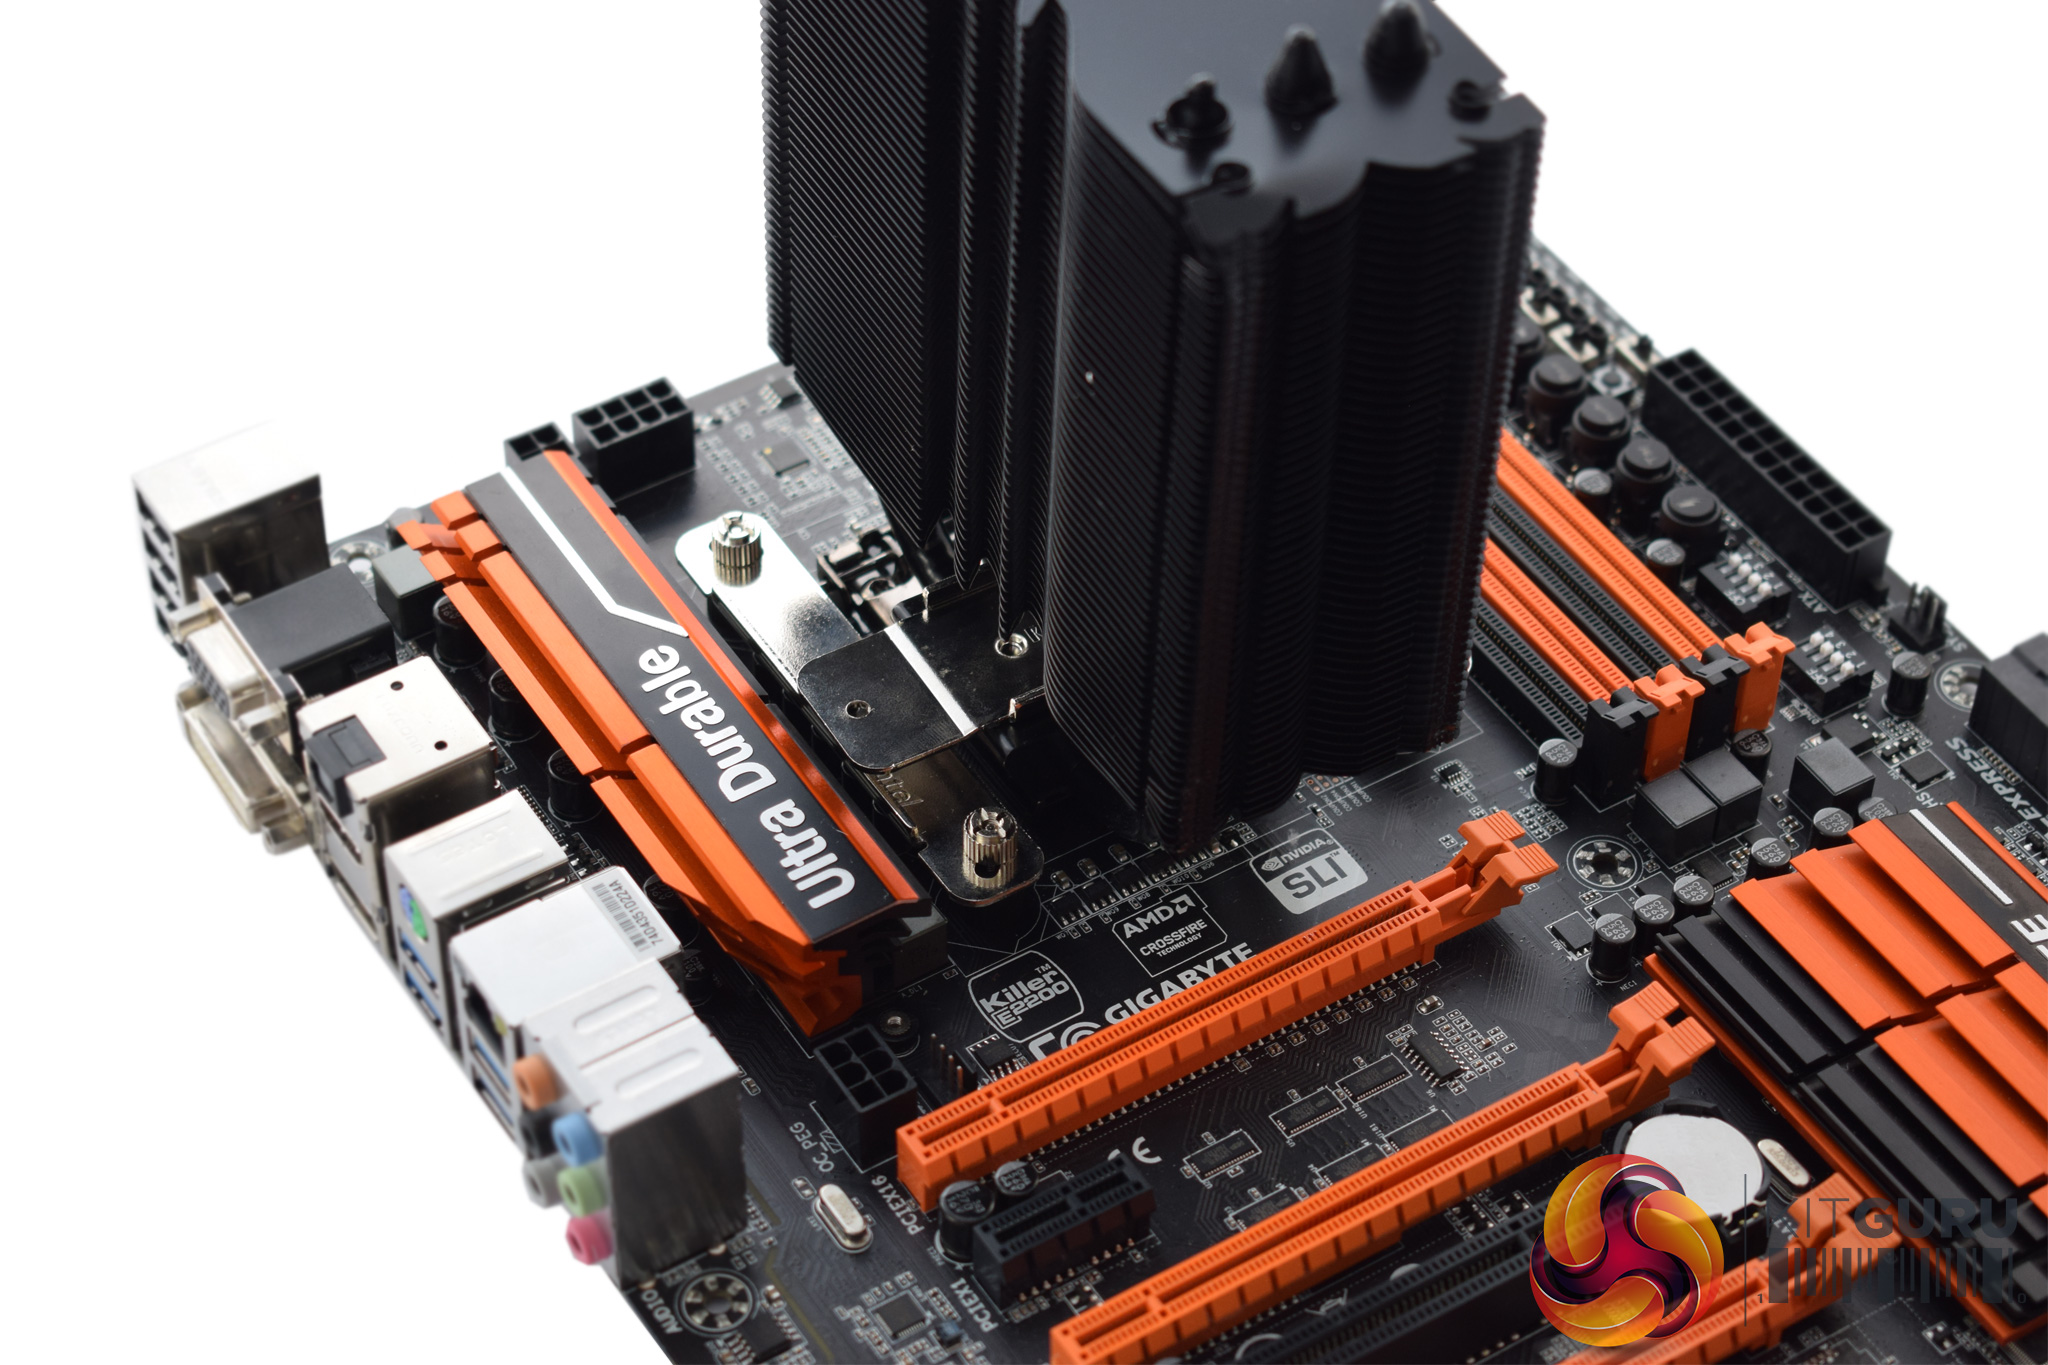
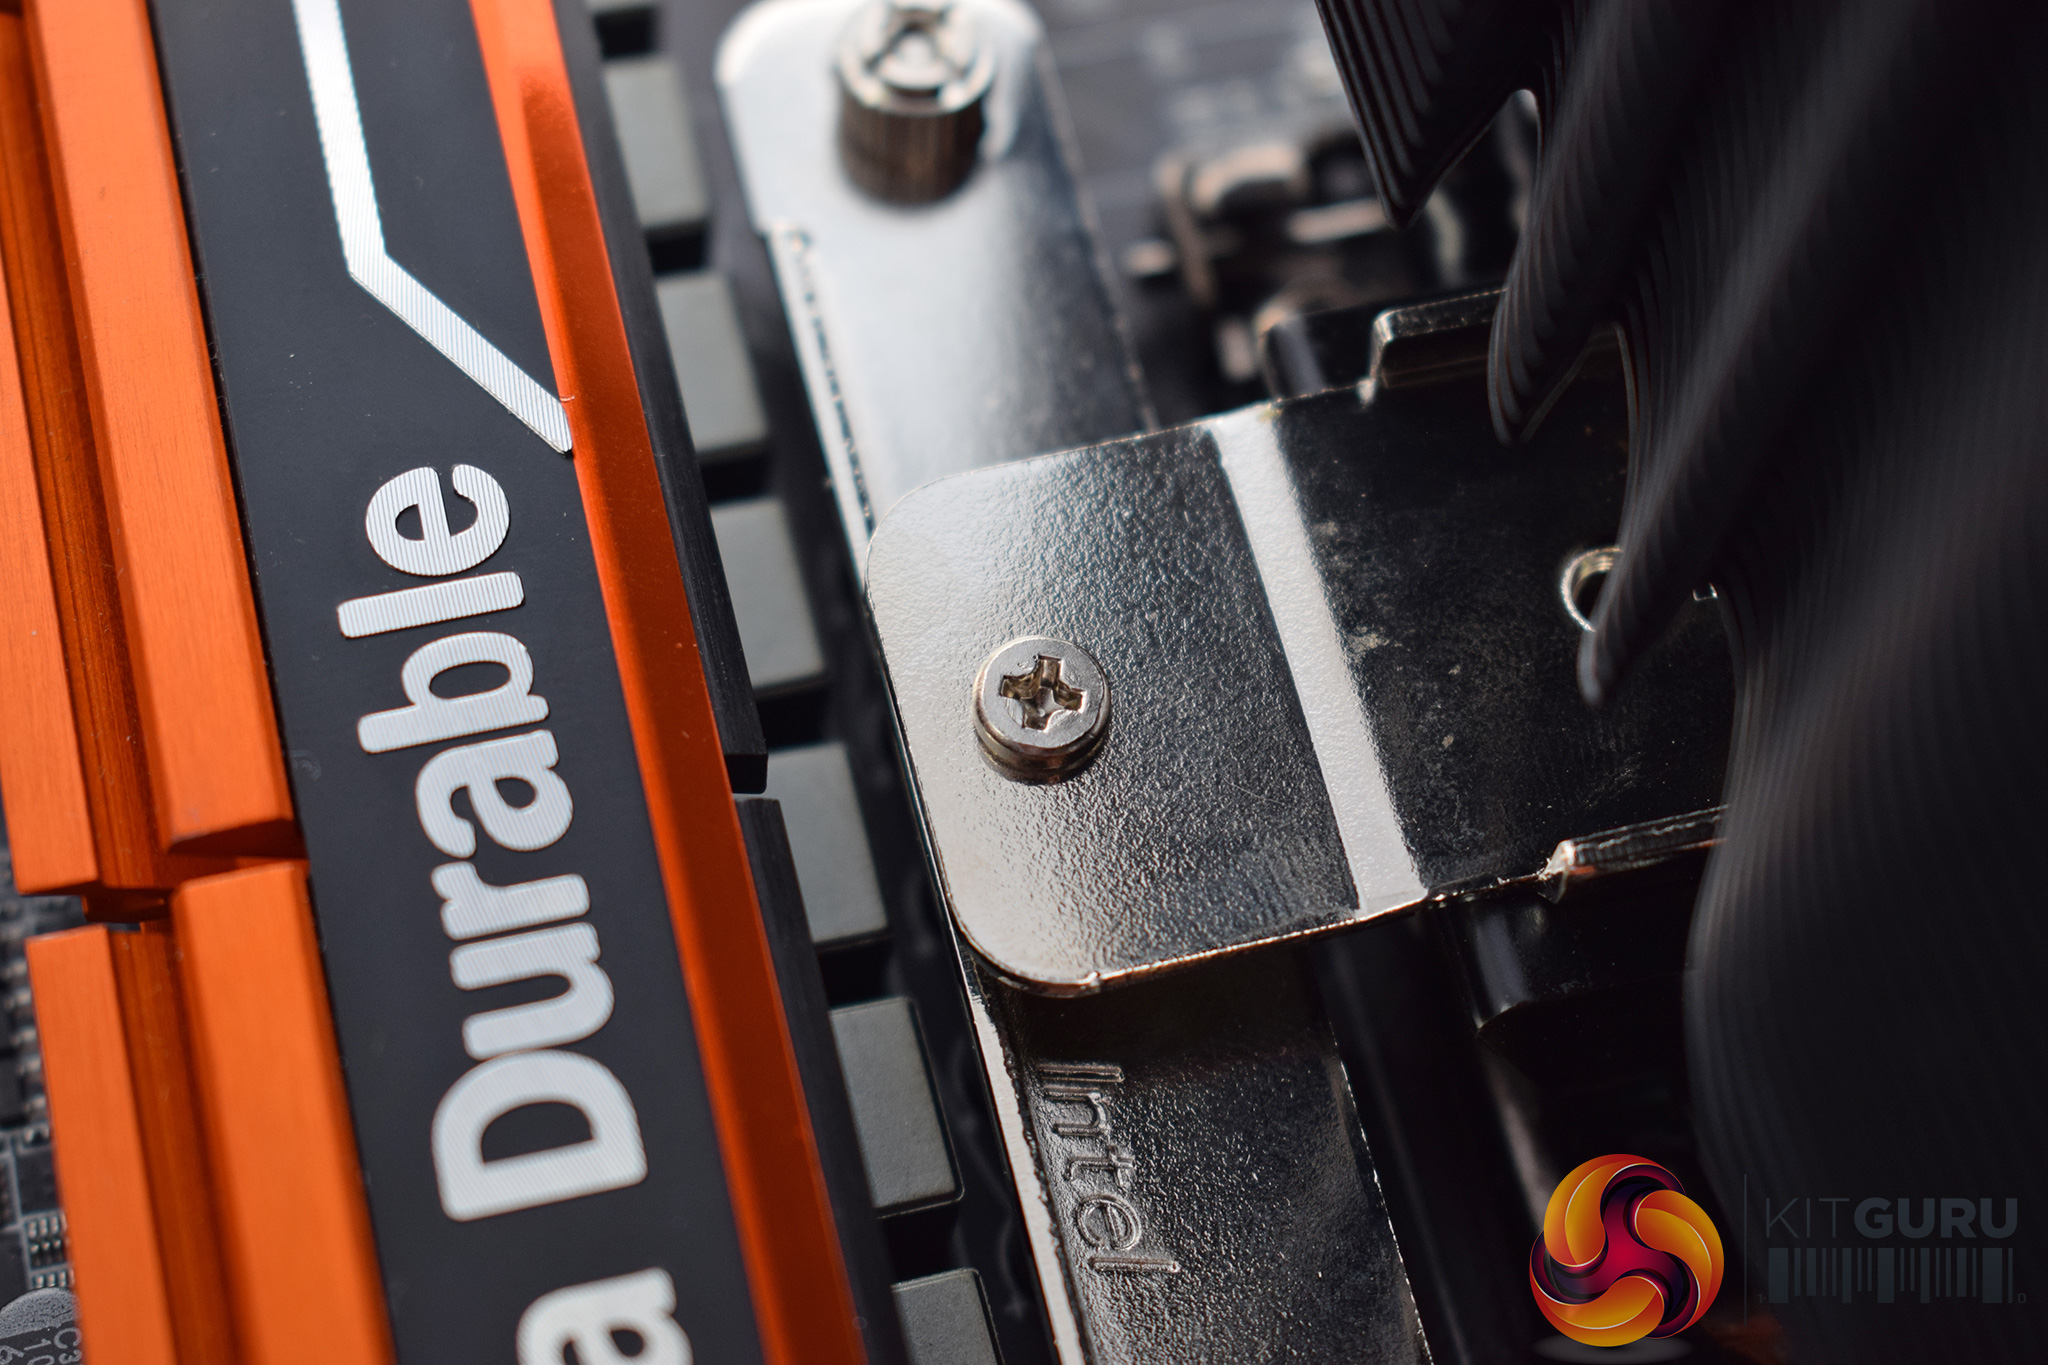
After applying thermal paste, the cooler can then be mounted. The small metal mounting plate has holes either side which should align with the holes on the rails. Simply screw that plate to the rails to secure the heatsink.
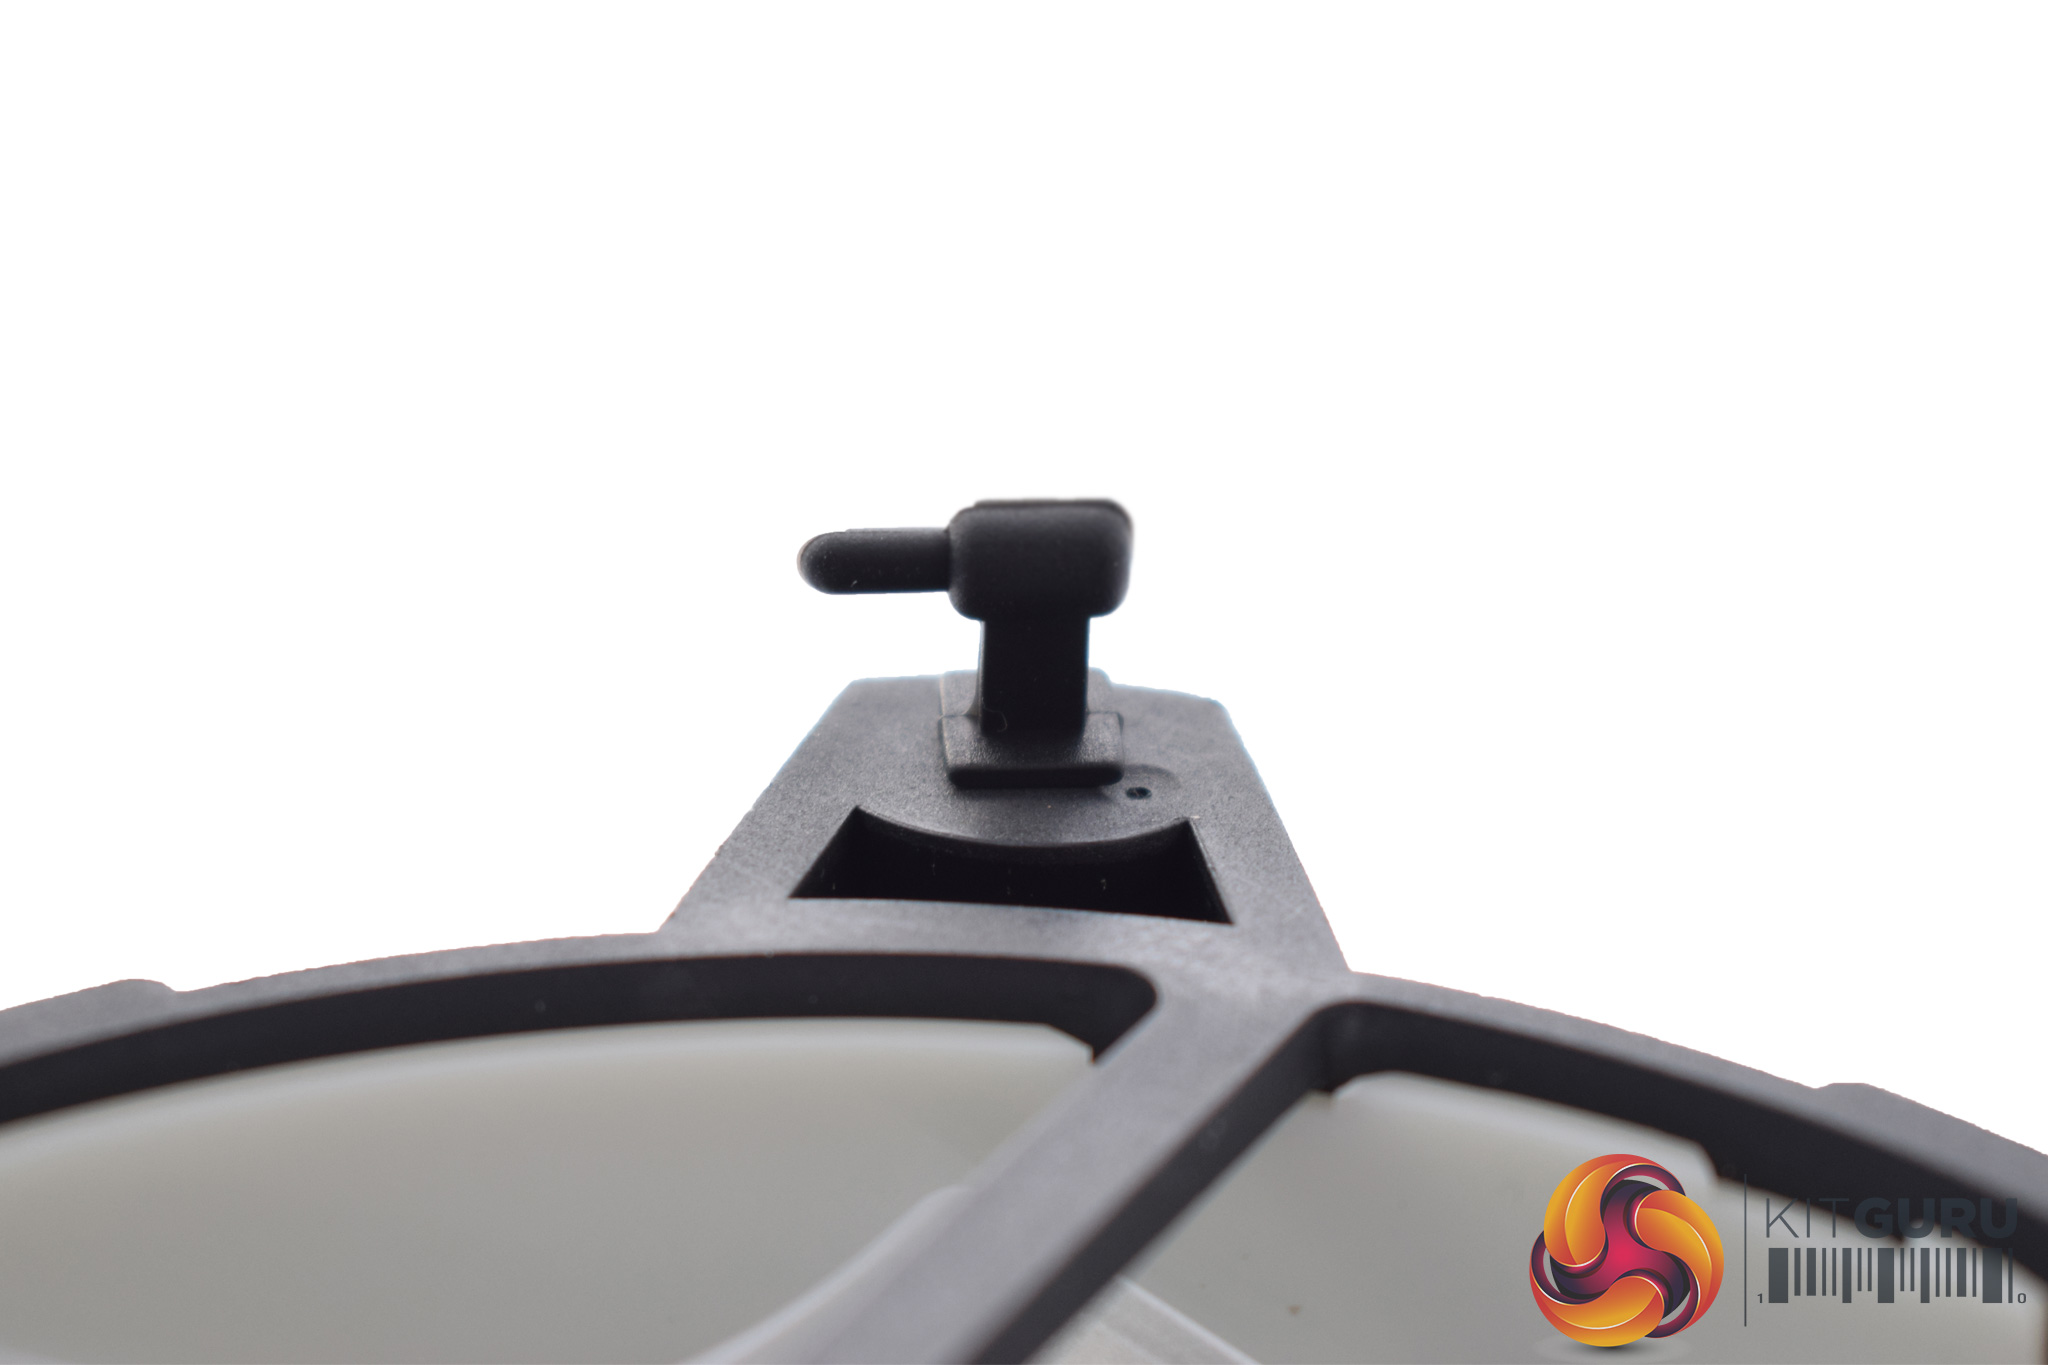
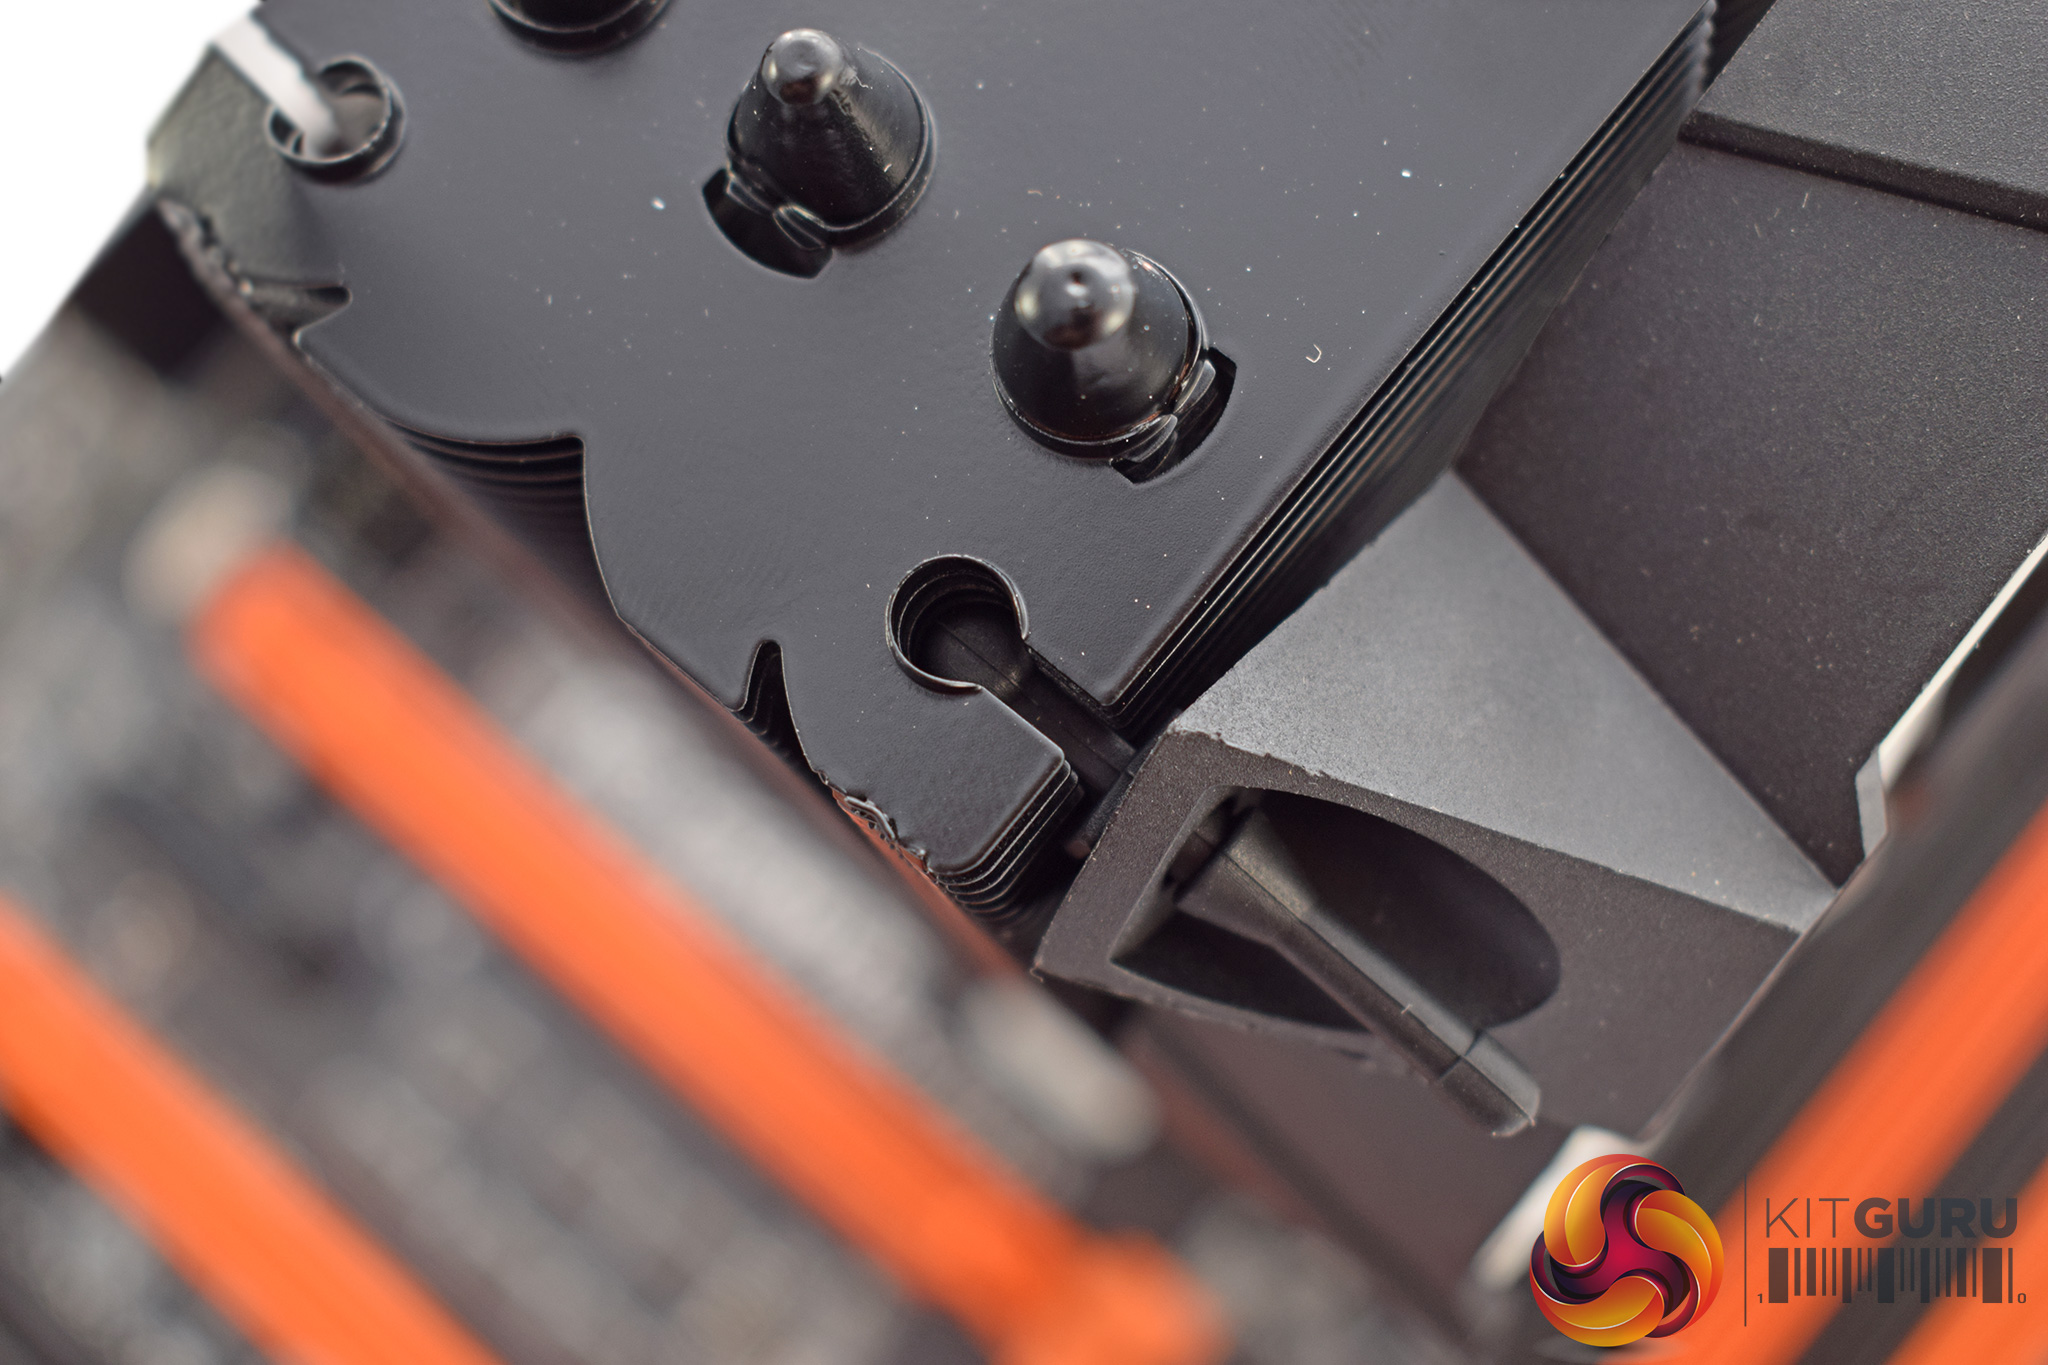
Attaching the fan is interesting as Raijintek has implemented a unique way of doing this, using a set of rubber anti-vibration tabs. These need to be passed though the underside of the fan, and then looped through the appropriate cut-outs on the top and bottom of the heatsink (as above).
Once that is done, the installation process is complete. It is not too tricky but, as I mentioned above, Raijintek really needs to look at how the backplate screws stay in place.
Turning the system on, we also get a look at the white LED fan – the 8 LEDs positioned centrally are strong and clear, while they are also quite ‘white', so Raijintek has done well here.To test all CPU coolers, we devised an easily repeatable test with no variables other than the coolers themselves. This ensures that figures from every cooler we test are comparable with each other.
Test rig
Using an open-air test bench, we deploy an Intel Core i7-4790K plugged into a Gigabyte Z97X-SOC Force motherboard. Alongside this is 16GB of 2400MHz Corsair Vengeance DDR3, as well as a 120GB OCZ Trion 150 SSD. Powering everything is a Corsair RM750x PSU.
The test process
Testing coolers involves taking a total of 4 temperature readings per cooler. First, we measure the idle temperature of the i7-4790K at stock speeds (turbo boost disabled), before measuring its temperature under load at stock speeds. Next, we overclock the CPU to 4.5GHz using a 1.3 Vcore, ensuring greater heat output. In its overclocked state we then measure the idle and load temperatures of the CPU again. The figures we present are temperature deltas – meaning we take each temperature reading and minus the ambient temperature from it. This allows us to test in an environment that is not temperature-controlled.
To ward off potential comments or questions, we know 4.5GHz using a 1.3 Vcore is not the ‘best’ overclock – this particular CPU could reach that frequency at closer to 1.25 on the Vcore, which is more efficient. That is not the point, however. We are trying to stress the coolers to see how they deal with excess heat … hence the higher than necessary Vcore.
Where possible, each cooler’s fans are plugged directly into the motherboard using the CPU_Fan or CPU_Opt headers. Some AIOs, however, ship with their own fan controllers or PWM hubs. If we are unable to plug the fans directly into the motherboard, it is specified in the performance section of the review.
An idle reading comes from leaving Windows on the desktop for 15 minutes. A load reading comes from running Prime95’s (version 26.6) Small FFTs test for 15 minutes – enough time for temperatures to plateau.
Noise output
Unfortunately I am unable to properly measure the sound output of CPU coolers using a digital sound meter. This is because I am based alongside a busy road (with high ambient noise levels). Using a sound meter is, as such, not possible as there are variables out of my control. However, I will try my best to subjectively describe the noise output in a helpful manner.Temperatures
All temperature charts are sorted with lowest load temperatures at the top.
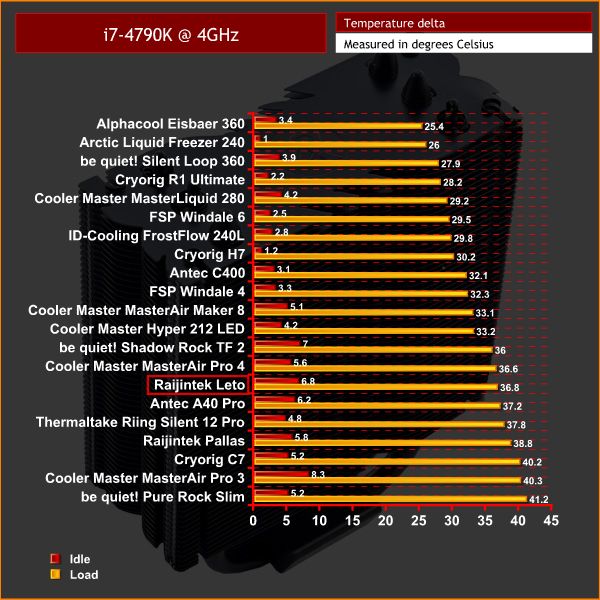
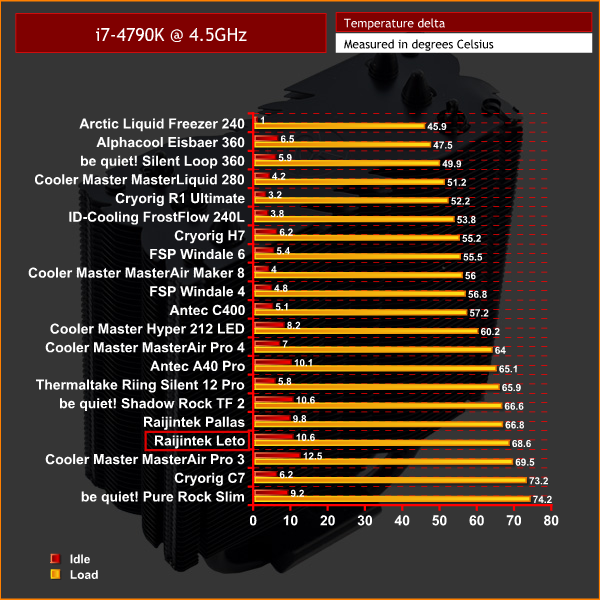
As you can see, the Leto's relative performance is best when tested with the CPU at stock clocks. Here it performed almost identically to the bigger Cooler Master MasterAir Pro 4, despite that cooler having an extra heatpipe as well. For the money, the Leto's stock-clocked performance is quite impressive.
However, things take a slight dive once the CPU is overclocked. Incidentally, the delta T of 68.6 degrees was recorded with an ambient of 24.4 degrees Celsius, so the real-word CPU temperature was well into the 90s and very close to TJMax.
Acoustics
At least part of the Leto's lacking performance (with the CPU overclocked) can be explained by acoustics – its fan is very quiet even with the CPU stressed to the limit, something I was very surprised by. In-fact, I would go as far to say this is one of the quietest air coolers I've tested, coming in just behind the Scythe Mugen 5 PCGH Edition. With the CPU idling, or even dealing with some basic tasks, I could not hear the fan spin at all.For a budget air cooler, the Raijintek Leto definitely has its fair share of both positive and negative features.
I'll start with the installation, and this is one area that absolutely needs work. In particular, Raijintek really needs to implement some way of locking the backplate screws in-place, preventing them from slipping out as soon as you turn the motherboard over.
I do like the black aesthetic, though, and this is complemented nicely by the white LED fan. There are also blue and red LED fan options available so the choice is yours.

Performance is mixed, with the relative performance being much better with the CPU left at stock clocks. Once we overclocked the chip to 4.5GHz, with 1.3Vcore, temperatures soared into the mid-90s which is far from ideal.
That said, the Leto has the advantage of a supremely quiet fan, so if you value silence then this will definitely appeal. Just be aware this comes at the cost of thermal performance.
All things considered, then, whether or not you should buy the Raijintek Leto depends on how you will use it – it would be perfect for someone with a multiplier-locked processor looking for a quiet-yet-good-looking cooler to do the job with minimal fuss. However, if you want to squeeze every last Megahertz from your chip without breaking the bank, you would be best served by the Cryorig H7.
Discuss on our Facebook page, over HERE.

You can buy one from Overclockers UK for £26.99 HERE.
Pros
- Good-looking.
- Very quiet.
- Decent thermal performance with the CPU at stock clocks.
Cons
- Installation process needs improving.
- Thermal performance gets a fair bit worse with an overclocked CPU.
KitGuru says: Despite its flaws, the Raijintek Leto wins our ‘Worth Buying' award thanks to its very quiet fan and admirable stock clocks performance.

Having just bought and installed this cooler on an i5 4570, the black plastic spacers are threaded, so if you put a backplate bolt through, and then put its black spacer on, it stays in place perfectly. I didn’t drop a single screw whilst building.
I was also really impressed with the thermals considering the price and whisper quietness under load. Definitely an amazing cooler that I definitely recommend.