With the likely release of 3rd Generation Threadripper just around the corner, here at KitGuru we thought it would be an ideal opportunity to look at some potential cooling solutions for the new socket TR4 CPUs.
Cooler Master and AMD exclusively collaborated during the design of the Wraith Ripper, so it’s labelled as the official cooler for 2nd generation Threadripper. With a rating of up to 250W TDP, it should be capable of keeping the HEDT Threadripper temperatures under control.
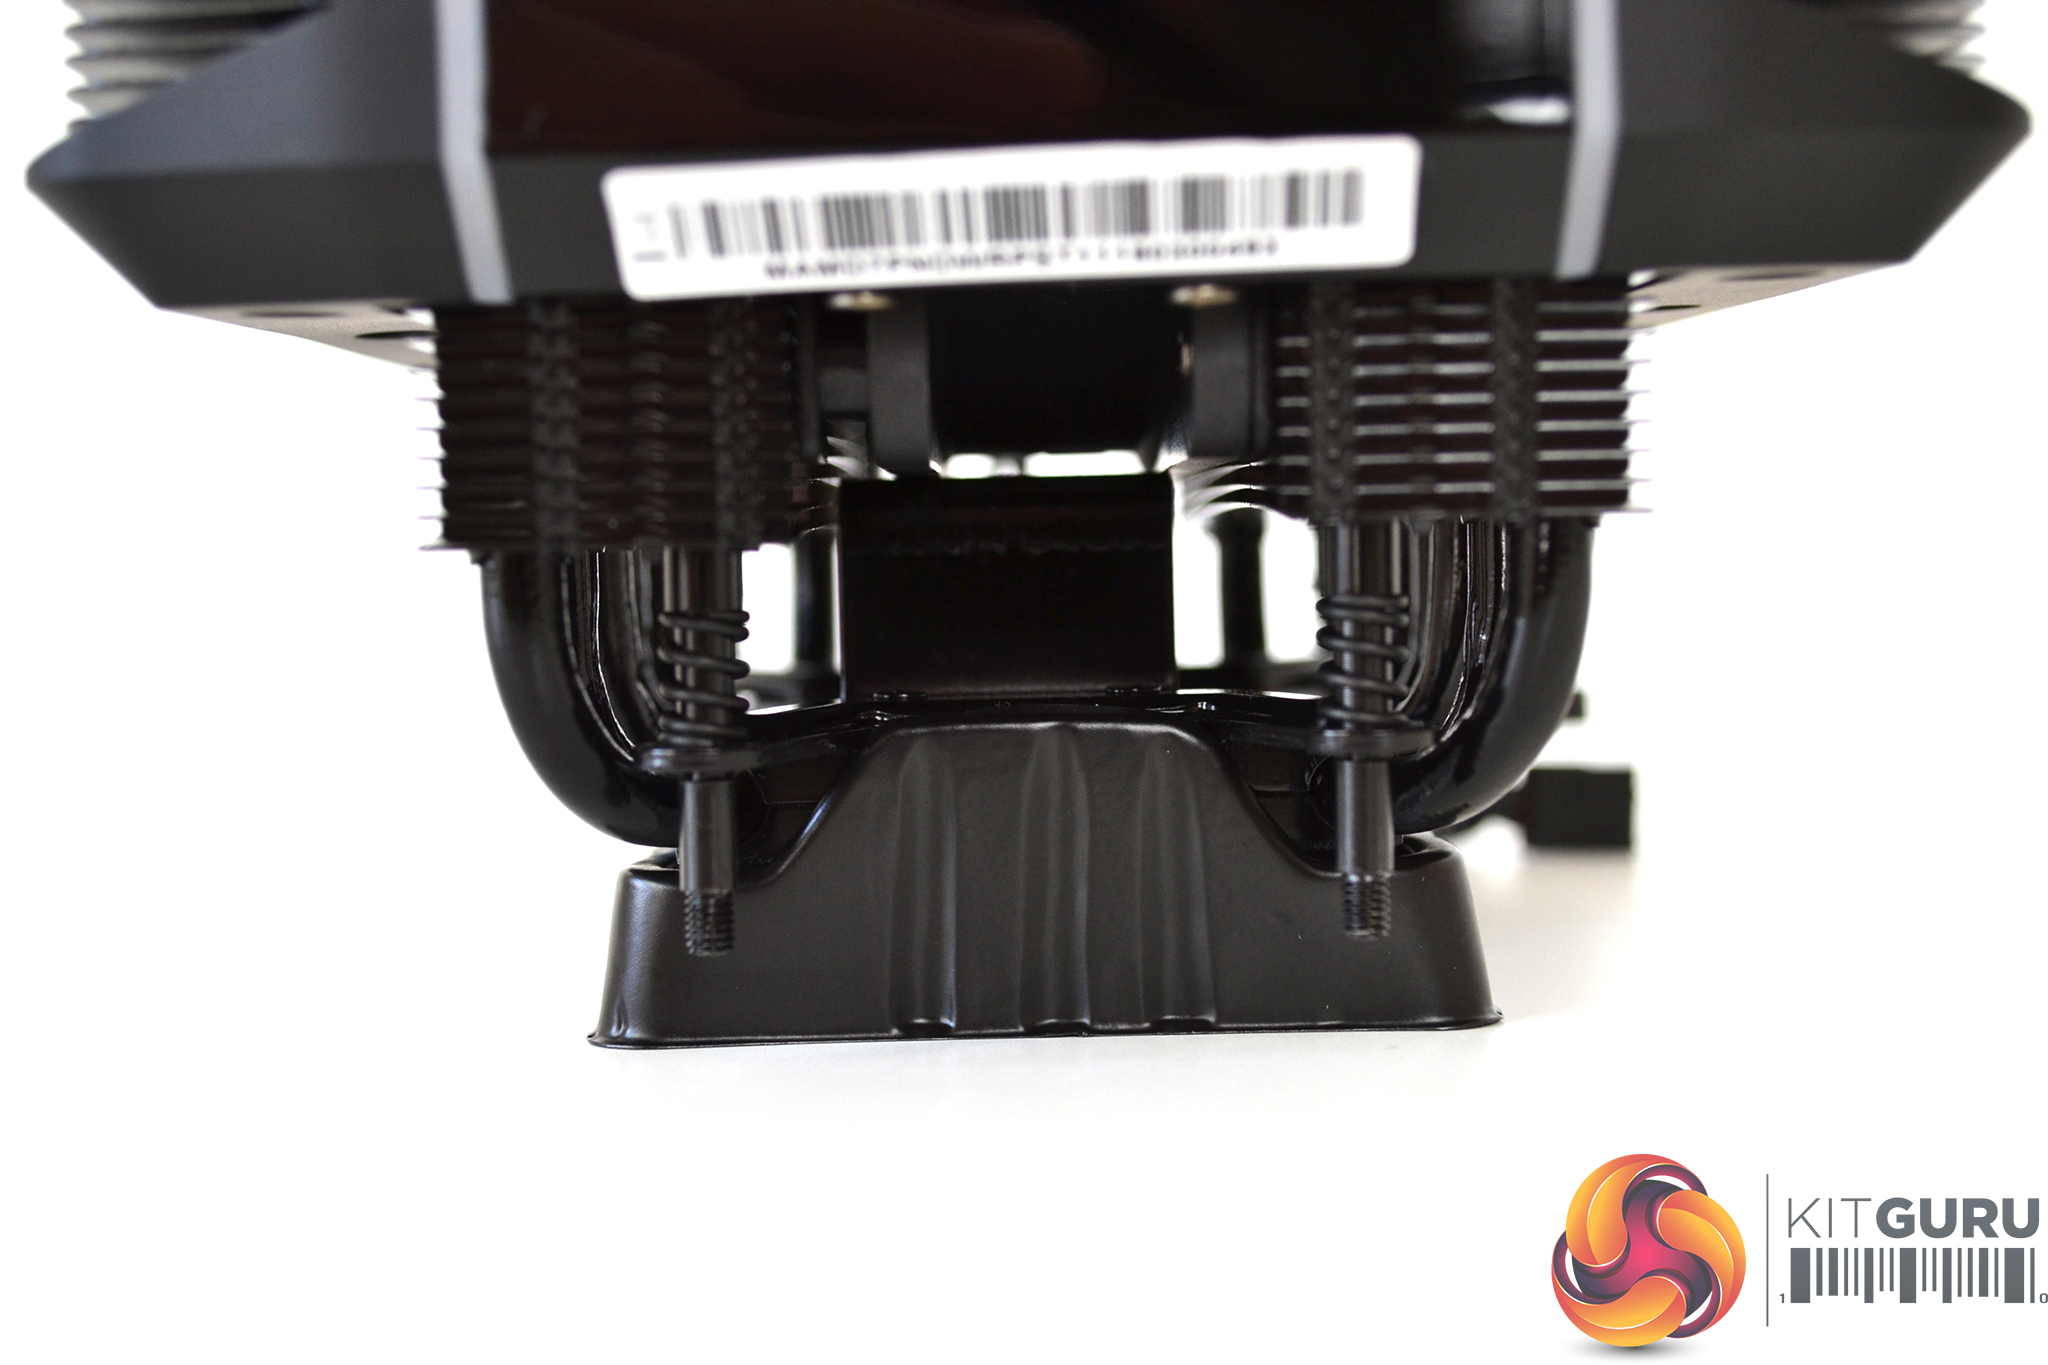
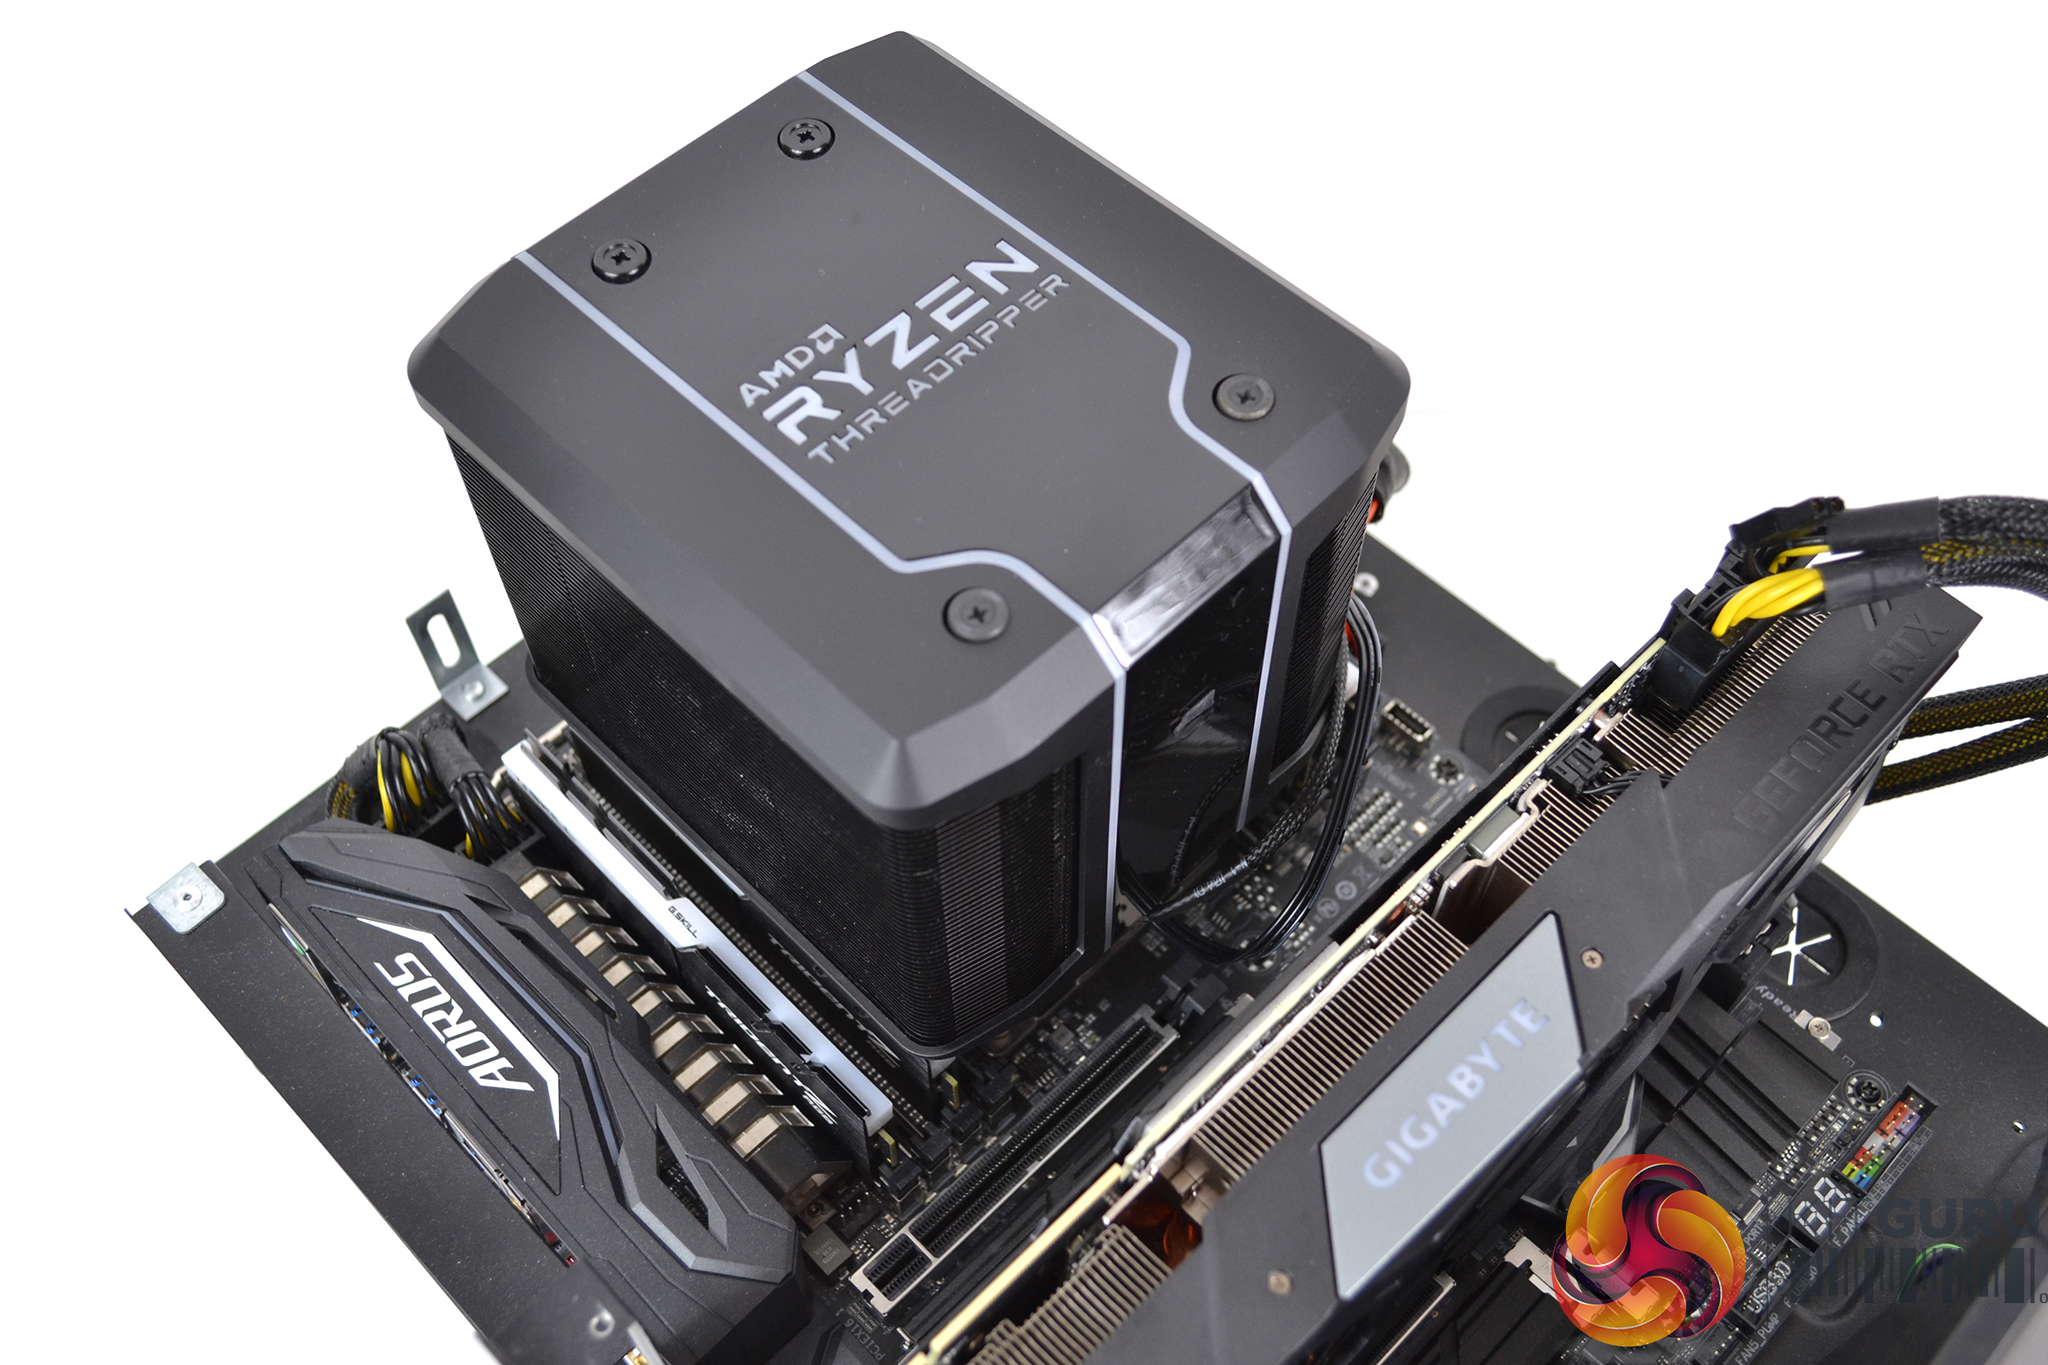
A 44.6mm x 76.4mm heat transfer plate has been implemented into the Wraith Ripper, so unlike some of the AIO solutions adapted for Threadripper, the Wraith Ripper covers the whole IHS which should aid thermal dissipation of the 32 core 64 thread 2990WX monster.
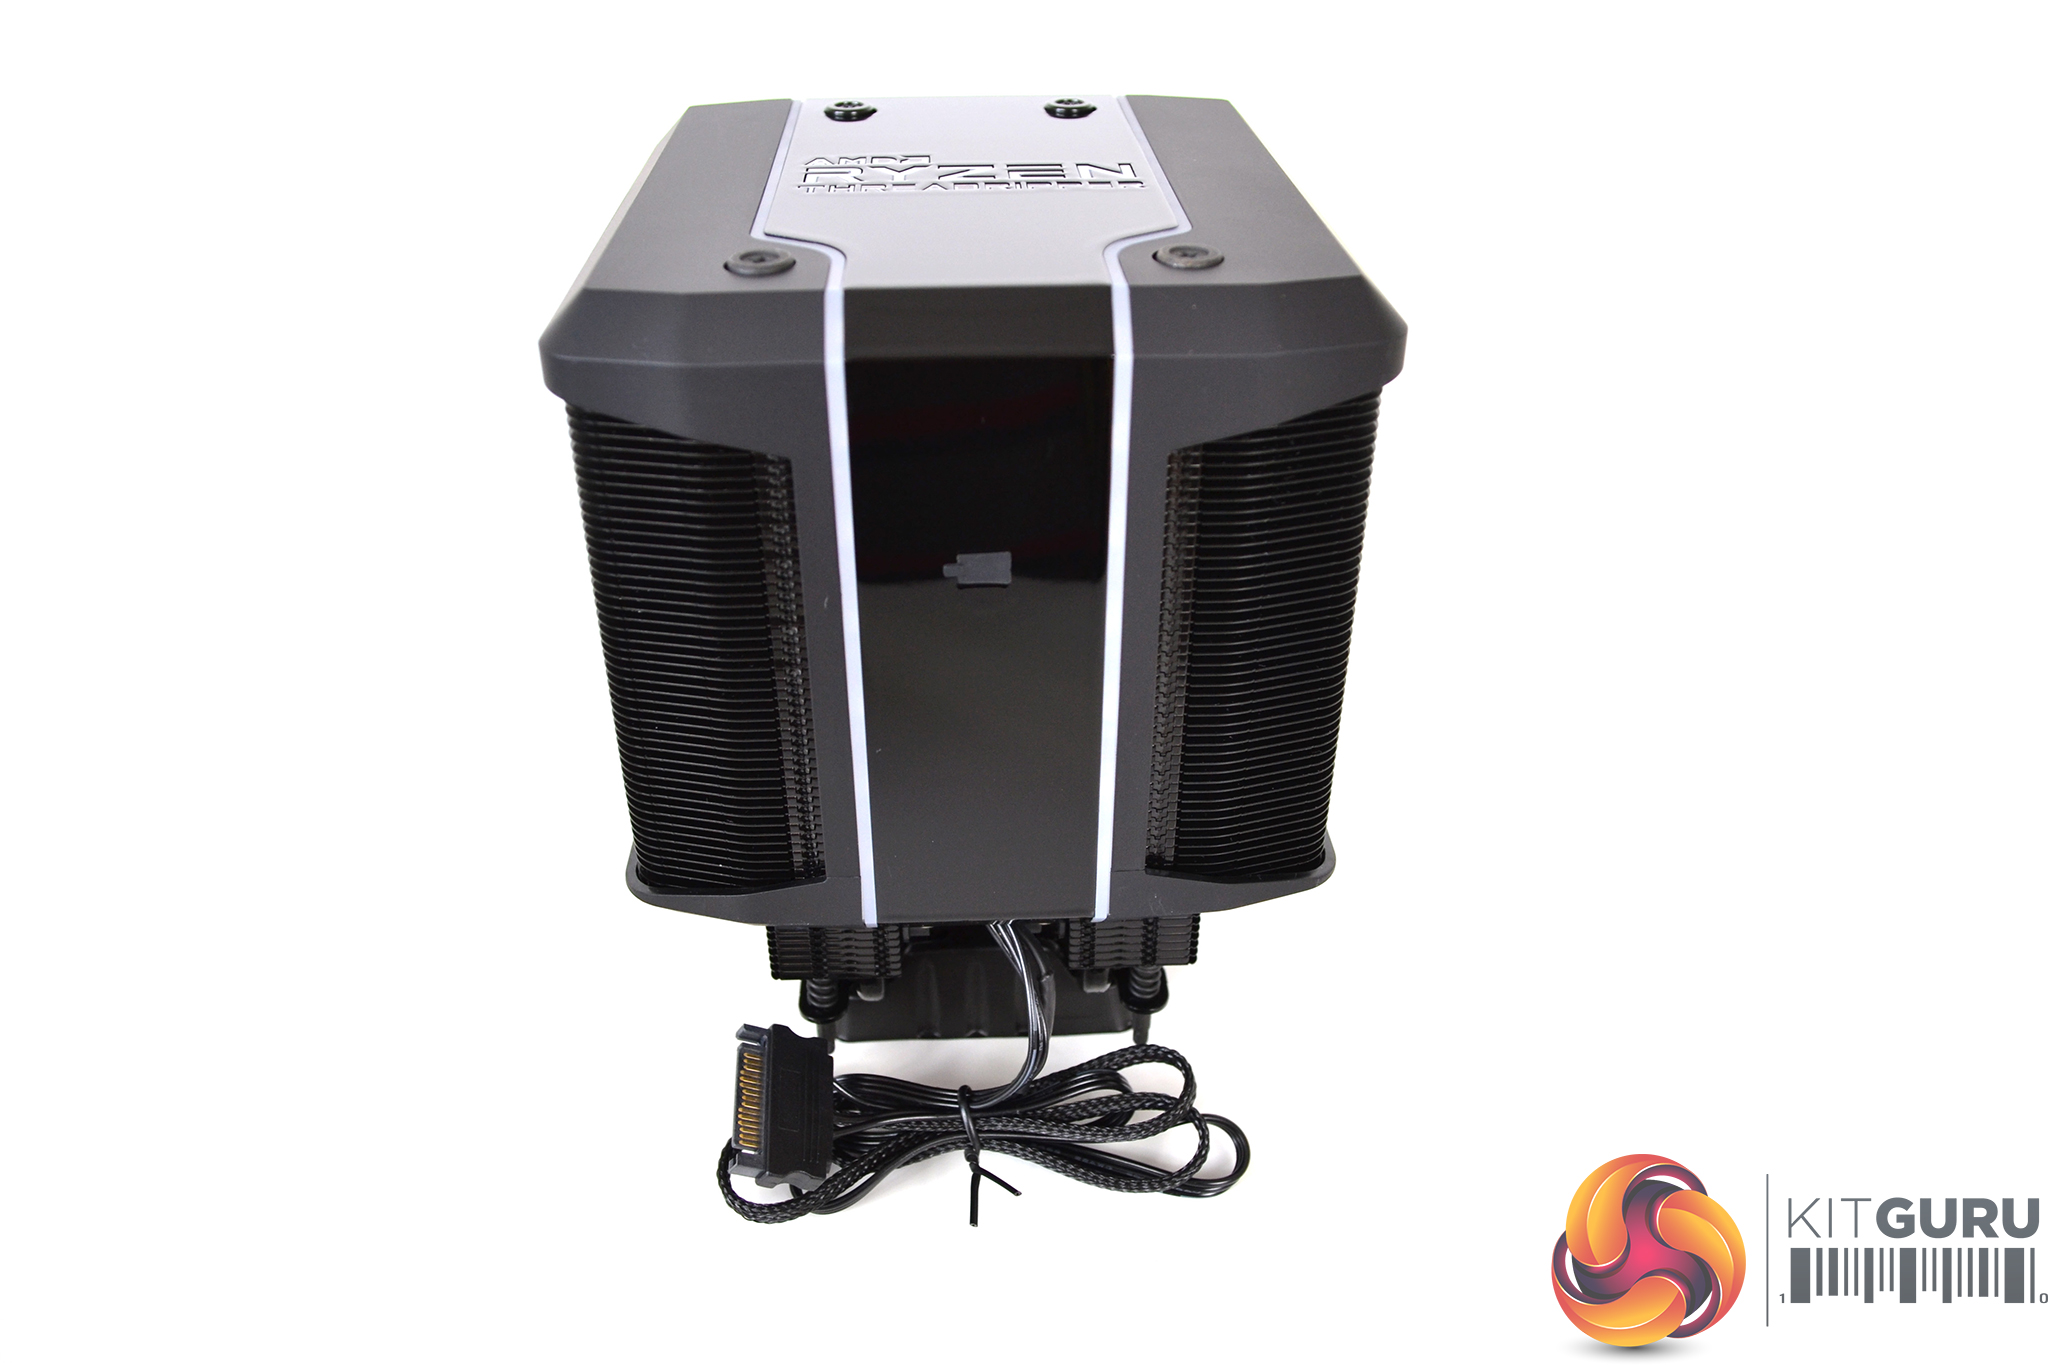
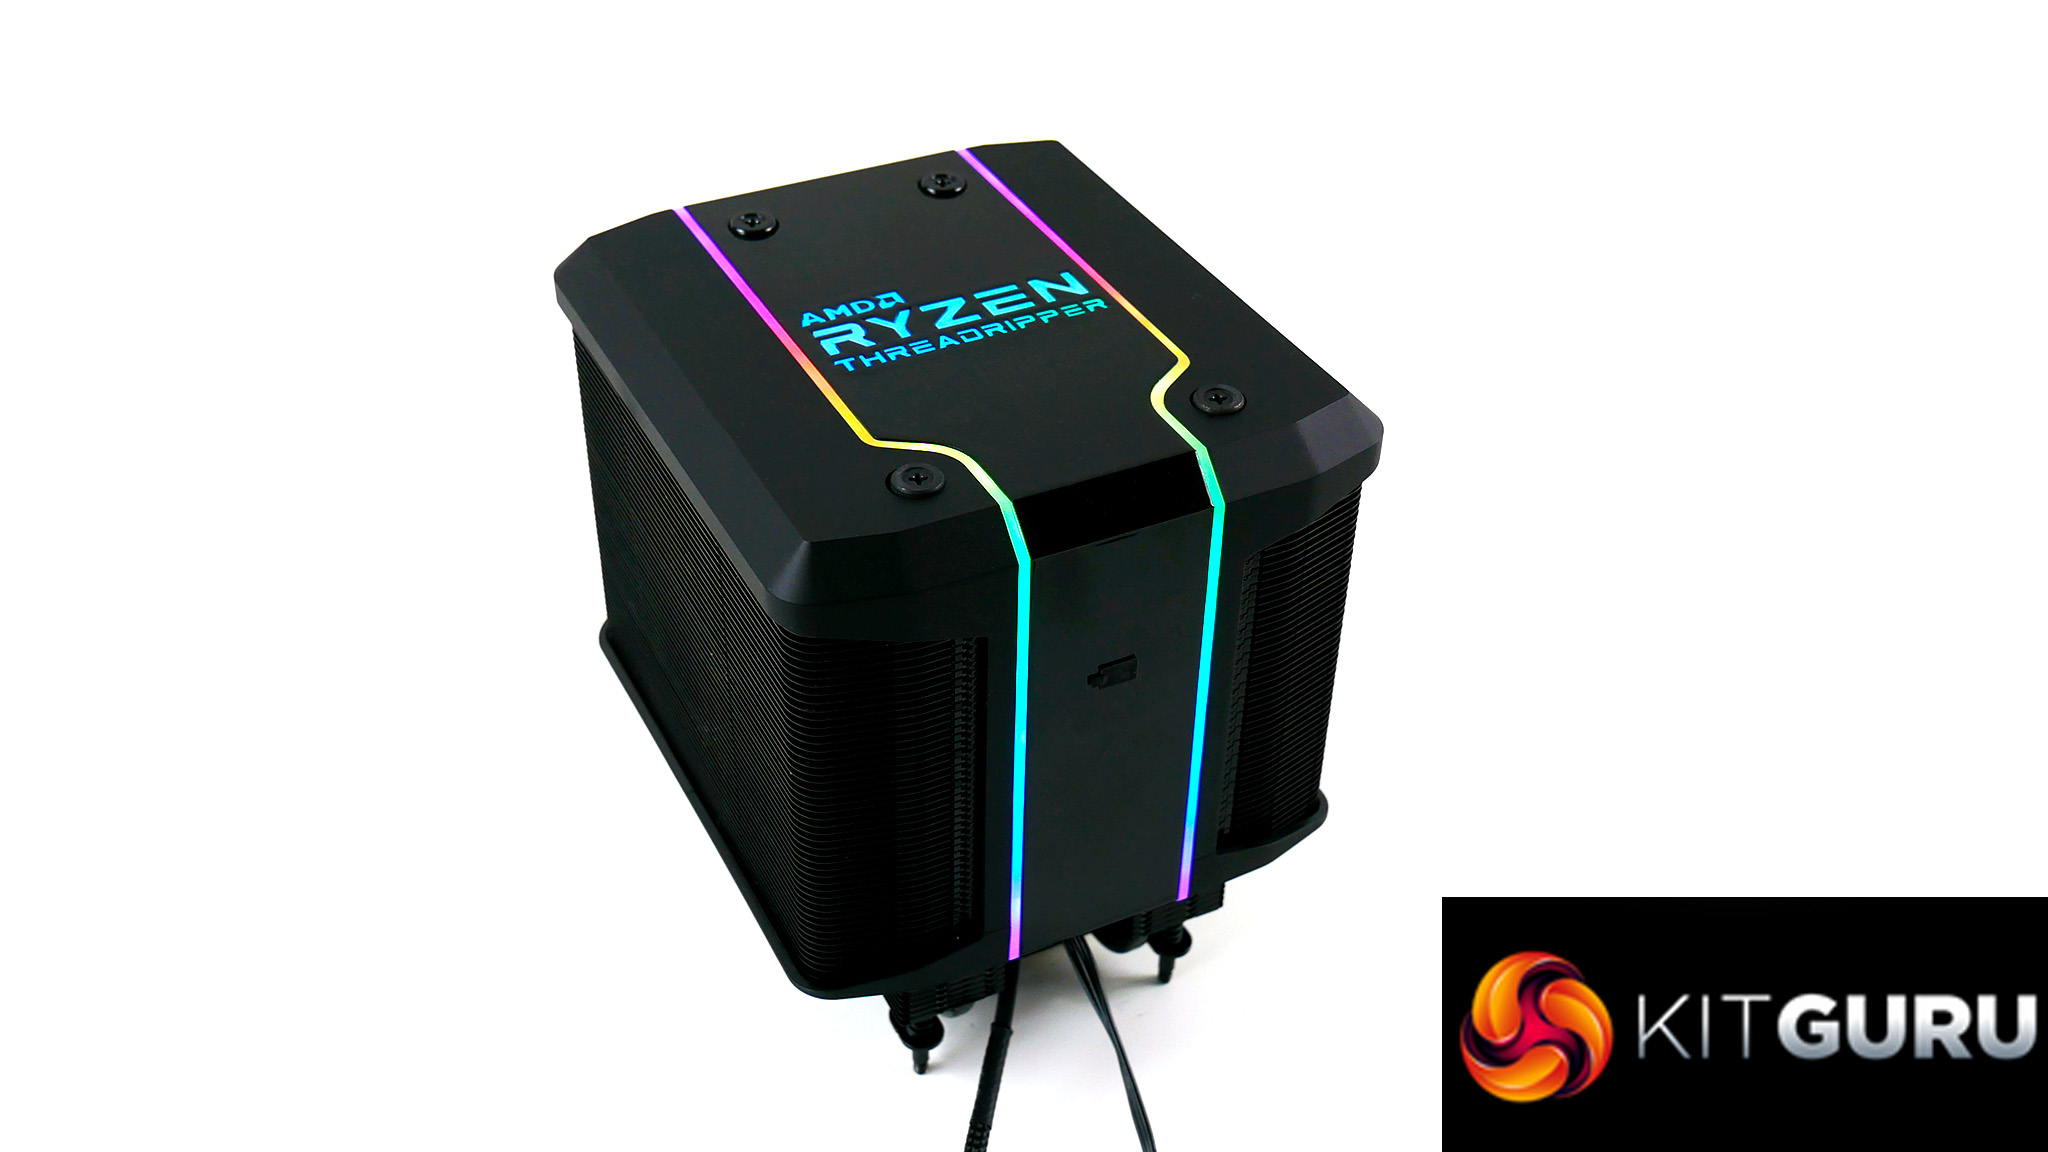
Wraith Ripper is a dual tower design with a large cooling fin surface area. Cooler Master say the black coating enhances radiation cooling performance. A seven heat pipe array is spread out symmetrically, which should spread heat uniformly over the heatsink.
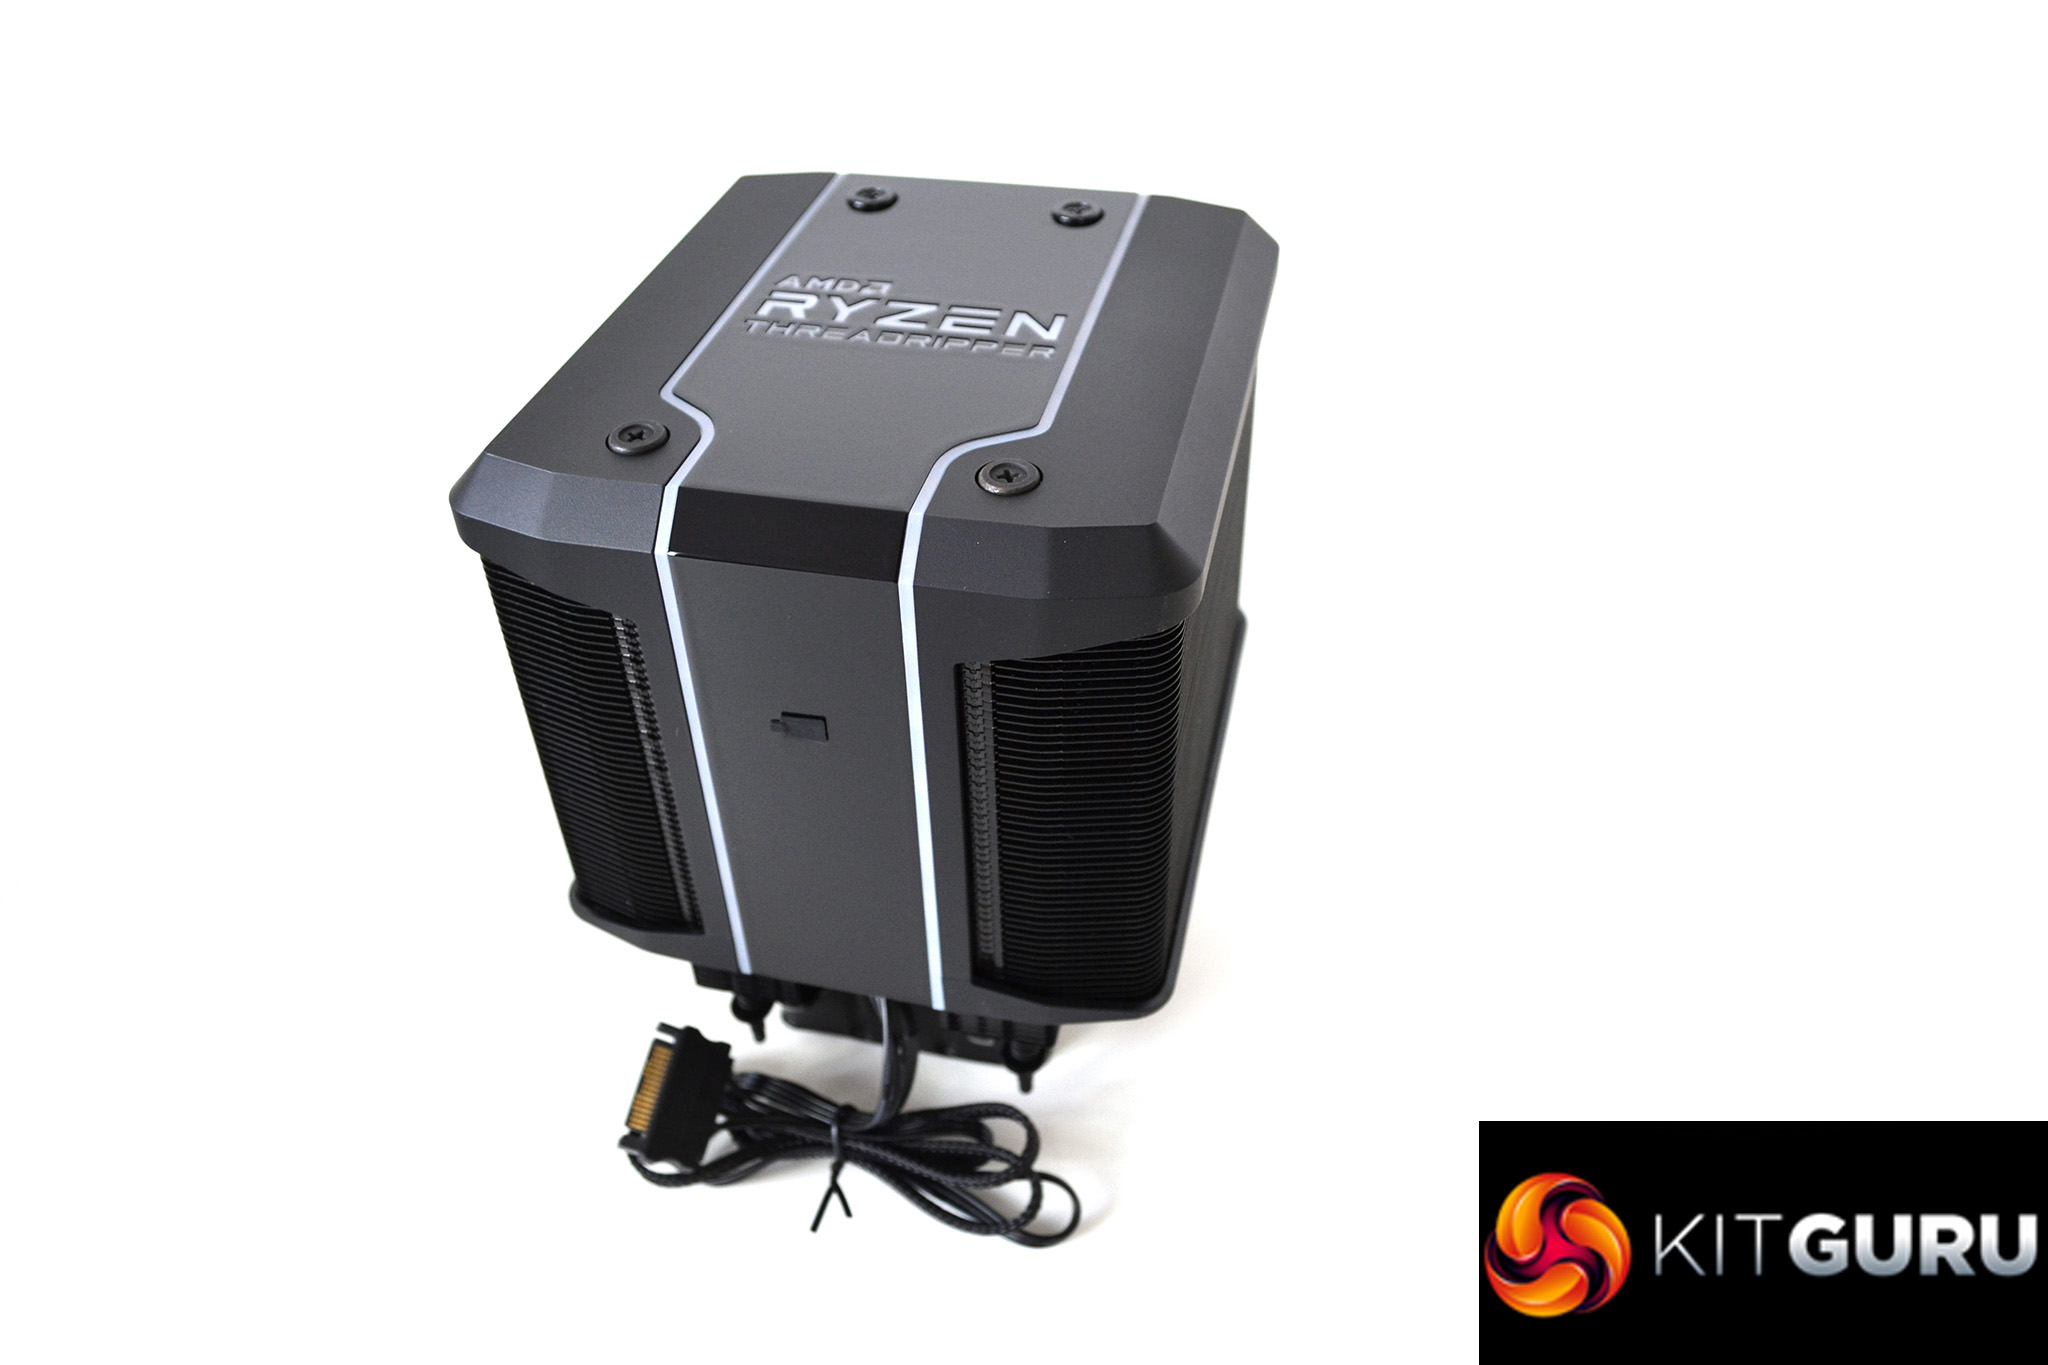
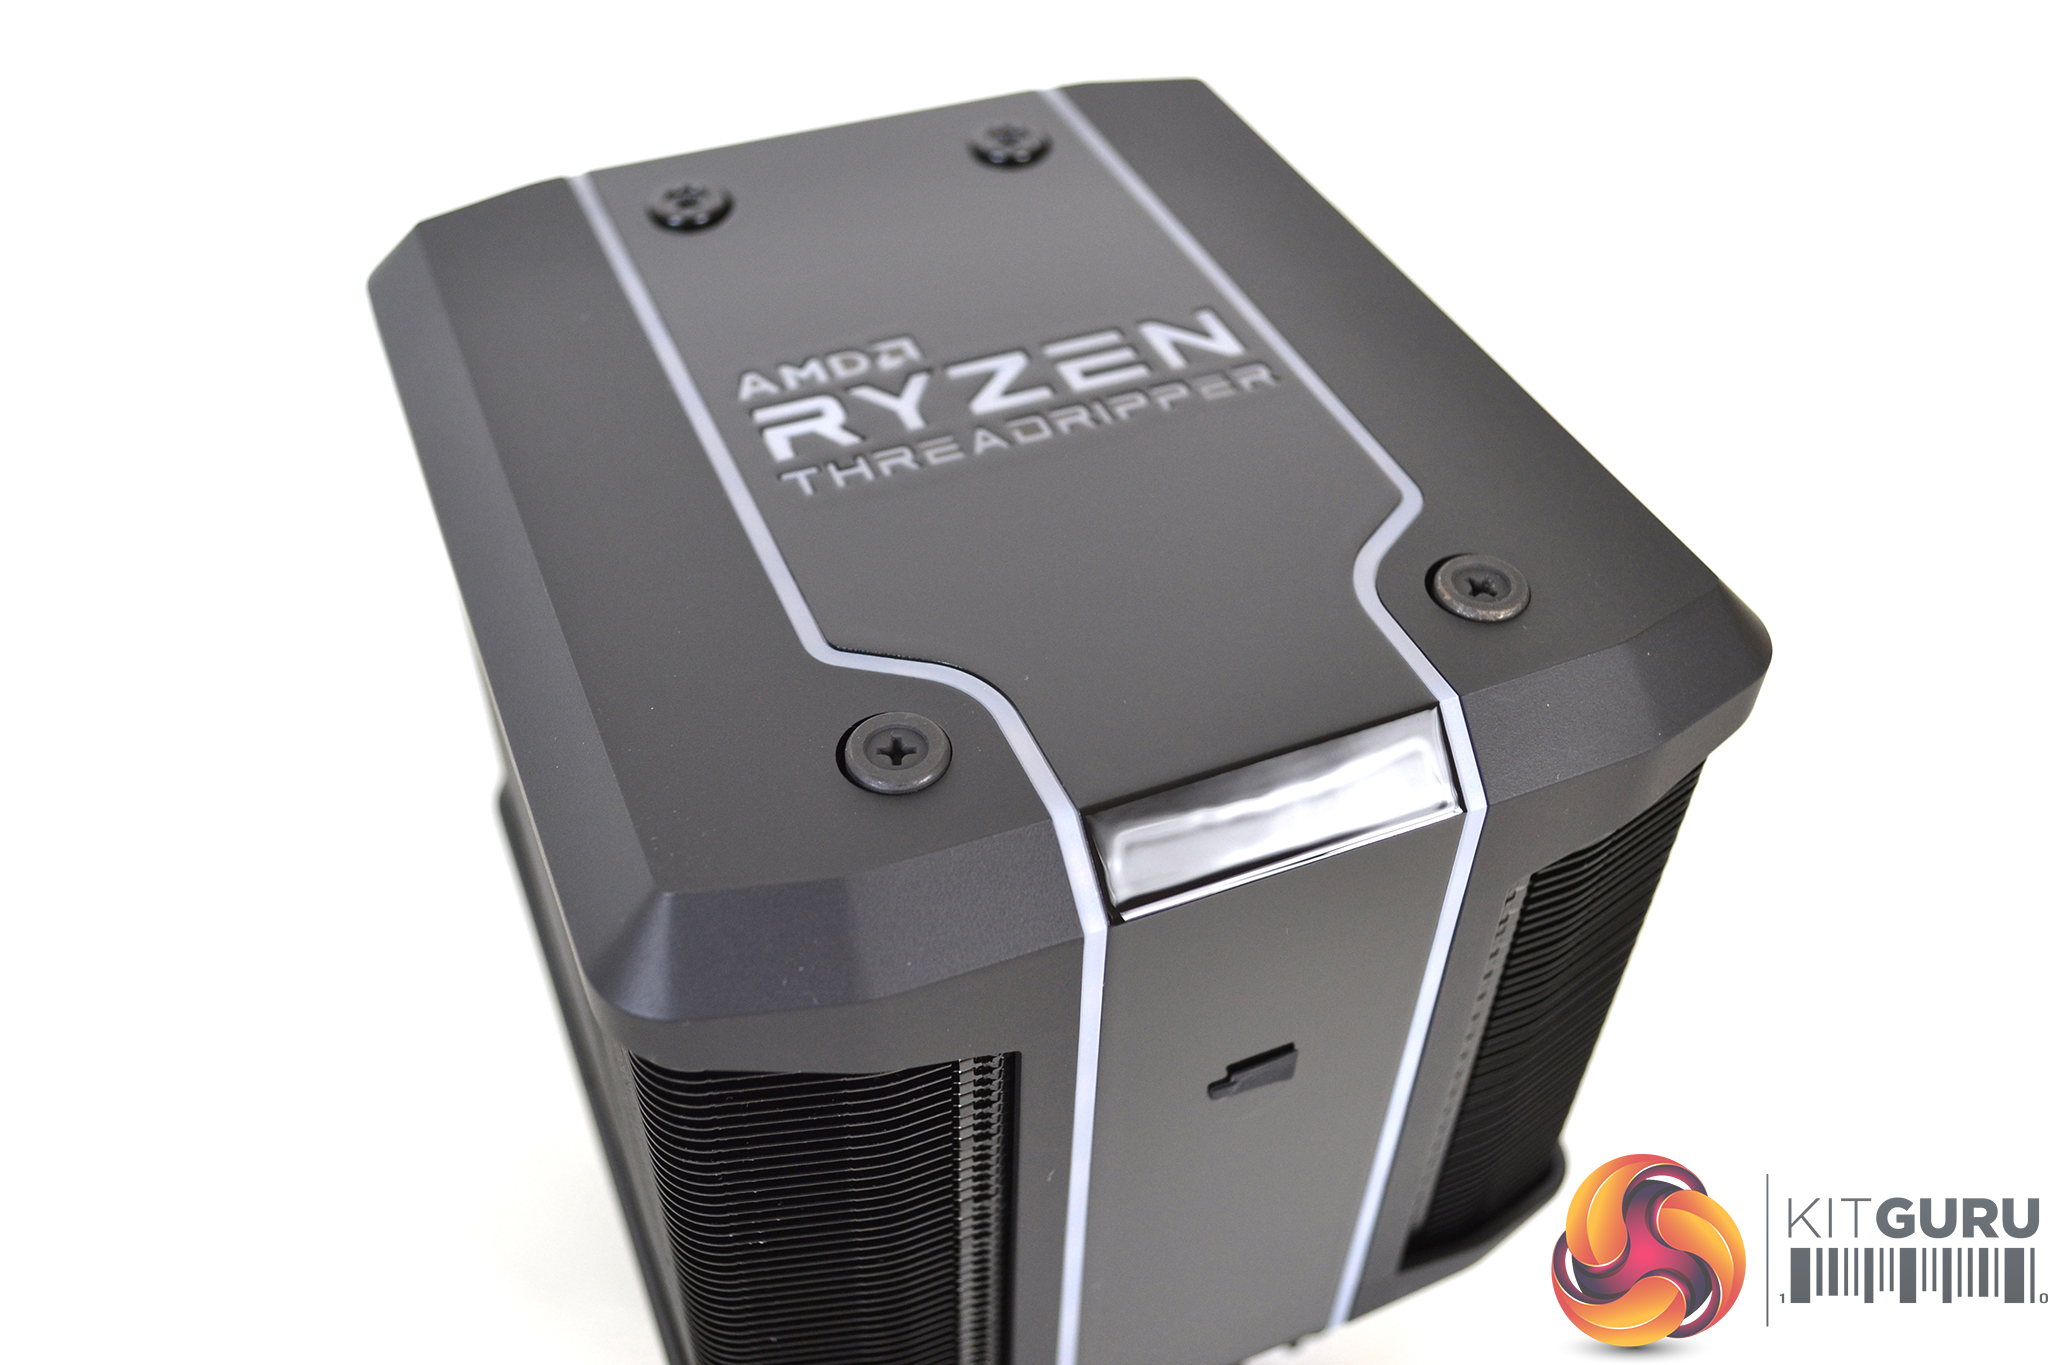
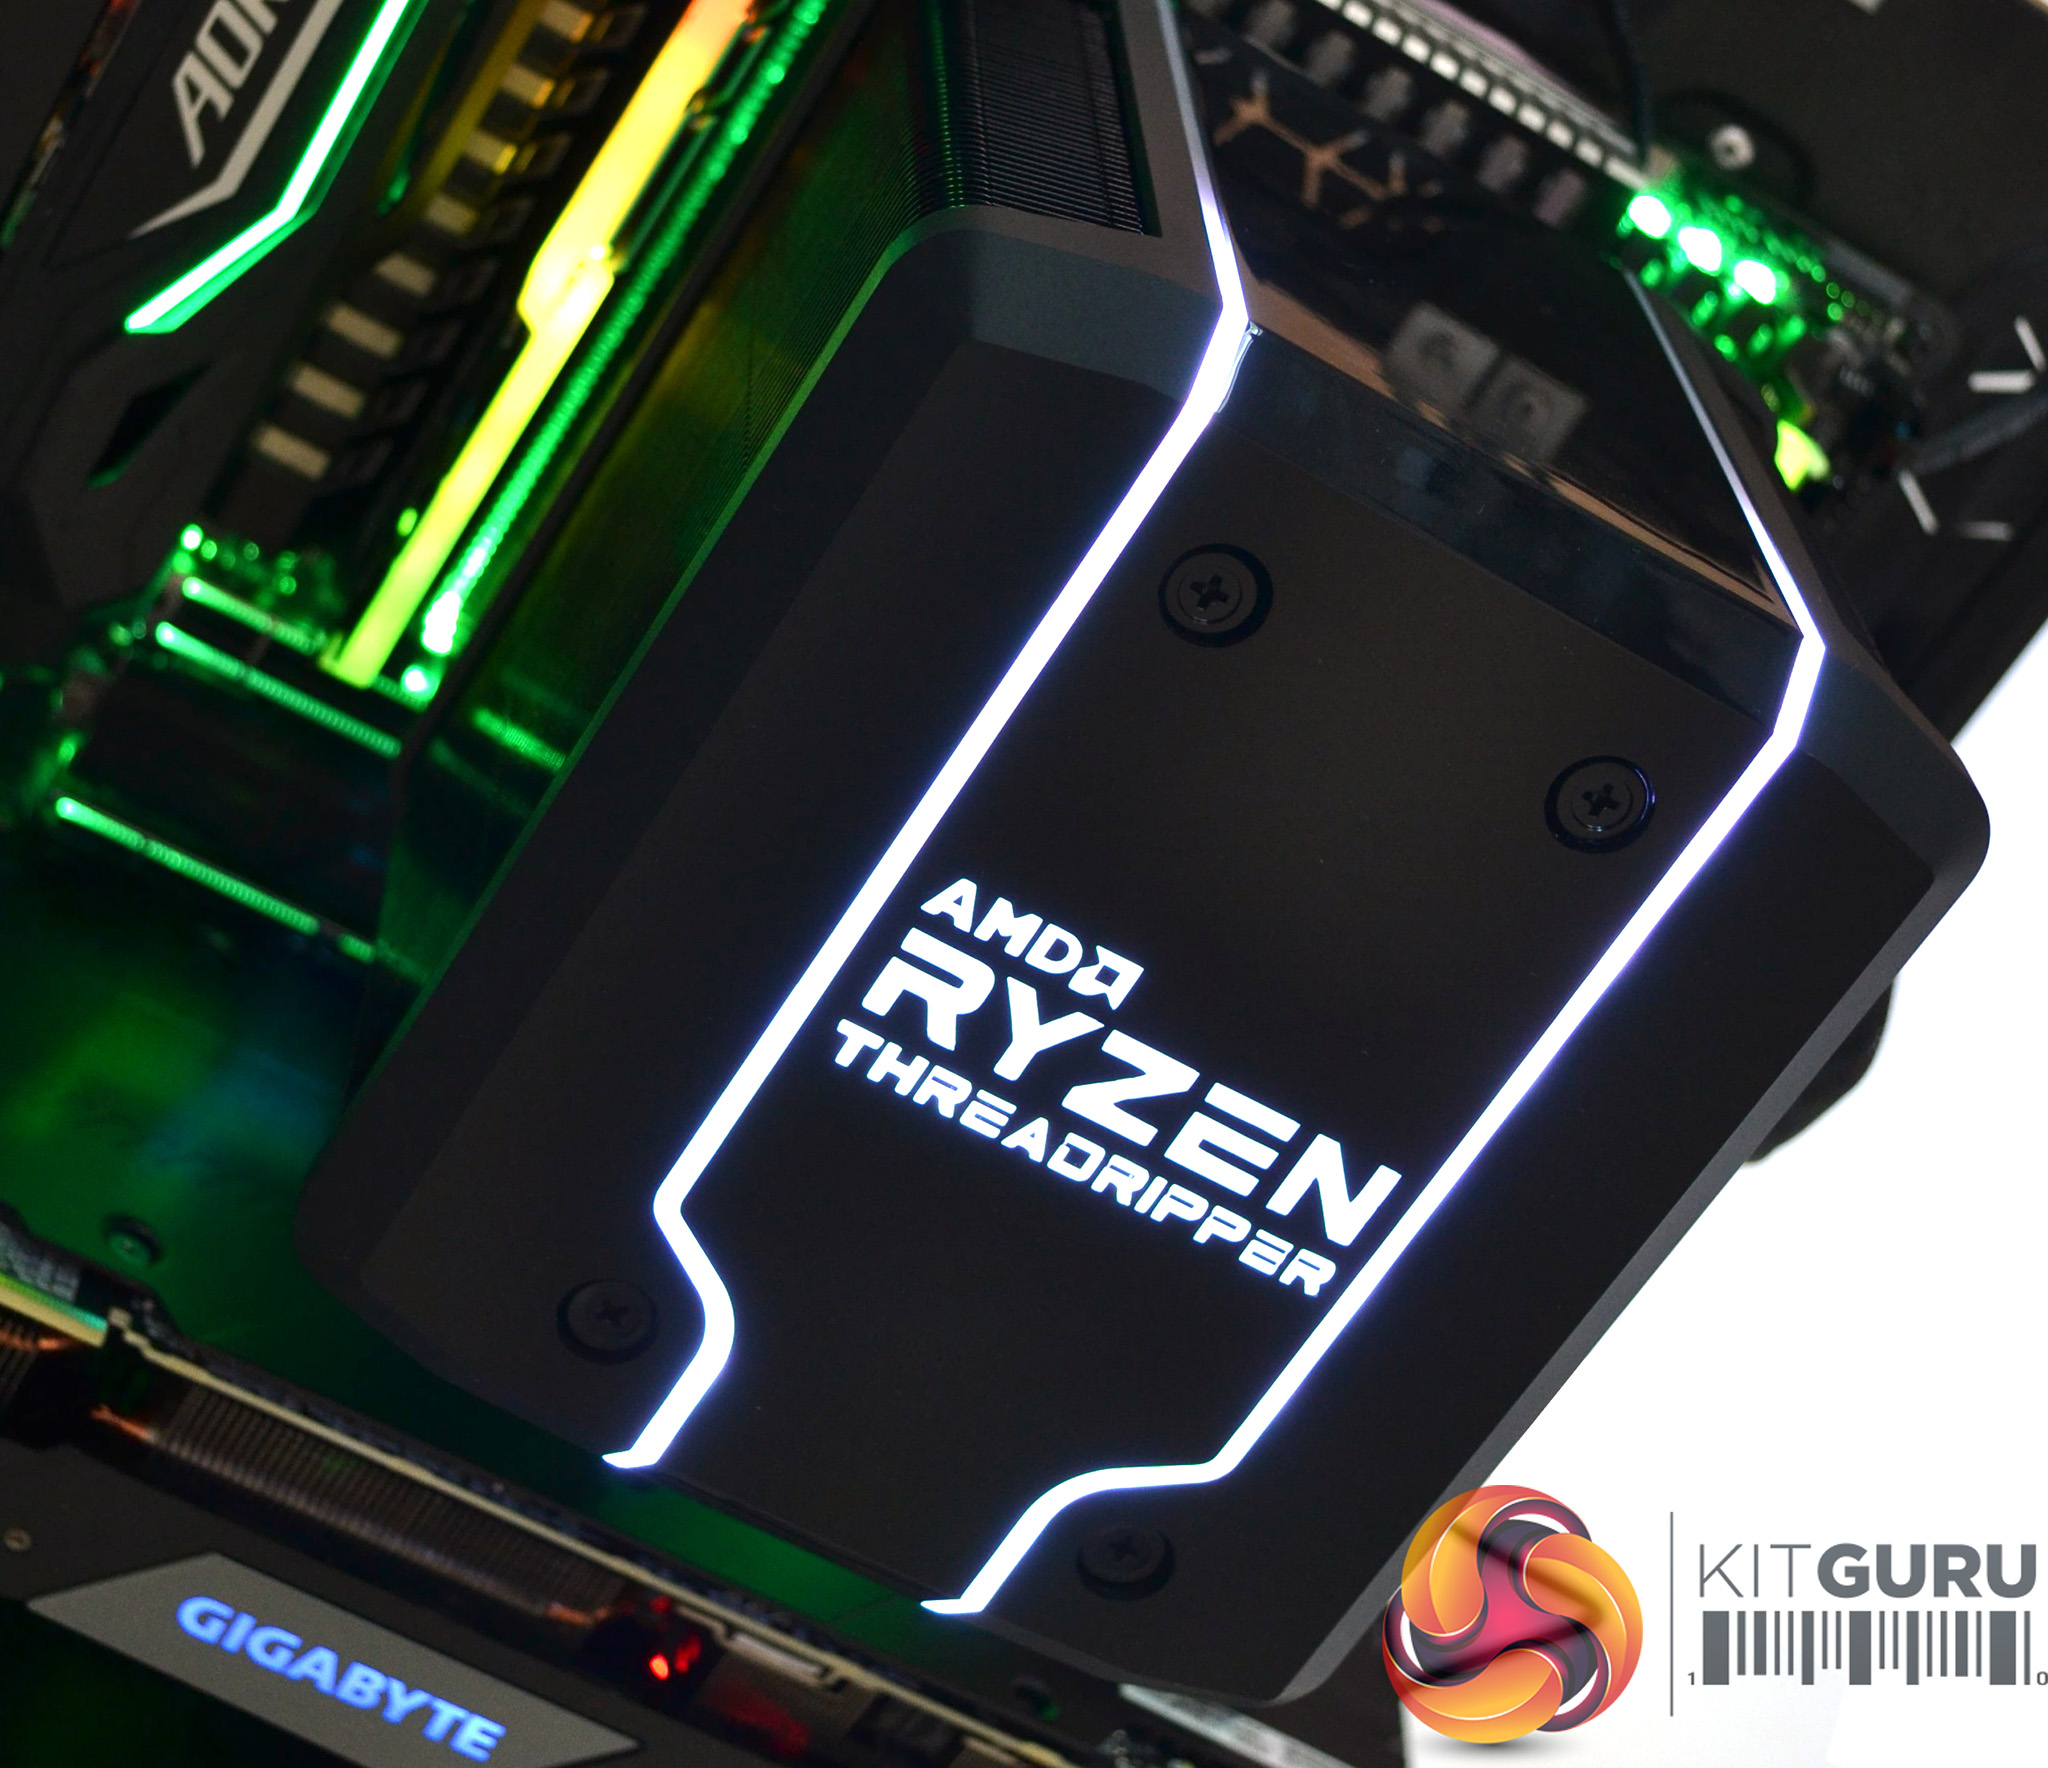
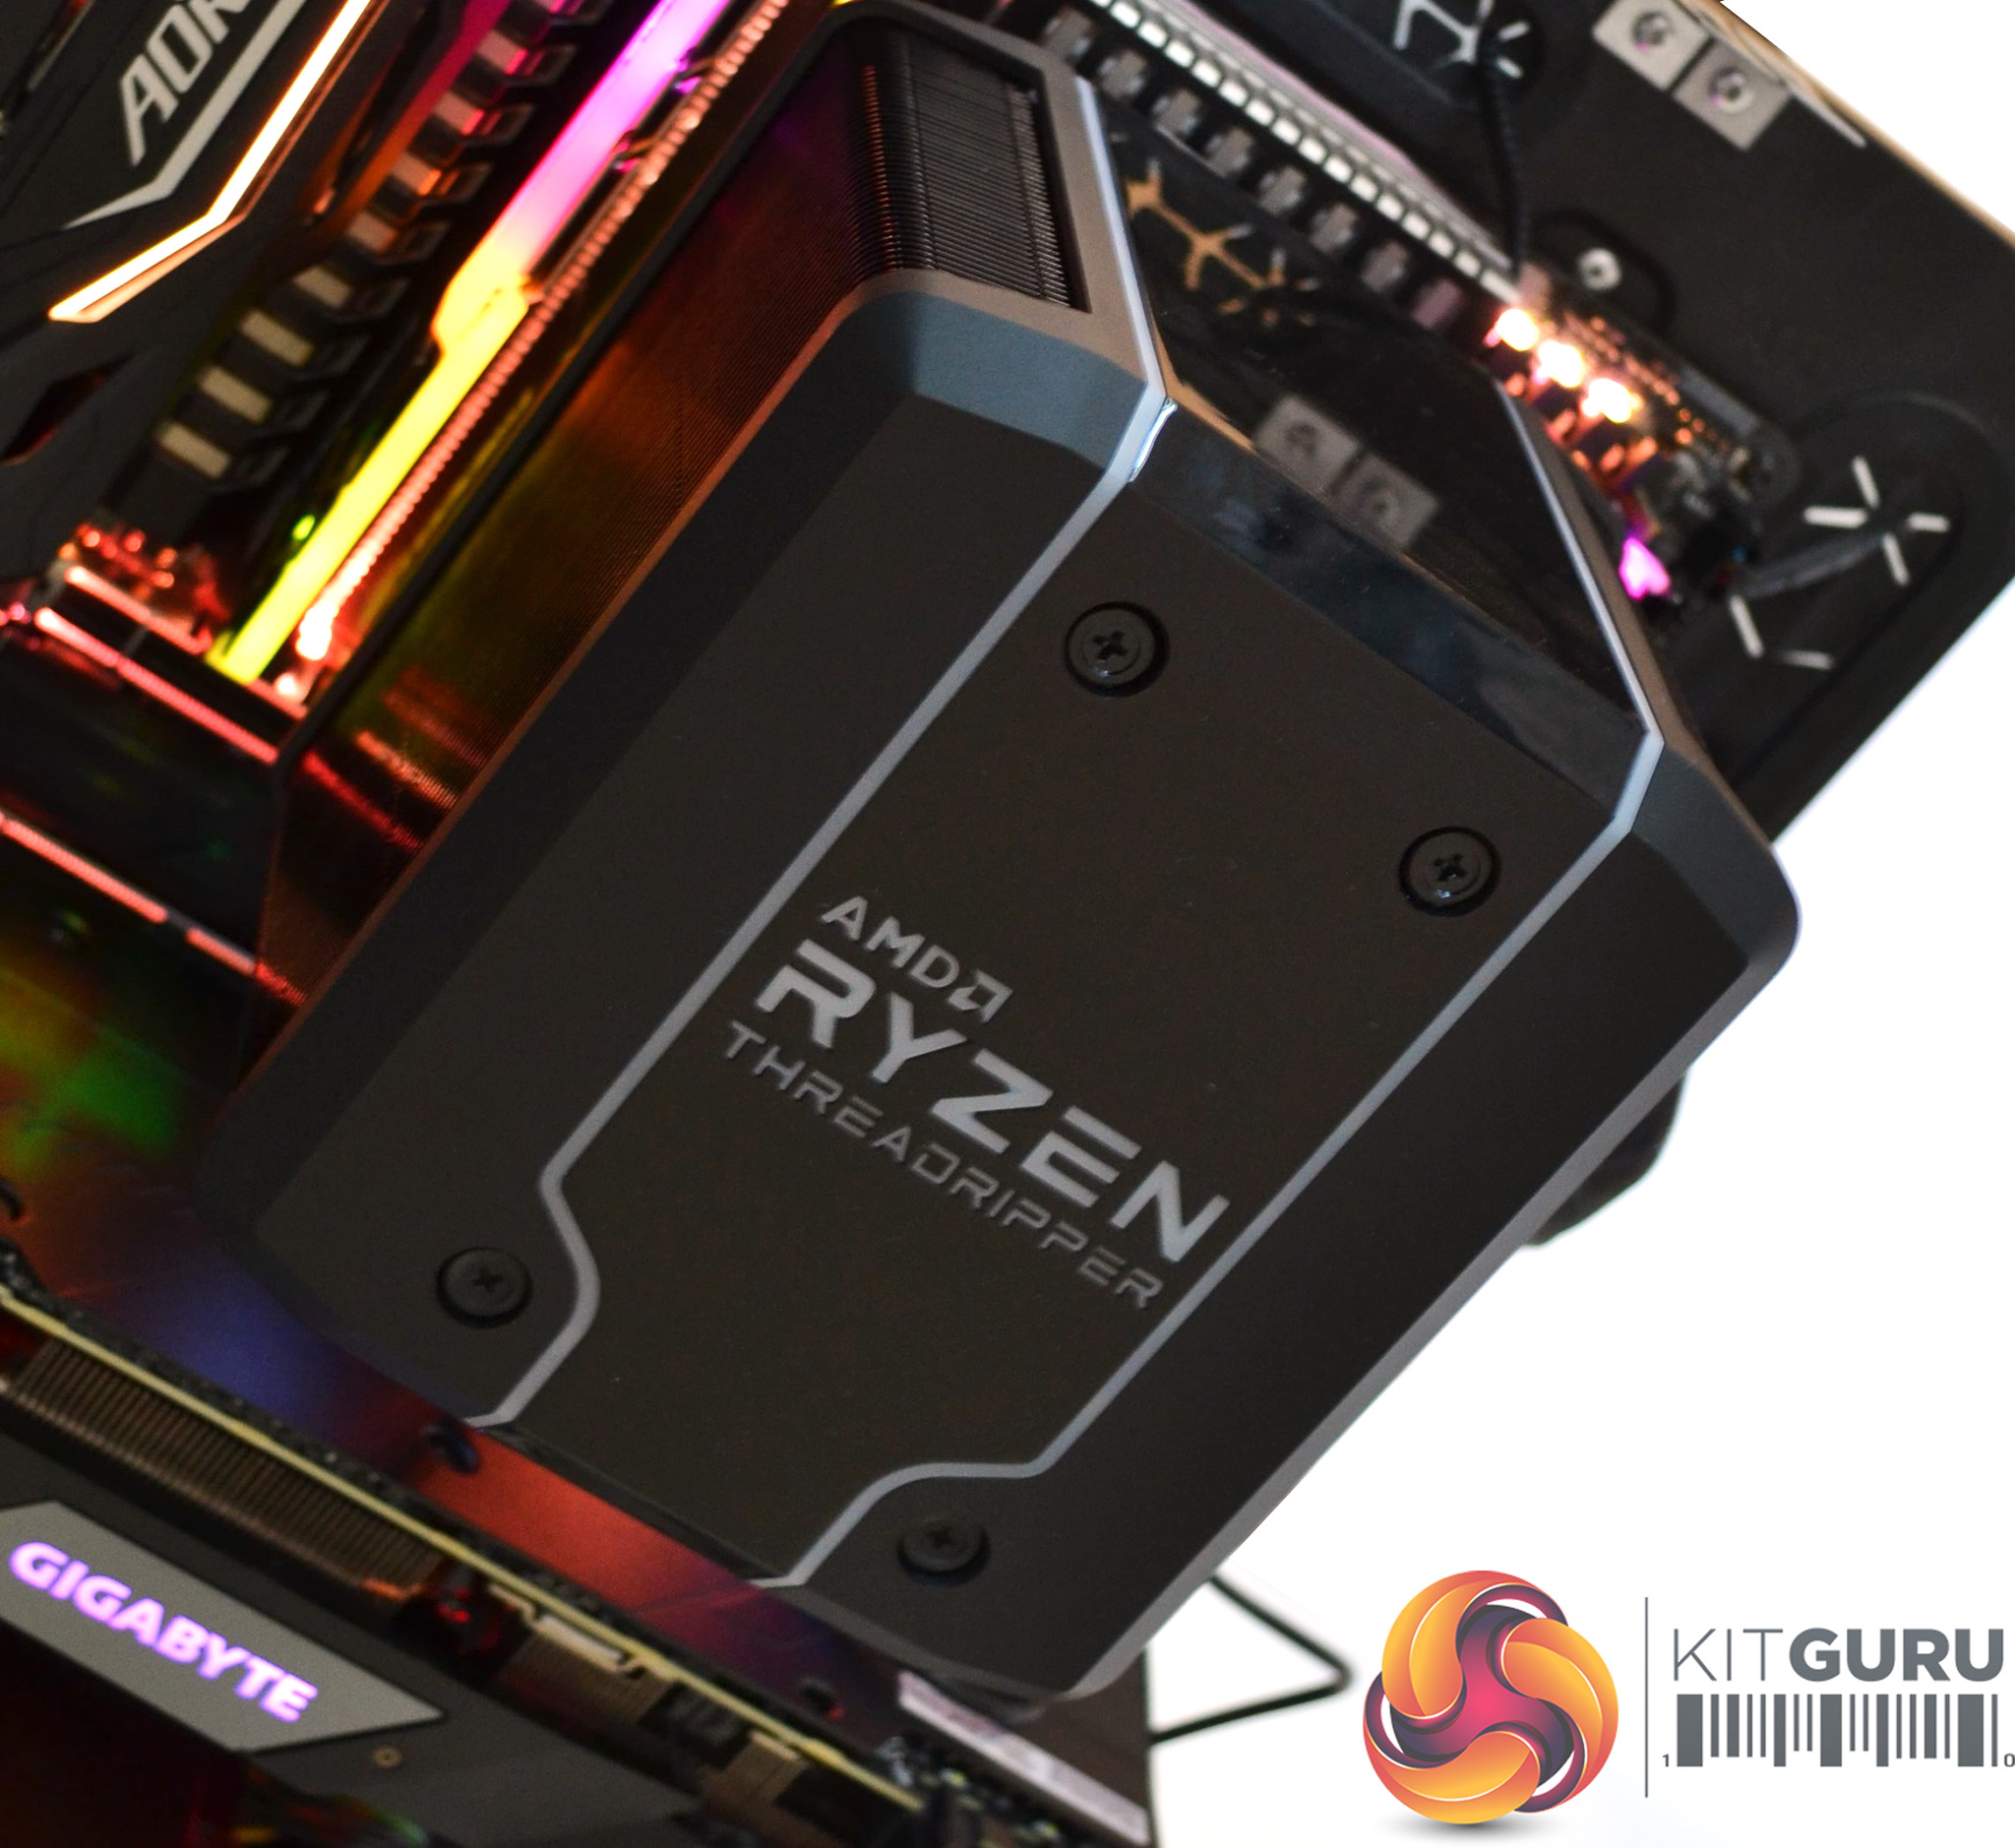
A plastic shroud, which Cooler Master have named Wraith Armour, is designed to guide the flow of air for peak cooling performance and reduce dead heat spots on the cooler. The Armour is also illuminated by a number of addressable RGB LEDs for full colour customisation.
Measuring a huge 150mm long, 132mm wide and 160mm high, the Wraith Ripper takes up a large chunk of space, so a large ATX case will be required to house it.
At around £100 in the UK the Wraith Ripper is rather expensive for an air cooing solution. With other high end coolers such as the NH-D15 from Noctua coming in at under £80, owners of Threadripper will be paying an extra premium to ensure their CPU temperatures are under control.
Key Features
- Dual cooling towers.
- Seven heat pipes.
- 120mm Servo Fan.
- Full cover thermal transfer plate.
- Socket TR4 specific design.
Specifications
- CPU Socket – AMD TR4
- Dimensions (L X W X H) – 150 x 132.2 x 160.5mm (5.9 x5.2 x 6.3 inch)
- Heatsink Material – 7 Heat Pipes / Aluminium Fins
- LED Type – Addressable RGB
- Lighting Control Method – Wraith Ripper RGB Lighting Software
- Lighting Power Connector – SATA Power
- Lighting Interface – USB Connector (9 pin)
- Fan Dimensions – 120 x 120 x 25mm (4.7 x 4.7 x 10 inch)
- Fan Speed – 0 ̴ 2750 RPM (PWM) ± 10%
- Fan Air Flow – 76.4 CFM (MAX)
- FAN MTTF – 490,000 Hours
- Fan Noise Level – 0 ̴ 38 dBA
- Fan Power Connector – 4-Pin (PWM)
- Fan Rated Voltage – 12 VDC
- Fan Rated Current – 0.45 A
- Fan Safety Current – 0.6 A
- Fan Power Consumption – 5.4 W
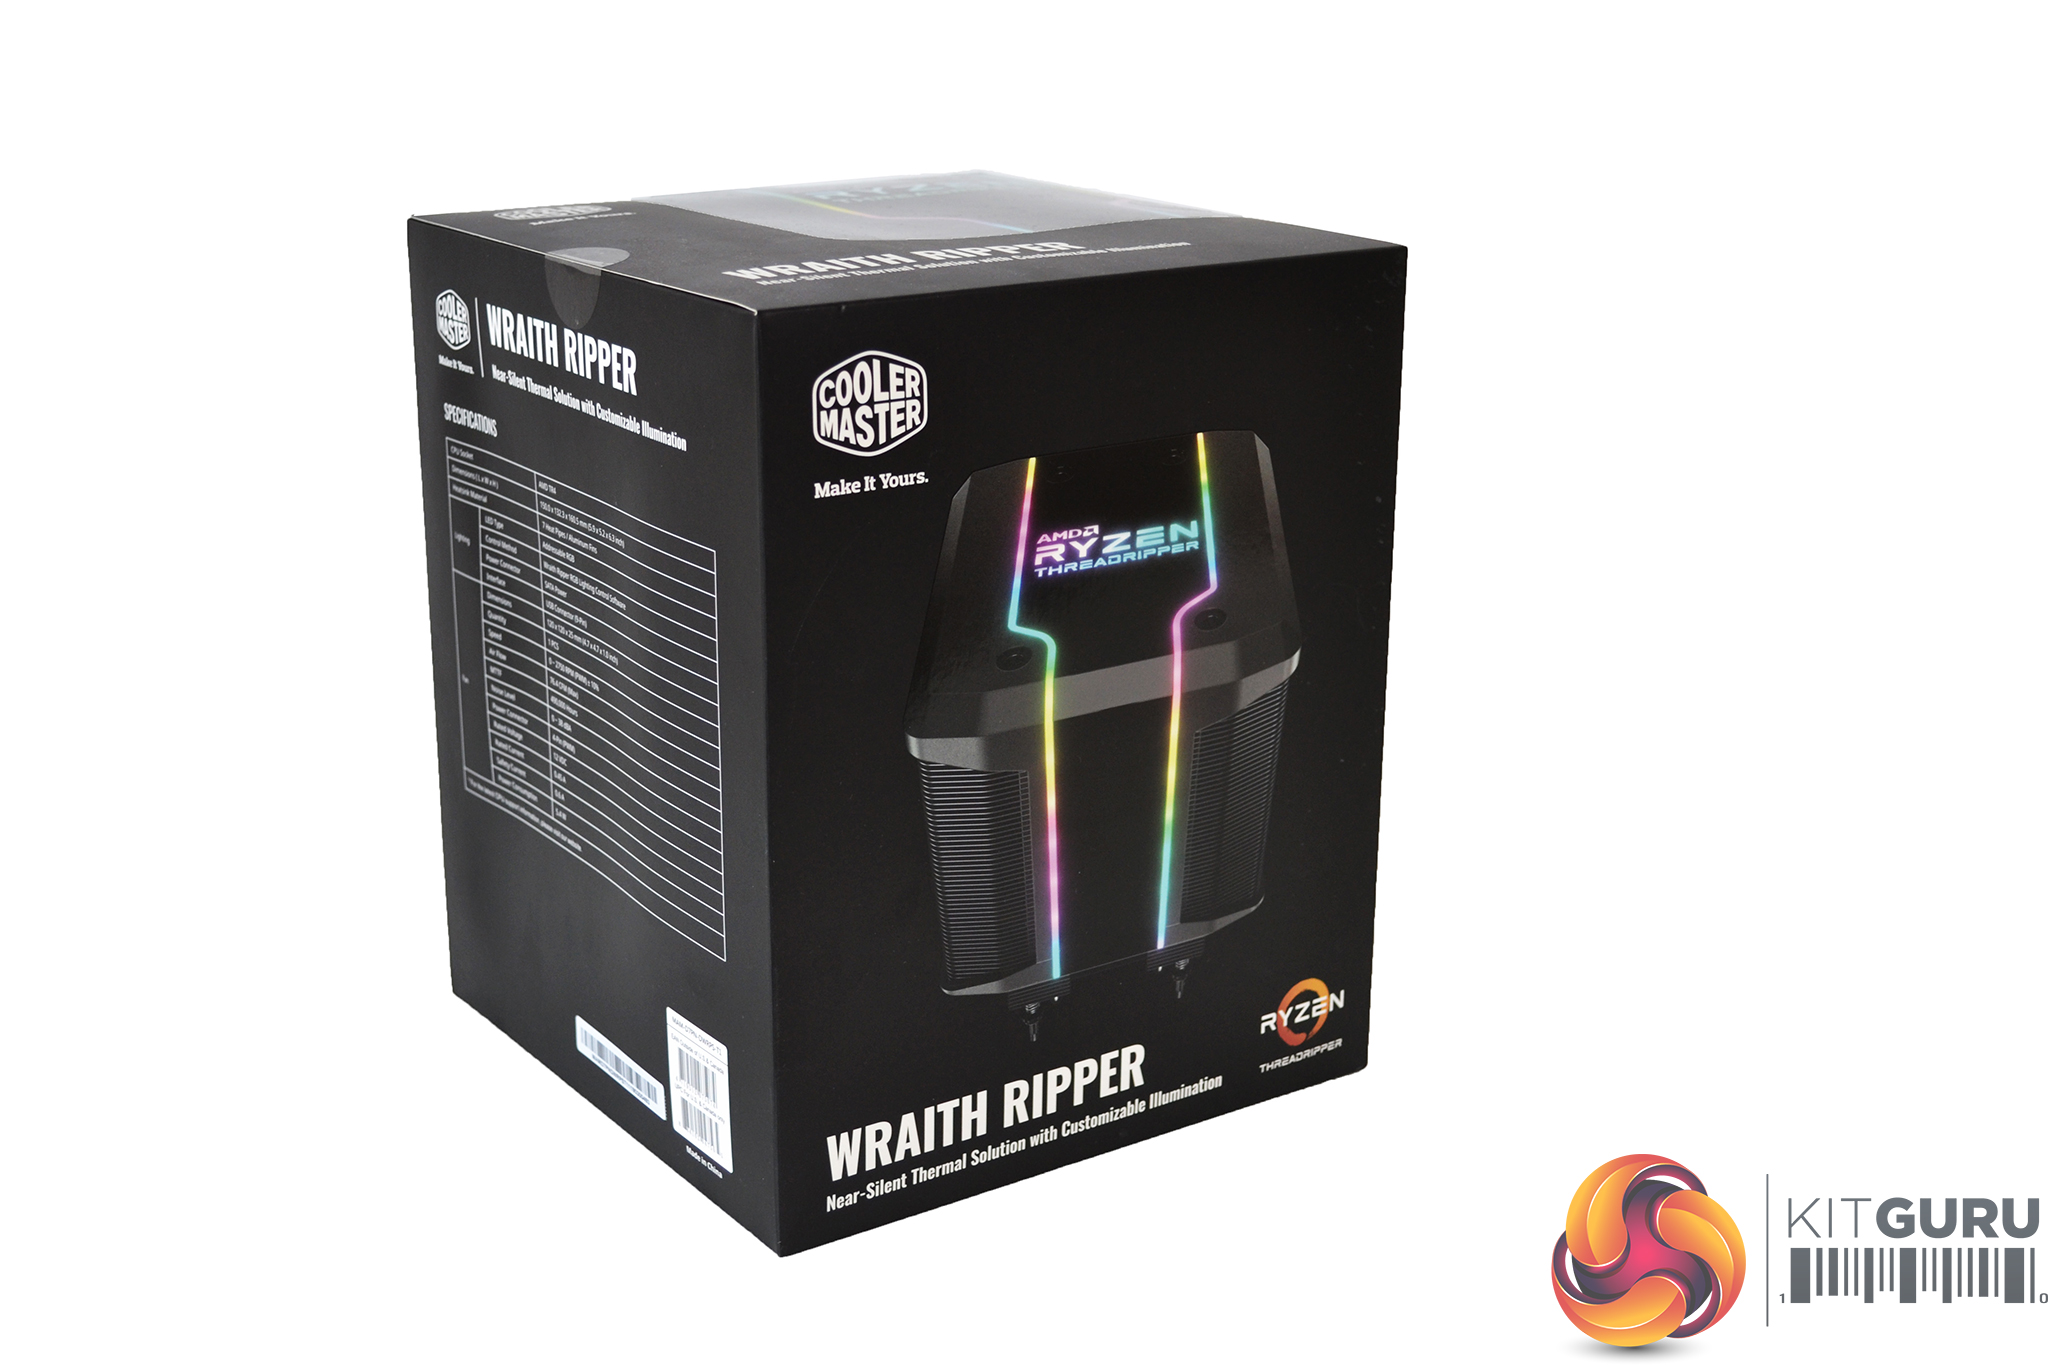
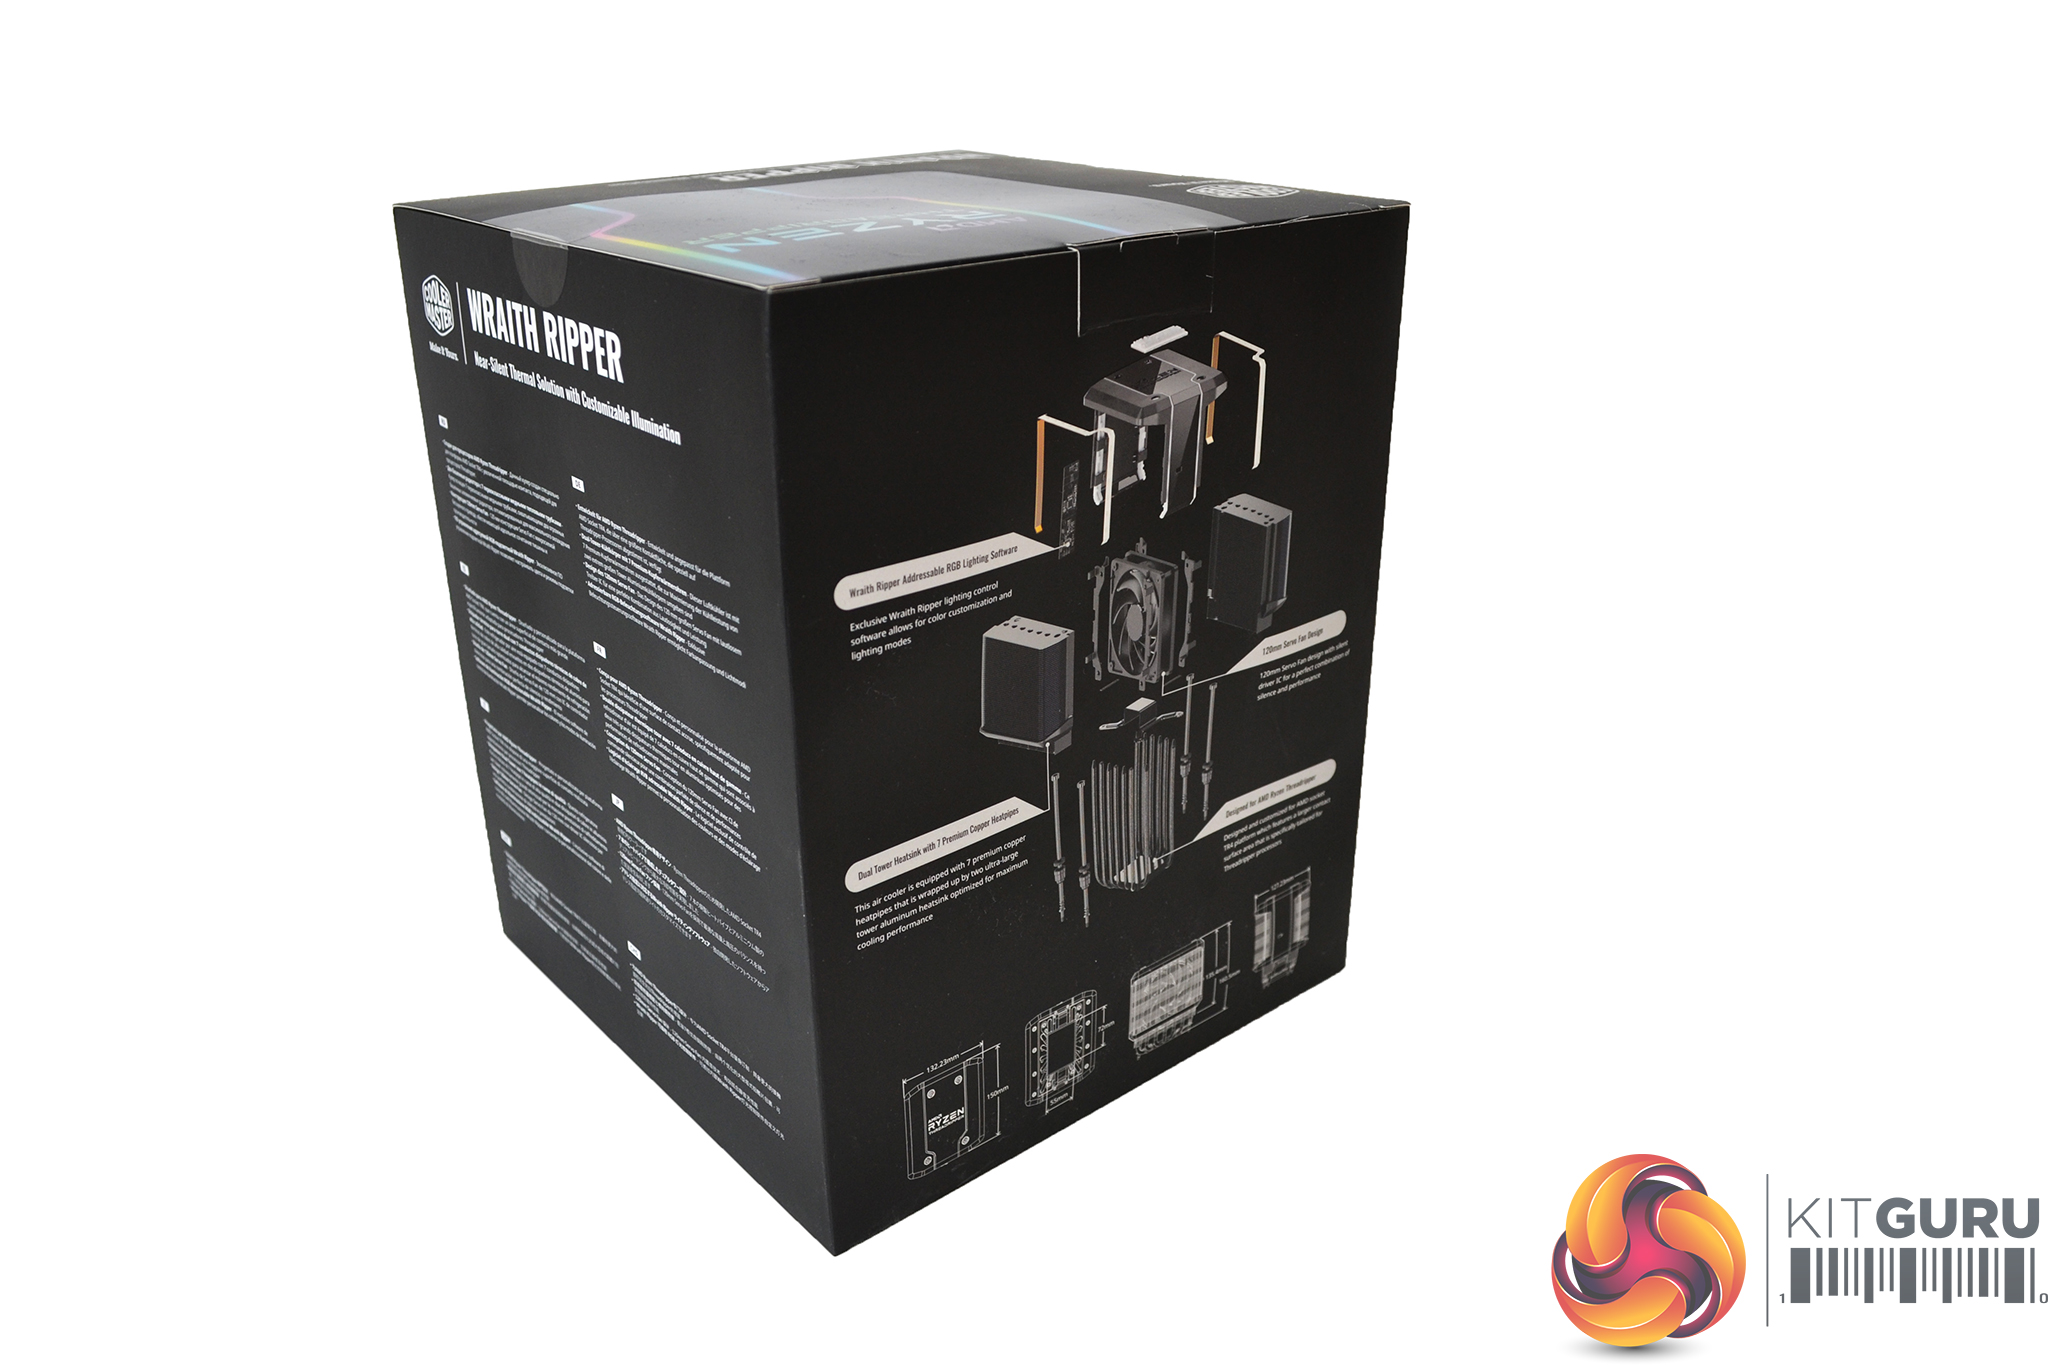
The Wraith Ripper arrives in a thin, black cardboard box. On the front, a large image of the cooler takes up most of the real estate, and on the rear we find an exploded diagram showing all the component parts of the cooler.
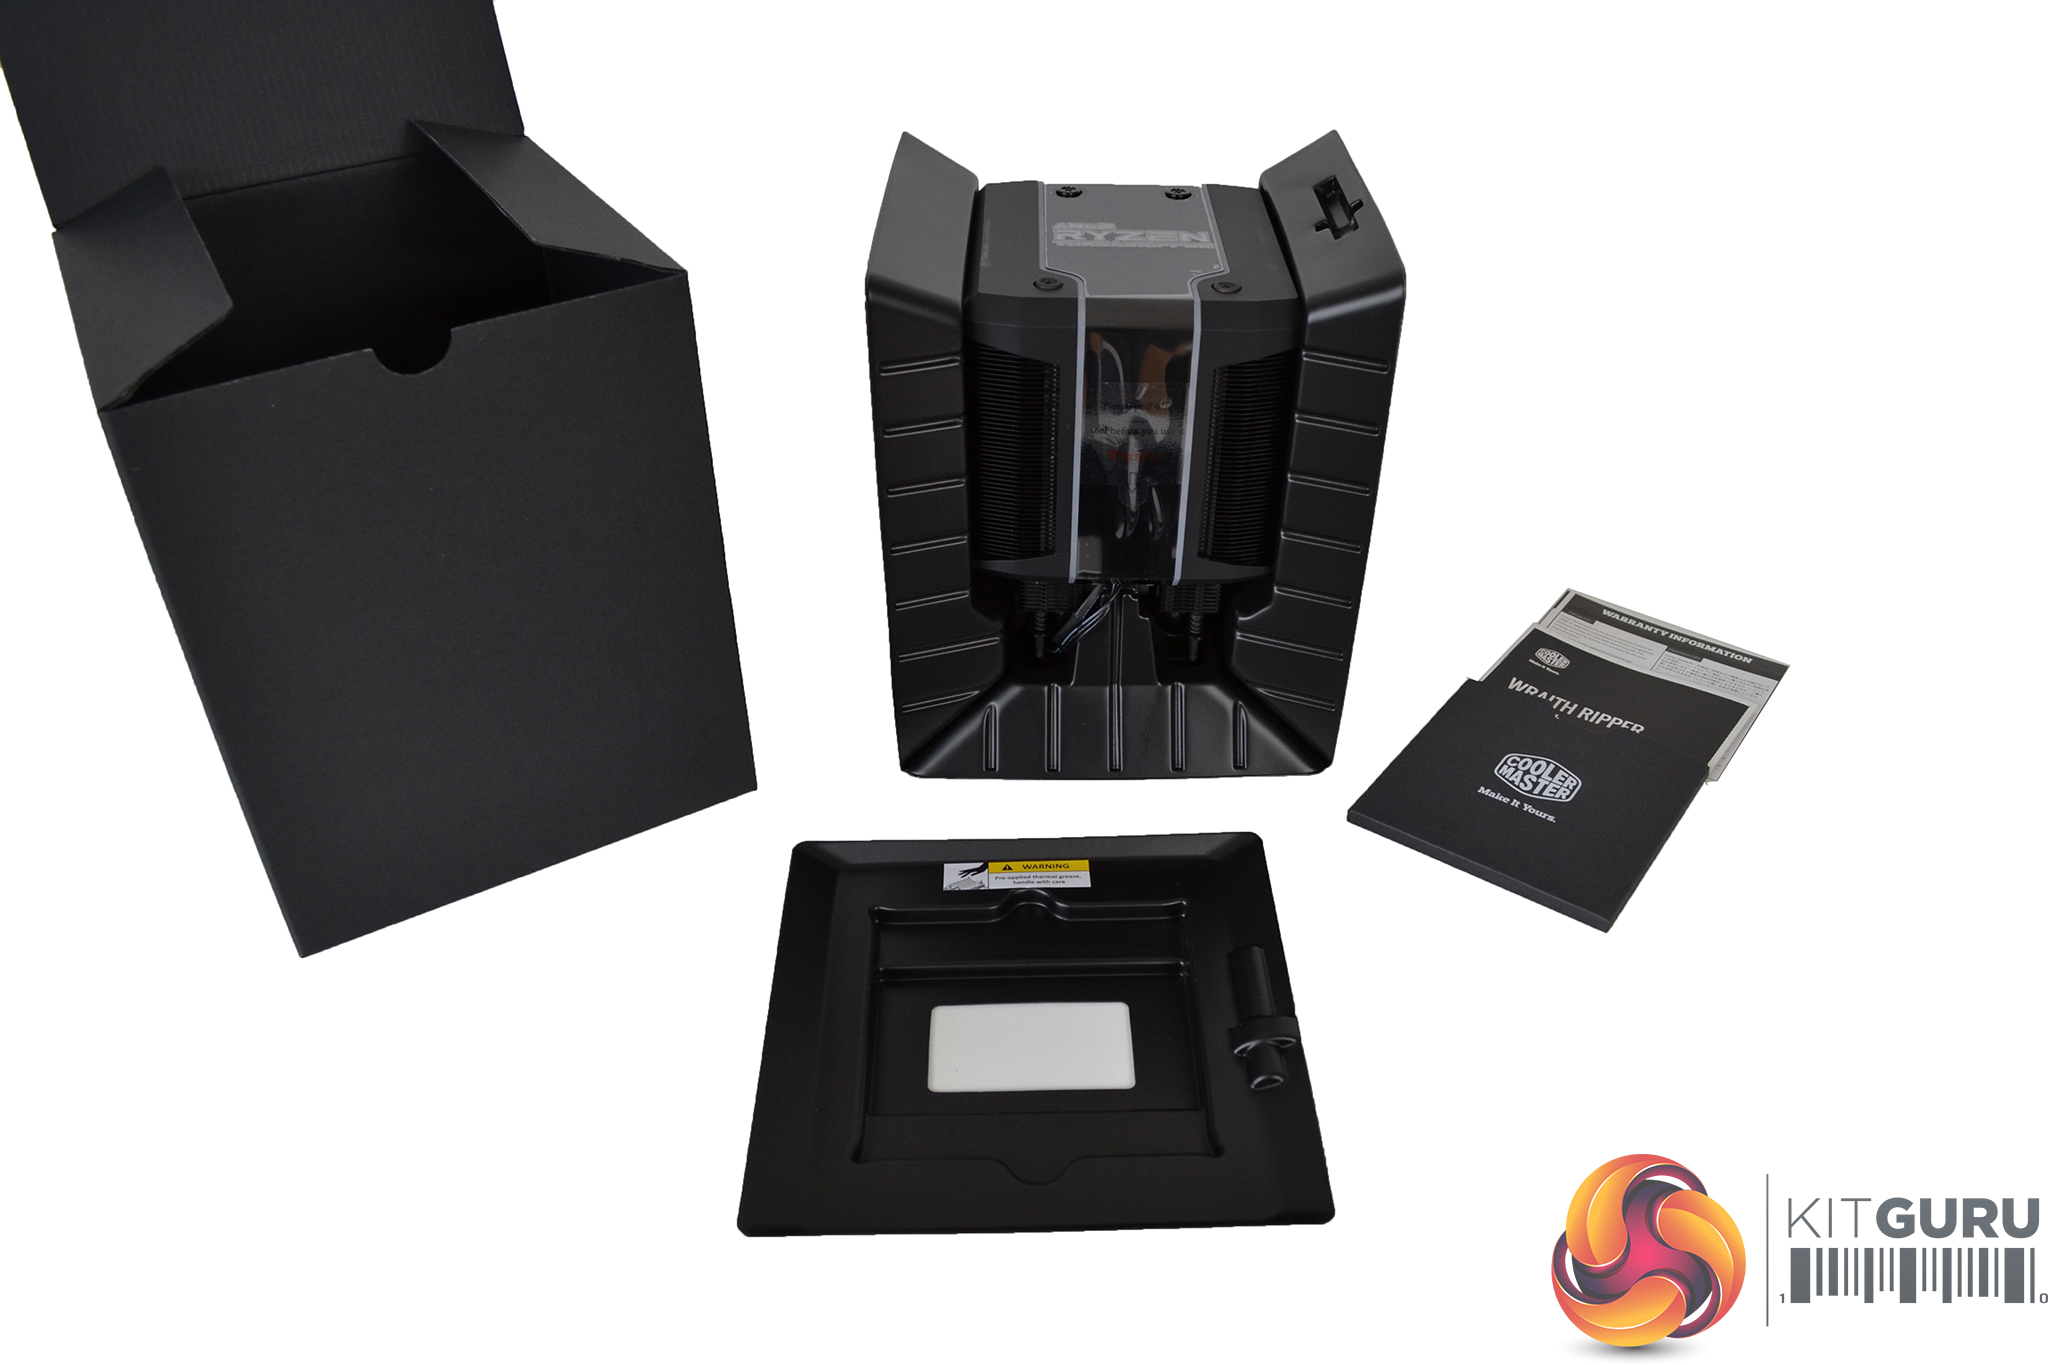
Inside, a thicker, all black cardboard box further protects the cooler along with some stiff plastic. A user manual and warranty card are also found inside.

Since the wraith Ripper uses the stock TR4 mounting plate, there is no additional installation hardware supplied, so installation should hopefully be a straightforward process.
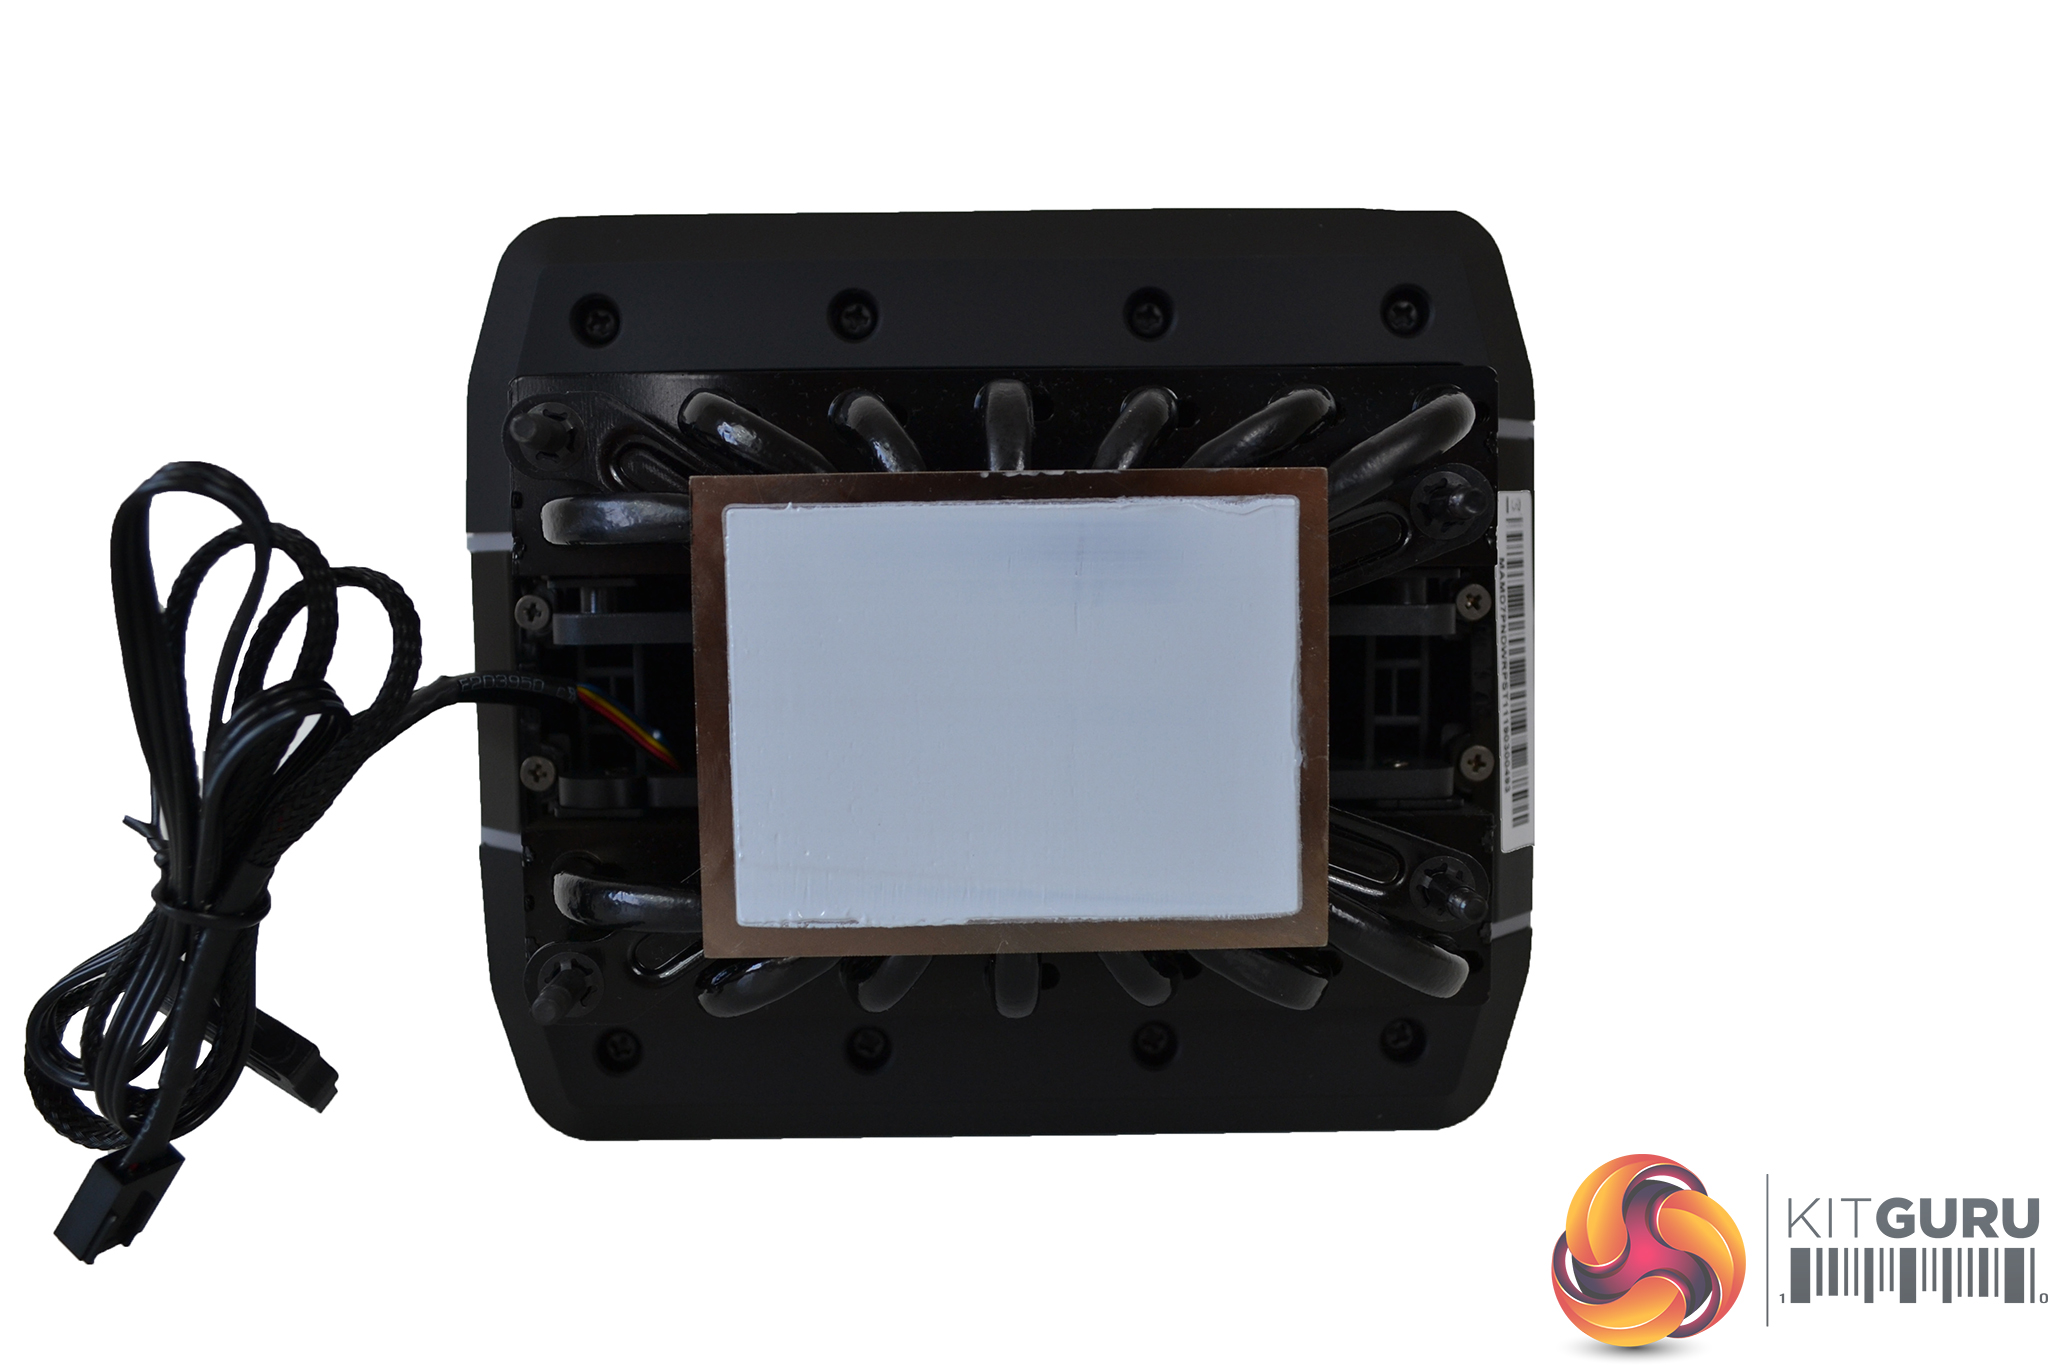
Cooler Master have pre-applied thermal compound to the full cover base plate of the Wraith Ripper which should give an even spread when installed – a time saver for the end user when it comes to fitting.
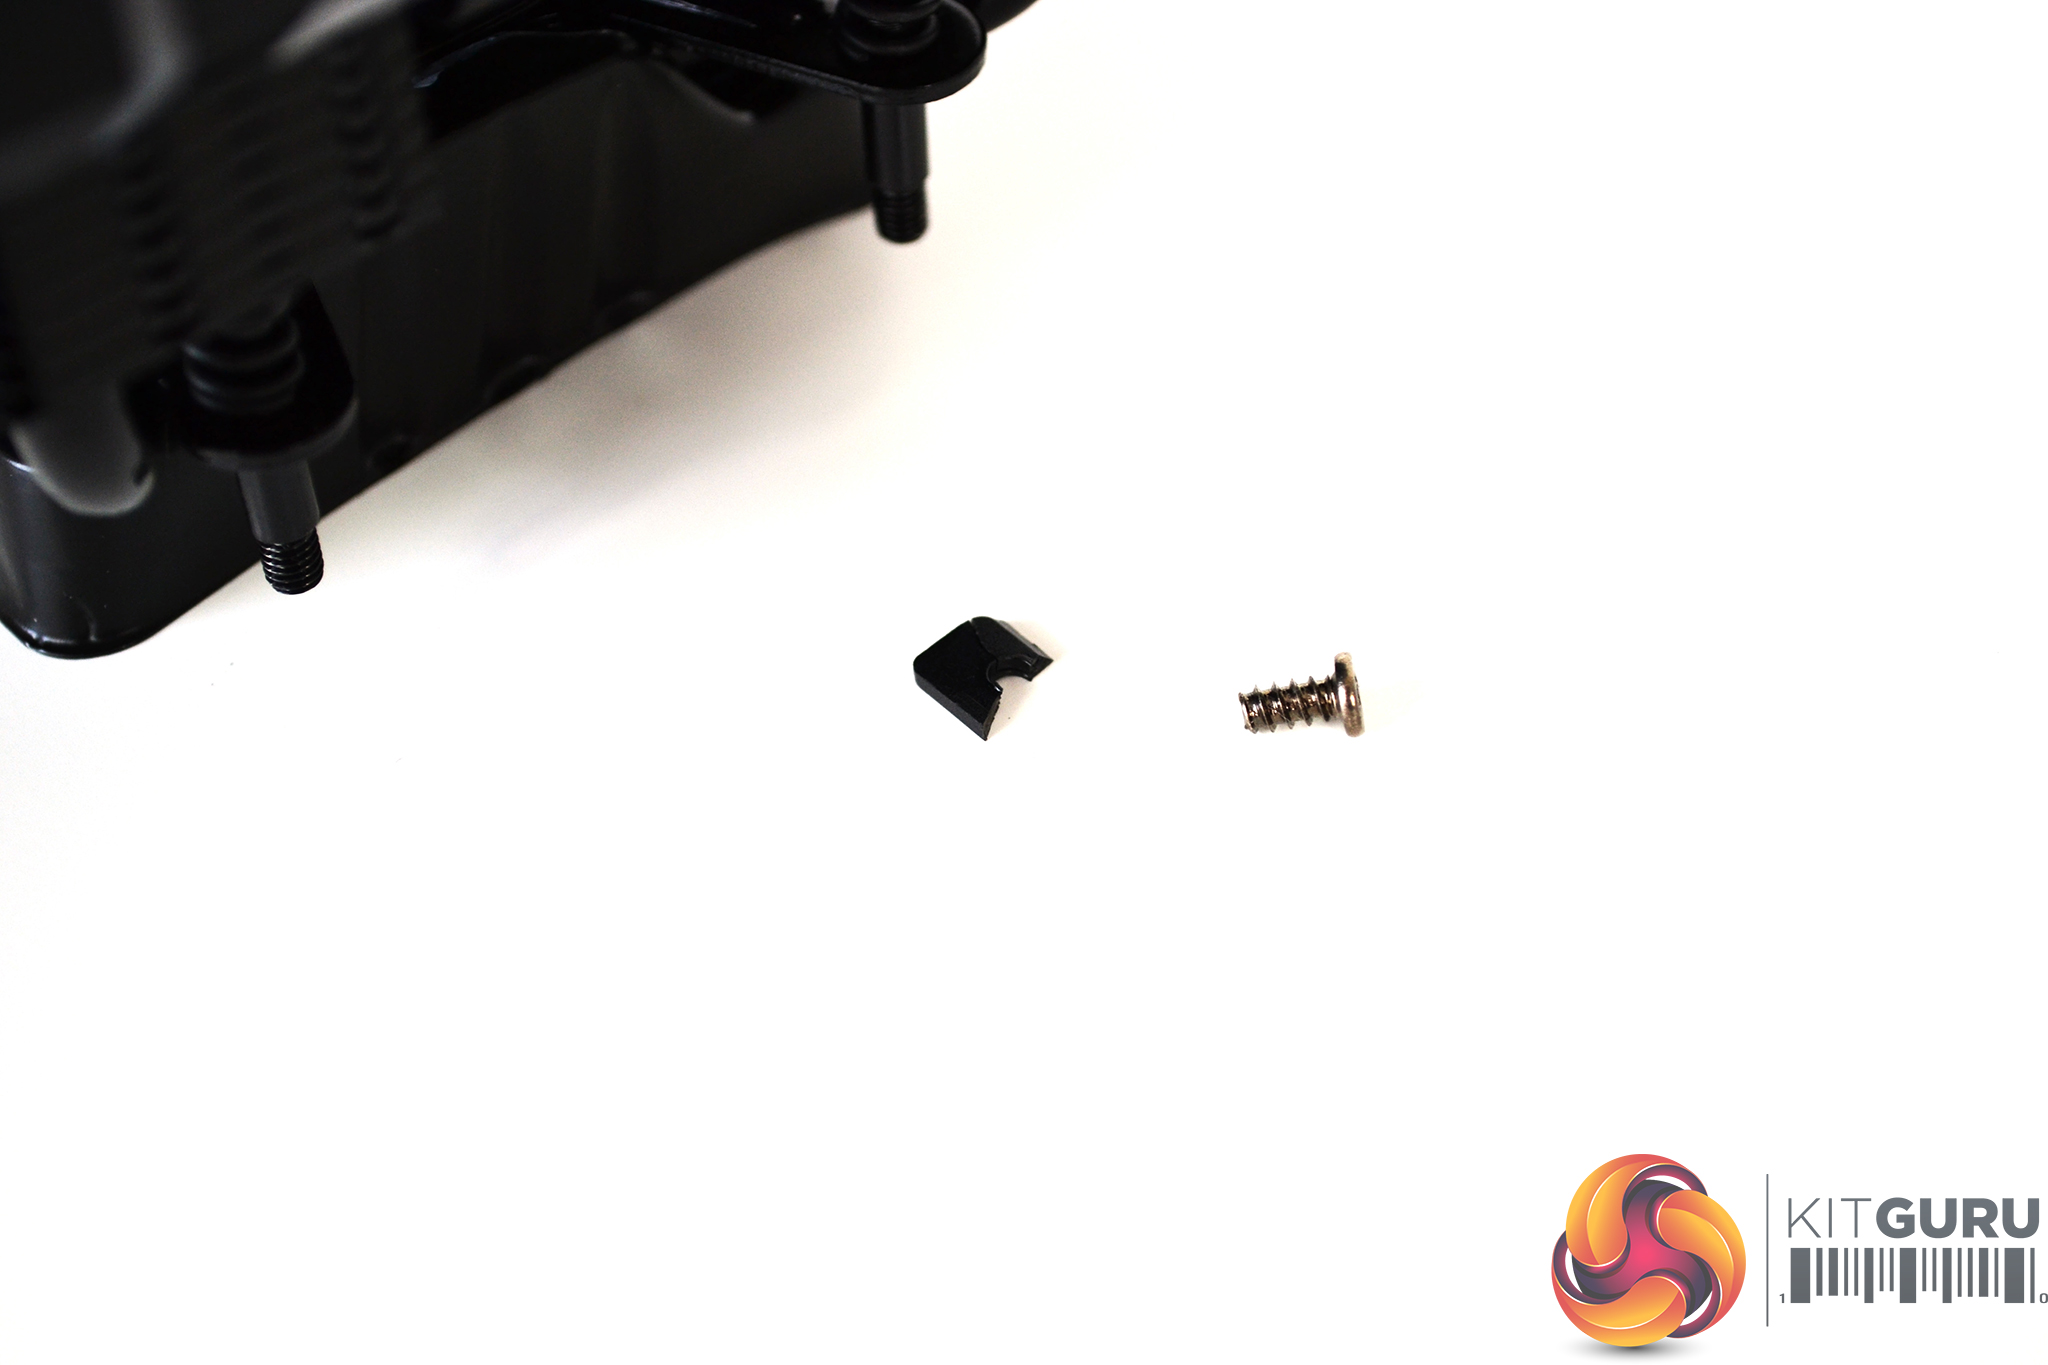
Although the plastic shroud on the Wraith Ripper looks good, it has quite a cheap feel to it. This became even more apparent when attempting to take a closer look at the fan, as a piece of plastic snapped off one of the screw holes – it’s probably best leaving well alone.
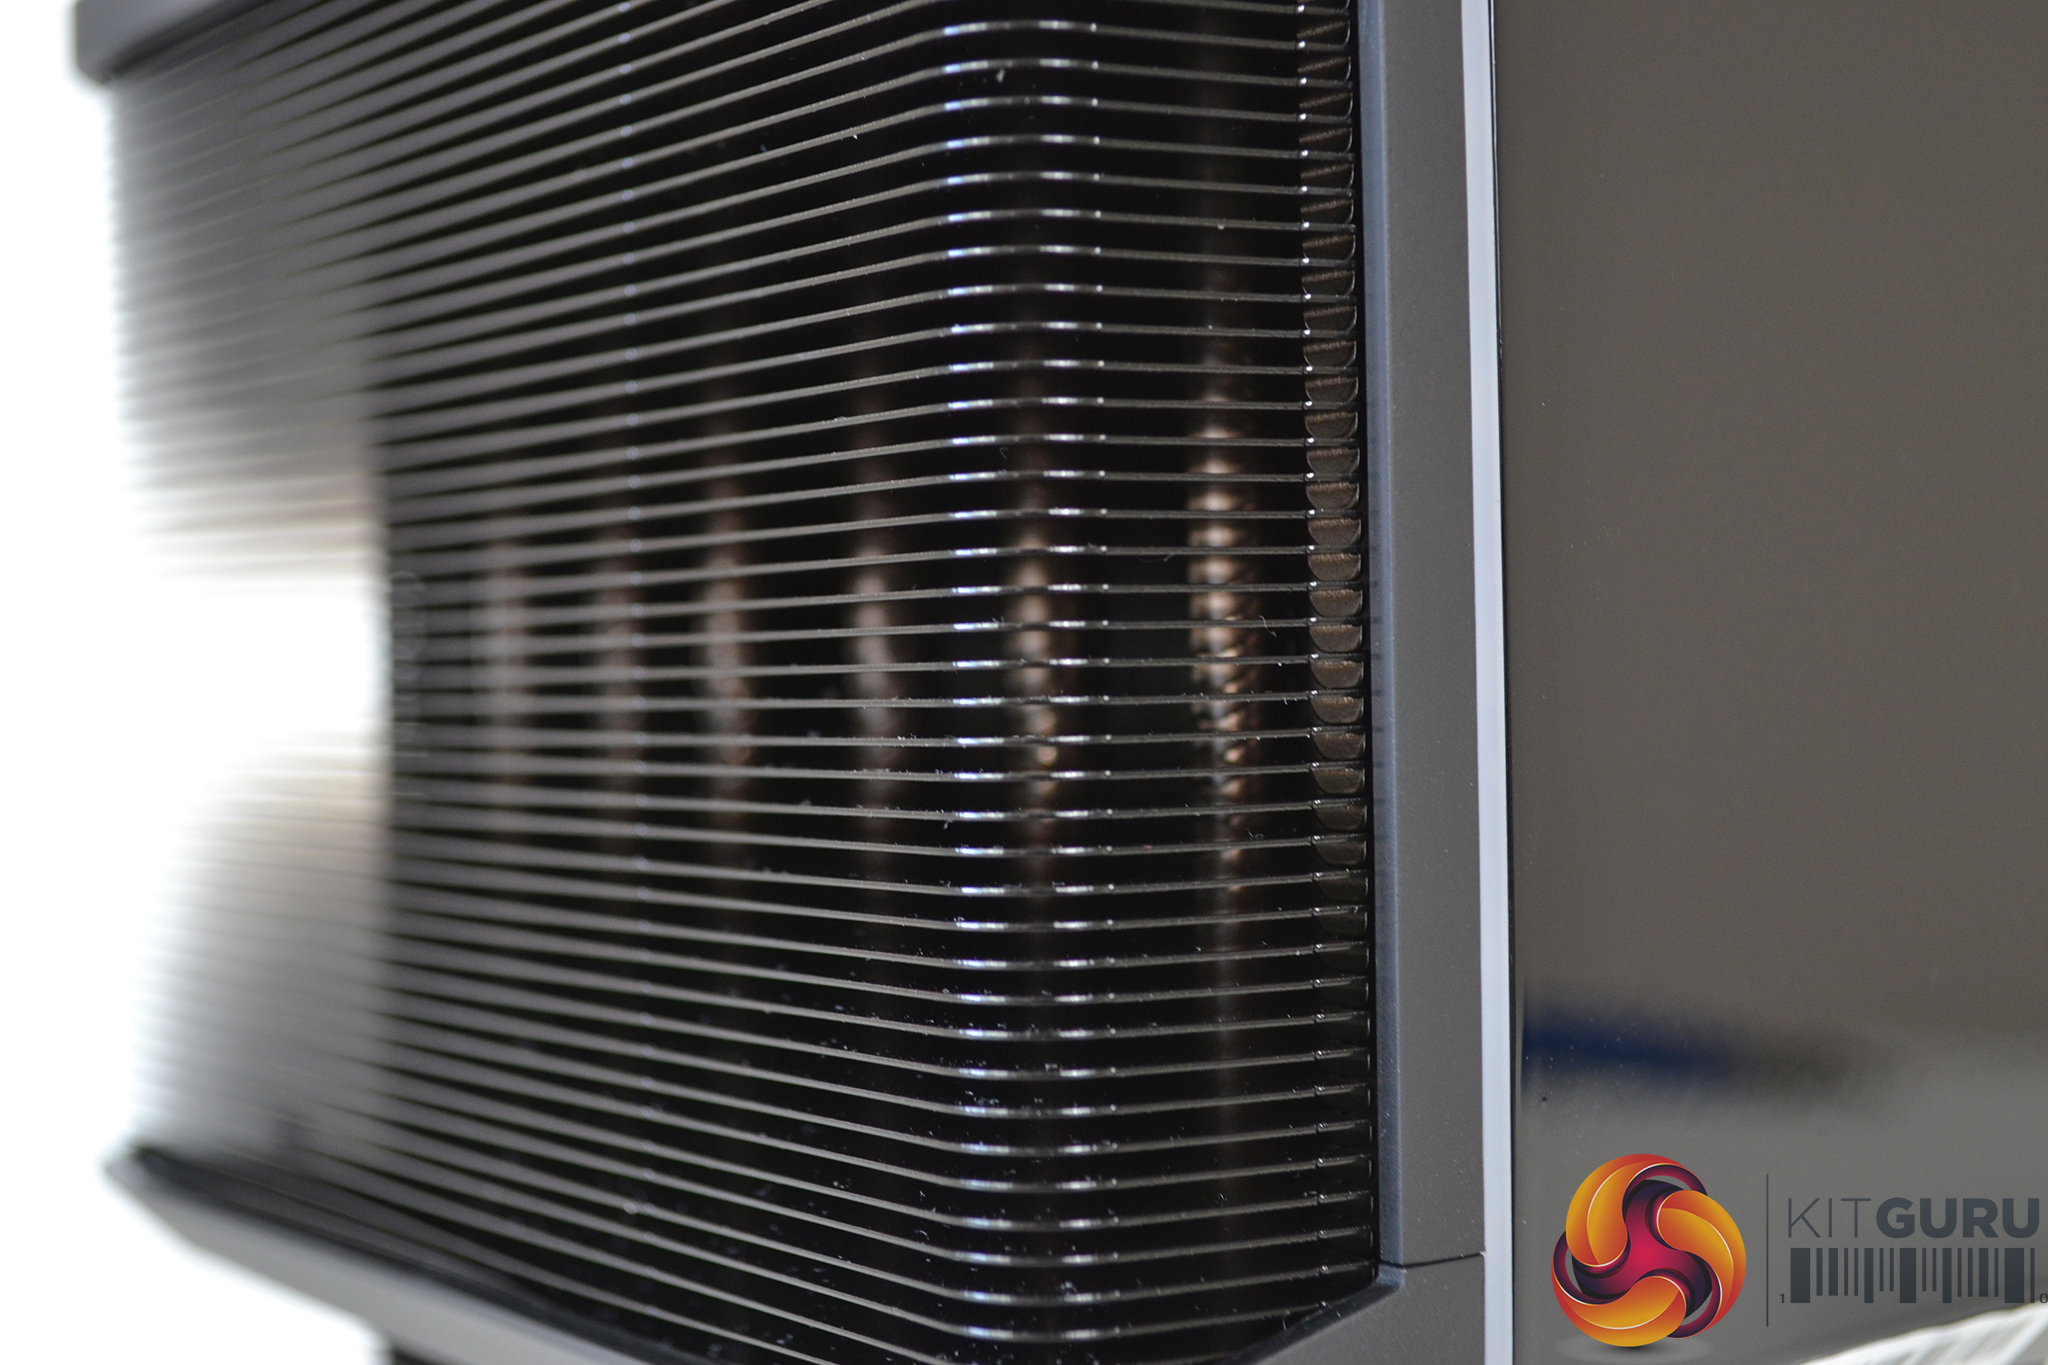
The outer areas of the plastic shroud are a matte black finish while the centre is gloss. This does give it a nice contrast and clean looks, but I can’t help feeling it may affect cooling performance by partially blocking off some of the cooling fins.

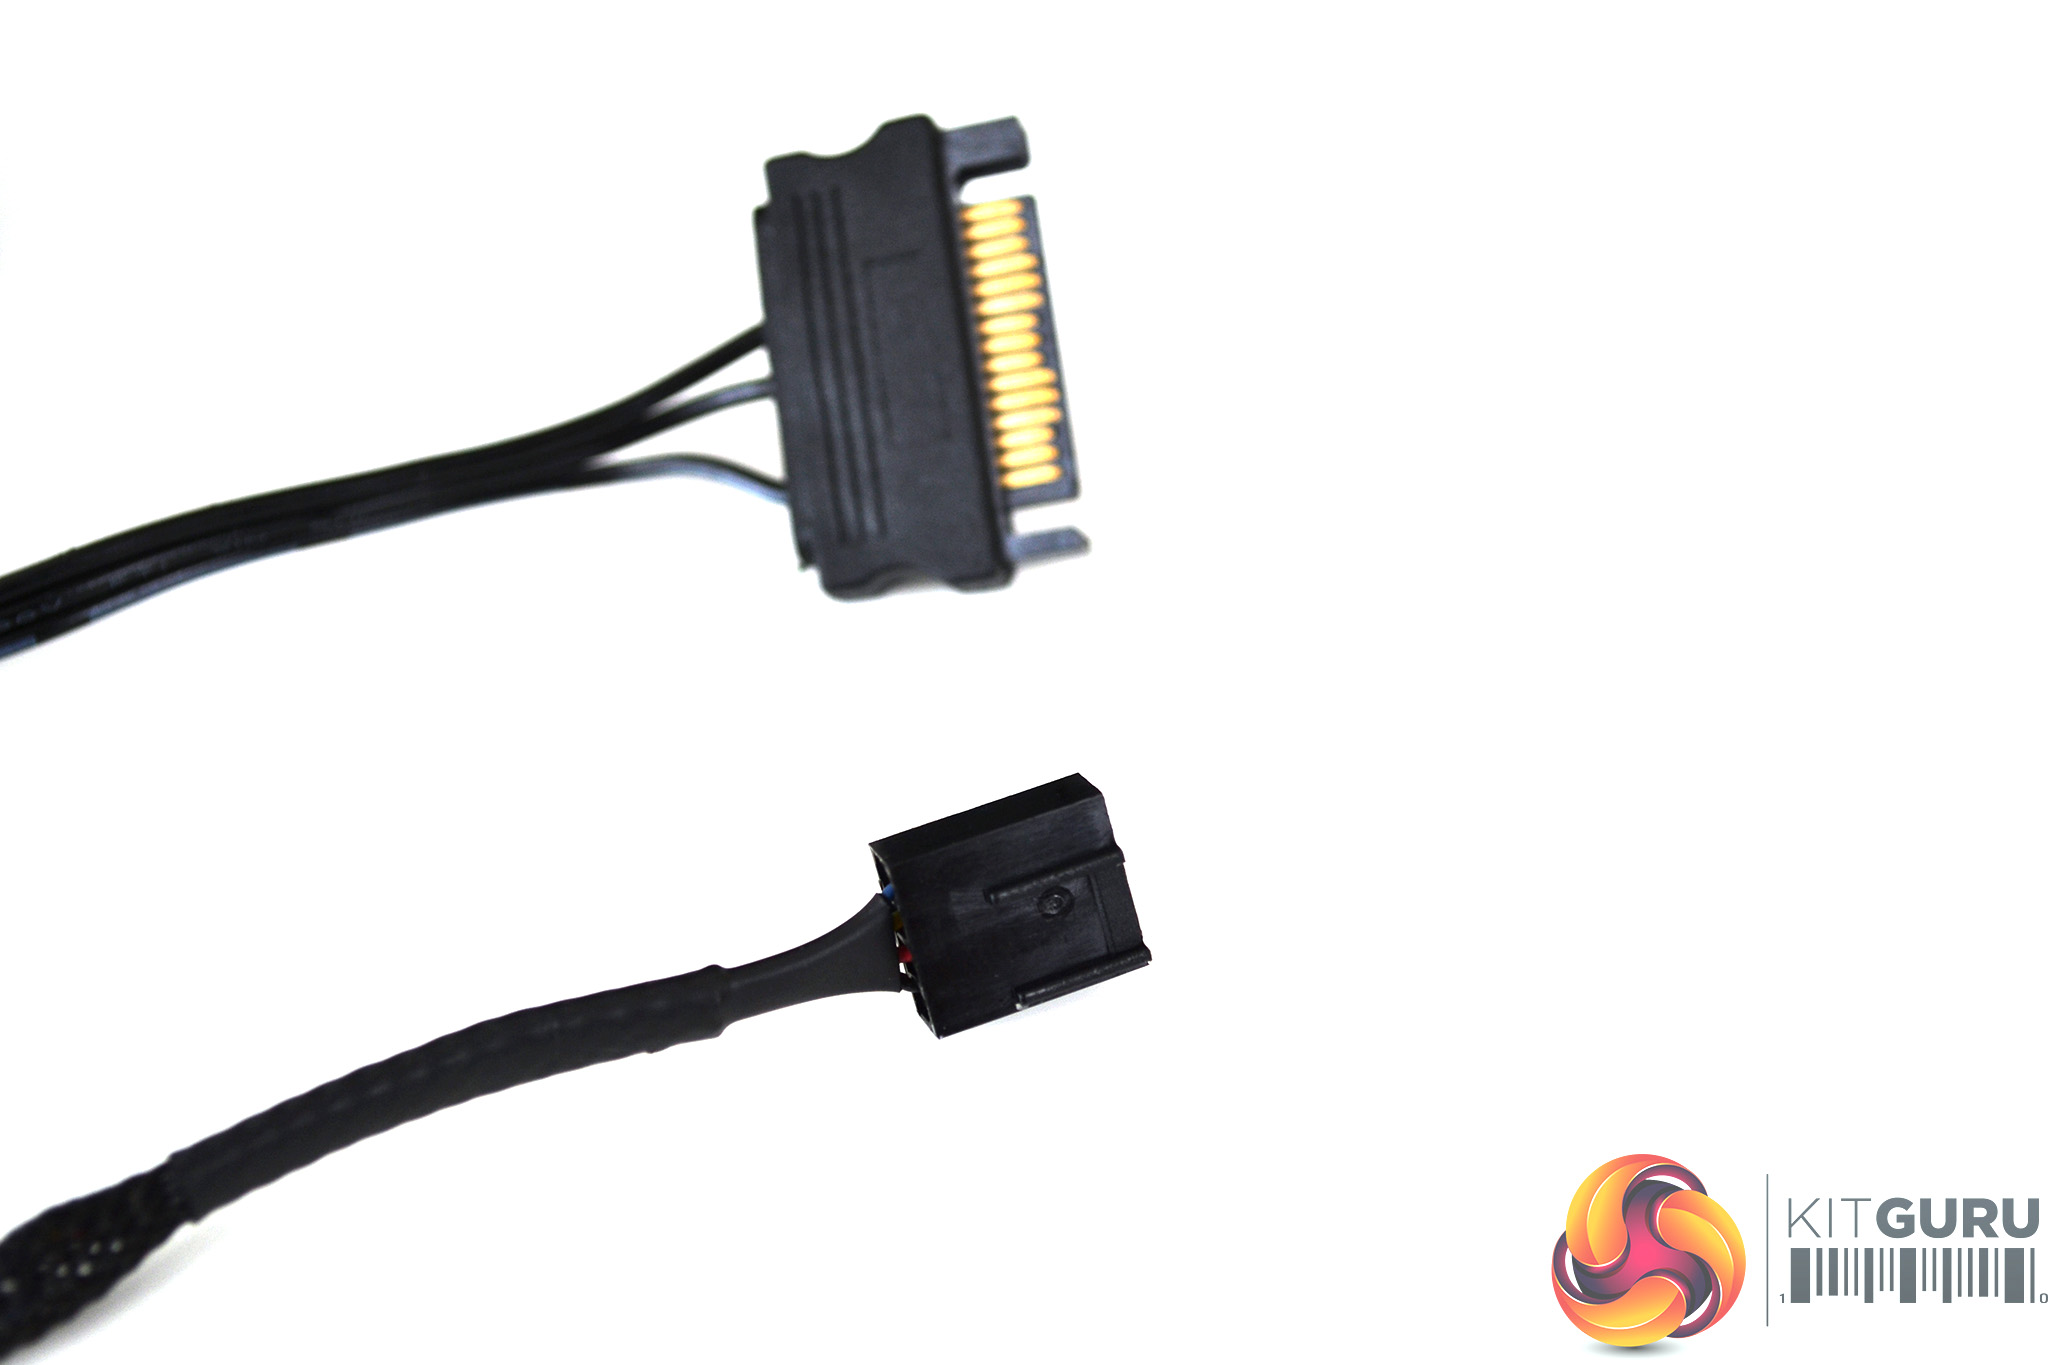
A 120mm Servo Fan with silent driver IC sits between dual cooling towers. A four-pin PWM connector is used to power the fan and control speed. An additional SATA connector is deployed to power up the RGB.
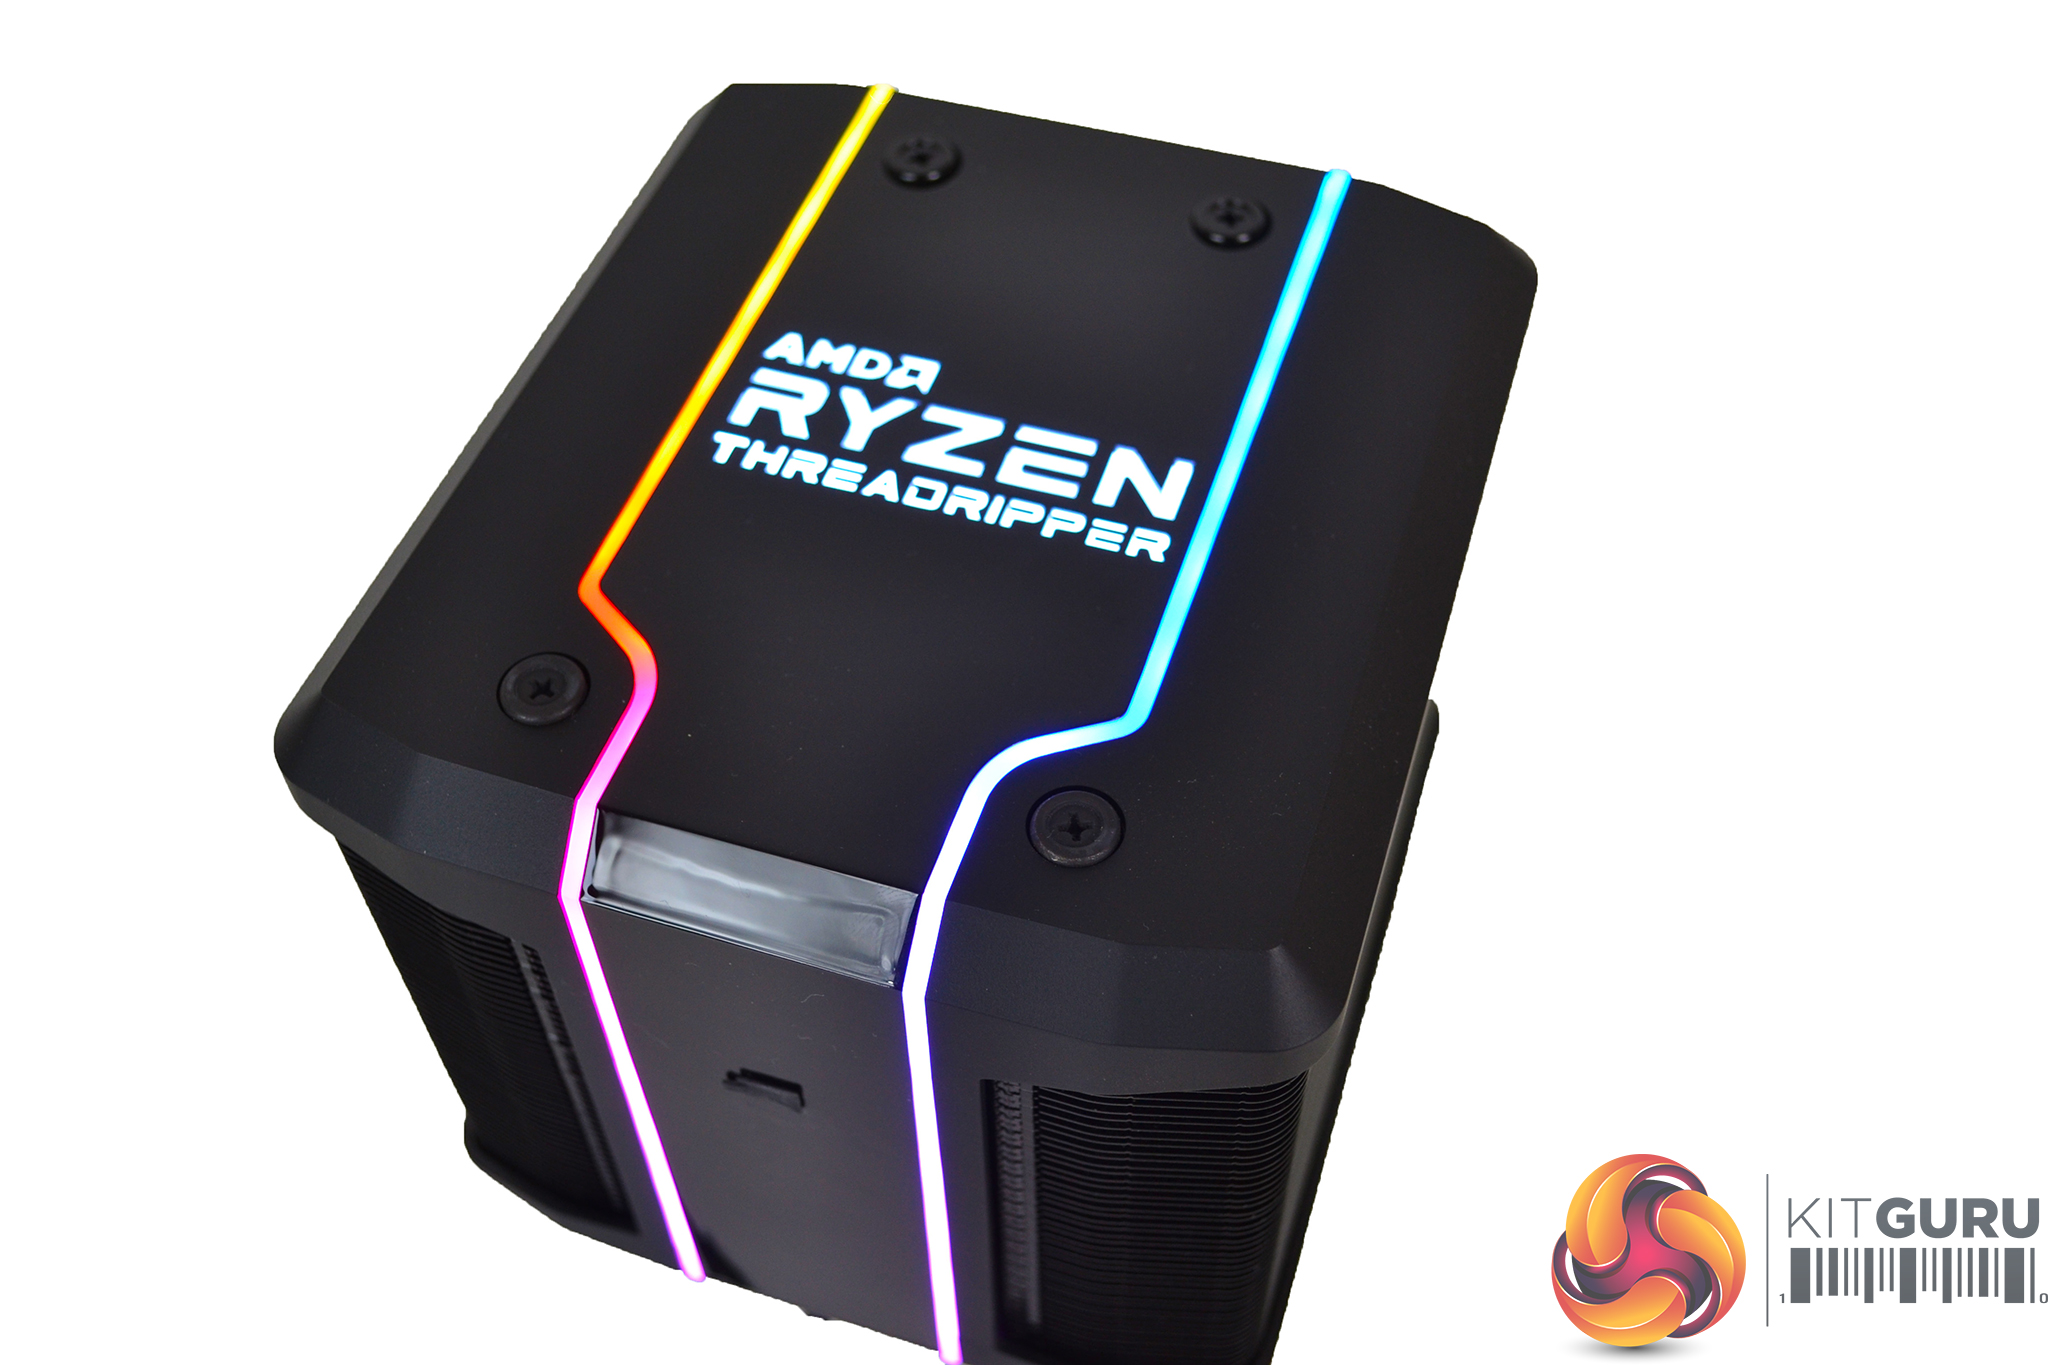
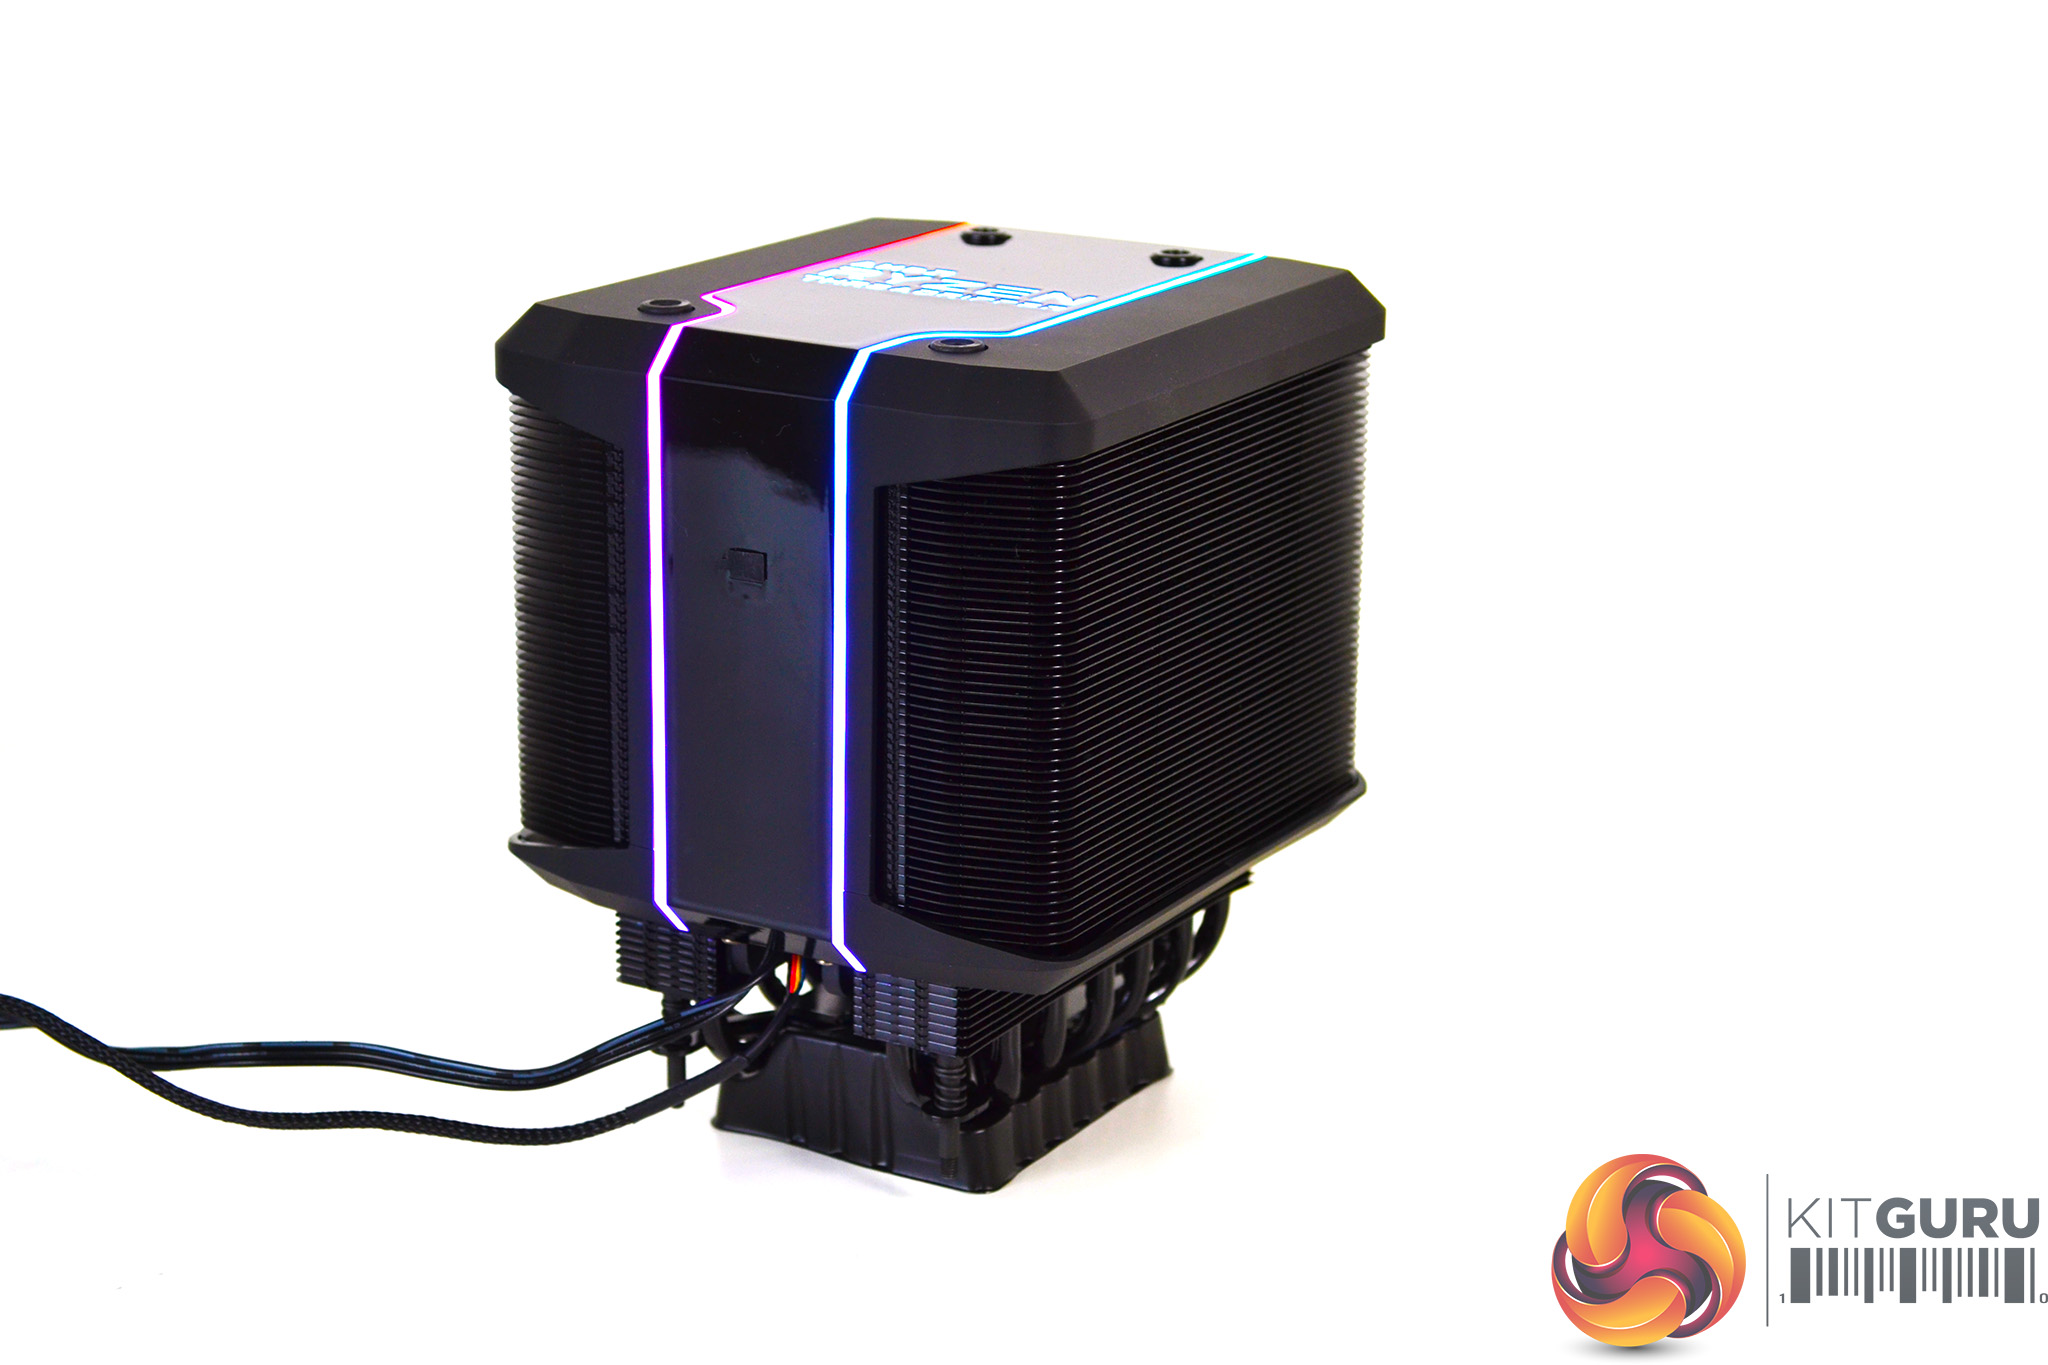
Running between the matte and gloss plastic is a thin strip of RGB lighting which continues up to the AMD Ryzen Threadripper logo on the top. When lit up, the RGB is nice and bright and the colours pop out well.
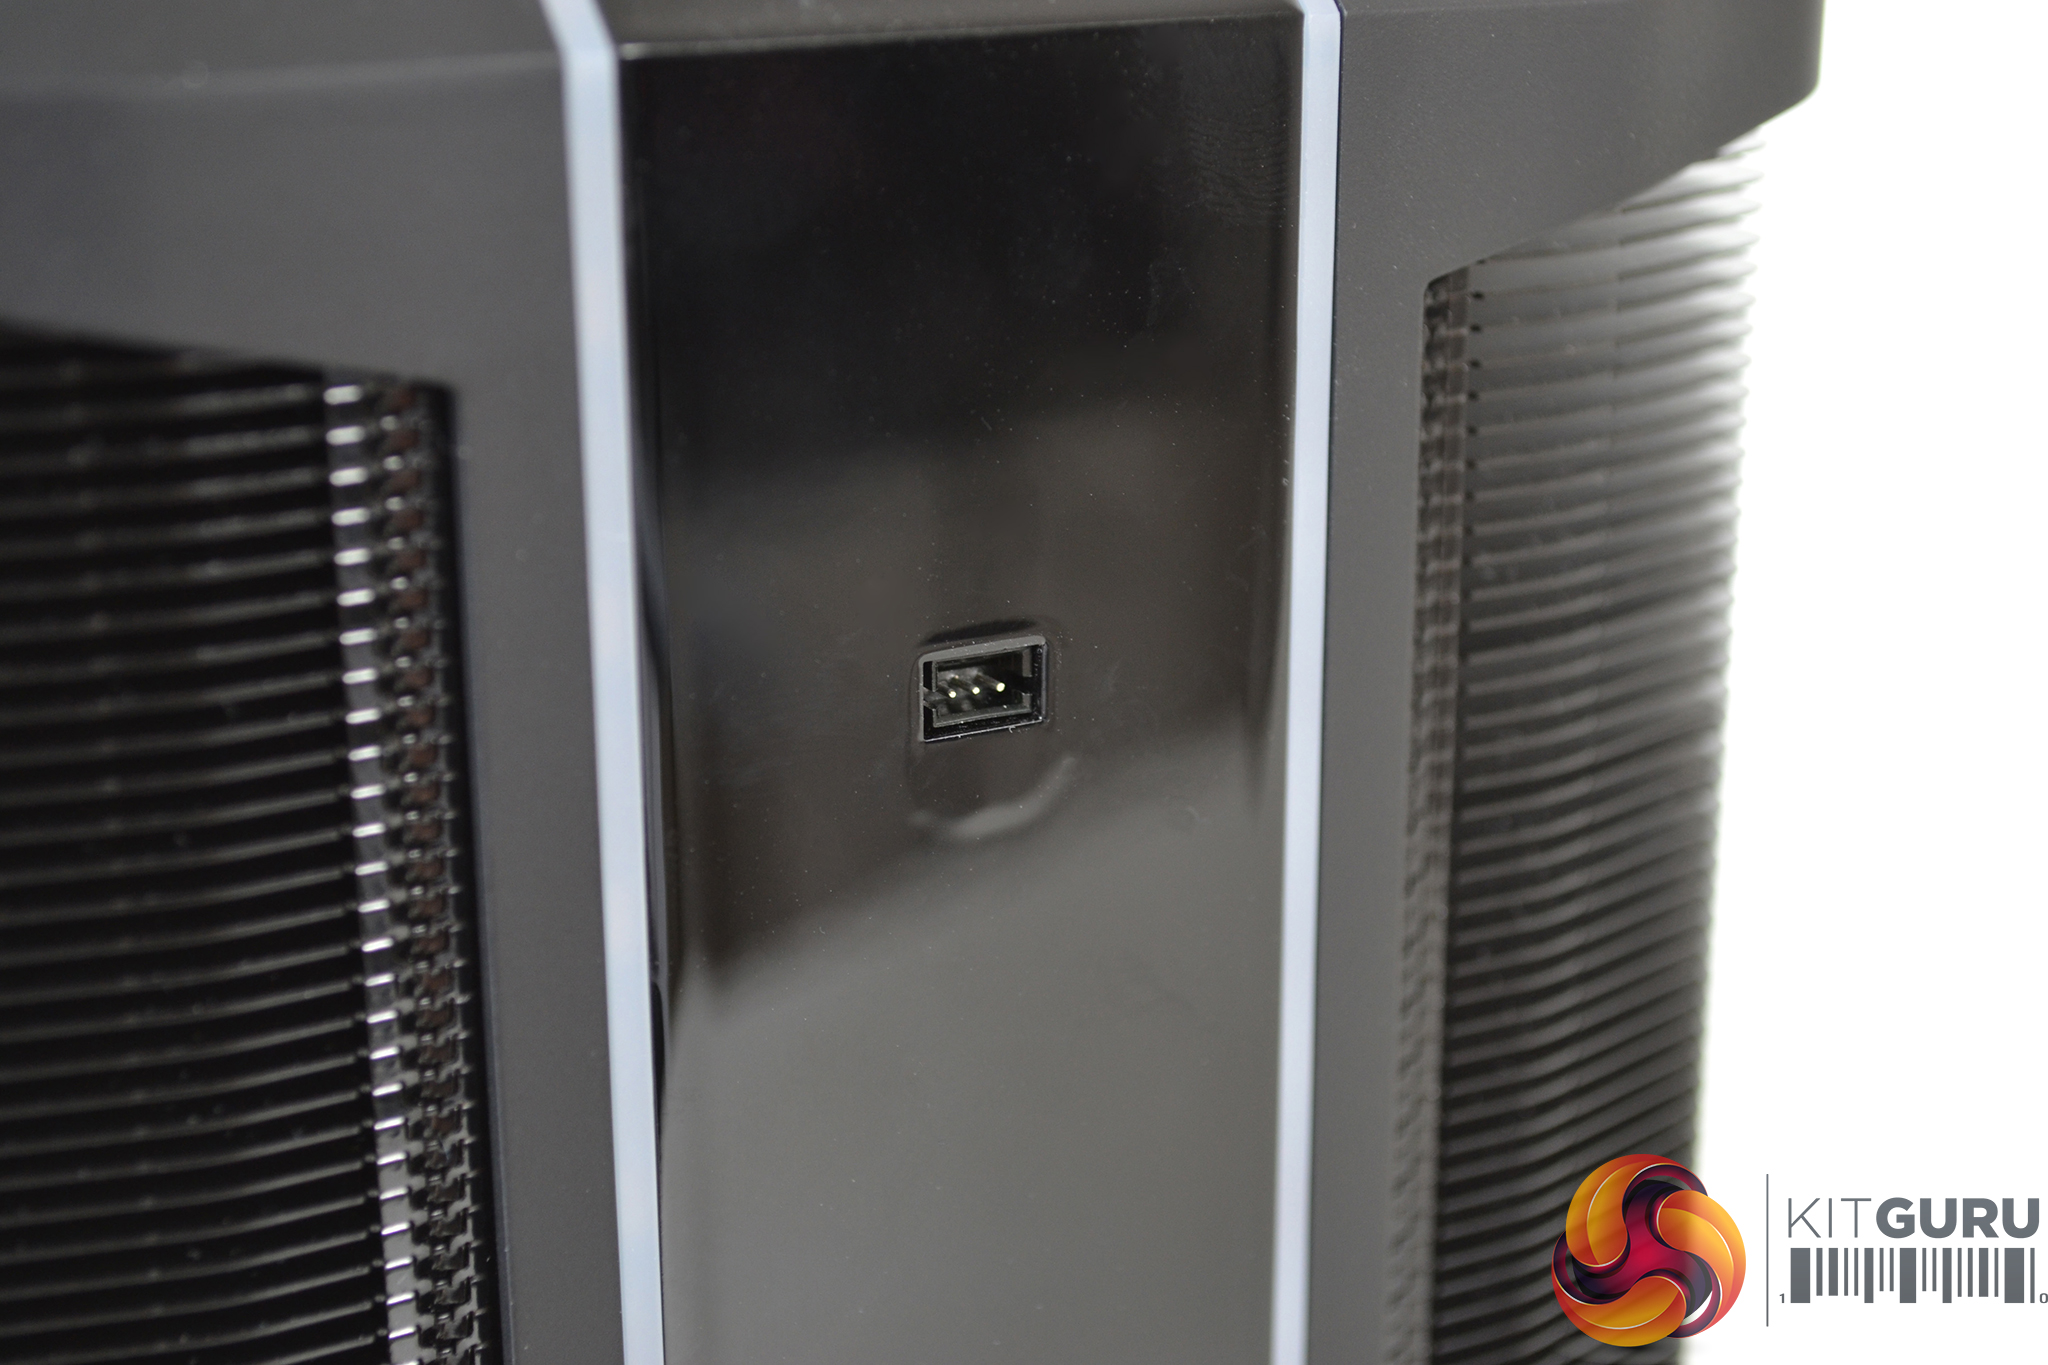
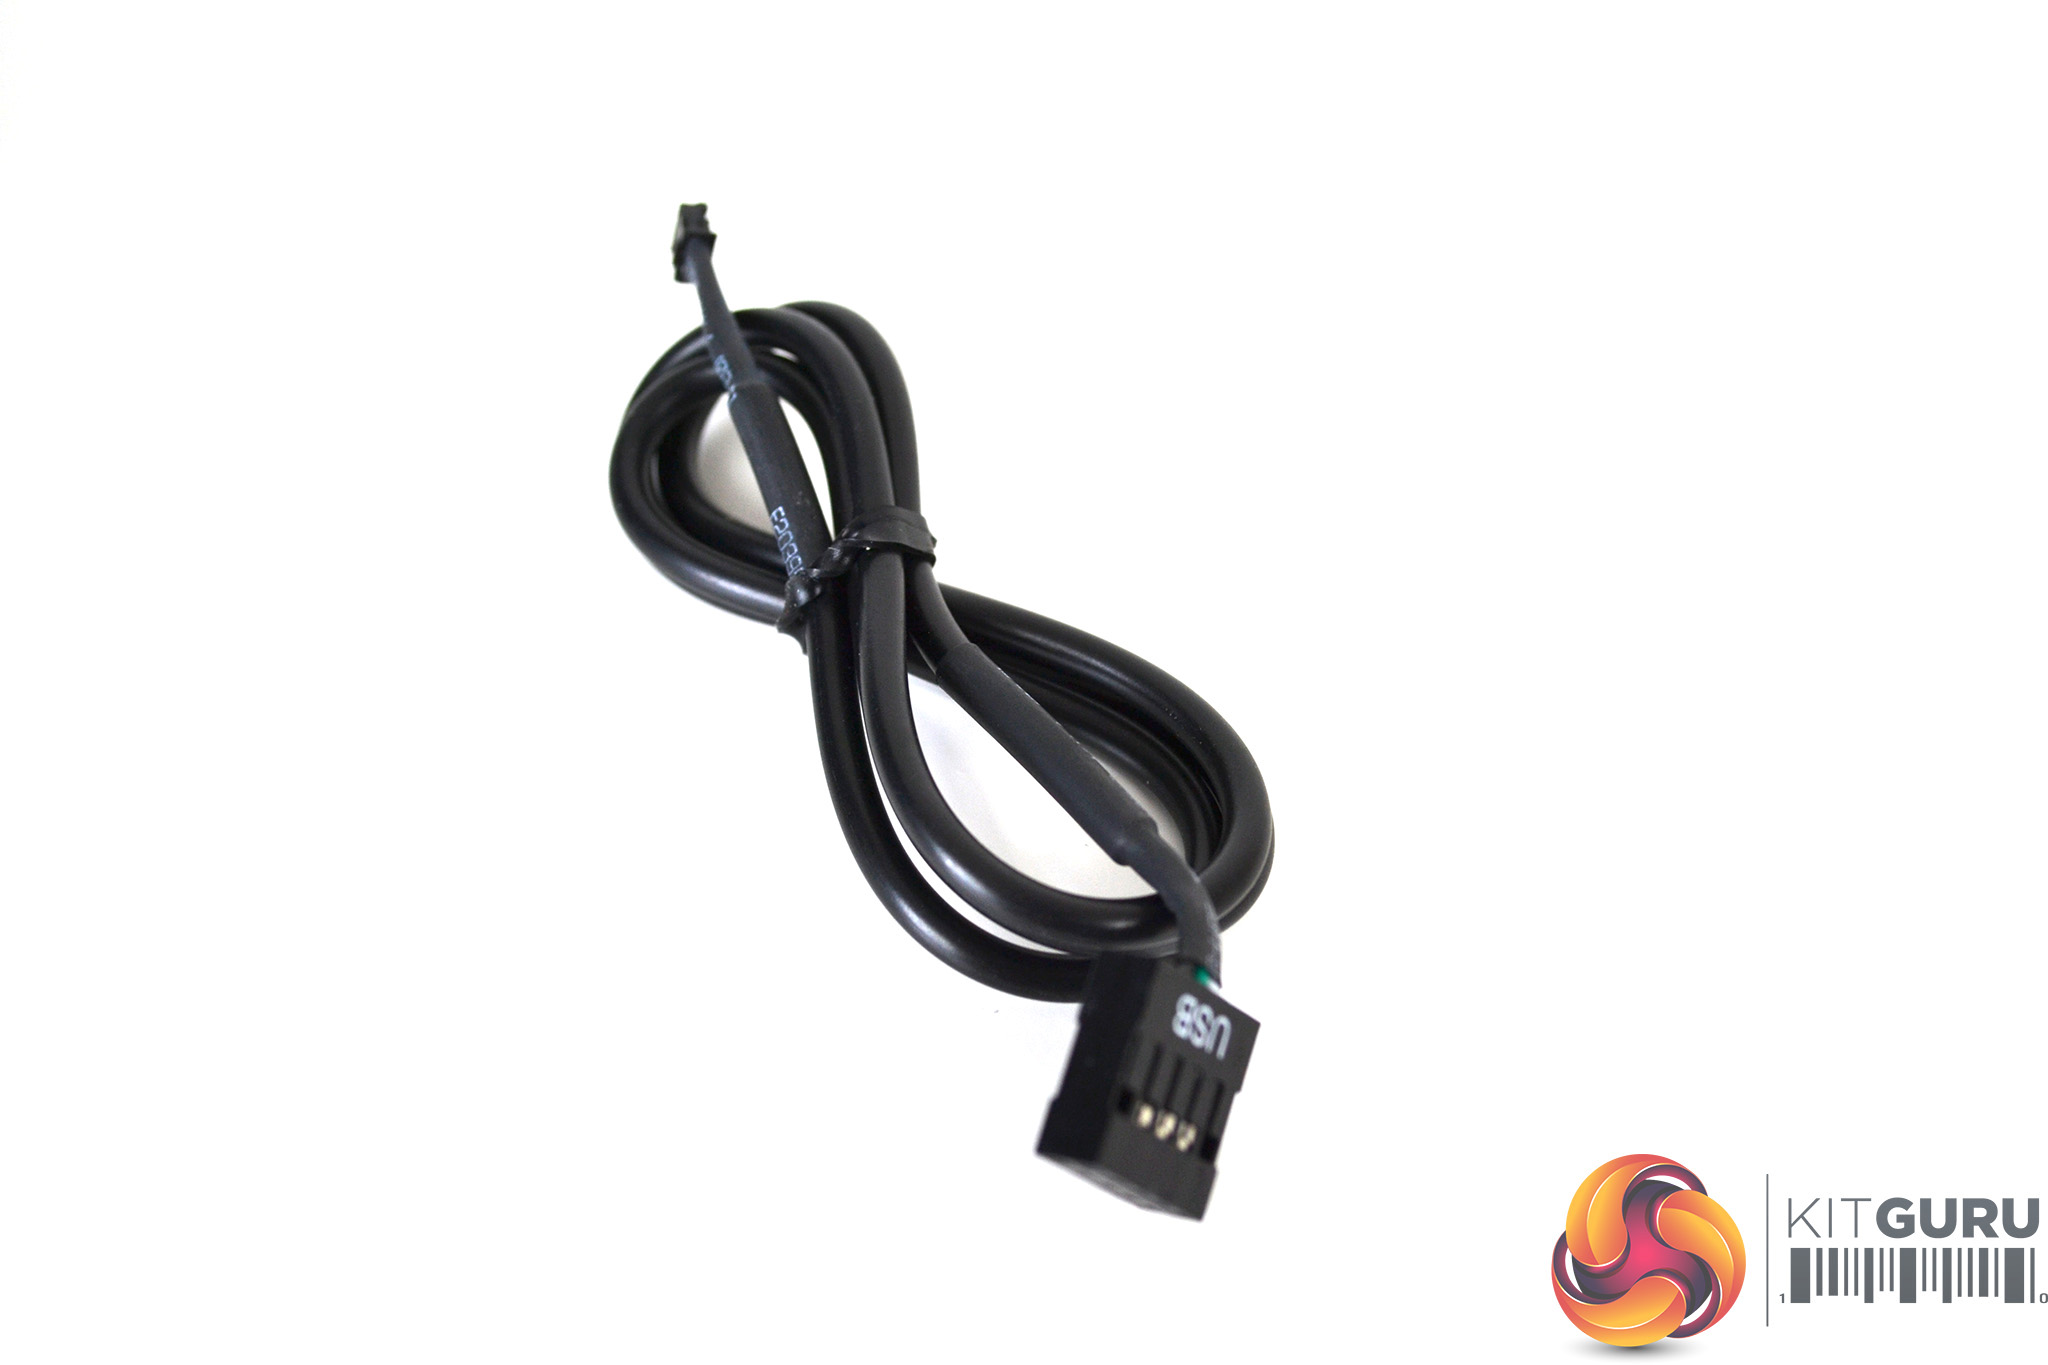
Behind a small rubber grommet, there is a three-pin socket to connect the provided USB cable. This cable used in conjunction with Cooler Master’s Wraith Ripper RGB software, enables control of various RGB patterns and colours.
Overall the Wraith Ripper looks rather nice. Contrasting plastics and RGB lighting certainly make it stand out, while the central fan ensures a clean and sleek look.
Hardware Installation
The installation process of the Wraith Ripper couldn’t have been made any simpler. There are no additional brackets to install, as it utilises the stock mounting.
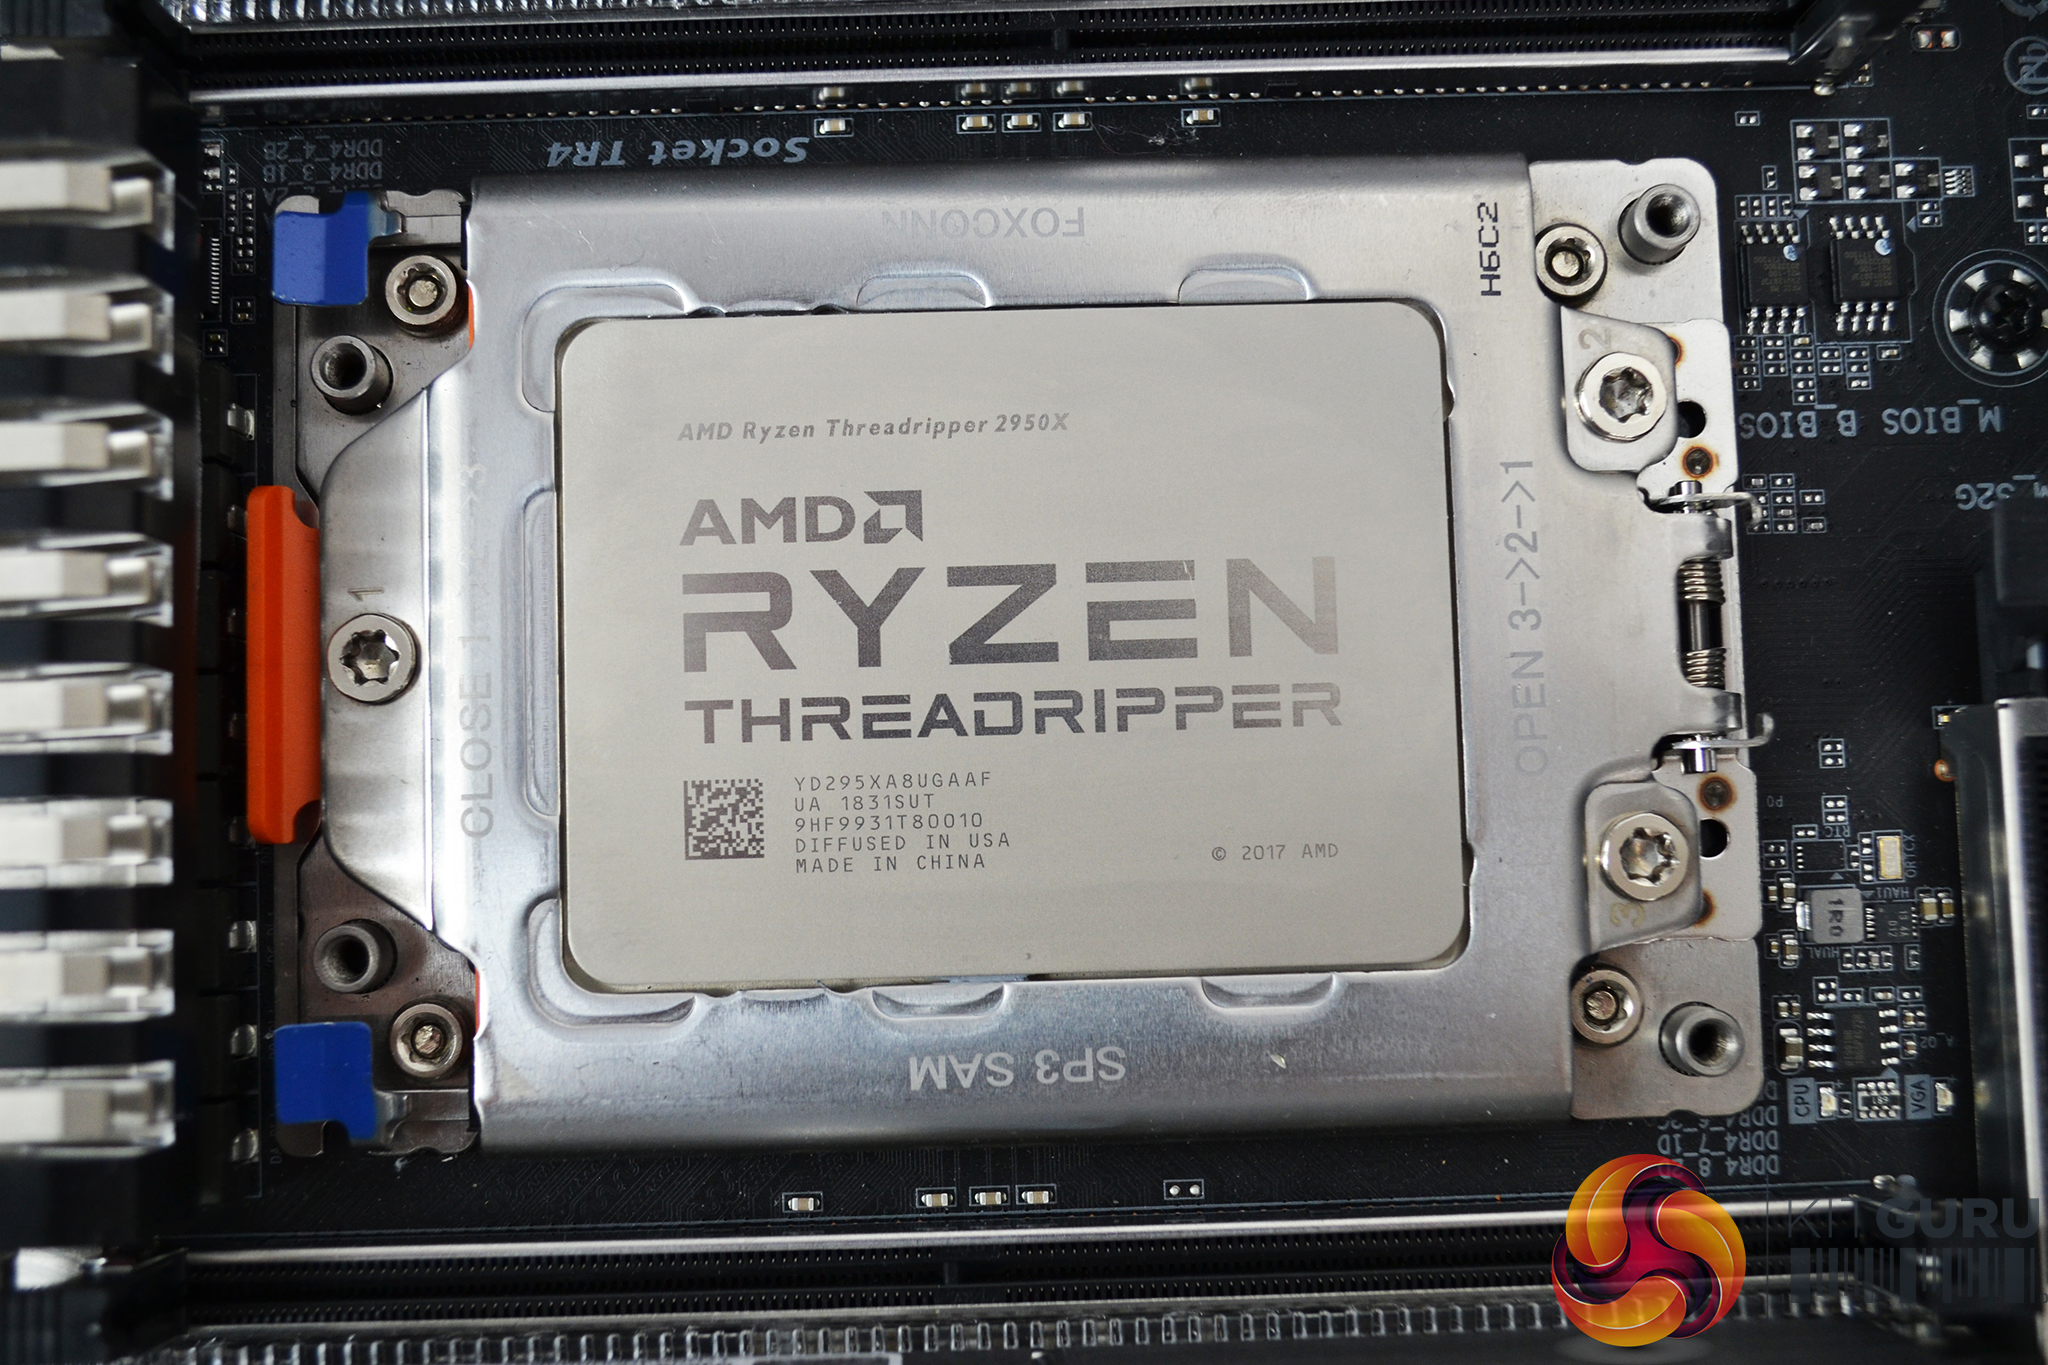
First of all, check the orientation of the mounting holes and ensure the cooler is lined up correctly. It only fits one way round so you will know if you have it positioned incorrectly.

Looking at the CPU socket with the GPU below, the AMD Ryzen Threadripper logo on the Wraith Ripper should be the correct way up. If not, rotate it 180 degrees, lower it into position and engage the four screws in the socket mounting holes.
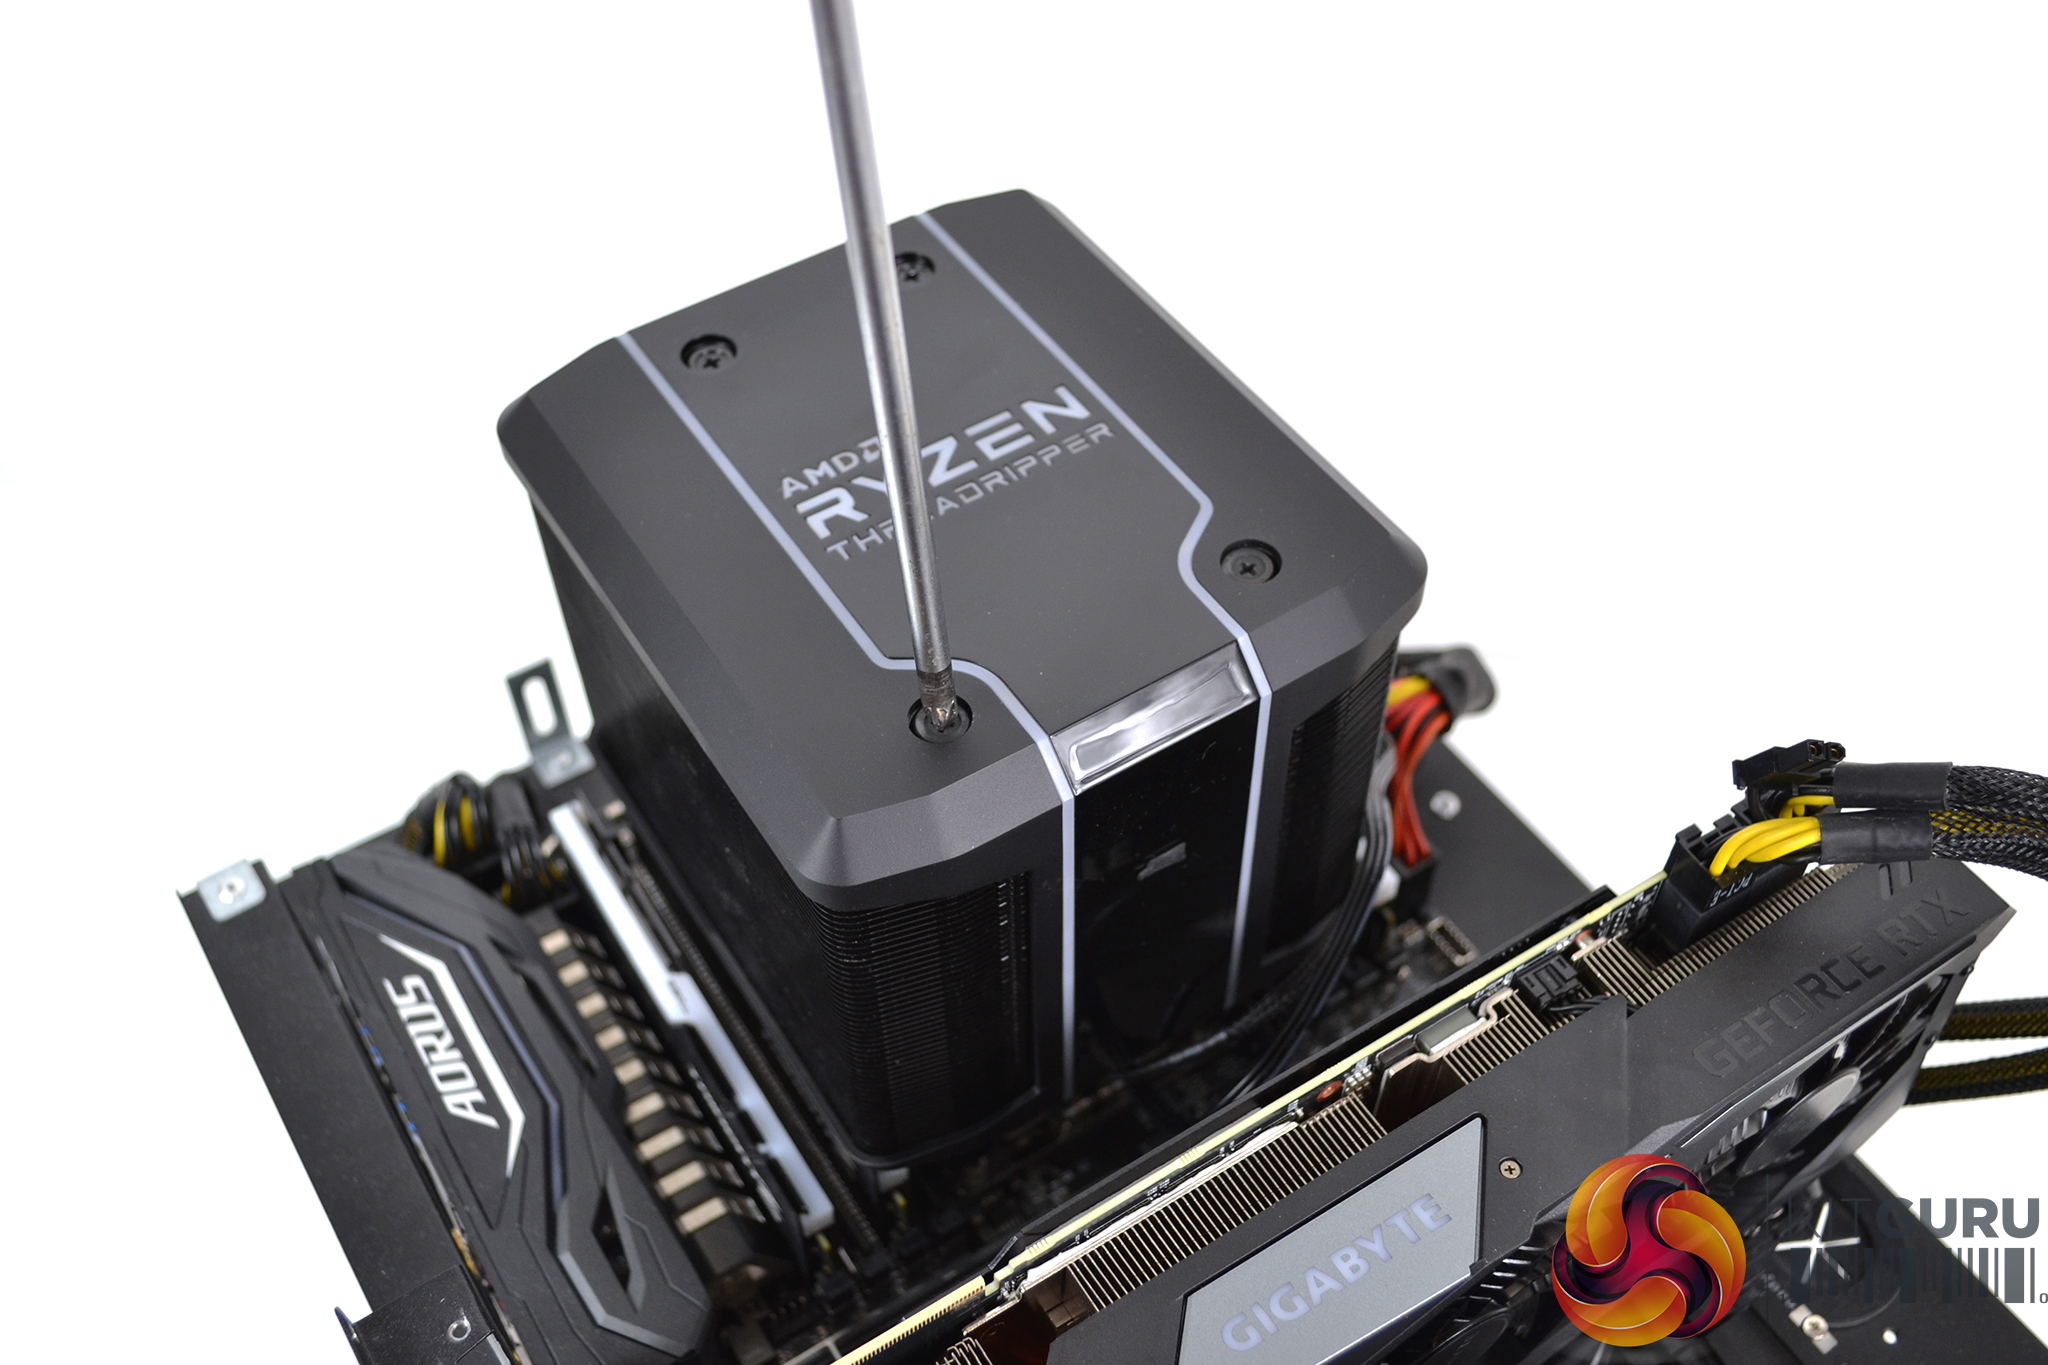
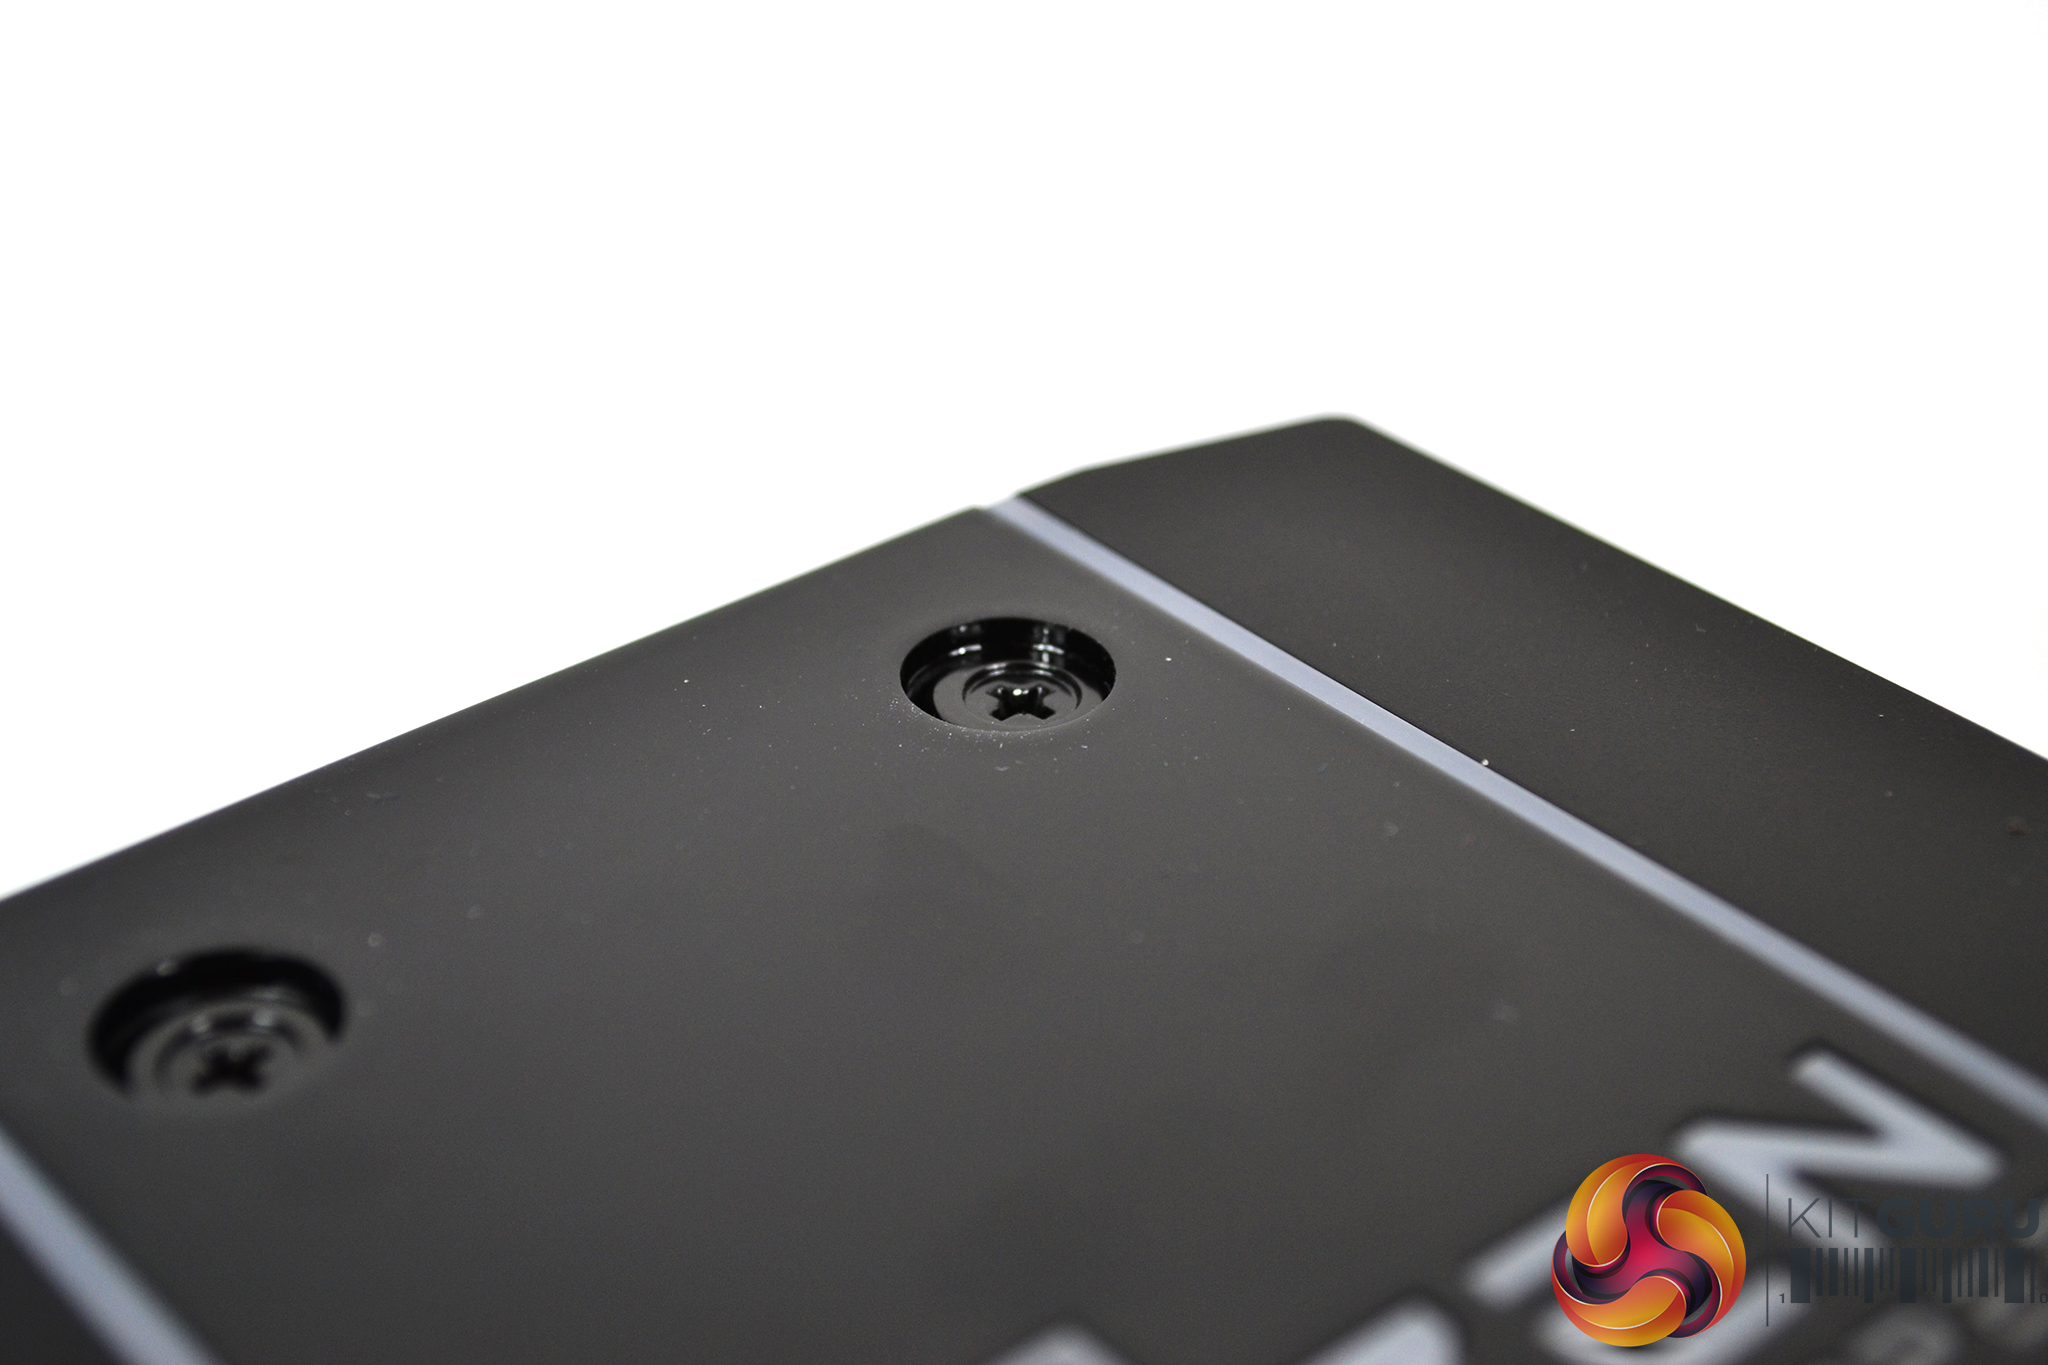
Next, simply tighten the four mounting screws on the top of the cooler evenly and in an X pattern to ensure equal pressure over the CPU HIS is applied. When you feel resistance on the screwdriver, the screws will be fully tightened. You will notice the screw heads sink below the surface when tight.
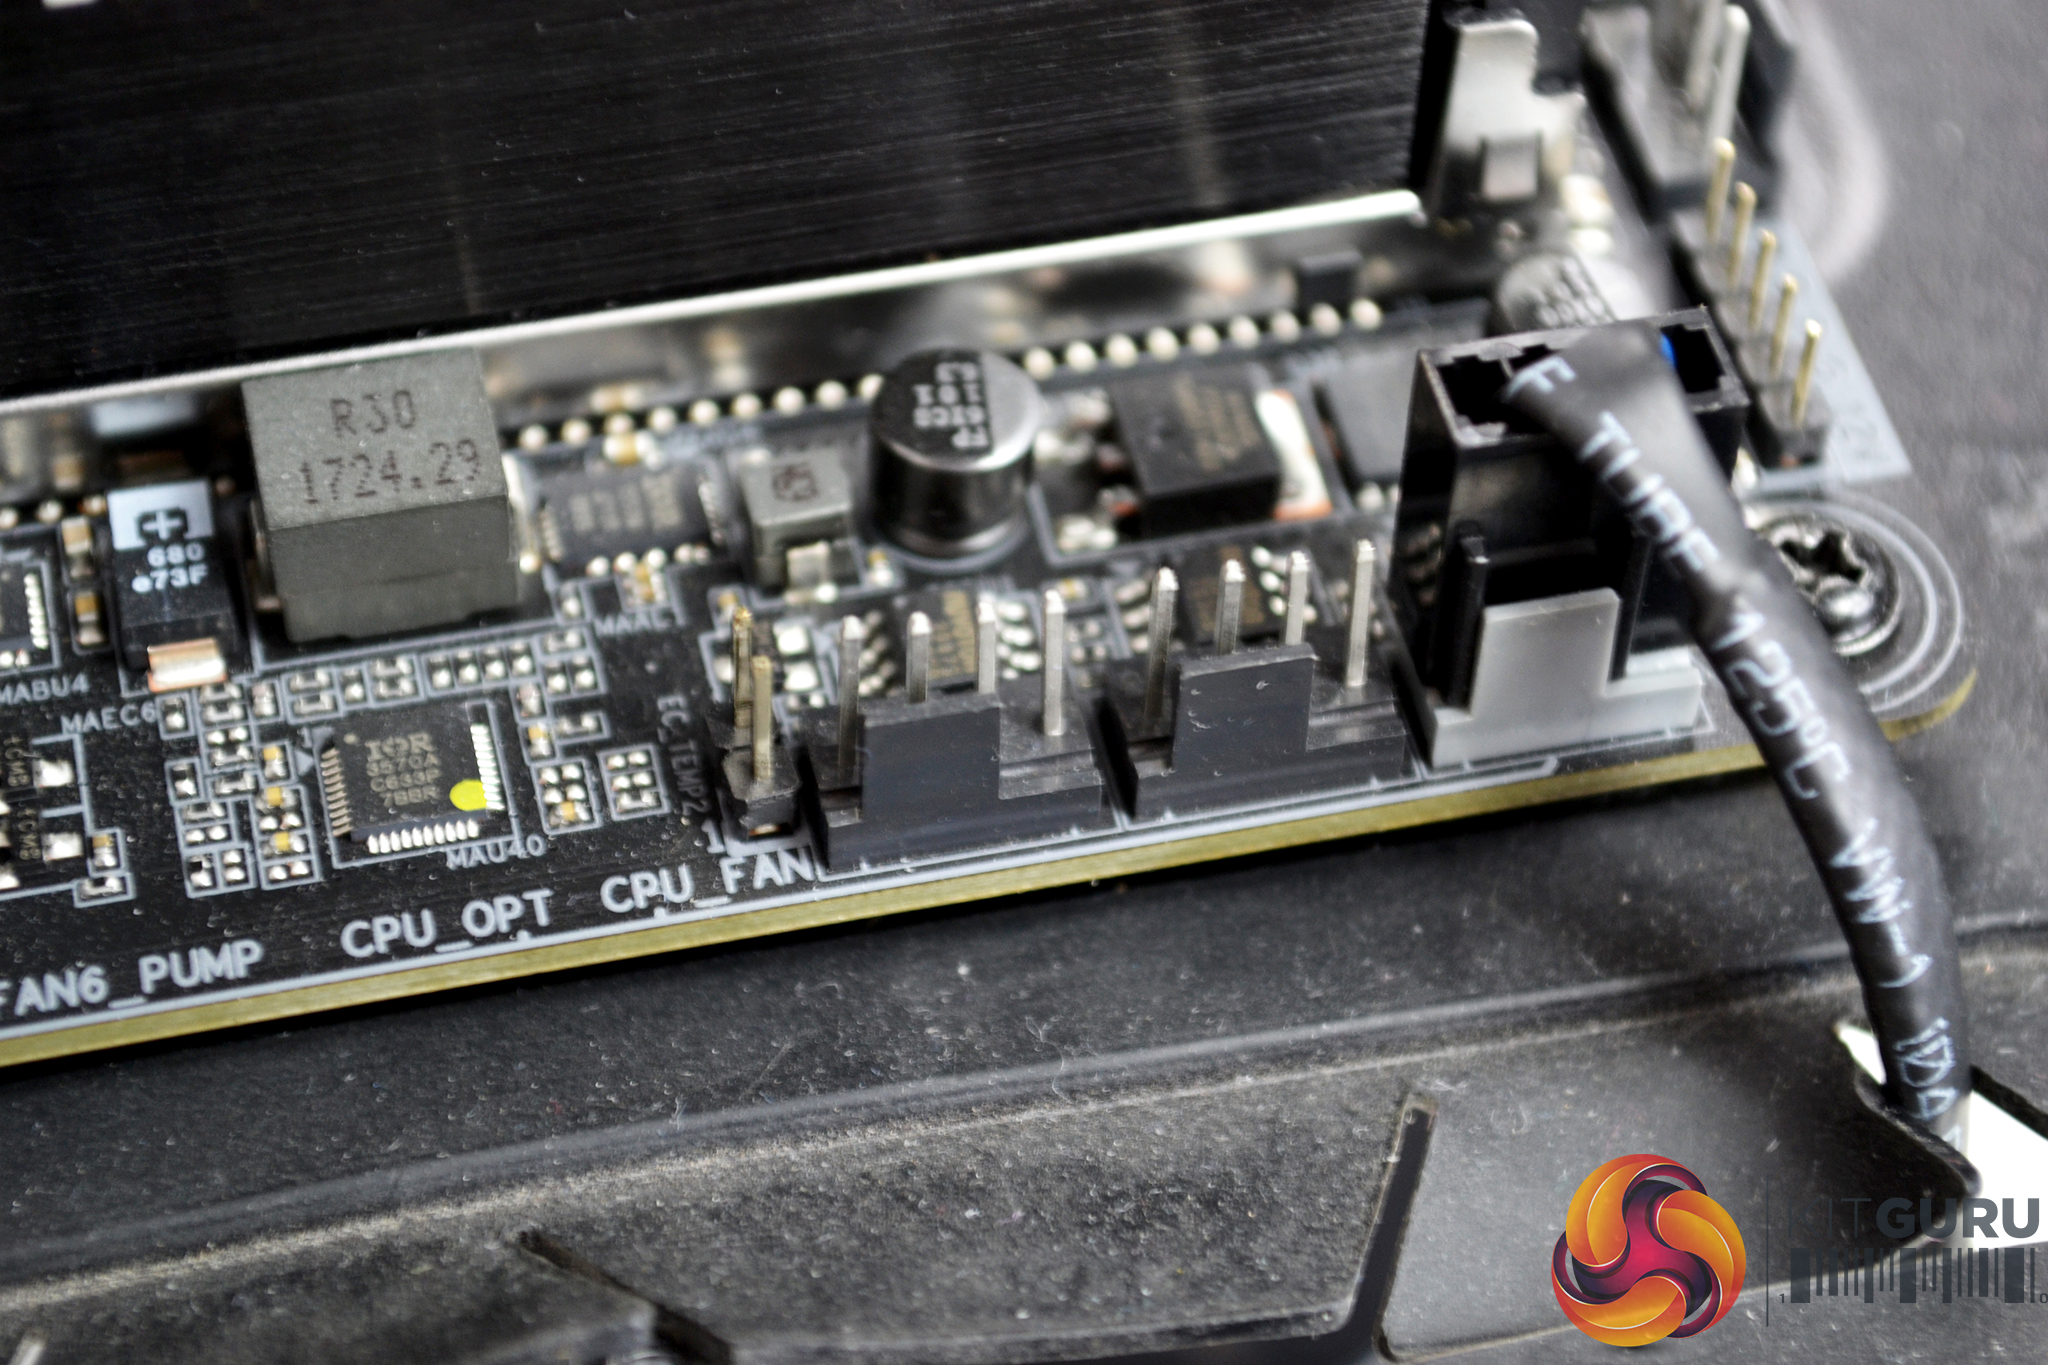
Now, locate the CPU_FAN header on the motherboard and connect the four-pin PWM fan cable to it. The best way I found to hide the fan cable to ensure it looks neat and tidy was to thread it between the underside of the cooler and the RAM slots to the nearest cable cut out.


Next, connect the SATA power cable for the RGB. Again, under the cooler and alongside the RAM was the optimal way to hide the cable. Routing the RGB USB cable was a different story – due to its length it wouldn’t reach the top cable cut out, so instead I had to route it around the GPU which looks a little untidy.

Obviously, if RGB is not to your liking, then you could leave the SATA power cable unplugged and not install the USB cable, which would therefore neaten things up a little.
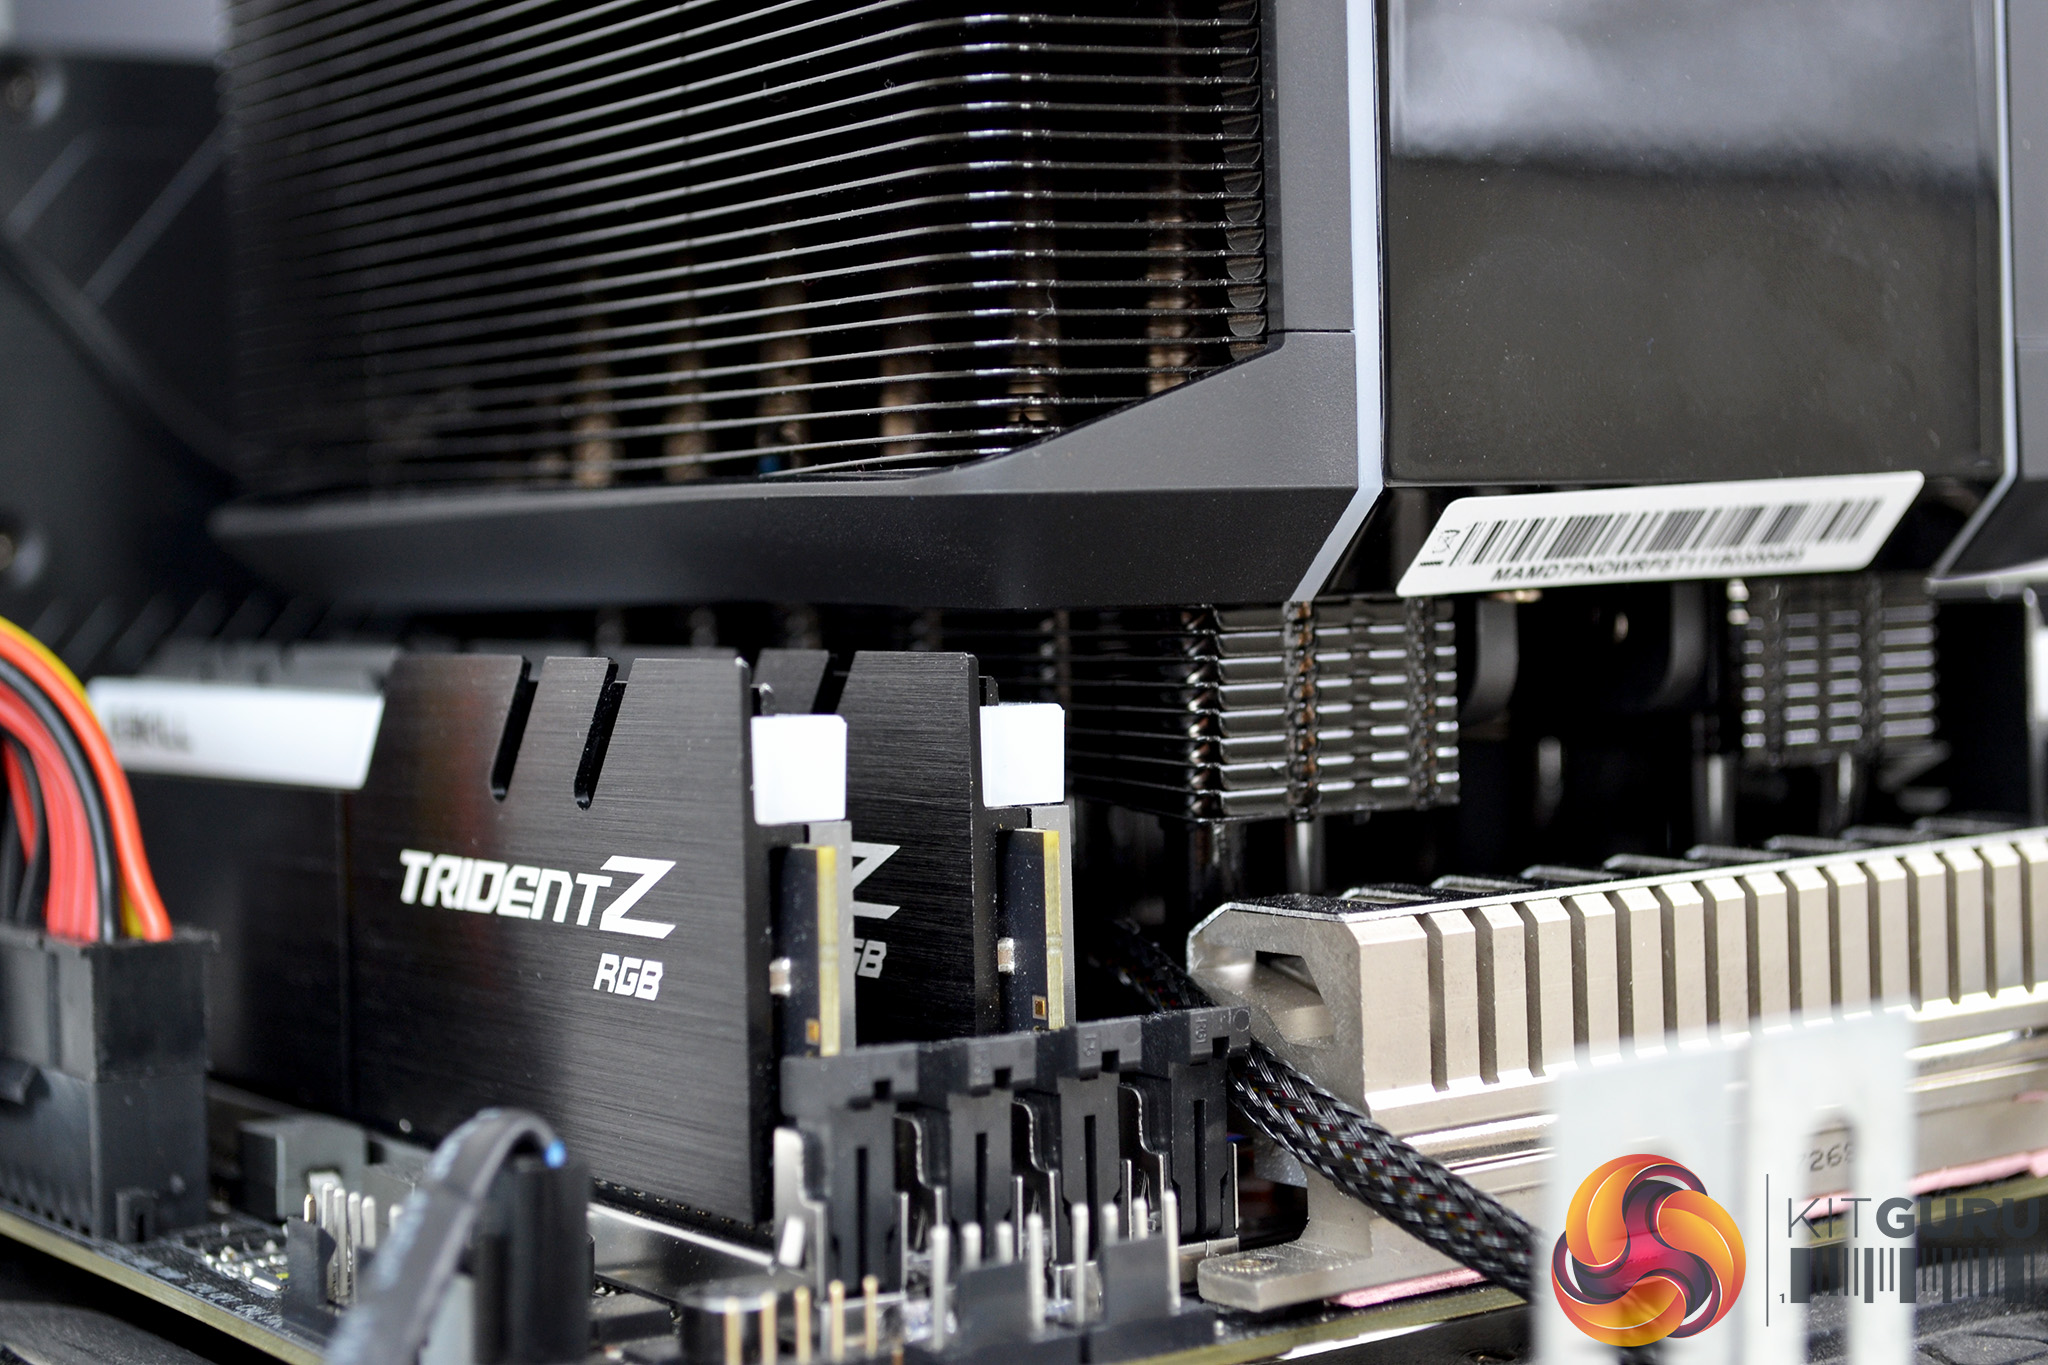
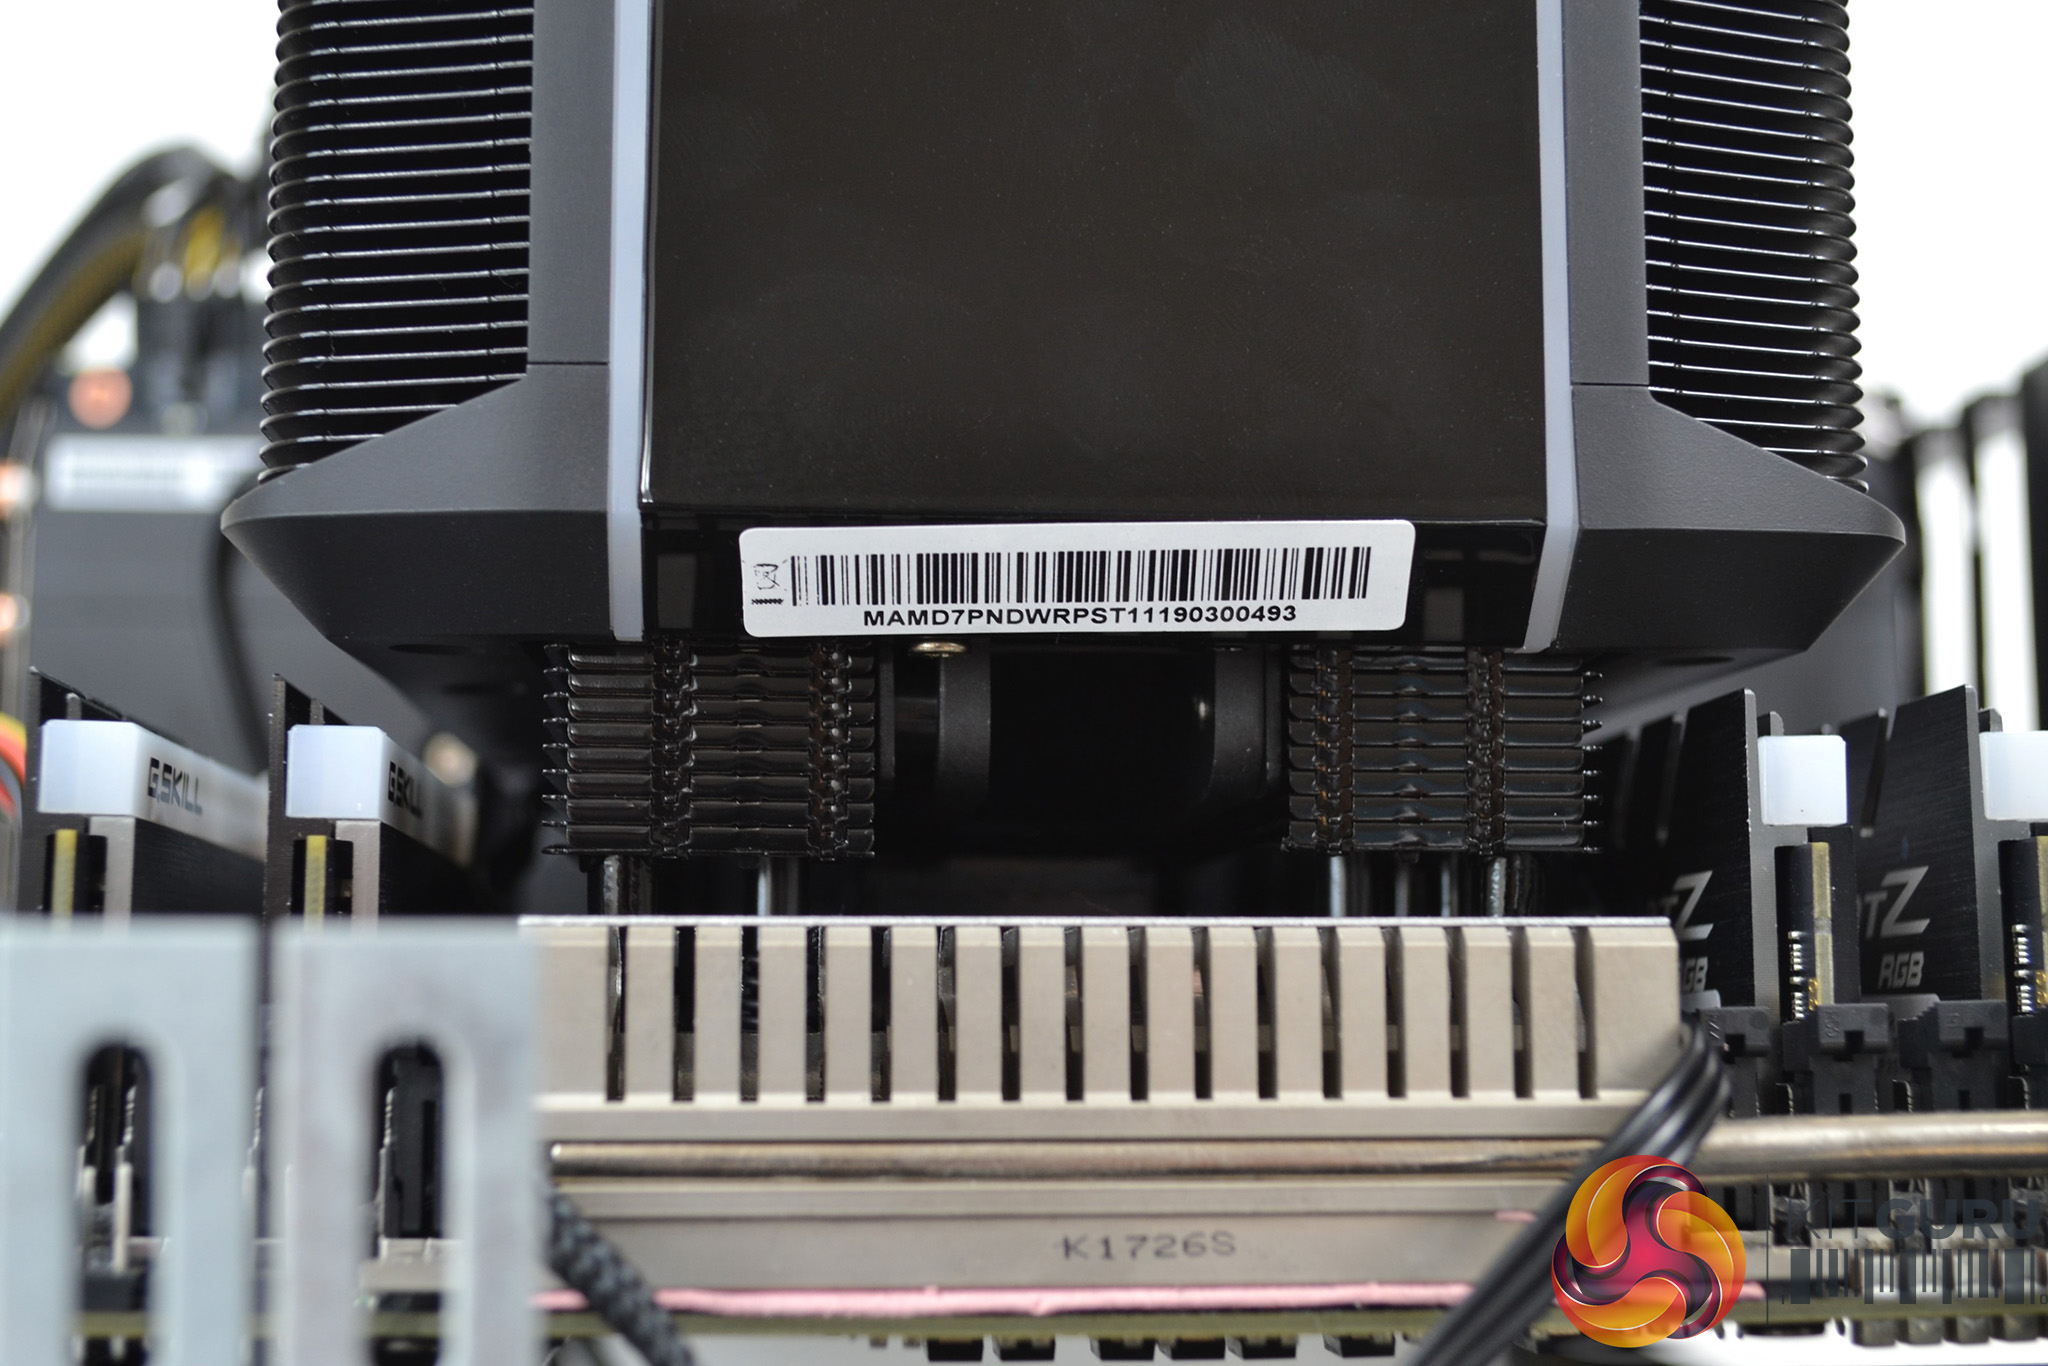
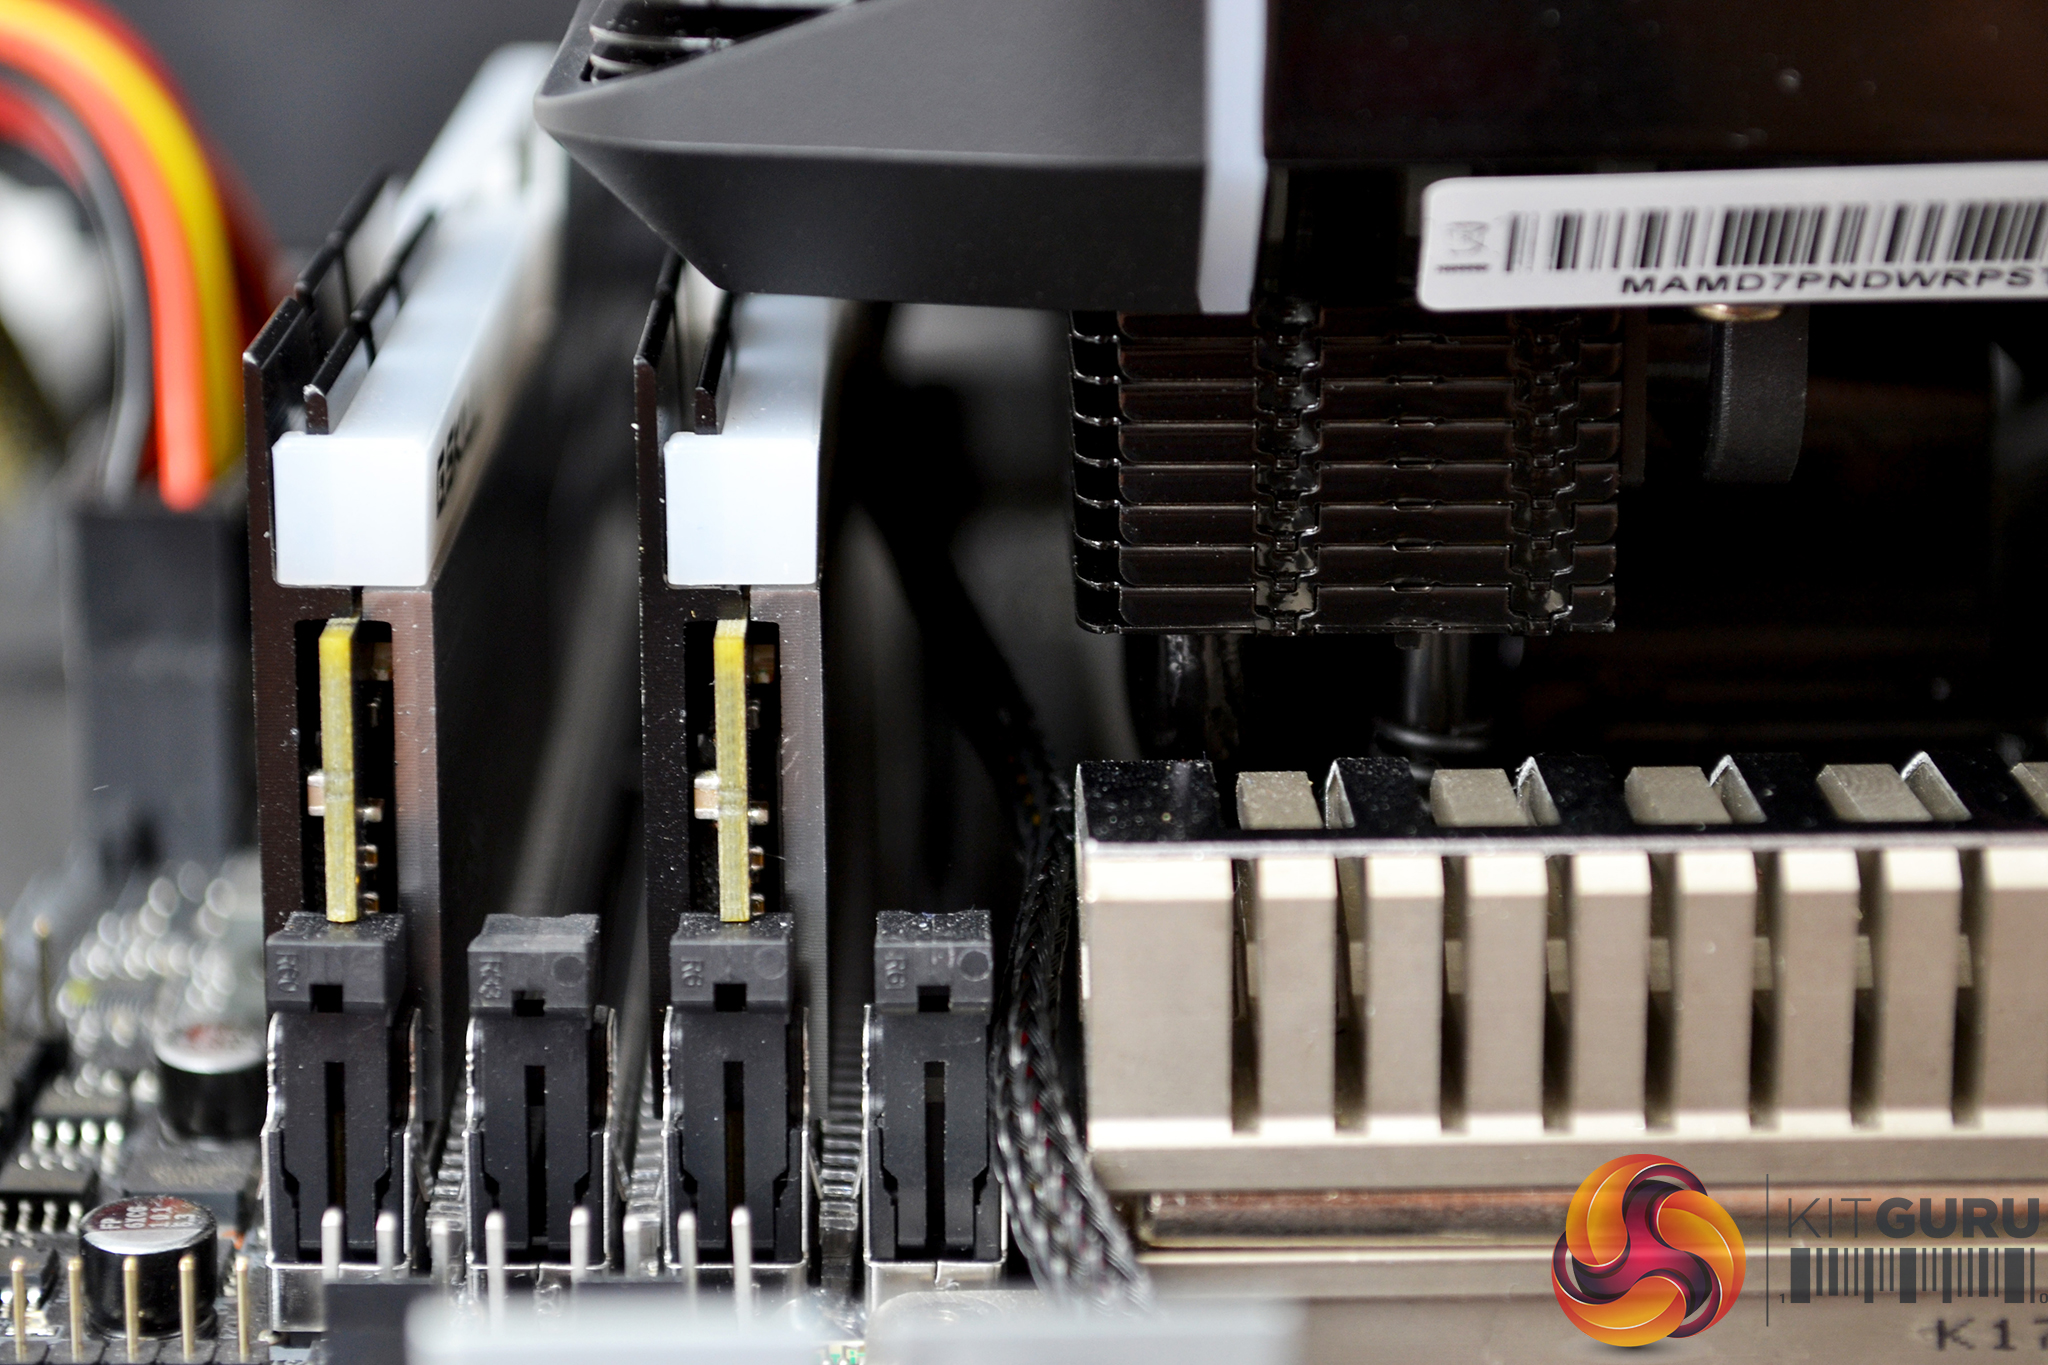
Something worth noting about the Wraith Ripper is RAM clearance. It sat quite tight to our G.SKILL Trident Z RGB modules, so clearance with tall RAM modules may be an issue and worth looking into before purchasing.
Overall, the hardware installation process is extremely simple and took about 10 minutes in total. Even a complete novice should find it an easy task.
Software Installation and Configuration
RGB lighting configuration is controlled by Cooler Master’s Wraith Ripper software, which can be downloaded from Cooler Master’s website here.
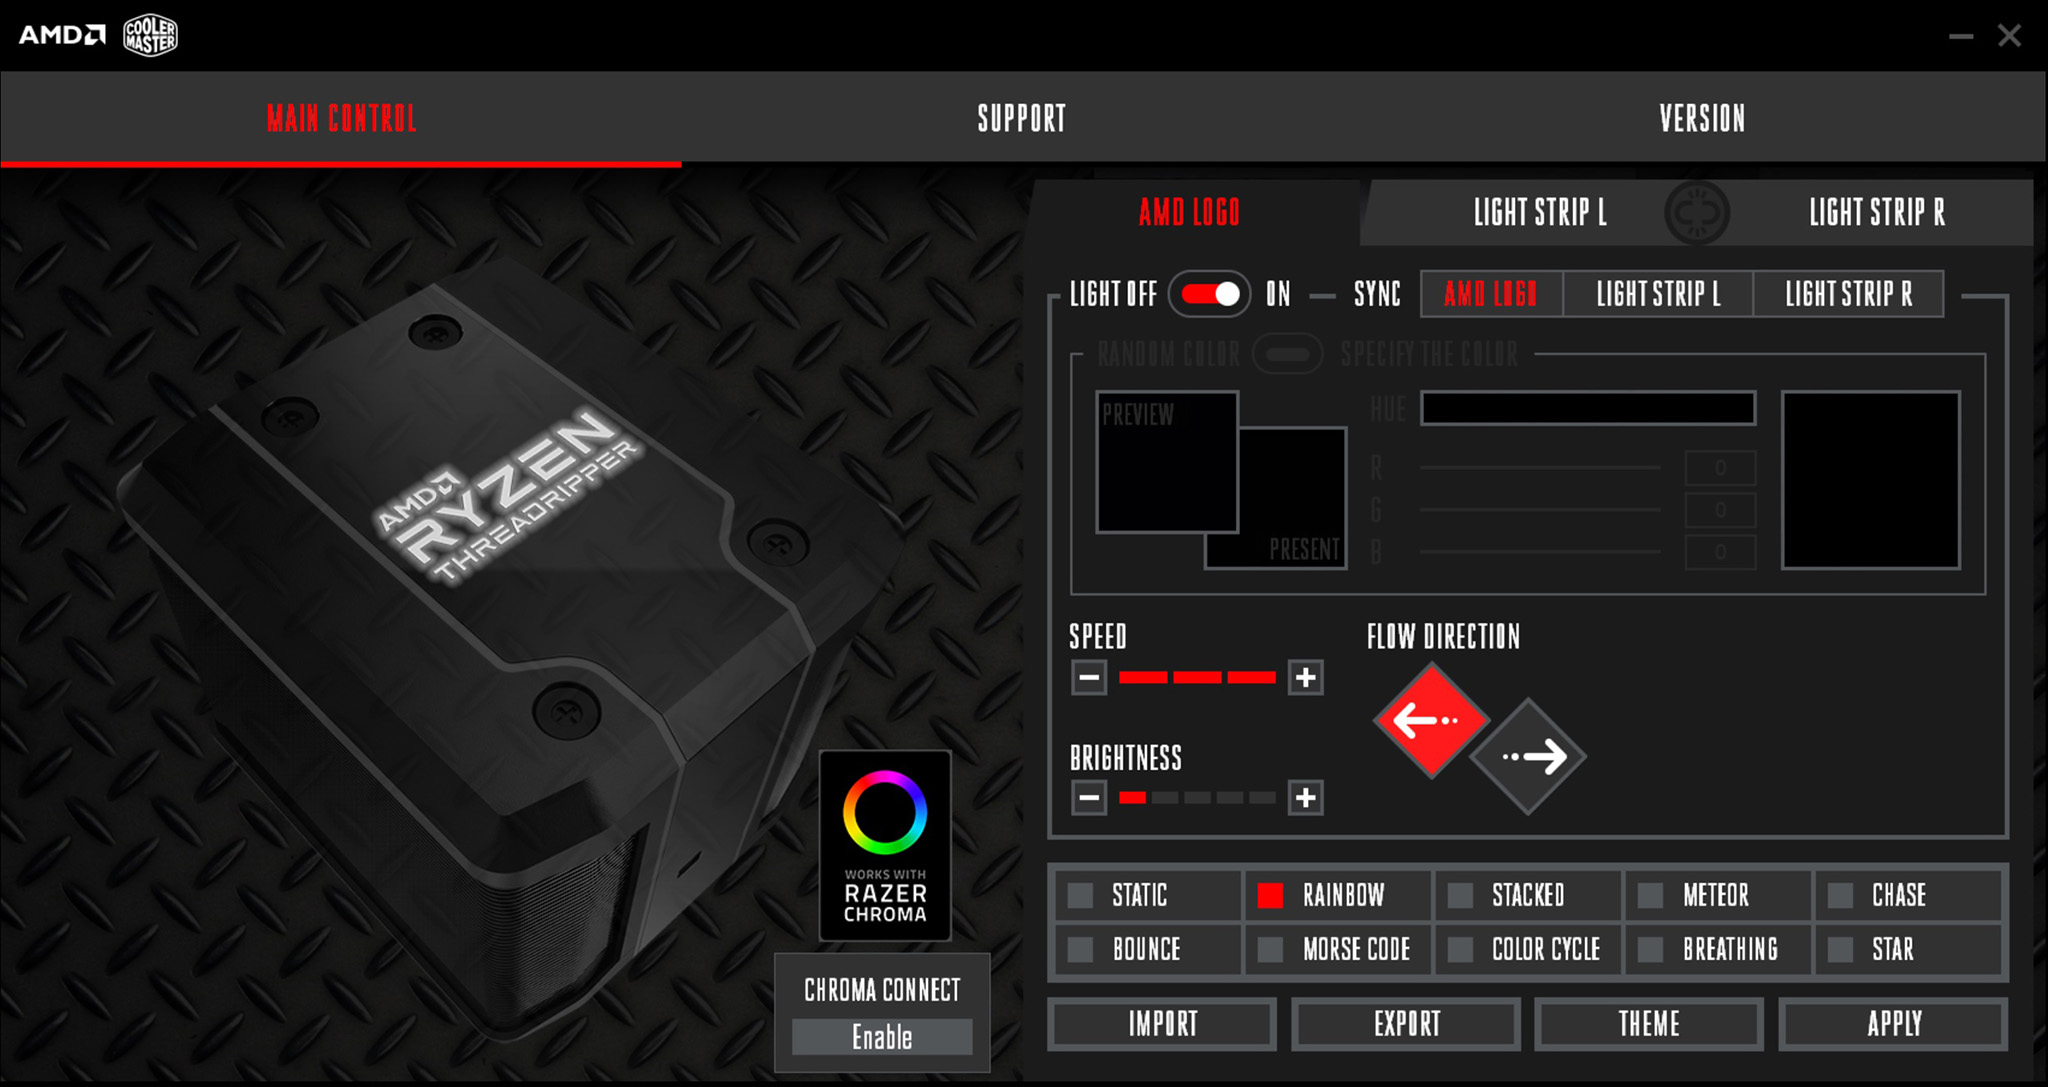
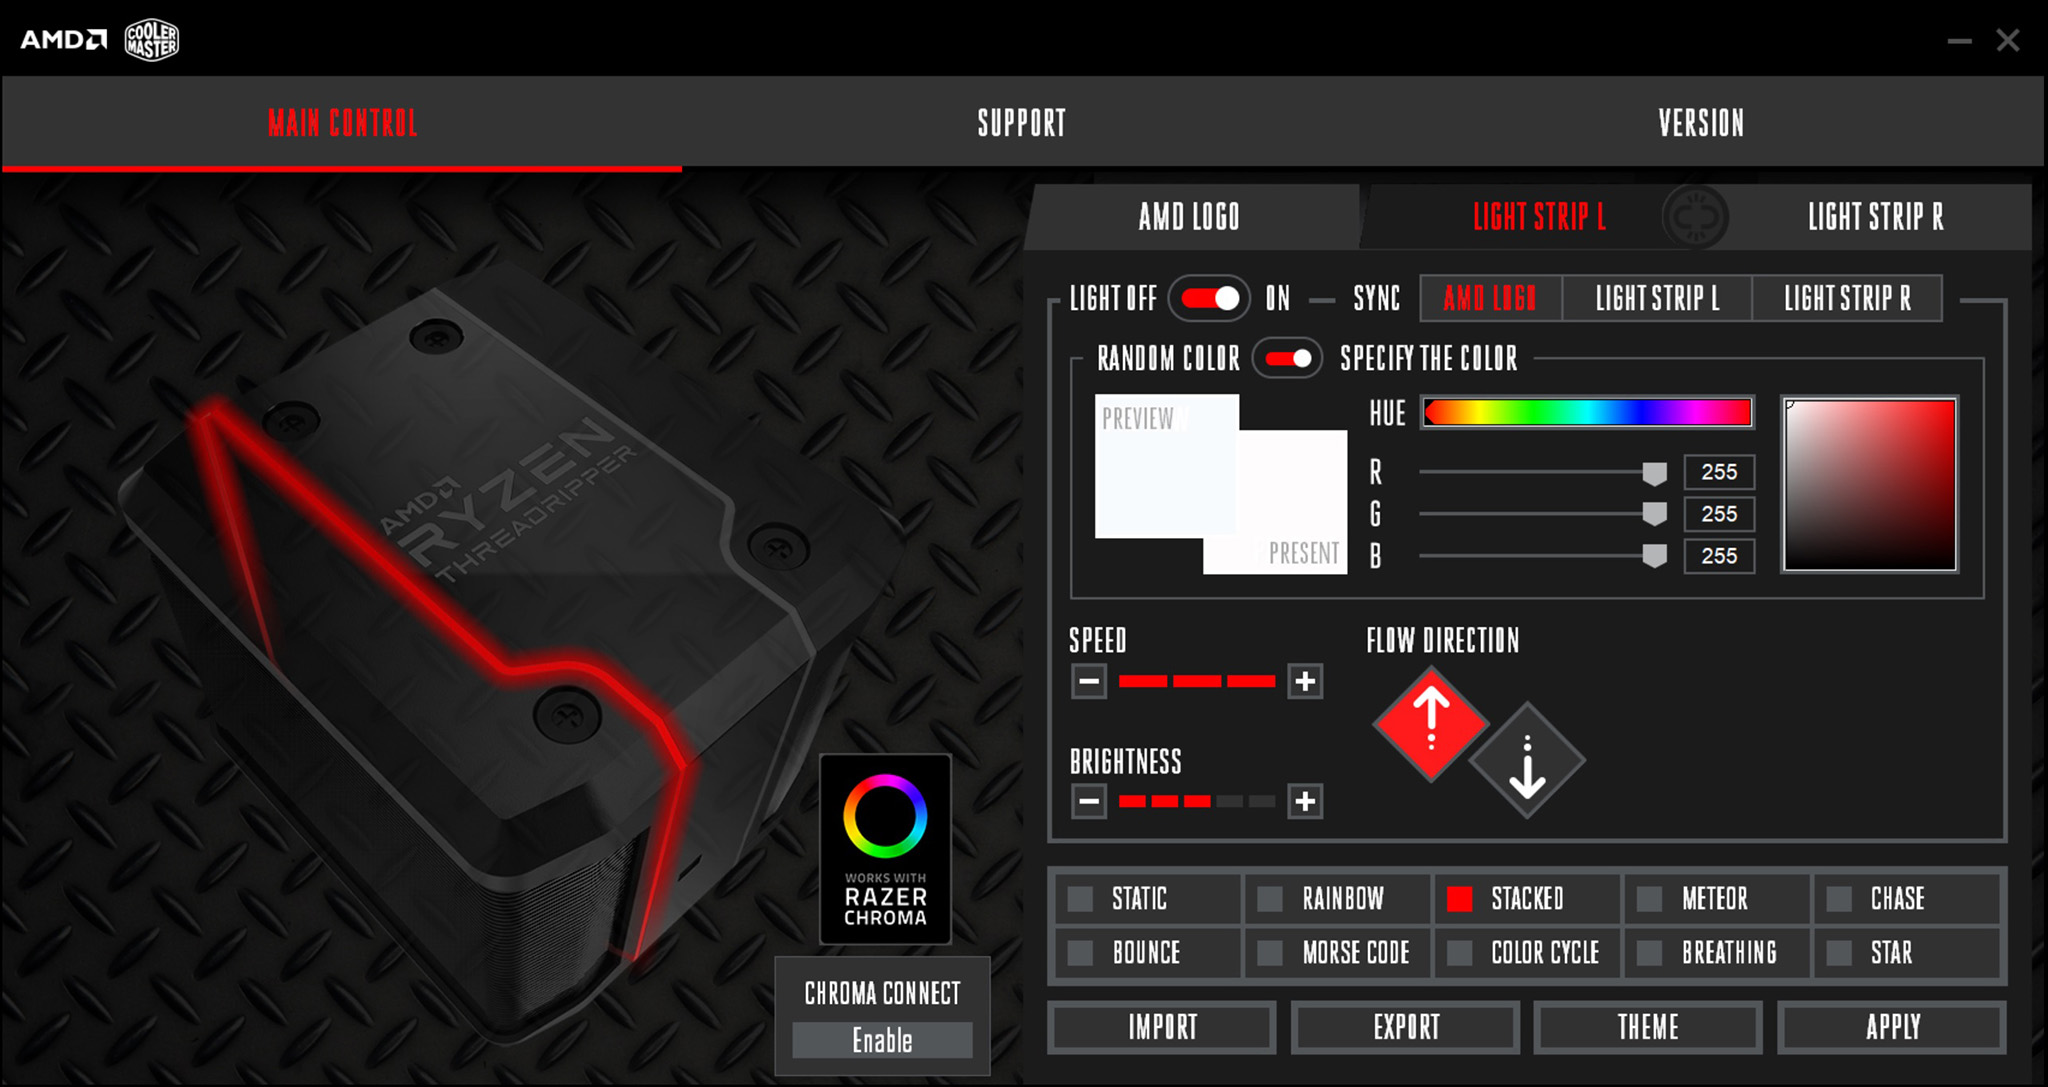
Once installed, there are multiple options. The software splits the coolers RGB lighting up into three areas – the AMD Threadripper logo, light strip L and light strip R. All three areas can be configured individually or in sync.
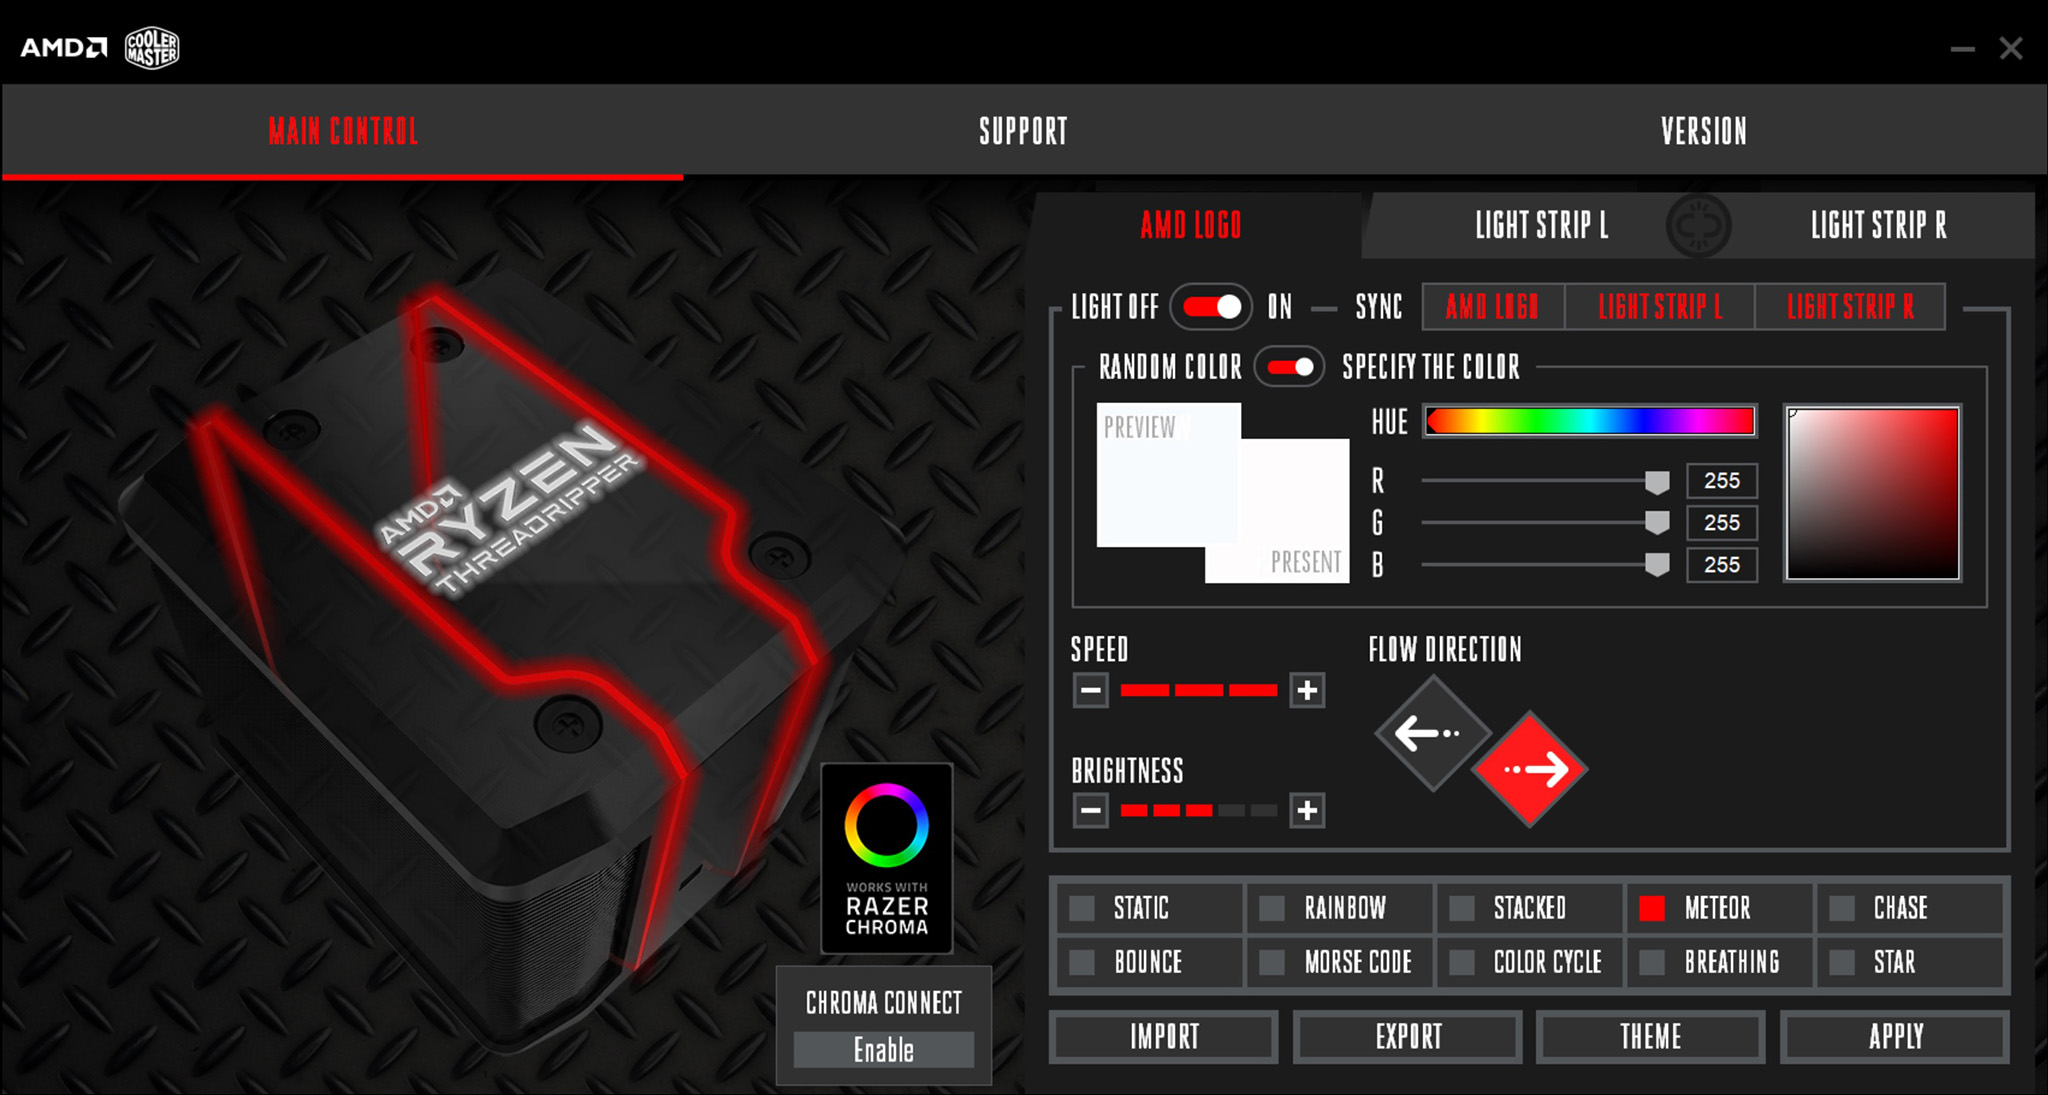
You can swap between static, rainbow, stacked, meteor, chase, bounce, Morse code, breathing and star patterns. In Morse code configuration, you type a message which is then played back in Morse code through flashes of lighting.
If you prefer not to use RGB, you can set a solid colour for each area of lighting. There is also an option to turn off all the lighting completely.
The Wraith Ripper software is compatible with Razer Chroma so can be set to sync with other Razer Chroma compatible devices. Unfortunately, the option to connect directly to a motherboard ARGB header isn’t an option, which is a shame.
To measure the performance of TR4 CPU coolers, we devised an easily repeatable series of tests. The only variable is the coolers themselves to ensure the results can be accurately compared against one another.
Test Rig
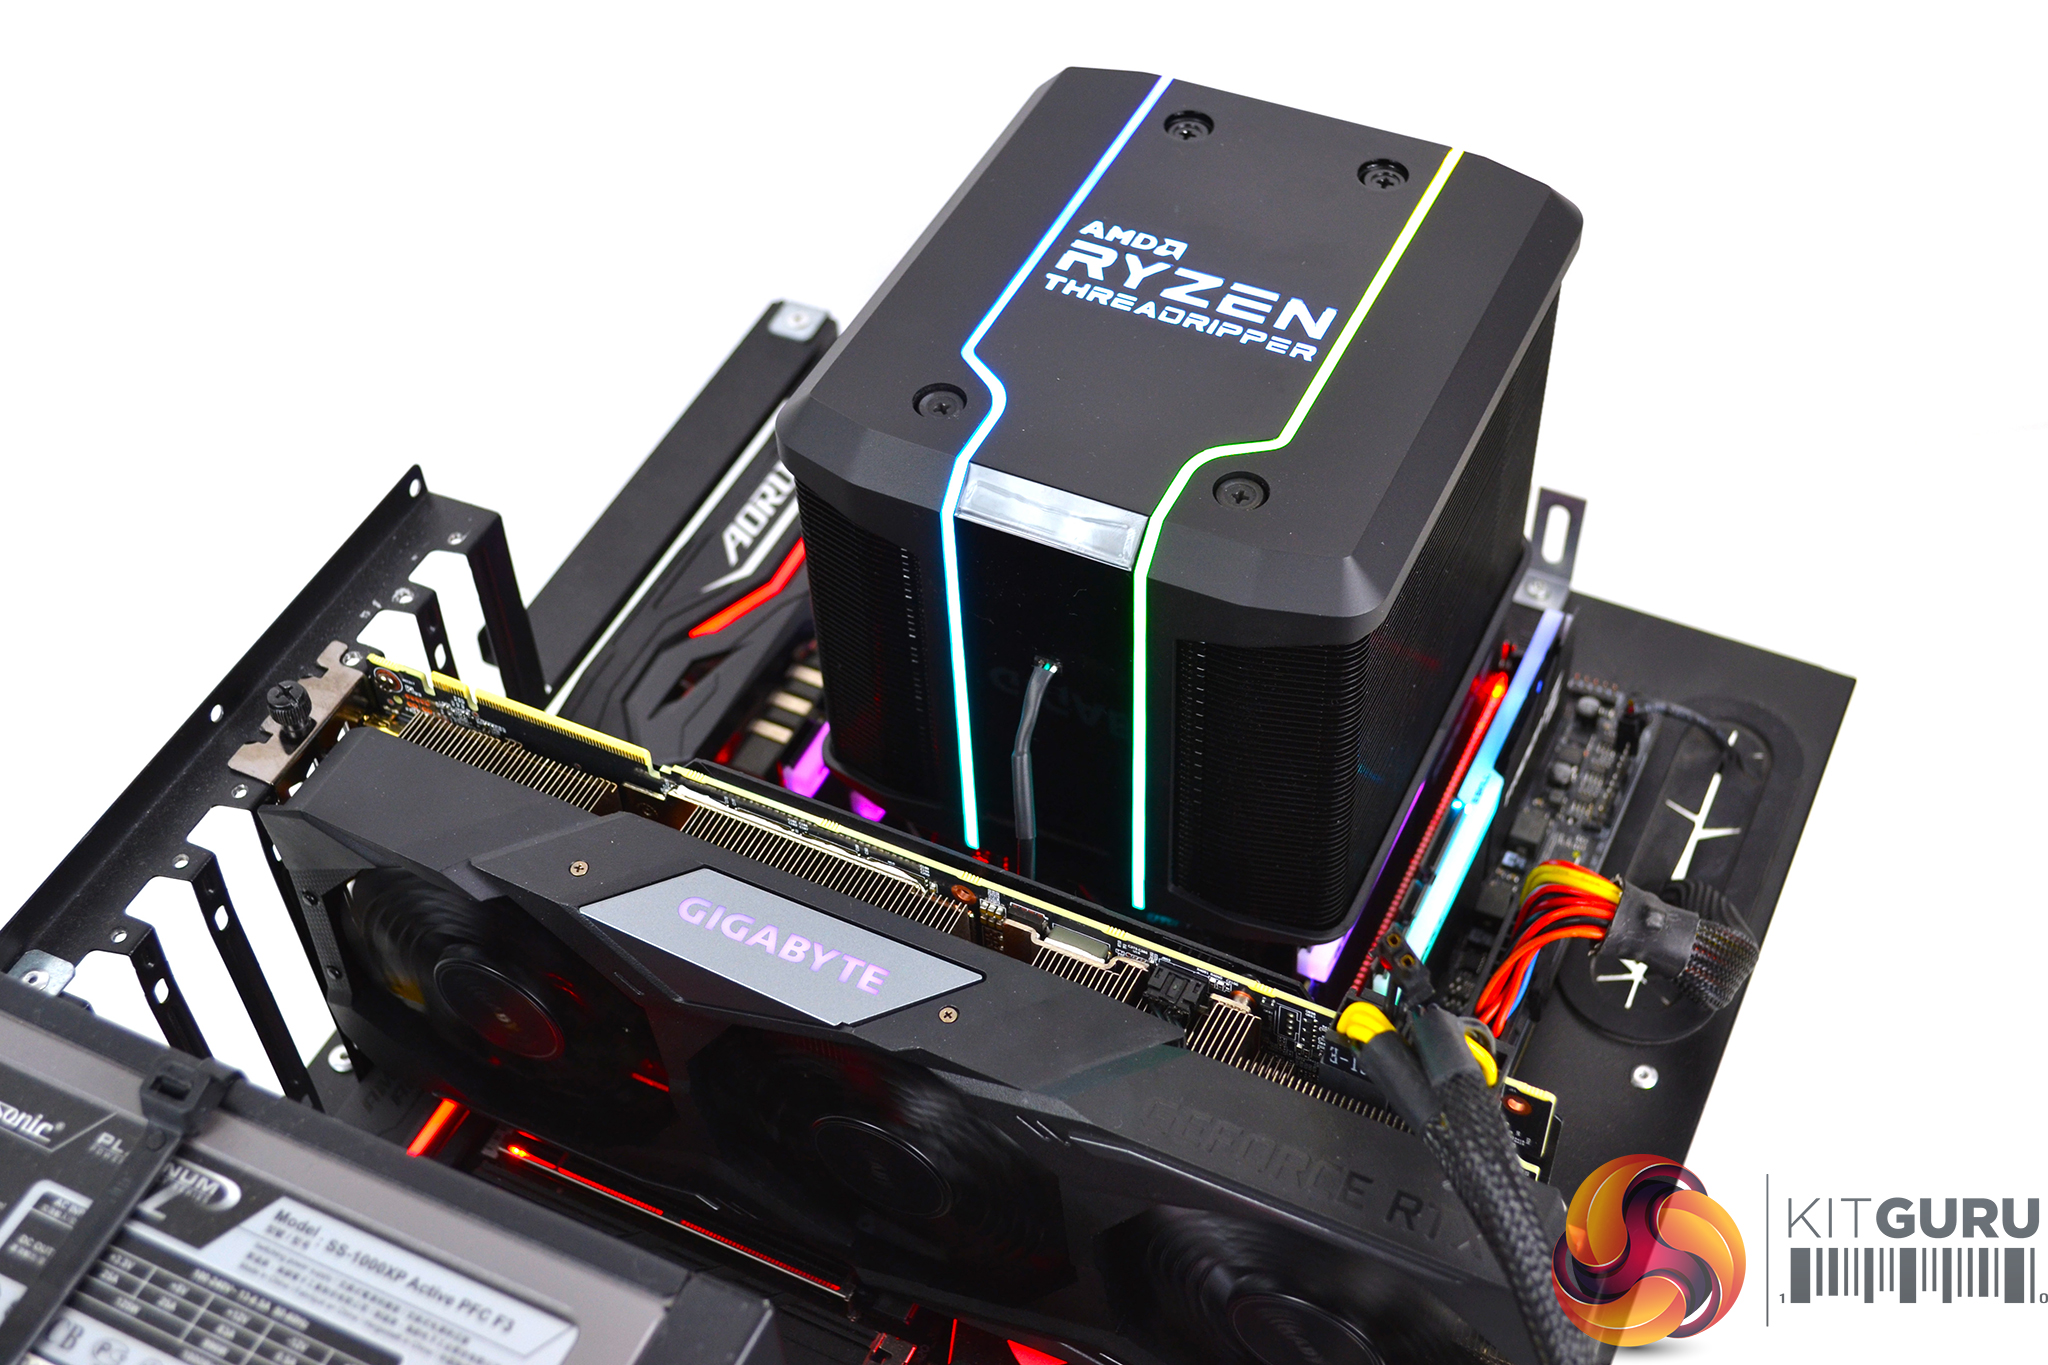
To reflect current hardware demands, we have updated the test system at KitGuru. It now comprises of an X399 platform and included is the AMD Zen+ Threadripper 2950X, mated with a Gigabyte X399 Aorus Gaming 7 motherboard and 32GB (4x 8GB modules) G.SKILL Trident Z RGB DDR4 RAM, running at 3200MHz CL16. Our storage device is the Corsair Force LE 120GB SATA SSD. A Gigabyte RTX 2070 Super GPU is installed to enable a display output. Power to the test system is managed by a Seasonic Platinum Series 1000w PSU.
Thermal Testing Procedure
The procedure consists of several tests, that will produce eight temperature readings for each cooler. The data can then be used to compare cooling performance.
First, we will lock the 2950X at its 3.6GHz all core base clock speed, with a 1.225V Vcore applied in the BIOS. Then, let the system idle in windows for 15 minutes and measure temperature. At the same frequency, we will then measure the load temperature.
To simulate overclocked frequency, we will then lock the 2950X to 3.8GHz on all cores with a 1.25V Vcore and run the same idle and load test again. To measure an extreme overclocking situation, we will lock the 2950X frequency to 4.0GHz on all cores with 1.275V Vcore and run the tests one final time – this should push the limits of the cooling performance of even the very best CPU coolers.
Admittedly, the overclocked frequencies/voltage may not be the highest achievable, but, nevertheless, it will give us a good set of data to compare the effect frequency/voltage changes have on temperature.
The temperatures presented in the graphs will be average Delta temperatures measured over the length of the test. We will calculate the Delta temperature by deducting the ambient temperature in the test room from the measured CPU temperature, both at idle and under load.
All idle temperatures are measured by letting the system idle in Windows for 15 minutes. Load temperatures are achieved by running AIDA64 stressing CPU, FPU and cache, again for 15 minutes. This should give the CPU enough time to reach its maximum temperature.
Throughout testing, Load Line Calibration will be set to Level 6 (Turbo) in BIOS and all CPU fans/pumps set to maximum RPM.
As the 2950X is suited more for productivity, a 300 second loop of Cinebench R20’s multi core benchmarks will be run, which amounts to 8 passes, followed by three passes of Blenders BMW CPU benchmark to give a better idea of temperatures during typical use.
Noise Testing
Noise levels will be measured with our sound meter at a distance of 1 meter from the test bench. The cooler’s fans will be set to their maximum RPM rating. Ambient noise level in the room is measured at 37.4dBA and the peak noise level of the cooler will be recorded in dBA.
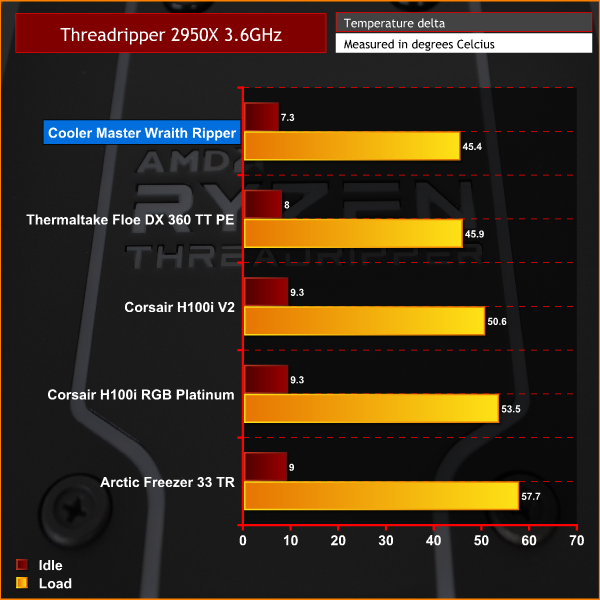
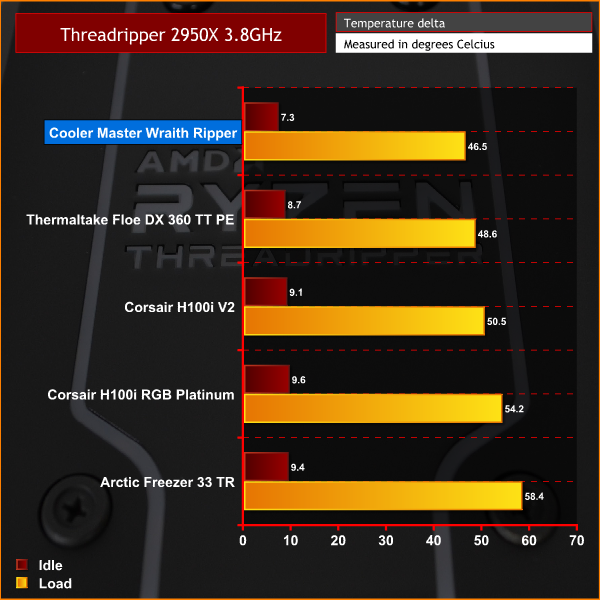

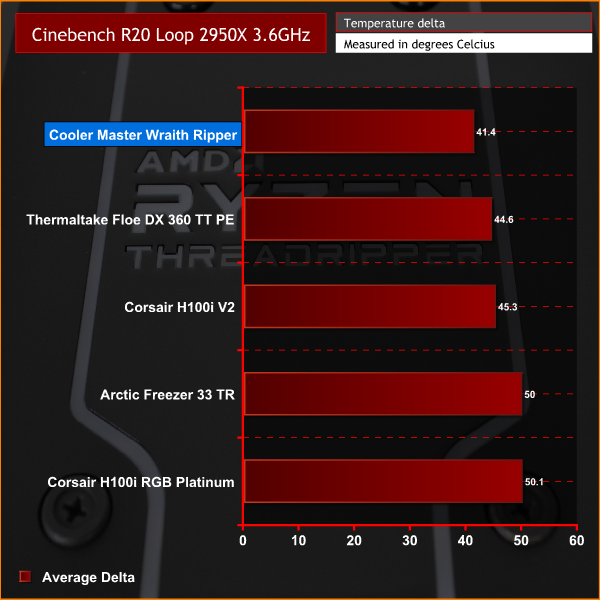
Results from the three AIDA64 stress tests carried out follow the same trend, with the Wraith Ripper outperforming the other coolers we have tested so far. In our highest overclocked test, the Wraith Ripper had the greatest performance advantage.
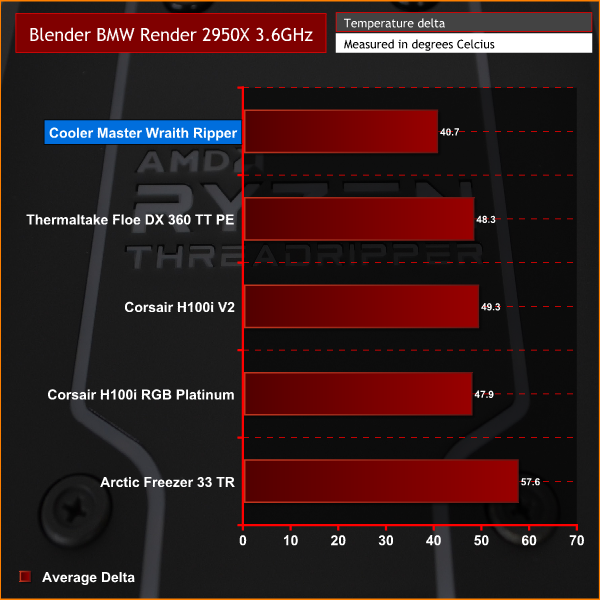
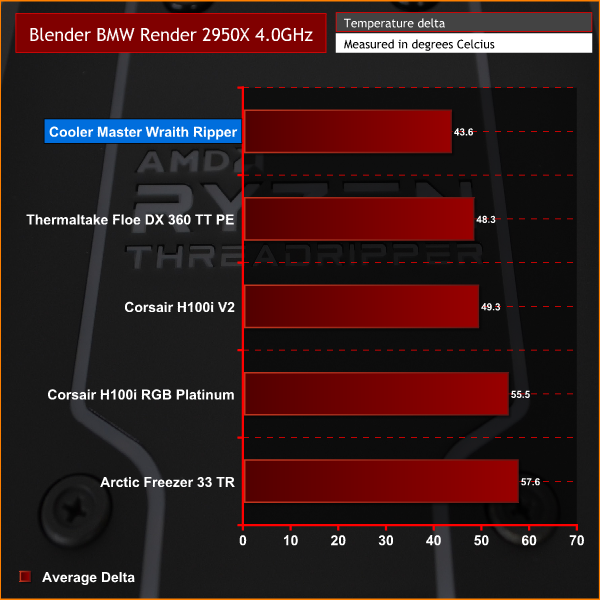
Again, in our productivity test, the Wraith Ripper is doing a great job of keeping temperatures under control. The advantage of the full cover heat transfer plate proves a worthy improvement over the other adapted AIO coolers.
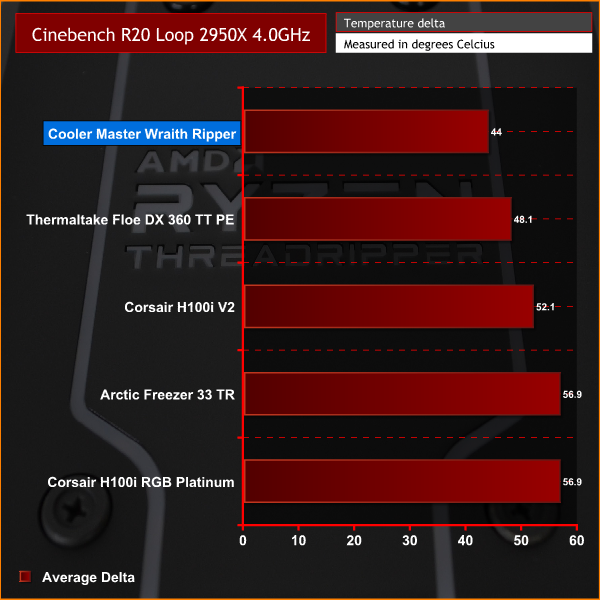
As we saw in our earlier tests, the Wraith Ripper considerably outperforms the other coolers tested, easily outperforming both the adapted Asetek 240mm and 360mm AIO coolers.

In the noise levels test, the Wraith Ripper is one of the louder coolers on our chart, but with noise levels peaking at 46.8 dBA it is still not too distracting.
Taken as a whole, the Cooler Master Wraith Ripper is a very good solution for keeping Threadripper temperatures under control, while looking aesthetically pleasing at the same time. Cooler Master and AMD's hard work designing this cooler has paid off.
During testing, the Wraith Ripper made easy work of cooling our 2950X CPU both at stock and overclocked frequencies. Its full cover thermal transfer plate made a noticeable improvement on temperature over the adapted Asetek AIO coolers we also tested.
Not only does the Wraith Ripper easily accomplish its primary objective of providing great thermal transfer, its sleek looks and RGB lighting make it an attractive addition to the system. With the option to configure the RGB lighting to suit your own style, there is no reason why the Wraith Ripper won't fit in with any theme – but if you prefer, the RGB can be turned off completely.
The installation of the Wraith Ripper is extremely simple. Using the stock TR4 mounting system is great, as it means no extra fiddly brackets or fixings are needed and makes the total installation time around 10 minutes. We are confident that even the most novice PC builder would be able to install the Wraith Ripper without any problems.
A large dual tower design as implemented in the Wraith Ripper can be challenging to pull off when so many possible configurations of system components determine the size and shape of the CPU cooler. RAM clearance is the biggest hurdle to overcome and as suggested earlier, with tall RAM installed this may be an issue for the Wraith Ripper as it doesn't offer much memory clearance.
While the Wraith Armour plastic shroud looks great, it does feel a little cheap, especially the matte finished areas. With very little effort, a small piece of a plastic fixing point easily snapped off during our review, which was a little disappointing.
One feature we would have liked to have seen would be an ARGB cable to connect the Wraith Ripper directly to an ARGB motherboard header. While the Cooler Master software is good and gives you plenty of options, it would have been better to have the option to sync the RGB lighting with the motherboard and other system components.
As we touched on earlier, the current price of around £100 seems a little high for an air cooler, when compared with others. We admit the performance is great, however, we feel slightly let down by the cheap feeling plastics and the other issues already highlighted and therefore would be a little apprehensive purchasing at this price.
With a relatively limited amount of large air coolers available specifically designed for Threadripper, the Wraith Ripper is certainly one of the best options available, especially when overclocking a CPU such as our 2950X or the 32 core 2990WX, which would really struggle with an adapted AIO or smaller air cooler.
The Cooler Master Wraith Ripper is available for £109.50 from Amazon HERE.
Pros
- Excellent thermal performance.
- Sleek design.
- Multiple ARGB lighting areas.
- Easy to install.
Cons
- Cheap feeling plastics.
- High cost.
- RAM clearance could be an issue.
- No ARGB motherboard header compatibility.
KitGuru says: With options limited when it comes to TR4 specific coolers, the Wraith Ripper is one of the best options for raw cooling performance, but it comes at a high price.