

Today we are bringing something different to the channel. As well as the usual in-depth technical reviews, KitGuru has always been interested in modding and pushing the performance of our hardware to the limits. Just like our readers and viewers, we are enthusiasts too so we are always looking at ways of improving performance by overclocking and finding more efficient ways of keeping our hardware cool, which is exactly what we are looking at in this project.
Timestamps:
00:00 James' latest DIY project with EKWB – details
02:53 Tests on CPU at stock
04:56 Running CPU in two configurations – BIOS setup
08:34 Stock BIOS profile – results
10:00 James manual overclock profile – results
11:05 5.2GHz is stable – we are hoping for more
12:00 Delidding and tools
16:10 Successful delid – some cleaning work
22:39 Delidded 12900k – part two coming soon!
Ever since the launch of 12th Generation Intel Alder Lake processors, we have been left a bit deflated by the overclocking potential due to the heat produced by these CPUs. Even the most conservative of overclocks on the 12900K specifically, have produced rather high thermals. On top of that, we have seen various reports of issues when cooling the stock CPU with certain off the shelf cooling solutions and after talking with various system integrators it seems like this is a widespread problem.
While we are not focusing on the problem with current cooling solutions and CPUs/motherboards etc potentially bending and causing deterioration in thermal performance as there are various temporary fixes already well documented. We want to find out if we can create significant thermals improvements for Intel's 12th Gen parts, for true enthusiasts who don’t mind getting their hands dirty with some proper modding.
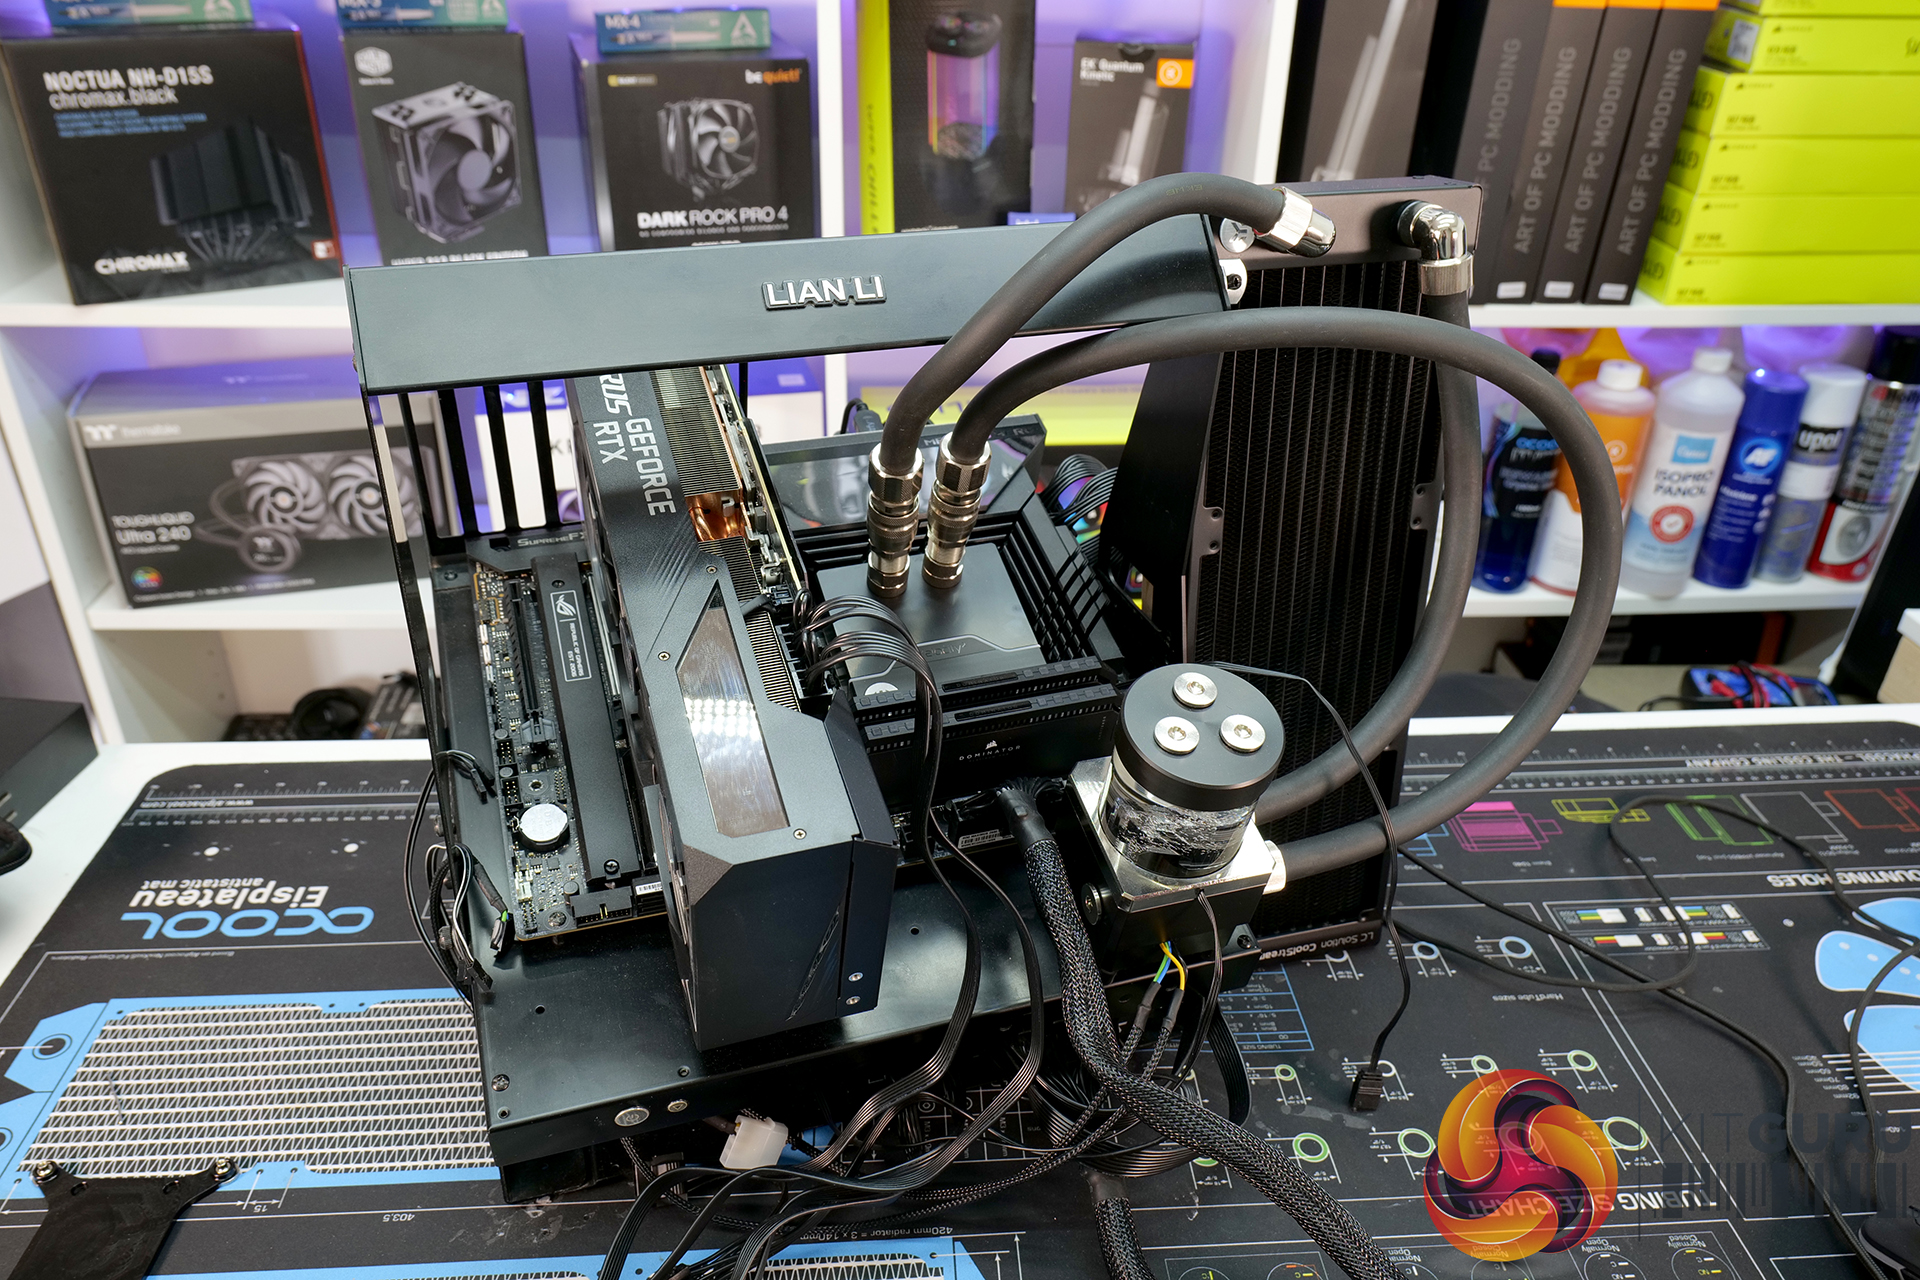
Over the past few weeks, we have been working directly with EK Water Blocks to come up with a solution for the enthusiast who wants to push their 12900K to the limits with custom water cooling. The current LGA1700 CPU water blocks from EKWB are very good, but due to the CPU design there still isn’t much thermal headroom for overclocking, so to try and improve this EKWB and ourselves have come up with a direct die cooling solution which we think will offer a significant drop in thermals, on the i9-12900K at least.
EKWB is still working on producing the first prototype of the product for us to test in our next video, but today we take a look at the 12900K in its stock physical form, run some thermal tests with stock BIOS configuration then perform a manual overclock to see what can be achieved. Then delid the CPU ready for the 2nd round of testing using direct die cooling.

12900K Stock Thermal performance
To measure the thermal performance of the Intel Core i9-12900K first at its default BIOS configuration the majority of the motherboard BIOS settings were left at default or AUTO. However, Asus MultiCore Enhancement was changed from AUTO to Enabled as we found the auto setting to give very inconsistent CPU package power during testing. With Multicore enhancement at AUTO, package power would fluctuate right up to 270W, but with it configured to Enabled, package power was steady at 205W during Cinebench R23.
After measuring the thermal performance of the CPU at its Intel default configuration, we applied an overclock manually in the BIOS. The highest stable overclock that we could perform was 5.2GHz on the P-Cores and 4.1GHz on the E-Core. This was achieved by setting the P-Core Multiplier at 52x, E-Core Multiplier at 41x, CPU Vcore voltage 1.33v with level 6 Loadline Calibration set and CPU SVID support set to disabled. We were able to leave the CPU input voltage at AUTO, during both stock and overclocked settings XMP was enabled to allow the Corsair Dominator Platinum DDR5 to run at its maximum 6000MHz frequency.
For both the intel default and overclocked thermal tests we ran Cinebench R23 multi-core stress test in a loop for one hour so that the CPU could reach steady-state temperature, we then recorded the average CPU package temperature from the final 15 minutes of the stress test. We will repeat the same thermal tests using the two saved BIOS profiles once the custom direct die water block is available from EKWB to measure improvements.
The temperature figures shown in the charts below are Delta temperature – meaning the ambient room temperature has been deducted from the actual CPU package temperature giving us a Delta, so any change in ambient temperature isn’t a factor in the results. Delta temperature in the test room is between 18-20°C.
Test System Specification:
- CPU – Intel Core i9-12900K
- Motherboard – Asus ROG Maximus Z690 Hero
- Memory – 32GB (2 x 16GB Modules) Corsair Dominator Platinum RGB DDR5-6000 C36
- Graphics Card – Gigabyte RTX 3080 Master
- Storage – 500GB Corsair MP600 PCIe Gen4 M.2 NVME SSD
- CPU Cooler – EKWB Custom Loop
- Power Supply – Seasonic Prime TX-1000 80+ Titanium Rated 1000W
- Fans – 3 x 120mm Noctua A12x25
- Open Bench – Modified Lian-Li Pitstop T60
- Operating System – Windows 11
EKWB Cooling Hardware:
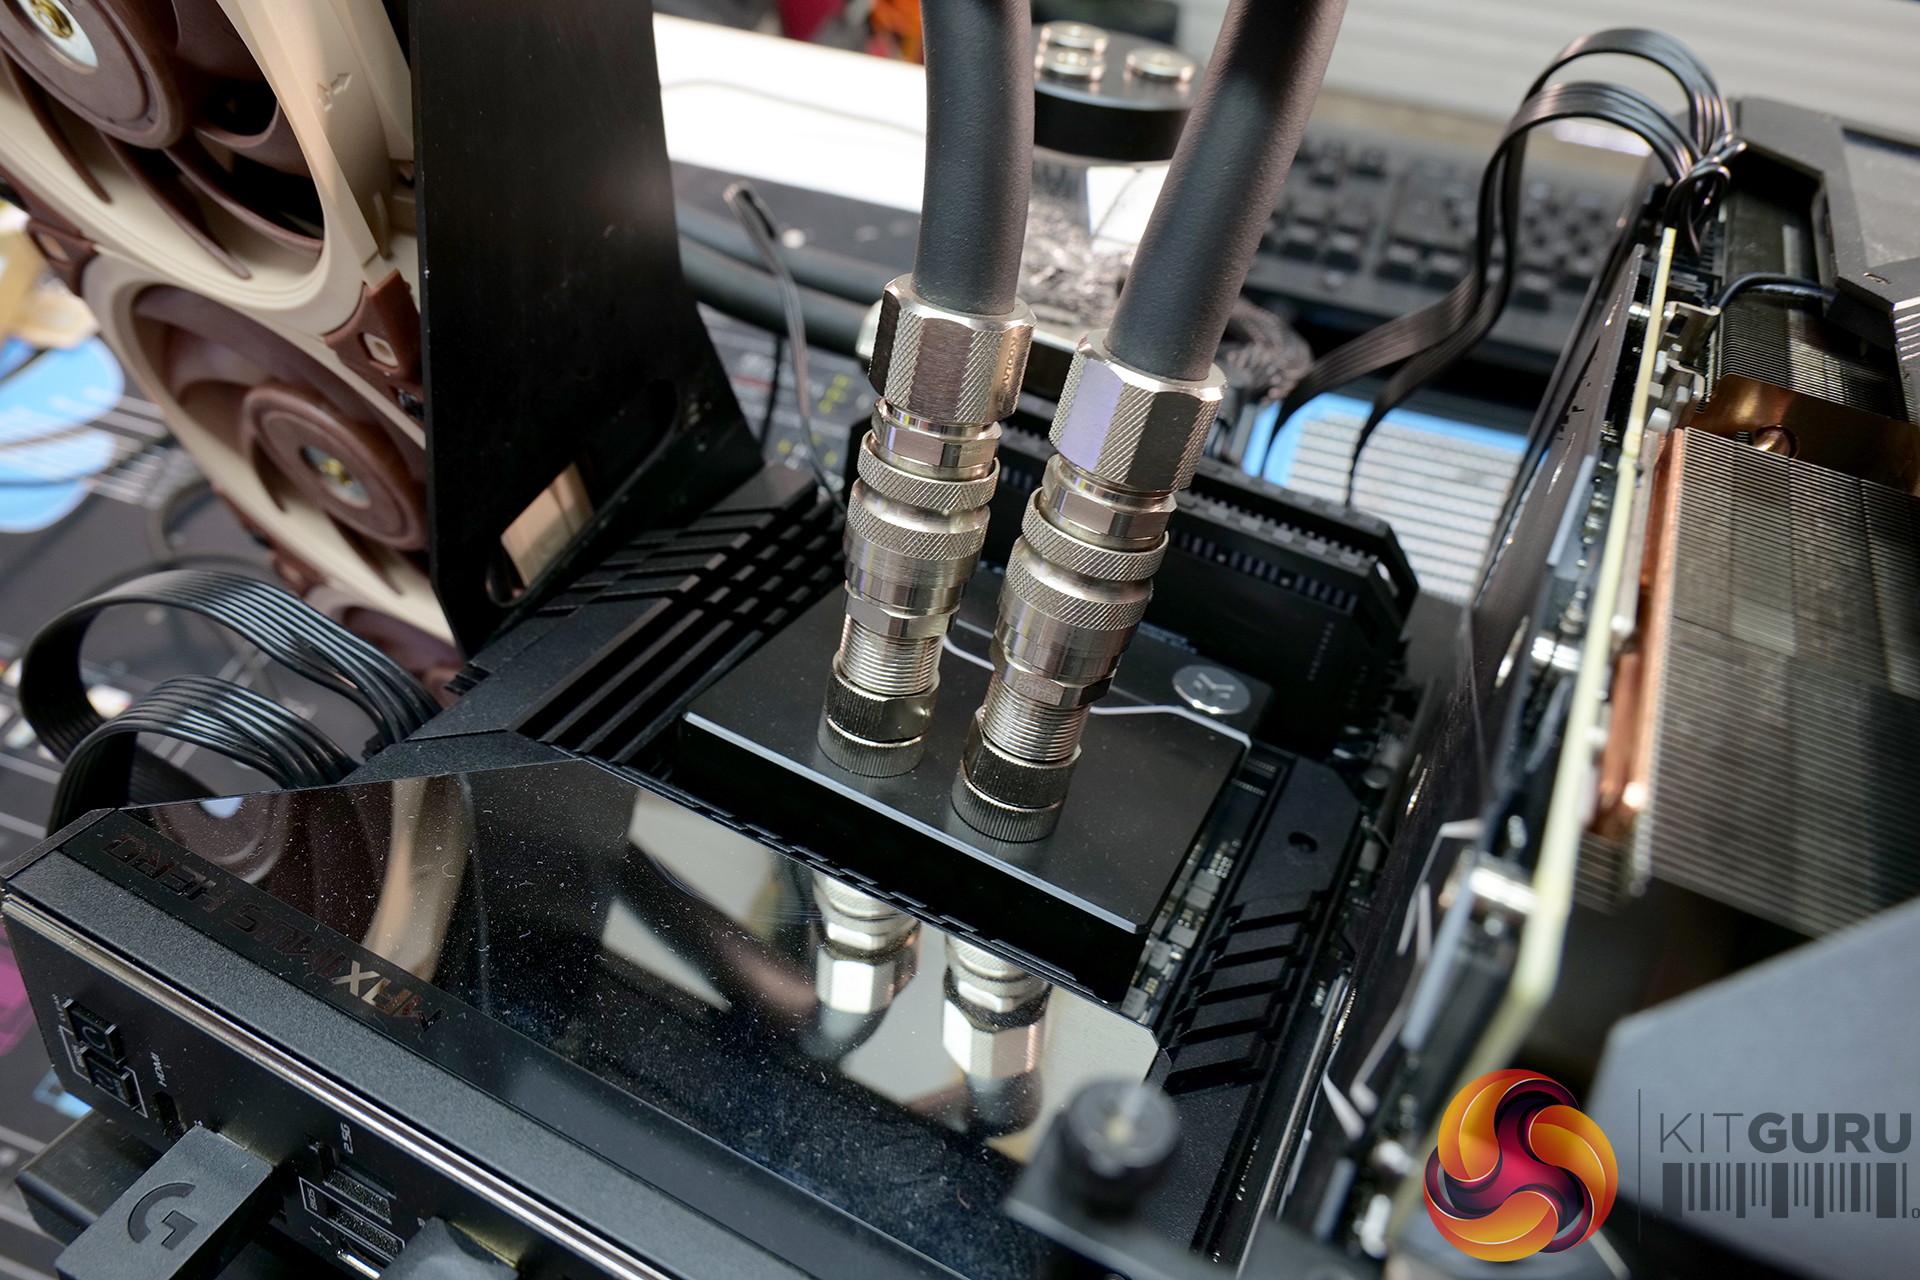
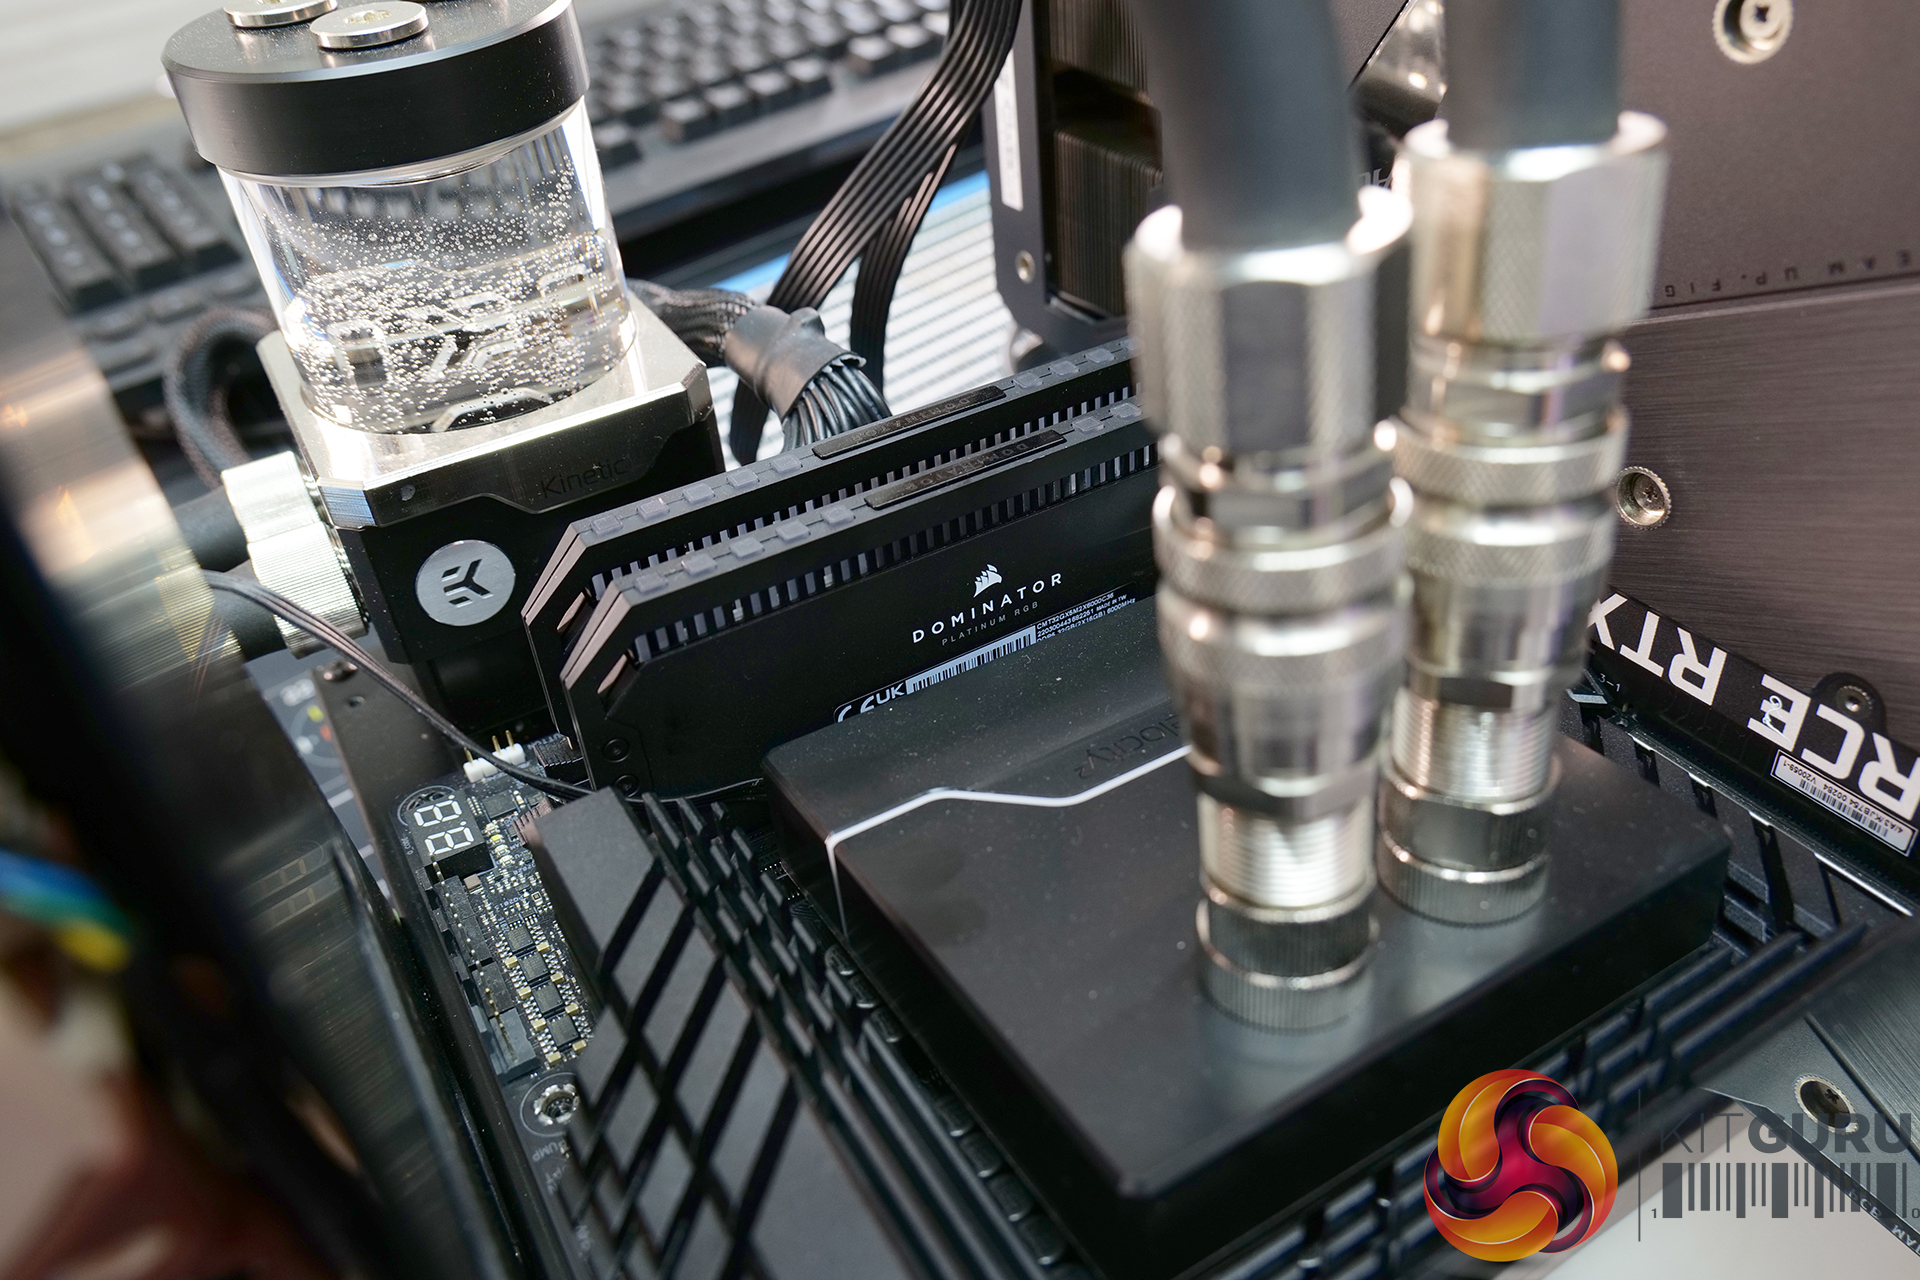
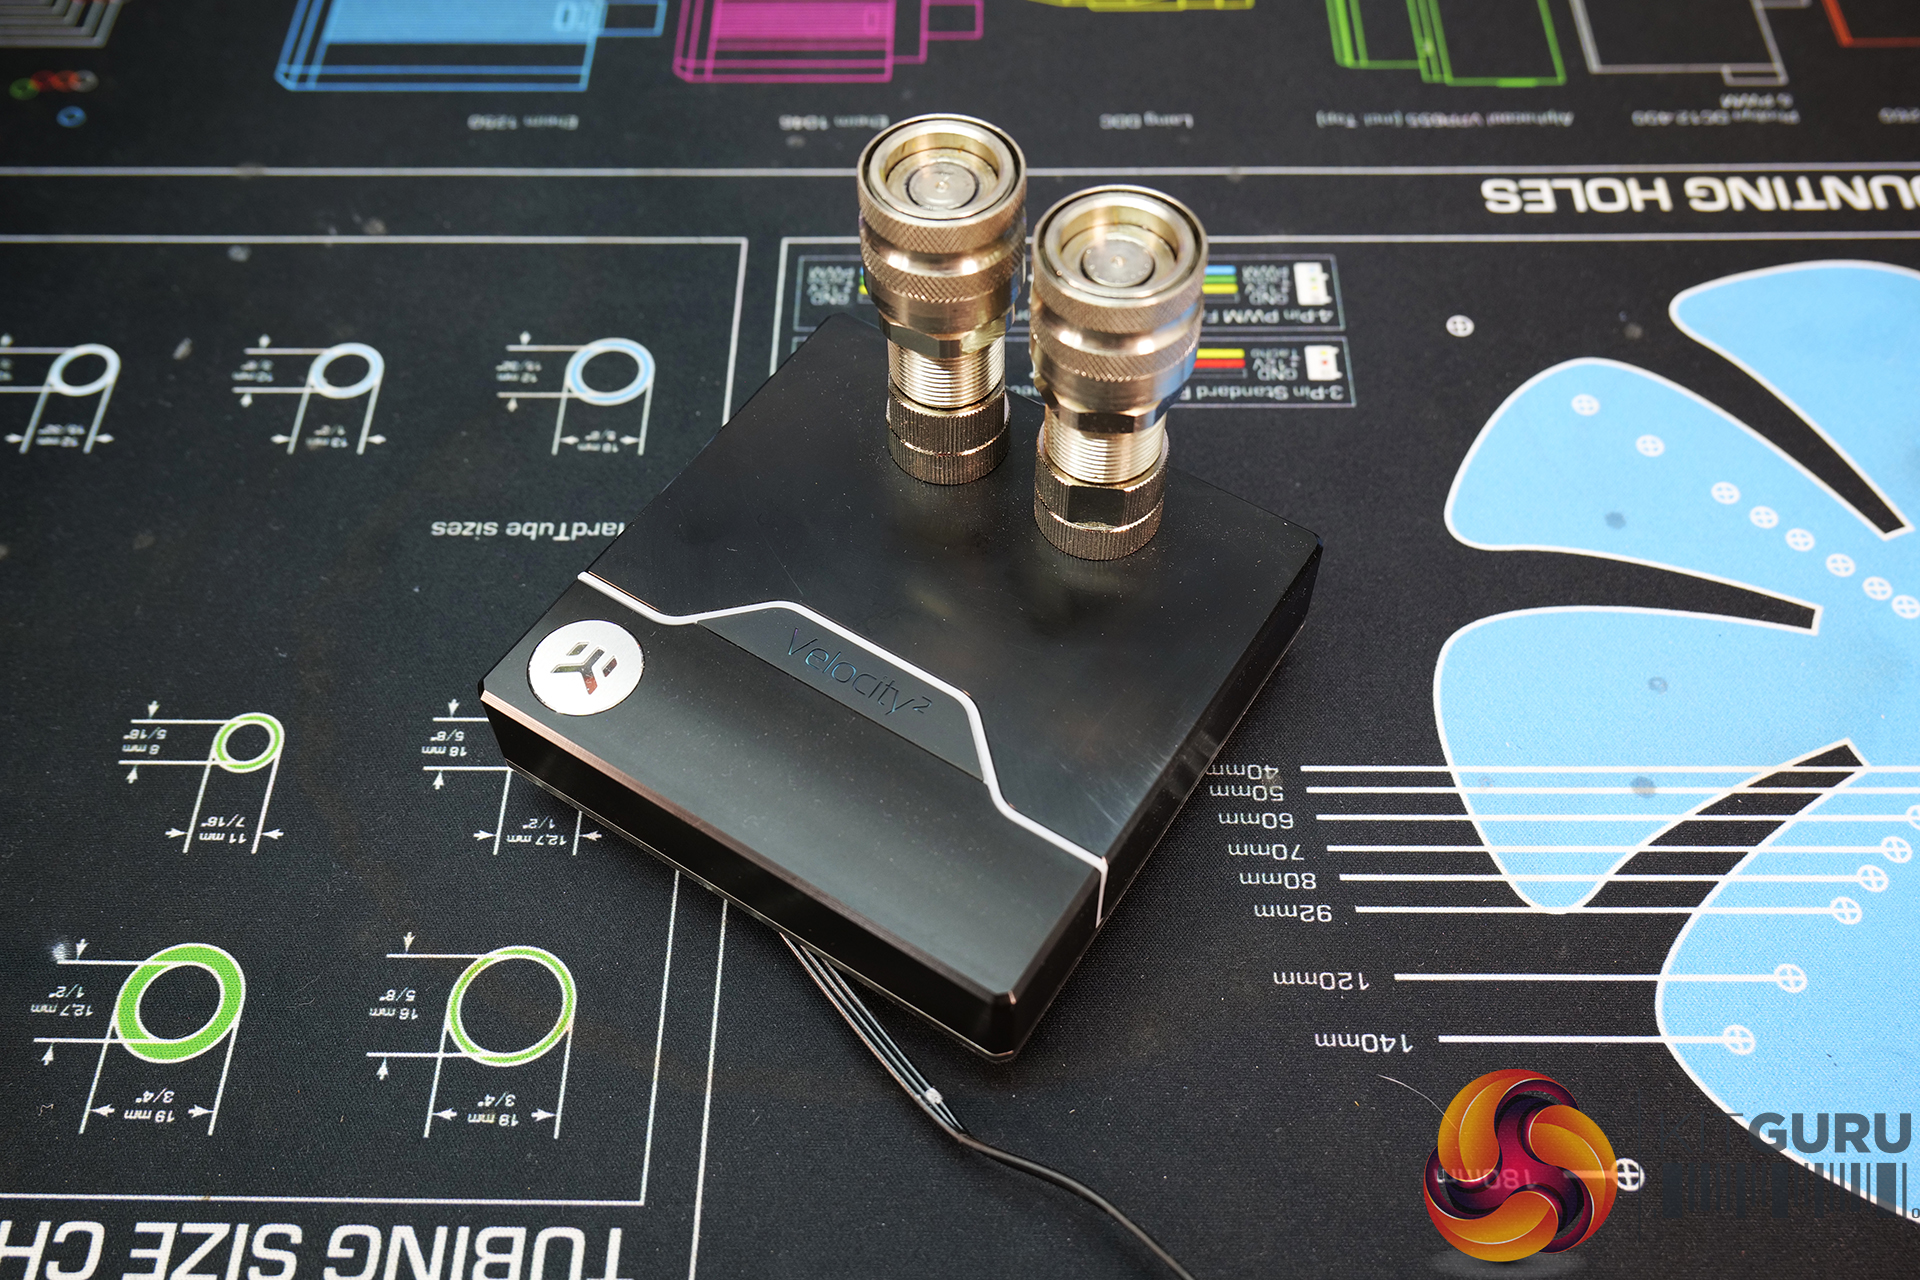
- CPU Water Block – EK-Quantum Velocity² D-RGB – 1700 Nickel + Acetal
- Pump/Res Combo – EK-Quantum Kinetic TBE 120 DDC PWM D-RGB – Acetal
- Radiator – EK-CoolStream PE 360 (Triple)
- Fittings – EK-Classic STC 10/16 – Nickel
- Tubing – EK-Tube ZMT Matte Black 15,9/9,5mm
Thermal Performance Overview
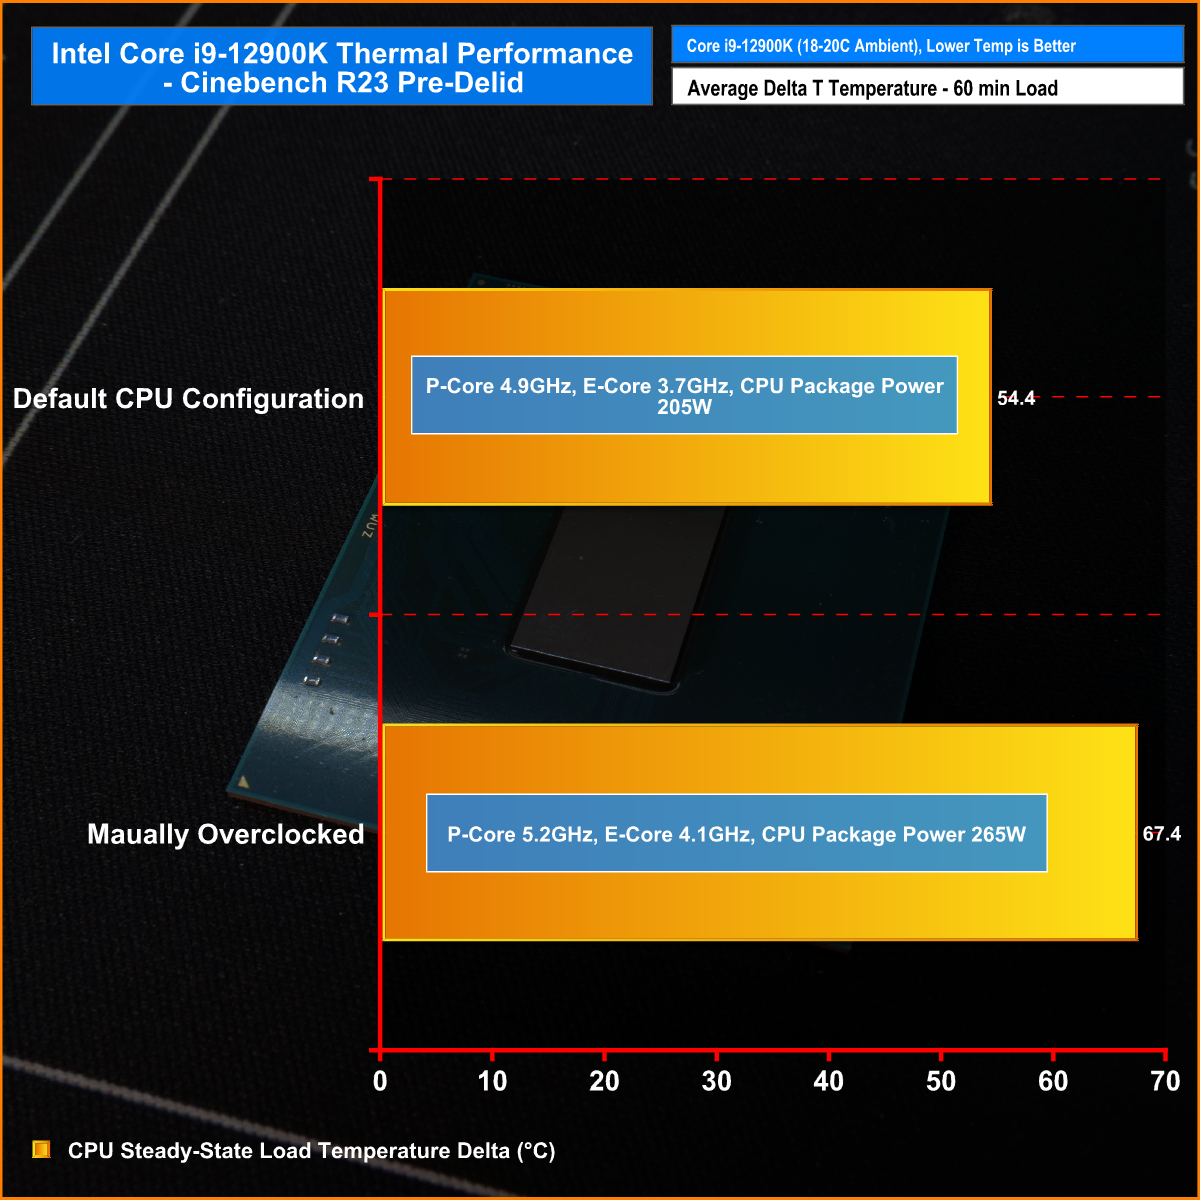
During our thermal tests with the CPU in its default configuration, our results with this 12900K are in line with what Leo found during his 12900K launch review, However, this time around we are using a custom loop to cool the CPU so thermal performance is improved a little.
We were able to push the overclock higher this time around while still being able to keep the CPU package temperature around 90°C (67.4 Delta) during Cinebench R23 sustained load. With a full custom loop including a 360mm radiator, 90°C (67.4°C Delta) is still within Intel thermal limits but we would hope for a lower temperature using such high-end cooling. This is what we aim to improve upon with the direct die water block.
For reference, the absolute Peak CPU temperature measured from the CPU package was 74°C with the CPU at default frequency/package power and 91°C in the manually overclocked state.
Delidding the 12900K
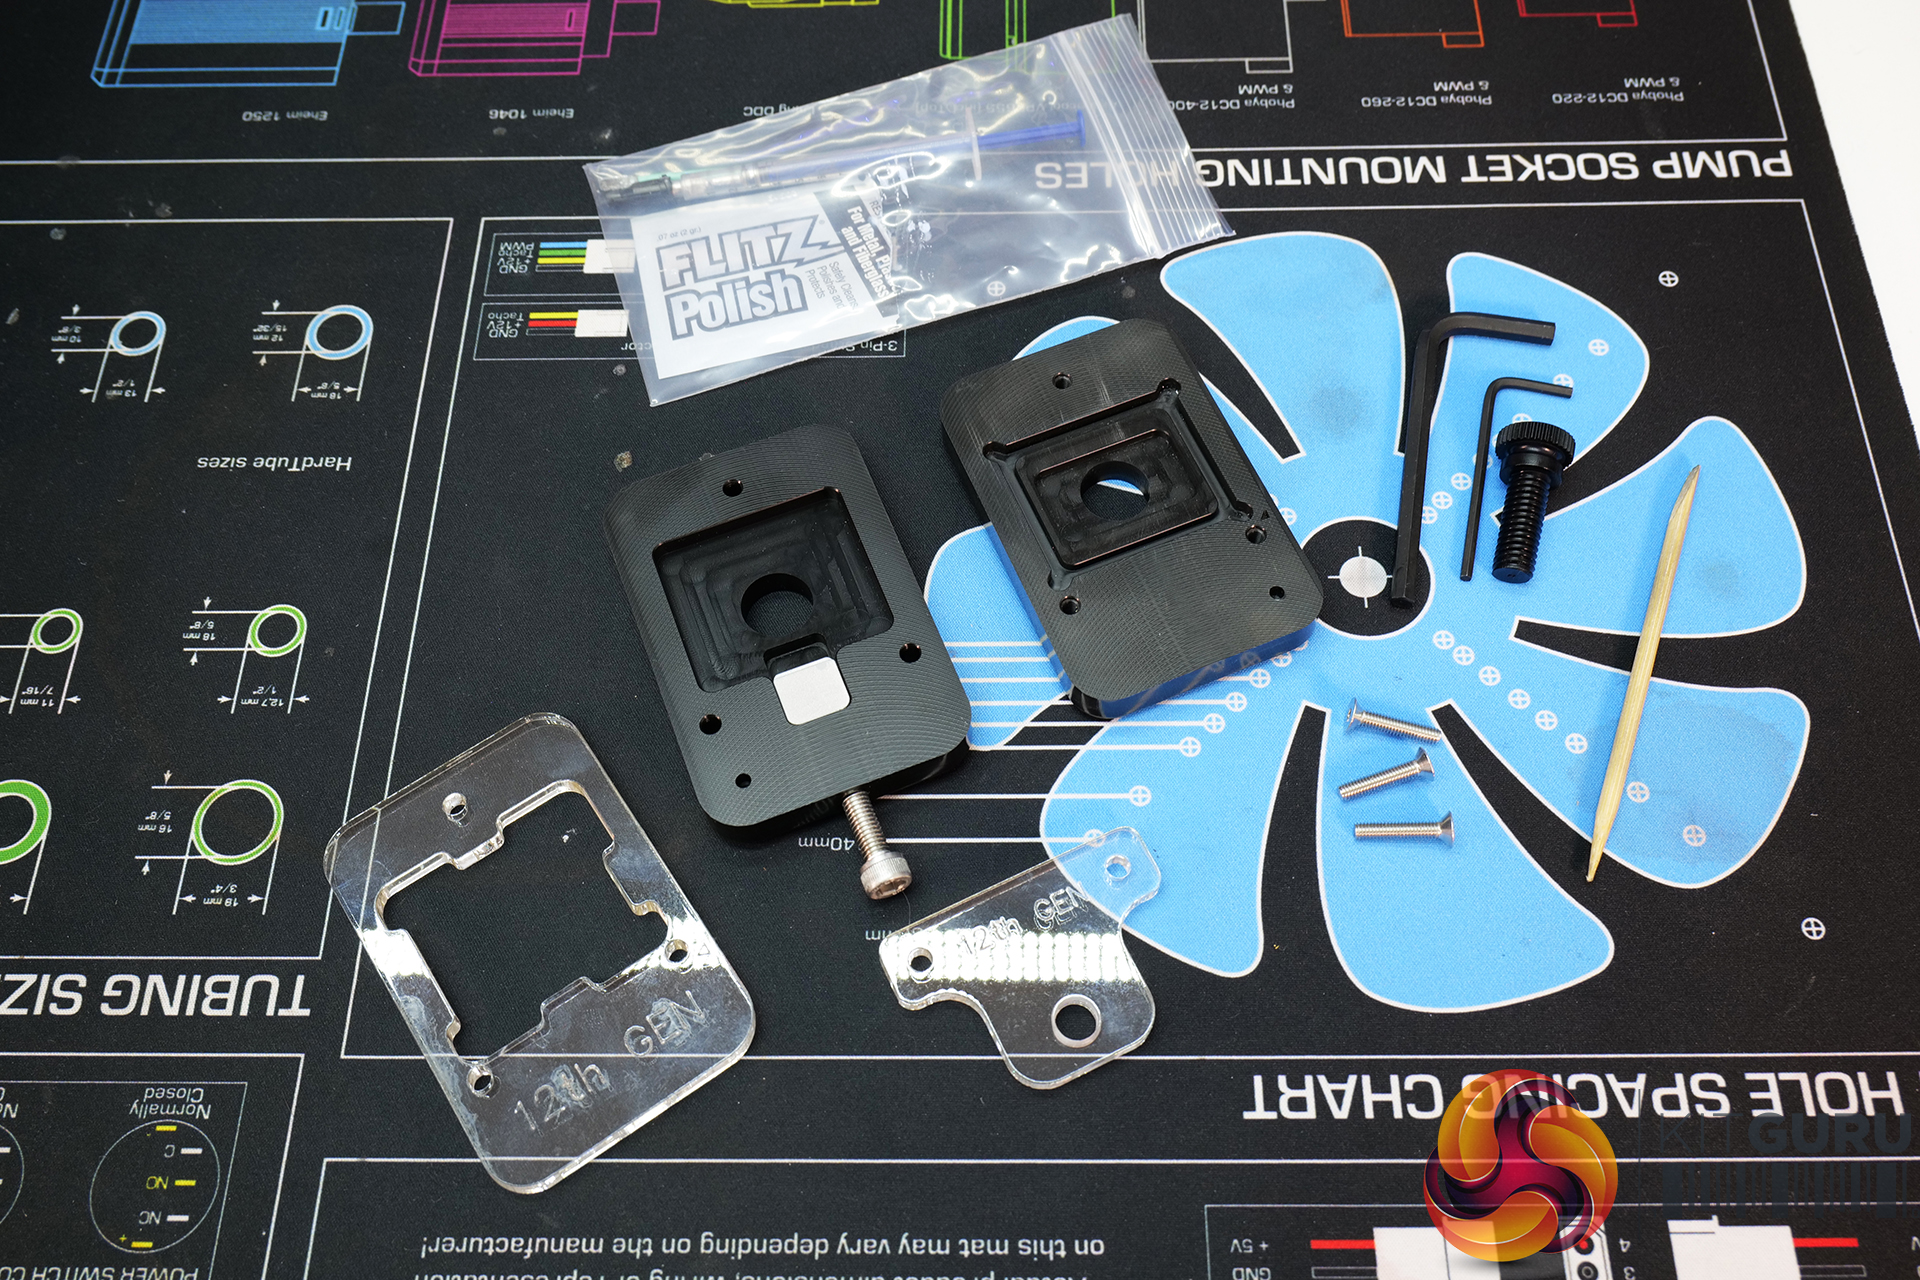
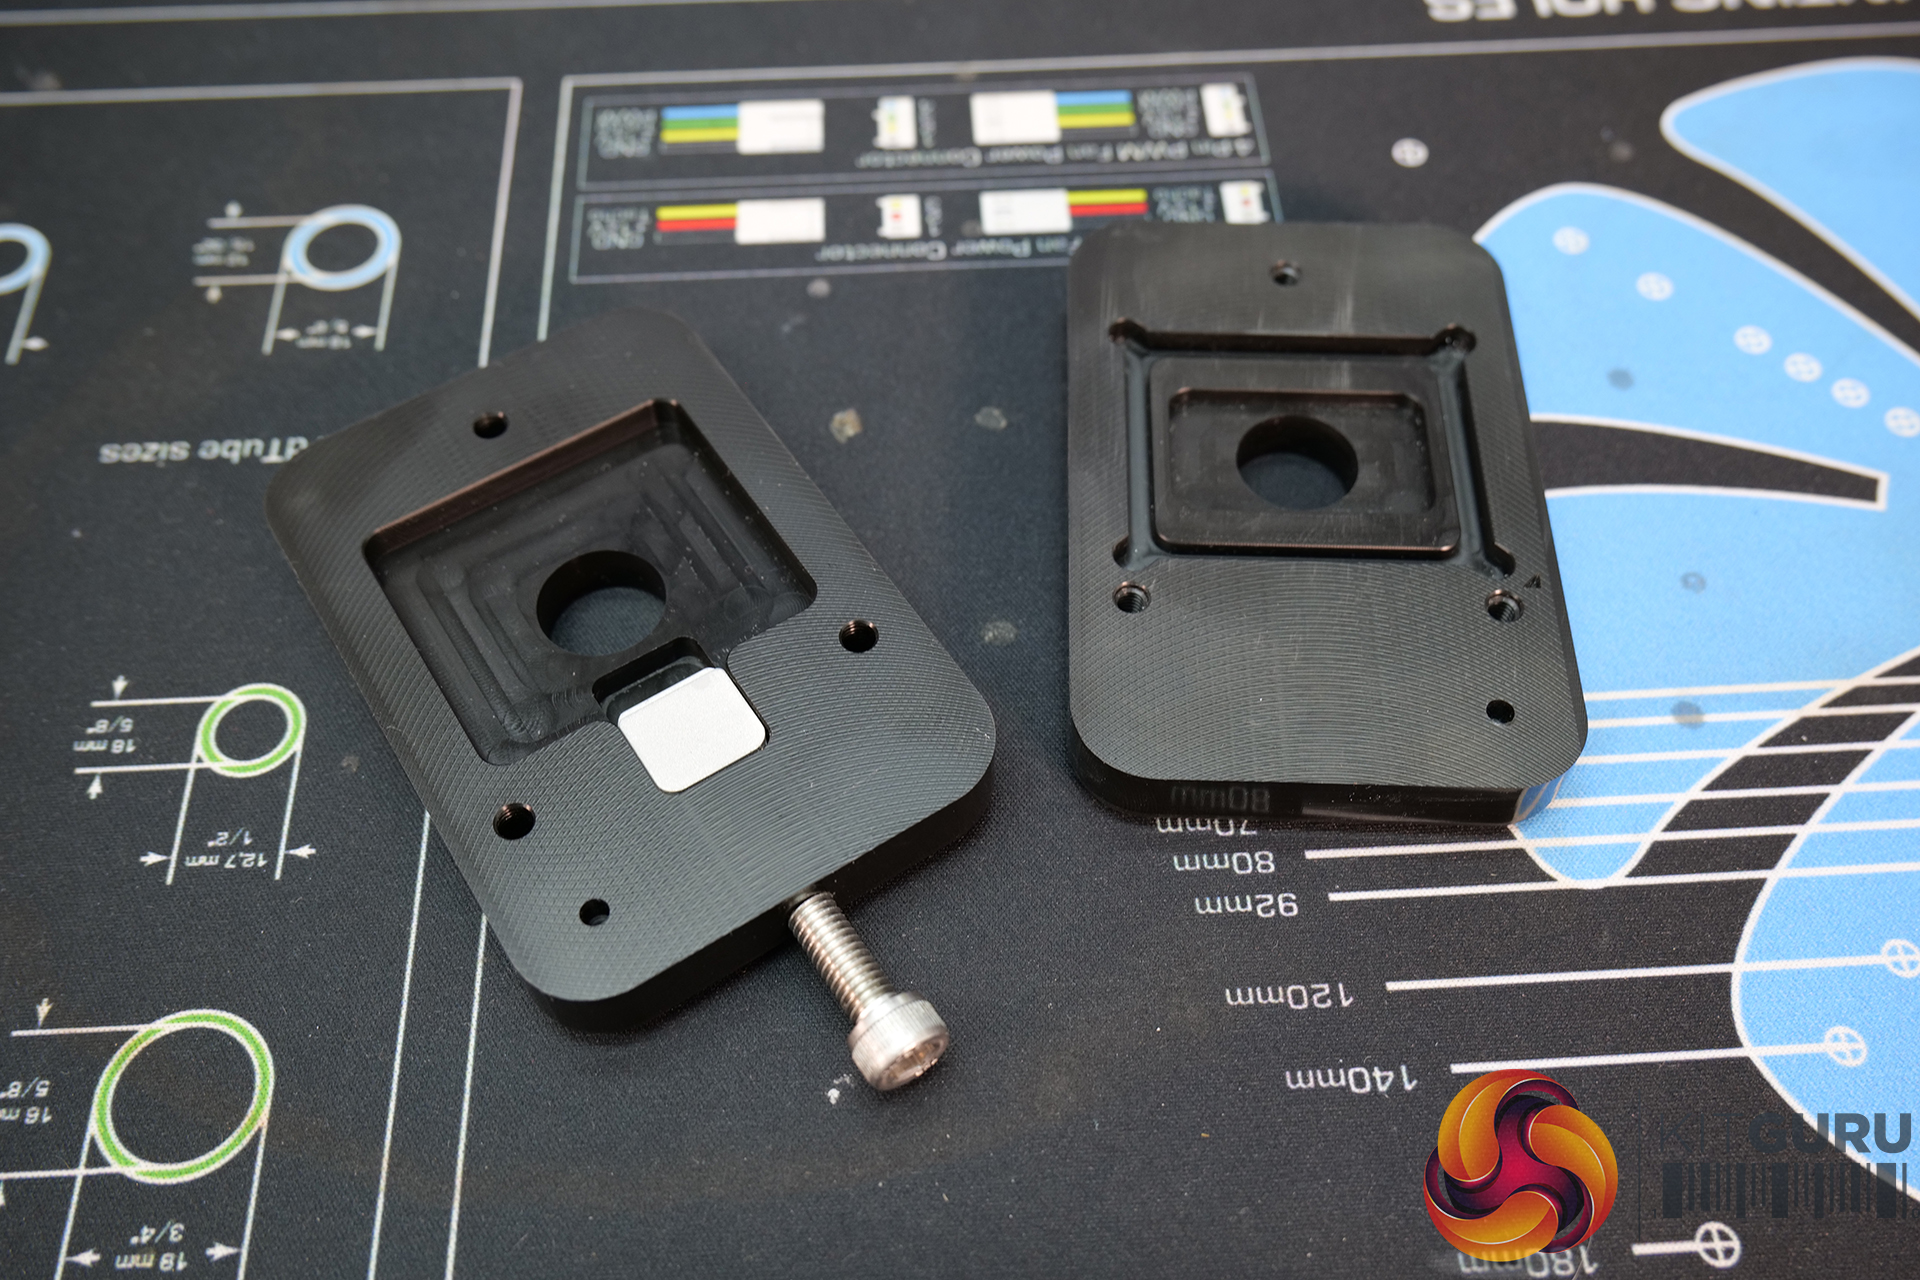
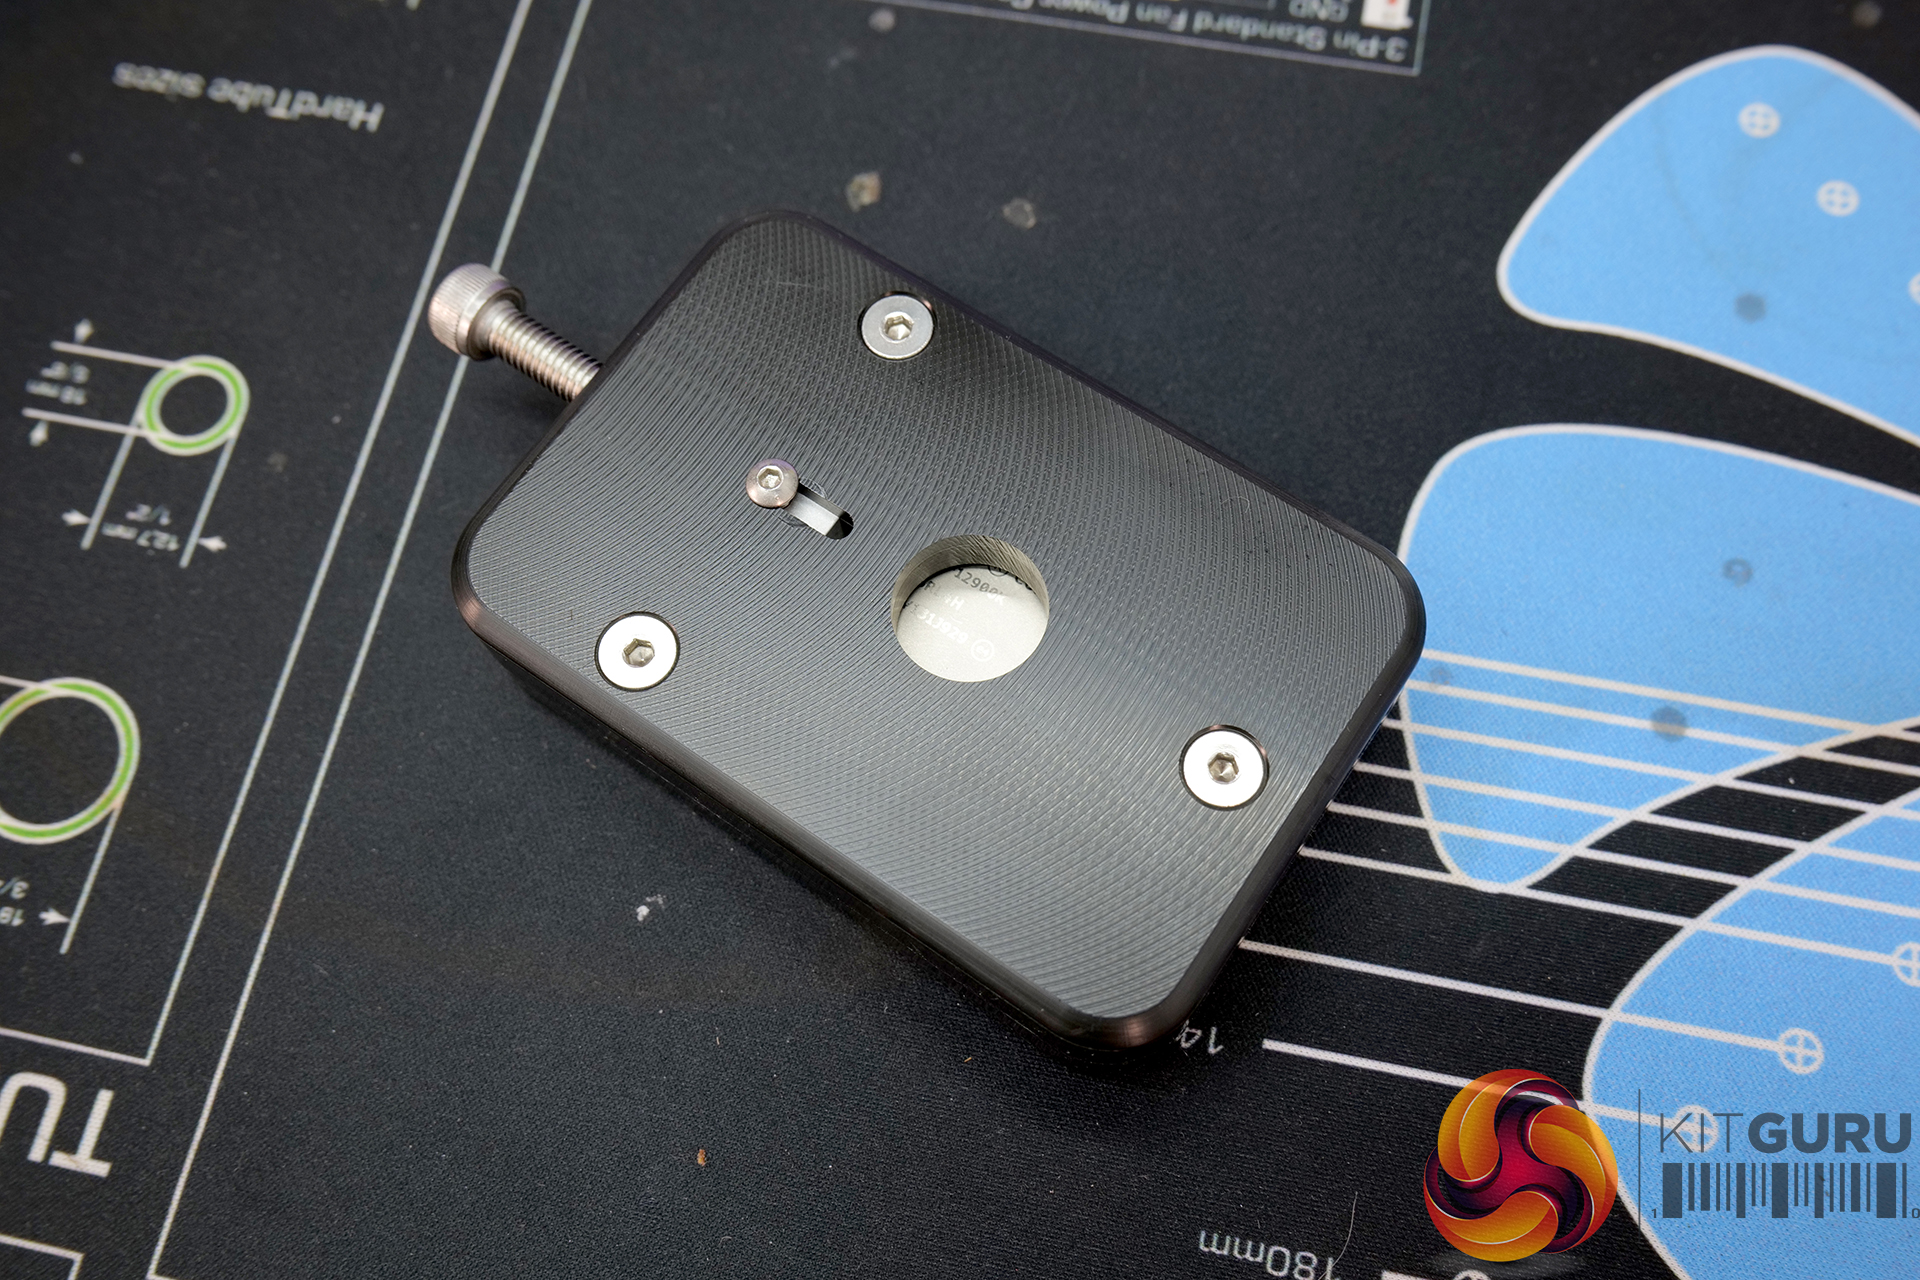
When we first planned this experiment, there was no readily available CPU delid tool for Intel 12th Gen CPUs. Thankfully, just a couple of weeks before filming the video, we found a delid tool released by a U.S company named RockitCool. I have used a RockitCool delid tool for Skylake previously and was impressed by the function and quality, the same can be said for this 12th gen tool also.
The kit comes complete with the delid tool, a couple of Allen wrenches for use during the delid process, equipment for cleaning the remaining Indium solder from the CPU die and IHS, as well as a jig for those who want to replace the thermal interface material and re-lid the CPU afterwards.
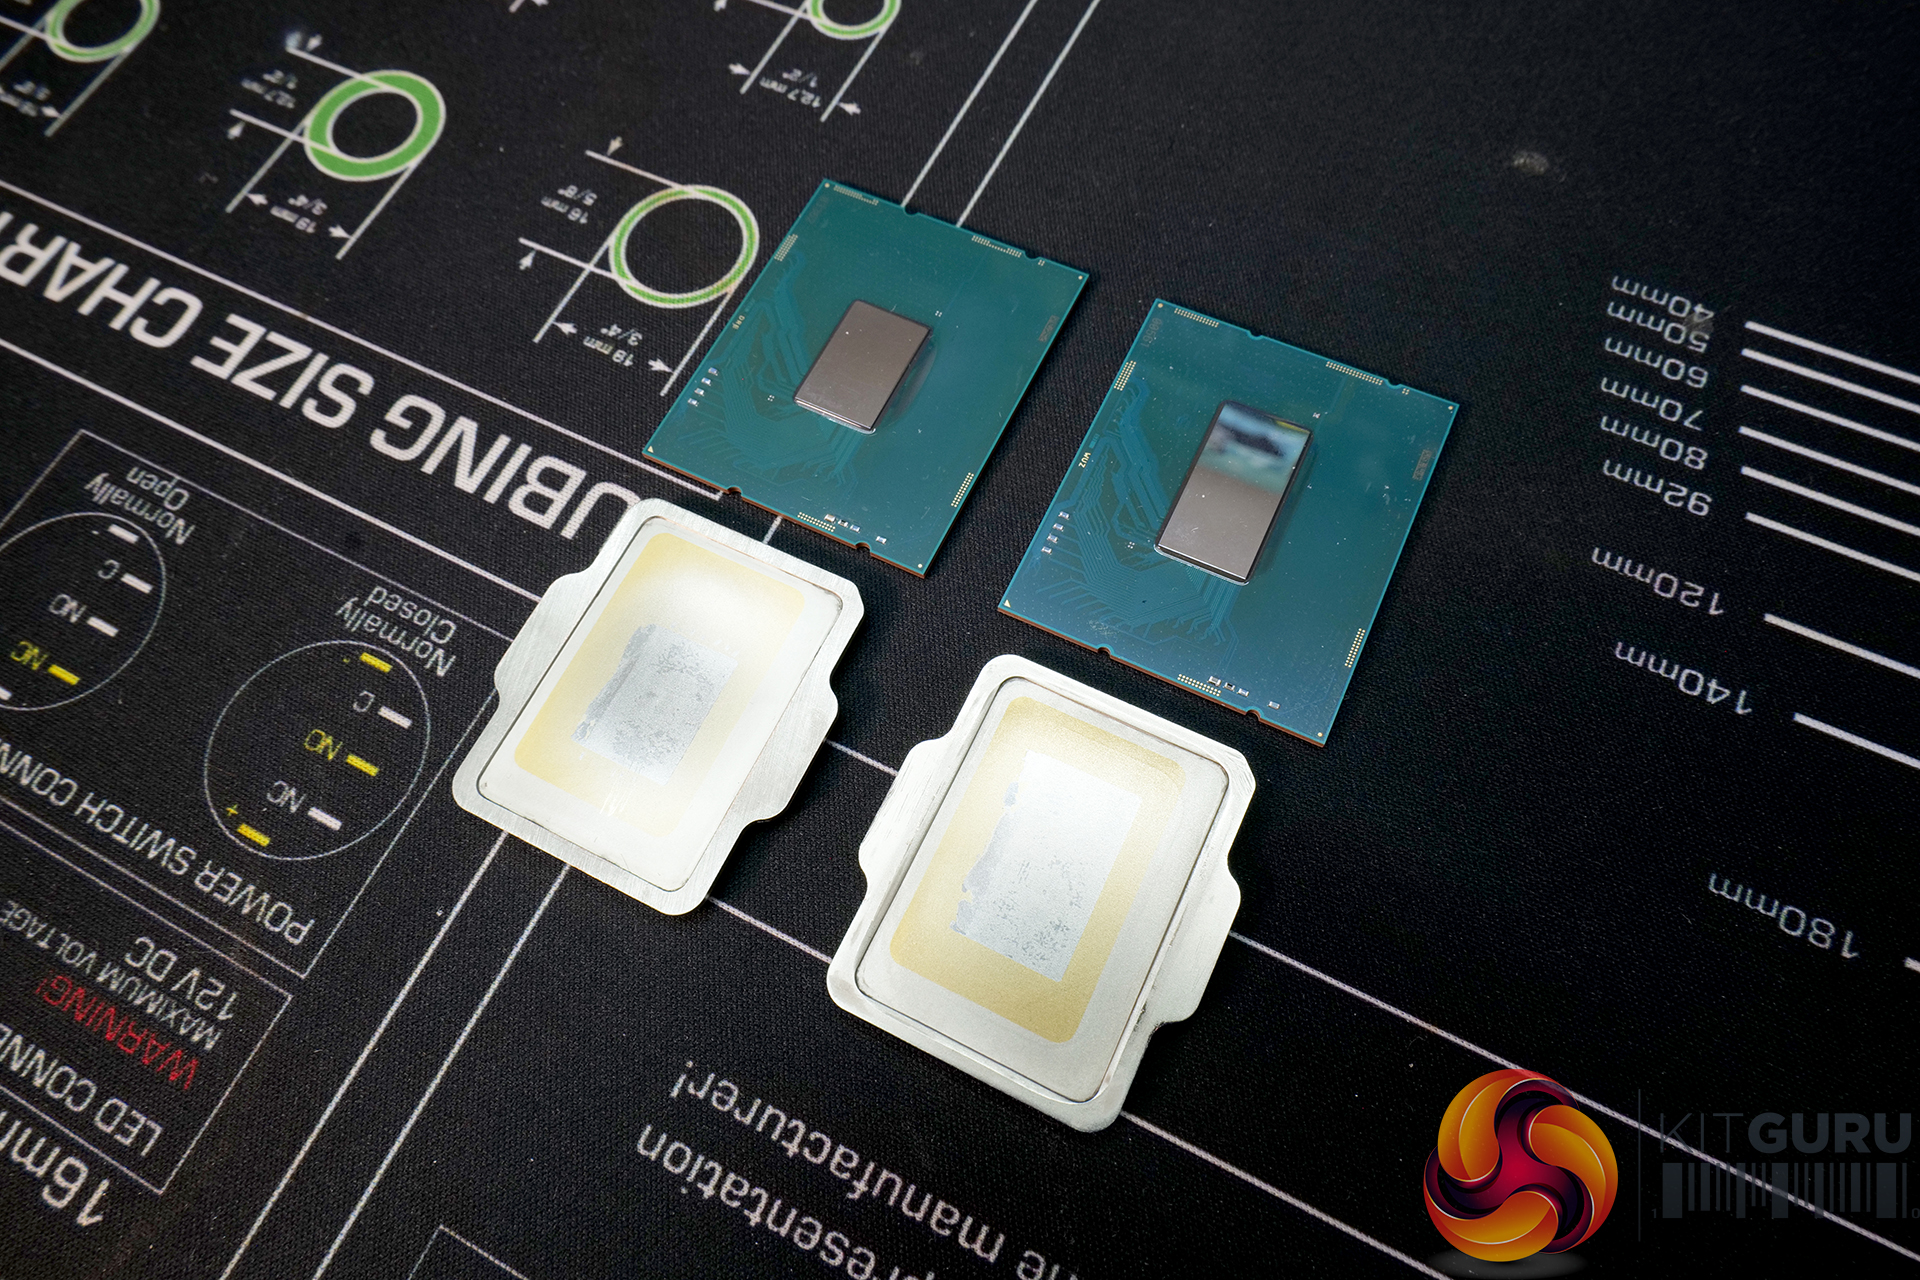
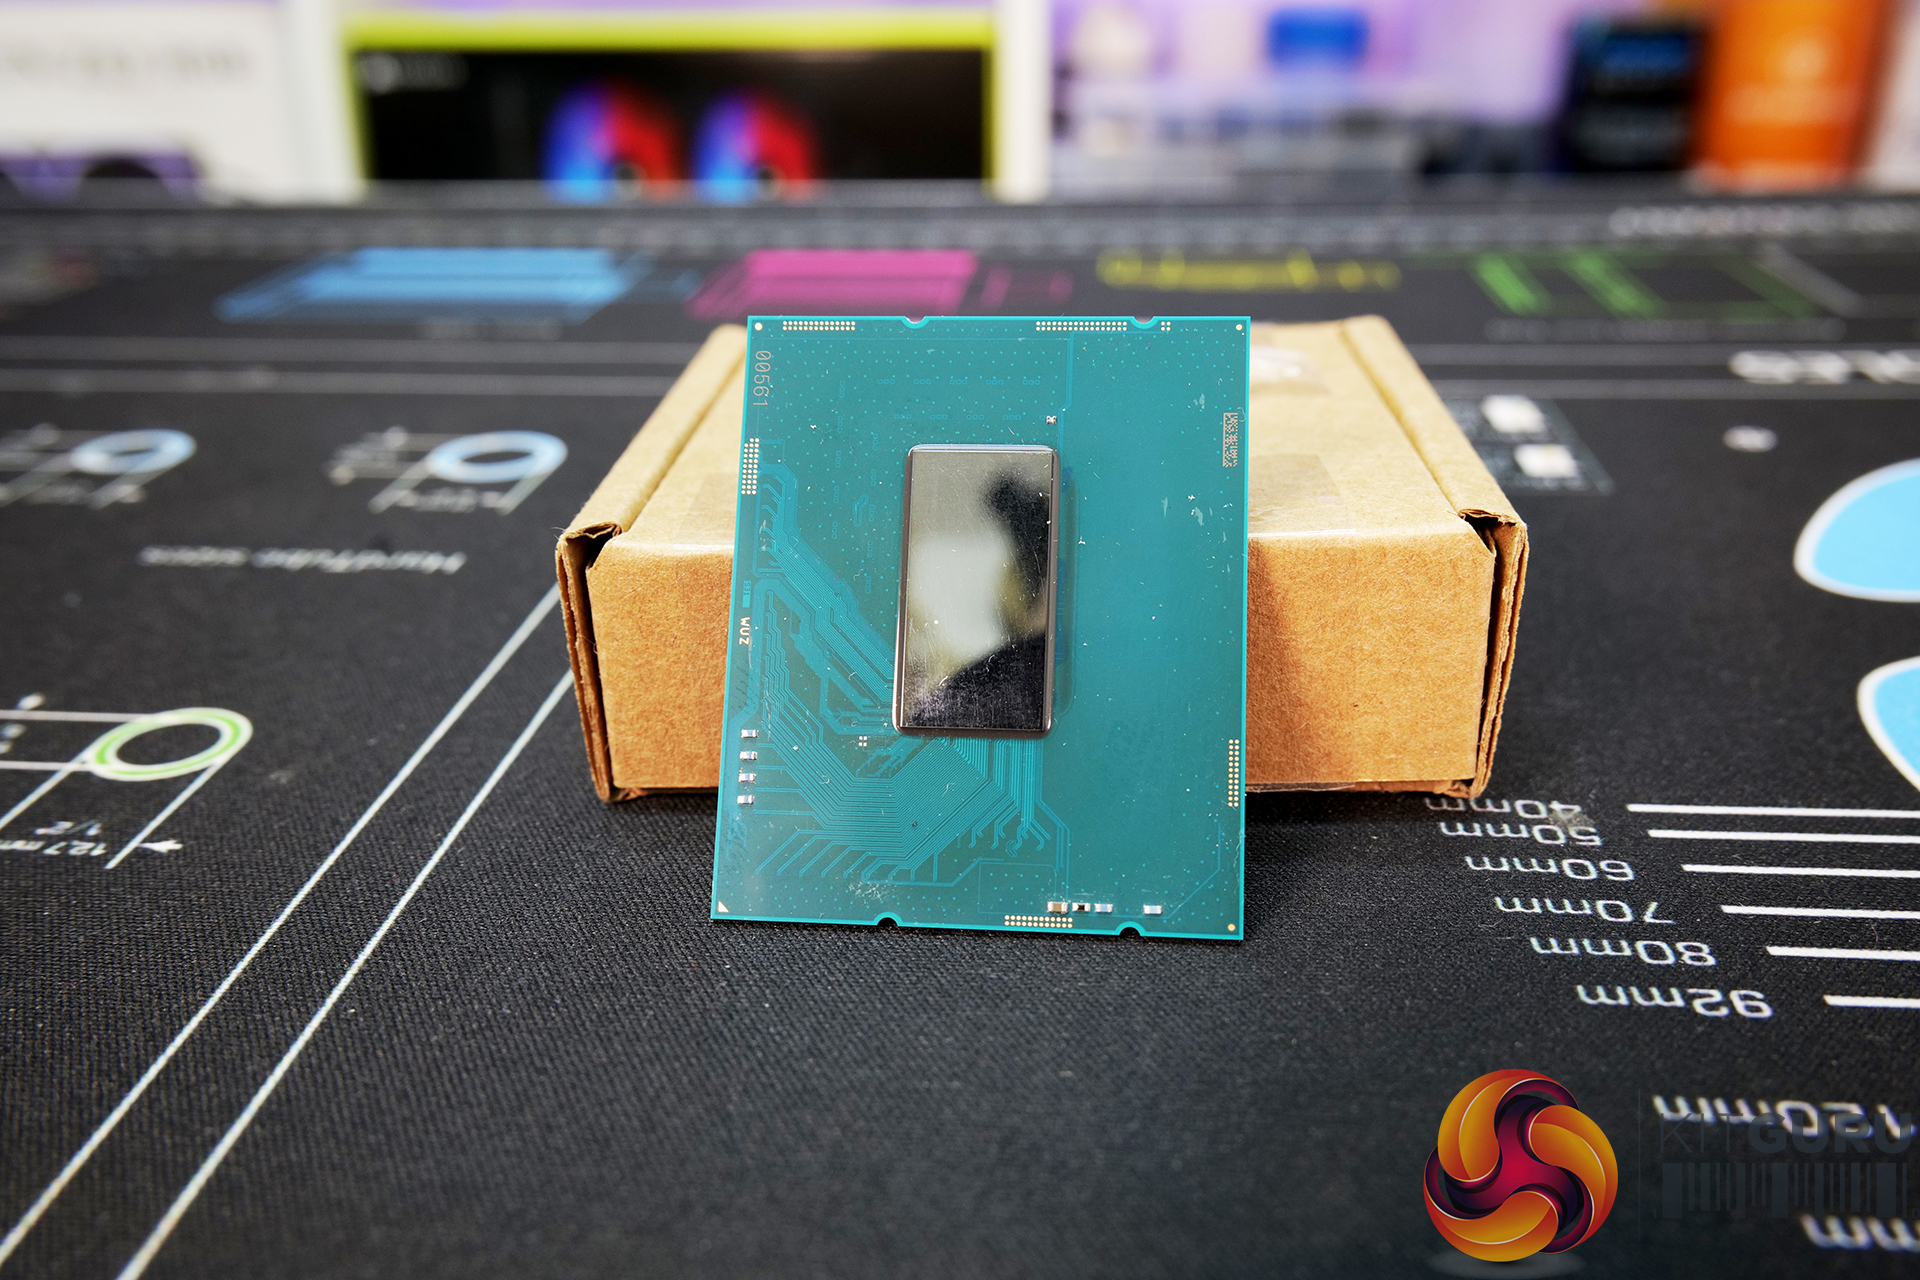
As you can see in the video, the delid process is quite easy. You can gently heat the CPU IHS before placing the CPU in the delid tool with the arrows on the CPU and tool aligned. Tighten the lid in place and then crank away on the Allen head bolt to push the IHS from the die. It's very tight towards the end and makes some scary noises when the IHS breaks free, but the process seems to be successful every time.
Delidding the CPU is as far as we can go with the first part of this project, but in the next video we will have the first prototype of the EKWB Custom direct die water block, be bale test fit the block and run the all-important thermal tests with direct die cooling, to find out exactly how much improvement can be gained in terms of thermal performance, and if we can push our overclock even further.
Discuss on our Facebook page HERE.
KitGuru says: We expect to see a significant improvement in thermals with our direct die cooling solution, but what do you guys think of the idea? Would this be a product you want for your 12th Gen Intel CPU?