

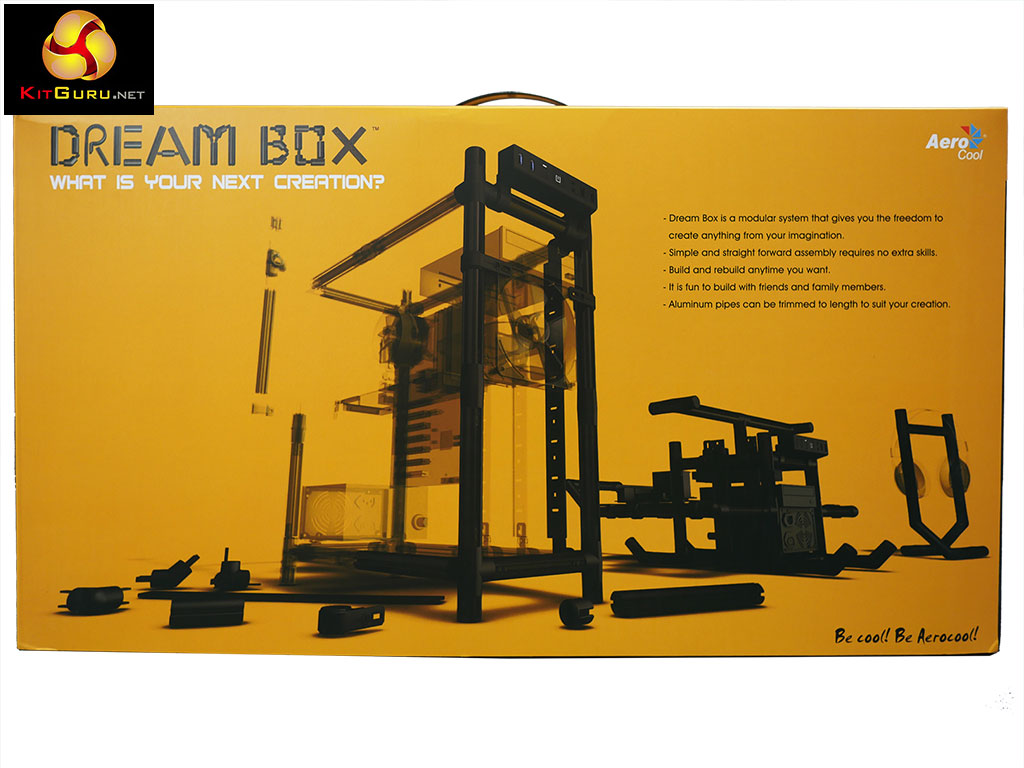
Aerocool describes its Dream Box as a ‘revolutionary DIY kit…to give you the flexibility to build a computer case like no other!' and if you take a look at our photos and video no doubt you will agree with that sentiment.
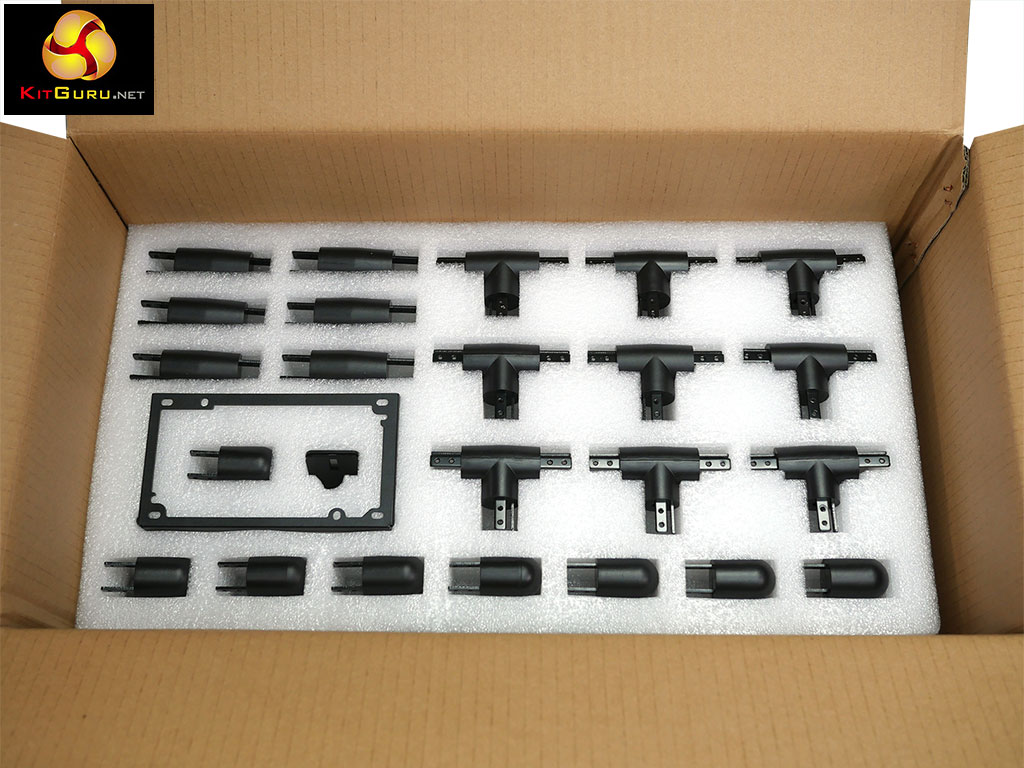
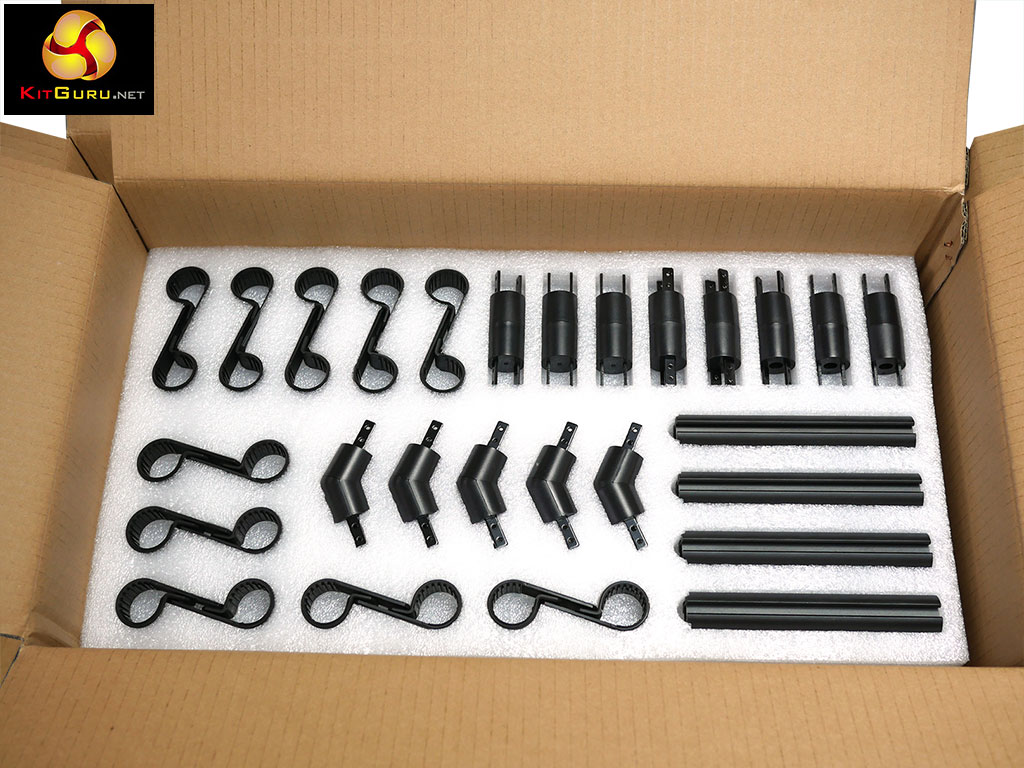
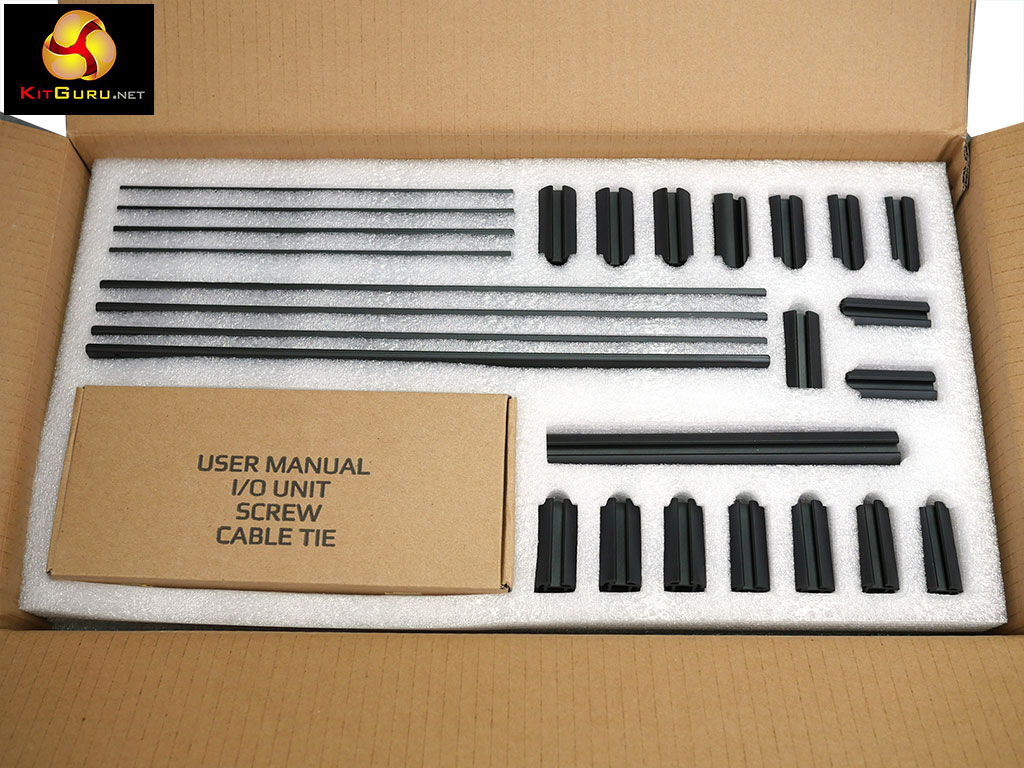
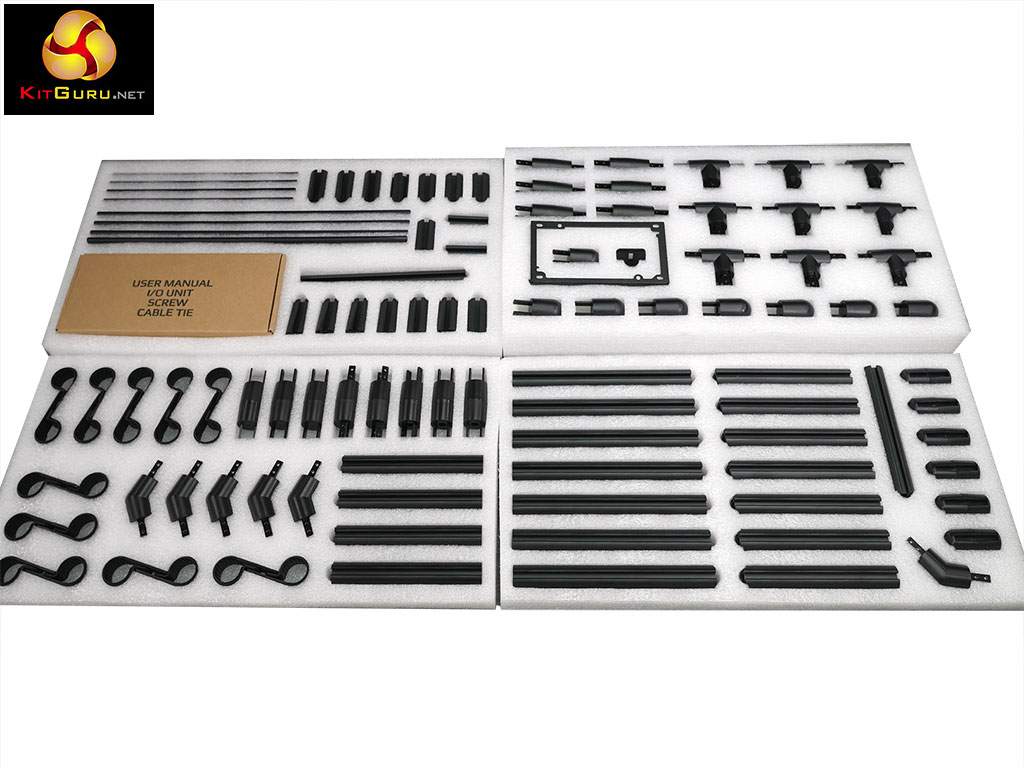
When you open the box you will find four trays of parts that are neatly arranged where each part has its own cut-out in the plastic foam packing so they all arrive in perfect condition without any scratches or marks.
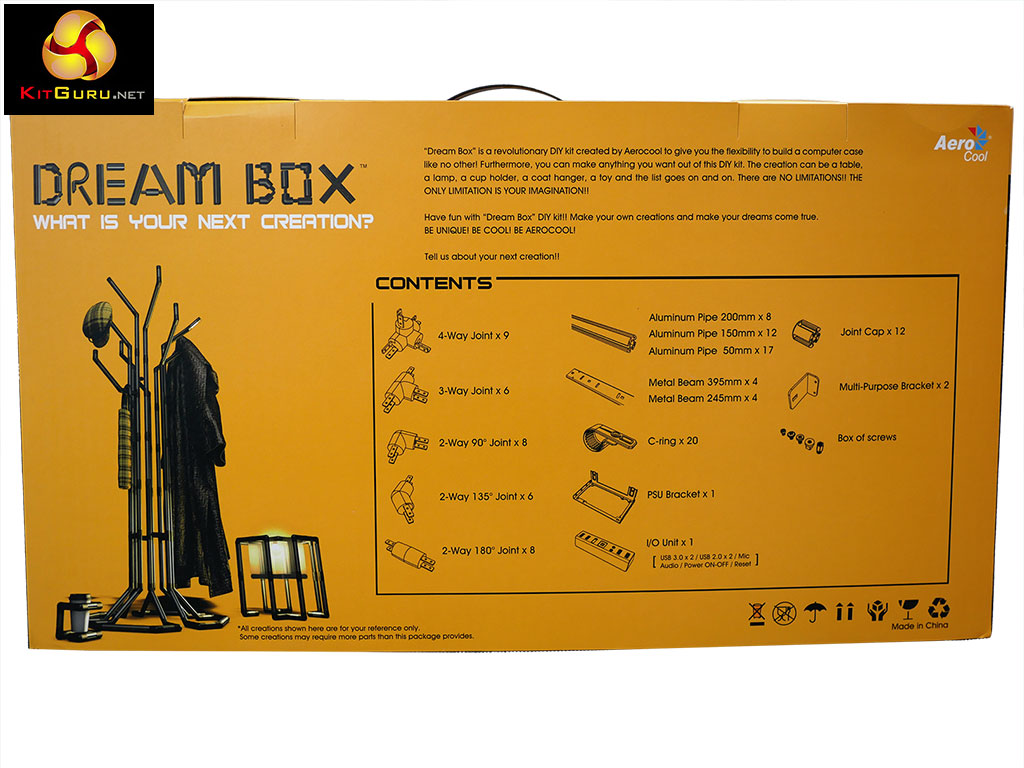
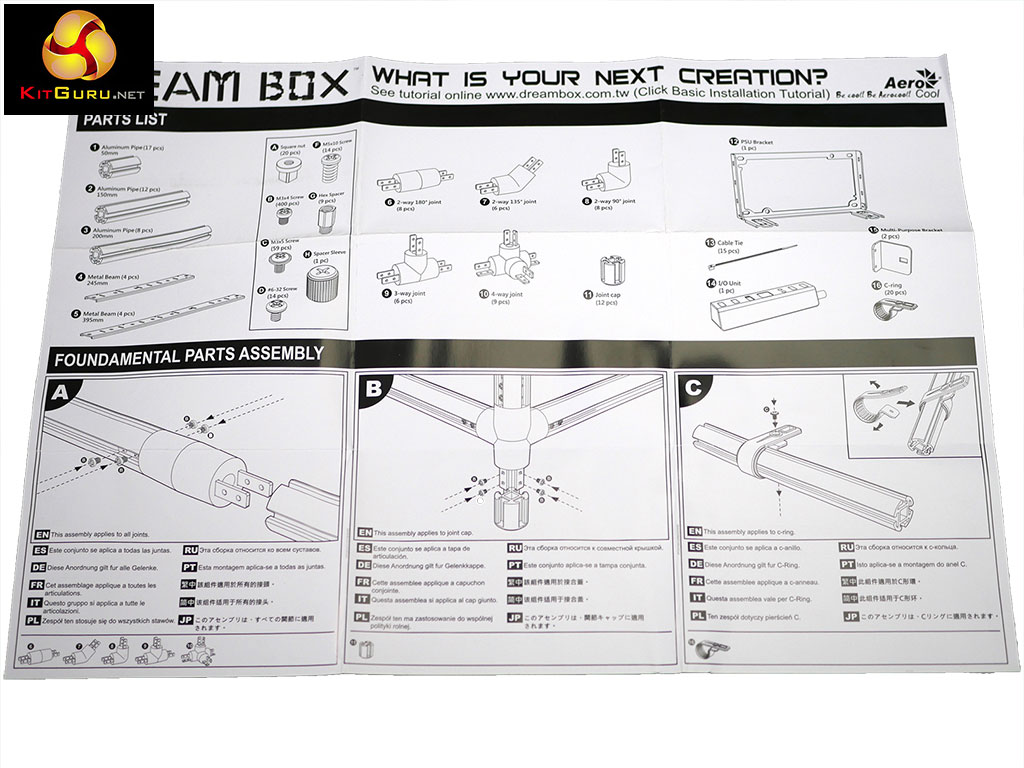
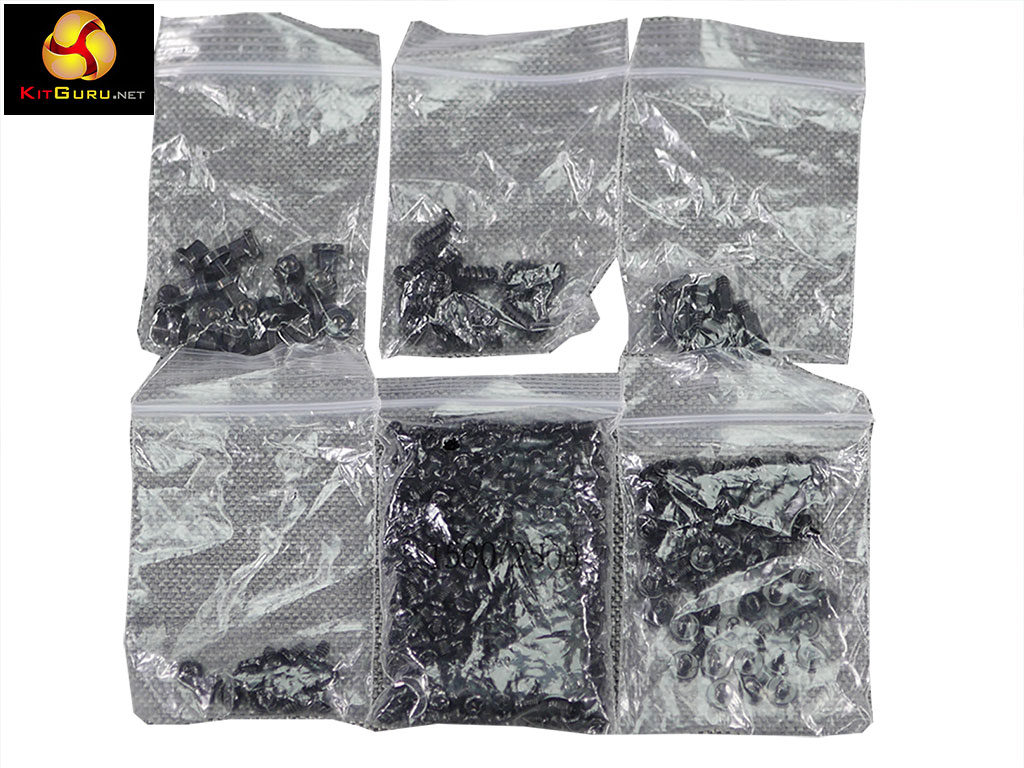
The box contains 188 parts plus a large number of screws. The main bag of fasteners contains 400 screws, which is an indication of the amount of work involved in building a PC case using the Dream Box kit. If you look at the examples shown on the Dream Box website you might instead build a helicopter or a wild boar, and we seem to recall seeing a Dream Box shark at some point in the past. The instructions supplied with Dream Box are a quick start guide and are nothing like the detailed guide you get from IKEA or Lego so it helps if you have a certain amount of creative flair.
Anyway that is our excuse so when you watch the video please be generous and accept we were doing our level best to build something that looked approximately like a PC case.

Test System:
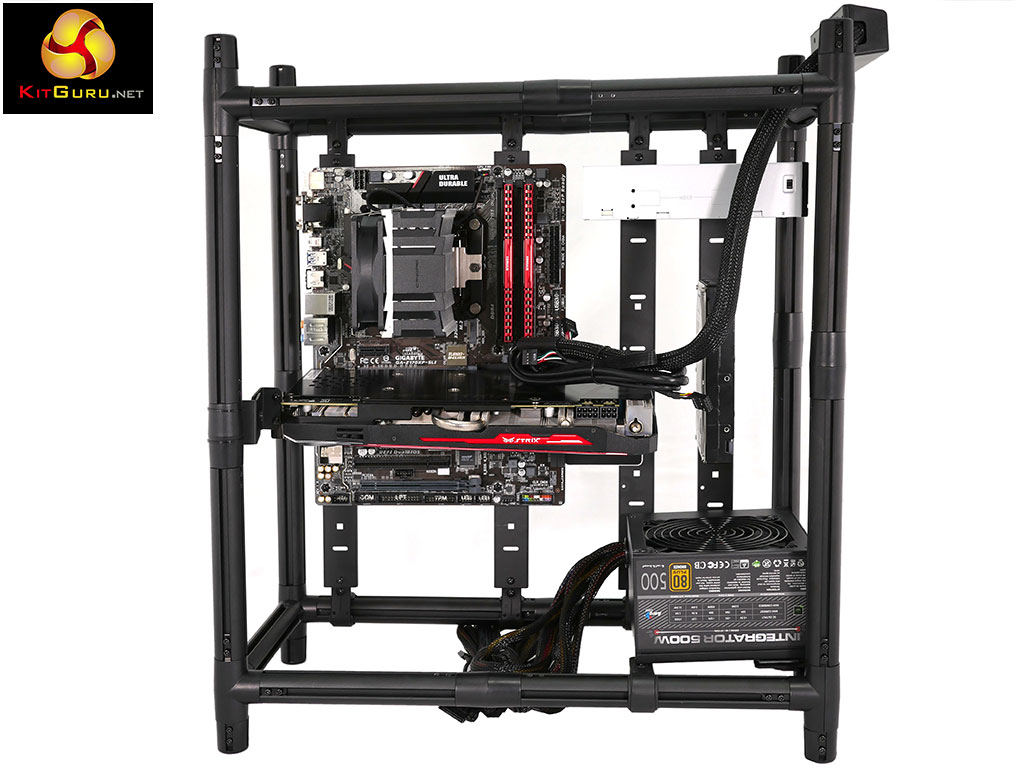
- Processor: 4.2GHz Intel Core i7-6700K
- Motherboard: Gigabyte Z170XP-SLI
- CPU cooler: Cryorig M9i
- Memory: 16GB Corsair DDR4-1600MHz
- Graphics card: Asus R9 390 8GB
- Power supply: Aerocool Integrator 500W
- Storage drives: 240GB OCZ Vector 180 SSD
- OS: Windows 10.
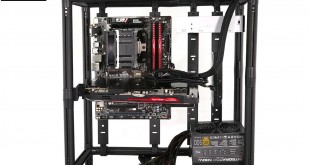
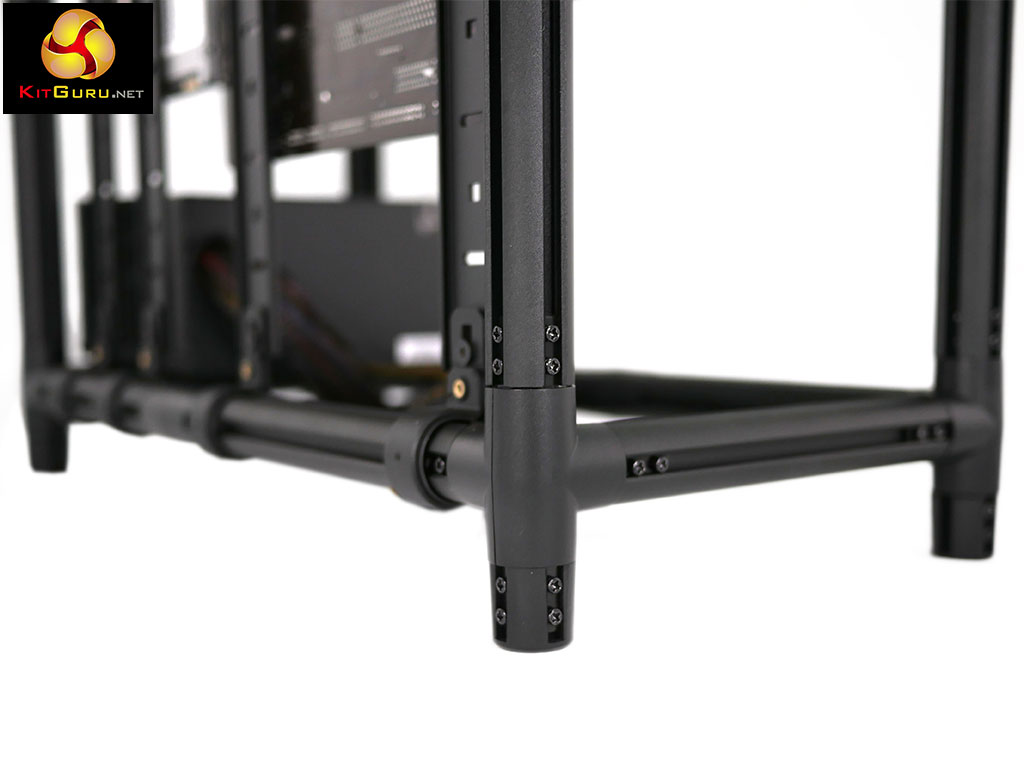
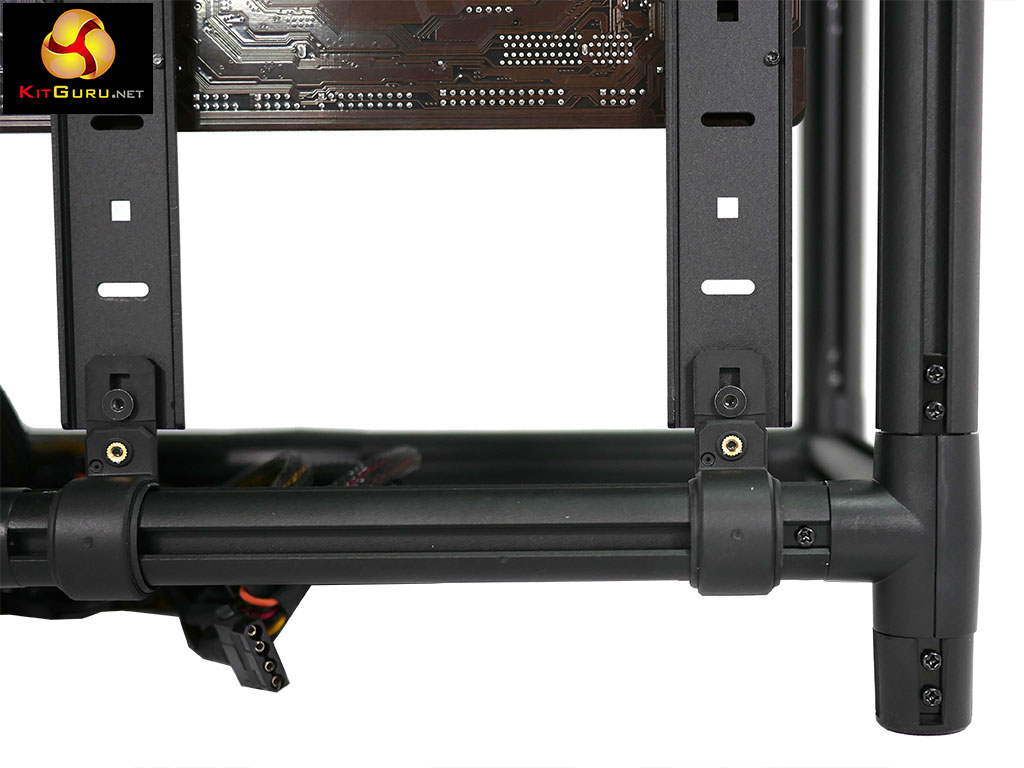
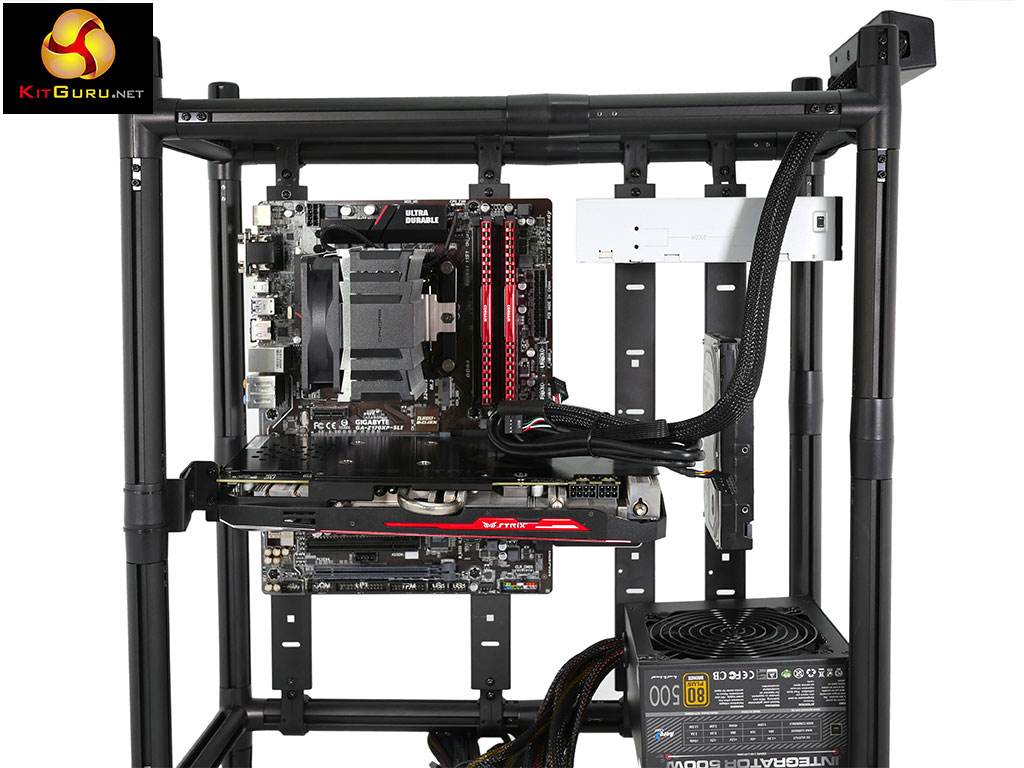
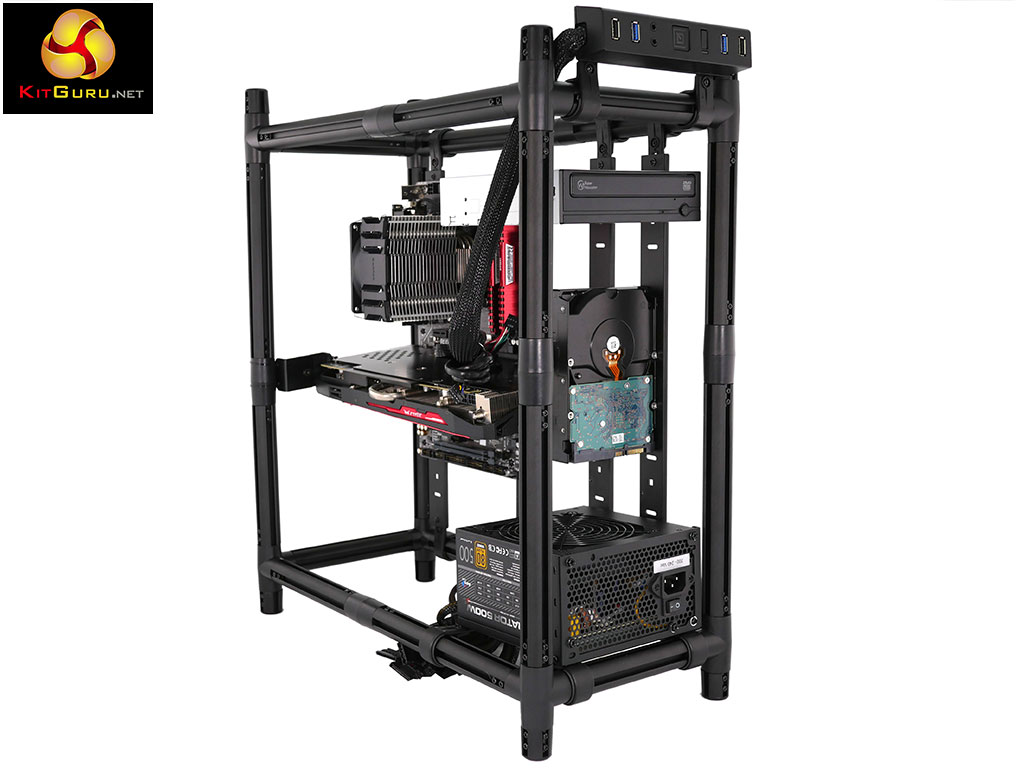
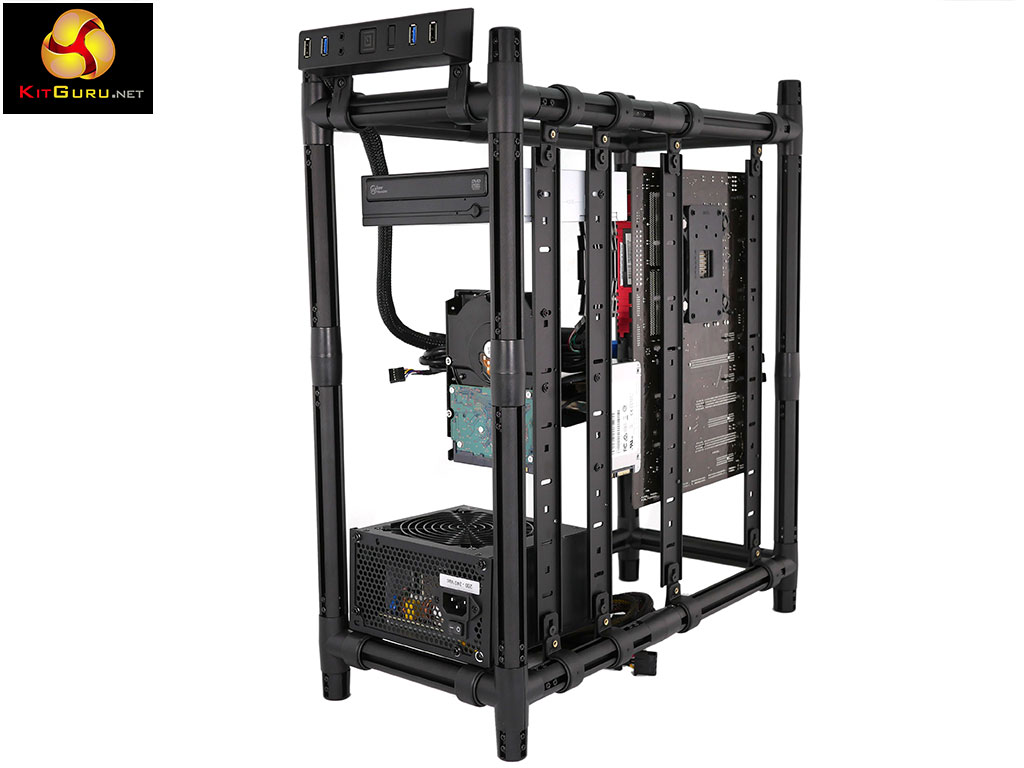
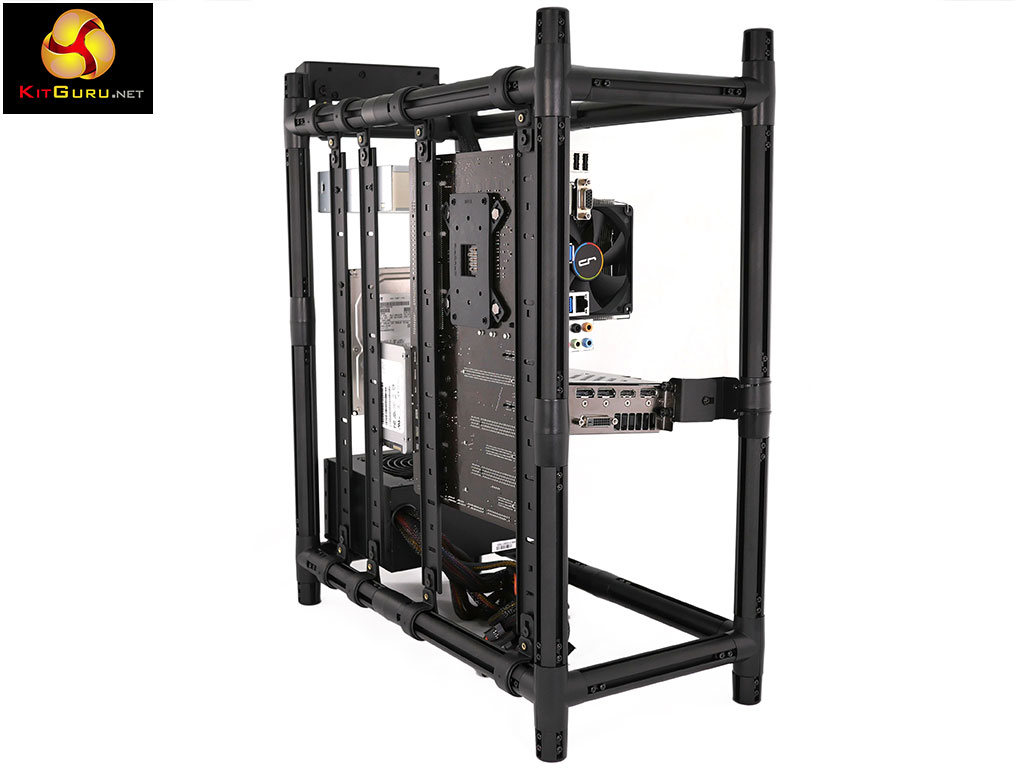
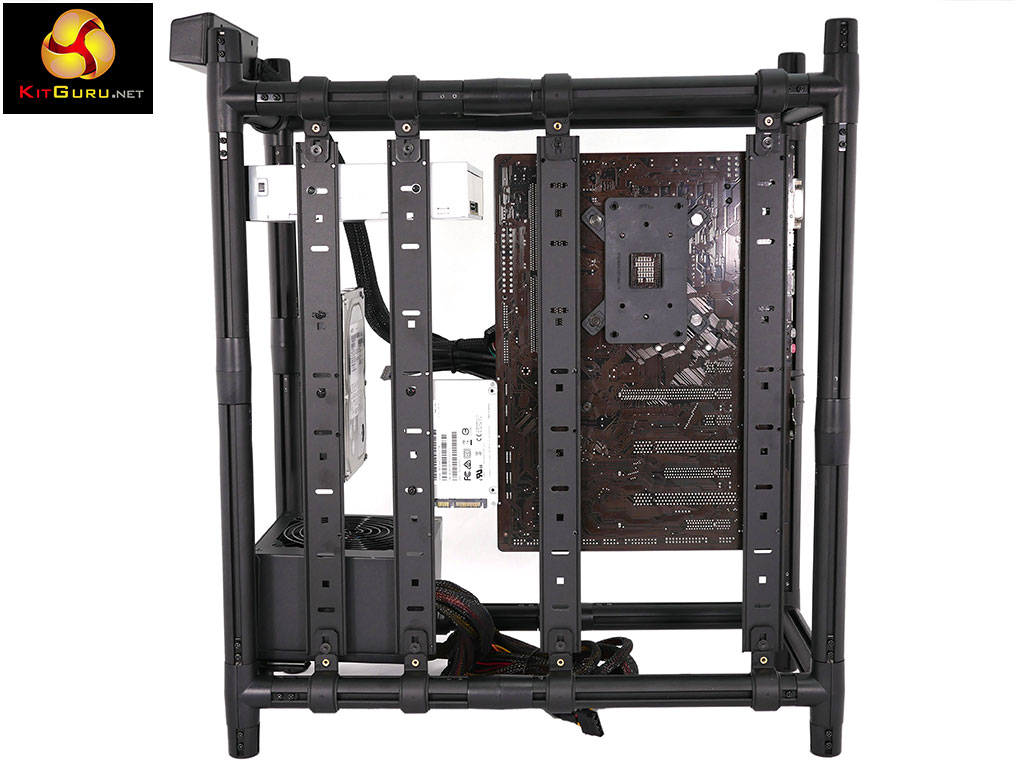
The various parts of the main chassis slip together quite securely. It is worth spelling out that the various lengths of pipe are extruded aluminium as they look like plastic in the photos. You require a good number of the screws during construction (we used about 200) and that takes a fair amount of time as well as a decent No. 2 Phillips screwdriver. What you cannot see in the photos and videos is the amount of work required to move parts around and get the brackets and mounts aligned in the correct position so you can install the motherboard or hook up a drive.
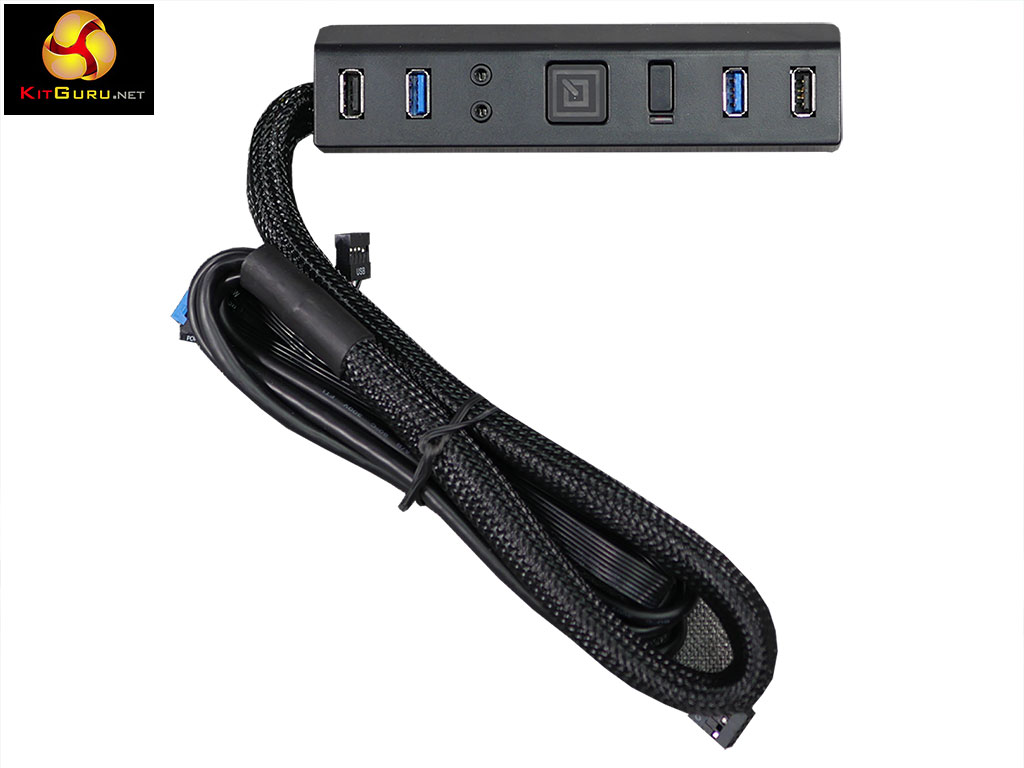
The big parts are relatively easy but sorting out the finishing touches is a different story if you want to use Dream Box as an open PC or a test bench. Securing the plastic I/O panel on the front was simple as its light weight was well-suited to the P clip mounting system. On the other hand we were deeply unhappy about the way the power supply was left hanging in fresh air and simply wouldn't entertain a hard drive mounted on two screws on just one side. For that matter it isn't all that easy to properly support a weighty graphics card and avoid putting stress on the motherboard.
In many respects those are details as the fundamental question is to wonder why you might buy a Dream Box in the first place. Clearly it isn't much use as a PC case and there is a huge variety of PC cases on the market, so there is no obvious reason to build your own.
More to the point you can easily lay your hands on a test bench or open frame that will be considerably easier to use than Dream Box.
The way we see it is that Dream Box is a cross between a toy and a piece of art that happens to have a PC theme. If you want to display your PC hardware top visitors then Dream Box may well be the answer, admittedly to a question that we had not previously considered.
Closing Thoughts
Dream Box consists of some very nice pieces of aluminium extrusion and a bunch of joining pieces that help you construct your meisterwerk. This involves a great many tiny screws, plenty of screwdriver work and a certain amount of vision and foresight.
Once you have leapt those hurdles you will require a degree of genius to come up with some finishing touches that round the job off neatly or, in our case, you find yourself let down by some annoying loose ends. Either way Dream Box ends up looking rather expensive and the final result is not entirely satisfactory.
Pros:
- The components are well made and accurately finished.
- Good selection of components in the package.
- Neatly packed and arranged.
Cons:
- A massive number of screws are required for assembly.
- Our finished PC frame was not very practical.
- Rather expensive.
KitGuru says: Dream Box is fun but seems like a solution looking for a problem.

I currently get paid close to $6k-$8k /every month working from home online. Everyone willing to complete basic freelance jobs for few h daily from your living room and make good payment while doing it… Try this job CHILP.IT/45fc05a
vds
it’s good for a test bench tower, i have one and for £90 it’s a bit much. very handy for summer time pc gaming as you get maximum airflow but i do miss the safety a case provides and the features that it can come with…Also if they provide SOME BASIC PLANS WOULD BE NICE