A quick push of the joystick turns the monitor on, and then a longer one turns it off again – all very logical.
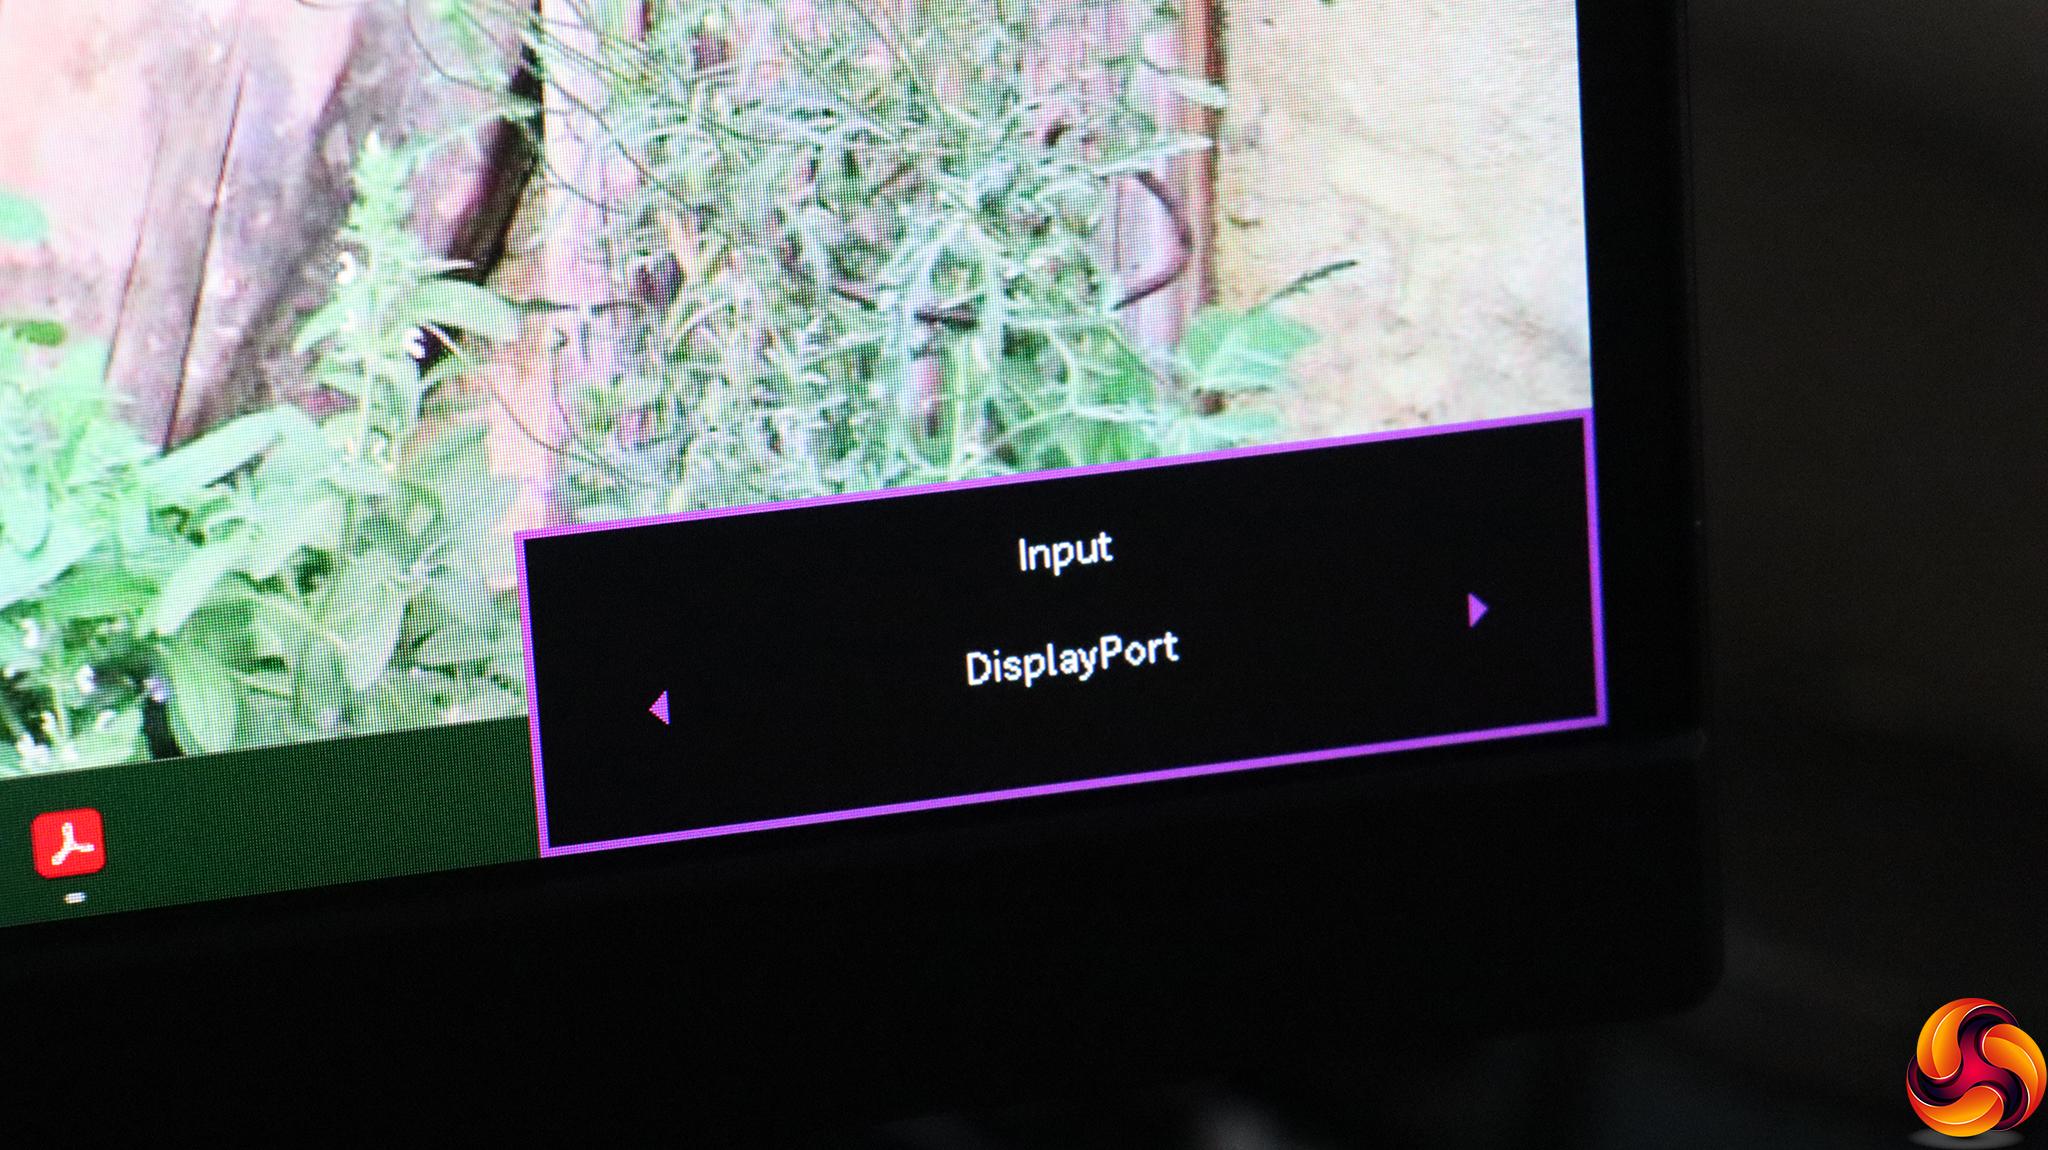
Pushing the joystick left lets you switch manually between the video inputs.
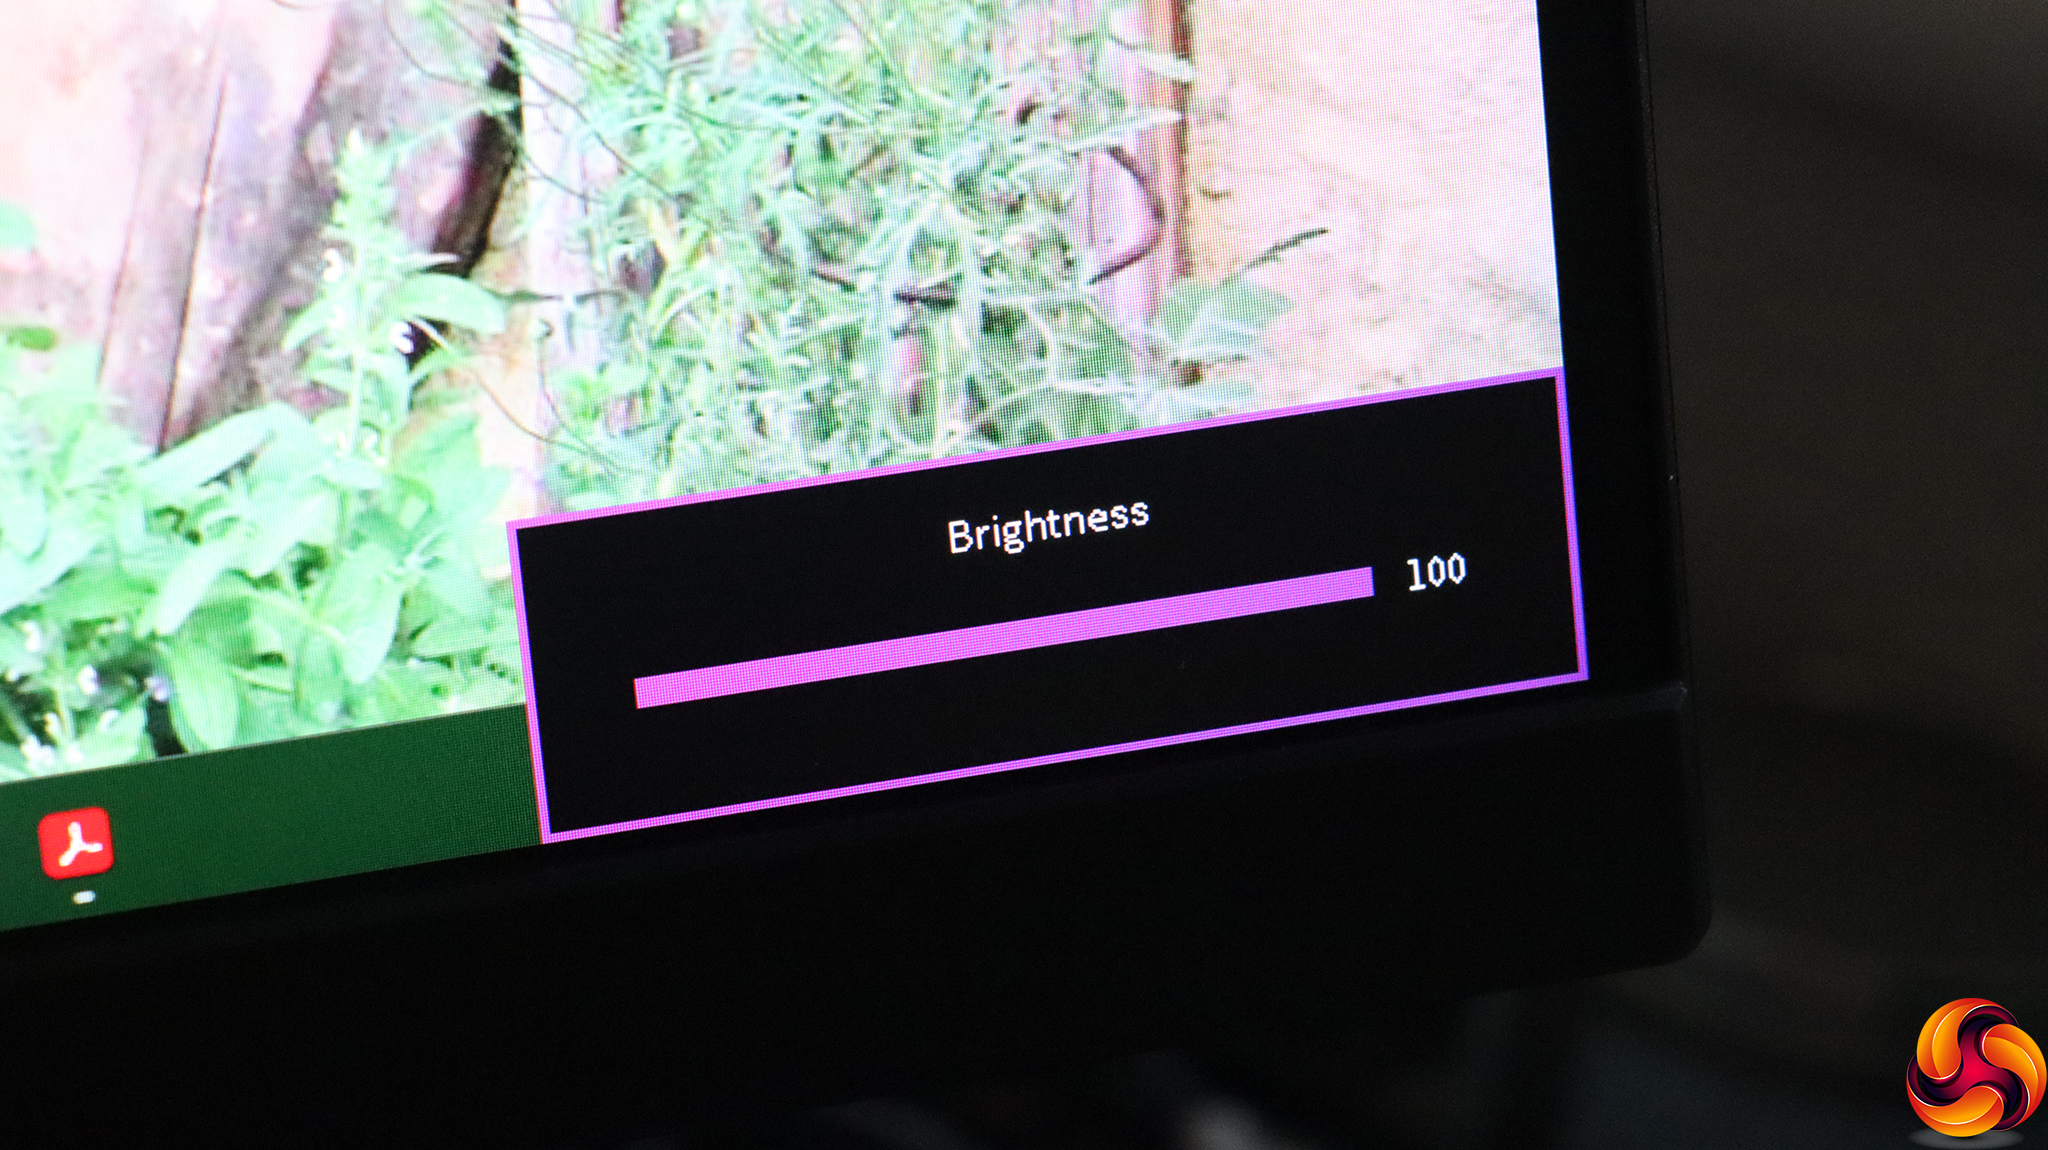
Pushing the joystick inwards lets you adjust brightness.
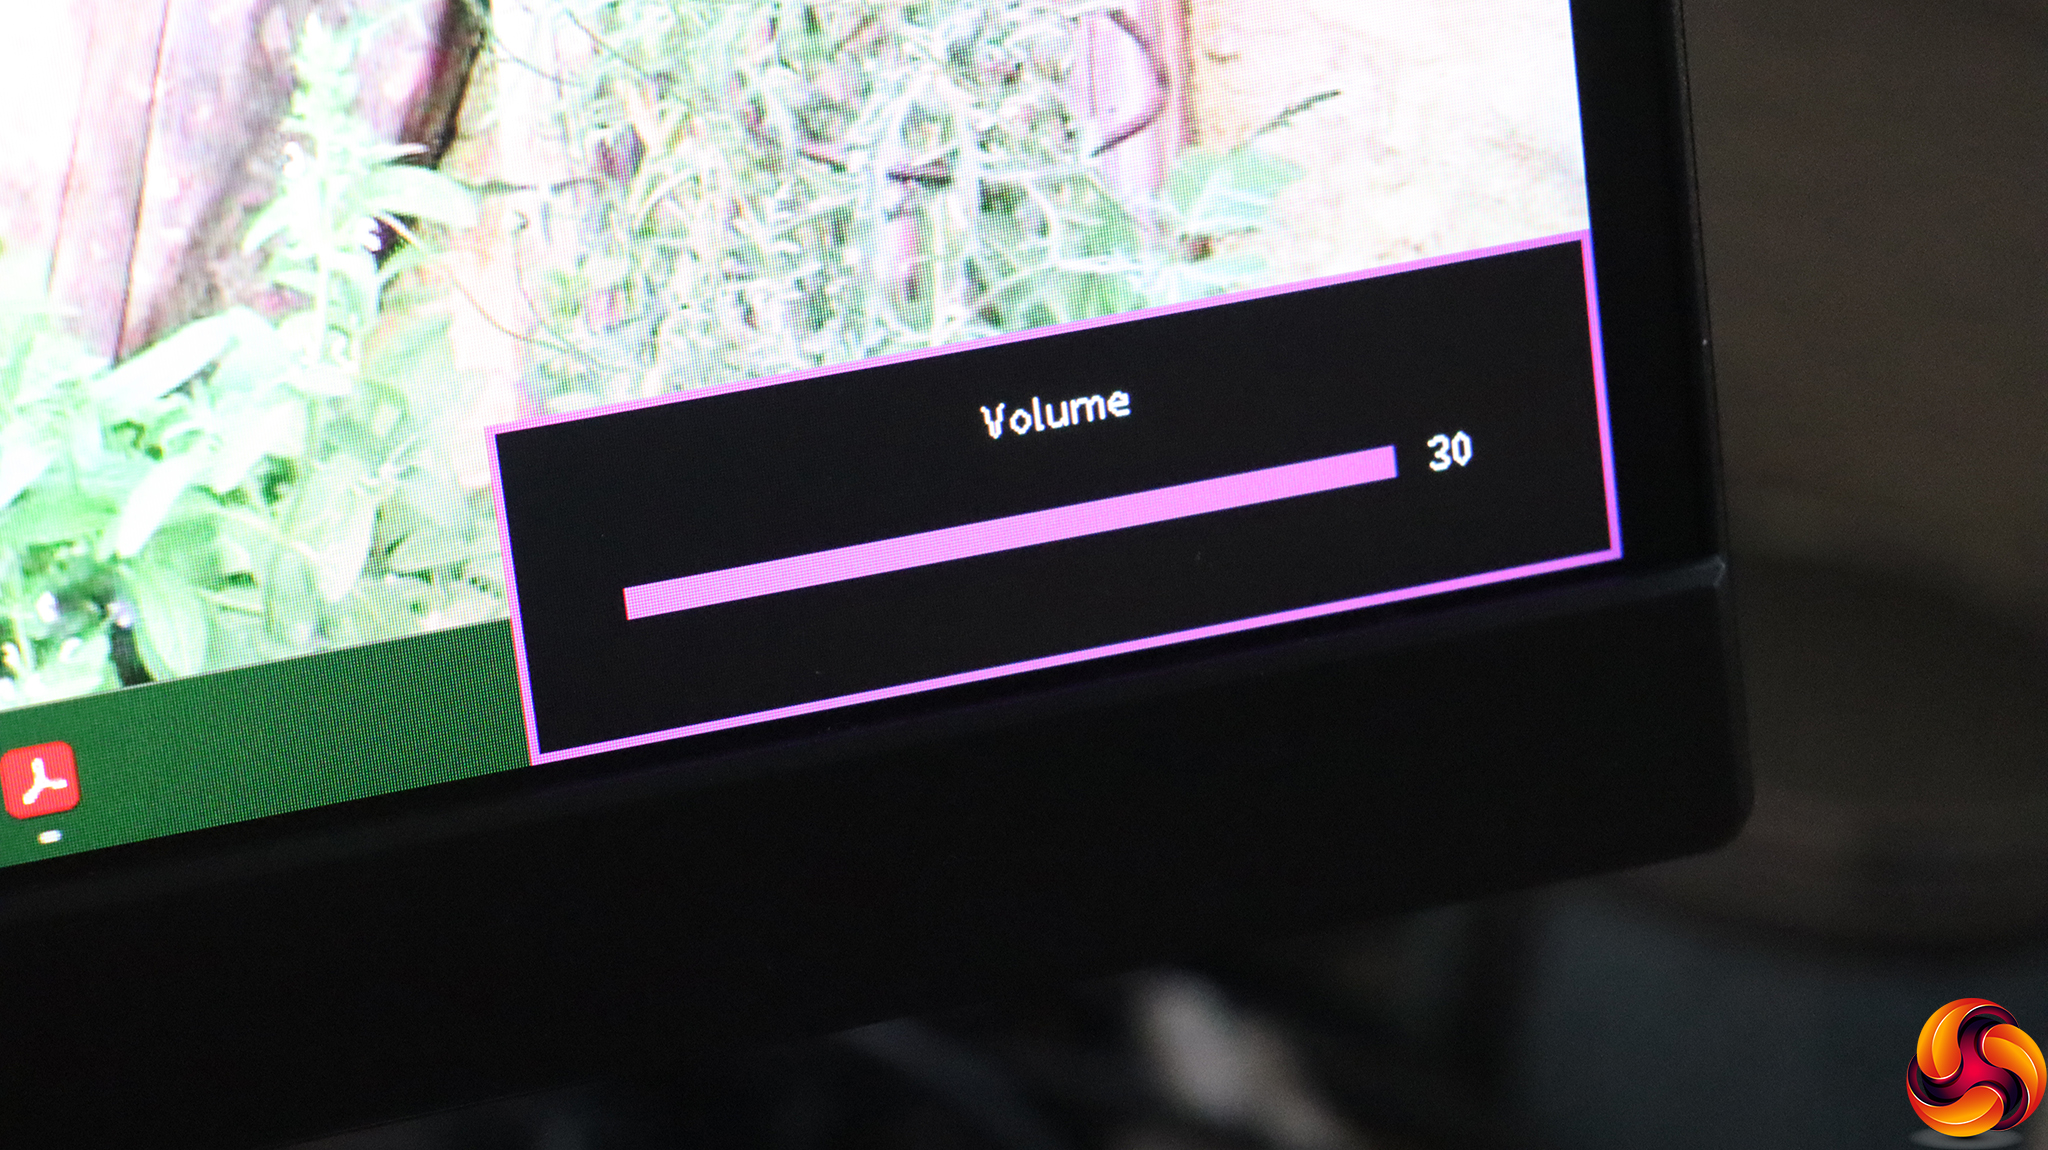
Pulling the joystick towards you provides control over the volume of the built-in speakers or attached external speakers or headset.
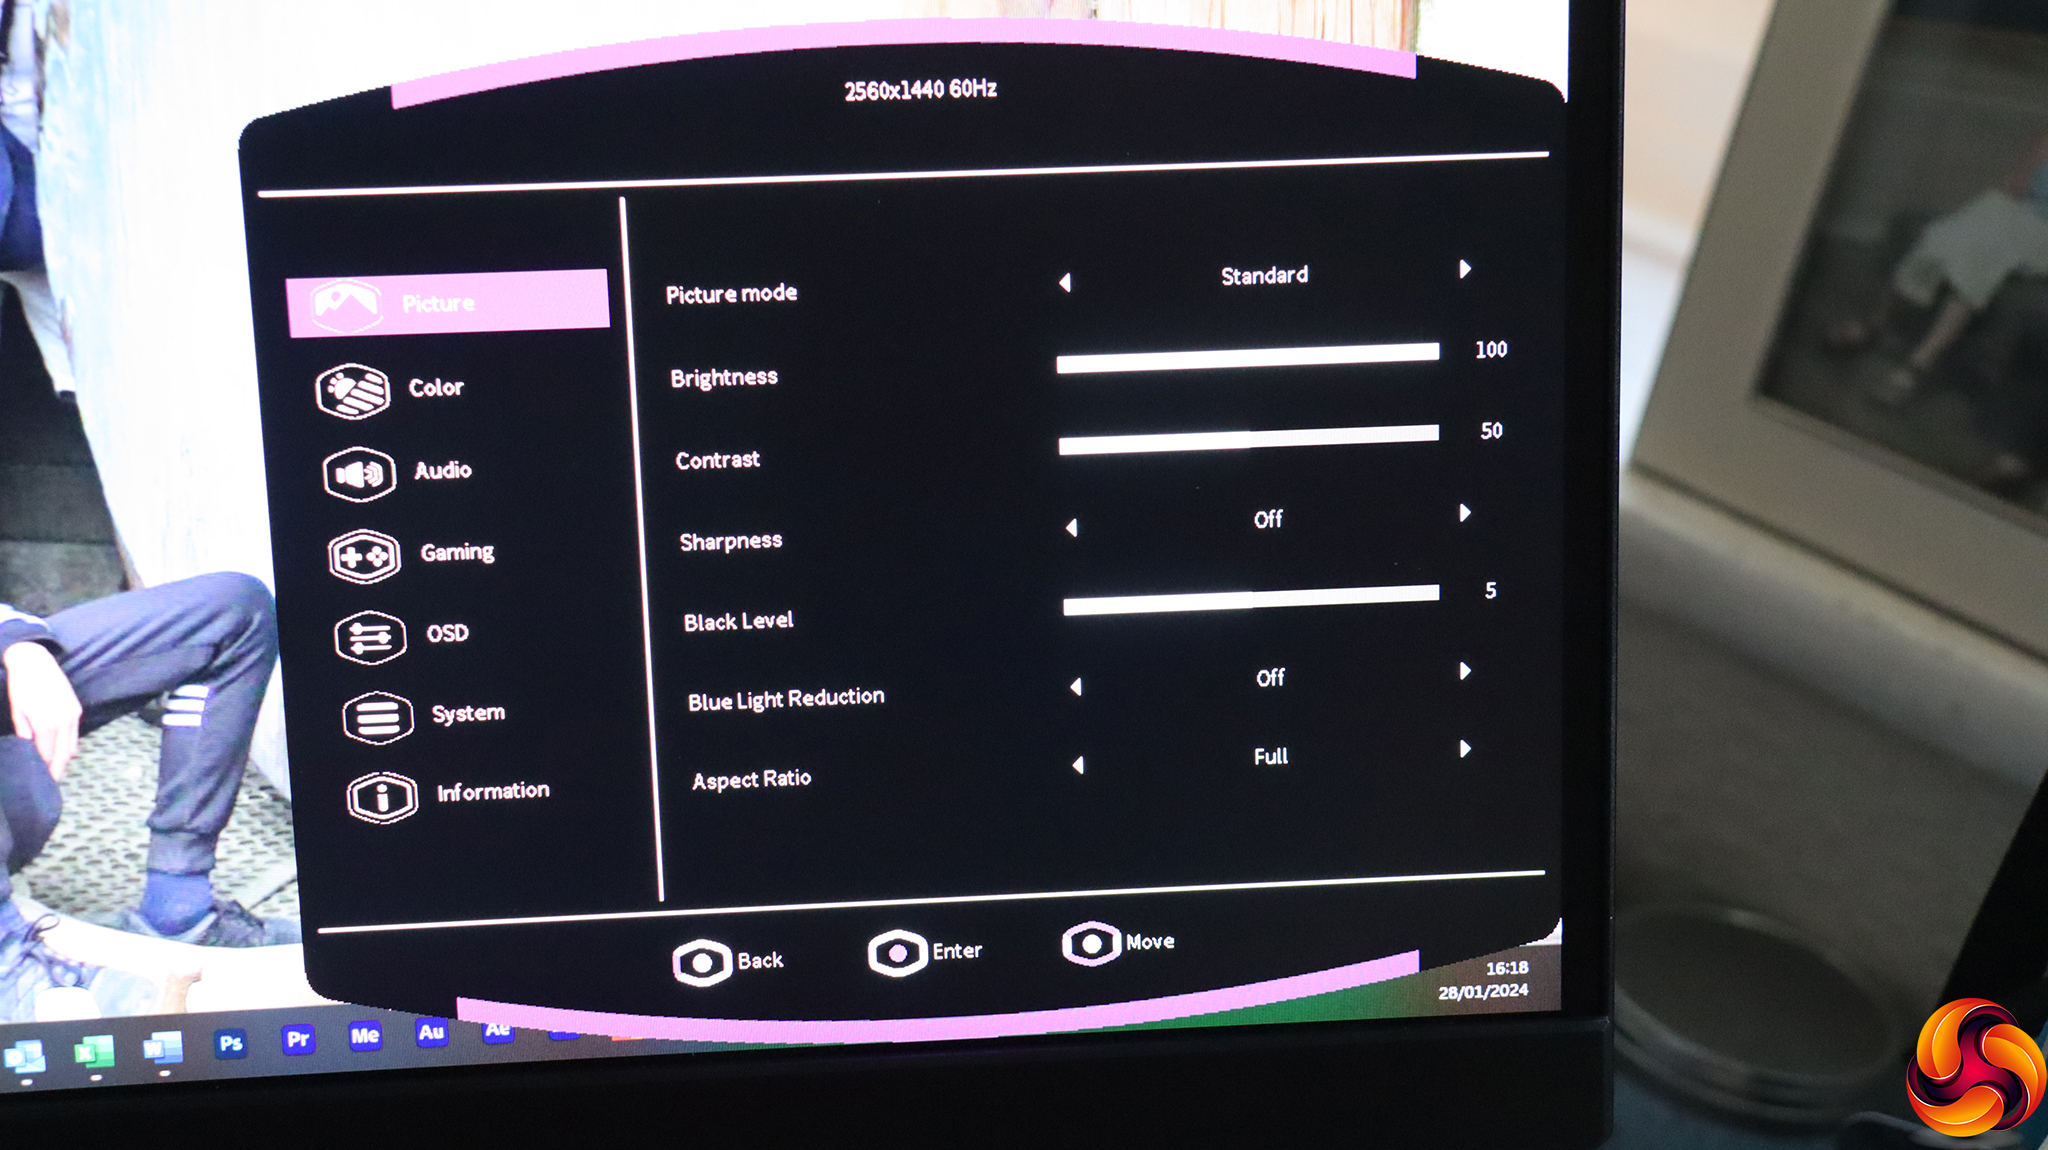
Finally, pushing the joystick to the right, or a quick press in when the power is on, calls up the main menu, with the Picture section the default one to appear first.
Top of the section is the Picture modes, which include Standard, Game, FPS, RPG, Web, and a Custom option where you can store your own settings. Next down are sliders for Brightness and Contrast, plus Sharpness with ten levels above Off. You can vary the Black Level from zero to 10 (5 is default), turn on Blue Light Reduction, alter the aspect ratio if the resolution is not native, and HDMI Range (not visible in this screenshot).
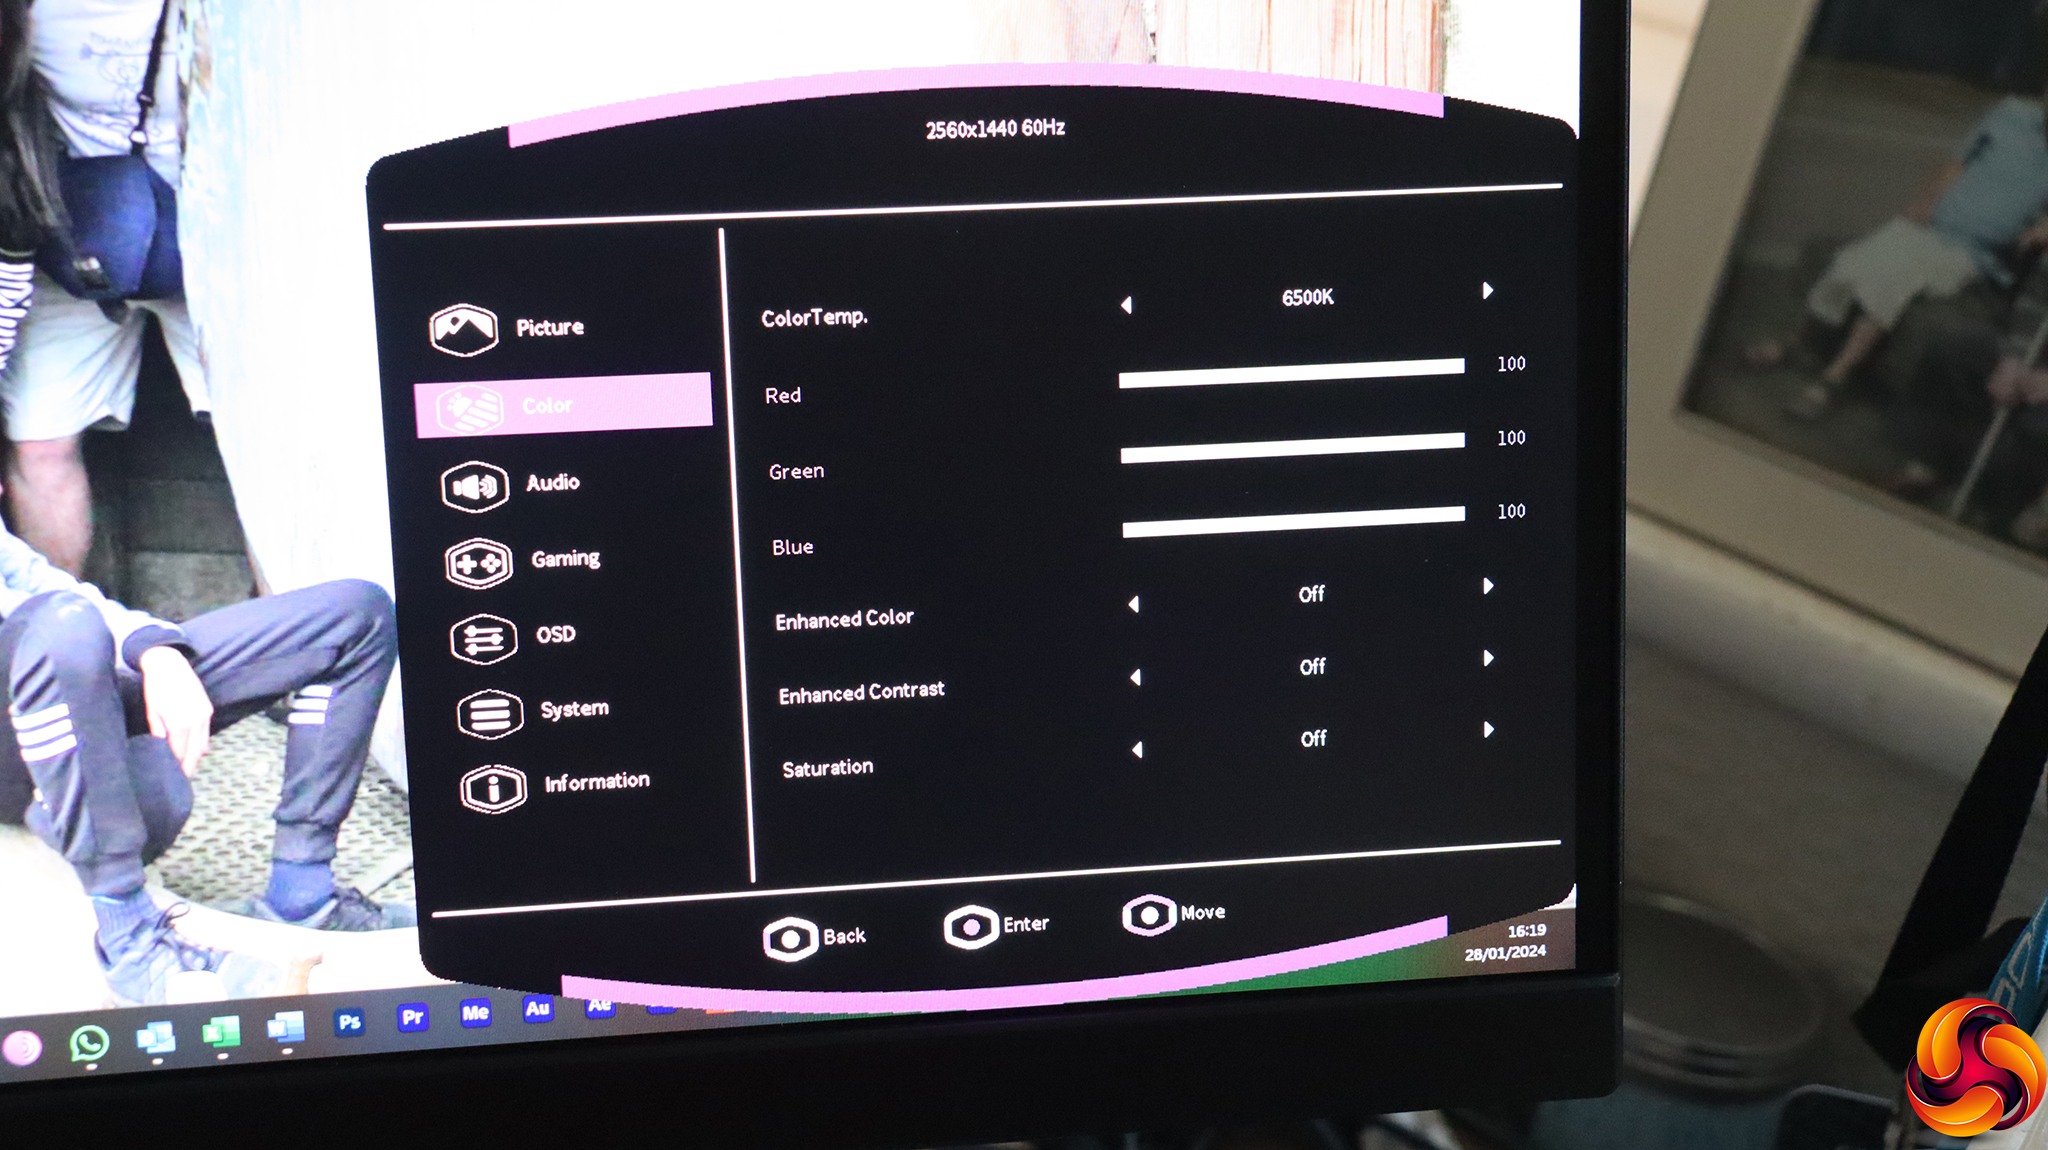
Next down in the main menu is the Color section. This offers 6500K, 7200K, and 9300K temperature presets, plus a User option where you can adjust red, green and blue levels manually. You can also add the Enhanced Color effect up to a strength of ten, plus add up to five levels of Enhanced Contrast. The Saturation option also has ten levels. Further down the menu is Gamma configuration, with 2.2 the default, or you can lower it to 2.0. HDR can be turned on or off, or left on auto.
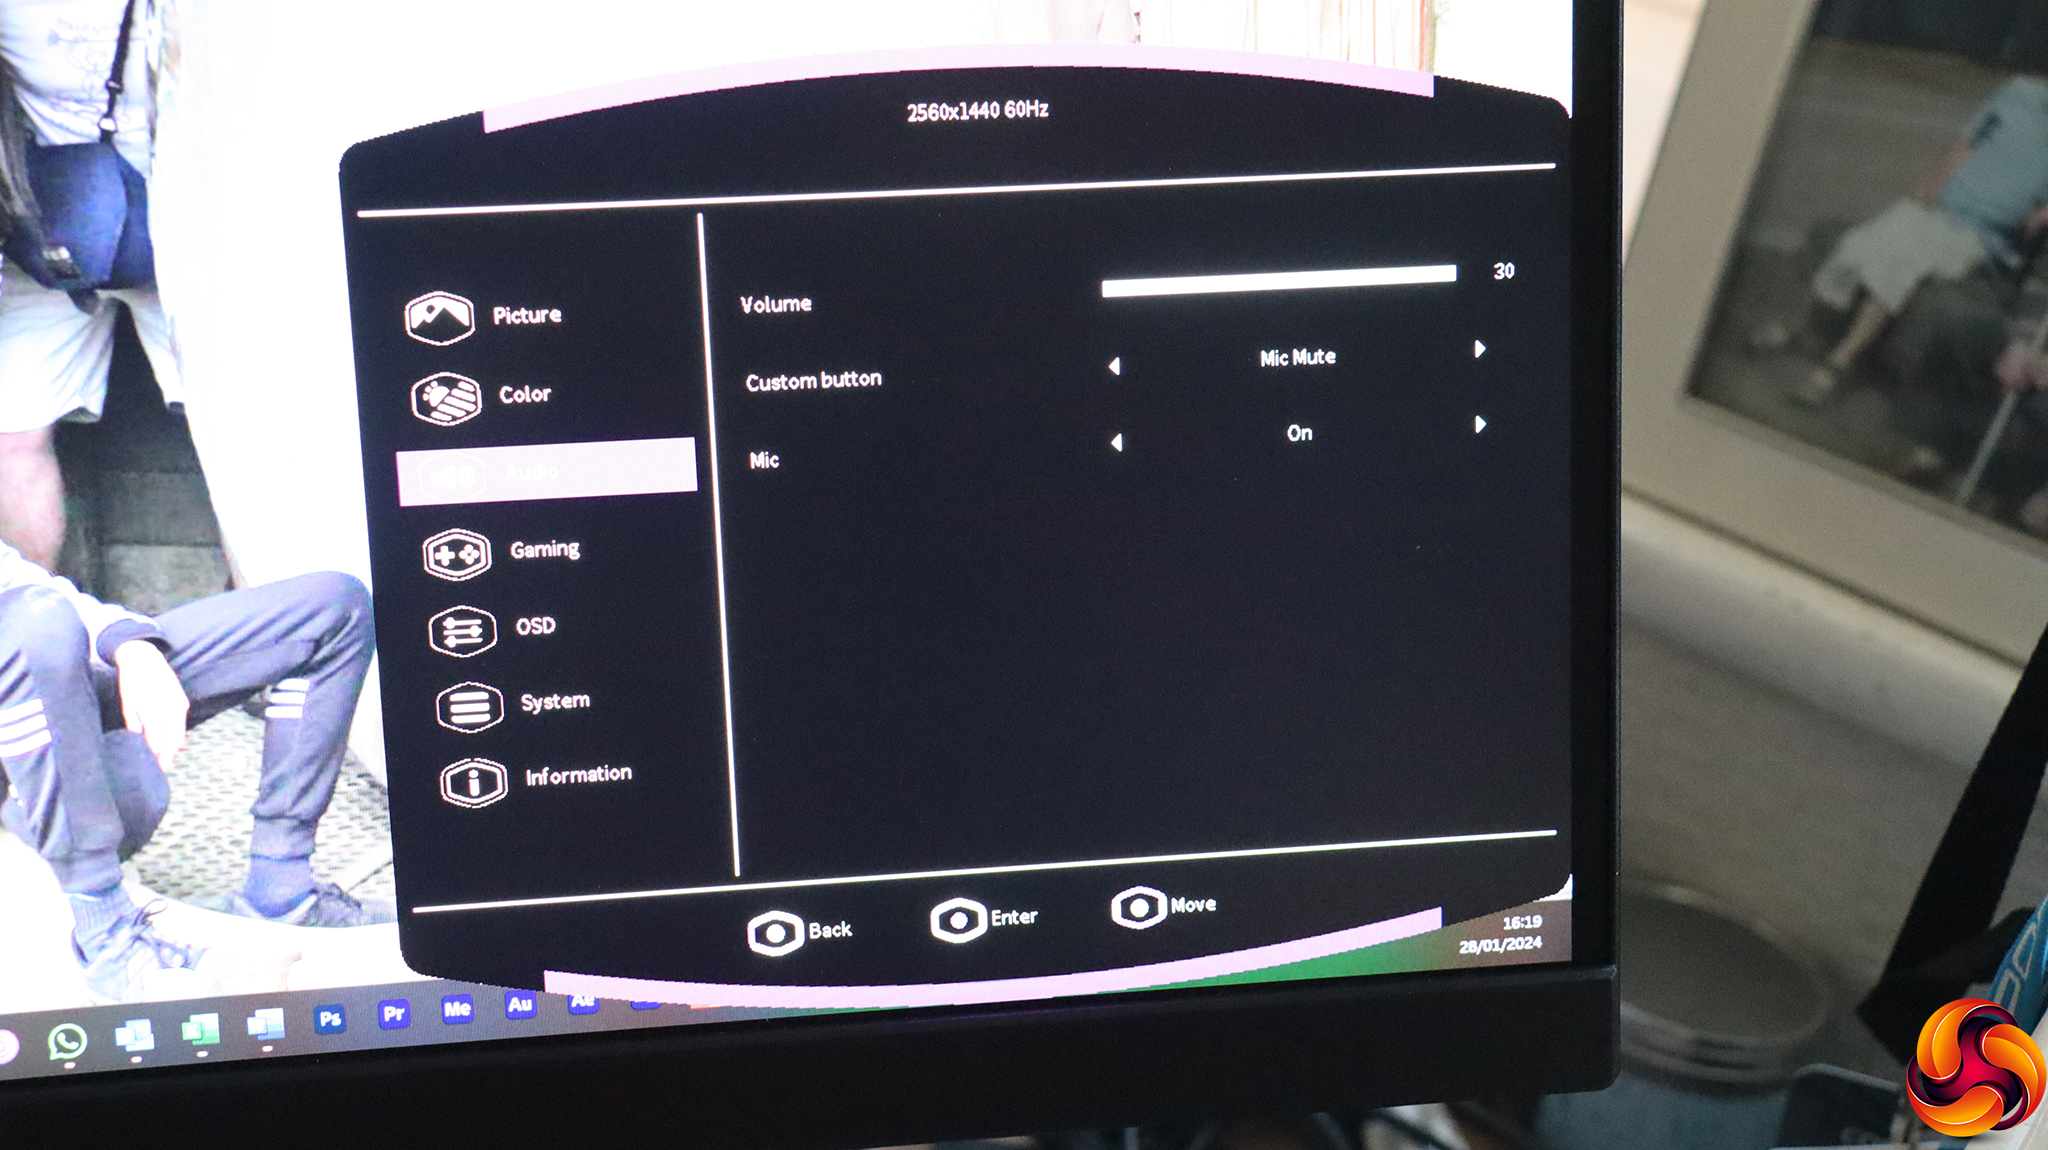
Third down can be found Audio settings, including volume and whether the microphone is enabled. There's also a “Custom button” option, which assigns what the button on your headset does.
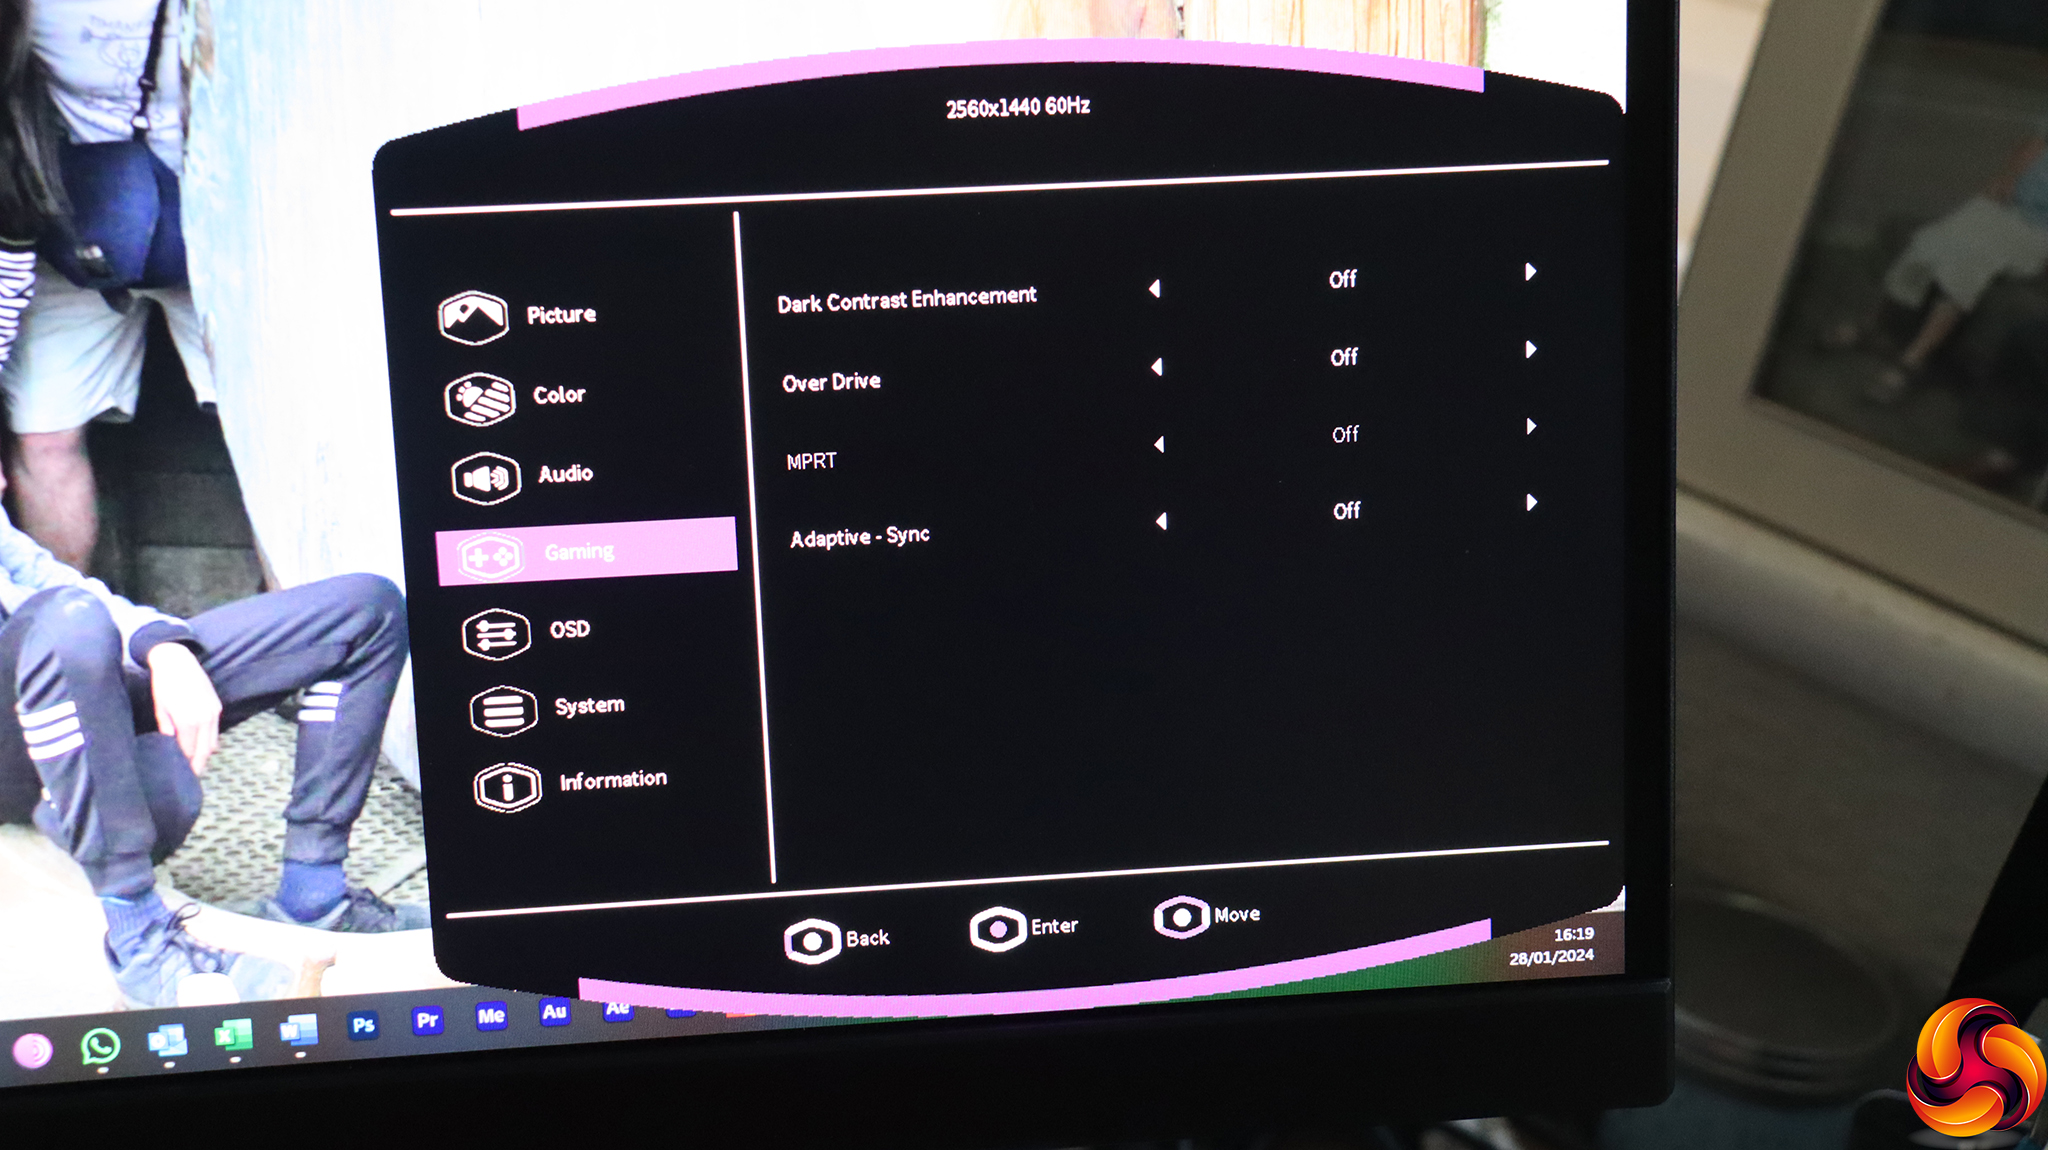
The Gaming section includes Dark Contrast Enhancement, with two Levels and two Auto Levels. This brightens up darker areas of the screen. Over Drive is typical pixel response enhancement, with three levels plus Burst. MPRT reduces picture motion blur, with three Levels above Off. However, you can't turn this on at the same time as Adaptive-Sync. We found our AMD graphics card detected the screen as FreeSync compatible with this option enabled.

The OSD section lets you configure how the OSD behaves, including how long menus stay onscreen, the language used, and rotation (useful if you're using the screen in portrait orientation).
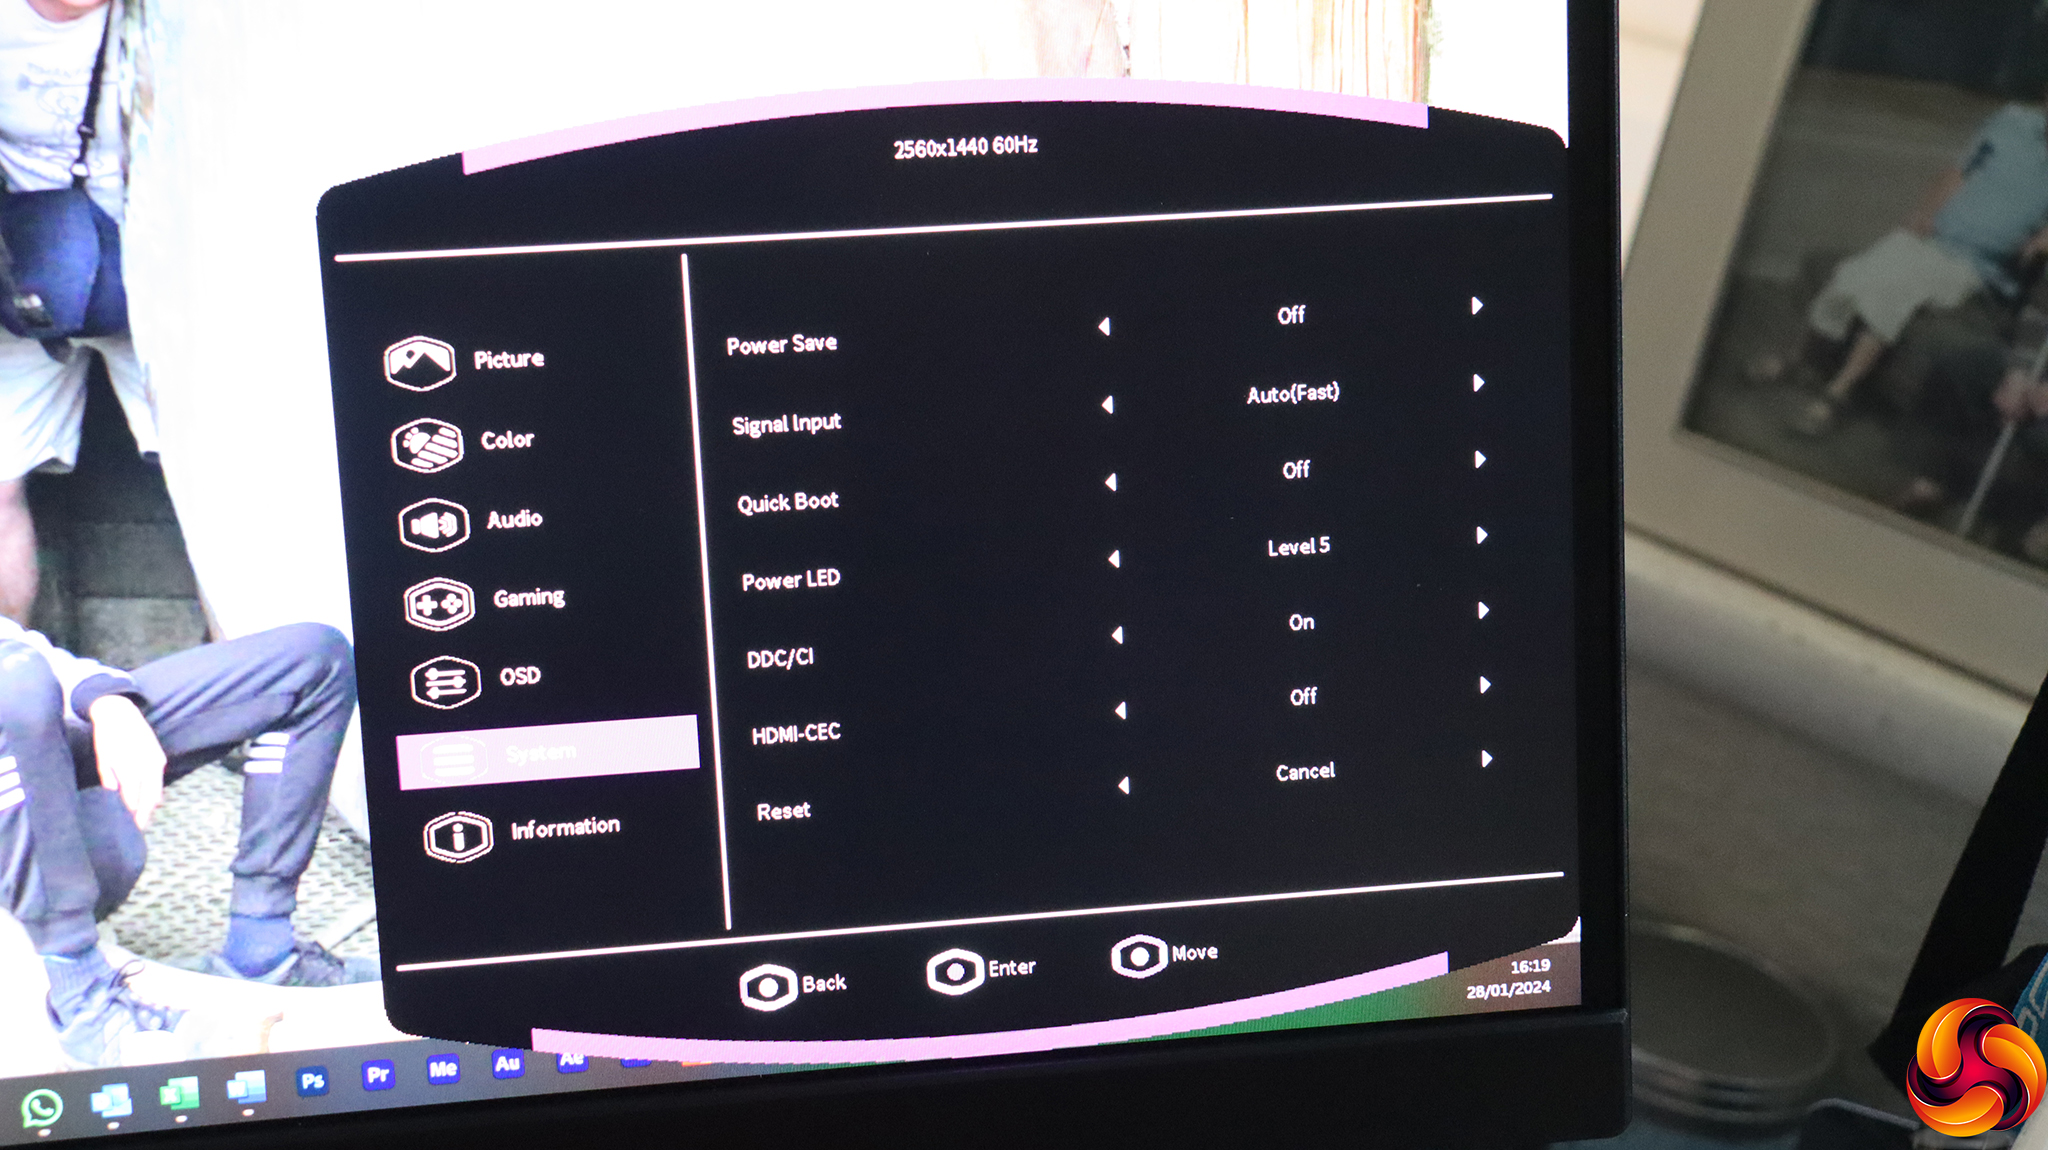
The System settings include two levels of Power Save. You can configure how the screen behaves when the video signal is lost, and speed up how fast the monitor turns on with Quick Boot. You can adjust the brightness of the power LED, and disable the DDC/CI function (where the screen can communicate its status with the host computer). HDMI-CEC enables remote control functionality. The Reset option returns all settings to factory default.
Offscreen in the image above is an option to update the screen firmware.
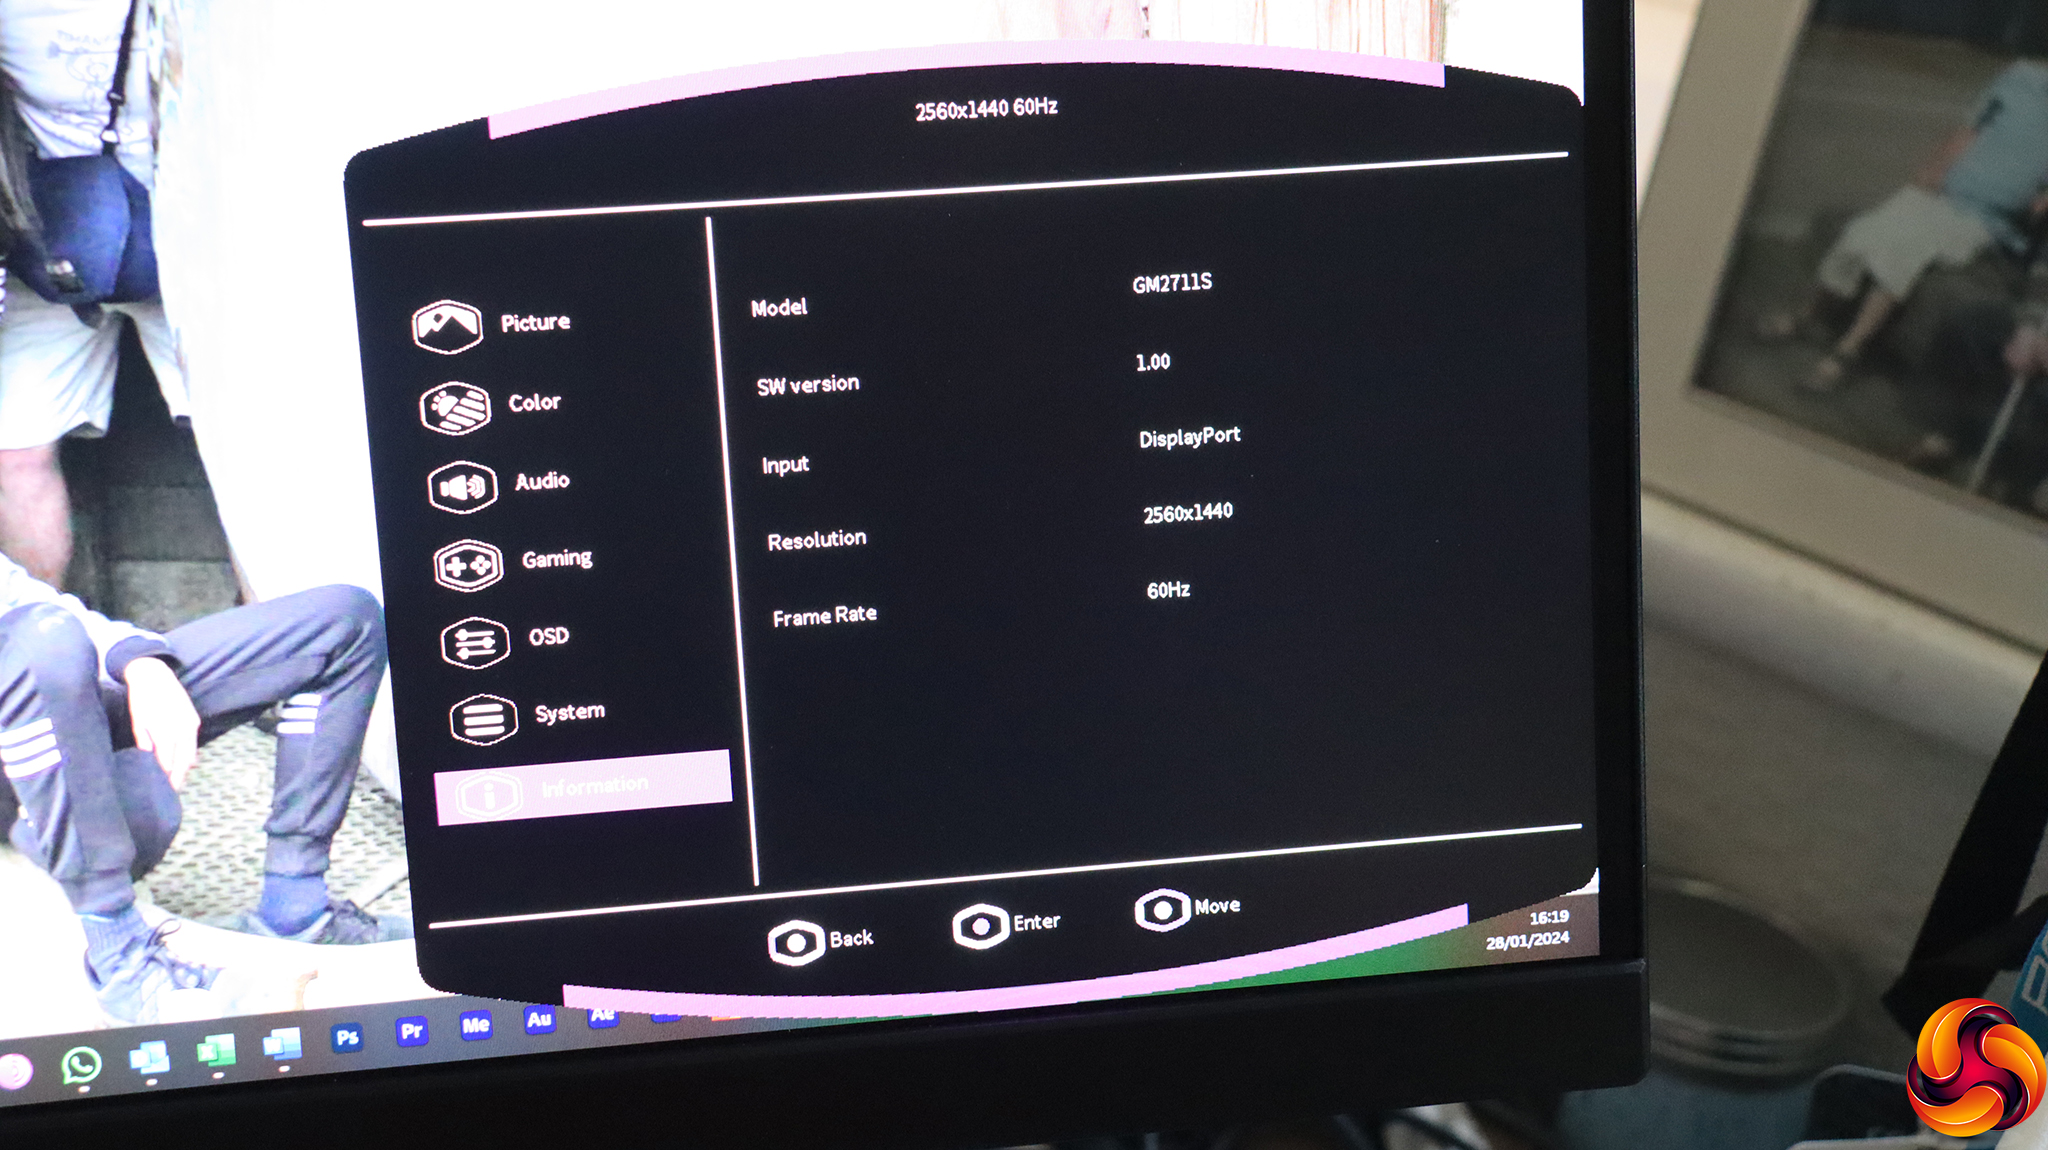
Finally, the Information section is simply a readout of the current monitor status.
Overall, the majority of important screen parameters are available and laid out in a way that makes them easy to find. However, you can't configure the quick joystick options, and there aren't any gaming extras such as an FPS counter, timer, or crosshairs. These are “nice things to have” rather than essential, but their absence puts this screen in the mainstream gamer category rather than giving it aficionado status.