Pushing the joystick in turns the unit on when it's off, but not vice versa. Once the monitor is powered up, pushing it in again performs another function. But more of that in a bit. Once the monitor is on, the joystick can call up a number of Quick Switch menus, depending on which direction you push it, and these are all user-configurable.

Pulling the joystick towards you calls up a menu for the Picture Modes. These include the default Standard, plus a mysterious AORUS option, FPS, RTS/RPG, Movie, Reader, sRGB, and three user-configurable Custom slots.
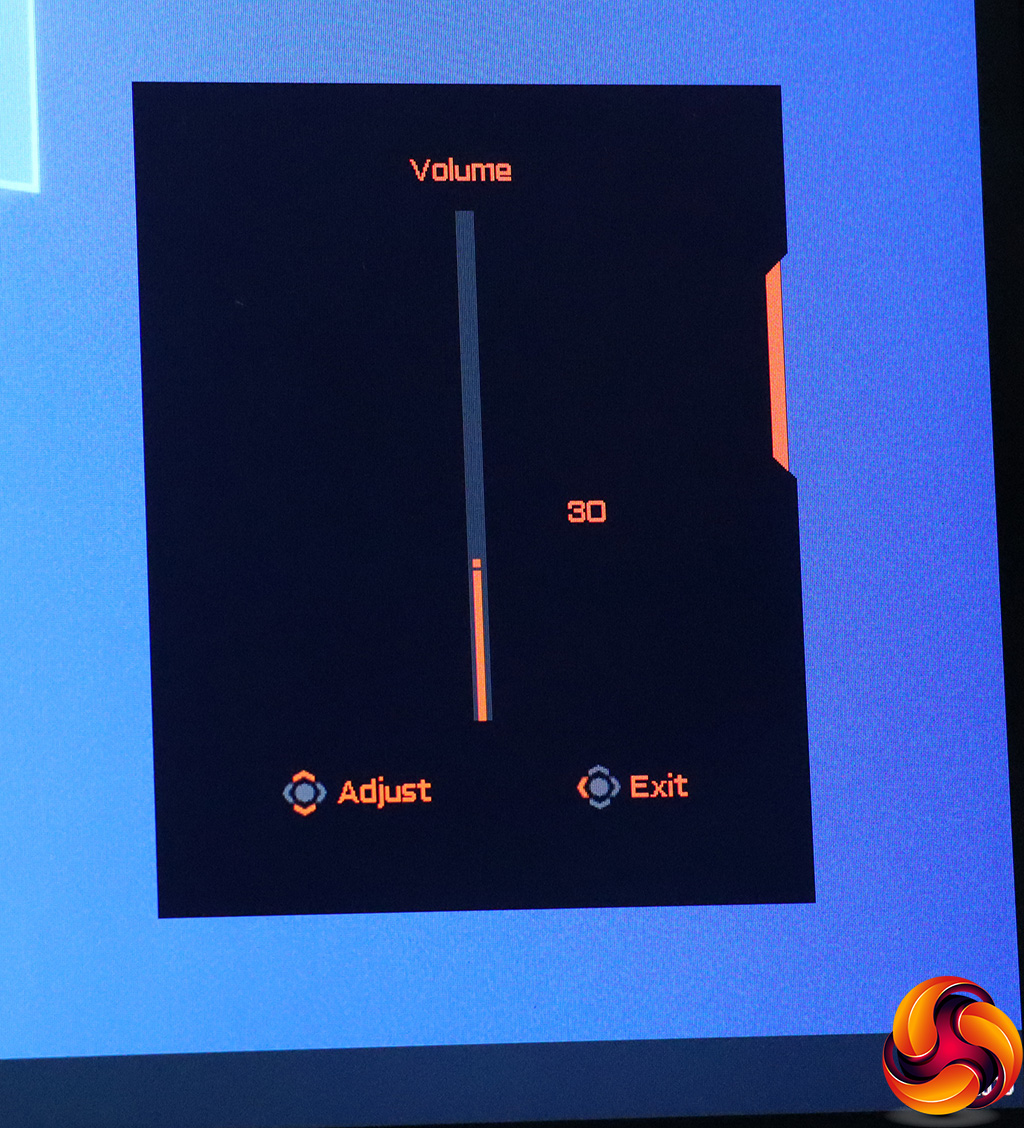
Pushing the joystick left lets you adjust the volume of the headphone audio output.
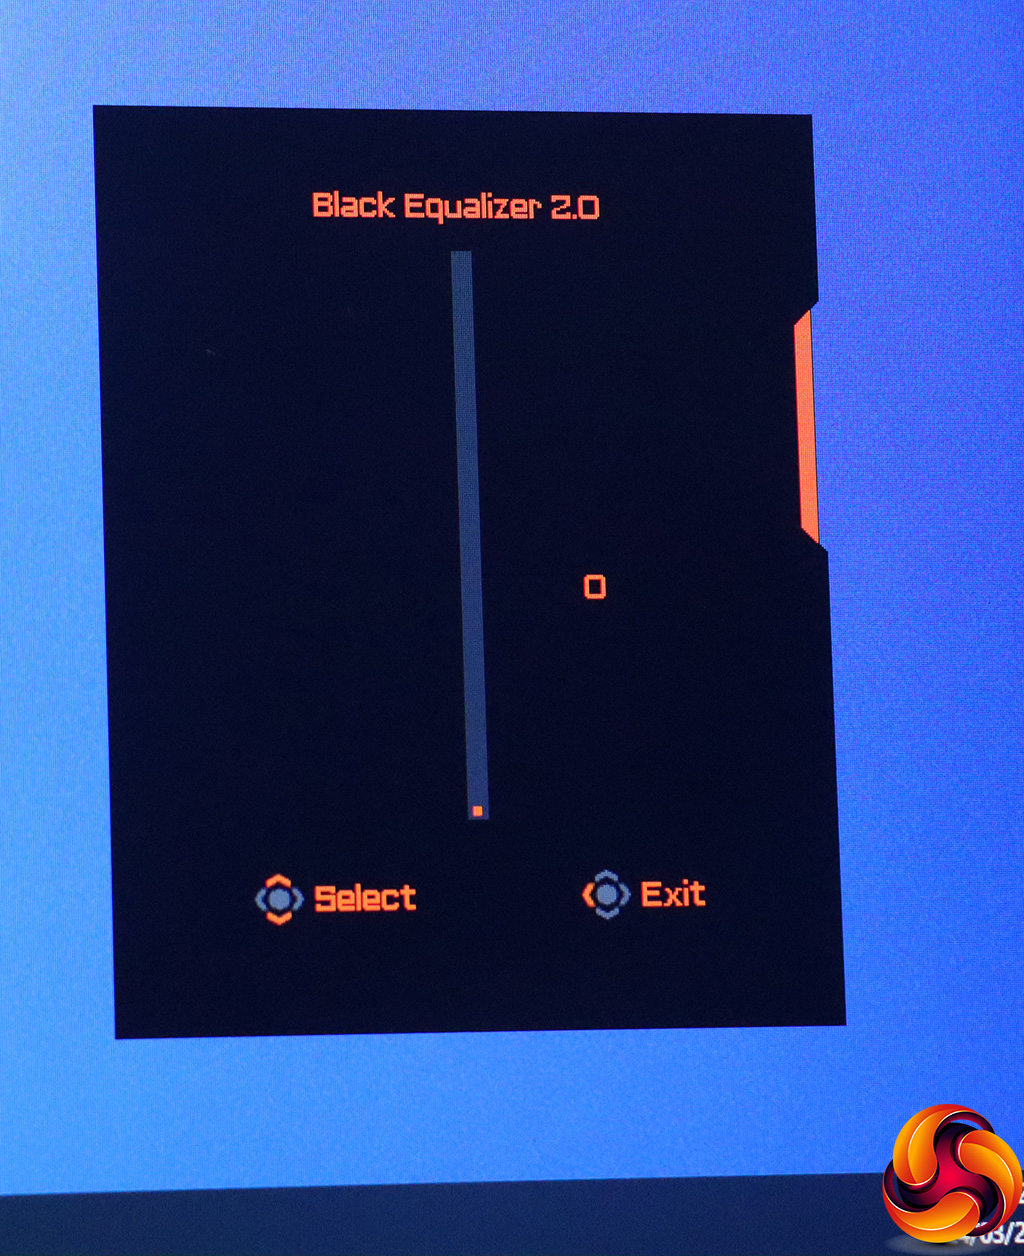
Pushing the joystick back enables the Black Equalizer 2.0 setting, which has three levels above zero. This brightens dark areas of the image so you can see more details in shadows.

Finally, pushing the joystick right lets you choose between the three video inputs manually.
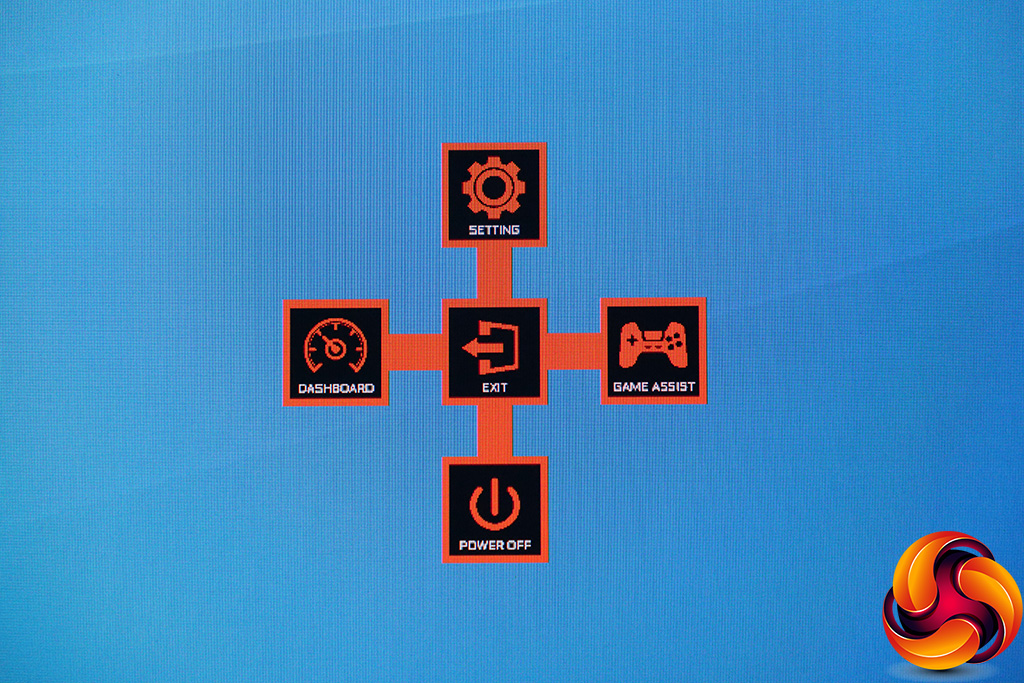
As already hinted, pushing the joystick in doesn't turn the monitor off. Instead, it enables four more options for joystick directions. Now, if you pull the joystick forward, this does actually turn the screen off.


Now if you push the joystick left, you get the Dashboard options. This will put PC information such as CPU temperature and frequency up in the top left of your screen (although you can change this). You can choose what to display, too. However, this only works if you have the USB upstream connected and the OSD Sidekick application installed and configured. You also need to be using Gigabyte components including graphics card and motherboard to get much more than the CPU frequency displayed.
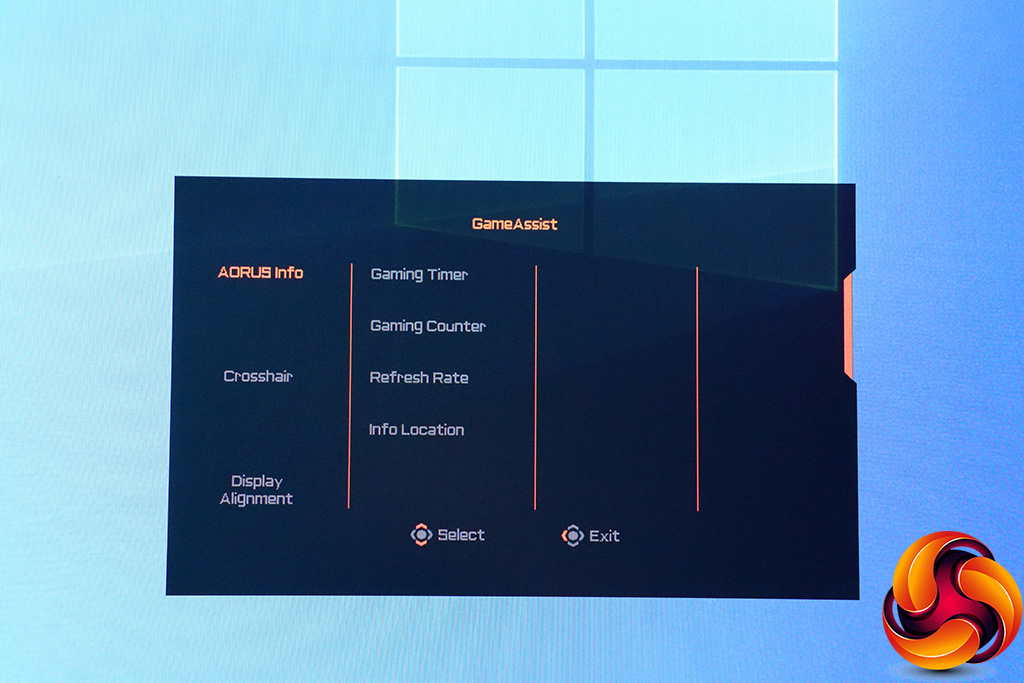
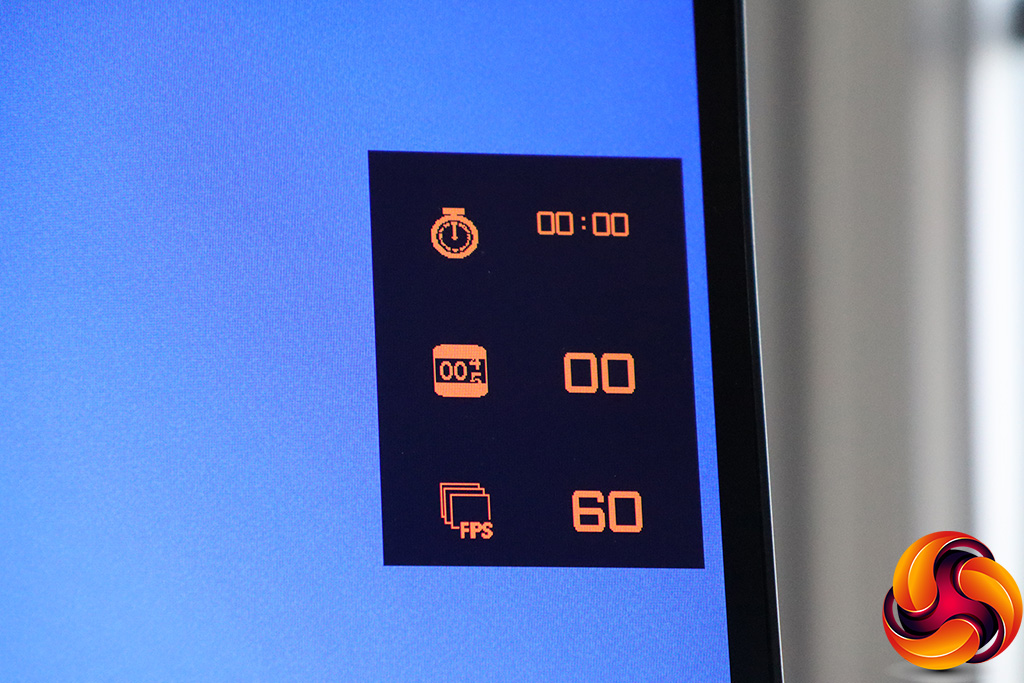
Pushing the joystick right now gives you the GameAssist options, which superimposes further useful information onscreen, including a timer, a counter, and the current FPS. You can also use this to add a hardware crosshair or align multiple displays in a multi-monitor setup.
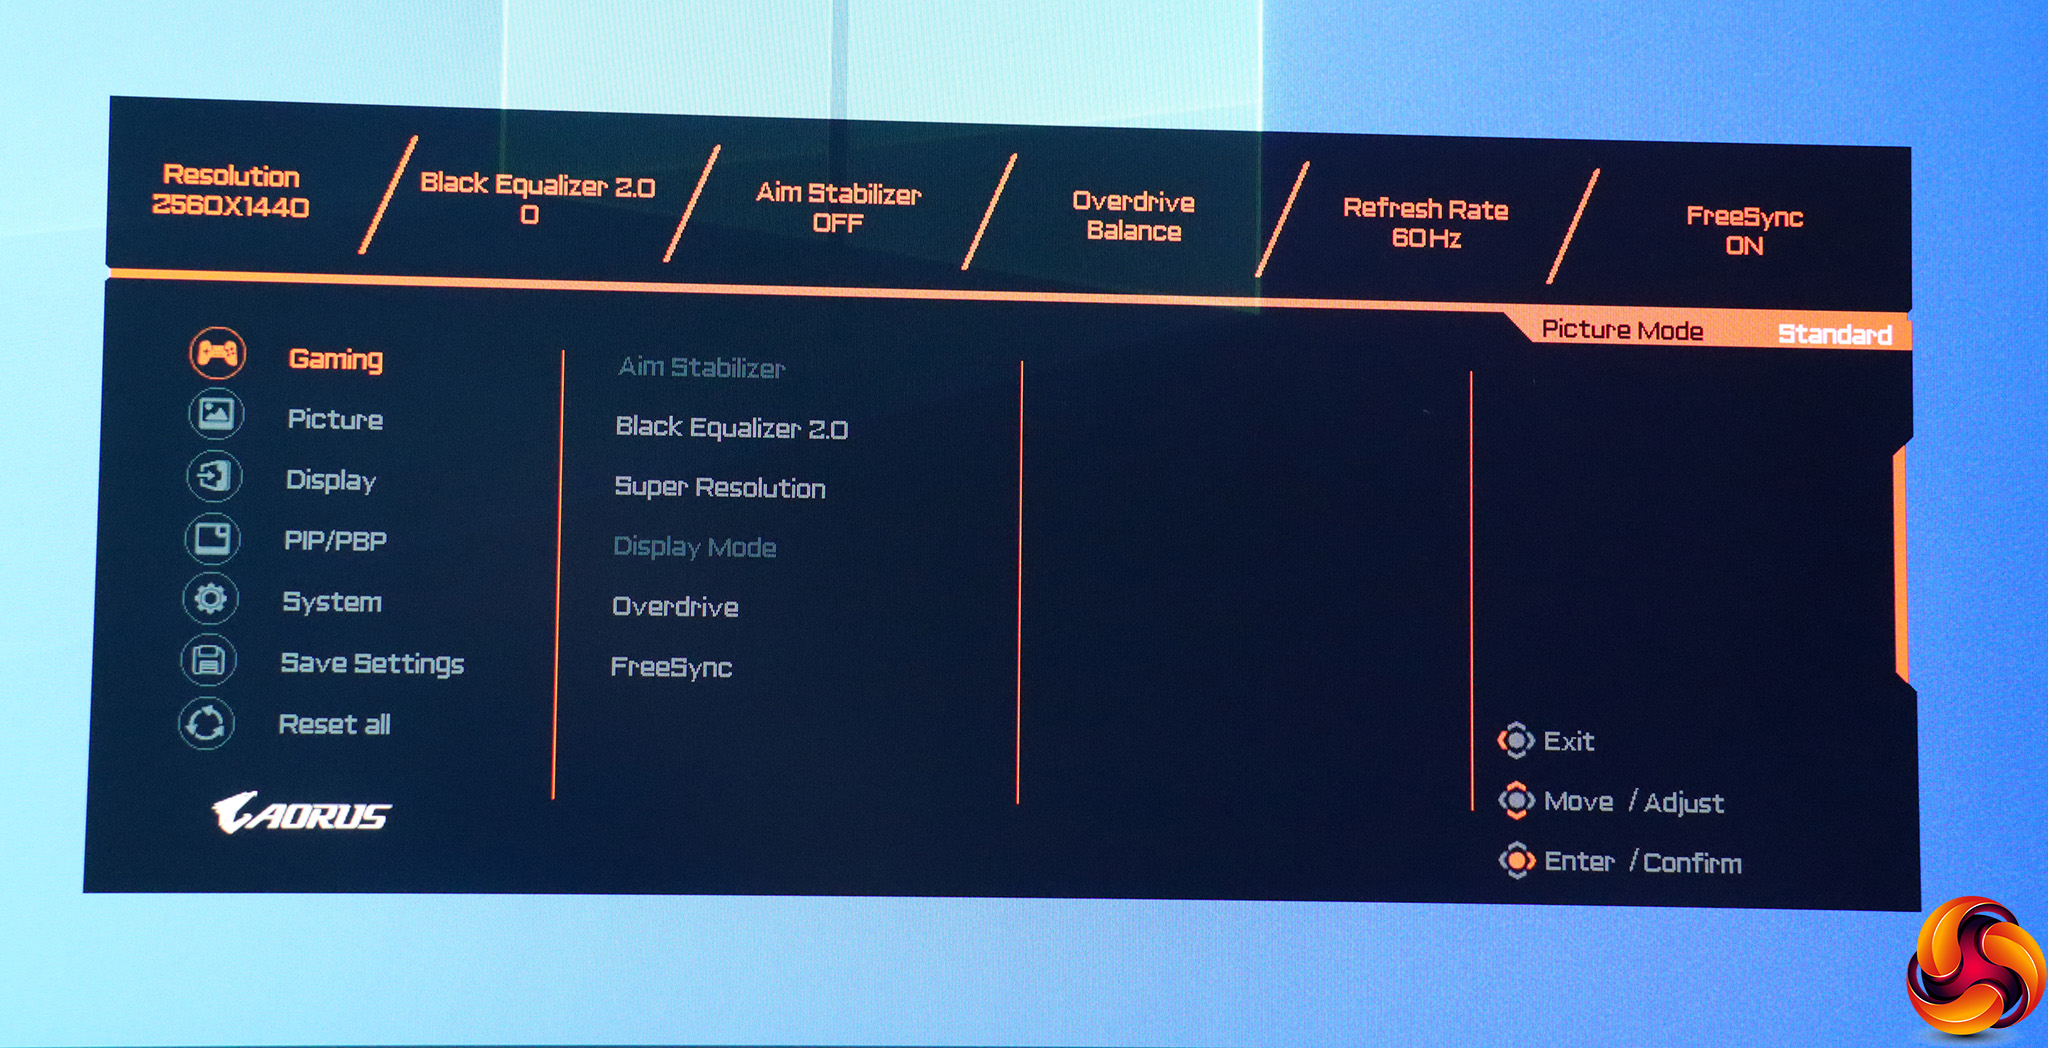
Finally, if you push the joystick backwards you get to the main menu, with the Gaming section the first that appears. This includes the main settings for this kind of activity. The Aim Stabilizer reduces the blur in fast-moving images, but you need to be running at a frequency higher than 75Hz and not in FreeSync or G-sync modes. We've already discussed what Black Equalizer 2.0 does. Super Resolution sharpens the image, whilst Overdrive improves response time. You can also toggle FreeSync if your graphics card supports it.
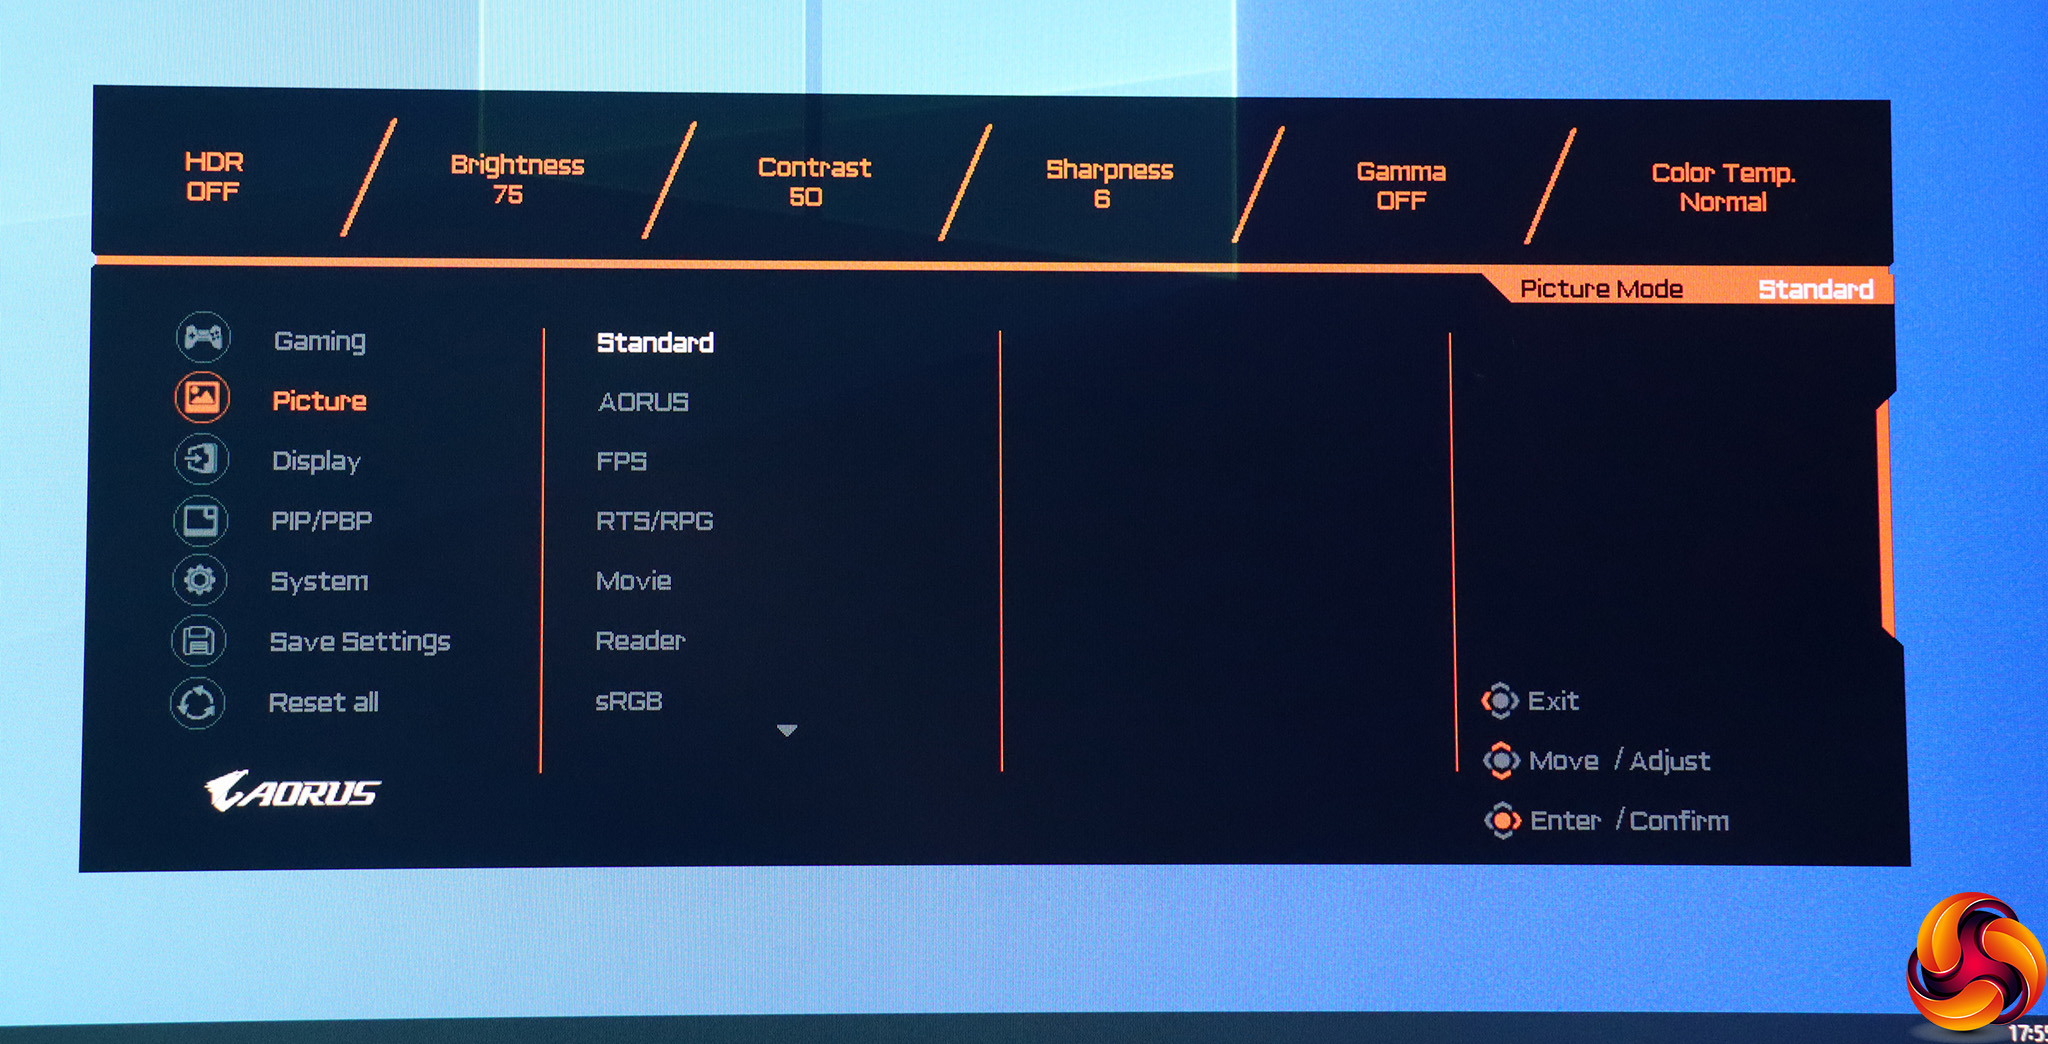
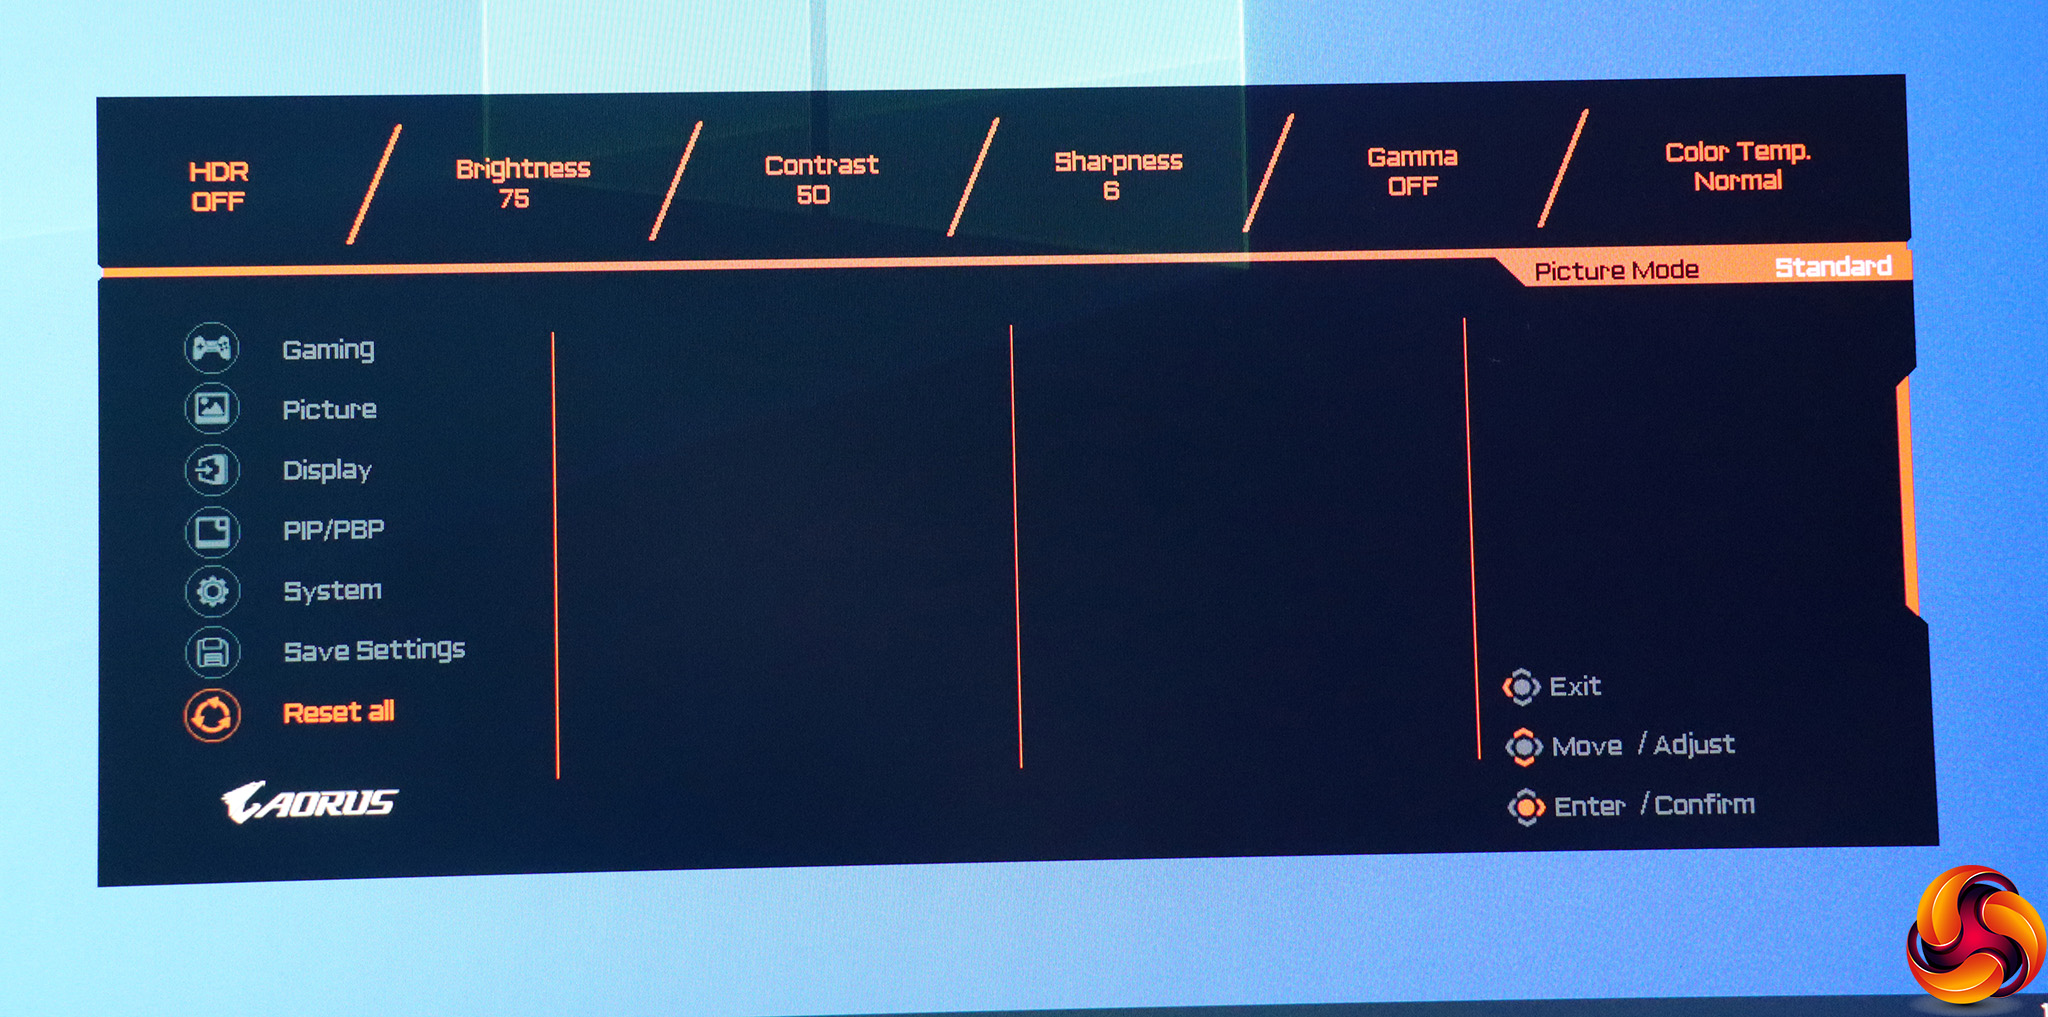
The second Main Menu section offers another route to the Picture presets. If you select one, you then get to alter its characteristics, including Brightness, Contrast, Sharpness, Black Equalizer level, Color Vibrance, Low Blue Light, Super Resolution, Gamma (which has five levels as well as, curiously, Off) and Color Temperature (Cool, Normal, Warm, or user-defined red, green and blue values). You can also specify whether Dynamic Contrast is enabled.
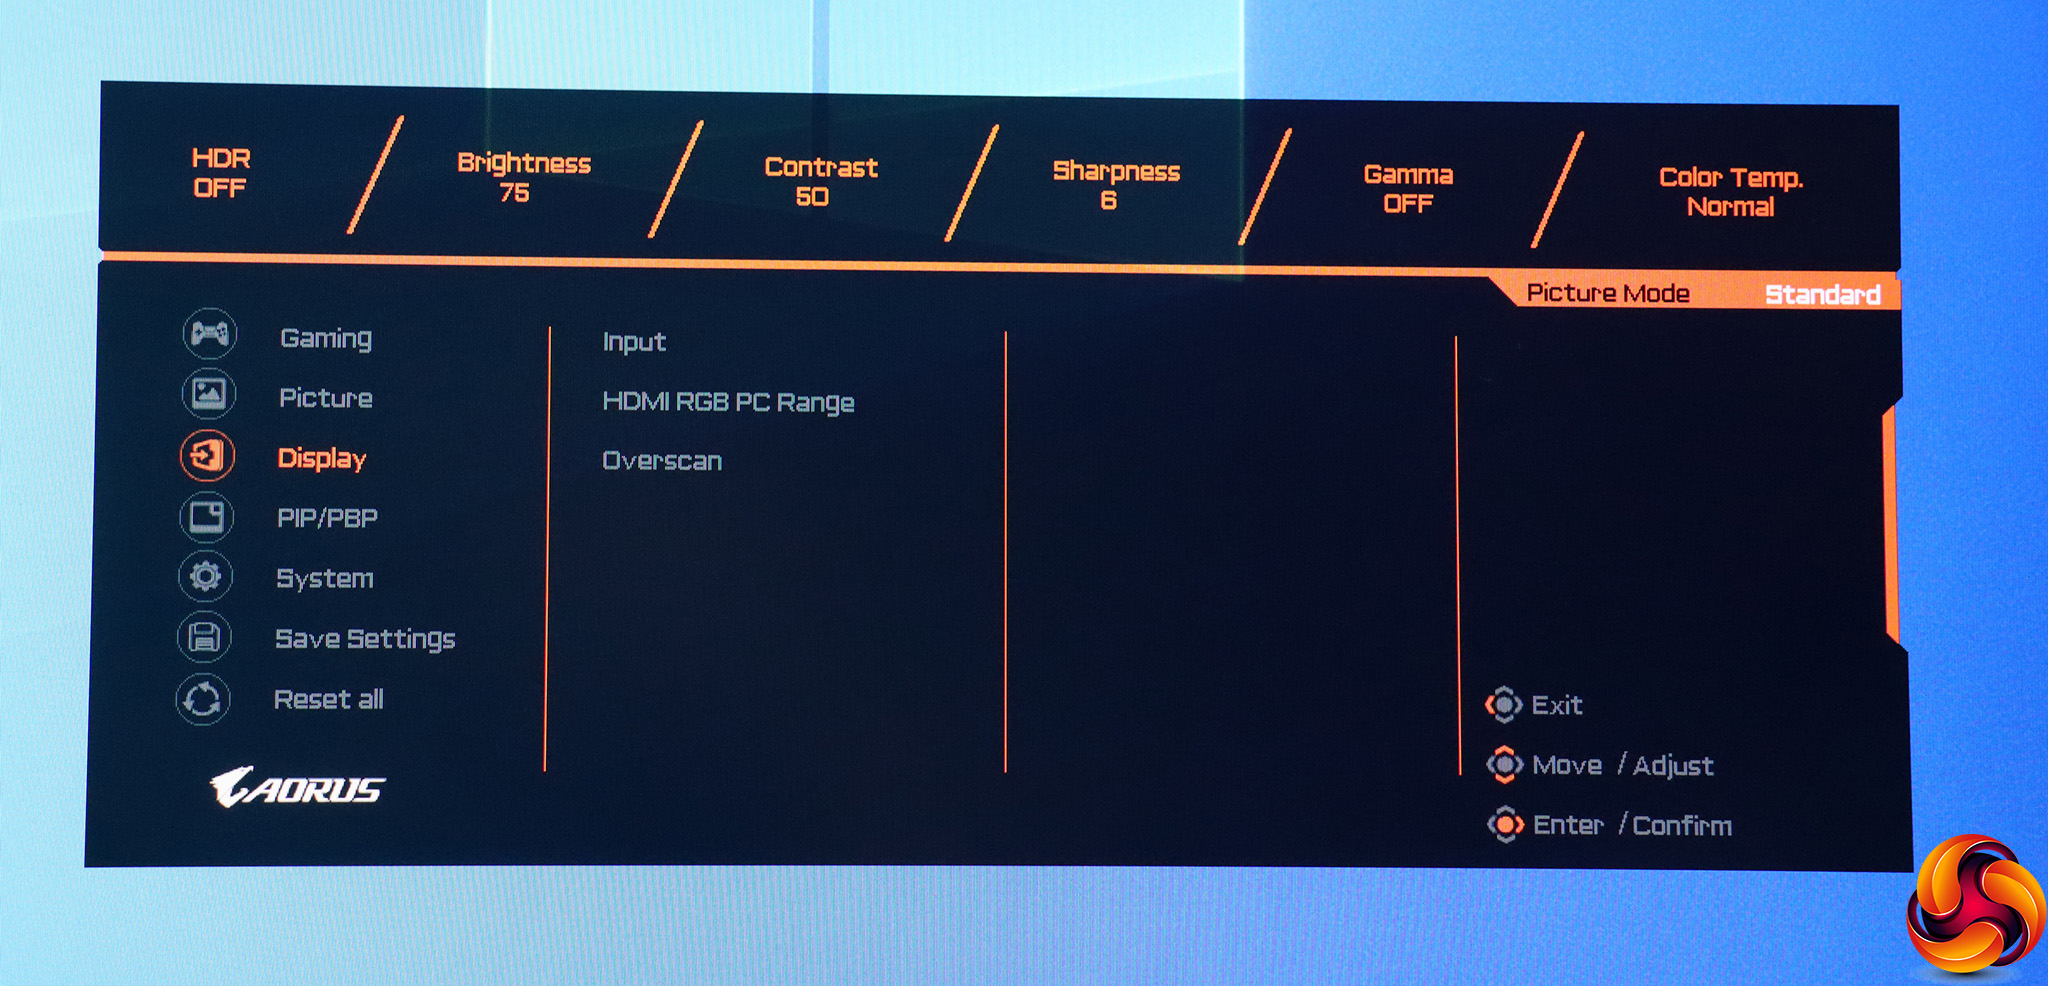
Next down is Display, where you can manually swap video inputs, change the colour range for the HDMI inputs, and adjust overscan when using an analog input.
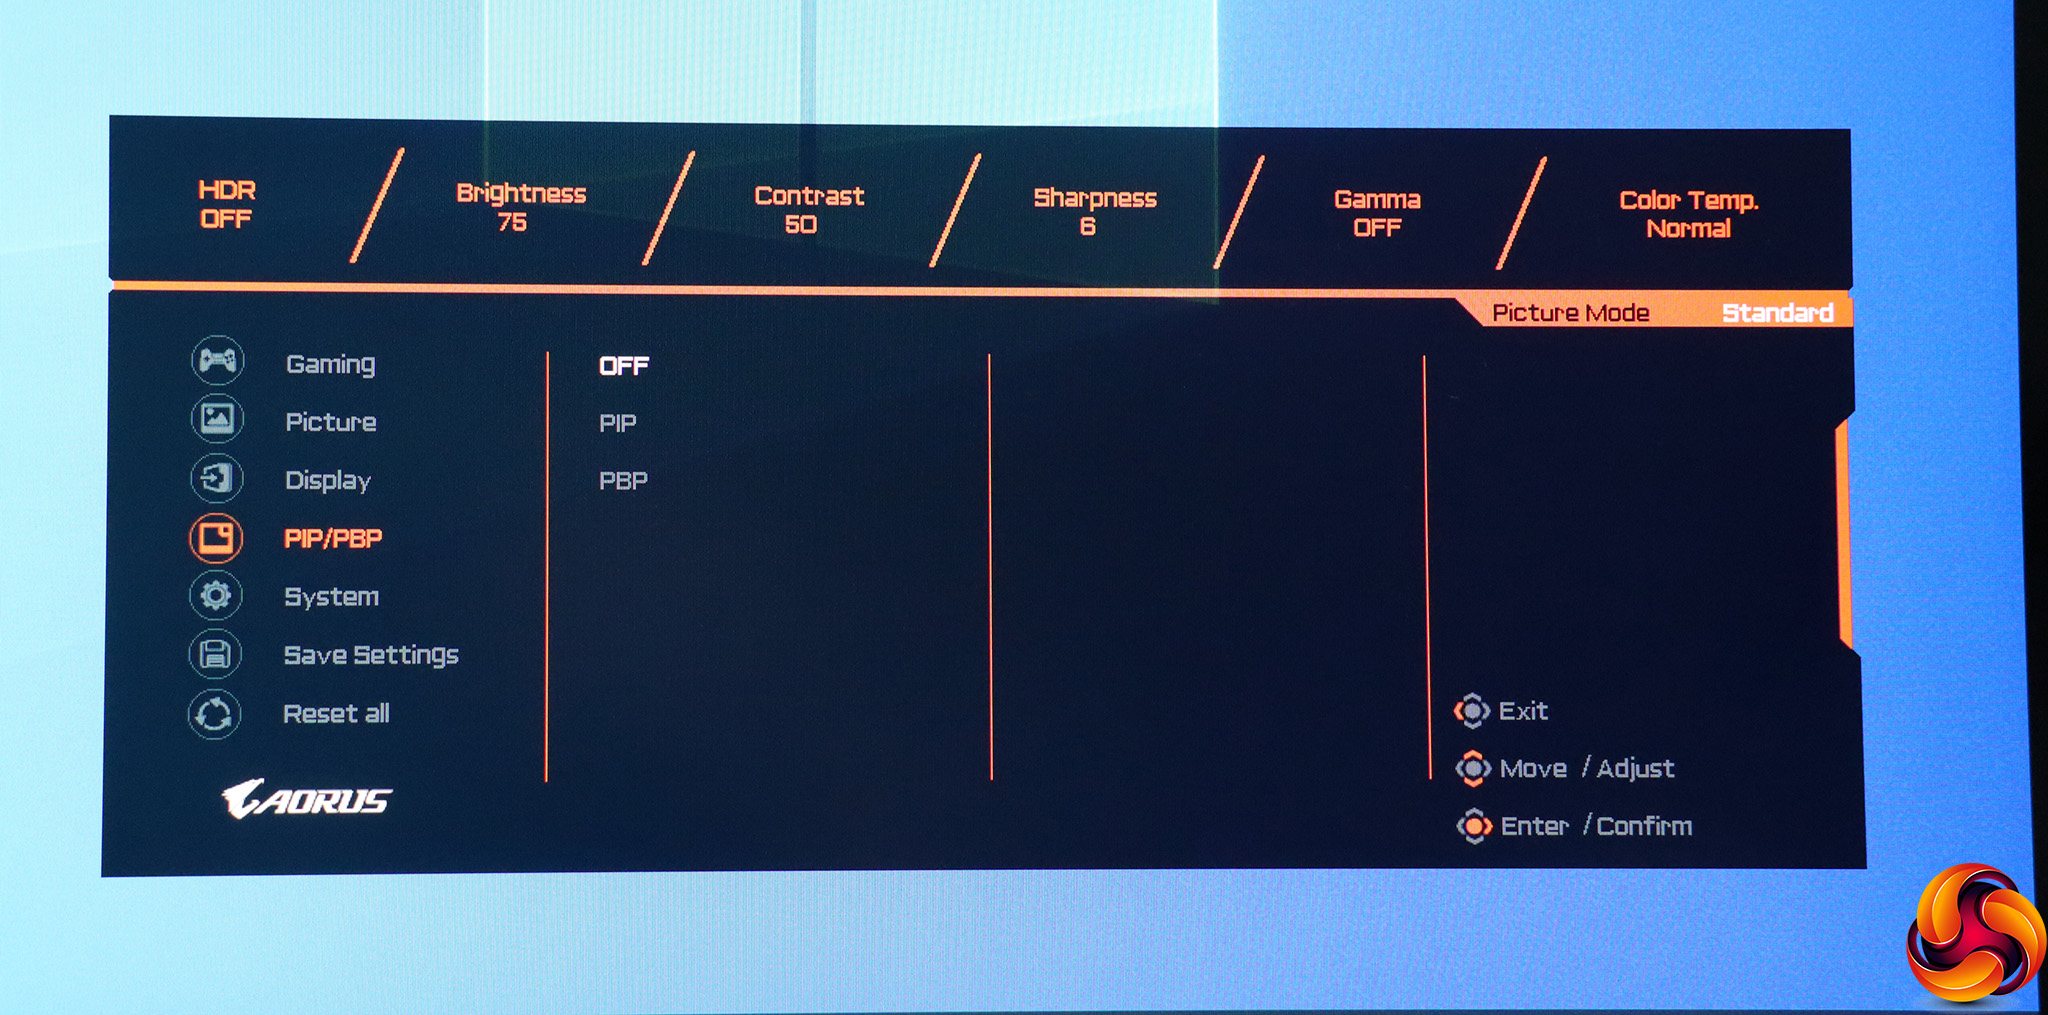
Using the PIP/PBP section, you can place the signals from two of the video inputs onscreen, either side-by-side or with one superimposed on the other.
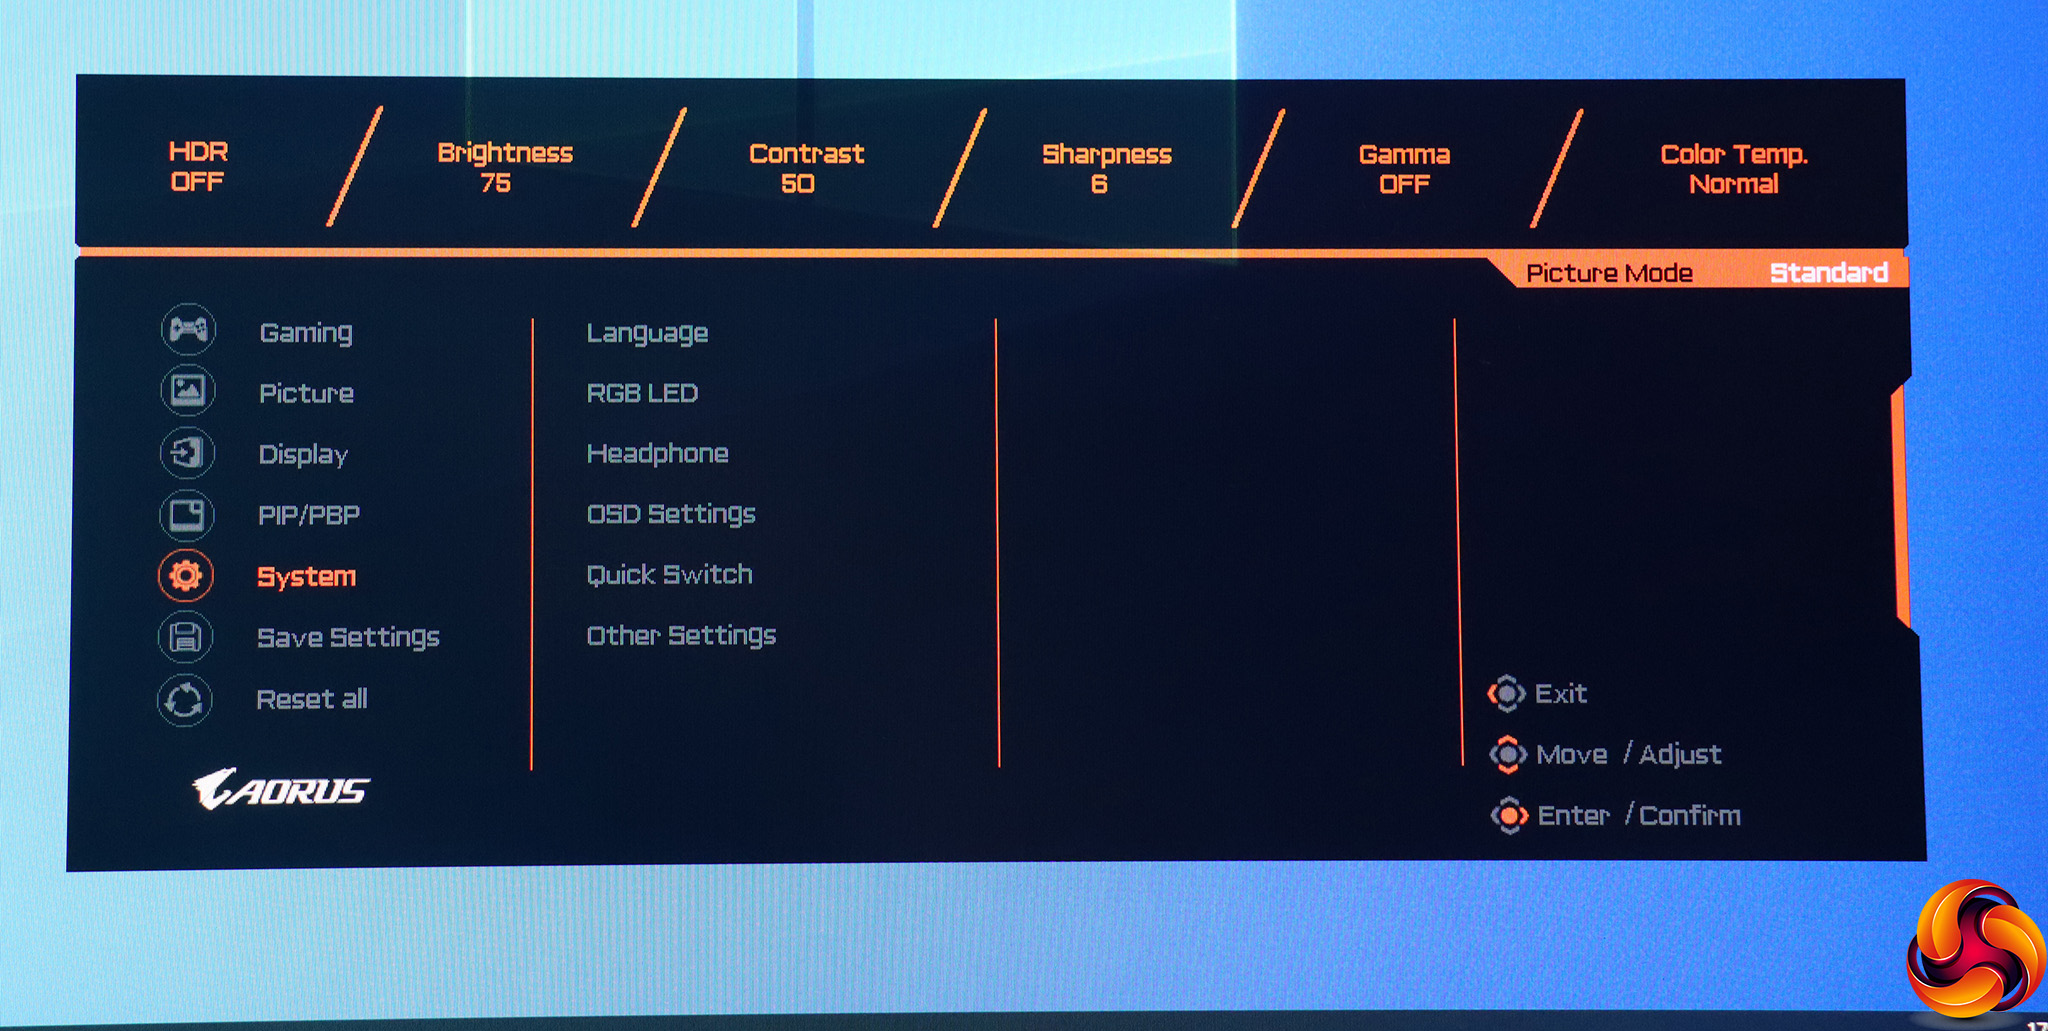
The System menu lets you choose the OSD language, options for the RGB LED lighting on the rear of the monitor, and headphone volume. You can also alter the transparency of the OSD, and the function of each of the Quick Switch joystick directions.
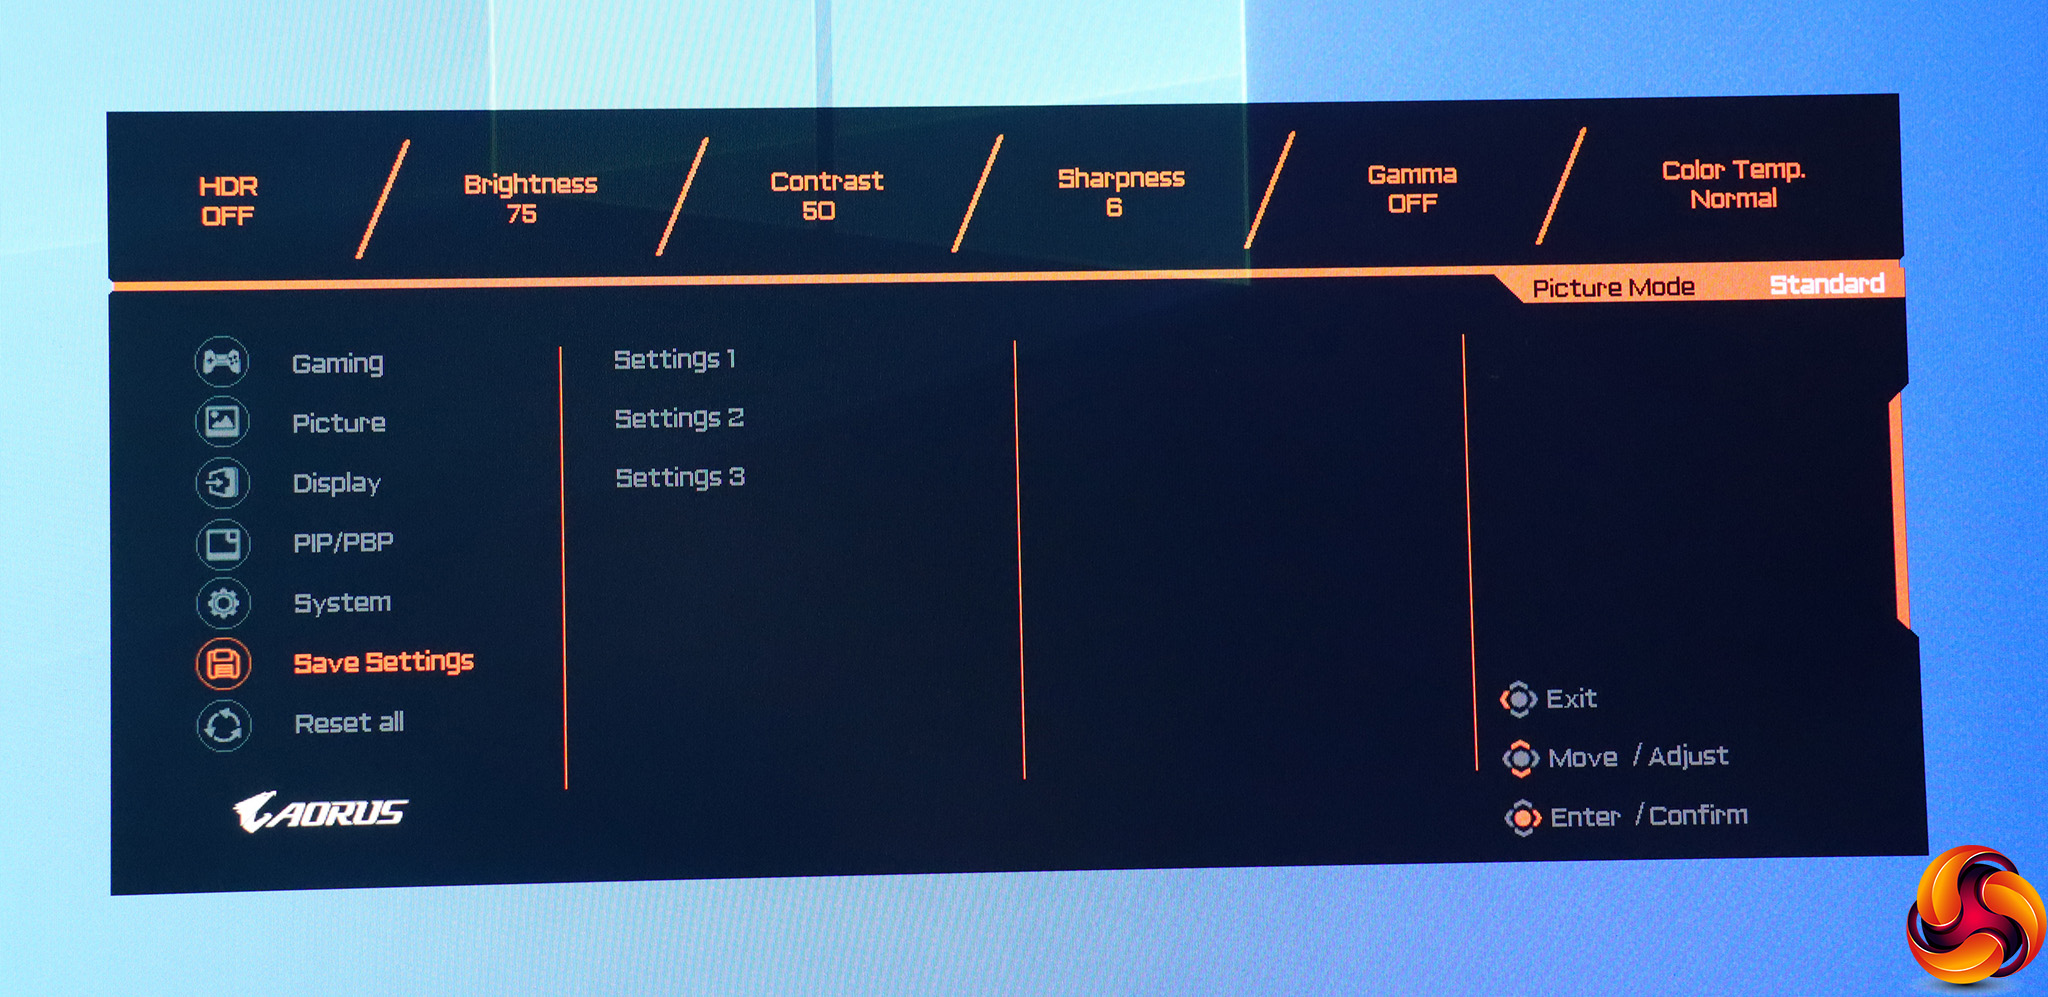
The Save Settings option simply lets you save the current settings into one of the user-configurable Picture presets.
Finally, resetting everything back to default has its own separate submenu option.
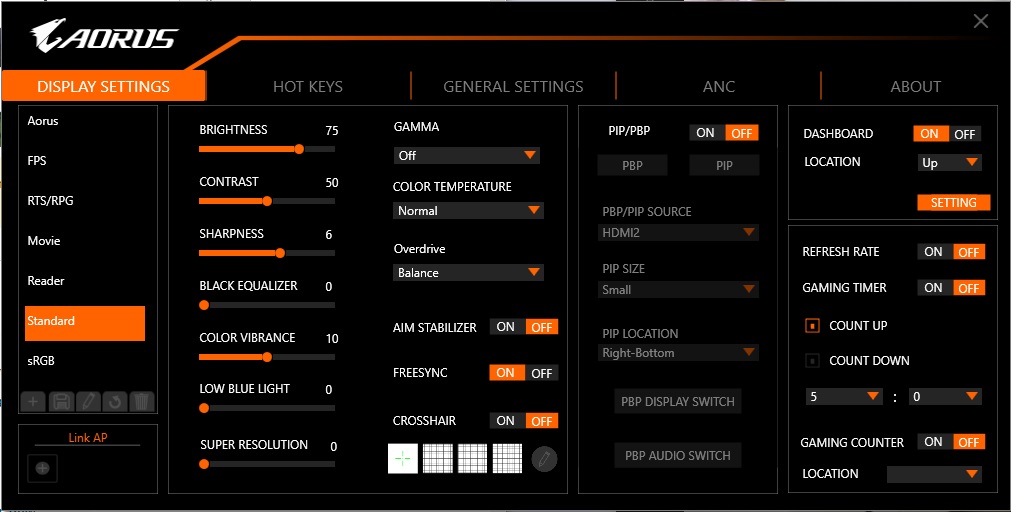
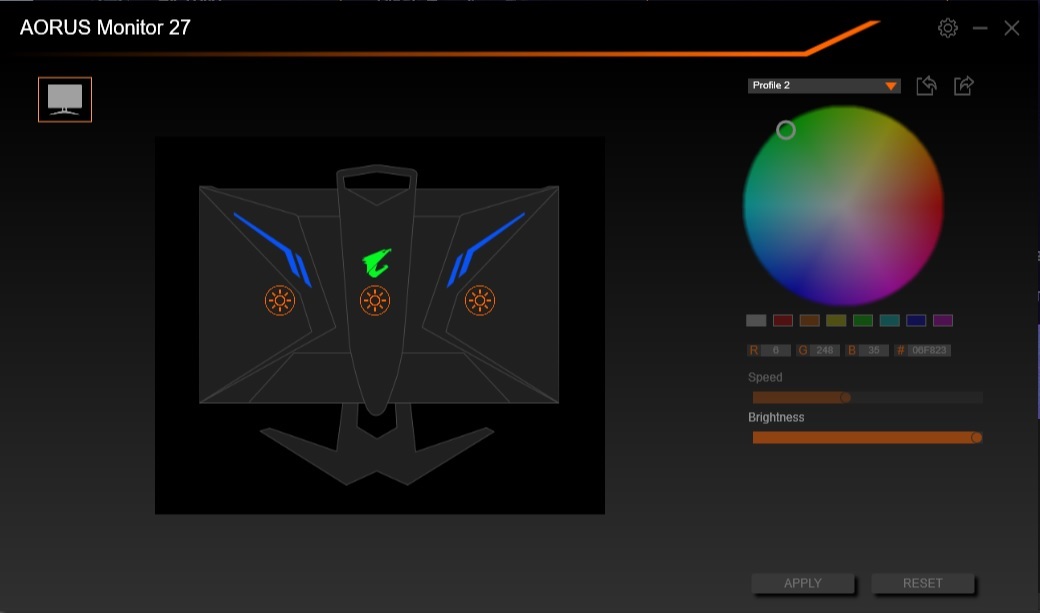
With the USB upstream plugged in and the OSD Sidekick application installed you can configure most of the monitor settings from your PC, including more detailed control over the RGB lighting on the rear of the screen.
Overall, the OSD feels less fully featured than it actually is, because you have to drill down into a preset to change settings like Brightness. This is a bit of a pain, but if you install OSD Sidekick, on the other hand, all these settings can be configured with your mouse from your operating system, which is much easier than any menu system built into the monitor itself. So you can readily configure this screen just the way you want it.