Since the joystick isn't used for controlling power, we will start with pushing the joystick left.
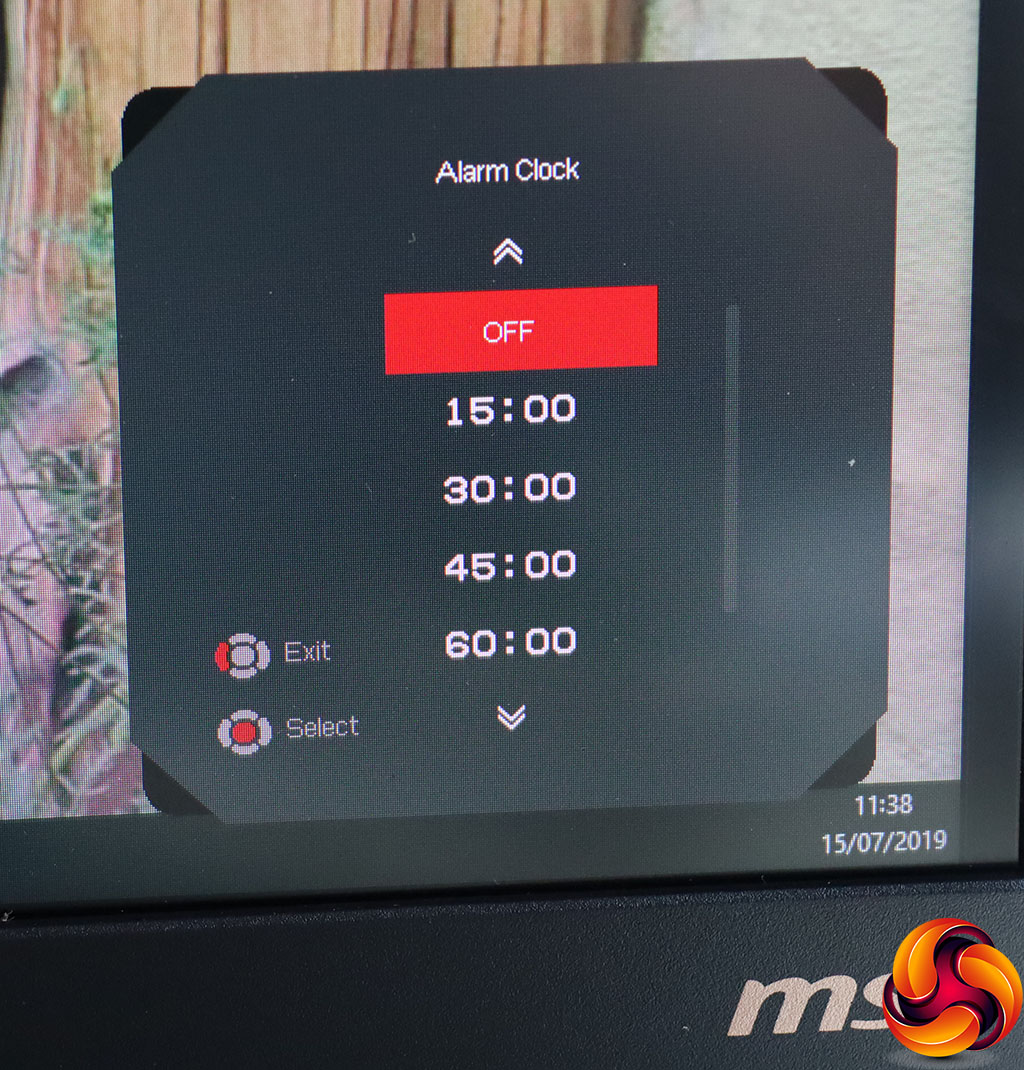
This calls up an Alarm Clock, which is actually more of a timer. This is presumably for when your mum tells you that you can game for an hour and then it's bed time. Or something.

Pushing the joystick up reveals the Game Modes, presets that include FPS, Racing, RTS, and RPG, so all the main categories are covered. You don't get any presets for everyday activities here, like watching movies or (ahem) work. They are to be found in a separate section, which we will discuss later.
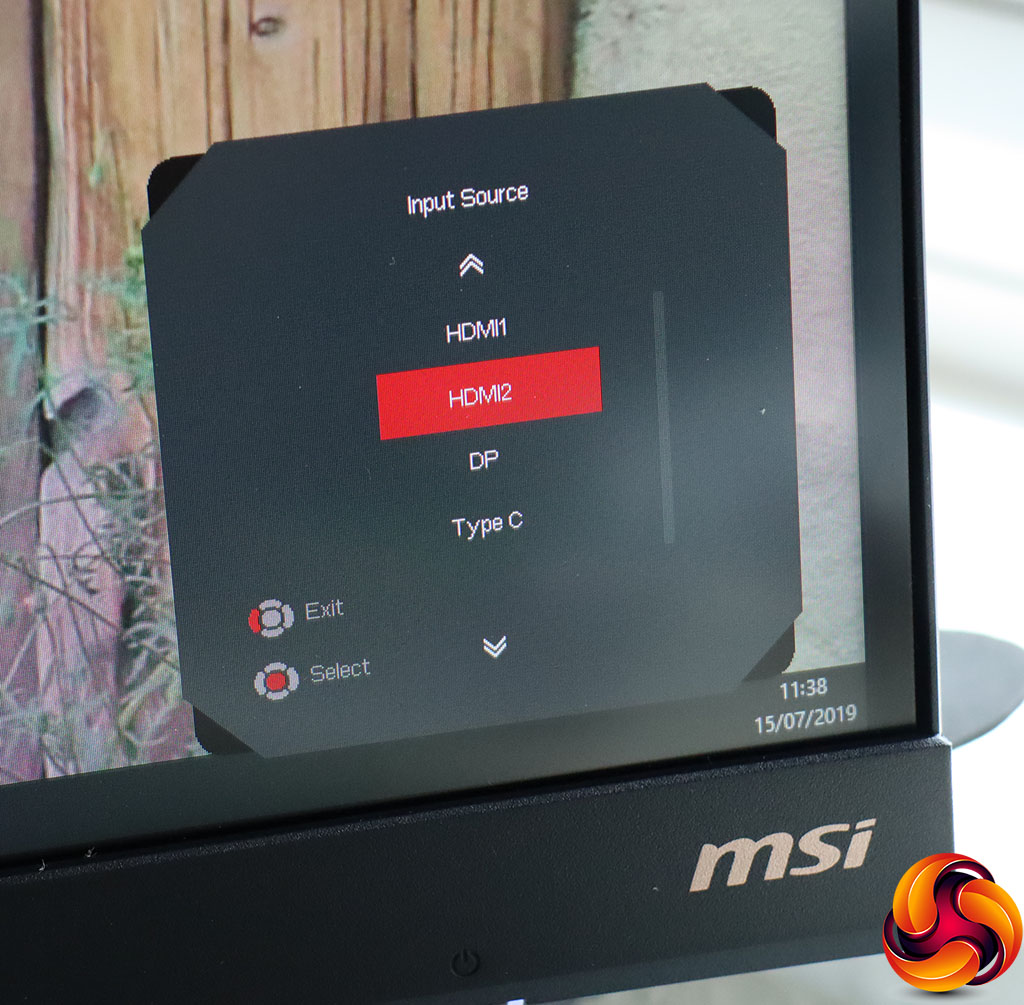
Pushing the joystick right calls up manual selection for the four input options.
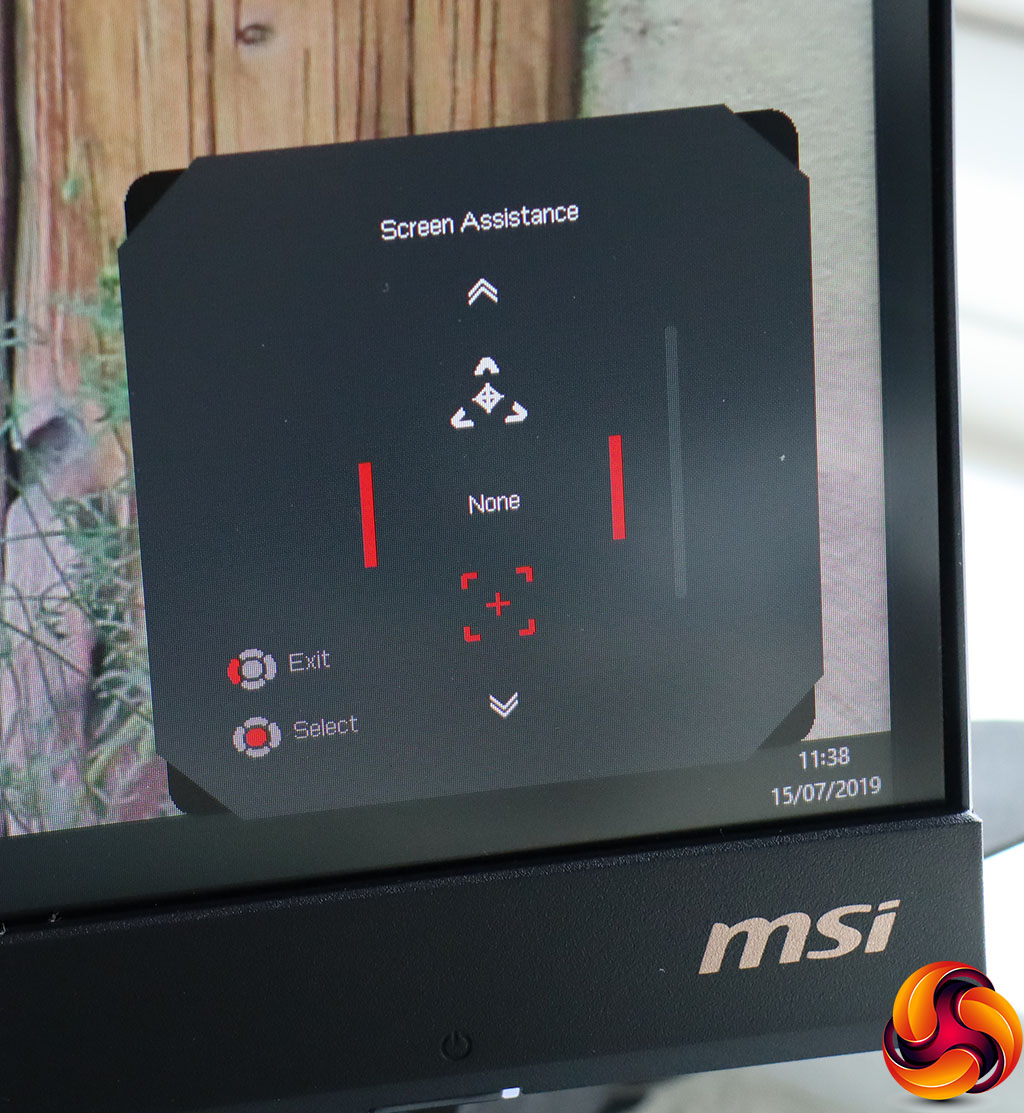
Finally, pulling the joystick down lets you enable “Screen Assistance” – which is basically a wide selection of hardware crosshairs, available in white or red. There's no option to display FPS via hardware here, however, which some high-end gaming monitors offer alongside crosshairs (although this can be found elsewhere – see below).
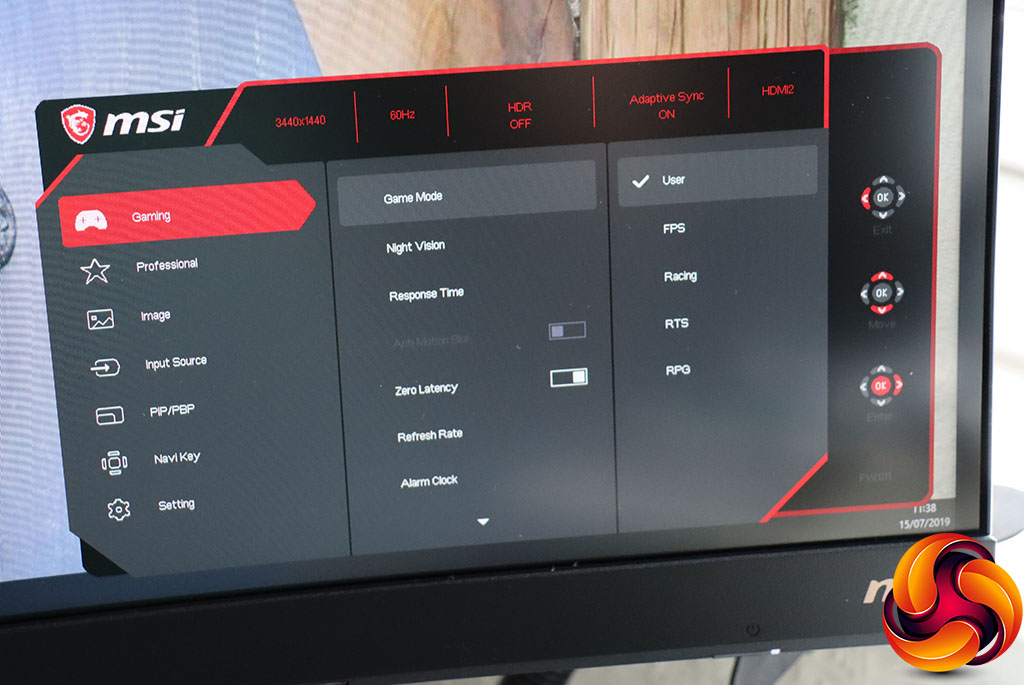
Pushing the joystick button in rather than up, down, left or right calls up the main menu, with the Gaming submenu as the initial starting point. This provides access to the Game Mode presets again, plus Night Vision, which enhances detail in shadows with various levels of power, plus a dynamic AI option. The Response Time option is a pixel overclocking system with three levels. Anti Motion Blur can only be enabled when a number of other features aren't, including HDCR (see below) and Adaptive Sync.
The Zero Latency option reduces input lag (but can affect image quality). Refresh Rate puts a FPS counter in the top left corner (by default – you can move it). The aforementioned Alarm Clock is also available here, and Screen Assistance if you scroll down. You can also toggle Adaptive Sync, which is turned on by default.
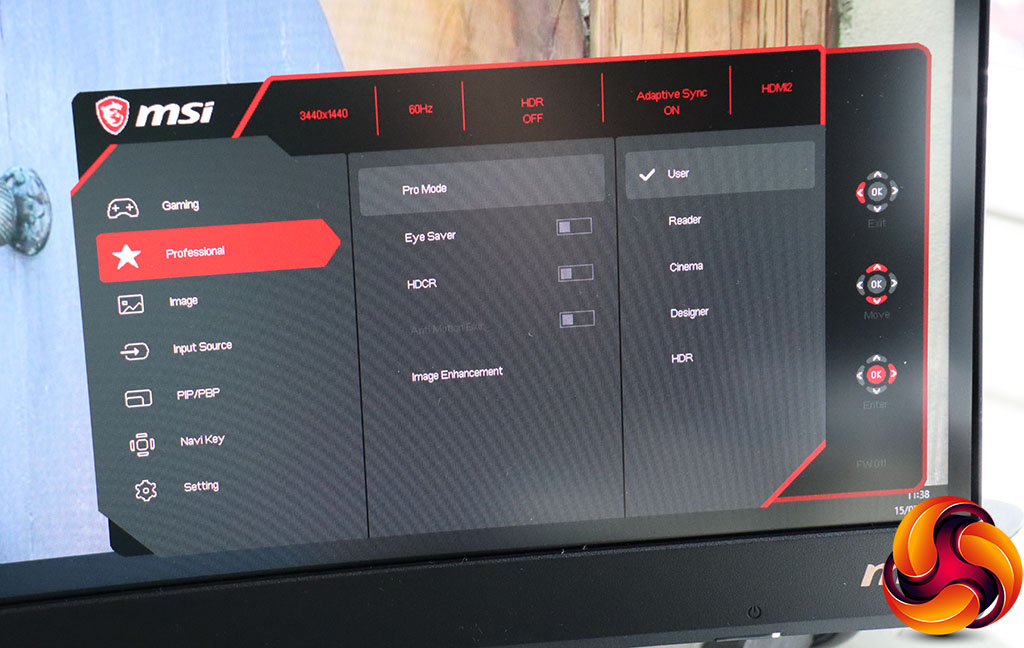
The next submenu down is called Professional, and here you will find Pro Mode presets for other activities than gaming. These include Reader, Cinema, Designer and HDR. Eye Saver is a low blue light mode, whilst HDCR is a dynamic contrast option that increases perceived contrast beyond what the panel is capable by varying the backlight intensity.
Anti Motion Blur can also be found here, but can only be enabled when various other options are disabled. Finally, Image Enhancement is a sharpening system with four strength levels.
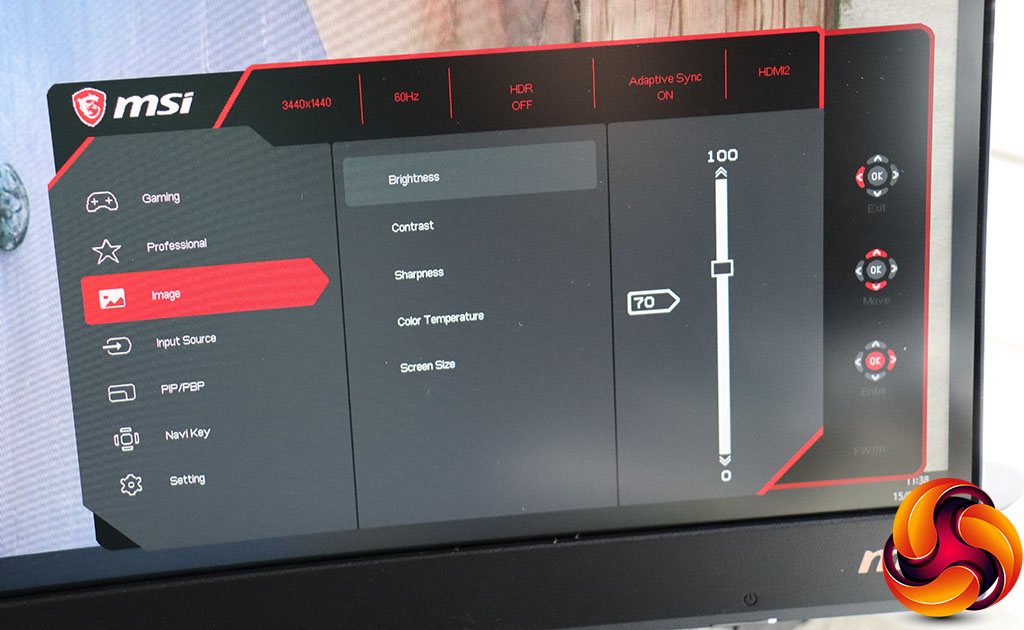
The Image submenu includes brightness, contrast, sharpness, and colour temperature. The latter has normal, warm and cool options. The screen size section lets you choose pixel aspect ratio, if you have a non-native resolution input.
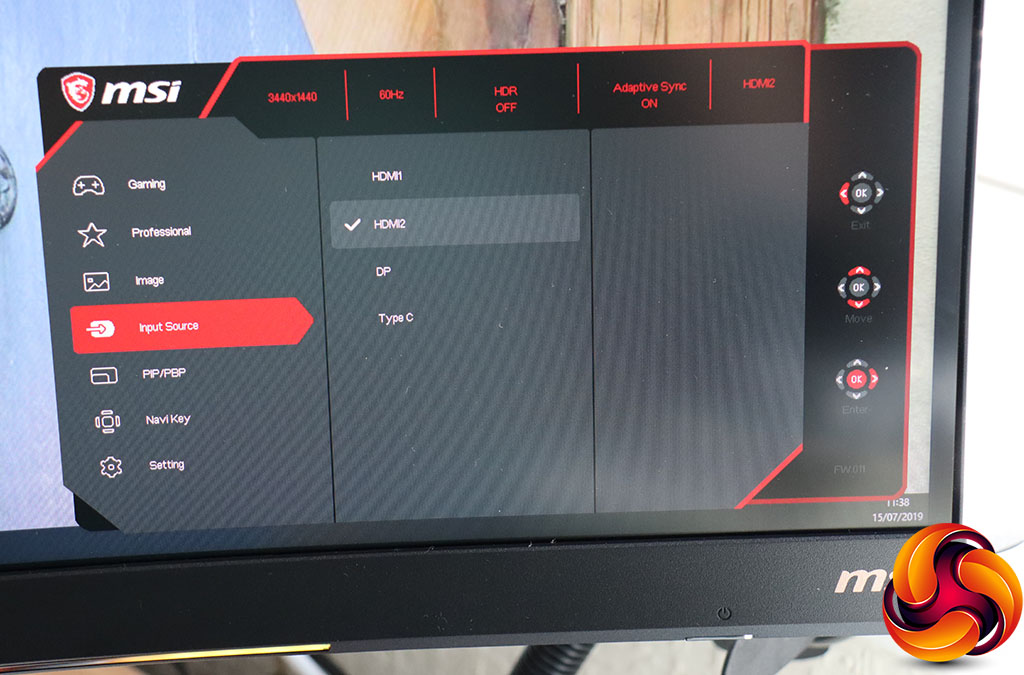
The Input Source submenu has the same function and options to the quick version.
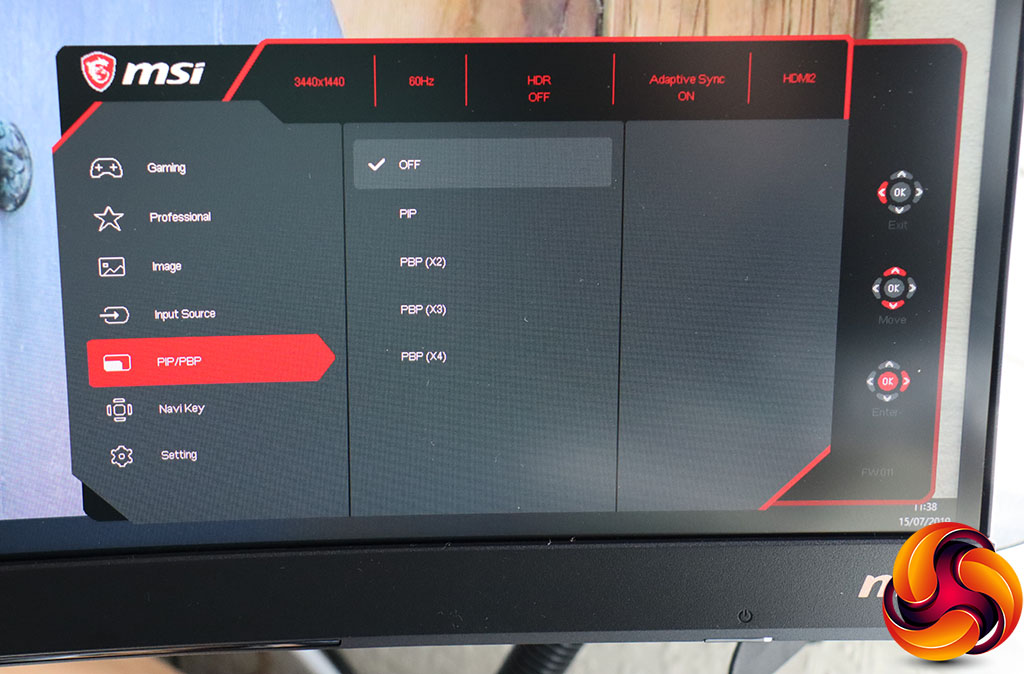
Picture-in-Picture and Picture-By-Picture are quite usable features with a screen this wide, with this resolution, and with this many inputs. There is one Picture-in-Picture option, or you can have up to four inputs side-by-side onscreen.
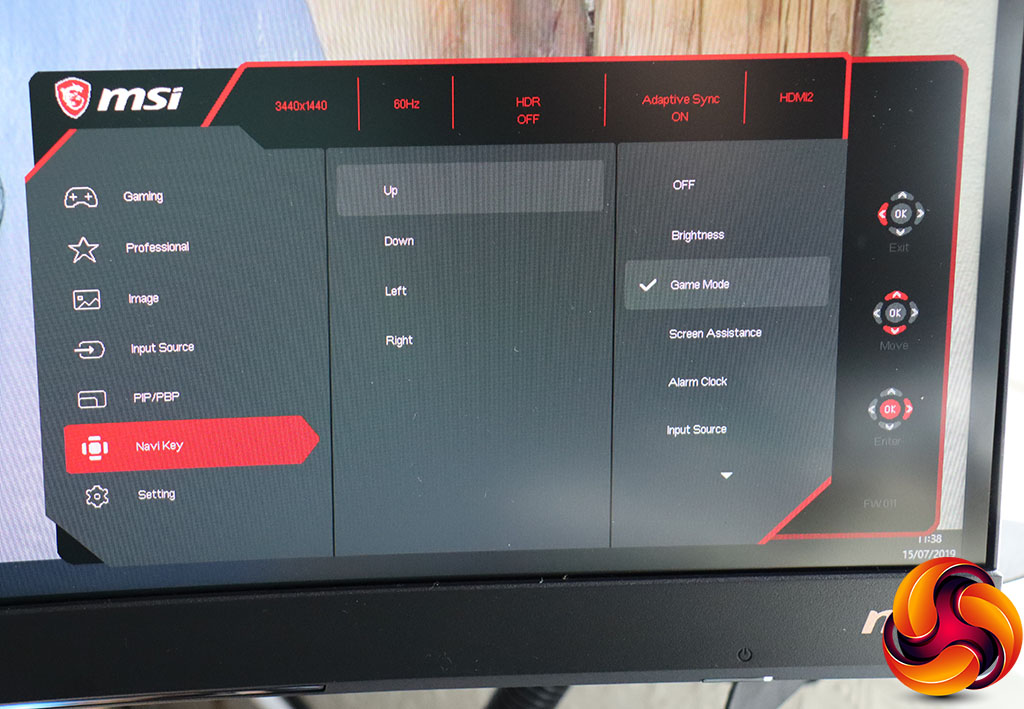
Although we've described the default functions revealed when pushing the joystick up, down, left and right, the parameters associated with all four motions are fully customisable. This is pretty handy, when most monitors either provide no customisability or just a couple of user options on a couple of buttons.
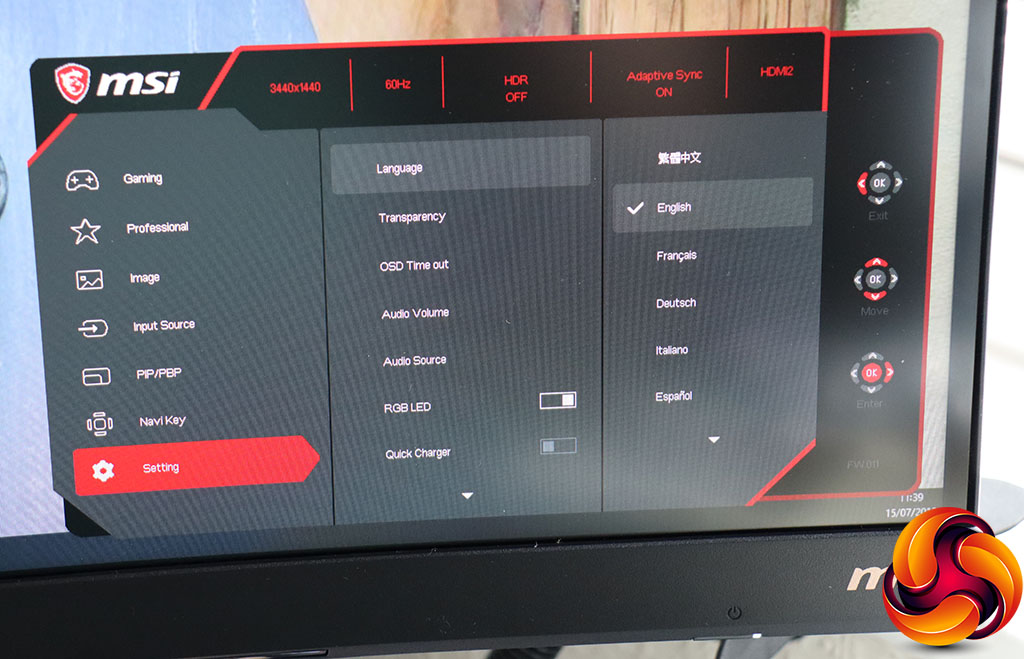
The final submenu configures all the options for the monitor's control settings, including the OSD language, transparency and and time out. You can adjust the audio volume and source here, and turn off the strip of LEDs on the front. You can also enable quick charging for the USB ports, and if you scroll all the way down, reset everything to default.
Overall, there are a lot of options in this OSD. We particularly like the fact you can configure the four joystick directions with a custom function. There's also a decent range of gaming-focused controls and extras. However, one thing we'd like to see is more user-configurable presets, so you can have your own custom options for your favourite games. There are also no gamma options on this screen, which is a bit of a surprise when most other configuration options are available.
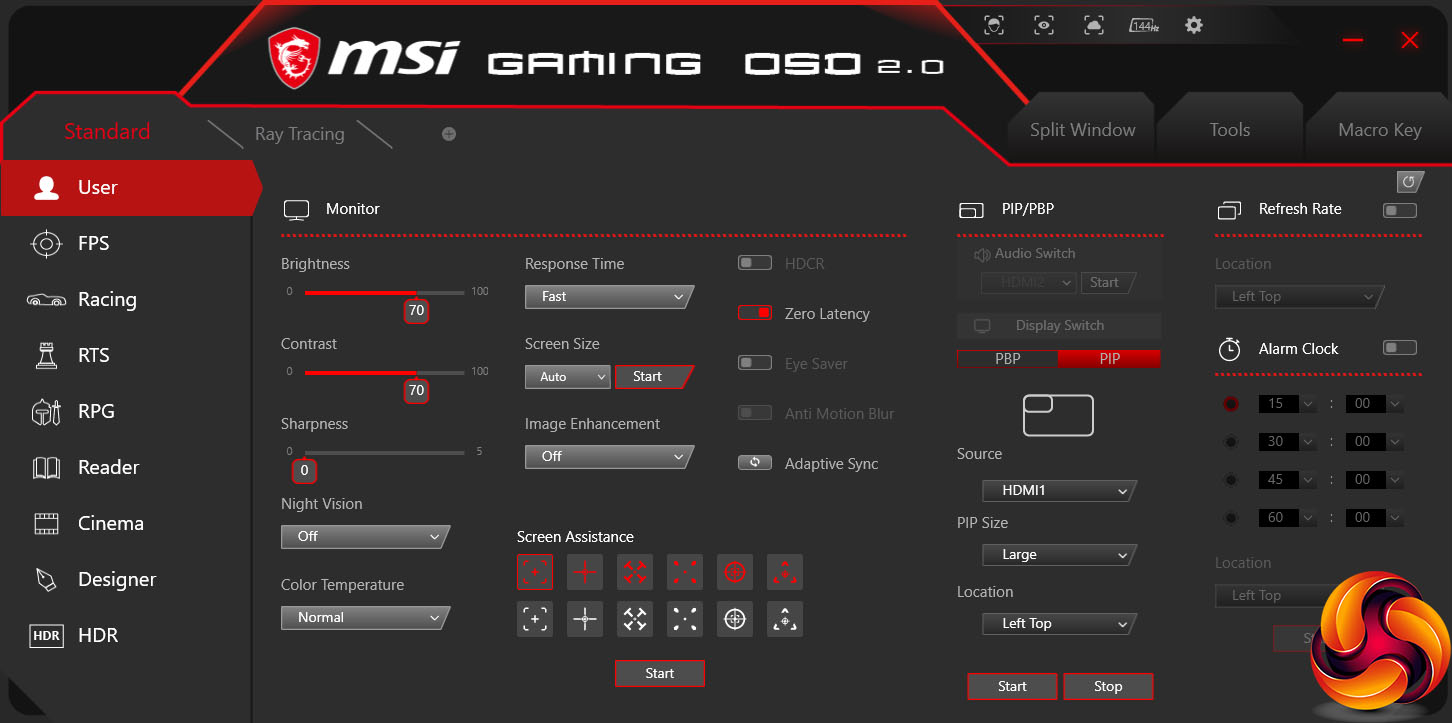
MSI offers another control system, however, via an app called Gaming OSD. This requires the USB hub to be connected up, as it uses this to provide control signals. The MSI Gaming OSD 2.0 software lets you easily switch between the four Game Modes and four Pro Modes, and then adjust the options for each. There's also a Ray Tracing preset for use with NVIDIA's RTX cards, and next to that a plus symbol that negates our criticism of the main OSD.
Using the plus symbol, you can create custom presets for any app or software type you like. You can also create a split window with one application on each panel, plus tools for various features like zooming into the screen or controlling mouse speed. The final Macro Key tab works with the button on the bottom left. By default, this starts up Gaming OSD, but can be reconfigured to perform one of a range of different functions.