Here at KitGuru we have eagerly followed the various MasterCases and MasterBoxes that Cooler Master have released over the last year or two. Today we are looking at the brand-new MasterCase Pro 6. It is priced at £139.99 here in the UK, so a key part of this review will be finding out if this is good value for money.
Despite the name, the Cooler Master MasterCase Pro 6 is not actually a successor to the MasterCase Pro 5. Rather, it is best to think of them as cousins – the Pro 5 is designed to offer extravagant visuals, while the Pro 6 is much more minimalistic. Of course, the MasterCase Pro 6 does make use of Cooler Master's trademark FreeForm modular system, so you can easily add in accessories and upgrade the case should you wish. Read on for the full review including an analysis of the internal and external features as well as our temperature testing.
Specification
- Available Colour: Dark metallic grey exterior with black interior
- Materials: Steel body, Plastic panels
- Dimensions: (LxWxH) 544 x 235 x 548mm
- Net Weight: 11.74 Kg
- Motherboard Support: ATX, Micro-ATX, Mini-ITX
- Expansion Slots: 7
- External drive bays: 5.25″ x2
- Combo 3.5″ / 2.5″ drive bays: x5
- SSD bays: 2
- I/O Panel: USB 3.0 x 2, audio in / out
- Fan Support: Front 120mm x 3 / 140mm x 3, Rear 120mm x 1 / 140mm x 1, Top 120mm x 2 / 140mm x 2
- Liquid Cooling Support: Front 240 / 280mm, Rear 120 / 140mm, Top 240mm / 280mm (max. 297mm radiator length)
- CPU Cooler clearance: 190mm / 7.48″
- PSU length: 200mm / 7.87″
- Graphics Card length: 412mm / 16.22″ (without 3.5″ HDD cage), 296mm / 11.7″ (with 3.5″ HDD cage)
- Cable Routing Behind Motherboard Tray: 25mm – 35mm
- Dust Filters: Front, bottom
The Cooler Master MasterCase Pro 6 ships in a large, dark grey box.
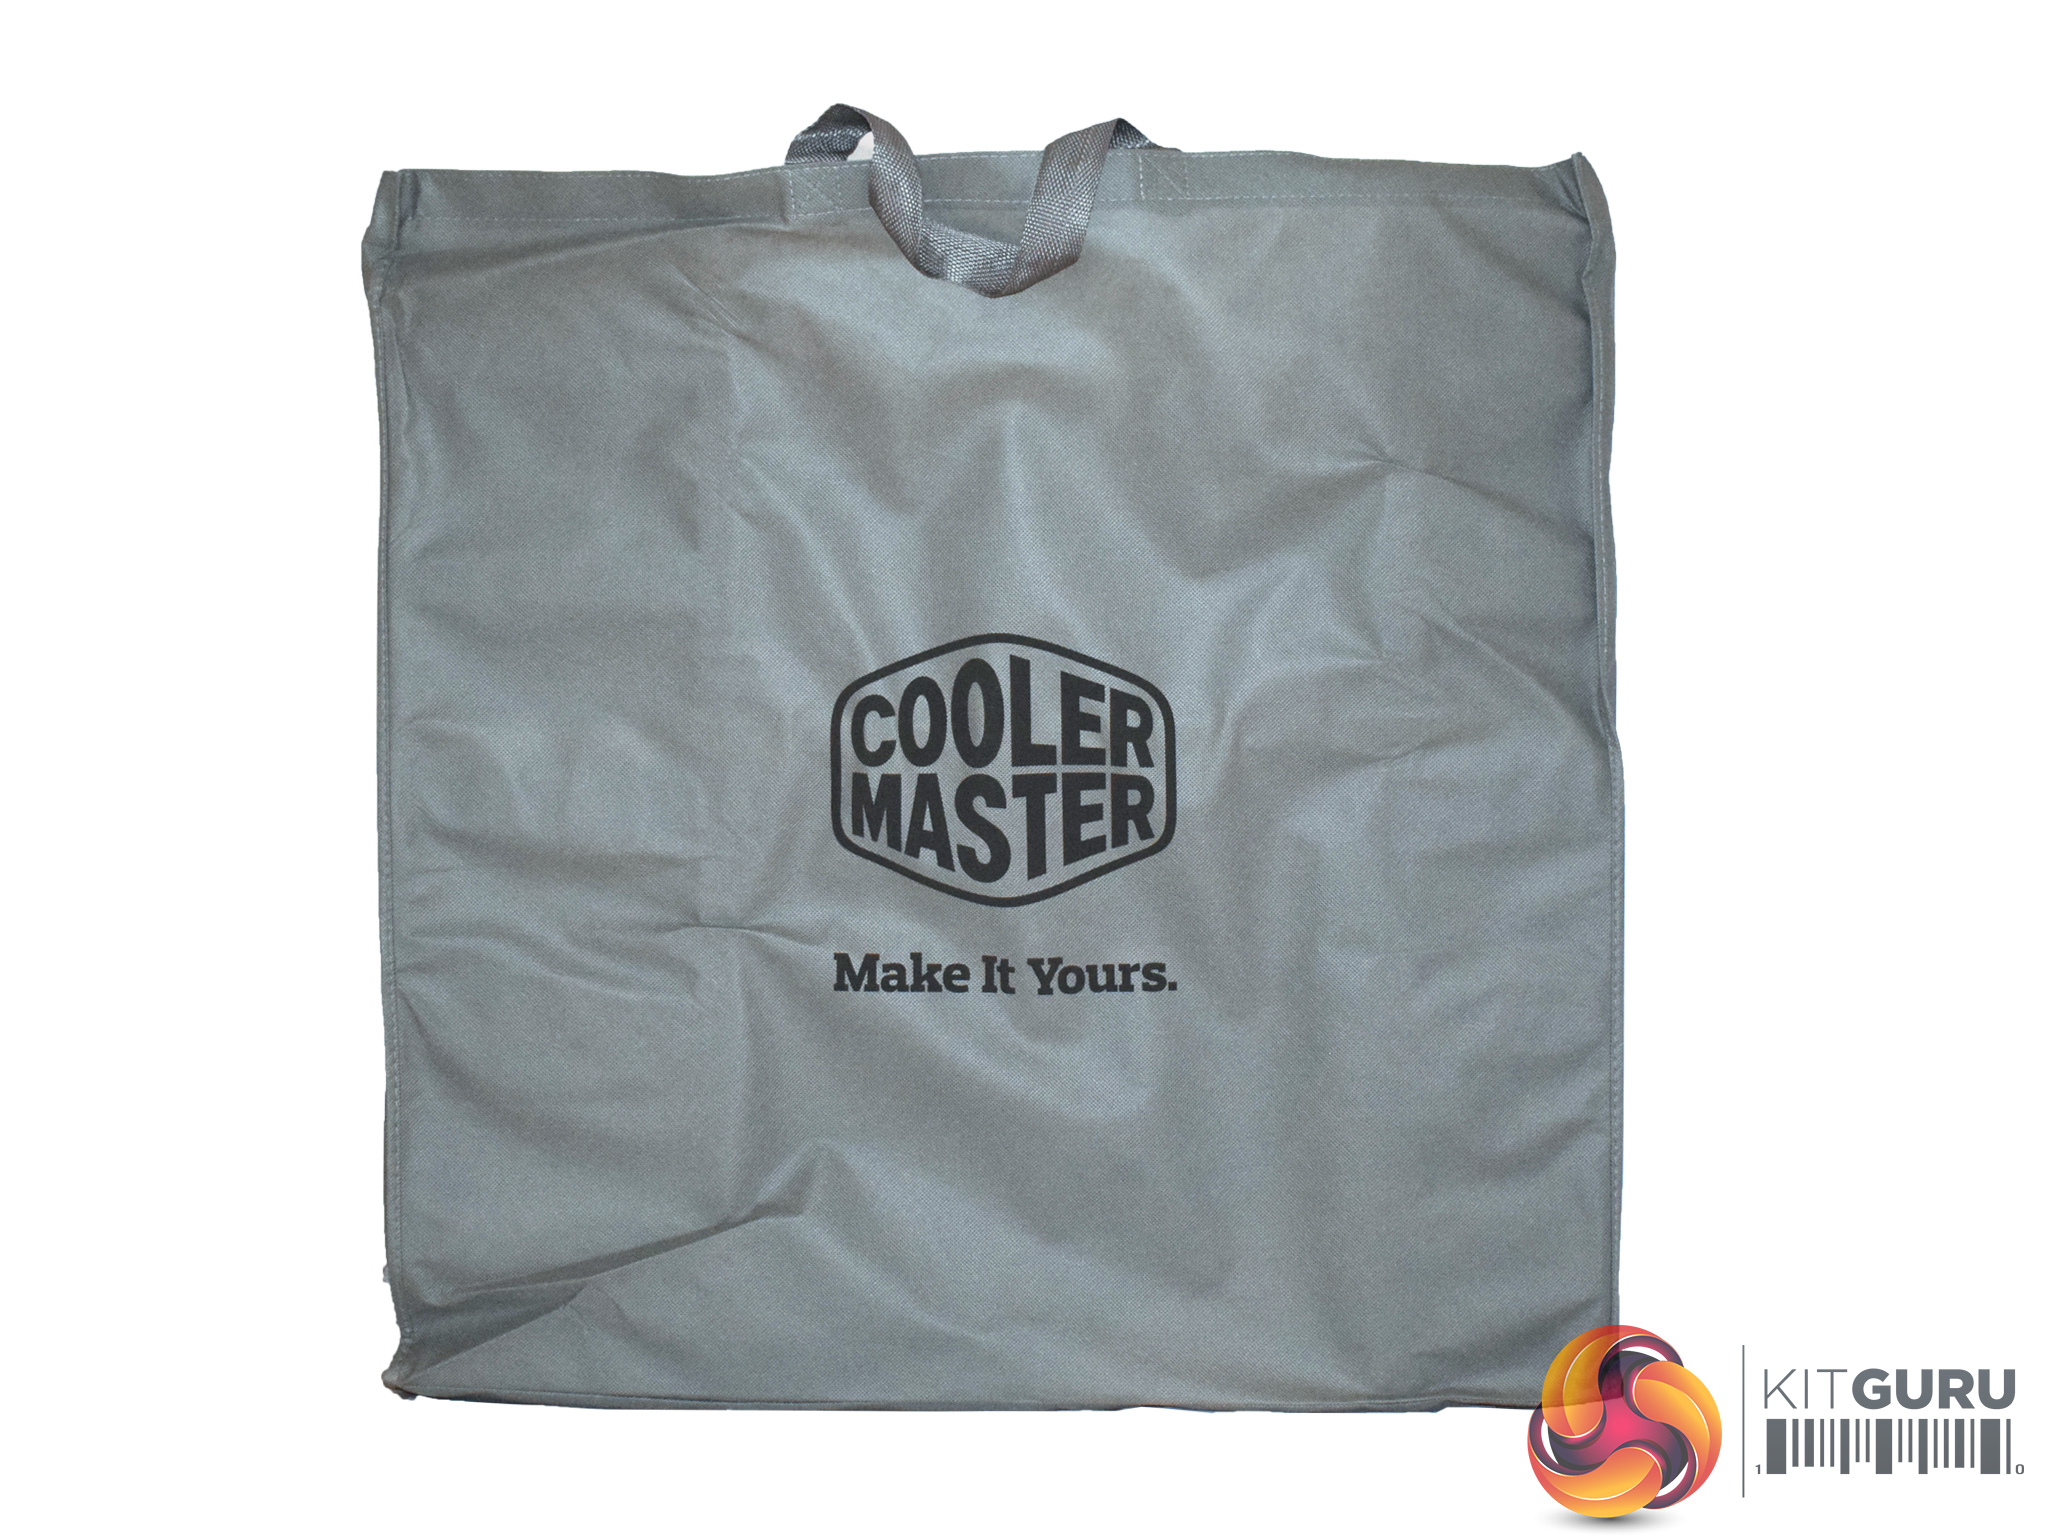
Inside, the case is actually packed in a huge bag as well – maybe something to help with the weekly shop perhaps?


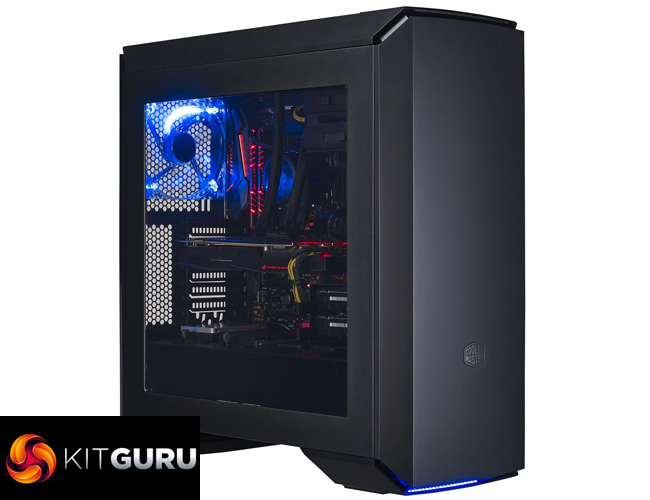
Once the case is out in the open, it becomes clear that the case is actually a dark grey – I thought, at a glance, that is is black, but it is definitely a metallic grey.
The left side panel features a large acrylic window while the right-hand panel is solid. Incidentally, the case is made from steel, though the top and front panels are plastic. Still, the majority of the case is steel which feels nice and sturdy. The side panels are also very thick so you can rest assured that they are not going to mind a slight bashing.
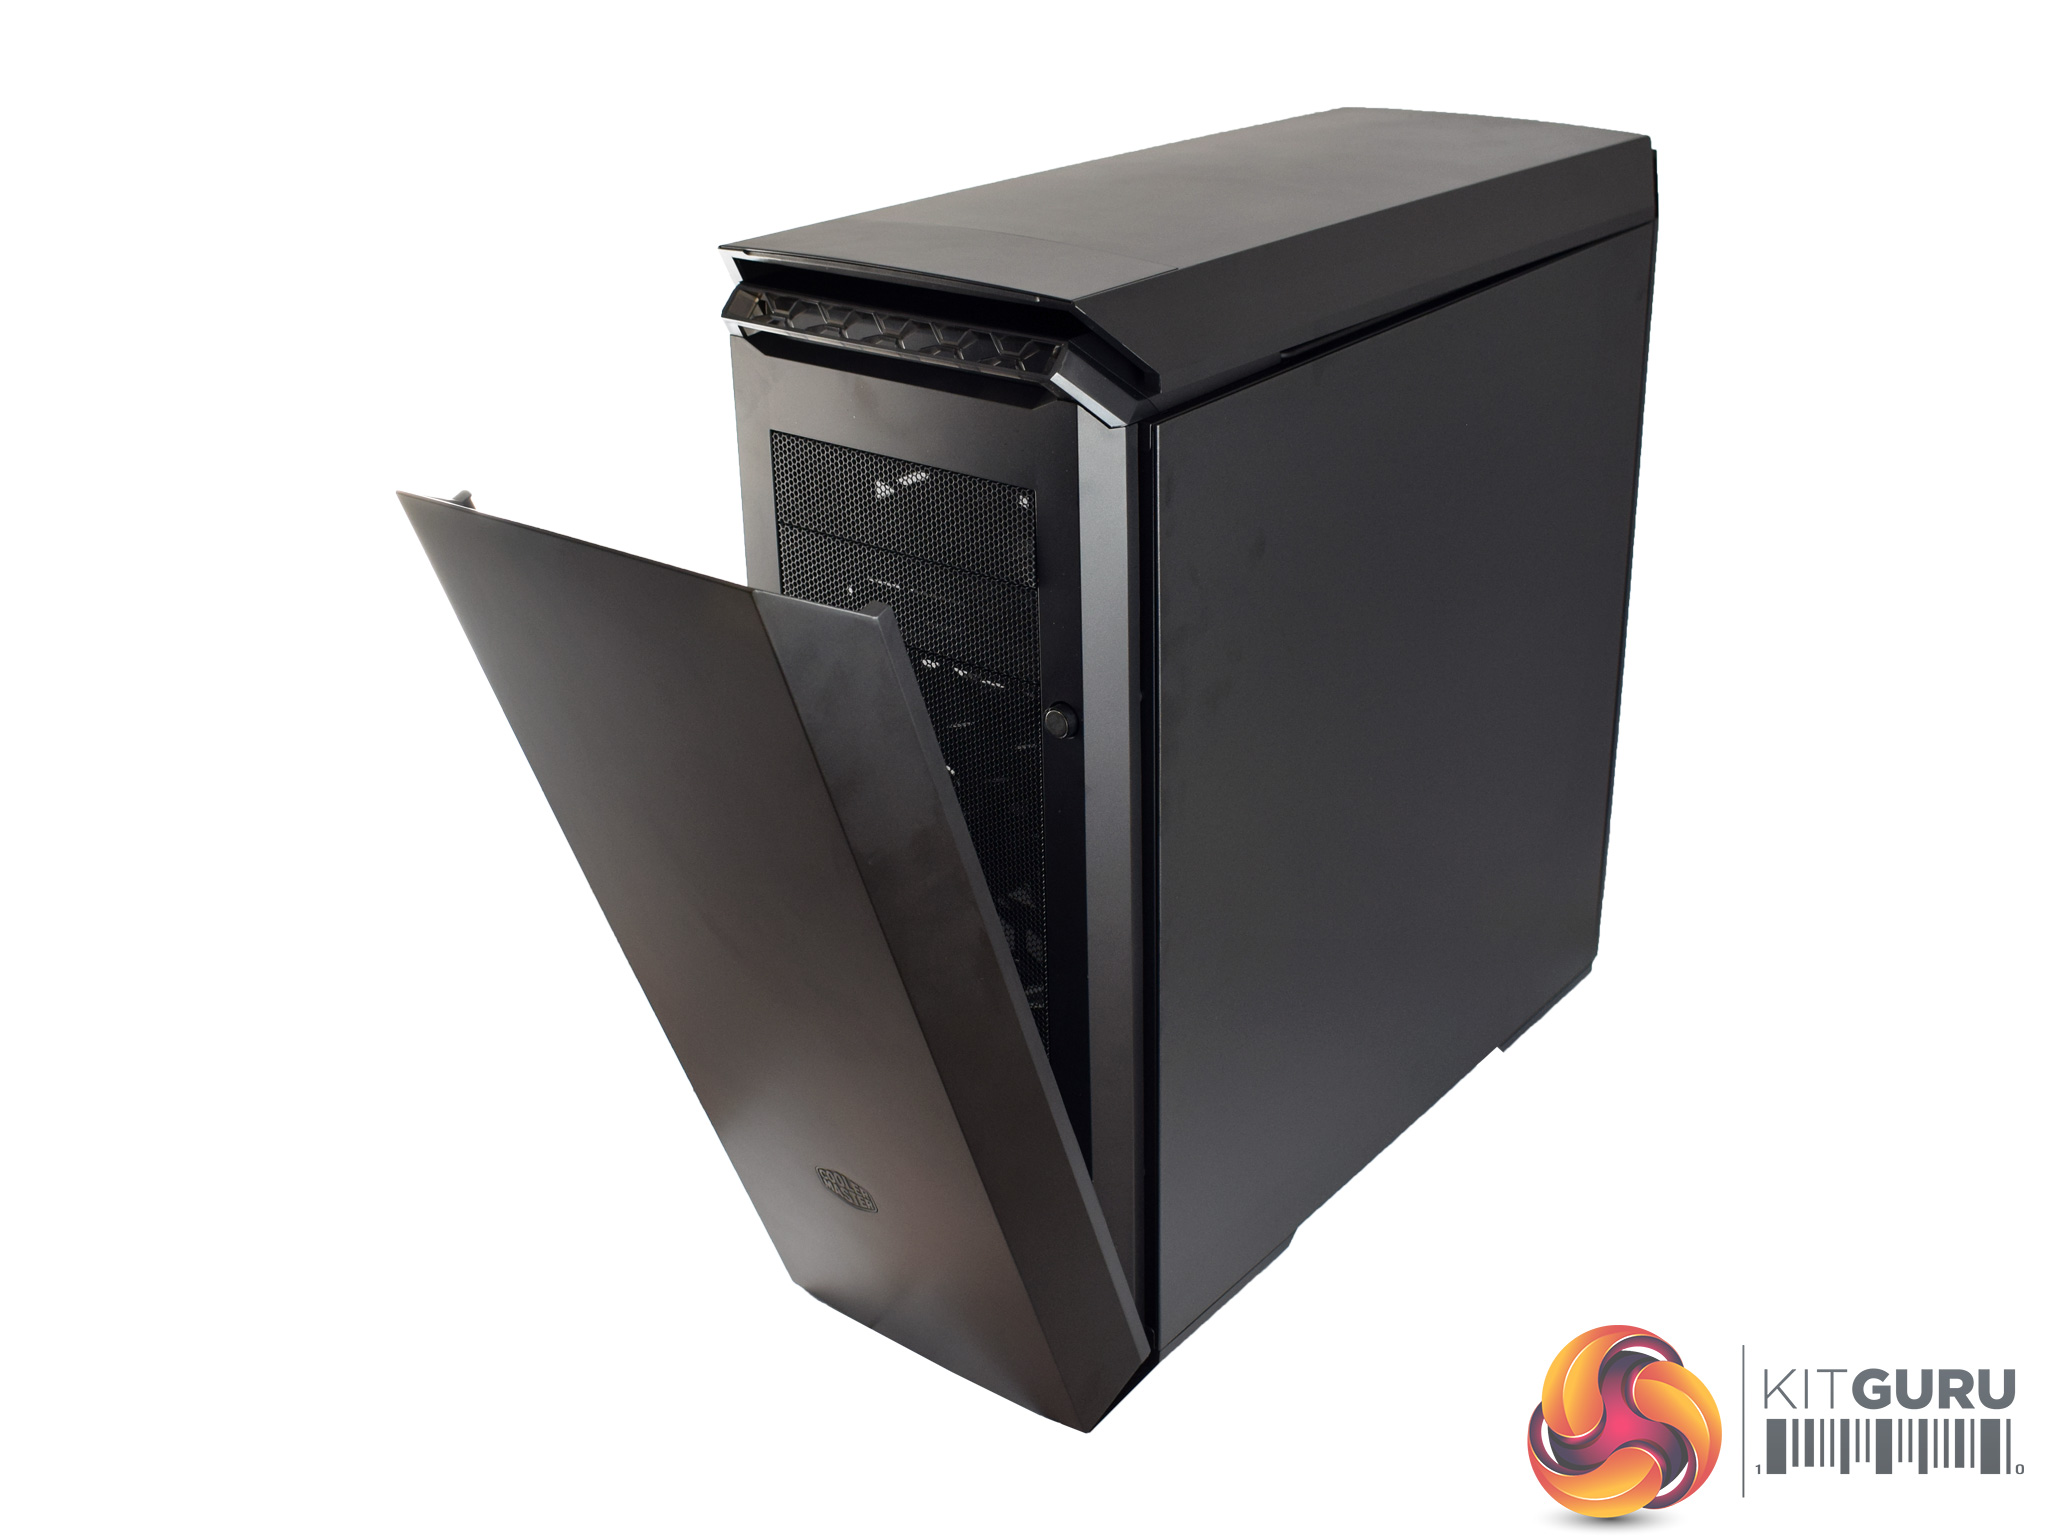
The front panel is actually a door that opens on a hinge (as above) to provide access to any 5.25″ drives you choose to install.

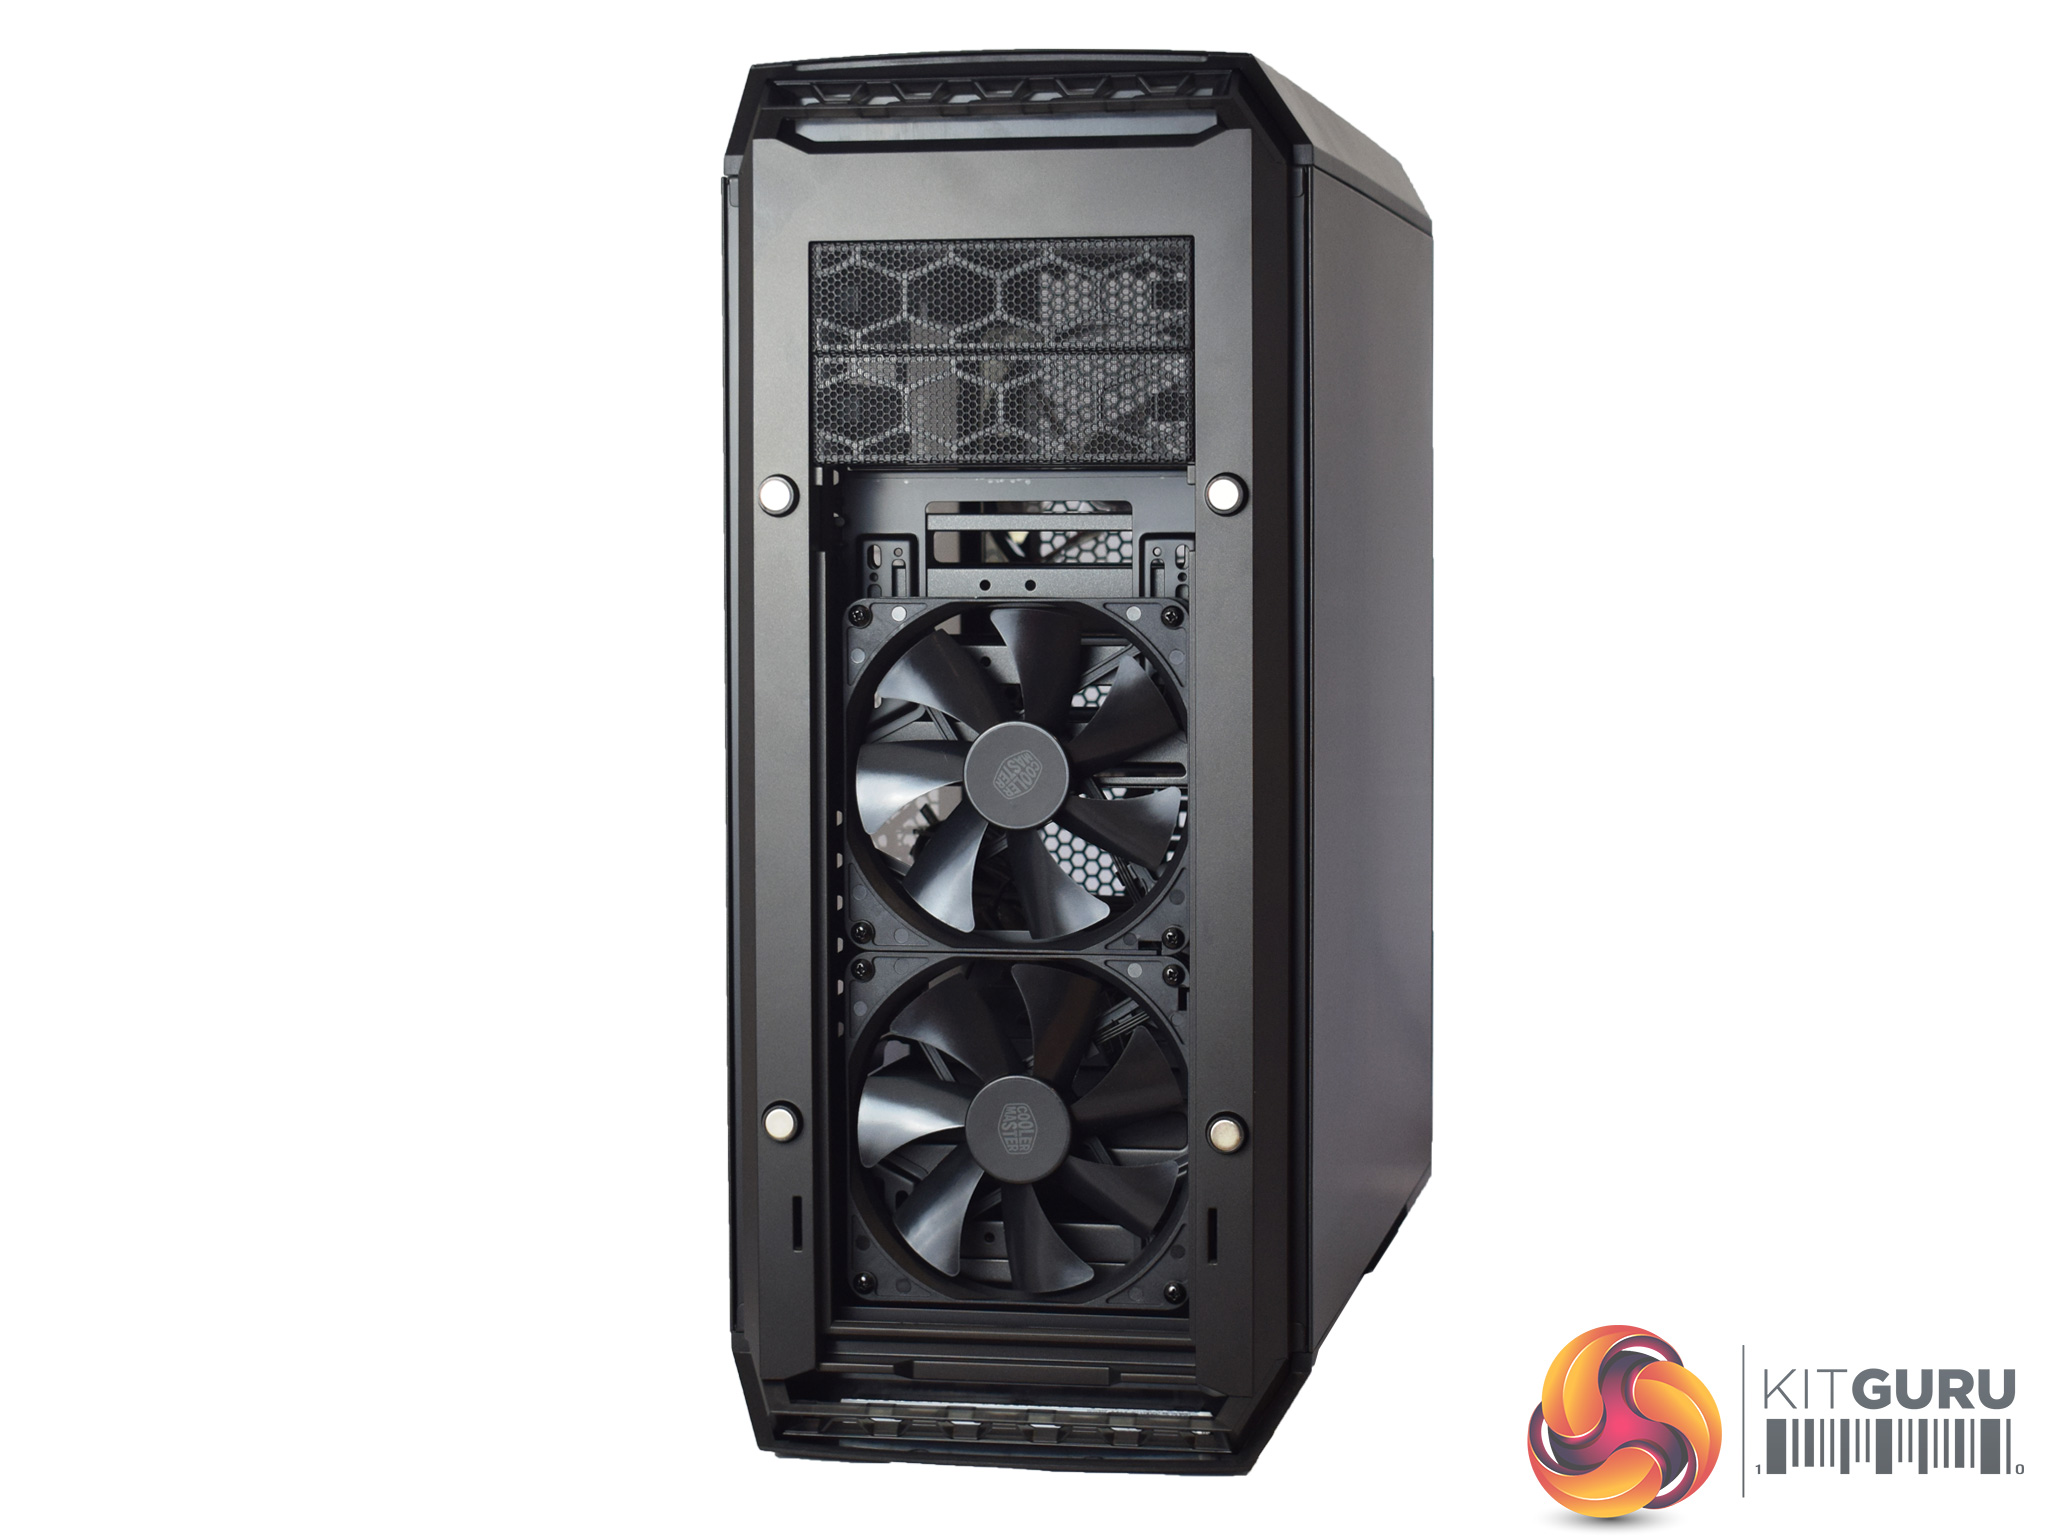
The door can also be completely removed, revealing a large dust-filter below.
Underneath the dust-filter we find 2x 120mm fans which should provide decent airflow – we look at thermal dynamics later in the review.
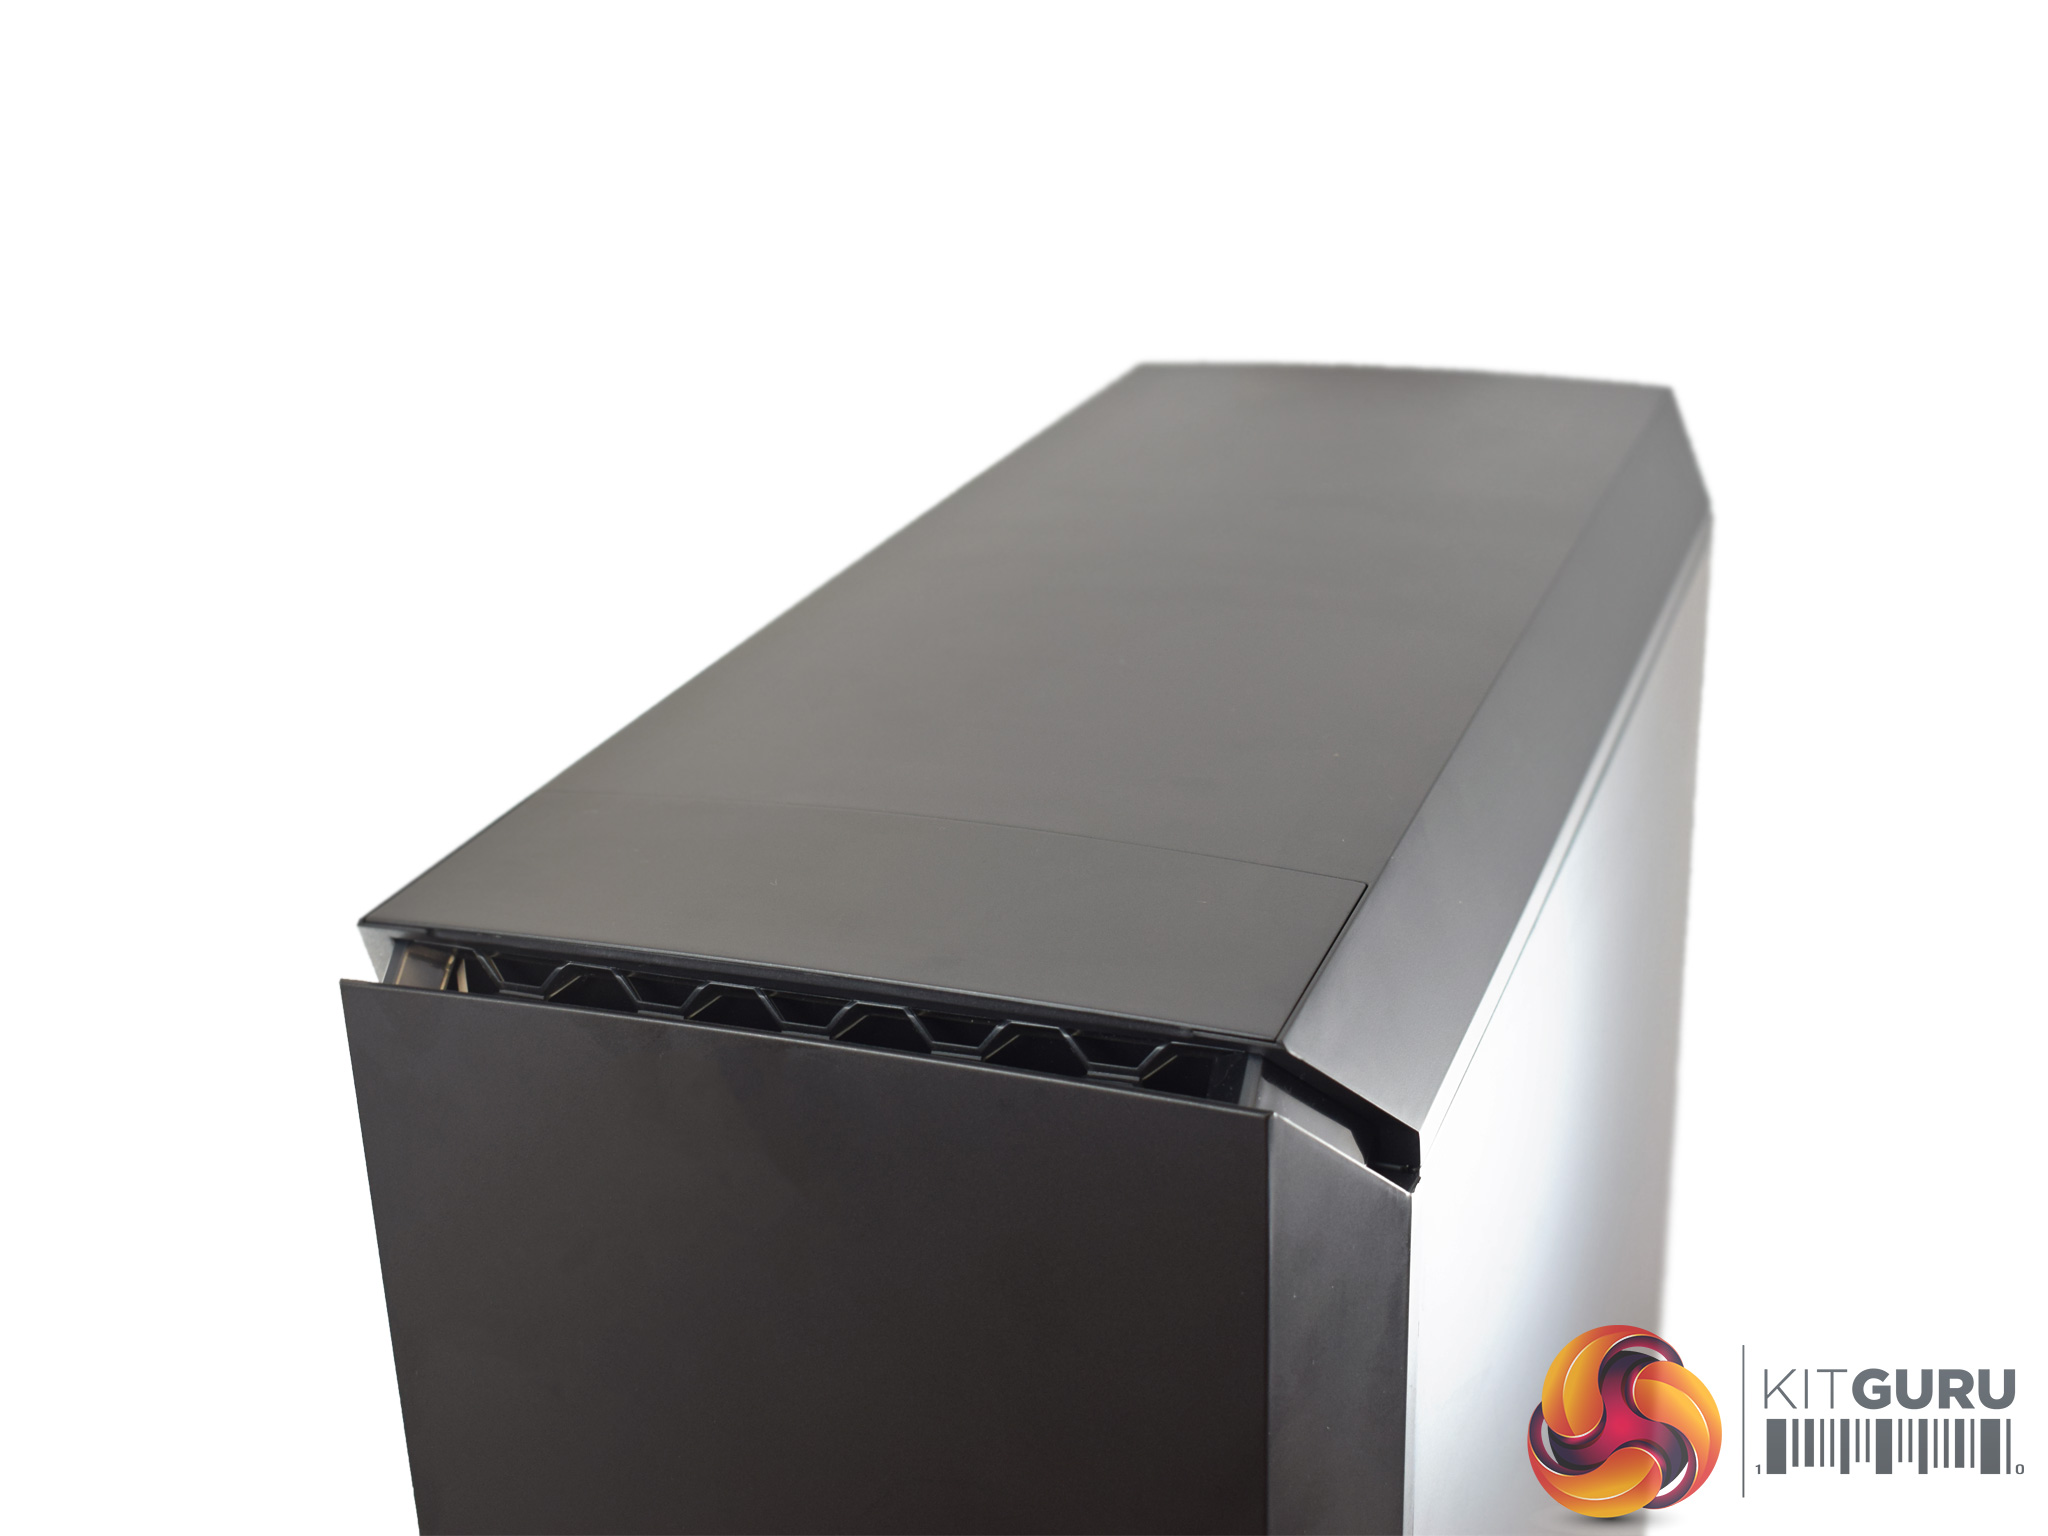
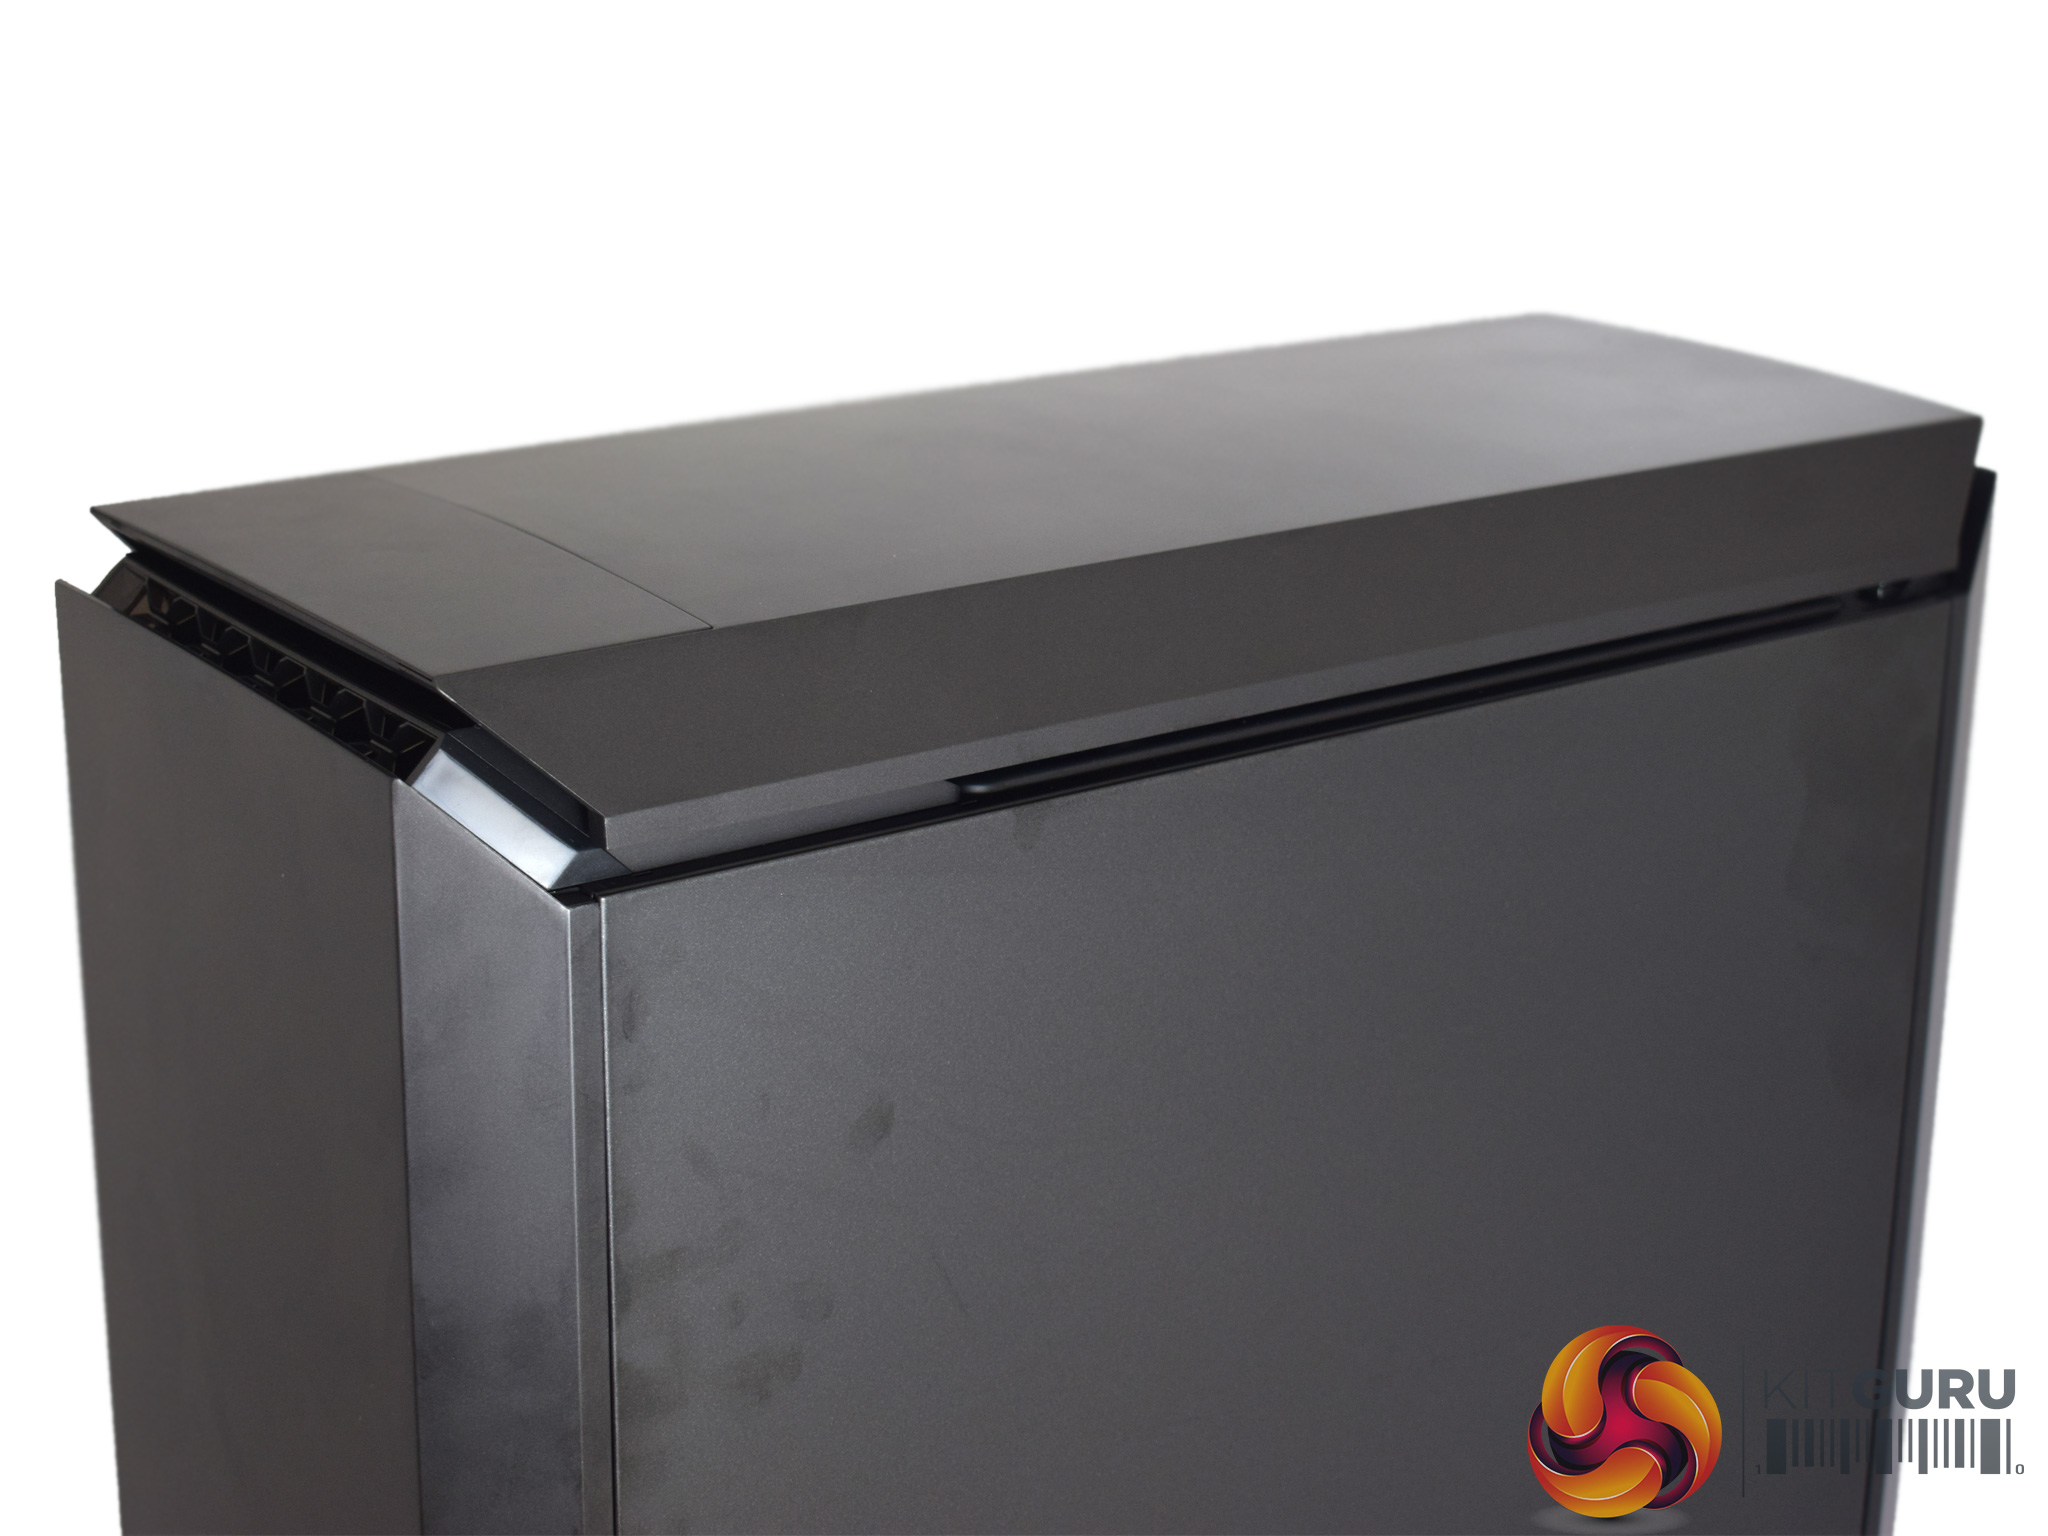
Moving upwards, the top panel is completely solid. That being said, a new feature of the case is that the top panel and front panels can actually ‘pop up' a bit (as pictured above, right). This is designed to help with ventilation – with the panels down airflow will likely be restricted, but now you can open up the case a bit more should you wish.
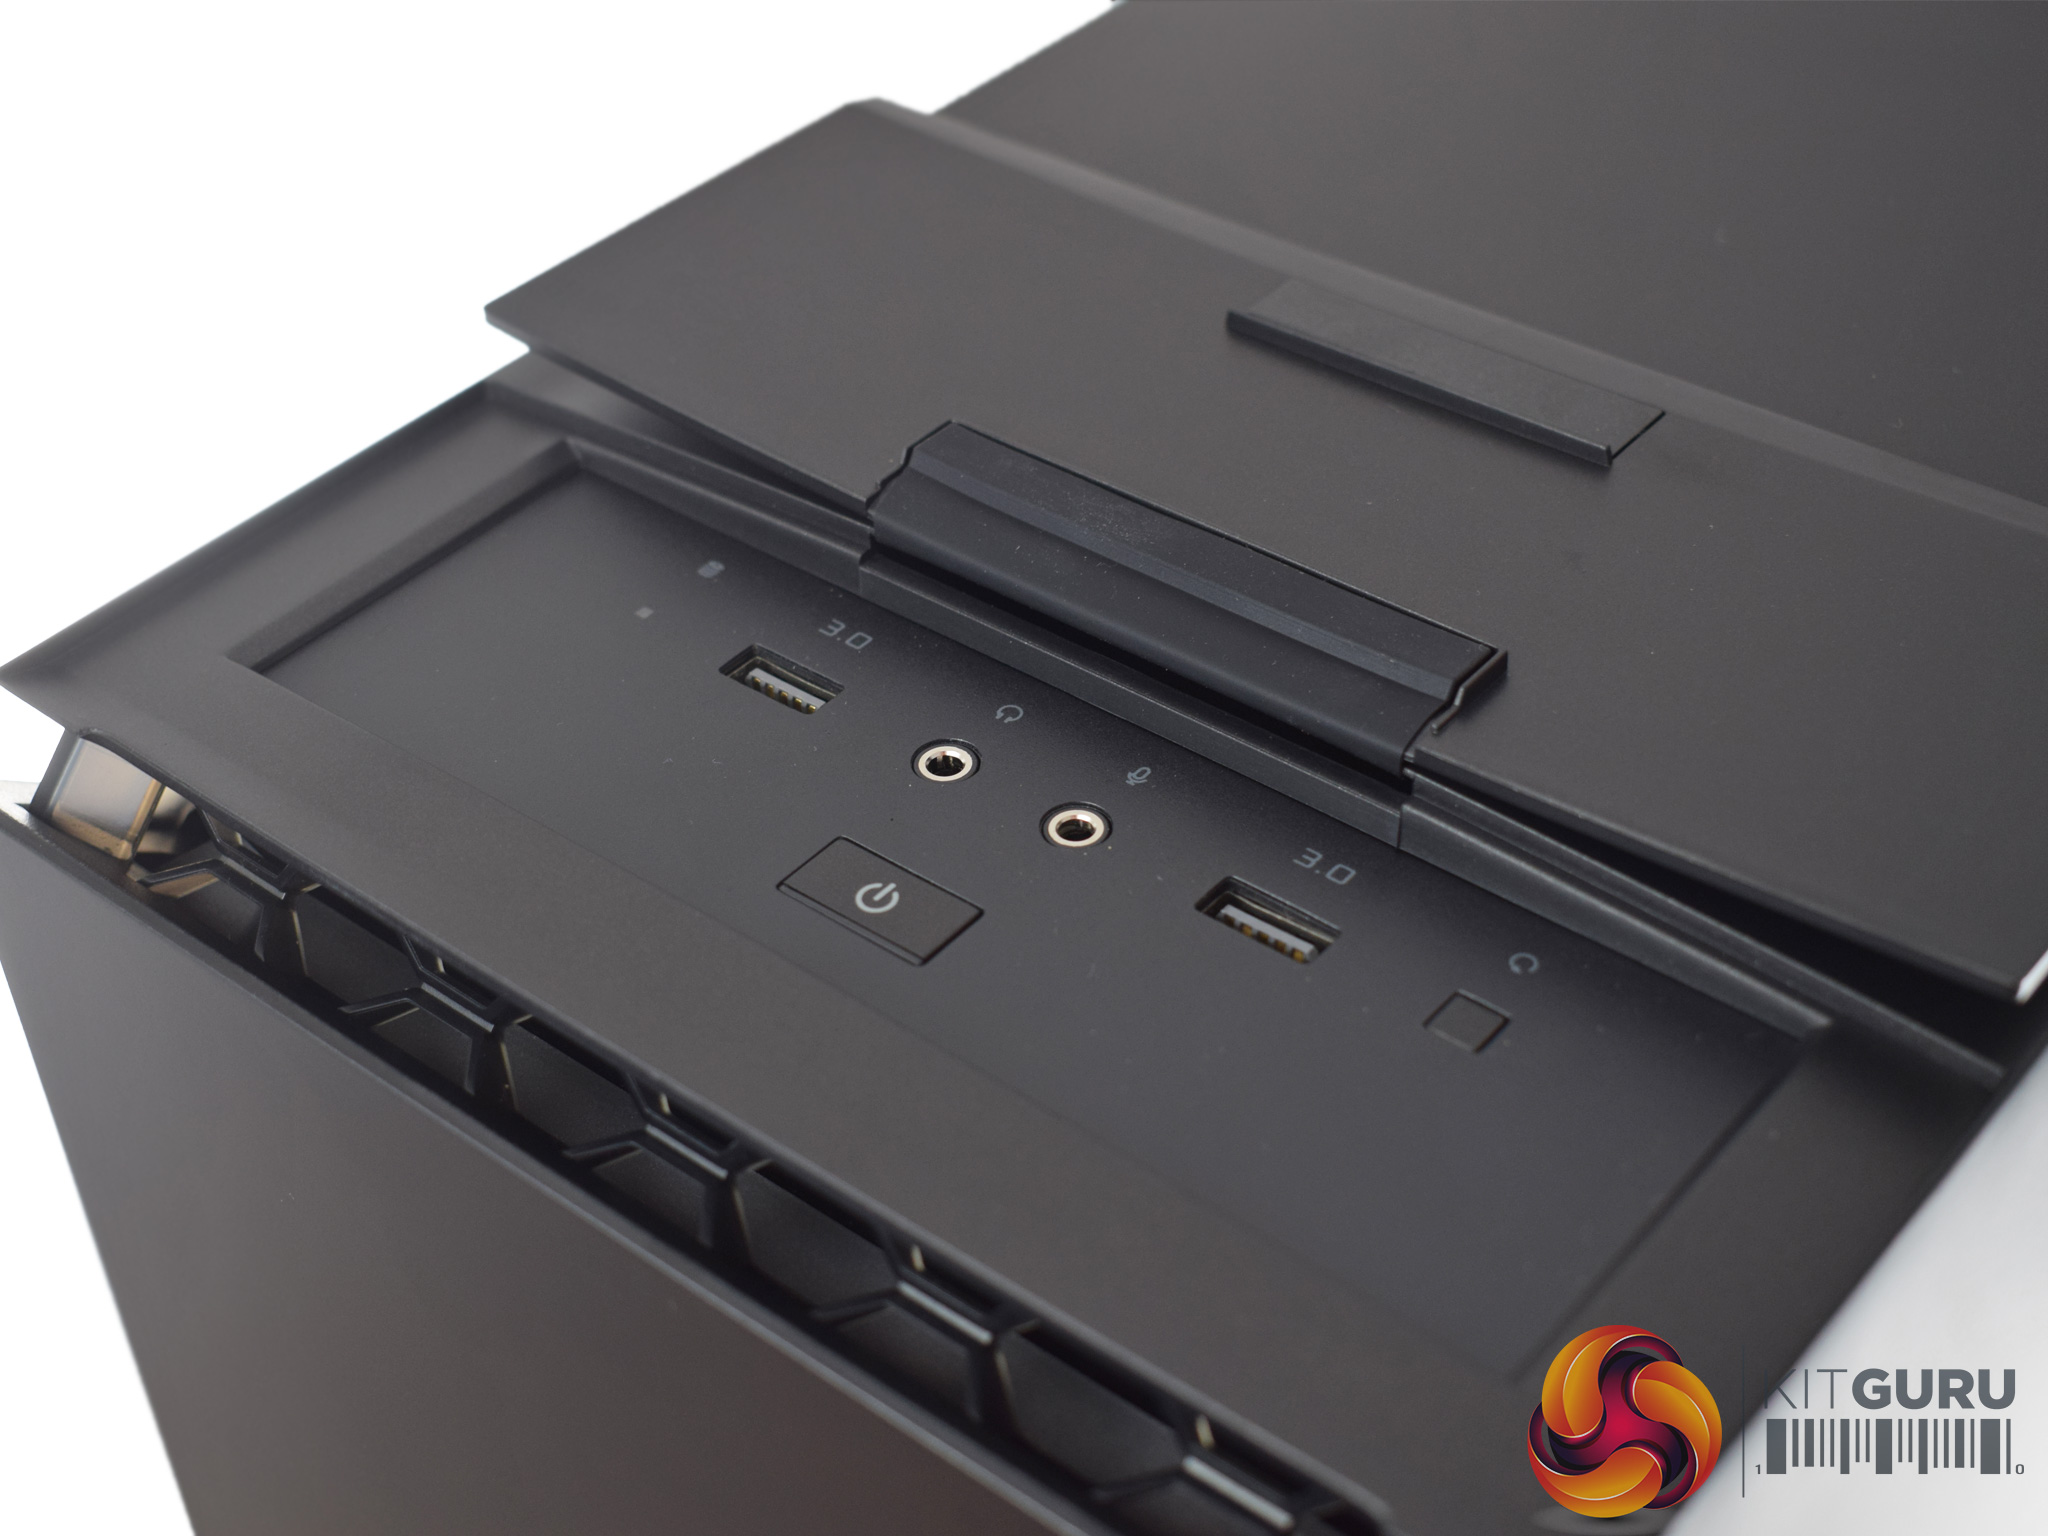
Continuing the stealth theme is the I/O panel – as it is actually hidden under a small flap. The I/O consists of 2x USB 3.0 ports and headset jacks.
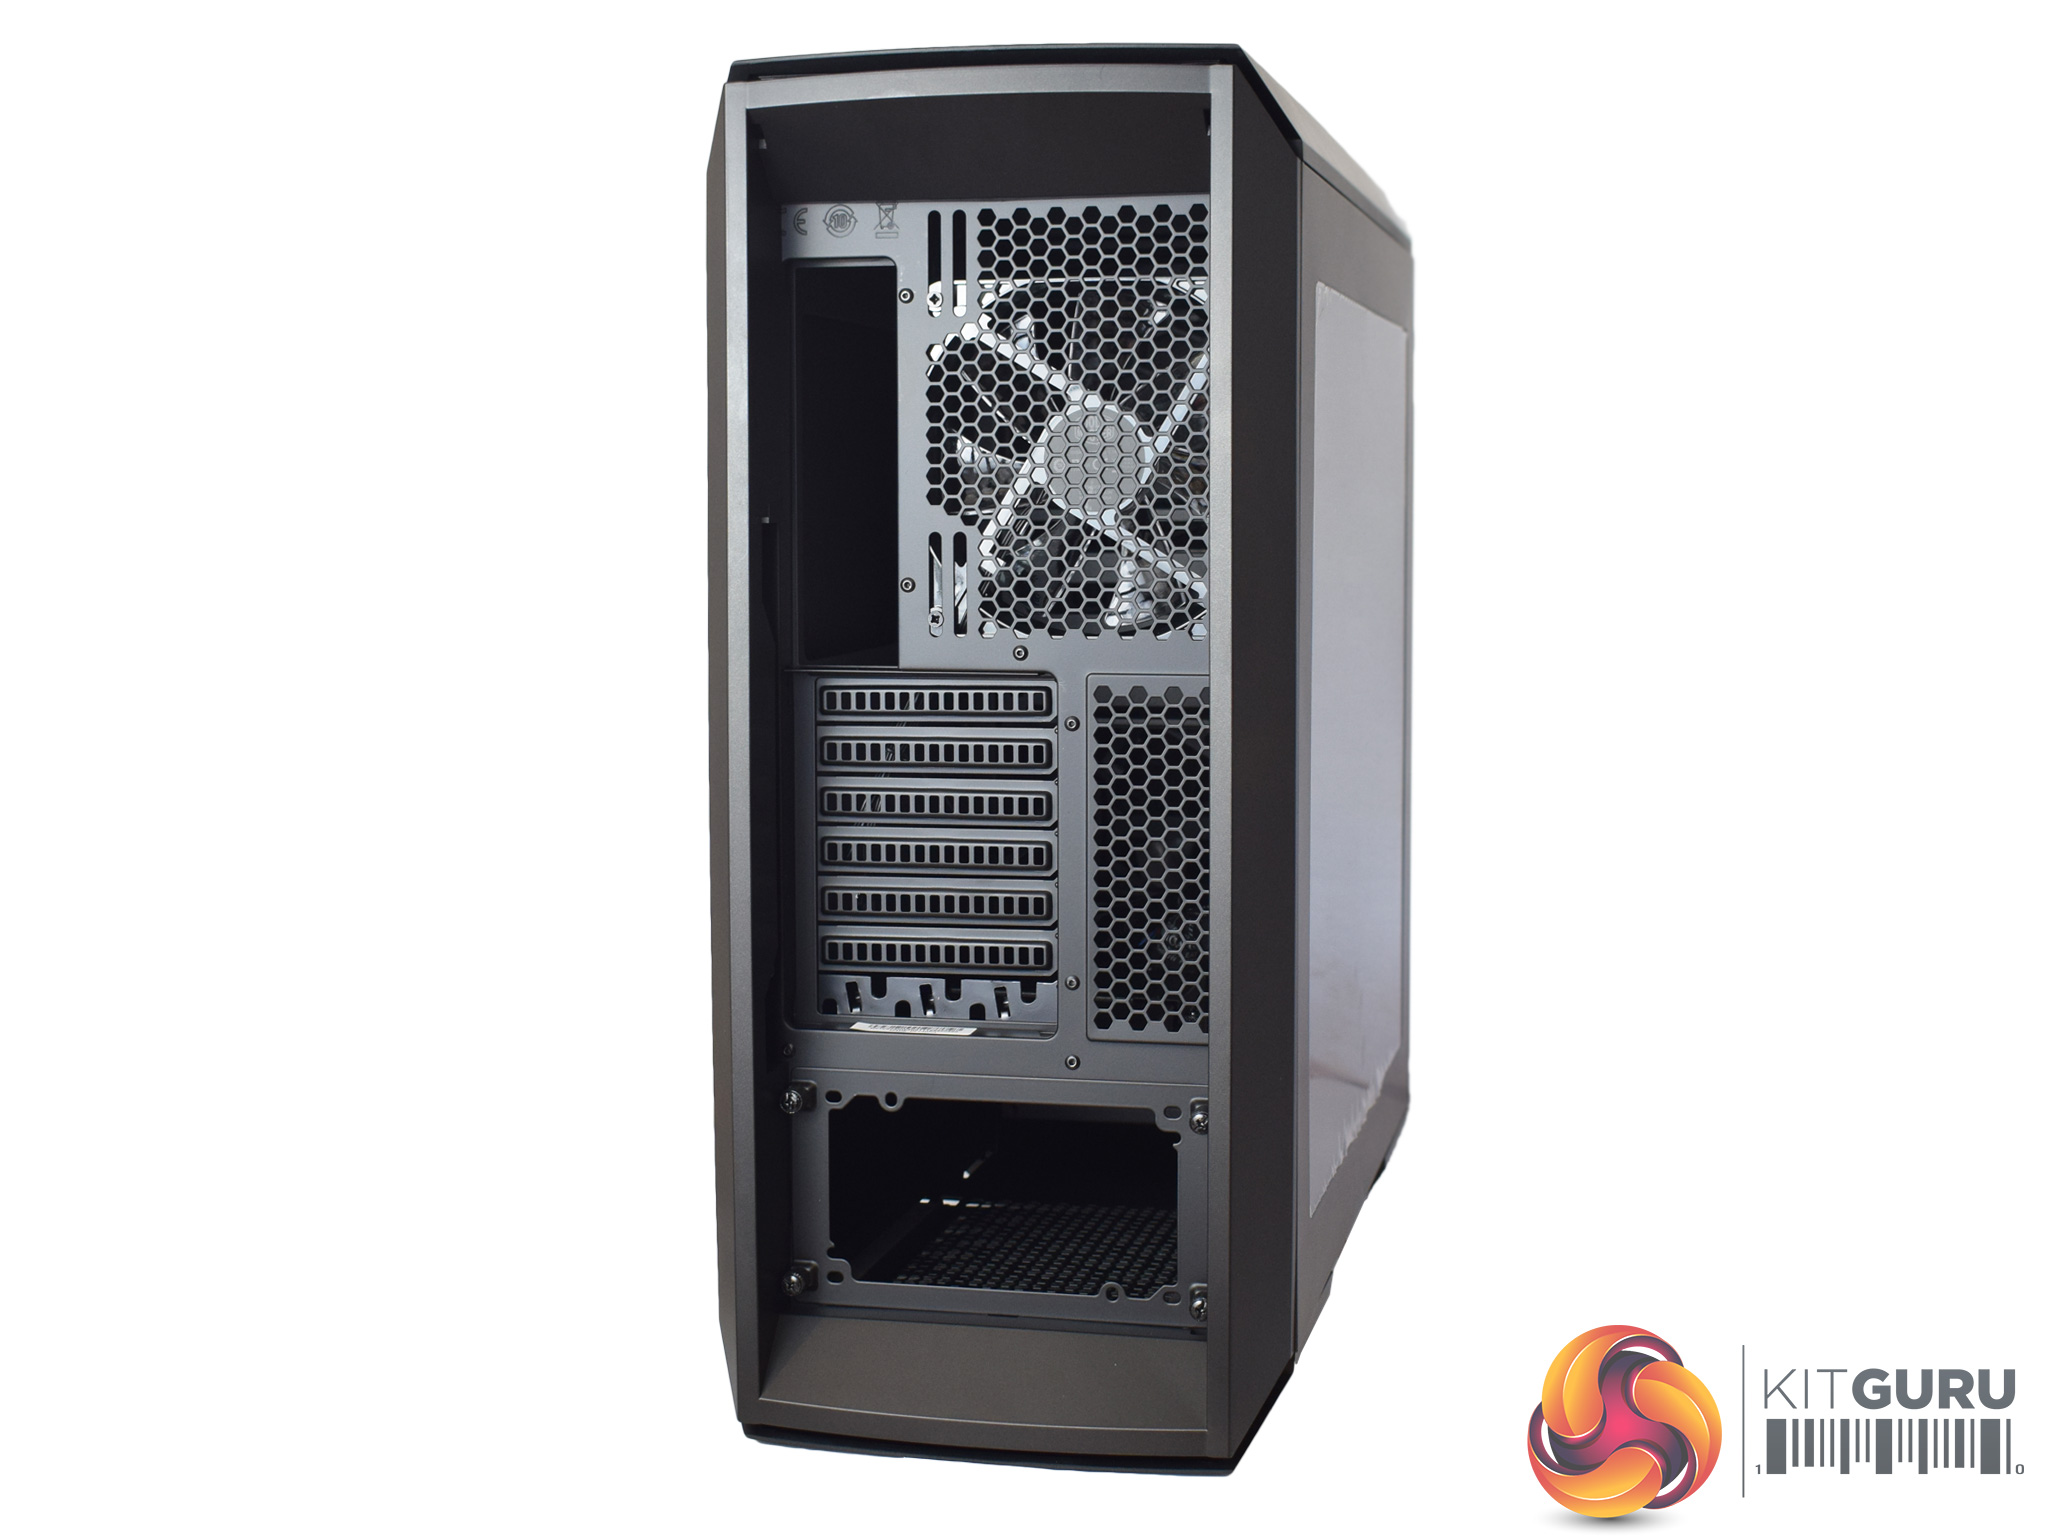
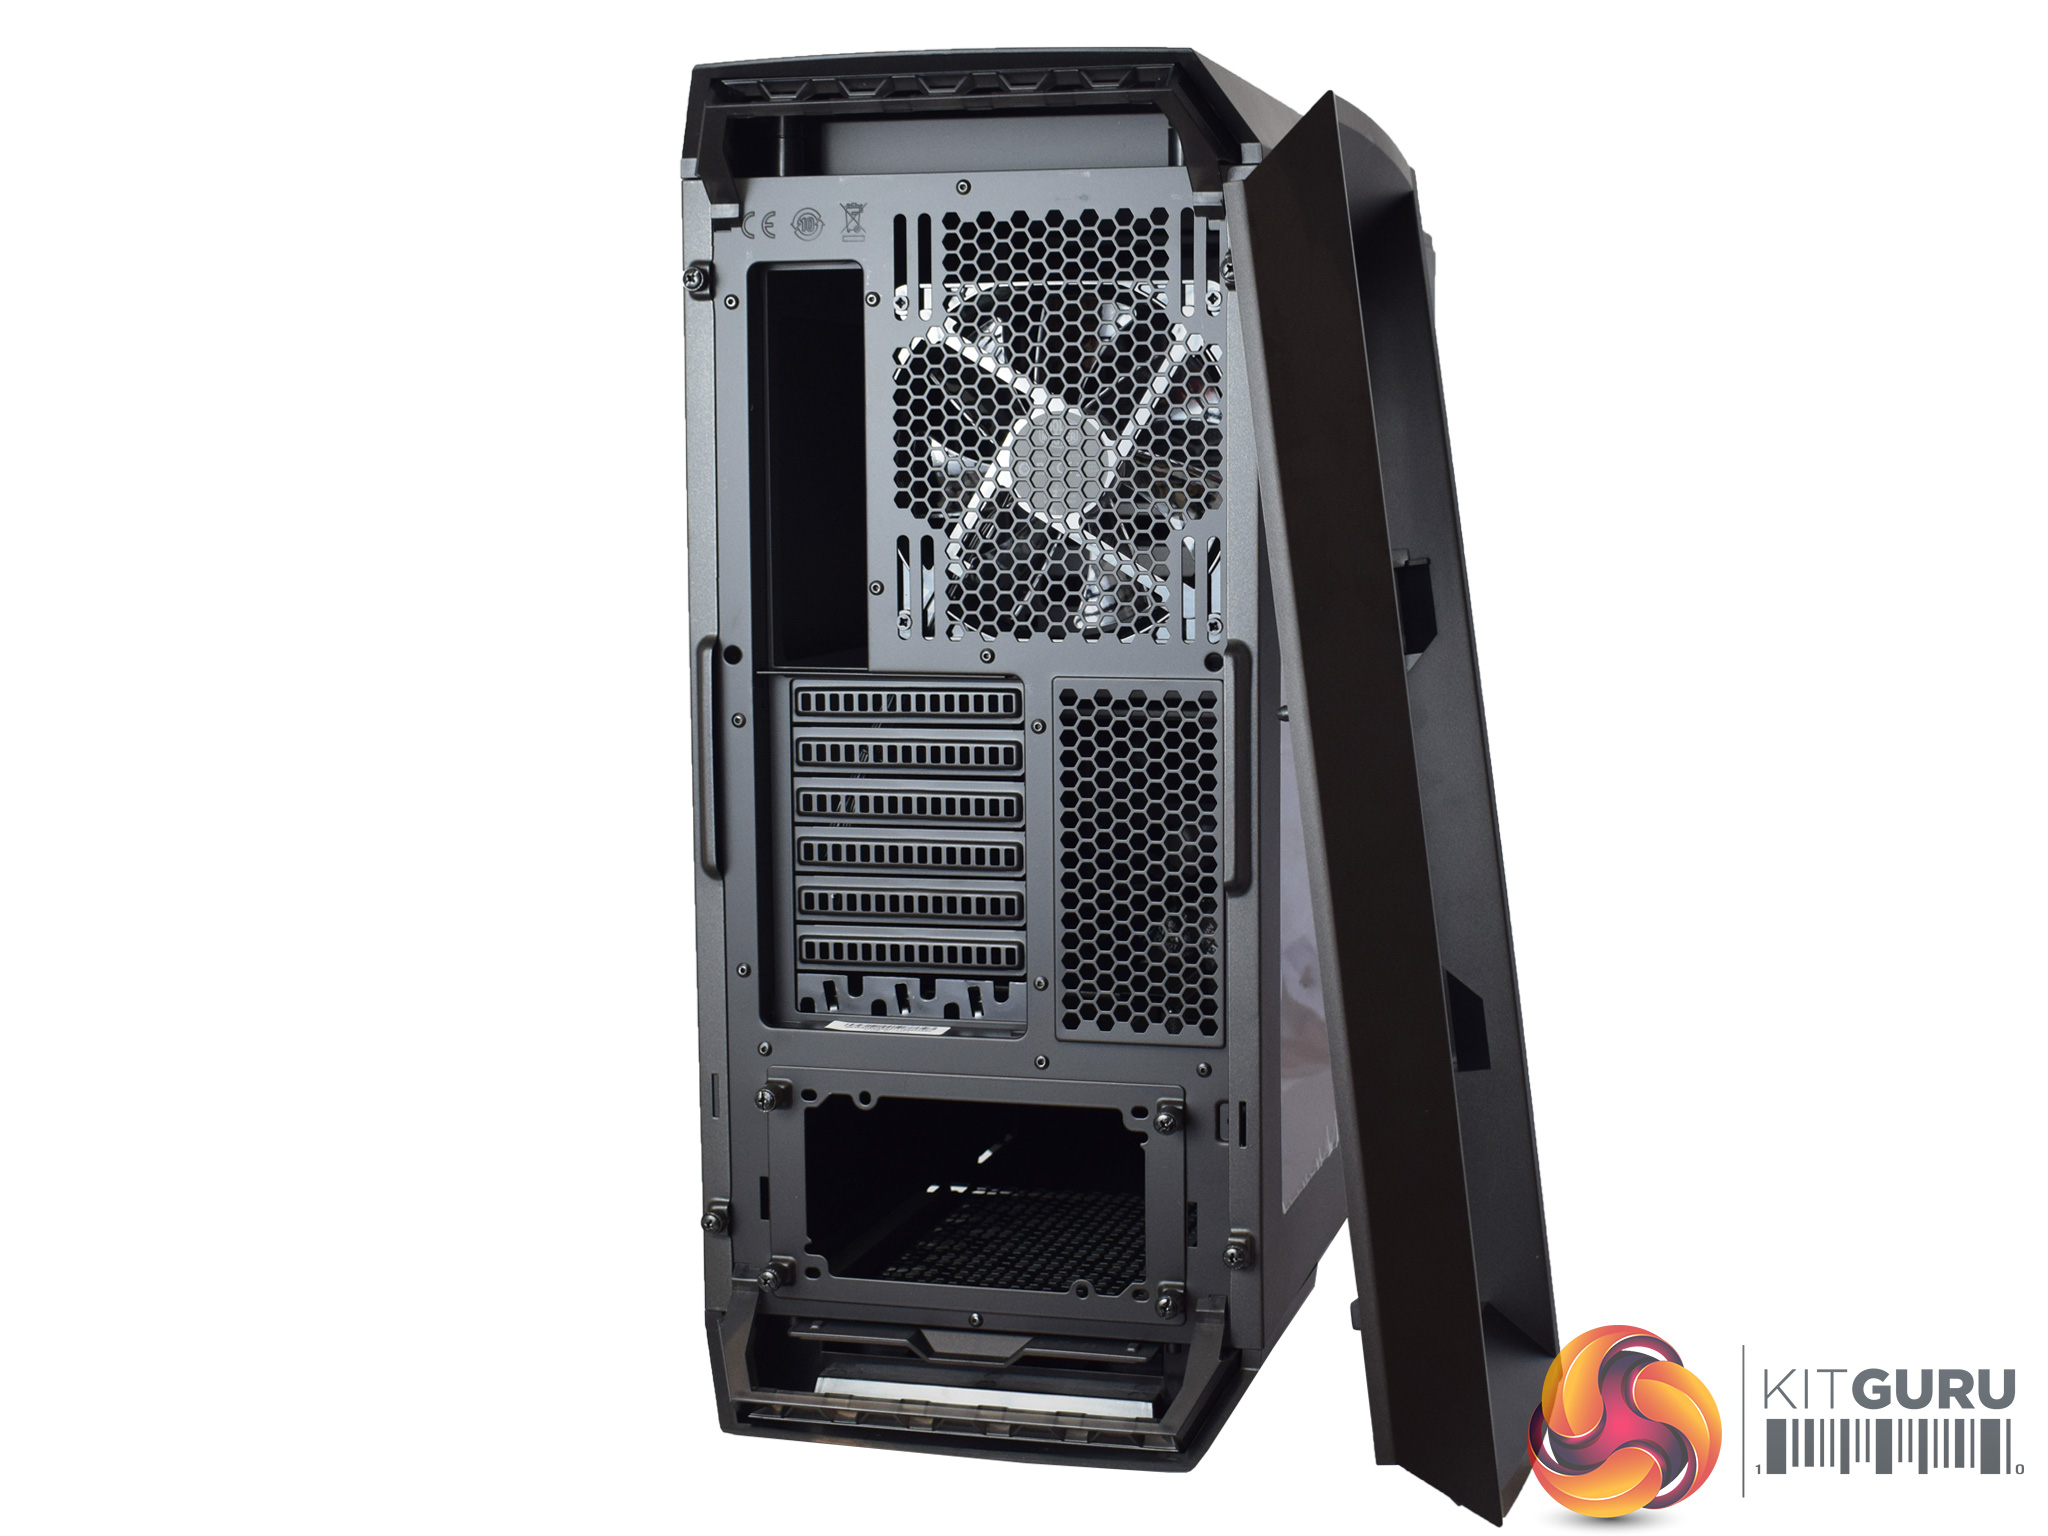
At the rear of the chassis, Cooler Master have done something interesting – they have included a removable panel that clips around the edges of the case. This is designed to help with the cables coming from your PC (such as your peripheral or monitor cables) as any excess cabling can be tucked away in this panel.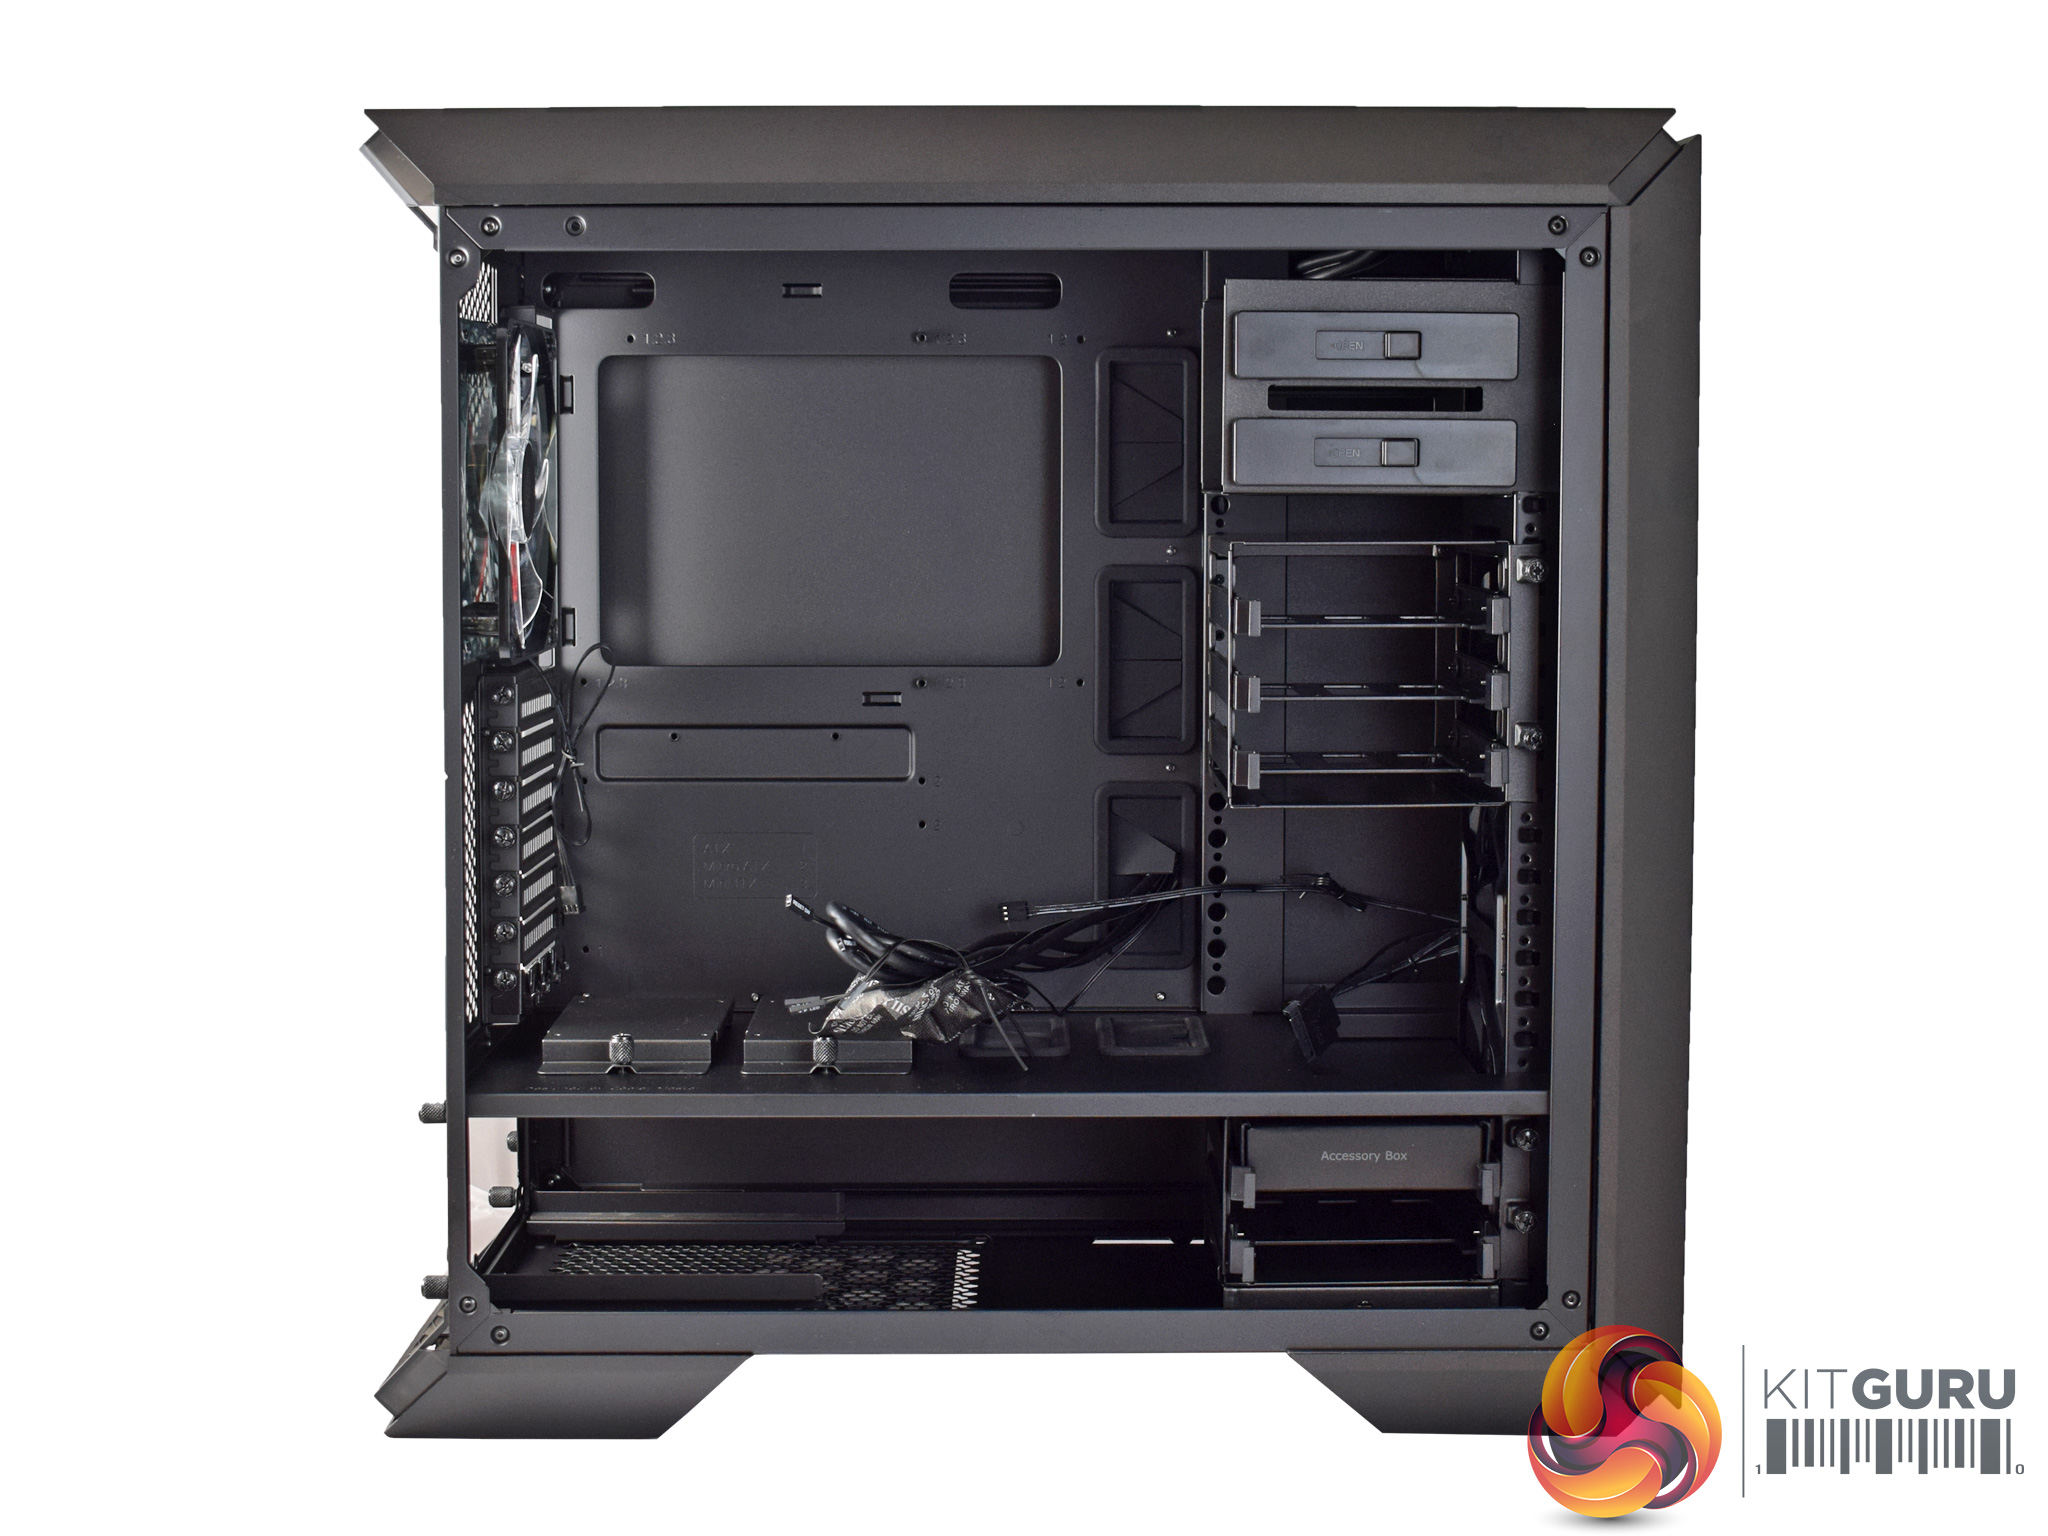
Here we take a look at the interior of the case, noting any features which should make the system installation process easier.
Firstly, though, I would point out that the motherboard standoffs are not pre-installed – I must say I find this a bit surprising considering this is a £140 case. Surely it could not be too hard for Cooler Master to have the standoffs installed before the case is shipped.
There are a good number of cable management grommets, though, which should to keep your system clean.
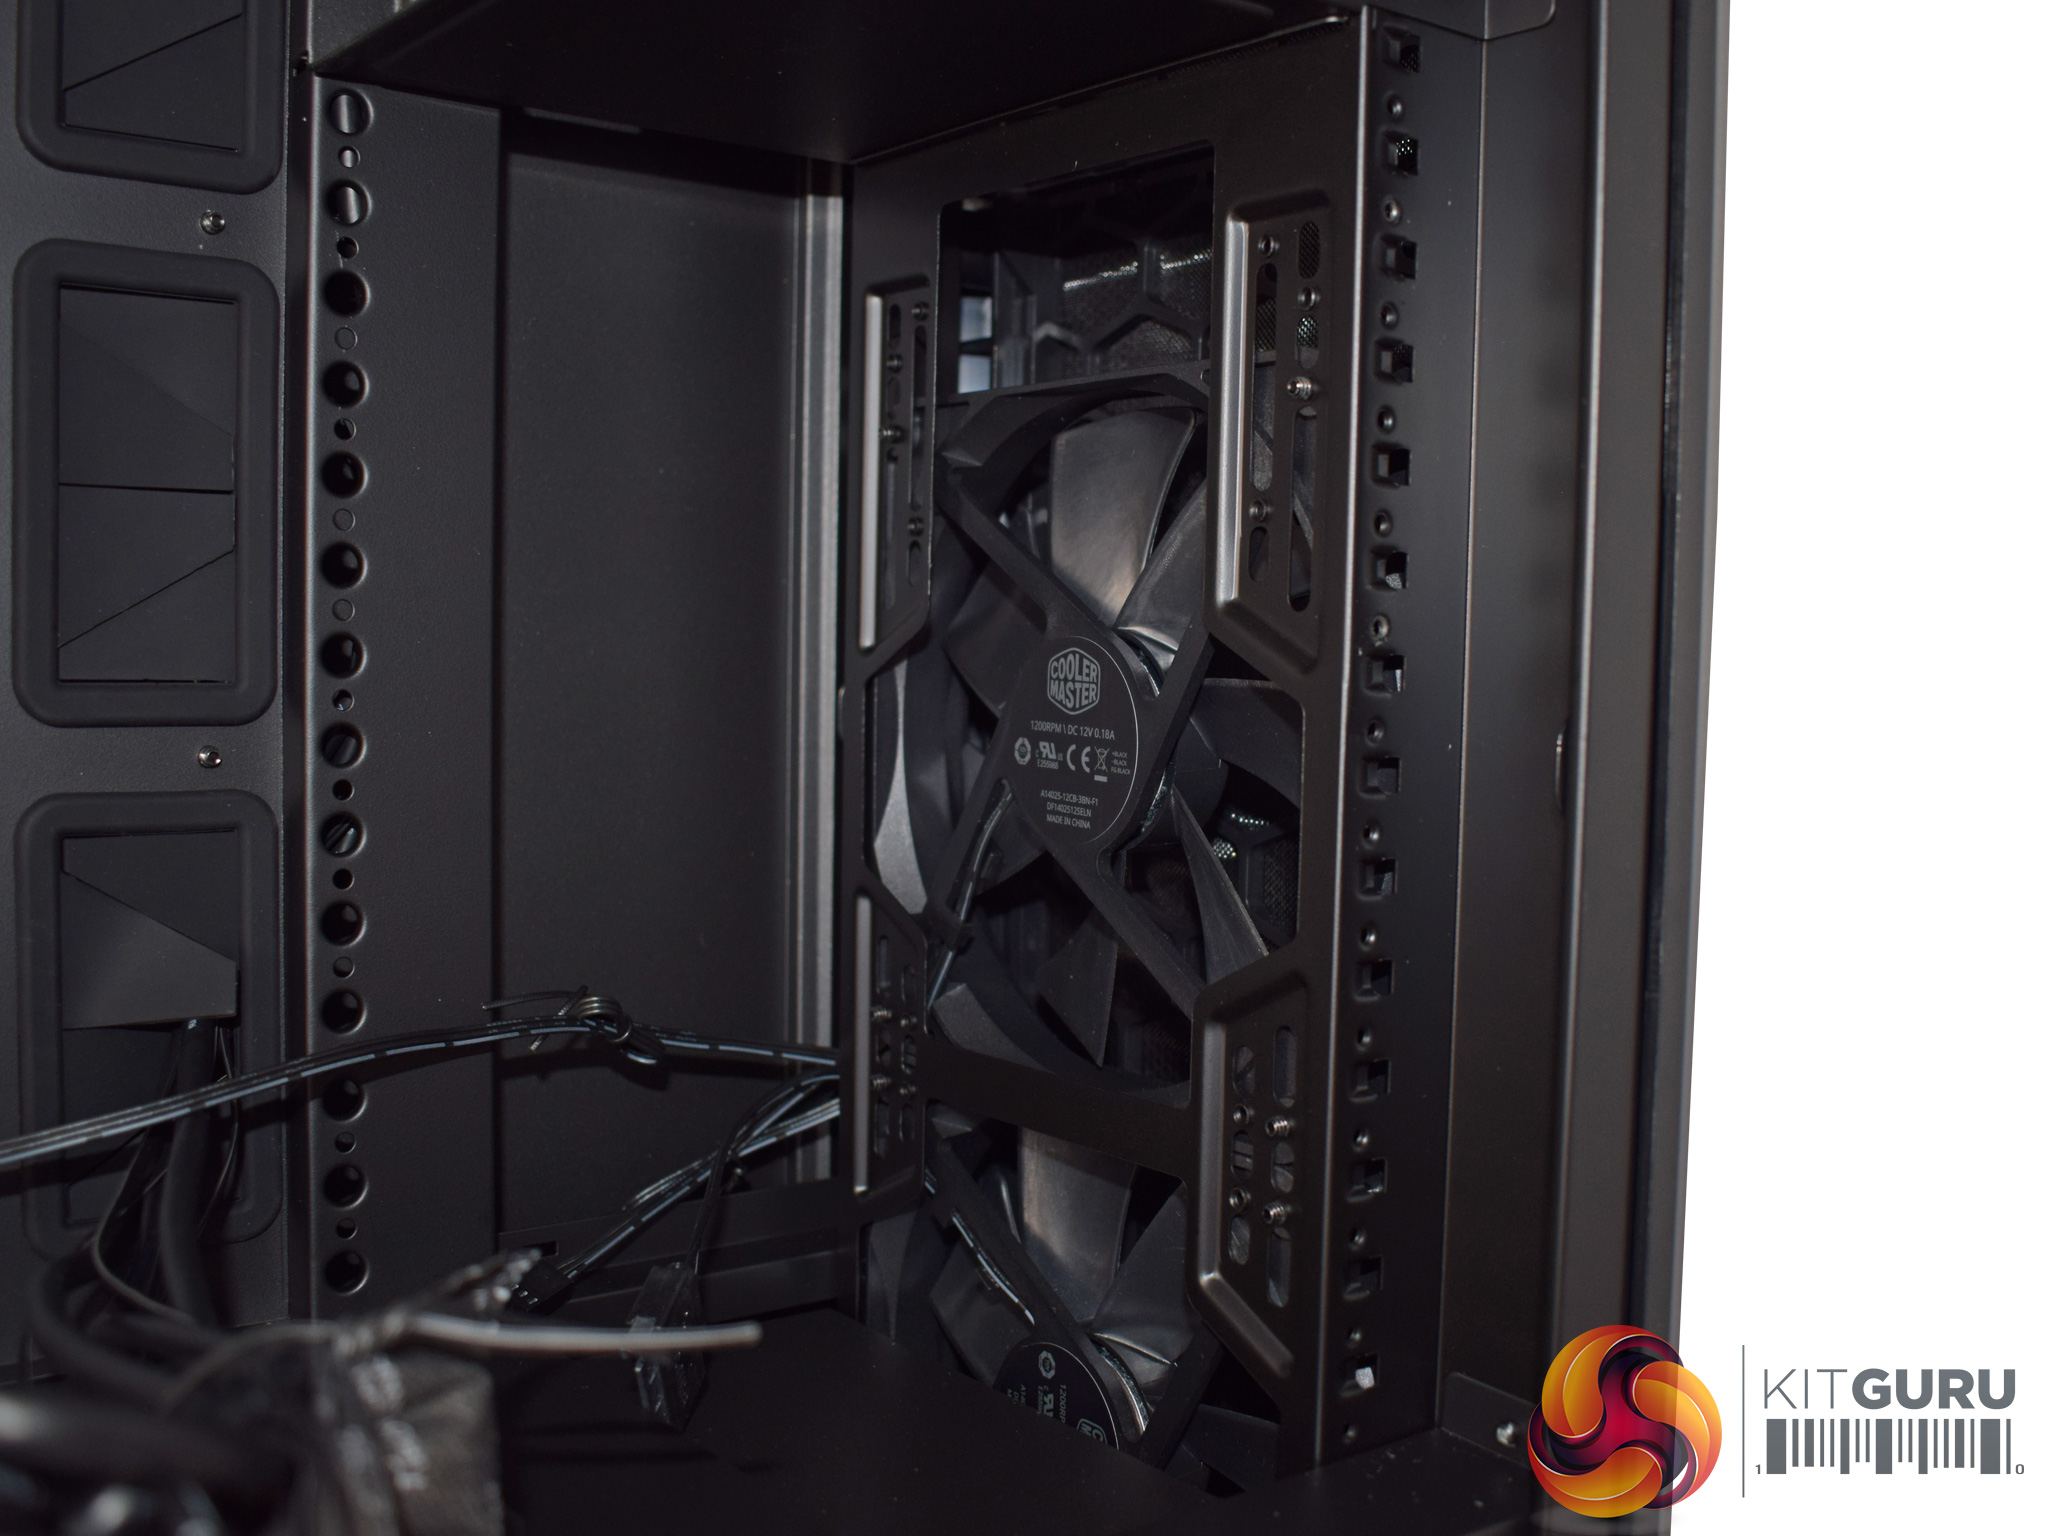
At the front of the case, two 120mm fans come pre-installed. The roof is left empty, though it can support 2x 120/140mm fans. At the rear, too, is an LED fan.
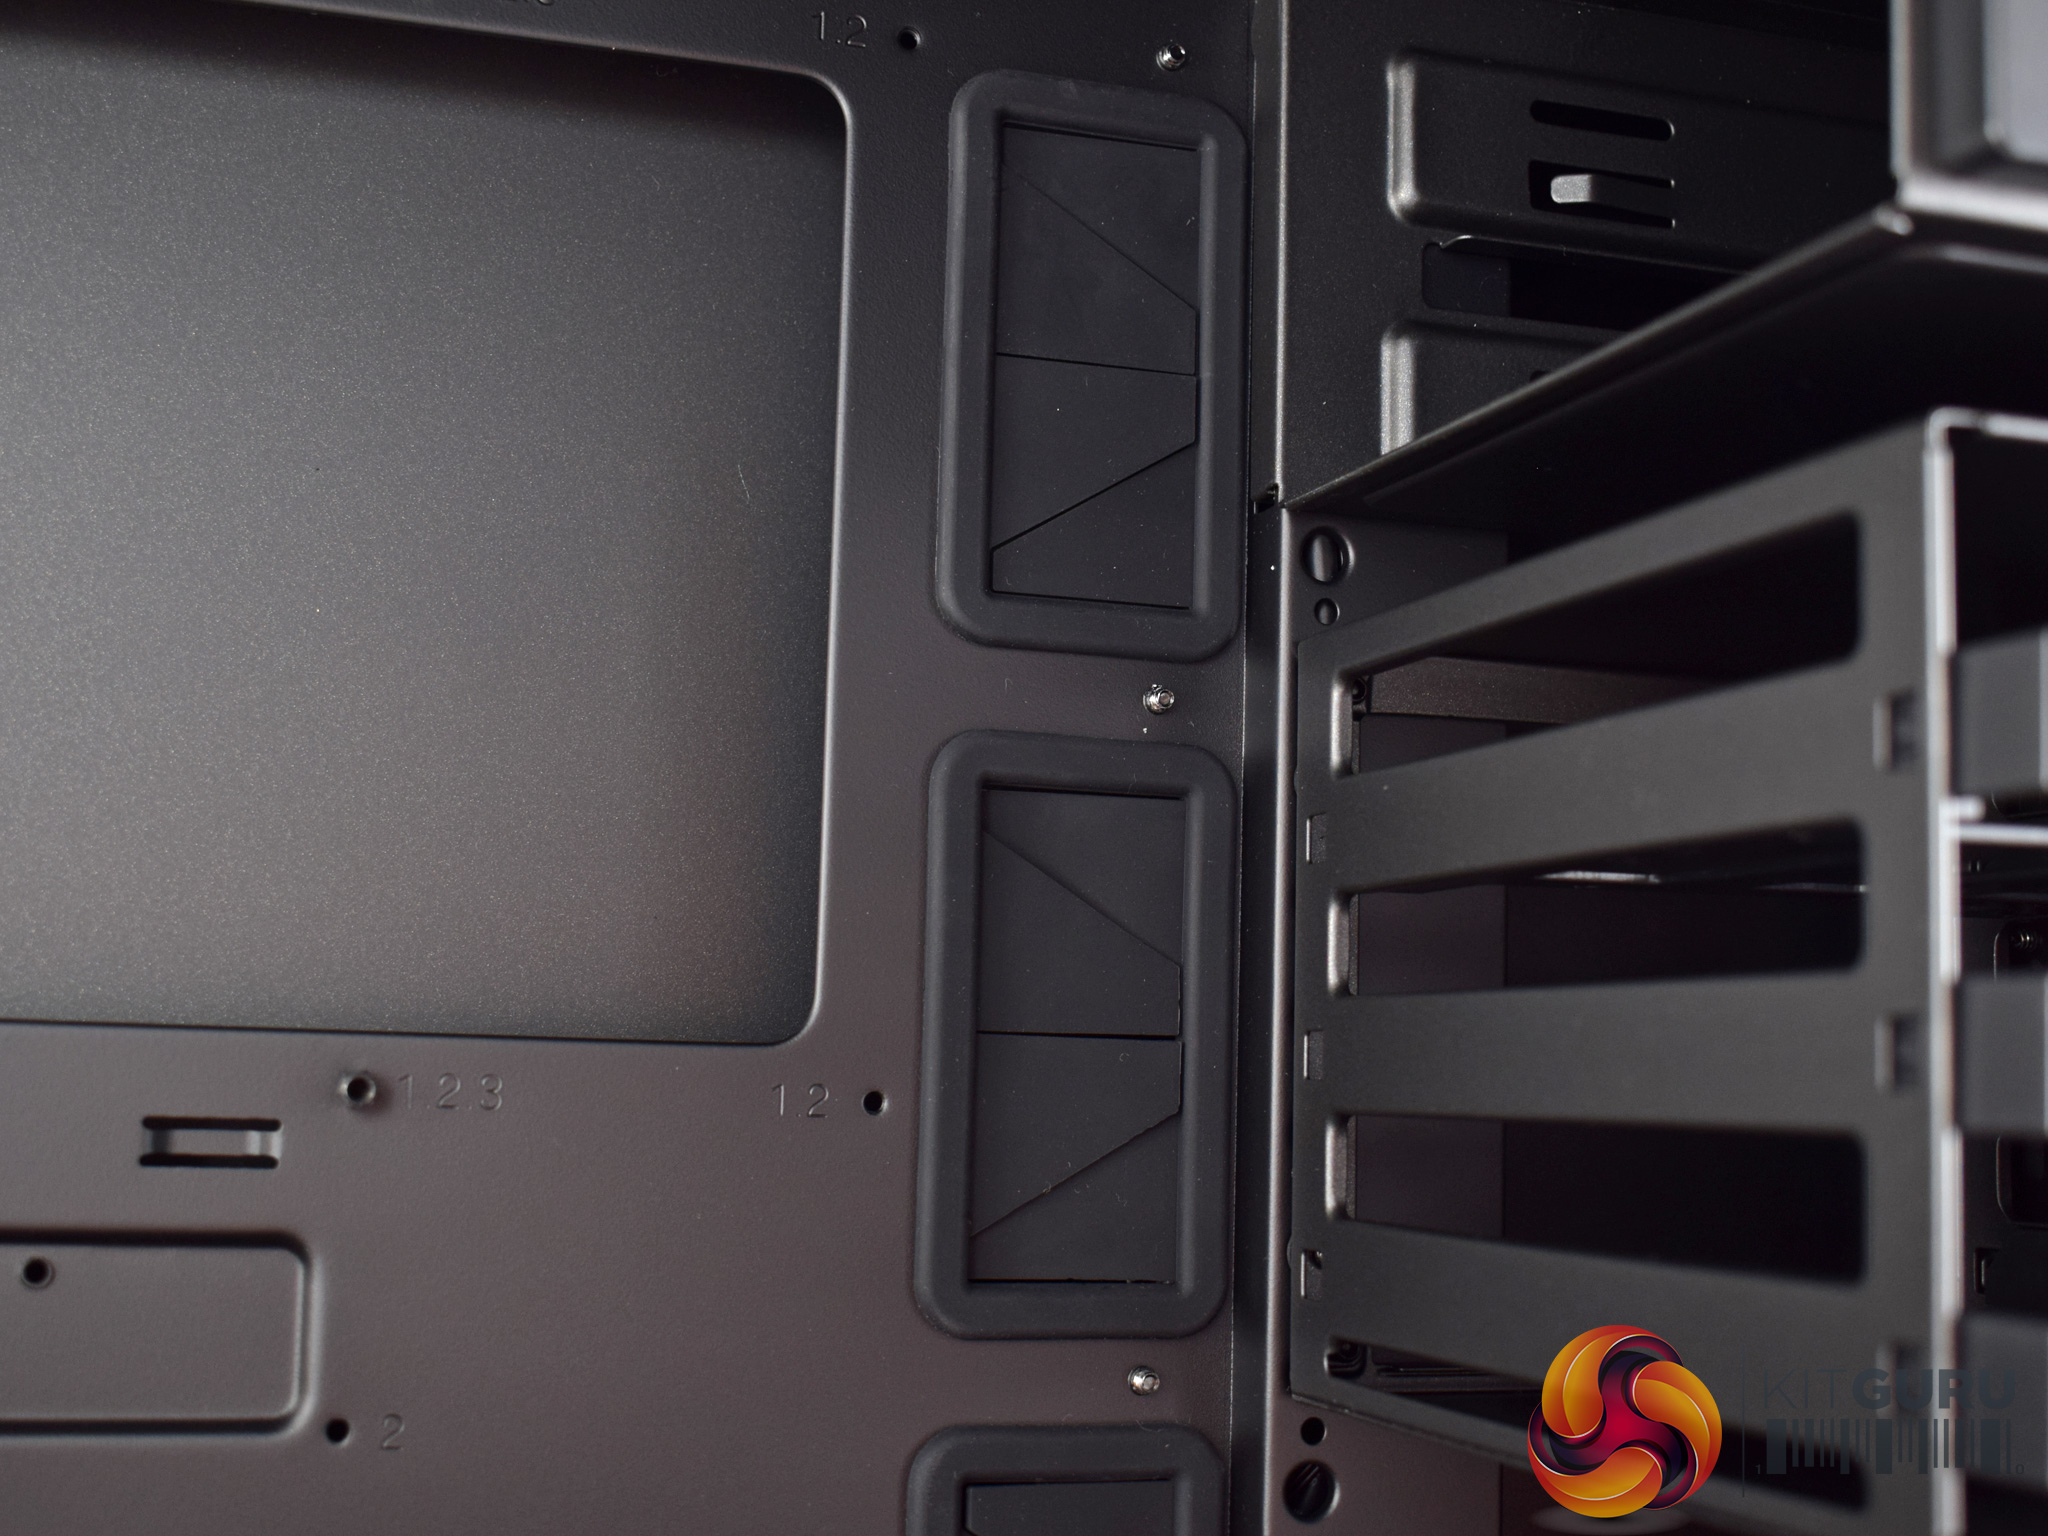
The MasterCase Pro 6 is interesting in that it still supports 2x 5.25″ drive bays – something many manufacturers have now moved on from. As the MasterCase Pro 6 uses the FreeForm modular system, though, these bays can be removed if you wish.
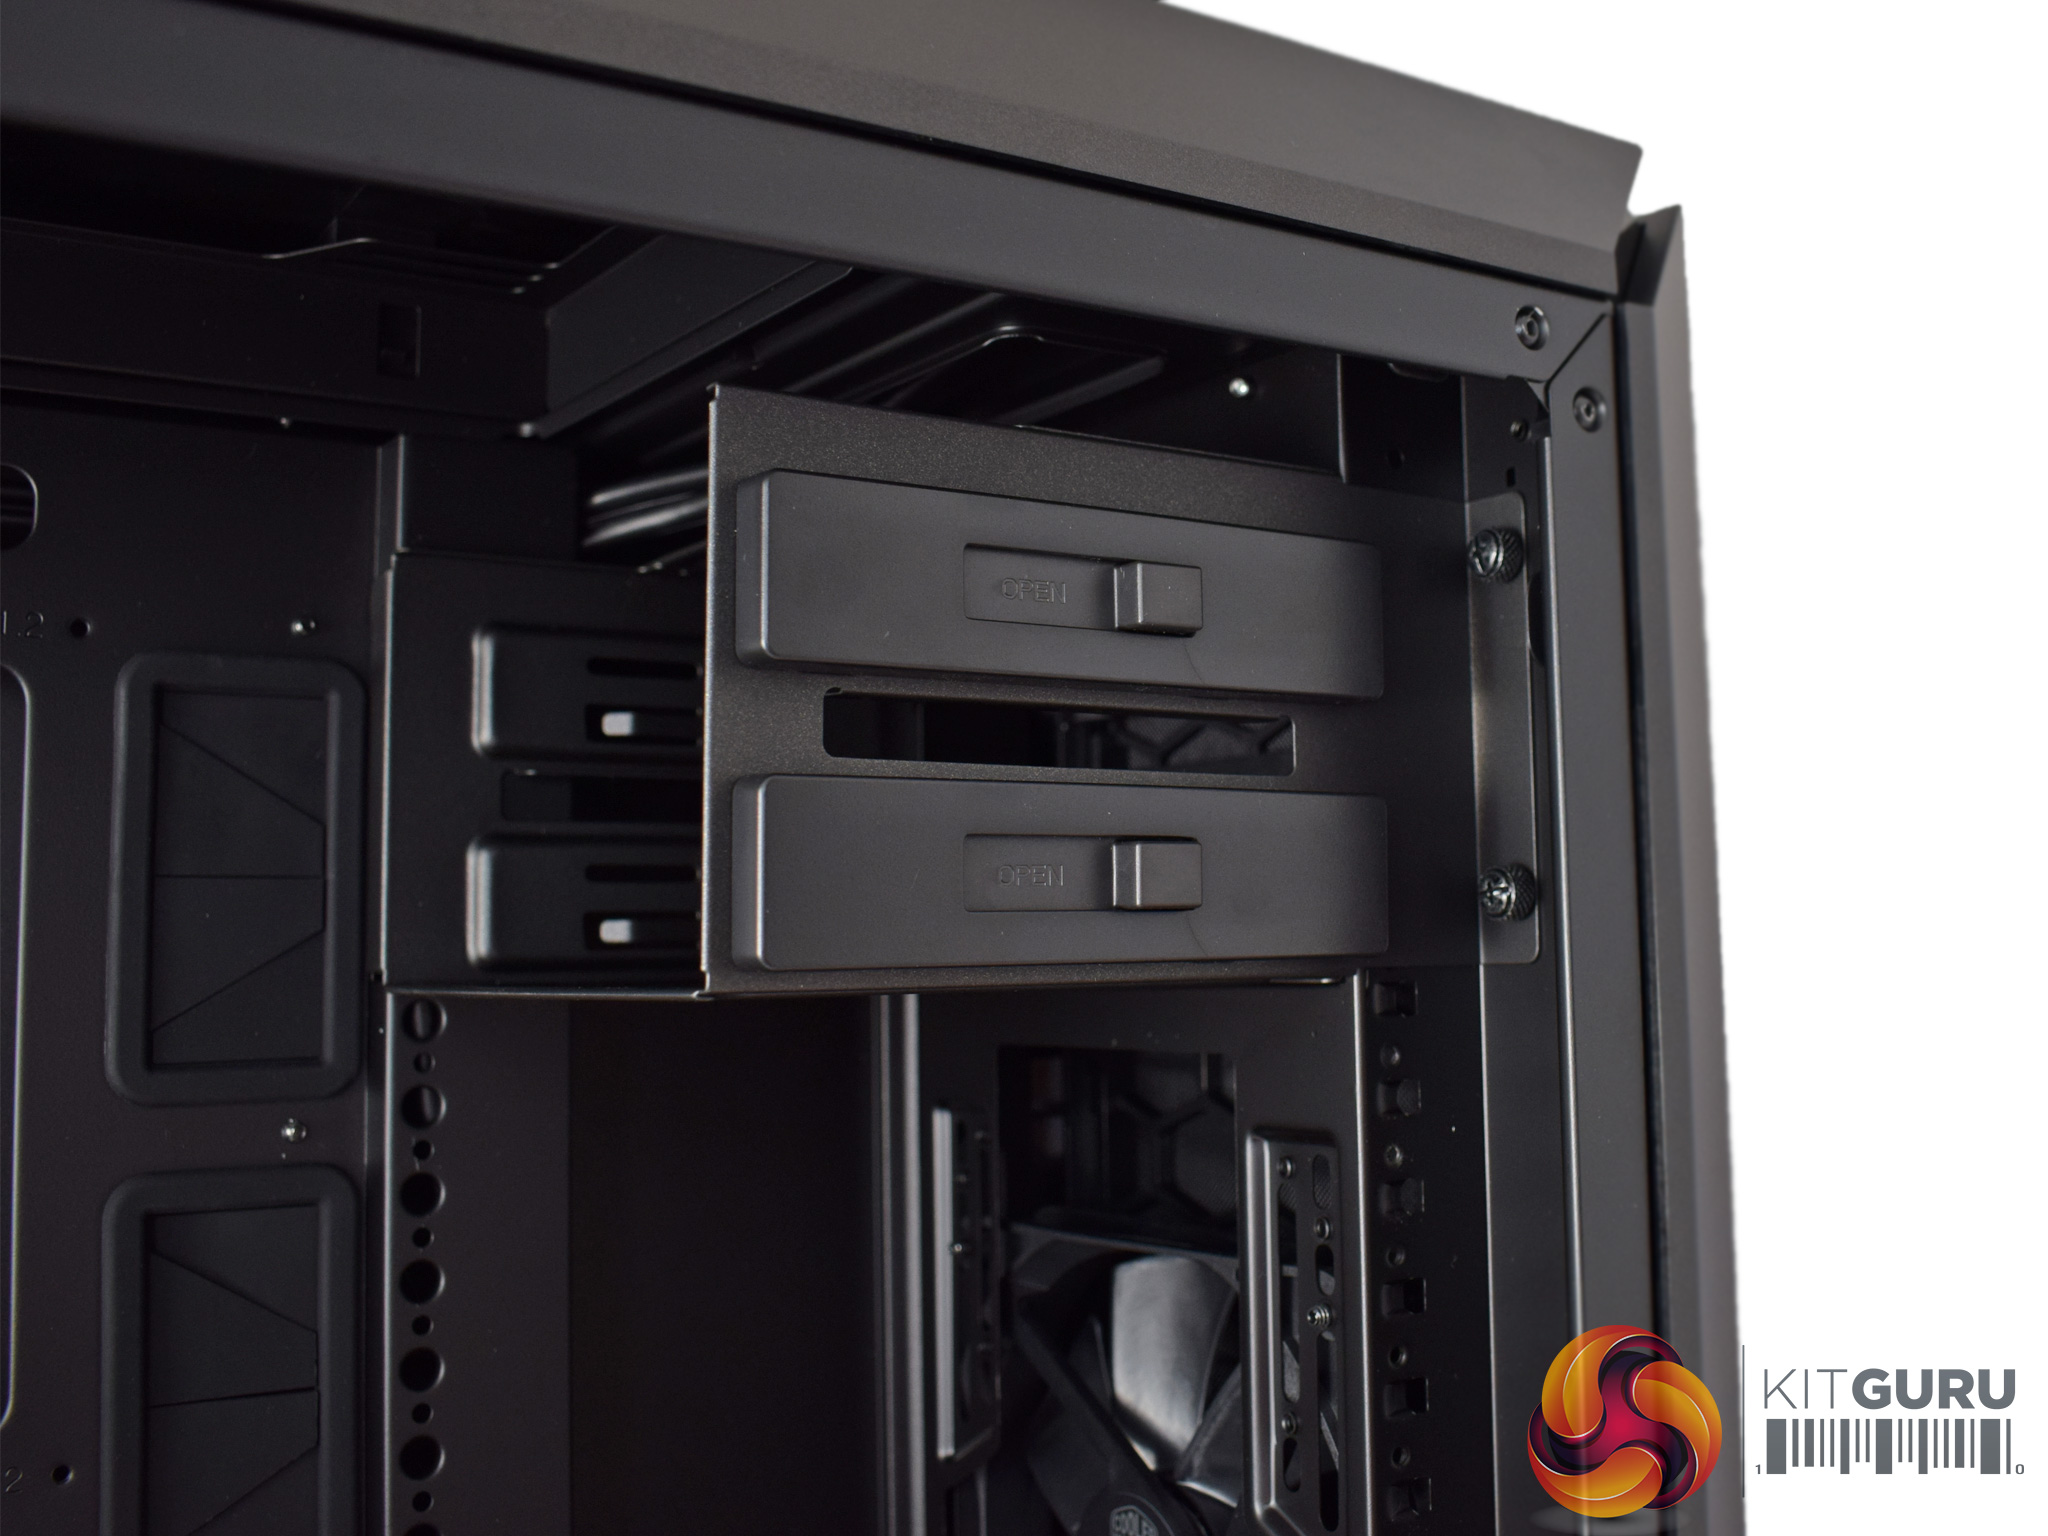
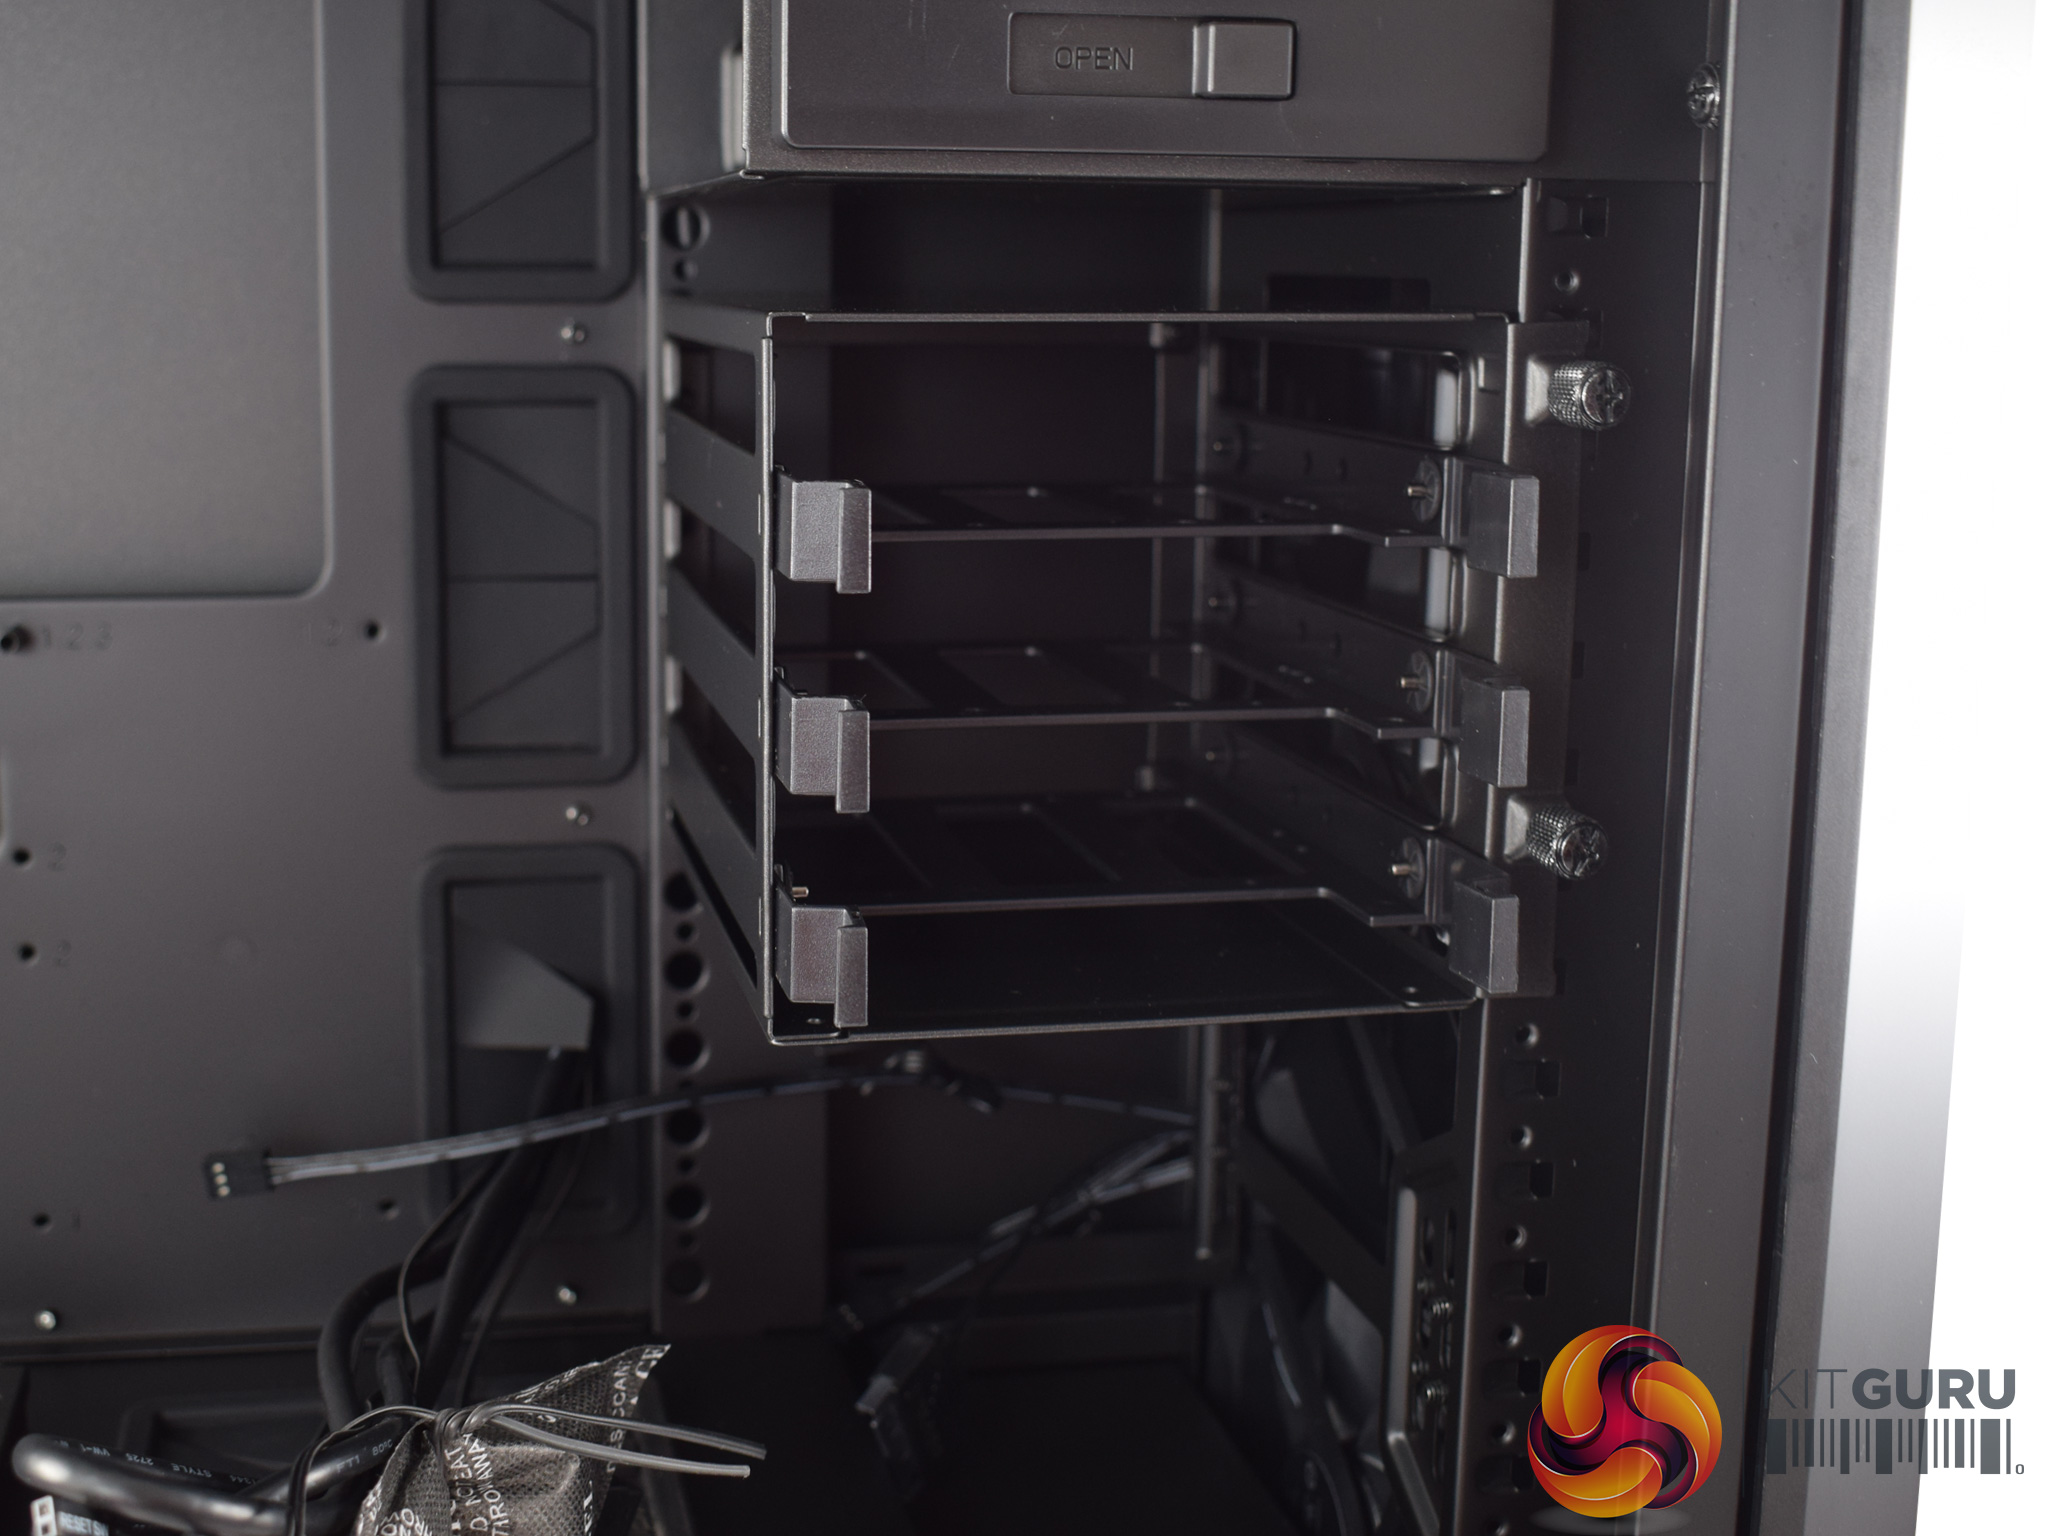
Underneath the 5.25″ bays we find 3x 3.5/2.5″ drive caddies – also fully removable. You can even re-position these bays if you want to move them down a bit – there is a lot of control over the bay positioning as it can slot into a row of holes that run parallel to the rubber grommets.
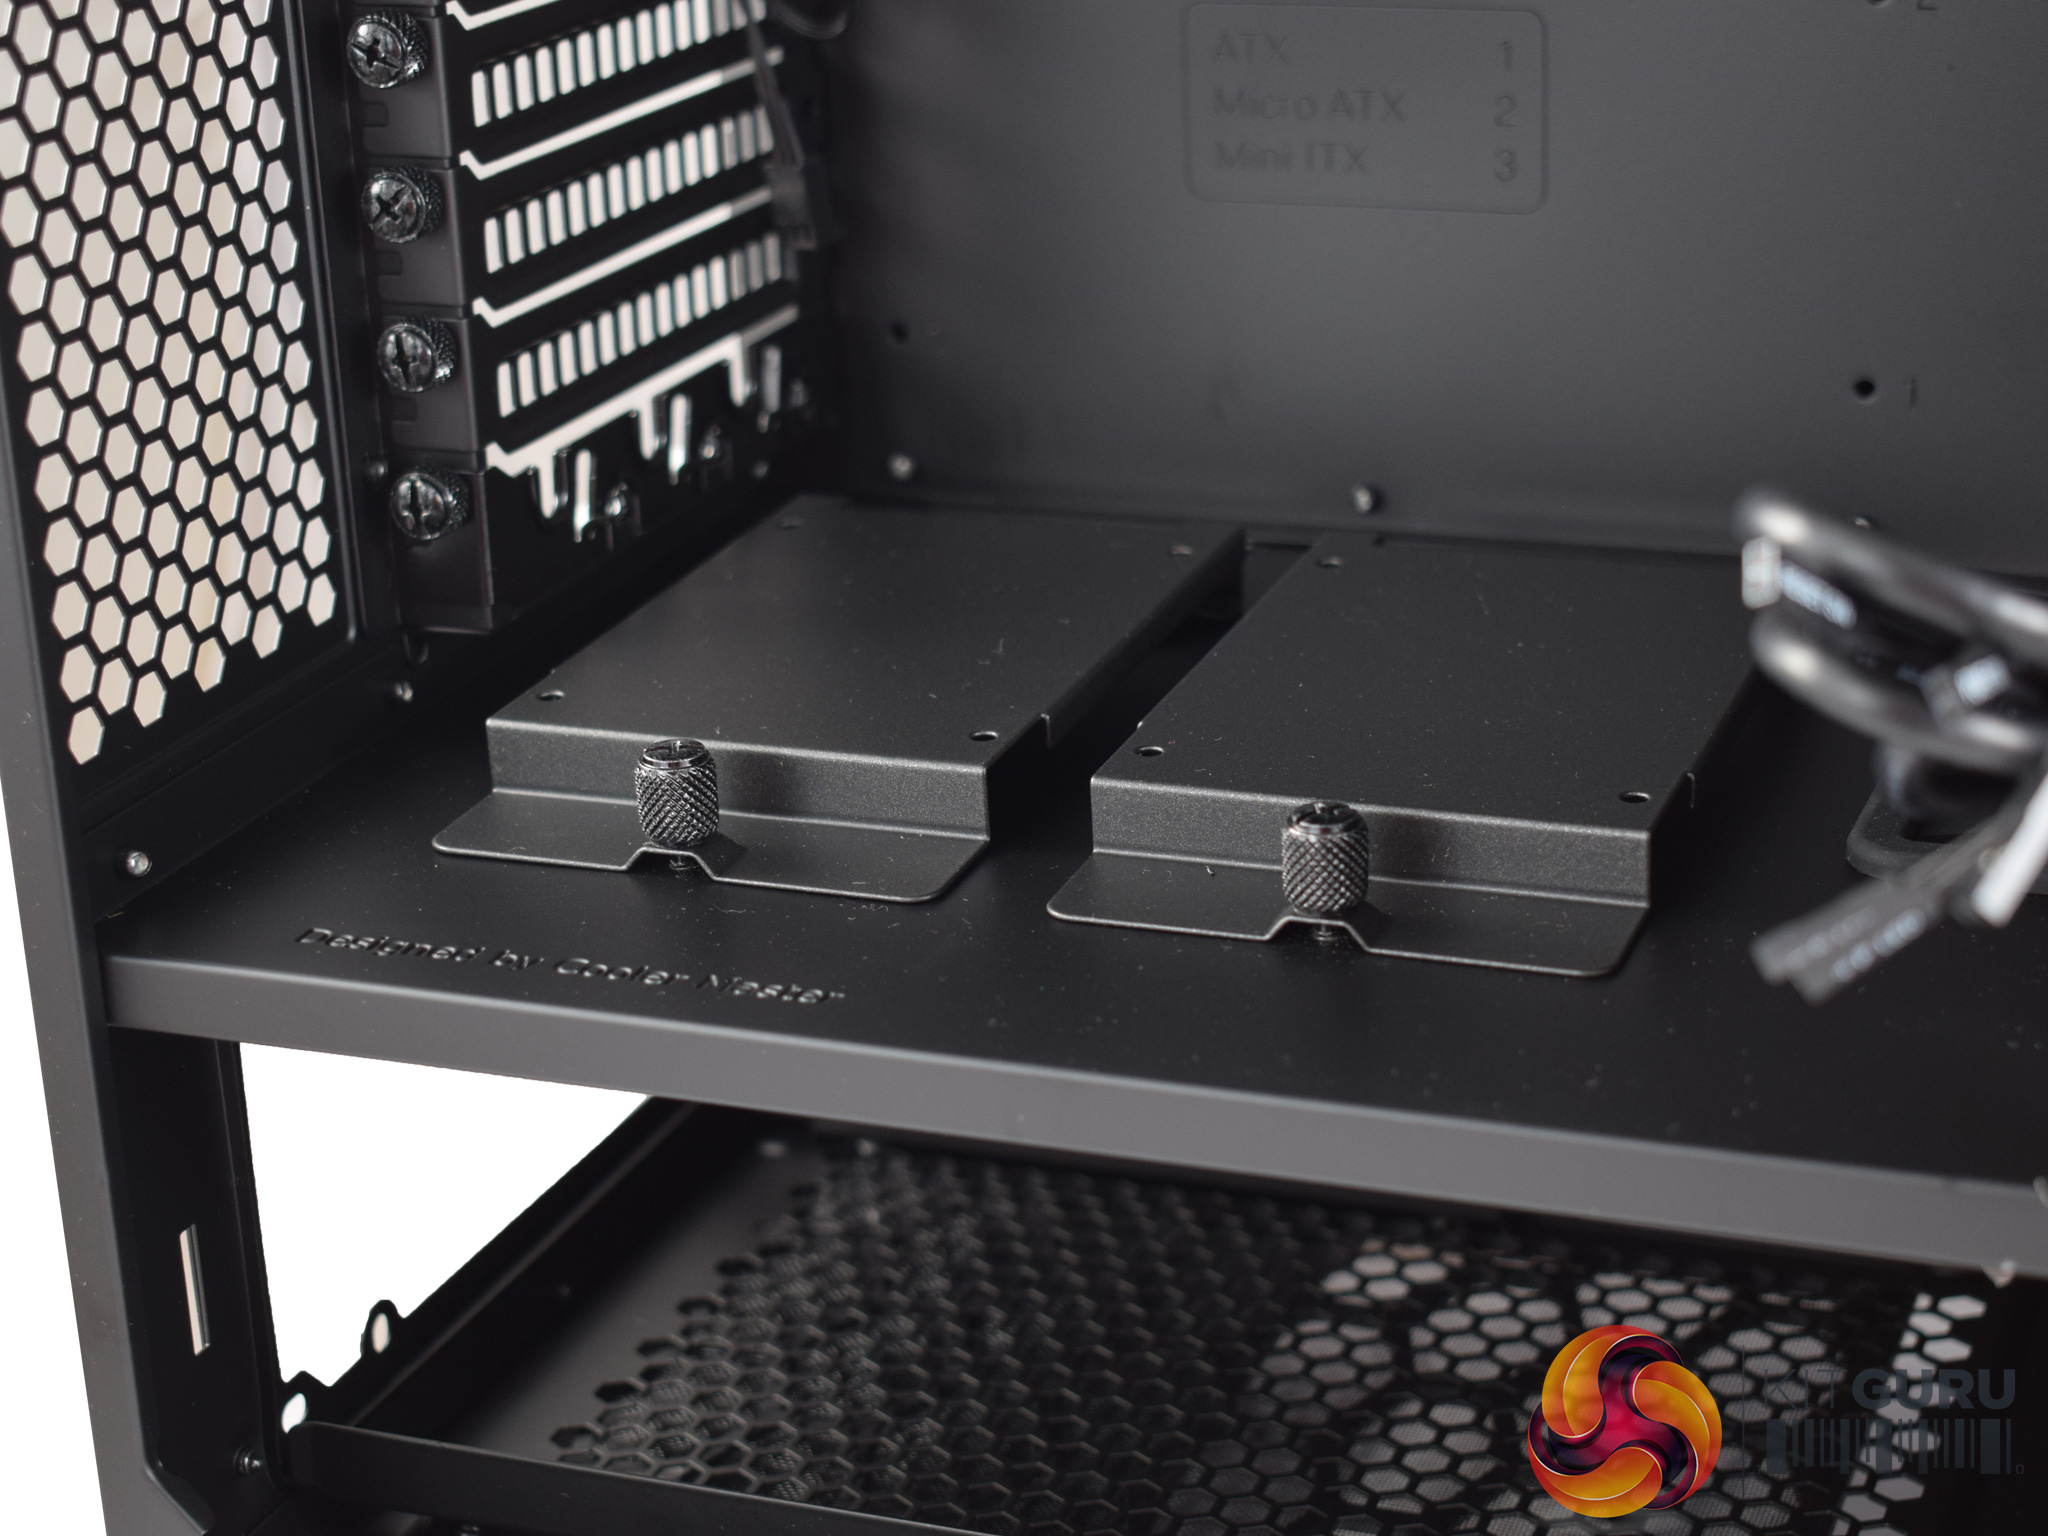
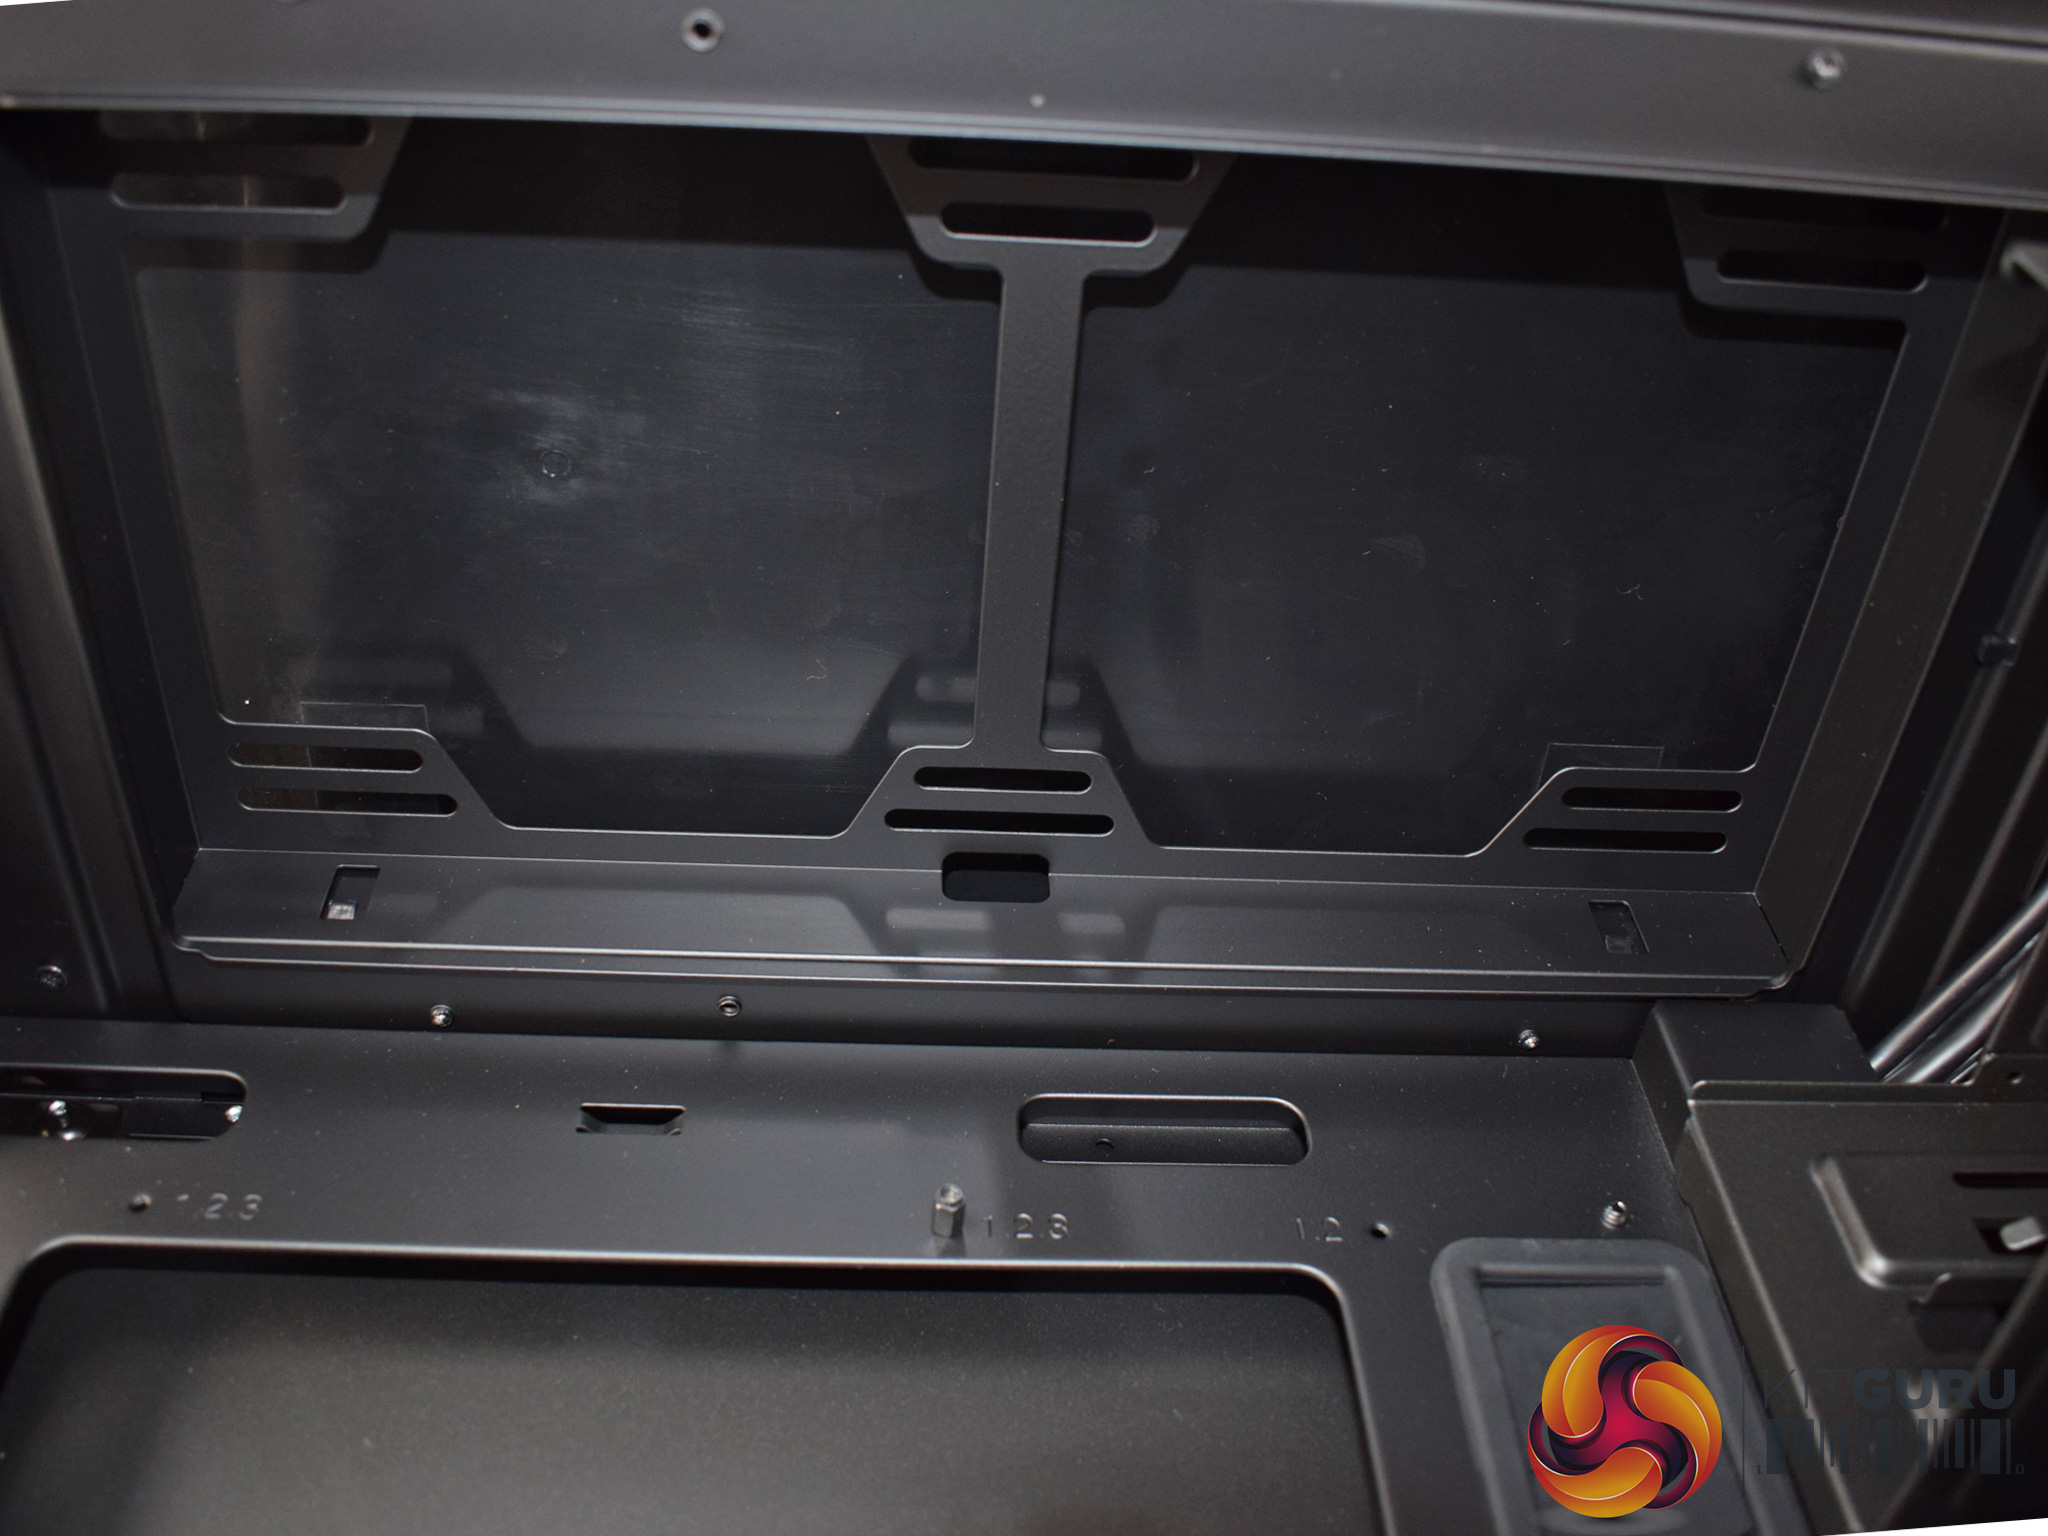
Sitting atop the PSU shroud are 2x dedicated SSD mounts, each held in place with a single thumbscrew.
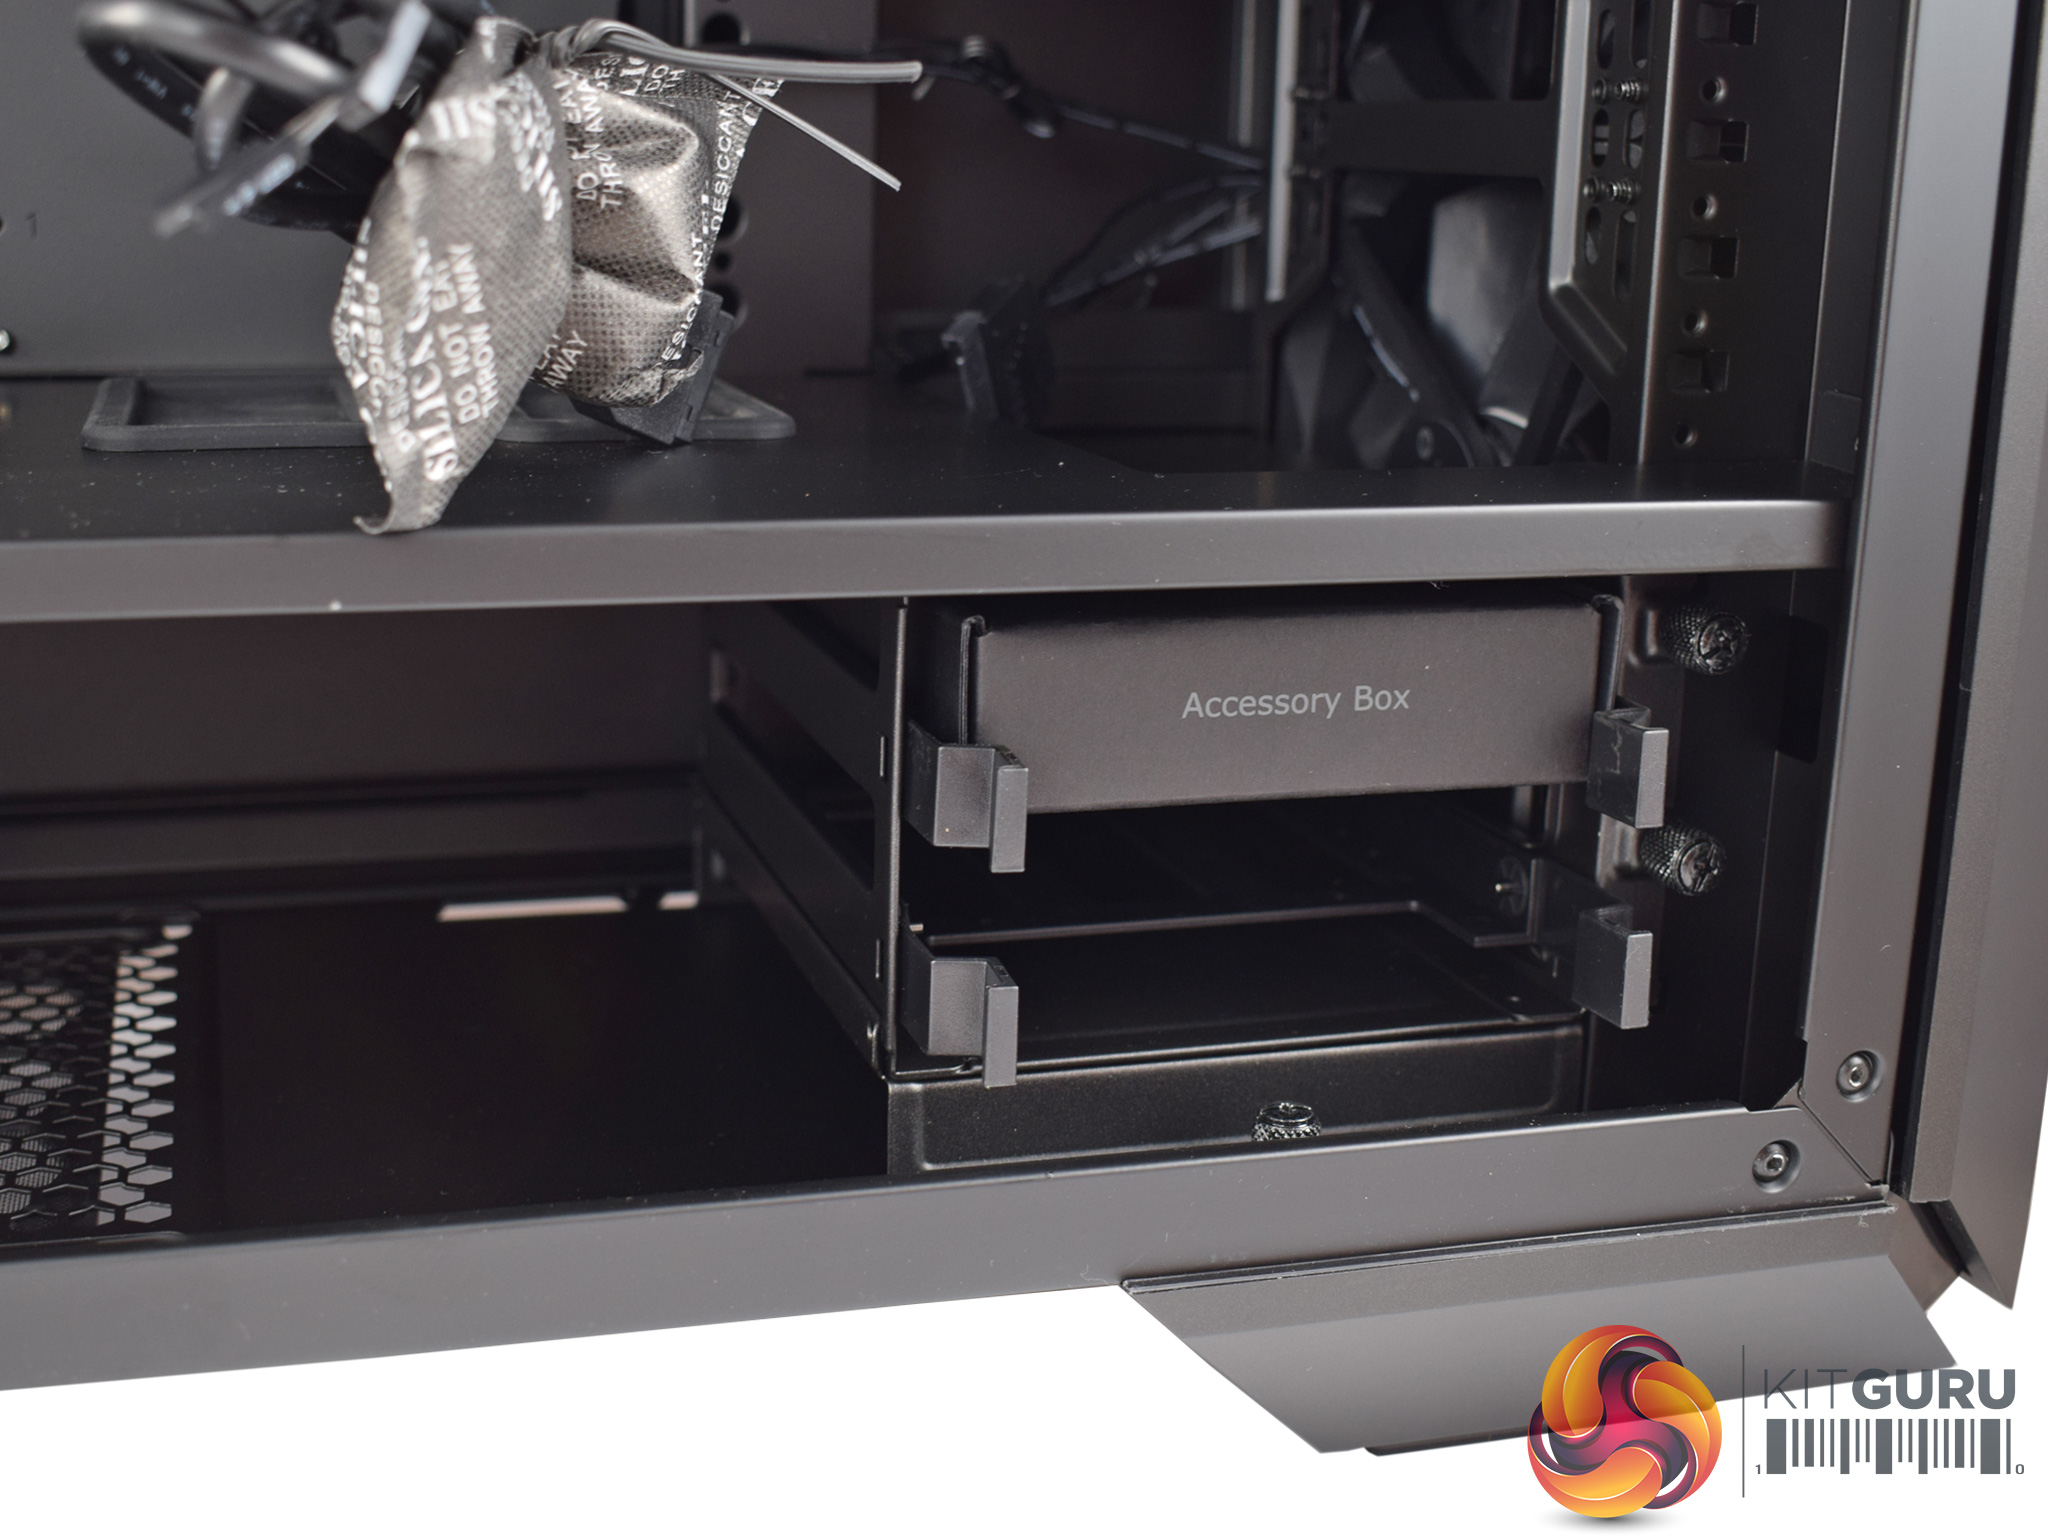
Tucked underneath the shroud, we find another 2x 3.5/2.5″ drive caddies – also removable.
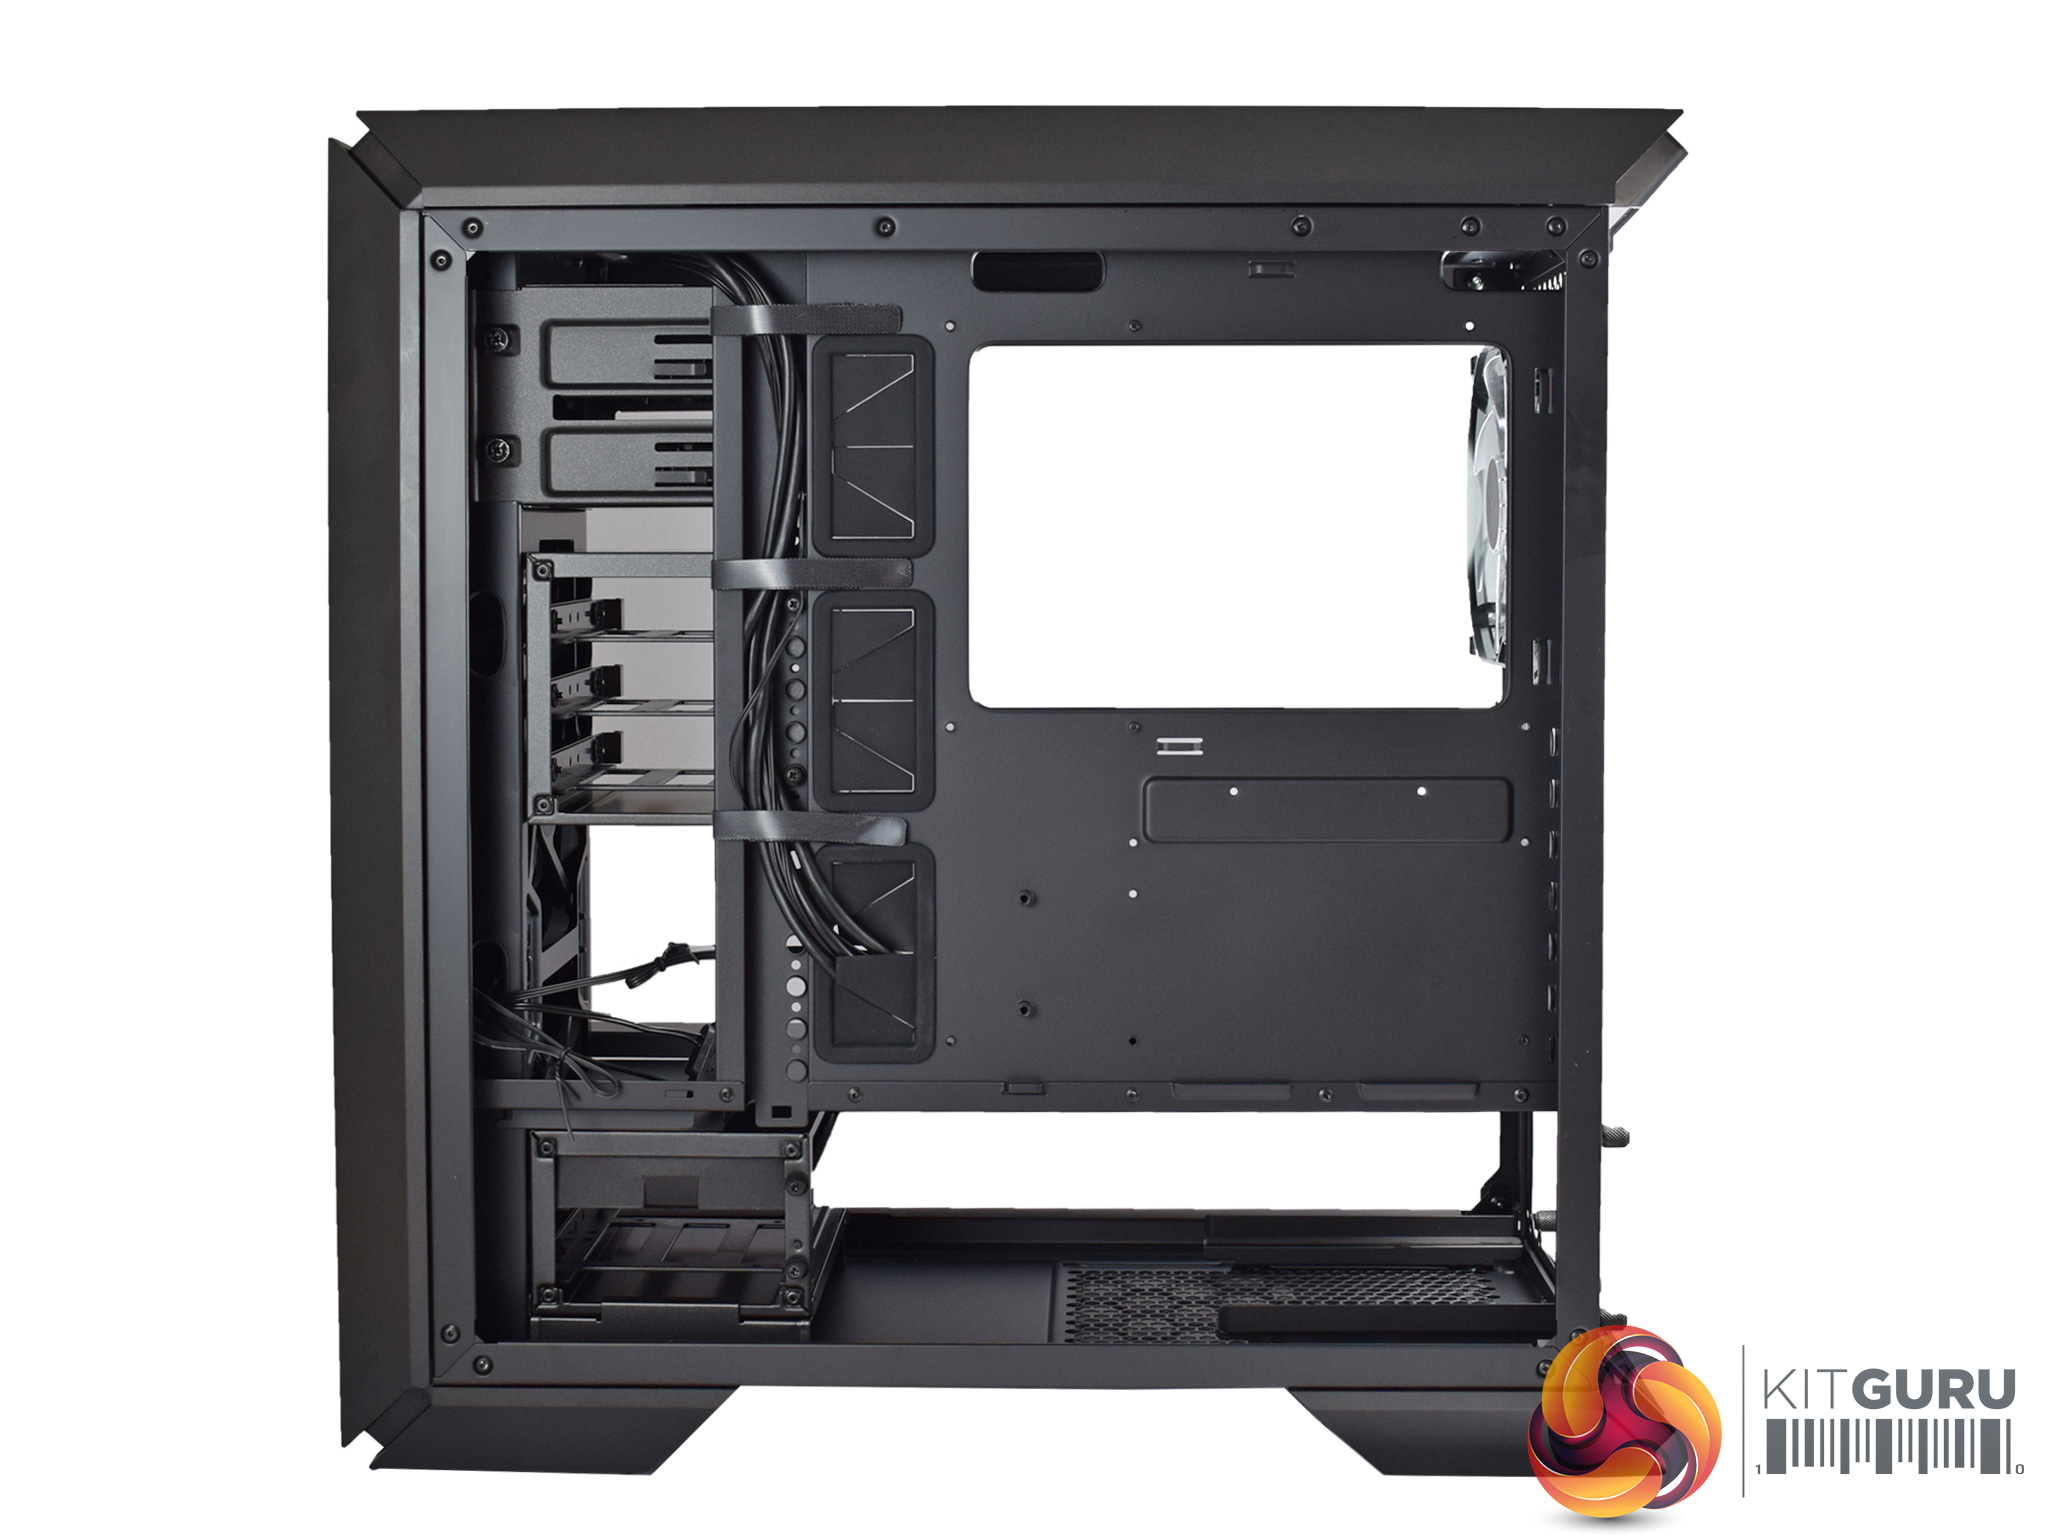
Moving behind the motherboard tray, it is worth noting that the front panel connectors come pre-routed. There are also some Velcro cable-ties to help with cable management.
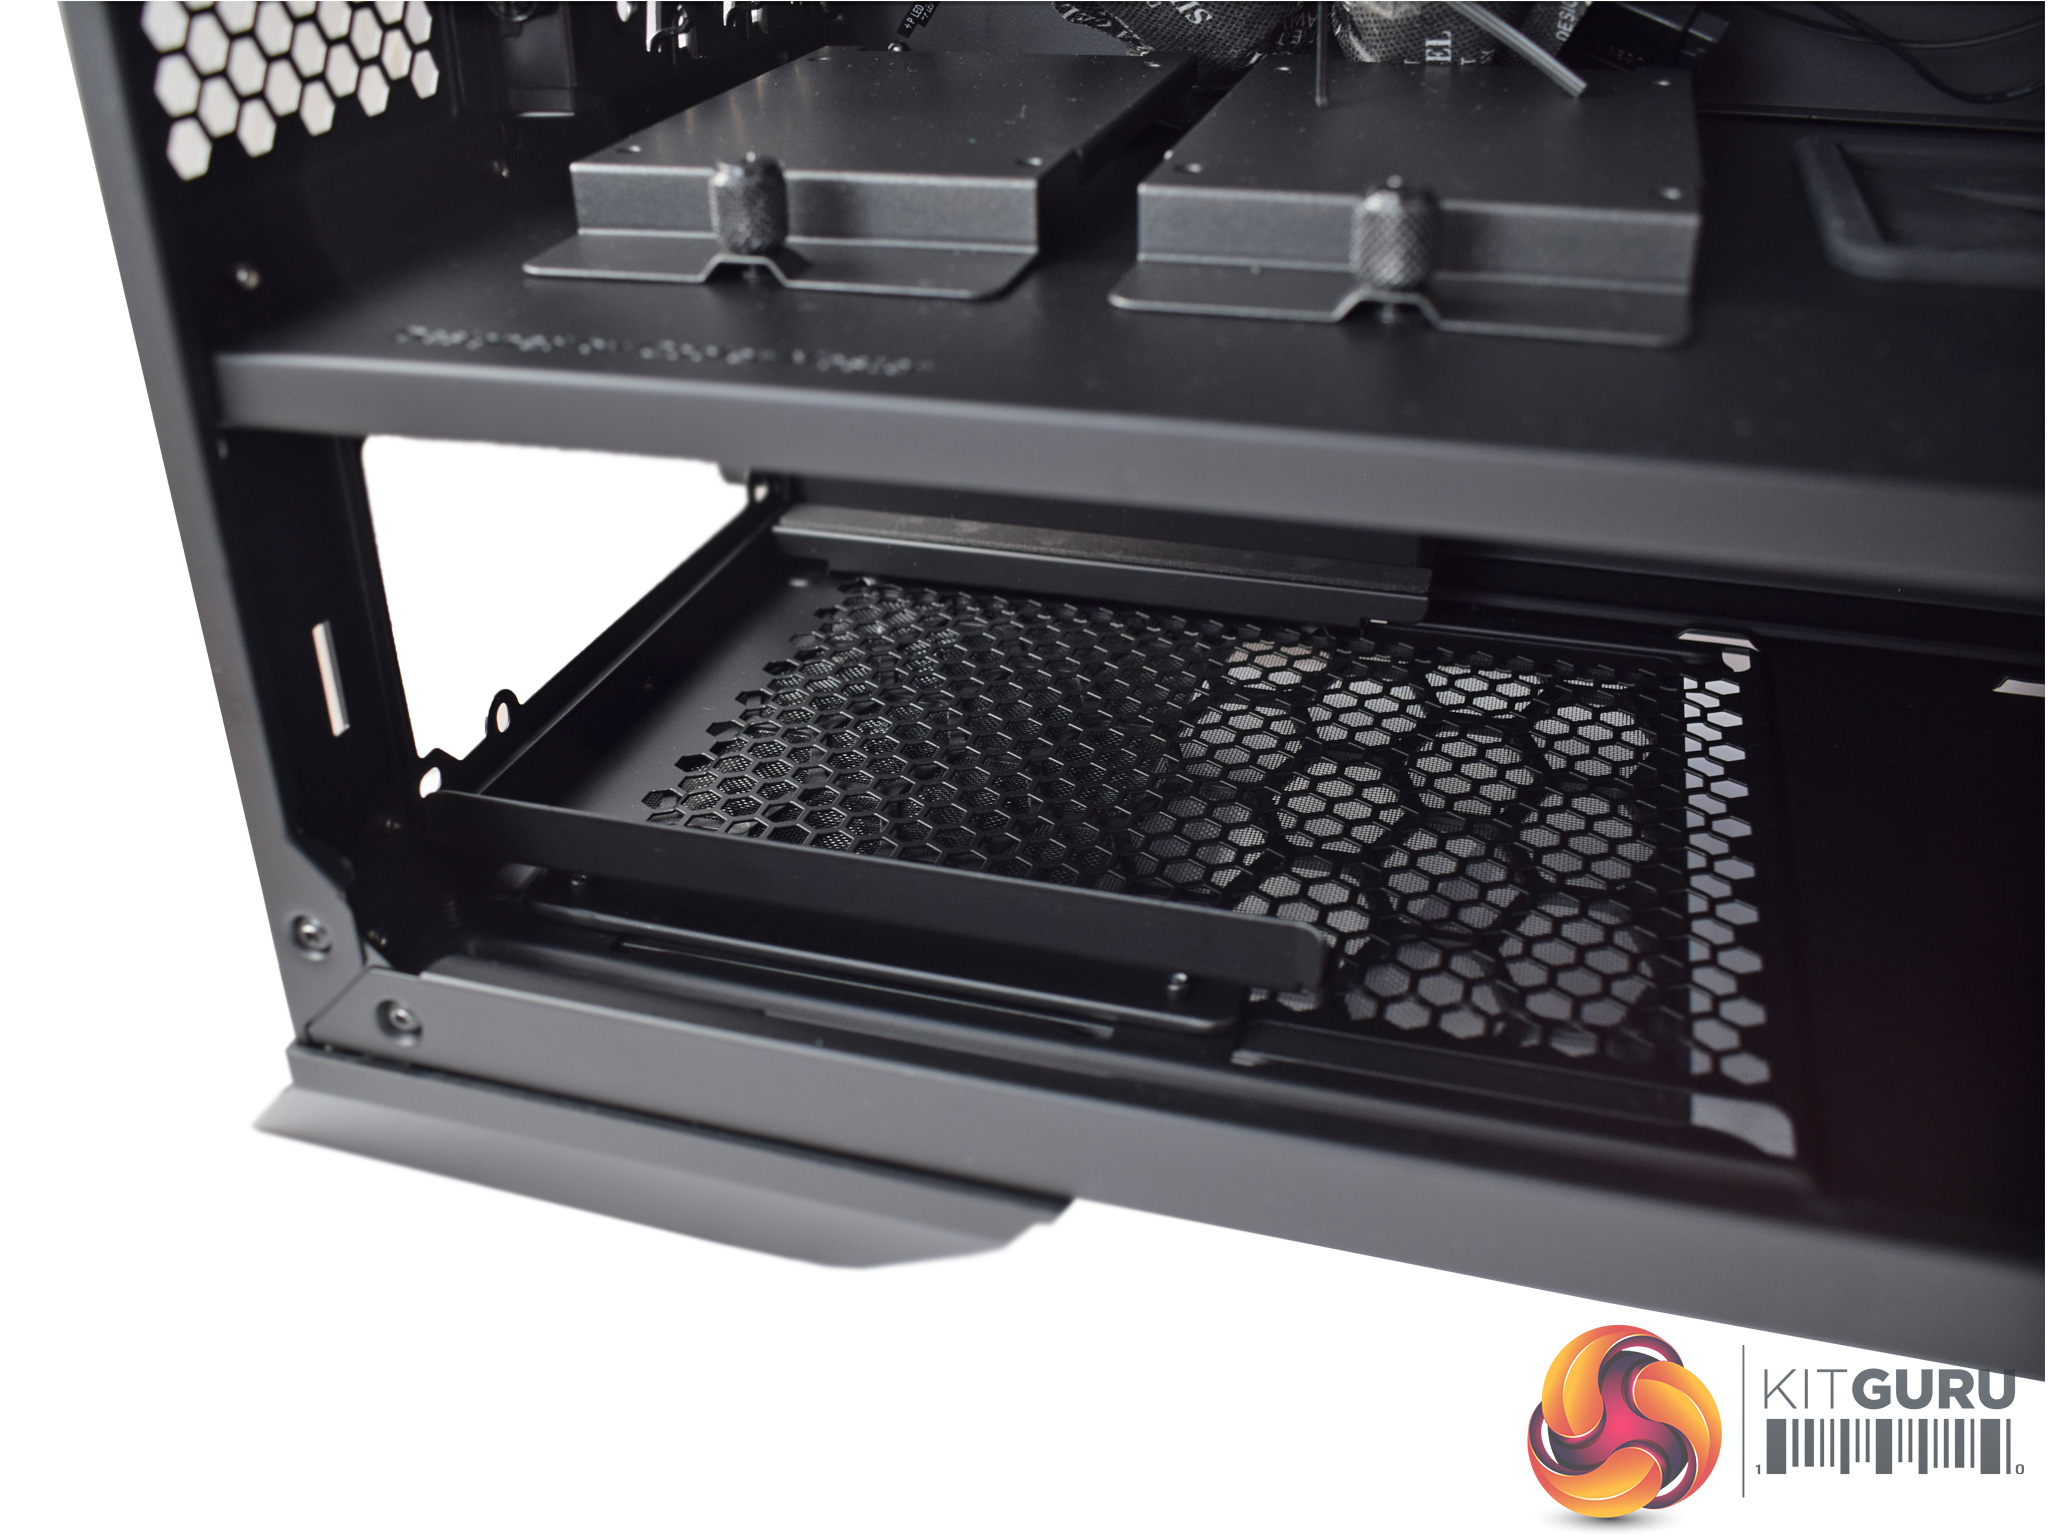
Lastly, there is also a large removable PSU dust-filter that simply slides out.Here we present some pictures of our fully-built system, as well as a discussion of the pros and cons of building in the MasterCase Pro 6.
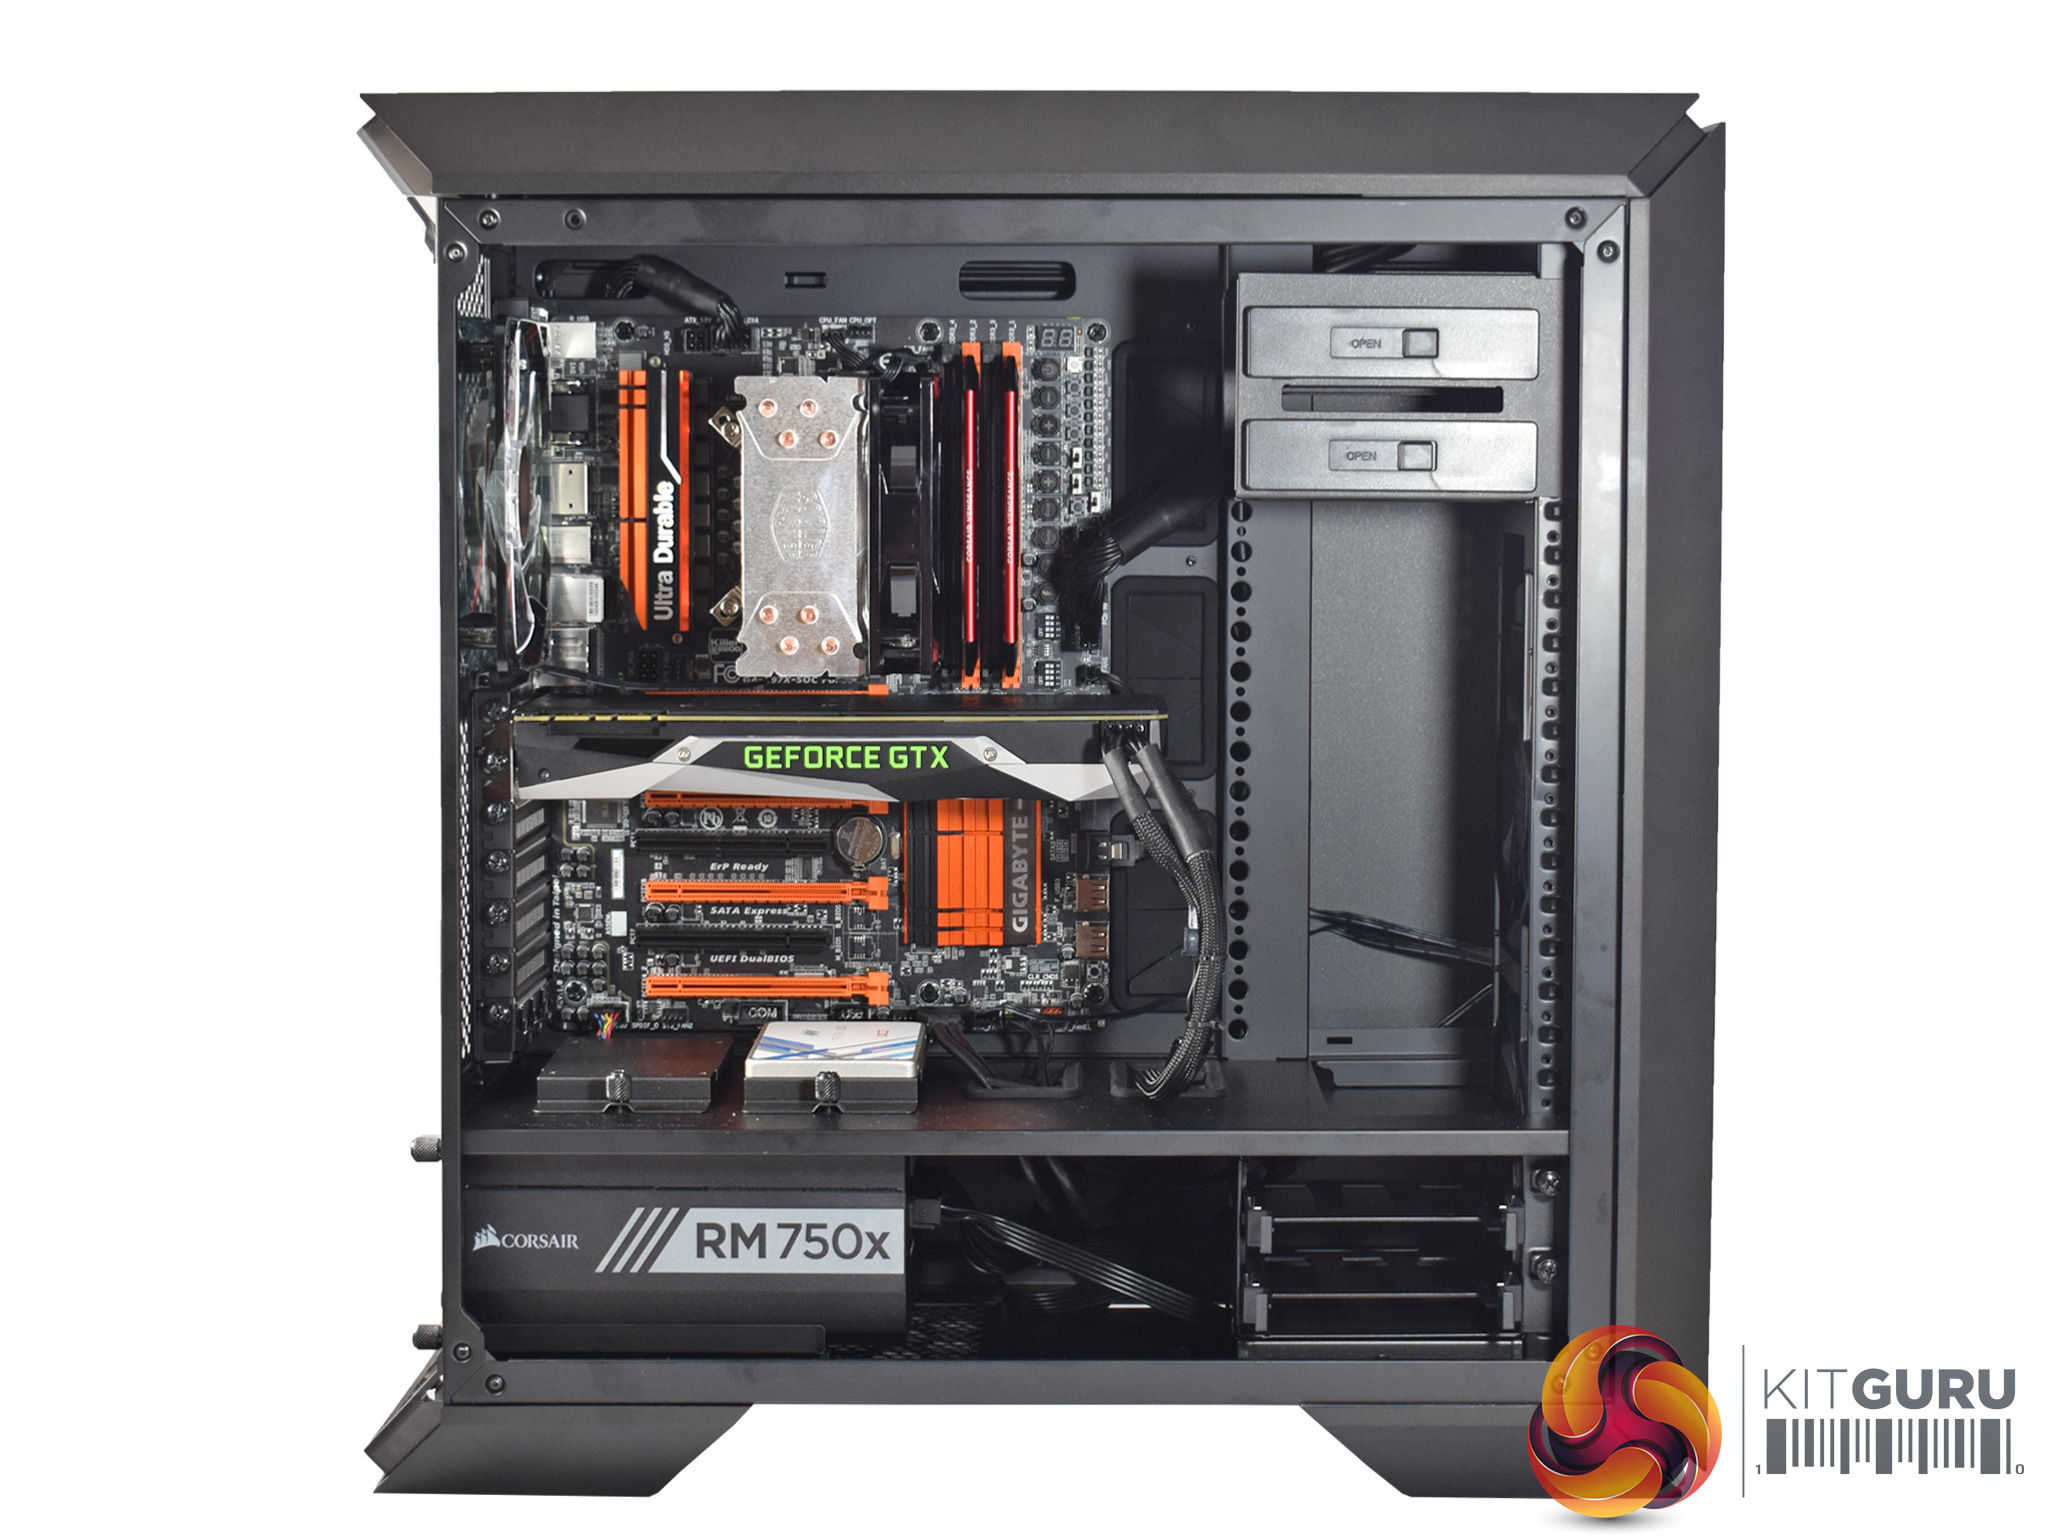
Overall, I was pretty happy with how things turned out (from the front, at least – more on that later.) The rubber grommets keep things looking nice and clean, and I also removed the front-mounted drive cage to make things look a bit tidier.
However, one big issue I had – and I think this is a oversight on Cooler Master's behalf – was to do with my choice of CPU cooler. I wanted to install the MasterLiquid Pro 280 – a brand-new AIO from Cooler Master themselves. I did not want to remove the front fans so I was going to mount the AIO in the roof as the case's spec-sheet lists support for roof-mounted 280mm radiators. However – there is a length limit of 297mm, and this actually excludes Cooler Master's own MasterLiquid 280. I just find it bizarre that Cooler Master would launch a brand-new case that does not support their brand-new AIO cooler.
Update 17/2/17: Cooler Master got in touch and have provided the following instructions which shows you how to mount a larger 280mm radiator in the roof of the MasterCase. It is still far from ideal but it does make roof-mounting a larger 280mm AIO possible. You can read the instructions HERE.
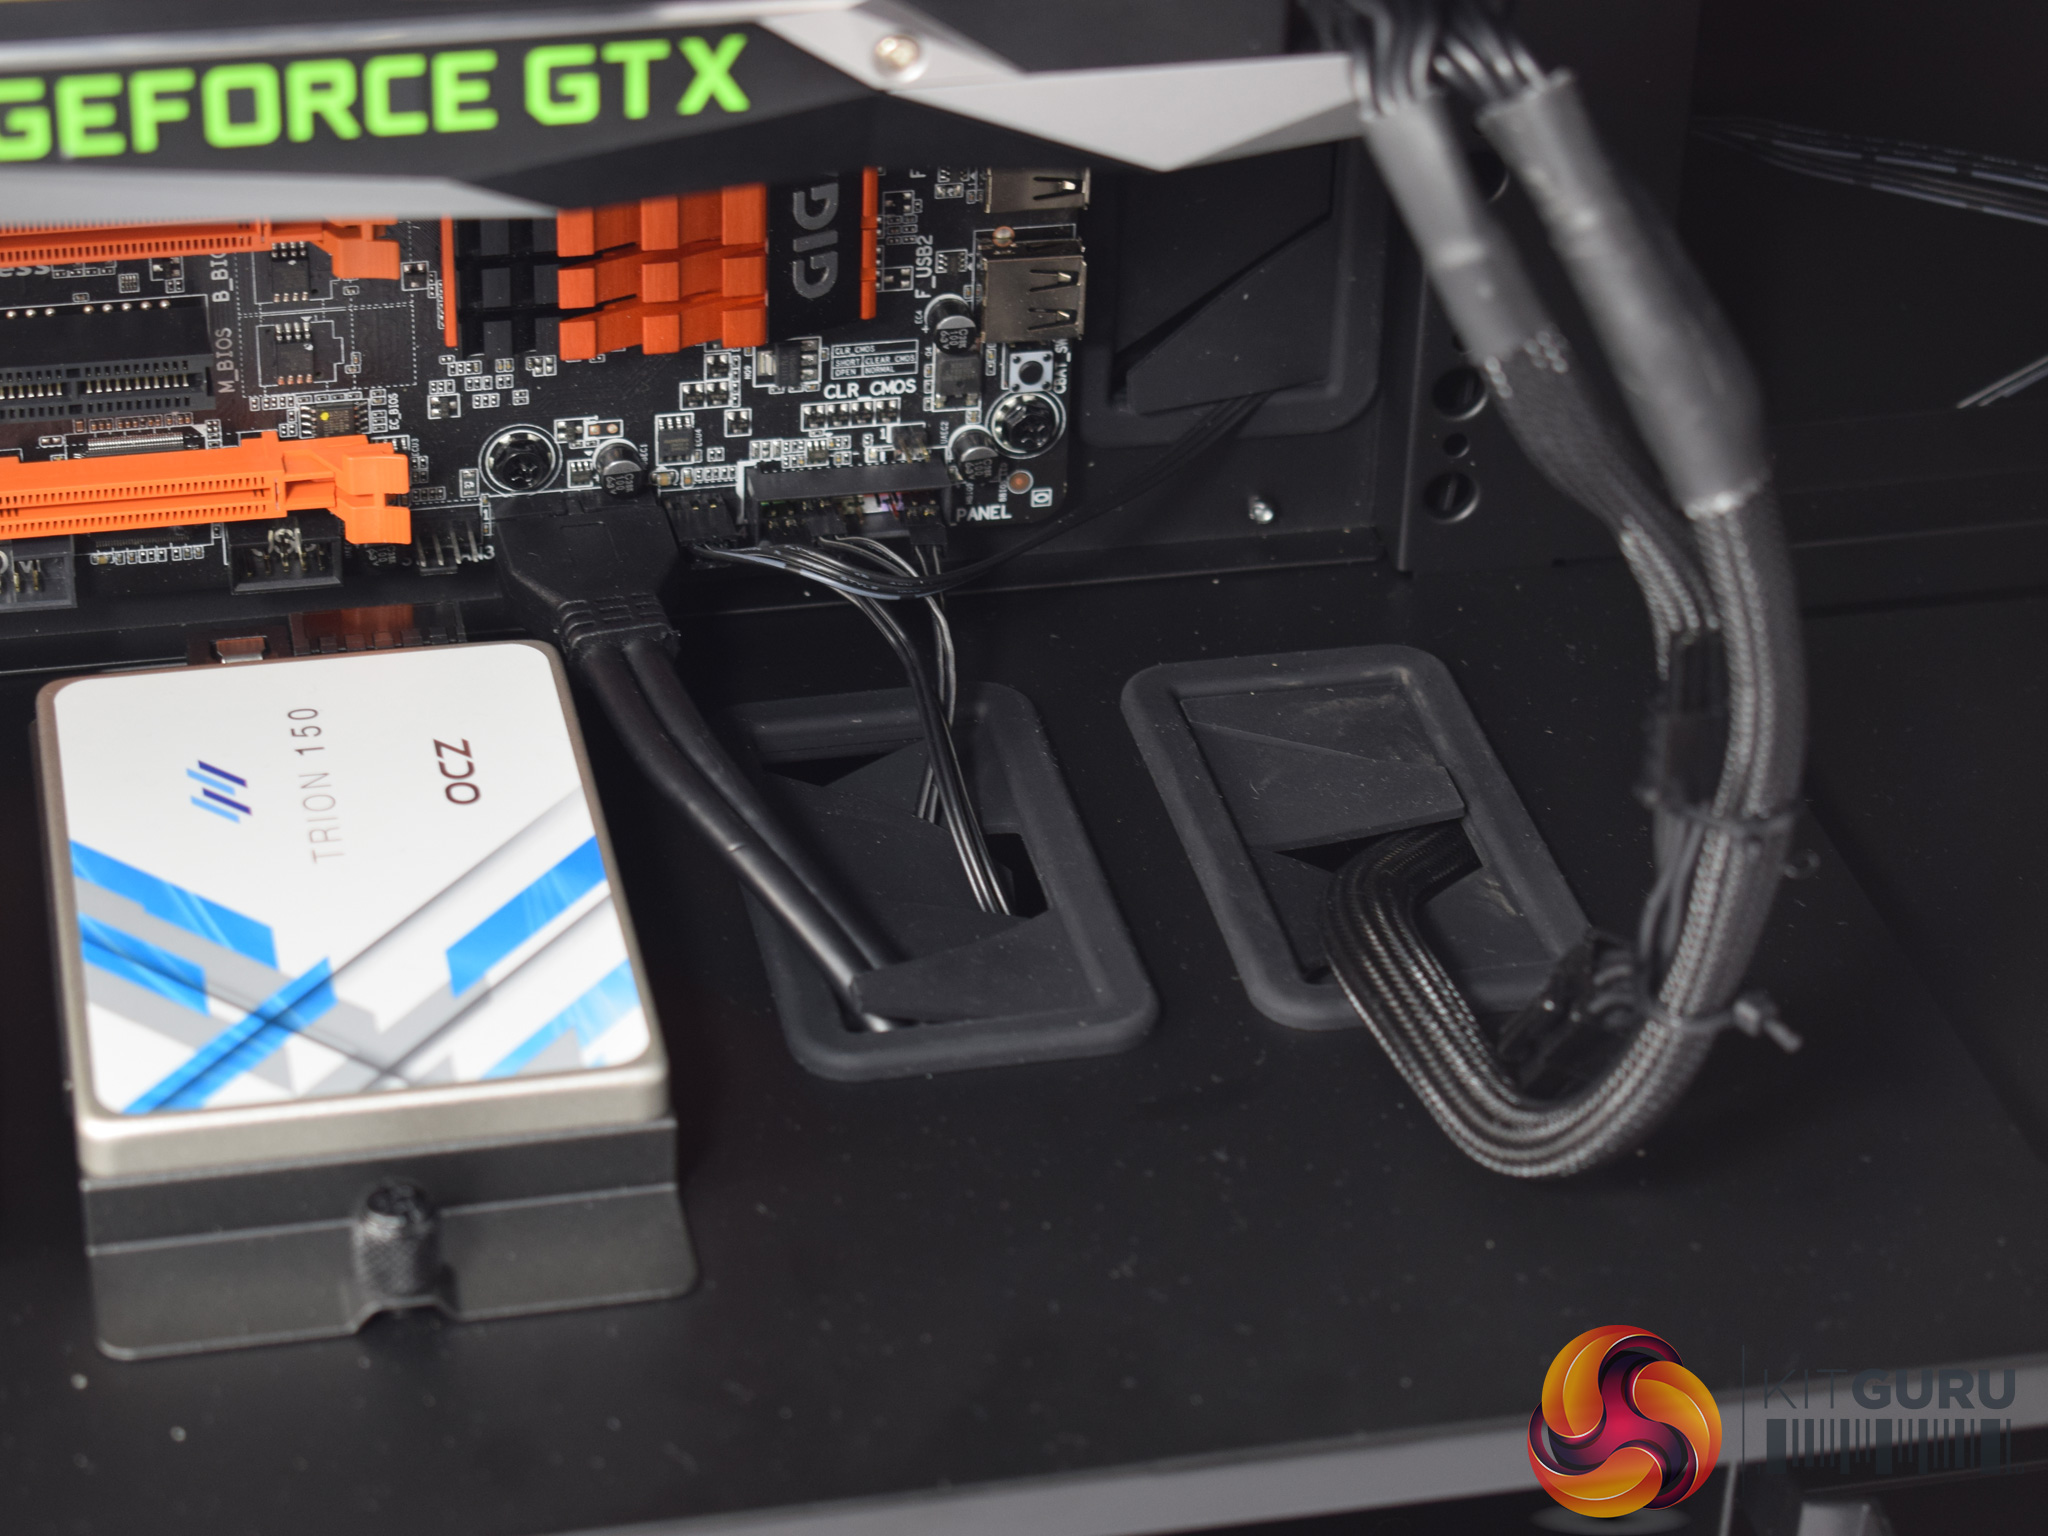
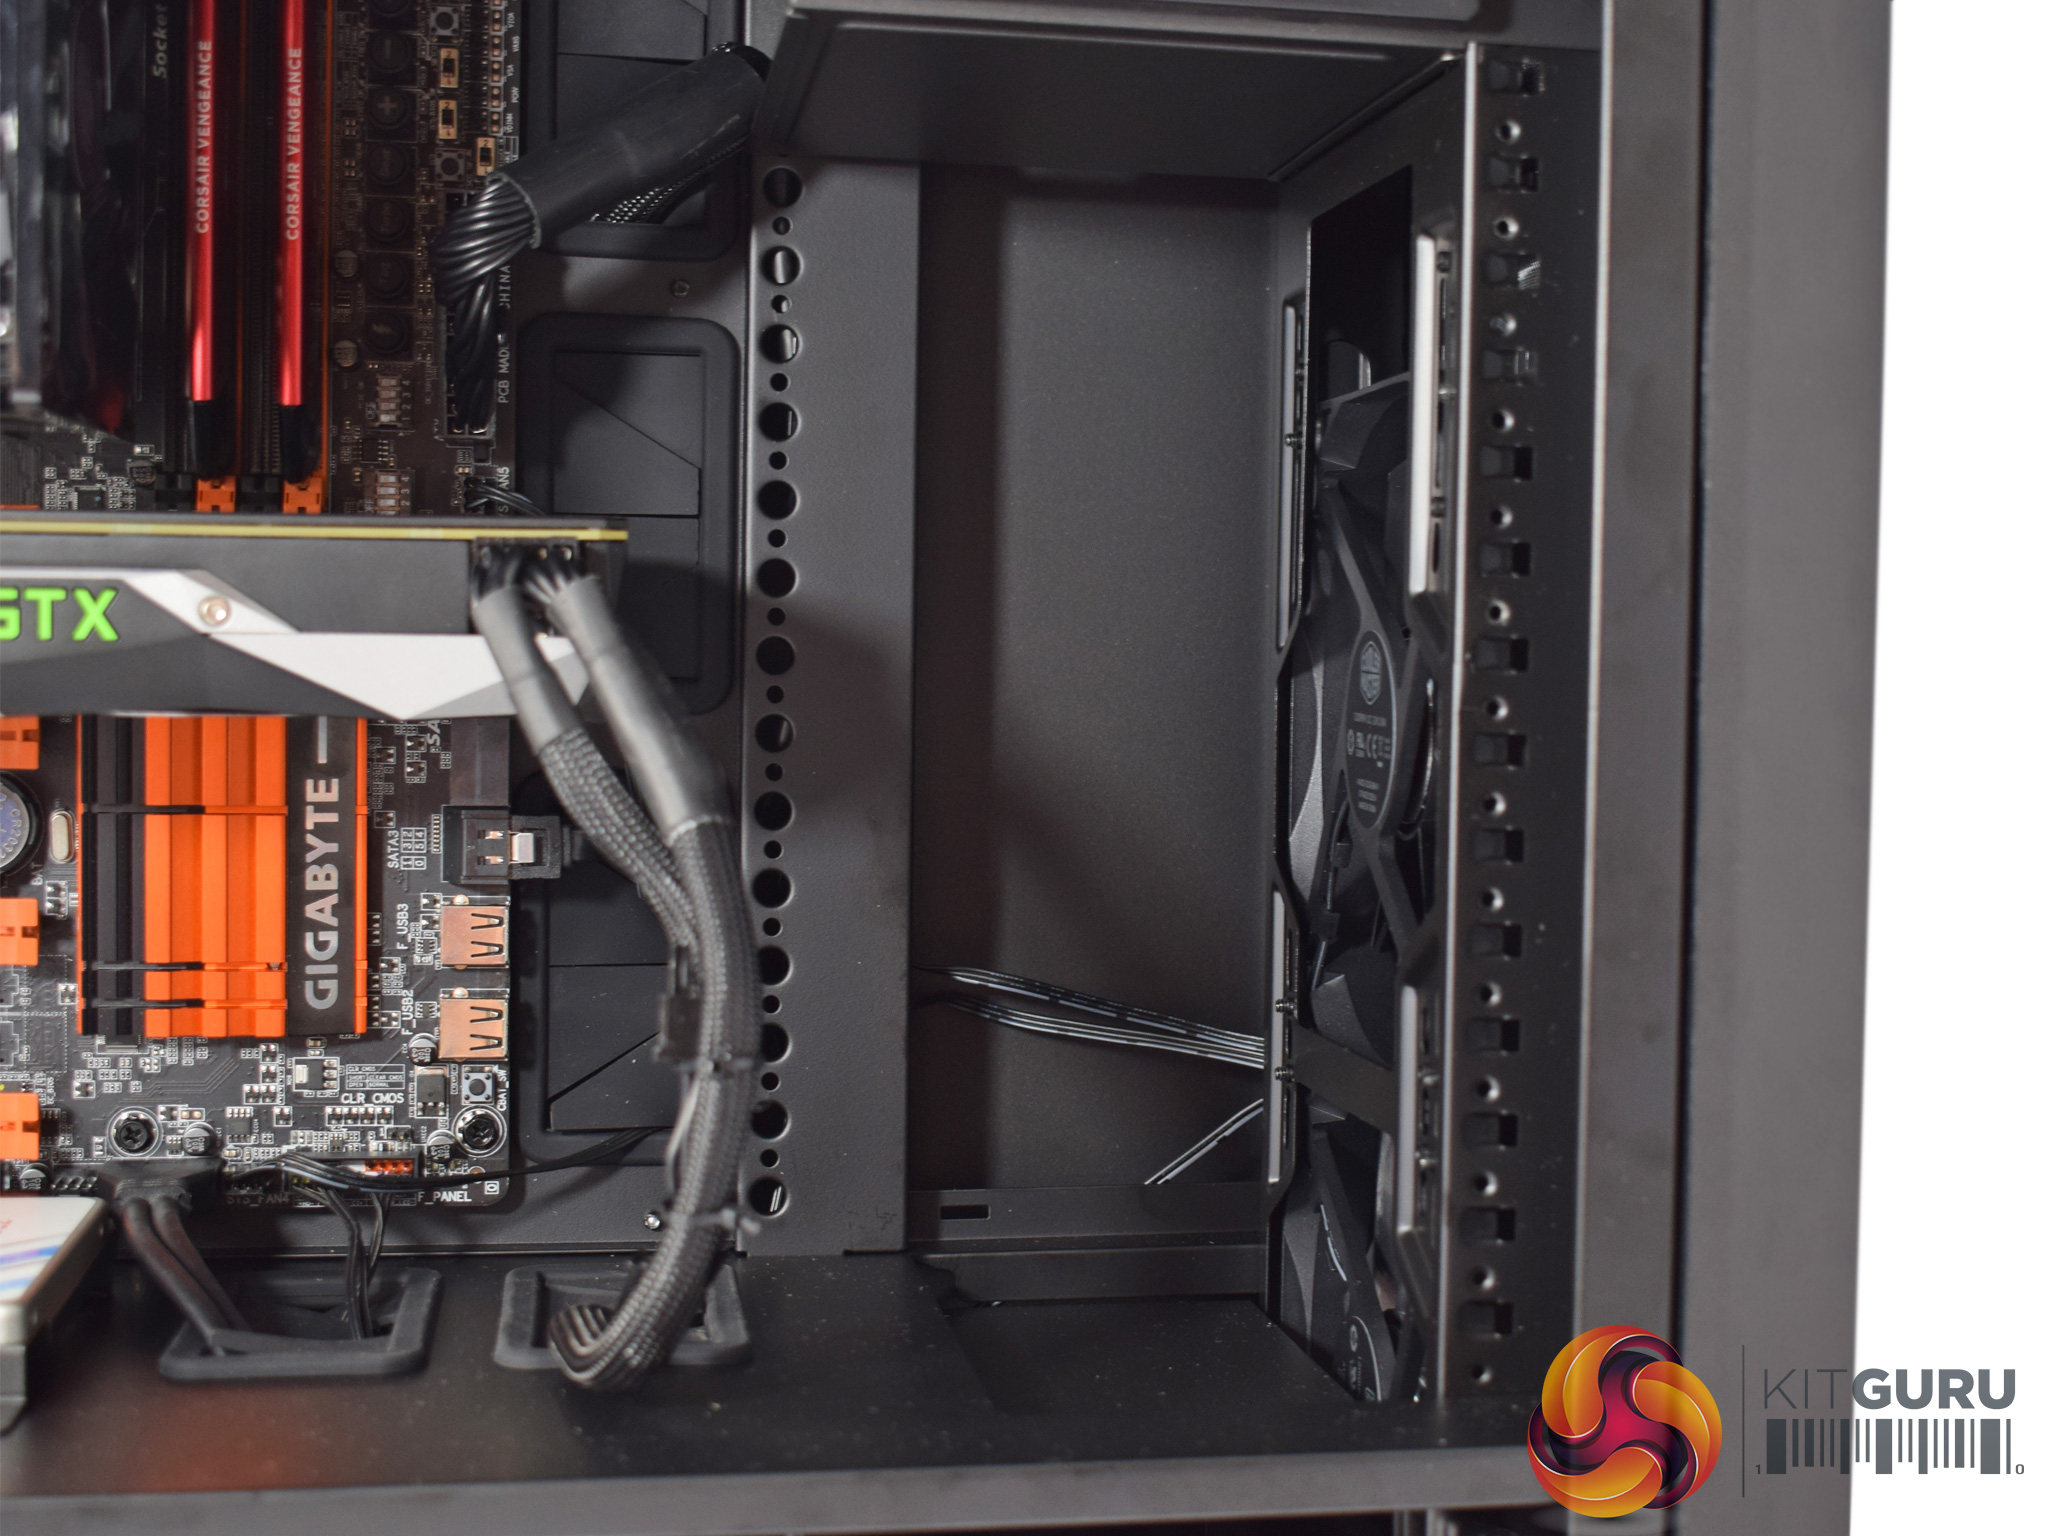
Moving on, though, the PSU shroud has plenty of cut-outs which help keep your front-panel connectors tidy. I also used one of these cut-outs to route the PCIe power cable for the GPU.
One negative aspect of the case, though, is the empty space at the front of the chassis. There is simply nothing there – this makes the front fan cables very visible, while it also feels like wasted space. I would have liked to see a blanking plate of sorts here to hide the cables coming from the front fans. This is something NZXT do very well with their cable management bar that features in the S340.
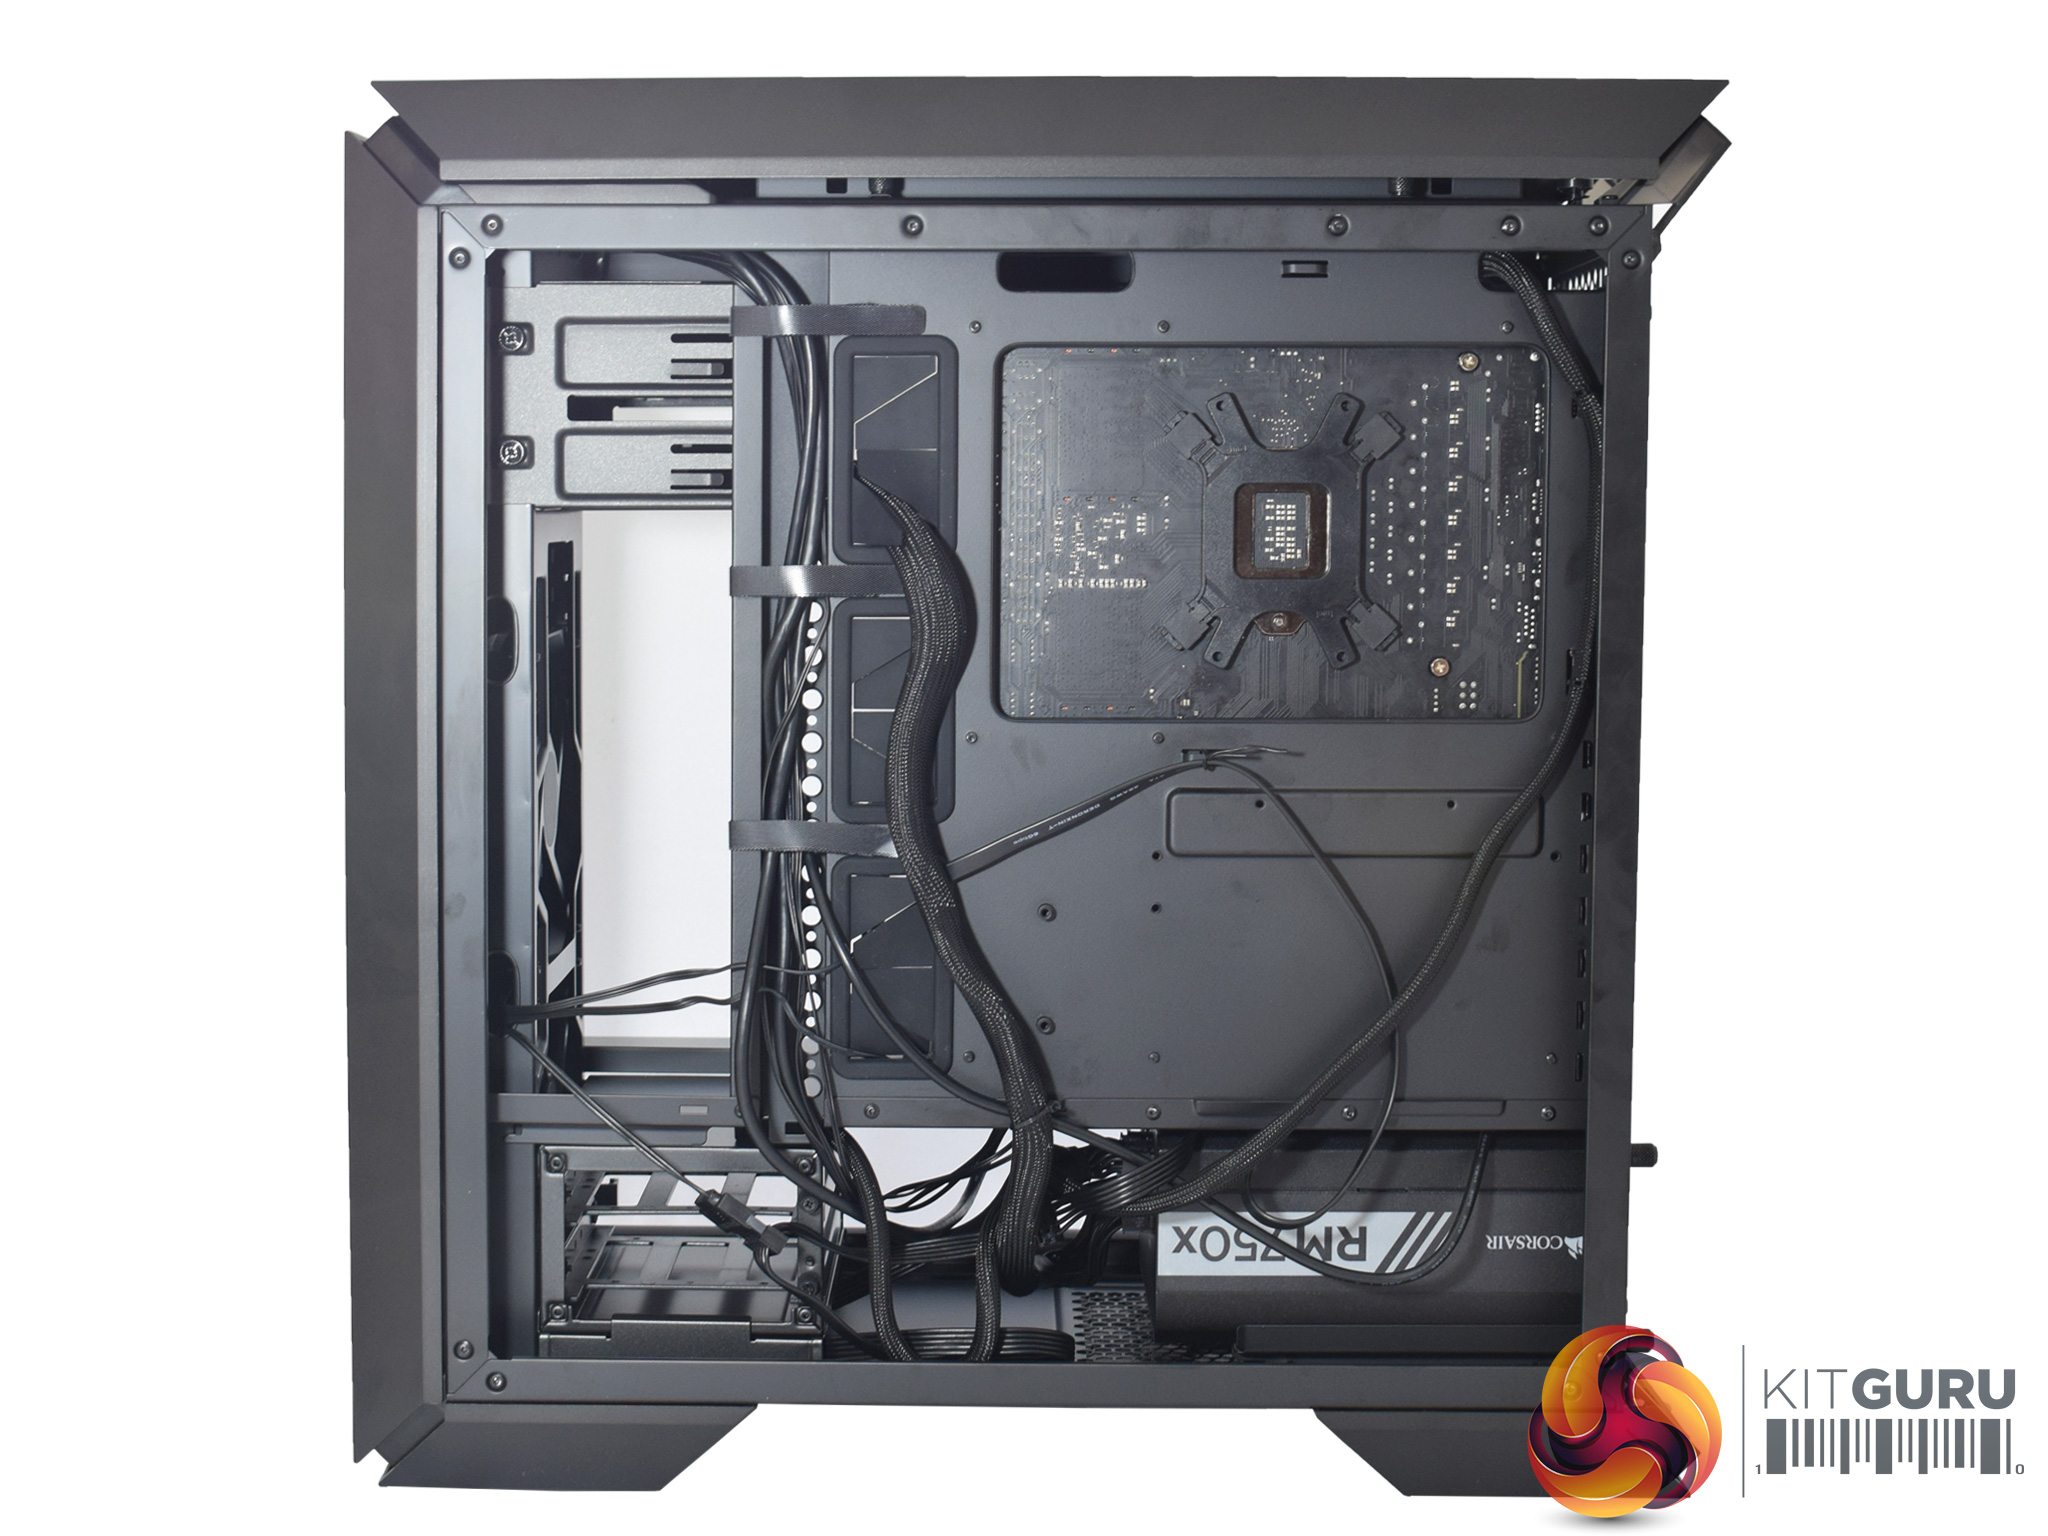
Round the back, I was not overly happy with how things turned out in the end, thought it is far from terrible. I found I was not able to route all my cables as tidily as I would have like due to a lack of cable tie-down points – there are about 5 or 6 at the back but they are spread out quite a bit which makes things difficult. In particular, the bottom edge of the motherboard tray has just a single tie-down point, and this is the place where I think there should be the most tie-down points.
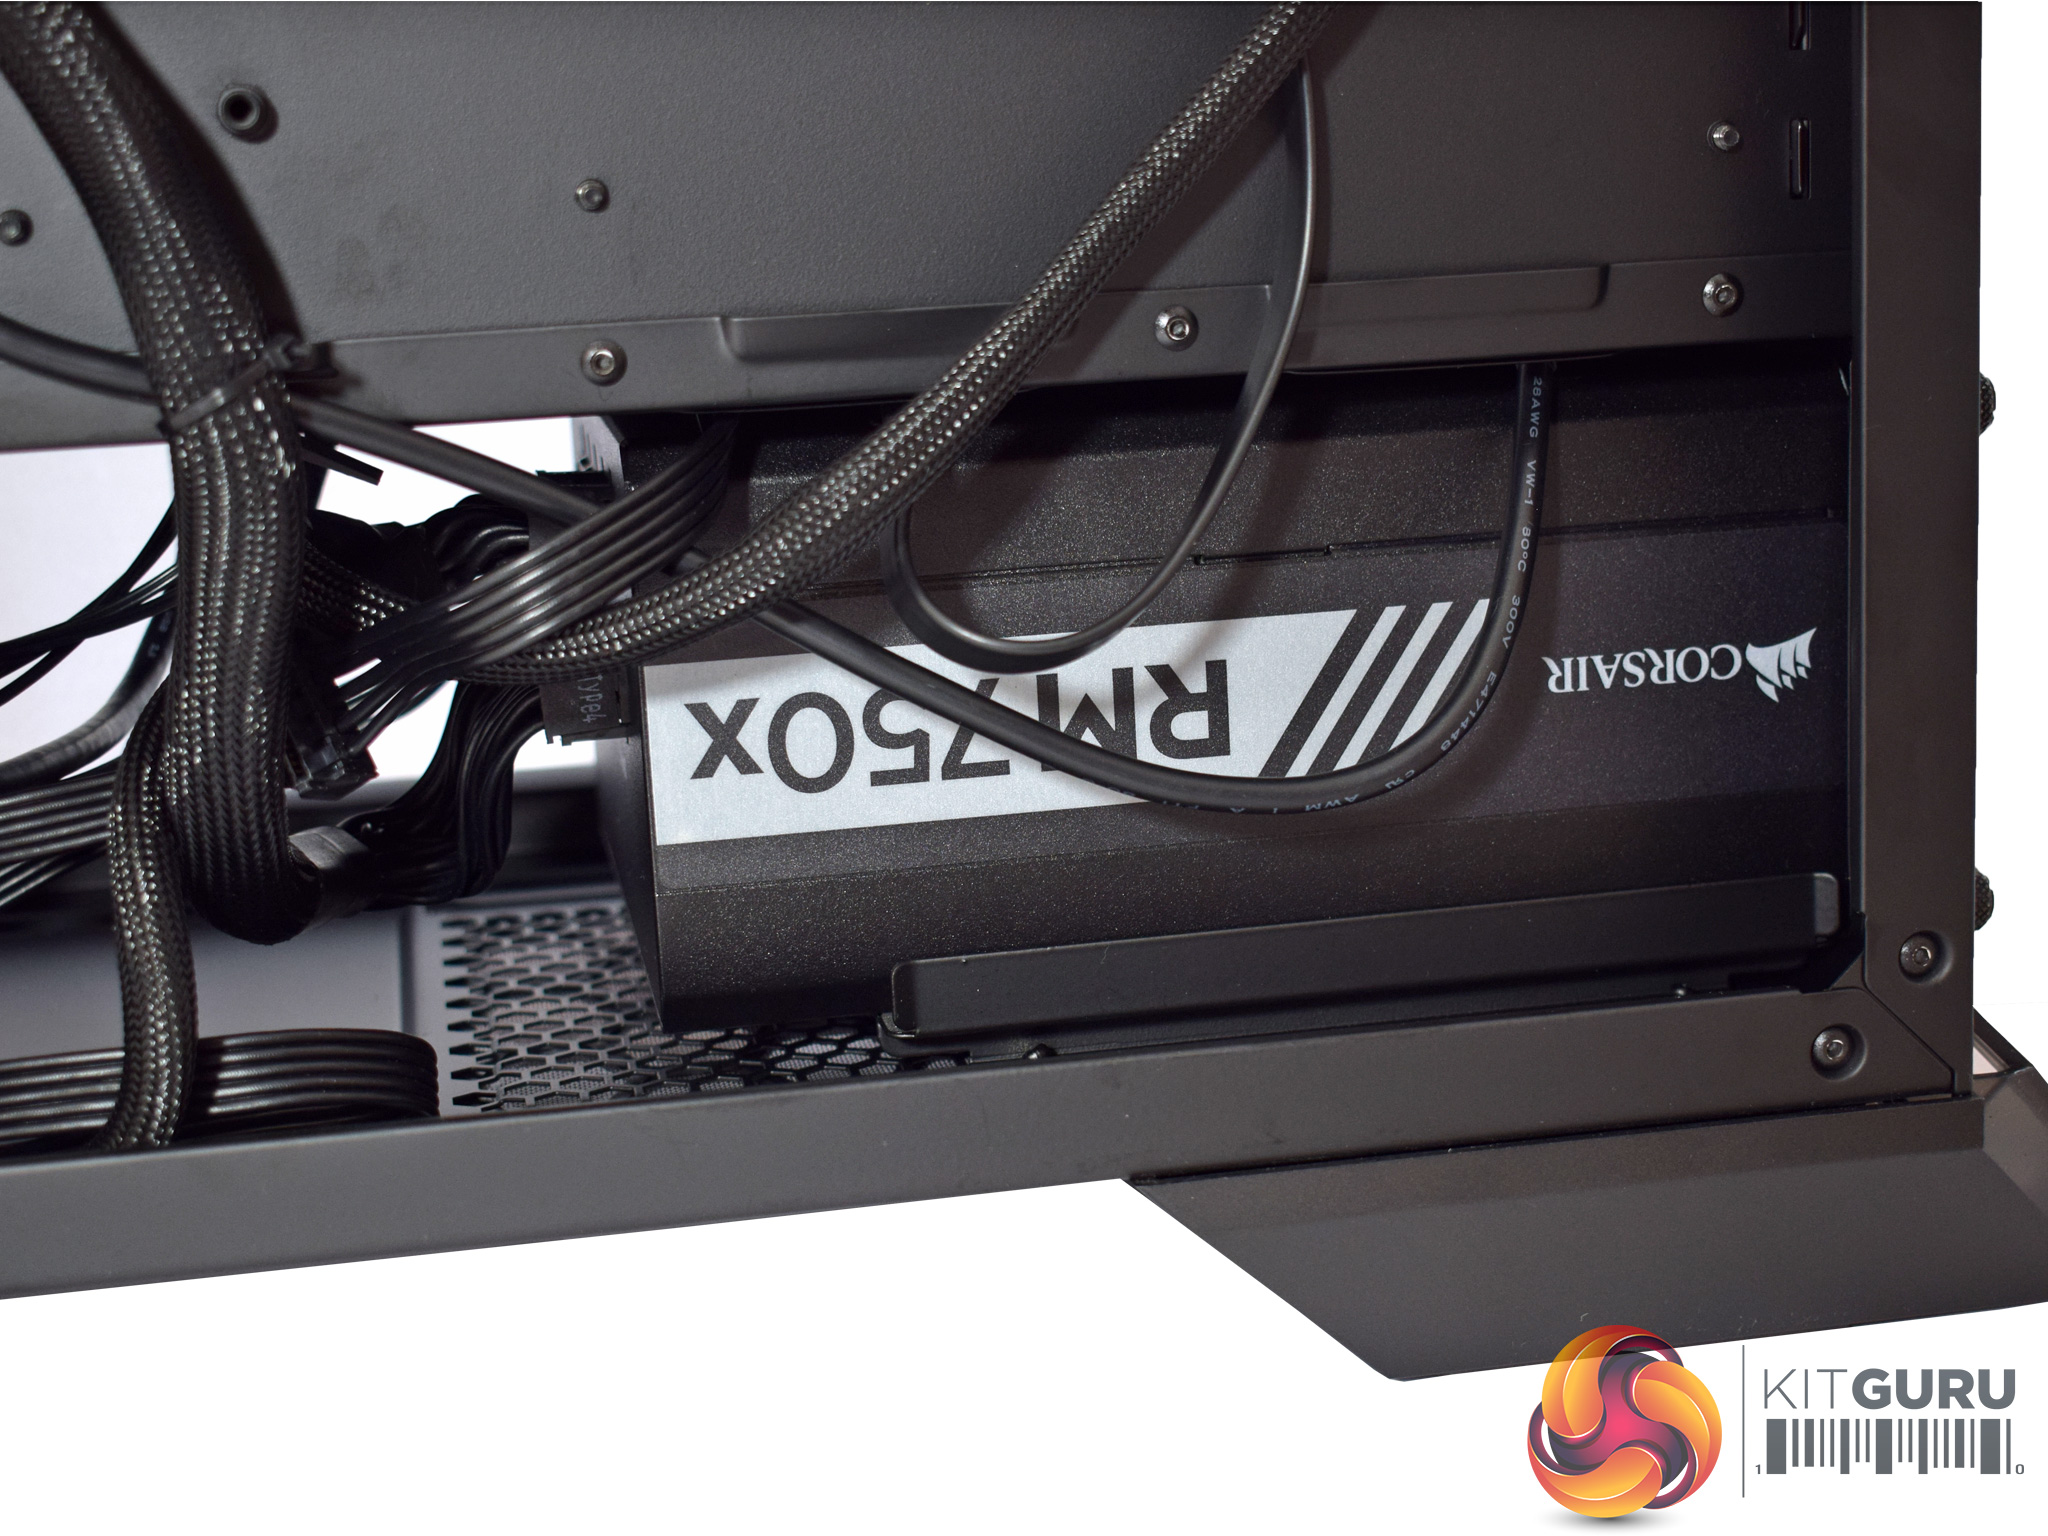
One great feature, though, is the PSU mounting system. The power supply mounts on a raised pair of feet which ensures the PSU is not making direct contact with the case's floor – this ensures no vibrations will occur, a nice touch.Testing a case consists of finding out how the chassis deals with heat generated by the installed components, and how much noise it produces while doing so.
To create excess heat, I ran Prime95 26.6 and 3DMark Fire Strike simultaneously to stress both the CPU and GPU. After 15 minutes, I recorded the maximum temperature for each component to report here.
To test the MasterCase Pro 6, I installed the following components:
- Intel i7-4790K CPU
- Cooler Master Hyper 212 LED CPU cooler
- 16GB Corsair Vengeance 2400MHz DDR3
- Gigabyte Z97X-SOC Force Motherboard
- GTX 1080 Founders Edition GPU
- Corsair RM750x PSU
- OCZ Trion 150 SSD
Thermal dynamics
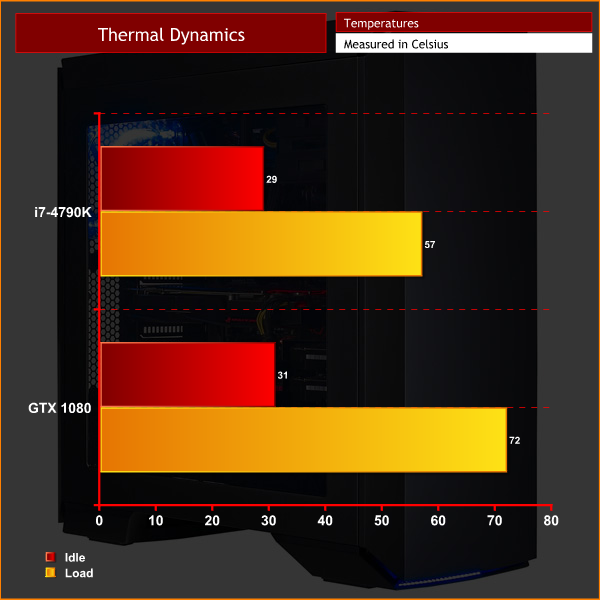
Ambient: 20C.
The MasterCase Pro 6 had no problems keeping our components cool. The two intake fans supply a good amount of fresh air despite the solid front and top panels.
Acoustics
Cooler Master have a reputation for delivering quiet cooling solutions, and the MasterCase Pro 6 is no different. I hooked up the 3 fans to the motherboard and let the motherboard control the fan RPM using the default fan curve. With those settings, the fans were inaudible at idle and hardly more than a whisper under load. This is one of the benefits of solid panels – it is much harder for noise to escape.All-in-all, the new Cooler Master MasterCase Pro 6 is certainly a good case, but I would not say it is a great case.
Build quality is good throughout thanks to the steel construction, while the new, stealthy aesthetic is certainly something I appreciate – comparatively, the MasterCase Pro 5 is much more flamboyant.
There are some good features, too – the ability to raise the front and top panels to allow better airflow is nifty, while the trademark FreeForm system allows you to upgrade the case with extra accessories if you wish. That being said, I would not say there are any features that made me step back and think ‘wow' – there are no killer inclusions that revolutionise PC building.
The case is pretty easy to build in, but I found the cable management options to be slightly lacking behind the motherboard tray. Also, one bizarre issue I had was trying to install the MasterLiquid Pro 280 – it does not fit in the roof without using an awkward, slightly dubious mounting method which you can read about HERE. I find this problematic and quite confusing as Cooler Master do not provide native support for their latest AIO in their latest case.
Thermals and acoustics are good, though, with the solid panels really helping to keep the noise levels down. Our GTX 1080 also stayed nice and cool with a peak temperature of 71 degrees.
So, overall, I do think the Cooler Master MasterCase Pro 6 is a good case. However, I do also think the £139.99 MSRP is a bit steep for what you are getting. The MasterCase Pro 6 does not really do anything spectacularly well nor are there any killer features. If it were closer to £100 the case would offer a generally solid experience for a reasonable price – but £140 is a bit much for a relatively basic case like this.
You can buy one from Ebuyer for £139.98 inc. VAT HERE.
Discuss on our Facebook page HERE.
Pros
- Good build quality.
- It looks nice and stealthy.
- Front and top panels can pop up to allow better airflow.
- Raised PSU mounting section prevents vibrations.
- Decent cooling and noise levels.
Cons
- It is expensive for what you get.
- Cable management options behind the motherboard tray are lacking.
- Does not support mounting the MasterLiquid Pro 280 in the roof.
KitGuru says: While it is certainly a good case, the MasterCase Pro 6 could do with a price-cut to make it more competitive. As it is, you are paying a fair amount of money for a case that is certainly decent and well-made, but it lacks any killer features to justify the price.

Be sure to check out our sponsors store EKWB here