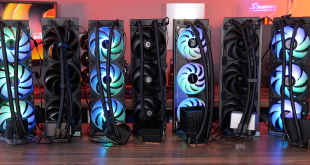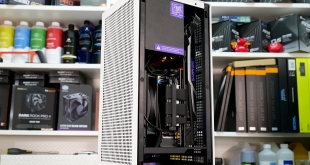
I think we can all agree that the NZXT H1 mini-ITX chassis had more than its fair share of ups and downs since its release almost two years ago. The case received positive reviews at launch with its smart design allowing novice users to easily build a mini-ITX system. Soon after the launch, there were problems with PCIe risers failing and, in some cases catching fire. Today, NZXT launches a new ITX case aiming to put all of that controversy in the past – but is the new model any good?
Timestamps:
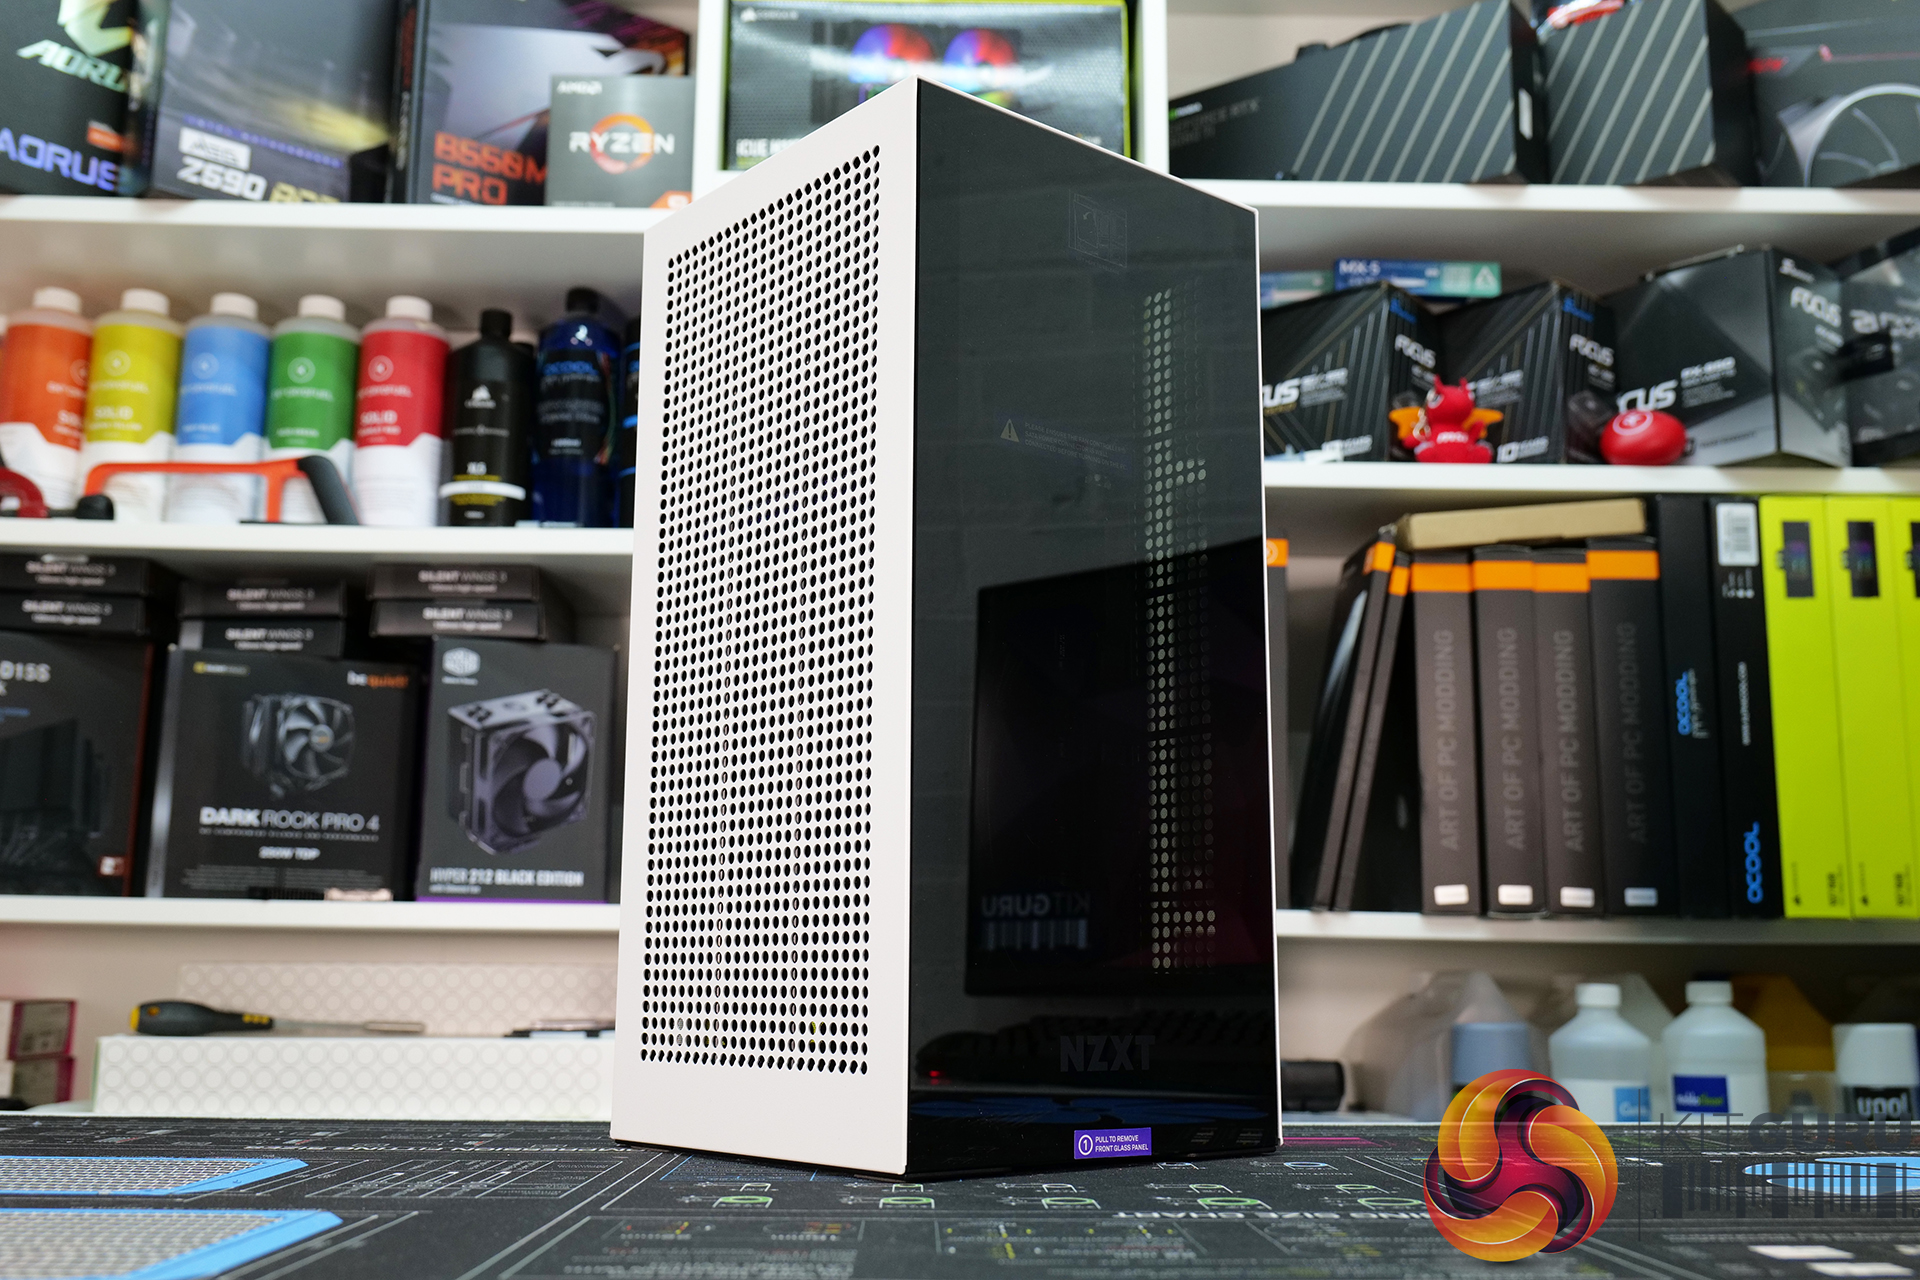
The original NZXT H1 is a very good mini-ITX chassis. The original scored 9/10 and won the KitGuru Must Have award which isn’t an easy feat. The innovative design makes it easy to build a system as there is technically only one way to do it. The case comes as a package deal with an included power supply and AIO CPU cooler as well as a PCIe riser, so users just have to select their own motherboard, CPU, memory, graphics card and storage to complete the build.
A downside is that users are limited in terms of creativity when building a H1 system as you can only buy the case with the included hardware, the case can't be bought as a bare unit. This meant that you are almost forced to use the included 140mm AIO and 650W power supply and there is no way of changing the orientation or positioning of fans, radiators or the graphics card so if you are the type that likes to put your own stamp on a build, its not possible with the H1.
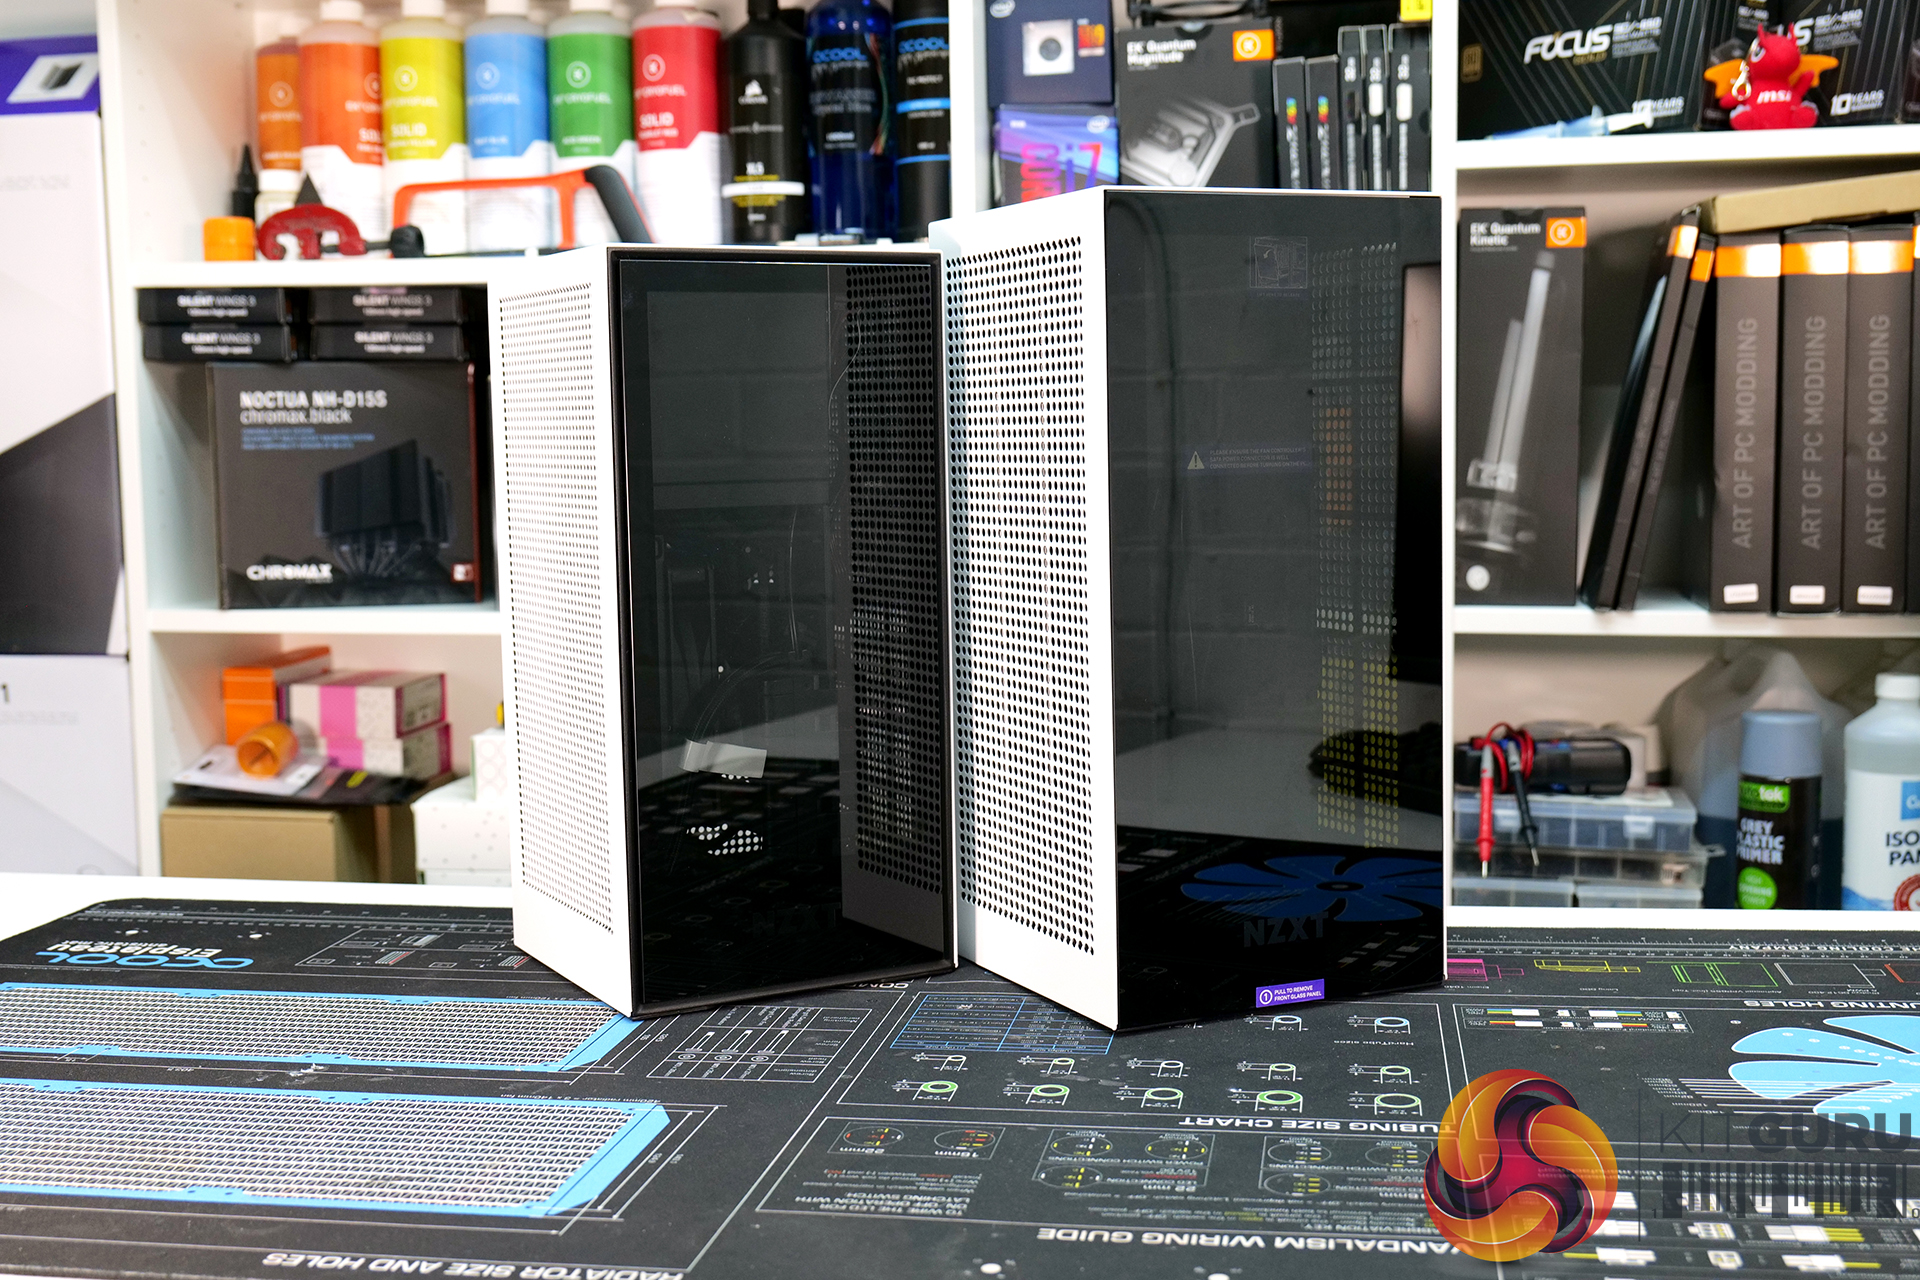
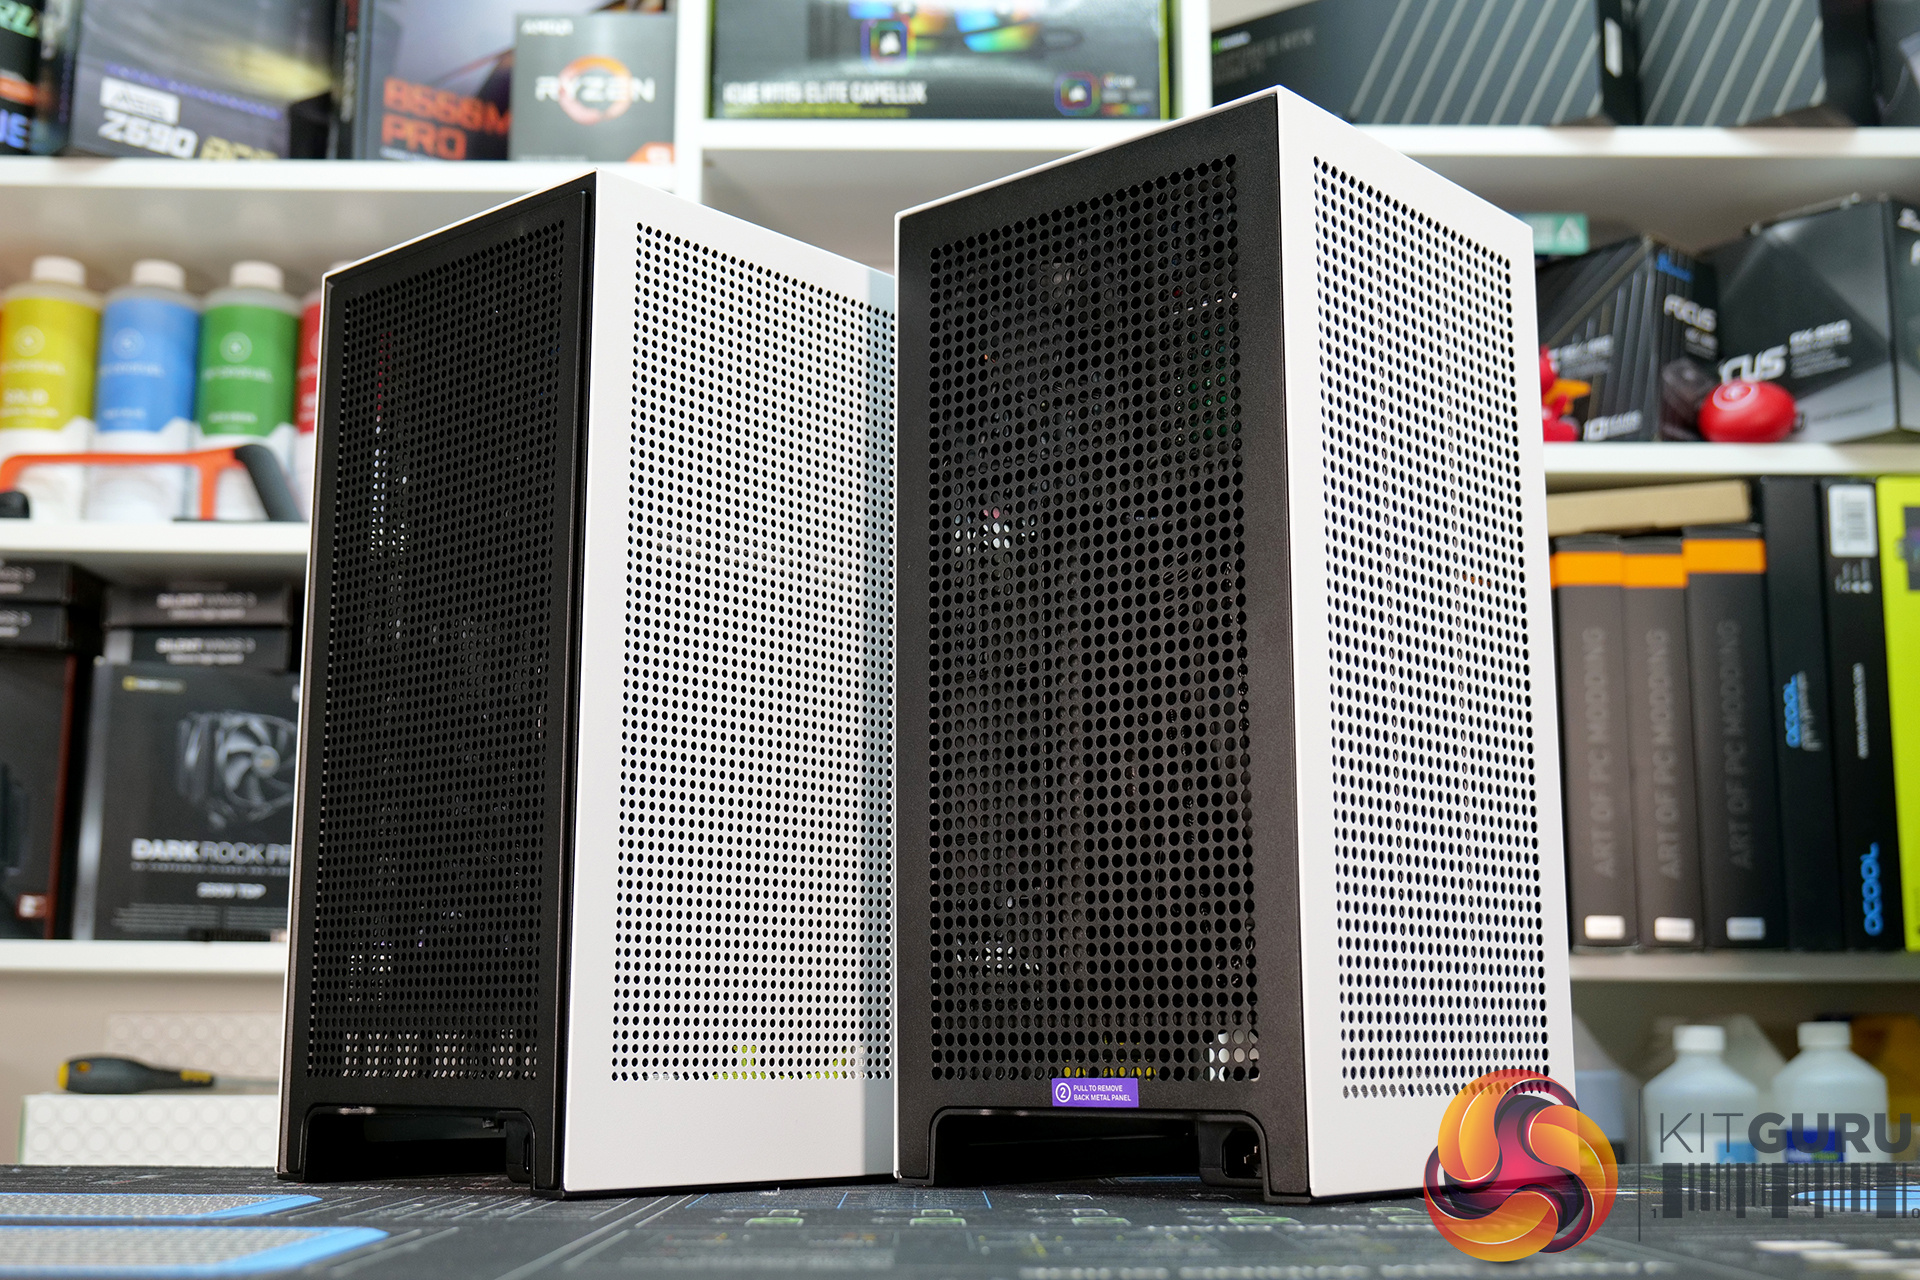
This is the same with the new H1 v2. However, NZXT has made some small but very important revisions to the case which means that users have much more choice when it comes to which graphics card to install. The original H1 only allowed for 2.5 slot cards with a maximum length of 304mm which meant that several high-end Nvidia RTX 30 series and AMD Radeon 6000 series cards were incompatible due to their size. The 650W power supply included with the original H1 could also be running on the limit with this new generation of cards which is an issue too.
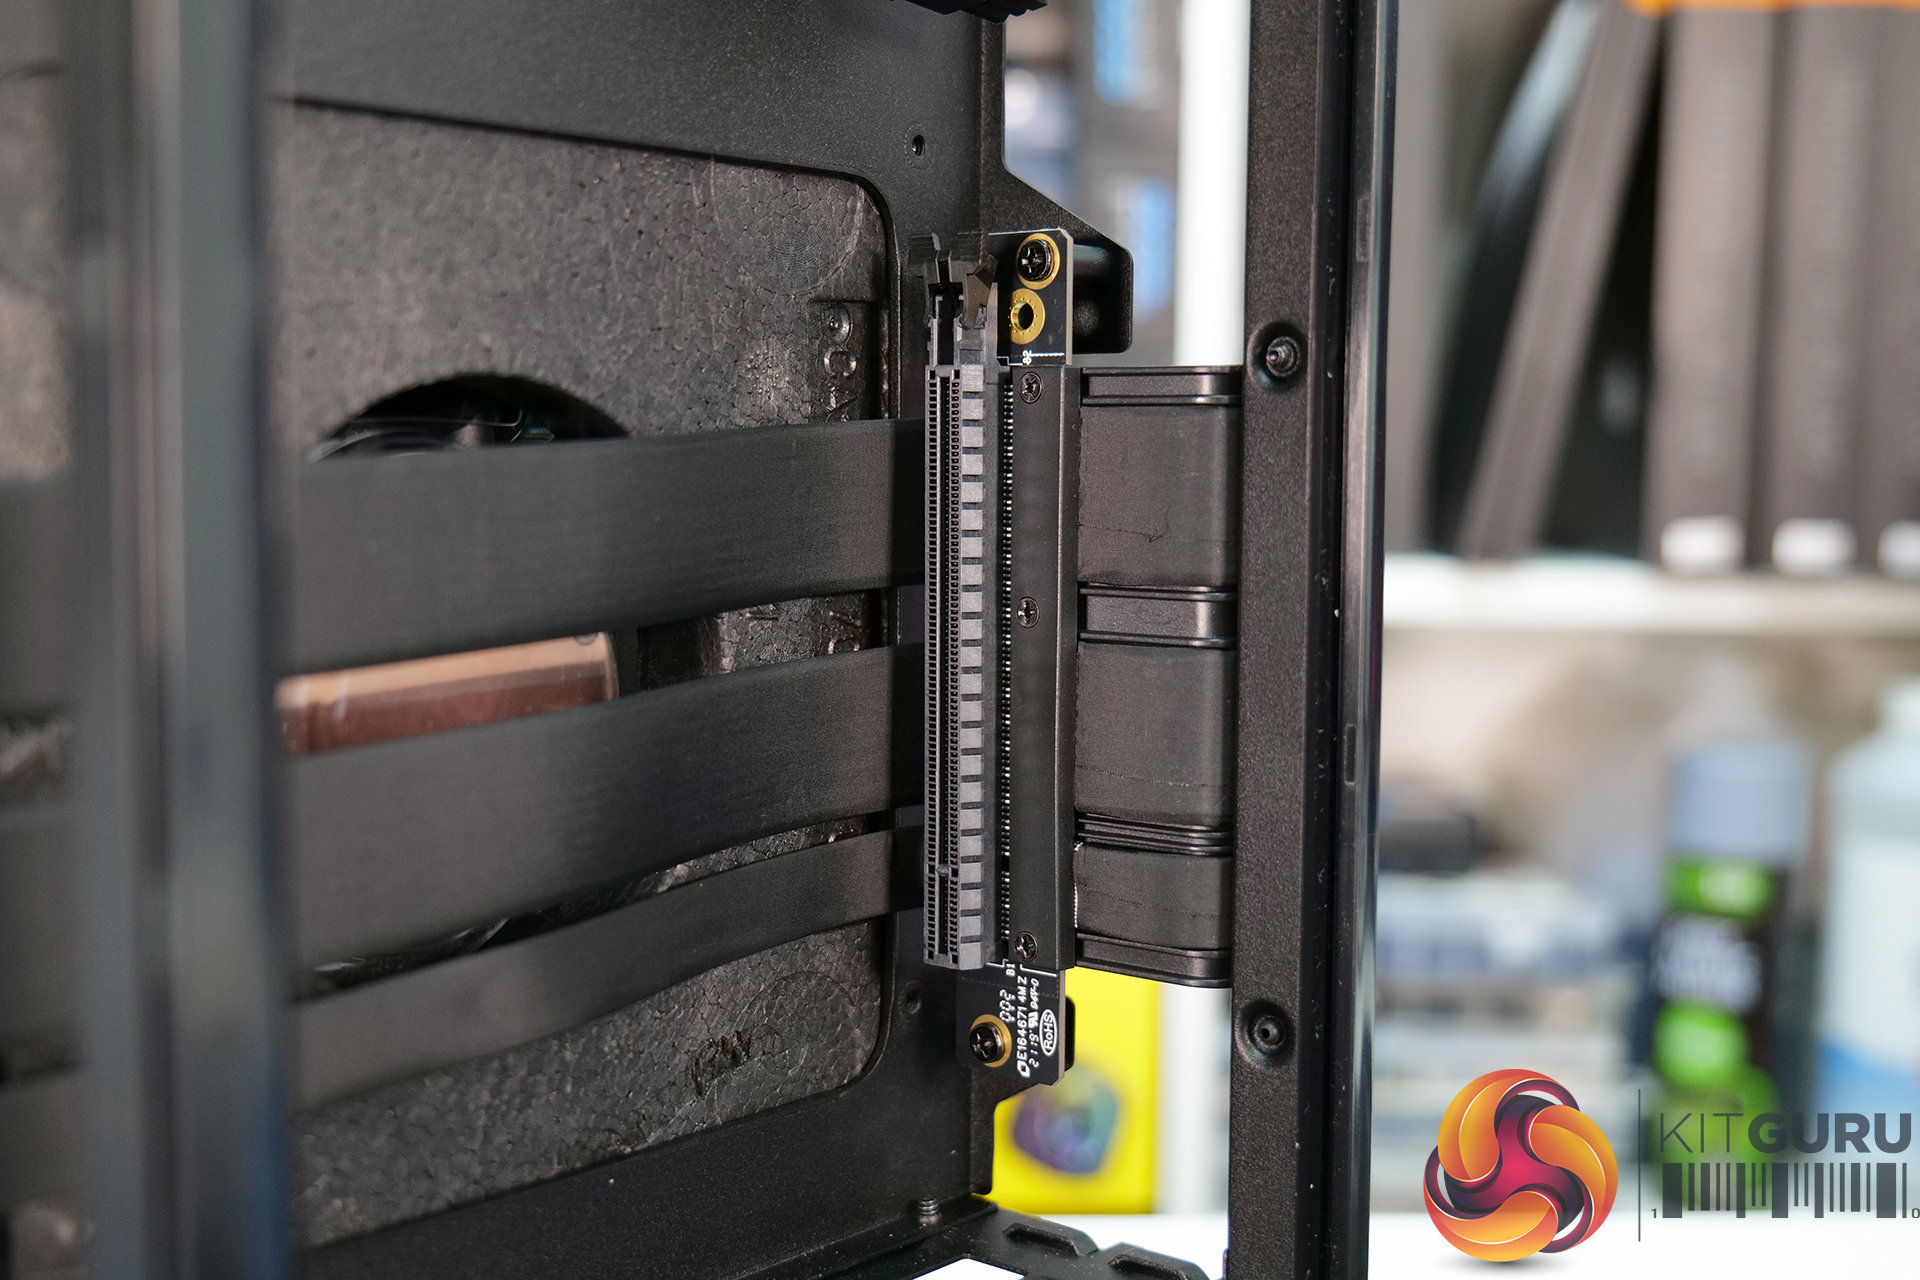
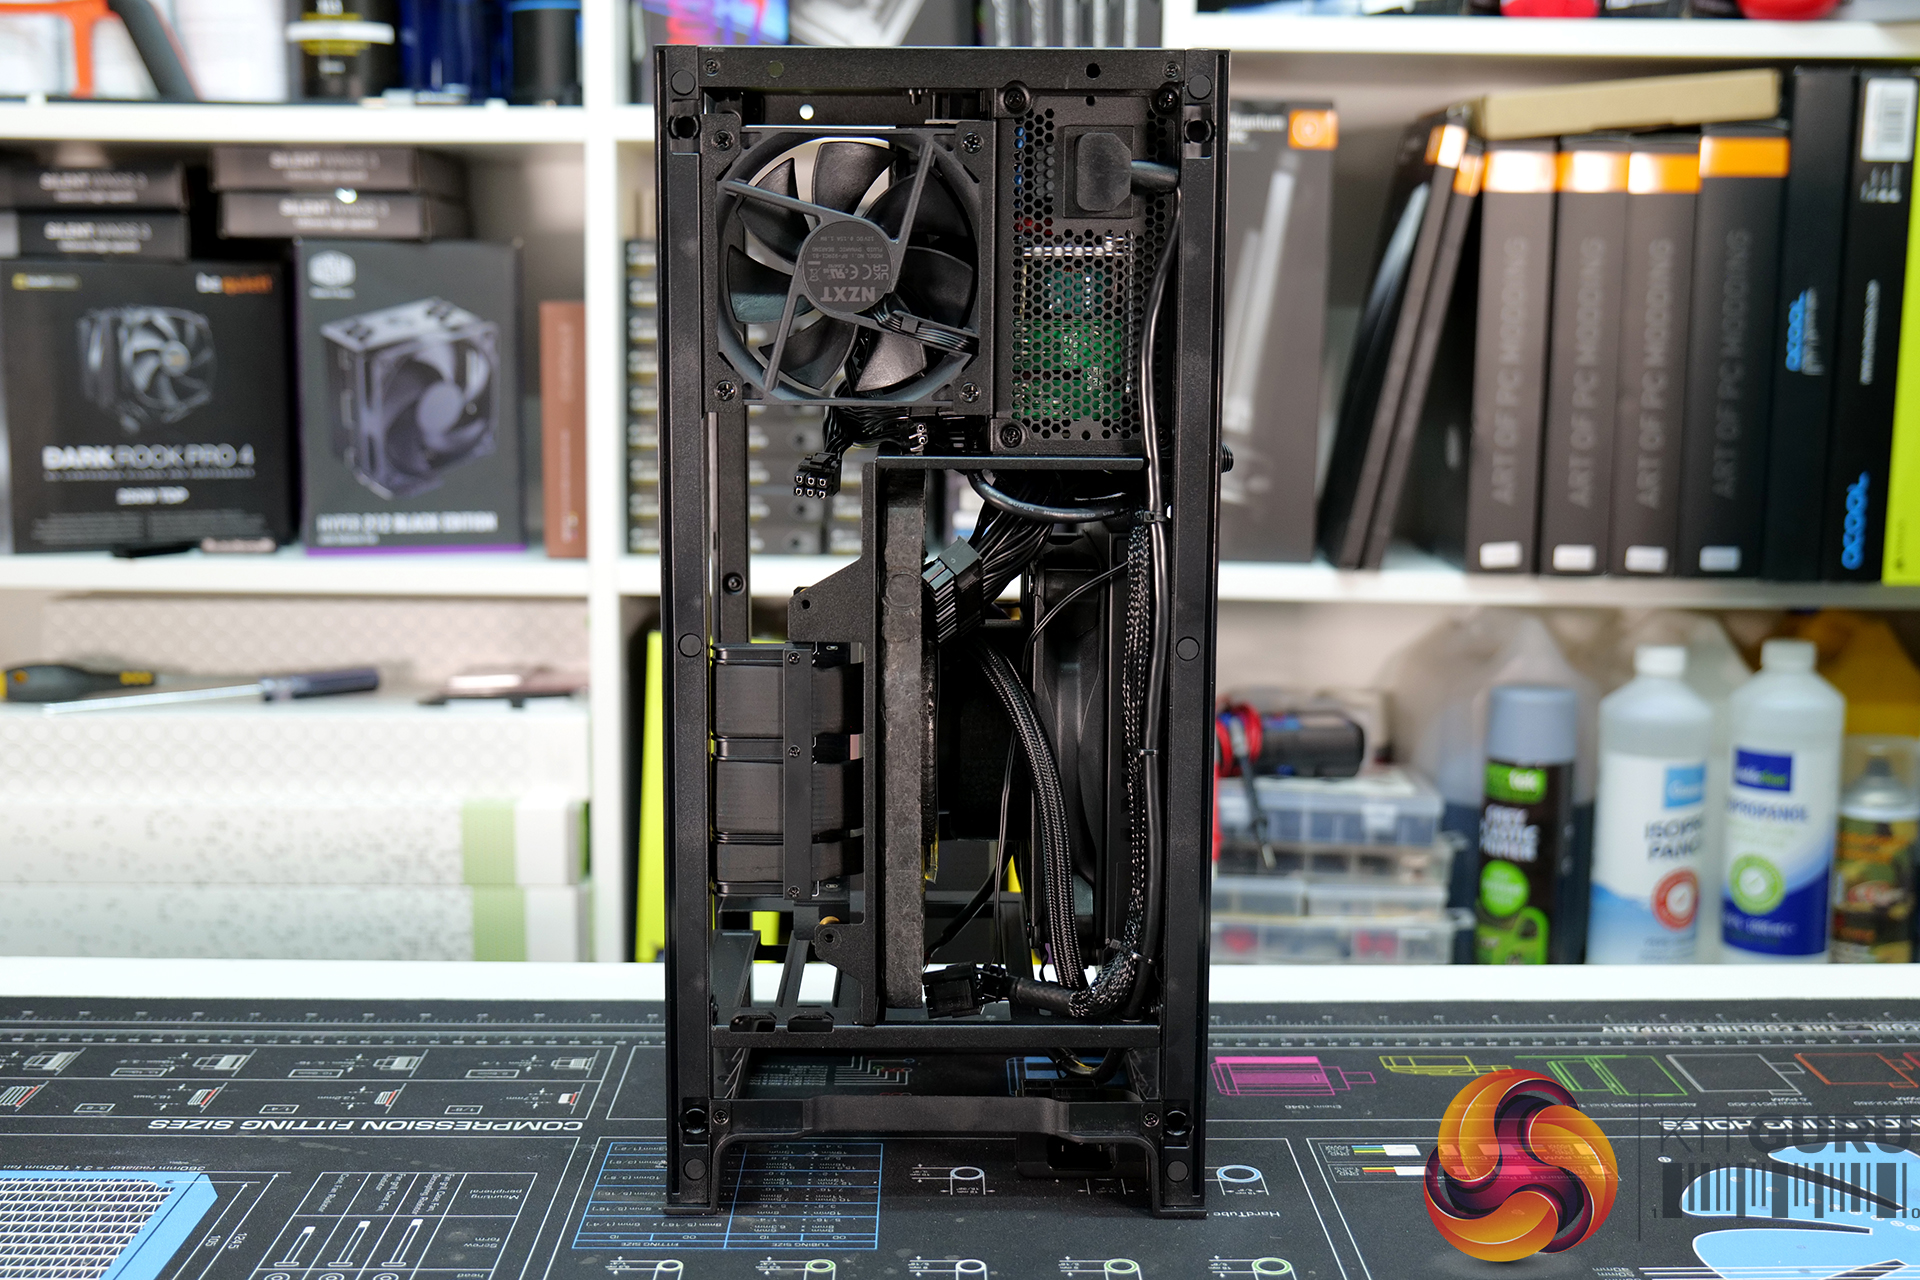
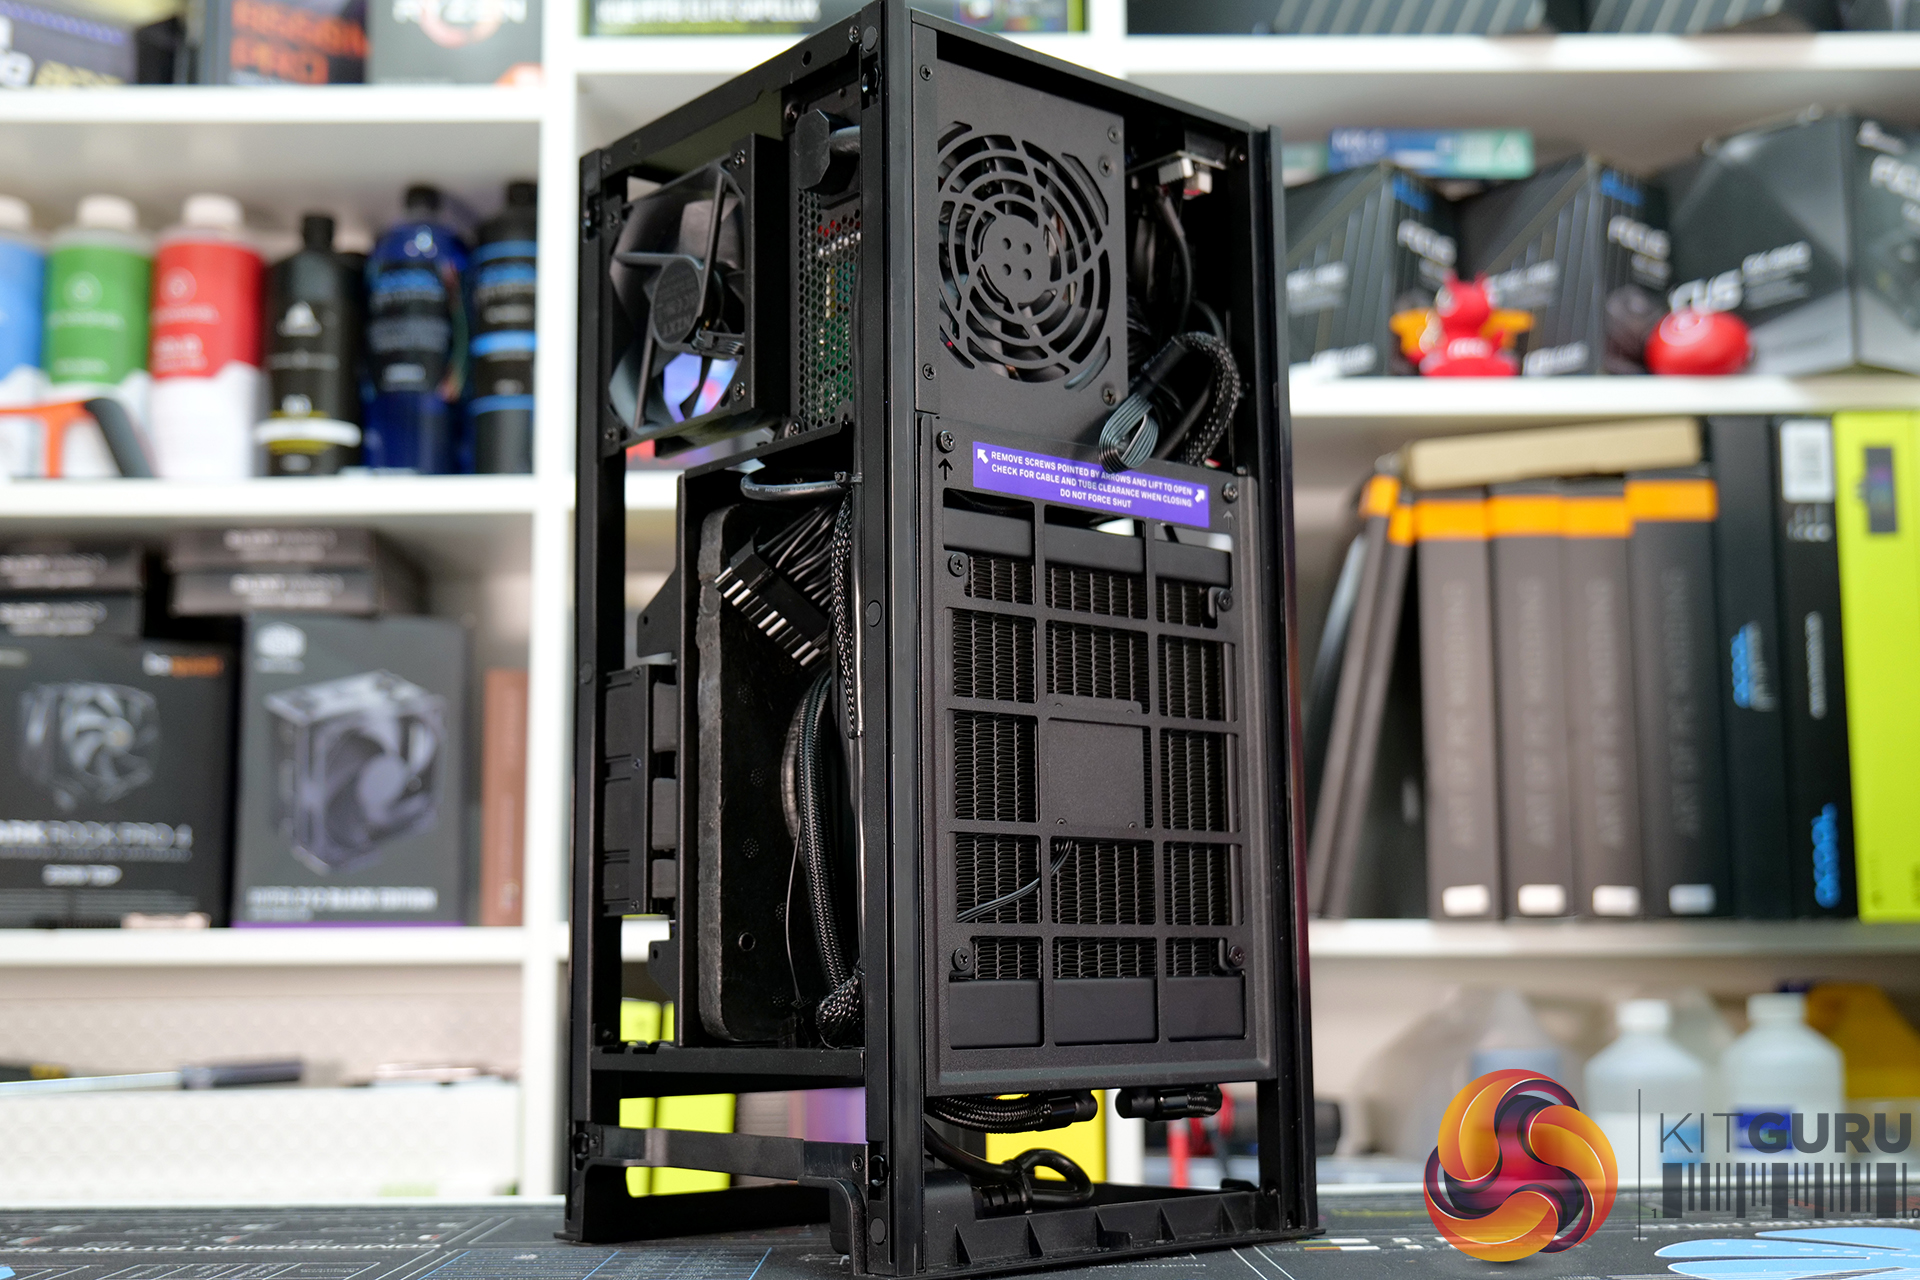
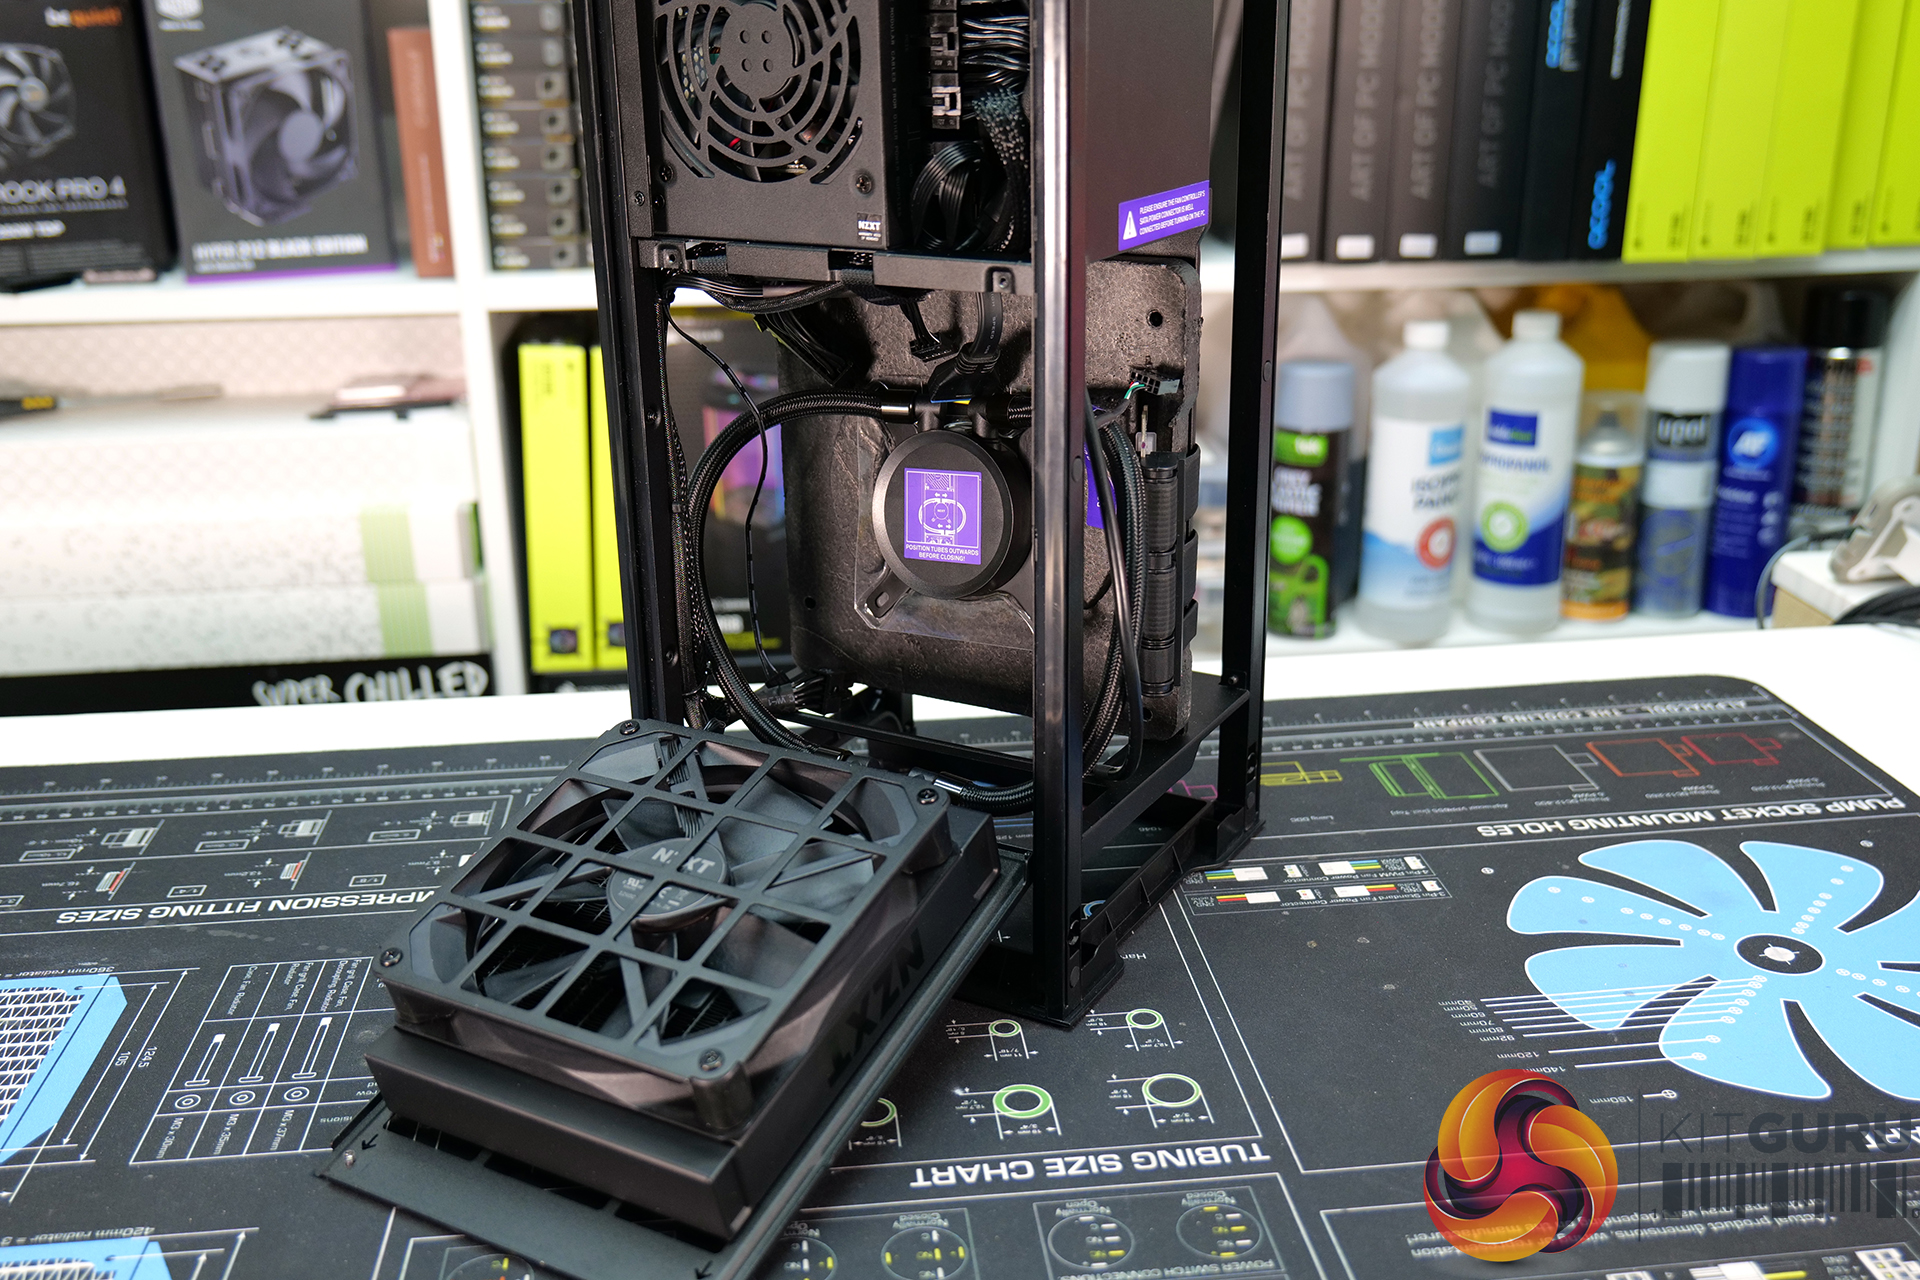
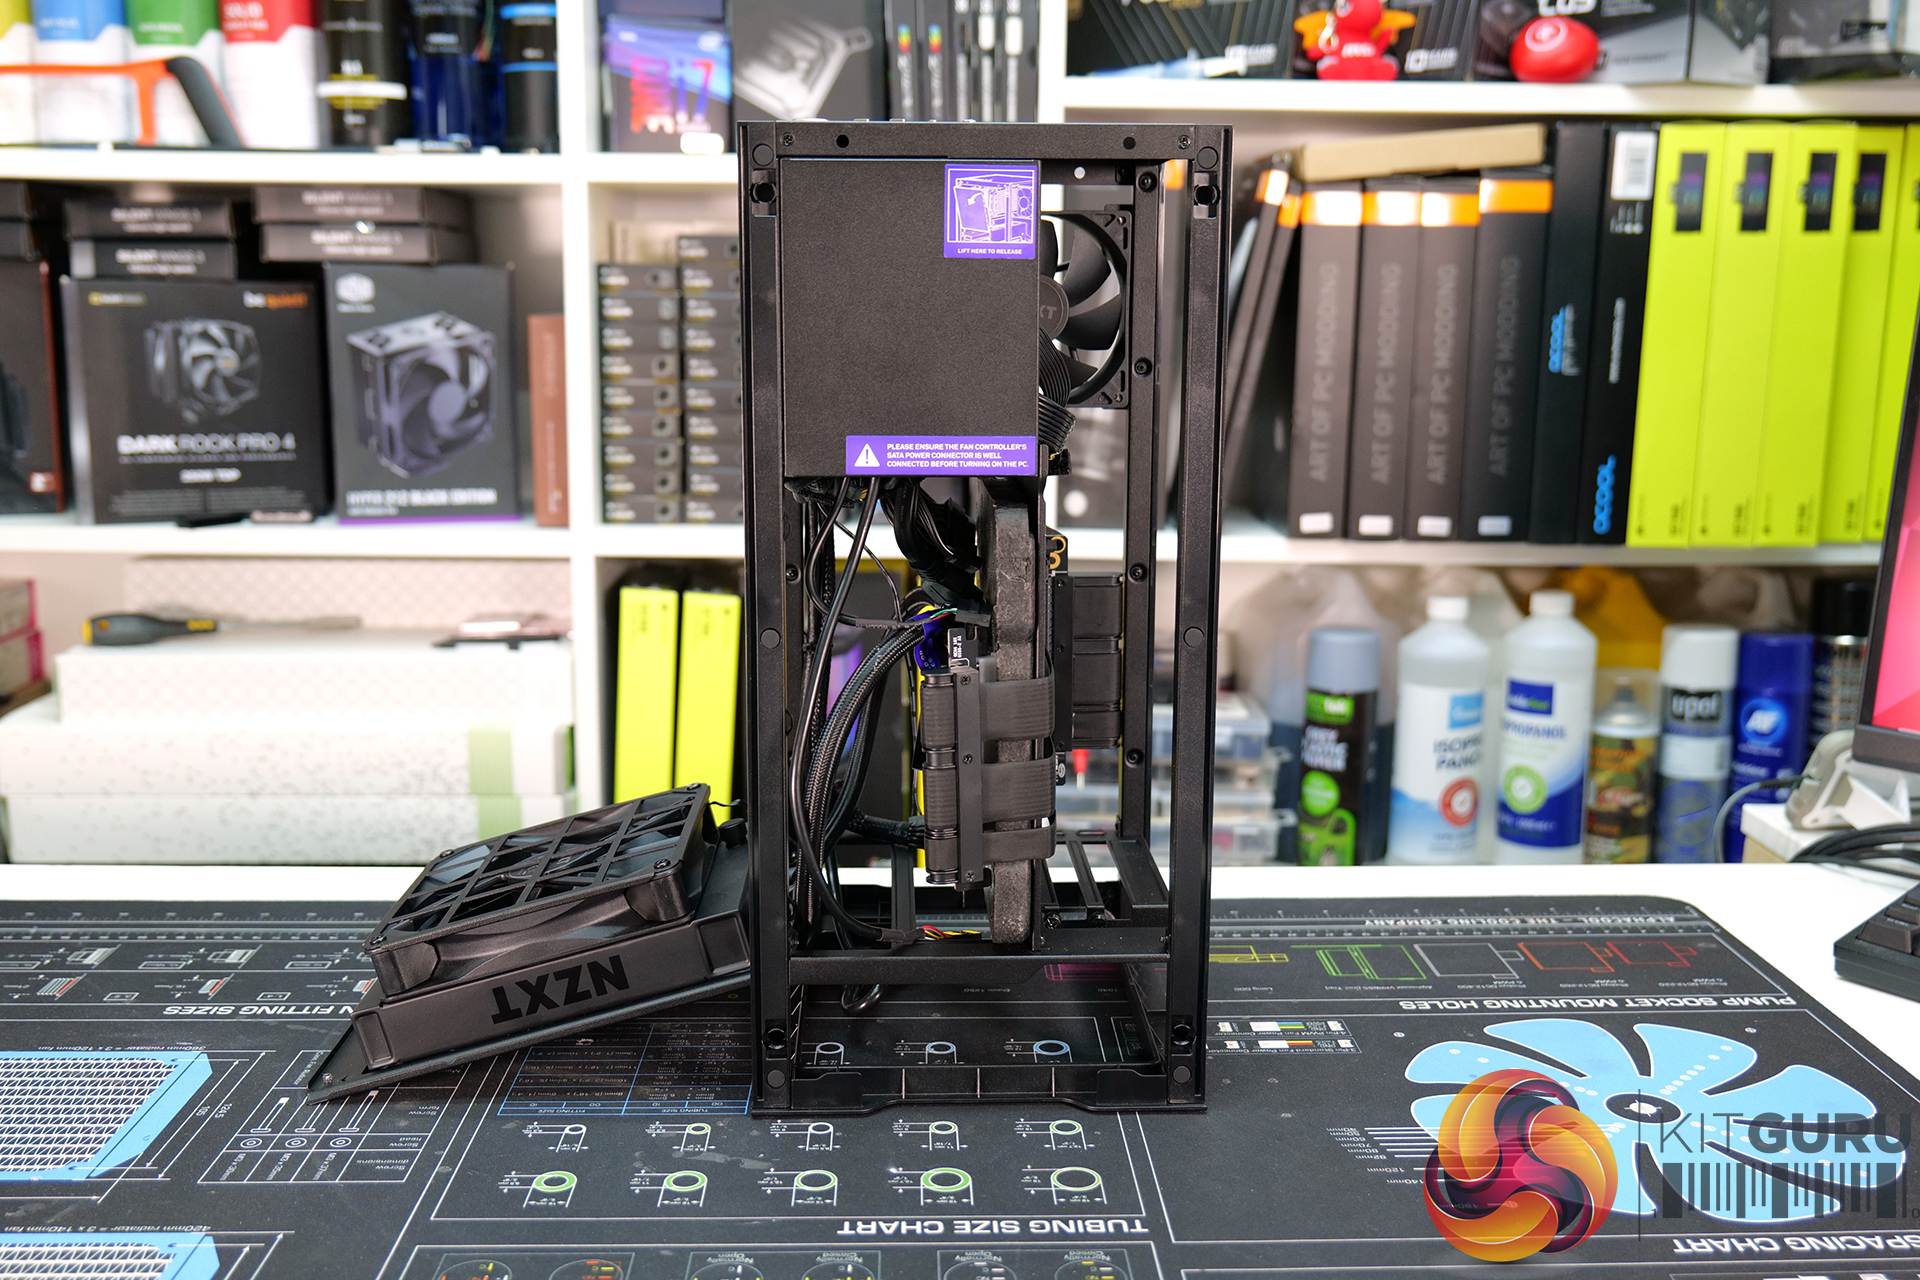
The engineers that designed the 2022 v2 version of the NZXT H1 addressed this problem by increasing the chassis height by 20mm, the width by approximately 8mm to allow for a longer, 2.7 slot thick card which increases RTX 30 and RX 6000 compatibility dramatically. A higher-Wattage 750W PSU is also included with the v2, as well as a PCIe Gen4 riser to fully support the performance of the new cards.
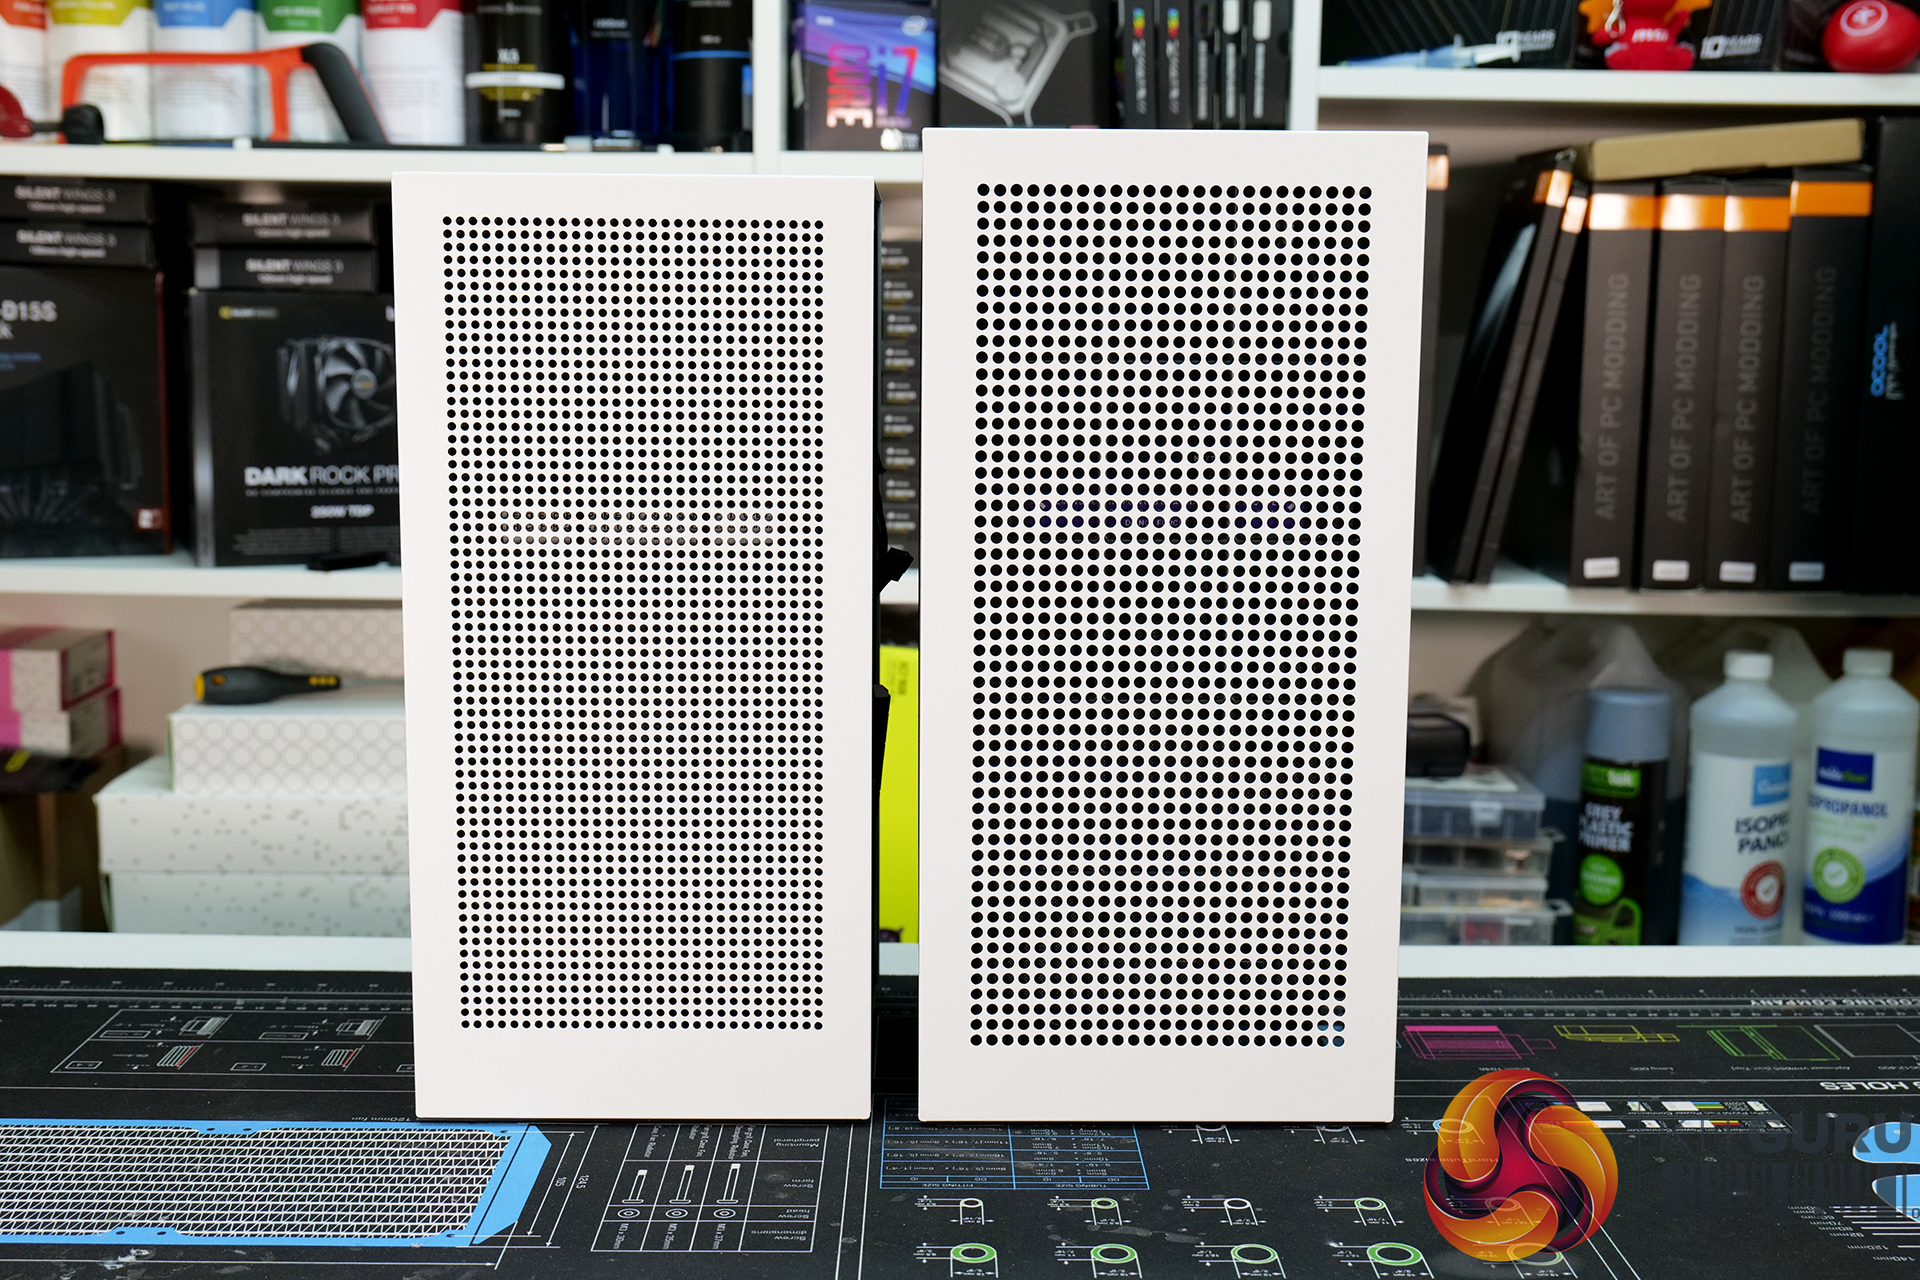
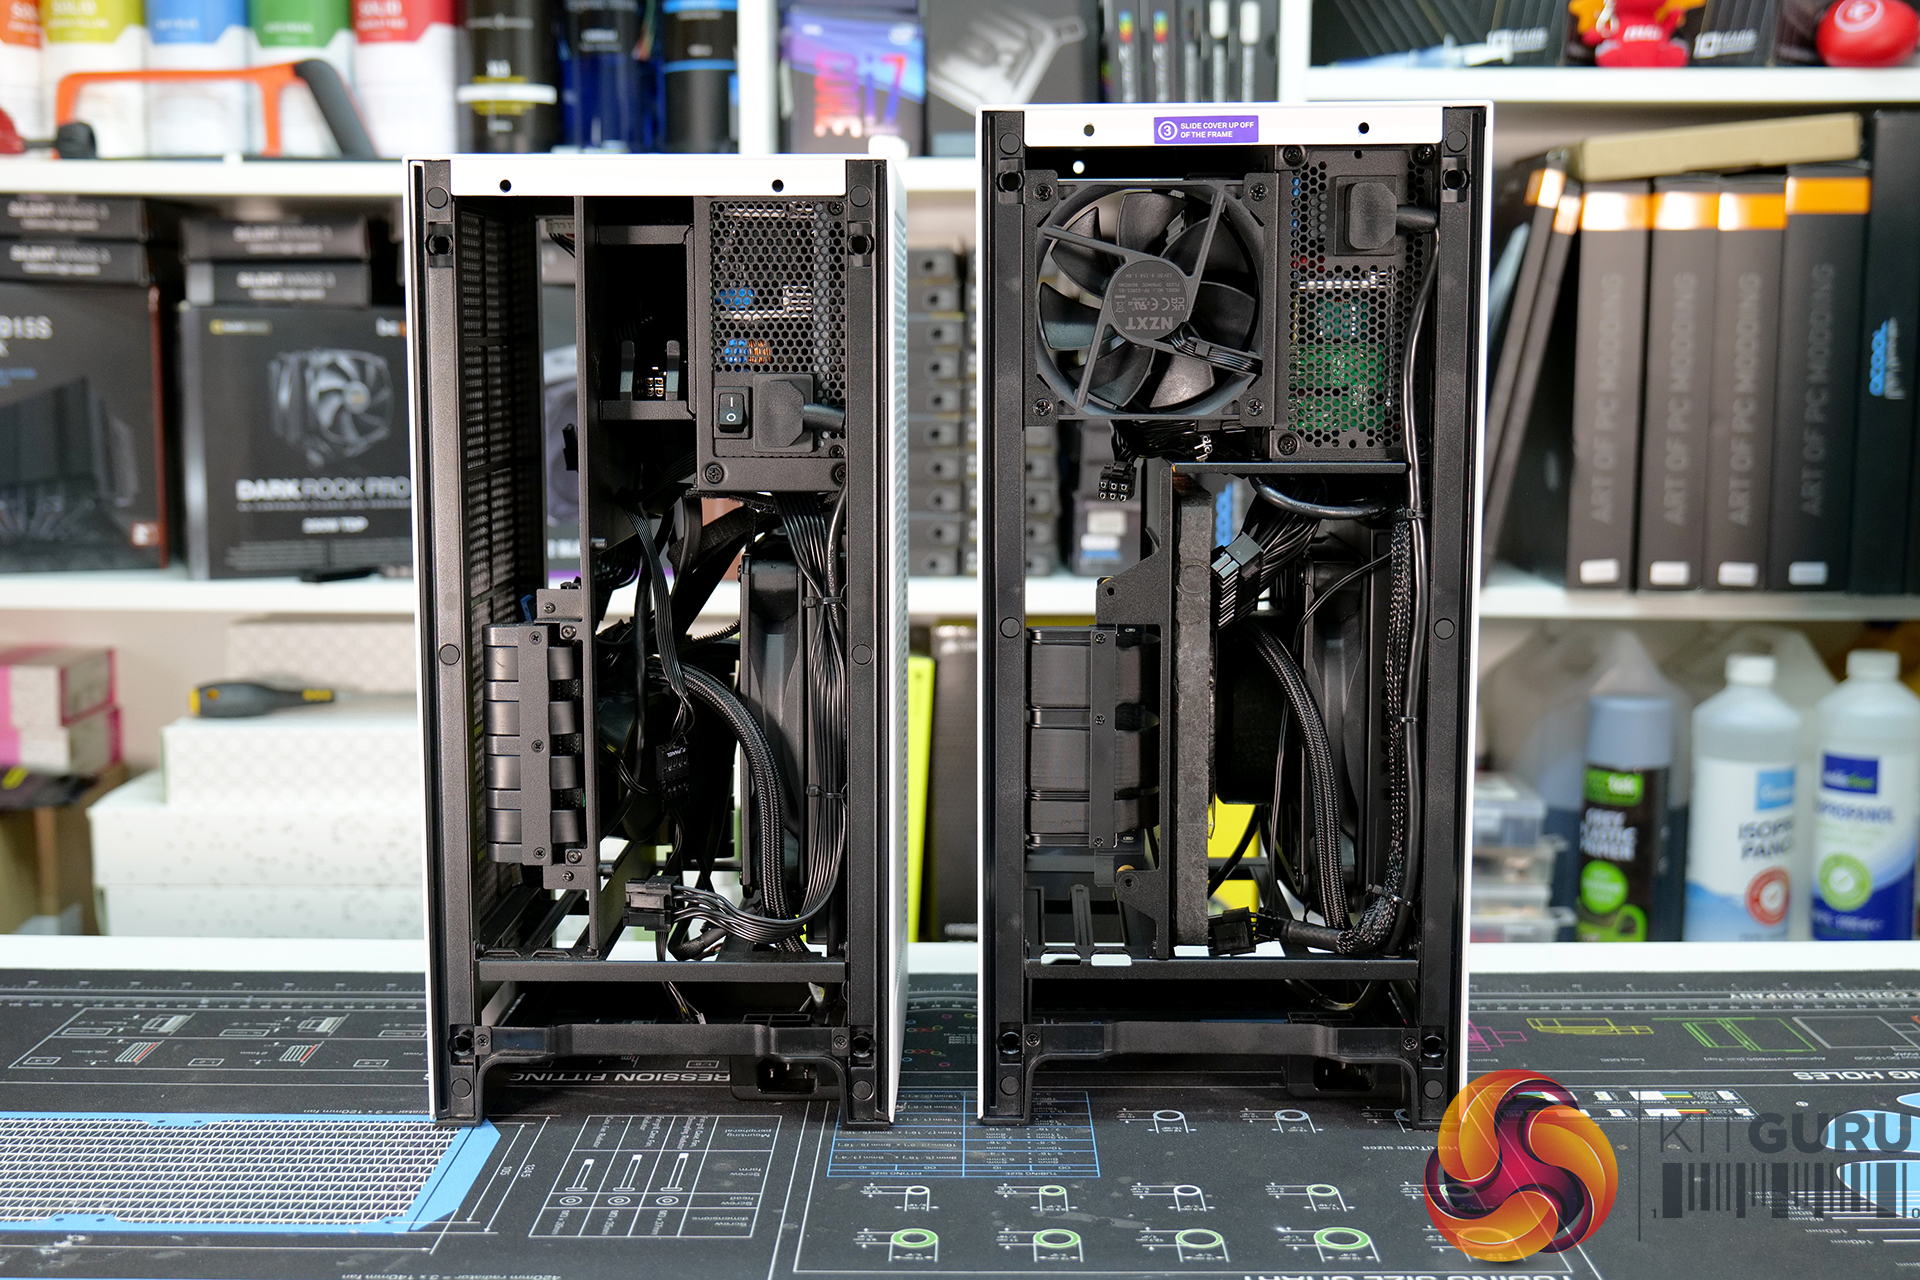
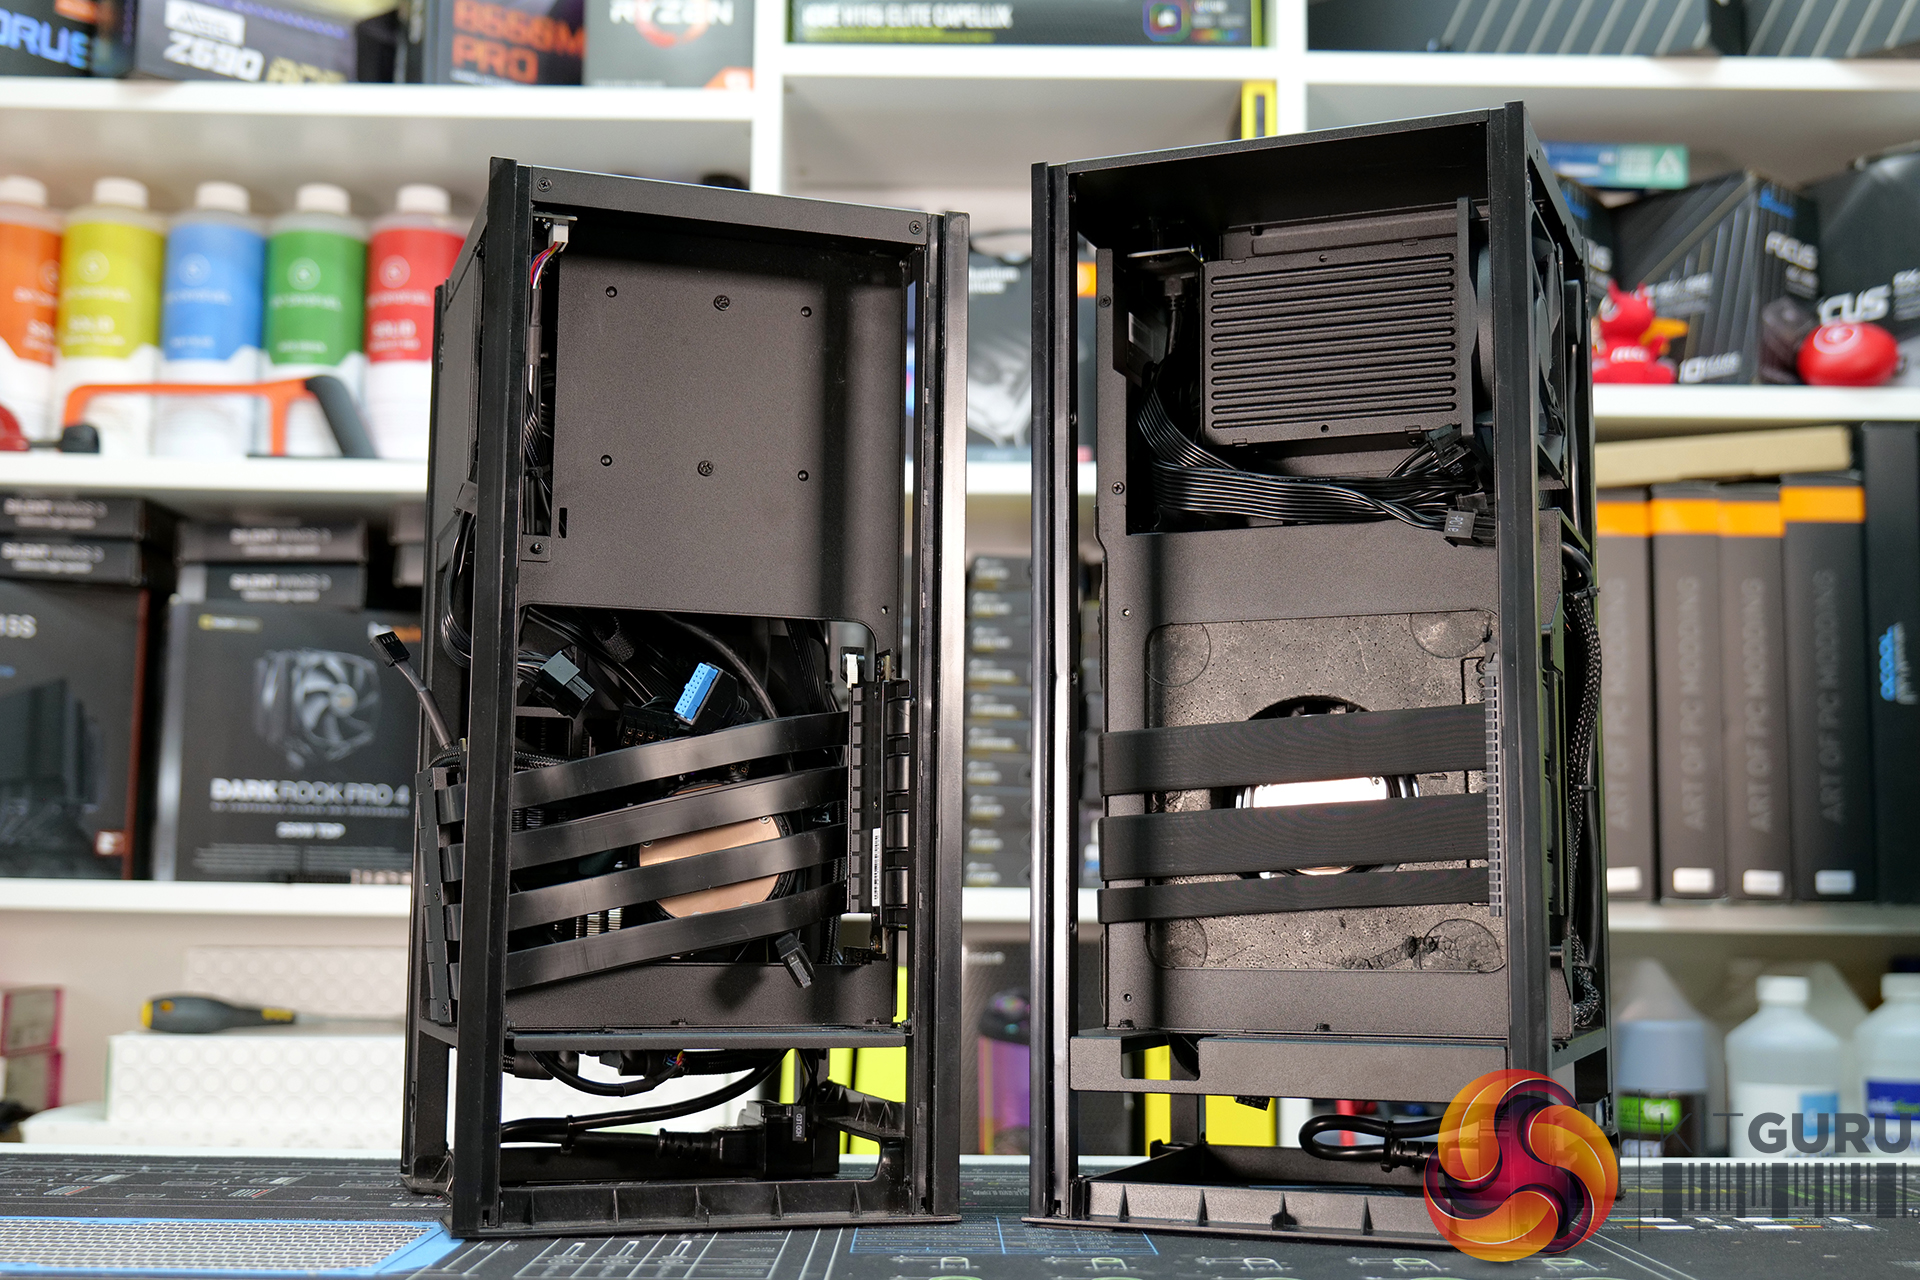
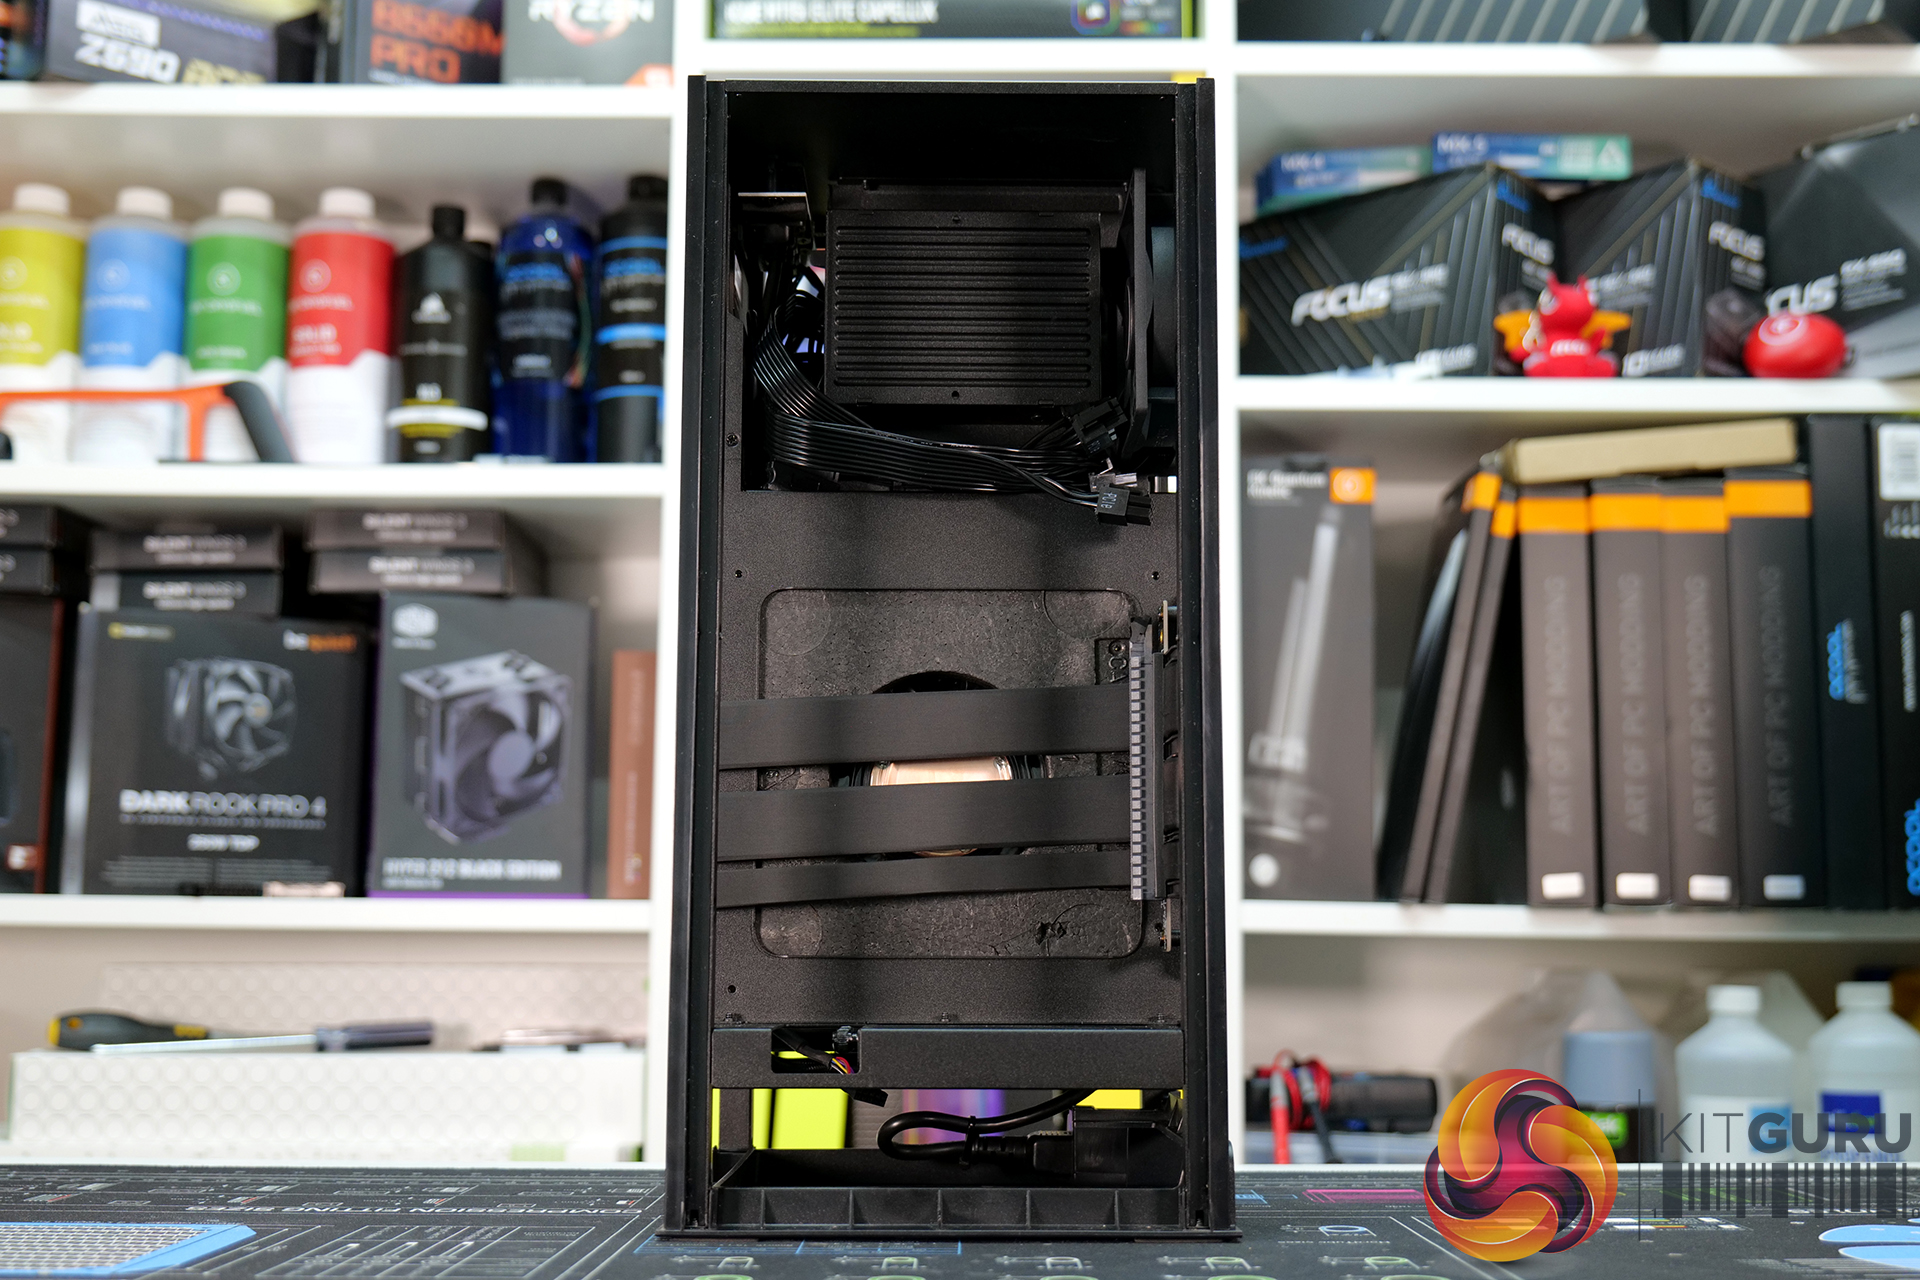
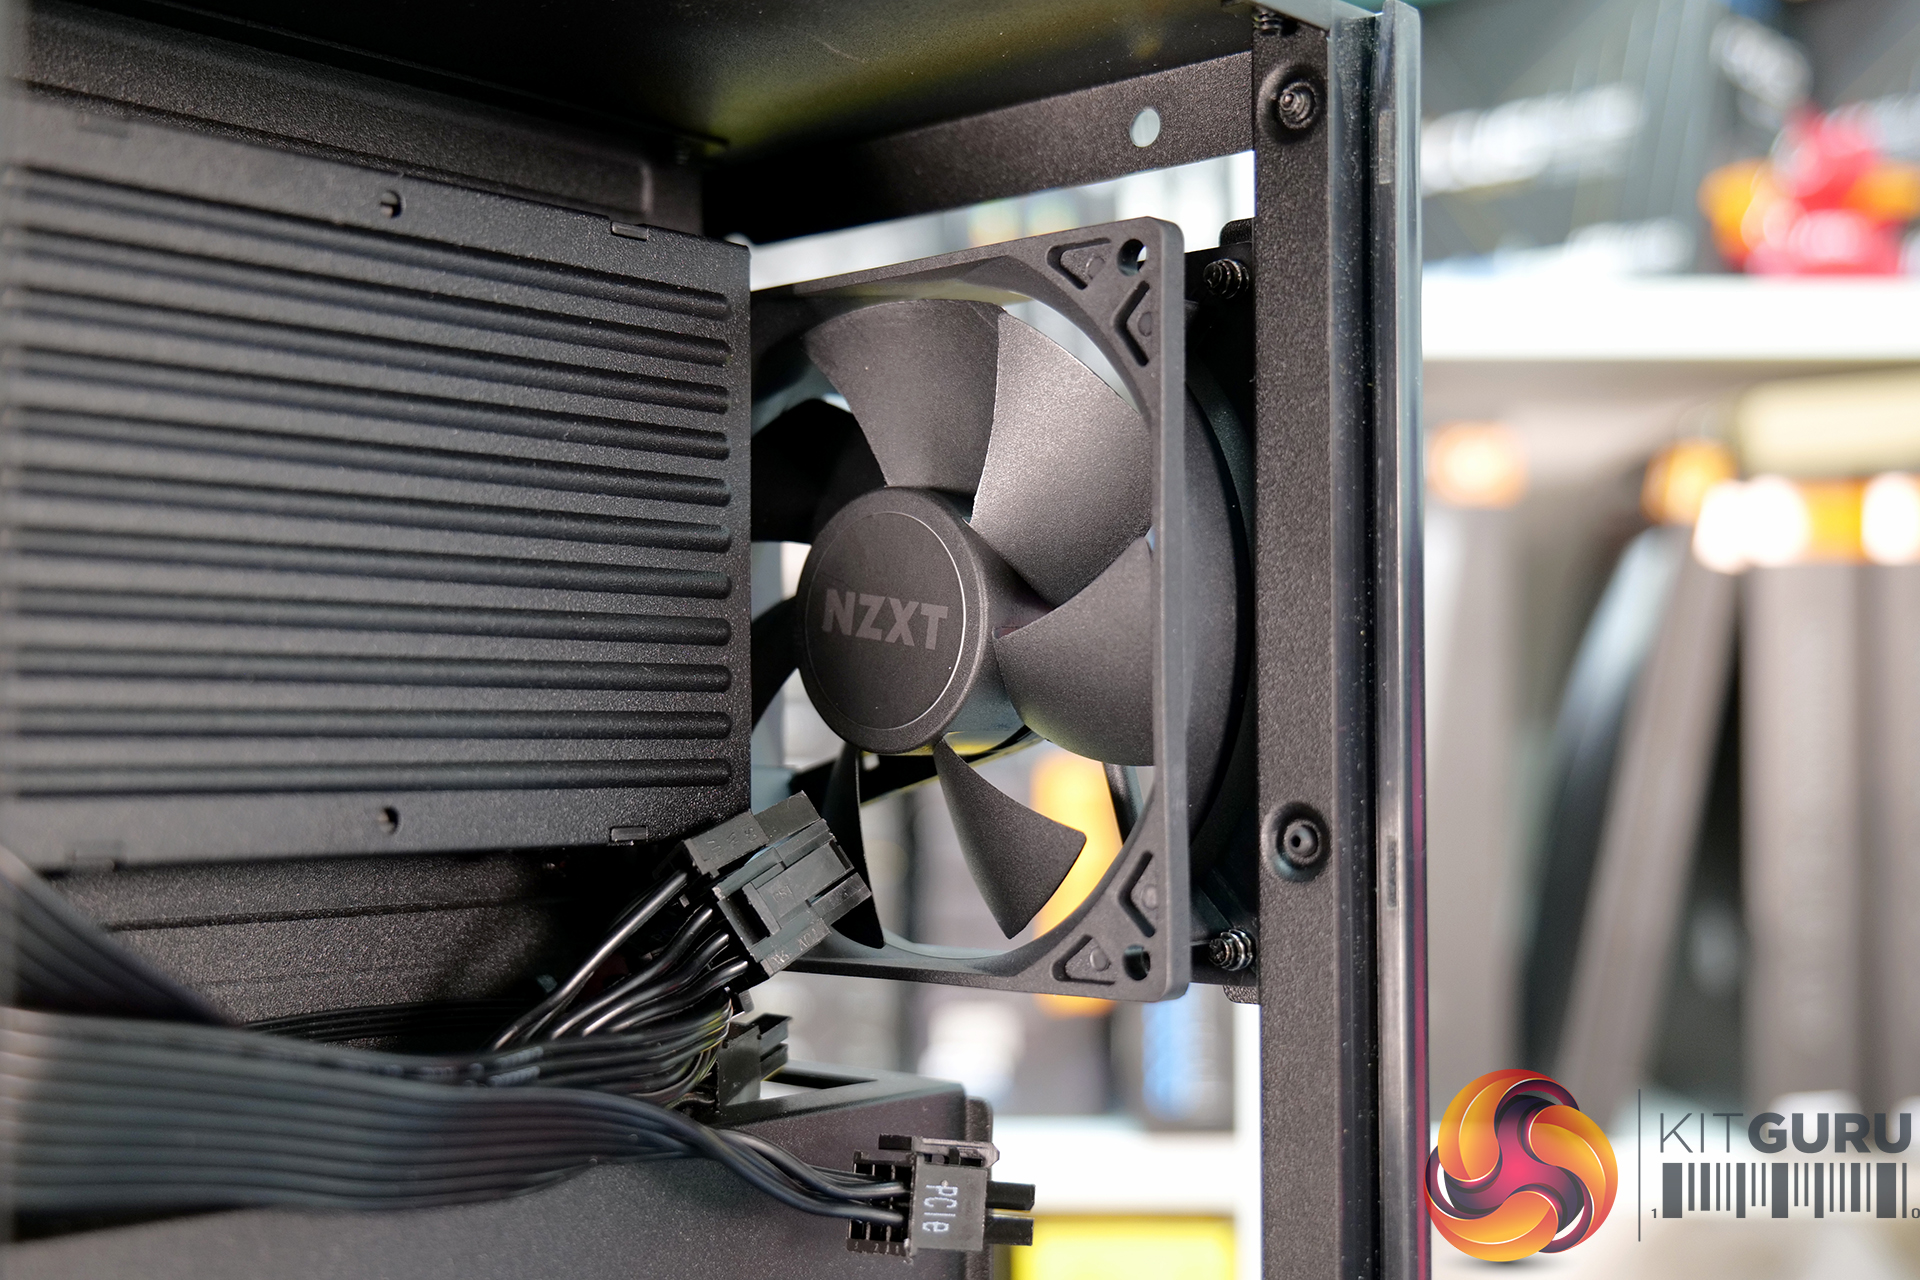
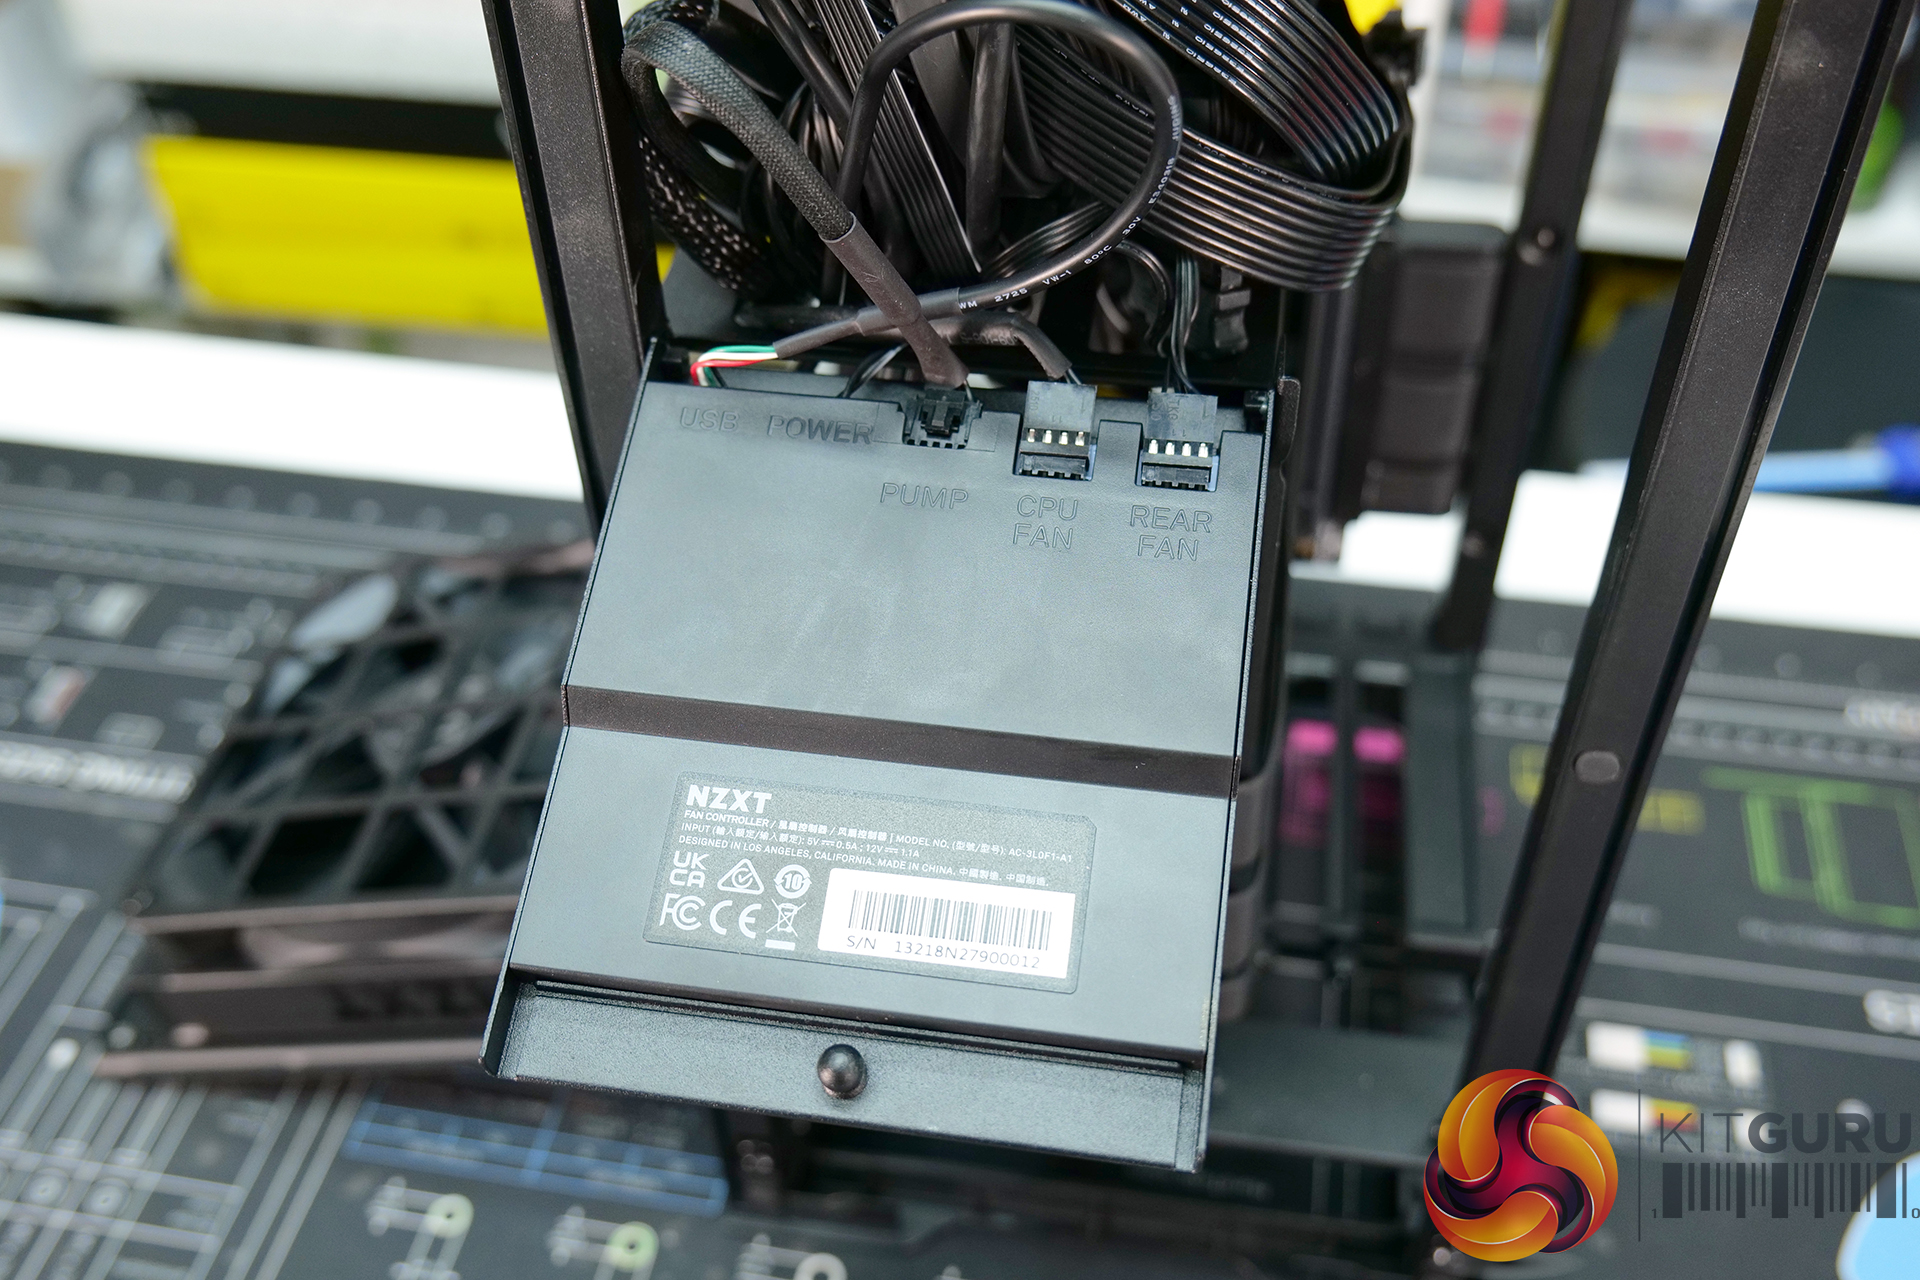
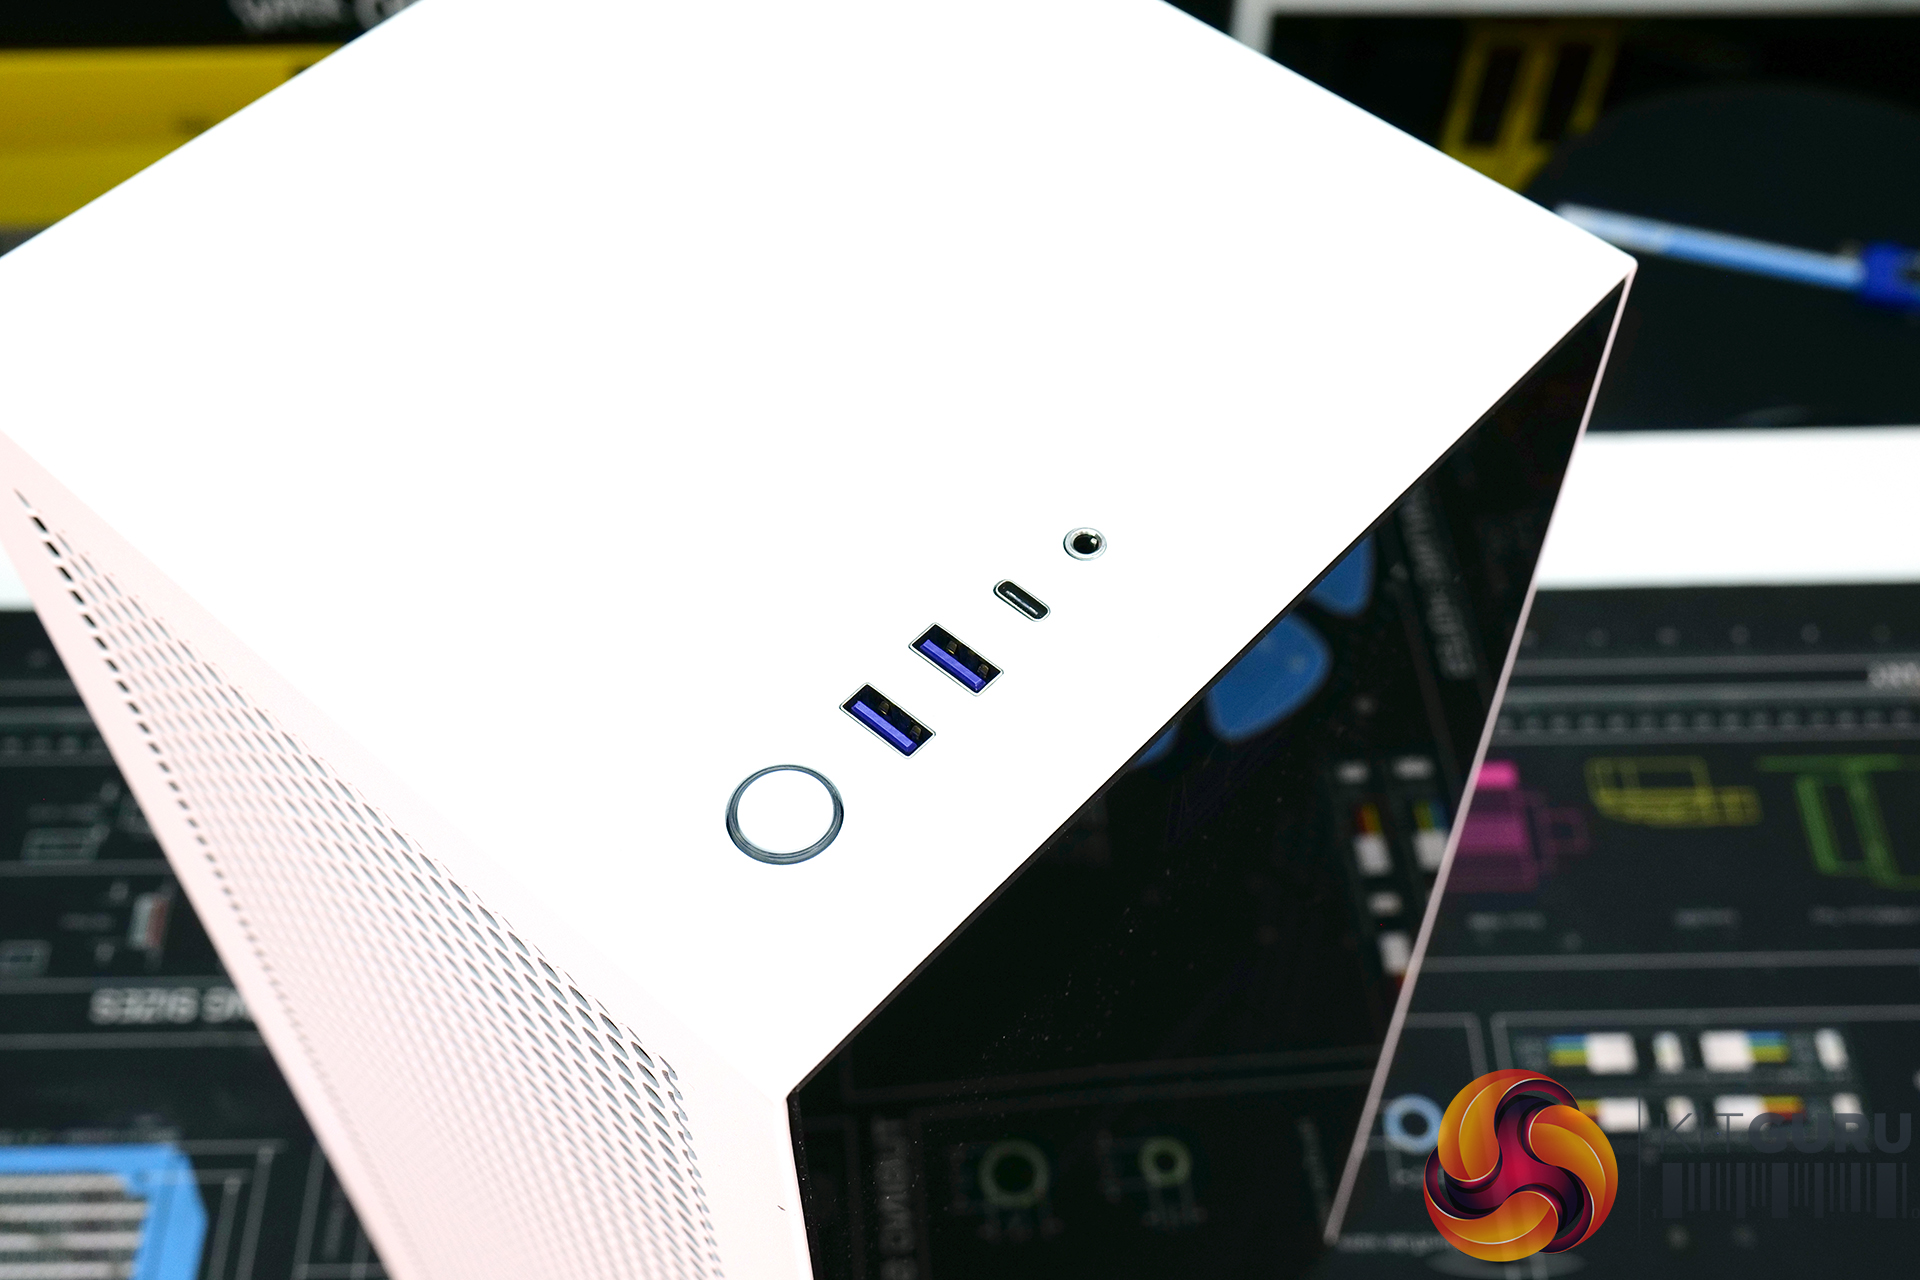
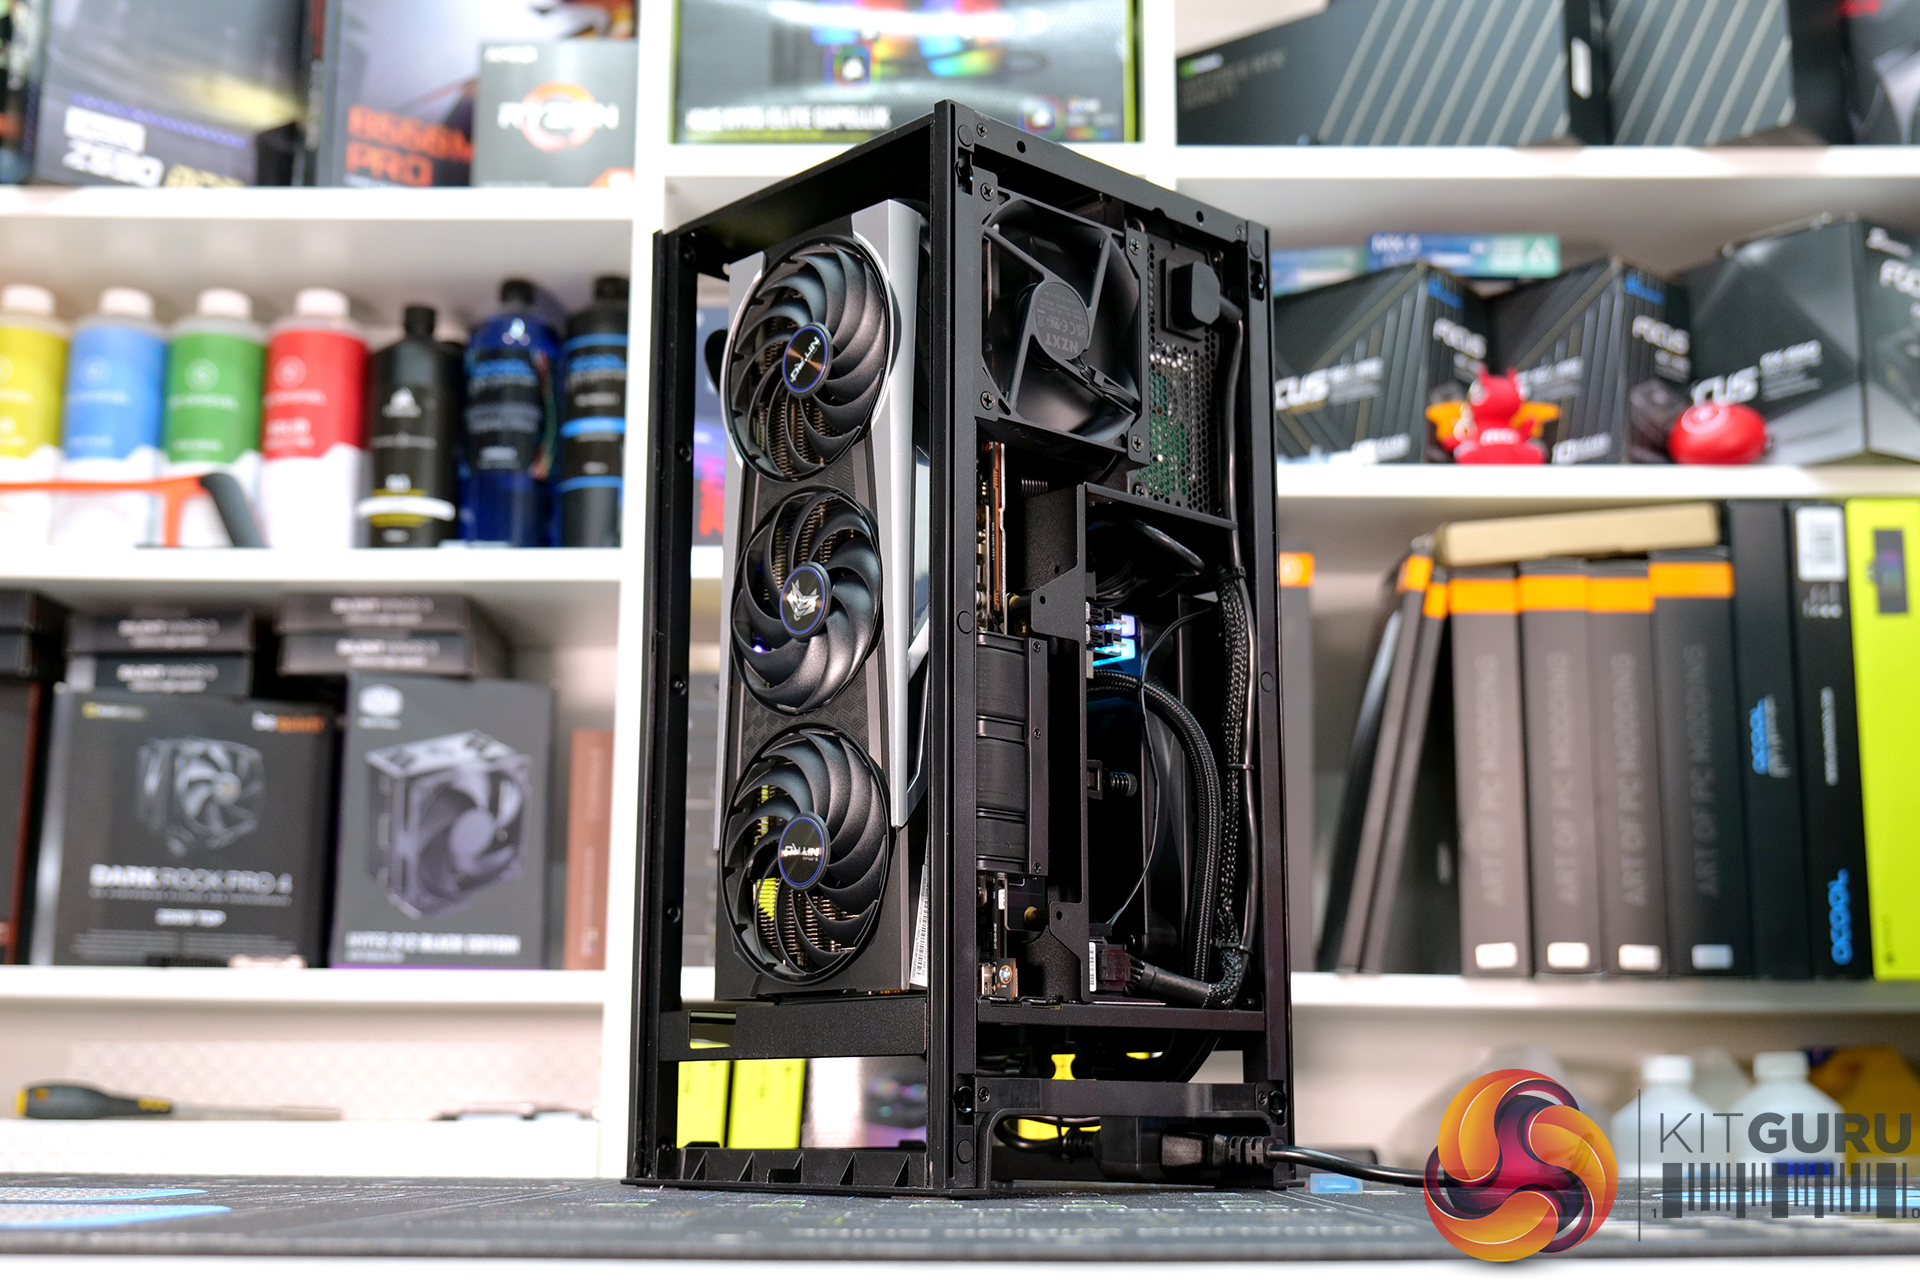
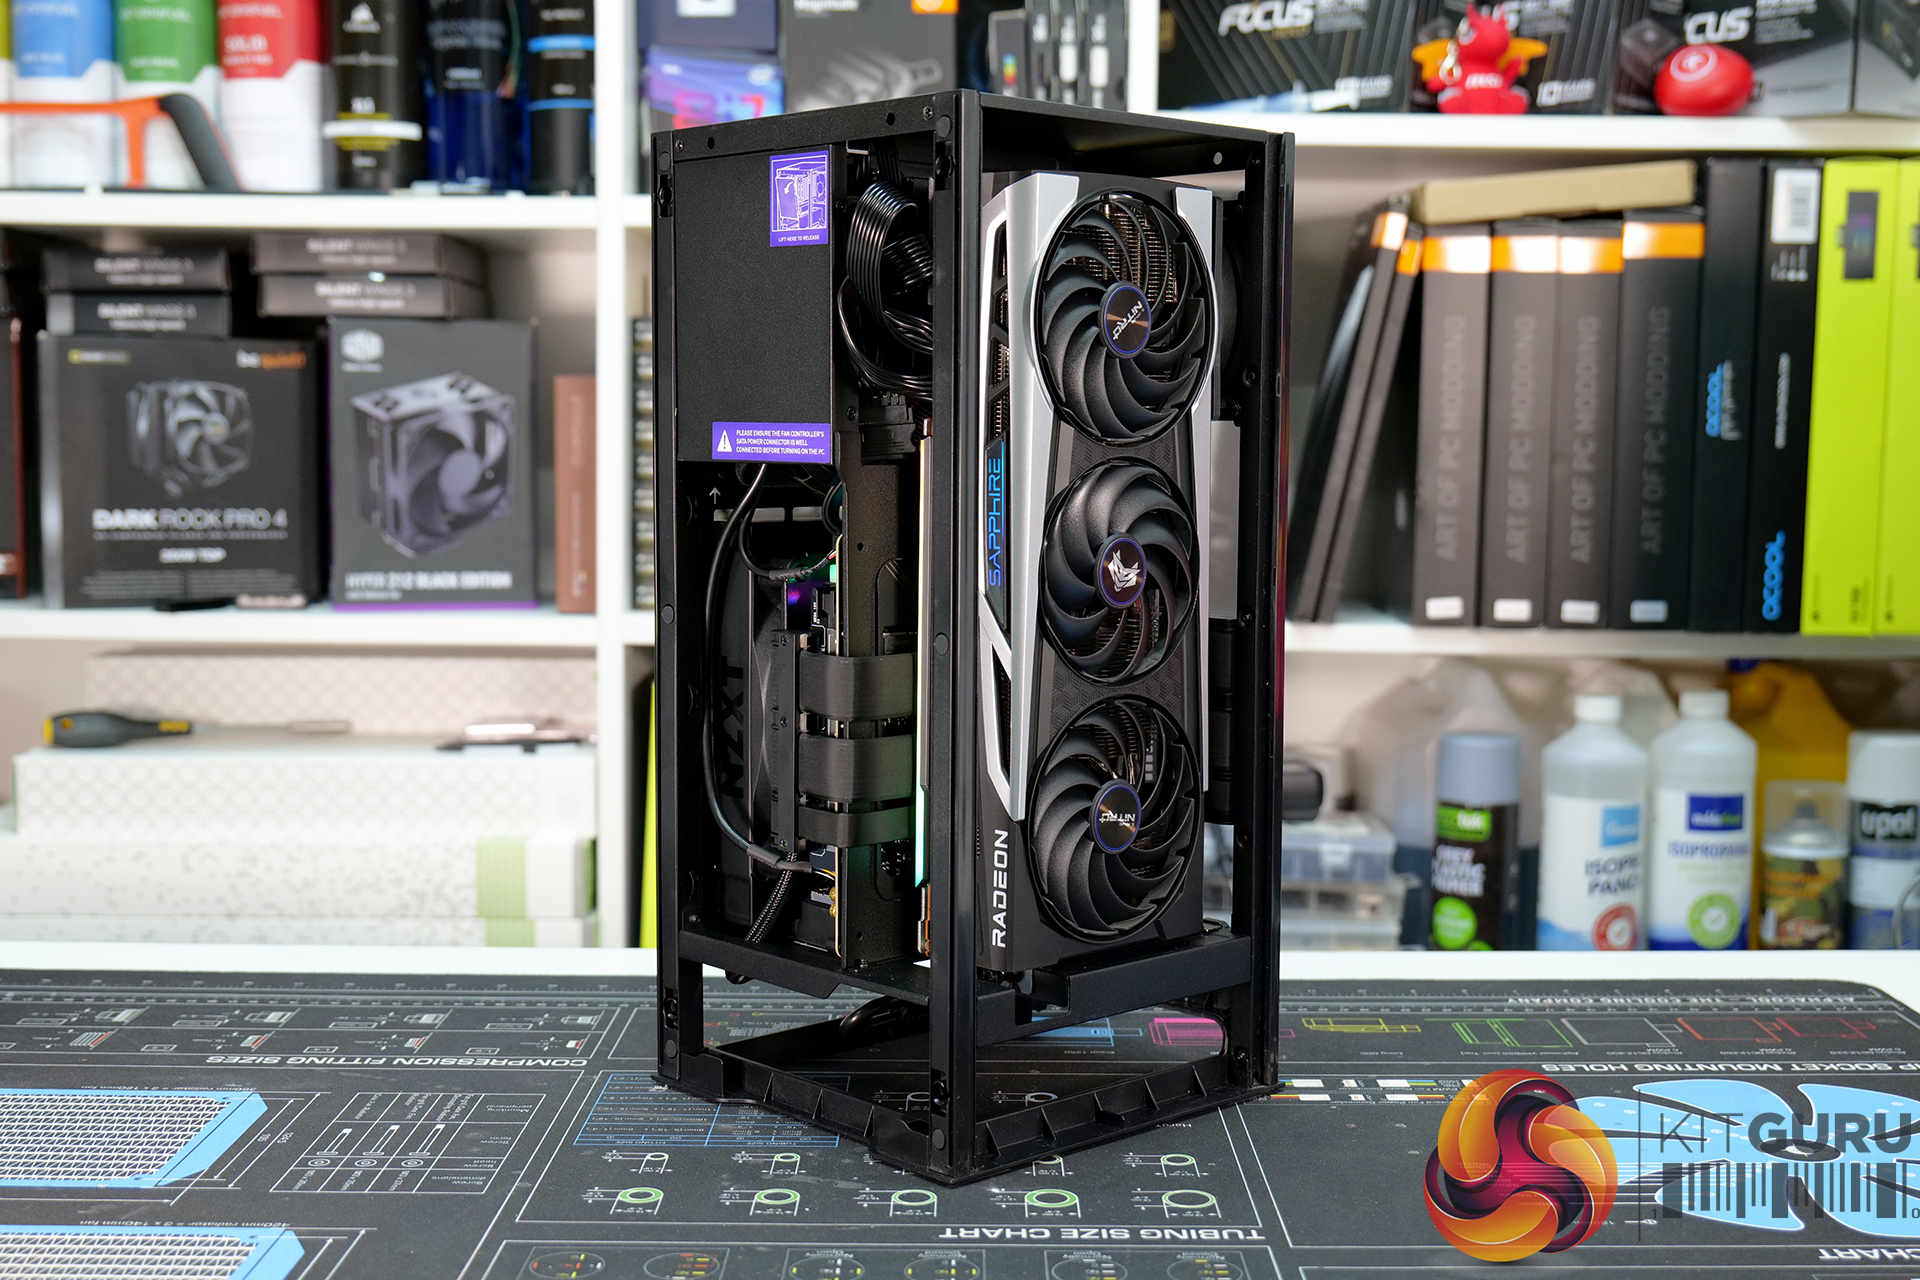
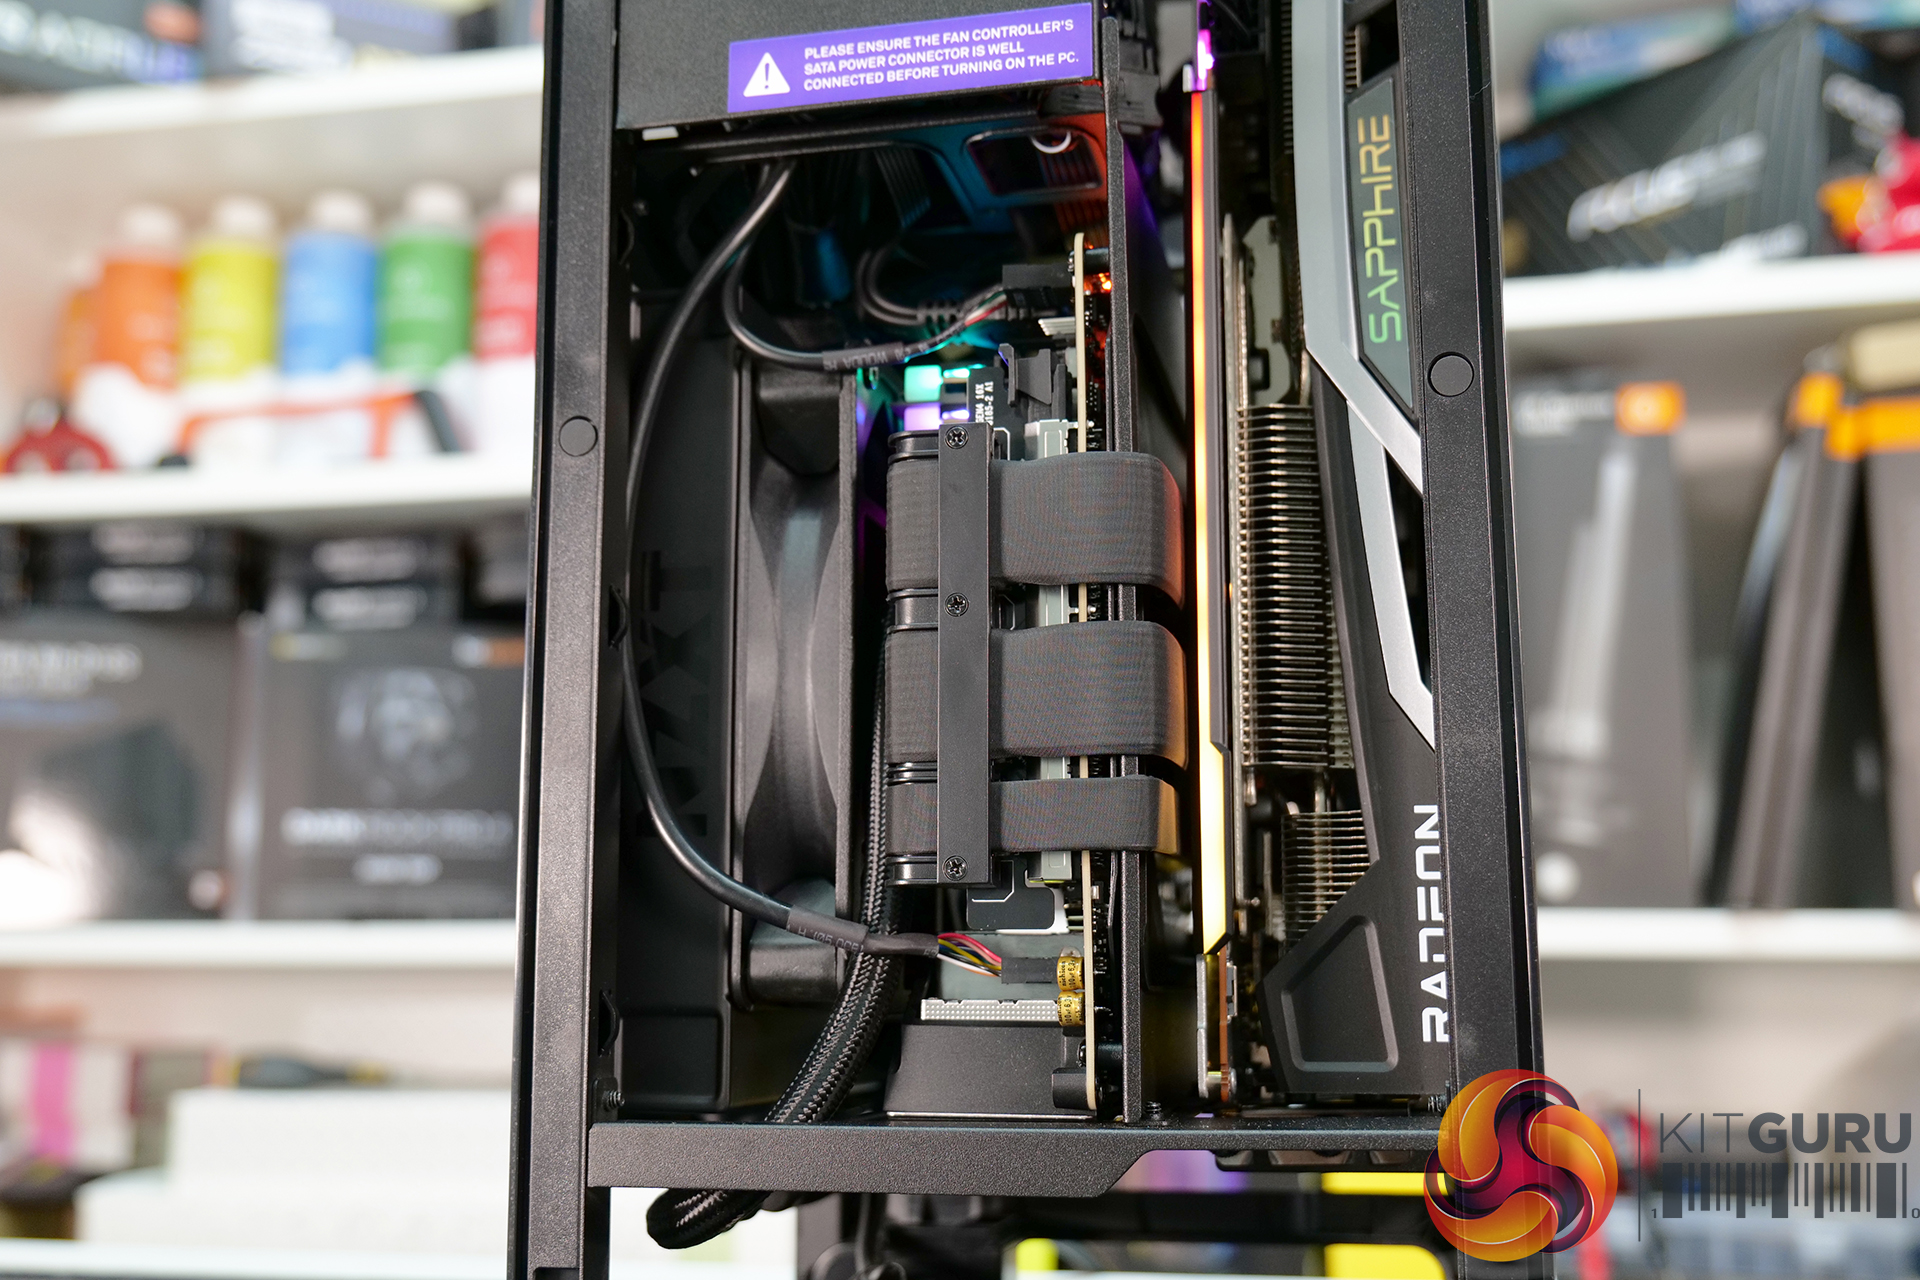
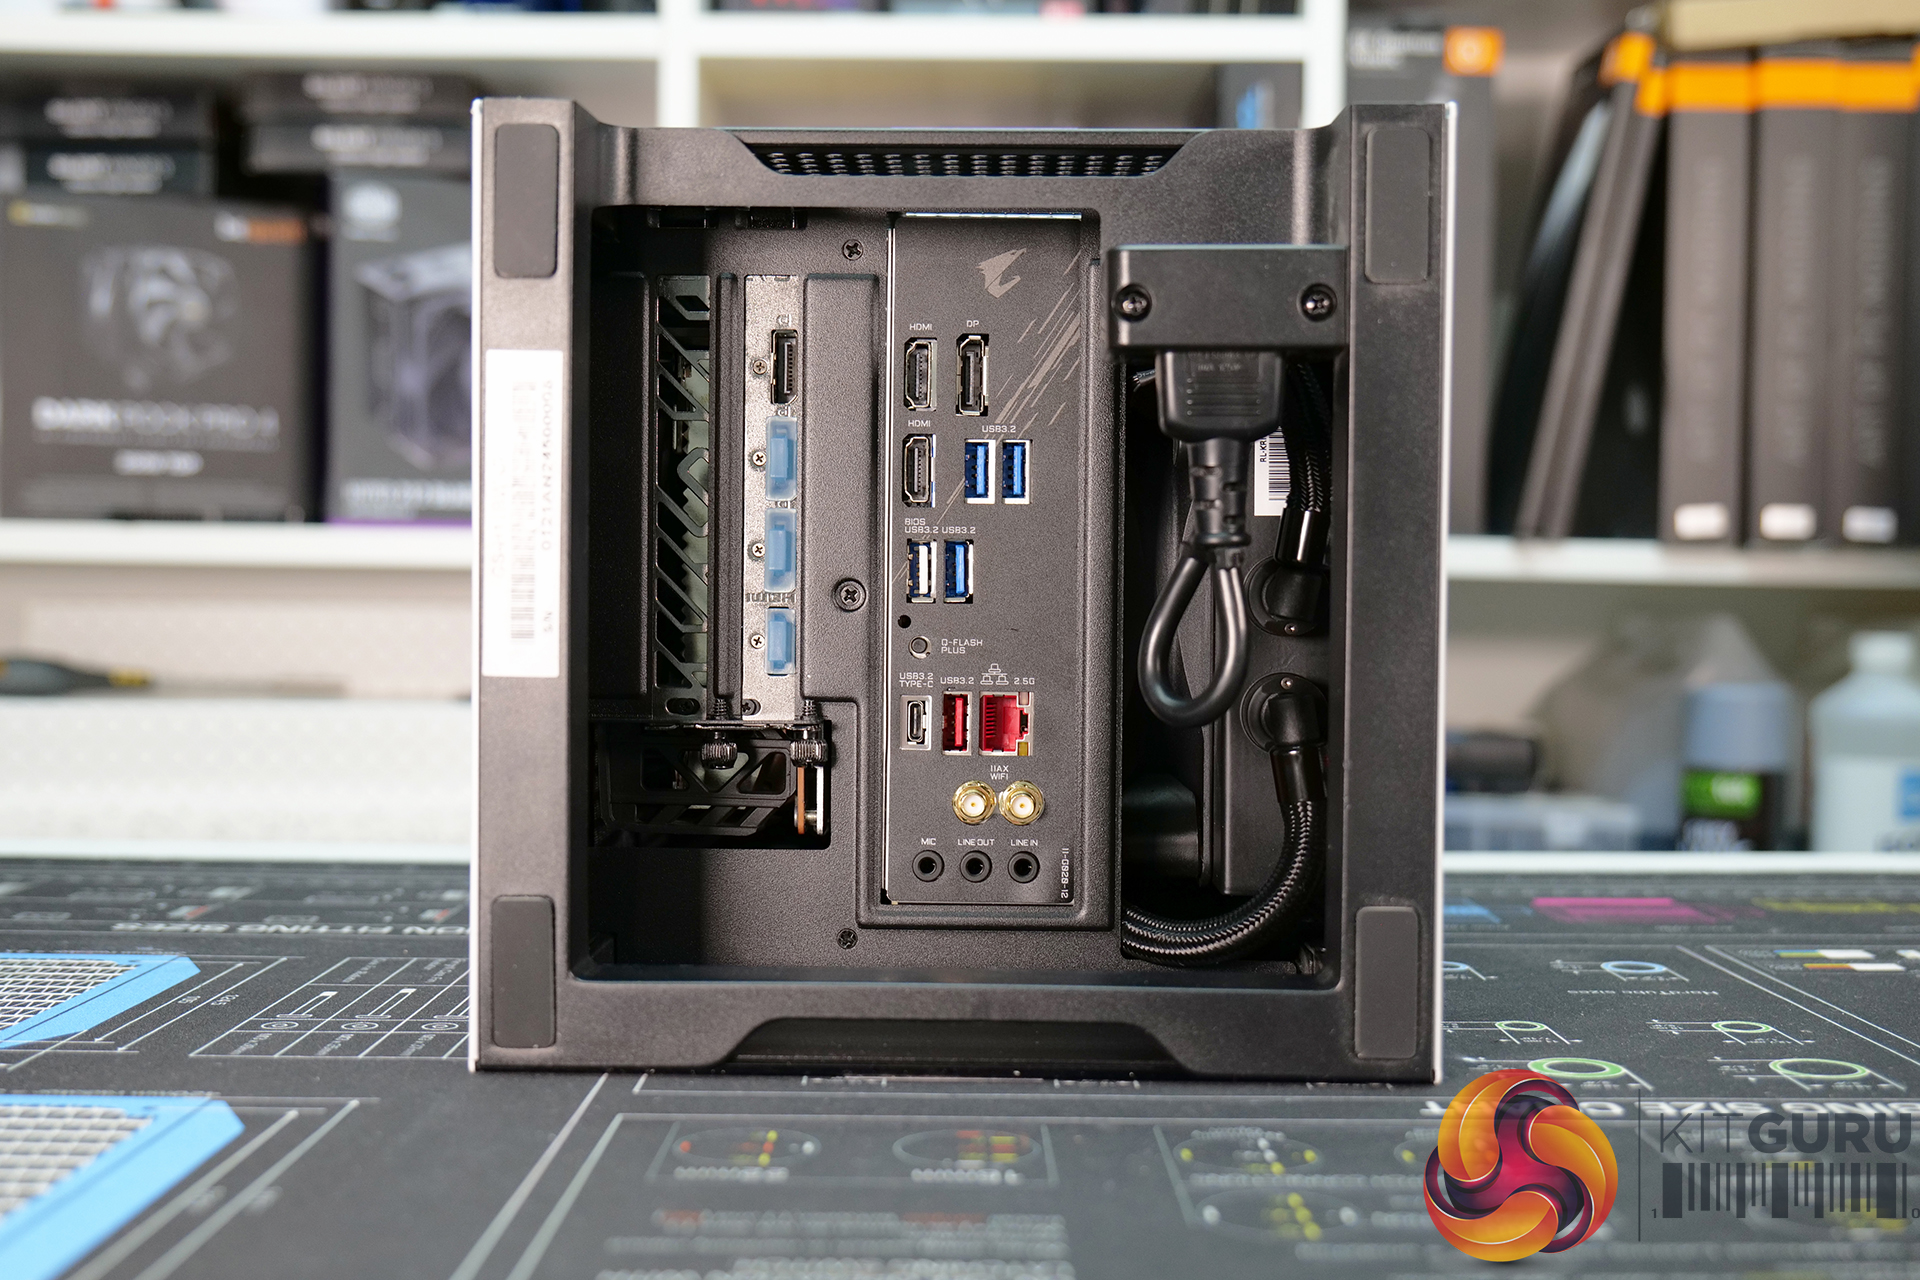
Other improvements include larger holes in the vented side panels and a 92mm exhaust fan squeezed into the top of the chassis GPU compartment to improve thermal performance. An extra USB Type-A port has been added to the front panel I/O and the AIO CPU cooler includes an LGA 1700 mount for 12th Gen Intel CPU compatible systems, boosting hardware compatibility even further. An NZXT fan hub controlled by CAM is built into the H1 now also.
NZXT H1 (v2 2022) Specification:
- Dimensions: 405 x 196 x 196 mm / 15.9 x 7.7 x 7.7 in.
- Motherboard Support: Mini-ITX
- Max GPU Thickness: 58mm
- Max GPU Clearance: 324mm
- Front I/O Ports: USB 3.2 Gen 1 Type-A x 2, USB 3.2 Gen 2 Type-C x 1, Headset Audio Jack x 1
- Drive Bays: 2.5”: 2
- Included Fans: 1 x 140mm Fan (Liquid cooler), 1 x 92mm Fan (Front)
- Integrated Power Supply: PS-7G1B SFX Modular 750W 80 Plus Gold
- Integrated CPU Liquid Cooler: RL-KR14H-01, Pump Speed 4200 ± 10%RPM
- Integrated PCIe Extender: PCI Express x 16 PCIe Gen.4
- Fan Controller: 2 CH, PWM Control
- Warranty: 3 years on the case, PCIe extender and AIO, 10 years on the PSU

System Installation
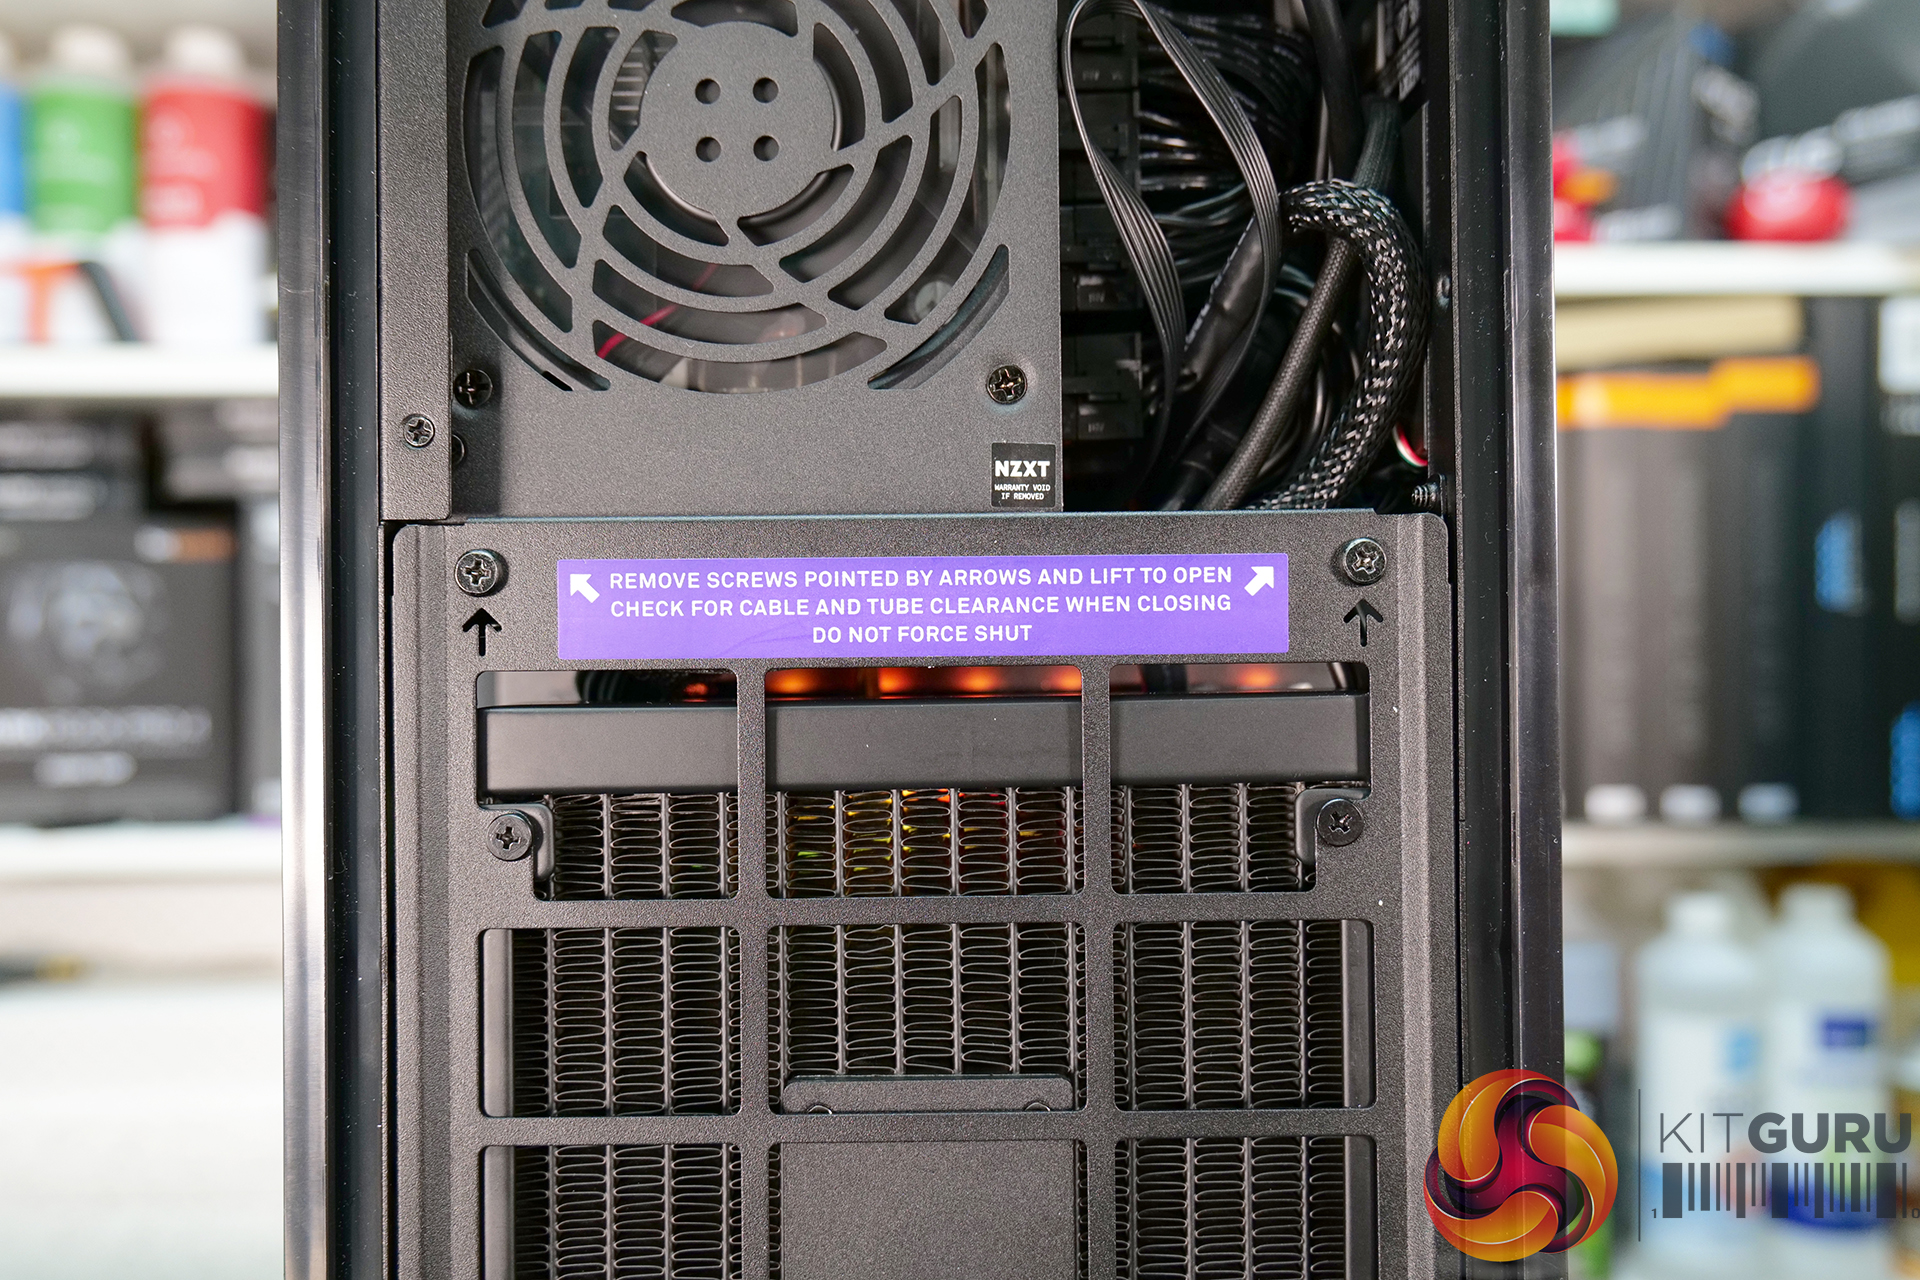
Since the major components needed to build in the H1 such as the power supply, AIO, PCIe riser etc are pre-installed and there is only one layout option, building a system inside the NZXT H1 is very simple which is great for novice users. NZXT add little pointers on labels around the case as a guide for first-time users. With these pointers and the user guide, it's almost impossible to go wrong when building with the H1.
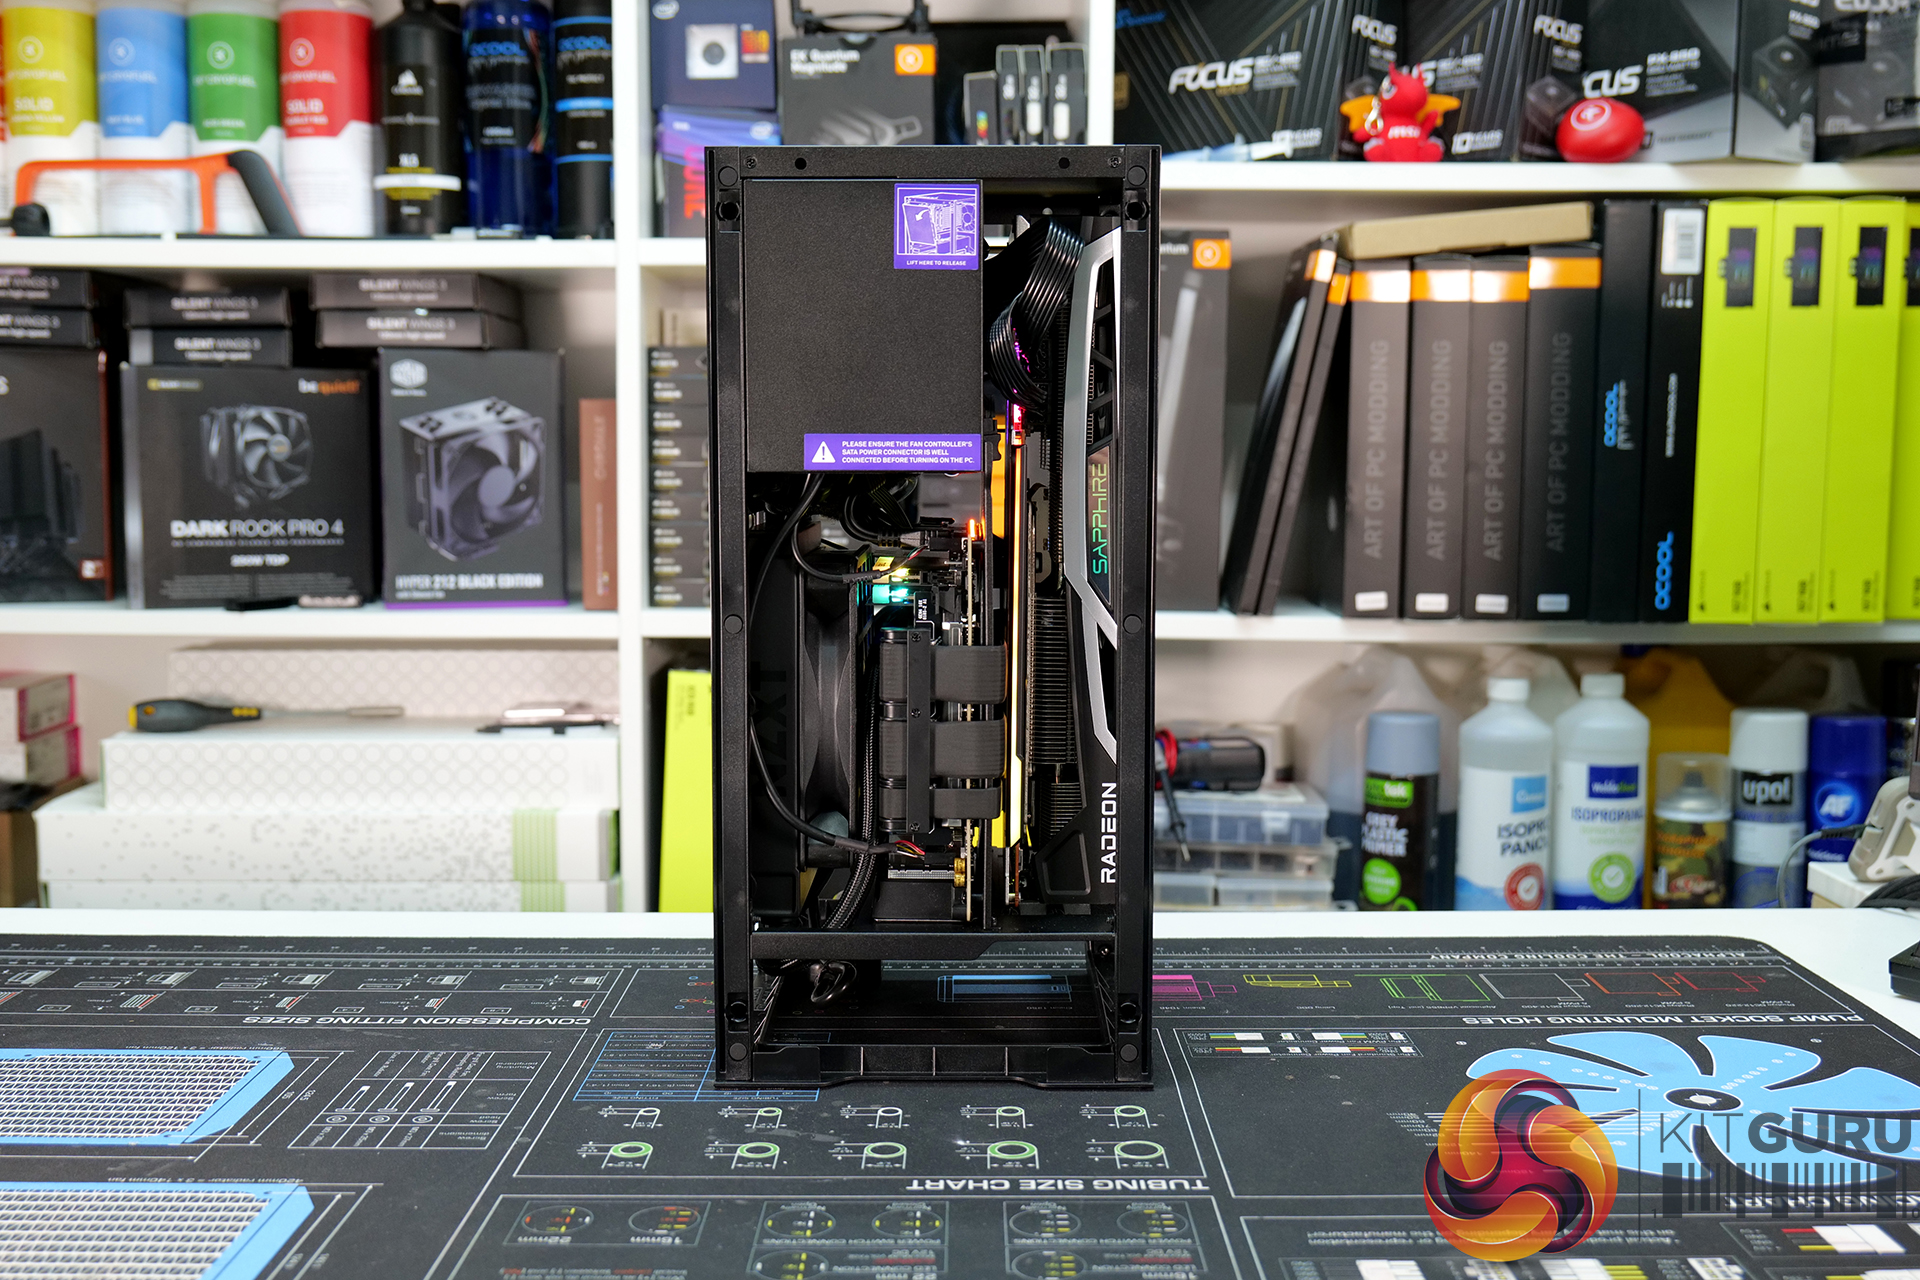
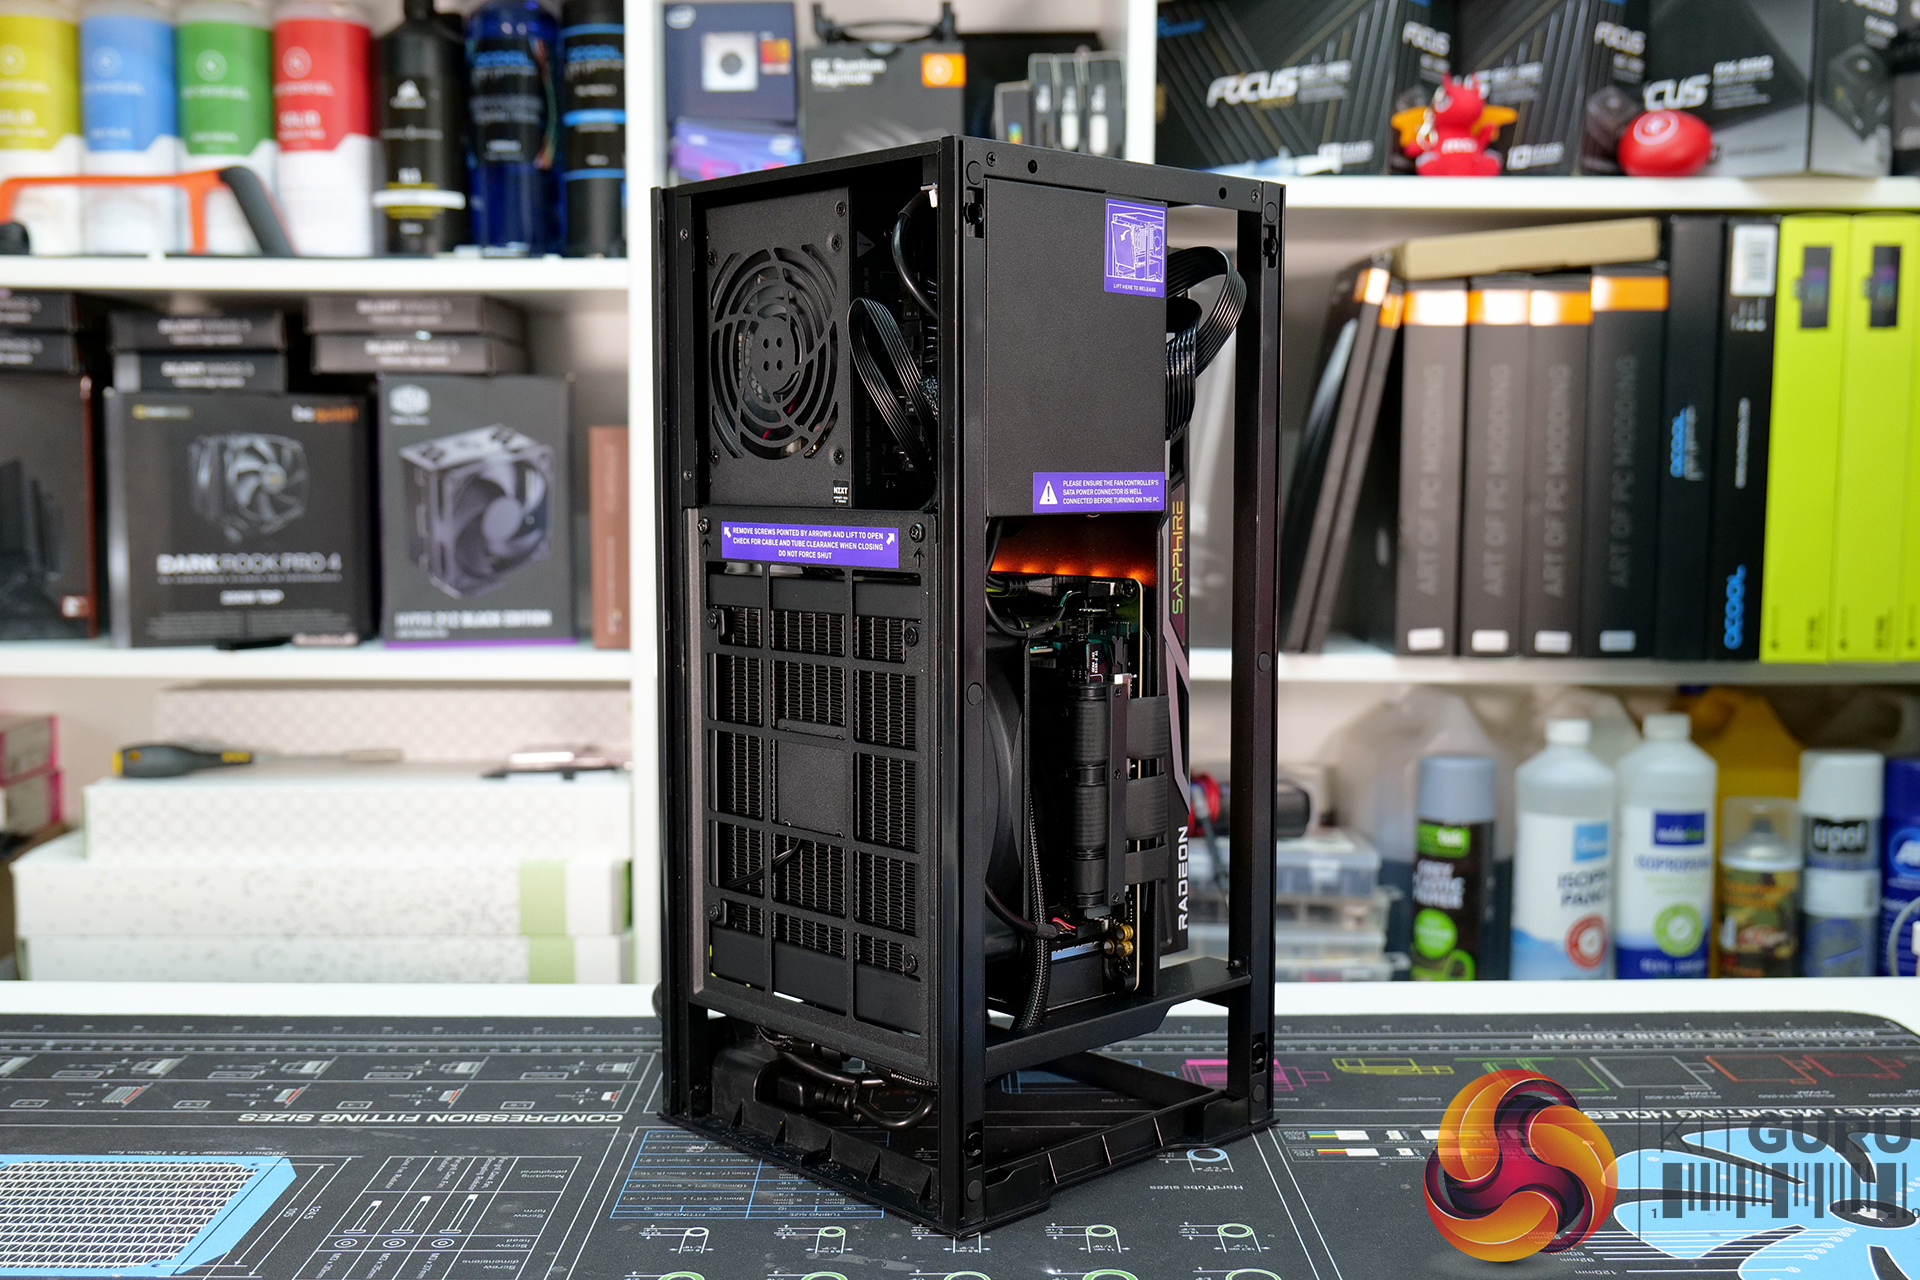
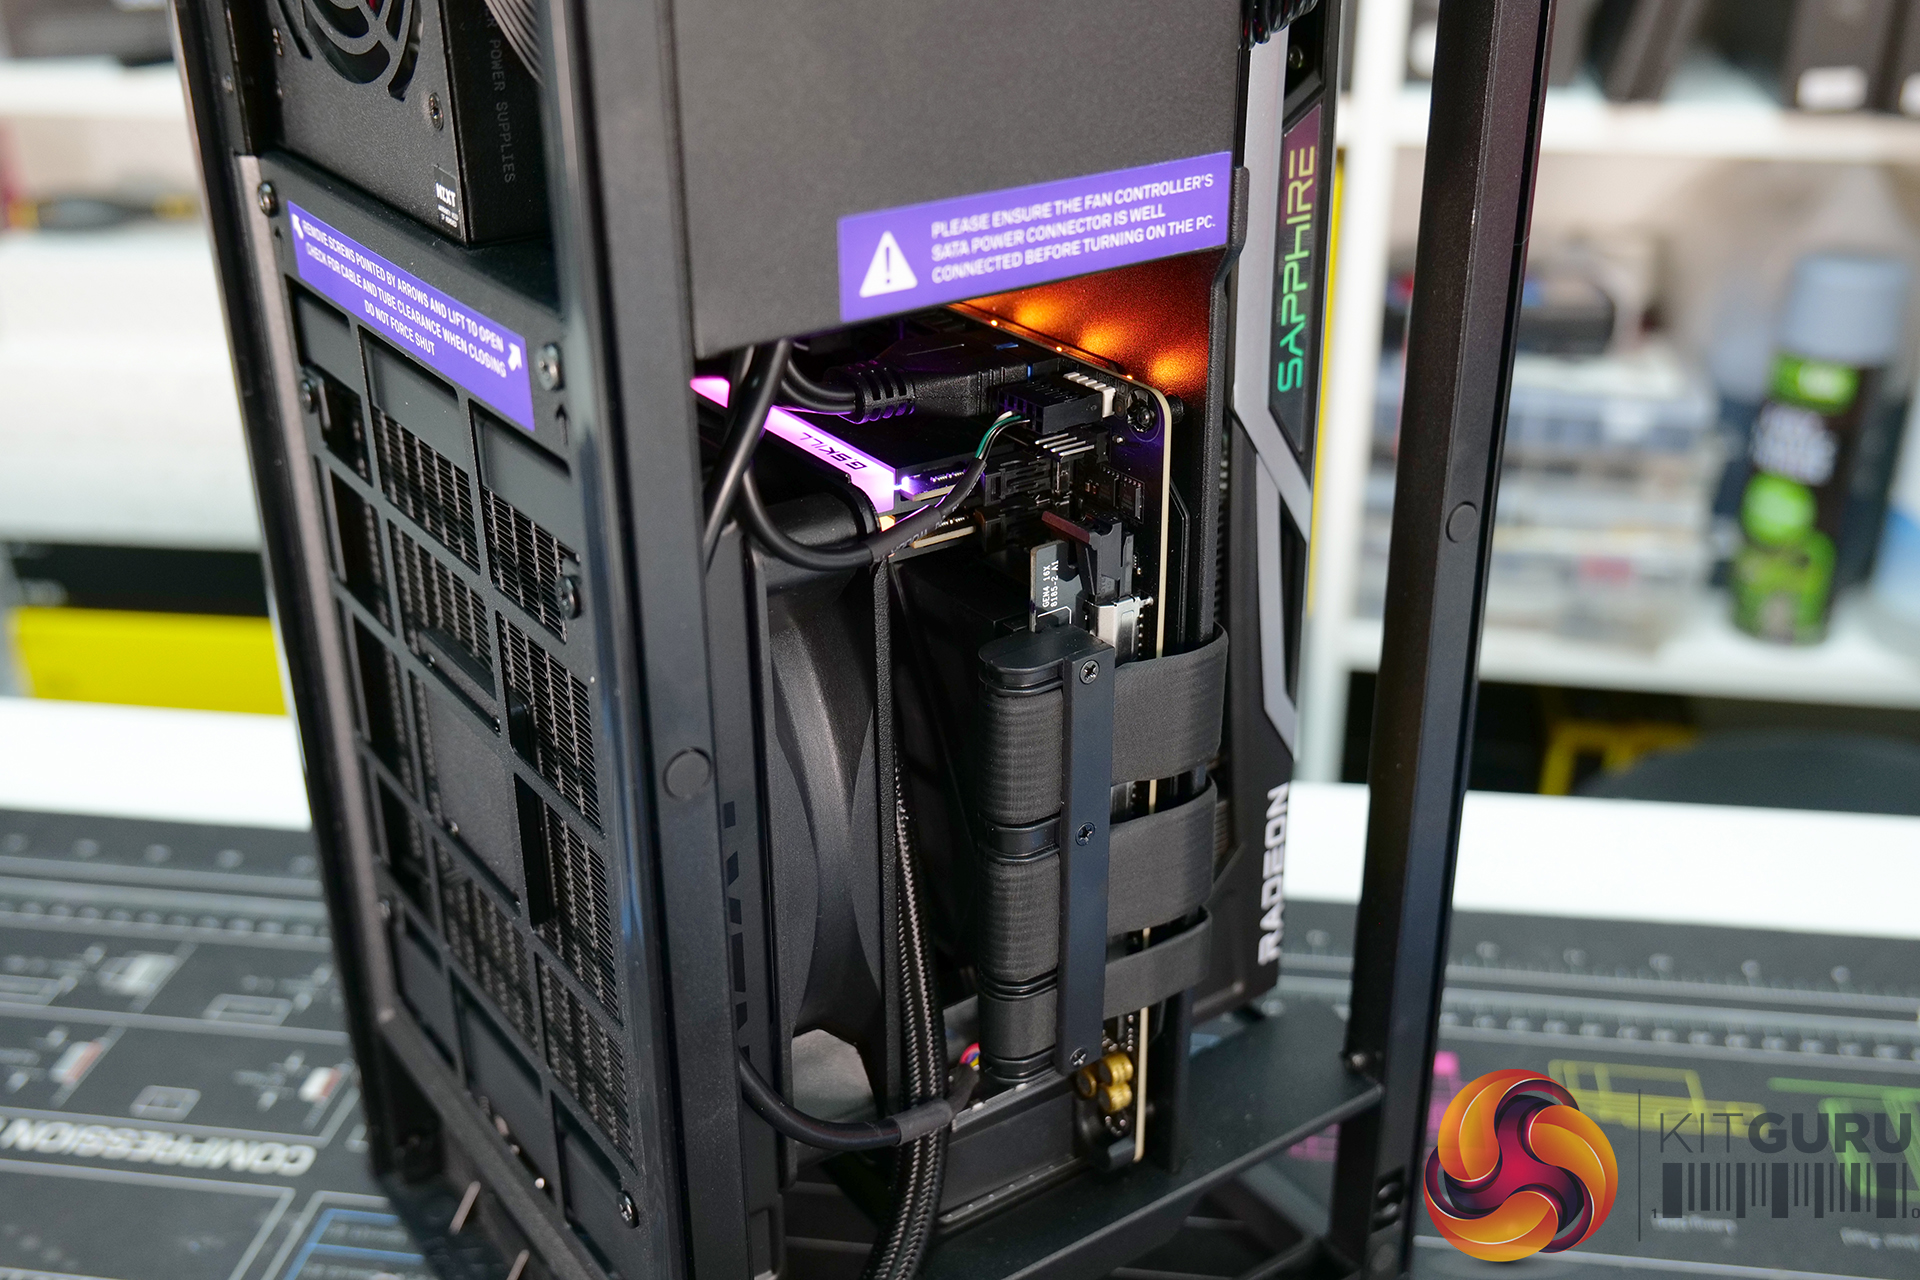
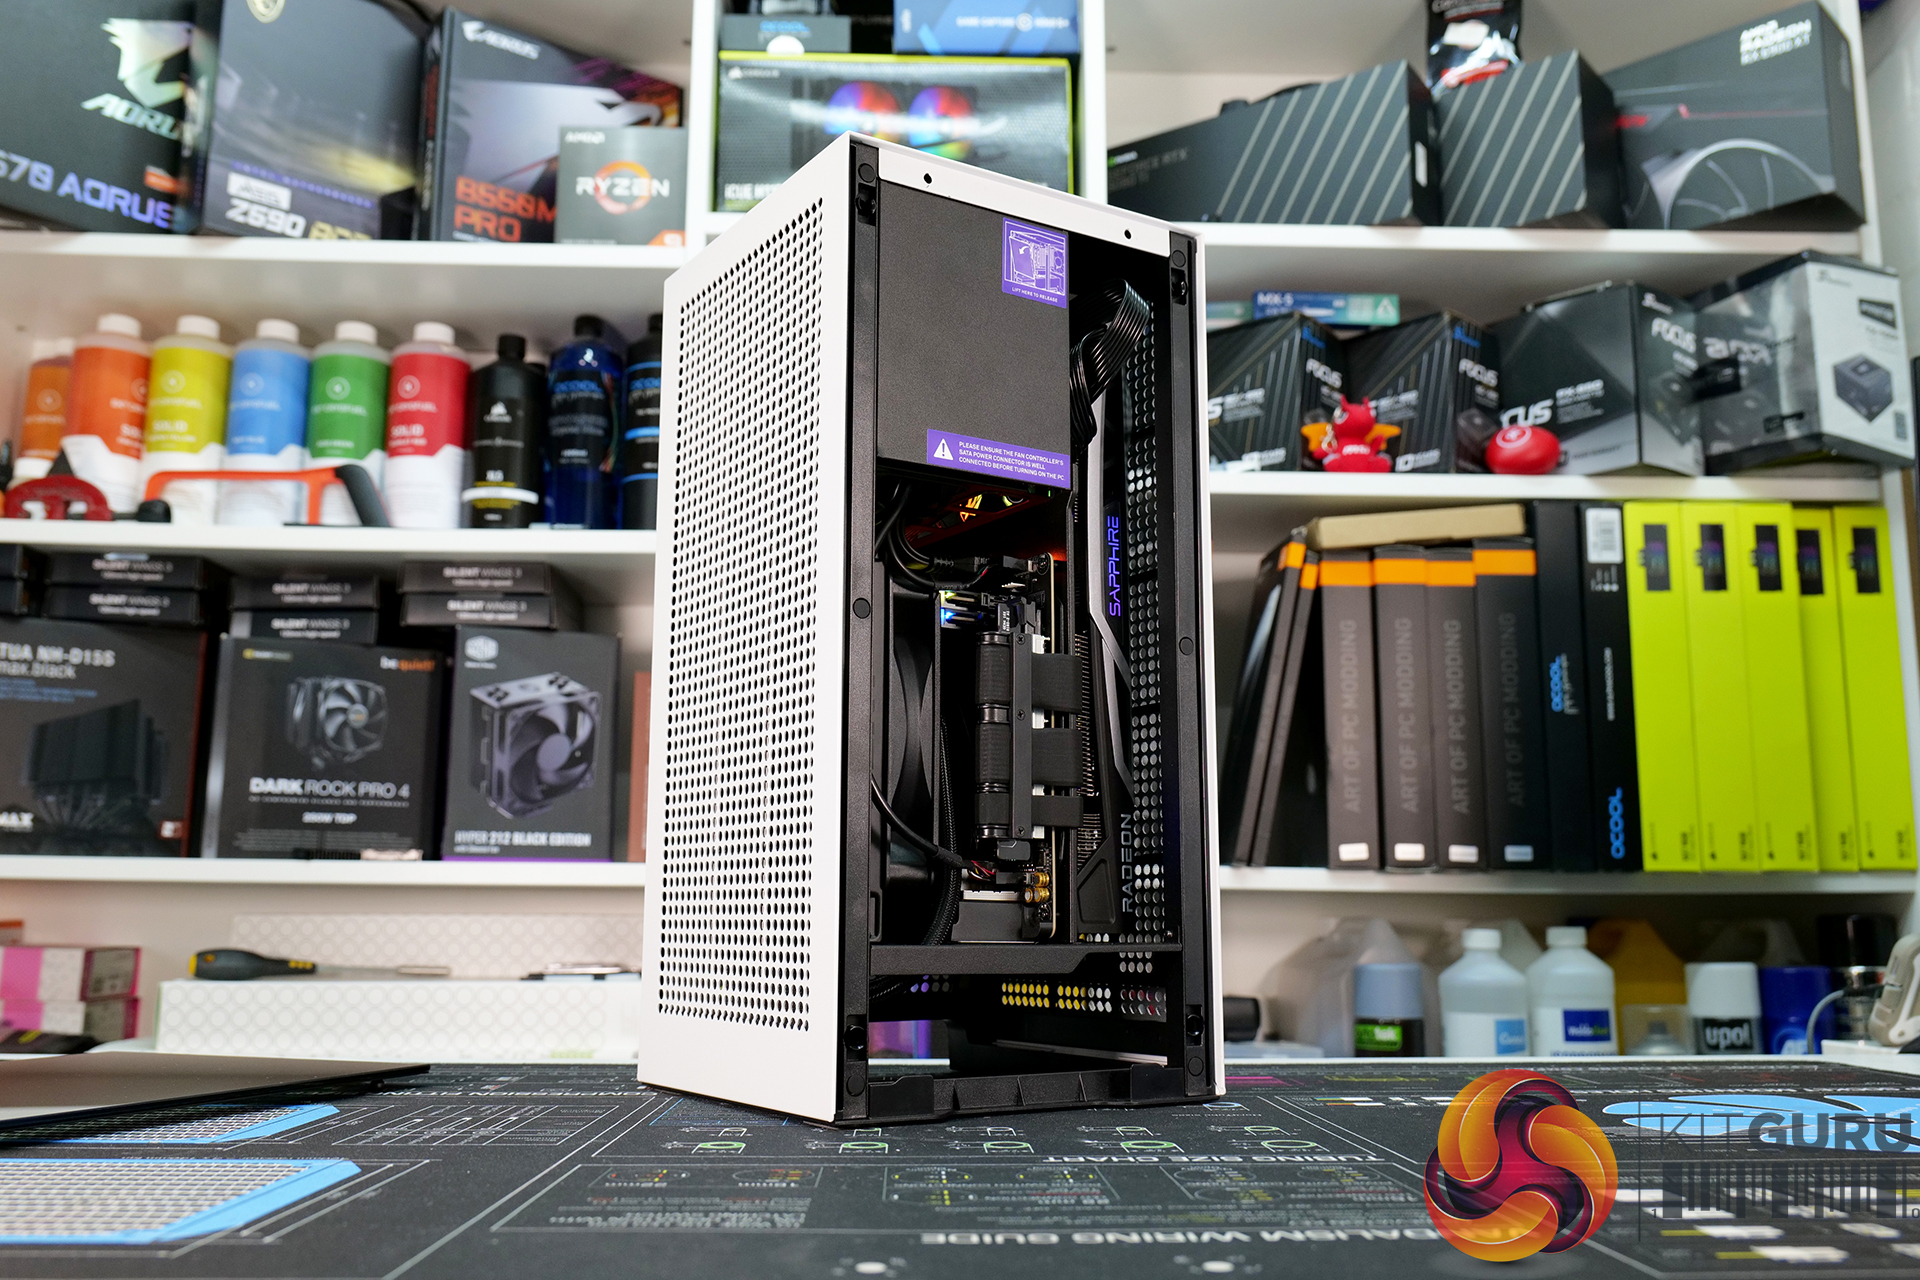
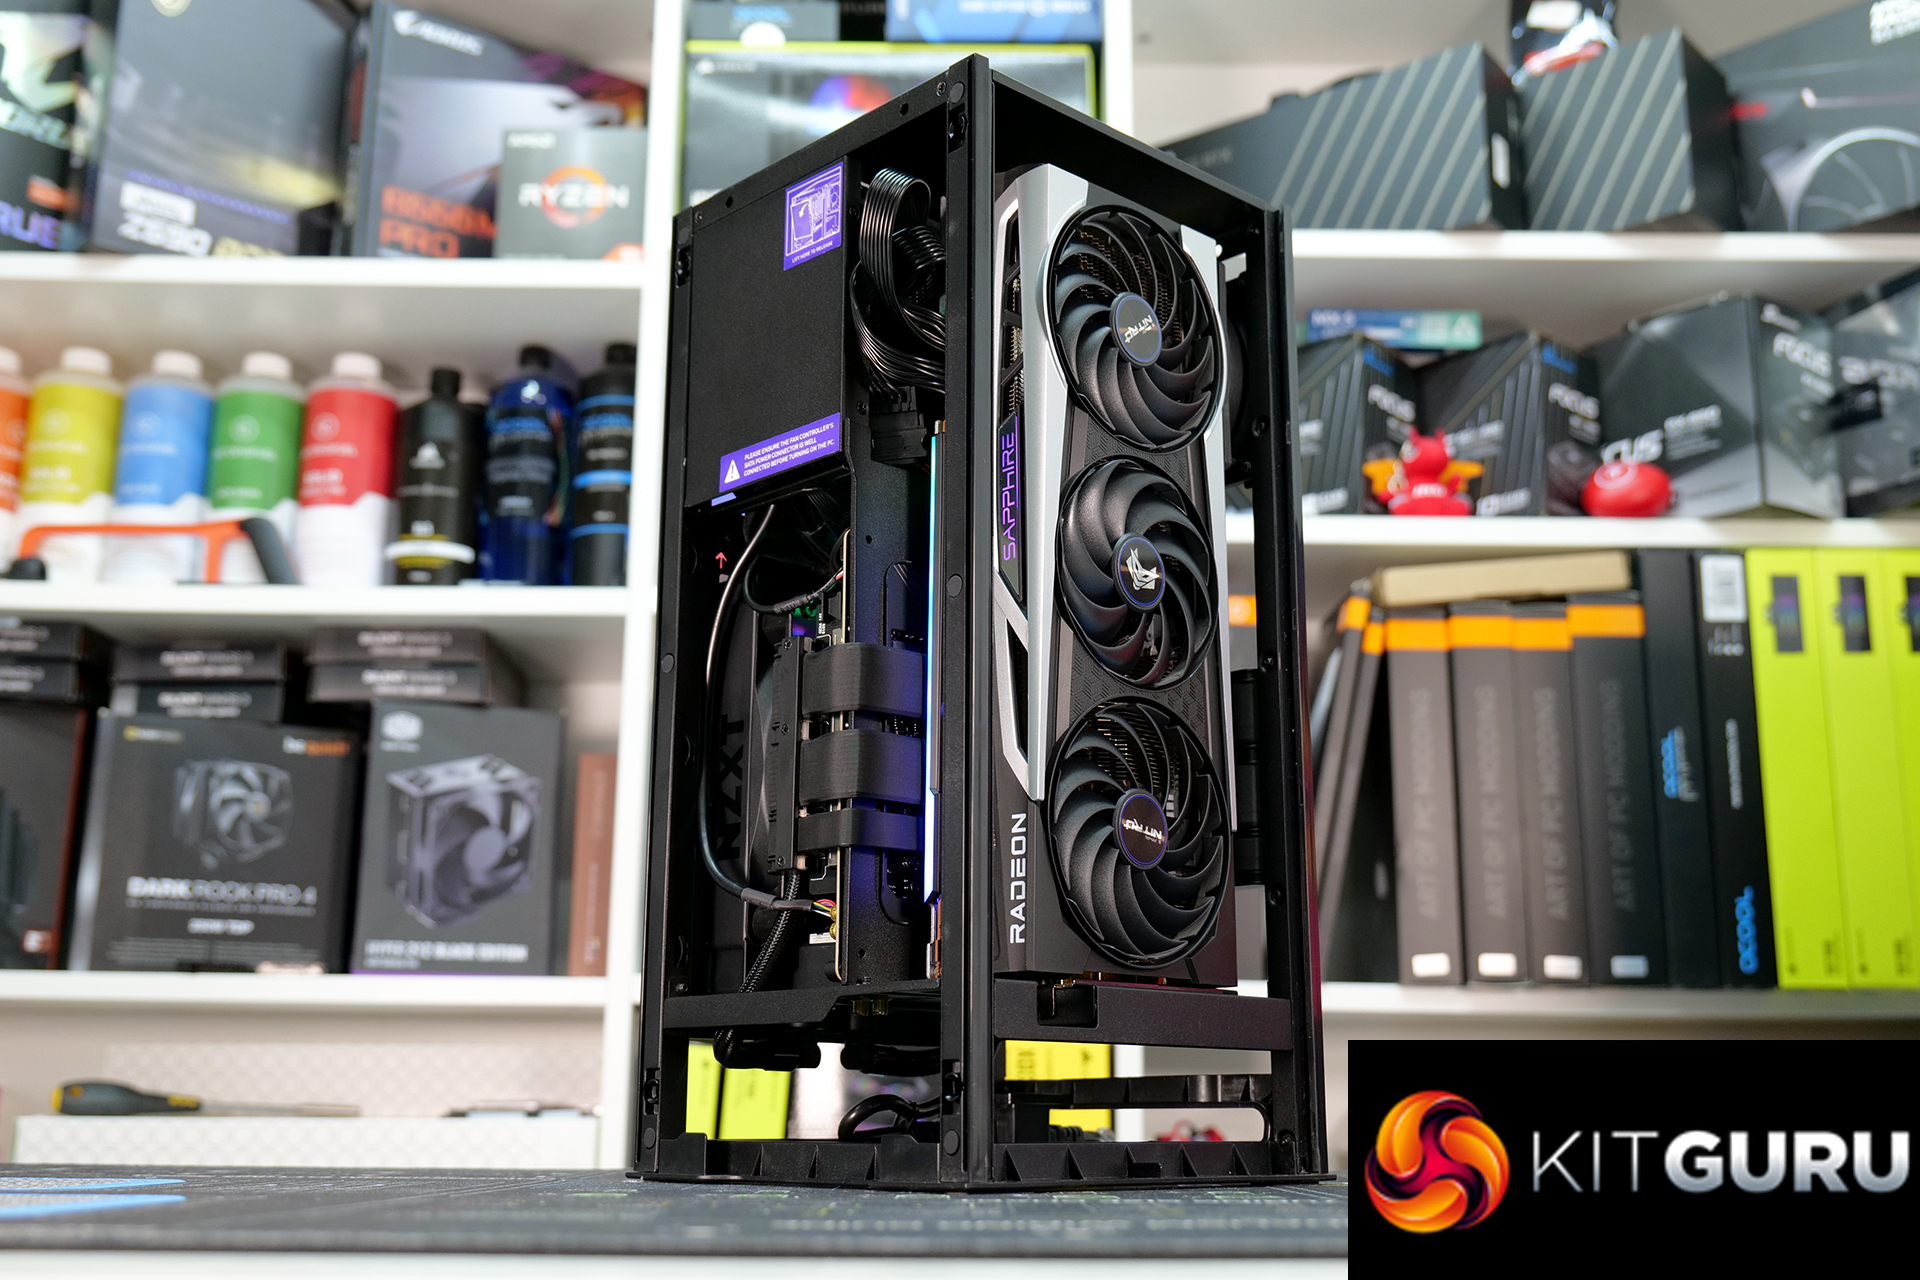
The extra space for bigger graphics cards in the H1 v2 is a bonus, For our system build, we used a Sapphire Radeon RX 6800 Nitro+. This card would have been incompatible with the original H1 due to its length and thickness but it was easy to install inside the revised case with the new dimensions.
Because the power supply is pre-installed it means that most of the important cables such as the EPS and 24-pin are all pre-routed and cable tied or Velcro strapped in place. Since the layout of most ITX boards are very similar, it means that a lot of the cable management is done for you, possibly the front I/O and SATA cables might need a bit of work but it really is simple to just tuck any excess in the space between the PSU and the fan controller.
Overall, the build took approximately 30 minutes to complete which is extremely quick for a mini-ITX build. Again this is helped by the pre-installed components and because I am familiar with the H1. However, it is so simple to build a system in the chassis that we expect even new users to have a build complete in under an hour.
System Specification:
- CPU: AMD Ryzen 7 5800X
- Motherboard: B550i Aorus Pro AX
- Memory: 16GB (2x8GB Modules) G.SKILL Trident Z RGB DDR4-3600
- Graphics: Sapphire Radeon RX 6800 Nitro+
- 1st Storage Device: 1TB PNY XLR8 Gaming CS3040 PCIe Gen4 NVME M.2 SSD
- CPU Cooler: Stock NZXT (Apaltek) 140mm AIO CPU Cooler
- Power Supply: Stock NZXT C750 80+ Gold SFX-L
- Case: NZXT H1 (v2 2022)
- Operating System: Windows 10
Thermal/Noise Performance Testing
To simulate thermal demand we run the Cinebench R23 multi-thread benchmark and Heaven Benchmark simultaneously in a loop for 60 minutes to fully load the system. This should give the CPU and GPU enough time to reach constant steady-state temperature. With this data, we can compare how the system handles the thermal demand and measure peak noise levels.
We run an additional thermal test to measure the CPU temperature individually using the Cinebench r23 multi-thread benchmark in a loop for 60 minutes, again this should give the CPU enough time to reach constant steady-state temperature.
We measure the thermal performance with the case in its default configuration, so all exterior panels are installed and fans in the default locations. We then transfer the system components to the original H1 and run the thermal tests again to measure whether the new H1 offers any thermal improvement over the original.
During testing, only stock case fans are used unless otherwise specified. All water pumps are set to maximum RPM and fans are set to the same fixed RPM by the Motherboard software/BIOS in both cases.
All temperature measurements are presented as Deltas – meaning the ambient temperature has been deducted from the CPU temperature giving us a Delta. Data shown in the charts represent the average component temperature over the length of the test as measured by HWiNFO and then calculated to get the average. Ambient temperature during thermal tests is between 18-22⁰C.
Noise levels are measured by placing a noise meter 300mm from the front of the chassis while the stress test is running and the peak noise level during the test is recorded. The noise floor (ambient noise level) in the room is 36dBA.
Thermal Performance Overview

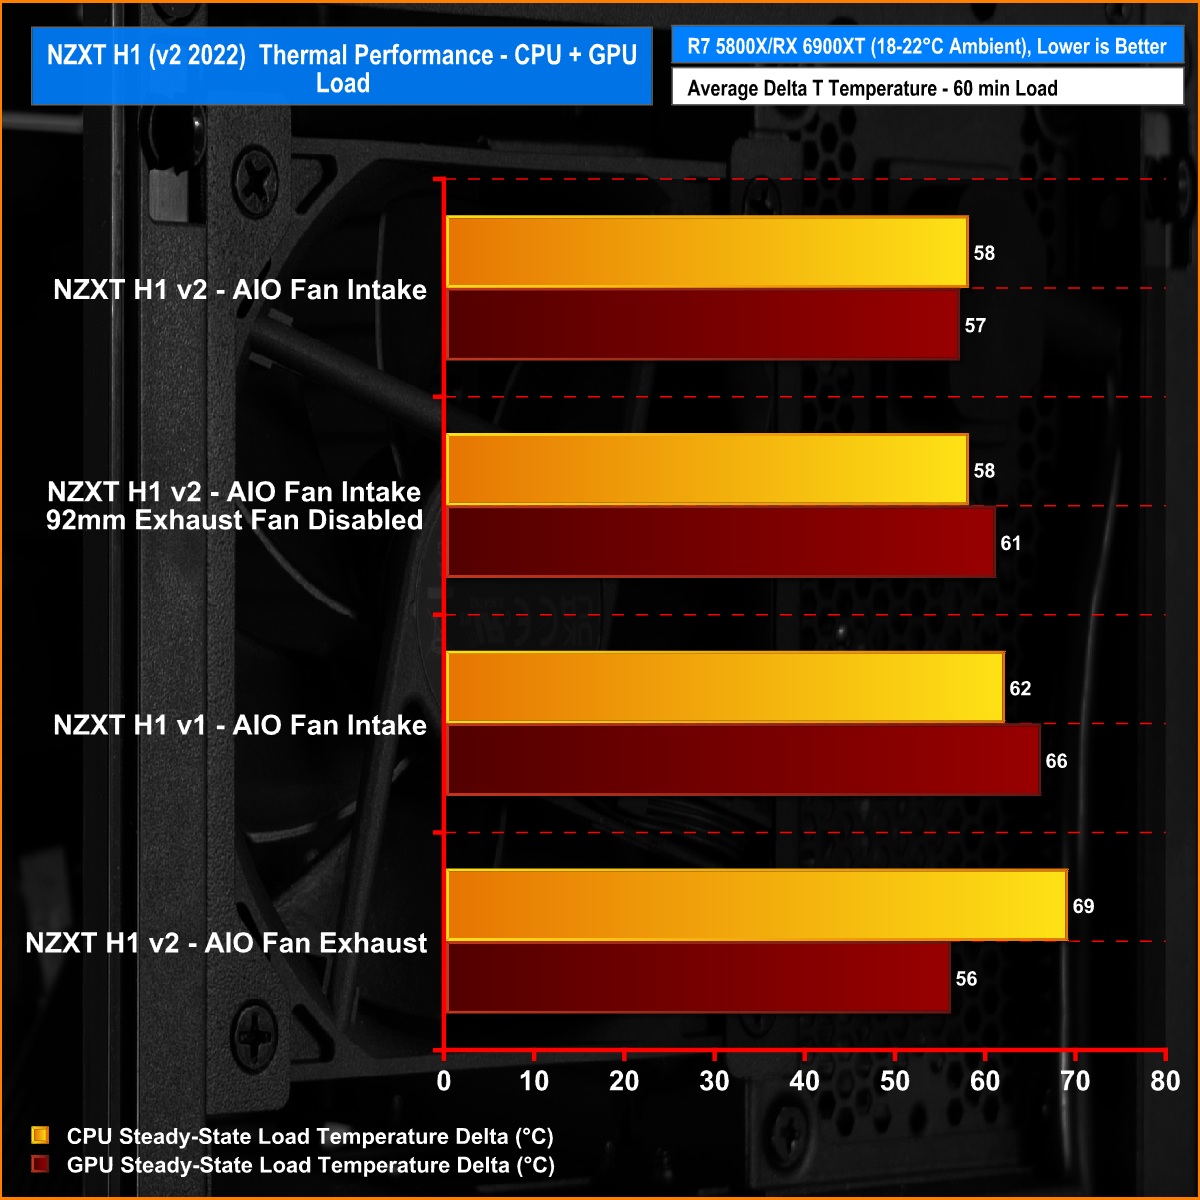
Initially, during our thermal performance tests of the CPU, we found that the original H1 was providing lower CPU temperature under load. After further investigation, we noticed that the AIO fan in the new H1 v2 was configured as an exhaust while the original H1 was intake. We switched the H1 v2 AIO fan to Intake to match the v1 but still recorded the effect of the v2 fan being configured as an intake in the above chart.
Once the H1 v2 AIO fan was switched to intake, we noticed an improvement in the CPU temperature under load. However, there wasn't a significant improvement in CPU temperature using the H1 v2 compared with the original H1. This didn't come as a surprise as both cases use the same 140mm AIO liquid cooler so we expected very similar thermal performance, but it's worth noting that CPU temperature is best with the AIO fan set as an intake.
The most noticeable improvement in thermal performance by the H1 v2 compared with the original H1 was when the GPU load was introduced. The H1 v2 significantly reduced GPU temperature compared with the H1 v1. We put this down to the added 92mm exhaust fan as you can see with the 92mm fan disabled, GPU temperature increased. The larger side panel holes and increased space inside the system may also contribute to the improved GPU thermals.
Noise Levels Under Load
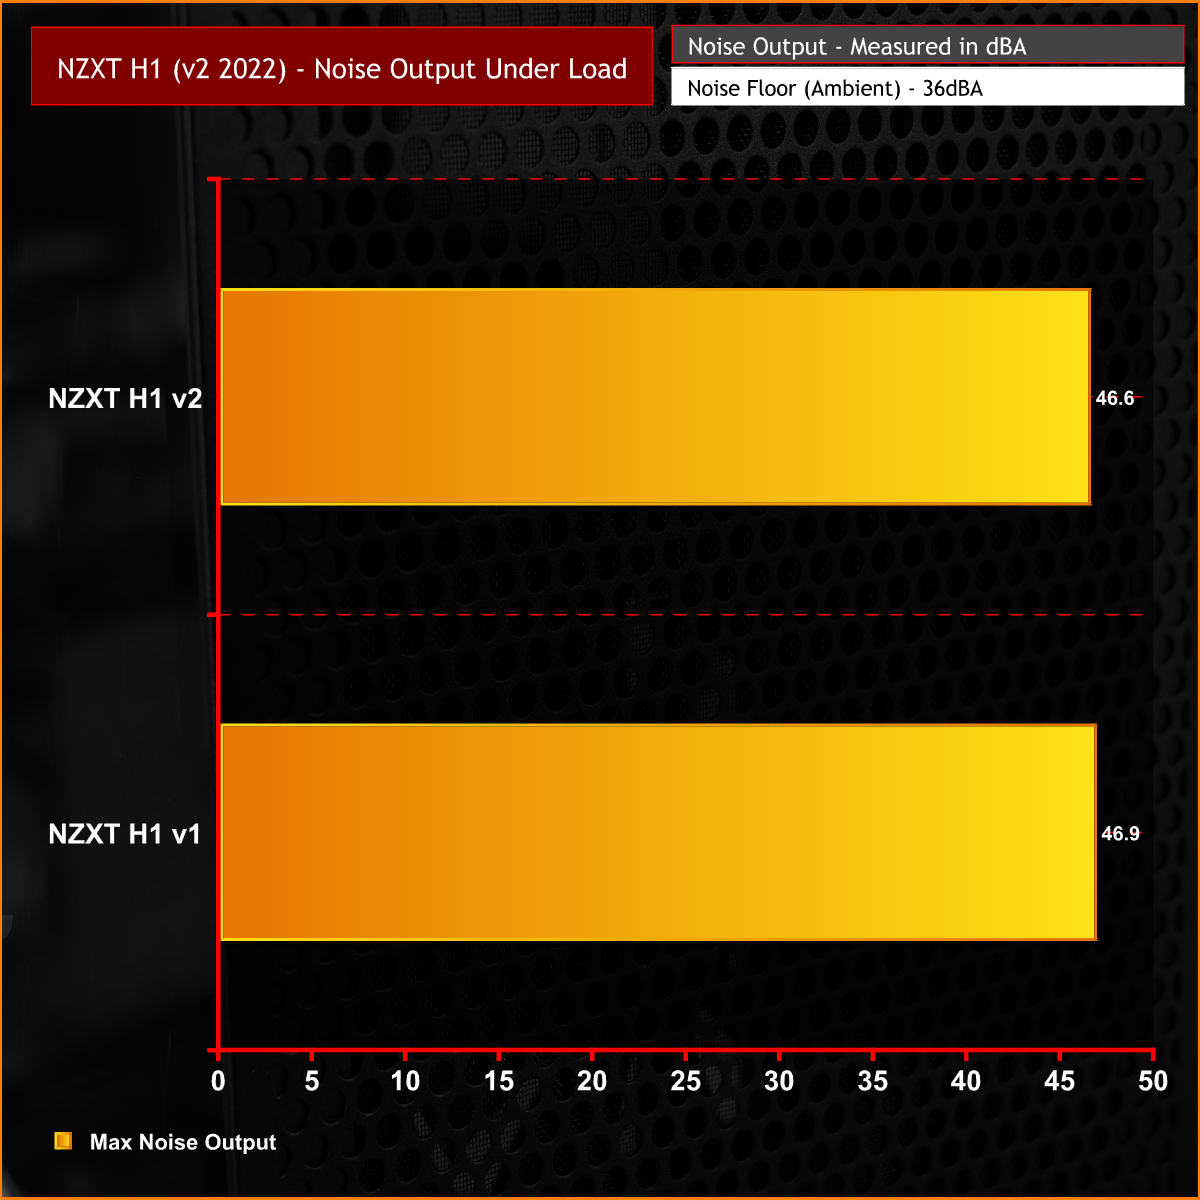
Since the new NZXT H1 v2 and the original H1 use the same AIO fan, under full load with the AIO fan running at maximum speed (1800RPM), noise levels are virtually identical which is no surprise. The 92mm exhaust fan runs quieter than the AIO fan at maximum RPM so it doesn't increase the noise output of the whole system.
Closing Thoughts
Compared with the original NZXT H1, the revisions applied to the new v2 version are individually quite small, but when combined they add up to a worthwhile improvement. The ability to install bigger, more powerful graphics cards is a welcome addition and having the extra 100W available from the power supply ensures that high-end GPUs have enough juice to run.
Likewise, the PCIe Gen4 riser and increased chassis airflow are essential to ensure that the latest generation of graphics cards is running at their absolute maximum performance, you can clearly see that this was a priority with the NZXT engineers when designing the H1 v2 and it hass paid off because the revisions work together very well.
As we saw with the original NZXT H1, this case is perfect for users that want a simple solution for building a mini-ITX system. The preinstalled AIO and PSU makes life easy when building a system in the H1. However, this can be a negative for users who want to be creative with the installation, as there is only one way to build in the H1 and you are forced to use NZXT hardware such as the AIO and power supply.
It is still a very good mini-ITX case, especially for users who want simplicity, if you are looking to buy a mini-ITX case for a new build, you want something that looks stylish and has a small footprint then the new NZXT H1 is worth buying. However, I would like to see NZXT offer the new chassis as a bare unit for current H1 users to upgrade the case when they upgrade to a GPU that won't fit inside the original H1.
I would also have liked to have seen NZXT go one or two steps further with the revisions. An alternative solid or vented steel front panel for users who don’t like the look of the tempered glass would have benefited the new case, as the inside of the H1 isn’t pretty to look at once the system is built. Squeezing in a bigger AIO cooler would have been a priority for me too, as the thermal demand of modern-day CPUs seems to be on the rise.
The only real fault I could find with the case was with the SSD caddy, when test installing a 2.5-inch SSD in the caddy for the first time, one of the plastic retaining tabs broke off with very little force applied, so the durability of the plastic might be questionable and something to watch out for. Other than that, it’s a very stylish looking case, with a small footprint, increased hardware support and improved GPU thermal performance which makes it a very solid mini-ITX case.
The NZXT H1 (v2 2022) is set to hit the market priced at £339.99.
Discuss on our Facebook page HERE.
Pros:
- Increased dimensions improve GPU compatibility.
- Still a small footprint.
- Higher power PSU to support the demands of the lastest GPUs.
- Noticeable improvement in GPU temperature.
Cons:
- Must install NZXT CAM software to control AIO pump speed.
- No mesh front panel option.
KitGuru says: When combined, all the little revisions to the NZXT H1 (v2) add up to make it a worthy improvement over the original. However, that comes with a considerable increase in cost, would that put you off buying one?