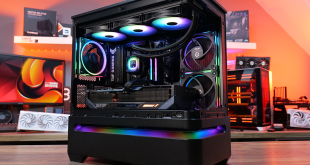
The Obsidian Series 450D has an elegant brushed aluminium front panel and a solid steel body. The interior is designed for superior cooling efficiency, with a modular removable drive cage system and dual SSD bays that mount behind the motherboard tray and out of the airflow path. I have to confess that I took those paragraphs from the side of the Corsair box but they are bang on the money and sum up the Obsidian 450D very nicely indeed.
In essence the Obsidian 450D is a high airflow mid-tower PC case.
Specifications:
- Motherboard support: ATX, Micro-ATX, Mini-ITX.
- Expansion slots: 7
- Included fans: 2x 140mm front intake, 1x 120mm rear exhaust.
- Fan mounts: Alternatively 2x 120mm front, 3x 120 or 2x 140mm roof, 2x 120mm bottom with drive tower removed.
- Radiator mounts: 240mm/280mm front, 280mm/360mm roof, 120mm rear, 240mm bottom.
- 5.25″ drive bays: 2.
- Internal drive bays: 3x 3.5/2.5″, 2x 2.5″.
- Dimensions: 497mm high x 494mm deep x 210mm wide
The packing box does a decent job of keeping the case in pristine condition in transit but that's not the end of the story.

Take a tour around the box and you'll see some illustrations of the Obsidian 450D that show you how the case pulls to pieces.
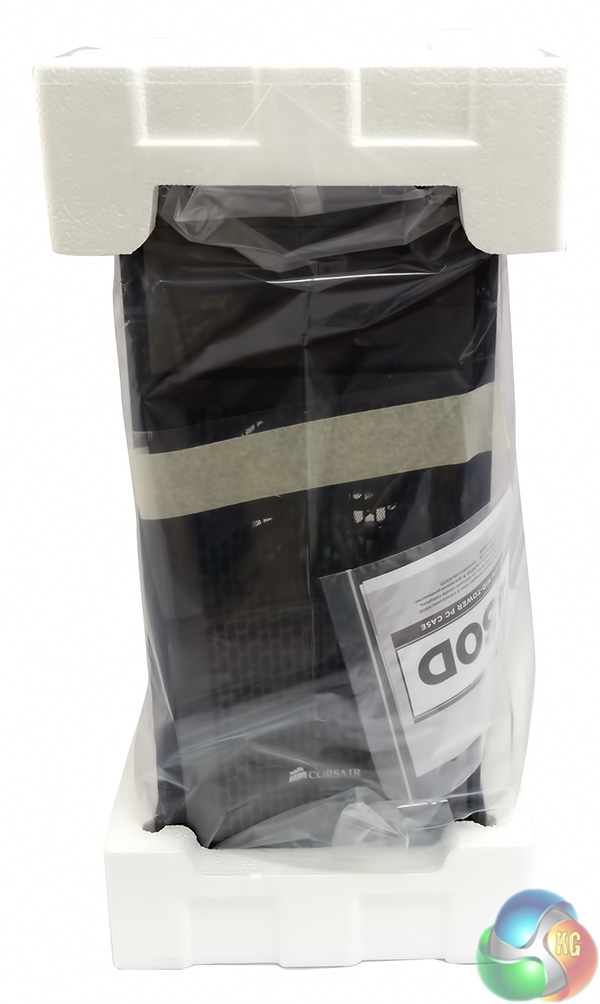
Once the box is open you'll see the Obsidian is protected by a plastic bag and two polystyrene end pieces. The case arrived in perfect condition so the packaging clearly did the job.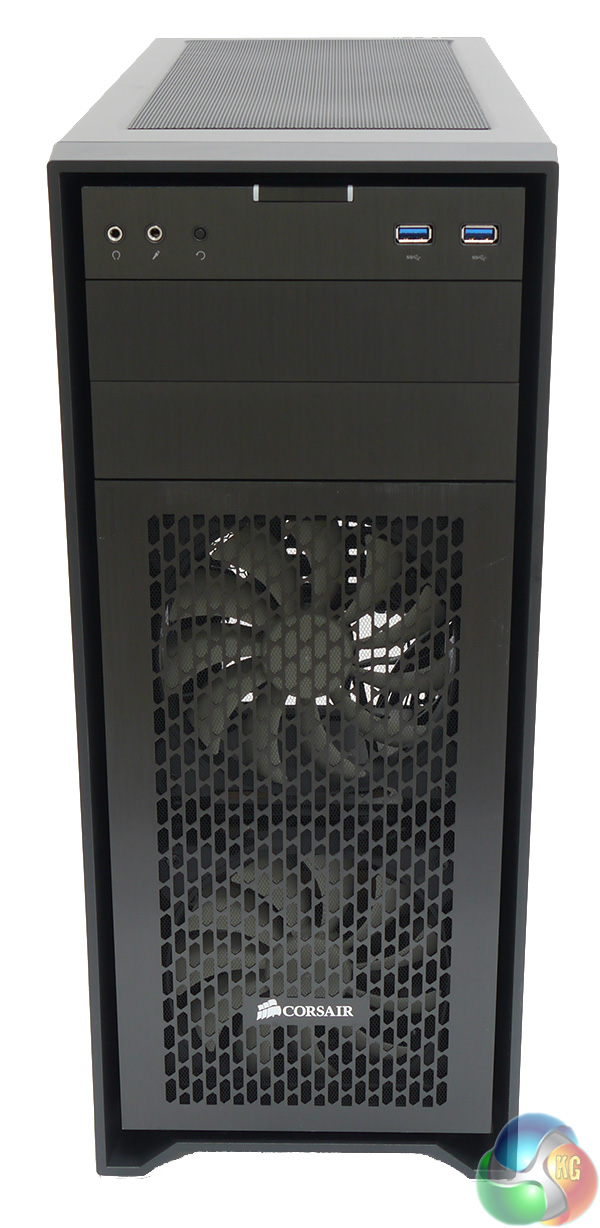
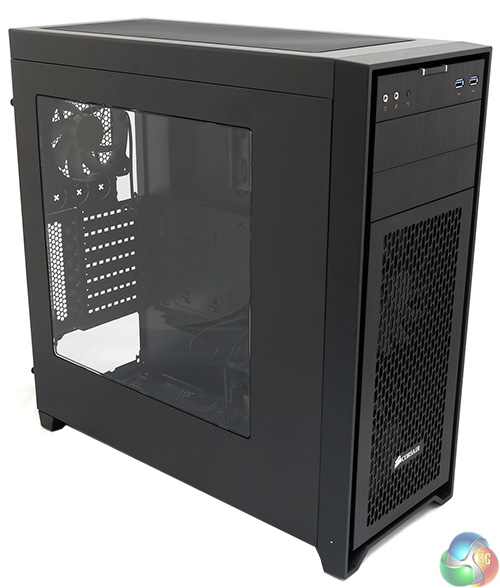
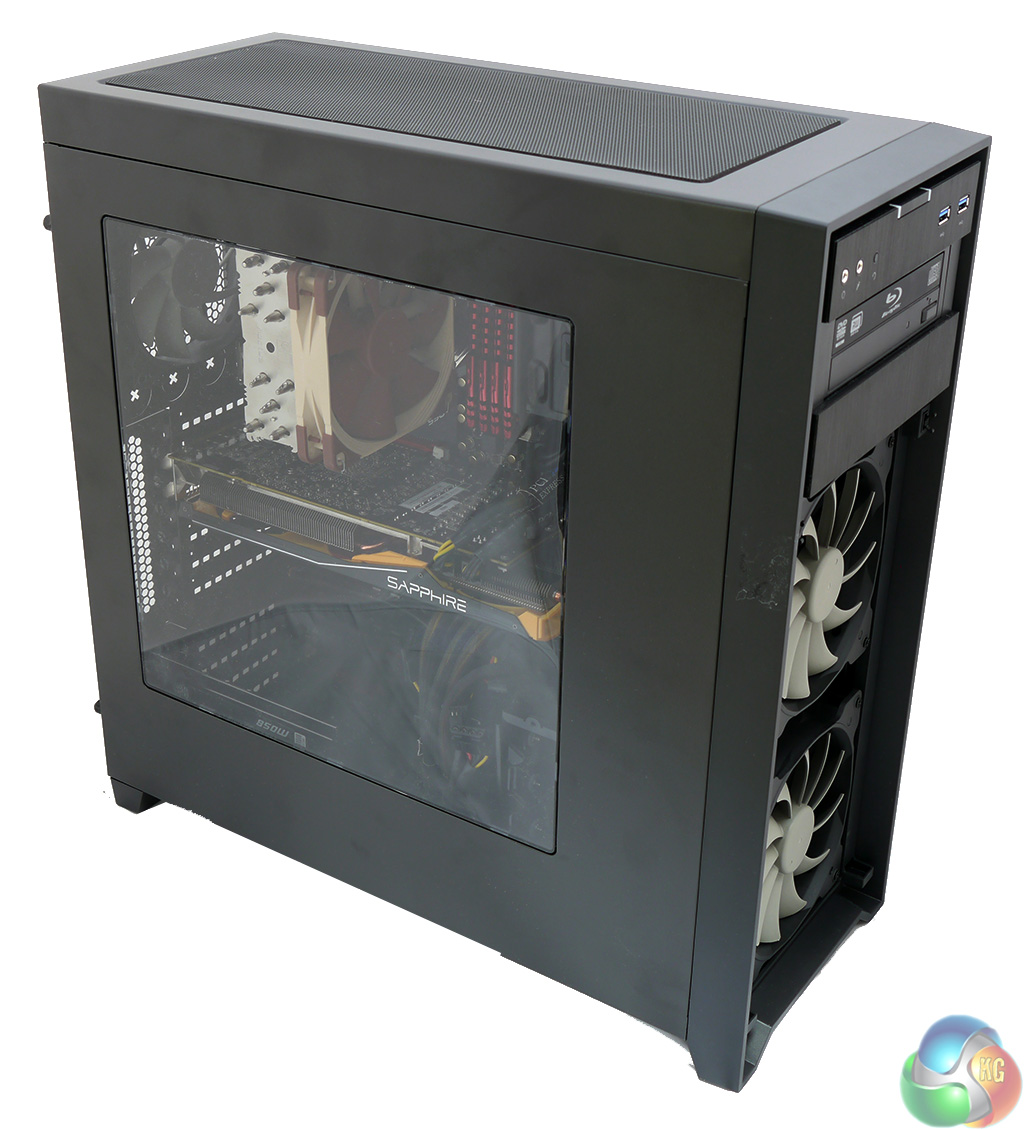
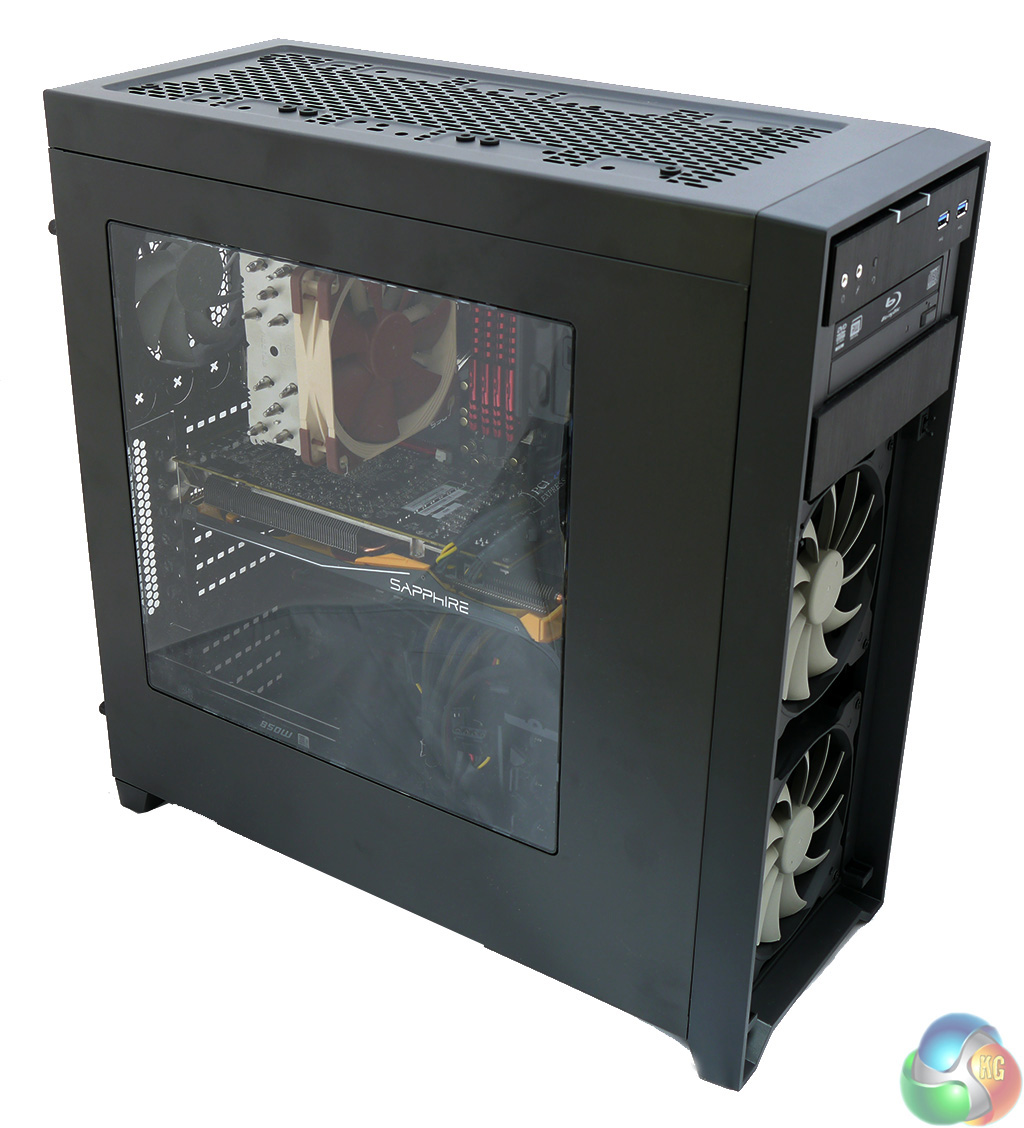
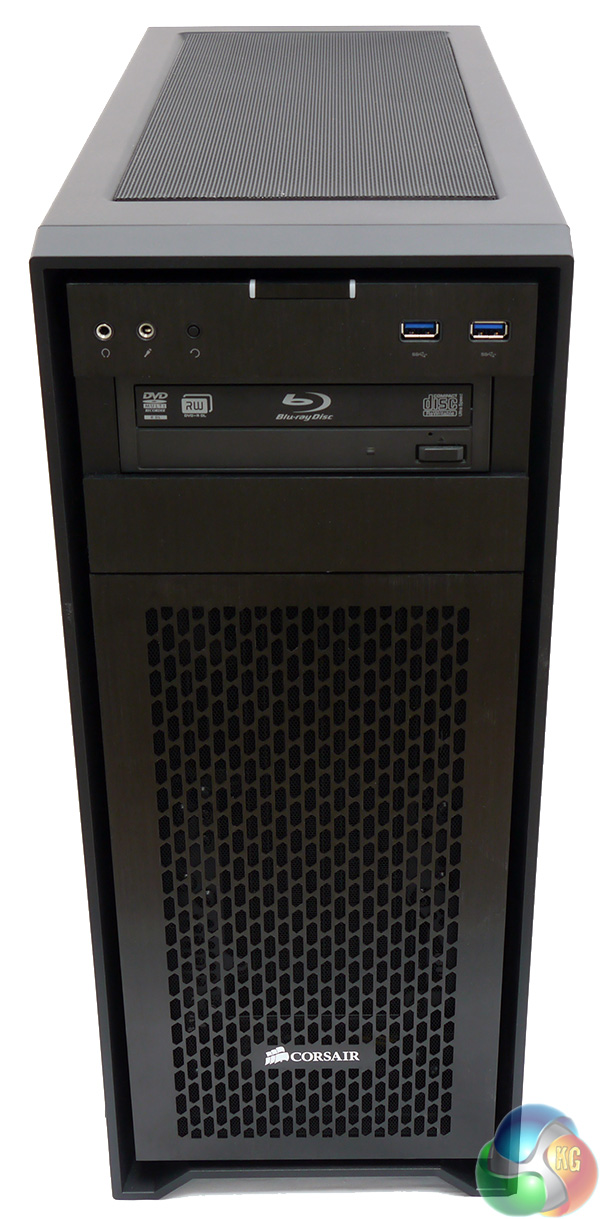
OK here's what we're talking about. The front of the case is dominated by a ventilated front panel that clearly shows the two Corsair AFL140L intake fans. These fans are based on the AF140, however there are no coloured lights or rubber mounts at the corners.
At first glance the front panel has three 5.25-inch drive bays but the top unit actually carries the headset jacks, two USB 3.0 ports and the power and reset buttons. Those USB 3.0 ports require the correct header on your motherboard and have no option of connecting to USB 2.0 instead.
The power button is a curious rectangular item that sits flush in the front panel and is tricky to locate by feel alone. The power button lights once it is pressed.
Next to the headphone jacks you can see the tiny restart button which is set flush and feels more like the sort of reset button you get on a domestic appliance.
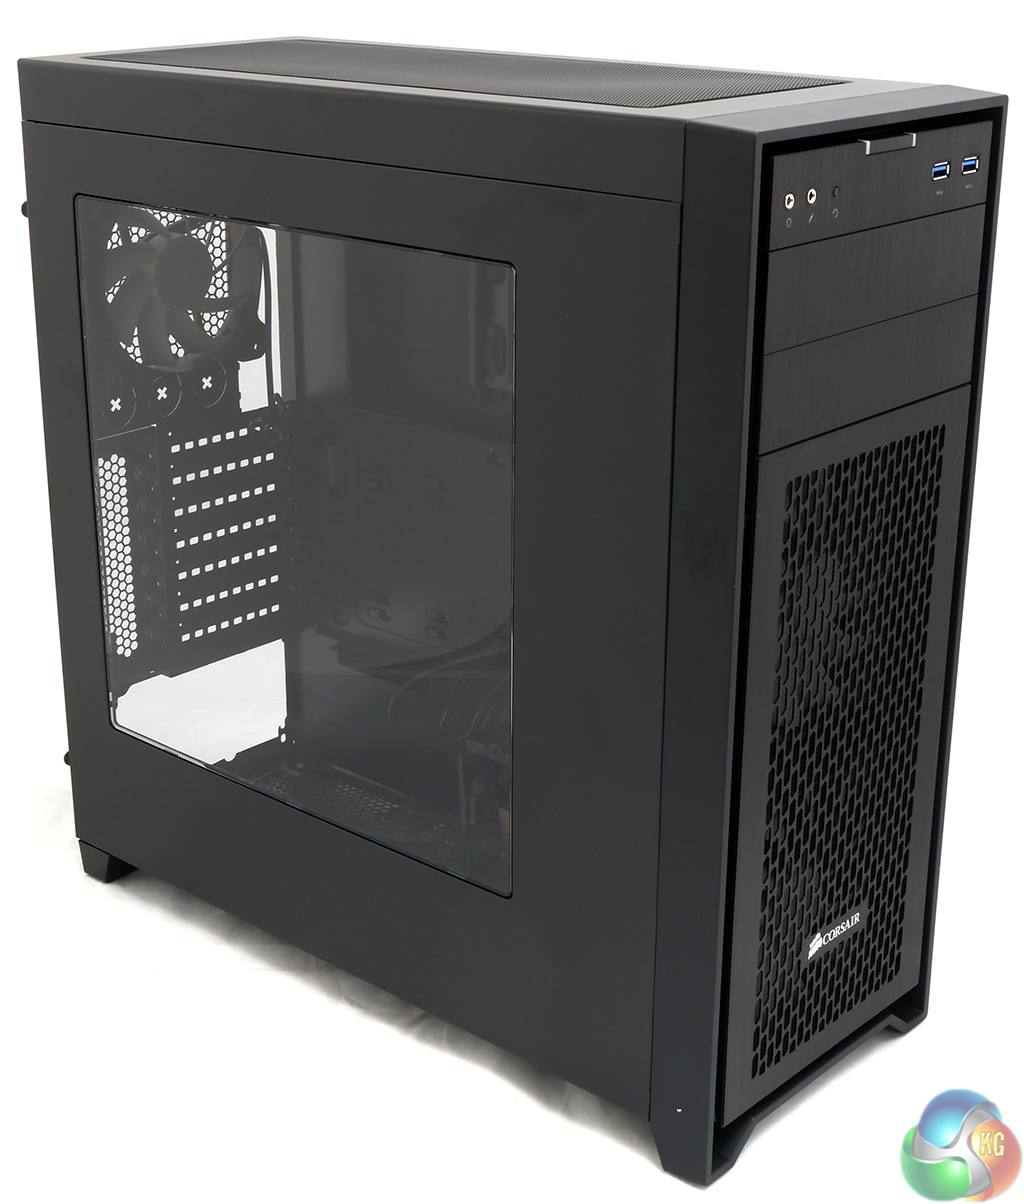
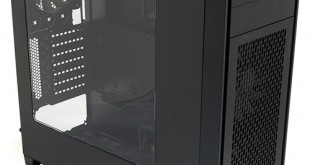
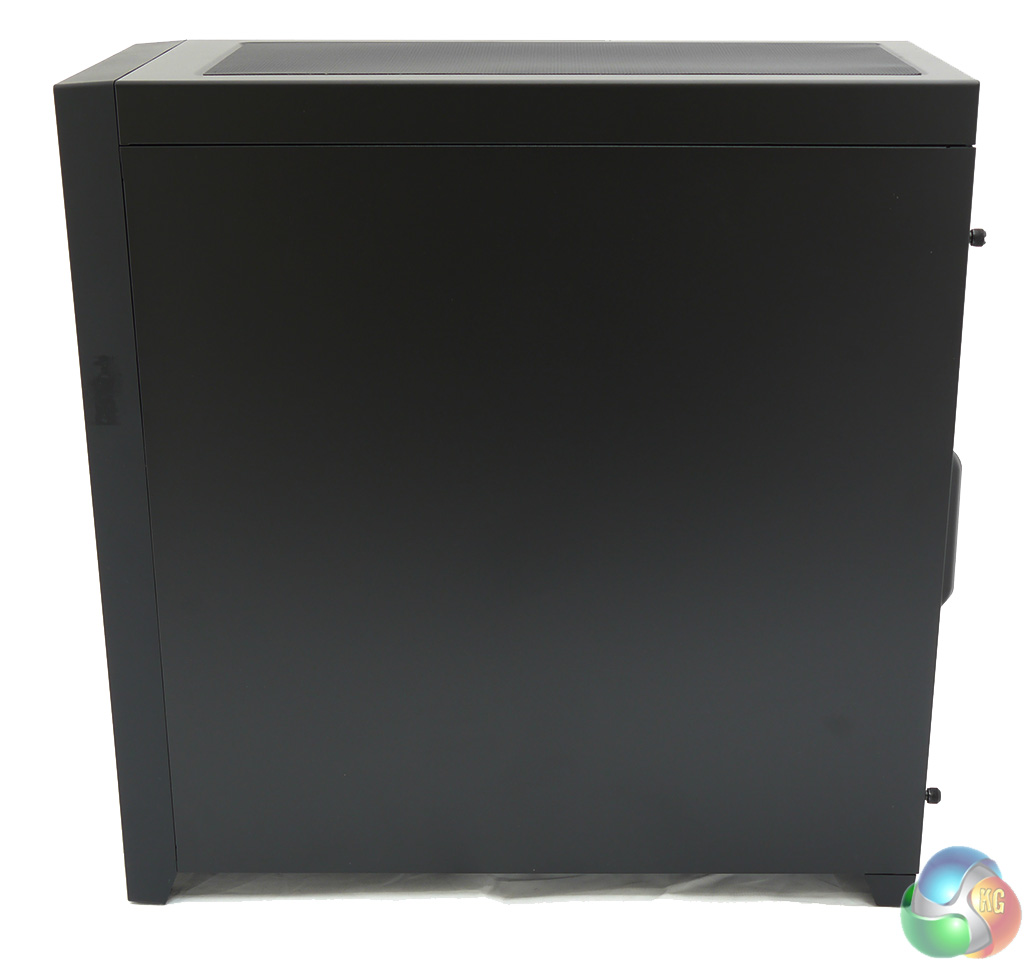
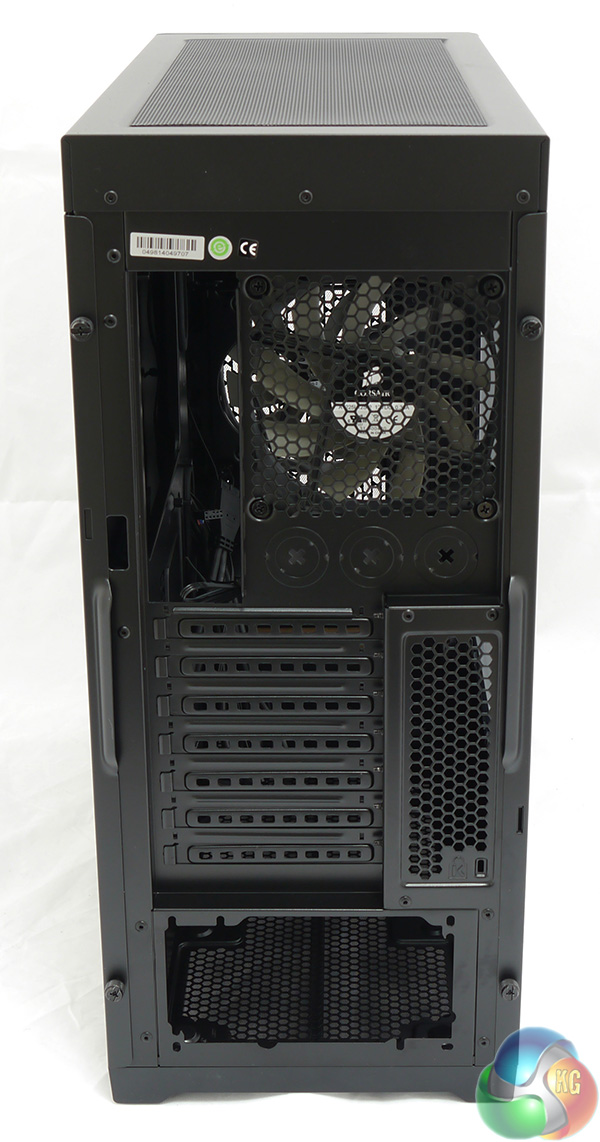
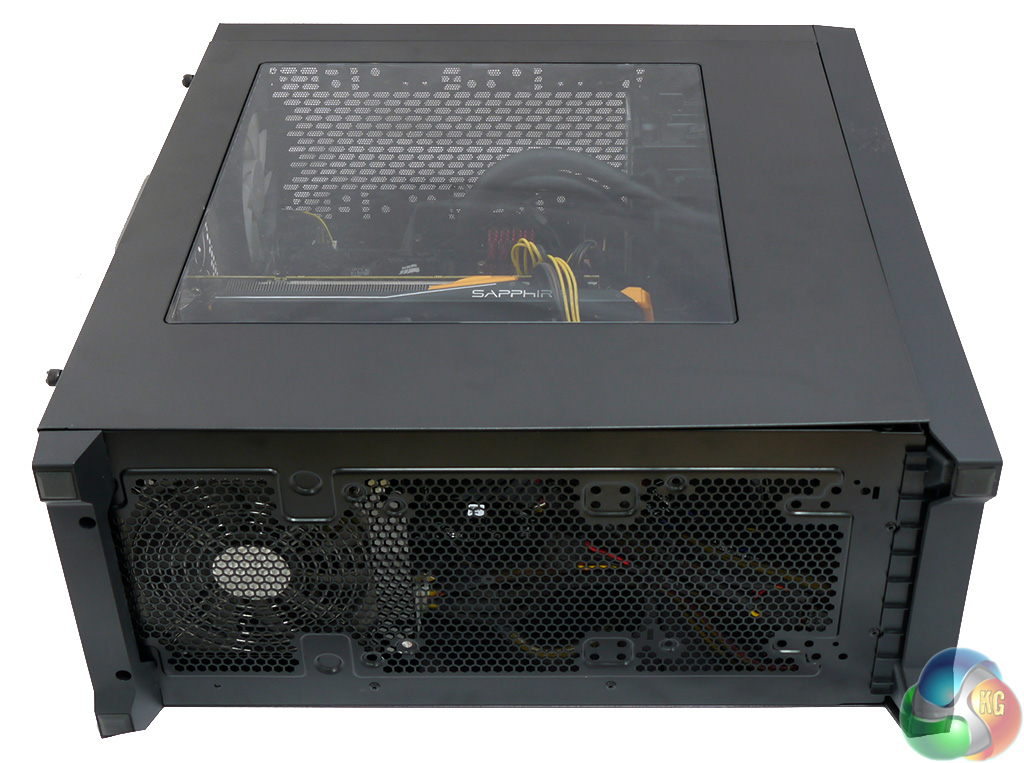
One side panel is plain steel, the other has a large window and at the back we find seven expansion slots and the power supply located at the bottom of the case. You'll also find a great deal of perforation and an ALF120L exhaust fan. The perforations are so extensive that it is quite easy to look straight through the case from front to rear.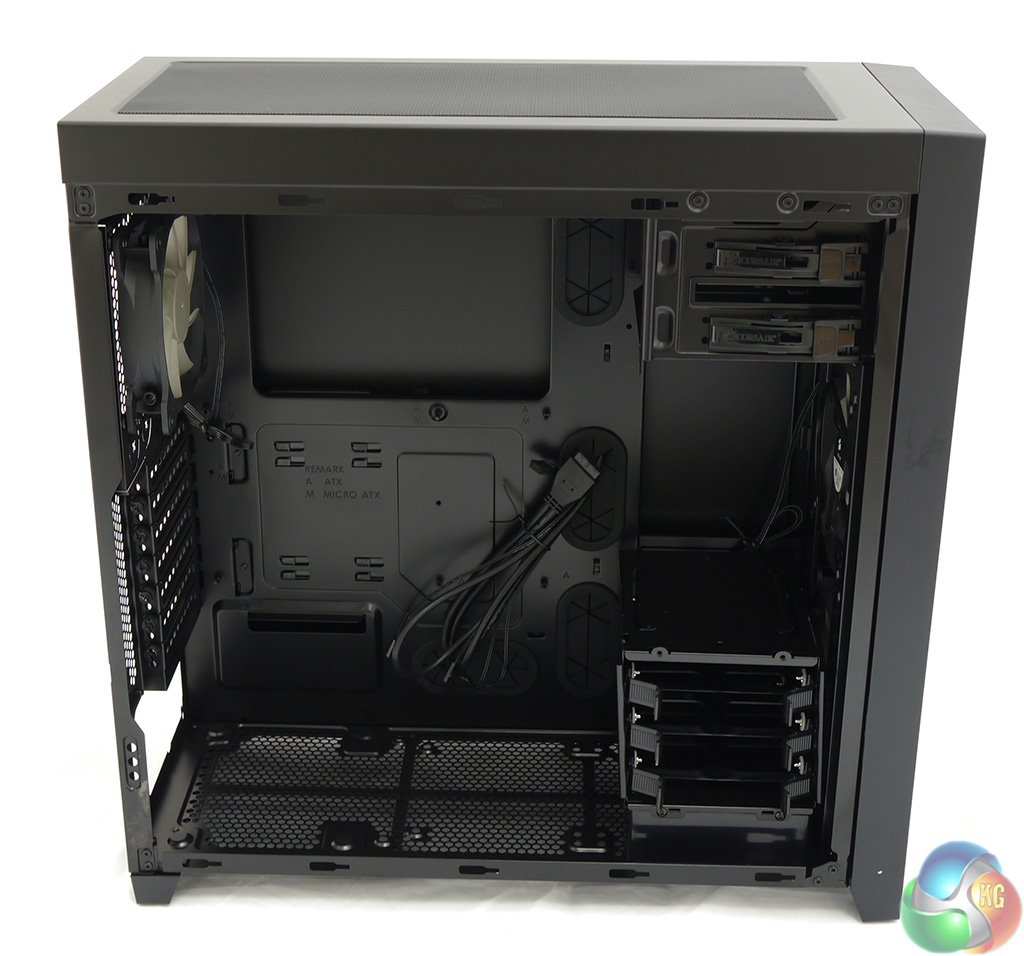
The side panel pulls free after you remove two thumbscrews and is a relatively light and flexible piece of steel work. With the case opened you can see a bundle of cables that have been fed through one of the grommets.

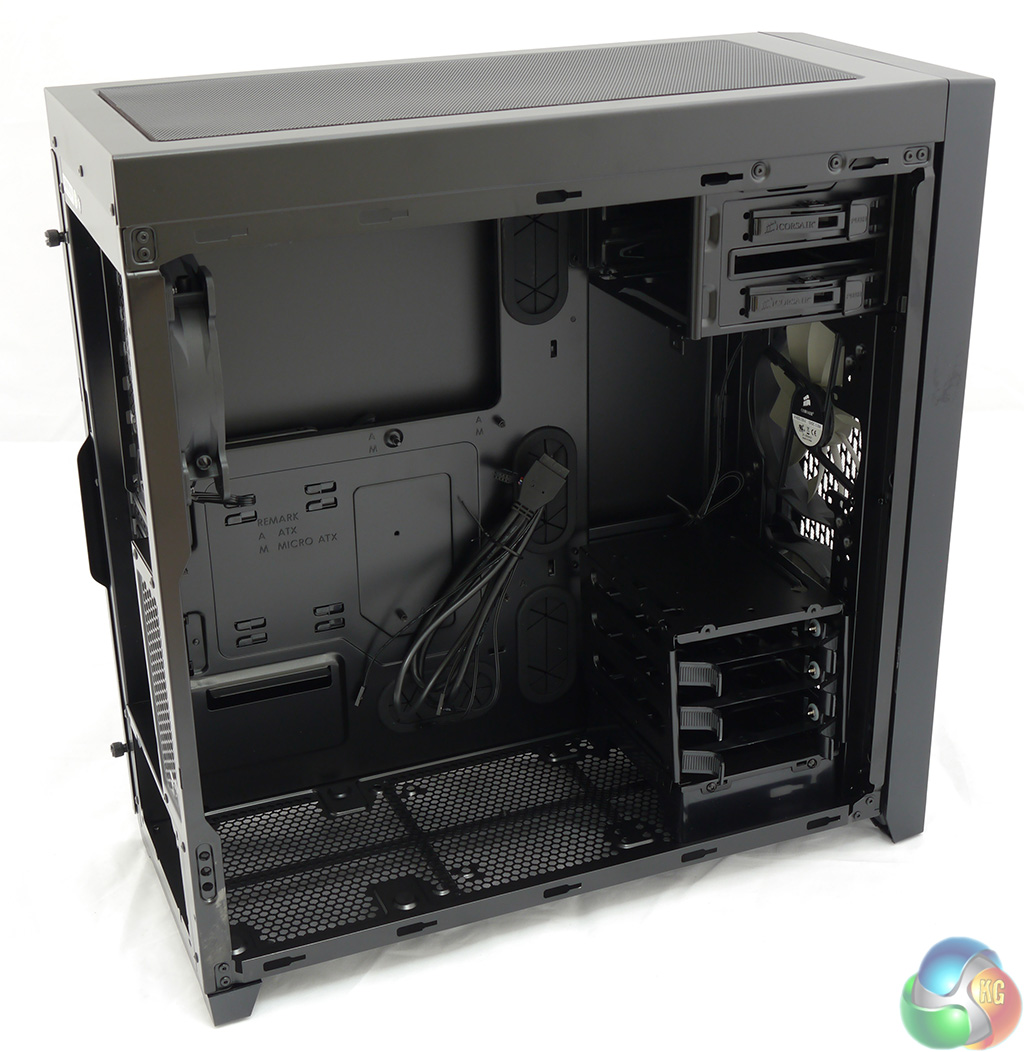
The plastic drive tower at the front of the case accommodates three 3.5-inch hard drives that slip easily into tool-free mounts. If you choose to install 2.5-inch drives you will need to screw them in place.
At the top of the case there are two 5.25-inch optical drive bays that are also tool-free. Although I had no problem sliding a DVD drive in I found the drive didn't lock in place and would move back and forth with a bit of pressure.
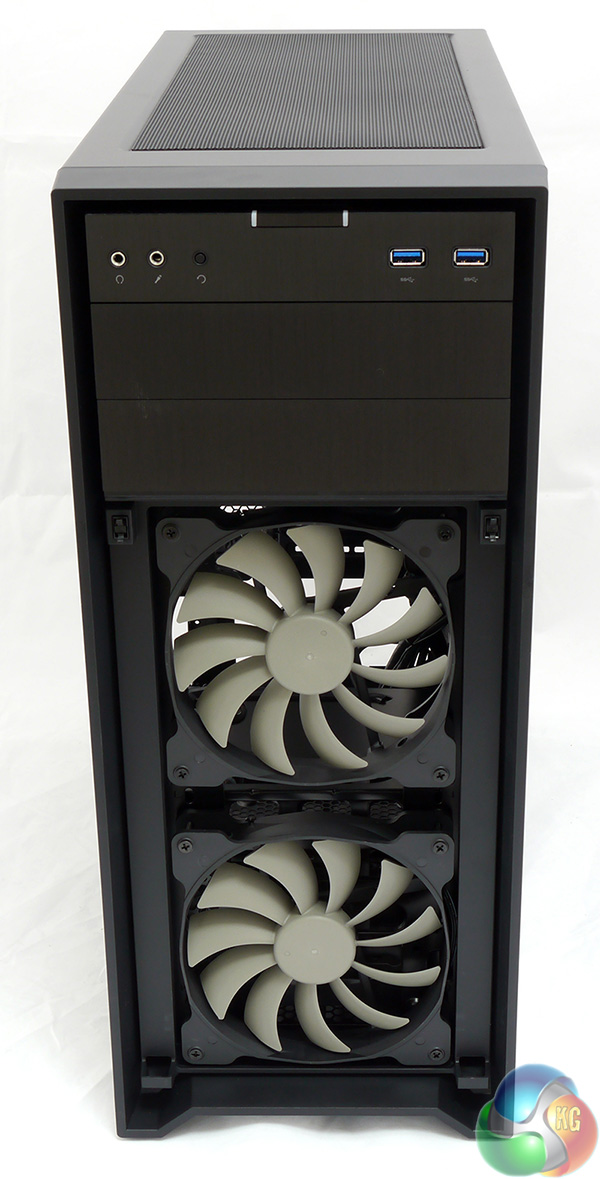
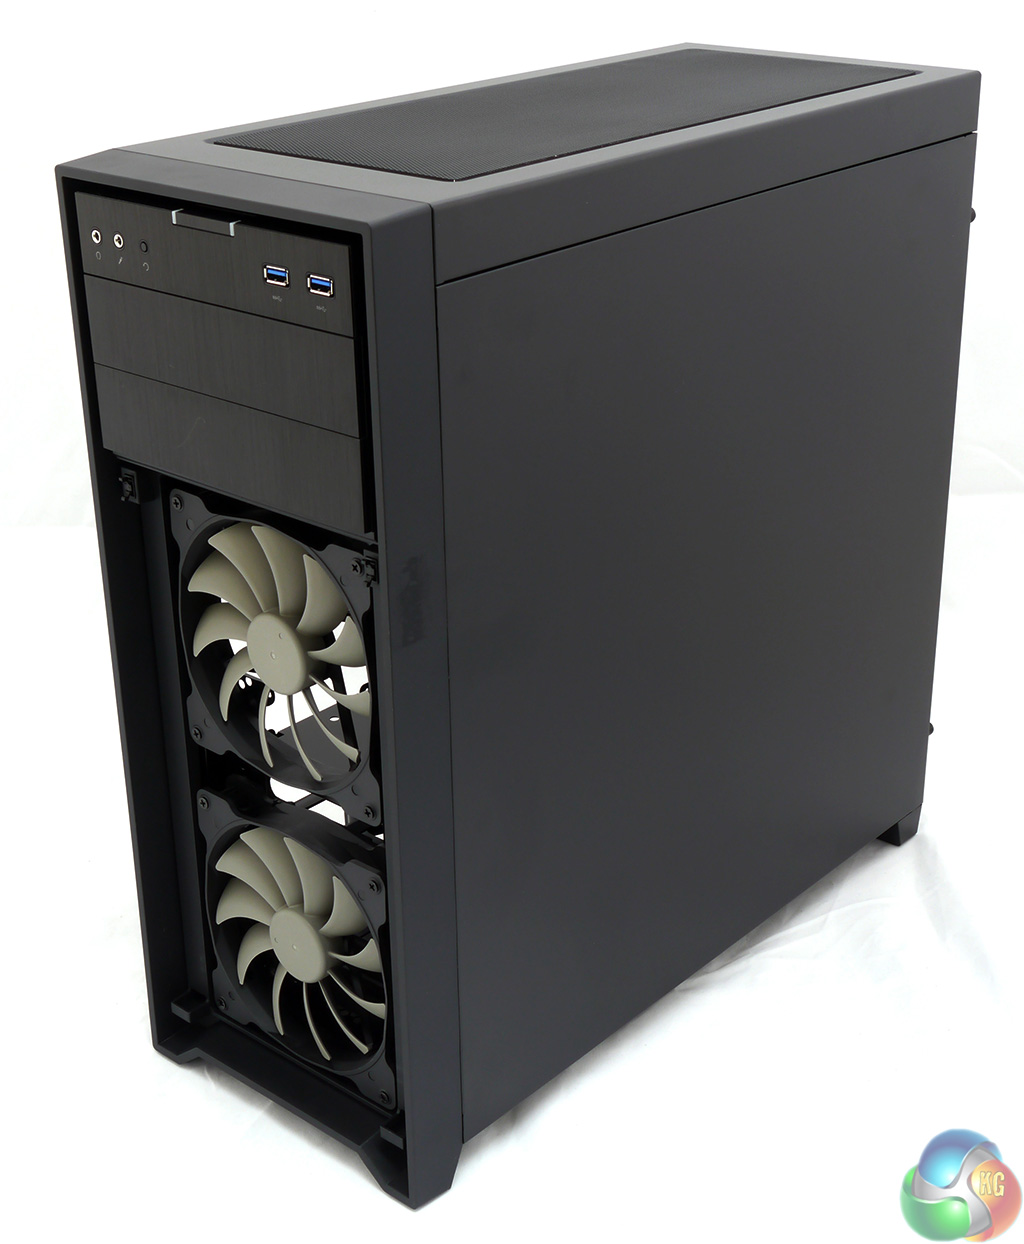
Returning to the front of the case, the grille that covers the two 140mm fans is simple to remove as the two mounts are press to release and the grille pops off. This is very handy if you want to clean the mesh to remove dust however I found the front panel popped off all too easily when I moved the case around. I estimate that during this review I had to replace it at least ten times.
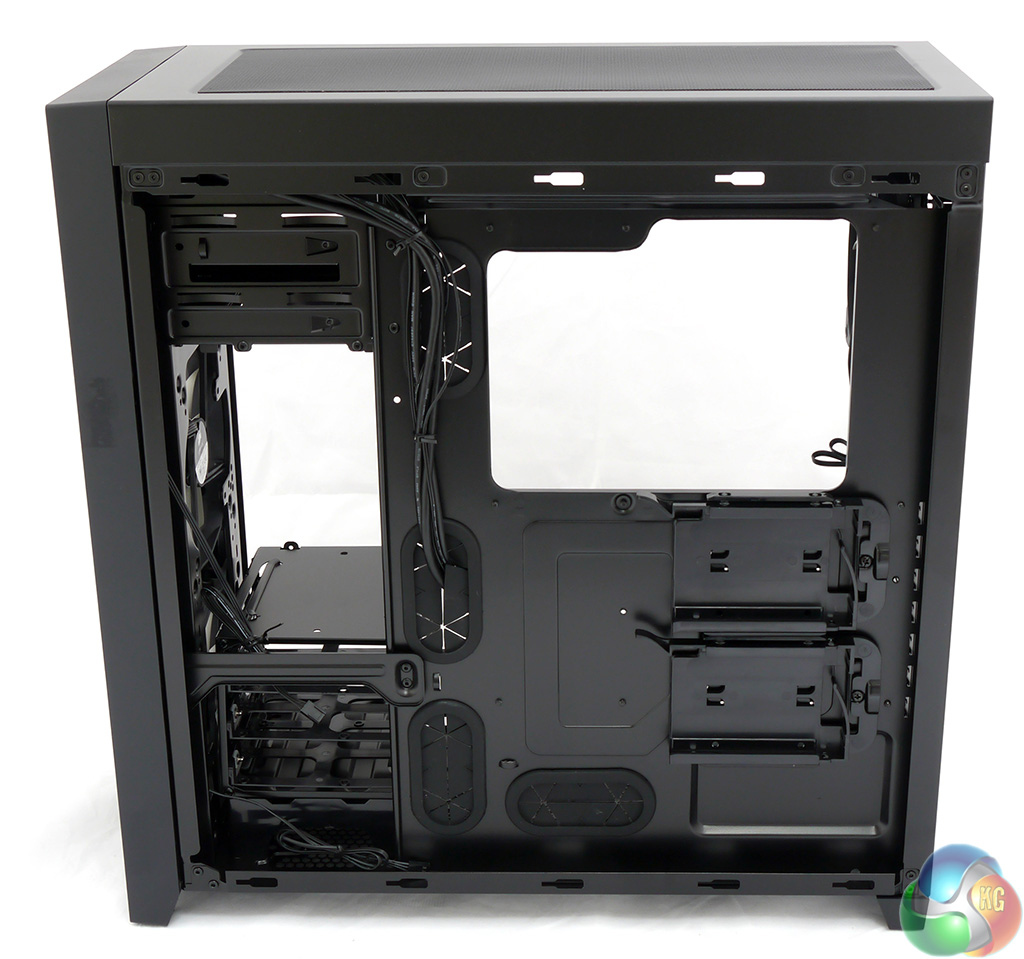
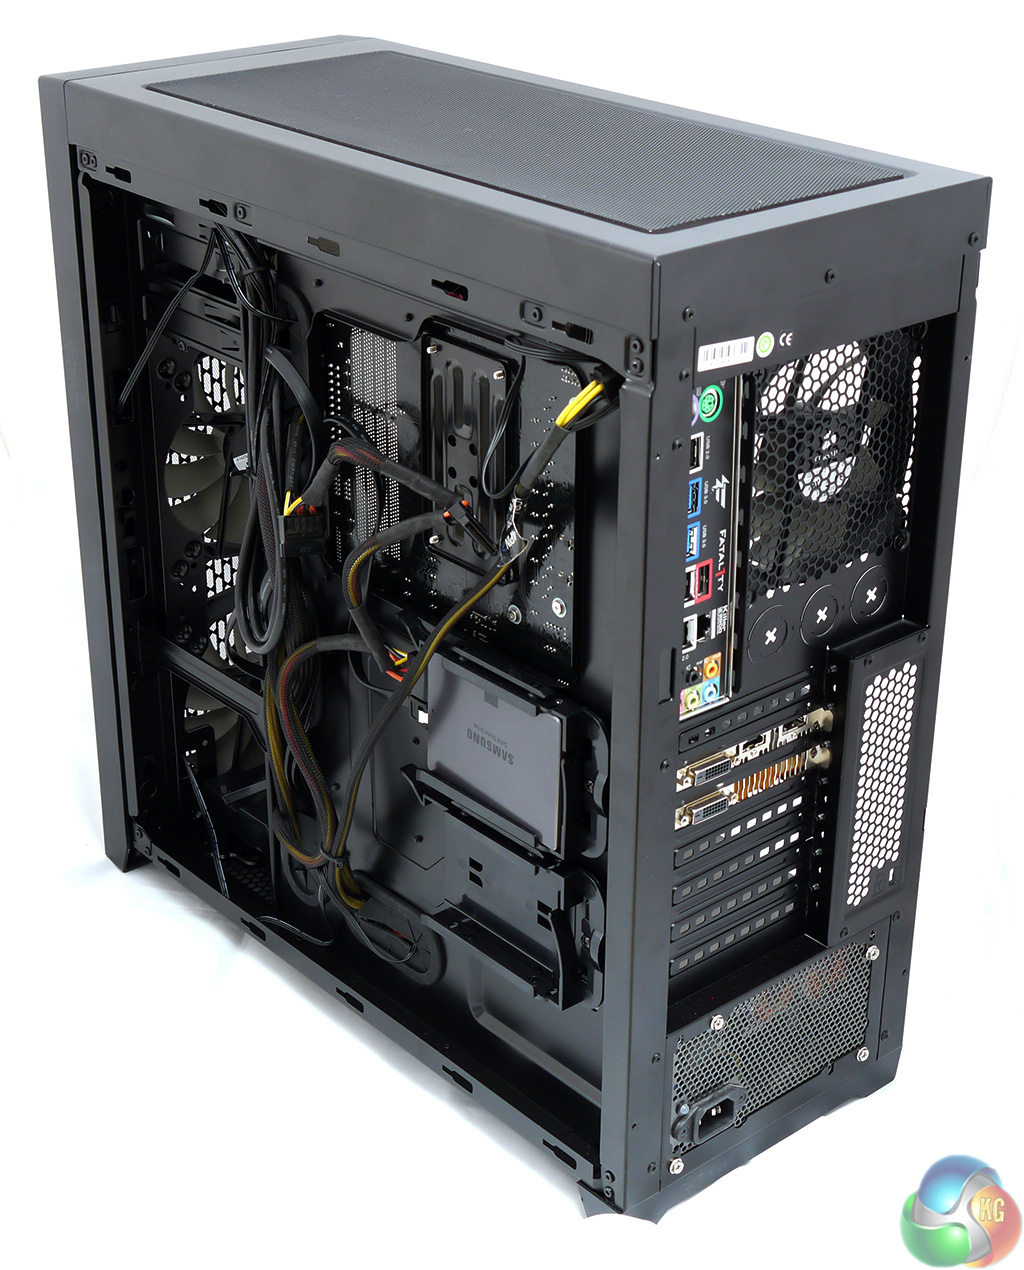
The back of the motherboard tray is interesting for two reasons. The first is that you don't get much room for cable management and I measured only 20-25mm of space which isn't enough room for hiding the cables away. I got some halfway decent results using a traditional power supply but you really need to use a modular unit in the 450D to get a tidy result.
Part of the problem is the lack of space but the other issue is the flexible nature of the steel side panel as you have to press the panel against the cables as you slide it into place.
One aspect of the Obsidian 450D that I like a great deal is the inclusion of two 2.5-inch drive bays on the reverse side of the motherboard tray. This means you can install a solid state drive along with a 1TB or 2TB mechanical drive and the whole lot can be removed from the main compartment and kept out of the airflow.
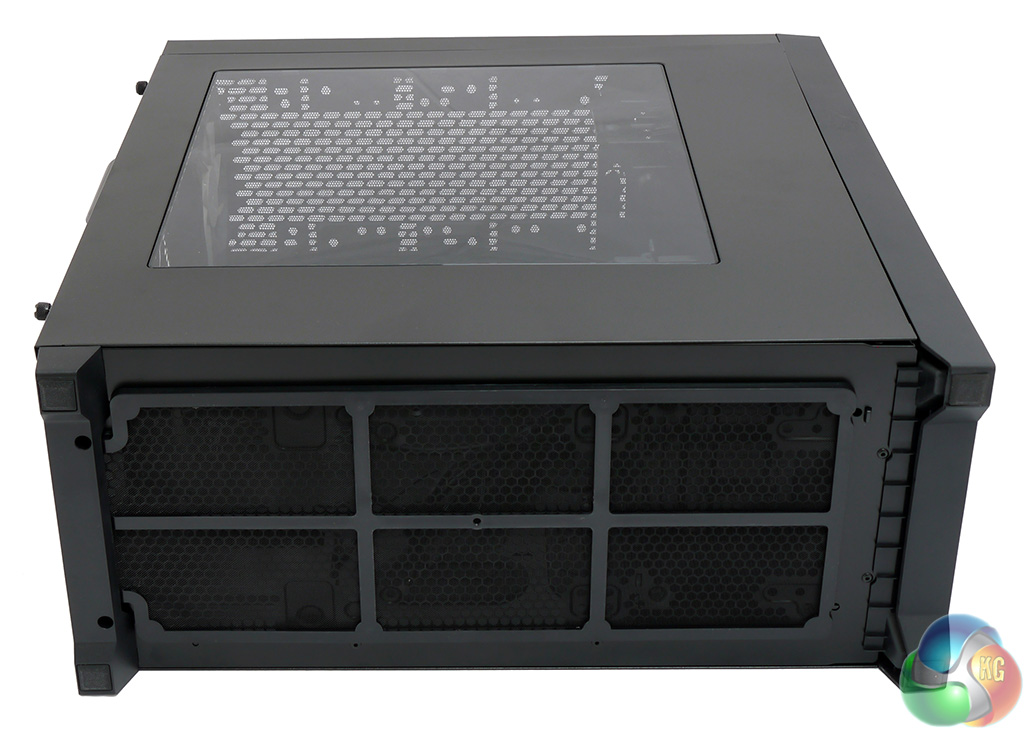
The bottom of the case is also heavily ventilated. Corsair has installed a mesh dust cover that is retained magnetically to keep all the usual nasties out of the 450D. I fully expect this case will remain clean inside and the various dust guards will be easy to clean.

Here is a quick series of photos of the outside of the PC once it was built that show the case with the grilles removed from the bottom, top and front of the case.
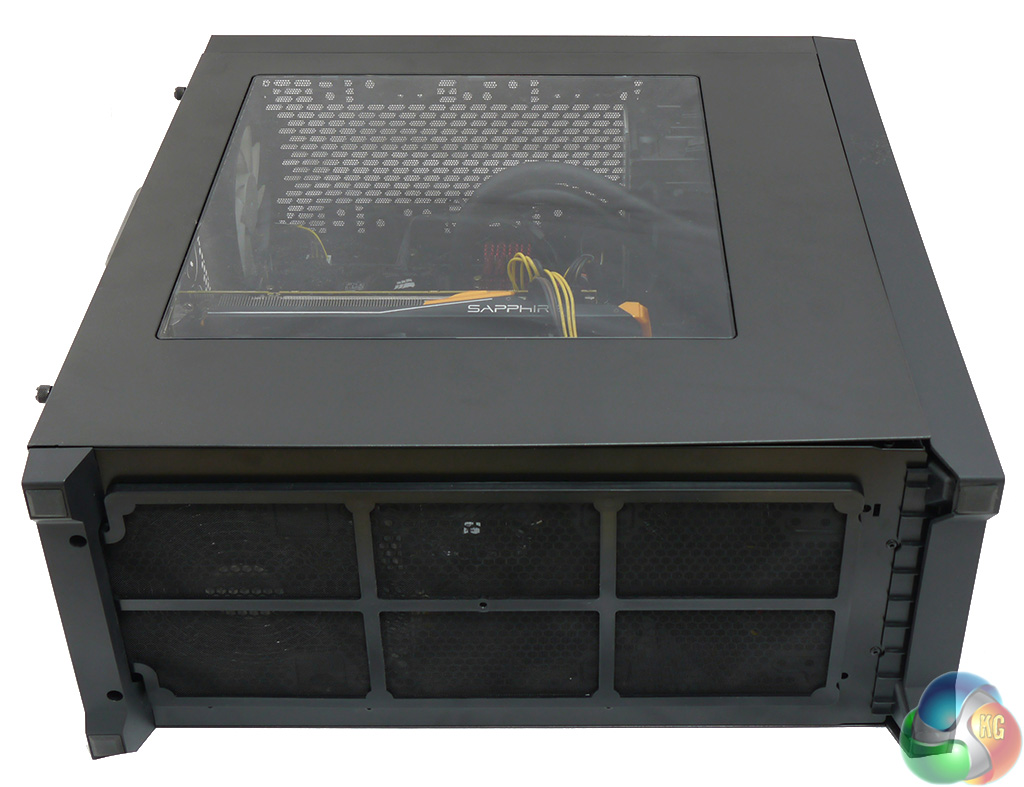
I want to drive home the point that the 450D has been designed with airflow in mind but is also a cinch to keep clean as the front grille pops off and the top and bottom dust covers are held in place with magnets.
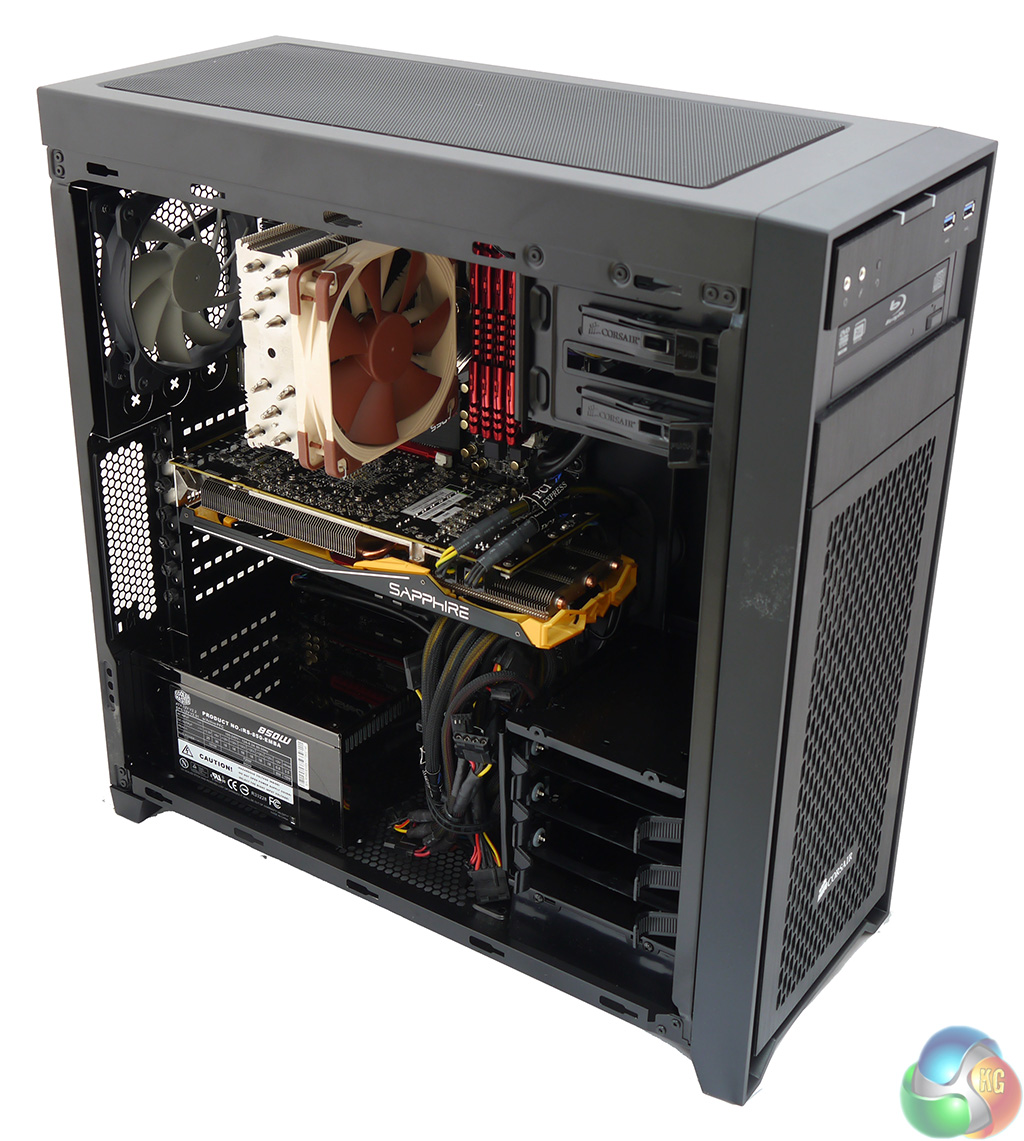
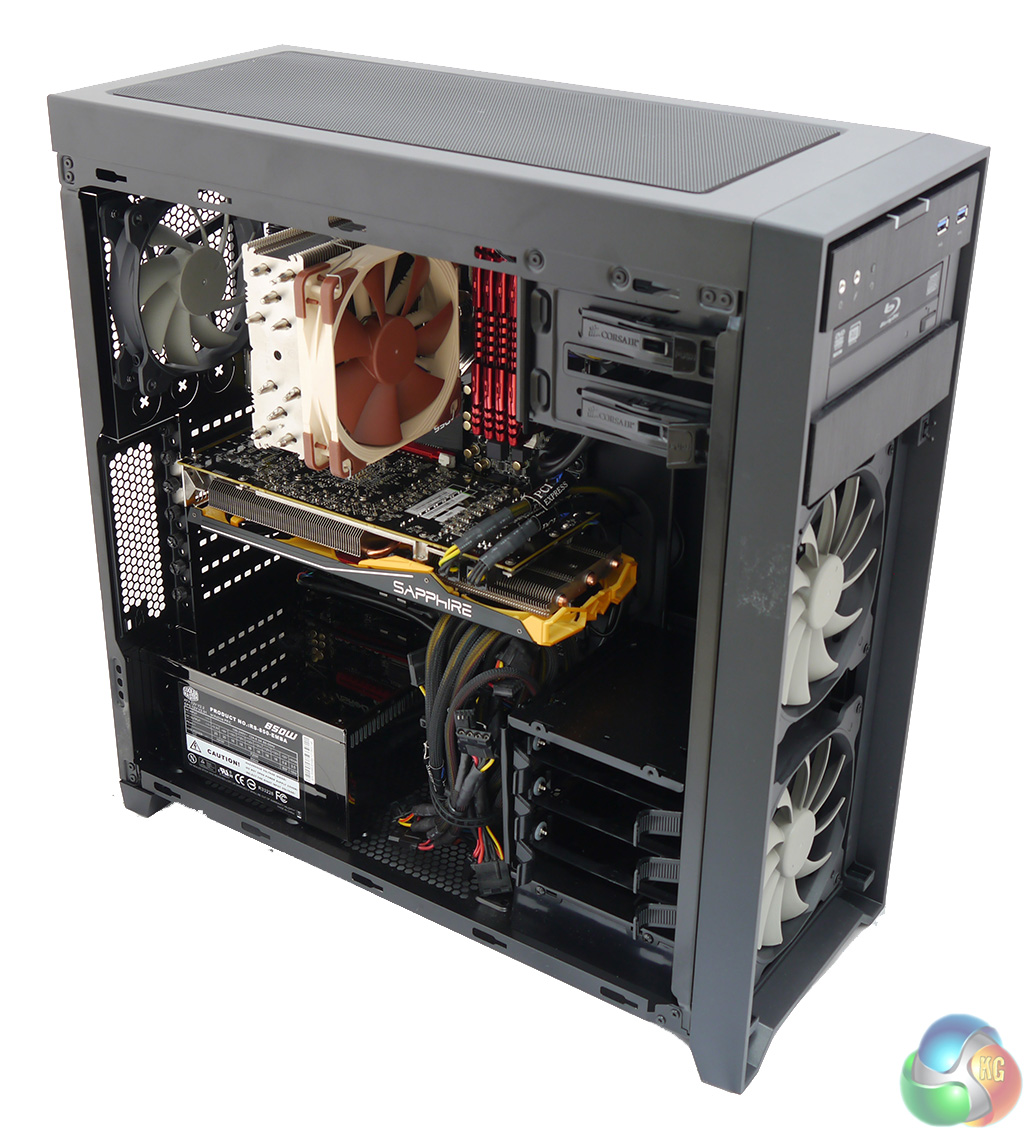
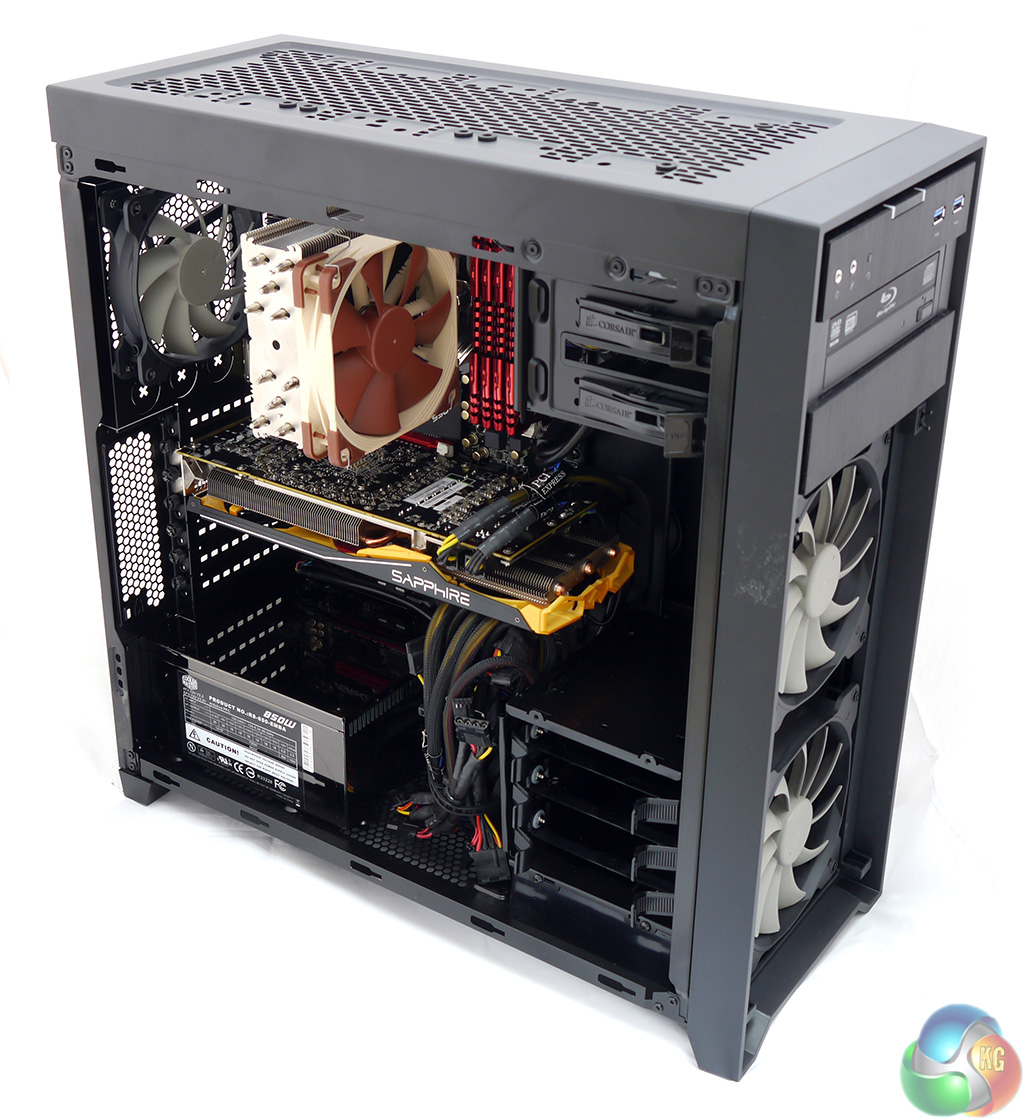
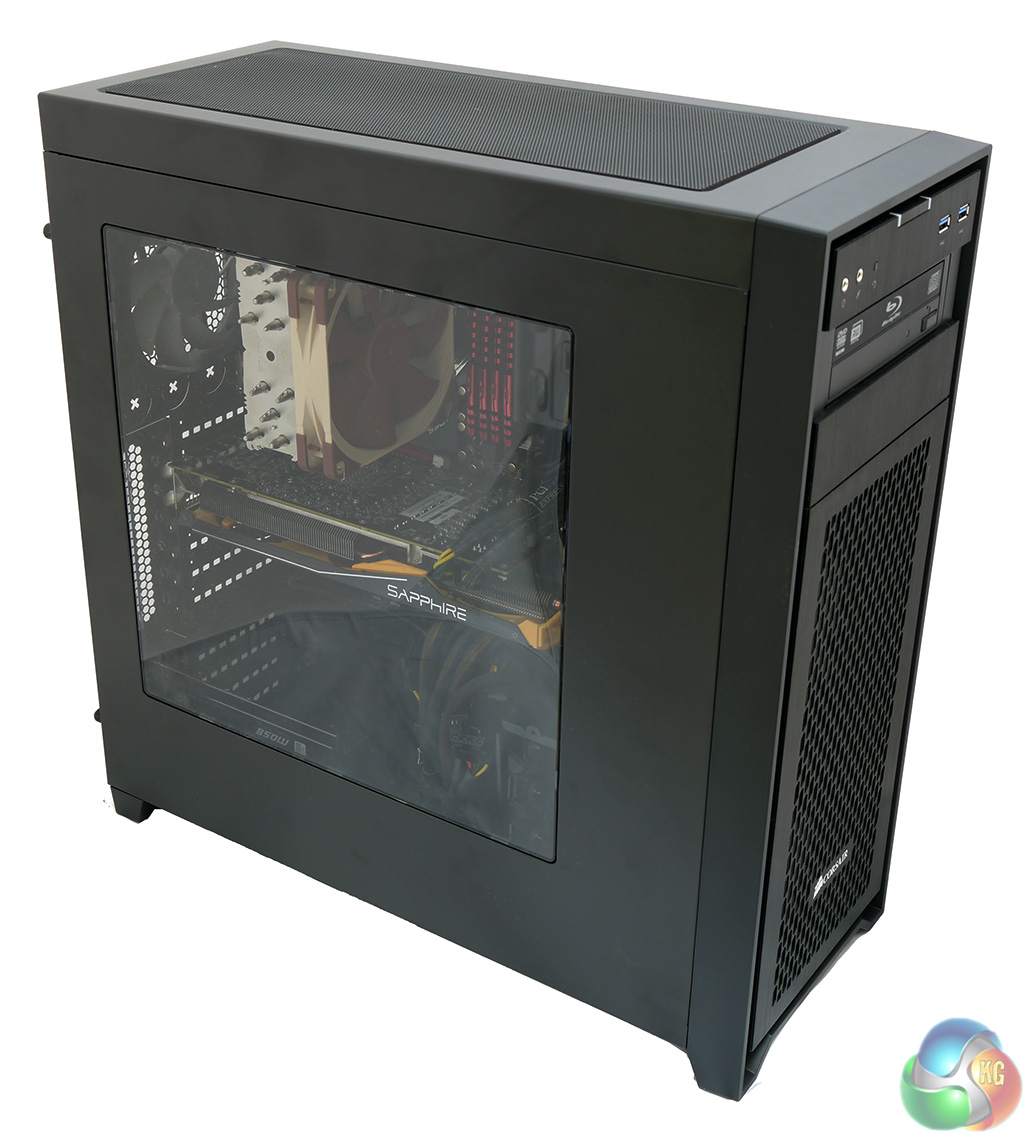
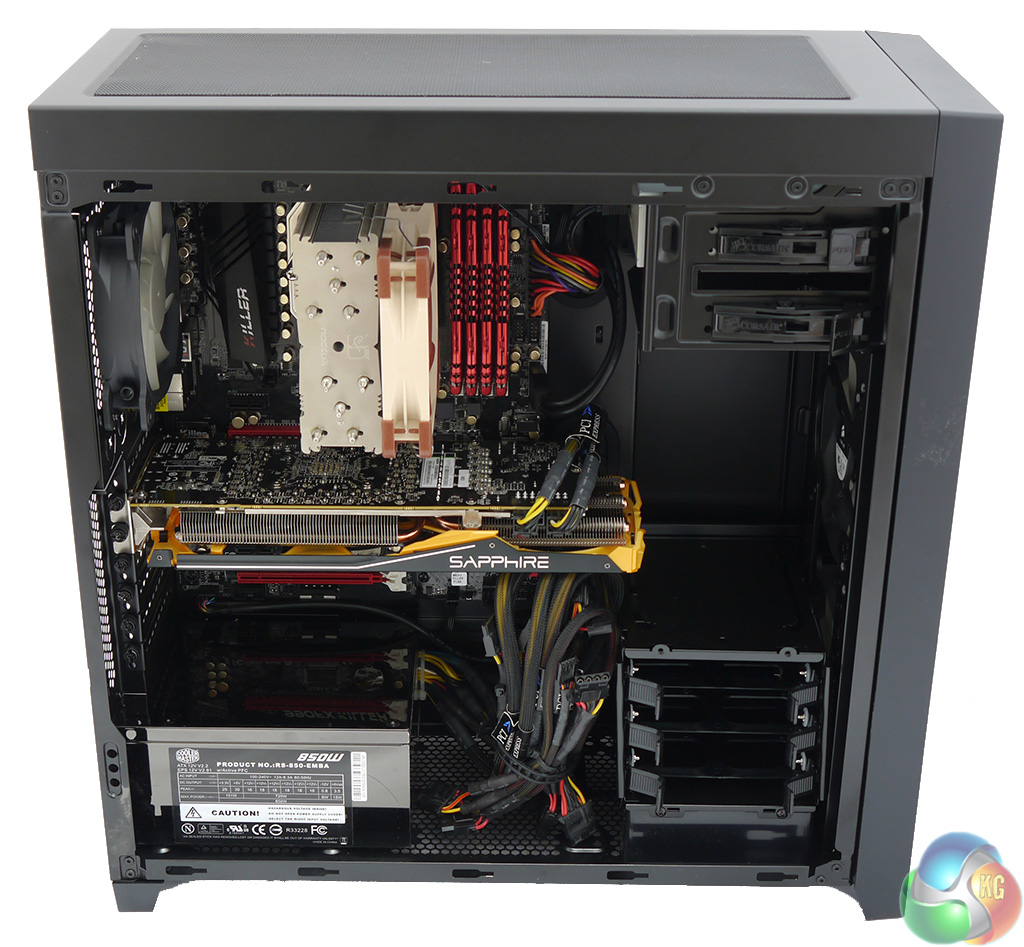
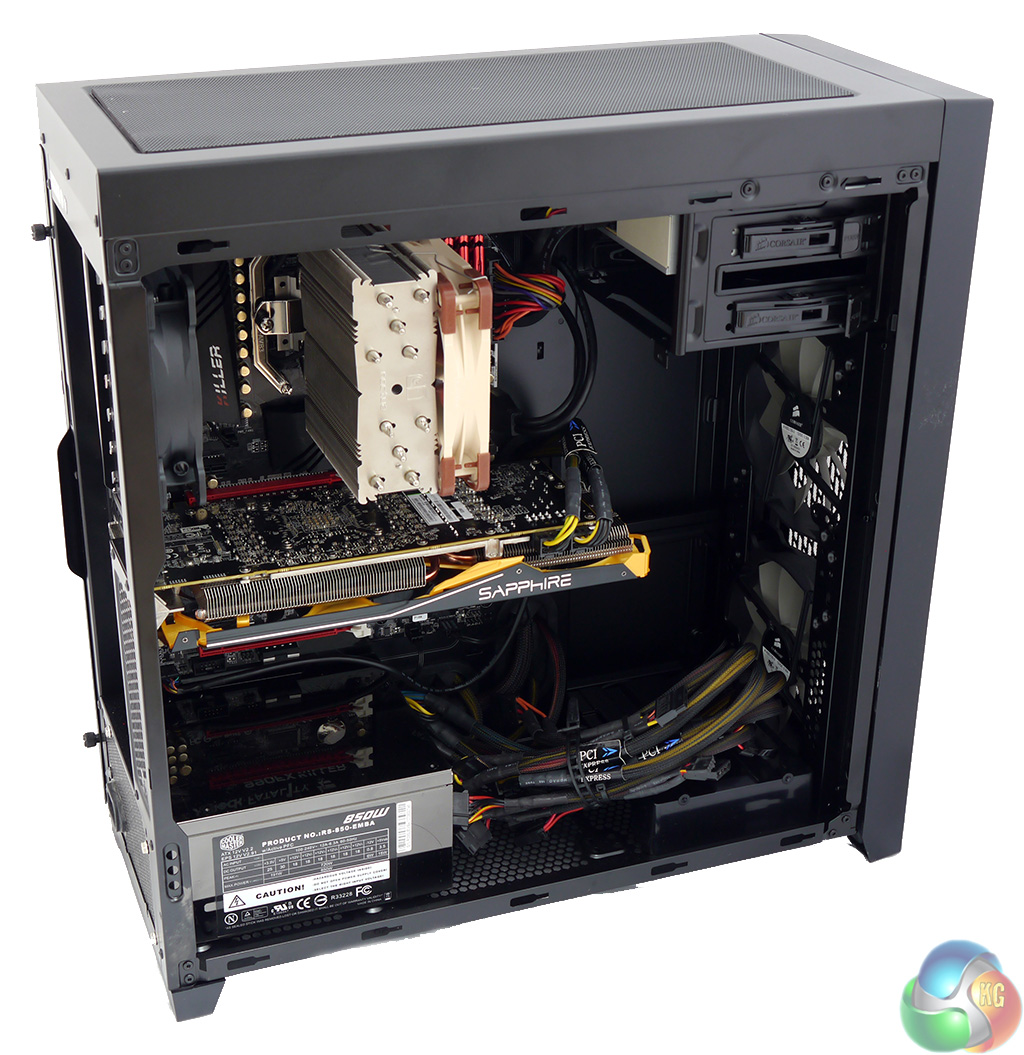
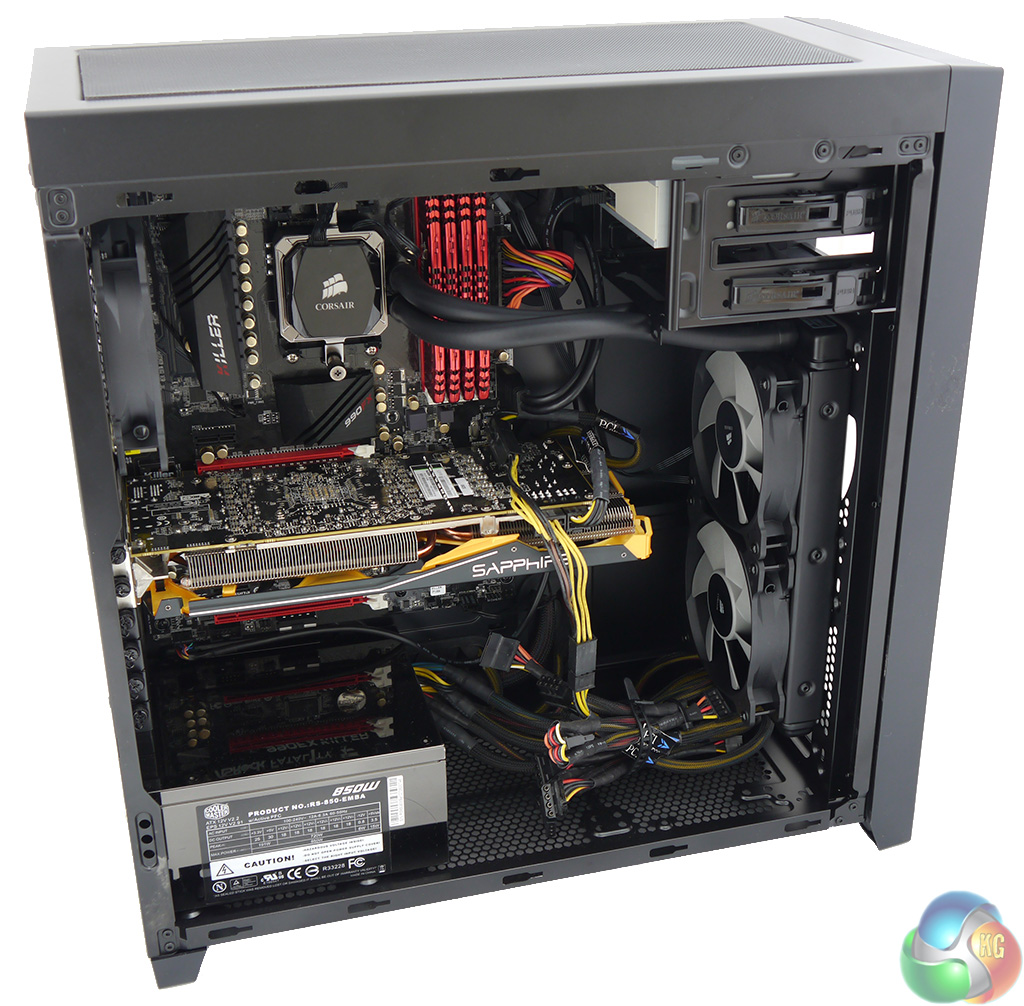
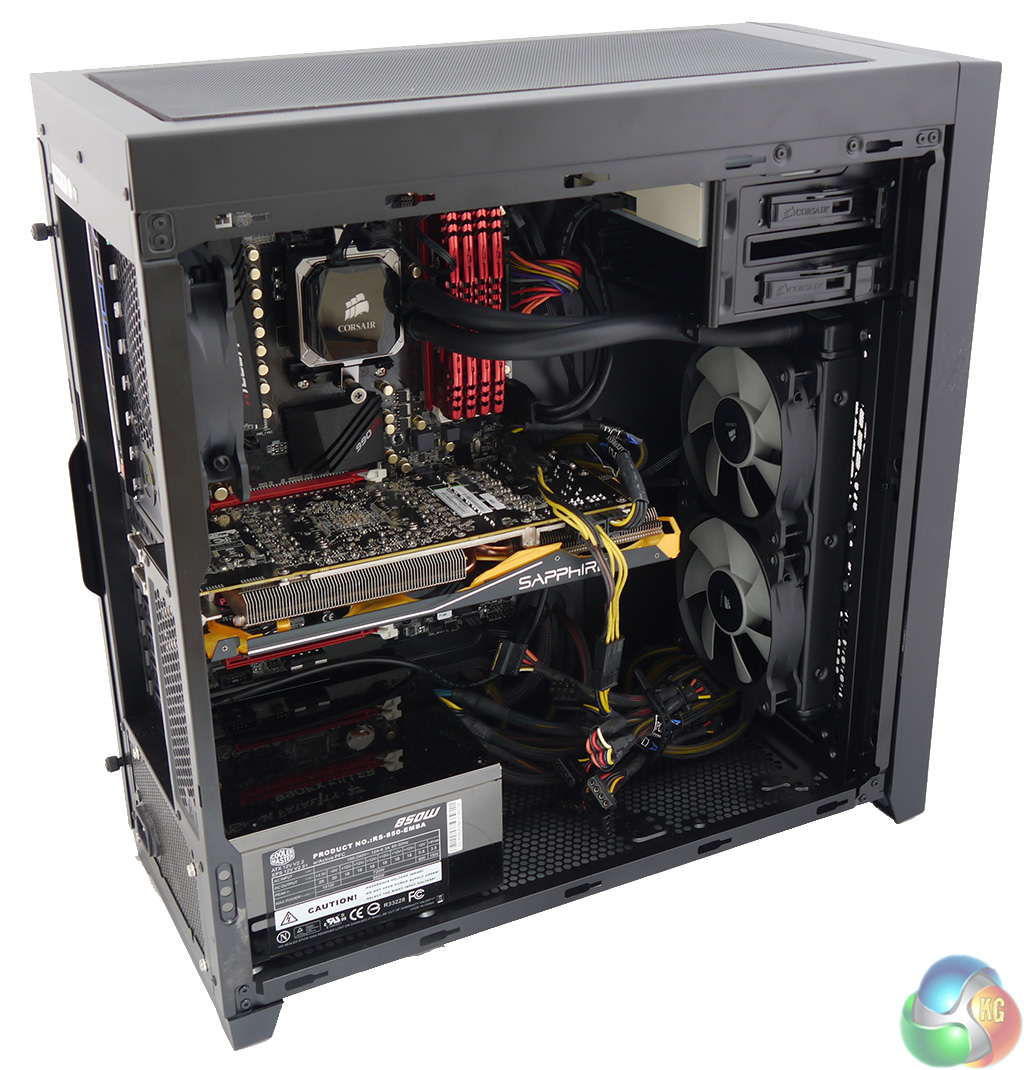
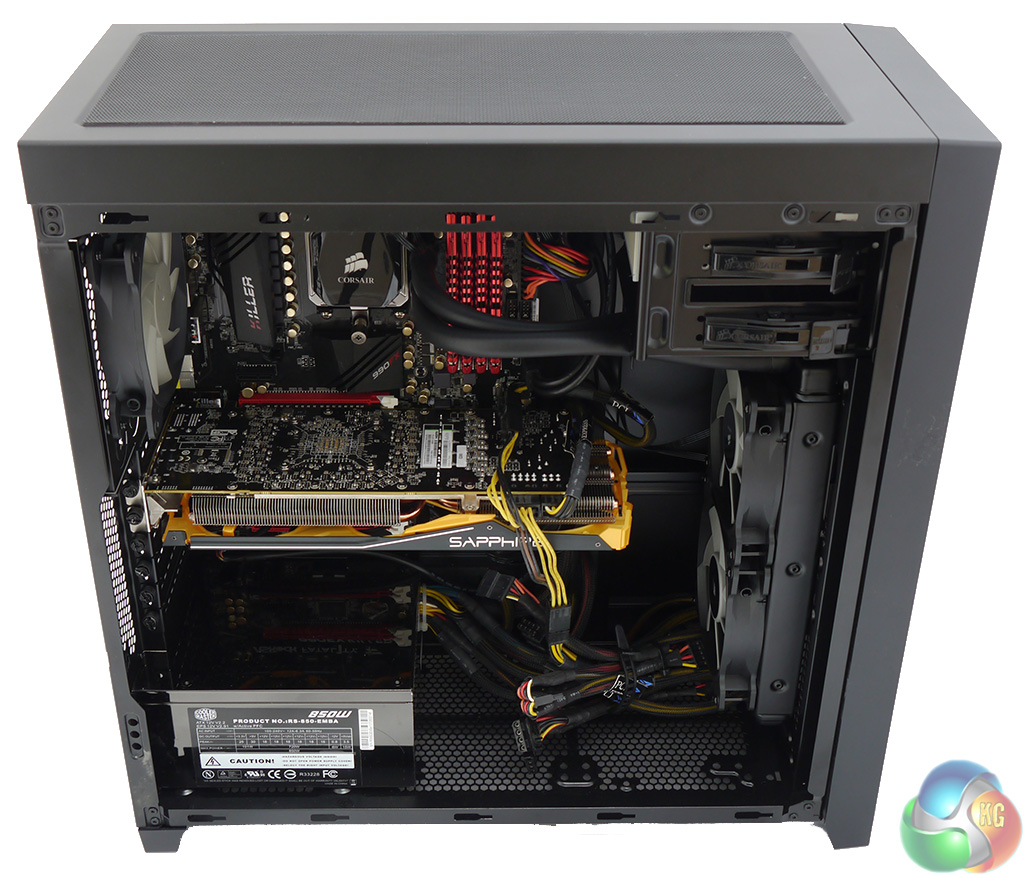
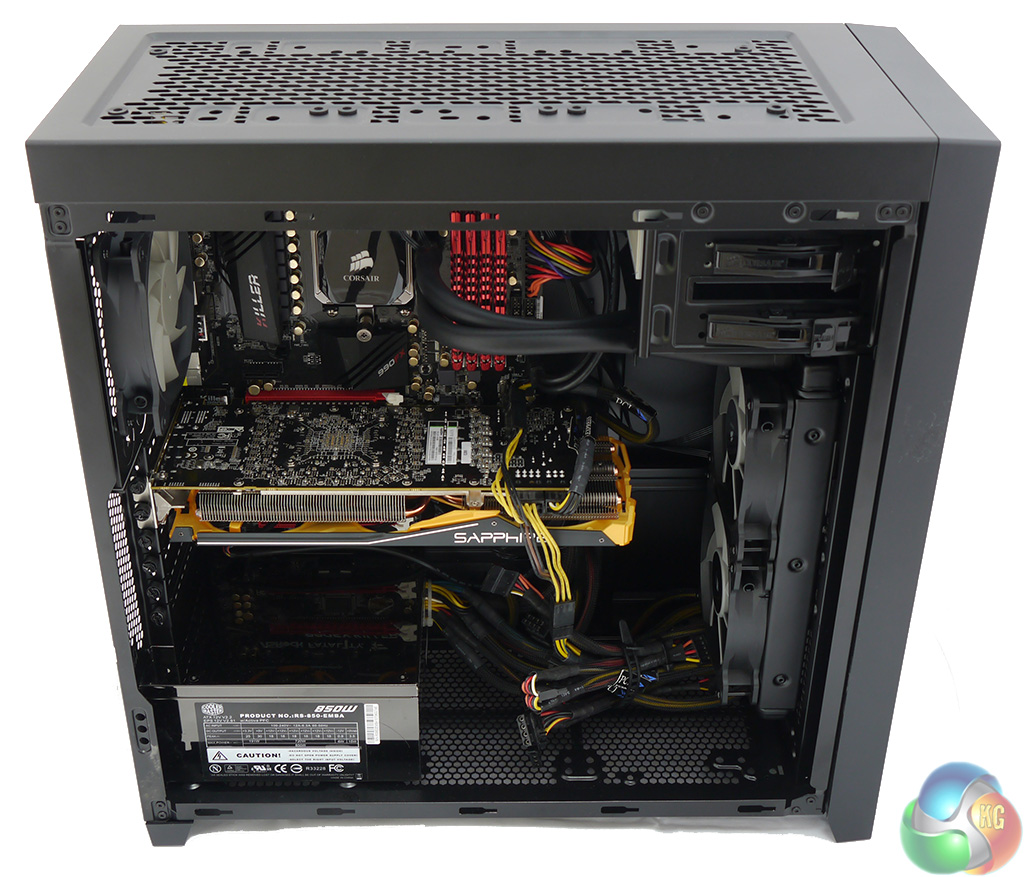
With the side panel removed you can see the ASRock 990FX Killer motherboard, AMD FX-8350 processor, four modules of G.Skill Ripjaws X RAM, Sapphire Radeon Tri-X R9 290 4GB graphics card and Noctua NH-U12S air cooler vanish inside without any problem. The Obsidian 450D is ‘limited' to using a CPU cooler that is 165mm in height. I use inverted commas as that isn't really a limitation at all.
The only fly in the ointment is that I grabbed an 850W Coolermaster PSU from the shelf that has fixed cables instead of using a modular design. This wasn't a conscious decision on my part, it just so happened the Coolermaster was the first PSU that came to hand. I knew I would have to hide the cables but as you can see from the photos this wasn't as easy as I had hoped.
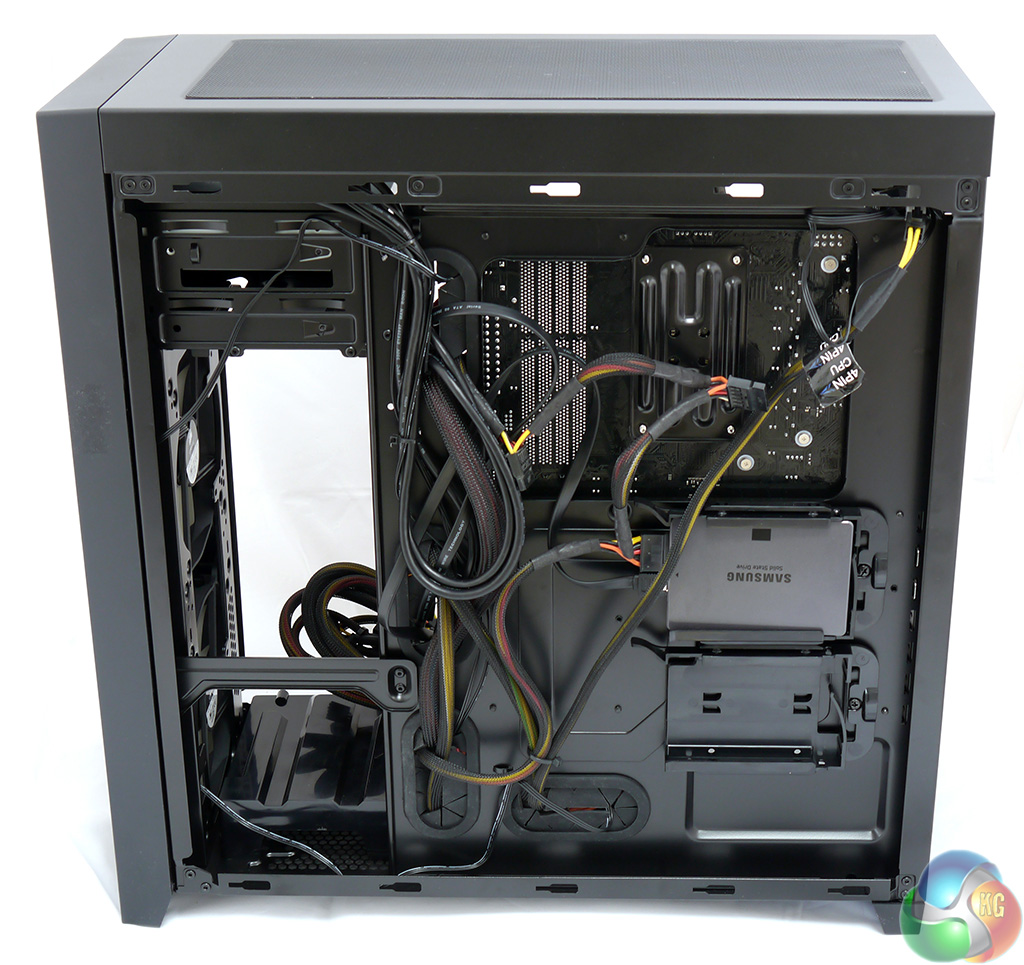
I built this system using a single Samsung 500GB 840 EVO SSD that went in a drive bay on the back of the motherboard tray which meant that I could remove the plastic 3.5-inch drive tower.
Removing the drive tower is a simple matter of undoing two screws and pulling the tower out. This freed up a fair amount of space for the PSU cables, however I would have done better to use a modular design.

So why didn't I feed the cables through those rubber grommets and hide them behind the motherboard tray? I tried, honestly I did, but there isn't enough space. In fact that is only part of the story as the grommets are prone to pulling out of place and the location of the cable holes isn't too great. In particular I found the eight-pin EPS cable was a stretch as there is very little leeway with routing of the PSU cables.
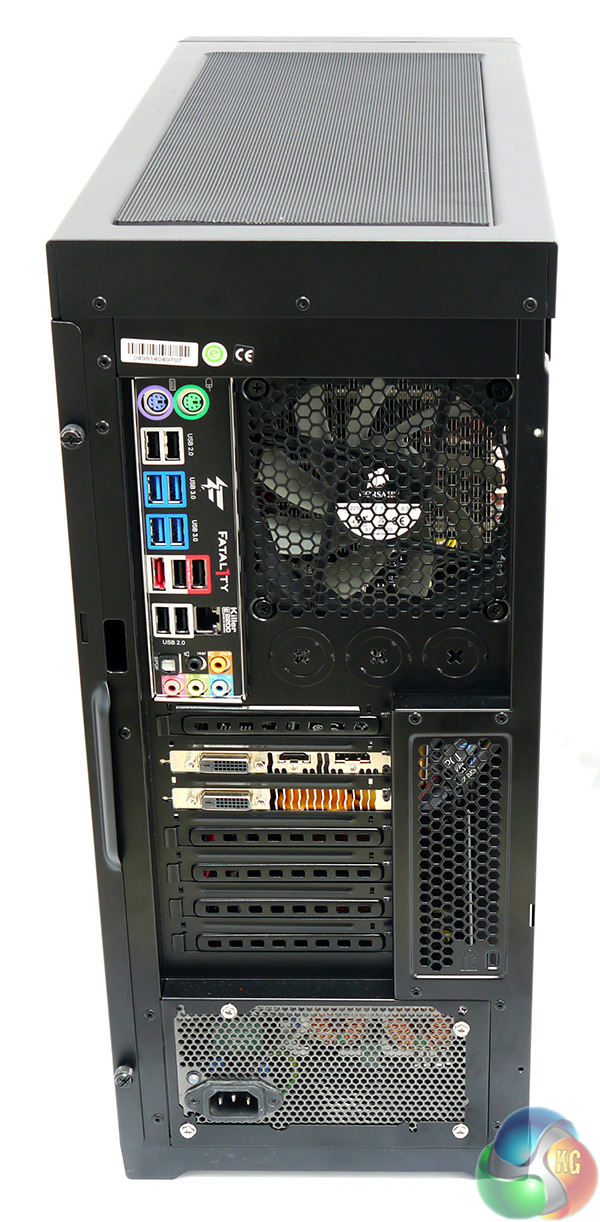
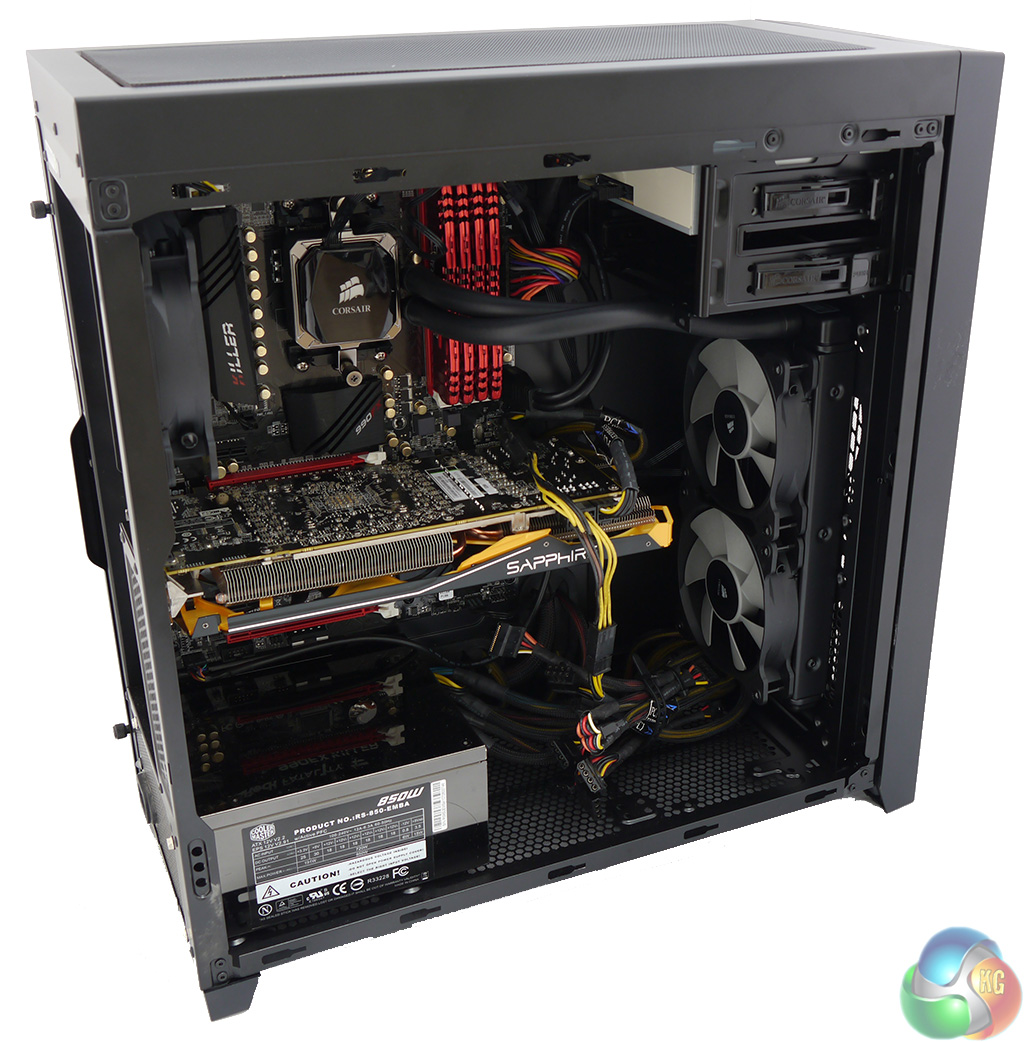
My overwhelming impression of the back of the built system is that it is all perforations and holes that add up to heaps of airflow.
Corsair makes a feature of the options for radiator mounts in the Obsidian 450D. Mounting a radiator up to 360mm in the roof of the case looks straightforward however I have my doubts about mounting a 240mm radiator at the bottom. I'm not quite sure why that would be desirable and am quite sure you'd need to use a compact and modular PSU to create as much space as possible. Clearly it would be a simple matter to substitute a 120mm radiator for the 120mm exhaust fan at the rear.
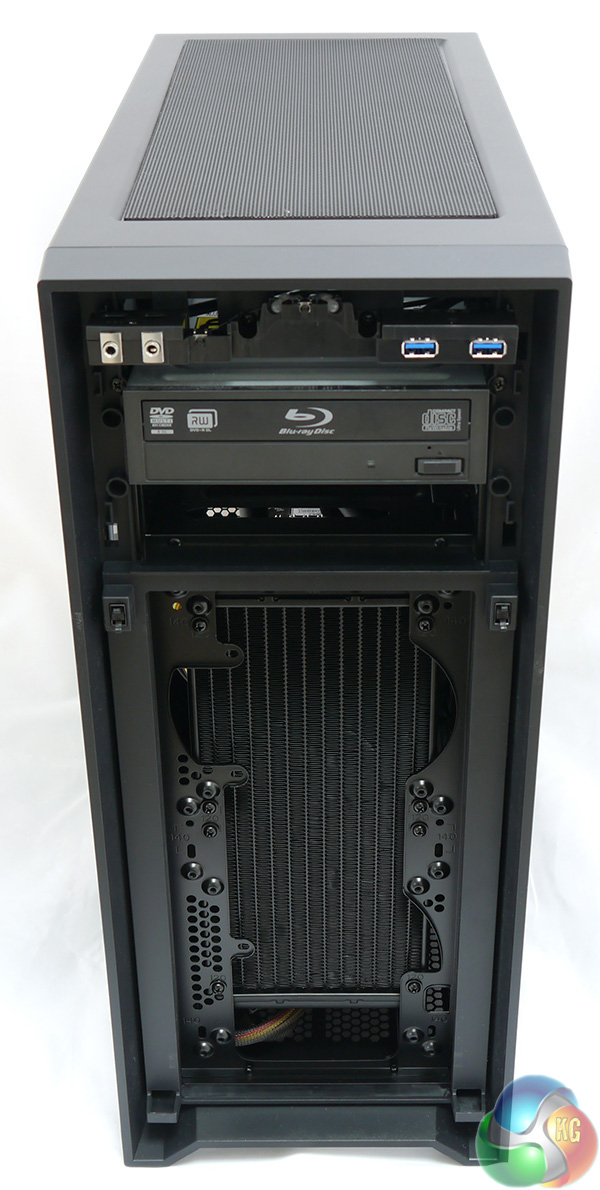
I was more interested in the claims about installing a 240mm or 280mm radiator at the front of the case. I had already removed the drive tower but that was only the start. Before I could install the 240mm Corsair H100i radiator I had to remove the plastic mount for the 3.5-inch drive tower as it fouled the end tank of the radiator so I laid the case on its back, popped off the bottom magnetic grille and removed four screws.
It looked like a simple job to remove the two front 140mm fans. I popped off the front mesh panels and removed the screws at the corners of the fans and that looked like the end of the job. Except that the block connectors for the fans didn't have the room to slip free at the front so I could pull the fans forward to the extent of the cabling but couldn't fully remove them from the case.
This forced me to unclip the drive bay bezel and then remove the two revealed screws. Then I could unlatch the front panel of the case (which includes the two front feet) and finally the front of the case was exposed.
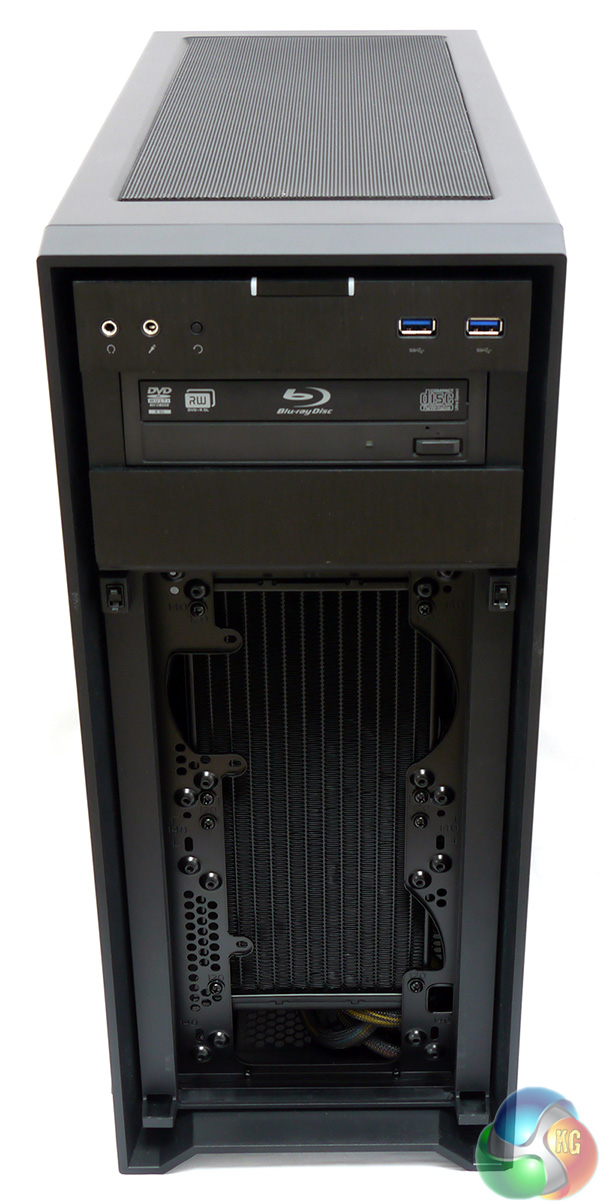
As you can see in the photos there are mounts for two 120mm fans or two 140mm fans and you can indeed install a 240mm radiator such as the Corsair H100i. It is worth spelling out that the exhaust points to the front as KitGuru is a firm believer in expelling hot air.
The finished installation was nice and tidy and shows the Obsidian 450D does indeed offer a number of choices for system cooling.
To put this case through its cooling paces we will be using a test system consisting of an AMD FX-8350, Radeon HD 7850 and multiple storage drives. This system allows us to produce a substantial amount of heat and effectively test the Corsair Obsidian 450D‘s cooling capabilities.
For stress testing we use a mixture of Prime95 and FurMark to create the maximum heat output. Prime95′s ‘Small FFTs’ setting allows us to stress our CPU. FurMark’s ‘GPU Burn-in’ mode creates the maximum amount of load our GPU is ever likely to see.
Test System:
- Processor: 4GHz AMD FX-8350
- Motherboard: ASRock 990FX Killer
- CPU cooler: Noctua NH-U12S
- Memory: G.Skill Ripjaws X 1600MHz RAM
- Graphics card: Sapphire Radeon Tri-X R9 290 4GB
- Power supply: Coolermaster RS850
- Storage drives: Samsung 840 EVO SSD
- OS: Windows 7 Professional 64-bit.
Thermal Performance Test Procedures:
- The case’s default fan configuration is used to give an accurate interpretation of the out-of-the-box performance.
- The Corsair Obsidian 450D‘s default fan configuration is: 2x 140mm front intake, 1x 120mm rear exhaust fans.
- The fans are operating at full speed.
- We allow the system to idle for 15 minutes and record the stable temperatures.
- We allow the system to operate under extreme stress for 15 minutes and record the stable temperatures.
Assess cooling.
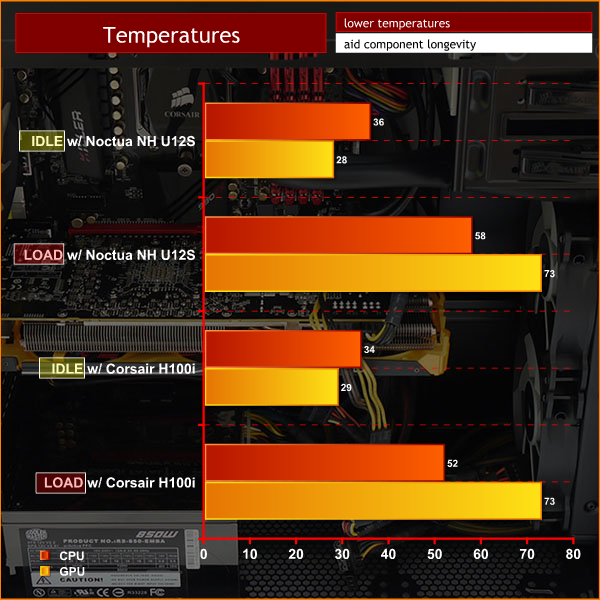
The Noctua NH-U12S does a reasonable job of keeping the FX-8350 cool. When the system is fully loaded the CPU temperature rises to 58 degrees. Meanwhile the GPU temperature went from 28 degrees to 73 degrees which is well within limits.
Swapping to the Corsair H100i liquid cooler helped improve CPU load temperatures, dropping to 52c. Well within safe parameters.
Acoustic Performance Test Procedures:
- We placed our Digital Sound Level Meter one metre away from the case.
- The case fans are set to maximum speed.
- The CPU cooler’s fans are deactivated.
- The Corsair Obsidian 450D‘s default fan configuration is: 2x 140mm front intake, 1x 120mm rear exhaust fan.
Assess noise
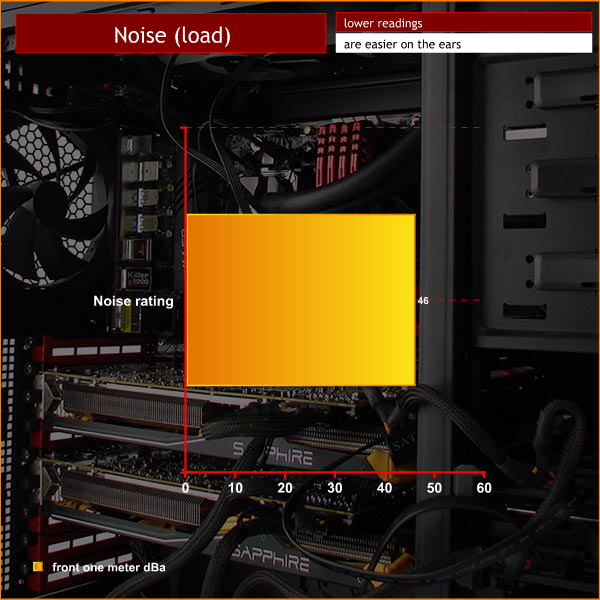
The Corsair Obsidian 450D is a fairly noisy case and the fundamental problem is fan noise. The two 140mm fans at the front and single 120mm fan at the rear use three-pin connectors and do not have speed controllers so the constant fan noise is pretty much unavoidable. This fan noise is compounded by the incredibly open nature of the case so the noise appears to go hand-in-hand with high airflow.
While I was using the Noctua cooler with the three Corsair fans I couldn't hear either the graphics card cooler or the CPU fan as the case fans were whirring away.
Switching from the Noctua to the Corsair H100i was a distinct improvement as it dispensed with the two case fans at the front. Or rather, installing the H100i at the front had that effect but if the radiator was installed in the roof of the case it would merely have added to the problem.
Ditching the two stock front case fans made a significant difference to the noise level of the Corsair, not so much in terms of the actual volume, but more in terms of the steady drone. The dip in noise levels meant that I was able to hear the graphics card fan spin up as the GPU got warm.
I like the Corsair Obsidian 450D but am not in love with it. The case is nicely compact and pretty much ideal for anyone building a gaming or home PC. I also like the cosmetic appearance of the case and would be very happy to give it house space if I was only judging by looks.
There are a number of things I dislike about the case including the somewhat flimsy nature of the side panels, the rather noisy three-pin case fans and the lack of space behind the motherboard tray for hiding away the power supply cables.
I was impressed by the ability of this case to keep everything cool once I had installed a liquid cooler in place of the two front case fans. The heavily ventilated nature of the case delivers massive airflow but also results in far too much noise if you don't keep the fan speeds under control.
The final piece of good news with this case is the clever way that Corsair has covered the vents with magnetic dust covers top and bottom and a pop-off grille on the front. Keeping your new PC clean and tidy has never been so easy.
You can buy the Corsair Obsidian 450D from Overclockers UK for £91.99 inc vat. Discuss on our Facebook page, over HERE.
Pros:
- Smart appearance.
- Dust filters are simple to remove, clean and replace.
- The free flow nature of the case gives epic cooling.
- Plenty of space for a huge graphics card and CPU cooler.
- Reasonable price.
- Loads of options for installing after-market cooling.
Cons:
- The stock Corsair fans are too noisy and don't have speed controllers.
- Not enough room for tidying away the cables.
- Flimsy side panels flex too much and can be awkward to replace.
KitGuru says: This is a good, effective case however the stock fans are too noisy. It doesn't take much work to fix it up but that shouldn't be necessary.