

Four screws are pushed through the multi-socket backplate's relevant holes. Comprised of a sturdy metal and vibration-damping foam, the backplate should enforce adequate structural rigidity for the heavy CPU cooler while also minimising noise-causing vibrations.
A welcomed addition compared to be quiet!'s past designs, four plastic holders are used to fix the backplate in position. This is a critical addition for the mounting procedure because, as we will see later, holding the backplate securely in place is a contributing factor to the level of difficulty for the installation process.
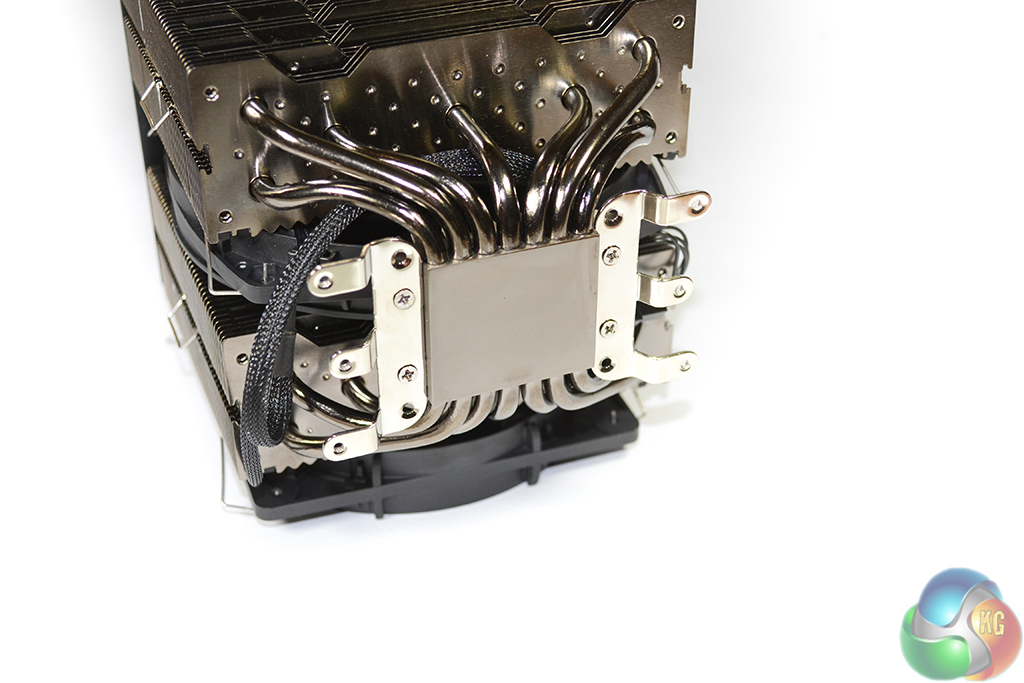
be quiet! opts for the bracket-on-cooler approach to securing the heatsink in place. A pair of brackets is secured directly to the heatsink and then screwed onto the retention mounts. Shown above are the AMD brackets installed and ready to be set in position.
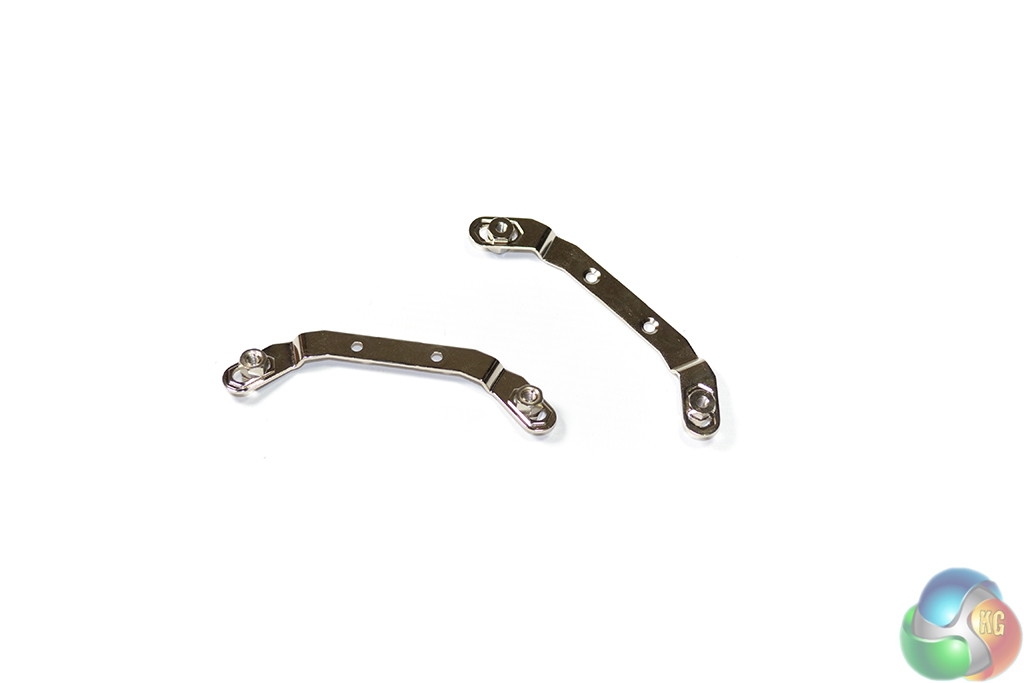
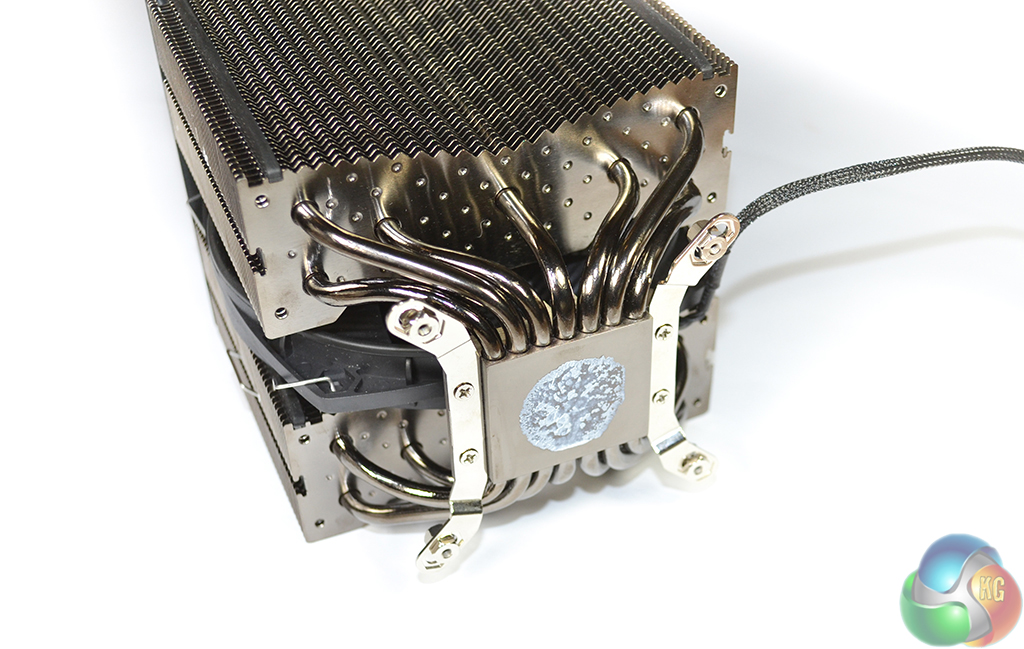
Attaching the securing nuts and bolts before screwing the brackets onto the heatsink is a crucial step in the installation procedure. The manual does point this out in a fairly clear manner. The reason it is so critical is because securing the nuts will be extremely difficult when the brackets are attached – heatpipes will obstruct the necessary turning radius of the tightening tool.
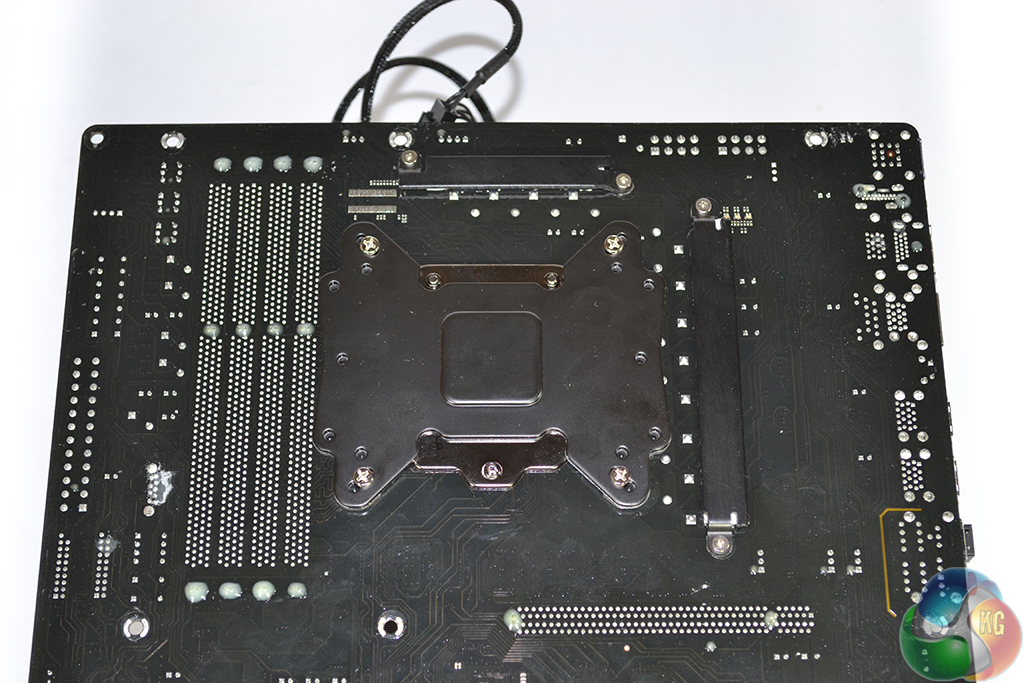
The final part of the procedure is physically attaching the CPU cooler to the motherboard. This is the point where difficulty starts to ramp up. Unlike the vast majority of high performance, dual tower heatsinks, be quiet! forces users to effectively mount the motherboard onto the cooler, not the other way round.
What I mean by this, is the cooler has to be placed on the relevant mounting holes and then the screws are tightened from the rear side. From what I experienced, this is easiest done by placing the cooler base-up on a flat surface and then aligning the mounting holes by trial and error. Thermal paste does get in places that one doesn't want it to, and the procedure requires balance and patience, but there doesn't seem to be an easier method.
be quiet!'s reasoning for such a difficult securing procedure is in the aluminium top plate. Securing the cooler from the front side (by placing it on top of an upwards-facing motherboard) would require removal of the top plate. be quiet! instead opts for the difficult securing approach, showing preference towards aesthetics over ease-of-installation.
Perhaps making use of long bolts which connect to the cooler's base brackets and then slip through the motherboard mounting holes would have been better. The bolts could have then been secured from the rear side which would make guiding the cooler into its correct position far less difficult.
As somebody who switches CPU coolers regularly, this is most certainly an inconvenience that I would rather not deal with. But to the vast majority of users (those who only remove the CPU cooler a handful of times per year), the tricky installation procedure will be far more bearable, and the added benefits of an attractive top plate will also be welcomed.
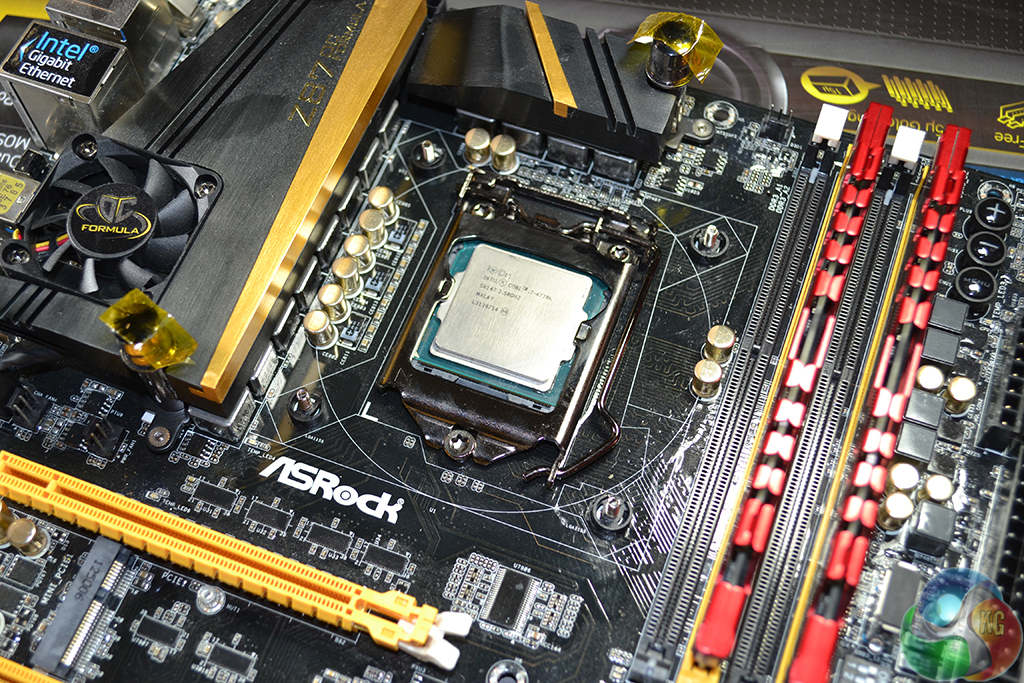
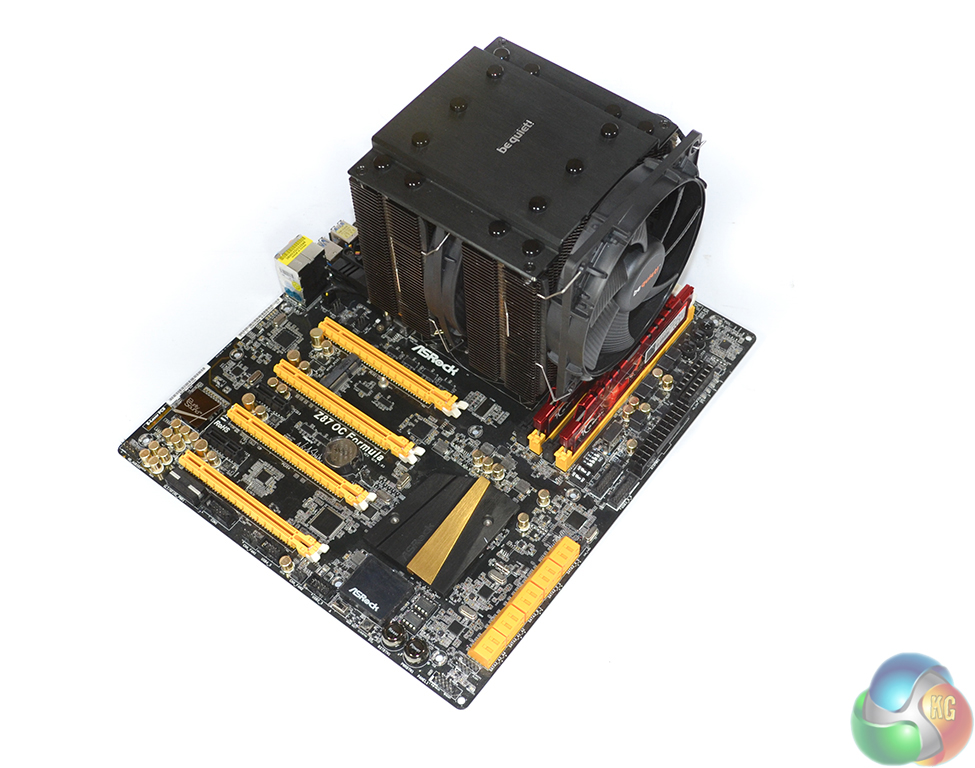
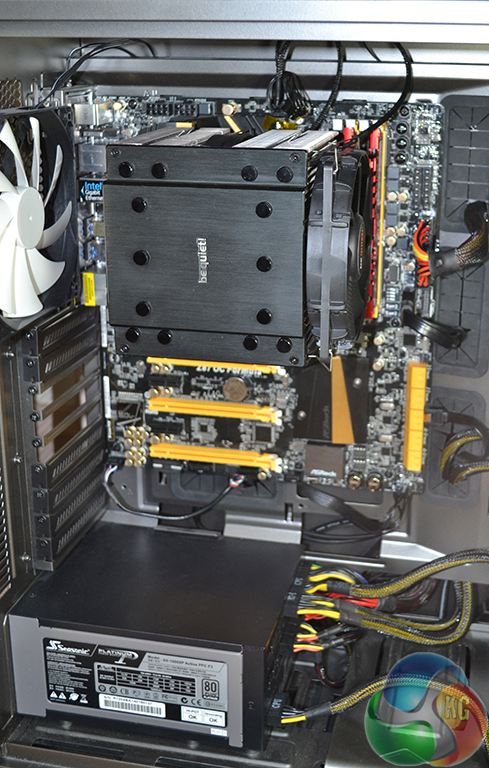
The VRM heatsink on our ASRock Z87 OC Formula motherboard very nearly interfered with a number of the cooler's 6mm heatpipes. Provided Intel's ‘stay-out' zone is respected, and VRM heatsinks aren't oversized, interference is unlikely to be an issue for many users.
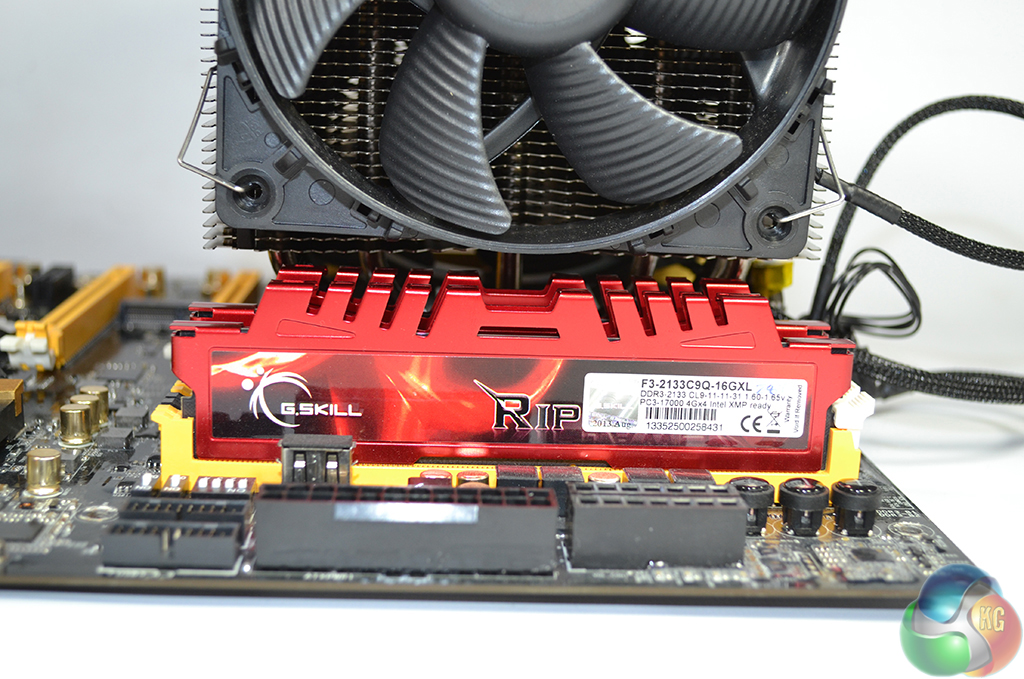
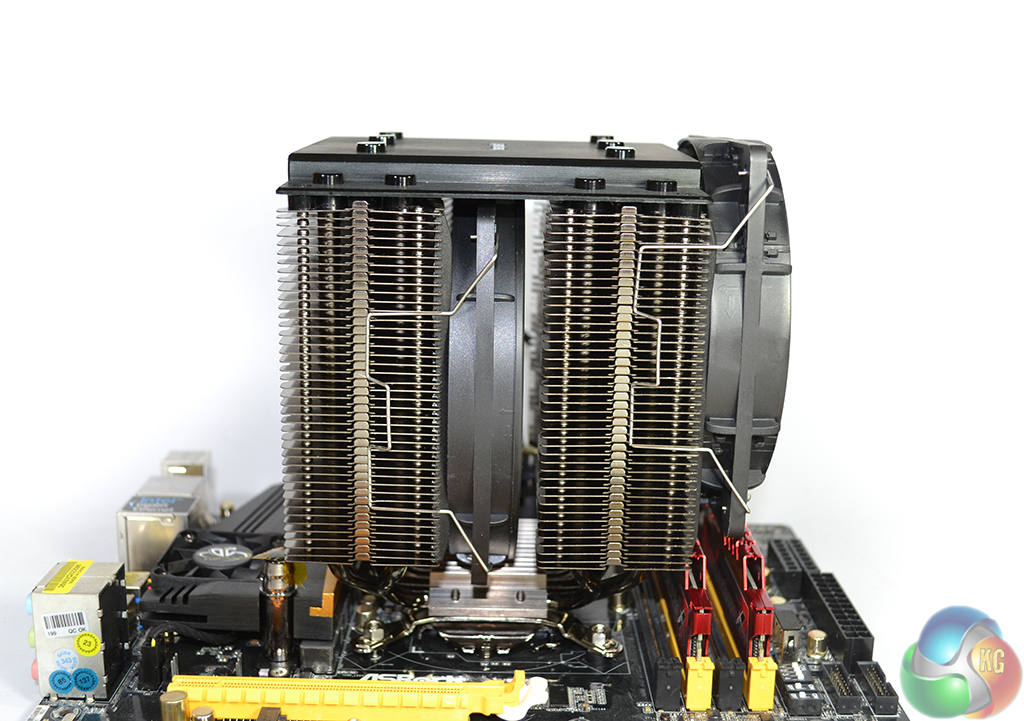
Thanks to the adjustable fan height, RAM clearance is unlikely to be a widespread issue. Even the fin array will not interfere with modules which are less than 43mm in height.
As we mentioned with the VRM heatsink, heatpipes exiting the base have the potential to cause interference. Upon closer examination, we could see that a number of heatpipes were overhanging the first DIMM slot on our motherboard, and therefore reduced the height of a module that could be installed.
Despite the tricky securing procedure, the sturdiness of be quiet!'s installation technique is excellent. The cooler does not move or rotate; I would have no concerns regarding the security of the Dark Rock Pro 3's mount.
As can be seen, the Dark Rock Pro 3 is a large CPU cooler. At 163mm tall, many mid tower cases may struggle to fit the unit in their belly and then close the side panel. One good point regarding interference is the cooler's 137mm width. Using our LGA 1150 motherboard, the Dark Rock Pro 3 did not extend past the board's upper edge, hence interference with roof fans is likely to be minimised.
What a fantastic cooler. I dont mind their fitting methods, they are never as good as noctuas, but the dark rock coolers are sadly underrated in our circles. they are fantastic, and very low noise.
I will be ordering this one. I dont like the noise of Corsair’s all in one coolers, last one I got I had to replace both fans, which is extra cost on the already high pricing.
Their products are always beautifully finished. love the fans too, bought a ton of them last month.
I’d like to thank you for the efforts you have put in writing this blog.
I really hope to check out the same high-grade blog posts from
you in the future as well. In truth, your creative writing abilities has motivated me to get my very own website now 😉
Can you comment on what improvements could be expected with an additional 120mm silent wings 2 fan using the kit-included clip?