

As I mentioned during the unboxing section of the review, the Frio14 comes with a very simple seven step installation manual- which is incredibly easy to follow.

To start off with, you'll need to verify your CPU platform and select the appropriate screw holes for your socket. Once that is out of the way, you'll need to hold the backplate with the vibration dampening foam side against the motherboard. Insert four screws through the backplate and secure it on the front side with the four nuts provided. That's it for backplate installation.
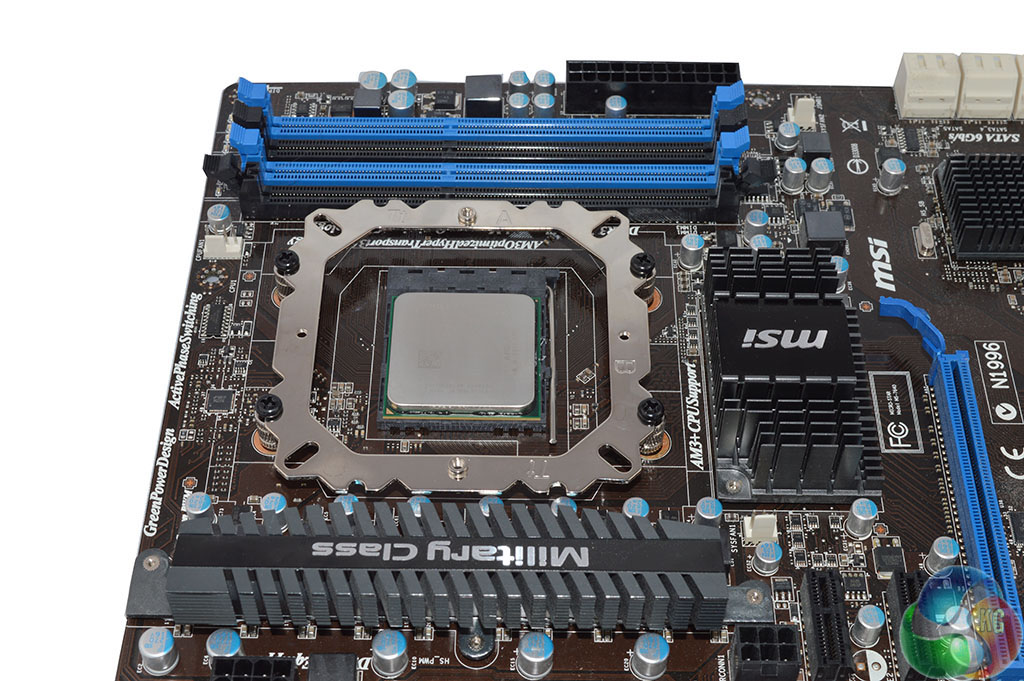
Now our attention moves to the front of the motherboard, place your mounting bracket on top of the four nuts and secure it with four more screws. This whole process is incredibly easy- Thermaltake's short and simple instruction guide will likely be useful to many beginners buying this product.
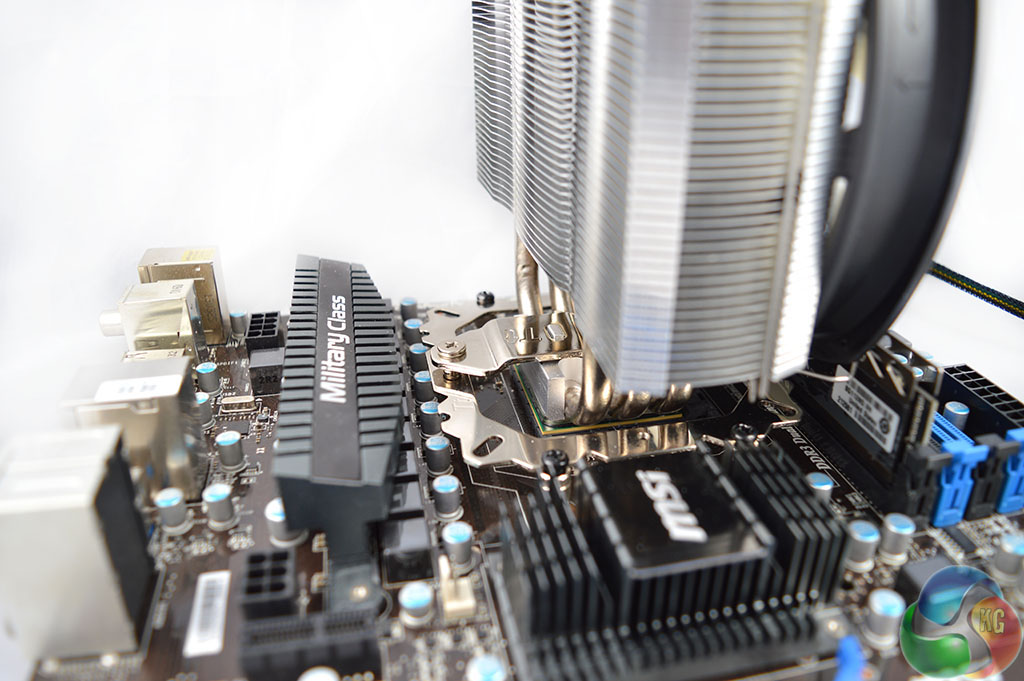
Now we just have to secure the heatsink itself, which is where things get a little tricky. First put some thermal paste down on your CPU, place the heatsink on top and take your mounting plate and align it with the metal notches on top of the CPU block.
Unfortunately, the instructions don't tell you how to secure the heatsink properly, they simply tell you to secure it with the two screws provided but it's not quite that simple.
Trying to secure the mounting plate to the bracket one side at a time won't work, you'll end up putting a lot of unnecessary strain on your motherboard and you could damage the screw threads.
The easiest way I found to screw the heatsink in was to push down on either side of the mounting plate evenly and try to thread both screws a little bit with my fingers. Then I could revert to using a screw driver, tightening each corner a little at a time.
Overall, Thermaltake's mounting process is user friendly but it falls apart at the very end when it comes to securing the heatsink to the mounting bracket. The instructions simply tell you to screw the heatsink in, when in reality, it's a little bit more complicated than that.
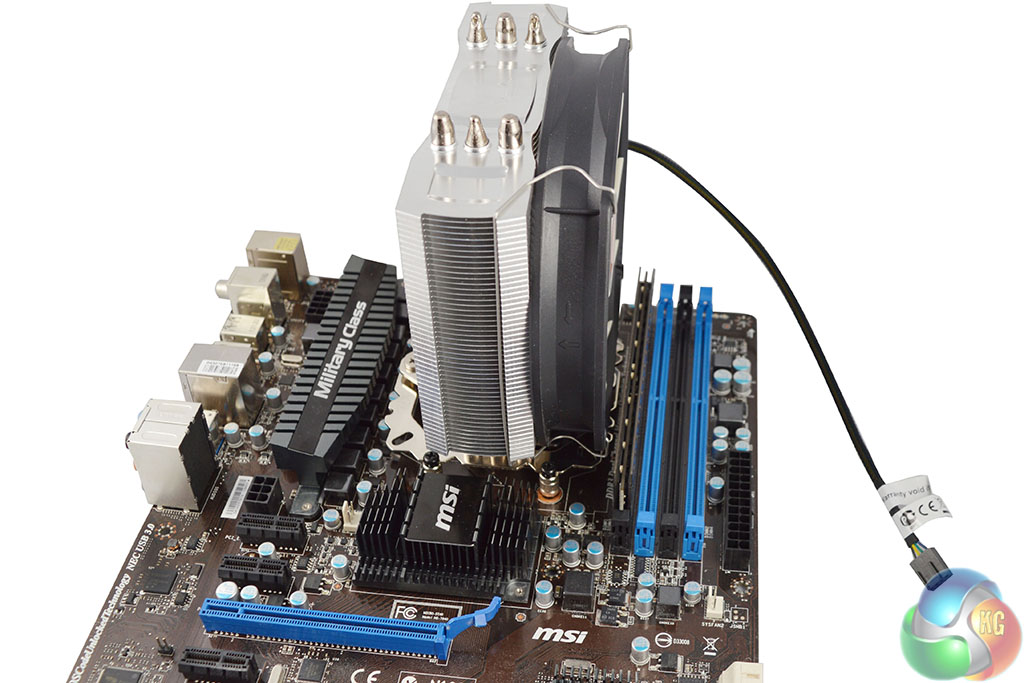
As you can see in this image, there is plenty of room between the cooler and the first RAM slot, making high profile modules a non-issue.
I have a bigger cooler, and looks exactly like this, but it’s from cooler master, and dose a pretty good job keeping my cpu cooled.
Whats an “Low Noise Cable?”
It uses 7V instead of 12V which reduces the RPM, which makes the fan even less noisy.
You can make a review of the Thermalright Archon SB-E X2? Thank you