

Manual CPU Overclocking:
To test the ASUS ROG STRIX TRX40-E Gaming motherboard’s CPU overclocking potential, we set the CPU Core Voltage to 1.25V and applied the Level 7 LLC setting.
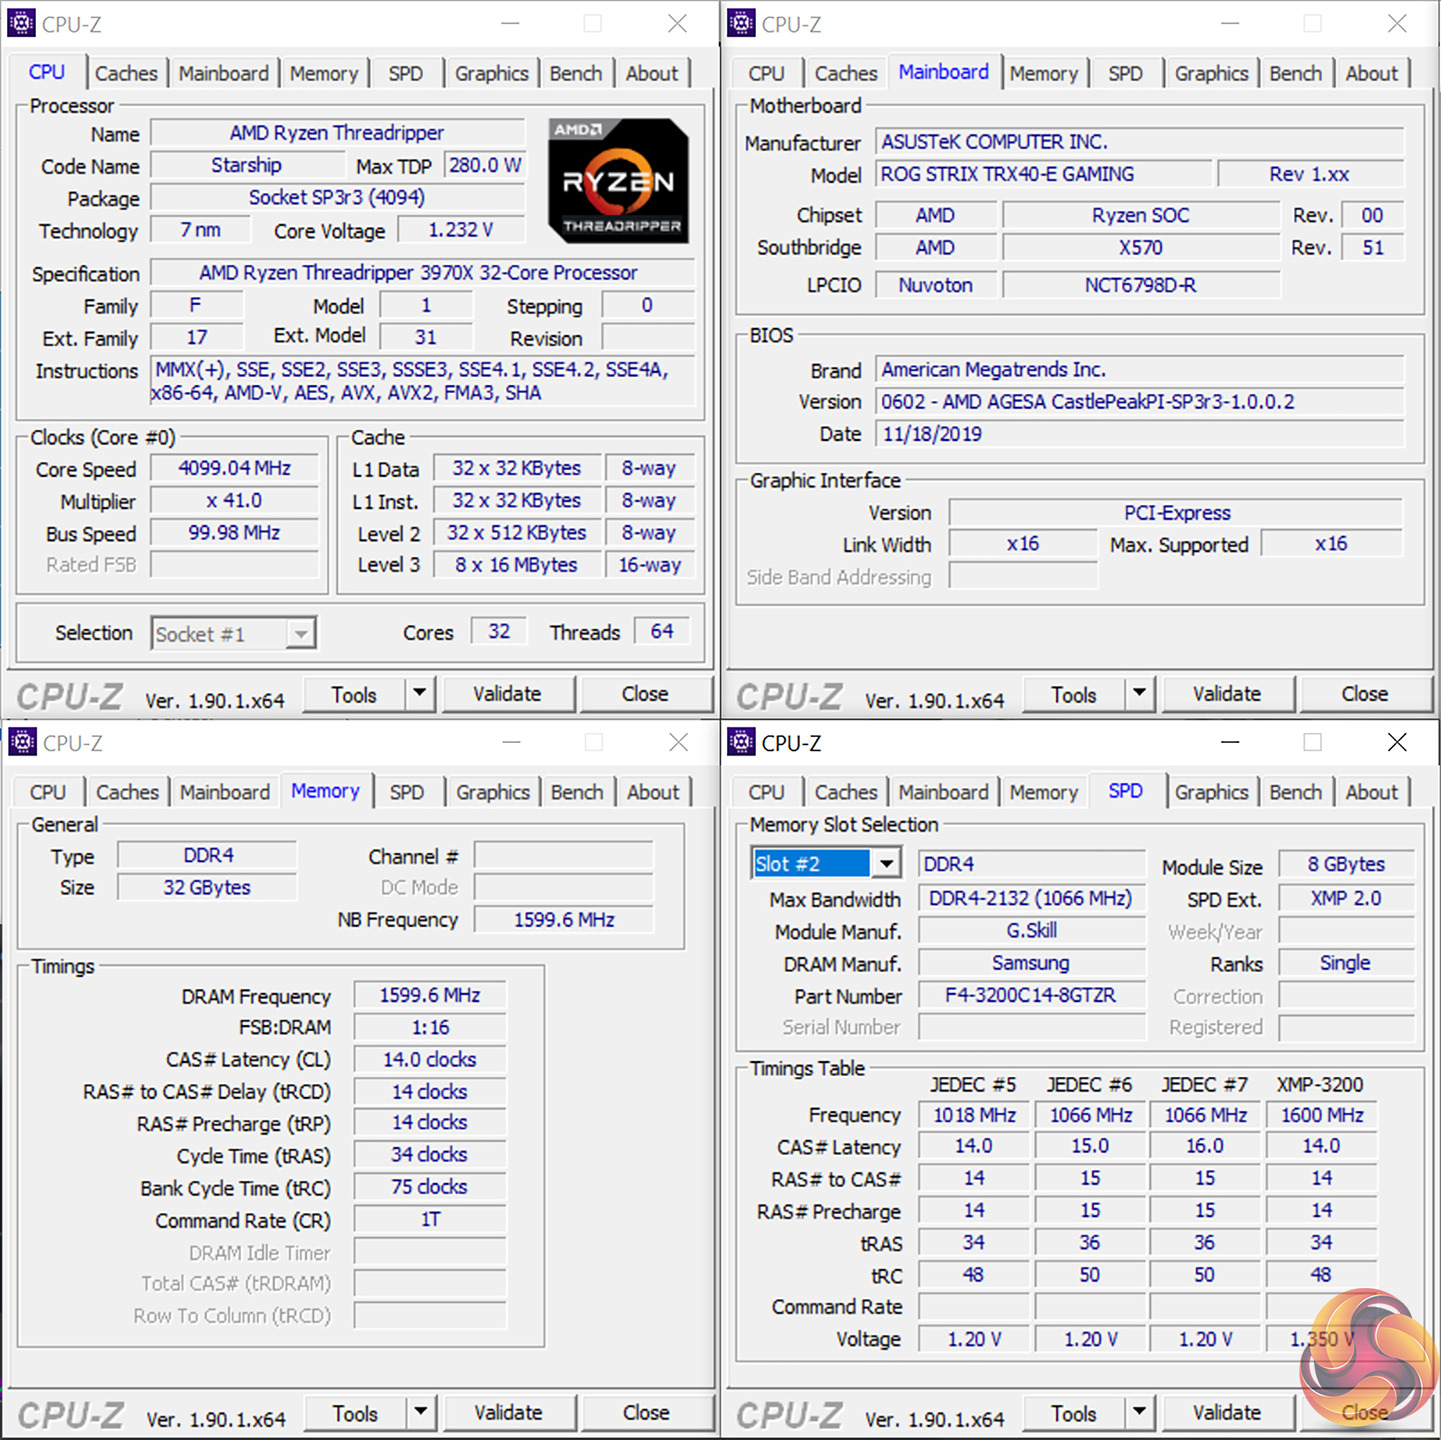
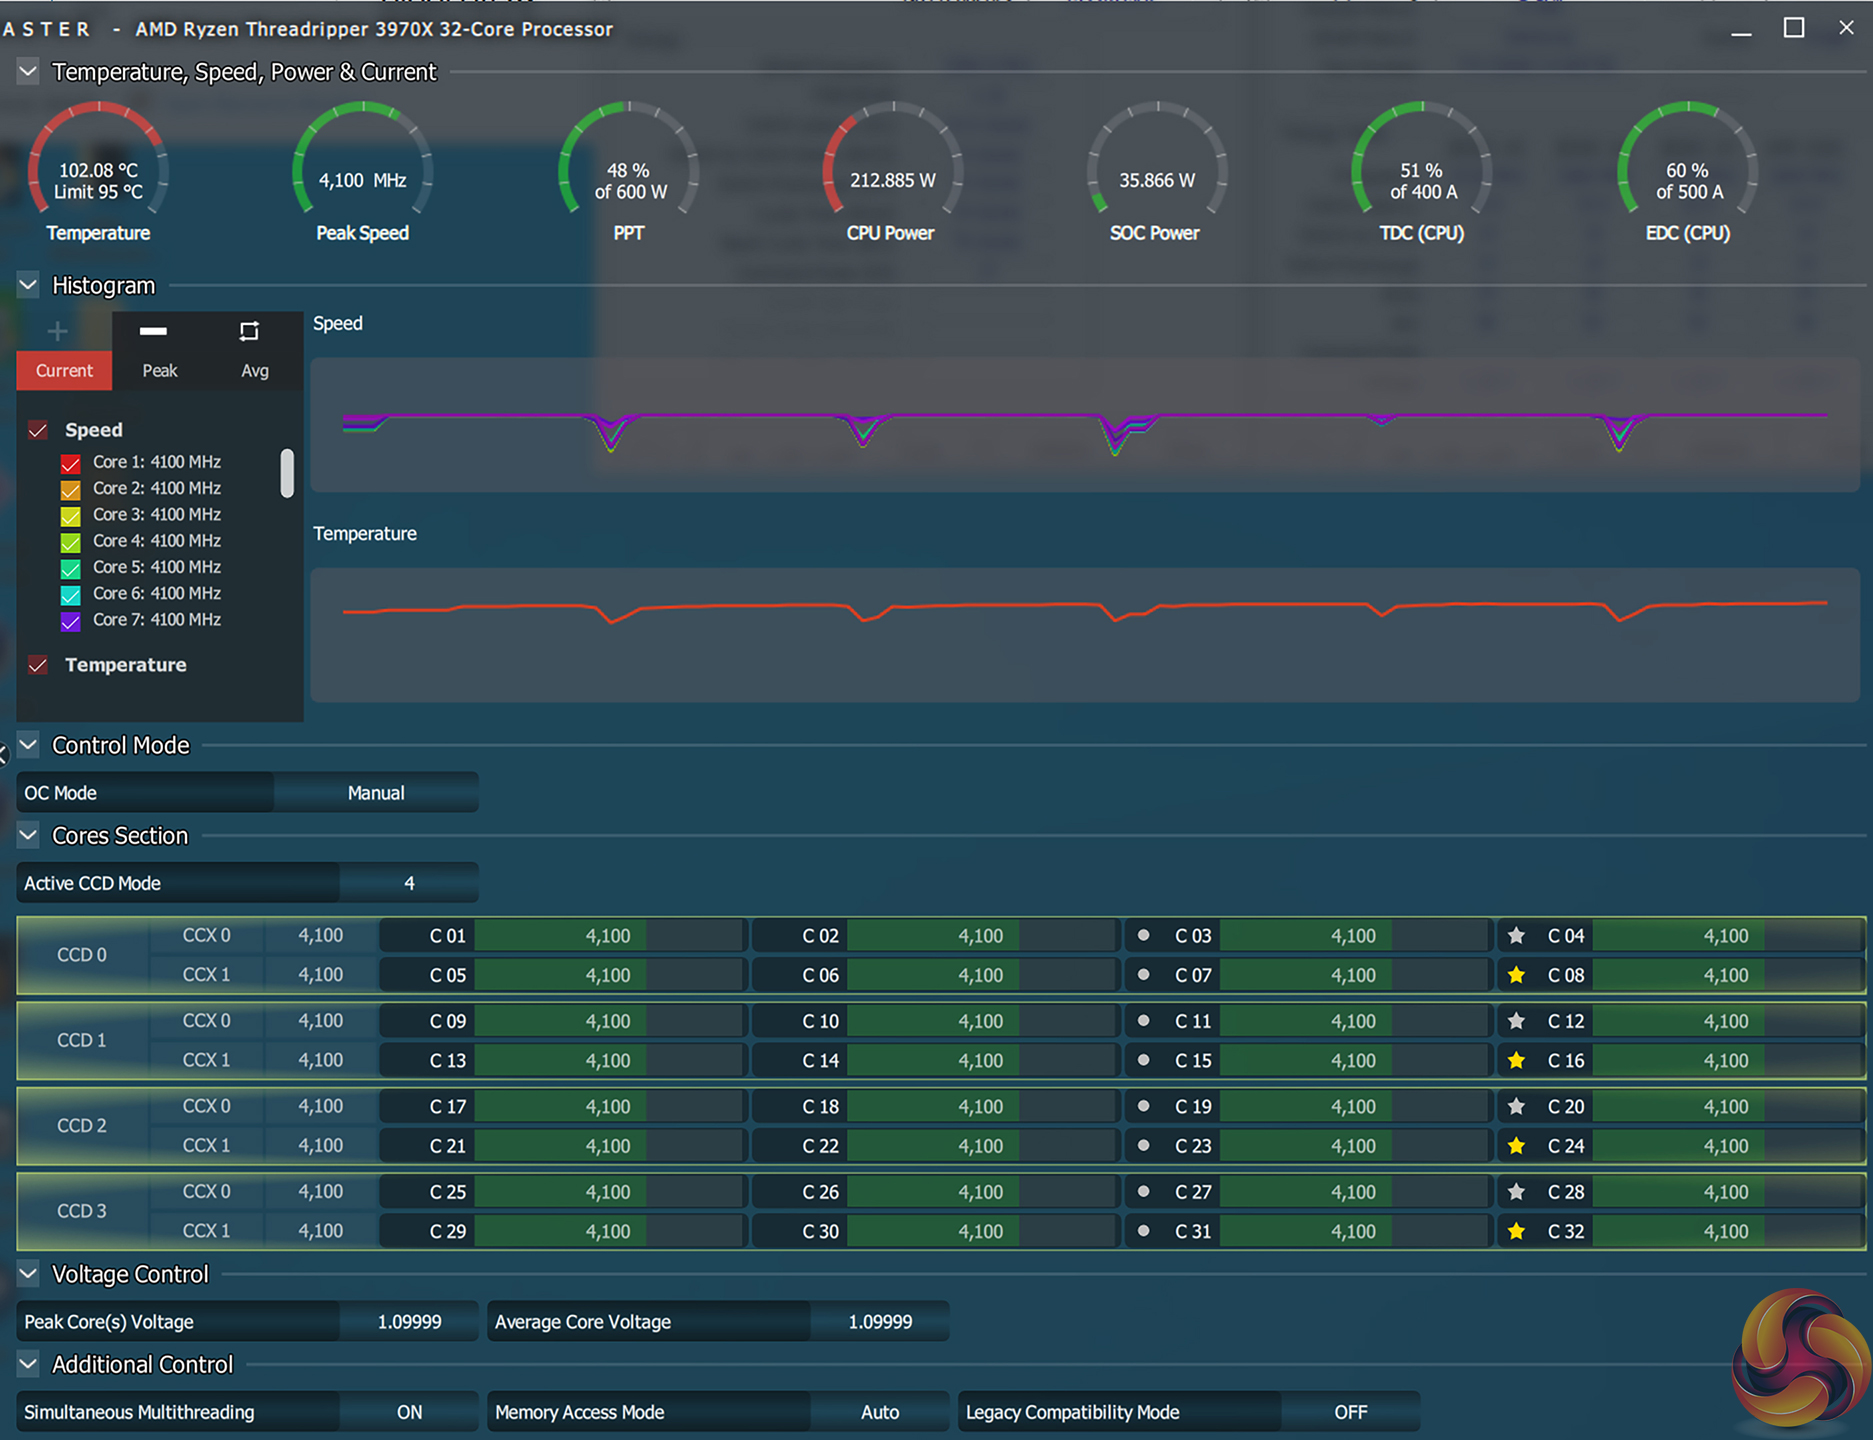
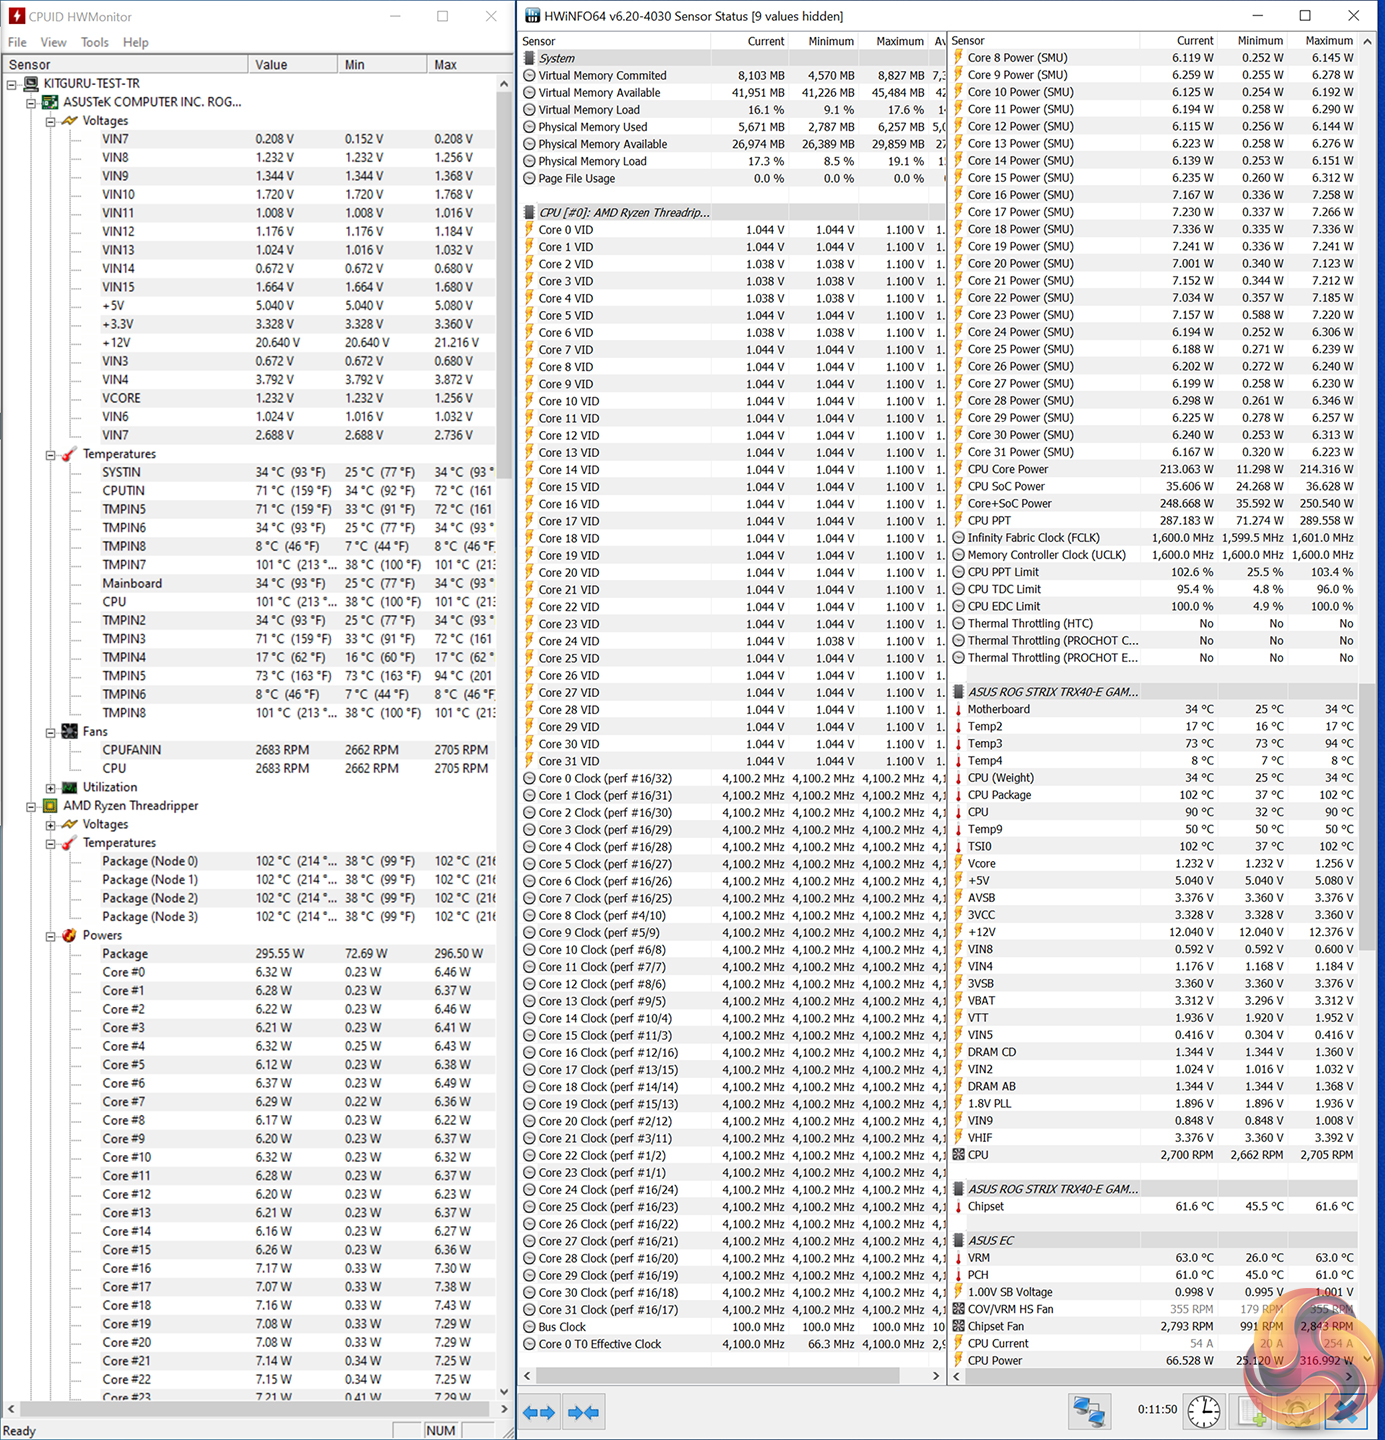
We were able to hit a stable frequency of 4100MHz using a load voltage of 1.232V according to CPU-Z and HWinfo. This used a BIOS-set core voltage of 1.25V, 130% CPU Current capability, and Level 7 load-line calibration (LLC).
ASUS’ LLC settings continue to make no sense and feature no useful explanation in the UEFI. Trial and error got us to Level 7, which resulted in a steady state offset of 28mV, which we deemed to be acceptable for our testing, stability checks, and cooling hardware.
Greater CPU frequency capability was achievable, and I’m confident that the motherboard could push further. However, going past this voltage level and clock speed requires cooling performance beyond a dual tower air cooler or even a reasonable 240mm AIO. At that point, you should be looking at 360mm AIO with high speed fans or, more realistically, custom liquid cooling.
Motherboard Sensors
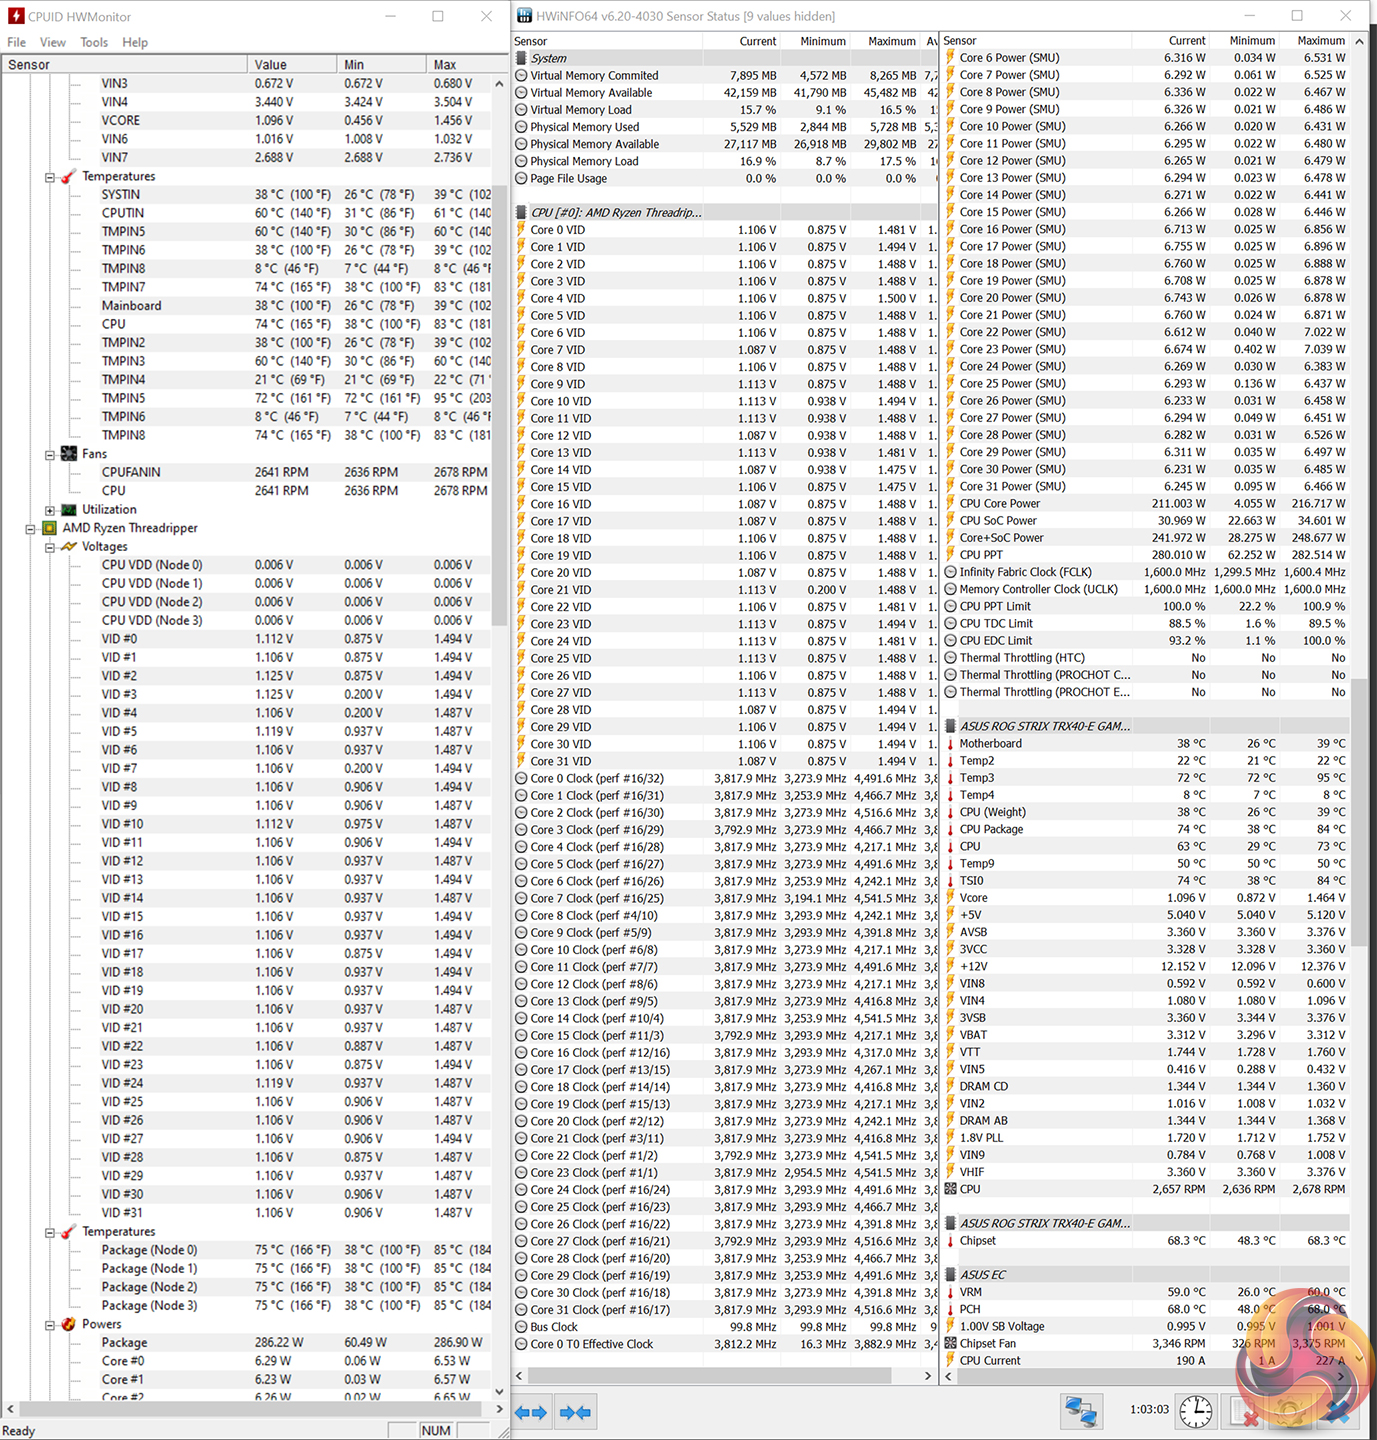
ASUS provides an excellent set of onboard monitoring data, including temperature sensors for the CPU, VRM, and chipset. The VRM temperature sensor is particularly good to see included (as it should be at this price and performance level) as users can tweak the VRM fan curve based on the temperature levels observed in their usage, and their tolerance to increased operating temperatures.
Data reported by HWiNFO and Hardware Monitor, such as CPU temperature and package power draw, tended to corroborate with the numbers displayed by Ryzen Master, which is good.
Overclocked Performance
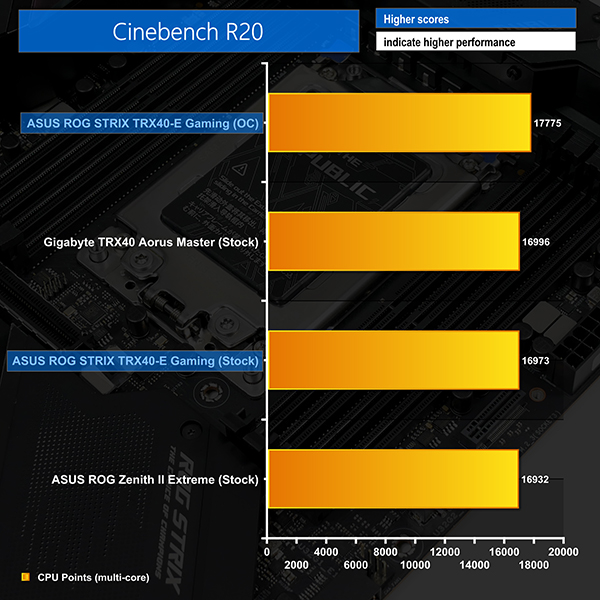
A solid performance boost of just under 800 points, or close to 5% was delivered by overclocking to a static 4.1GHz. Of course, the manual overclock also reduces maximum boost frequencies, so lightly threaded workloads will suffer versus the 4.5GHz maximum boost clock at stock conditions.
I still prefer Precision Boost Overdrive for overclocking with Ryzen Threadripper 3000 as you increase the all-core speed slightly but maintain the maximum boost clocks at lower load levels.
System Power Consumption
We leave the system to idle on the Windows 10 desktop for 10 minutes before taking a reading. For CPU load results we run Cinebench R20 nT and Blender Classroom stress tests and take a reading. The power consumption of our entire test system (at the wall) is shown in the chart.
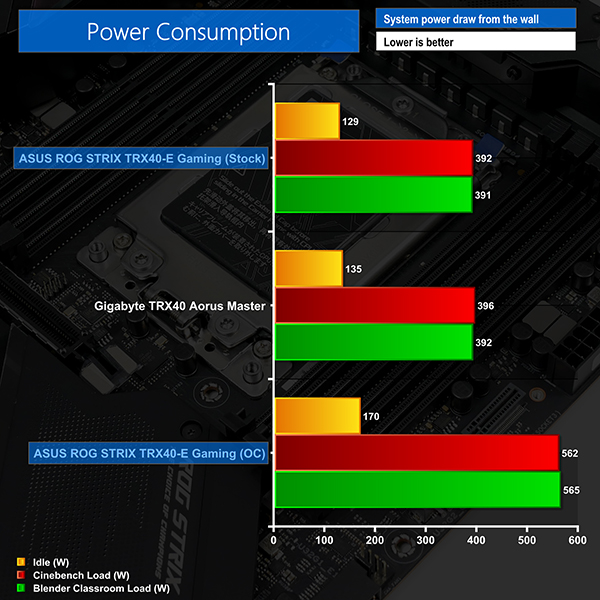
ASUS applies sensible voltages for stock operating conditions, and these resulted in reasonable power draw levels. Compared to Gigabyte’s relevant competitor, the ASUS TRX40-E Gaming required a smidgen less power at idle and when loaded. Realistically, there’s little difference in the results here.
Overclocking forced the system draw from the wall beyond 550W. ASUS’ board was perfectly capable of feeding the hungry, overclocked CPU and it did so with no motherboard-related stability concerns in our testing.
Clearly, a strong power supply like the Seasonic Prime TX-1000 unit that we used is an absolute requirement for a Threadripper system with a power-hungry graphics card thrown into the mix.
System Temperatures
We run the Cinebench R20 nT test on loop for 1 hour while recording the system data using HWInfo. This data is then analysed to show the CPU temperatures and also the VRM MOSFET temperatures, when the sensor data is available.
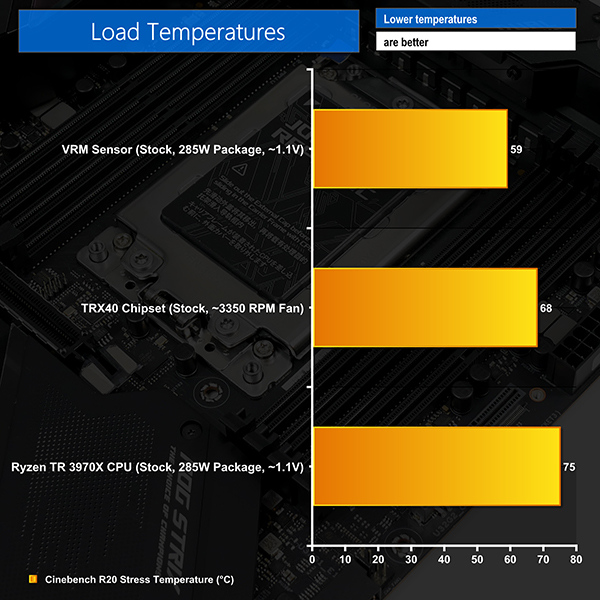
ASUS deserves a lot of credit for the superb design of its VRM system. The use of sixteen 60A power stages results in strong operating efficiency for the electrical components thus reducing their efficiency losses as heat. This, in turn, reduces the load on ASUS’ VRM heatsink and gives it a relatively simple job of keeping the components cool.
At stock, the VRM sensor never went above 59°C in our testing with the Threadripper 3970X pulling 285W. As 60°C wasn’t reached, the VRM fans did not kick in, which is a strong positive. Overclocking pushed the VRM temperature past 60°C within 5 minutes of load being applied. At that point, the VRM fans kicked in and rotated at reasonable levels to keep the system adequately cooled without becoming noisy. Of course, the fan speed curve and spin-up temperature can be manually tweaked.
Chipset cooling was perfectly fine. We saw temperatures around the 70°C mark after extended system operation. The 40mm fan tended to stay below 3500 RPM, so noise levels were tolerable and weren’t particularly audible over a CPU cooler fan.
