

Firstly, we are pleased to report that our NZXT Avatar S mouse worked to its usual standard in the Asus X99 UEFI. We’ve found our NZXT Avatar S to be the most troubling mouse with UEFI support, so when it functions correctly in the interface, that is usually a good sign for overall mouse support.
The UEFI used for Asus' TUF Sabertooth X99 motherboard is largely identical to the implementation used on its other X99 motherboards. Differences derive from the TUF part's enhanced thermal control options.
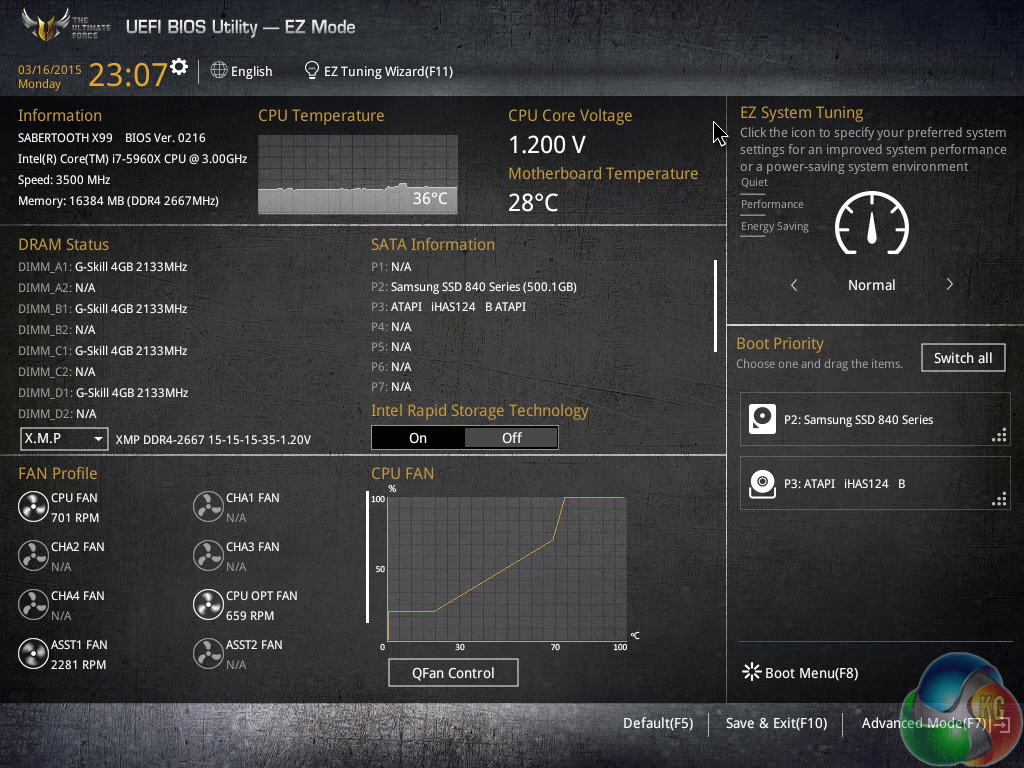
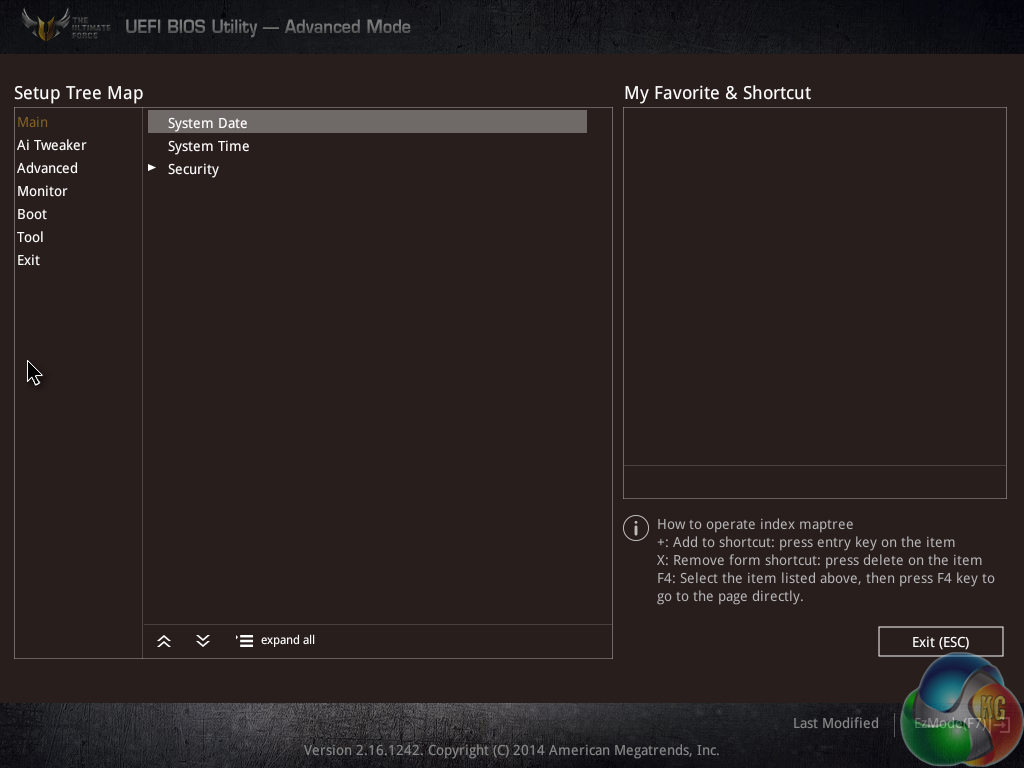
Asus opens its X99 UEFI with a summary page, of sorts, that squeezes a significant proportion of the important information onto a single 1024×768 screen.
This section is excellent for less-experienced users because it serves as a more basic (therefore less daunting) portrayal of the primary functions.
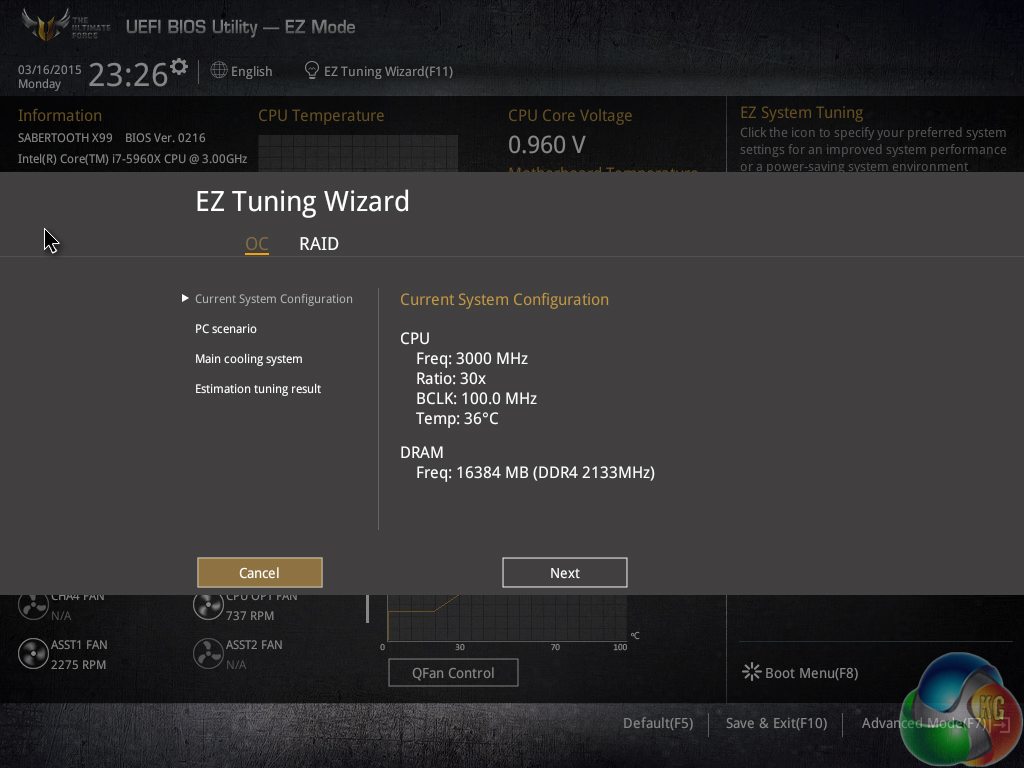

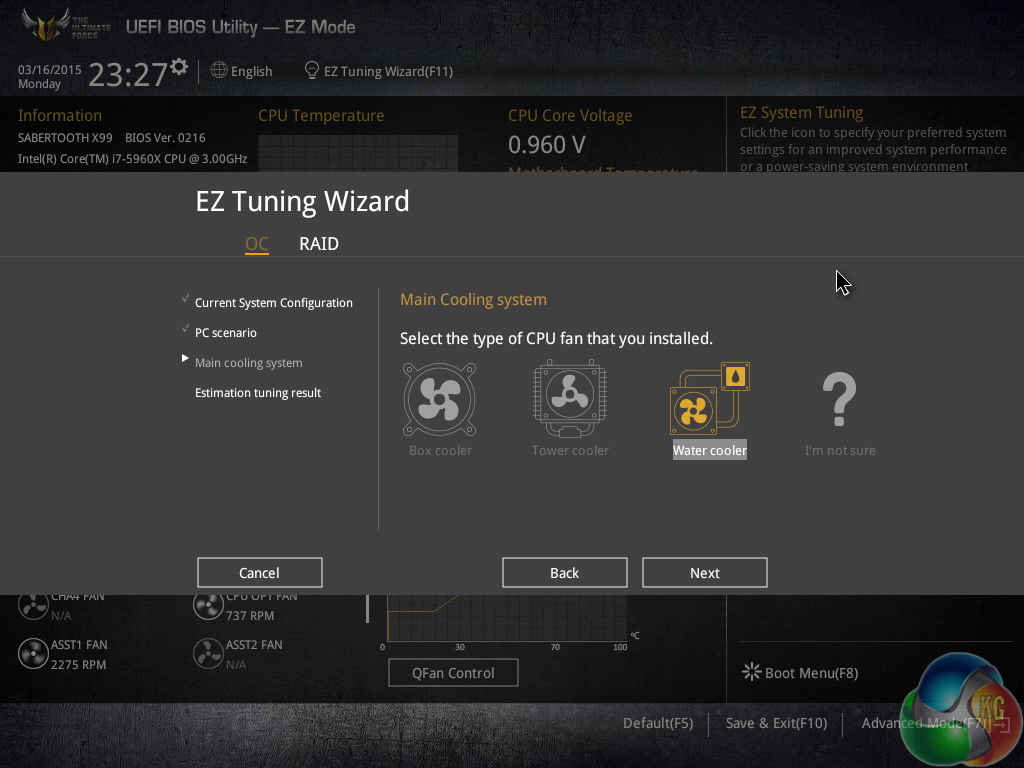
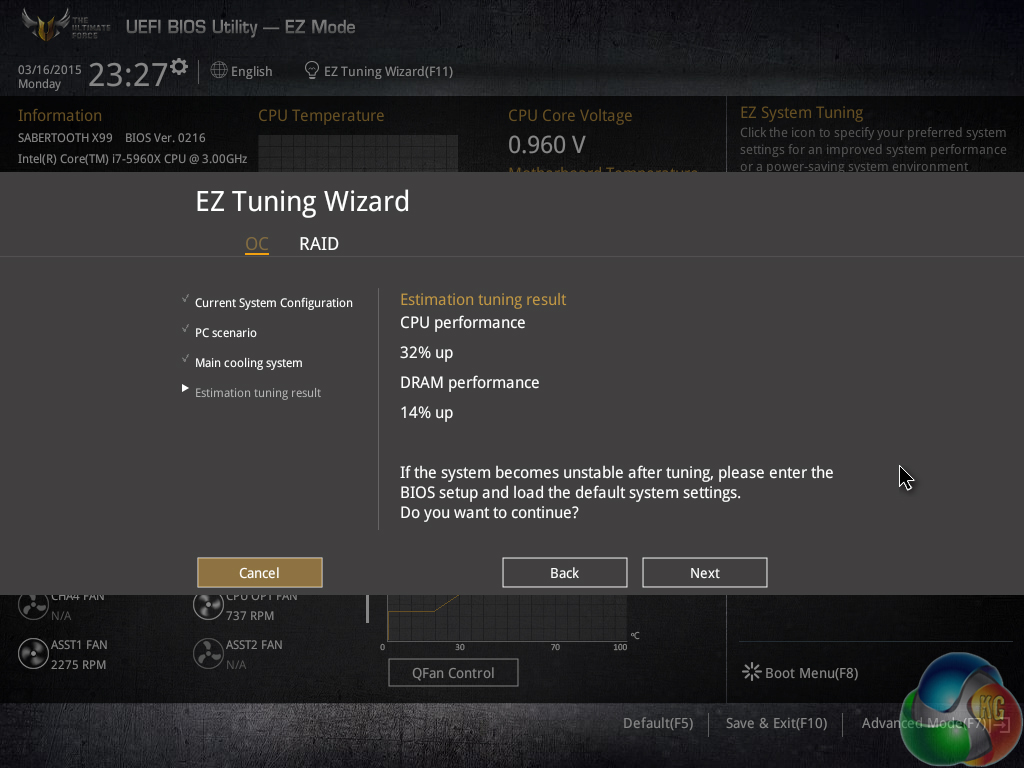
EZ Tuning automatically detects the installed components before allowing a user to select their system usage scenarios and cooling hardware. Once this has been processed, the wizard outputs a suggested DRAM and CPU frequency boost that can be achieved.
Selecting the Gaming/Media Editing mode increases the DRAM and CPU frequency, while the Daily Computing option boosts the processor’s speed only. Be aware though, the speed boosts aren’t guaranteed to work; other Asus motherboards gave us memory issues when trying to boot at the 3000MHz speed EZ Tuning set without XMP enabled.
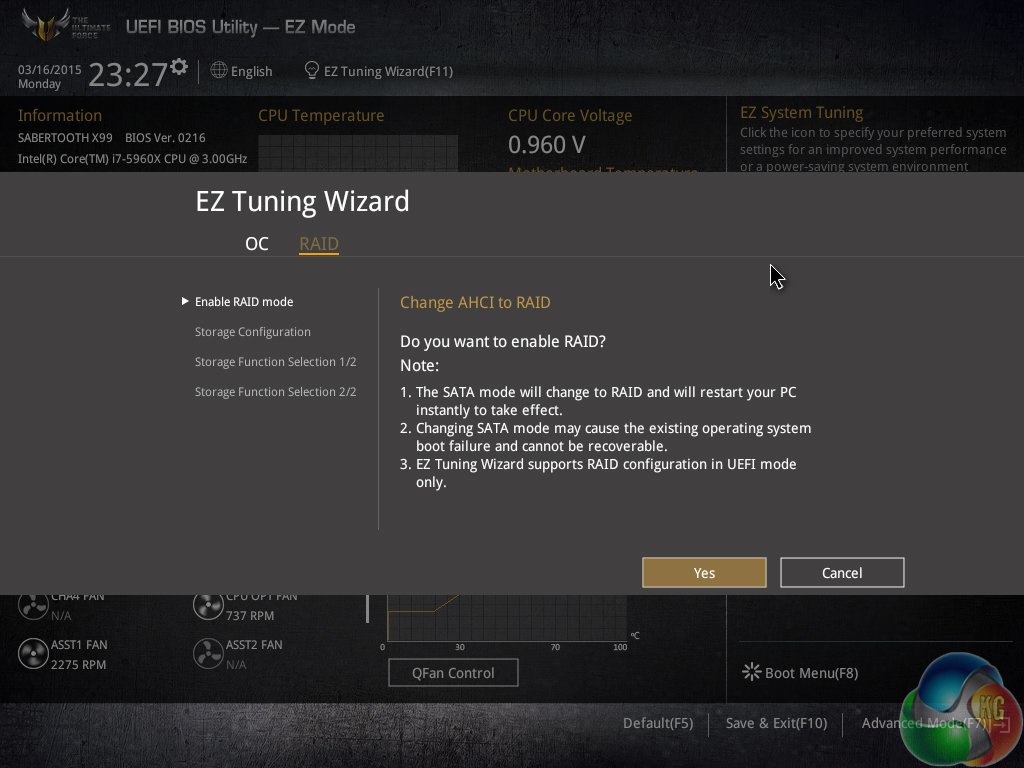
There is also an EZ Tuning section dedicated to the straightforward creation of a RAID array.
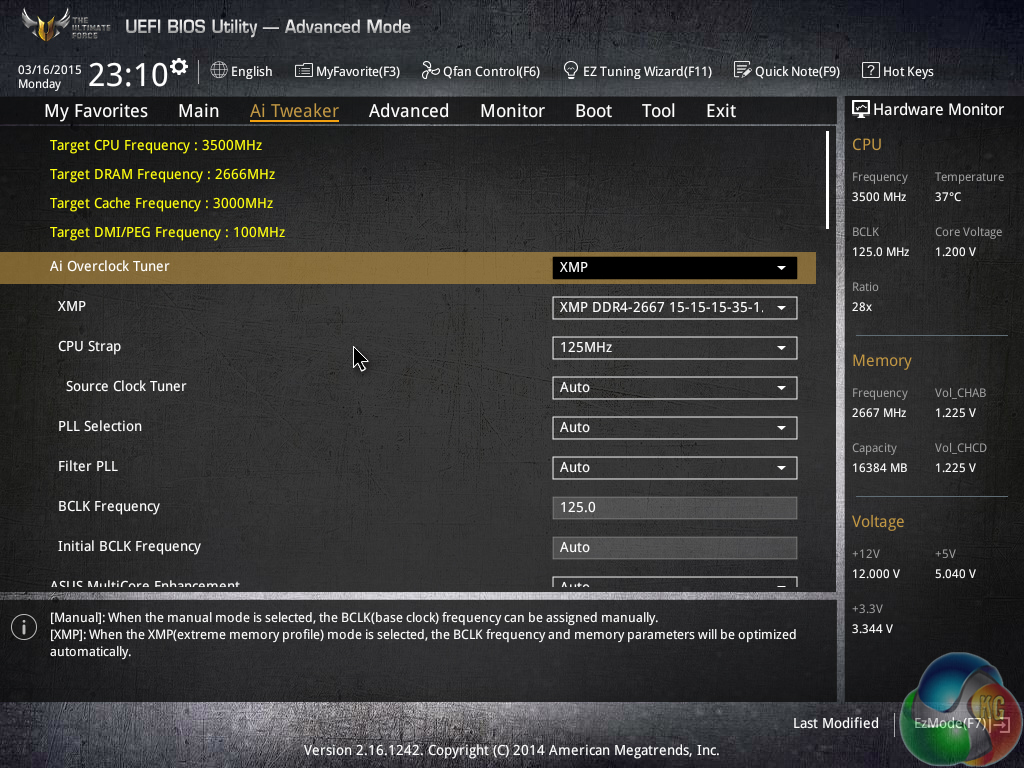

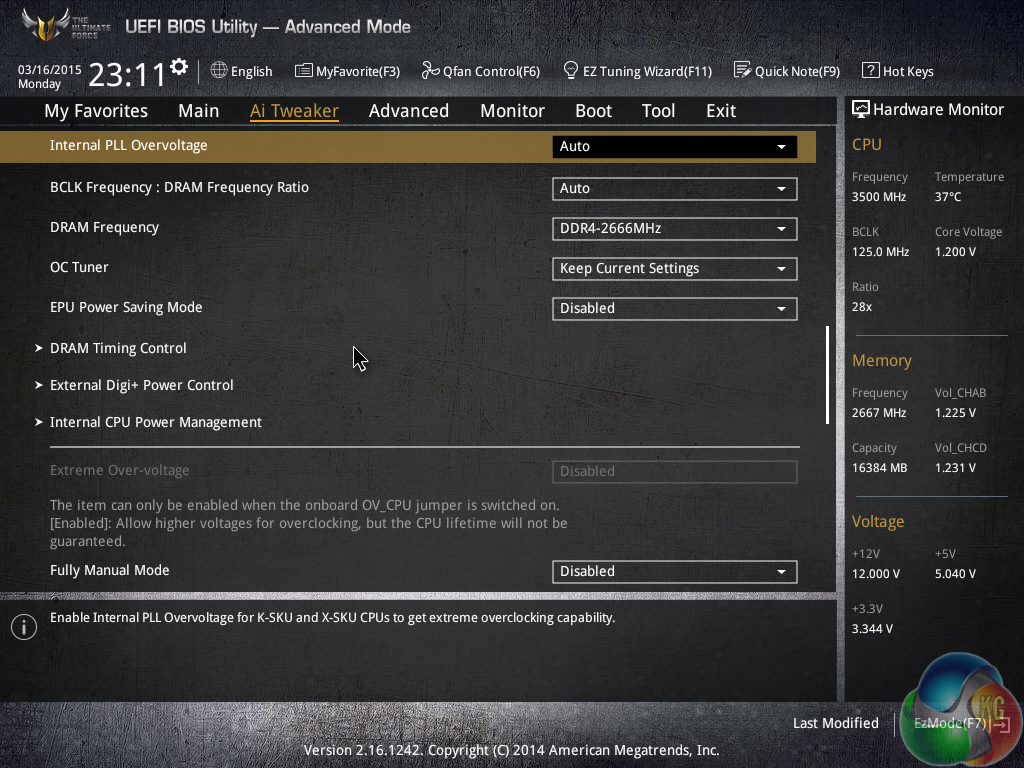
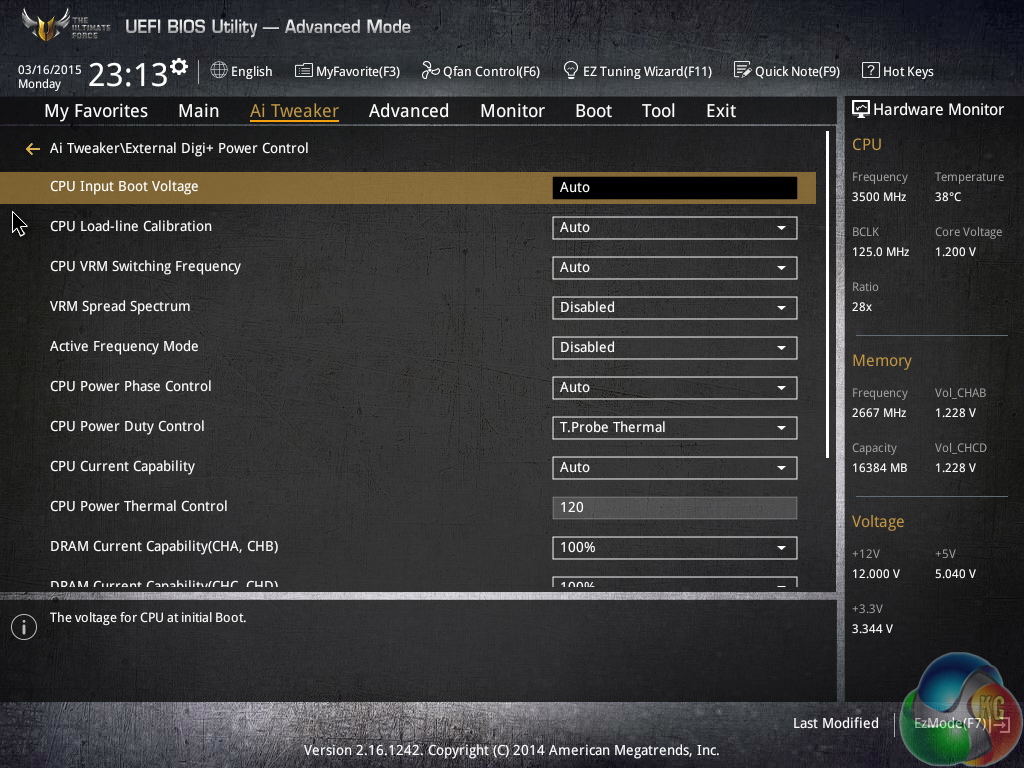
AI Tweaker is where all of the overclocking action takes place. From frequency adjustments, to voltage increases, to changed power parameters, it’s all controlled through AI Tweaker or its numerous sub-sections.
Asus gives users a strong degree of flexibility with both frequency and voltage tuning. And if you’re feeling particularly confident in your cooling configuration, there is the option for extreme voltage modes to be unlocked (with the aid of an onboard jumper for safety purposes).

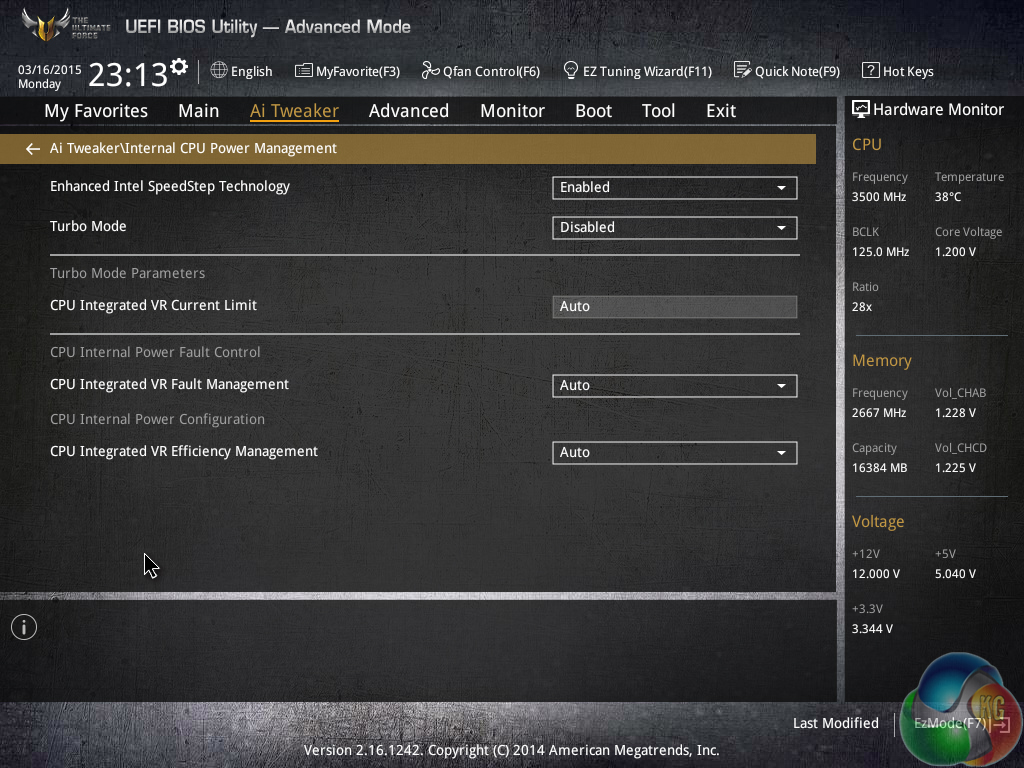
The thing I like most about the AI Tweaker layout is its simplicity. Novice overclockers who are still learning the skill will be able to navigate the options with ease, but that doesn’t interfere with the advanced settings that more experienced personnel require.
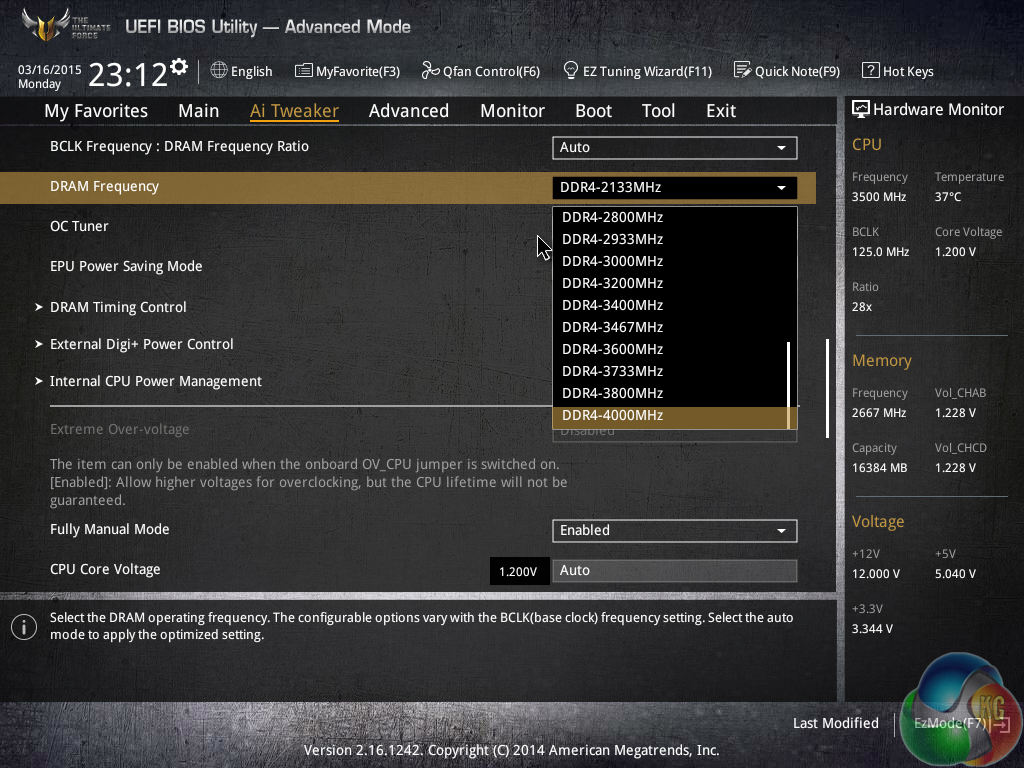
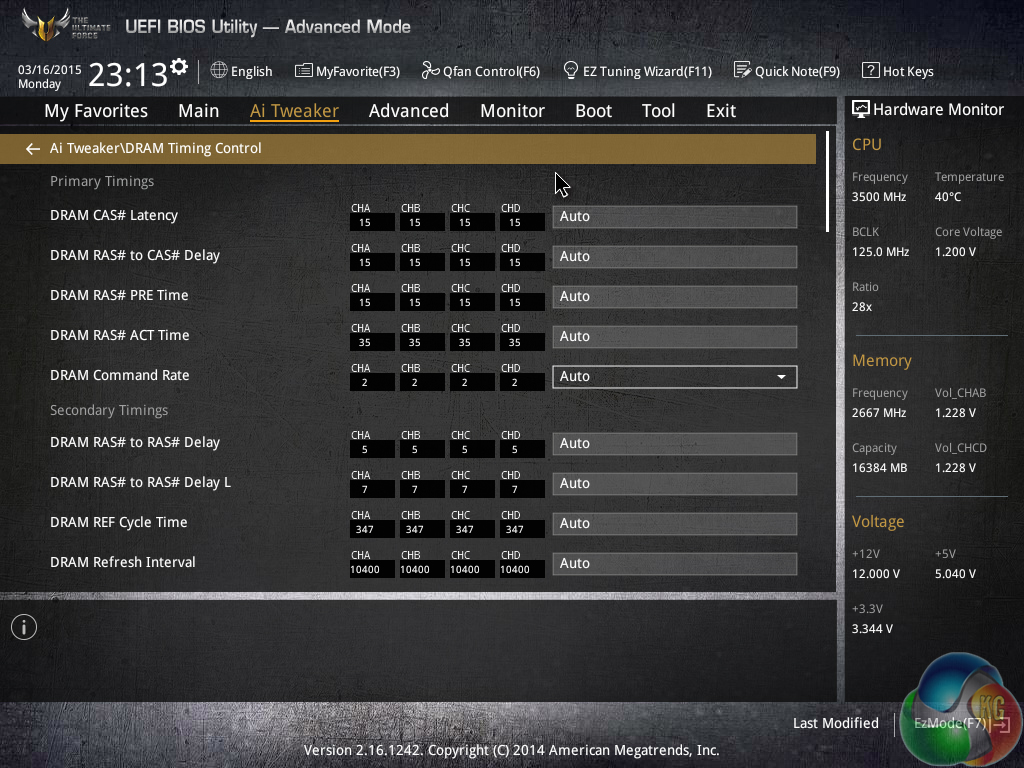
Asus provides support for plenty of memory frequency dividers, even if not all of them are relevant for usage today. There are also extensive timings adjustment options.
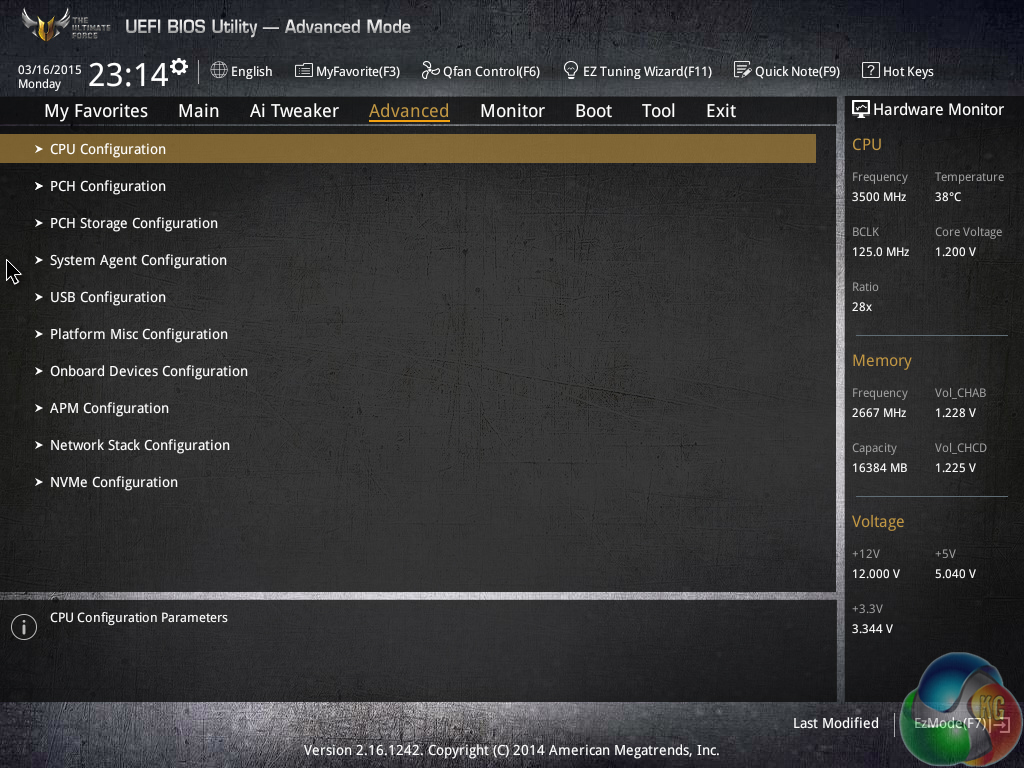
System operations can be accessed through the Advanced sub-sections. Actions such as adjusted PCIe lane allocation can be carried out in the relevant sub-section.
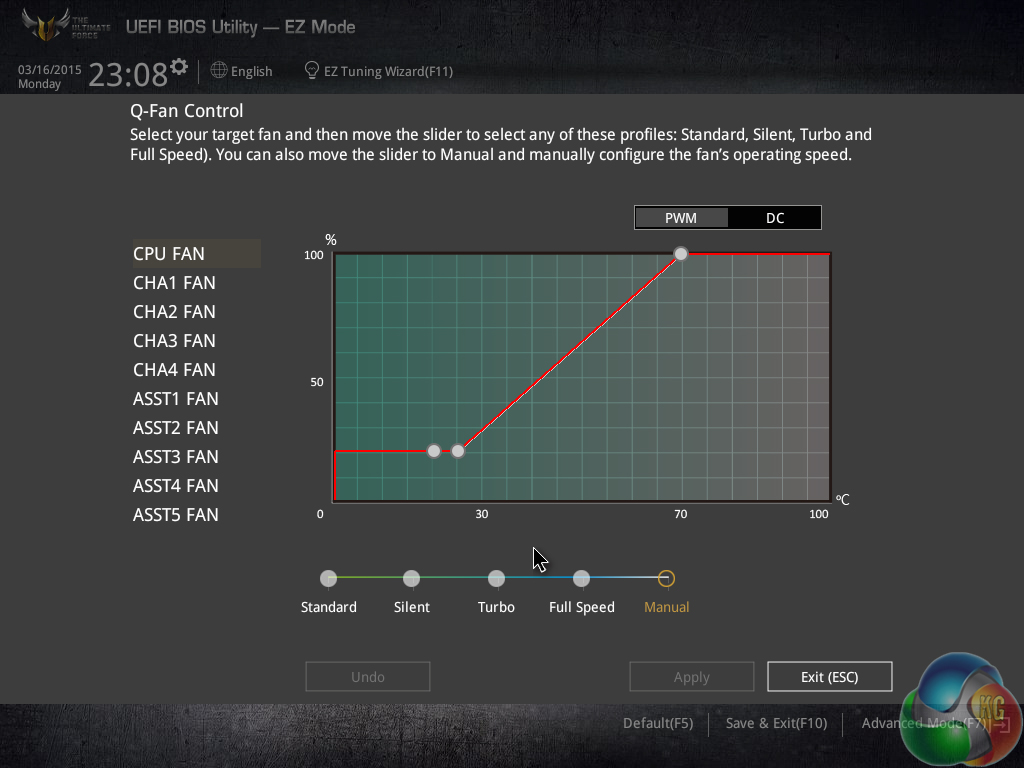

Asus’ Q-Fan Control is a method of adjusting and setting fan speed profiles in a graphical manner. The visual approach is also backed up by numerical and selectable choices on a specific section of the Monitor page.
While Q-Fan is an easy, yet effective, method of creating custom fan profiles, its limitation to a minimum fan speed of 20% is disappointing. I would prefer the ability to completely shut off a fan under certain temperature levels.

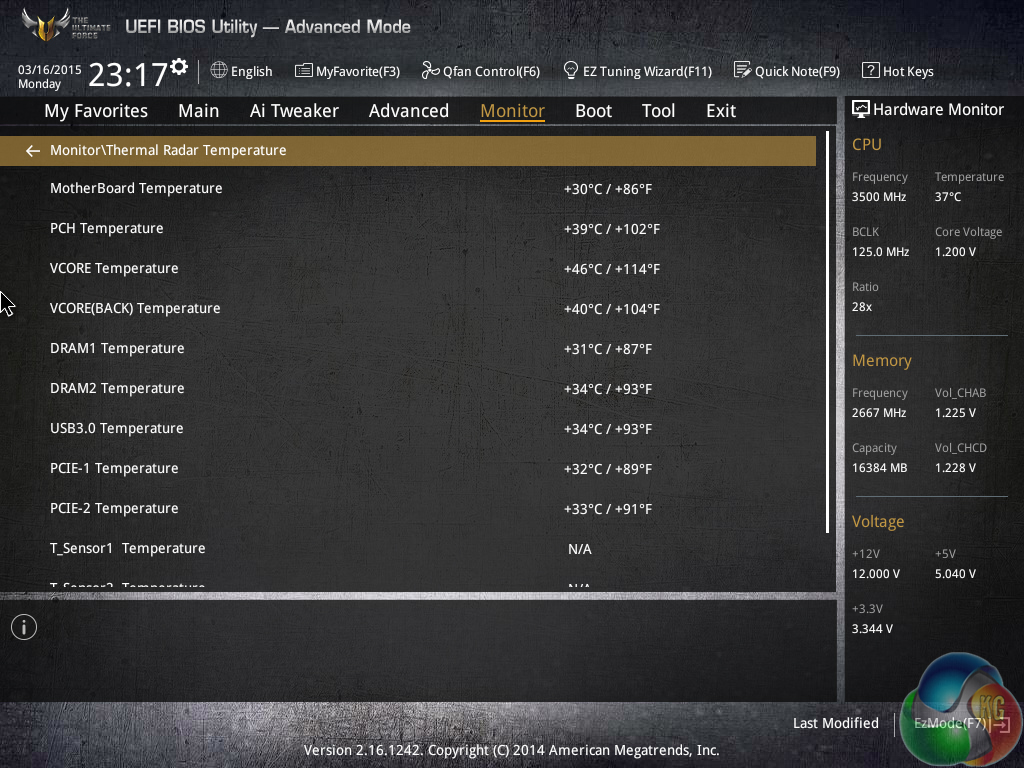
Temperatures and fan speeds are displayed on the Monitor page. Readings from the individually-deployed thermistors (if you choose to install them) can also be displayed on the page.
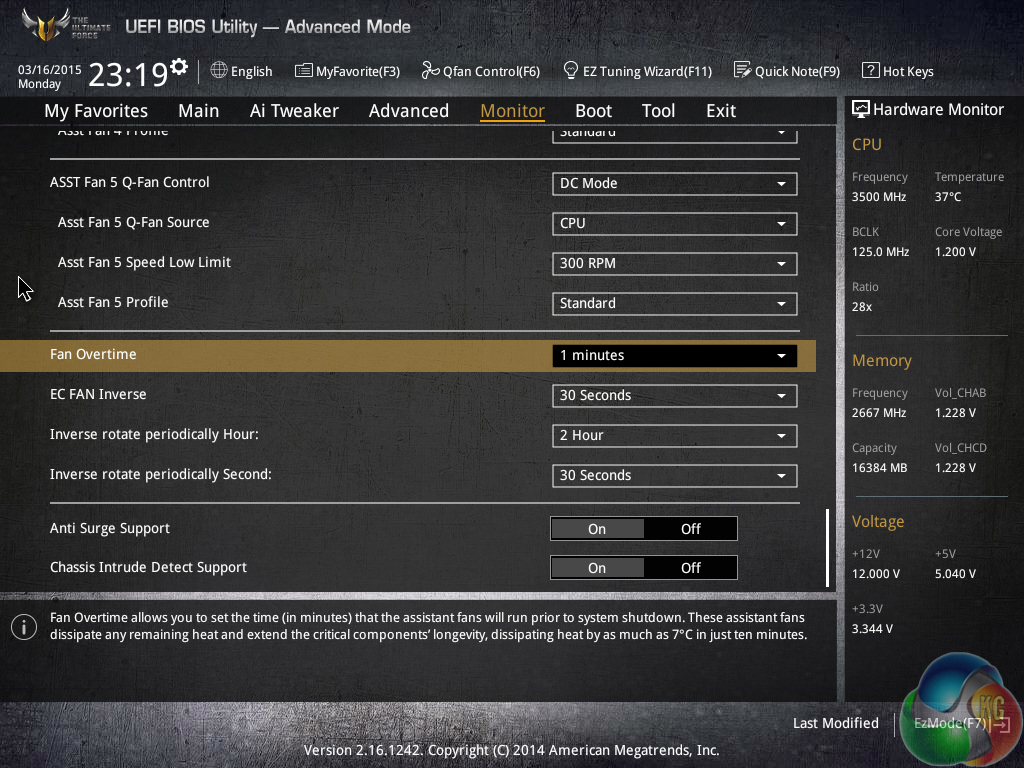
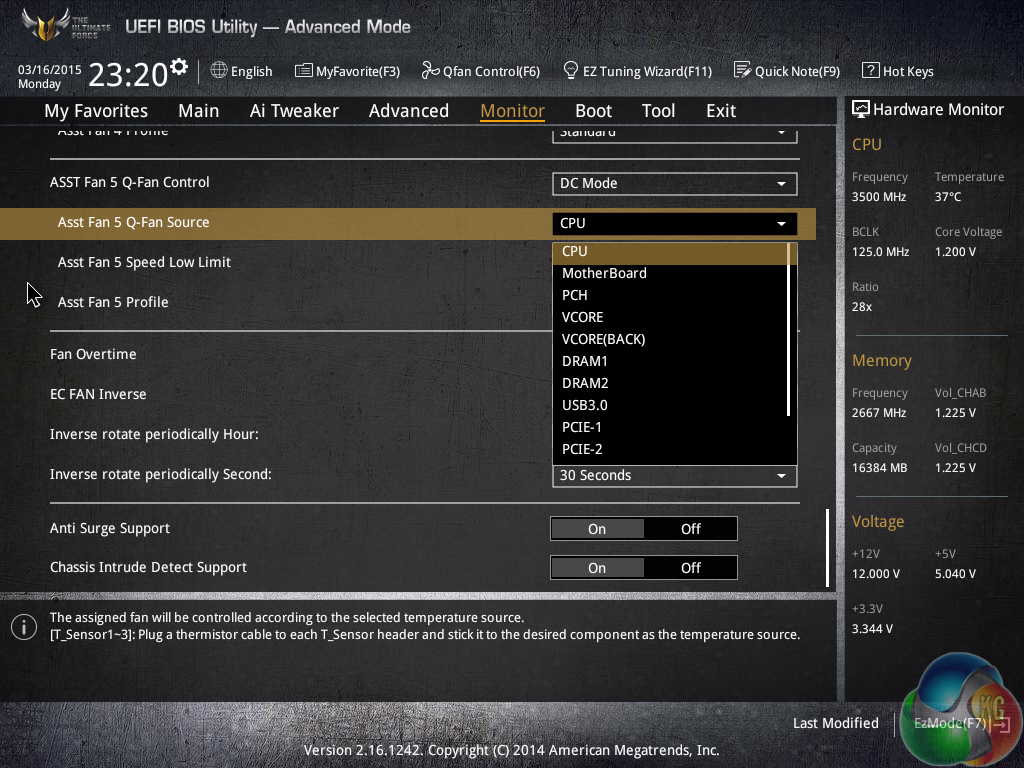
All of the fans can be controlled via a PWM or DC method with readings from a selection of temperature sensors. While the 40mm VRM fan cannot be set to run at 0% until a high thermal load in the UEFI, that action can be enforced in the OS-based software.
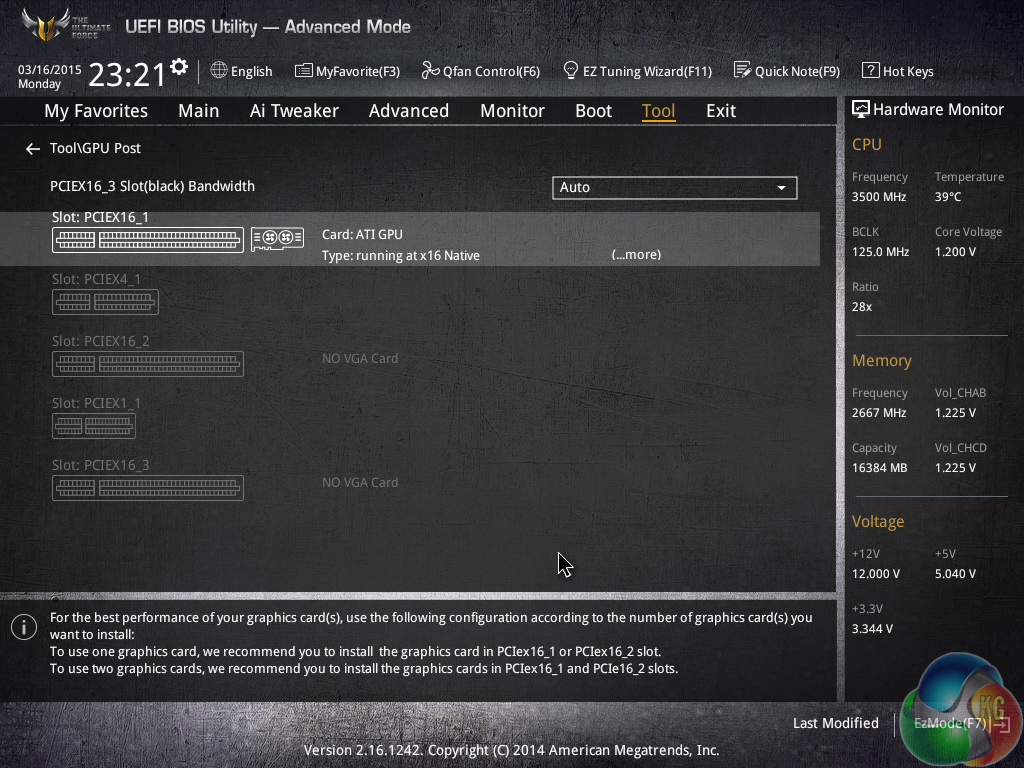
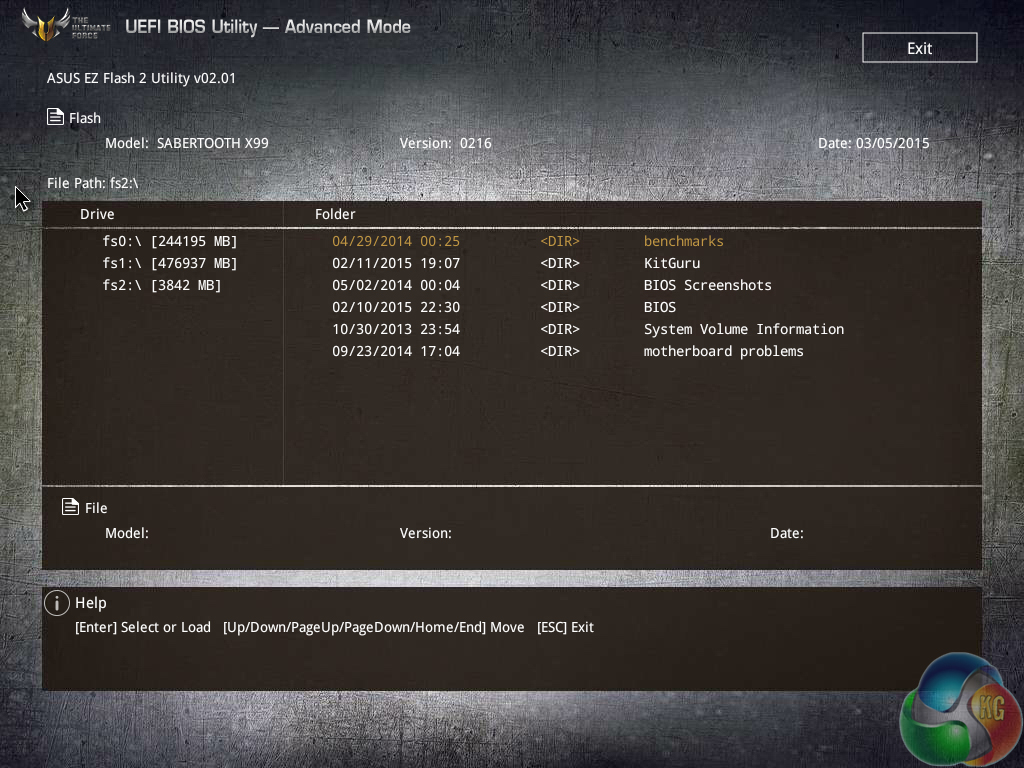
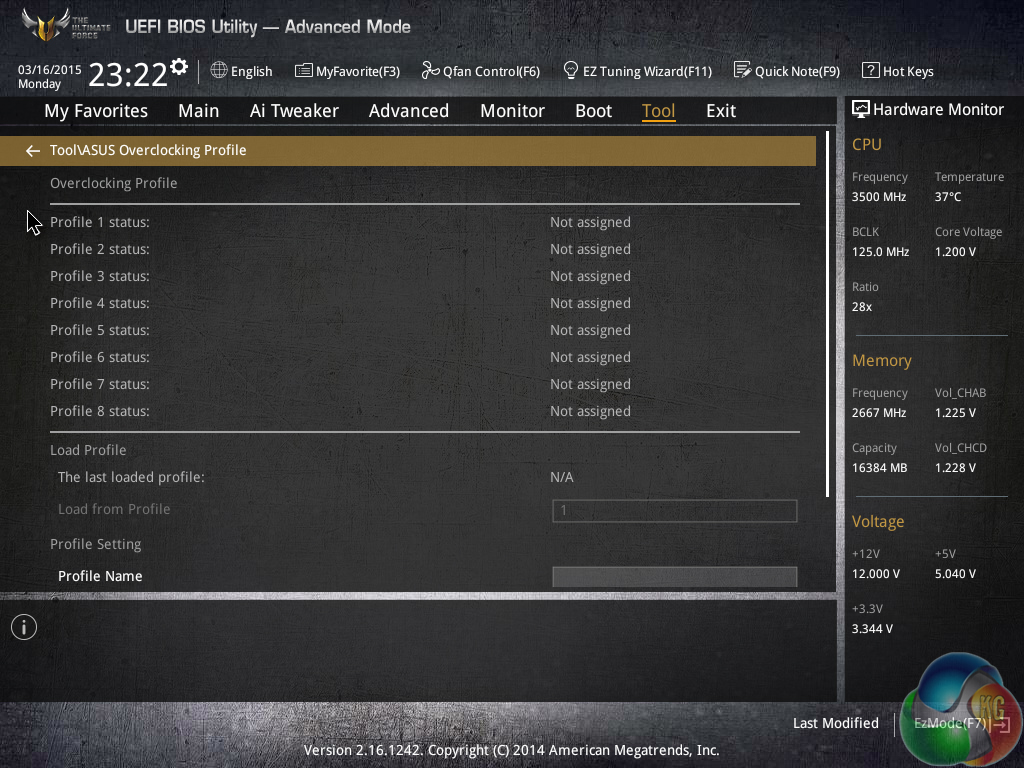
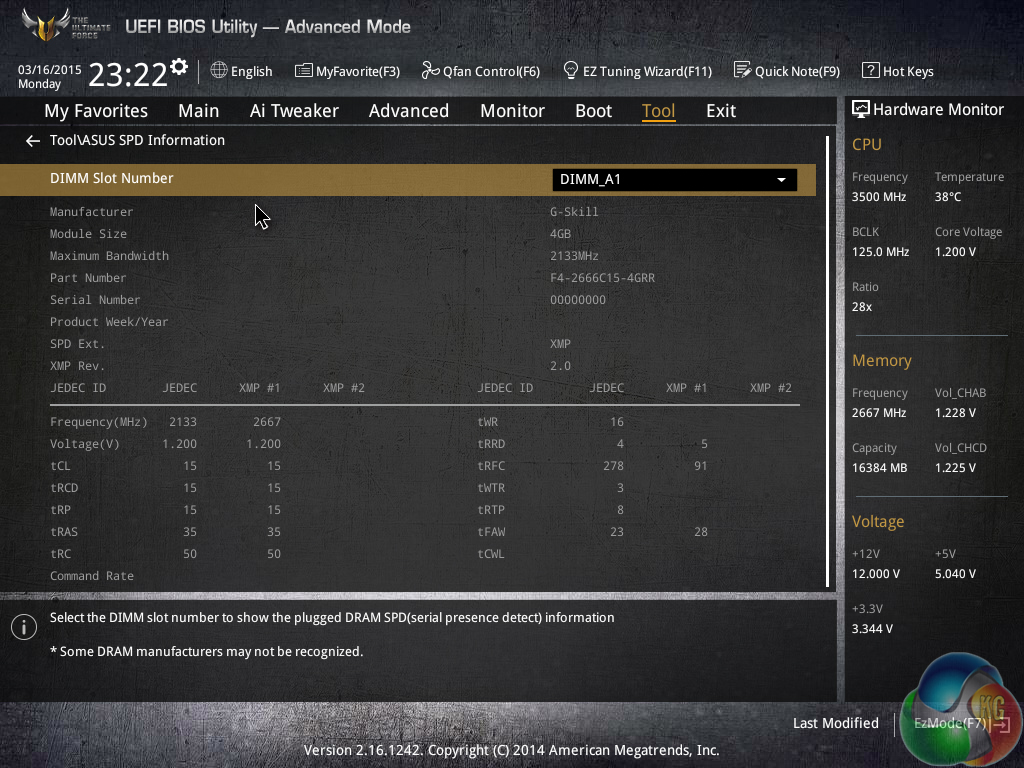
Asus' four tools include a section for reading GPU-related information, the excellent EZ Flash 2 BIOS updating utility, the eight profile saving slots, and a DRAM information page.
Up to eight distinct configuration profiles can be saved to the motherboard, while additional settings can be transferred via a USB flash drive.
Users are free to add certain parameters to their Favorites section which can be accessed quickly.
UEFI Summary
There’s very little to dislike about Asus’ X99 UEFI implementation. The interface is clean, low-clutter, and easy to navigate. And of course, there’s in-depth functionality to back up all of that layout tidiness.
While many competing vendors have switched to higher resolution – 1920×1080 – interfaces, we still don’t see the need for Asus to make the move because the UEFI designers manage to fit relevant levels of information on each 1024×768 frame.
Extensive fan control and monitoring abilities are particularly important for the TUF Sabertooth X99 motherboard. Asus delivers on this front.
Perhaps the only area where we would recommend minor improvements is the AI Tweaker sectioning. While the overall section is inherently easy to use, splitting some of the settings into CPU, DRAM, Power, etc. sub-sections may help to further minimise the clutter. Other than that minor point, the interface is, quite simply, excellent.

So I noticed you compared a synchronous buck driver IC to a standalone dual-MOSFET. Is there a reason for this? The Sync buck has built-in MOSFETs, but the dual FET IC would have to be driven by a separate driver. With the exception of space savings, a separate FET is sometimes preferred to increase efficiency, current handling capability, or (and probably most importantly) to allow thermal management of the FET which is the power handling part of the driver circuit. Pulling the MOSFET out of the IC allows you to have a smaller IC that needs little or no heat-sinking area on the PCB allowing just the FET to be heat-sank. In this instance, I’m not sure why ASUS has been given flack for this decision, and it seems more like the people who will be “disappointed” by this are people who do not know what they’re talking about.
I really like the look of this board… I just don’t see anywhere that details how much it’s going to cost! I recently bought the ROG Rampage X97 but I don’t see me getting 4 graphics cards on the go, so the less PCI-E slots would be better. The X99 chipset also seems to perform better than the X97 from the reviews I’ve read.
Hi Bobaganoosh,
Earlier in the review it is also pointed out that (cooled) IR3535 drivers are found on the rear of the board. The conclusion references the dual-MOSFET + separate driver solution as opposed to the well-respected IR3550 dual-MOSFET + driver co-packed solution.
The comparison stems from the use of IR3550 packages on some of Asus’ other motherboards, which are highly respected, especially in regard to their peak efficiency. I do not think that “Asus has been given flack” in the writing for the decision – I outlined that some people who have high regard for the IR3550 packages seen on Asus’ other X99 boards may be disappointed. That is not to say they necessarily have reason to be disappointed from a performance perspective – the dual-MOSFET + separate driver solution may have its own benefits in regards to cost or thermal performance, for example.
My aim with the power delivery components discussion is to deliver the information that allows users to make their own choice on whether or not the components suit what they individually desire.
Luke
Hi iiMStevo,
Pricing is outlined on the final page – the board is available for pre-order at £299.99 and will be available from April.
Luke
Fair enough, sir. I’m sorry I misunderstood your intentions. Other than that bit, I found it a very informative article.
That’s why i Love ASUS TUF Series 😀 My RIG’s build on that series ONLY.
now I Have PhenomII x6 1100BE (Cooled by Nepton 280L v2) on Sabertooth 990FX and its Masterpiece Also 😉 + 5 Years Warranty.
And, When are Hot Days i have temps (MOBO) around 38-46 deg. cels. (26 deg. ambient) CPU on 4.2GHz 232FSB, 2.8GHz NB + 2.55GHz HT + 1866 CL9 1.58v RAM from 1600CL8 1.5v (Corsair Vengence Black AMD)
So its Cool MOBO. But those X99 and new i7 Extreme x8 are Heat Devils 400Wtp !!!! My GOD its 50W on Core ! (OC) Hmm my Phenom (OC) has Only 19W on Core ! 1.54v (4.23GHz 43 deg. cels.) So i prefer x6 or x8 FX on my RIG. Less Heat.
Thanks for the feedback. I appreciate that the conclusion can be a little confusing on times (it’s hard to cram large amounts of information into a summarizing section), but I always try to ensure that the points I mention are fully examined elsewhere in the review.
Luke
No, your phenom definitely has less heat, but i guarantee you an AMD FX will NOT. The FX CPU’s are heat burning monsters!! And your mistaken about the tdp of the intels, the I7 5960X 8 core is only a tdp of 140w, not 400w, now once it’s overclocked you can hit up in the 300s sure, but that’s not the standard operating tdp. Compare that to the AMD FX-9590 “8 core” (psst, it’s actually 4 cores, they just seperate each core into 2 and let it share cache then say it has “8”), which has a tdp of 300 frickin watts already out of the box, hell even the FX-8300/8320 etc.. have a tdp of 250 watts, that’s nearly TWICE as high as the intel, then once you take the FX-8350/9370/9590 etc.. and overclock them you’re pushing 450 watts, whereas even an older I7 like my I7 4820K or even quite a few I5’s like the I5 4690K can walk all over even the FX-9590 in performance without even overclocking. As for performance, the FX processors are about equal to the most powerful Intel I3 overall. Then there’s the fact that the I7 is still cooler, and even if it wasn’t it’s twice as powerful as the most powerful AMD FX in the world. LUCKILY though, AMD realized how stupid their ancient 32nm architecture and splitting cores in half idea was and they’re FINALLY making new cpu’s after nearly 4 years, called “Zen”, so hopefully these will actually be anywhere near the power of intel ones, and cause intel to get off their asses and make some even better things, because they haven’t needed to make each new gen of CPU’s much better than the last since AMD hasn’t done anything for 4 years.
You mean Z97? Or X79? If you mean X79 i assume you have the Rampage IV Black? There is no rampage on the Z97, but there is the ROG Maximus VII Formula one that has the armor like this, it’s just not a rampage board. If you do mean the Rampage IV Black Edition then actually you won’t get an upgrade on much of anything unless you go for the X99 Rampage V Extreme, because the Rampage IV Black Edition is nothing like any other X79 board. It’s basically like asus made a new chipset called X89, it has a bunch of new features no other X79 has, 64GB RAM capacity, a bunch of Sata 6.0gb/s ports (10 of them iirc), ability to turn pci slots on or off if you don’t need them, faster USB performance, etc.. not to mention you have cheaper RAM; the same 16gb kit that cost me $250 to get in DDR3 for the Rampage IV Black X79 cost me $400 for the X99. So the only boards that would be much of an upgrade from this is the Rampage V Extreme, although you do still get some nice features with the Sabertooth X99 here, USB 3.1, the armor, M.2 support, DDR4 RAM etc.. although i don’t believe it has the “OC Socket” that helps overclocking like the X99 Deluxe and Rampage V Extreme has.