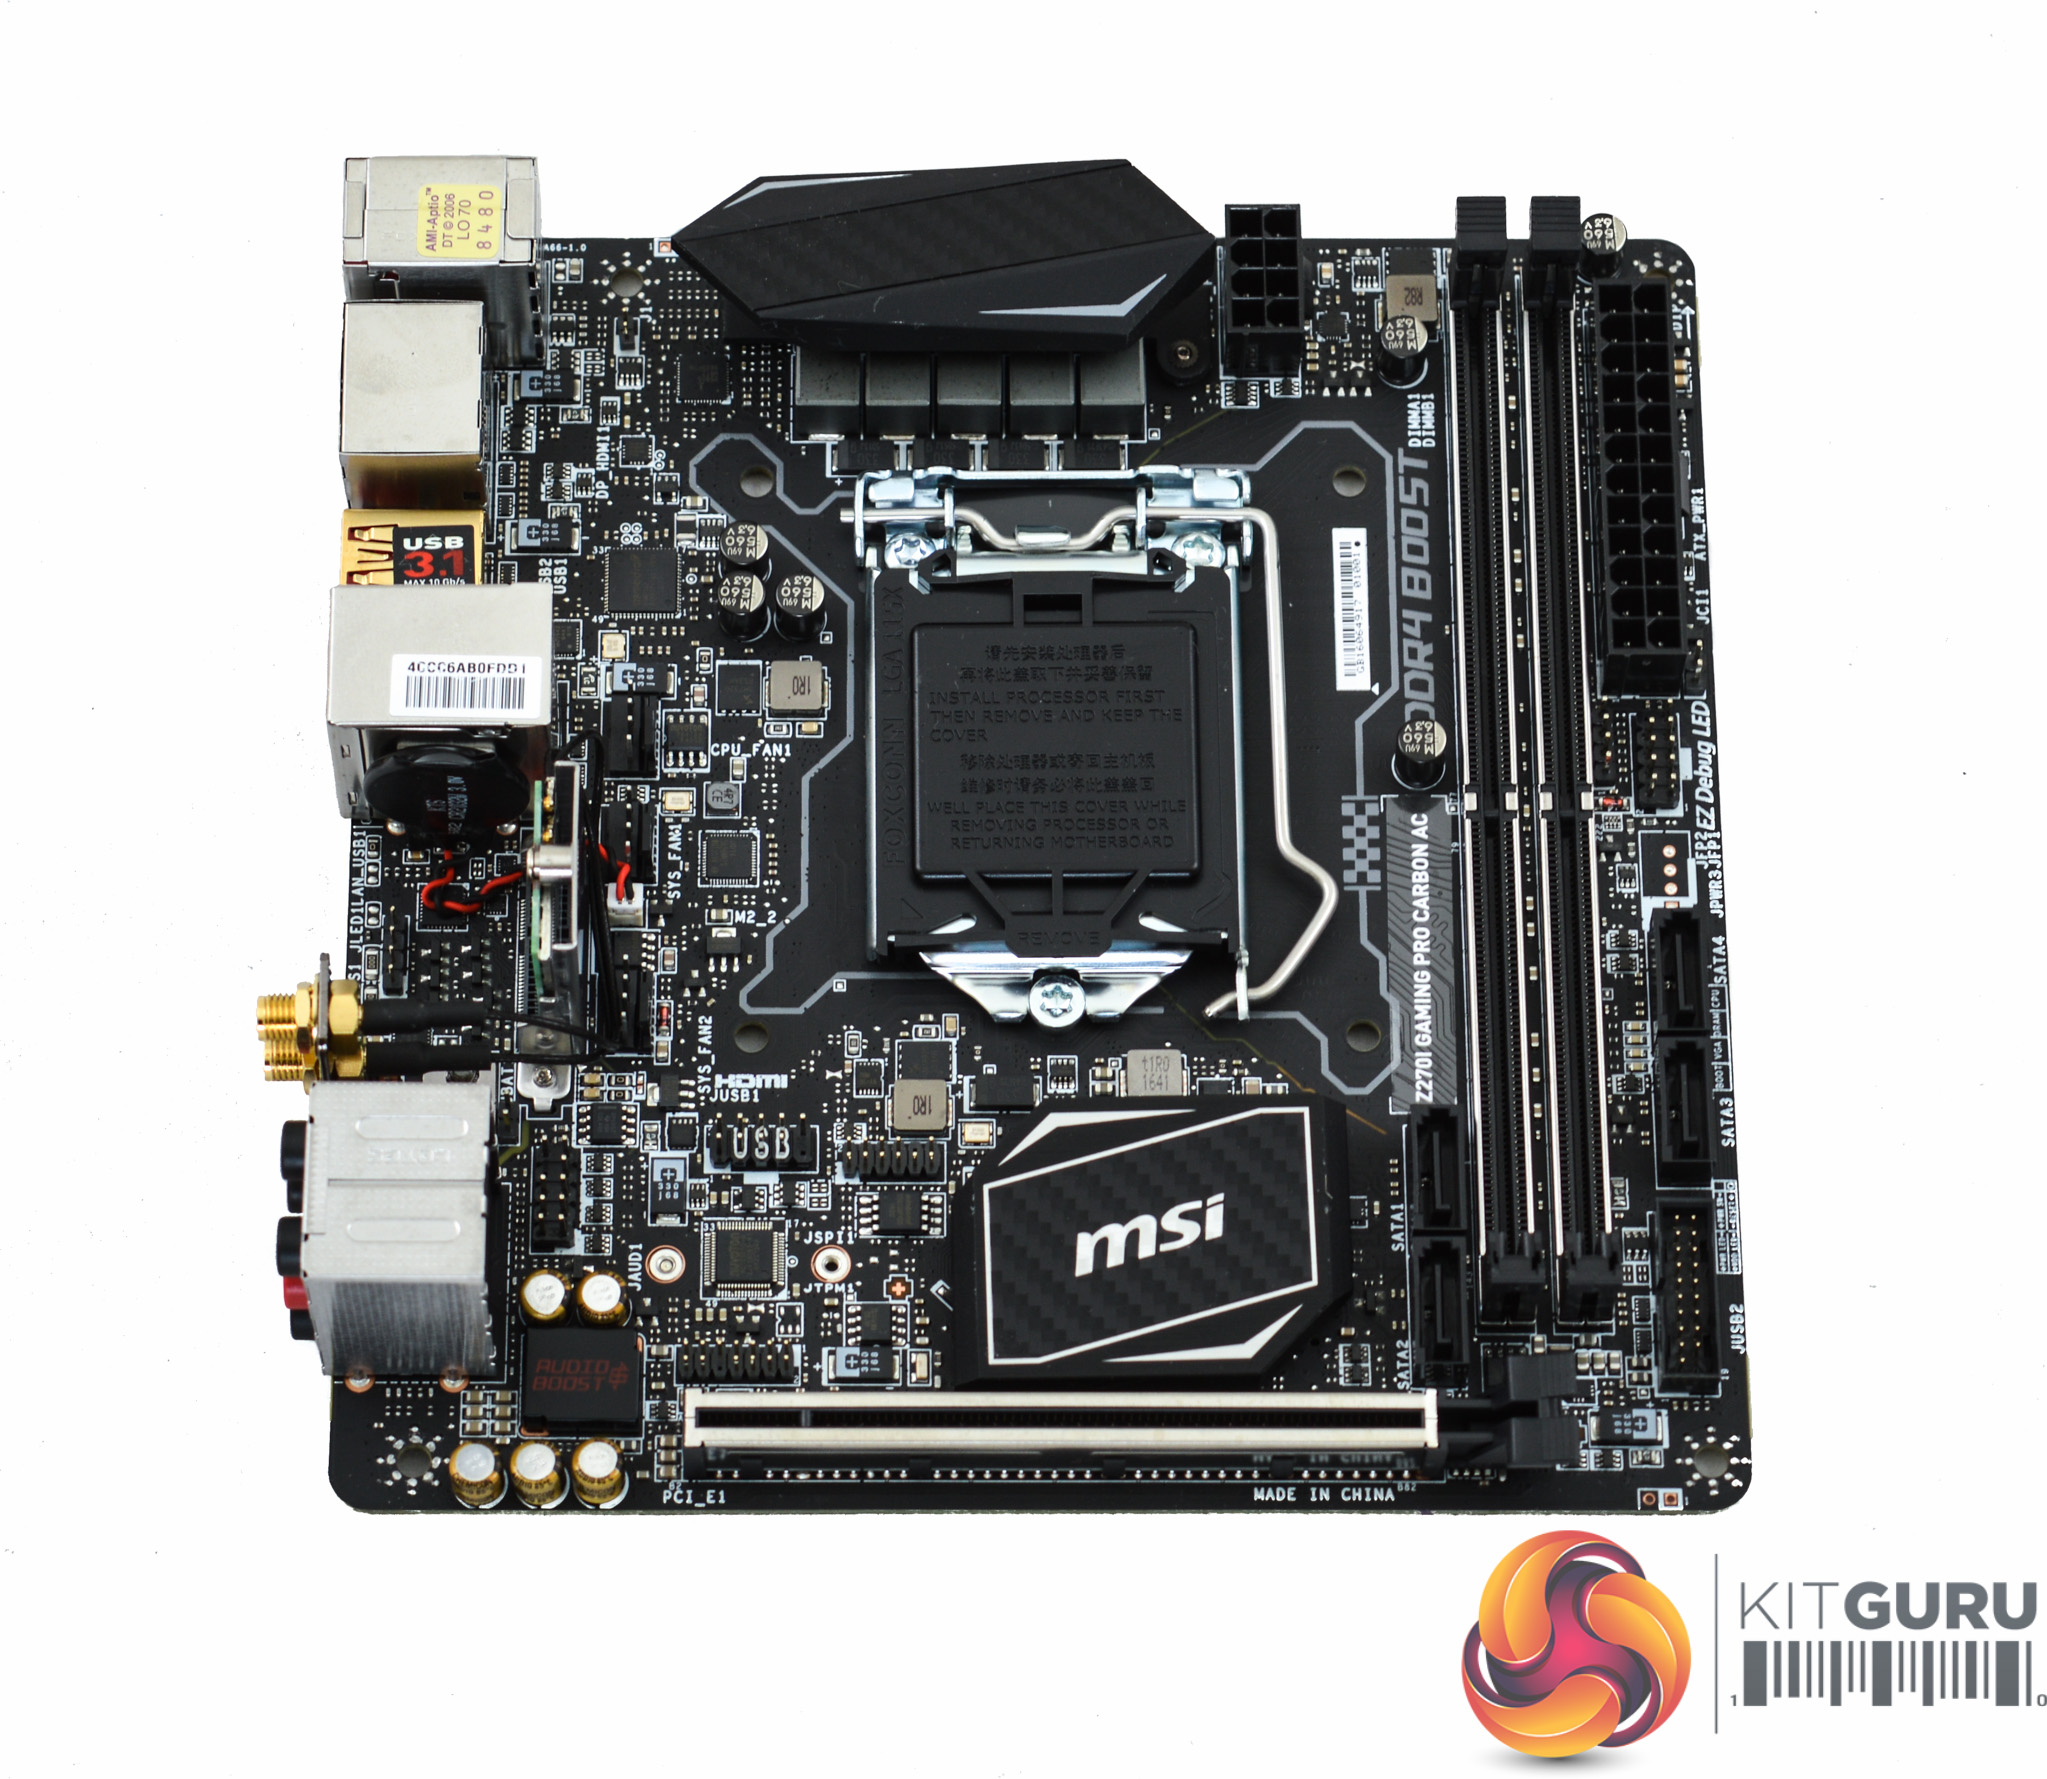
MSI's Carbon series of motherboards have typically used plain black or grey colours with user-customisable RGB LEDs so the Z270i Gaming Pro Carbon AC brings no design surprises. While Carbon by name, there are just two pieces of carbon fibre-style wrap on the whole motherboard – one on the chipset heatsink and one on the CPU VRM heatsink. The lack of a rear I/O Shroud or heatsink near the rear I/O leaves the MSI motherboard looking a little exposed, but it is a clean and tidy overall design.
RGB customisability is available in only two options, a strip running along the edge of the motherboard underneath the DDR4 lanes which is fully customisable and integrated from the get-go. Secondly, a 12v G R B header located near the rear I/O for standard RGB strips. It's an awkwardly placed header but MSI provides an extension cable which goes some way to mitigate that.
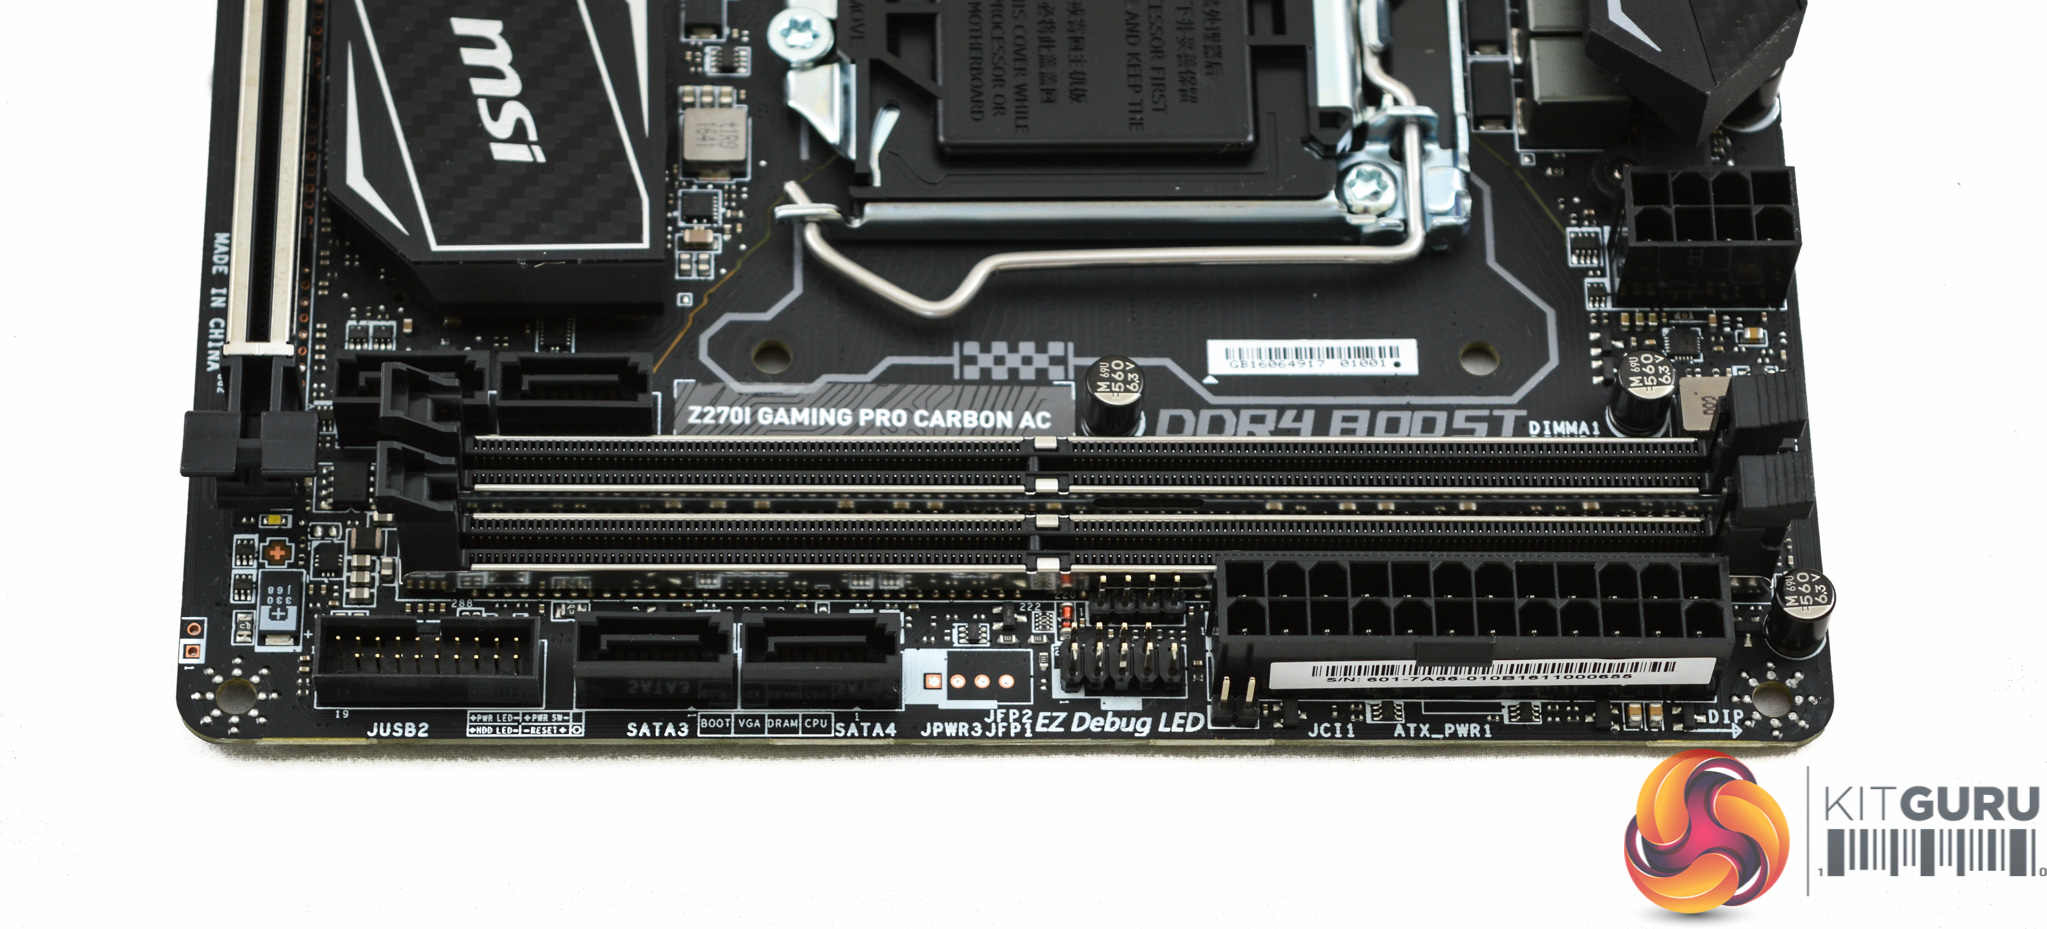
Along the side of the motherboard there are two SATA ports, a USB 3.0 header, plus two front panel headers and a chassis intrusion header. The second front panel header, meant for a motherboard speaker, looks surprisingly like an RGB header so be careful not to confuse the two.
Next to the SATA ports there is a strange space where MSI could have, and probably should have, included additional connectivity like another SATA port. Maybe there was a SATA port there once-upon-a-time since the System Status menu under the UEFI references a SATA Port5, unless this is a placeholder for the M2 port when used in SATA mode.
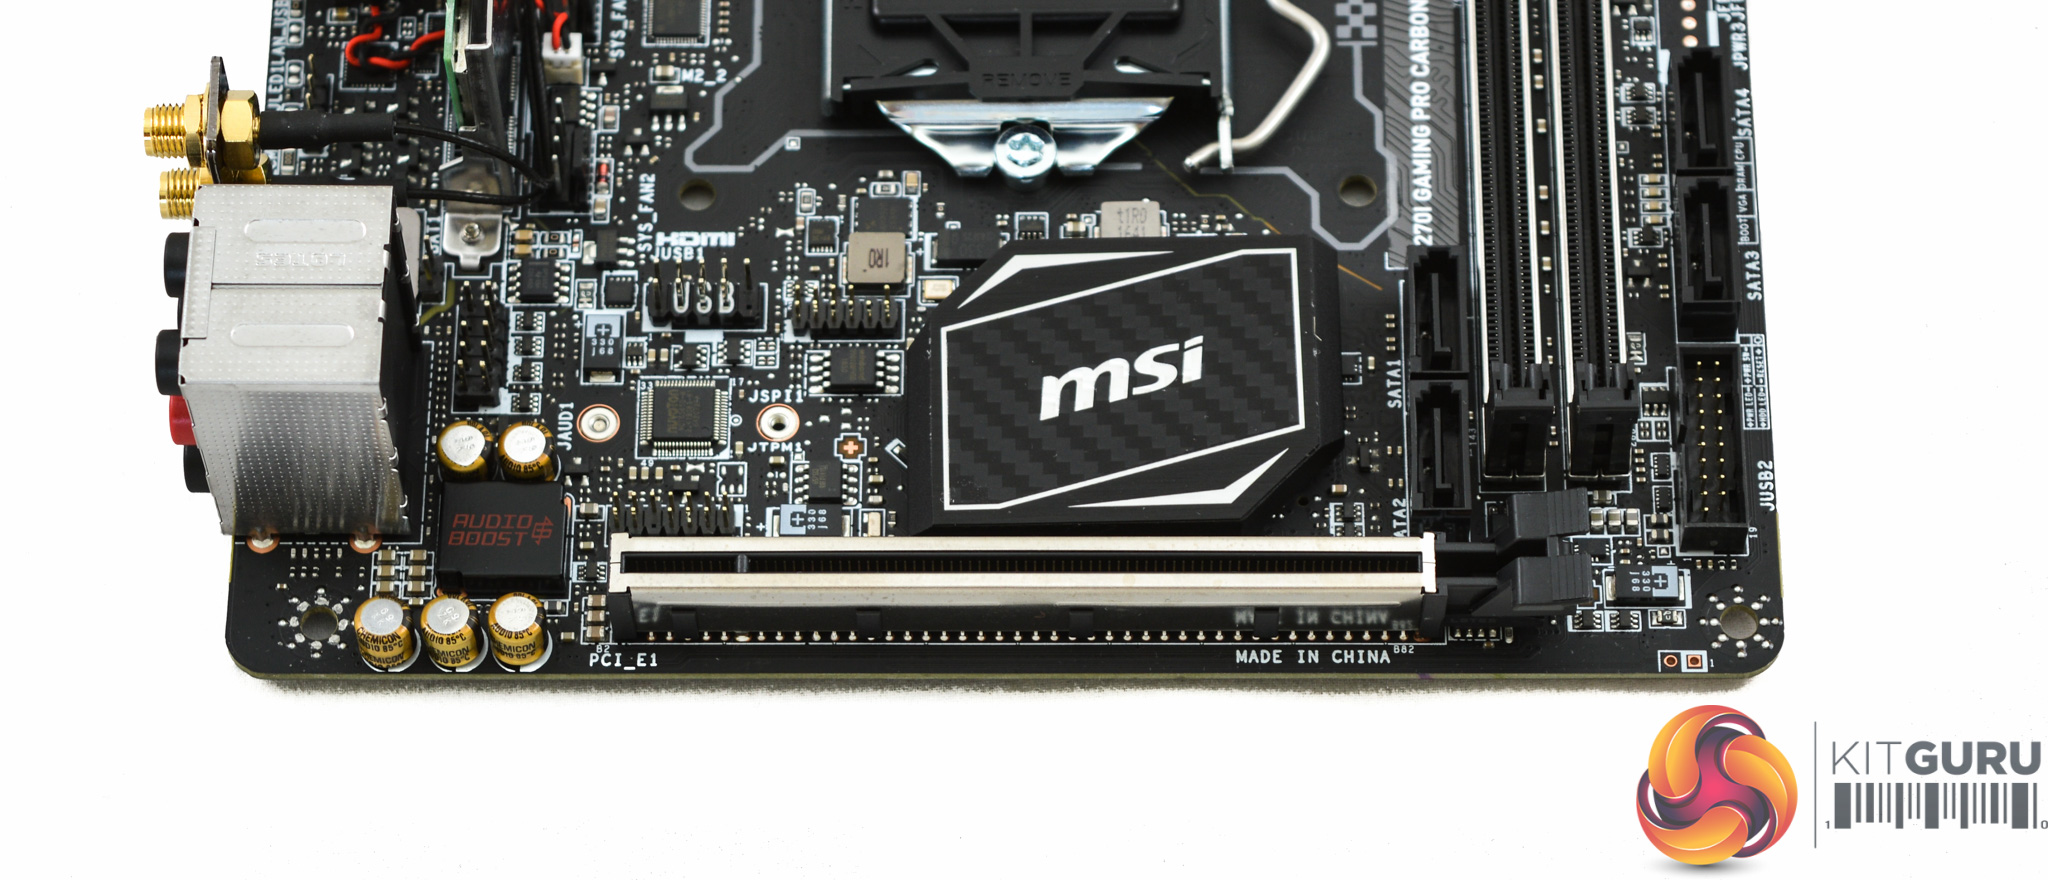
Moving down to the base of the motherboard you'll find a shielded PCIe lane with full 16X electrical bandwidth at PCIe generation 3.0 speeds. A further two SATA ports are sandwiched between the PCIe slot and two DDR4 lanes.
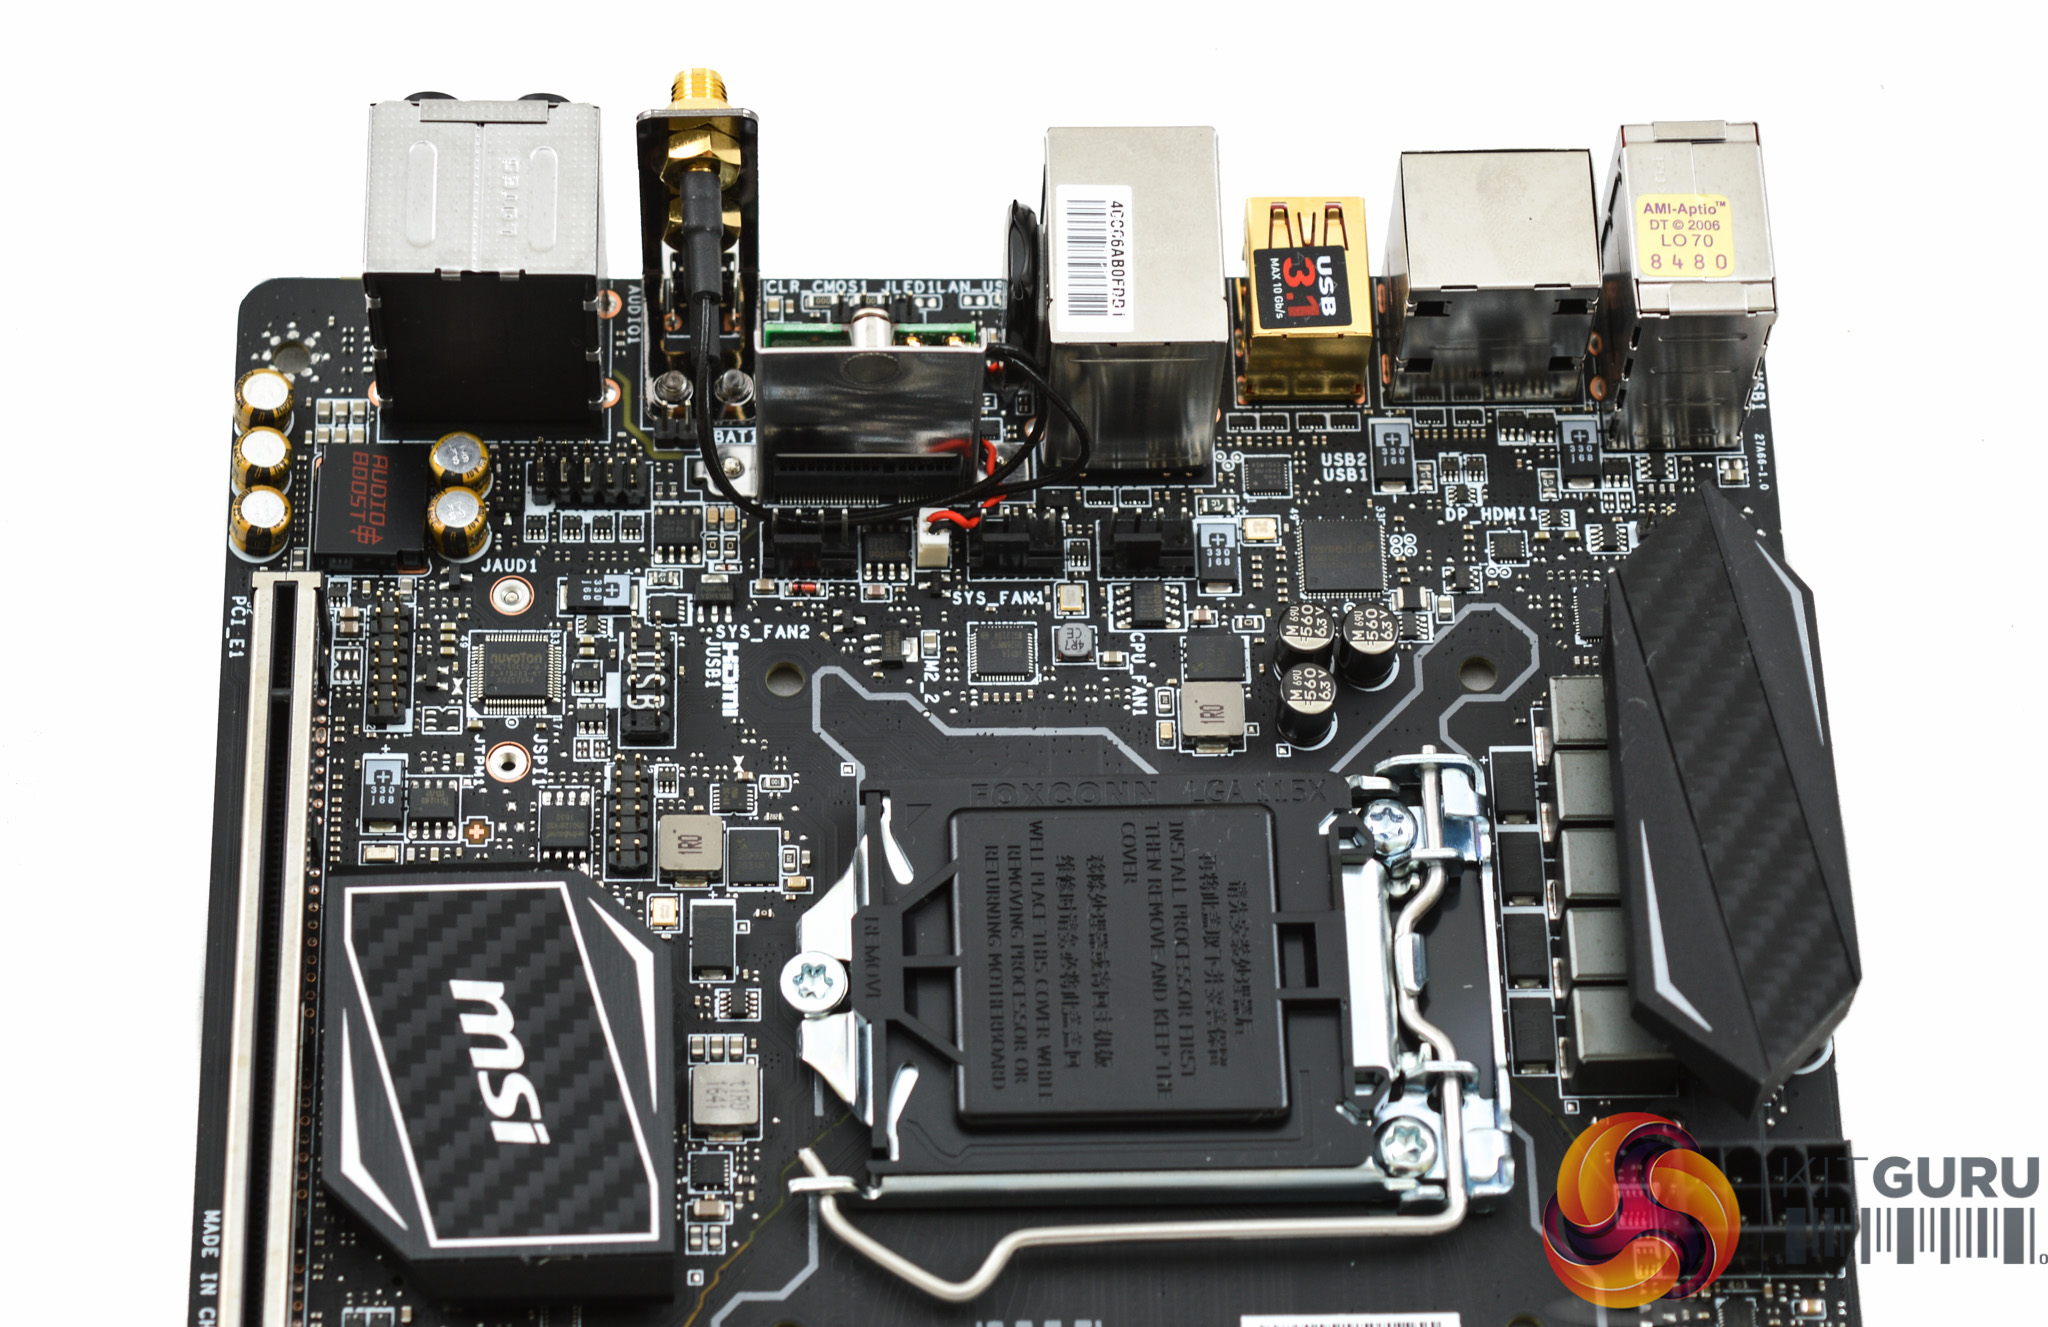
The audio section is crammed in next to the rear audio jacks where MSI found space for 5 audio capacitors and shielding for Realtek ALC1220 codec which integrates a headphone amplifier. Despite the congestion of components MSI still found a way to most isolate the PCB in the audio section, see the photo below of the underside of the motherboard for a clearer view of this.
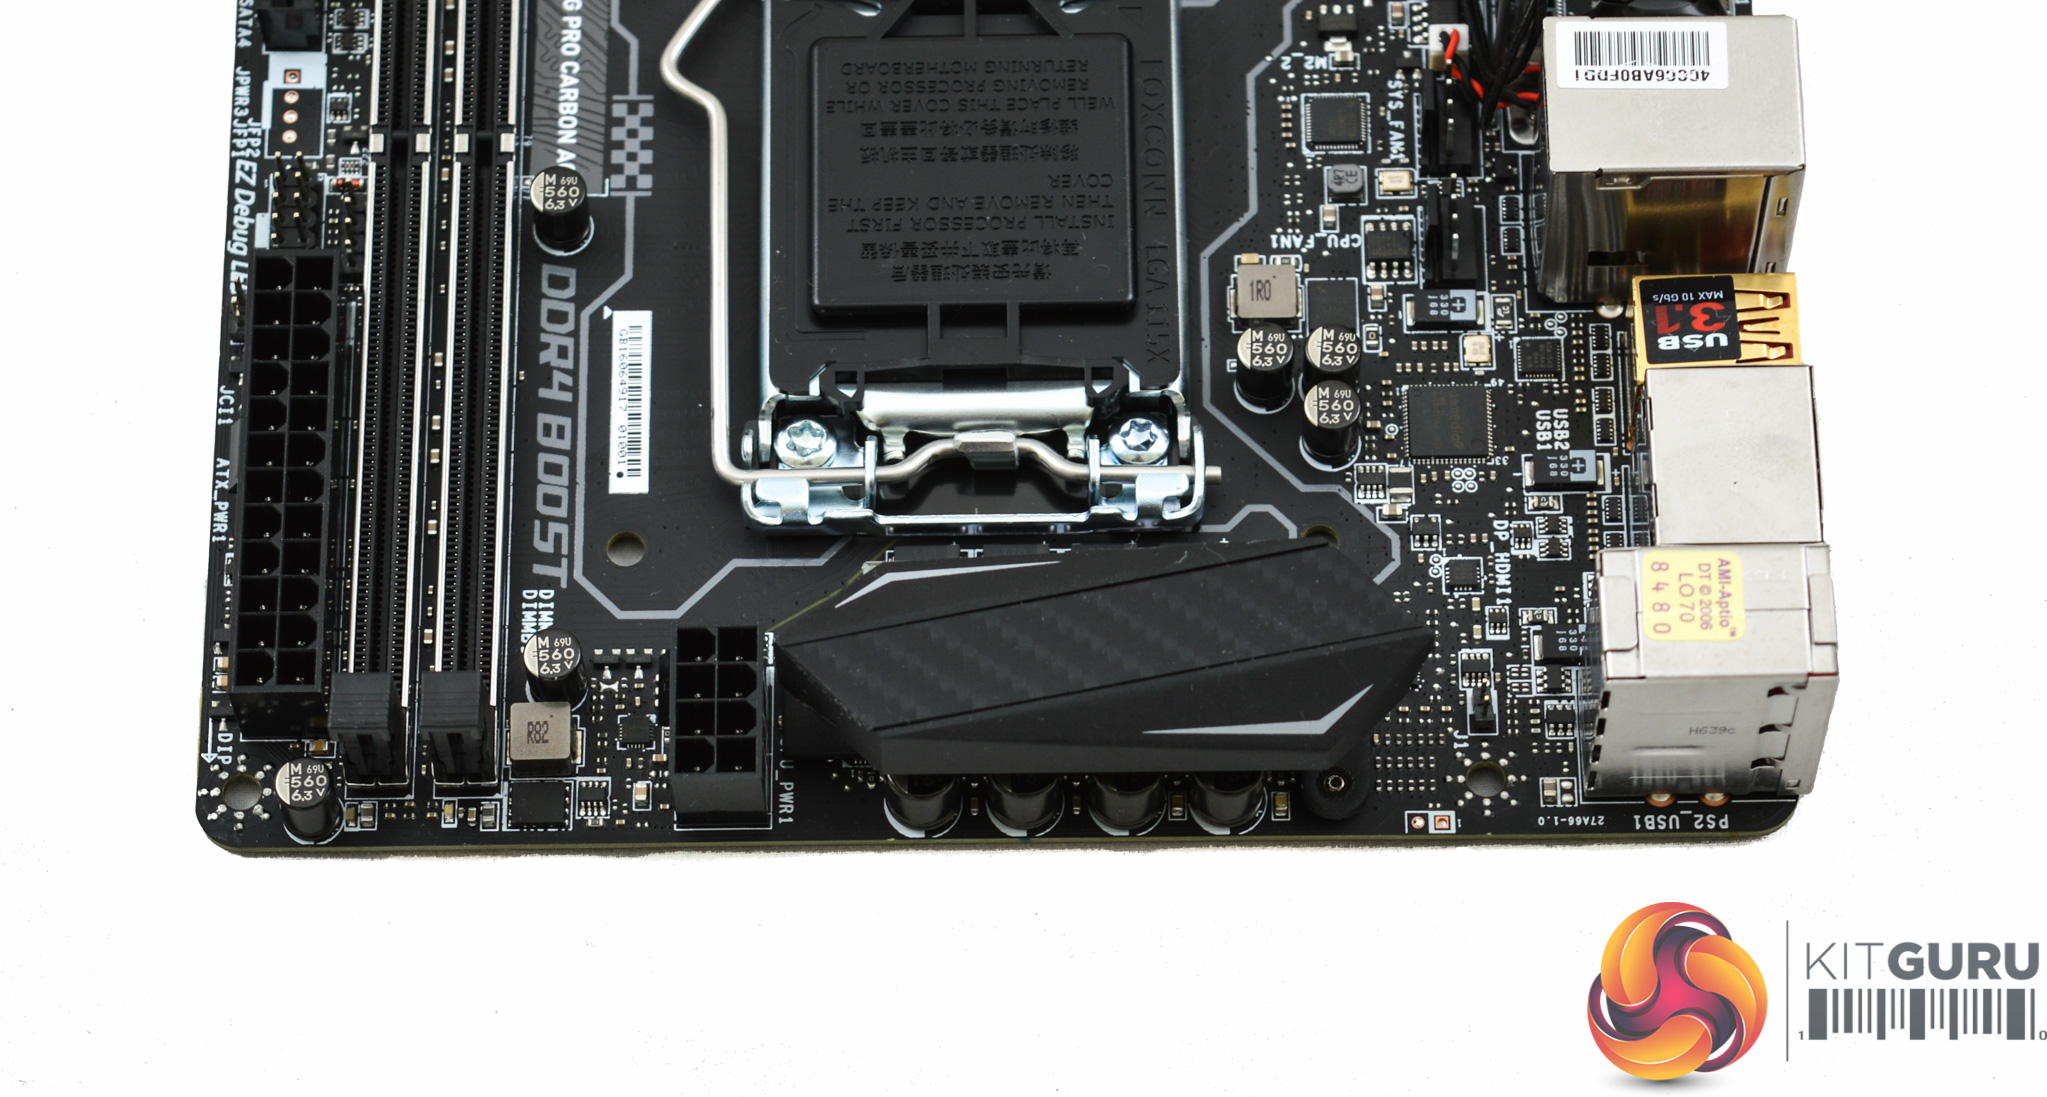
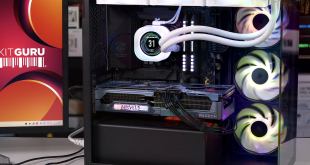
The CPU socket has what appears to be a 5-phase VRM and this is powered by a standard 8 pin EPS connection. The CPU fan header is located next to the two System fan headers by the rear I/O. If the end user has an AIO then now more than ever the integrated fan controllers built into the pumps make a lot of sense otherwise the board's three fan headers are used just for the AIO.
However, any AIO with a fan controller will likely require the single USB 2.0 header on the board for the AIO controller unit leaving no front panel USB 2.0 capability, there is a front panel USB 3.0 header though.
There's a cluster of headers around the back region of the board which include the previously mentioned three fan headers and USB 2.0 header, a TPM header, front panel audio and the LED header, The connector next to the MSI chipset heatsink is JSPI1, apparently an MSI port used to program the BIOS.
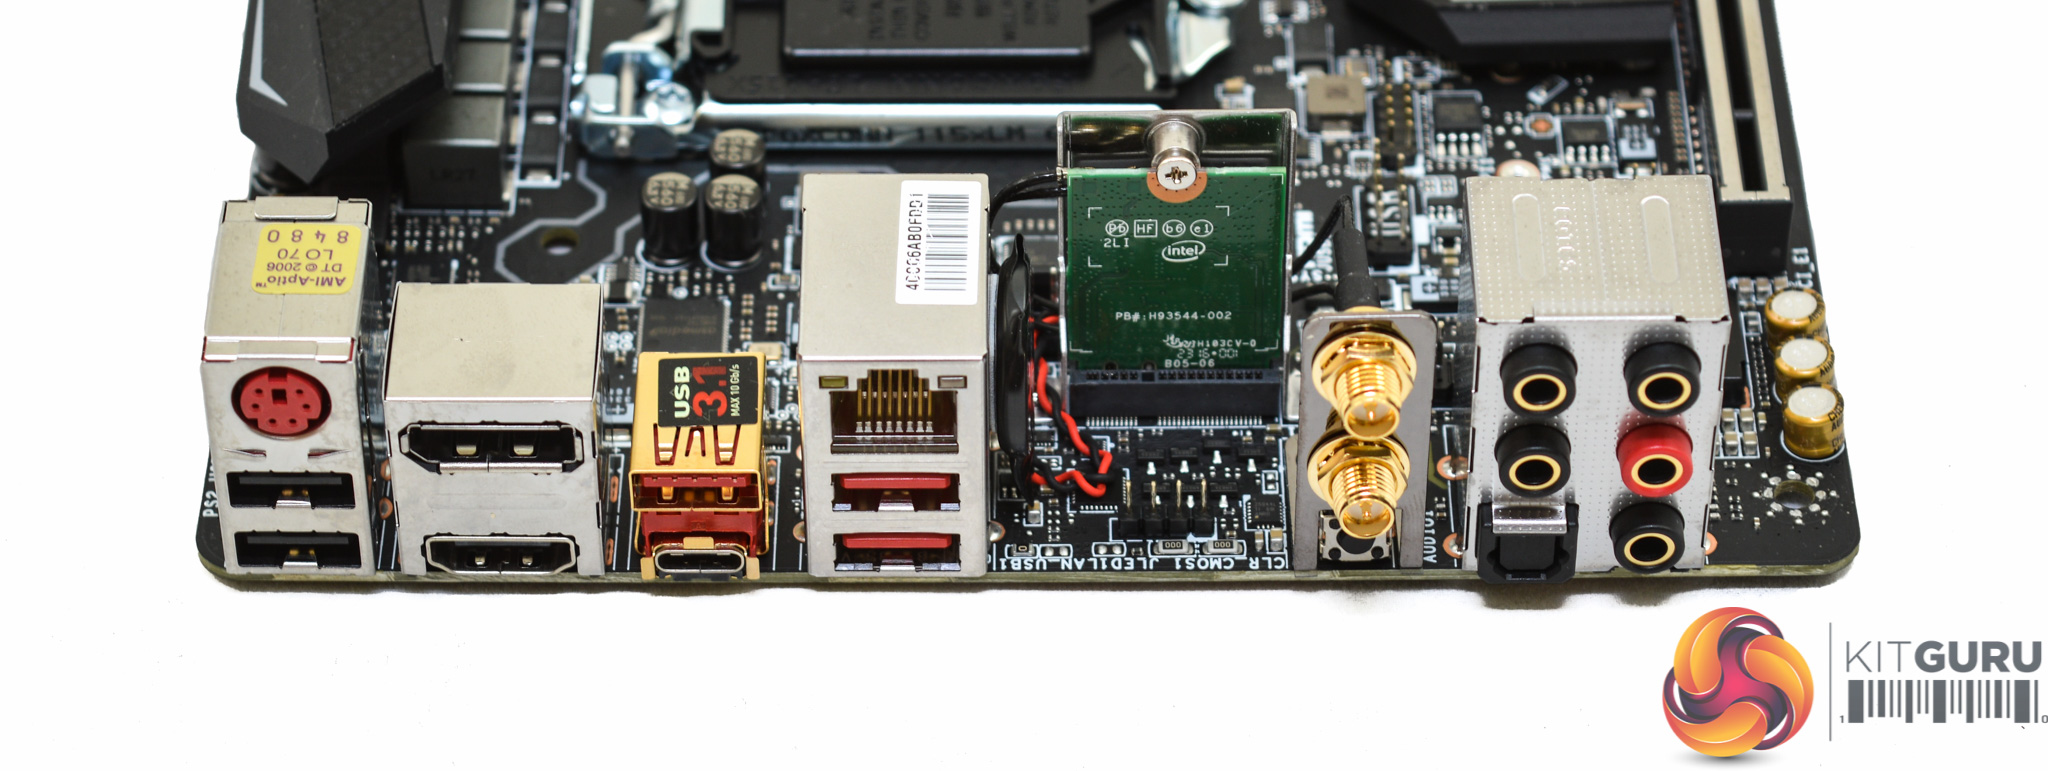
The rear I/O is good for the motherboards size, you get six USB ports of assorted speeds, two display connections, a legacy PS/2 combo, plenty of audio jacks and a clear CMOS button. The two optional WiFi antenna ports can also be populated with the supplied antennae if the user so desires.
From the back there's a clear view of the vertical M2_2 slot used to hold the WiFi Bluetooth combo card and the LED RGB port. MSI has vertically mounted the CMOS battery to save space which is now almost standard practice for mini-ITX motherboards.
The link speed for the M2_2 slot is not specified and MSI doesn't include either of the M.2 slots in the provided block diagram which is included in the manual.
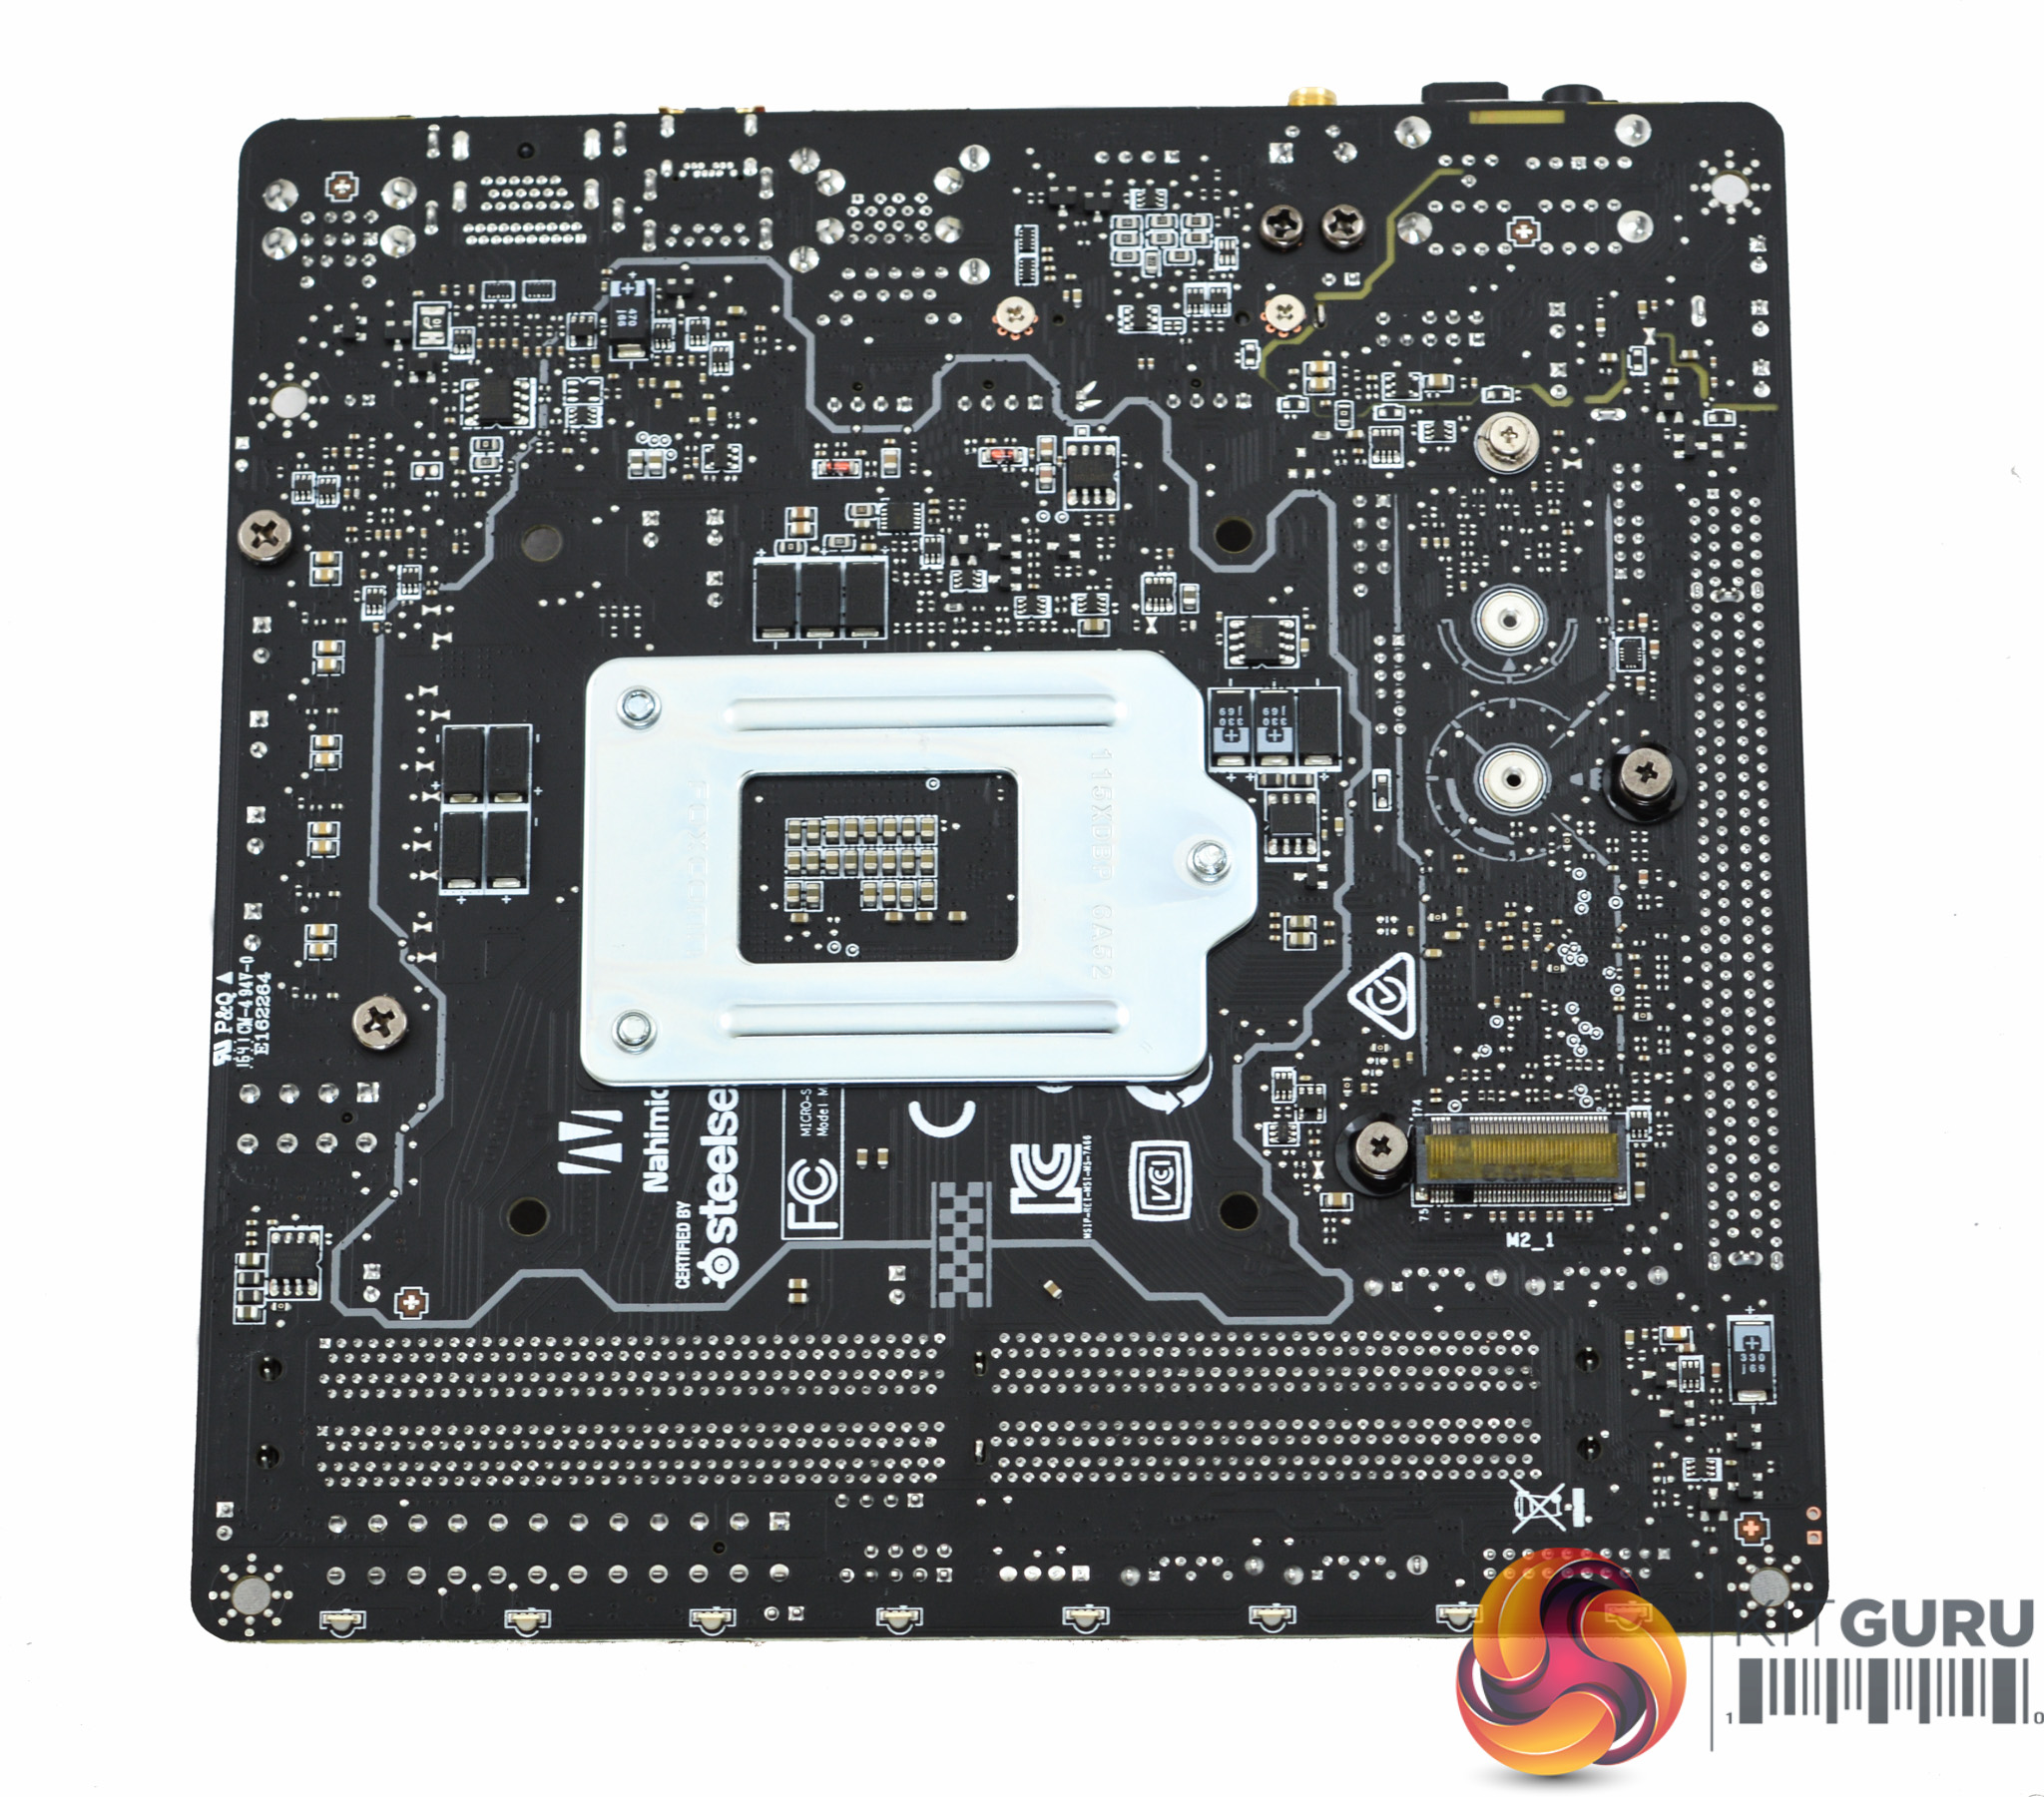
Underneath the MSI board you can see the M.2 slot which is down here as a space-saving measure, thankfully it doesn't conflict with any backplates as it is spaced adequately away from the CPU socket.
The aforementioned audio PCB shielding can be seen a lot clearer from this view. We're not sure as to the purpose of the grey outline that goes roughly around the extent of the CPU socket. It isn't transparent so it clearly isn't intended to enhance the LED system but it's possibly there for isolation purposes given that the underside of this board is so densely populated with components.