


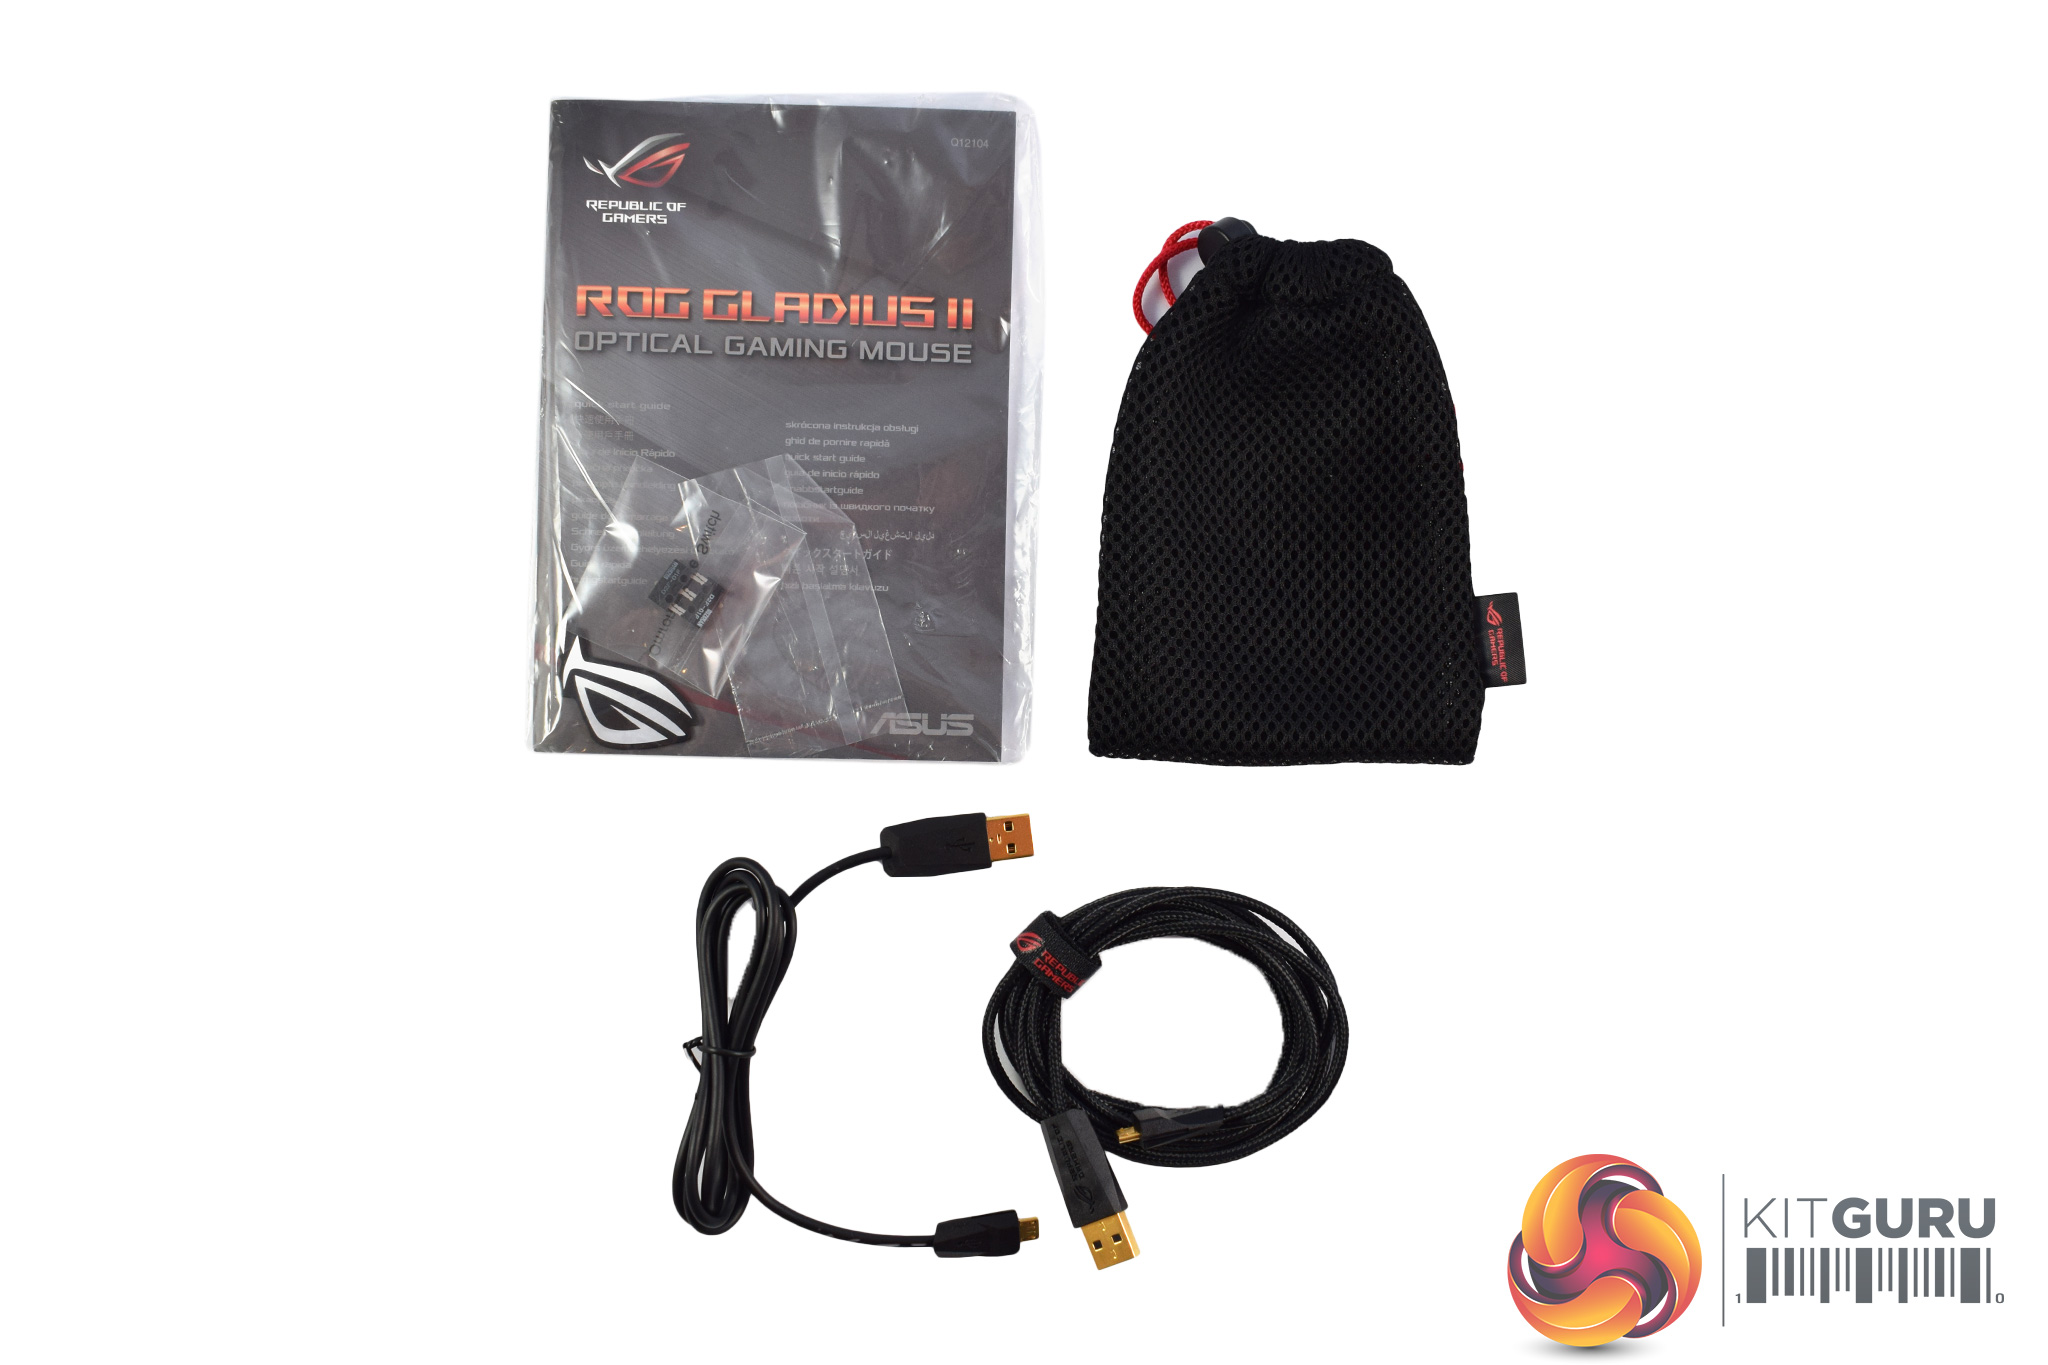
The ASUS ROG Gladius II ships in a box with all the usual ROG styling, while a large product photo is visible from the front.
Inside, ROG has included a manual and carry pouch, while there are also two USB cables (one braided and one rubber) so you can choose which one best suits you. Most interesting are the two extra Omron switches, as the Gladius II actually lets you change-out the mouse's switches if you so desire. We look at this in more detail below.
![]()
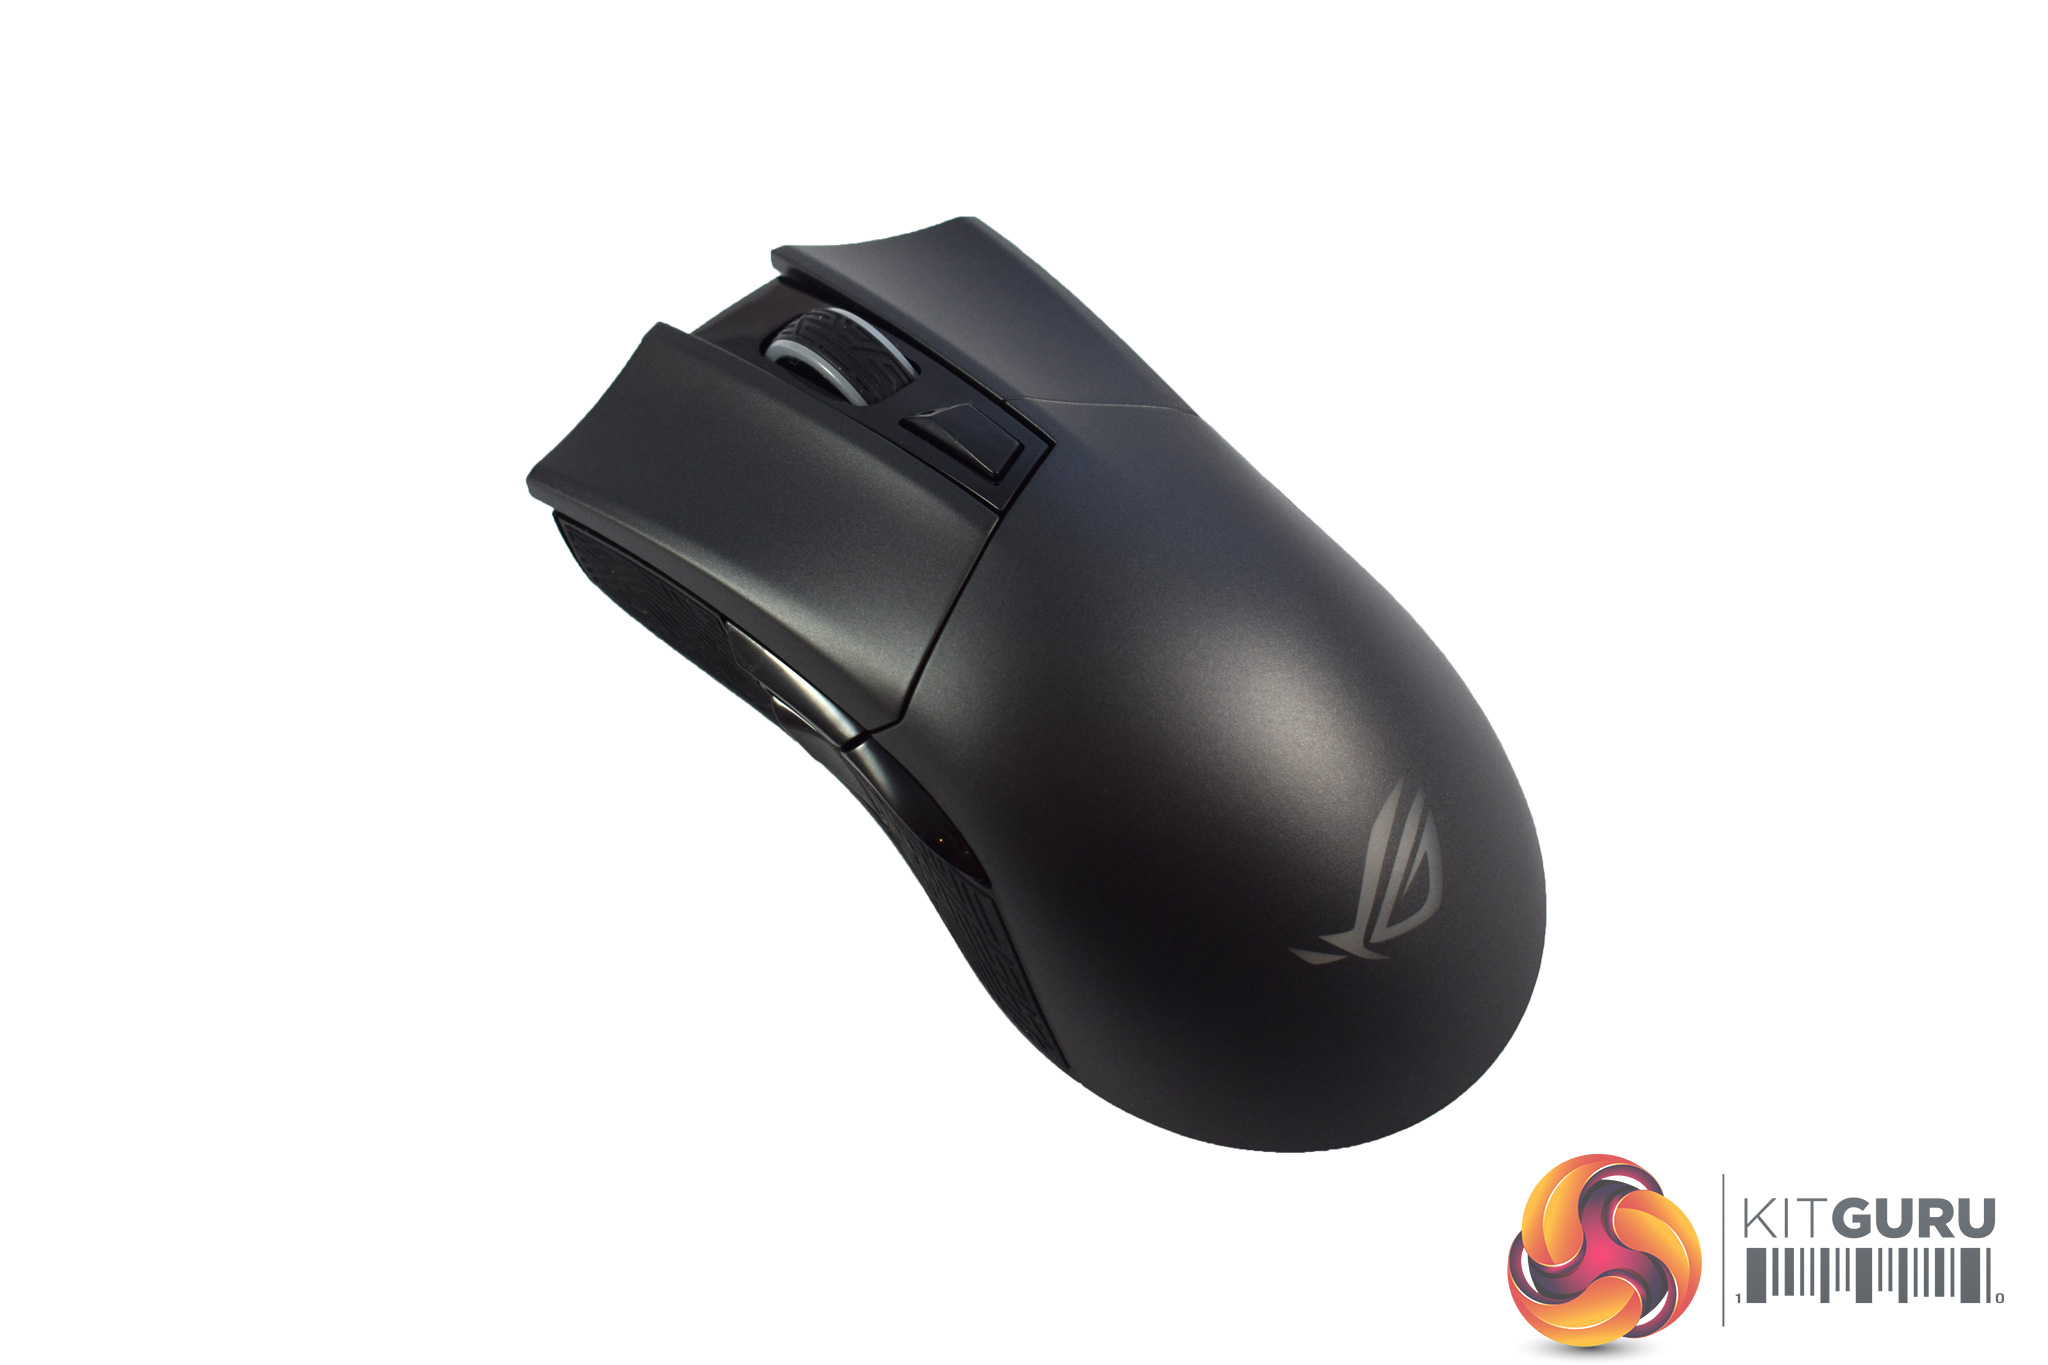
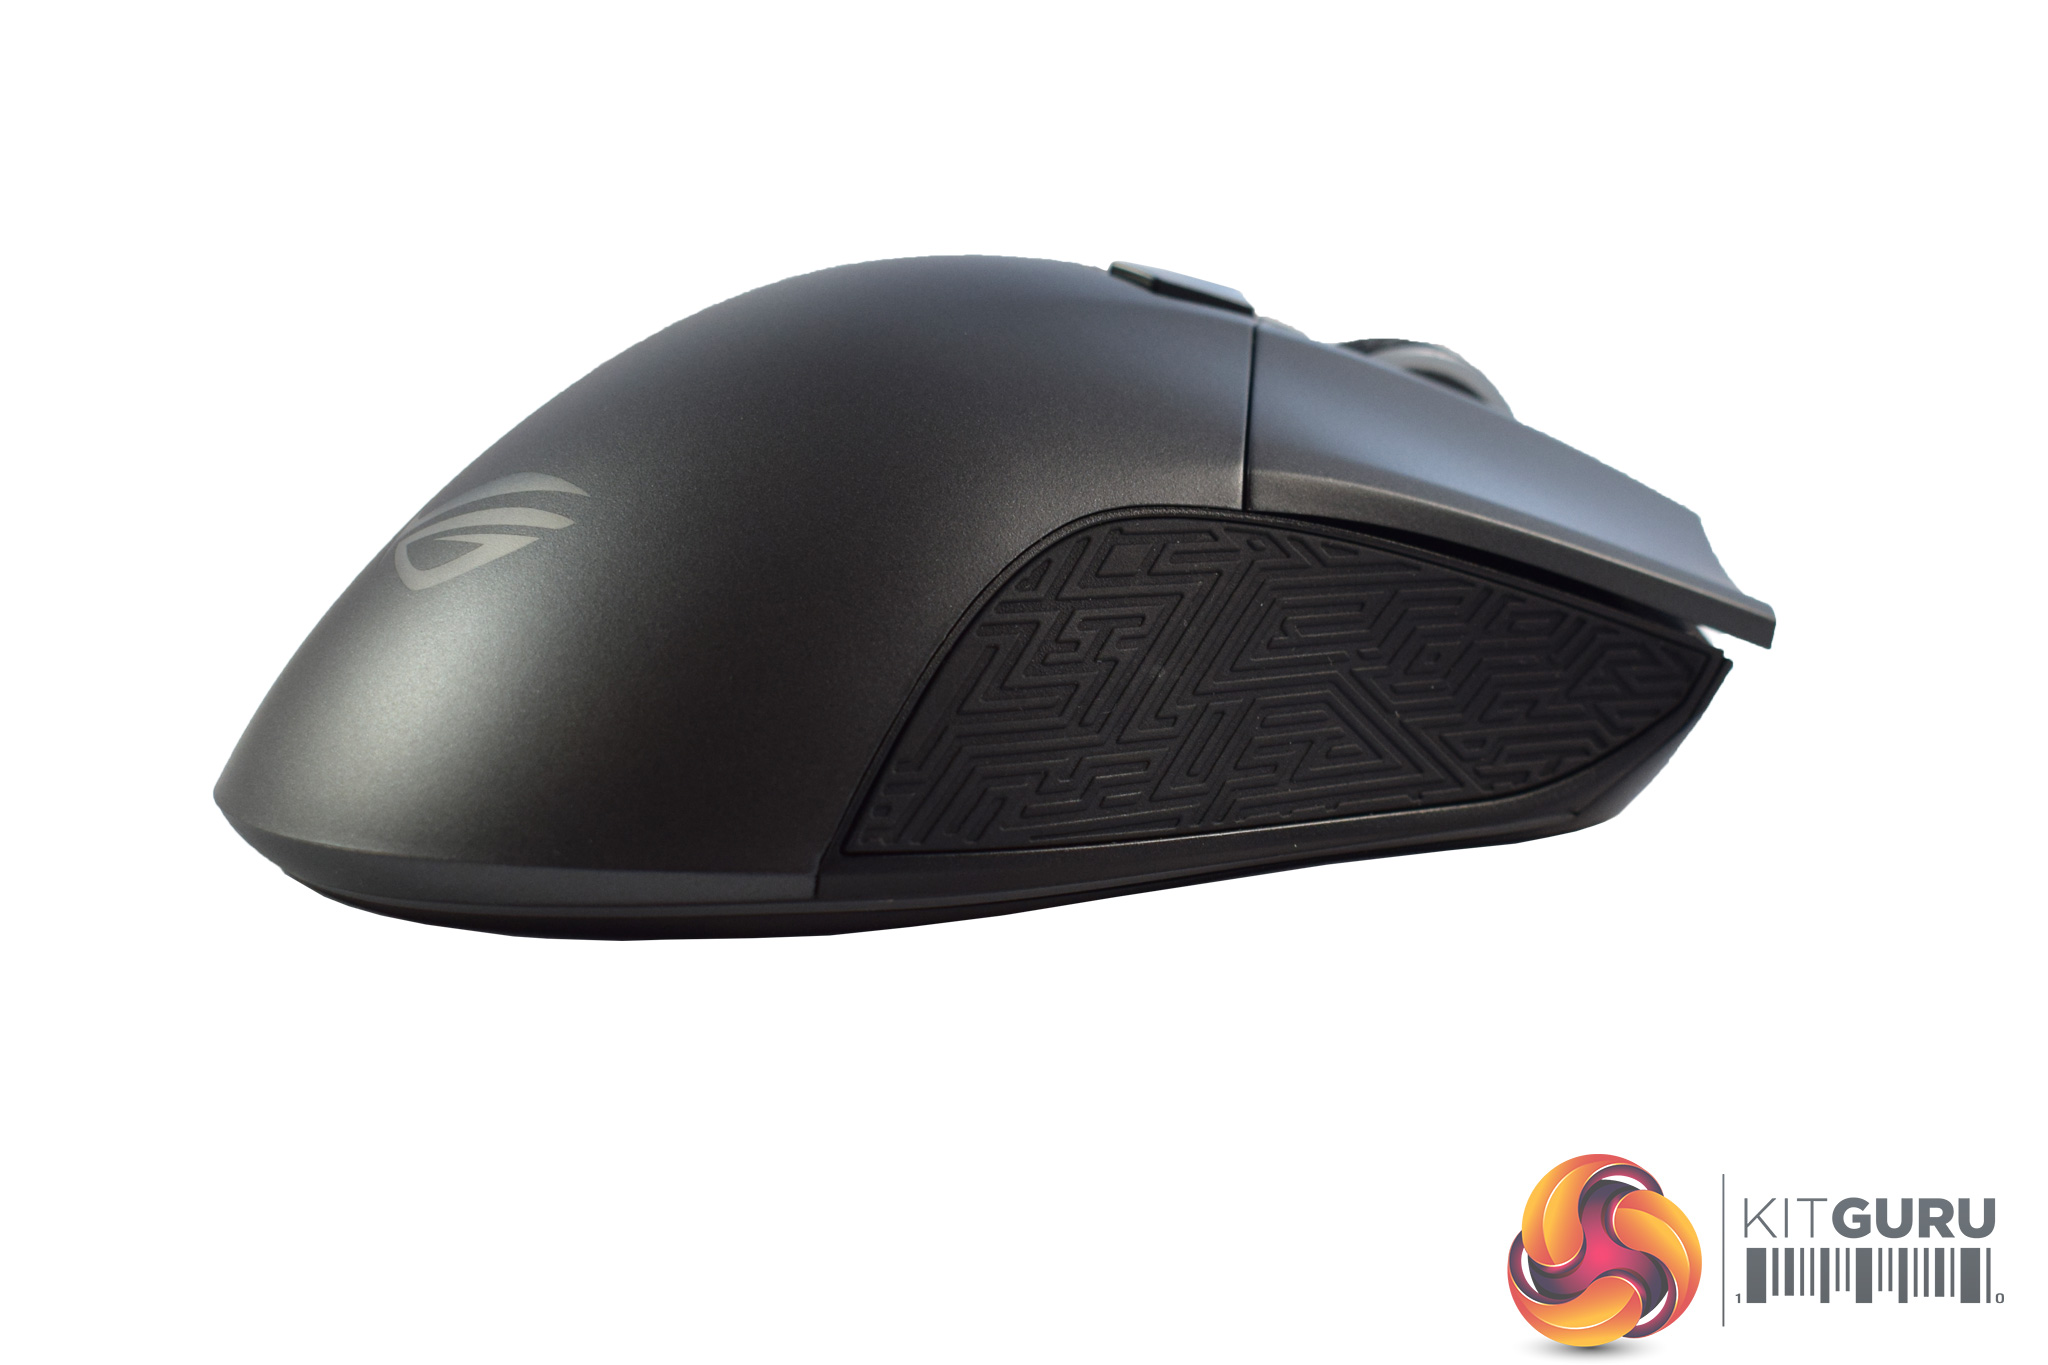
Getting our first look at the Gladius II, it is immediately obvious this mouse is designed to be an ergonomic, fast-paced FPS gaming mouse – it is very similar to the Razer DeathAdder Elite in that regard. Don't be fooled by the shape, too, as this is mouse is not ambidextrous but is exclusively for right-handers.
At the bottom of the mouse is the ROG logo, which is one of 3 lighting zones spread across the Gladius II's body.
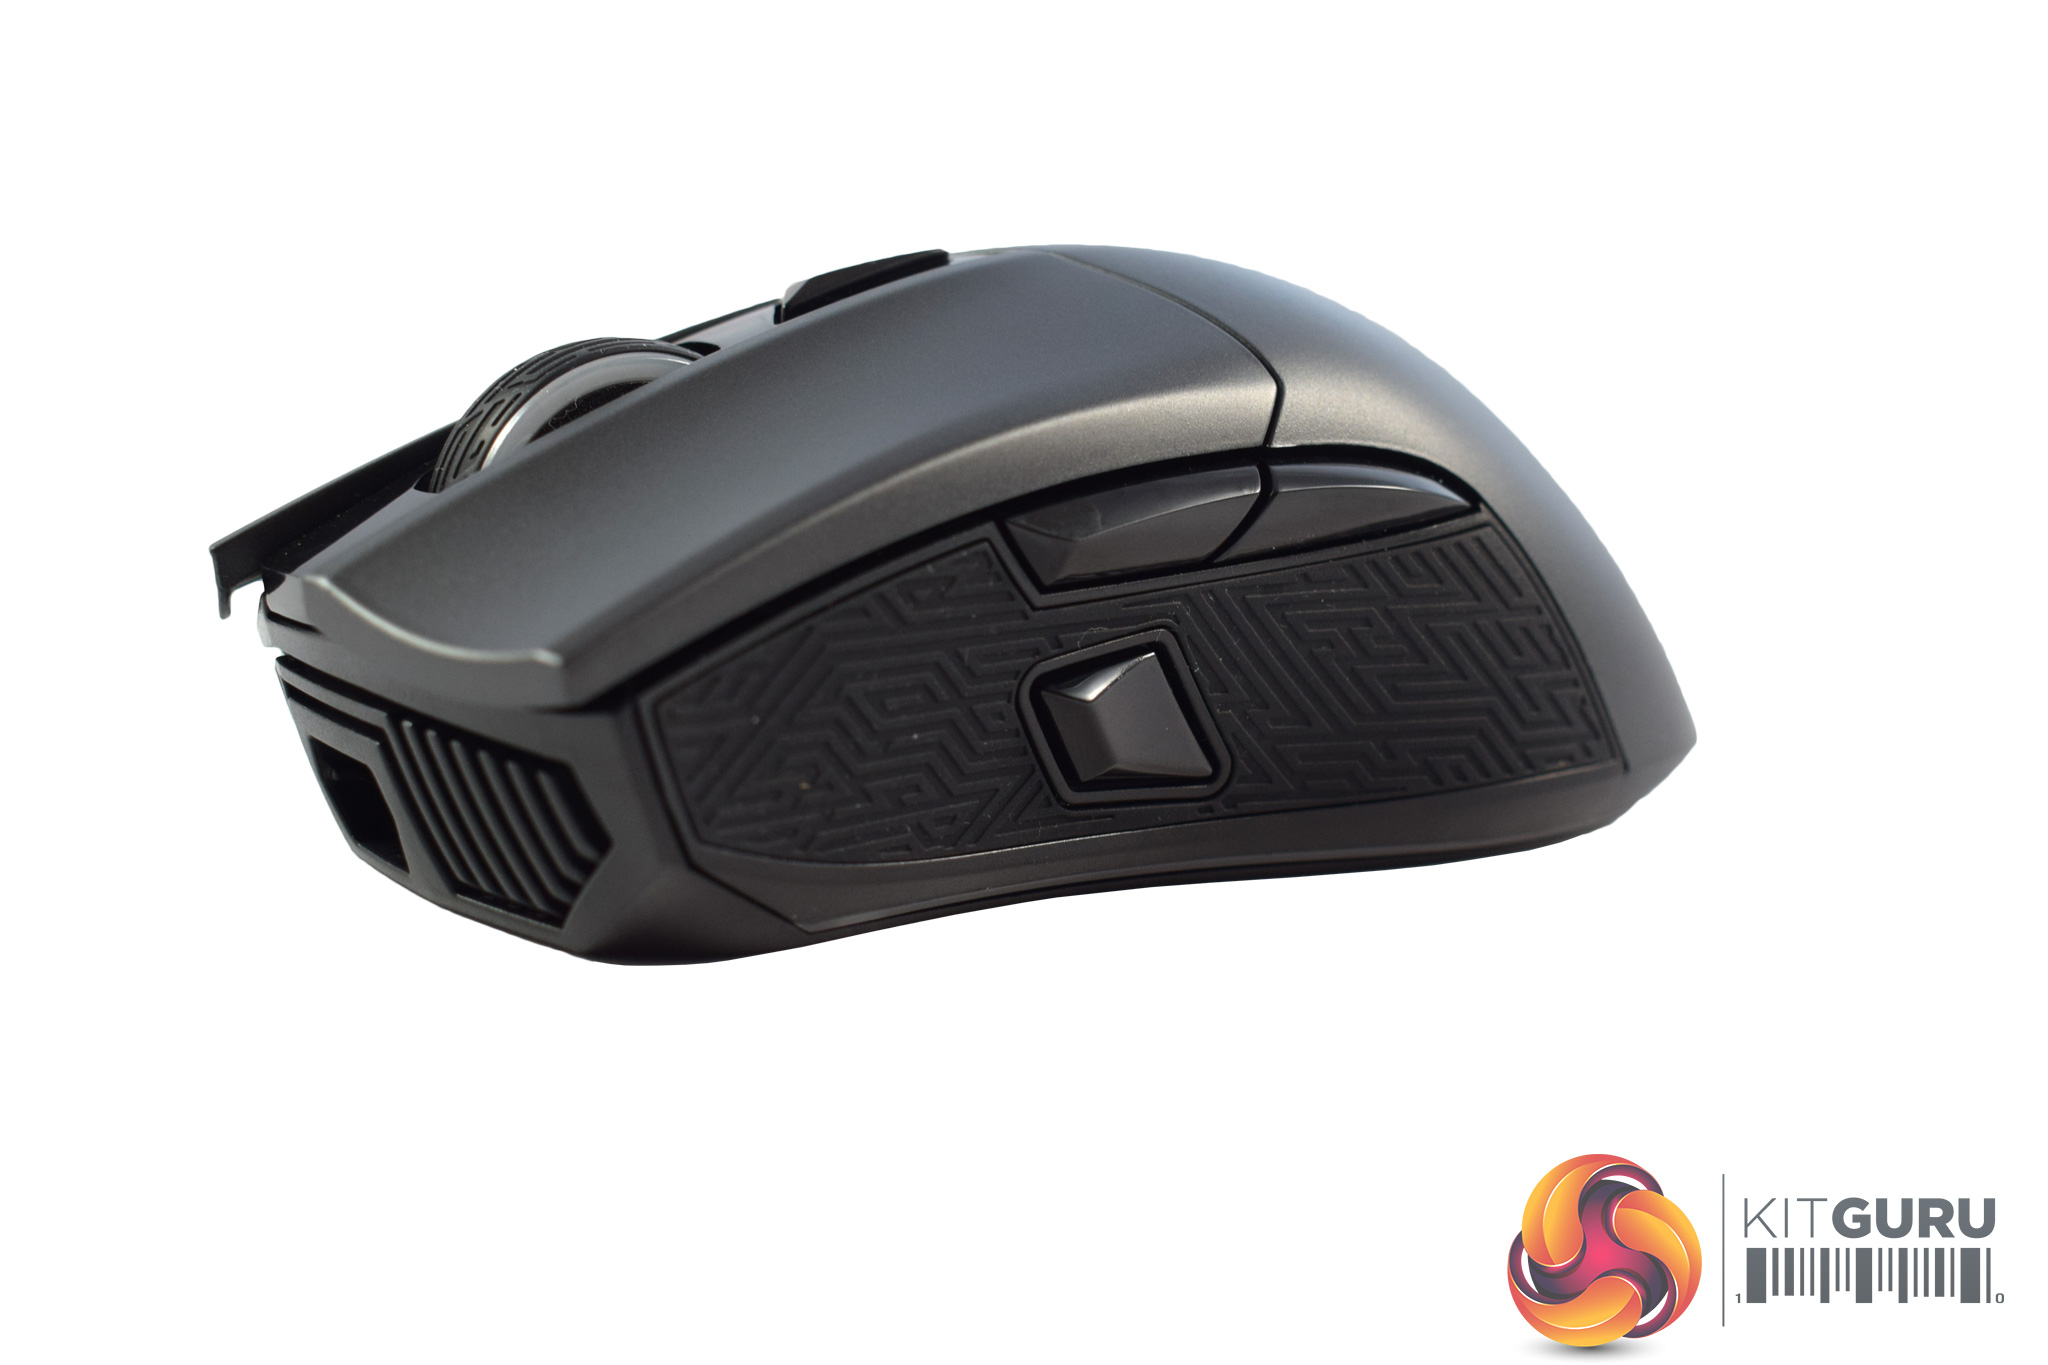
Moving to the left-hand side of the Gladius II, here we find the usual ‘forward' and ‘back' buttons as well as a third button just below these, which ROG calls the ‘DPI target thumb button.' Essentially, this works like a sniper button as it temporarily lowers (or raises) the mouse's DPI for as long as you hold the button. Surrounding these buttons is a large rubber section to help you grip, and the rubber is styled with ROG's trademark Mayan-inspired detailing.
The right-hand side of the mouse is less busy, featuring just a rubber pad to help your fourth finger grip.

At the front end of the Gladius II we get a look at the mouse's scroll wheel. This sports more of the same Mayan-detailed rubber, while the wheel is also the second of the three RGB lighting zones.
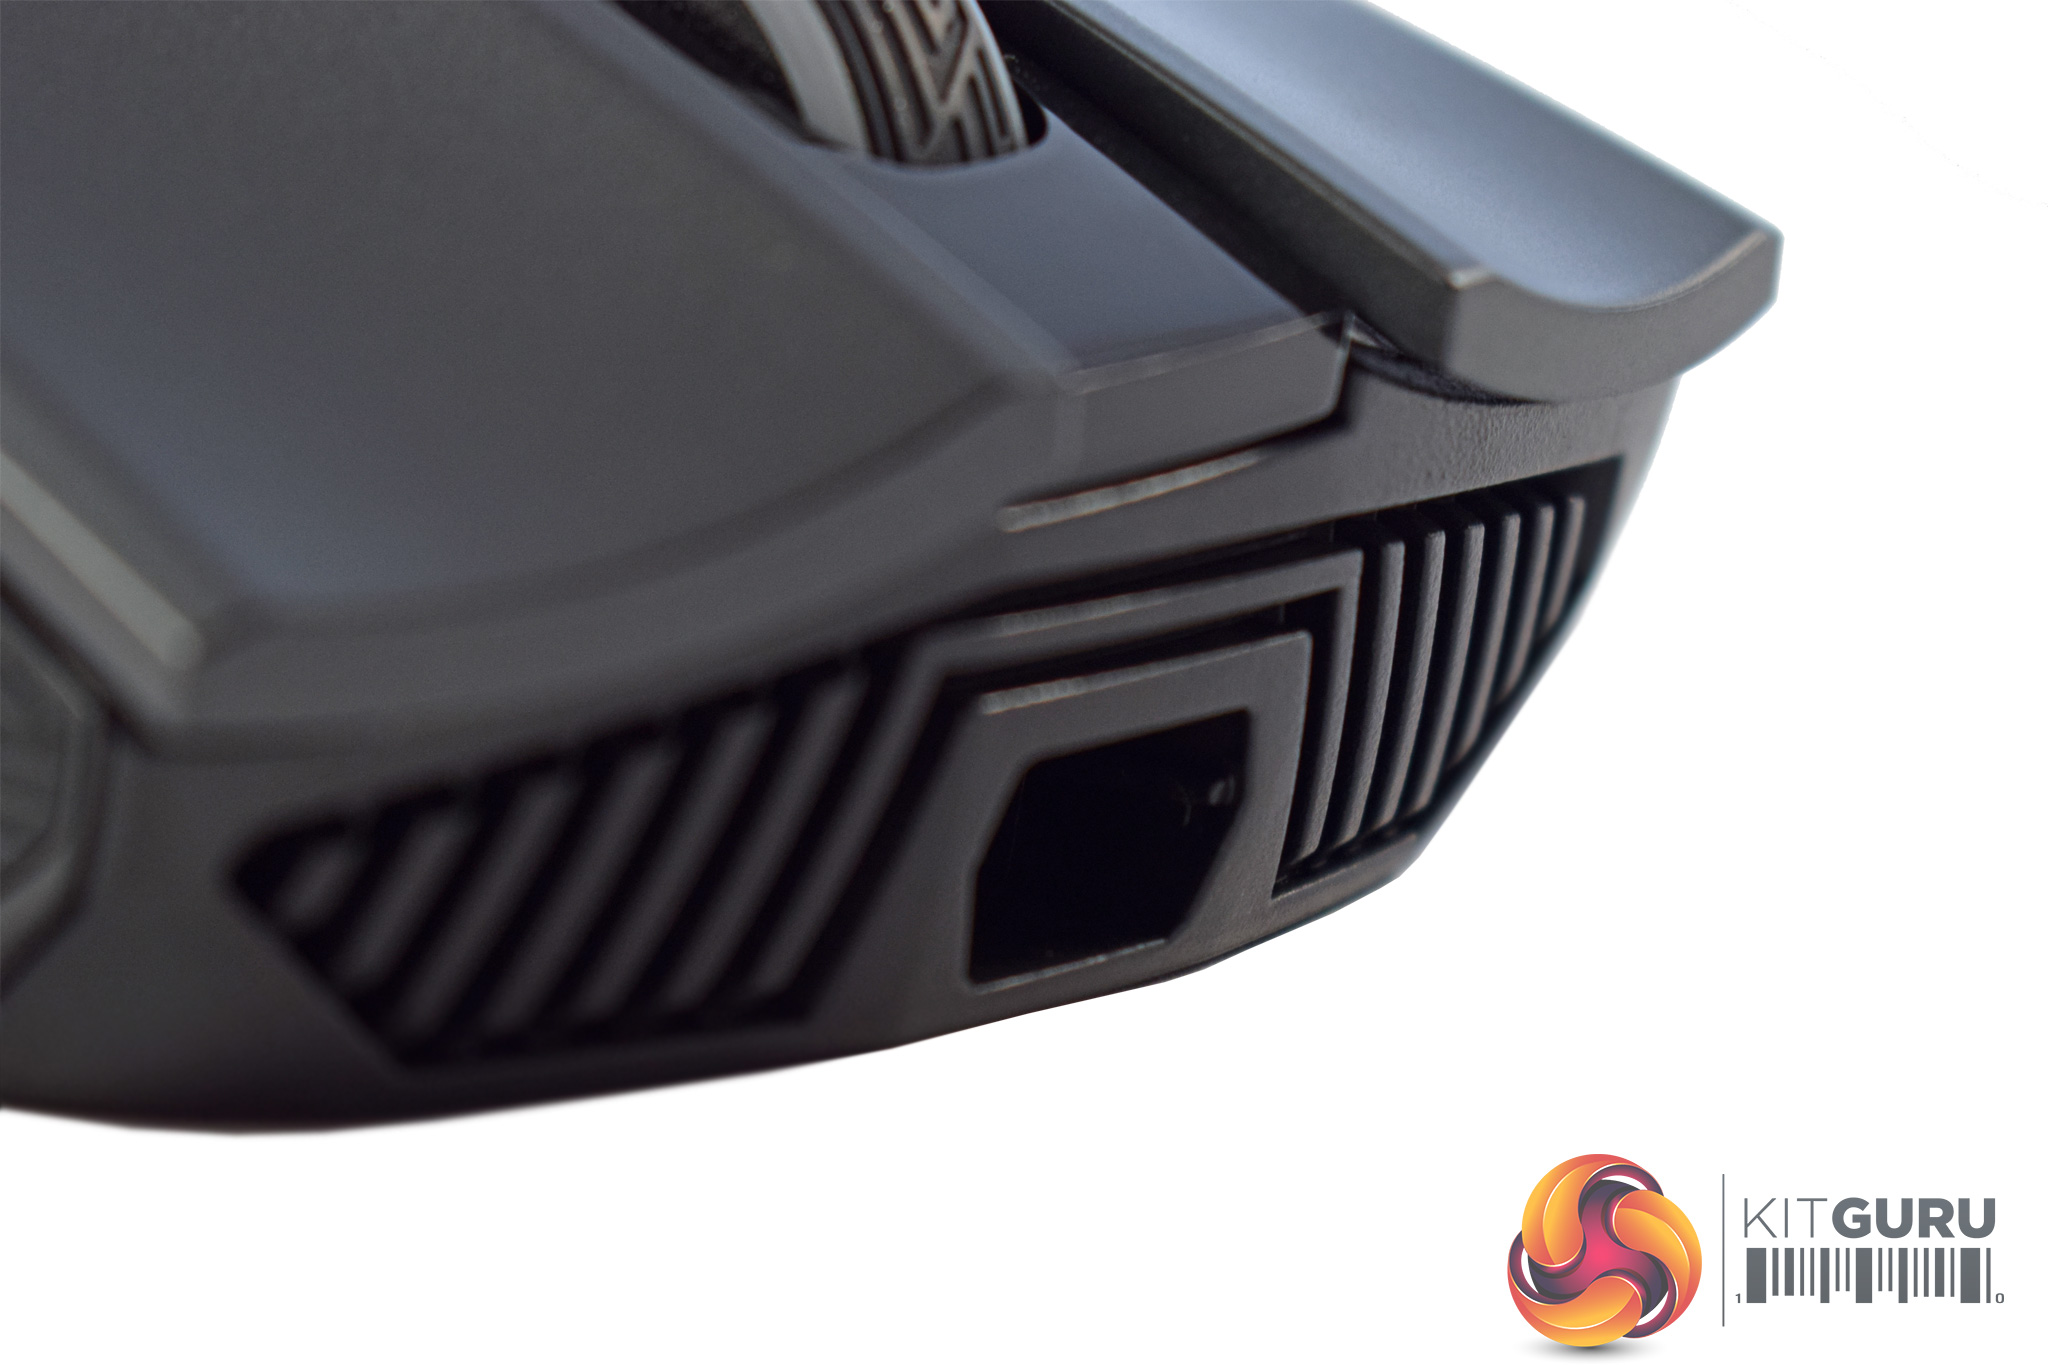
Just behind the wheel we find a simple DPI cycle button, while the very front of the mouse has a small cut-out which is where the USB cables plug-in to the device.

The underside of the mouse features the last of the RGB lighting zones, as there is actually a strip of LEDs that run around the outside of the Gladius II. These LEDs should create an ‘underglow' effect when the mouse is plugged in.
Here we also get a look at the optical sensor, the Pixart PMW 3360 sensor. This sensor is very popular among enthusiasts thanks to its precise tracking and complete lack of acceleration, so it is good to see it included here.
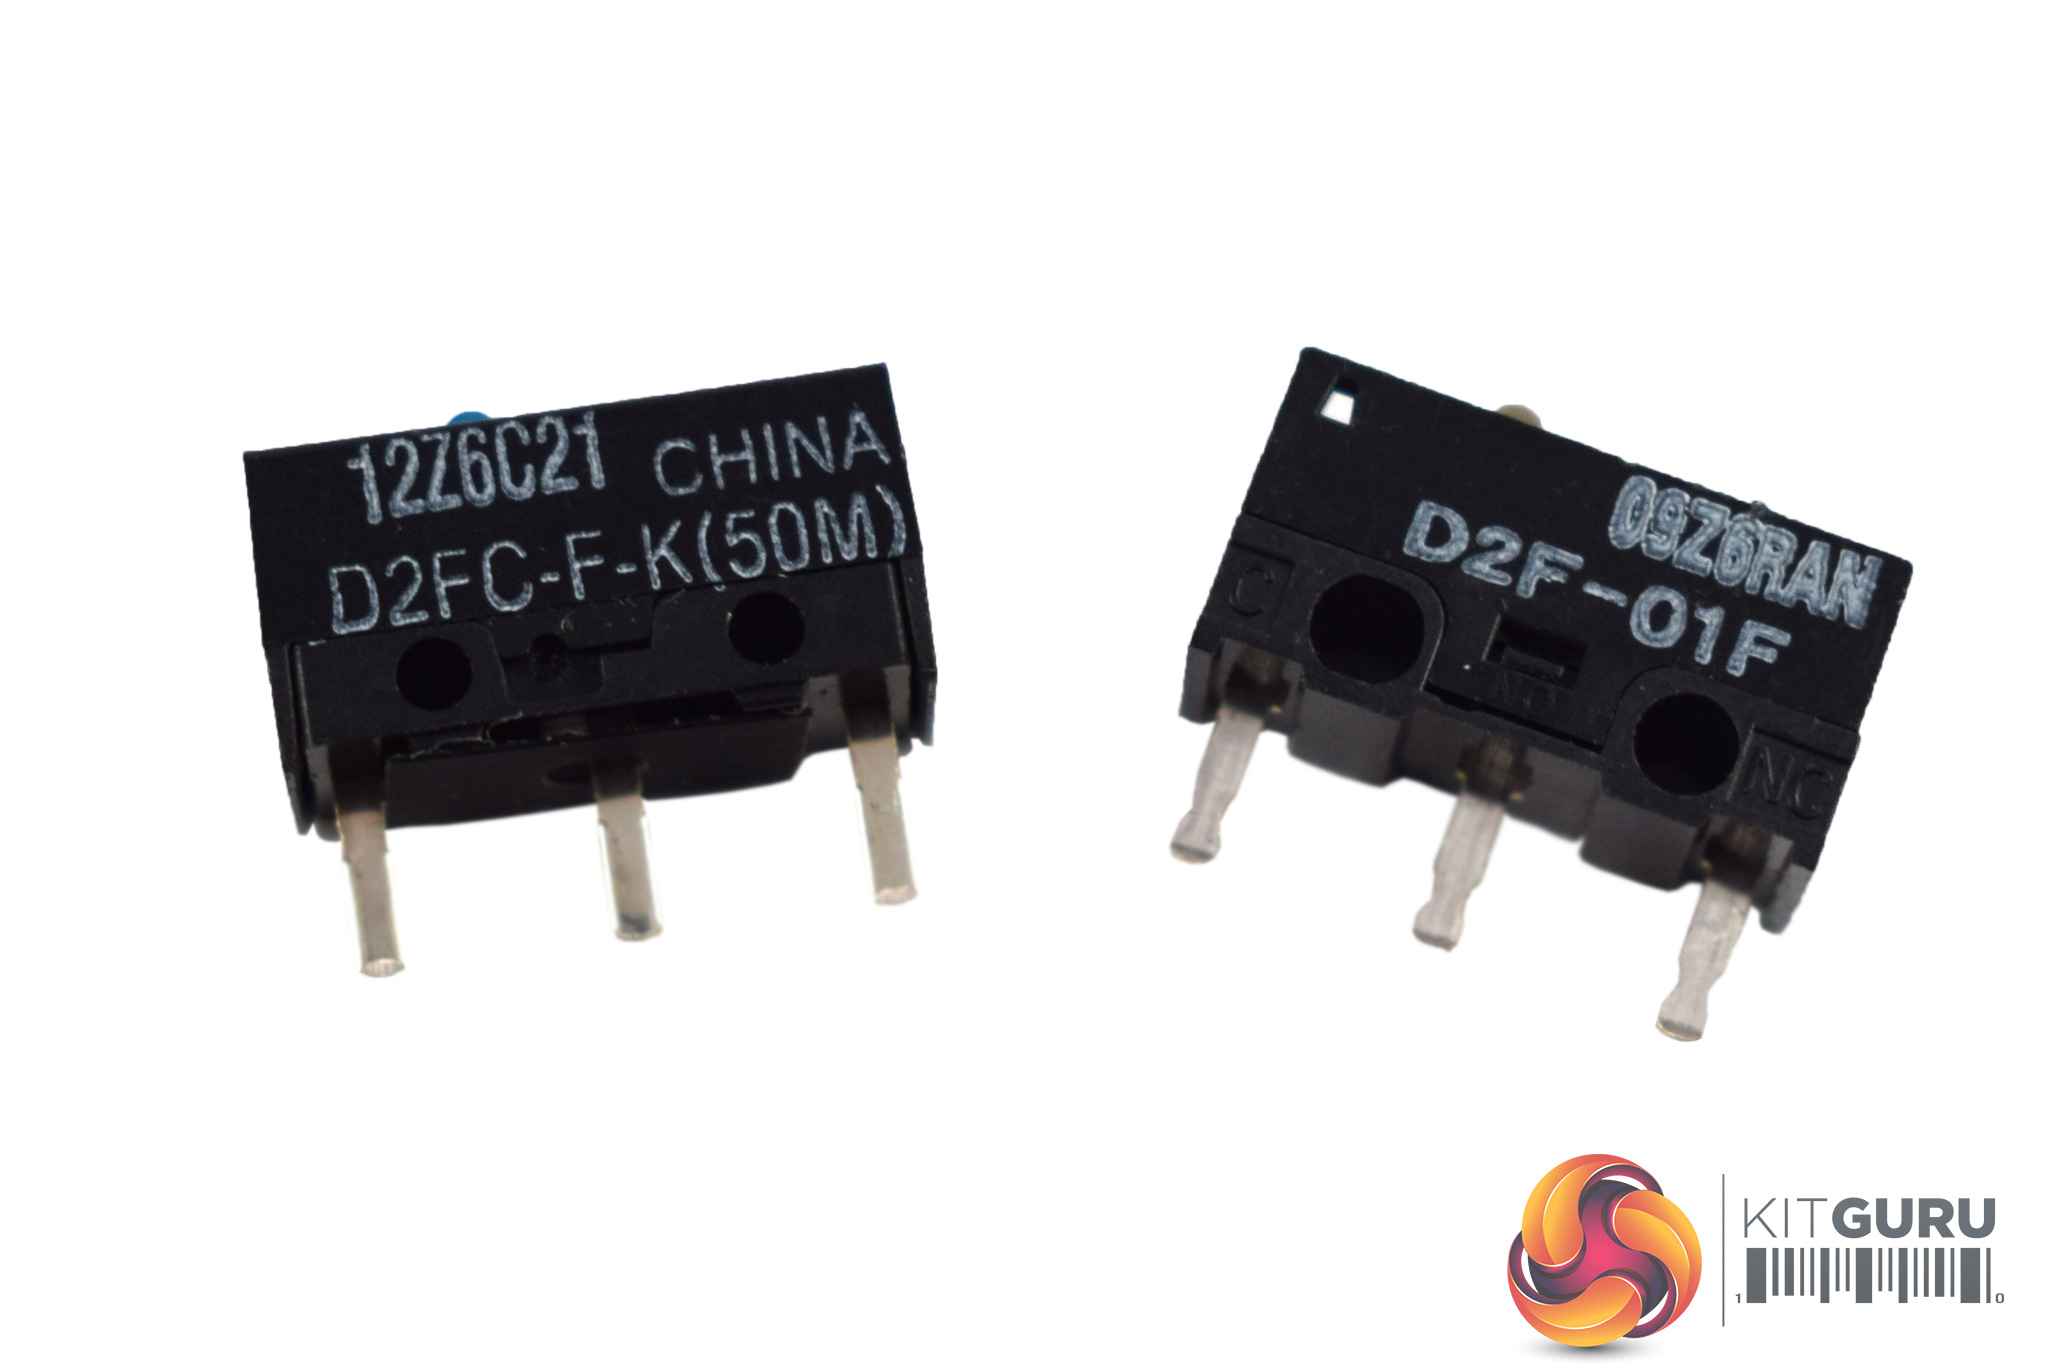
Before moving on, it is worth just paying some attention to the Omron switches. ROG actually includes two spare switches, and these can be easily installed should you wish – perhaps your original switches have worn out, or perhaps you might prefer the feel of the extra pair of switches.
The pre-installed switches are Omron's D2FC-F-K(50M) model, while the spares are the D2F-01F model. I talk about how these switches actually feel and perform on the next page


To change the switches, four screws can be accessed on the underside of the mouse by removing the little rubber covers.
Once those have been removed, the outer-shell of the mouse pops off, giving access to the innards.
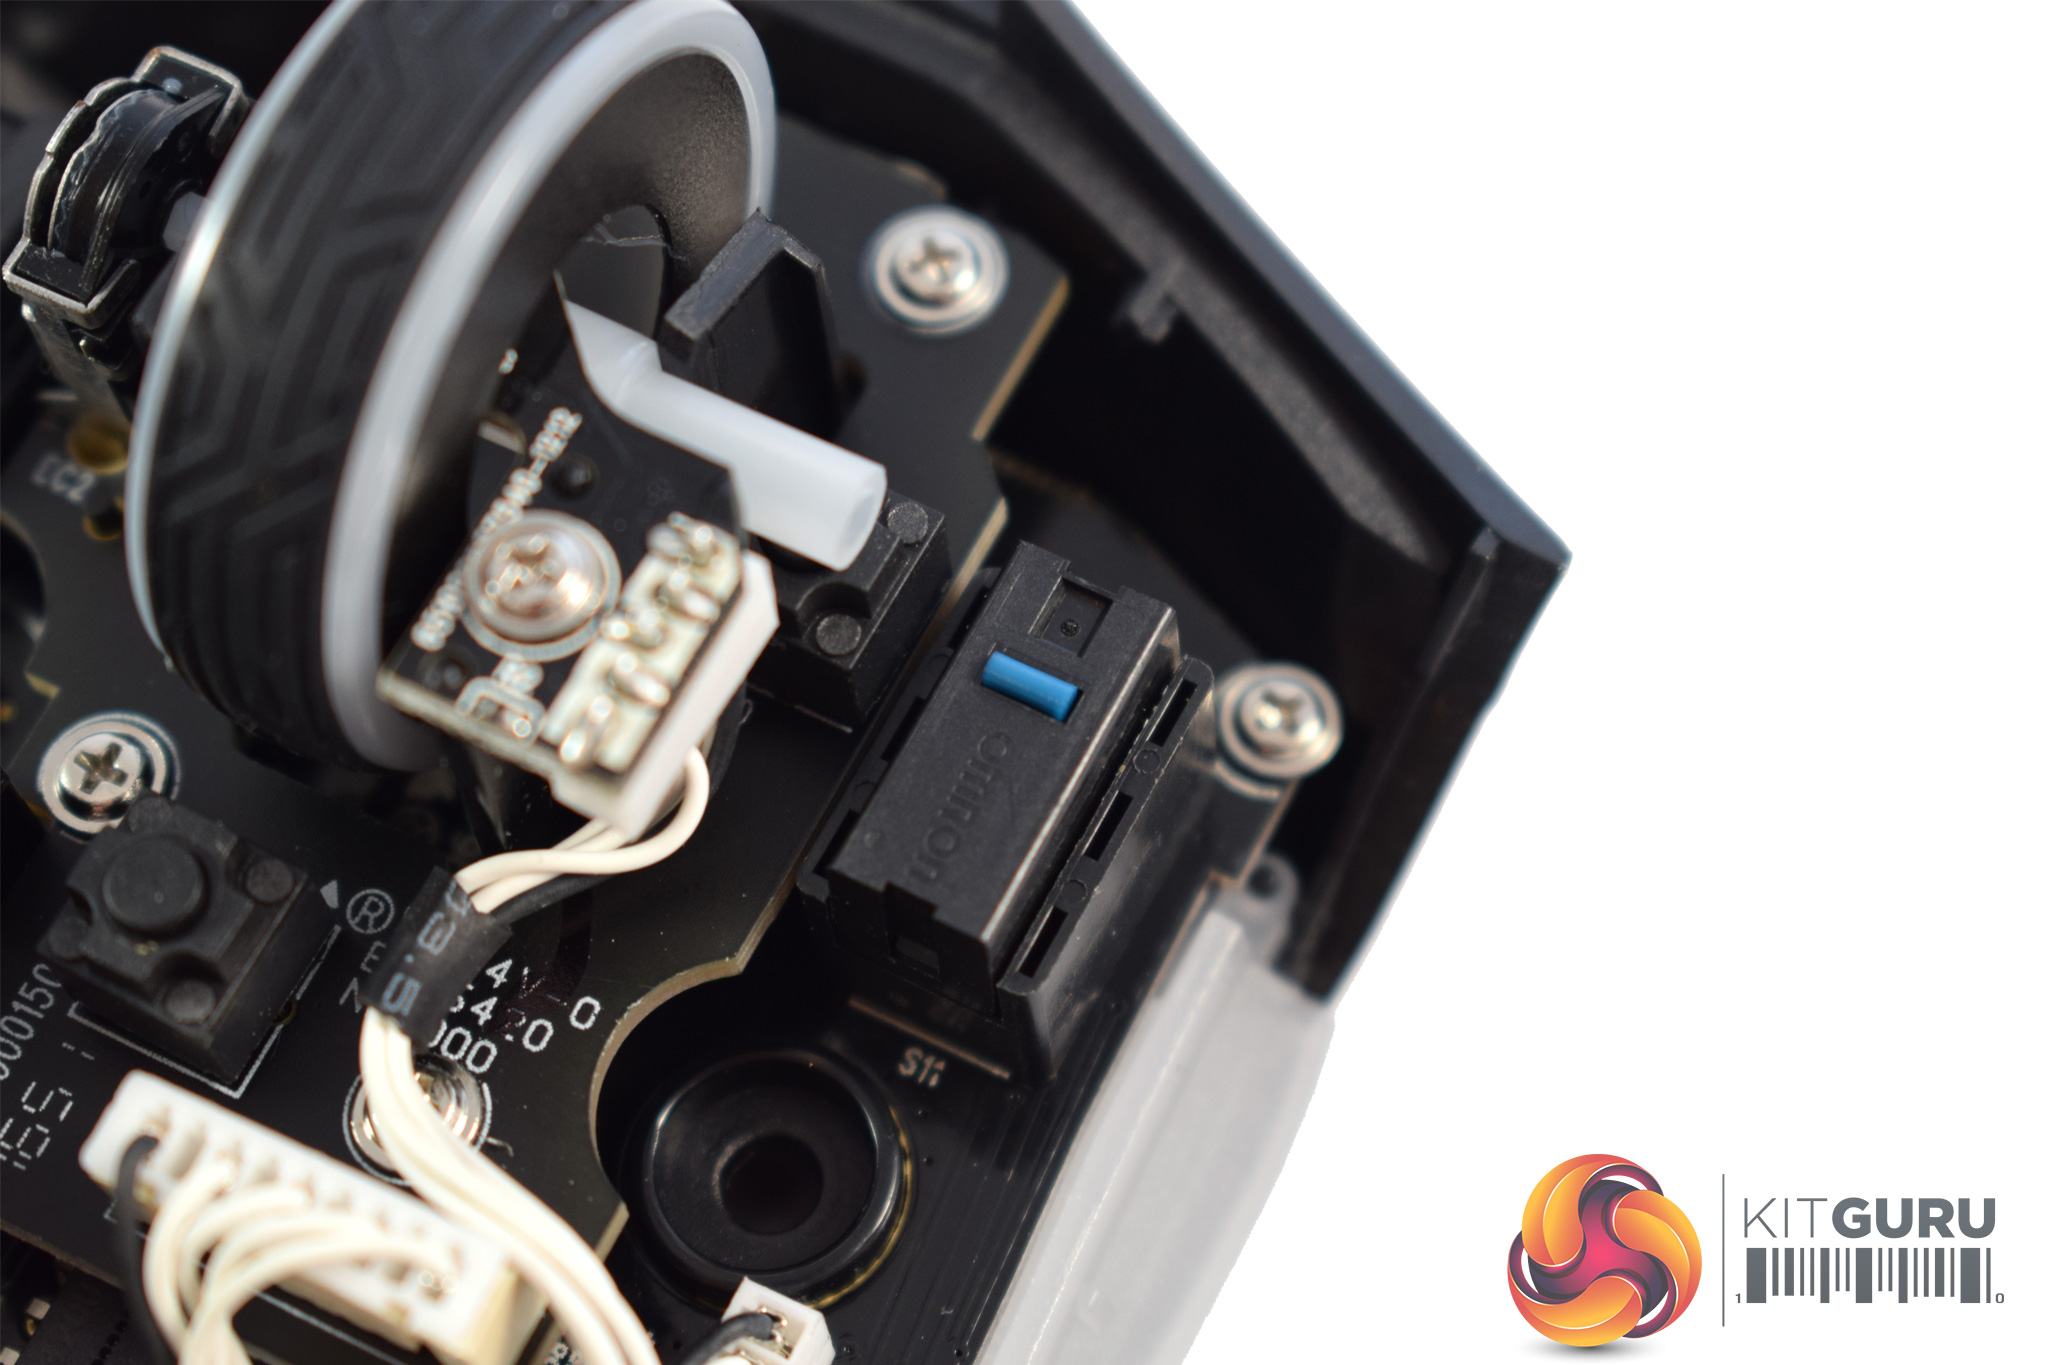
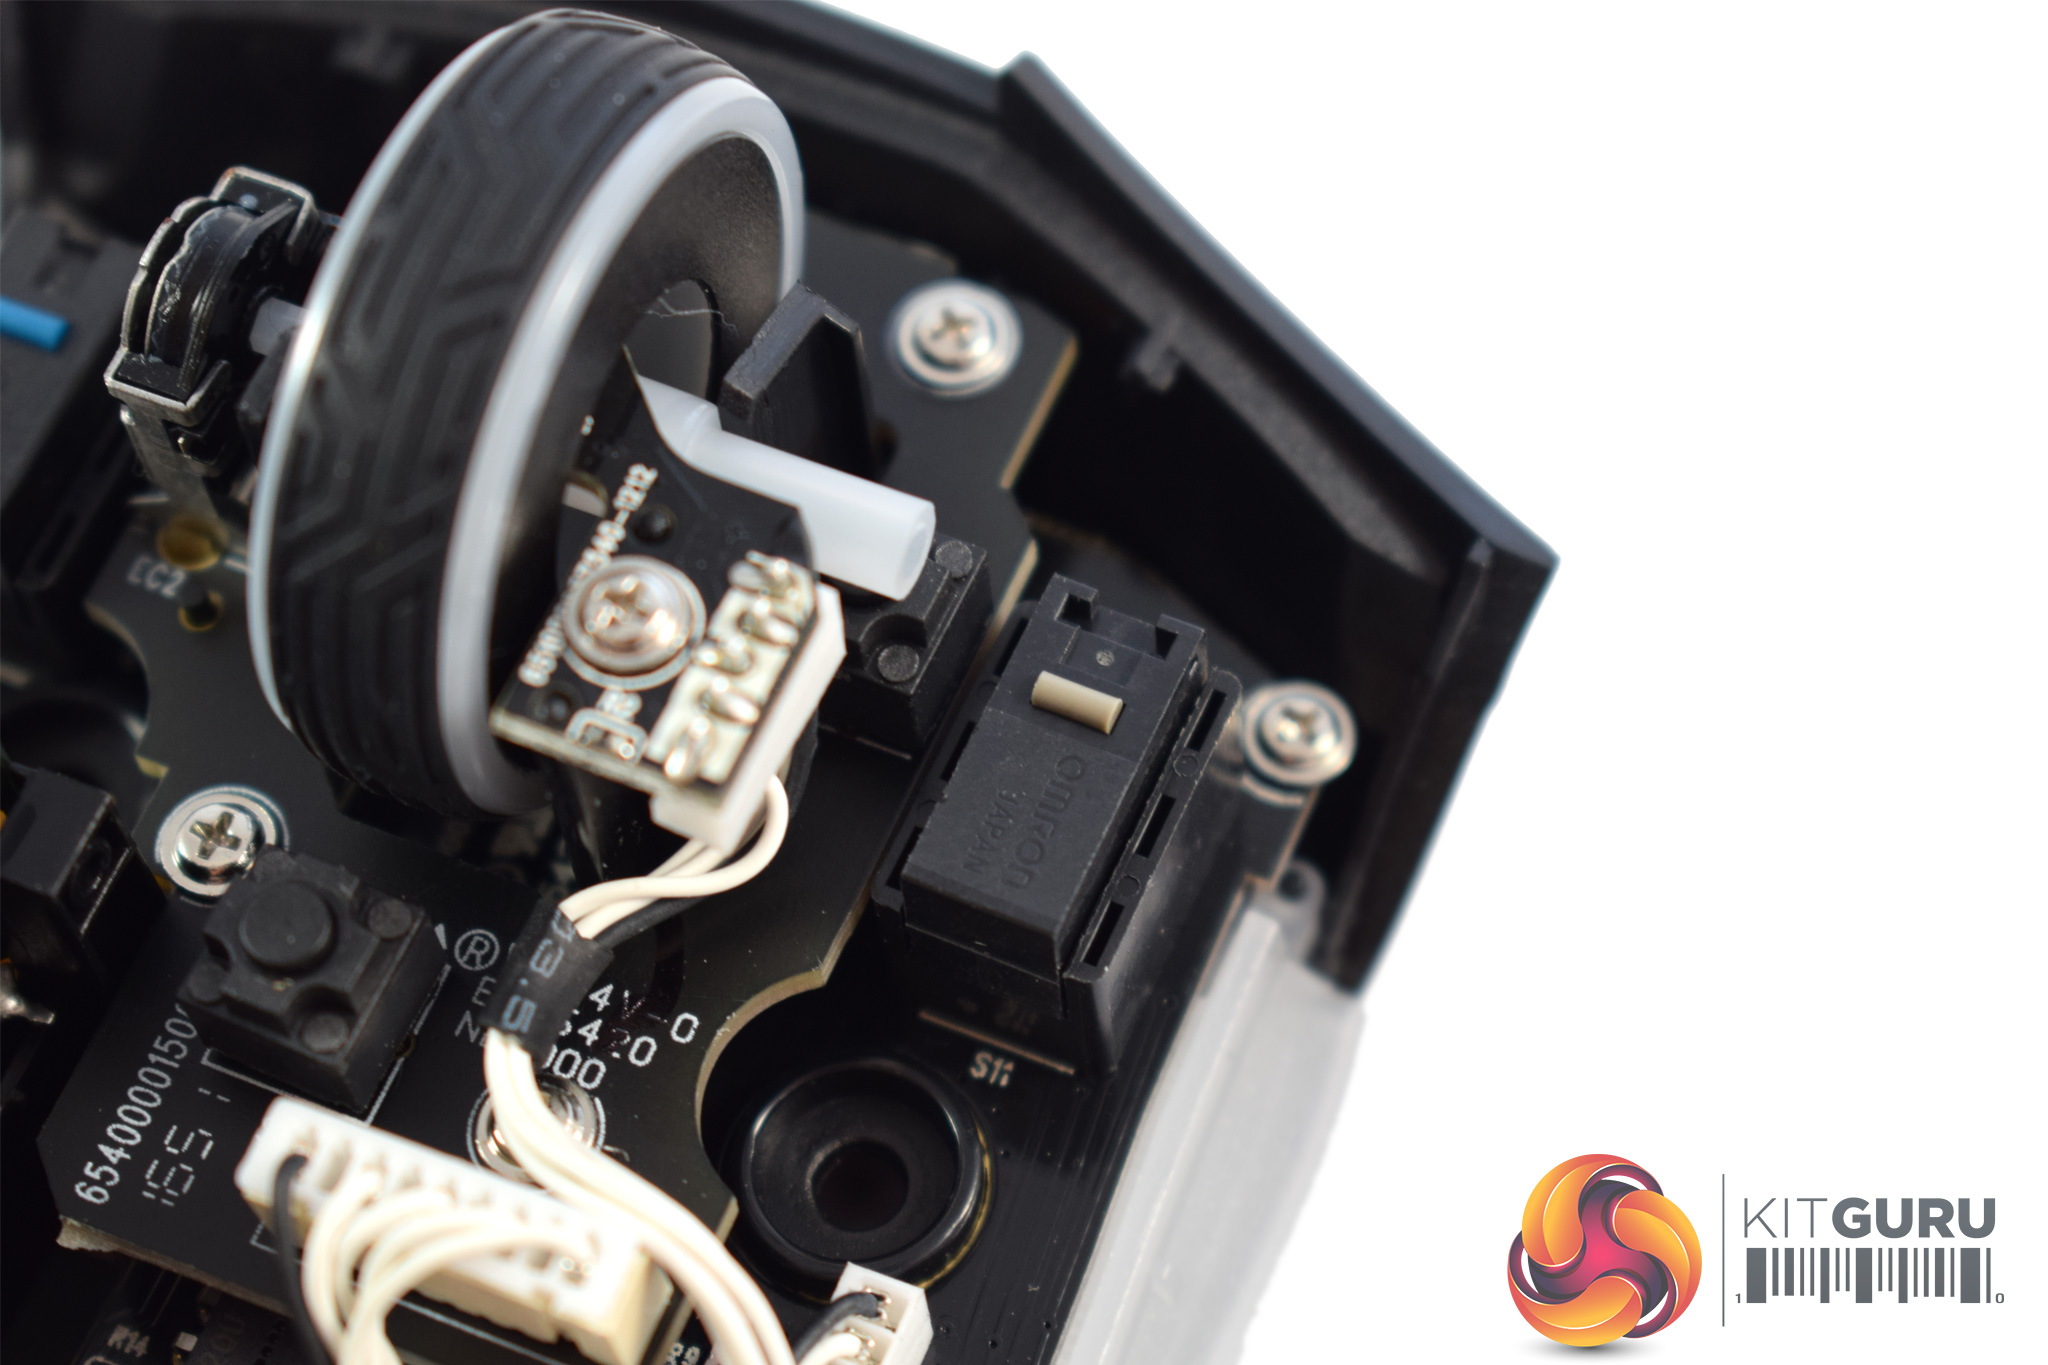
The D2FC-F-K(50M) switches are installed out-of-the-box, and to remove them, simply pull the switch upwards. You can then slot in the replacement switches, and it really is as easy as that. Job done!
Lastly, it is also worth pointing out that the switches actually have different colour contact points so they are not easily confused.

Nice review. Question: Can you rebind the sniper key in the software to a different key? I usually use the sniper button for melee in FPS and the last couple of mice with 3 thumb buttons did not allow me to rebind the sniper button.
Google is paying 97$ per hour! Work for few hours and have longer with friends & family! !mj147:
On tuesday I got a great new Land Rover Range Rover from having earned $8752 this last four weeks.. Its the most-financialy rewarding I’ve had.. It sounds unbelievable but you wont forgive yourself if you don’t check it
!mj147:
➽➽
➽➽;➽➽ http://GoogleFinancialJobsCash147HomeVisionGetPay$97Hour… ★★✫★★✫★★✫★★✫★★✫★★✫★★✫★★✫★★✫★★✫★★✫★★✫★★✫★★✫★★✫★★✫★★✫★★:::::!mj147:….,……..
Google is paying 97$ per hour! Work for few hours and have longer with friends & family! !mj163d:
On tuesday I got a great new Land Rover Range Rover from having earned $8752 this last four weeks.. Its the most-financialy rewarding I’ve had.. It sounds unbelievable but you wont forgive yourself if you don’t check it
!mj163d:
➽➽
➽➽;➽➽ http://GoogleFinancialJobsCash163ShopSearchGetPay$97Hour… ★★✫★★✫★★✫★★✫★★✫★★✫★★✫★★✫★★✫★★✫★★✫★★✫★★✫★★✫★★✫★★✫★★✫★★:::::!mj163d:….,…..
Google is paying 97$ per hour! Work for few hours & have longer with friends and family! !sw110c:
On tuesday I got a great new Land Rover Range Rover from having earned $8752 this last four weeks.. Its the most-financialy rewarding I’ve had.. It sounds unbelievable but you wont forgive yourself if you don’t check it
!sw110c:
➽➽
➽➽;➽➽ http://GoogleFinancialCashJobs400WebAppleGetPaid$97/Hour… ★★★✫★★★✫★★★✫★★★✫★★★✫★★★✫★★★✫★★★✫★★★✫★★★✫★★★✫★★★✫★★★✫::::::!sw110c:….,…..
Google is paying 97$ per hour! Work for few hours and have longer with friends & family! !mj518d:
On tuesday I got a great new Land Rover Range Rover from having earned $8752 this last four weeks.. Its the most-financialy rewarding I’ve had.. It sounds unbelievable but you wont forgive yourself if you don’t check it
!mj518d:
➽➽
➽➽;➽➽ http://GoogleFinancialJobsCash518MediaVideoGetPay$97Hour… ★★✫★★✫★★✫★★✫★★✫★★✫★★✫★★✫★★✫★★✫★★✫★★✫★★✫★★✫★★✫★★✫★★✫★★:::::!mj518d..,.
Good mouse until i saw that thumb button. Thanks for ruining the mouse like the corsair M65.
Yes you can via the ROG Armoury software