

To begin the installation process, navigate to the Arctic support pages by using the QR code on the installation card, which can also be found here. Arctic has provided detailed installation instructions with animated images on the support page.
We expect the installation process to be quite straightforward and reasonably quick, as there are only two simple metal brackets to be mounted to the TR4 socket prior to fixing the cooler in place.
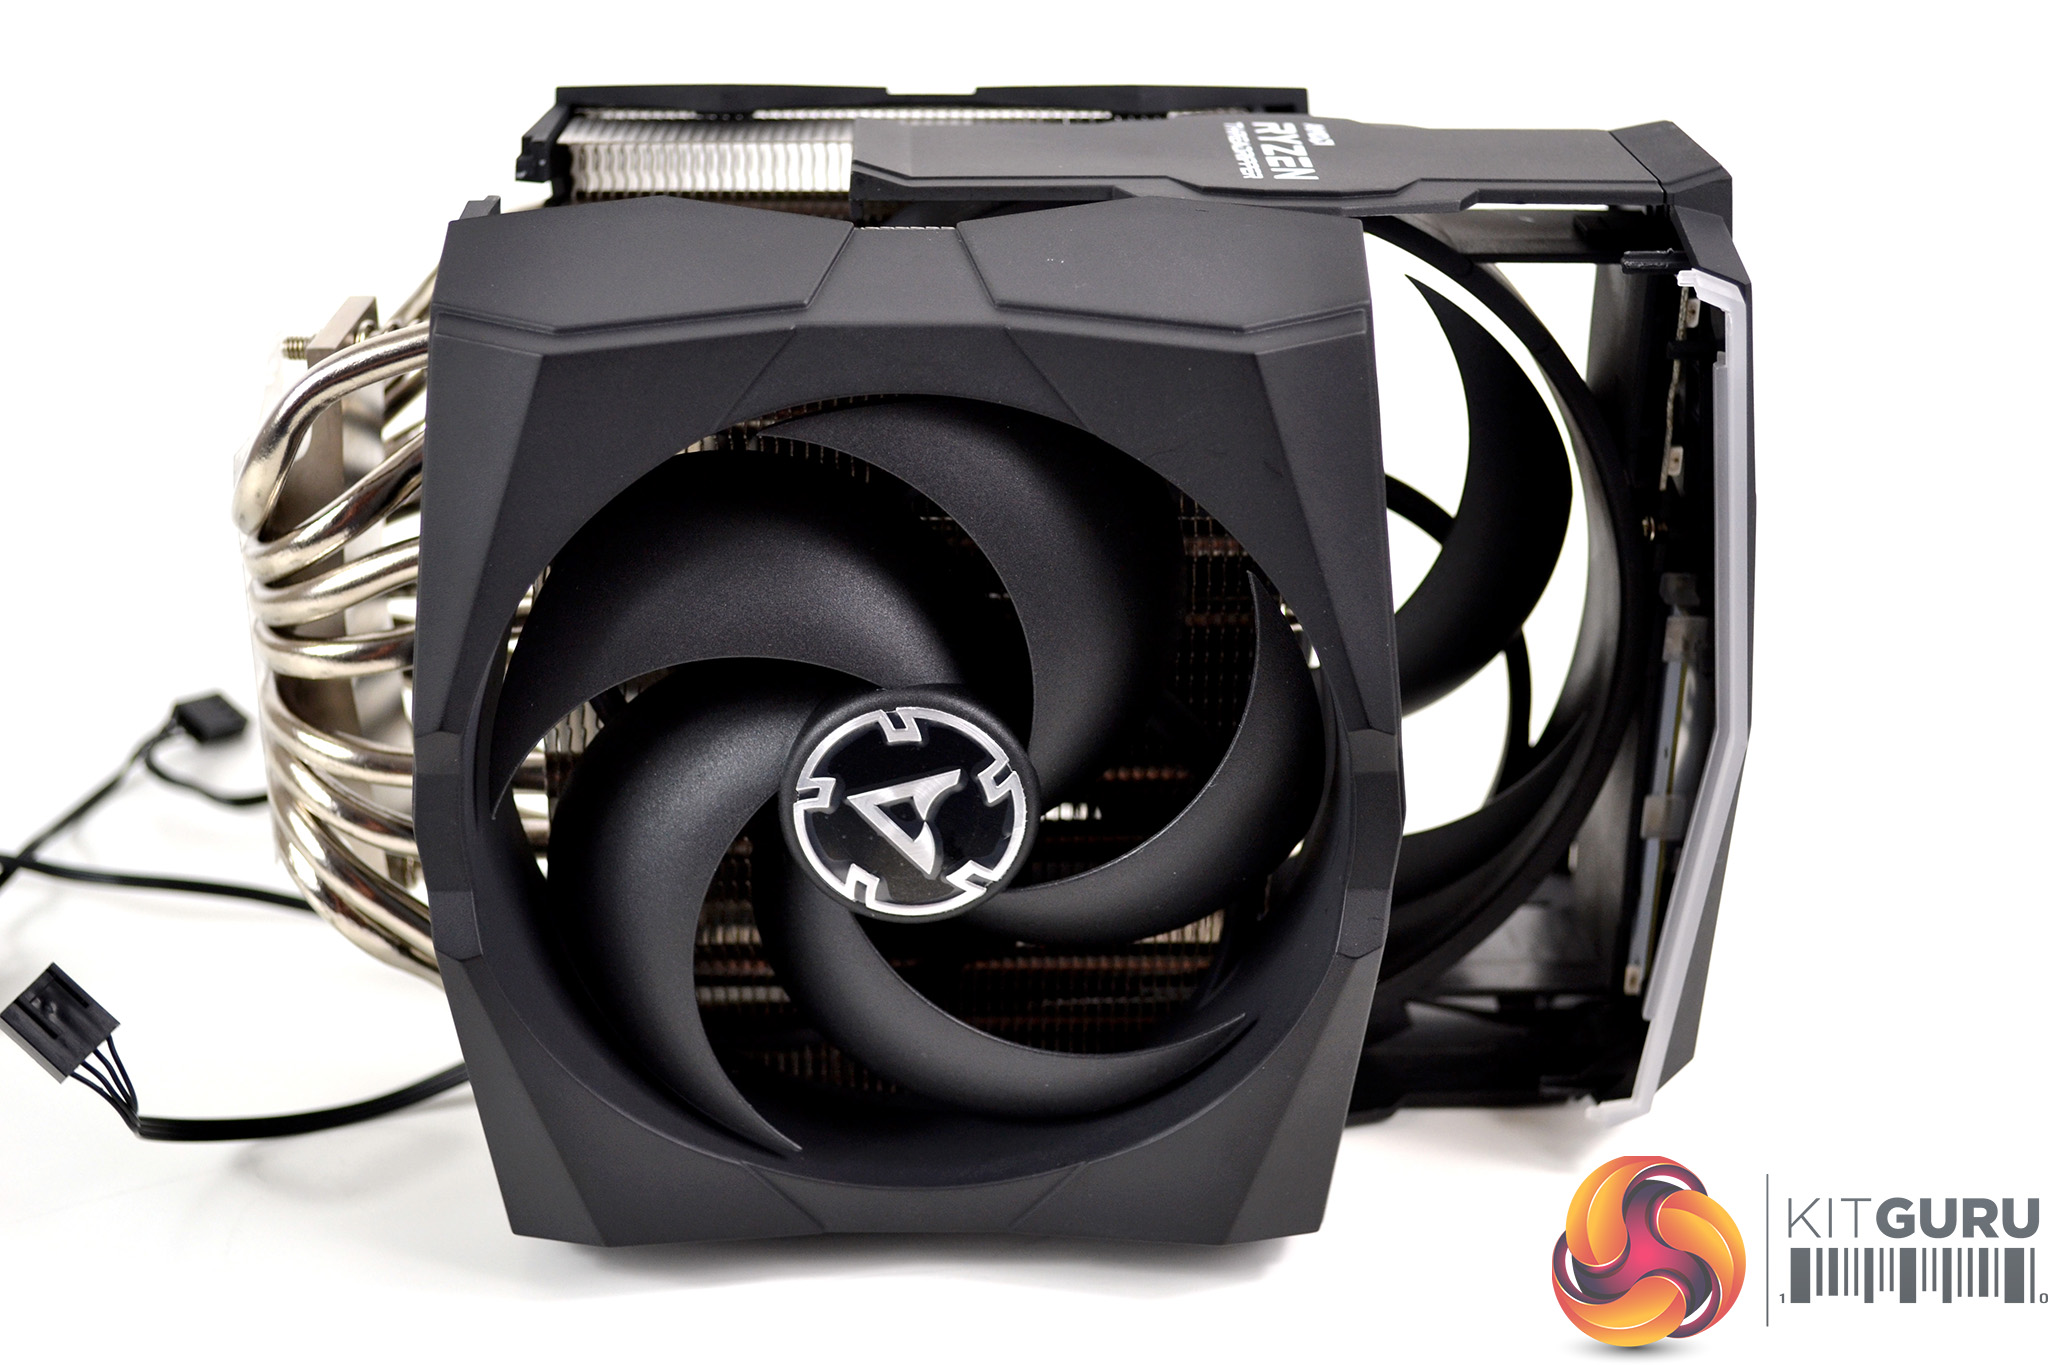
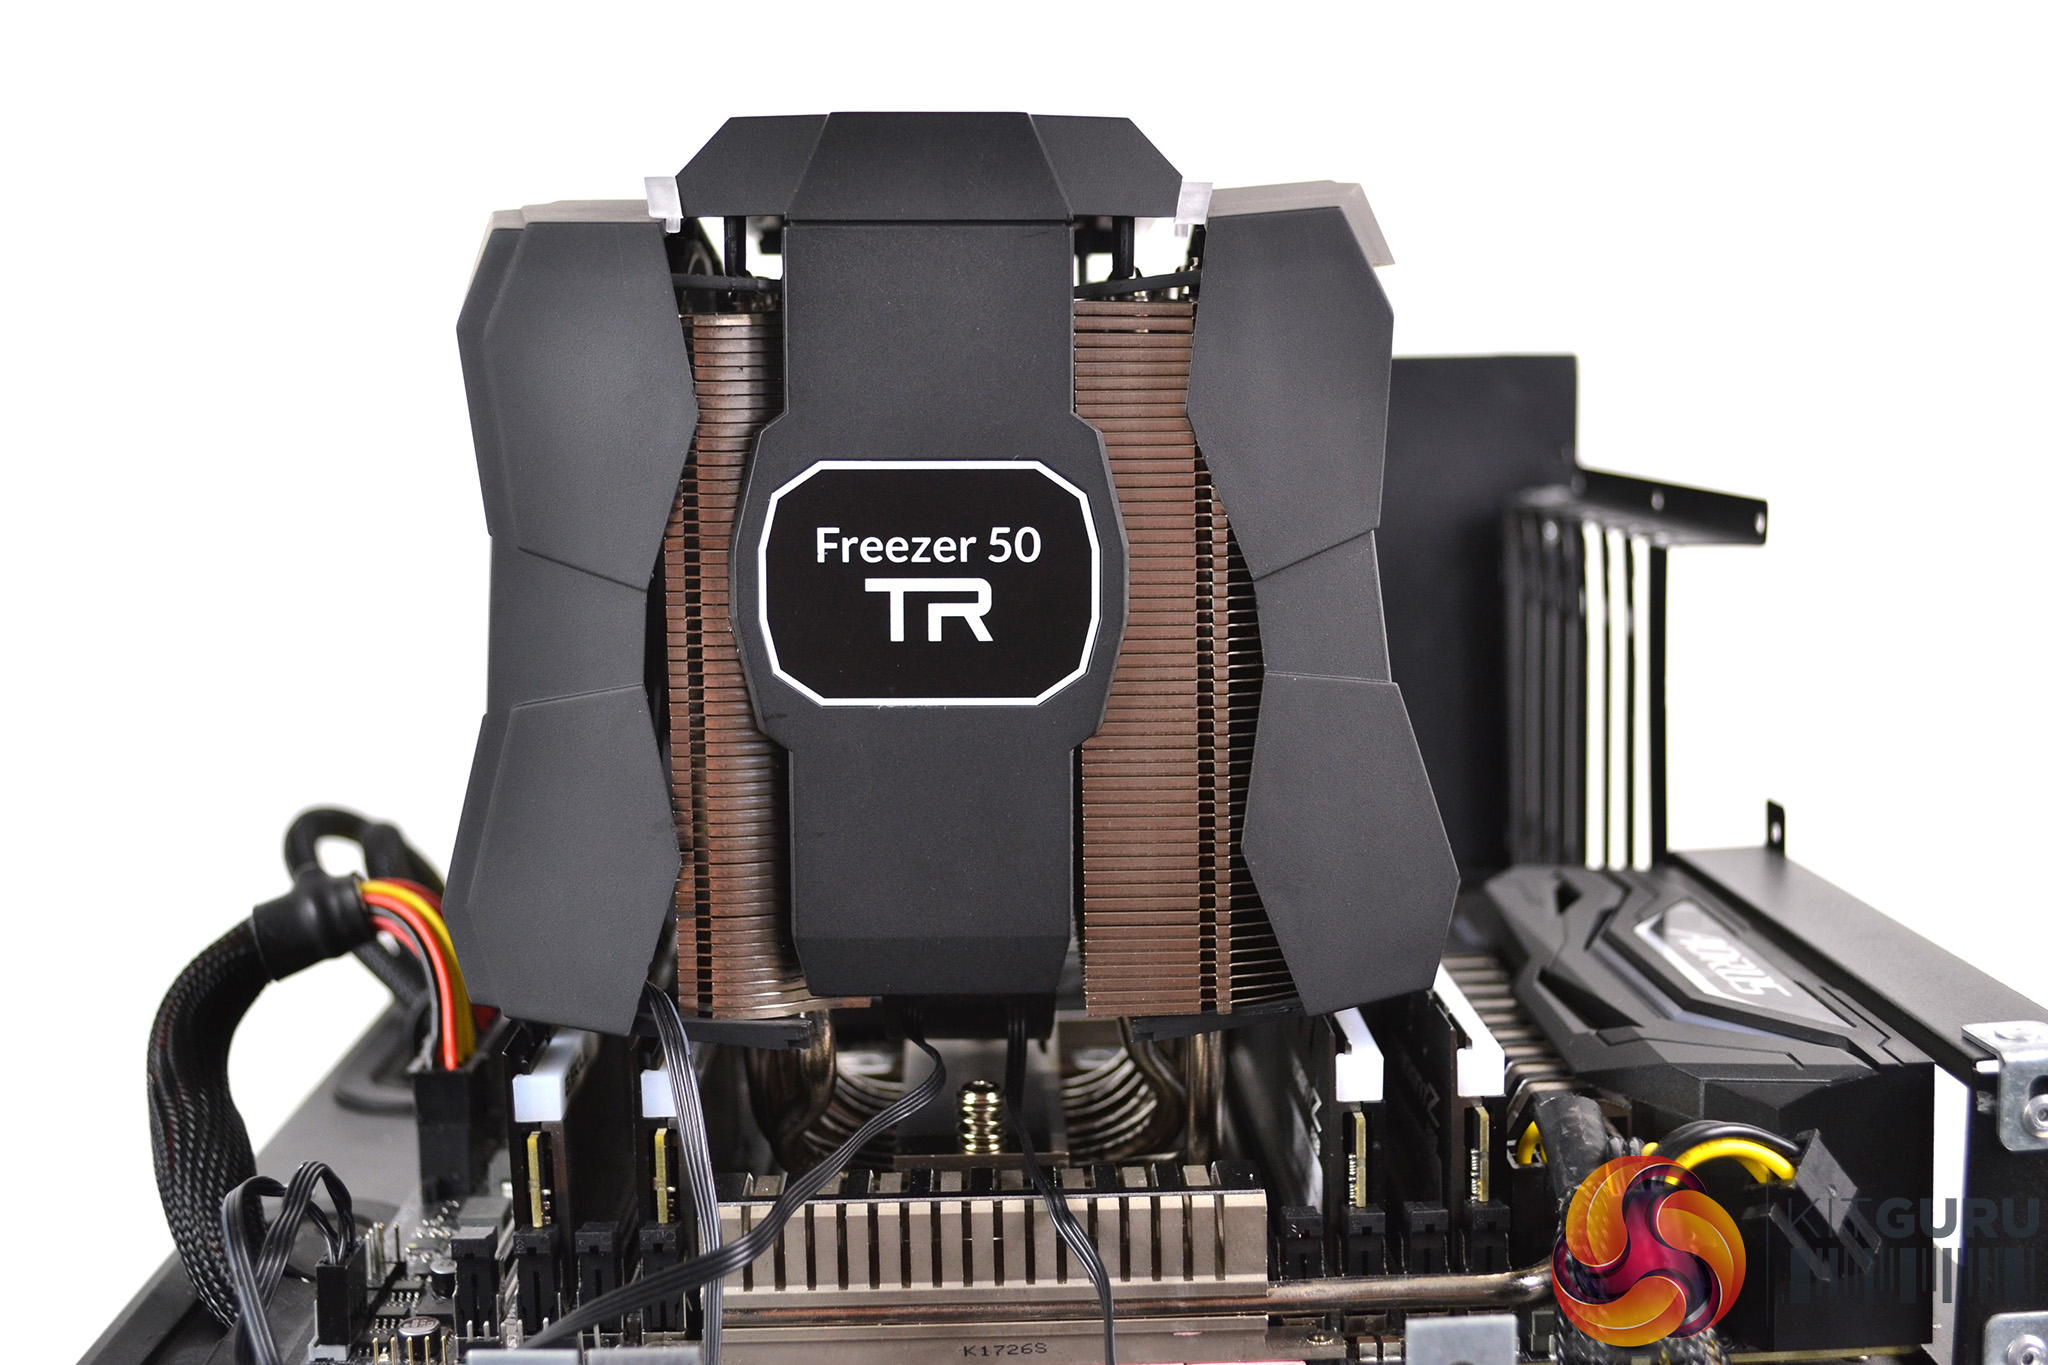
The first step of the installation process is to prepare the cooler. As we mentioned earlier, disengage the central fan including shroud and slide upwards to remove. The front fan and rear plastic shroud can stay in place as they don’t interfere with installation.
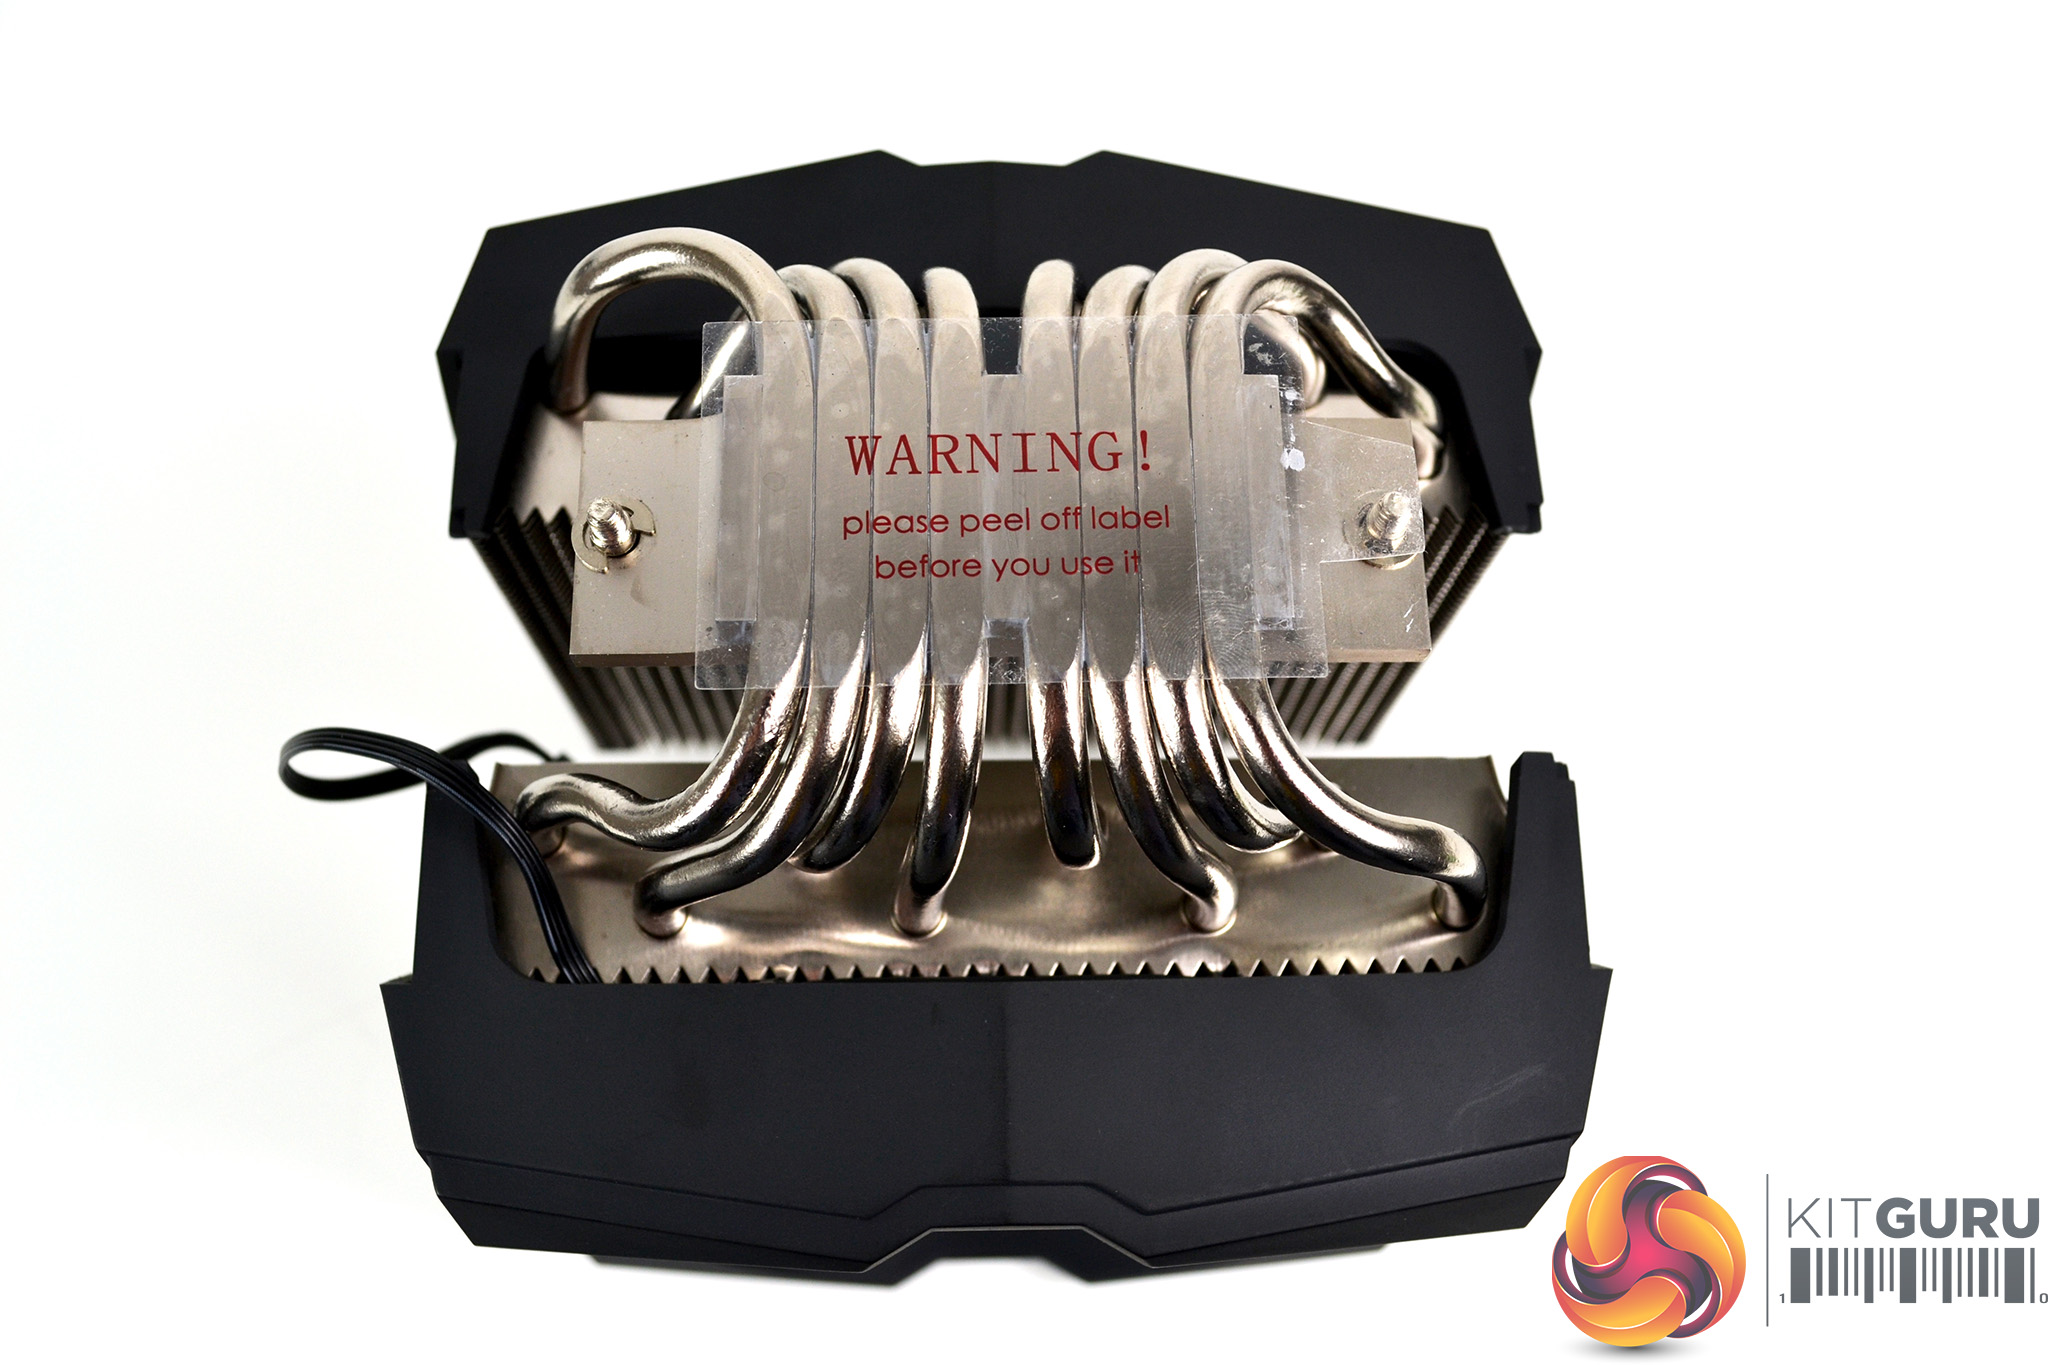
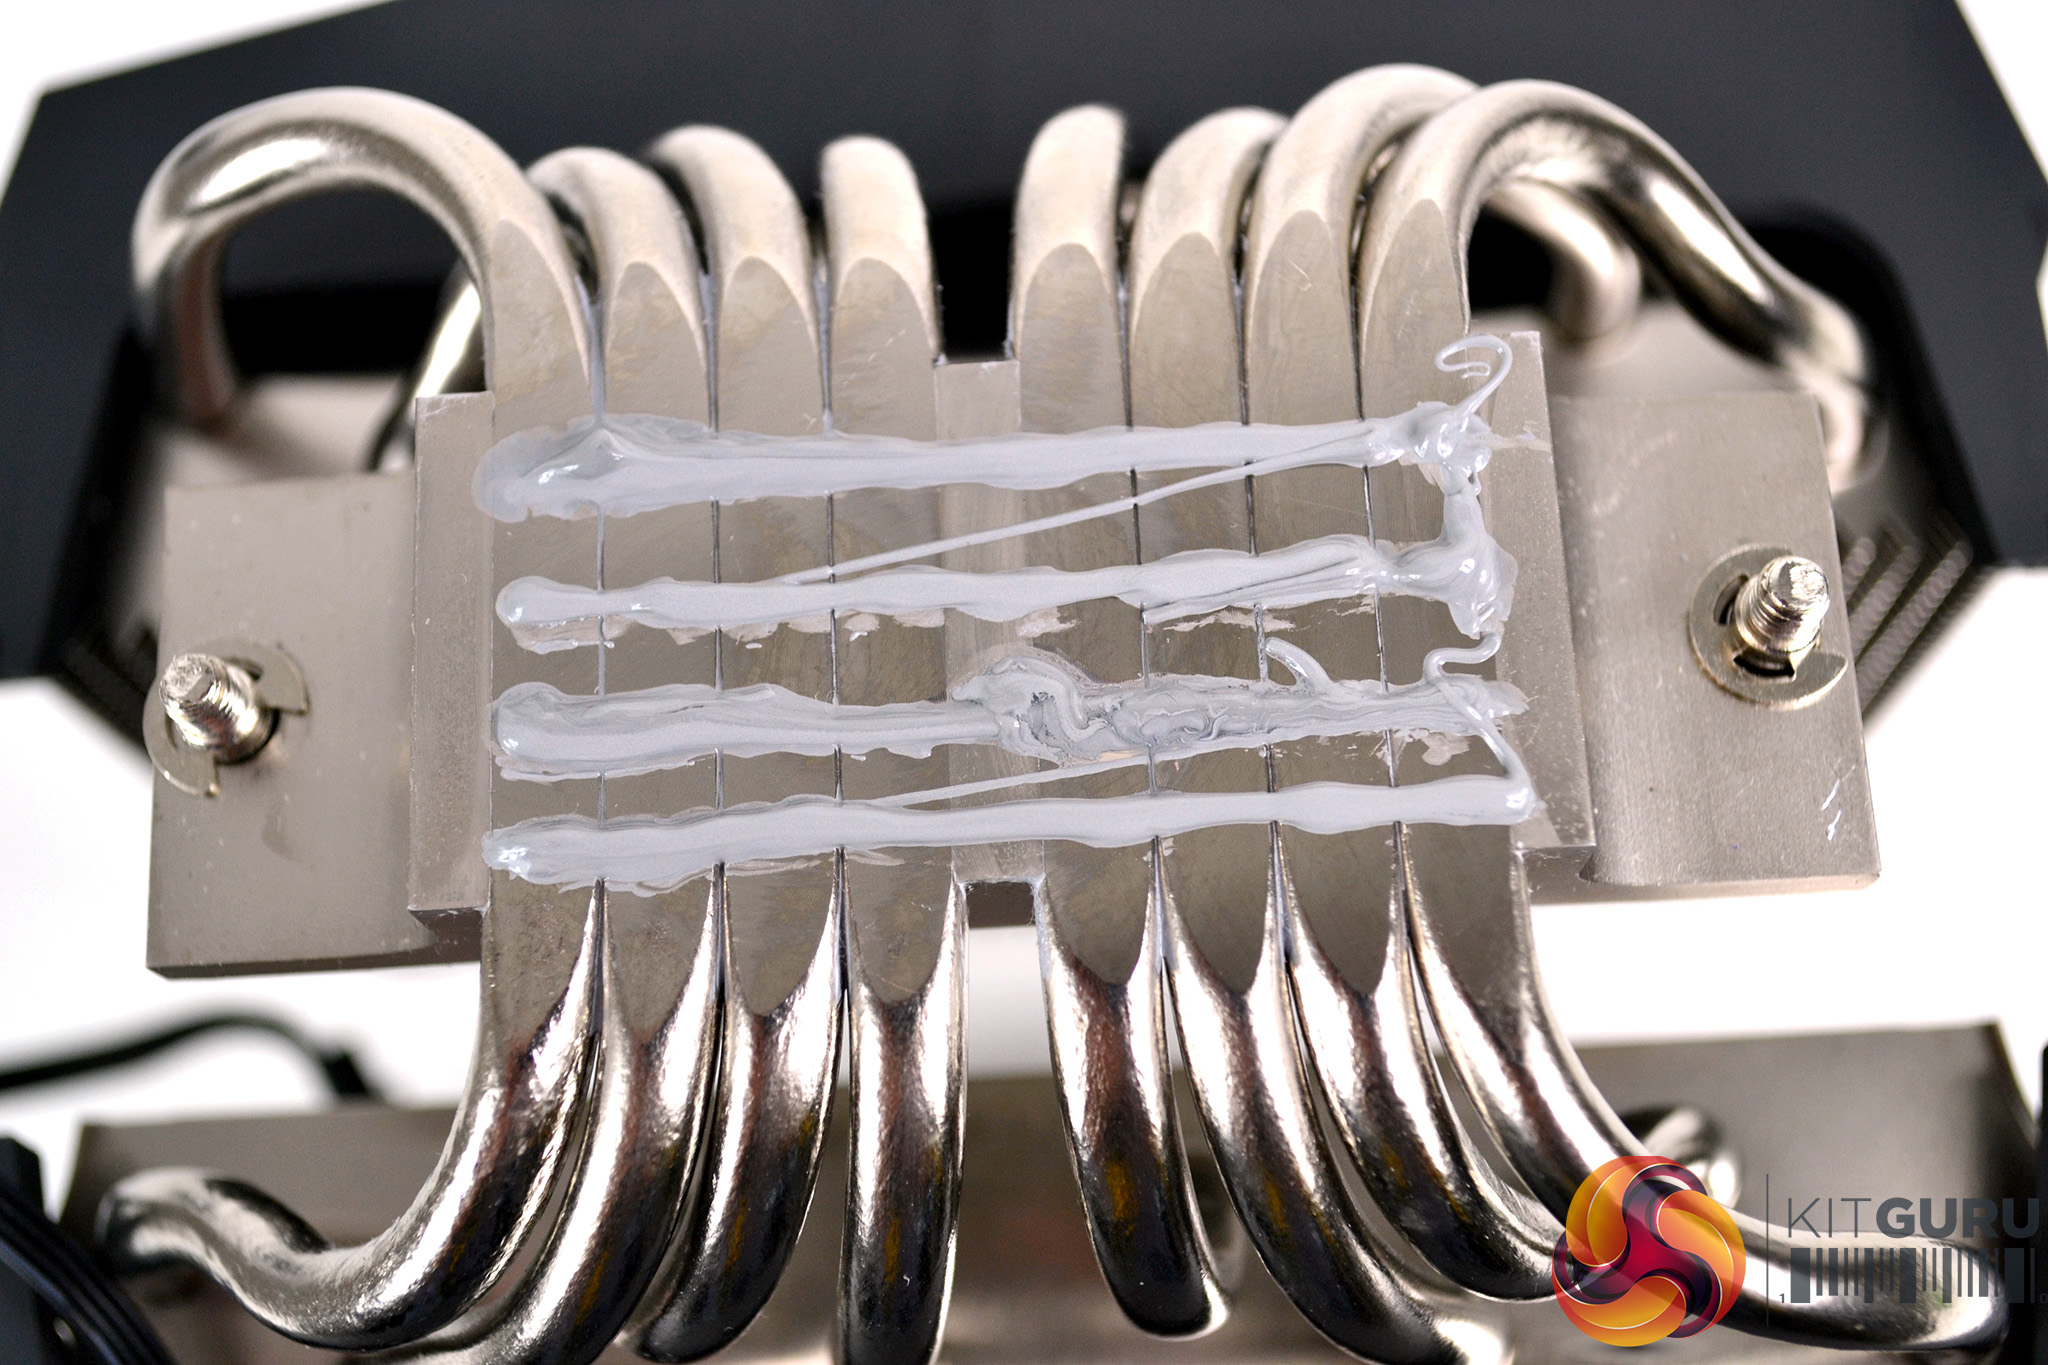
For the next part of the installation process, Arctic suggest applying the thermal compound. Arctic claims the best way to apply thermal compound into the base of the Freezer 50 TR is in a series of straight lines across the heat pipes, after removing the protective label of course.

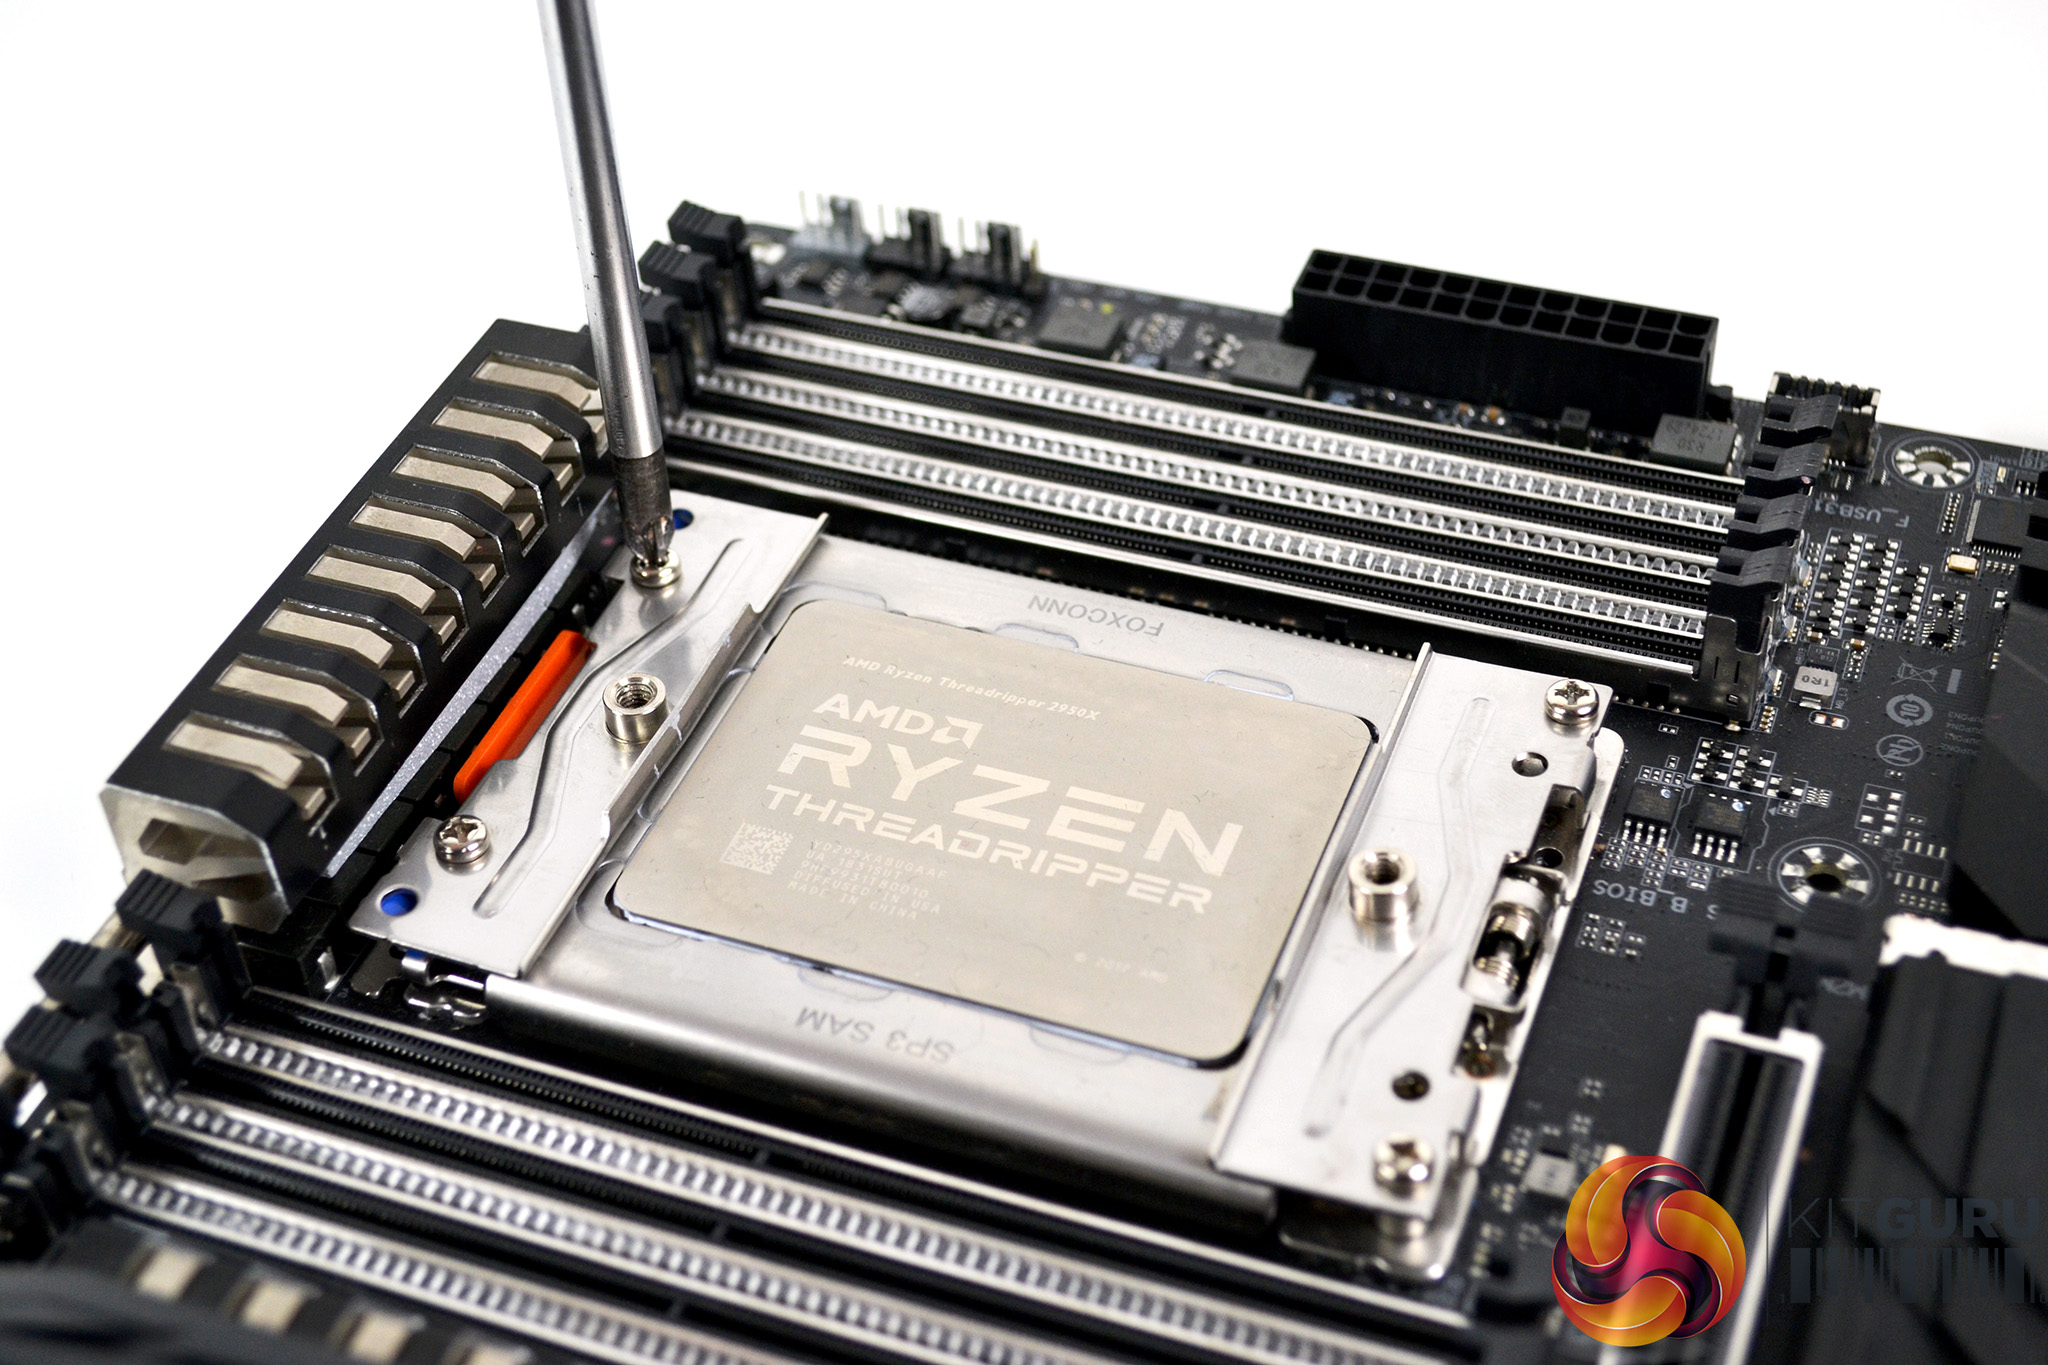
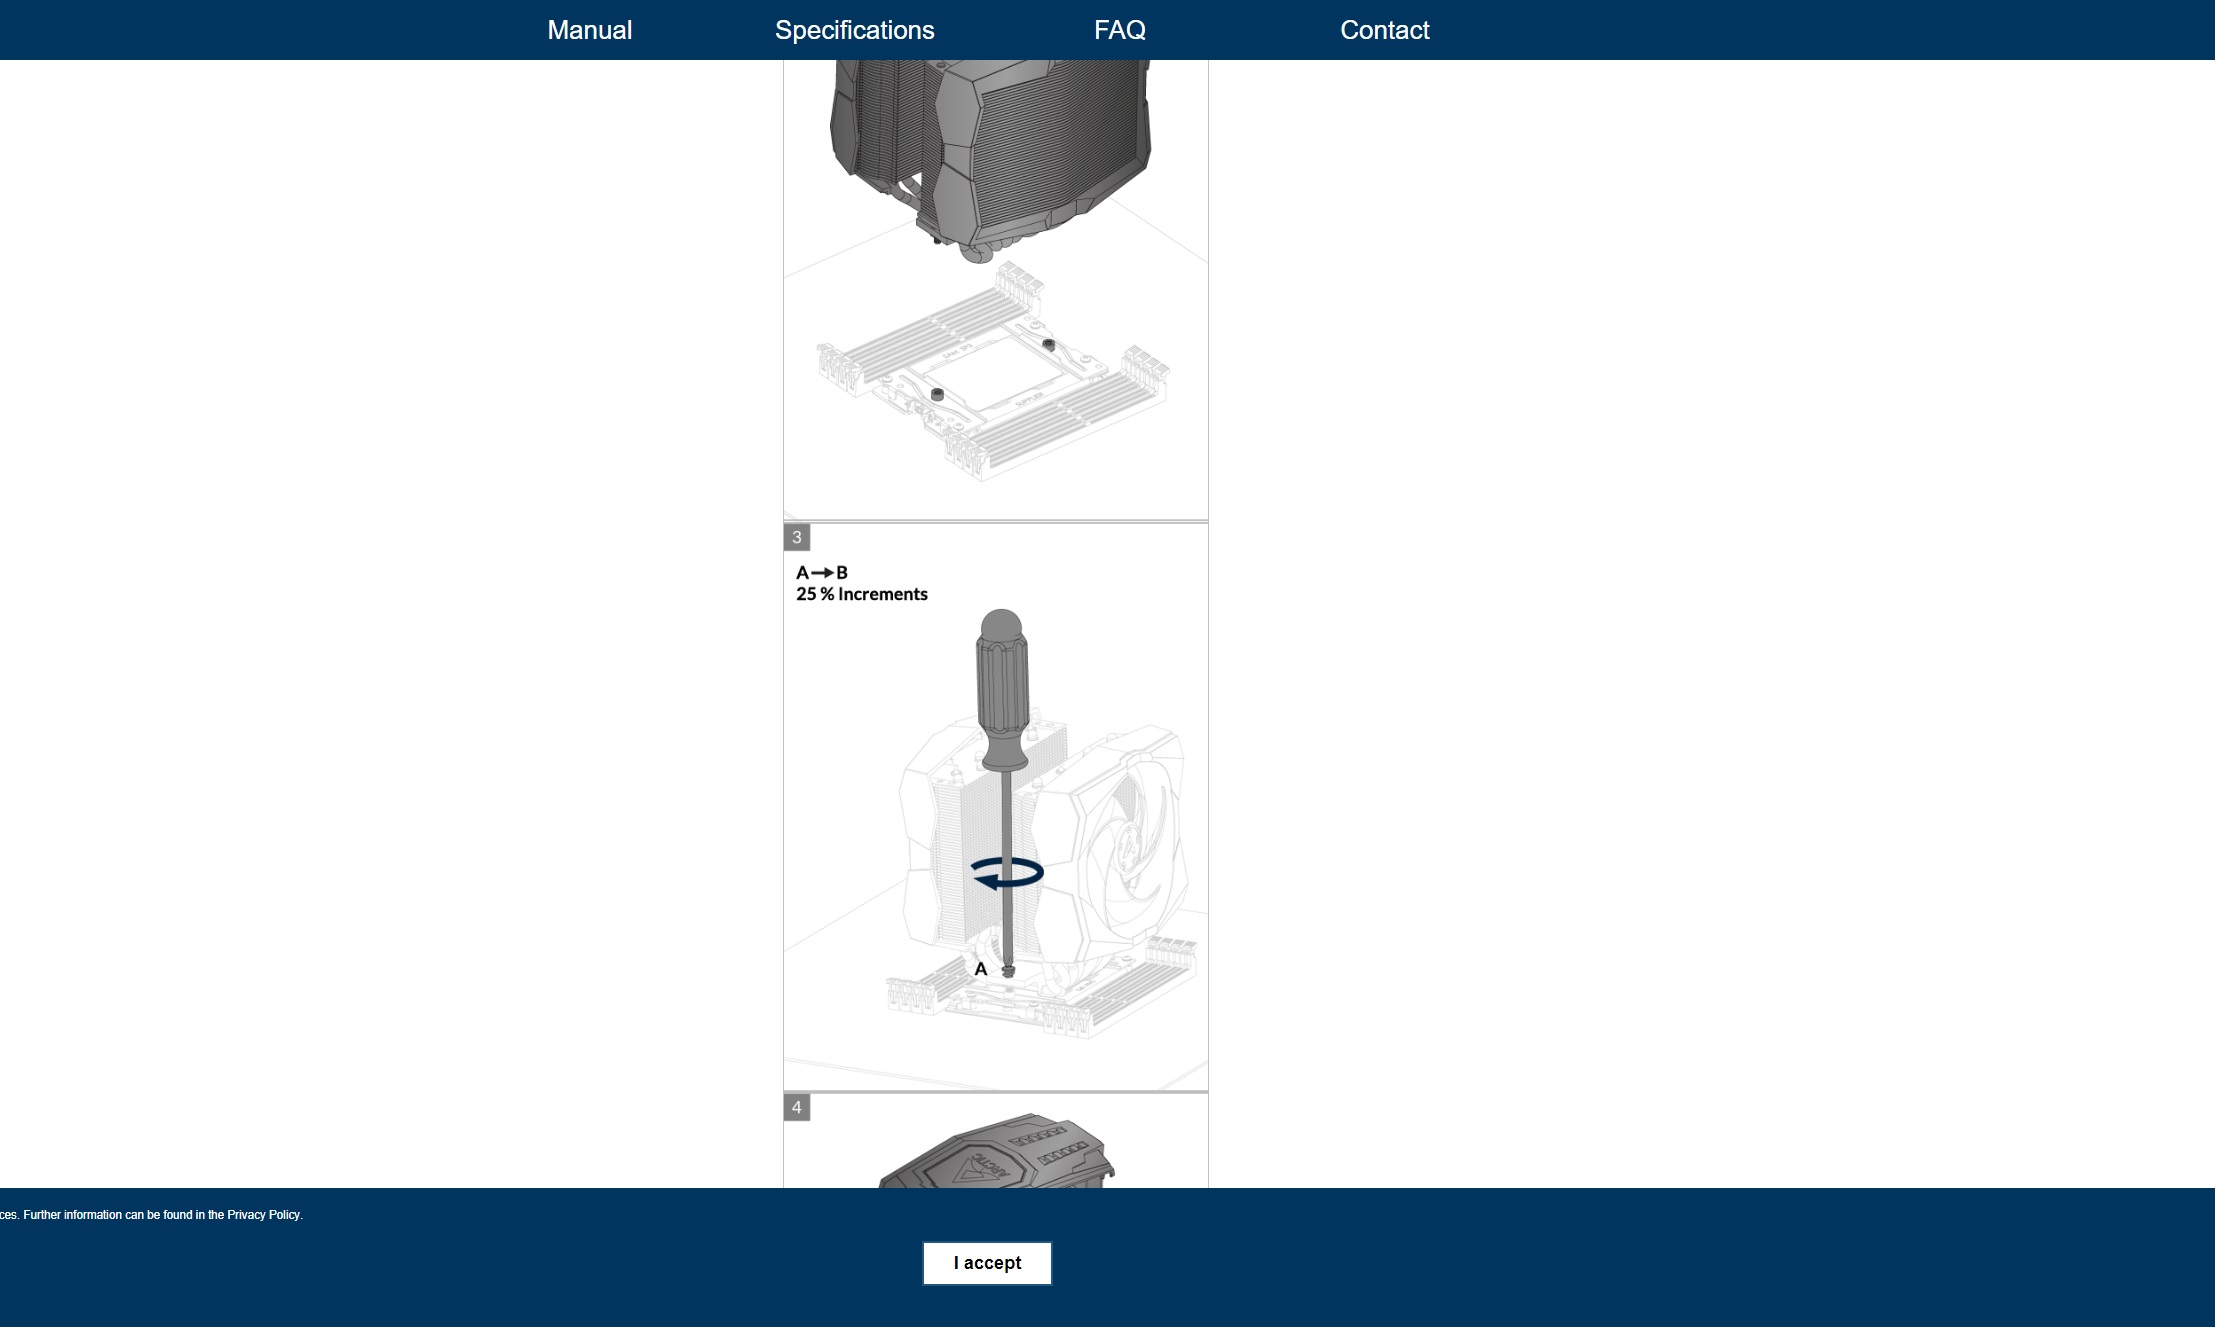
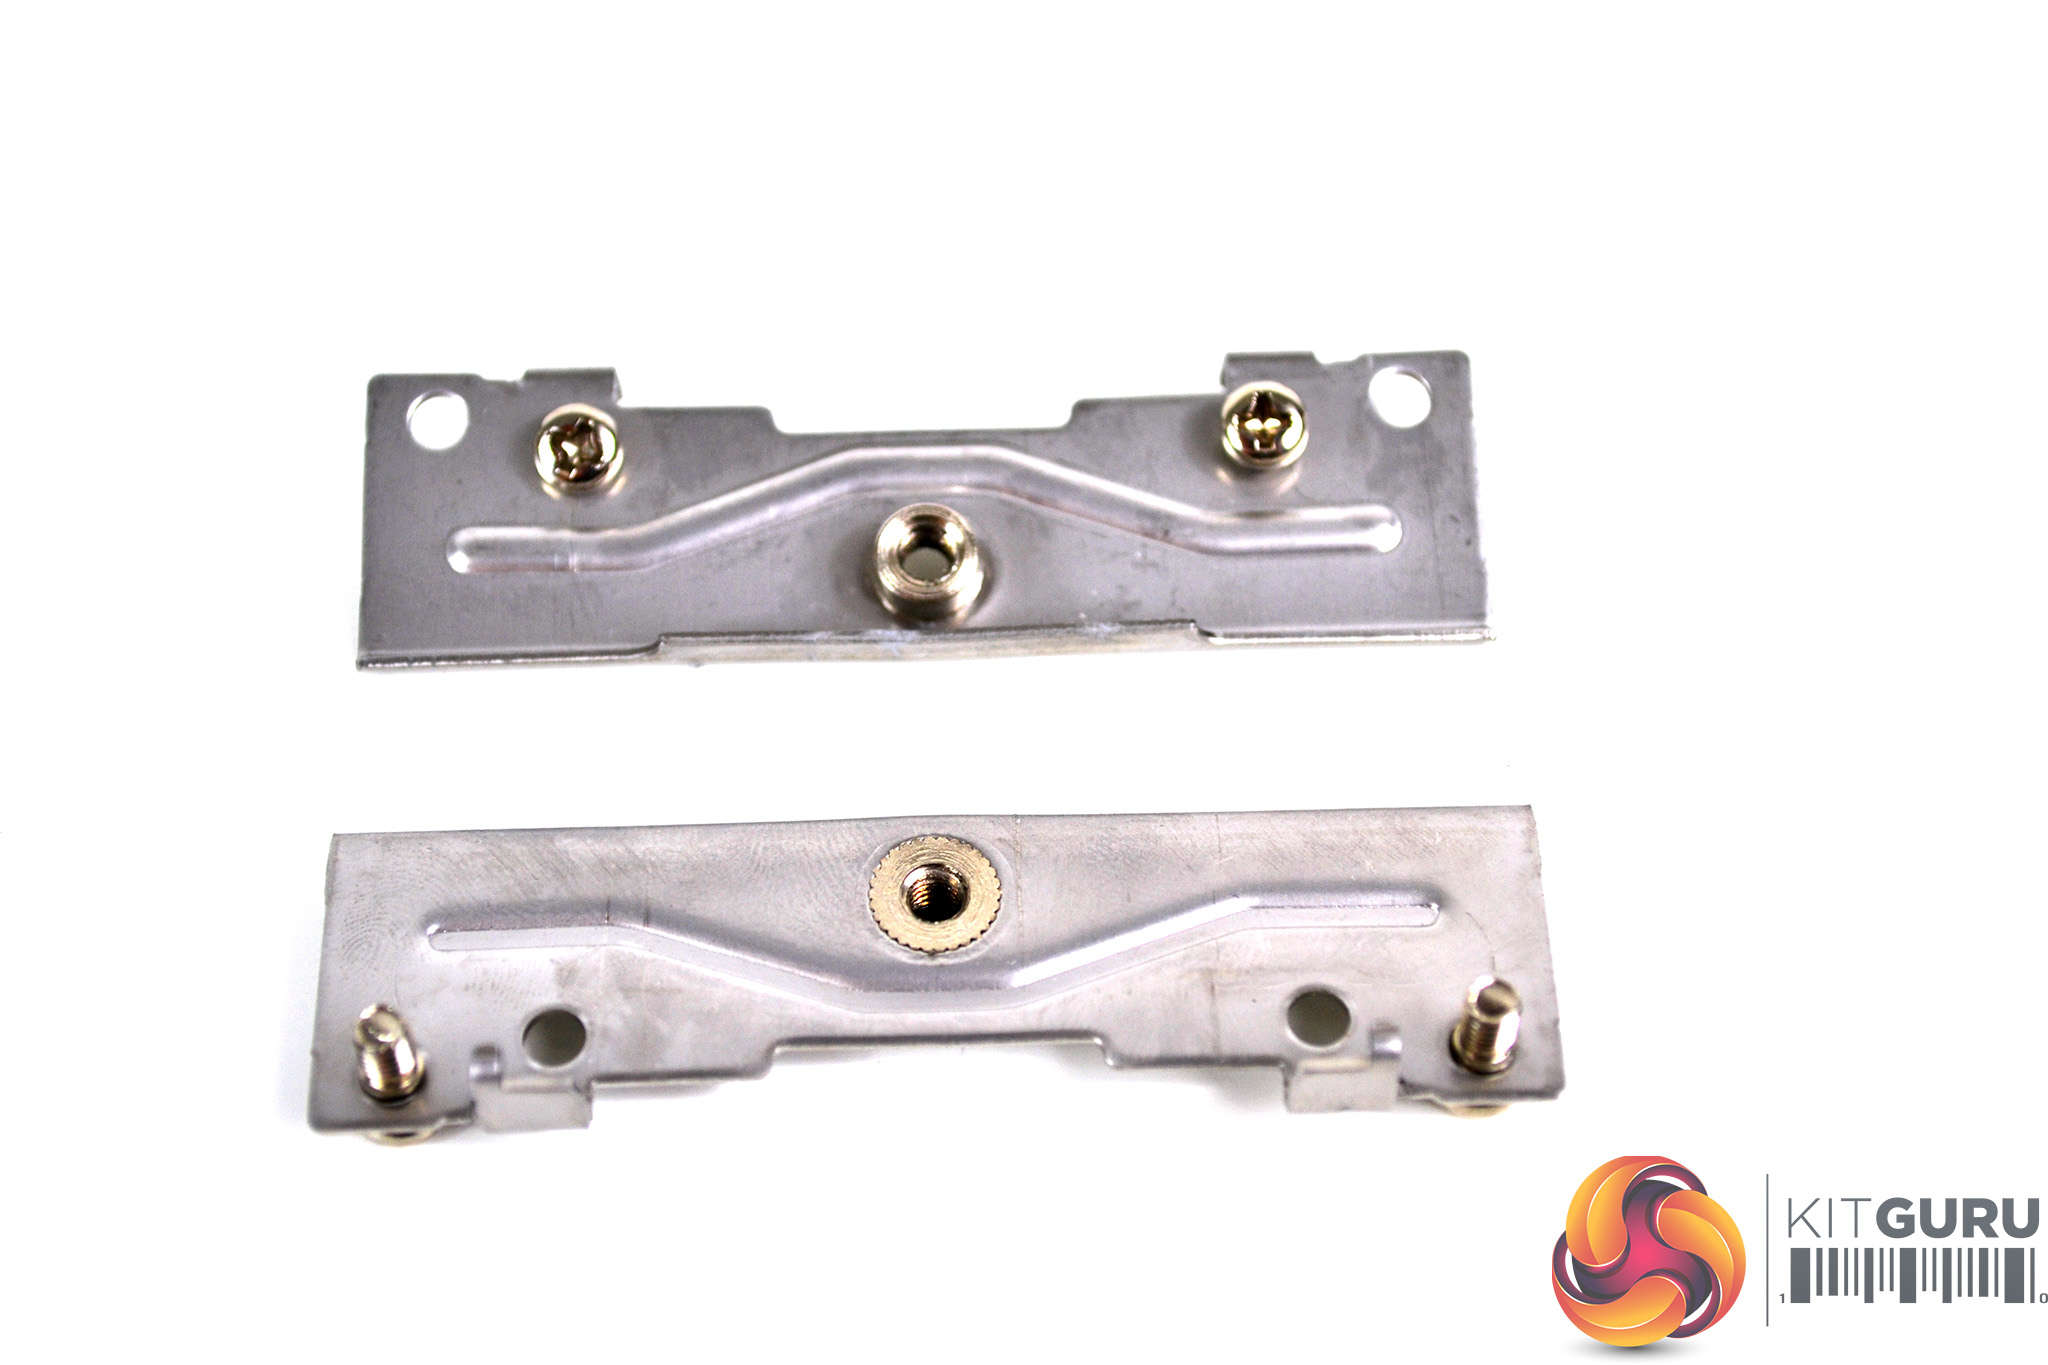
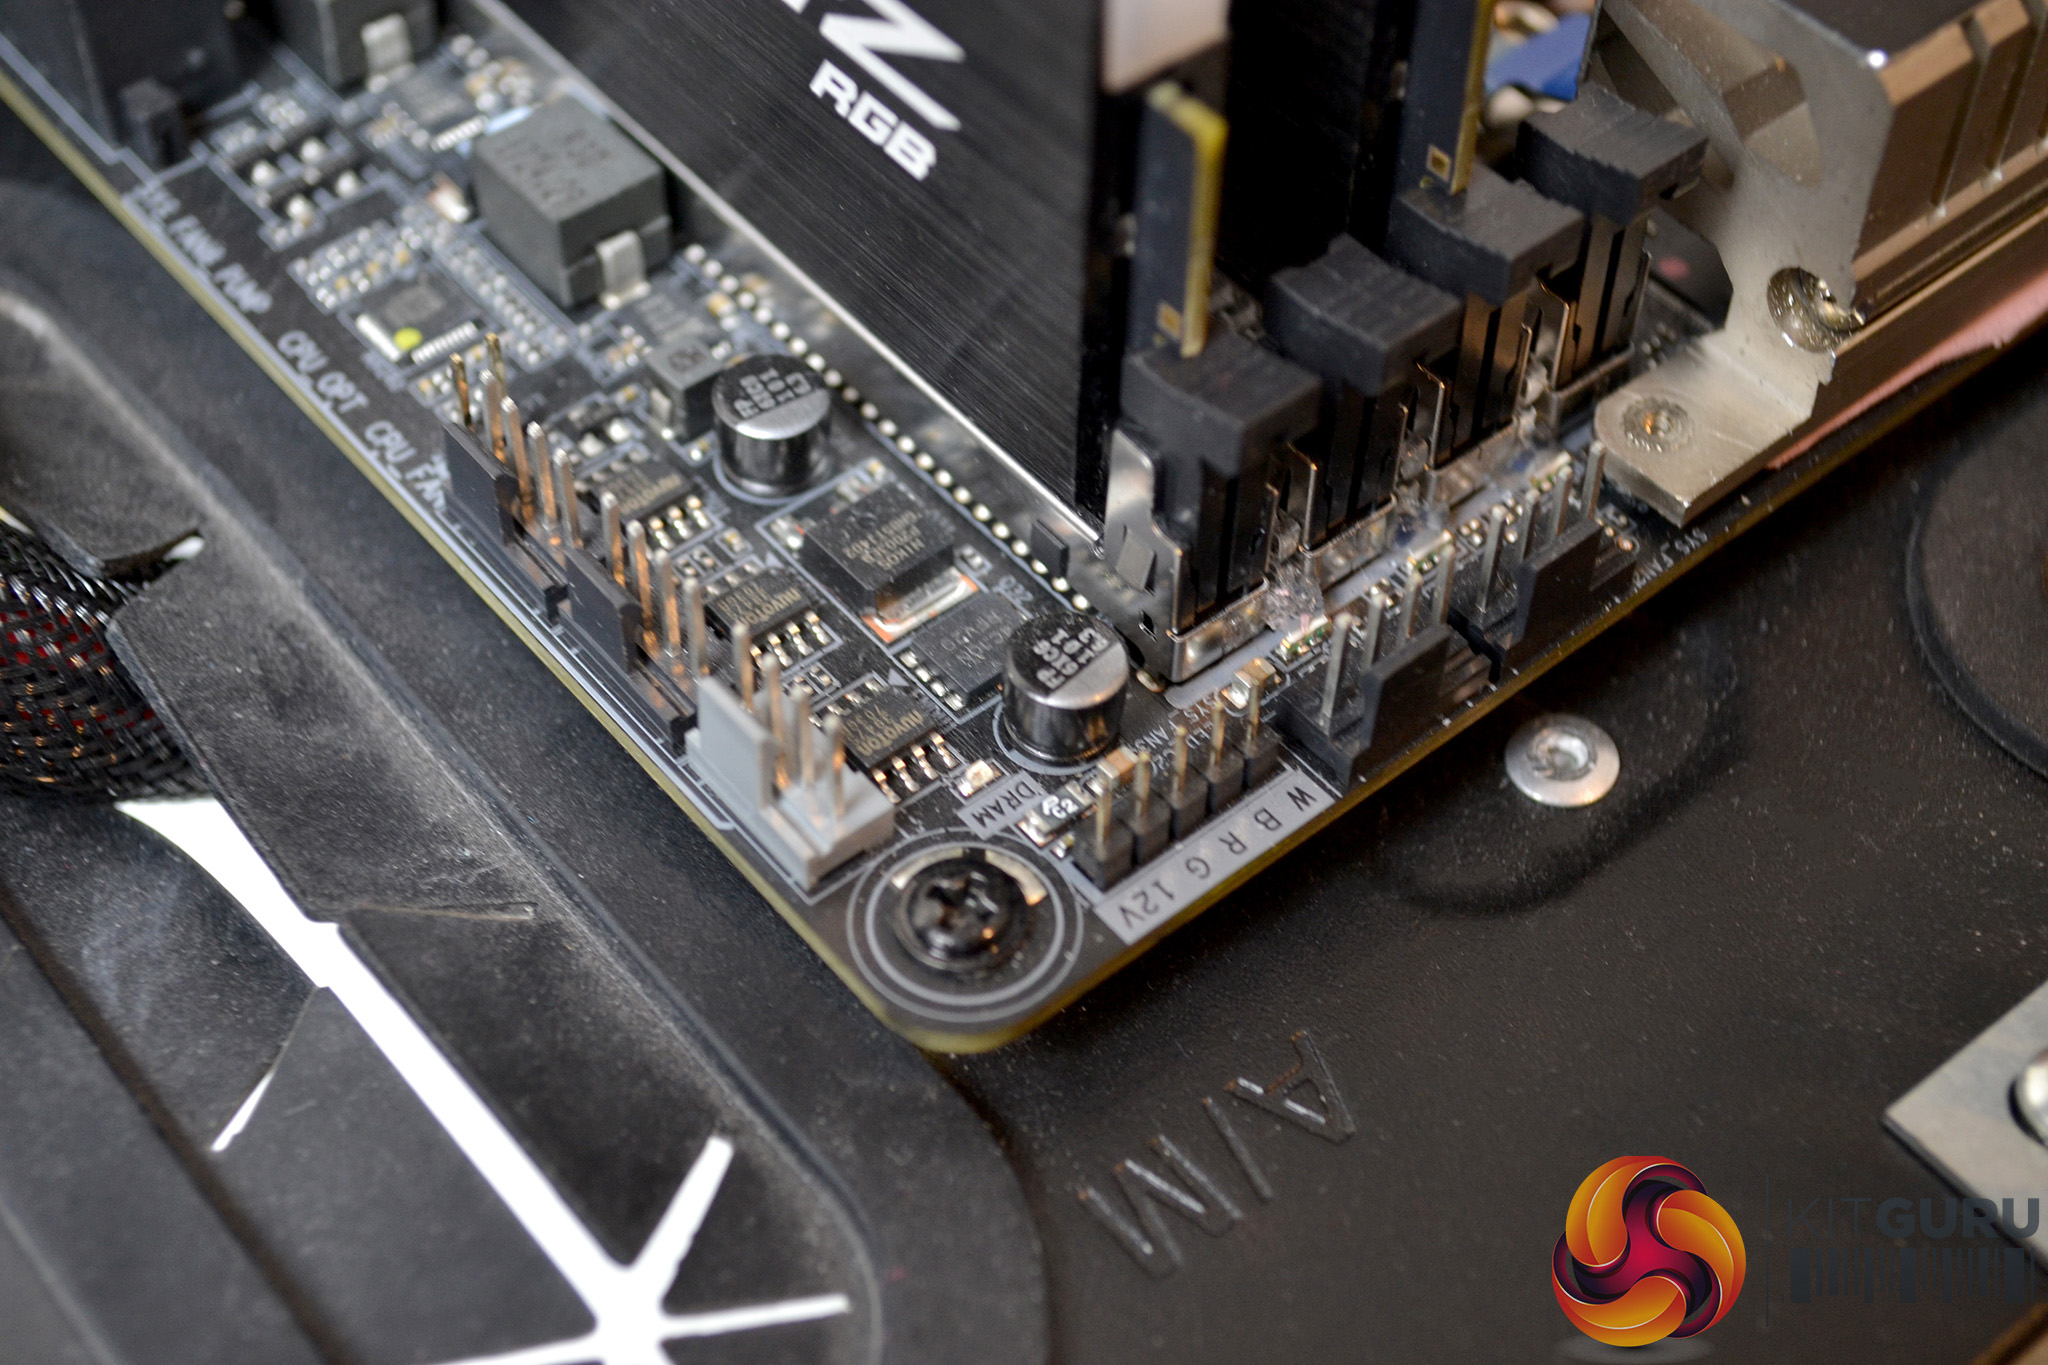
Now we can prepare the motherboard by fitting the two metal mounting brackets to the CPU socket. Positioning of the screw holes is different between the two brackets, so it is impossible to get them mixed up. Simply place them in the correct orientation and tighten in place using a Philips screwdriver.
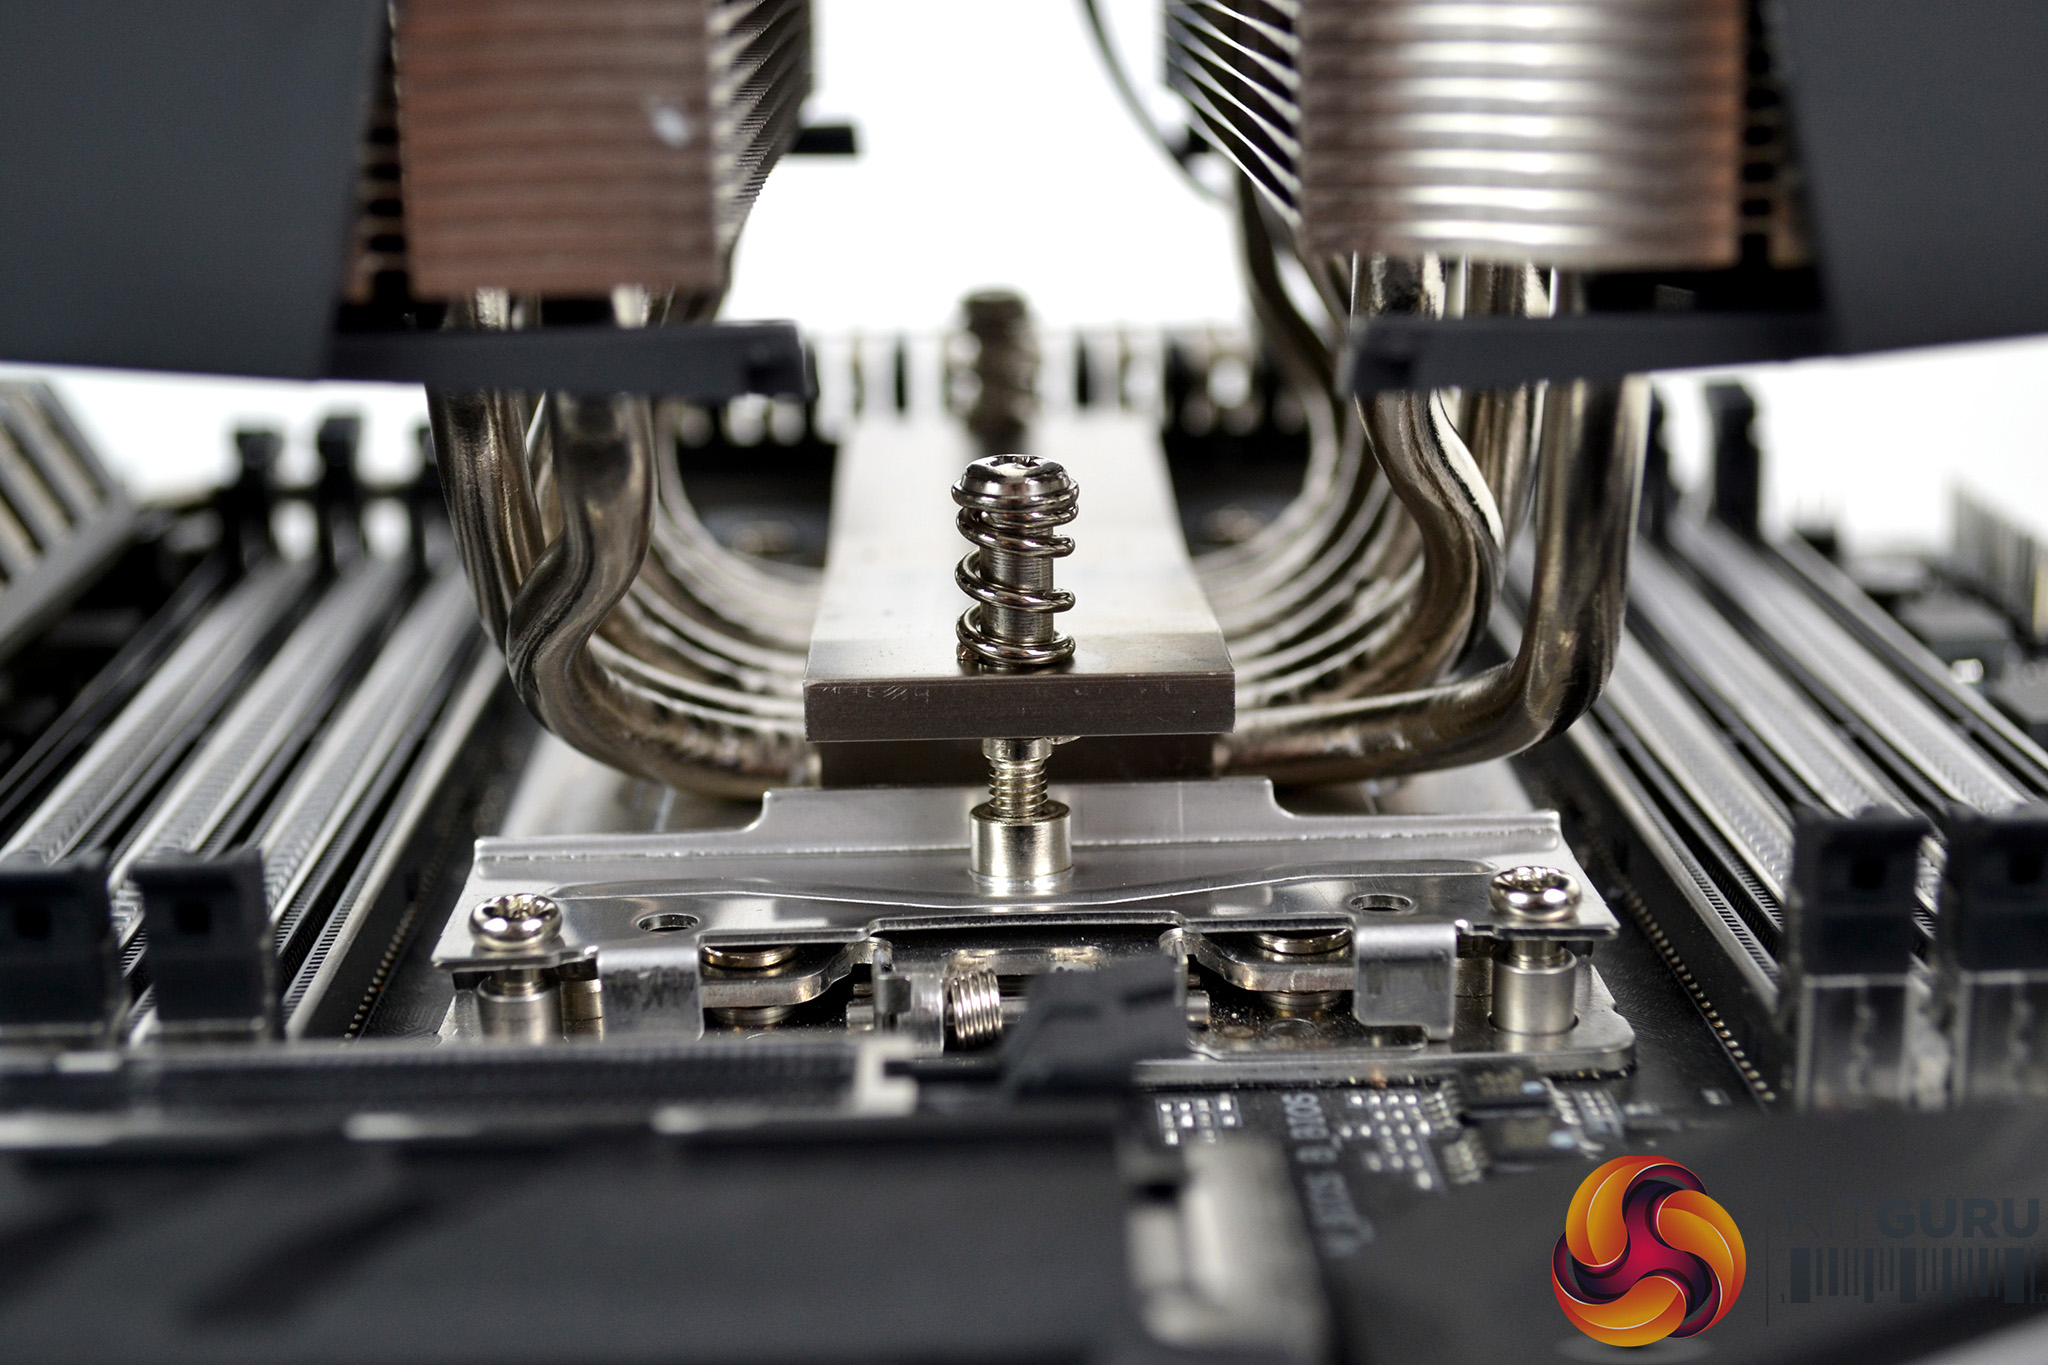
Align the cooler over the CPU socket and lower into place. Ensure the mounting screws are lined up with the correct fixing holes and then attach the cooler in place on the CPU socket by fastening the screws using a Philips screwdriver, until adequately tight.
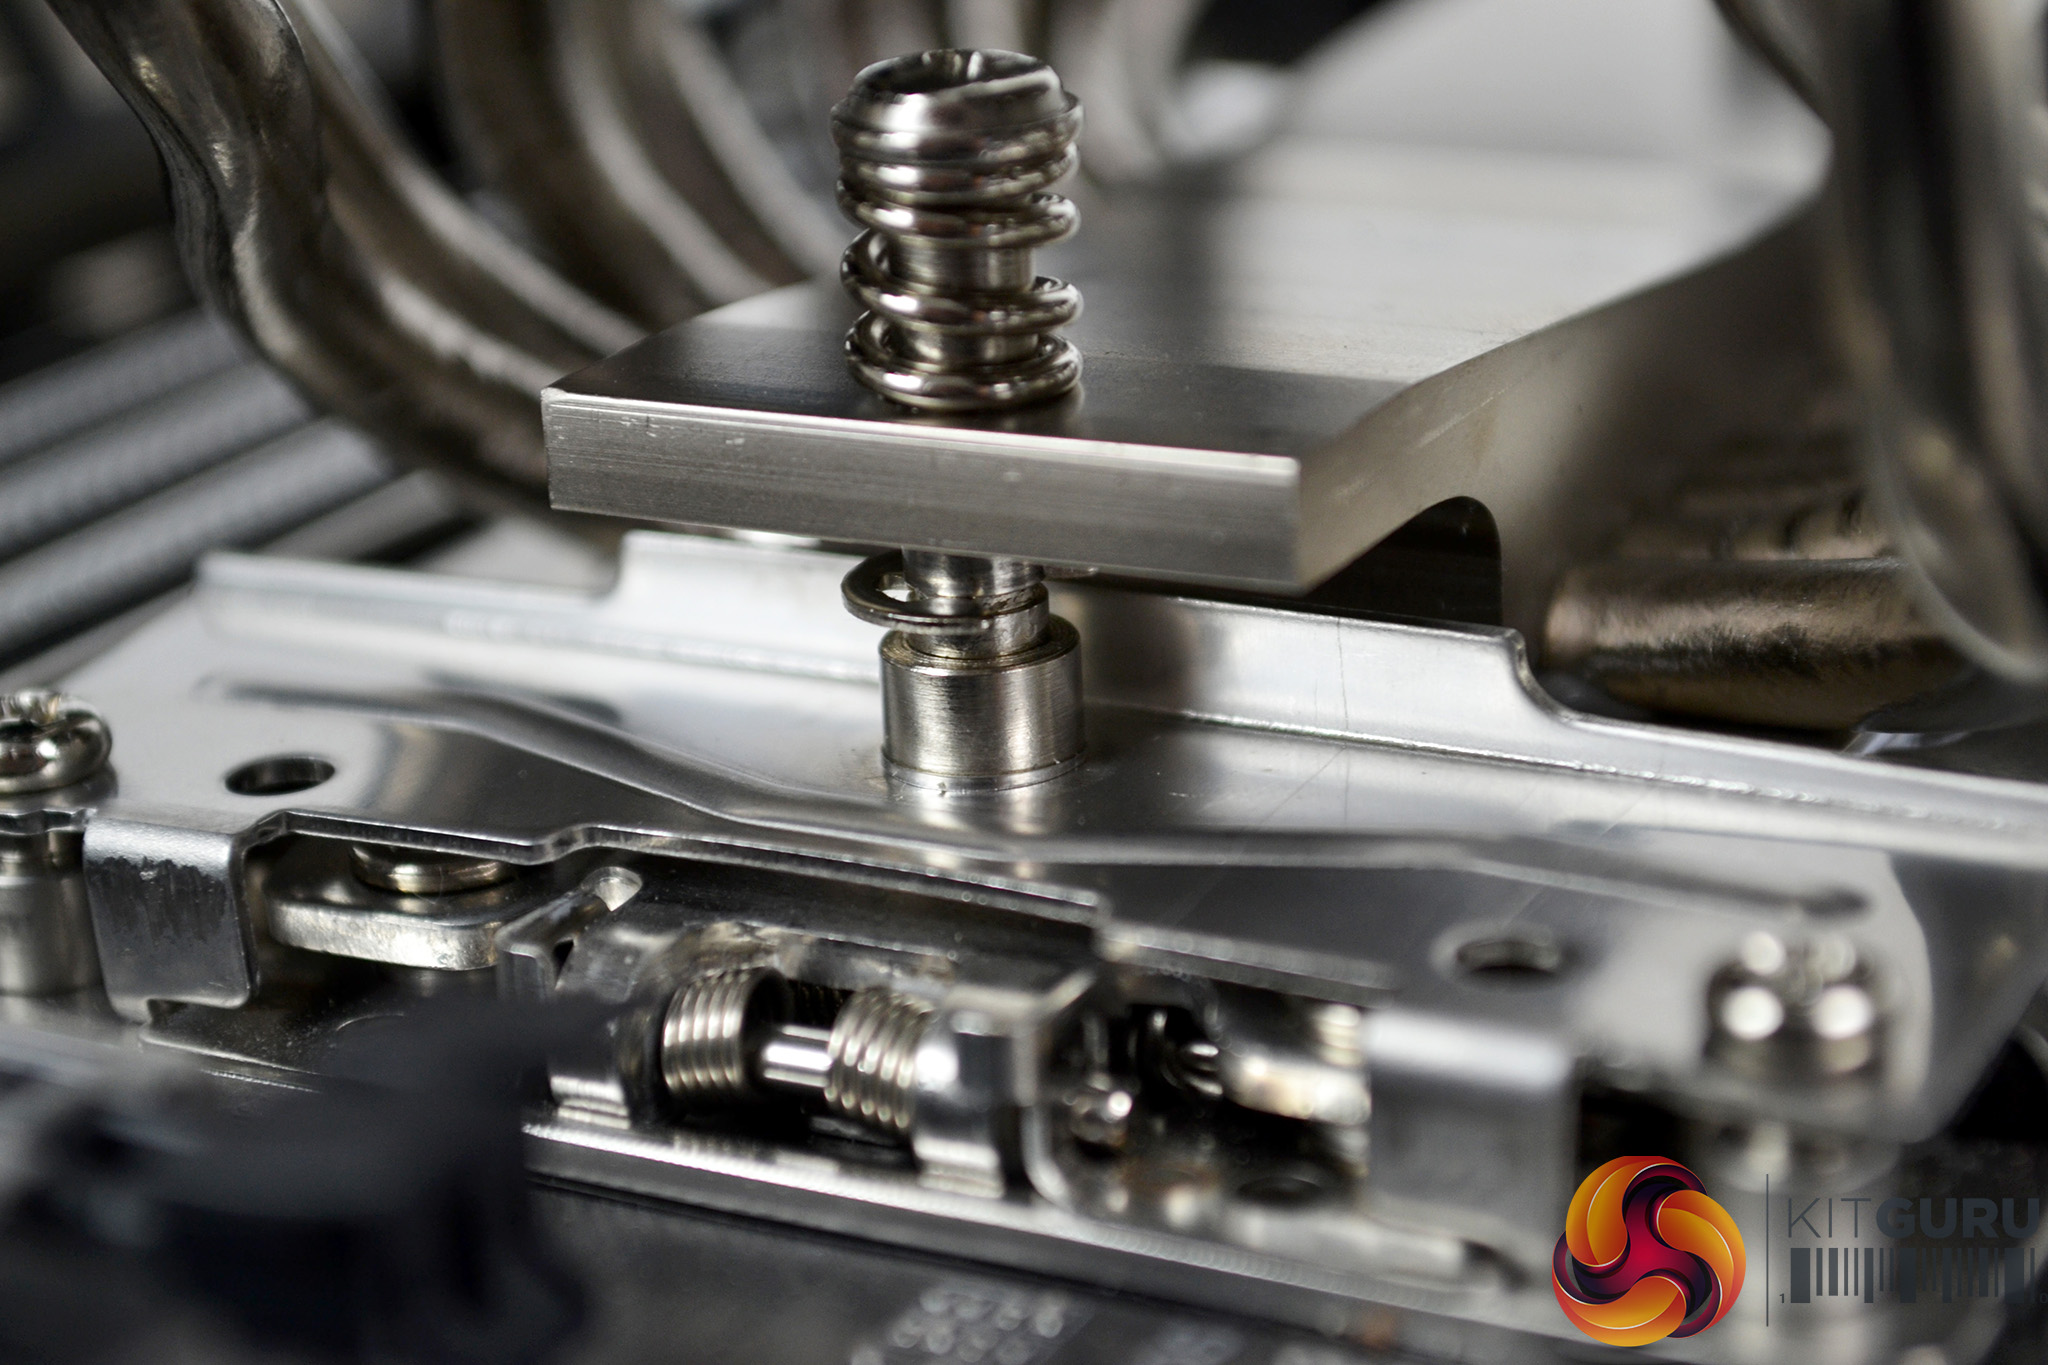
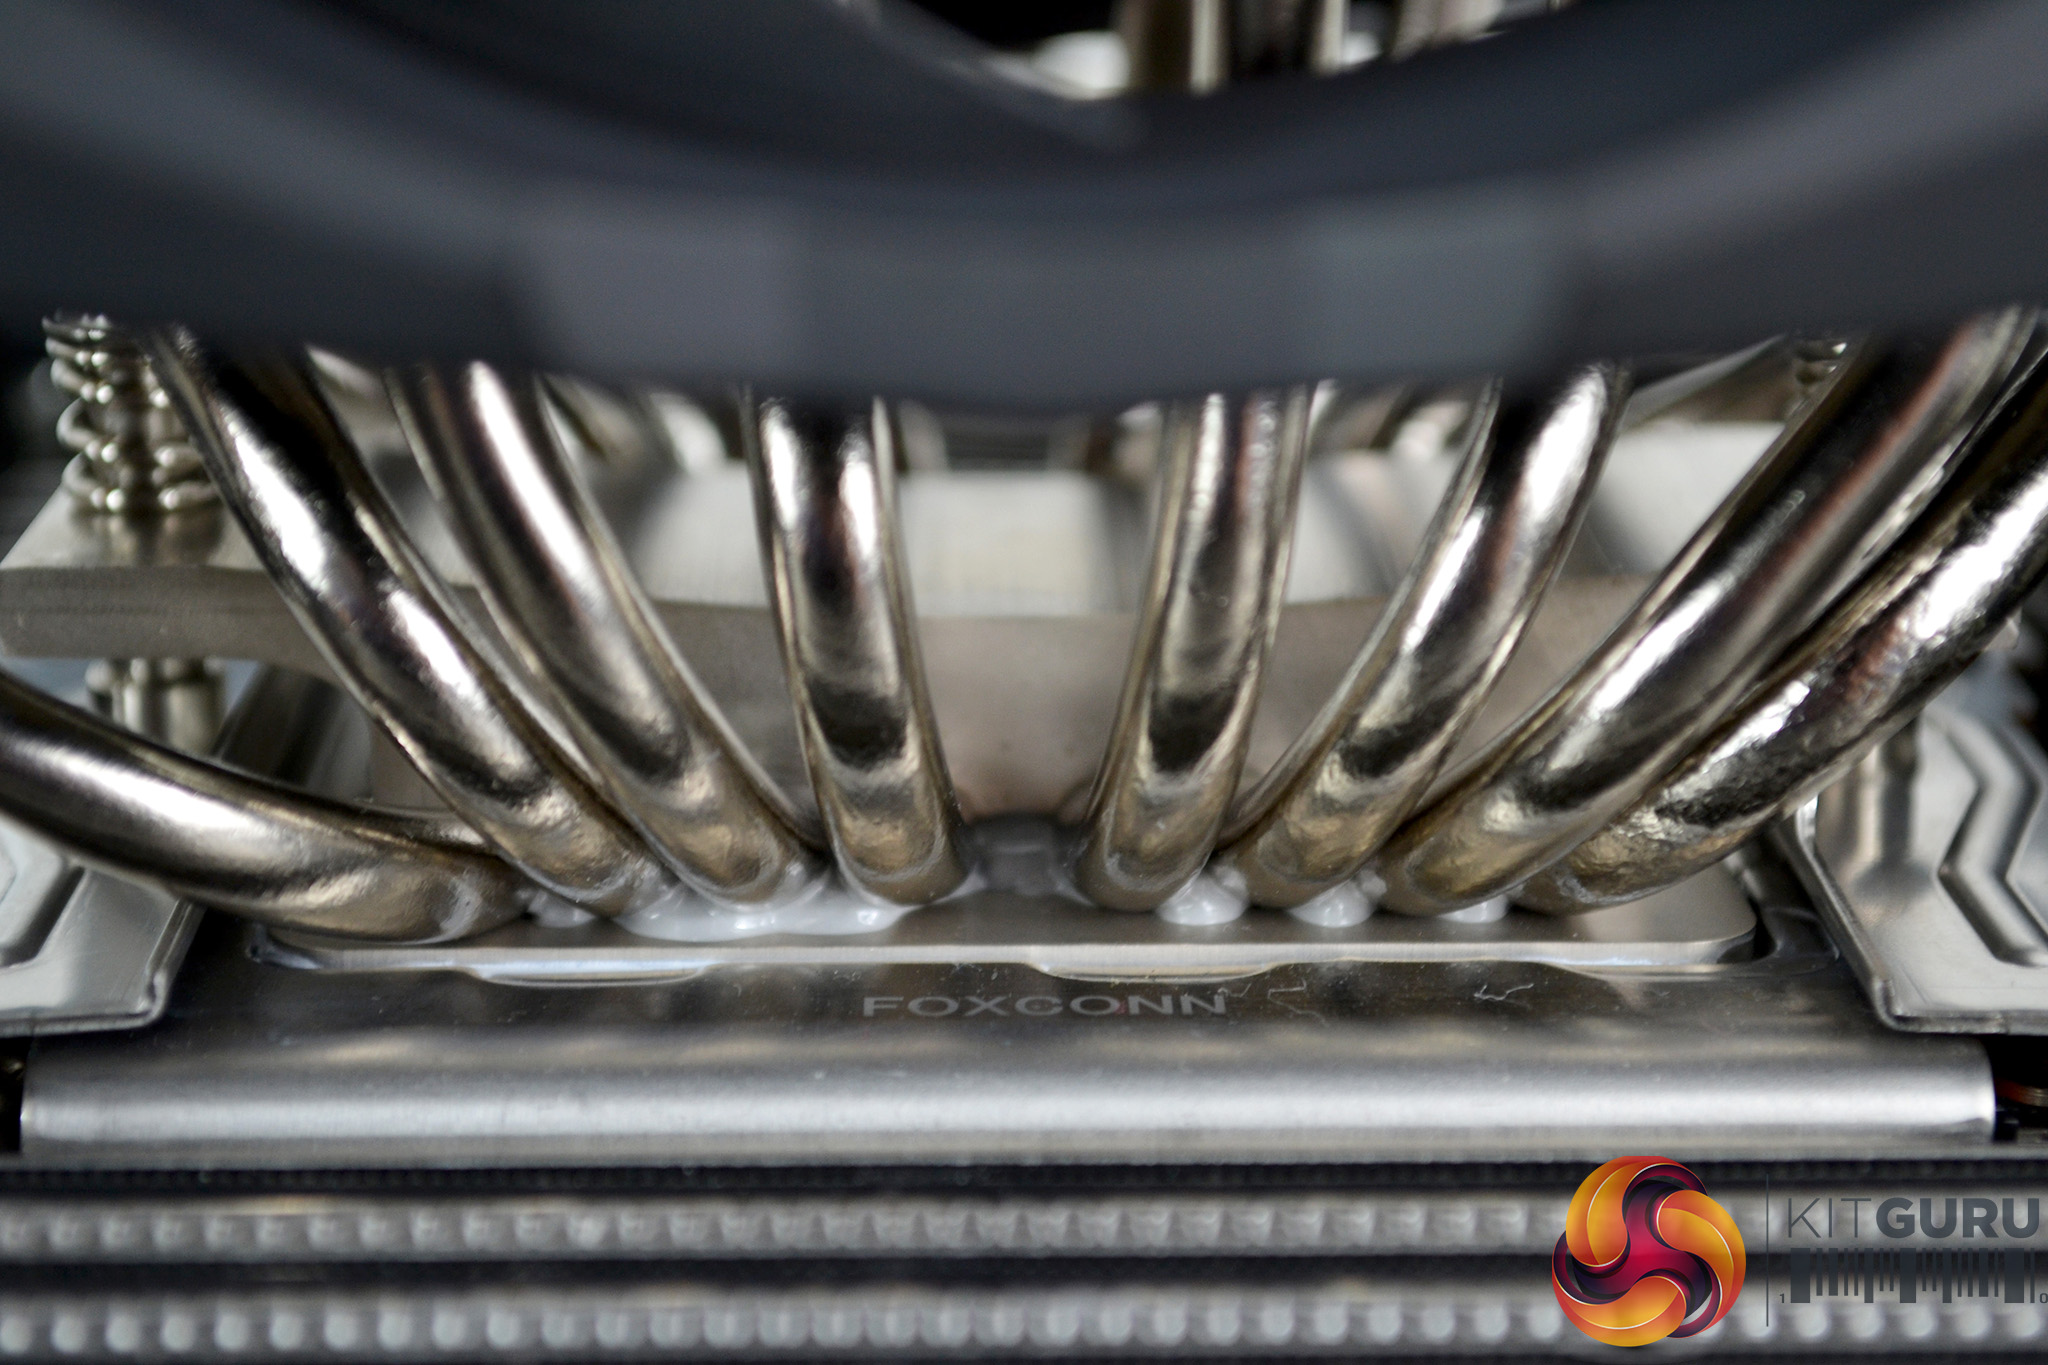
The mounting screws will be at their fully tightened position when the thread has completely bottomed out on the mounting holes. Notice there will be visible thermal compound which has been squeezed out when the cooler is correctly mounted and fully contacting the CPU HIS.
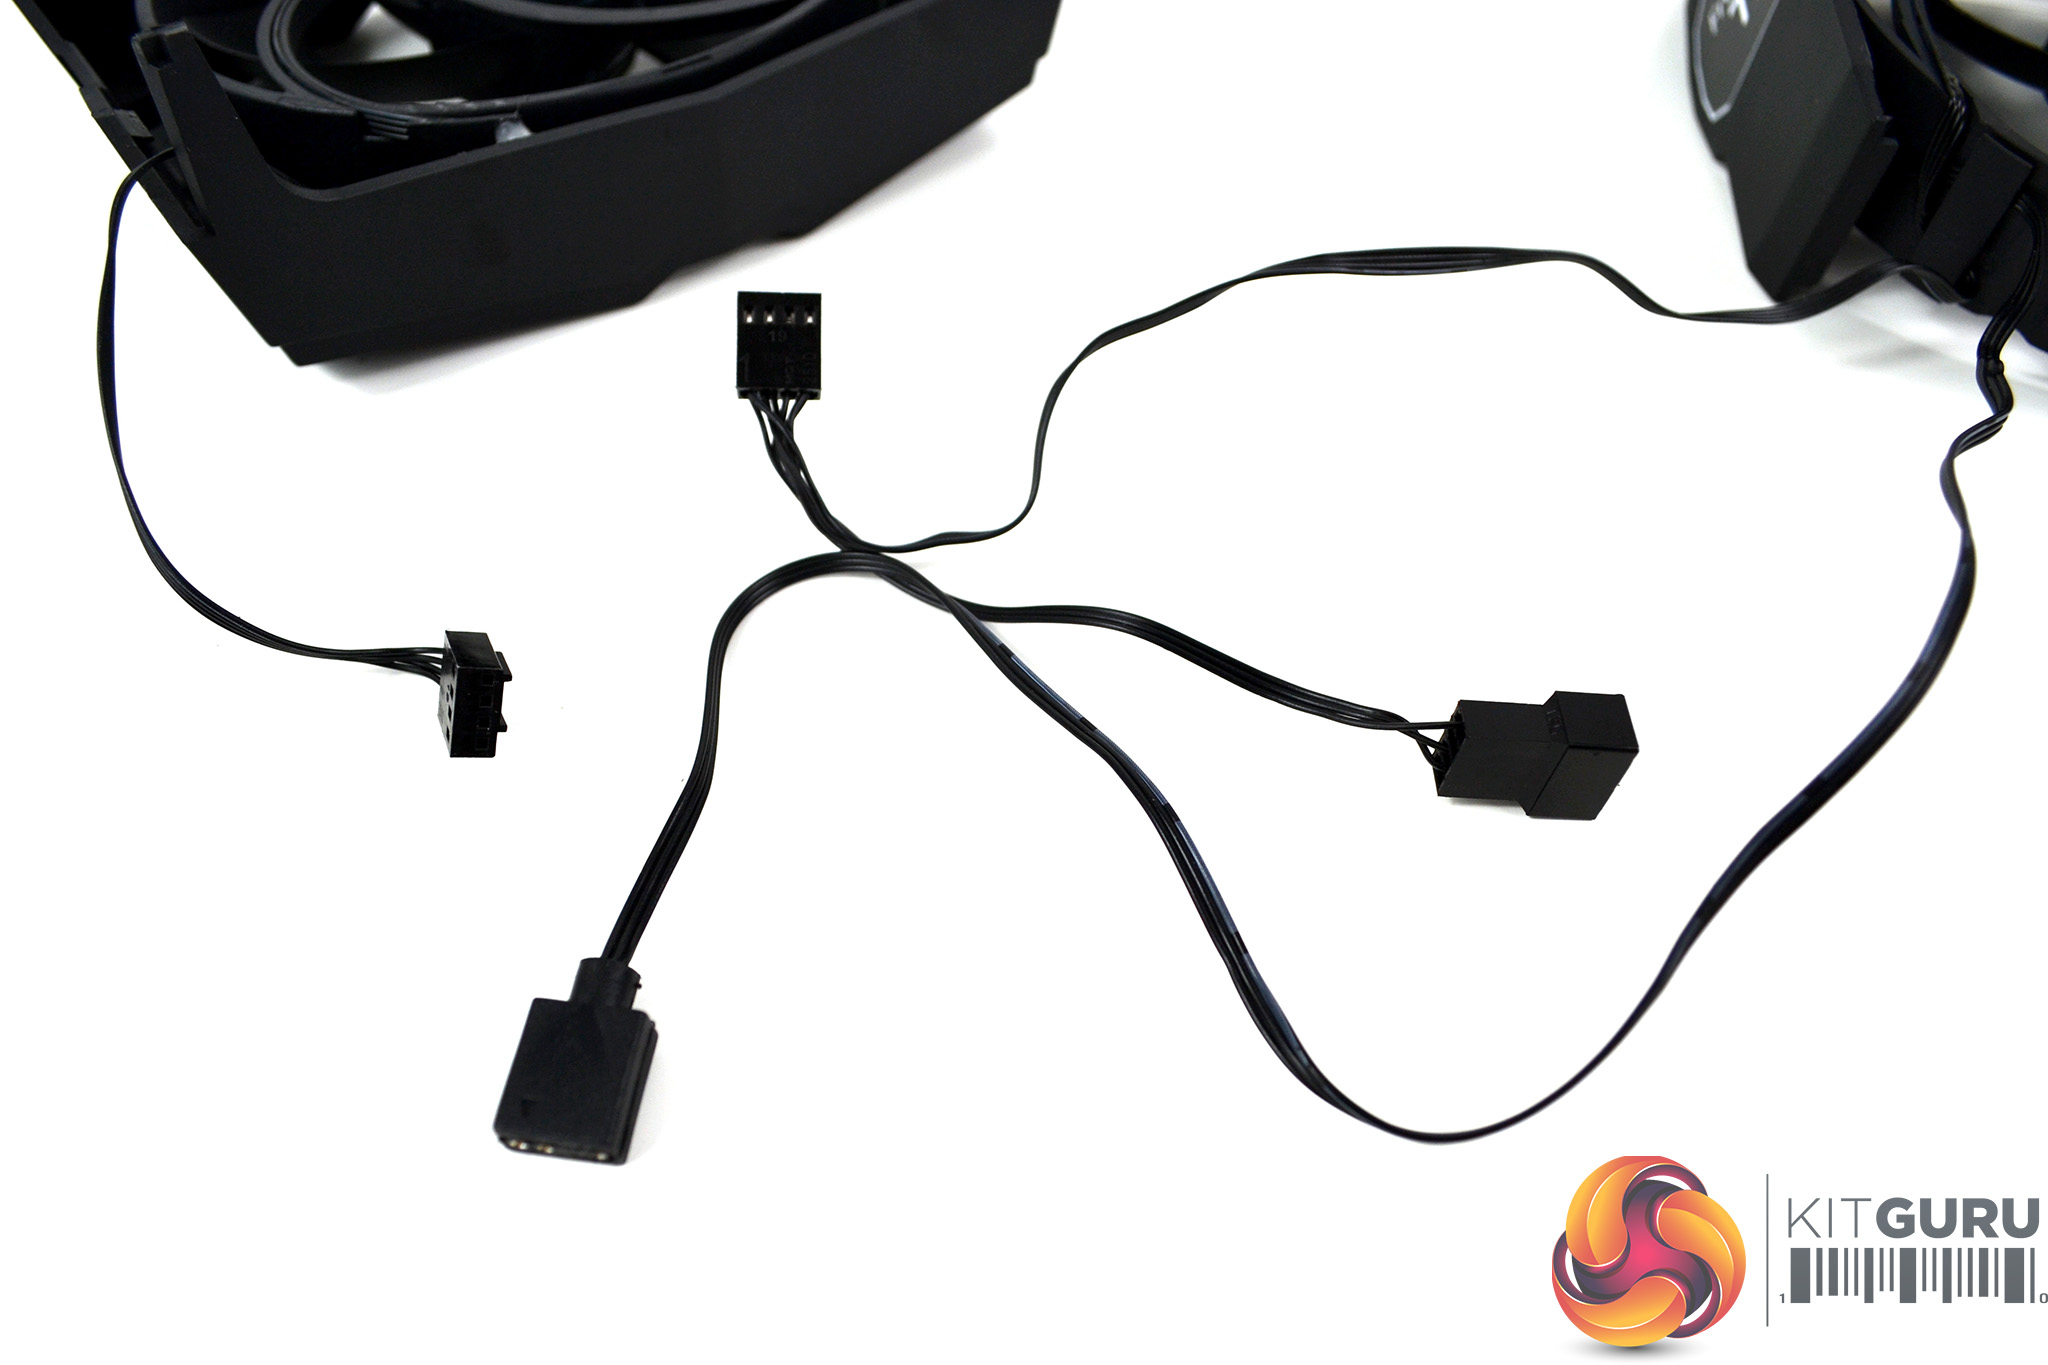
The final step of installation is to slide the central fan back into place and clip the shroud back together at the bottom. Connect the PWM fans together with the splitter cable and then connect the 4-pin fan power cable to the motherboard CPU_FAN header.

If your motherboard supports 3-pin 5V ARGB connection, now would be a good time to connect this up too. Unfortunately, Arctic has not supplied any RGB adaptor cables with the Freezer 50 TR, so we were unable to connect to our Gigabyte Aorus X399 Gaming 7 motherboard with an out of the box solution.
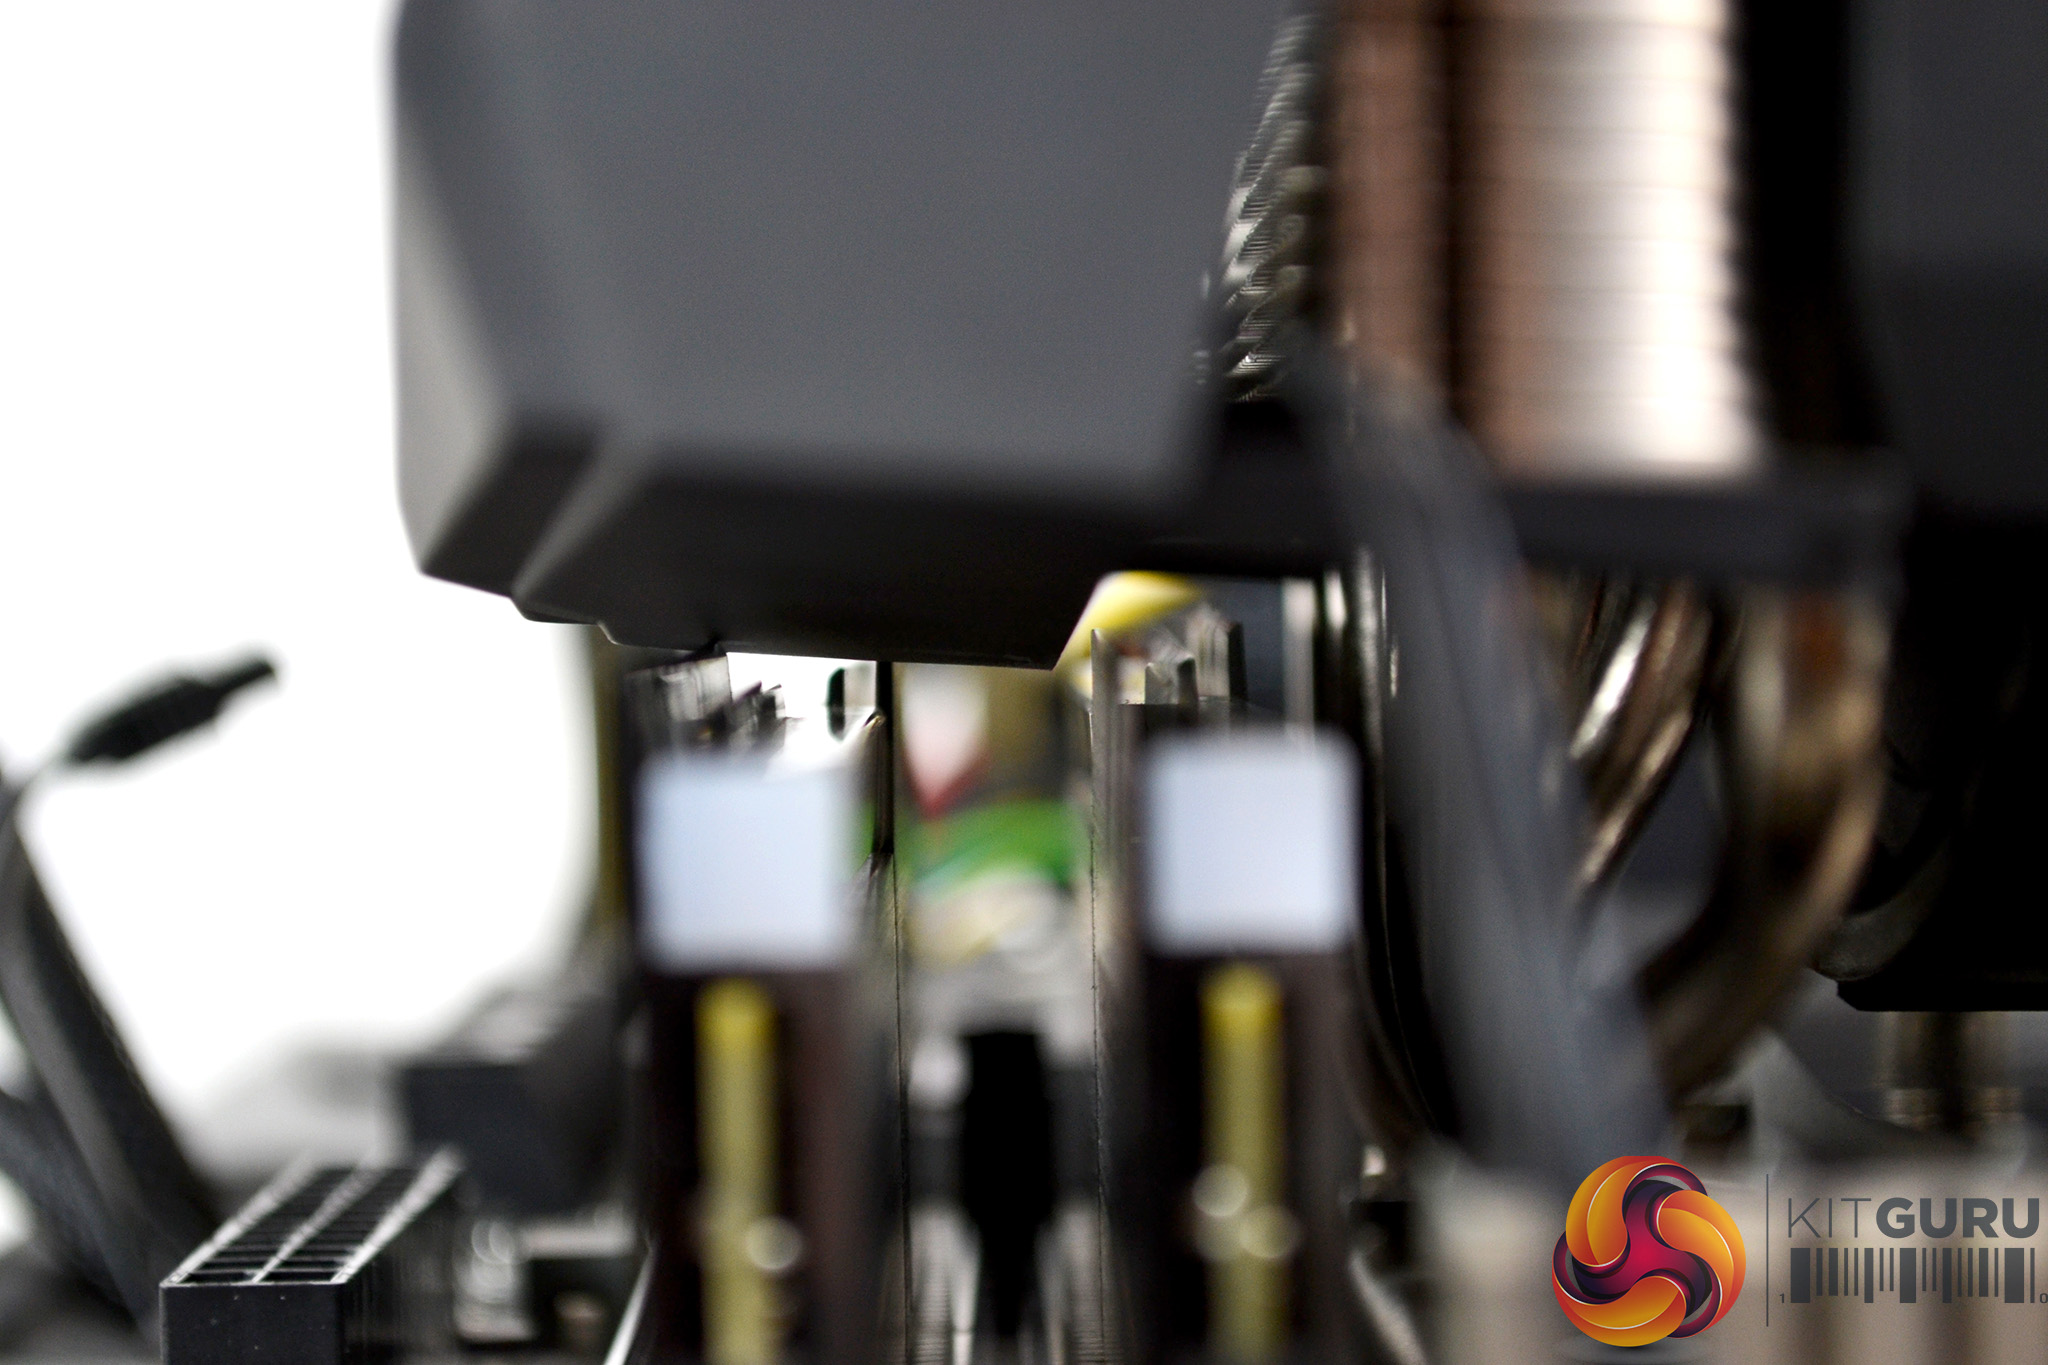
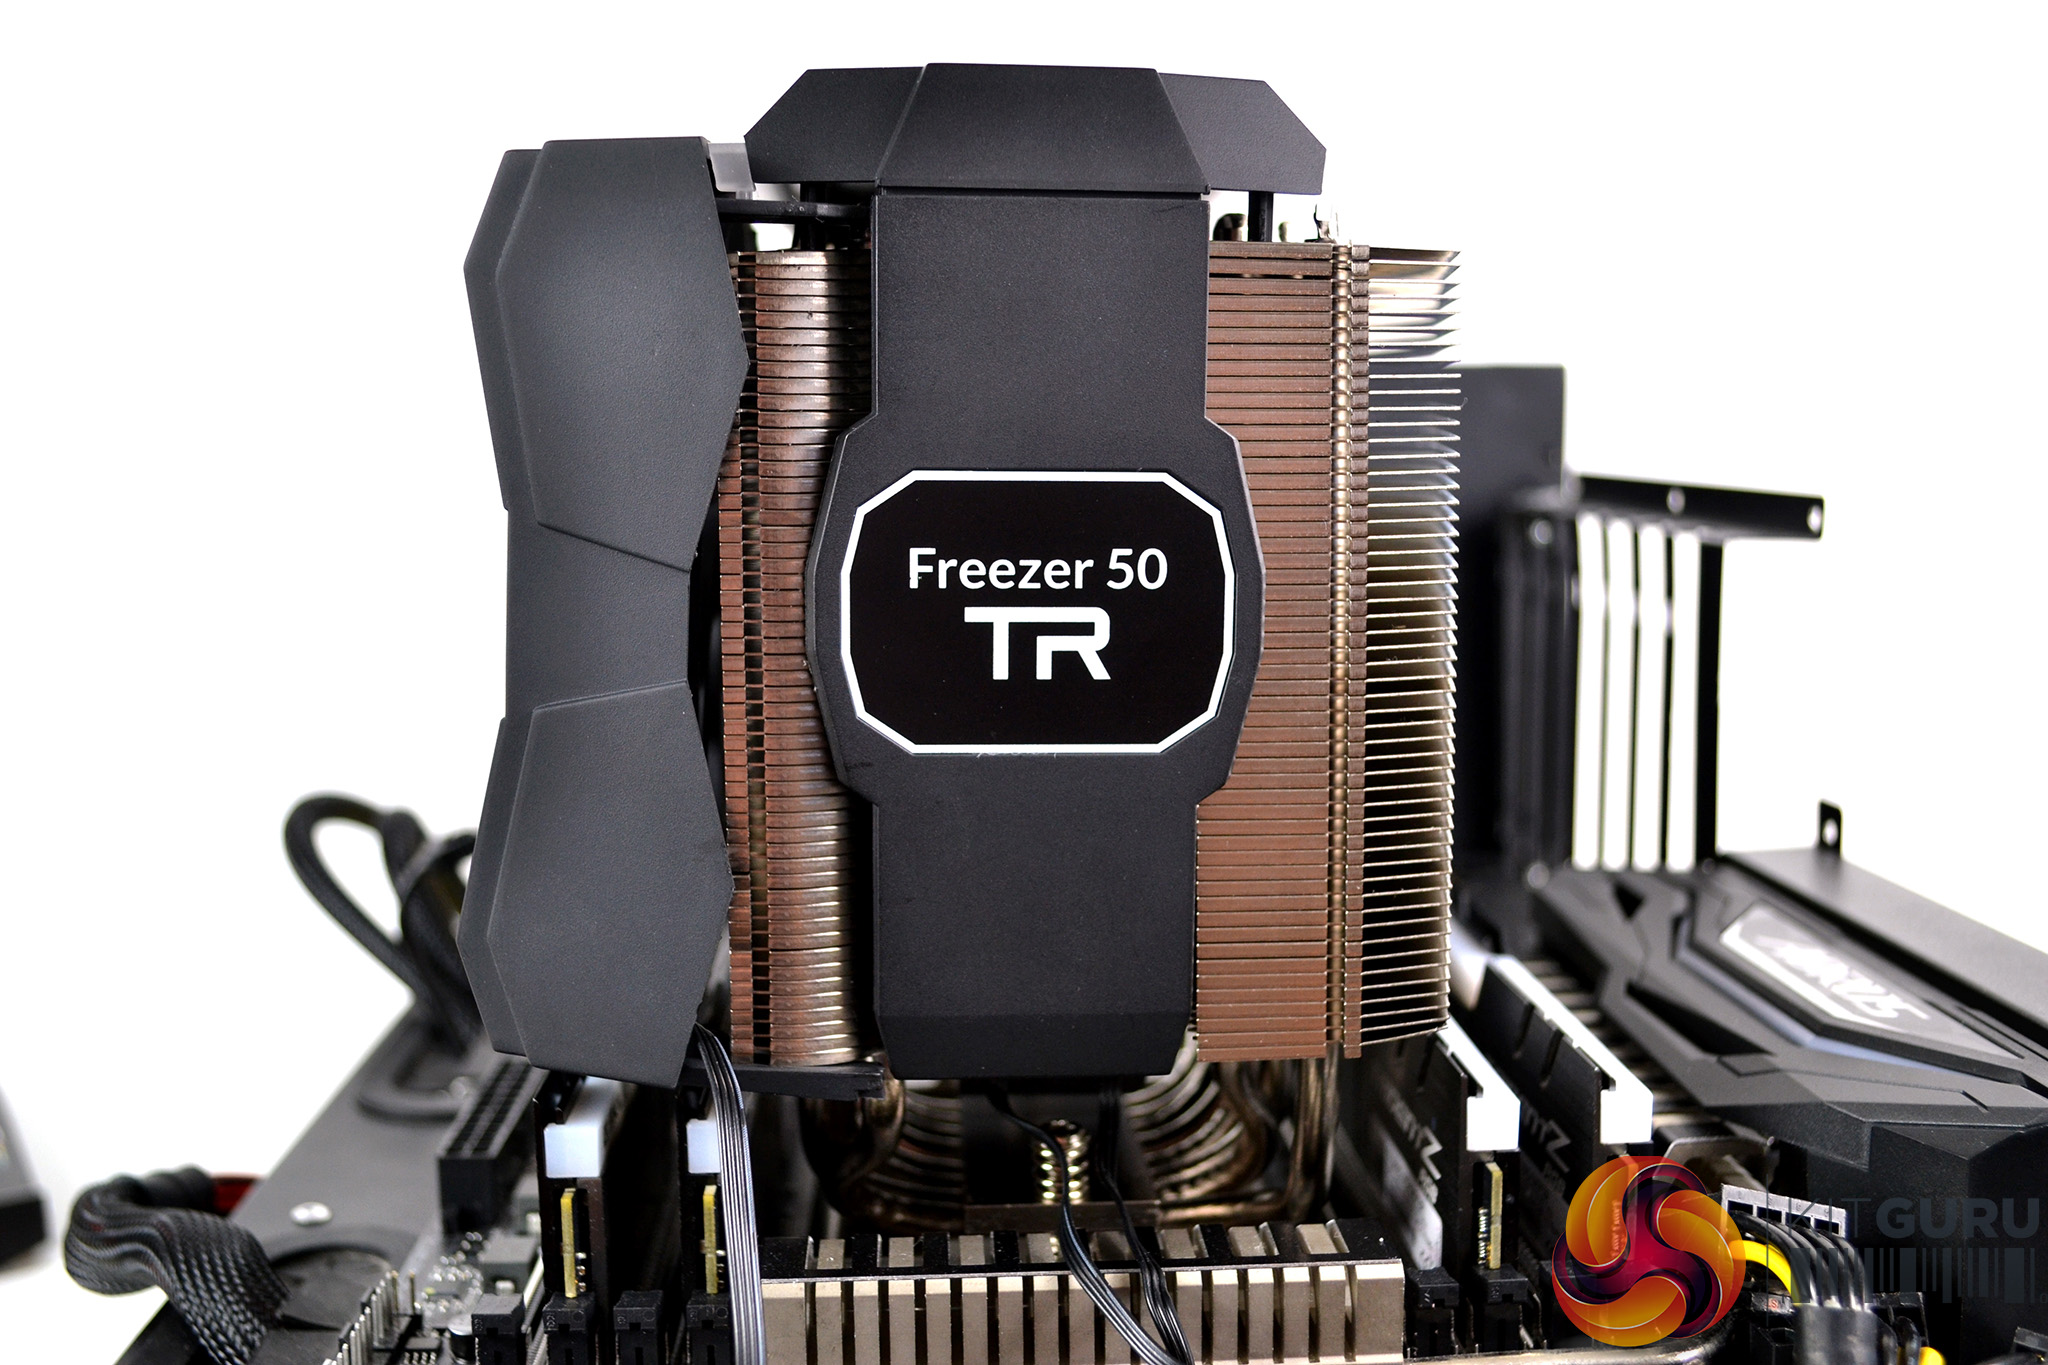
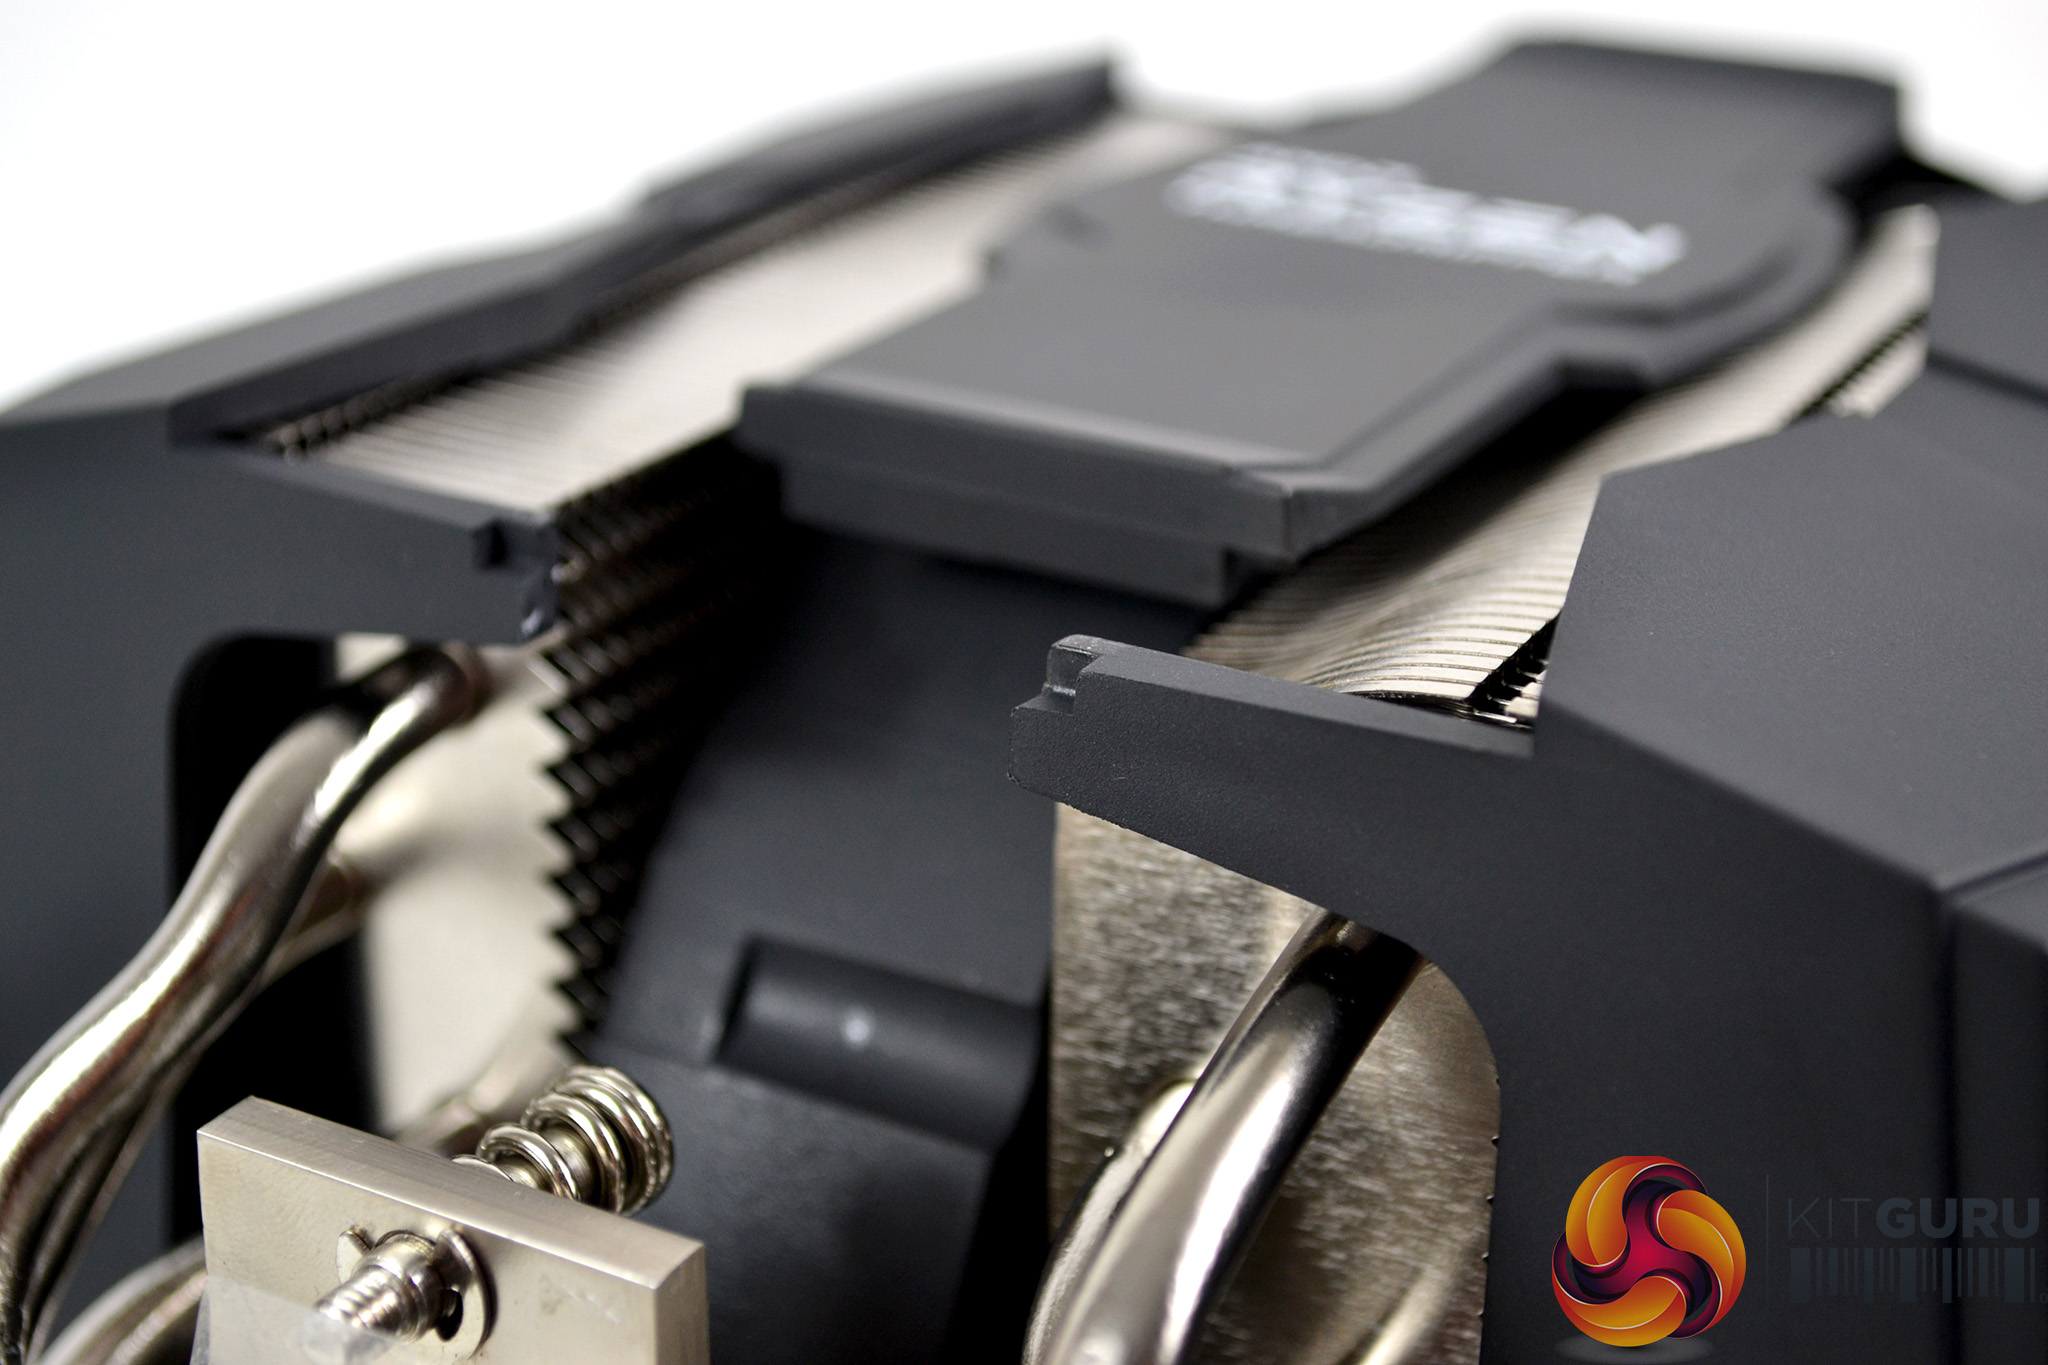
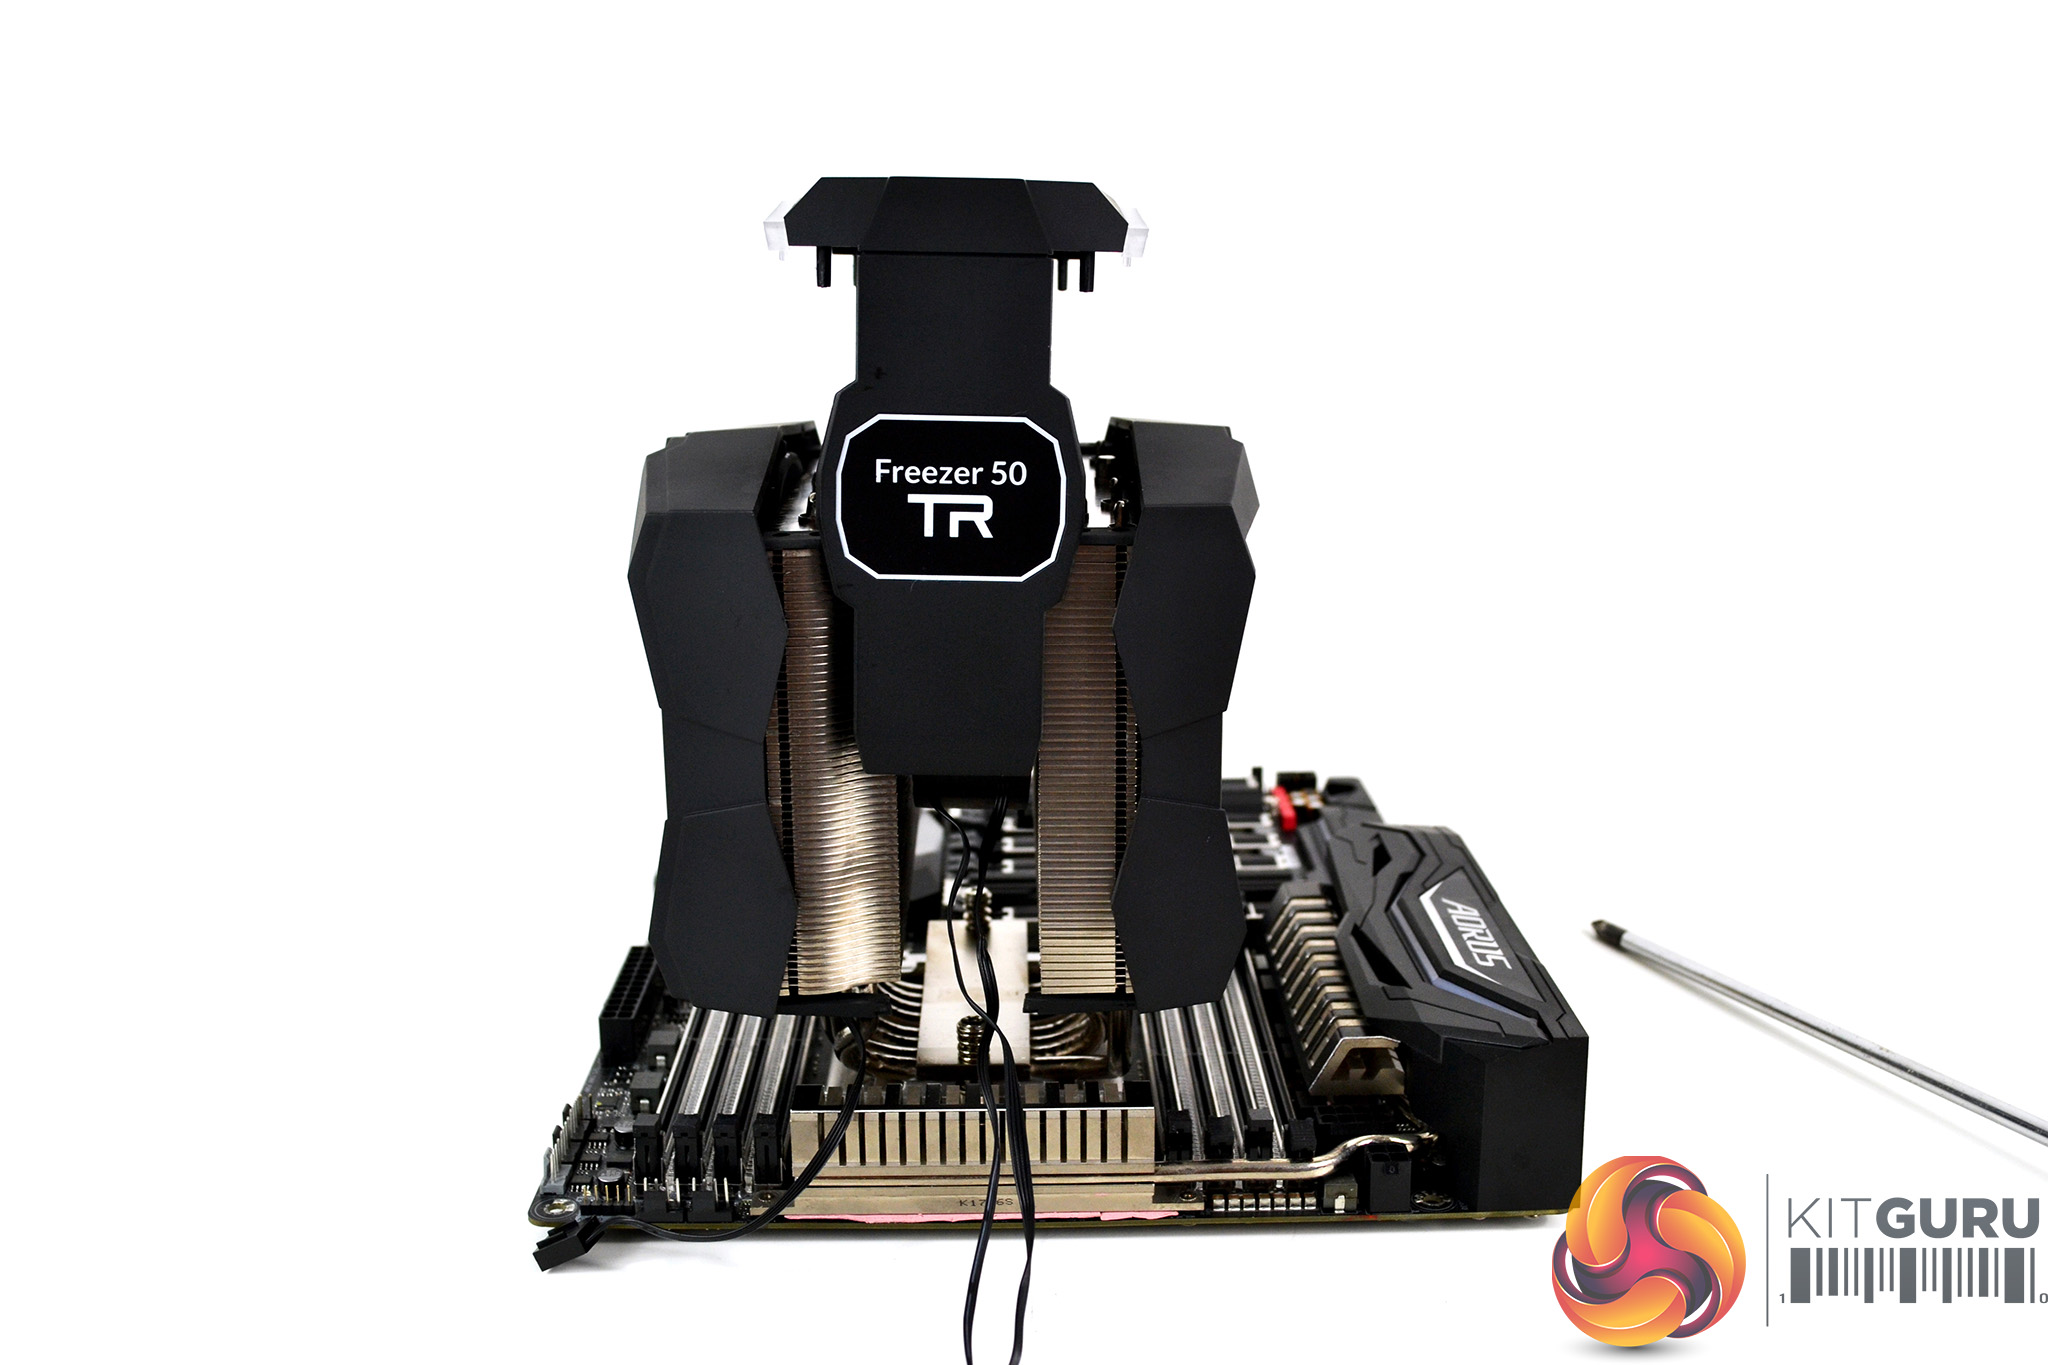
All was going well with installation until it came to fit our RAM. It instantly became obvious there was a problem with clearance to the G.SKILL Trident Z RGB memory DIMMs and the Freezer 50 TR front fan/rear plastic shroud. We managed to get the front fan in place, but it would not clip back together as intended by Arctic.
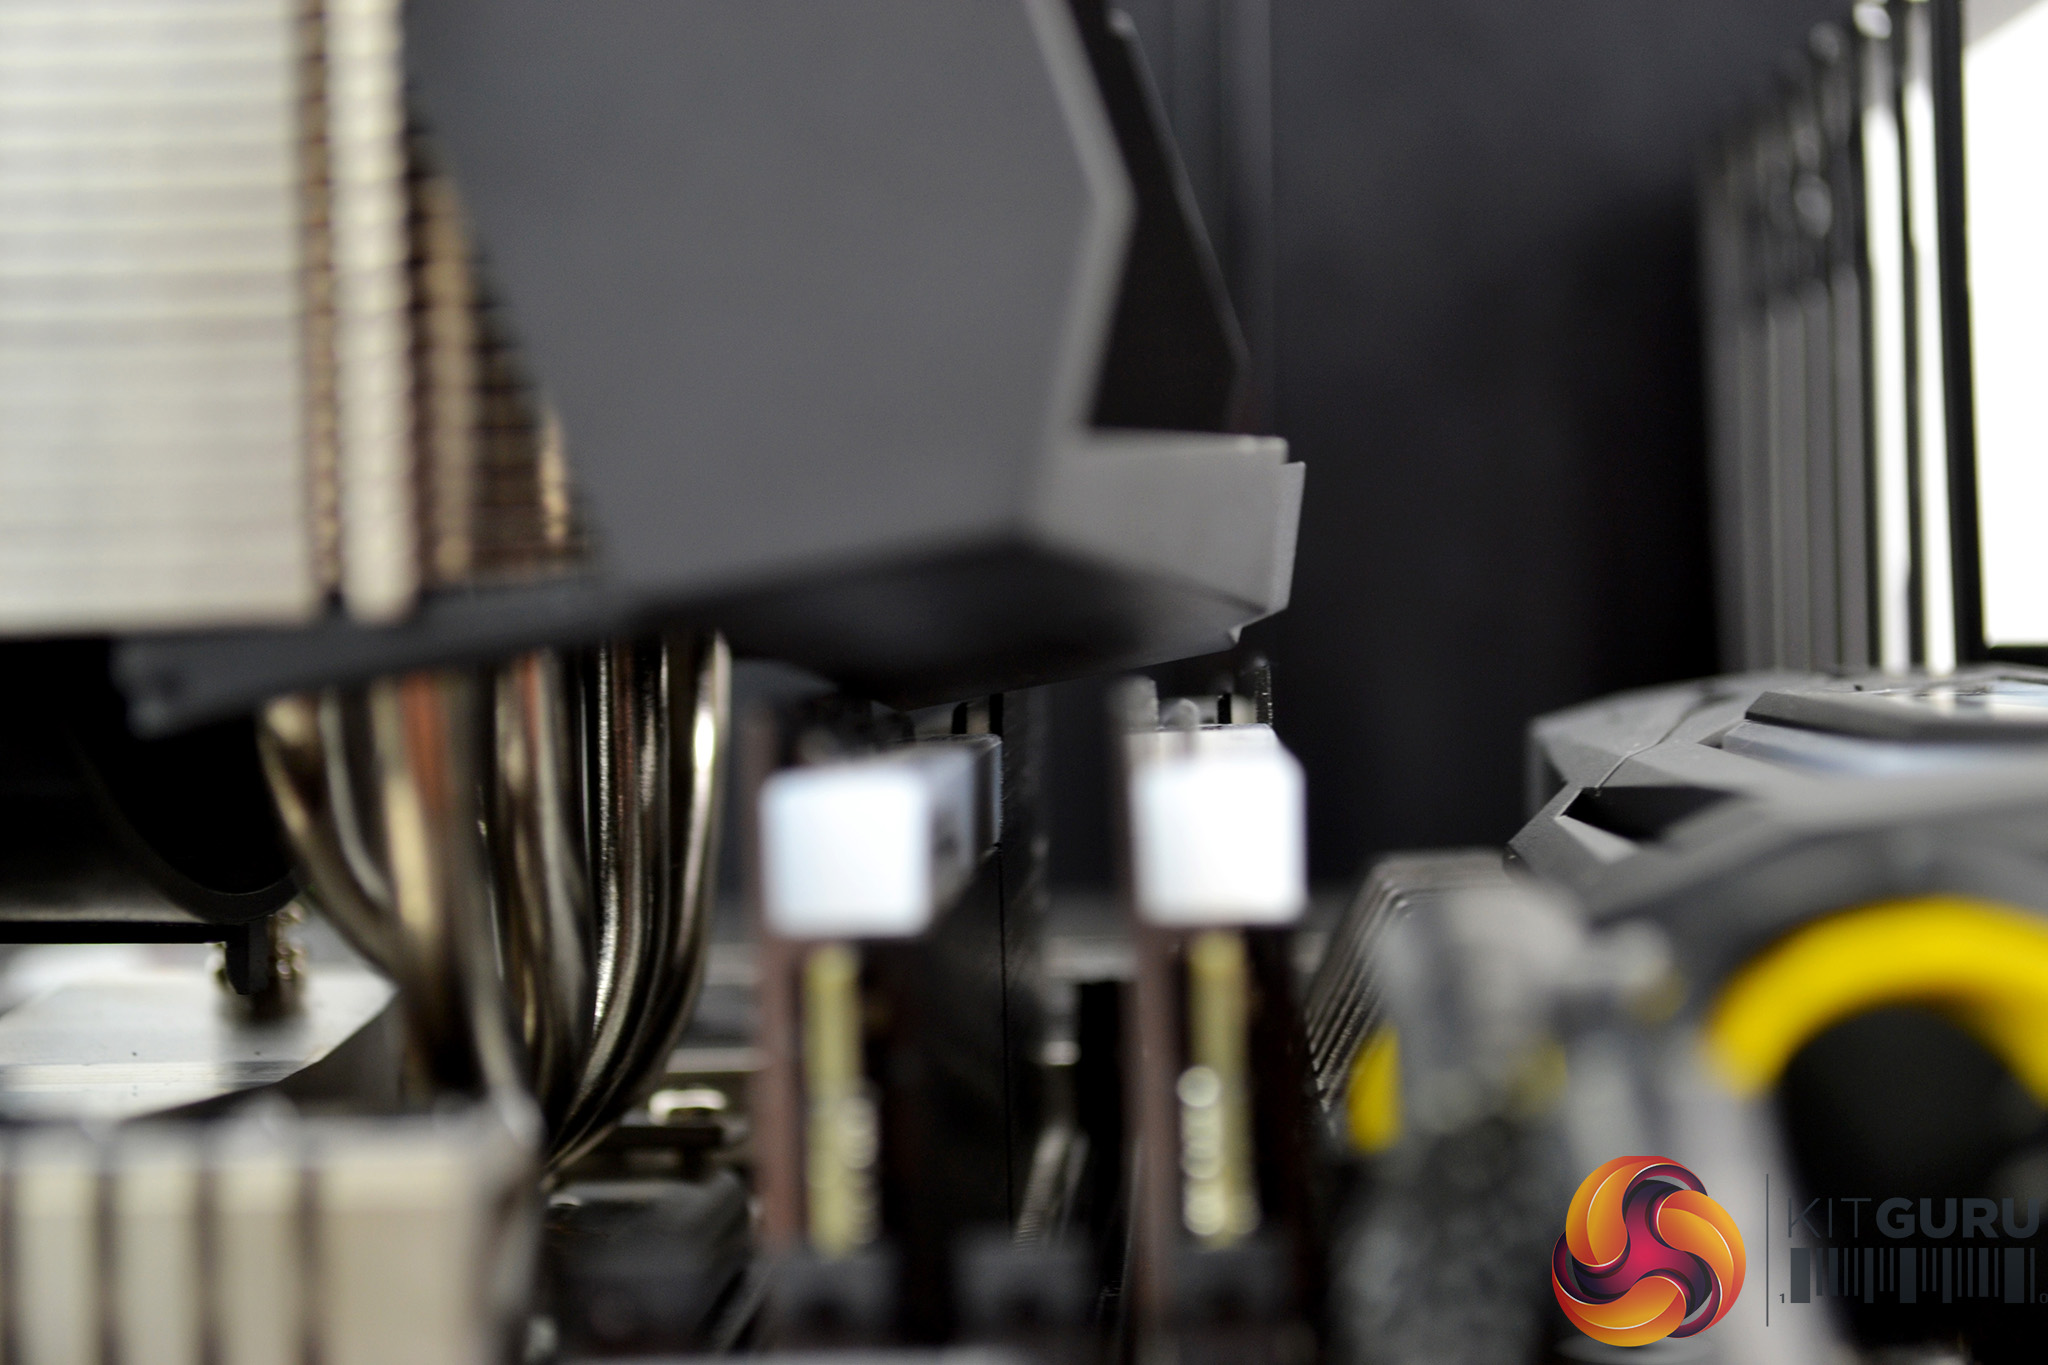
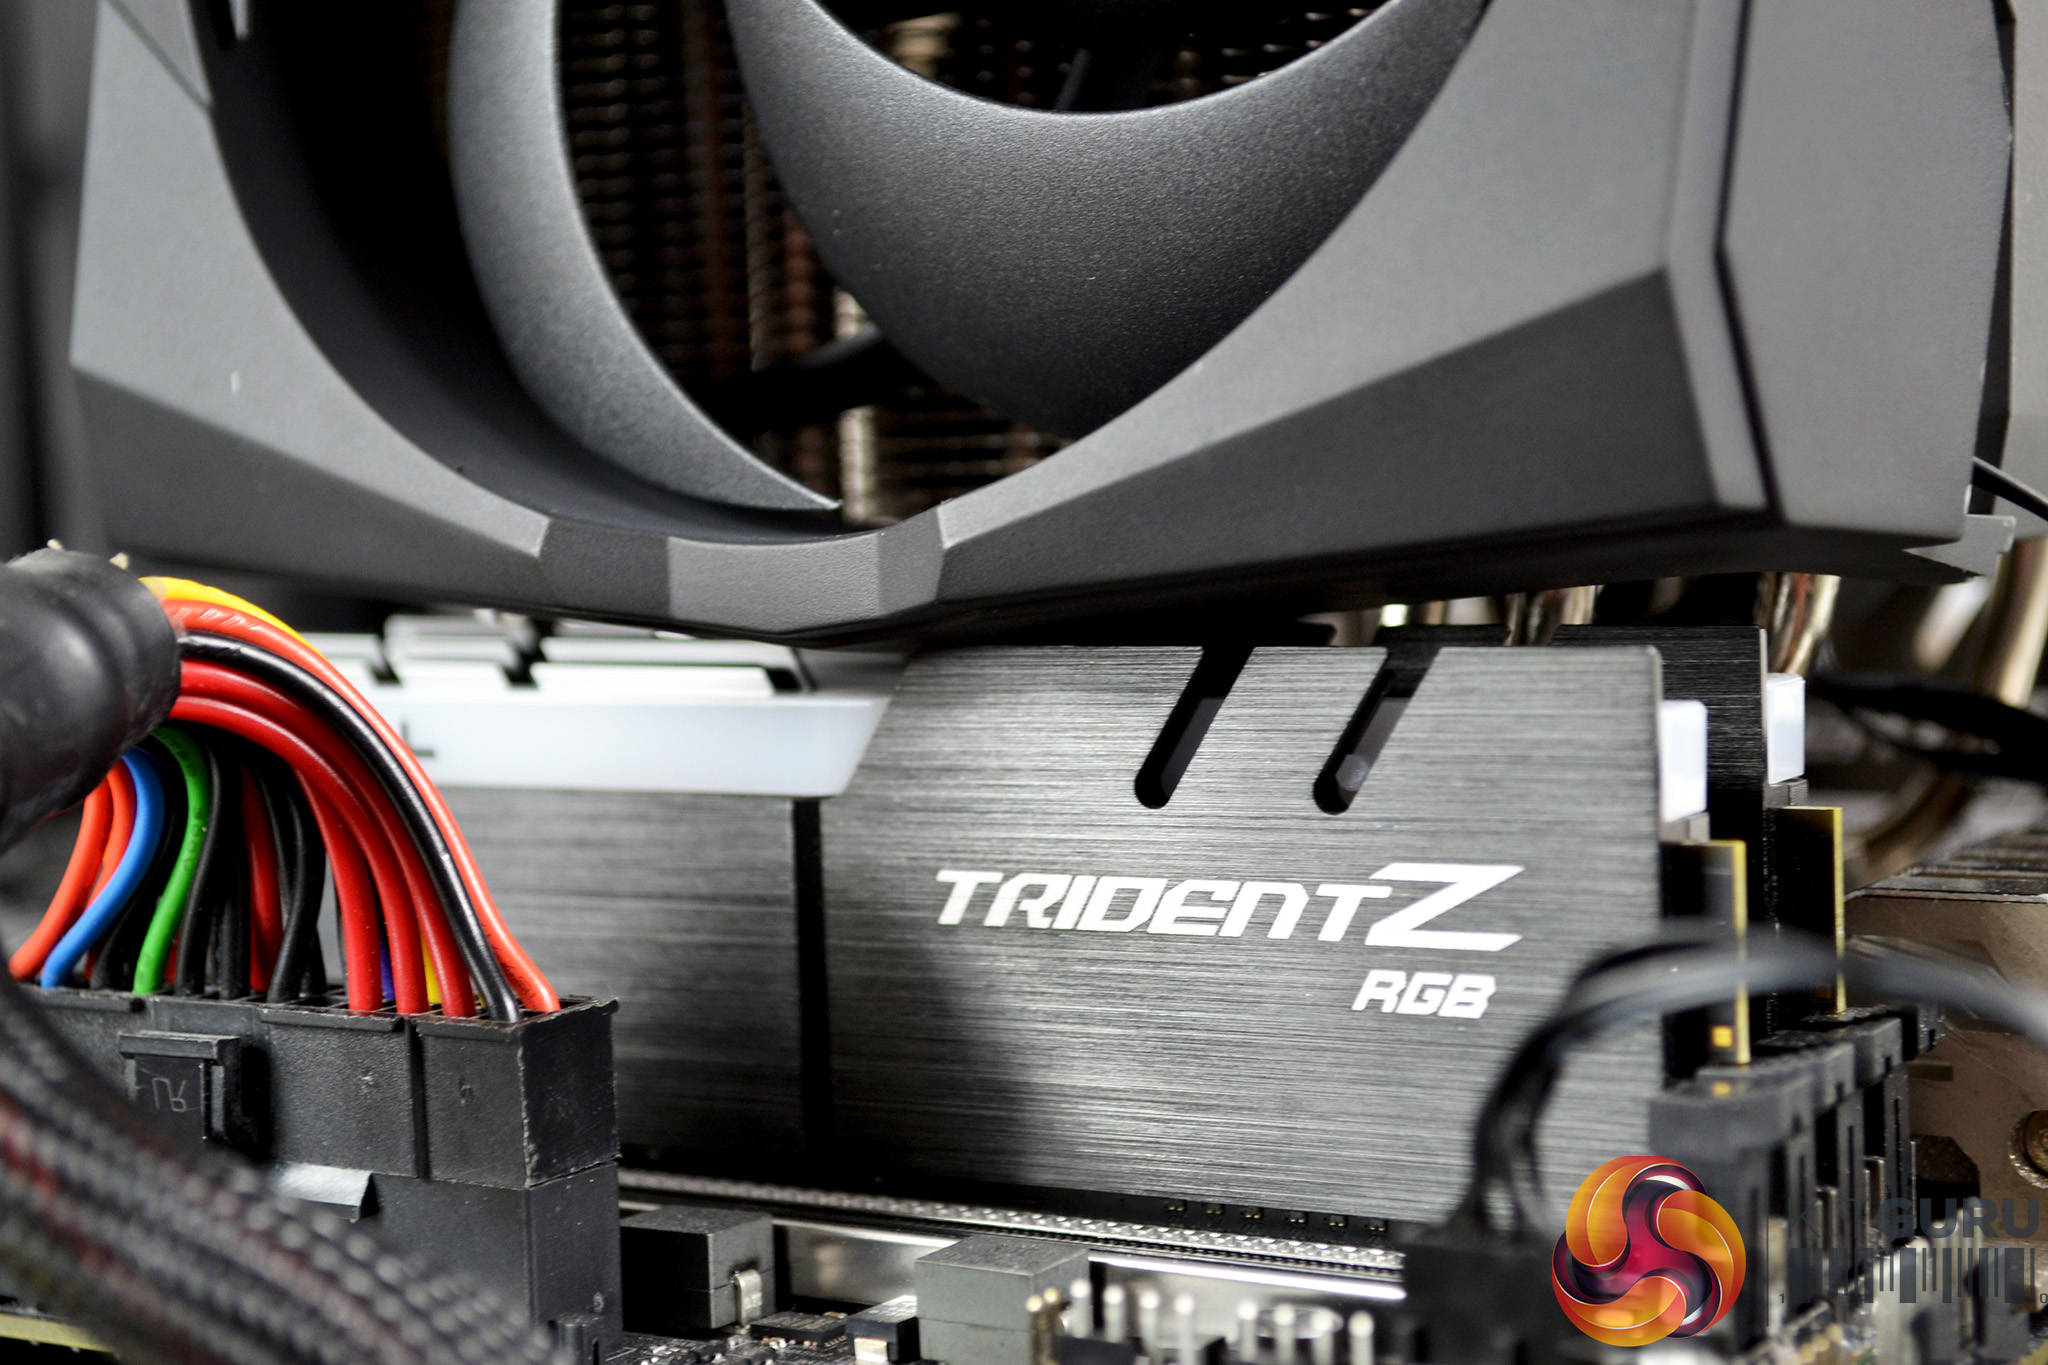
This is a major oversight by Arctic as the 37.5mm RAM clearance just isn’t enough. We wouldn’t regard the G. SKILL Trident Z RGB as extremely tall and expect this type of RAM to be typically installed in a Threadripper based system.
However, with the fan in place as it is, we must continue with testing. To keep our thermal testing consistent, we are unable to use different RAM as it may cause a change in CPU performance compared with previous tests, which in turn could affect thermals.
