Usually, when the word Mirage is mentioned, it’s swiftly followed by being headshot multiple times in Counter-Strike Global Offensive. That aside, it is actually the name of a new All-In-One Liquid CPU cooler from Cooler Master. Its full name is the Cooler Master MasterLiquid ML240P Mirage – not exactly an easy one to remember! Just how good is it for £139.99?
The Mirage is just one of a growing number of 240mm RGB All-In-One Liquid CPU coolers currently available from Cooler Master. Right now, there are a whopping seven 240mm All-In-Ones to choose from across Cooler Master's current line-up, which all have RGB lighting in some form.
With a current price tag of £139.99 from online retailers, it places the ML240P Mirage in a market full of very popular All-In-One liquid coolers. So what could Cooler Master have possibly thought up now to set the Mirage apart from the rest?
Key Features
- Transparent pump top
- Outer ring fan blade design
- Addressable RGB LED Lighting
- Braided tubing and cable sleeving
Specification
- CPU Socket – LGA2066, LGA2011-v3, LGA2011, LGA1151, LGA1150, LGA1155, LGA1156, LGA1366, LGA775, TR4, AM4, AM3+, AM3, AM2+, AM2, FM2+, FM2, FM1
- Waterblock Dimensions – 85 x 80 x 41.7 mm
- Radiator Dimensions – 277 x 120 x 27 mm
- Radiator Material – Aluminium
- Fan Dimensions – (L X W X H) – 120 x 120 x 26 mm / 4.7 x 4.7 x 1 inch
- Fan Speed – 2000 ±10% RPM (Max)
- Fan Air Flow – 60.95 CFM (Max)
- Fan Air Pressure – 2.33 mm H2O (Max)
- Fan MTTF – 160,000 Hours
- Fan Noise Level – 27dBA (1m)
- Fan Power Connector – 4-Pin (PWM), ARGB 3-Pin
- Fan rated Voltage – 12V DC
- Fan Rated Current – 0.30 A
- Fan Power Consumption – 3.60W
- Fan LED Colour – ARGB
- Pump MTTF – 160,000 Hours
- Pump Noise Level – < 20 dBA (1m)
- Pump rated Voltage – 12 VDC
- Pump Power Consumption – 3.96W
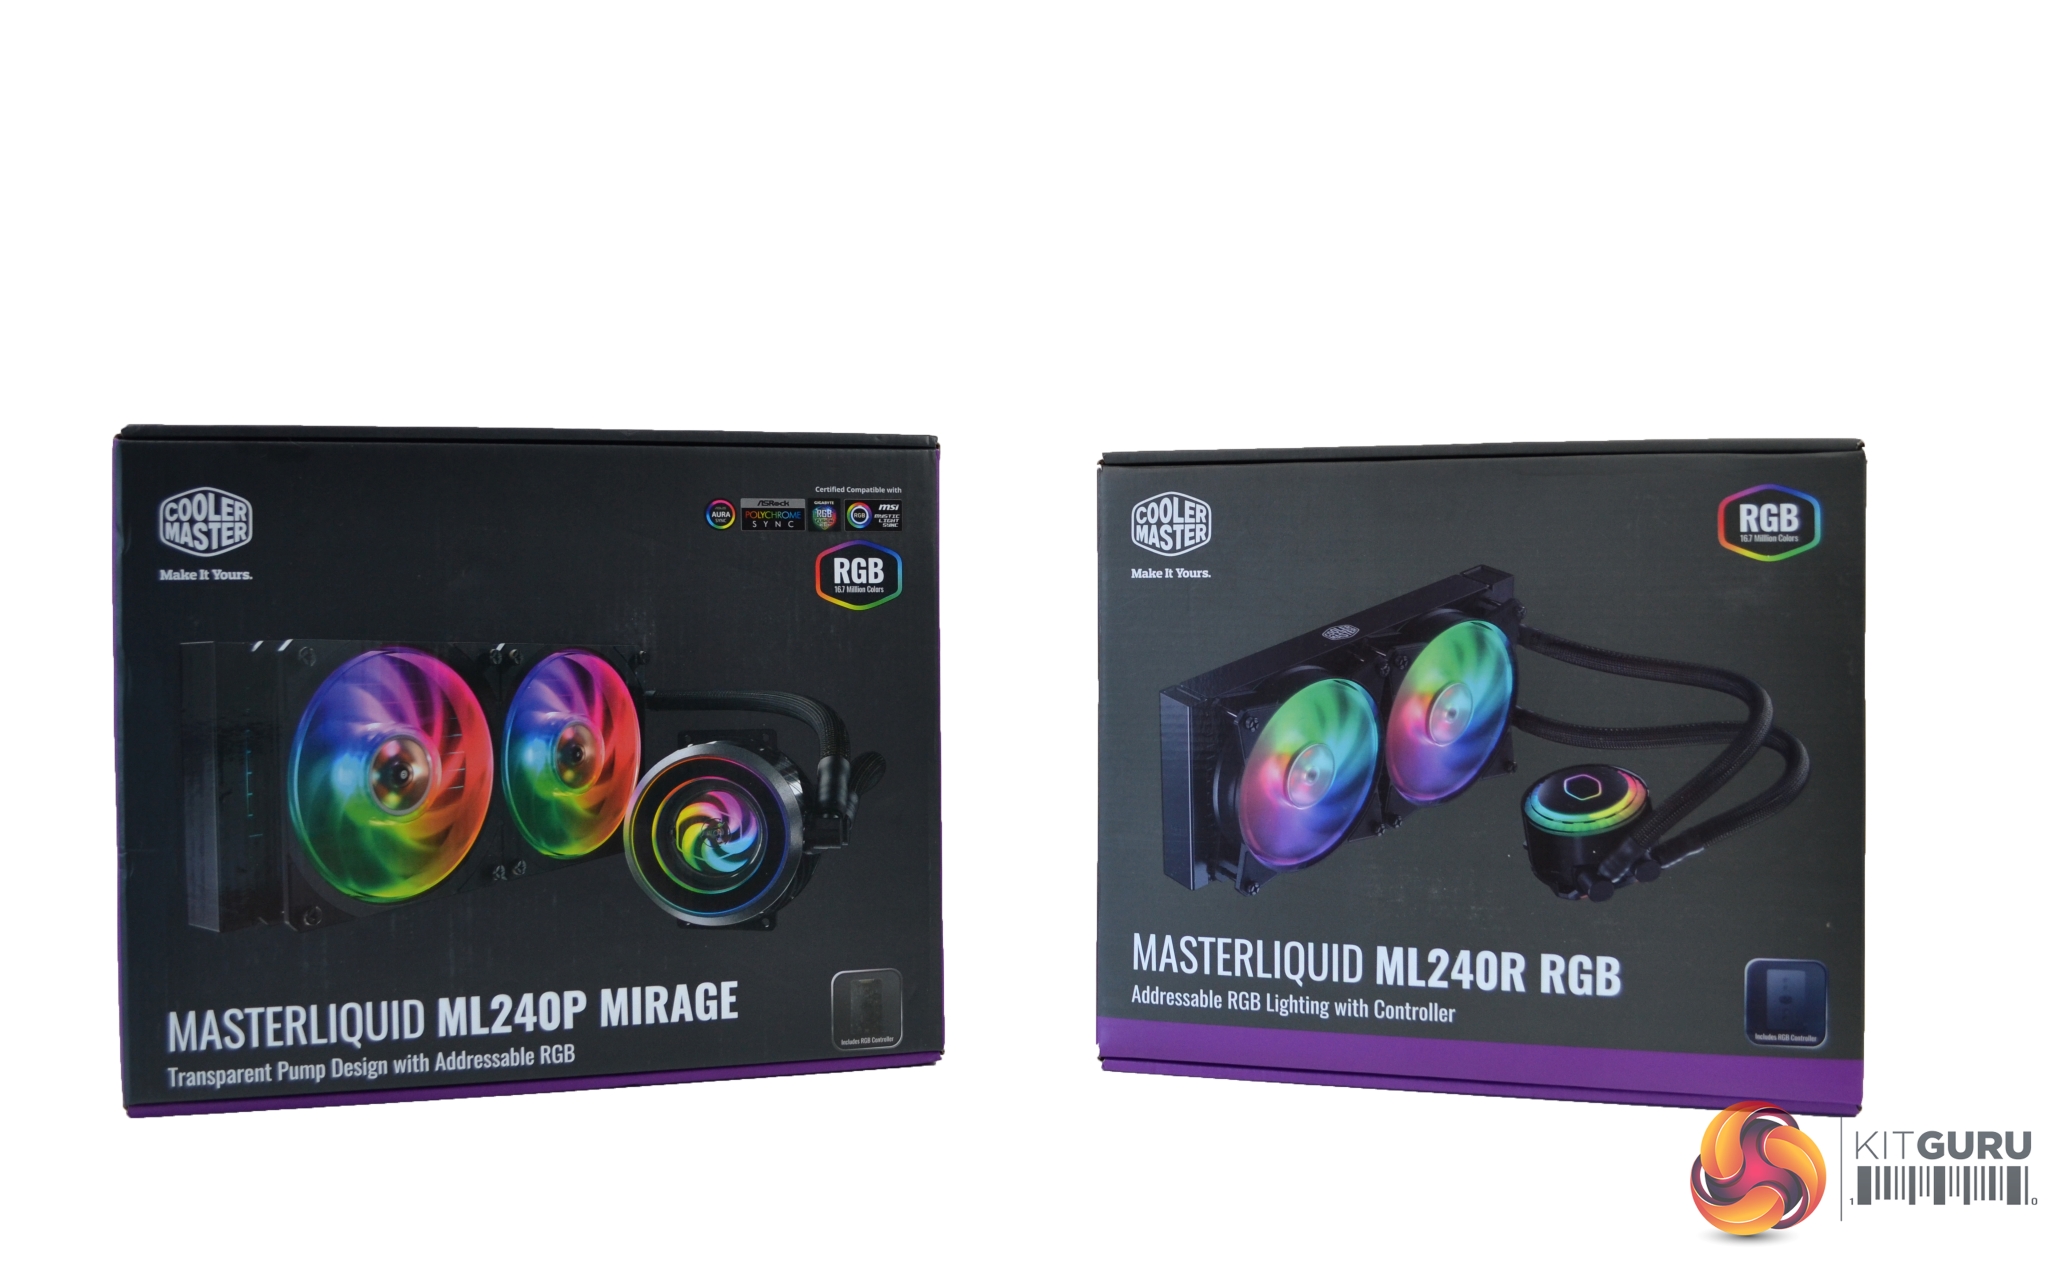
The first thing you notice about the packaging is how similar it is to previous RGB All-In-One coolers from Cooler Master. Put side by side with the ML240R RGB box, they could easily be mistaken for one another. This is intentional though and makes it easy to distinguish it’s a Cooler Master product.
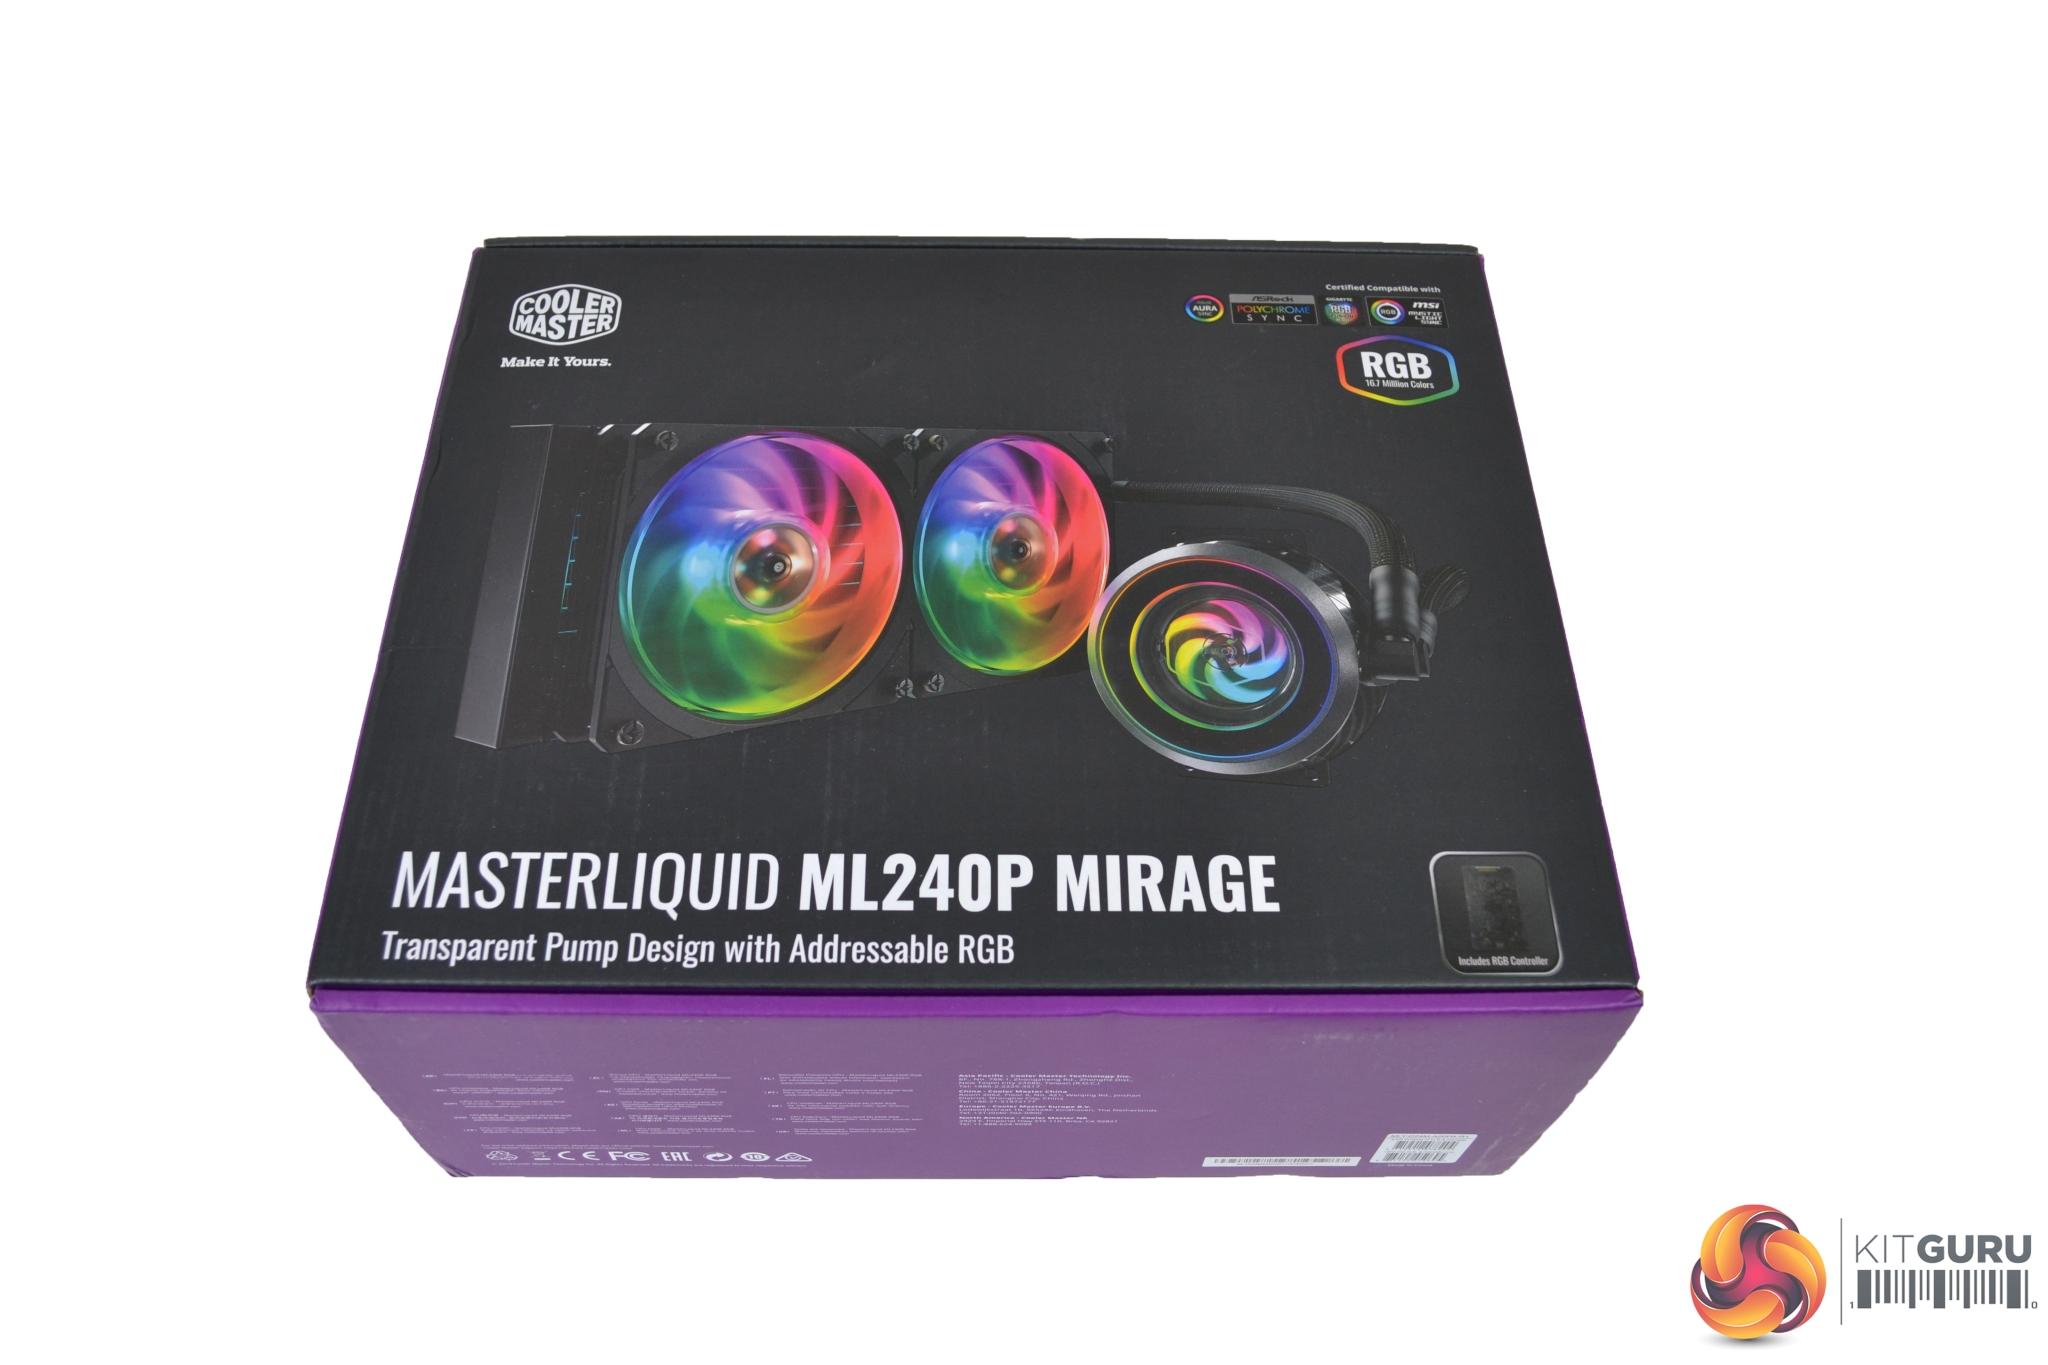
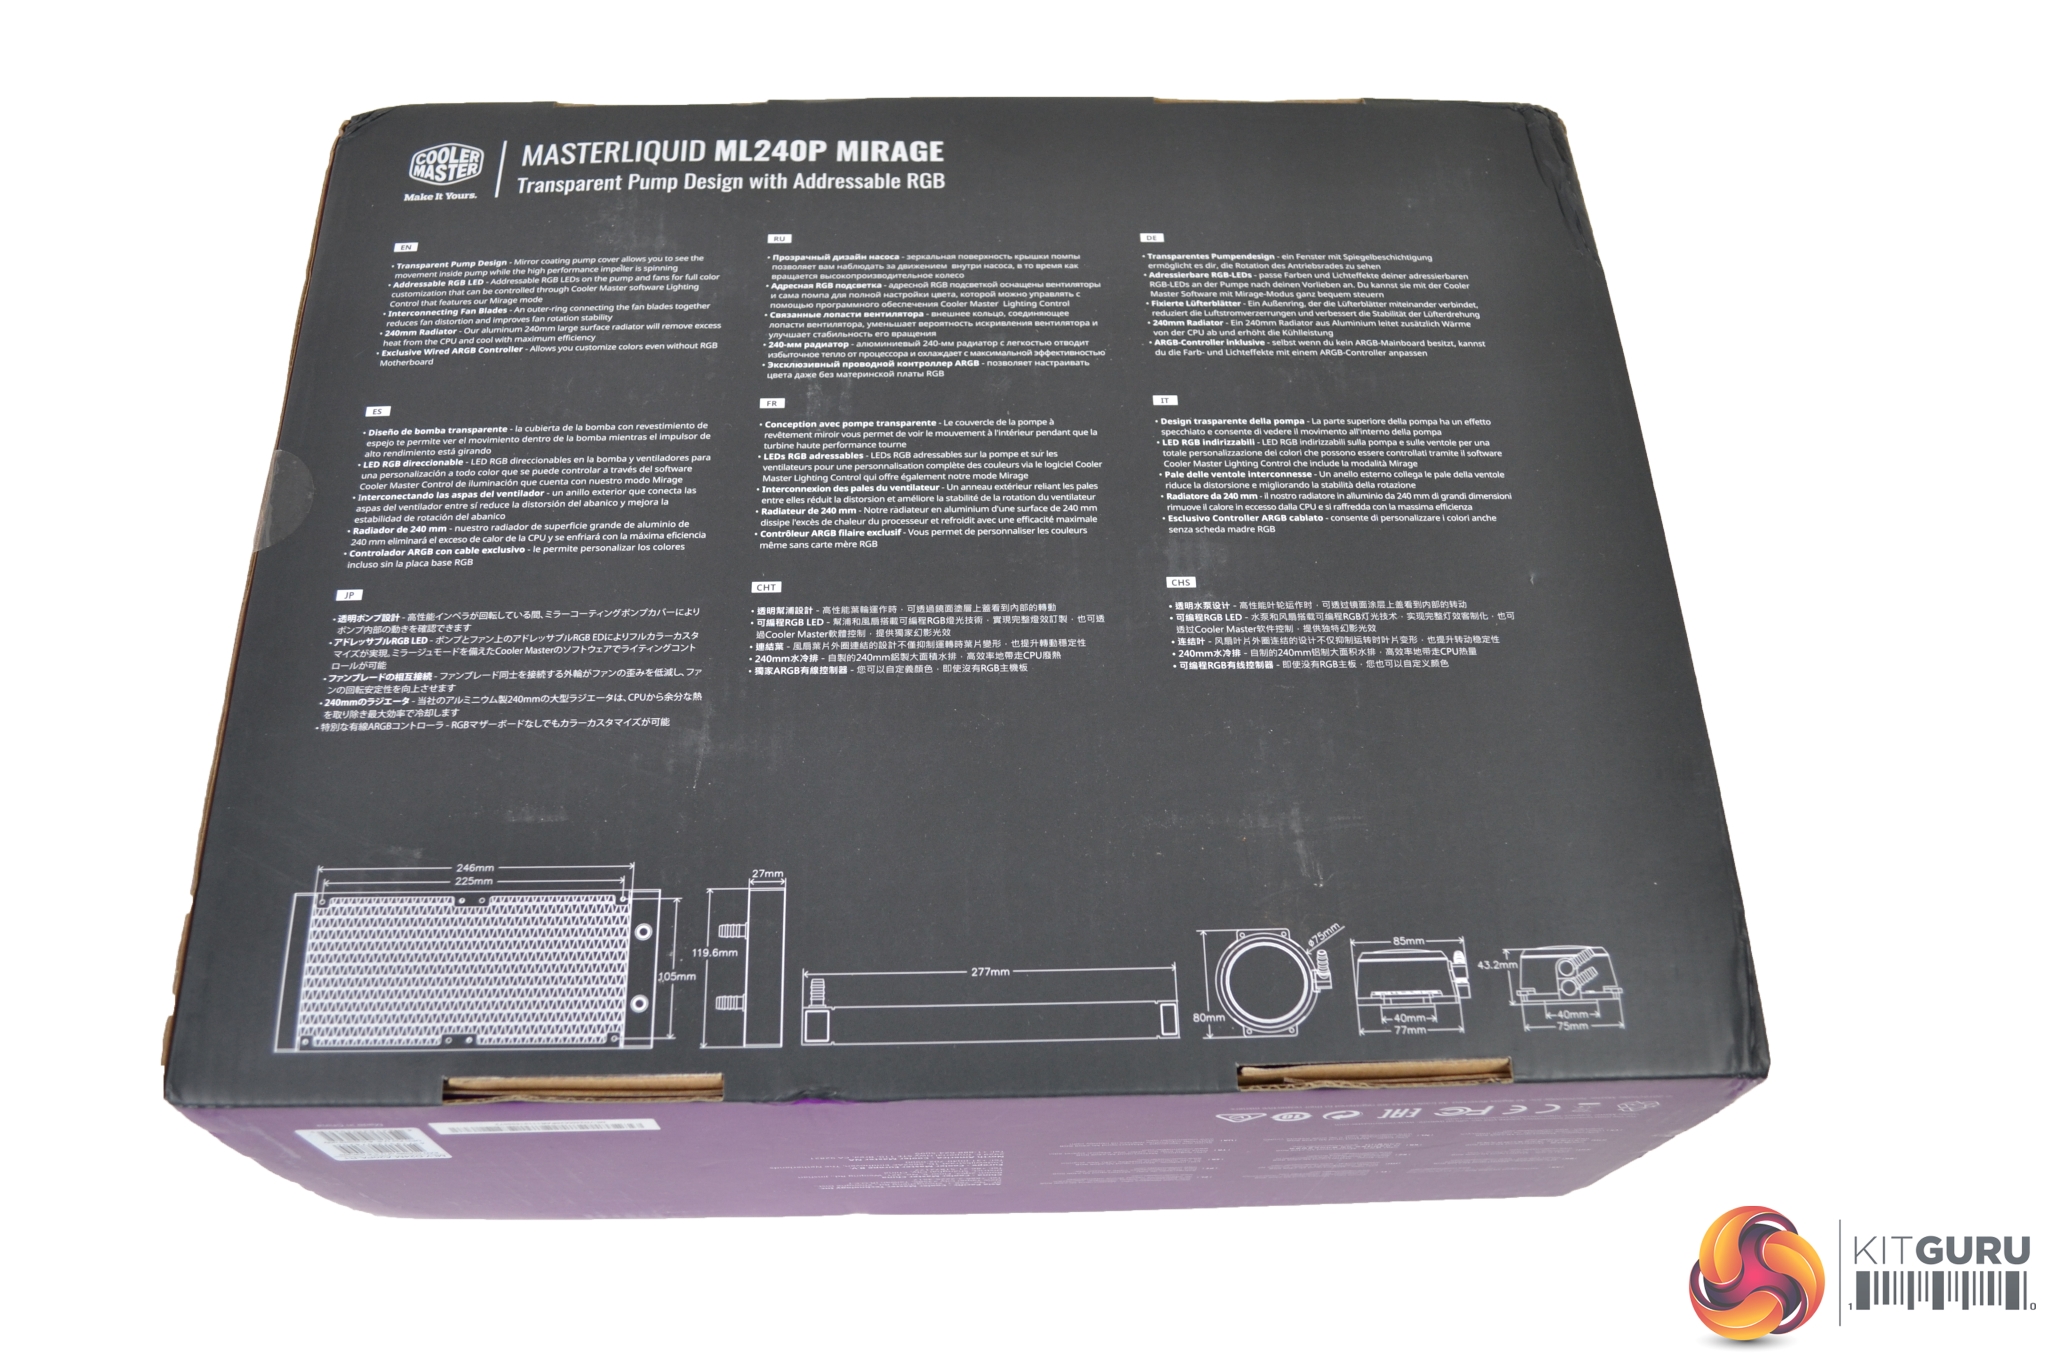
A large image of the cooler takes up most of the real estate on the front of the box. In the top left-hand corner is the Cooler Master logo and to the right, a list of compatible RGB software. On the rear, a list of features and dimensions are listed in multiple languages.
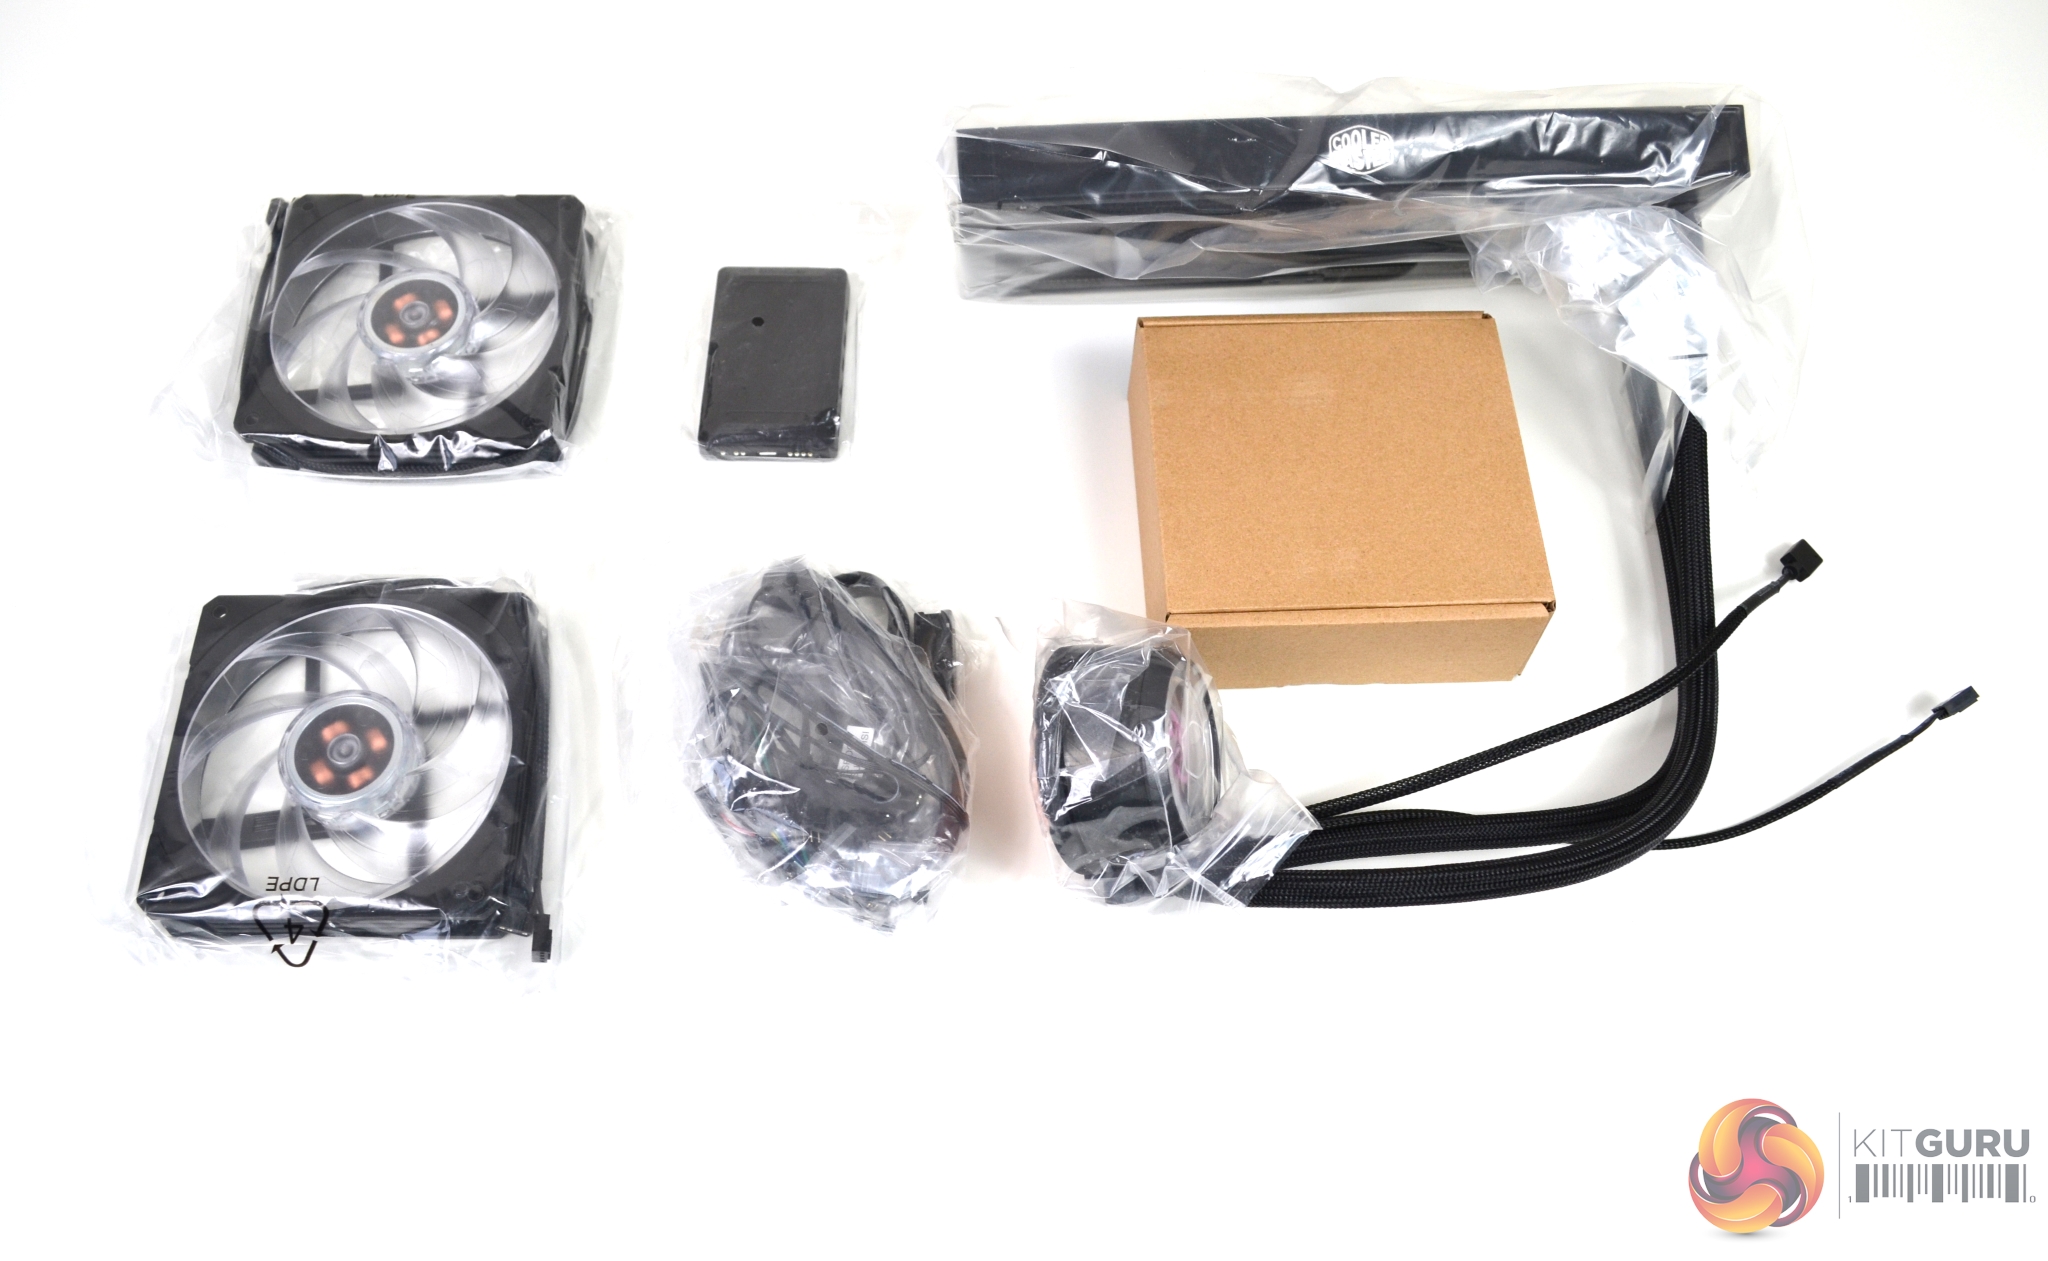
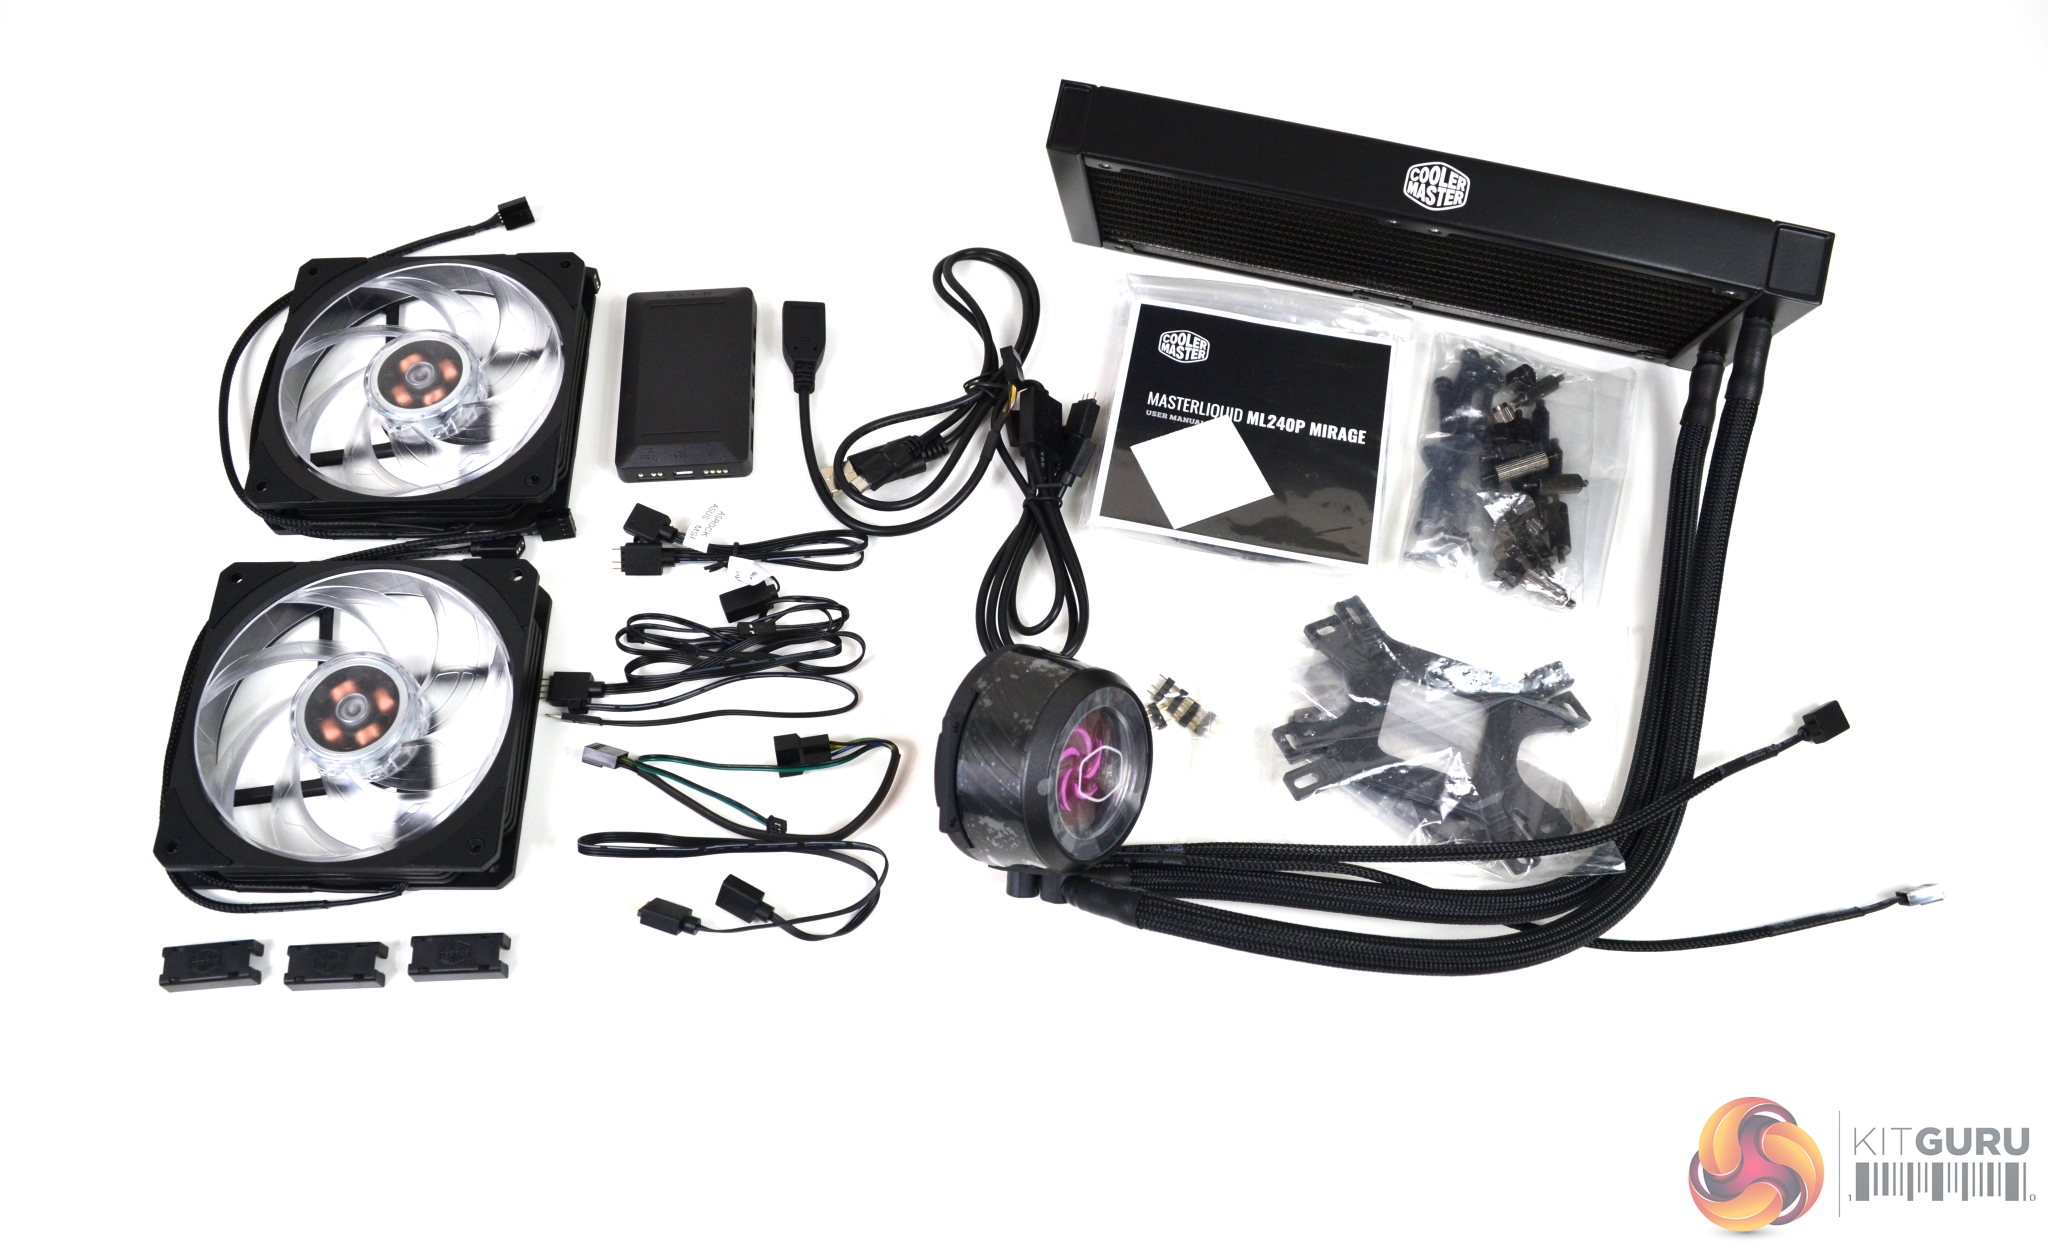
Opening the box, we find a comprehensive amount of accessories including installation hardware, two Cooler Master 120mm Mirage RGB Fans, an RGB lighting controller, a huge bundle of cables, the installation manual, warranty information, two Cooler Master decals and most importantly, the cooler itself.
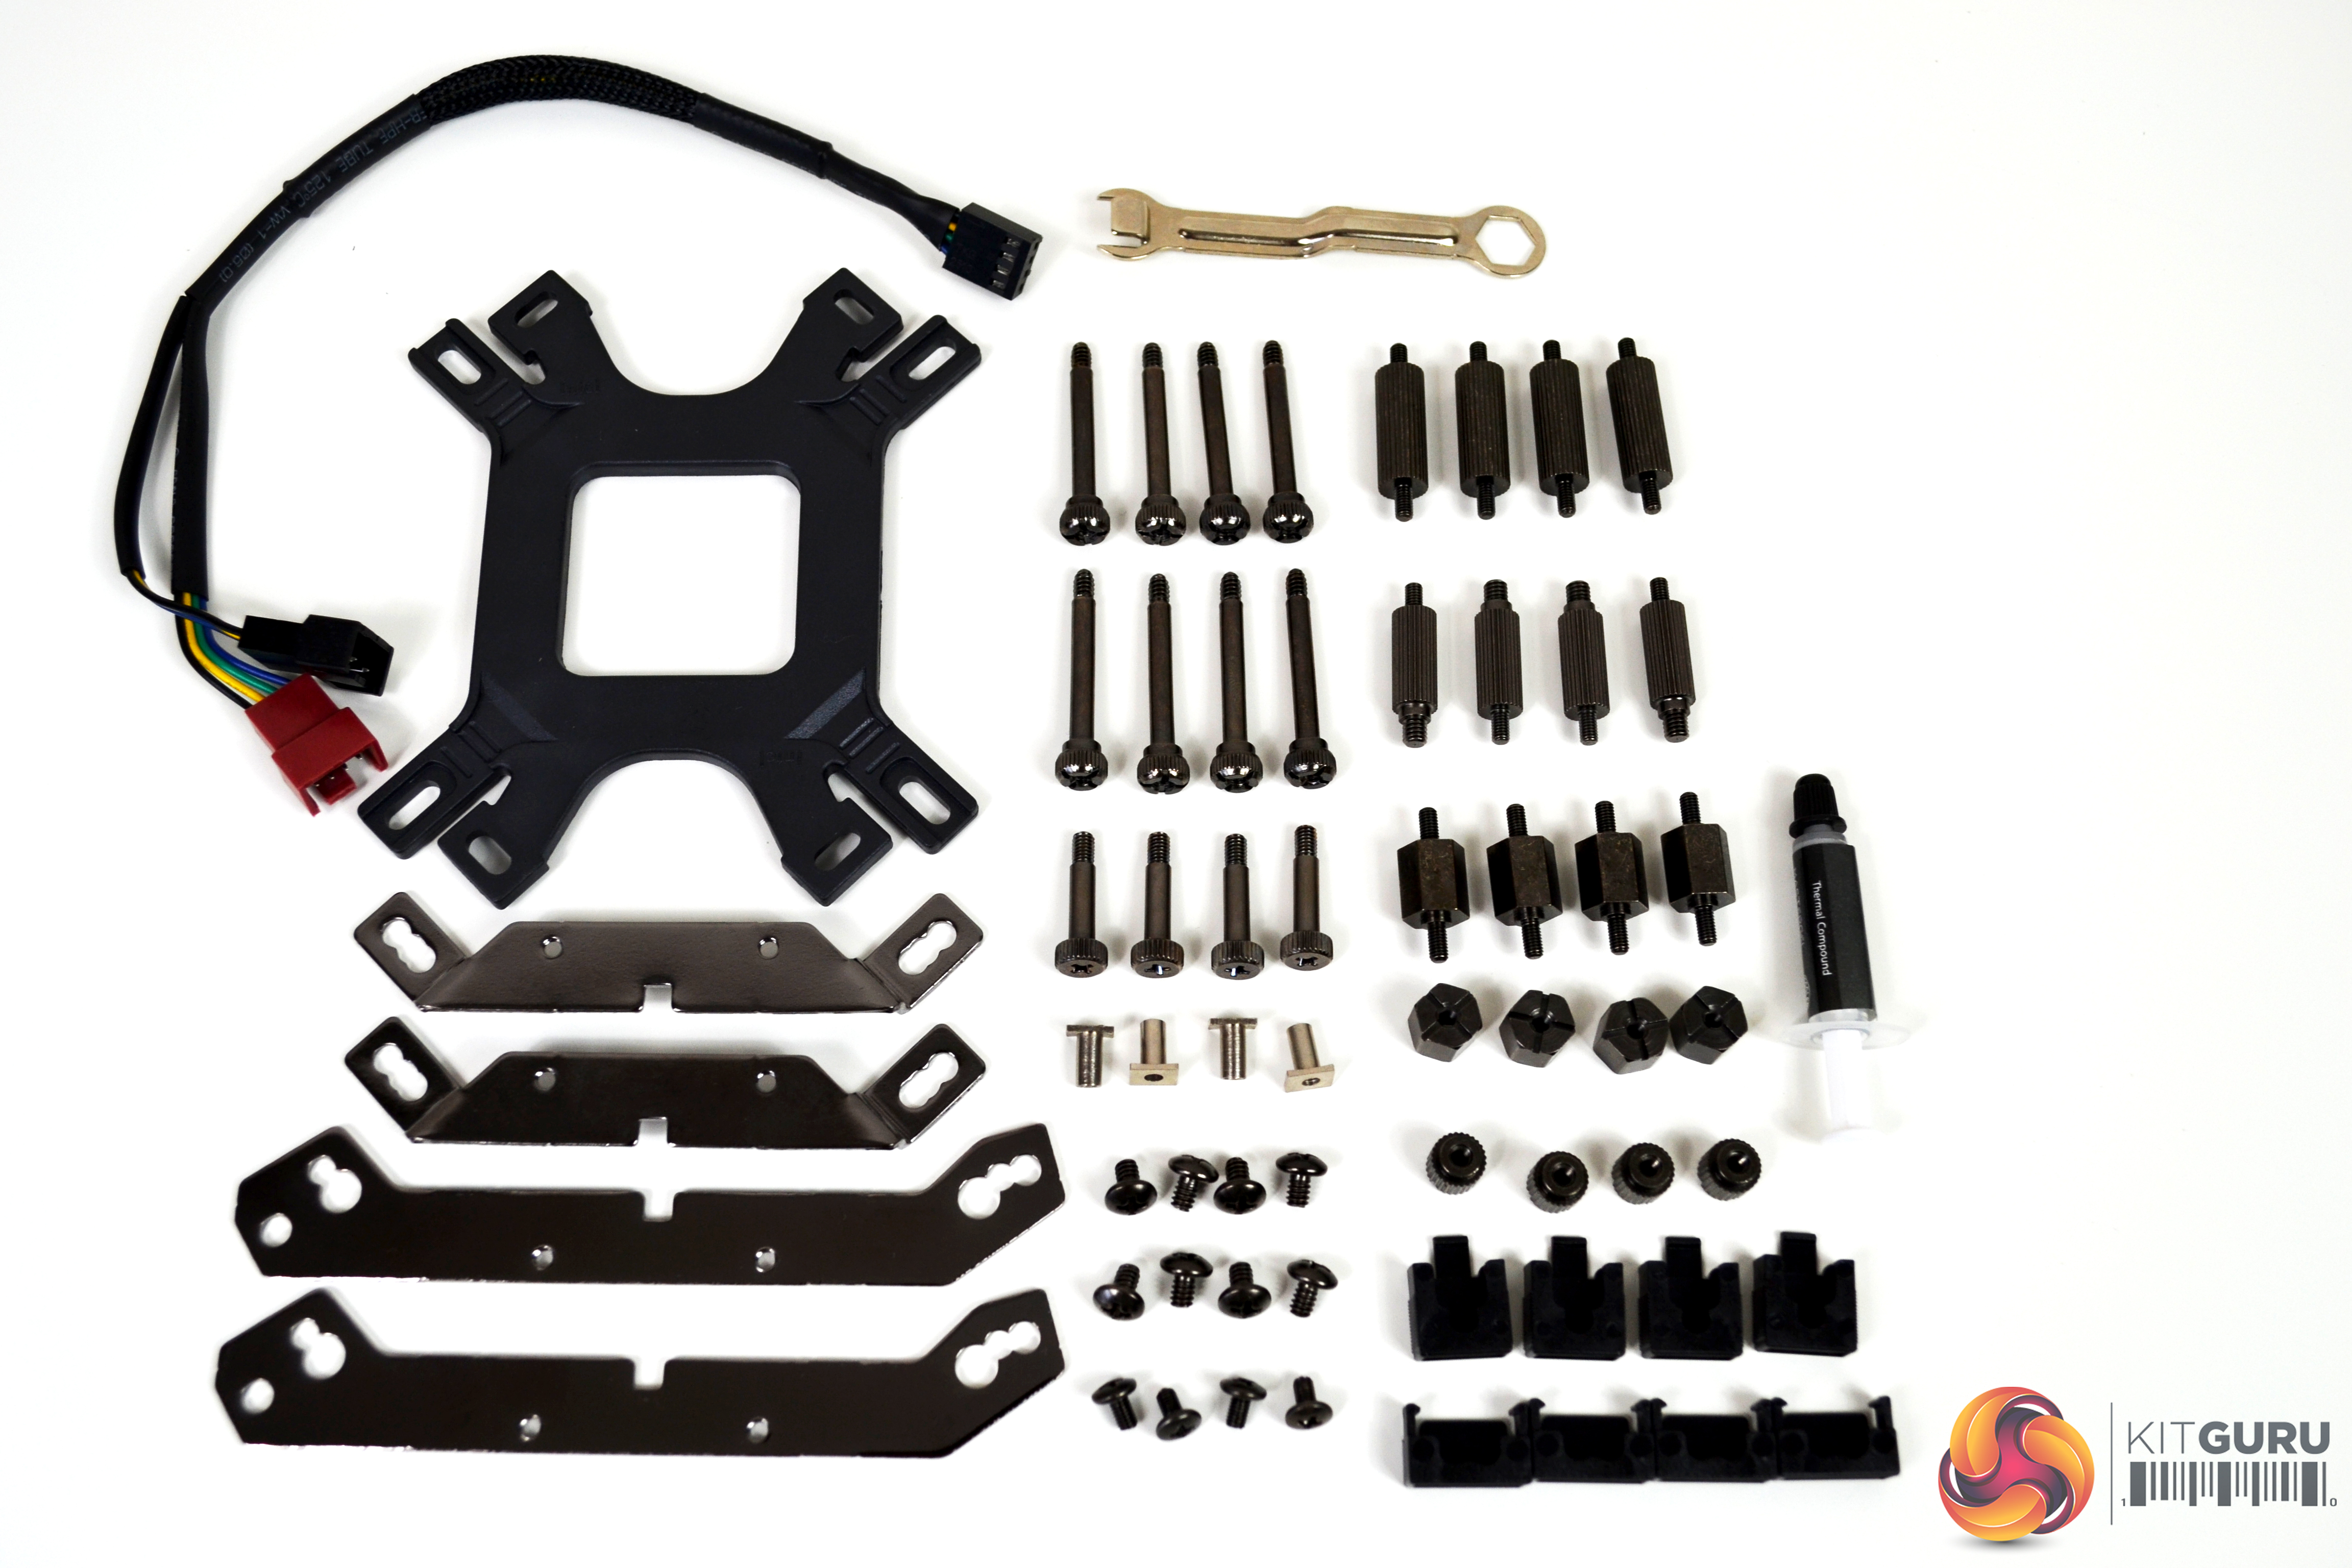
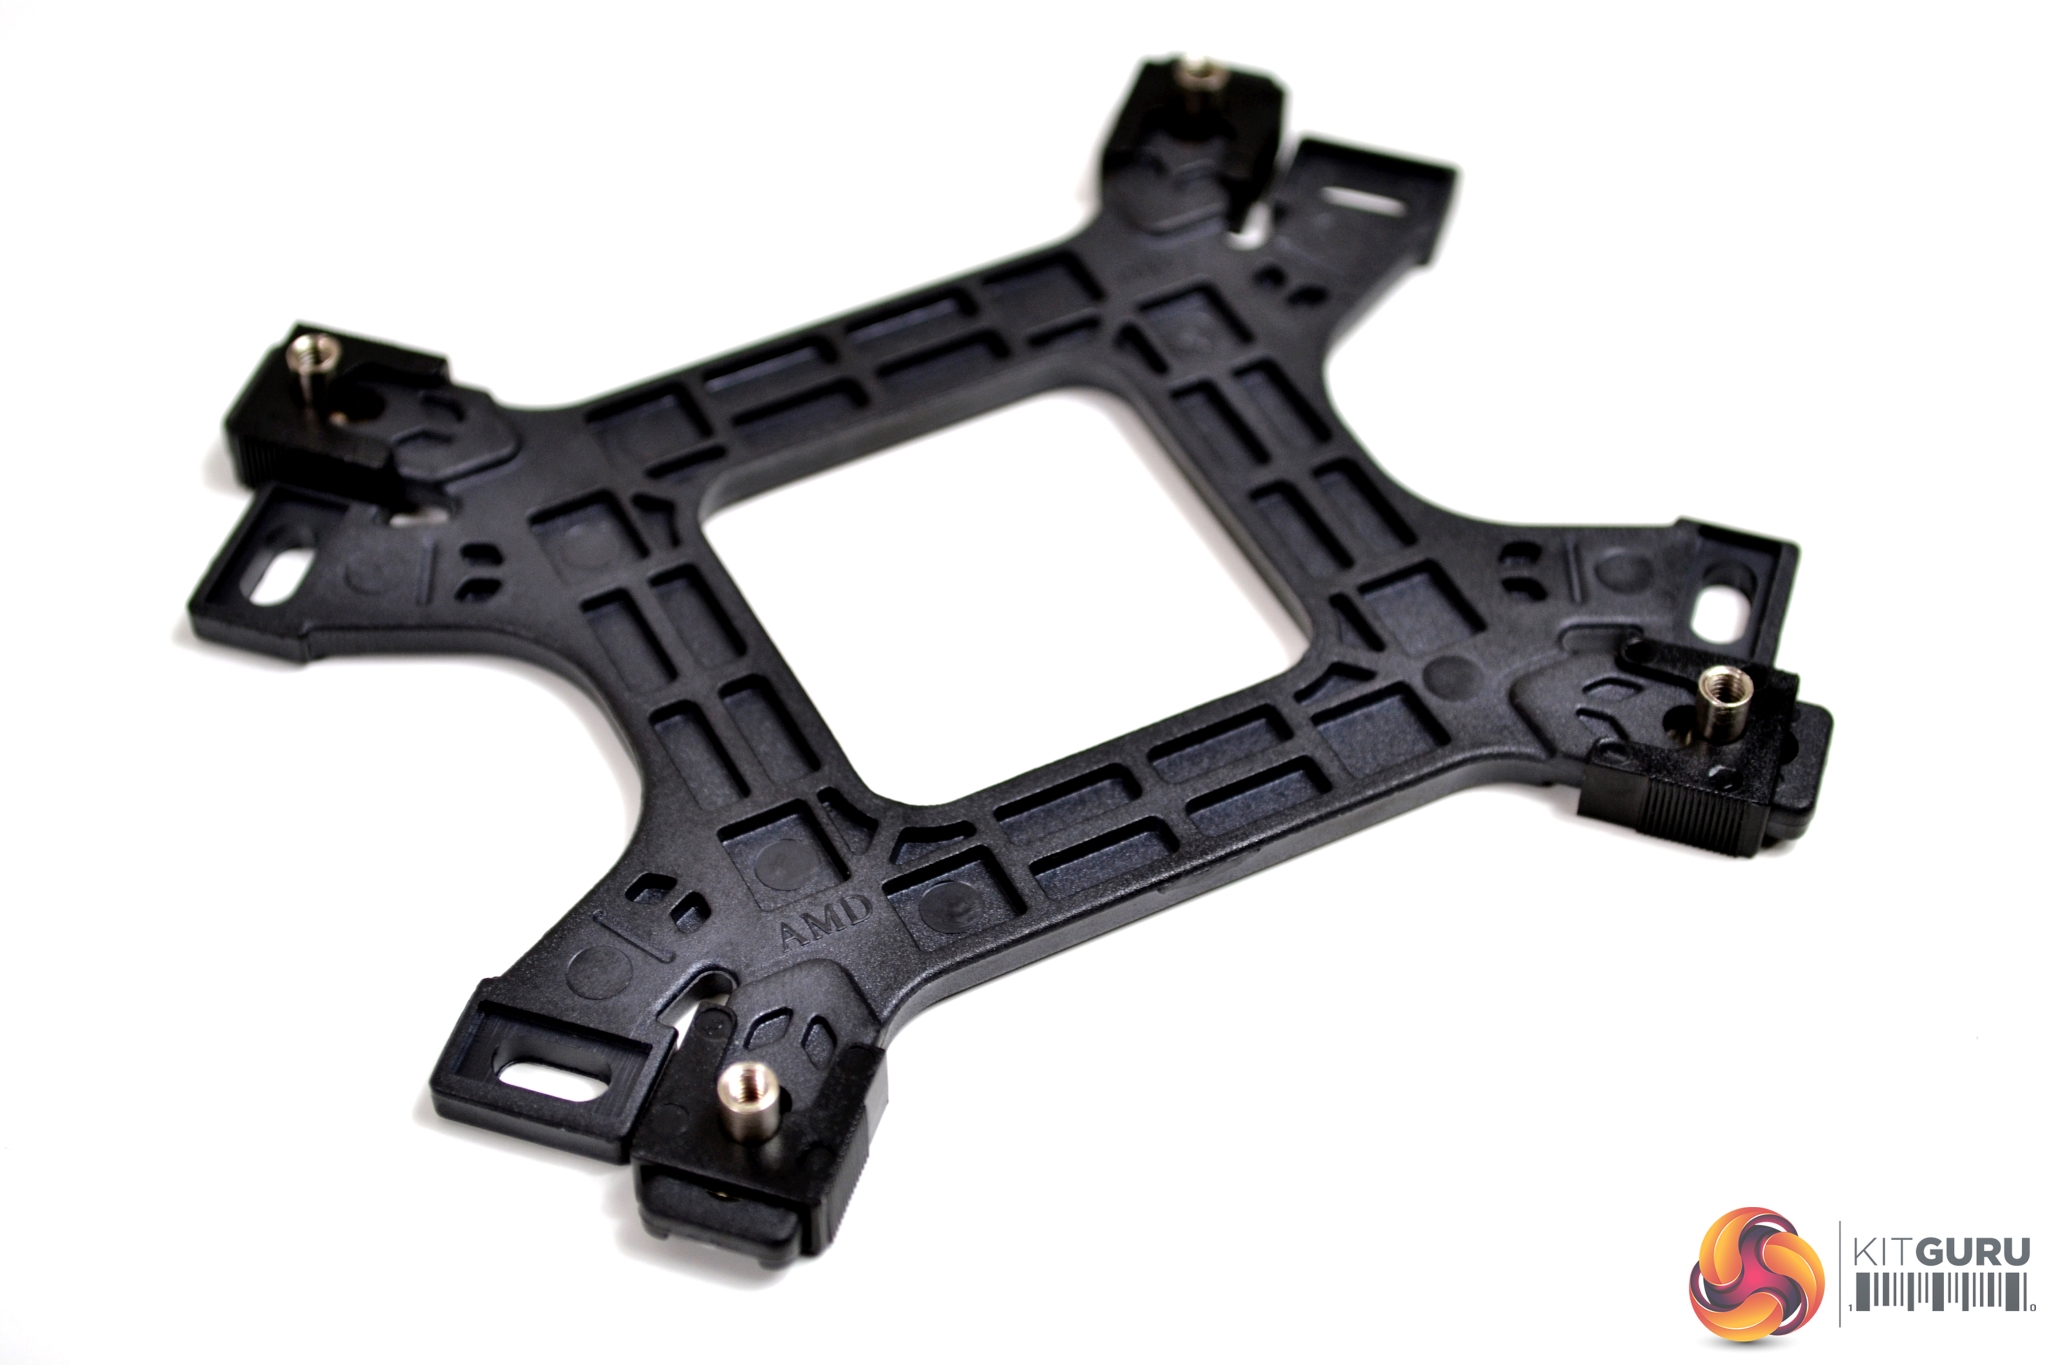
On closer inspection, there is mounting hardware for a range of Intel and AMD platforms including Intel LGA 2066/2011/1366/115X and socket 775, while AMD AM4/AM3+/AM3/AM2+/FM2+/FM2/FM1 and TR4 sockets are all covered.
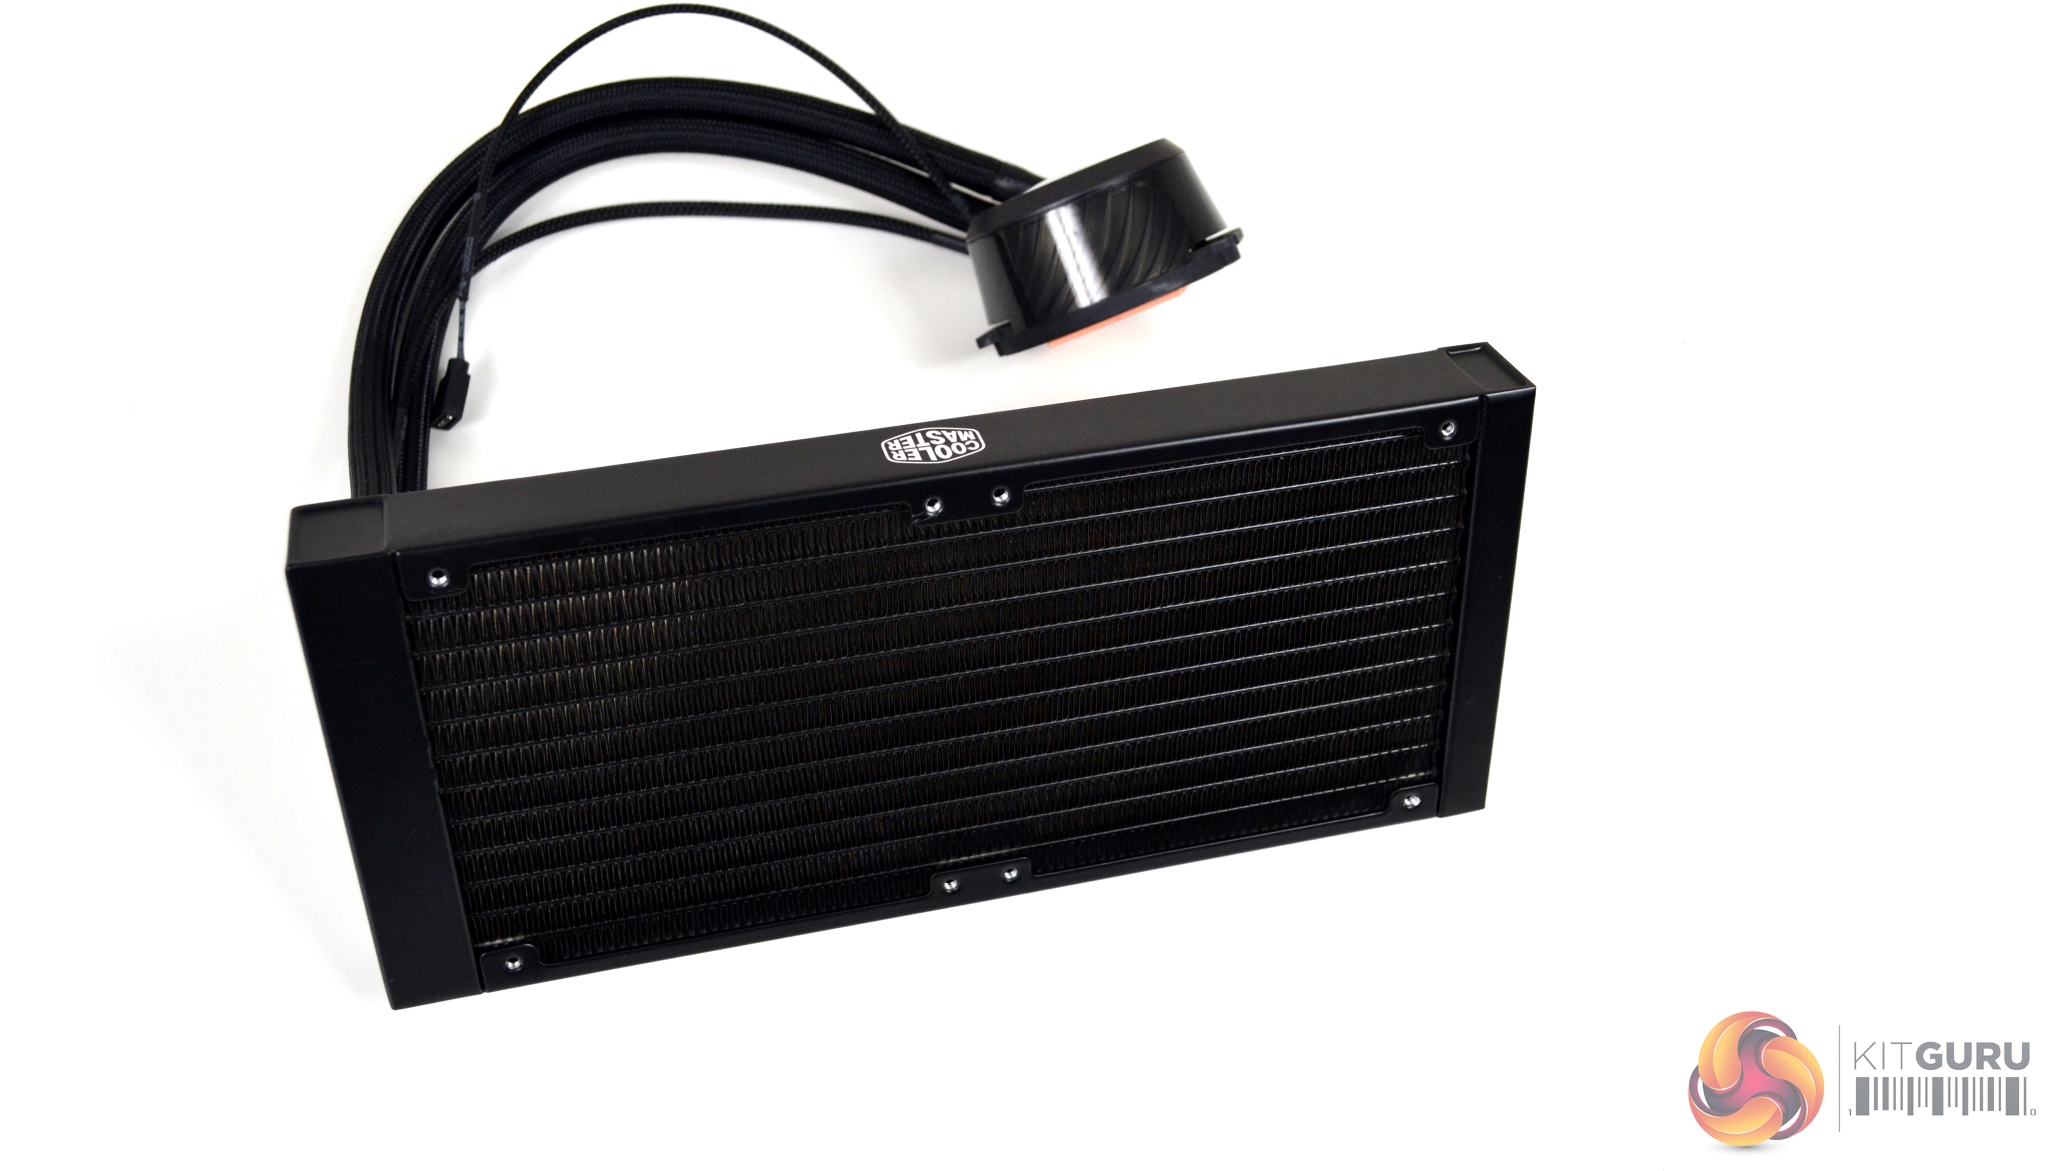
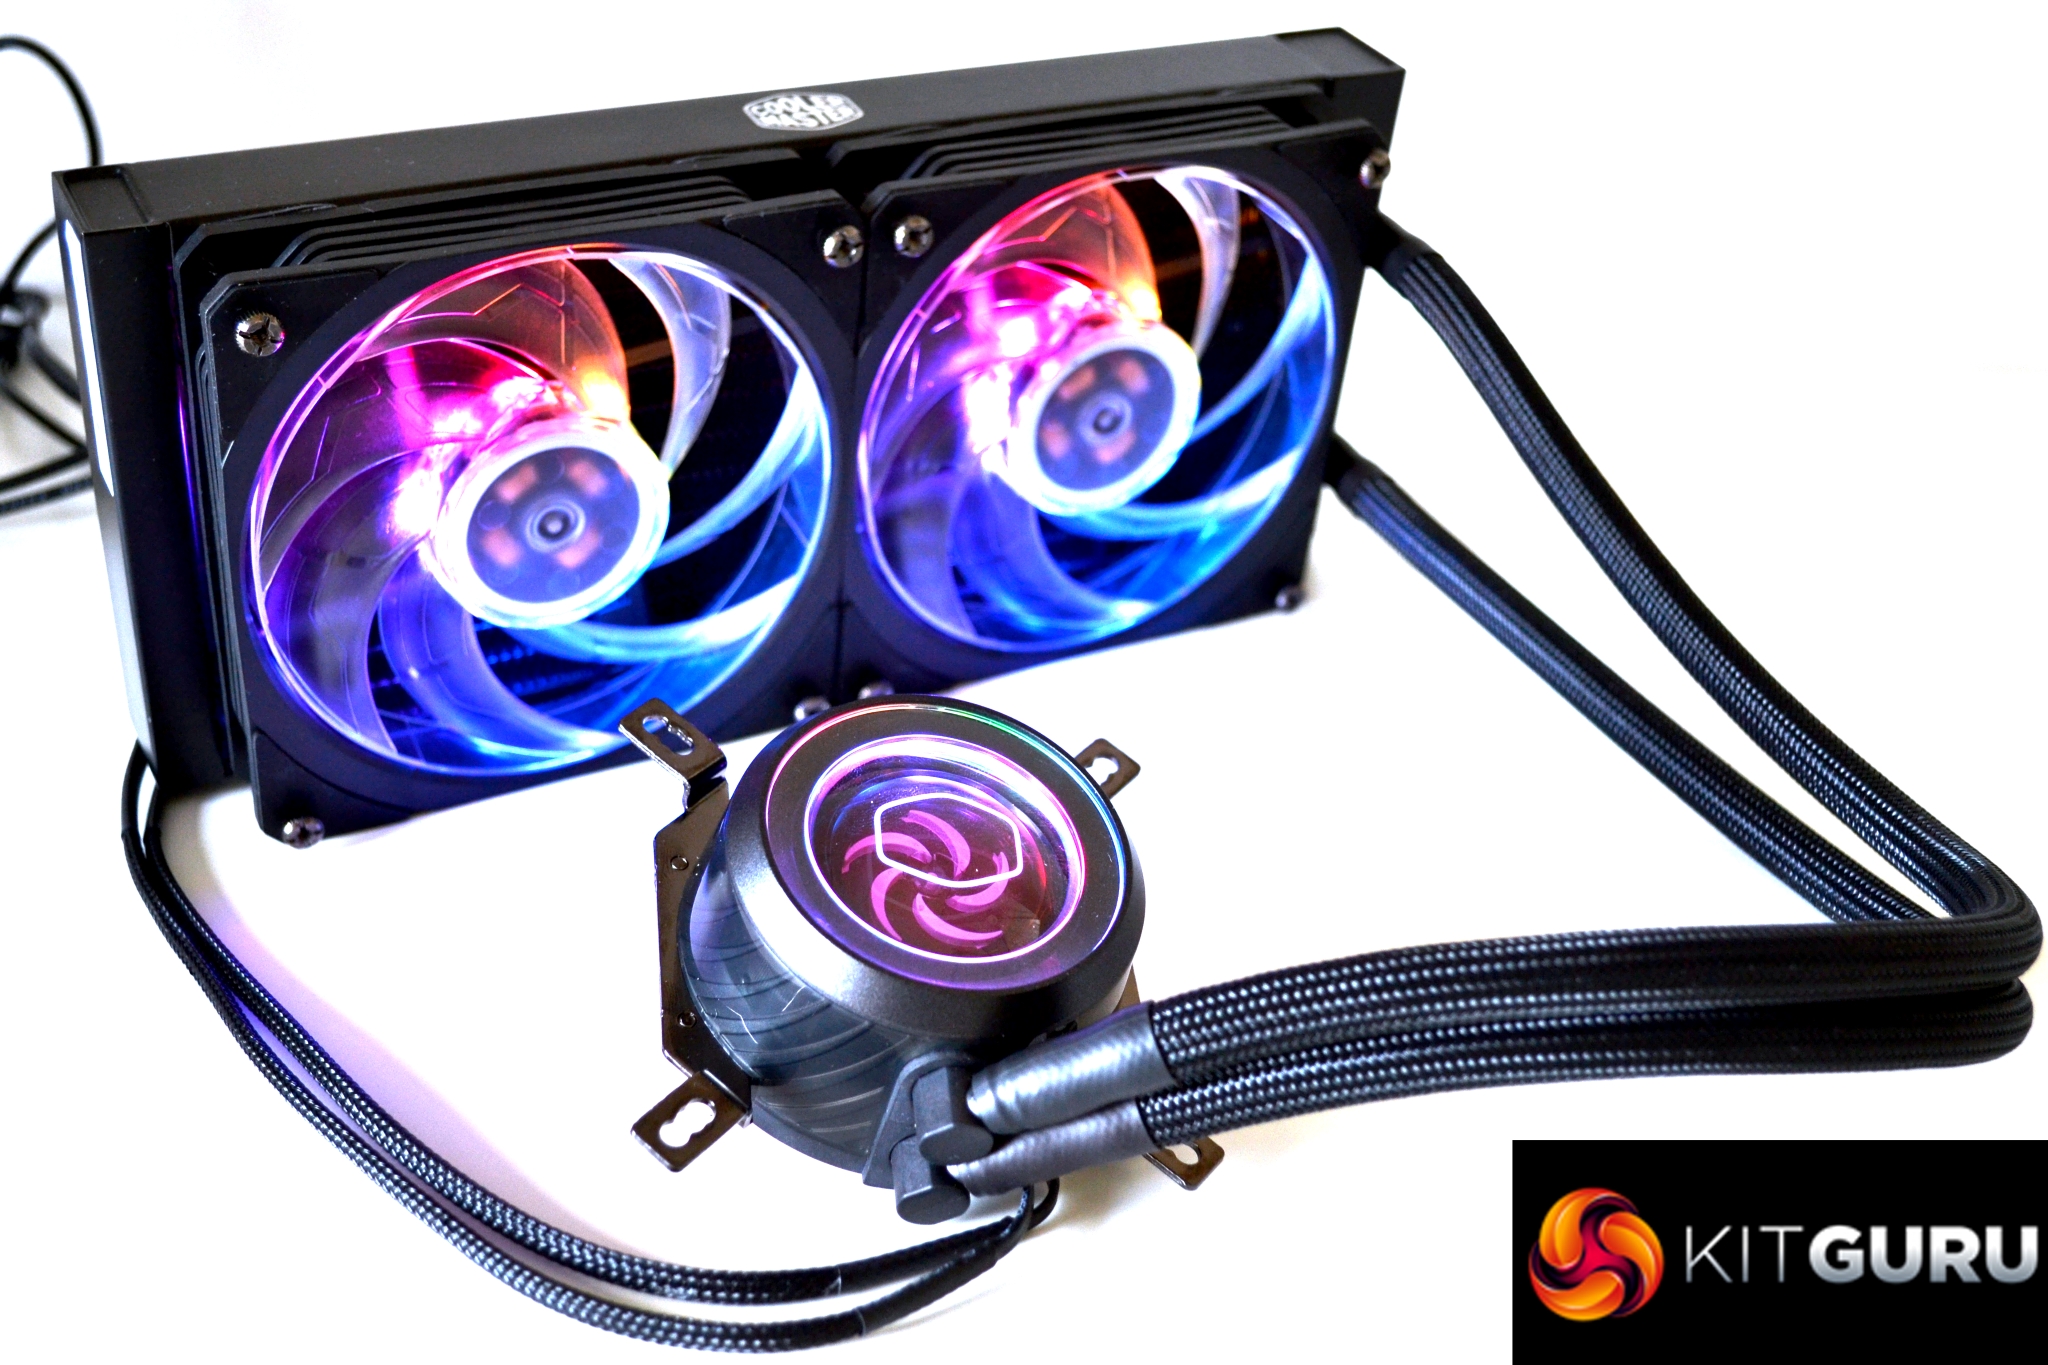
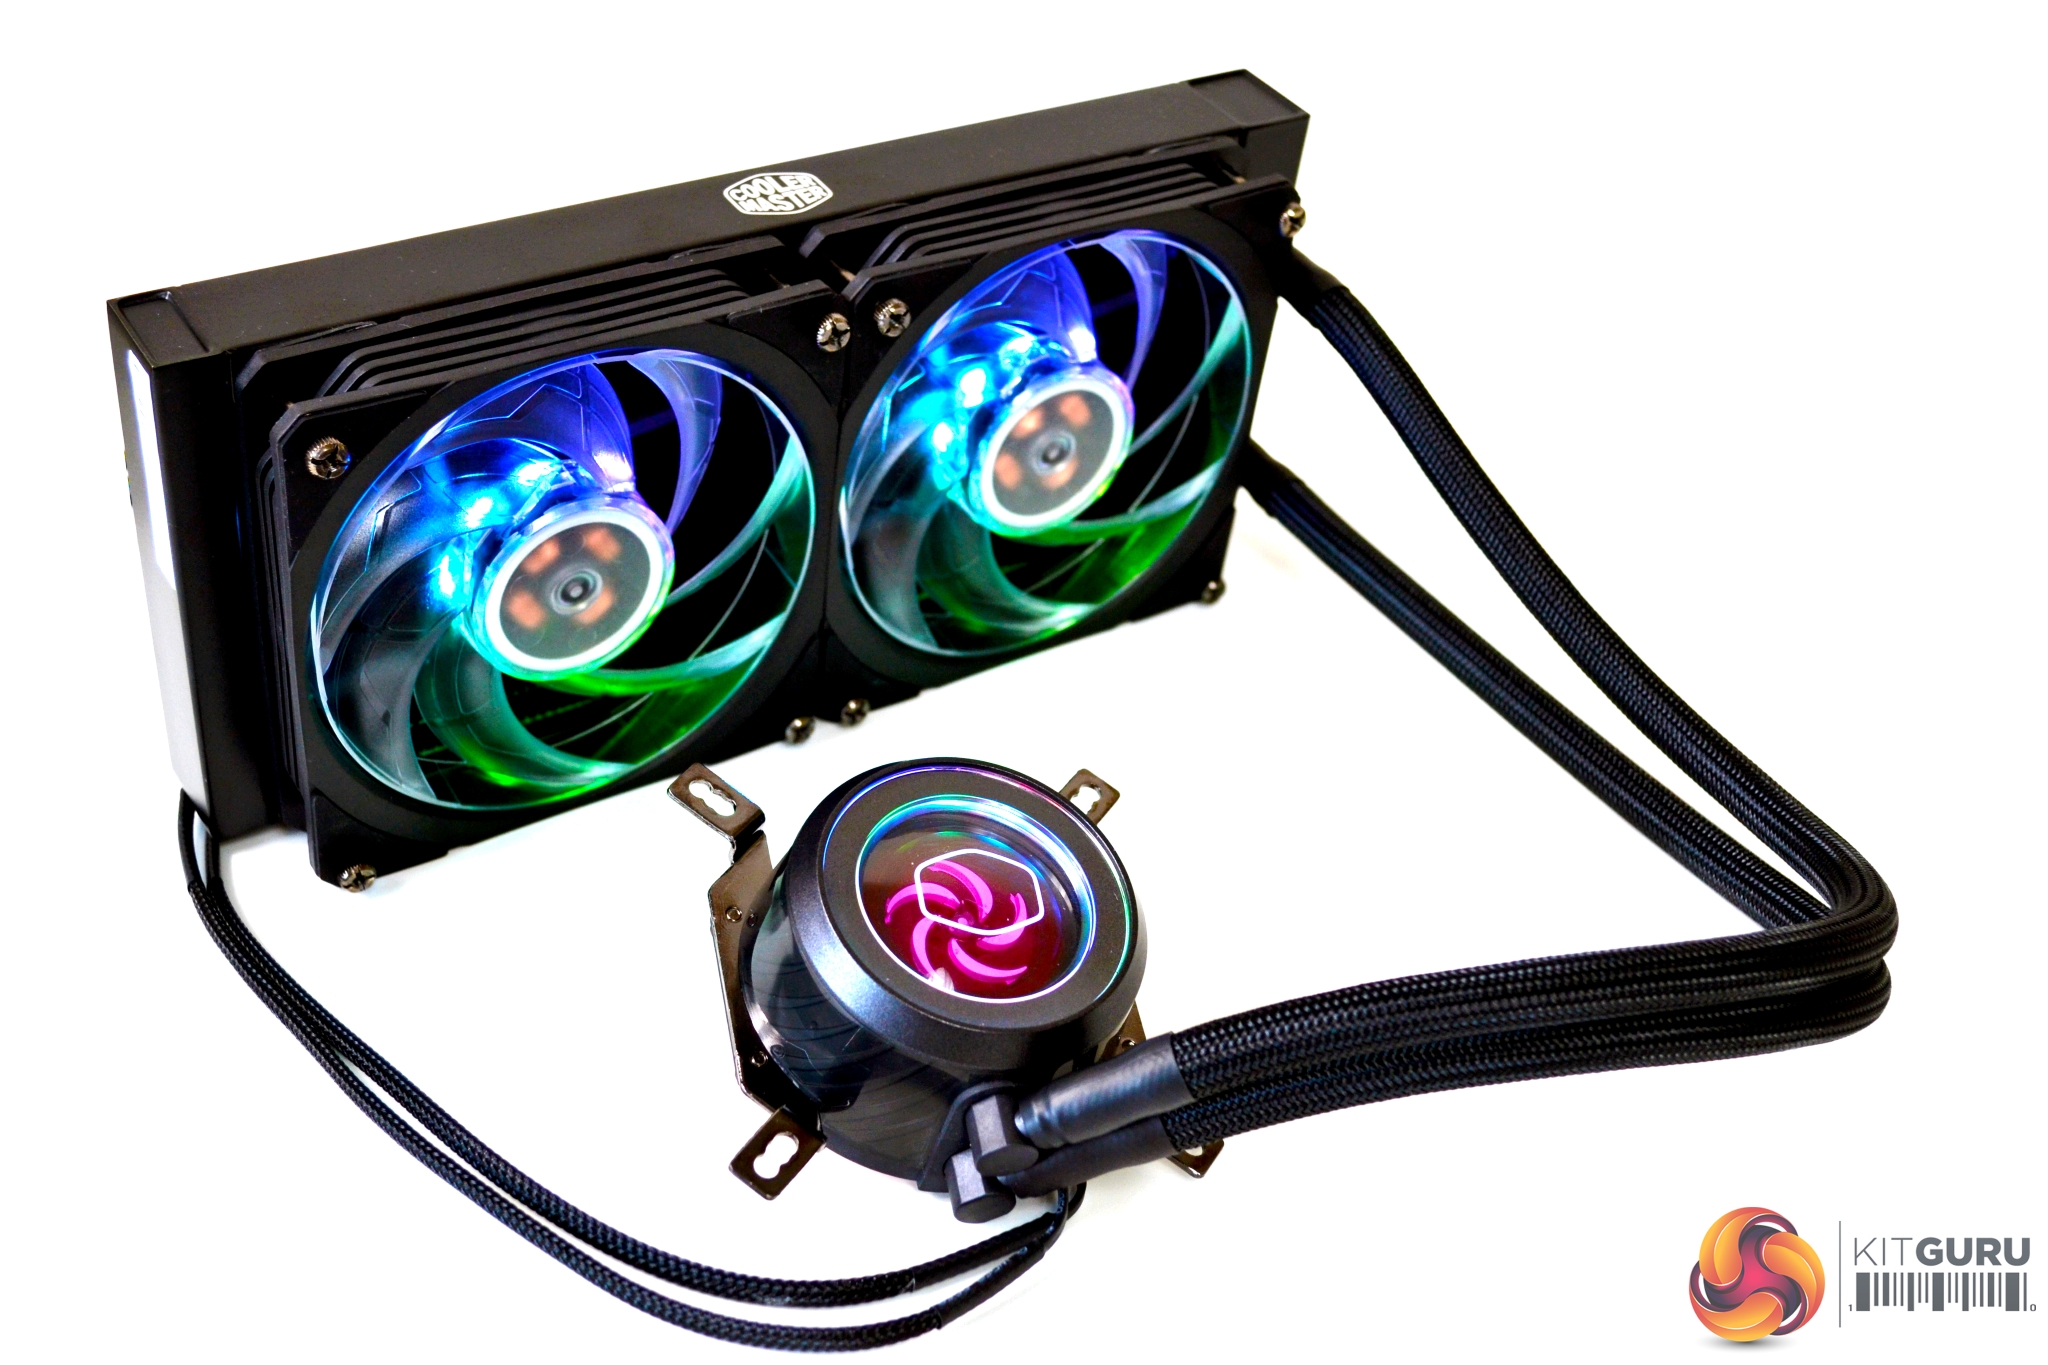
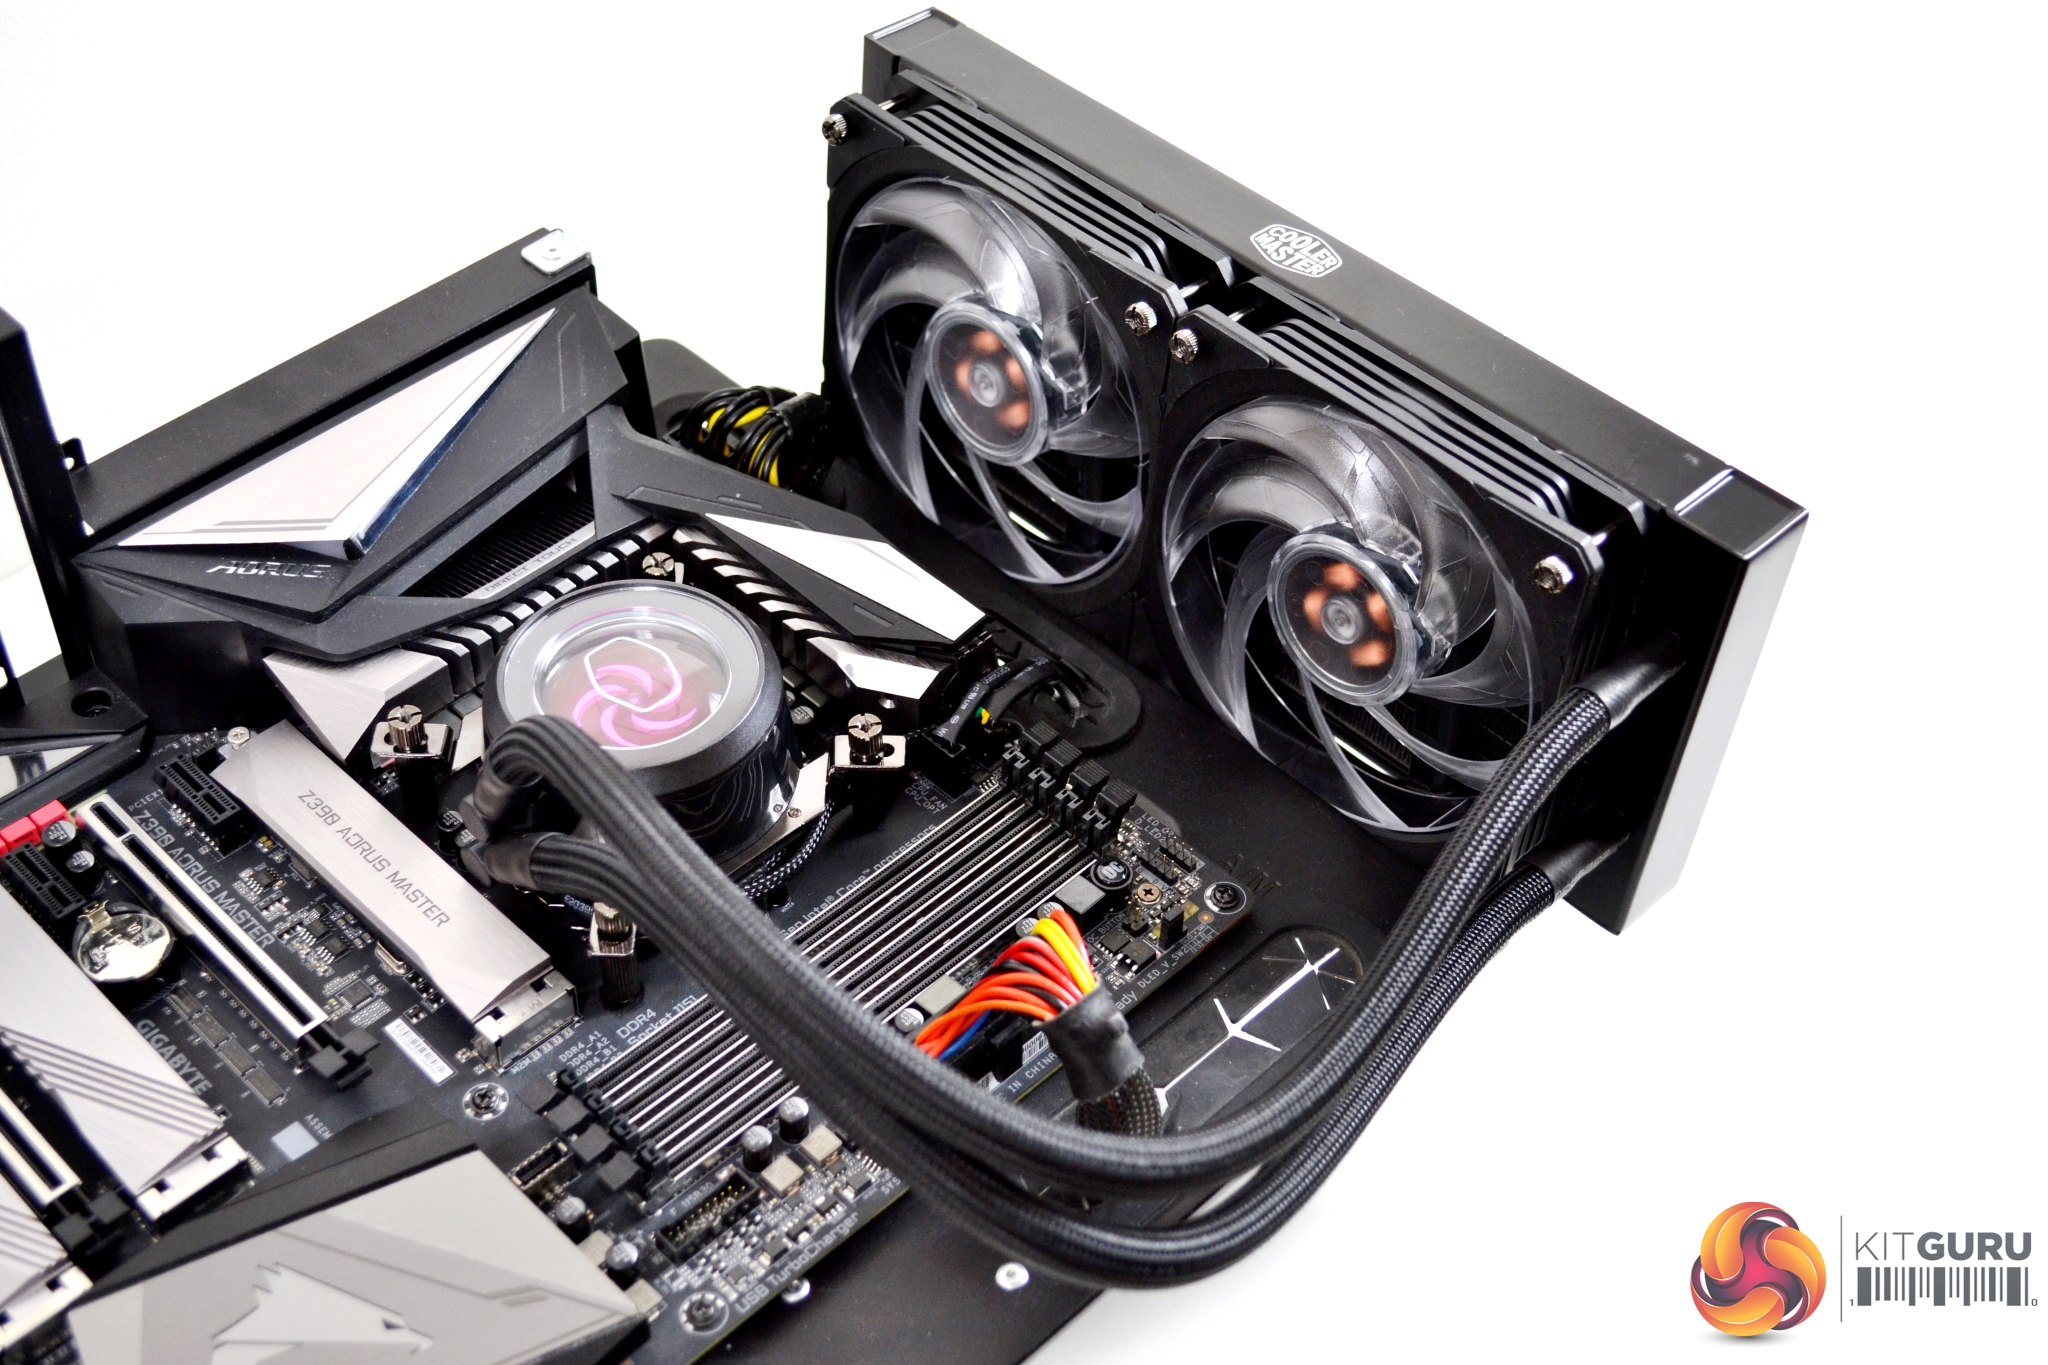
The build quality of the cooler is very good and up to the standard we are used to from Cooler Master. The radiator measures 277mm long, 120mm high and 27mm deep (without fans fitted). With the fans fitted, it measures 52mm deep.
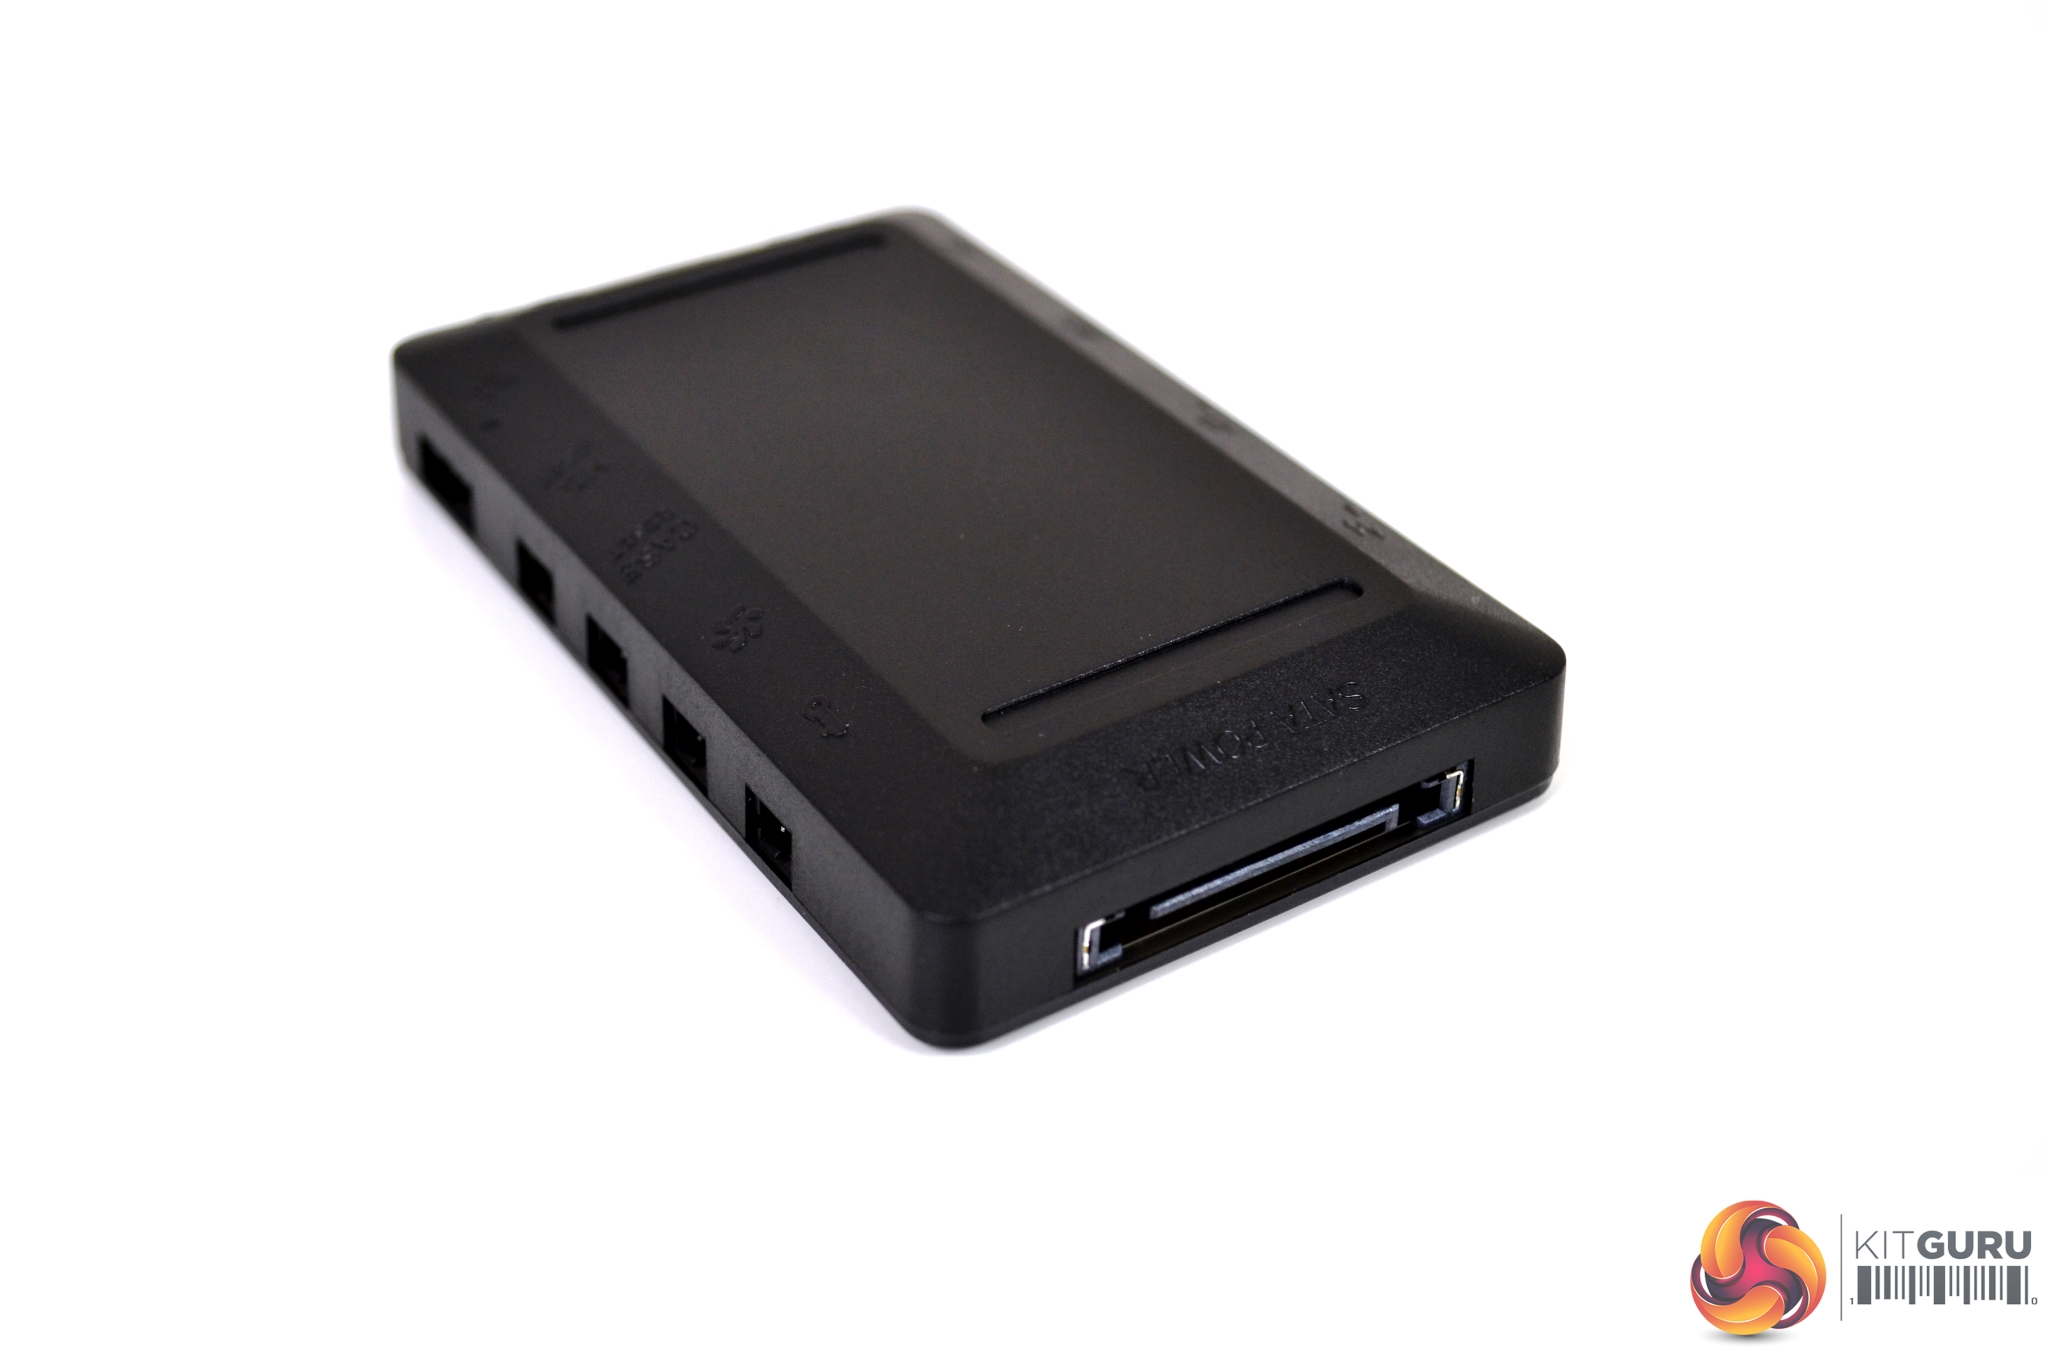
Aluminium is used for the construction of the radiator, which makes it very light and has a smooth evenly applied matte black coating with a Cooler Master logo on either side. Although the tubing looks quite thin (approximately 12mm including braided sleeving), it is reinforced, so can be manipulated into shape quite easily without kinking and can be rotated on the fittings at the pump.
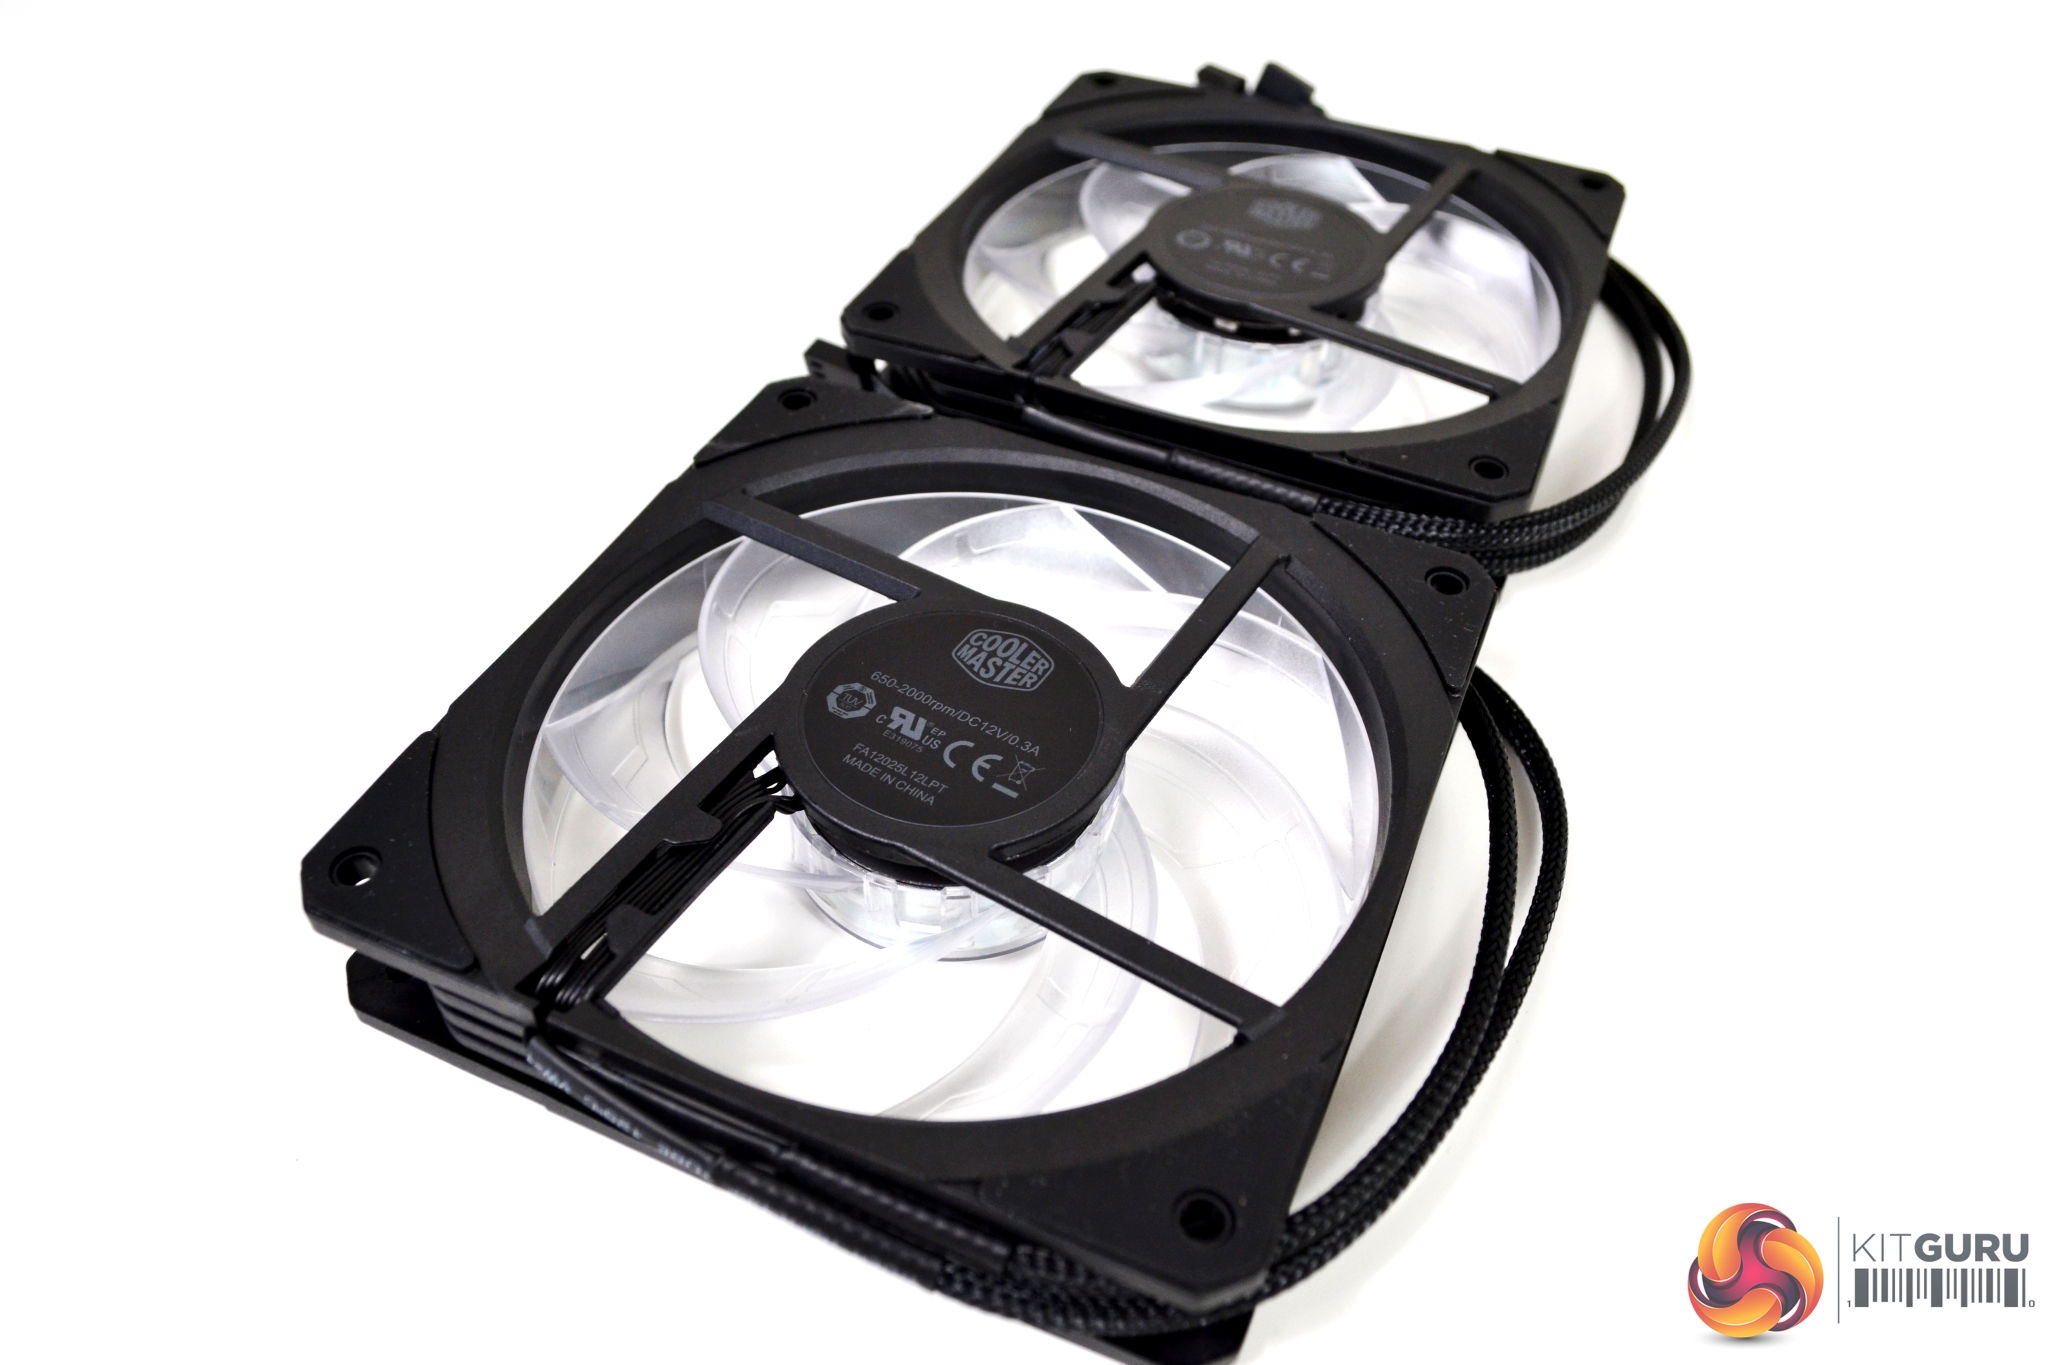
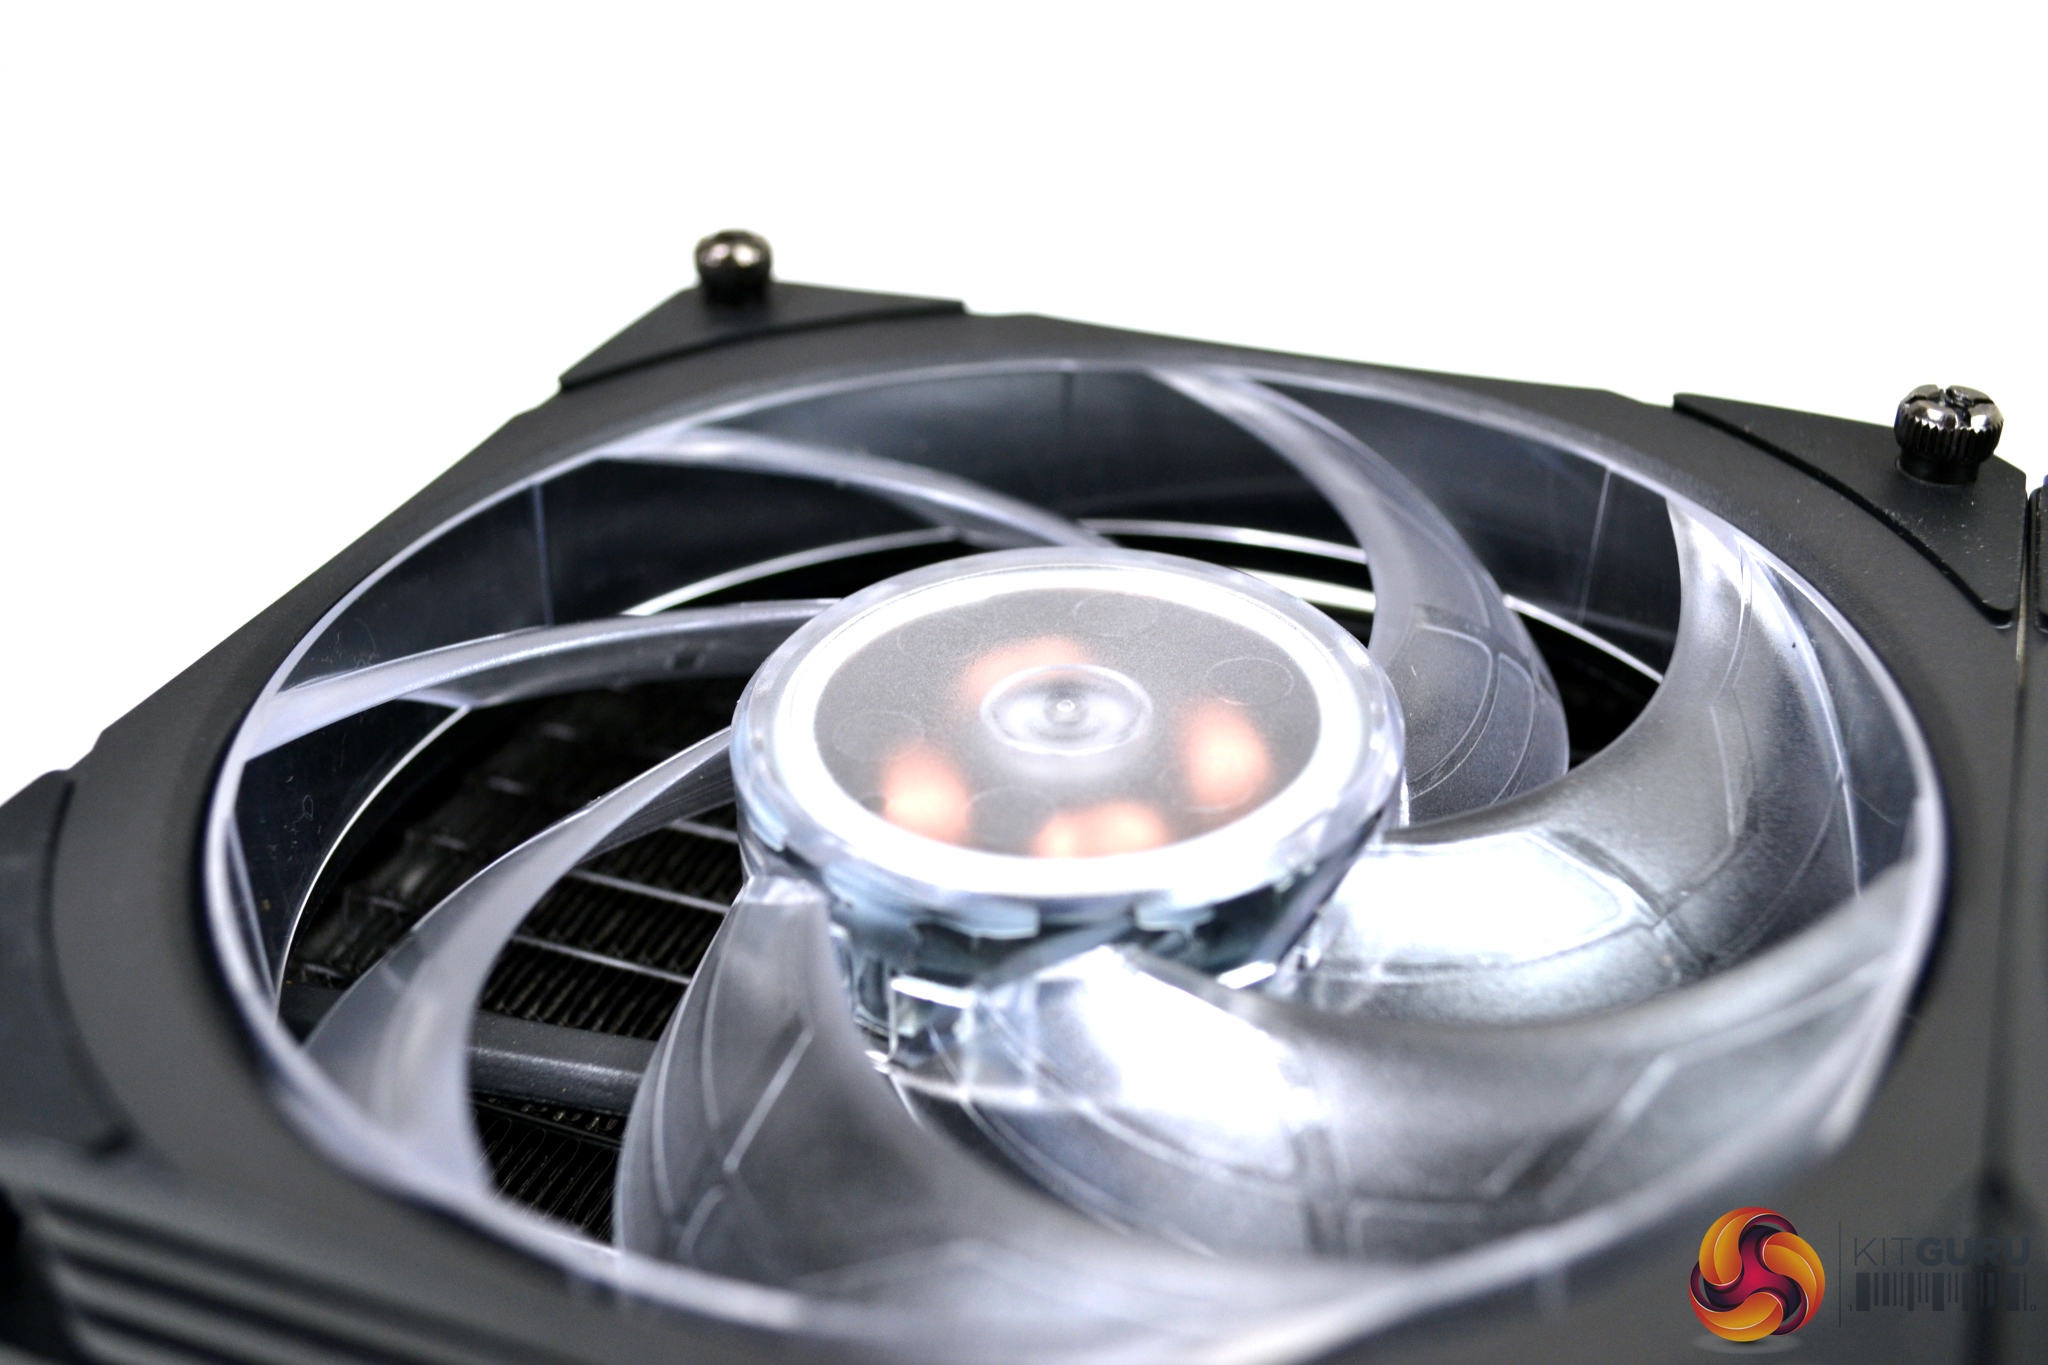
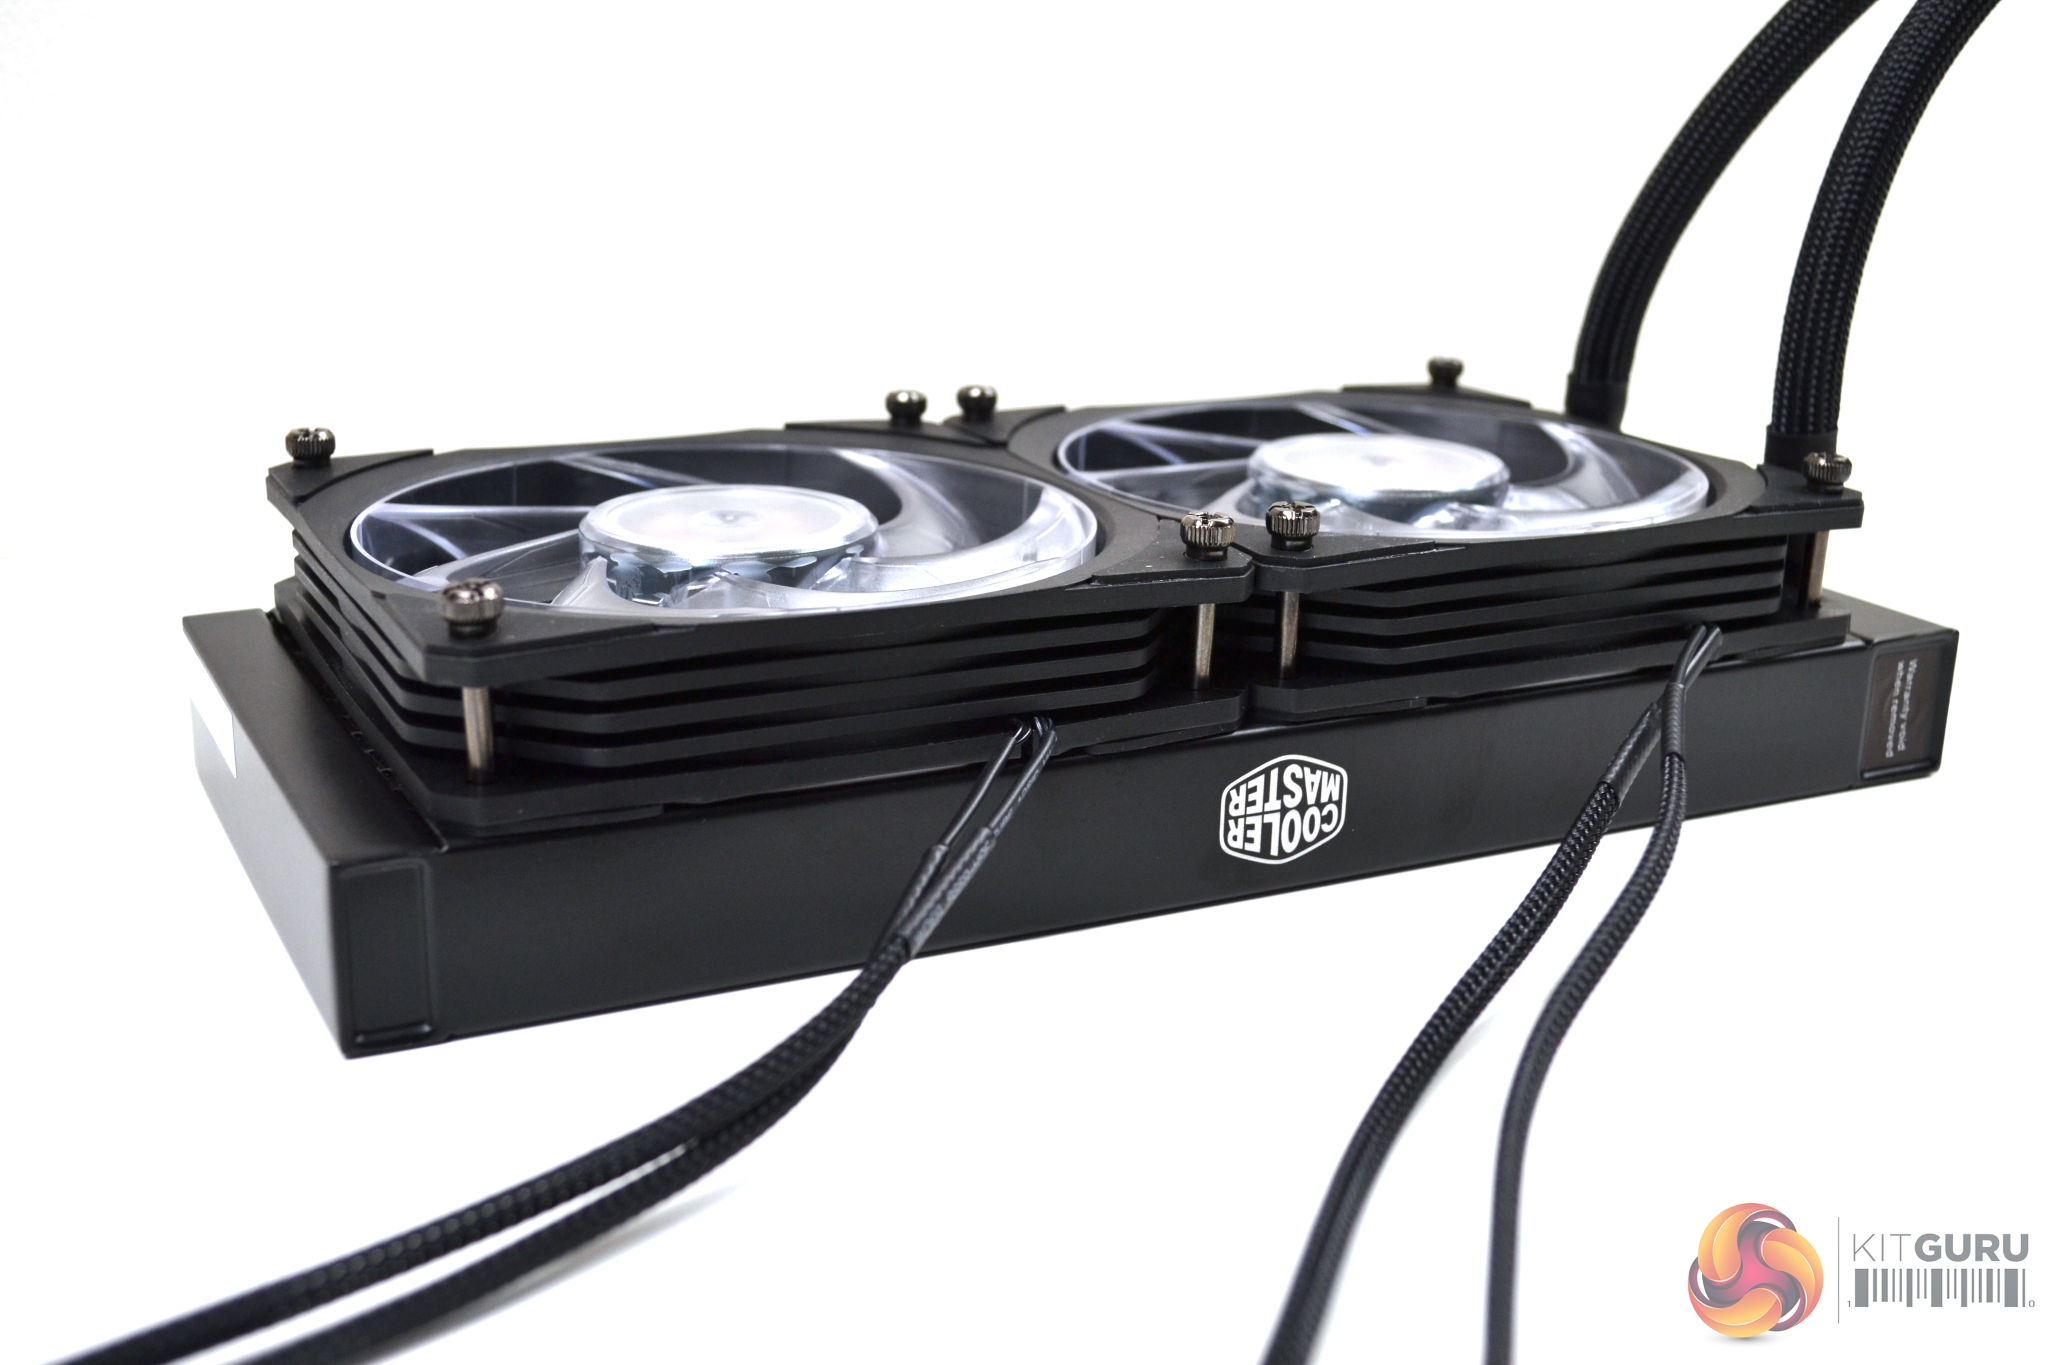
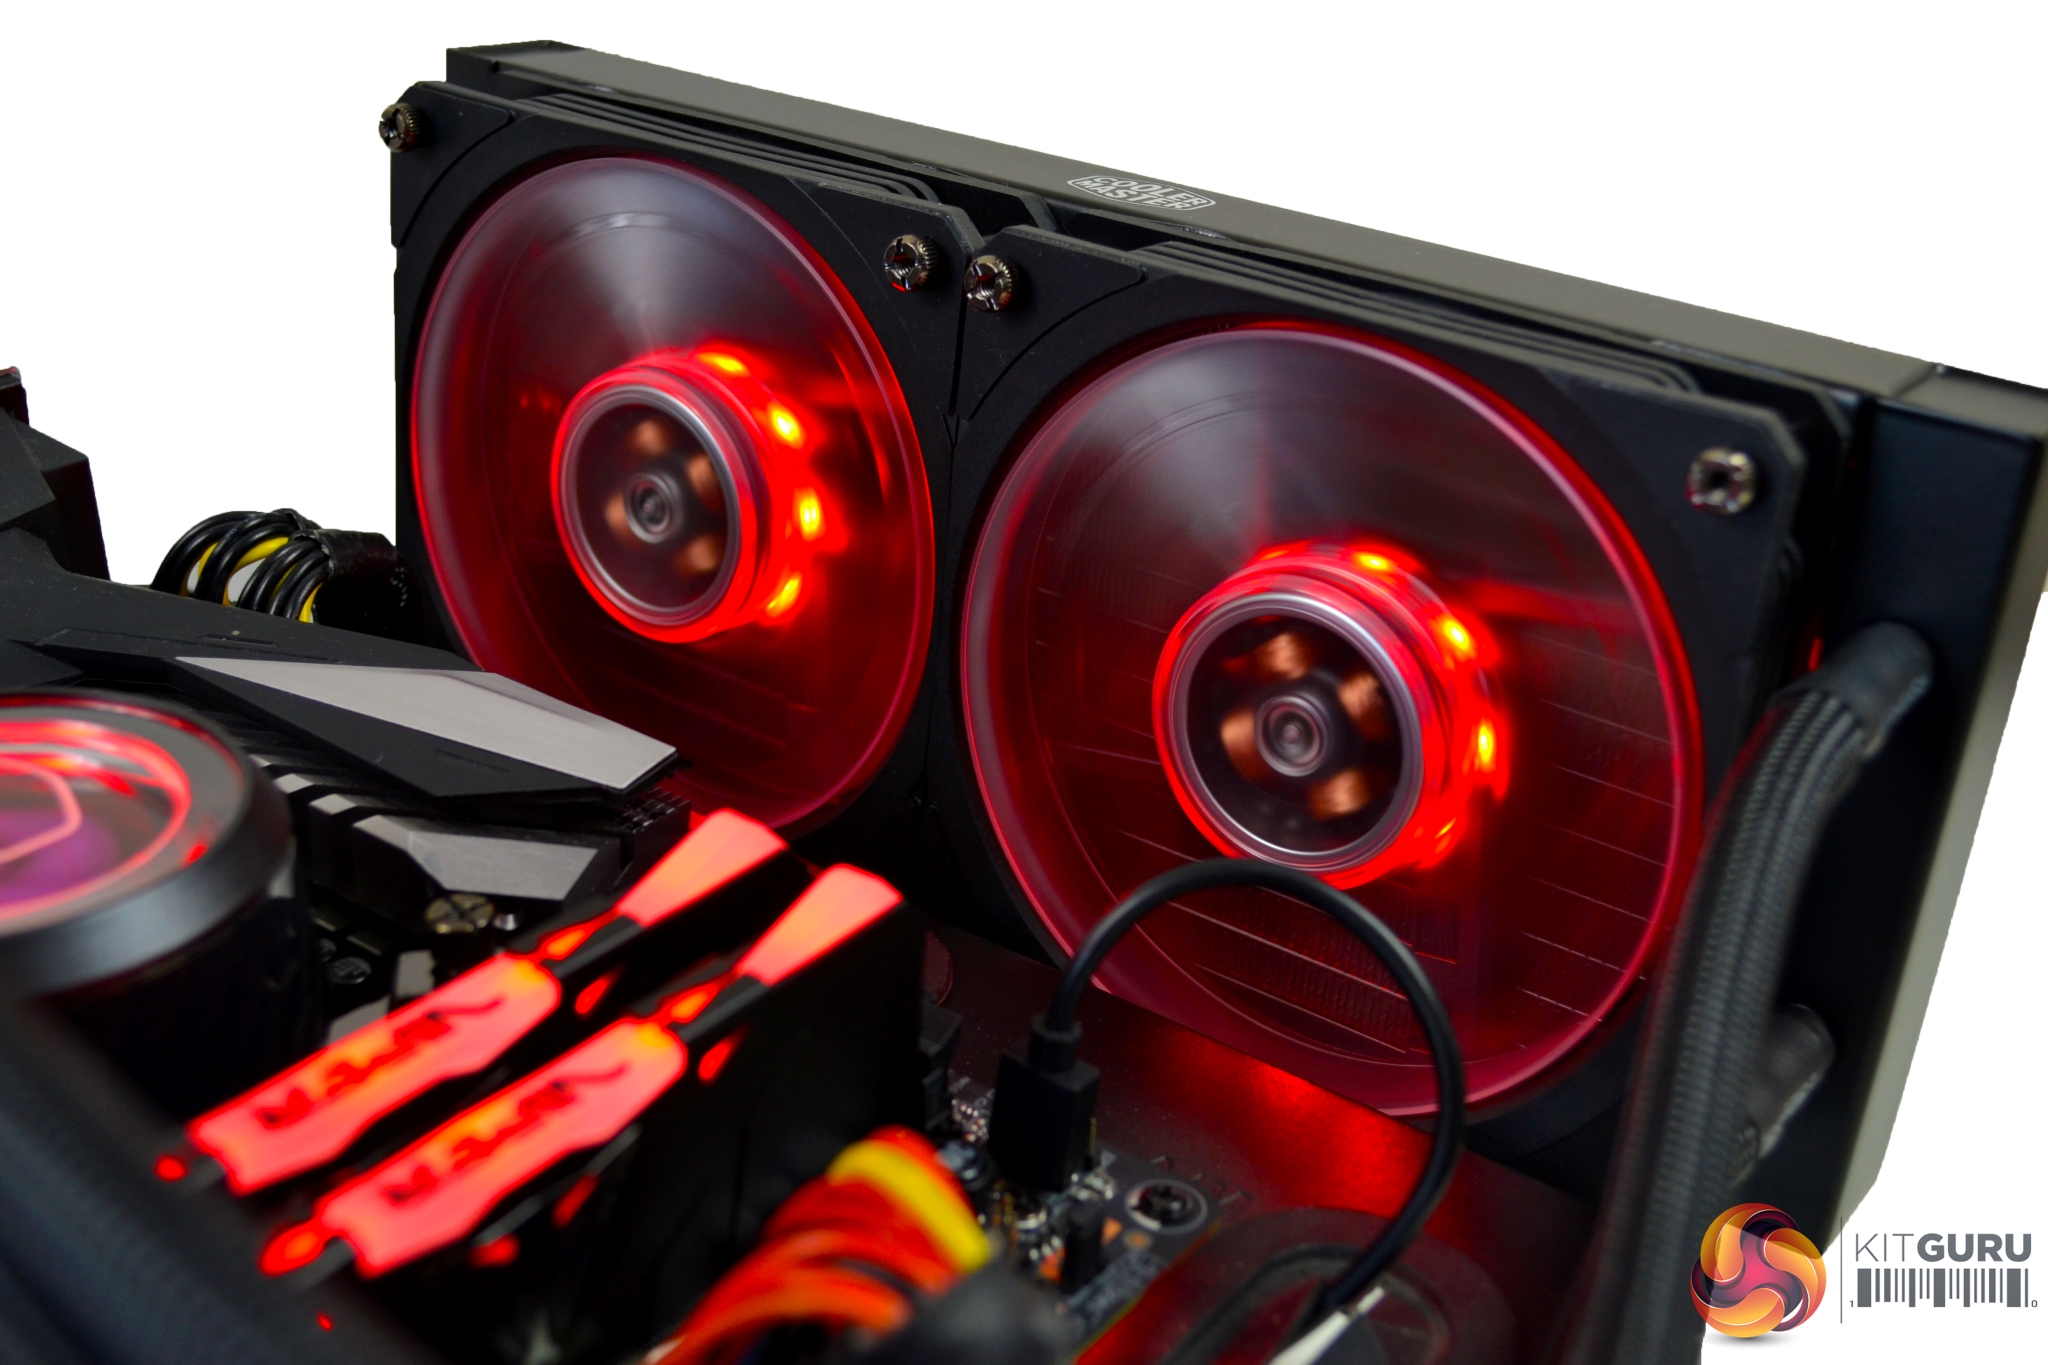
The two 120mm fans included are exclusive to the ML240P mirage All-In-One. The outer housing of the fans is a fairly plain-looking square design. Additionally, there are rubber anti-vibration pads on each corner around the mounting holes, a healthy length of cable with braided sleeving has been applied. What is interesting about the fans is the design of the blades – they have an outer ring which connects all the fan blades together. Cooler Master states this reduces fan distortion and improves fan rotation stability. Whether this affects cooling, we will soon find out.
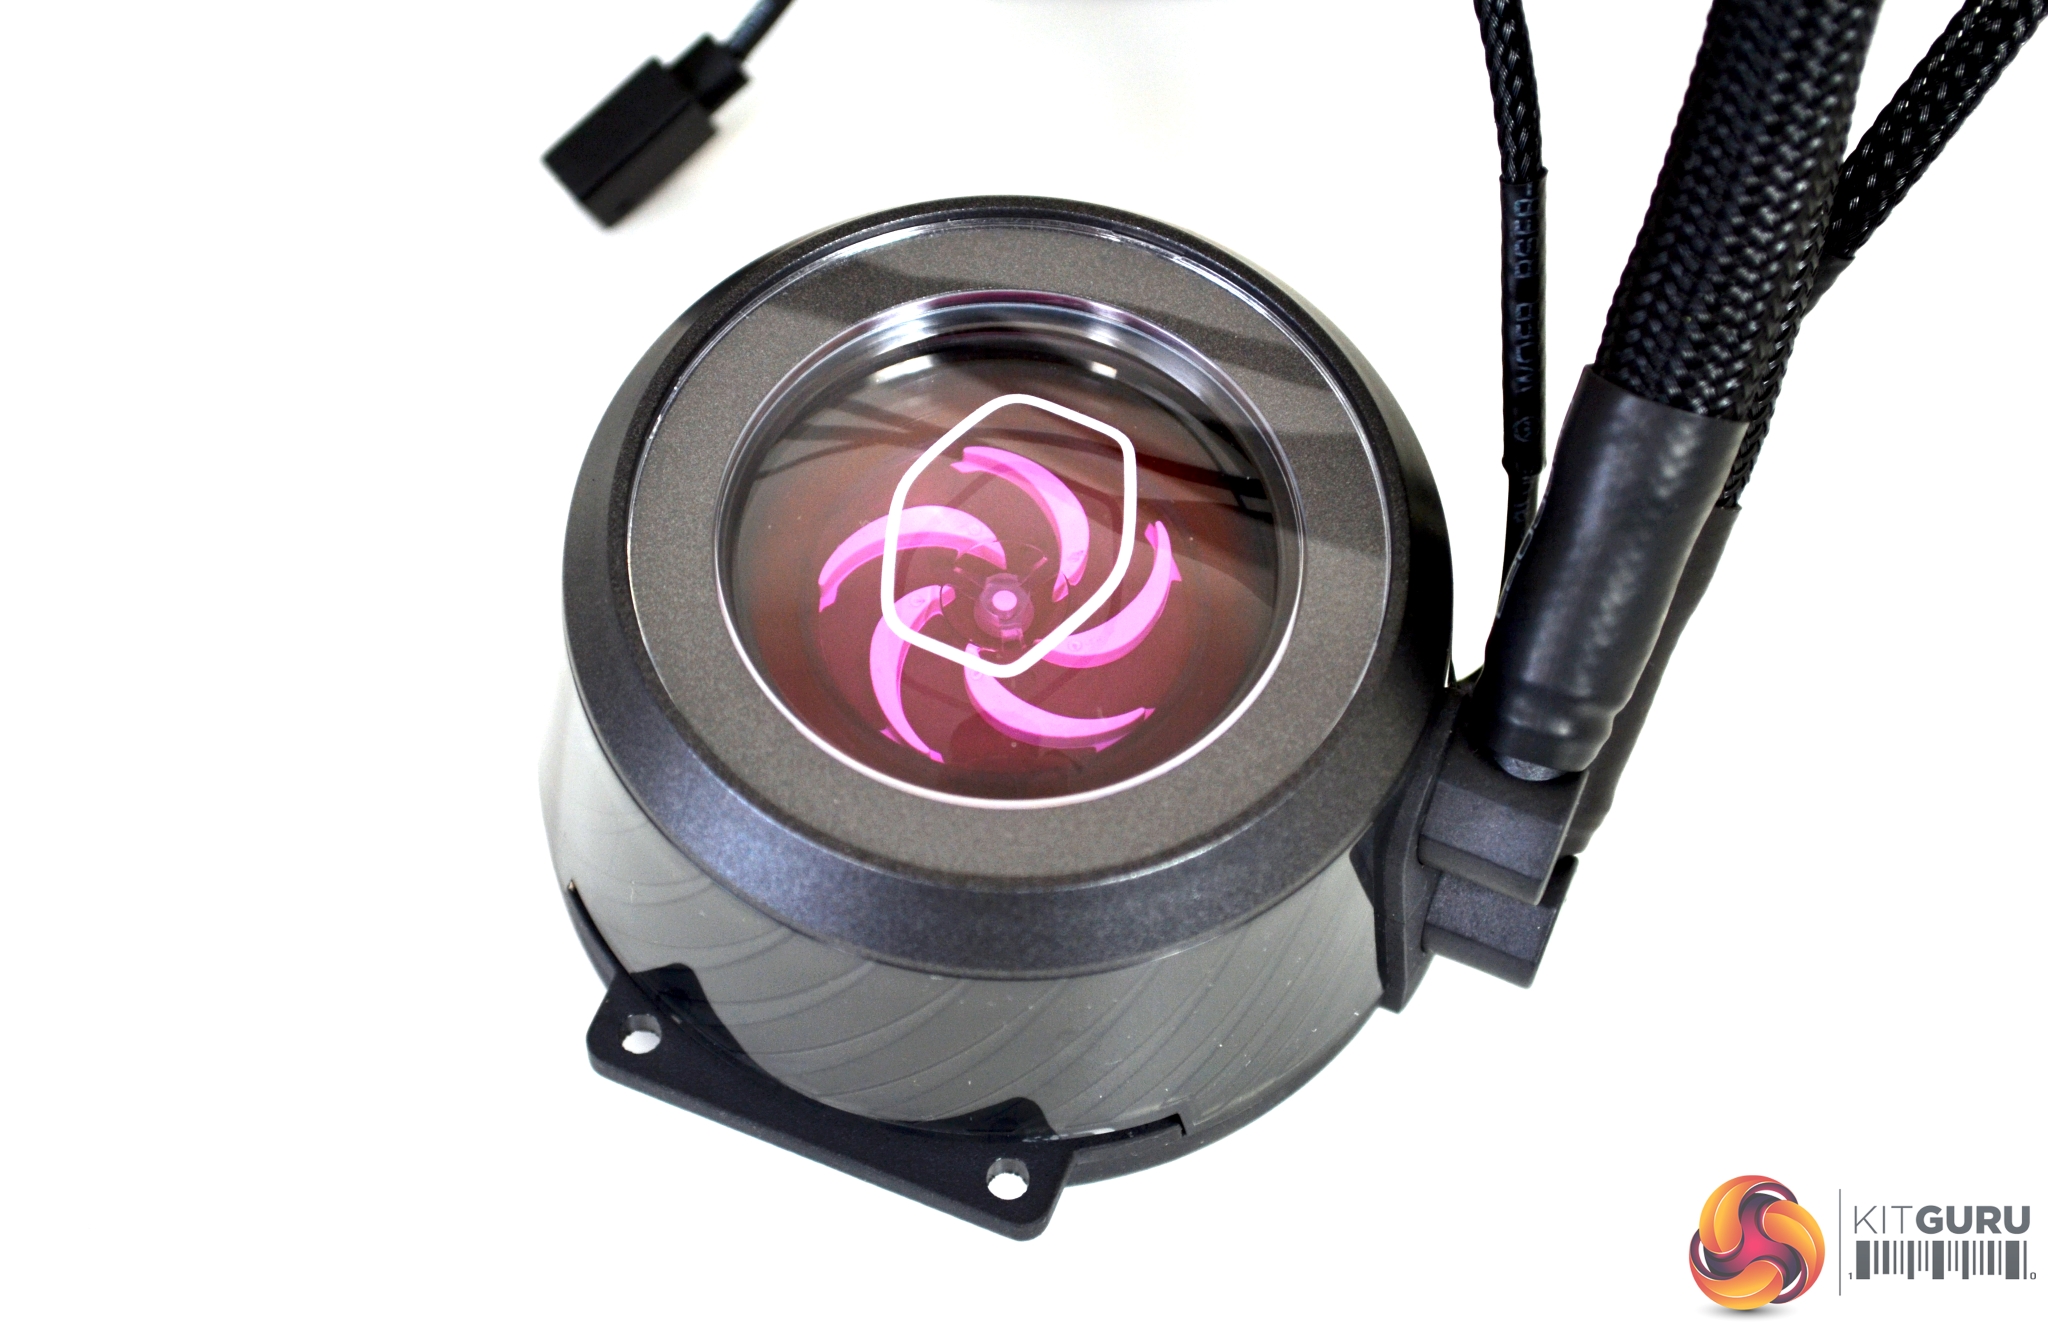

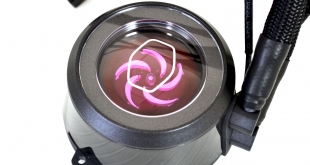
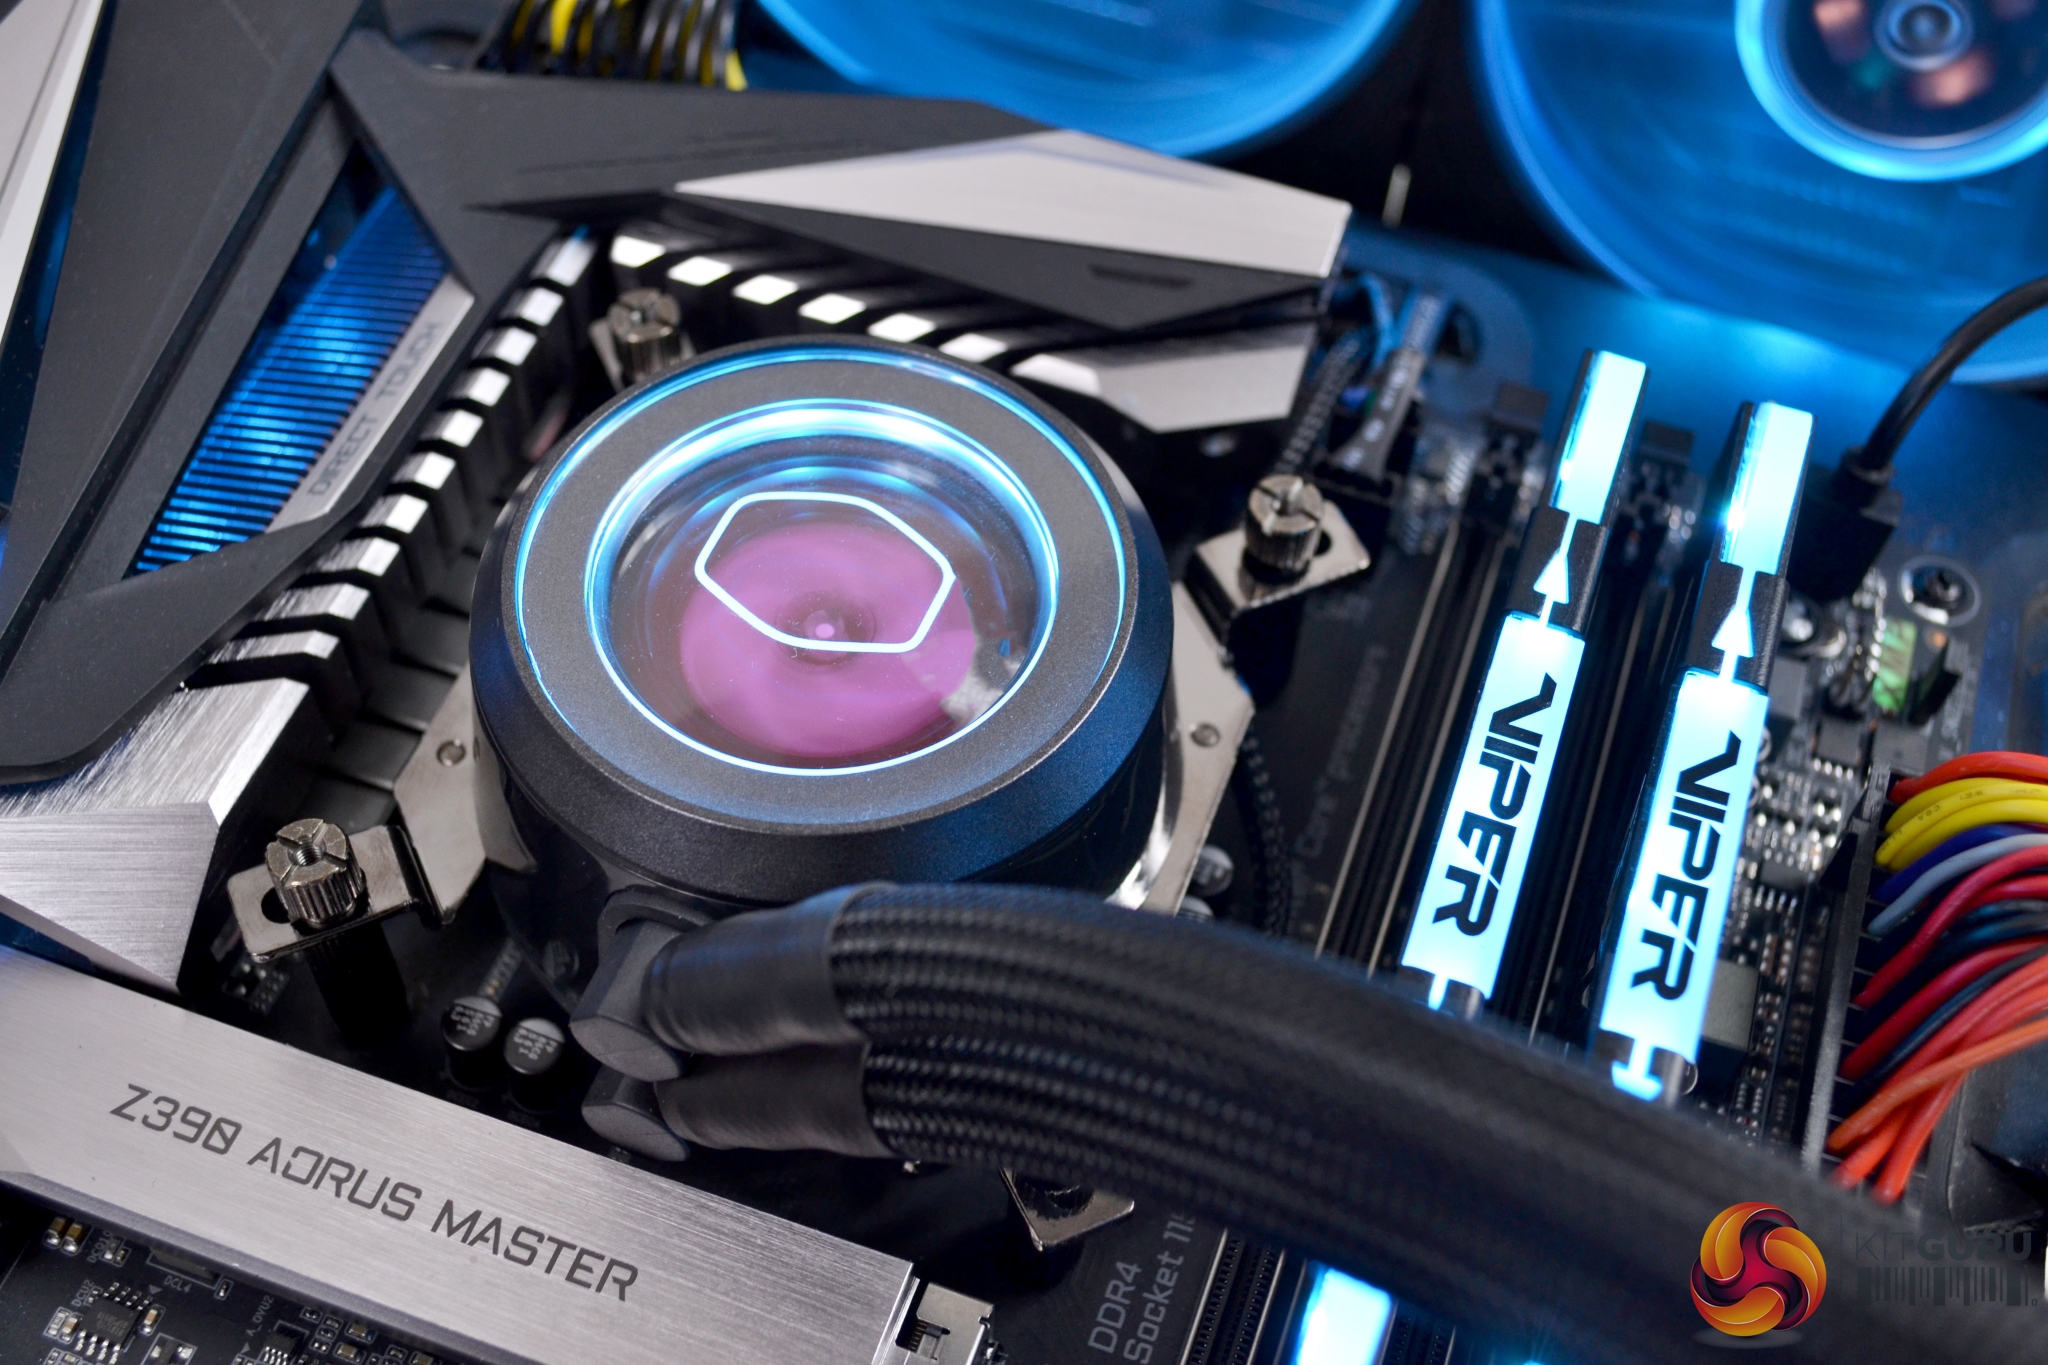
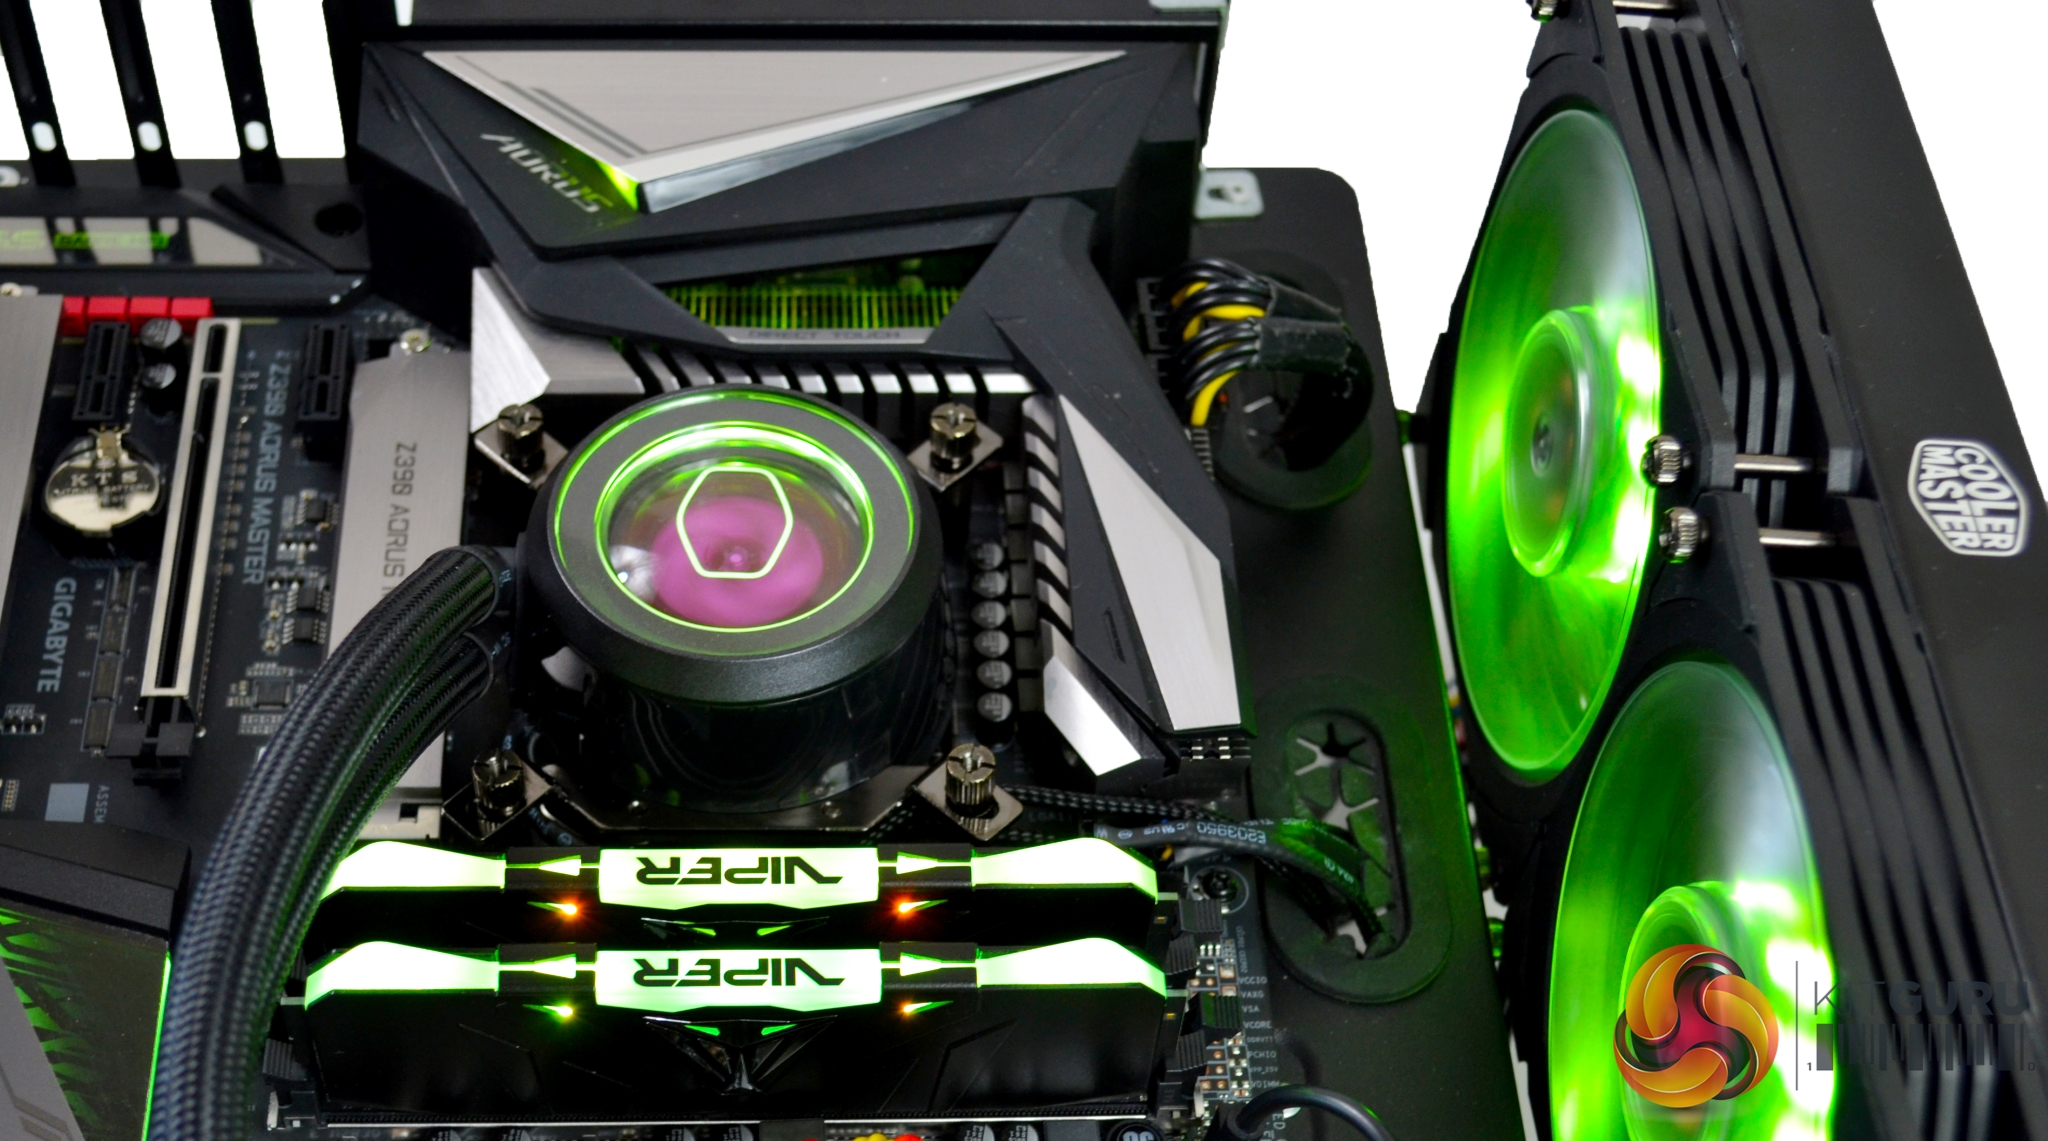
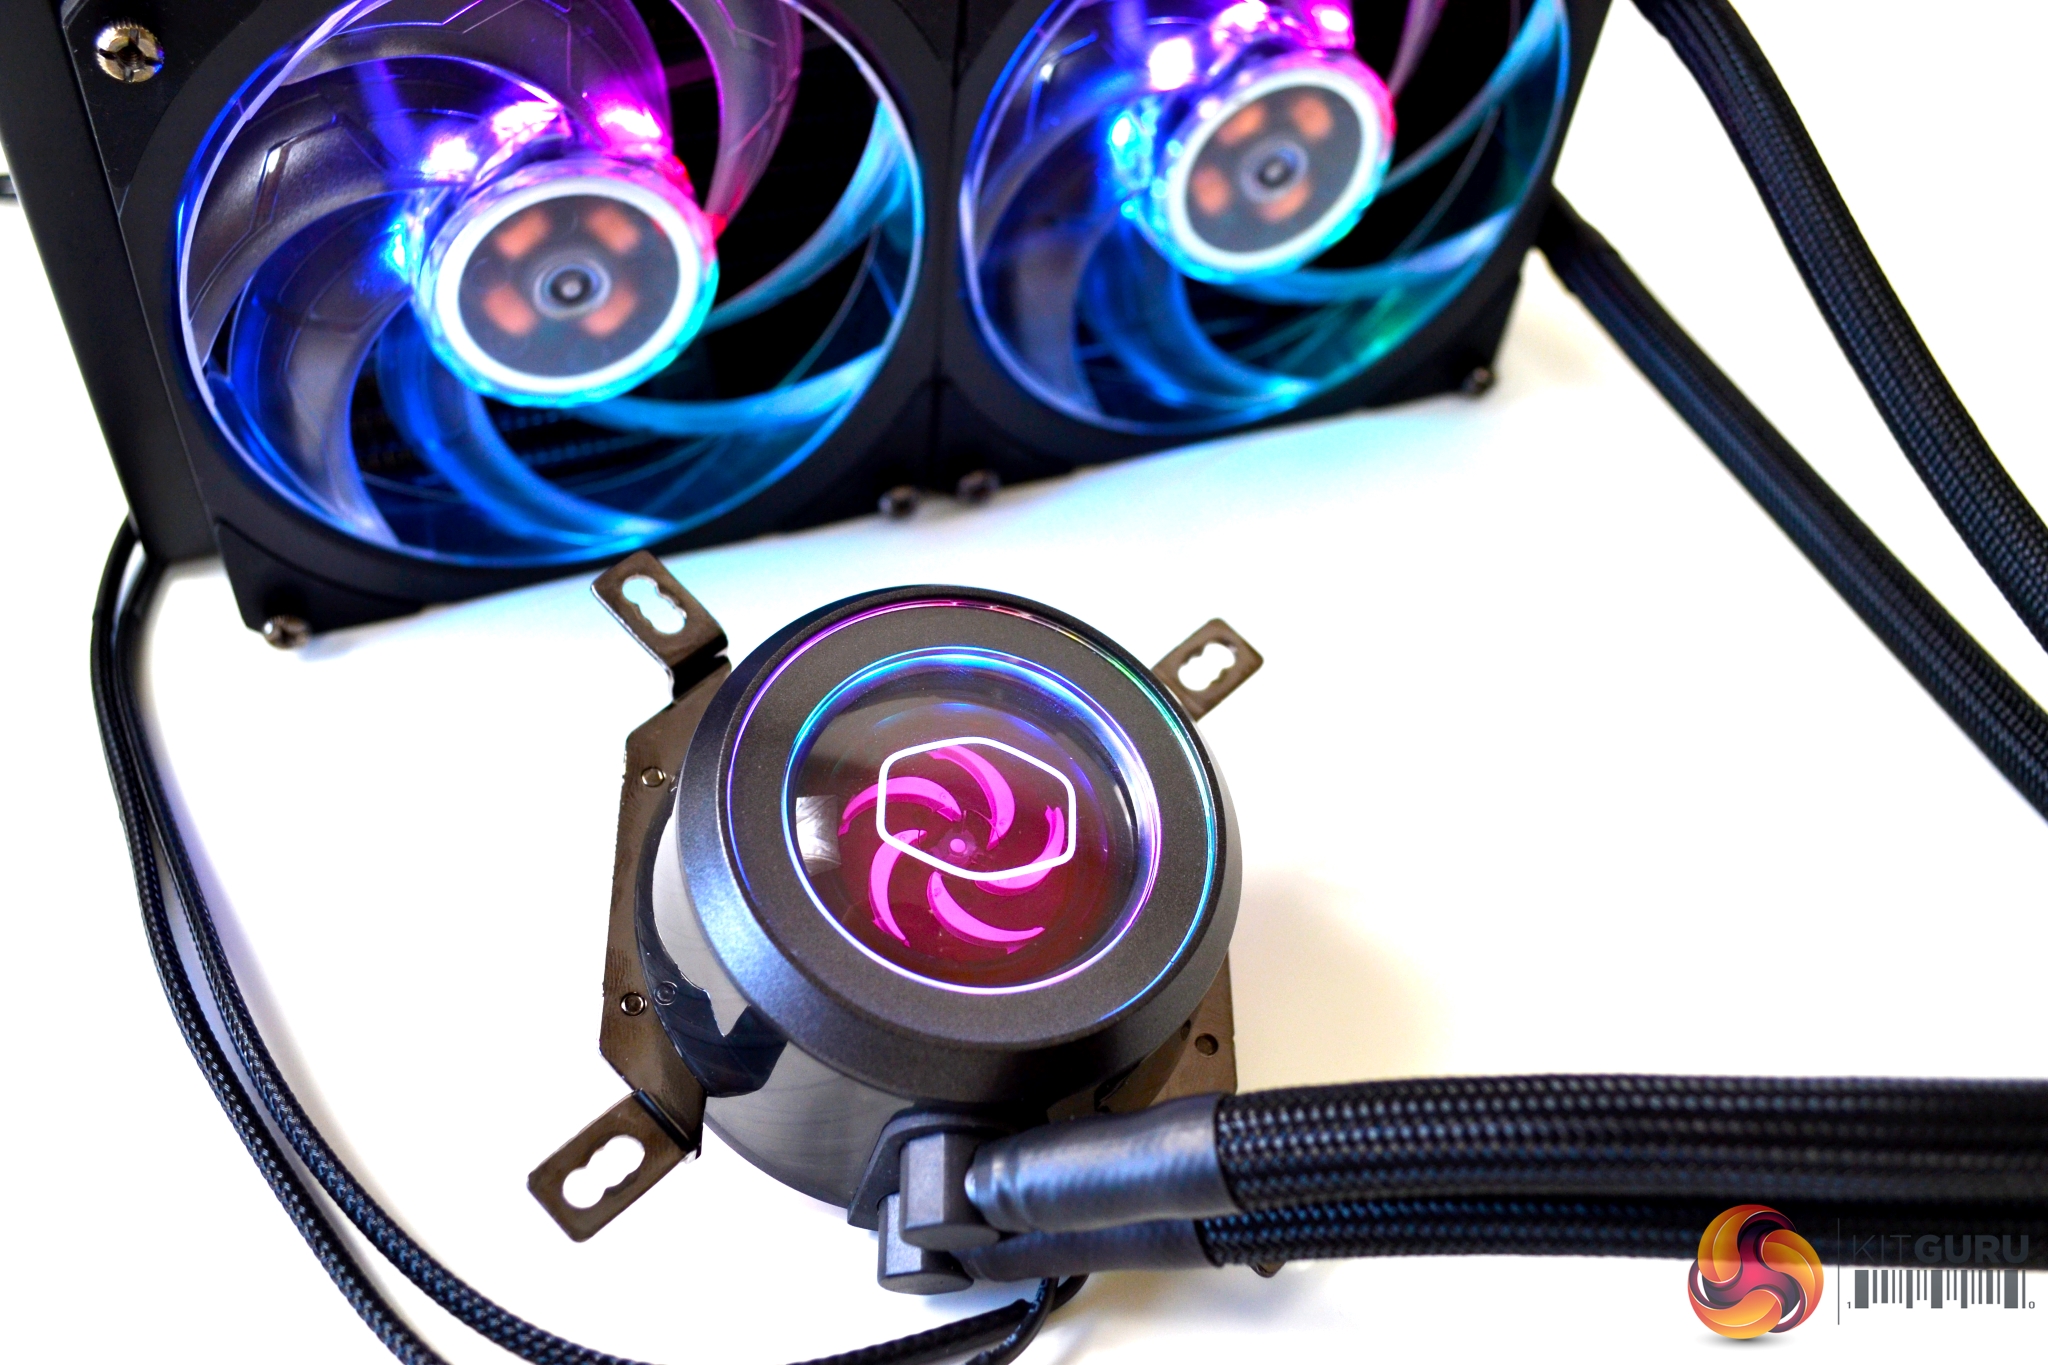
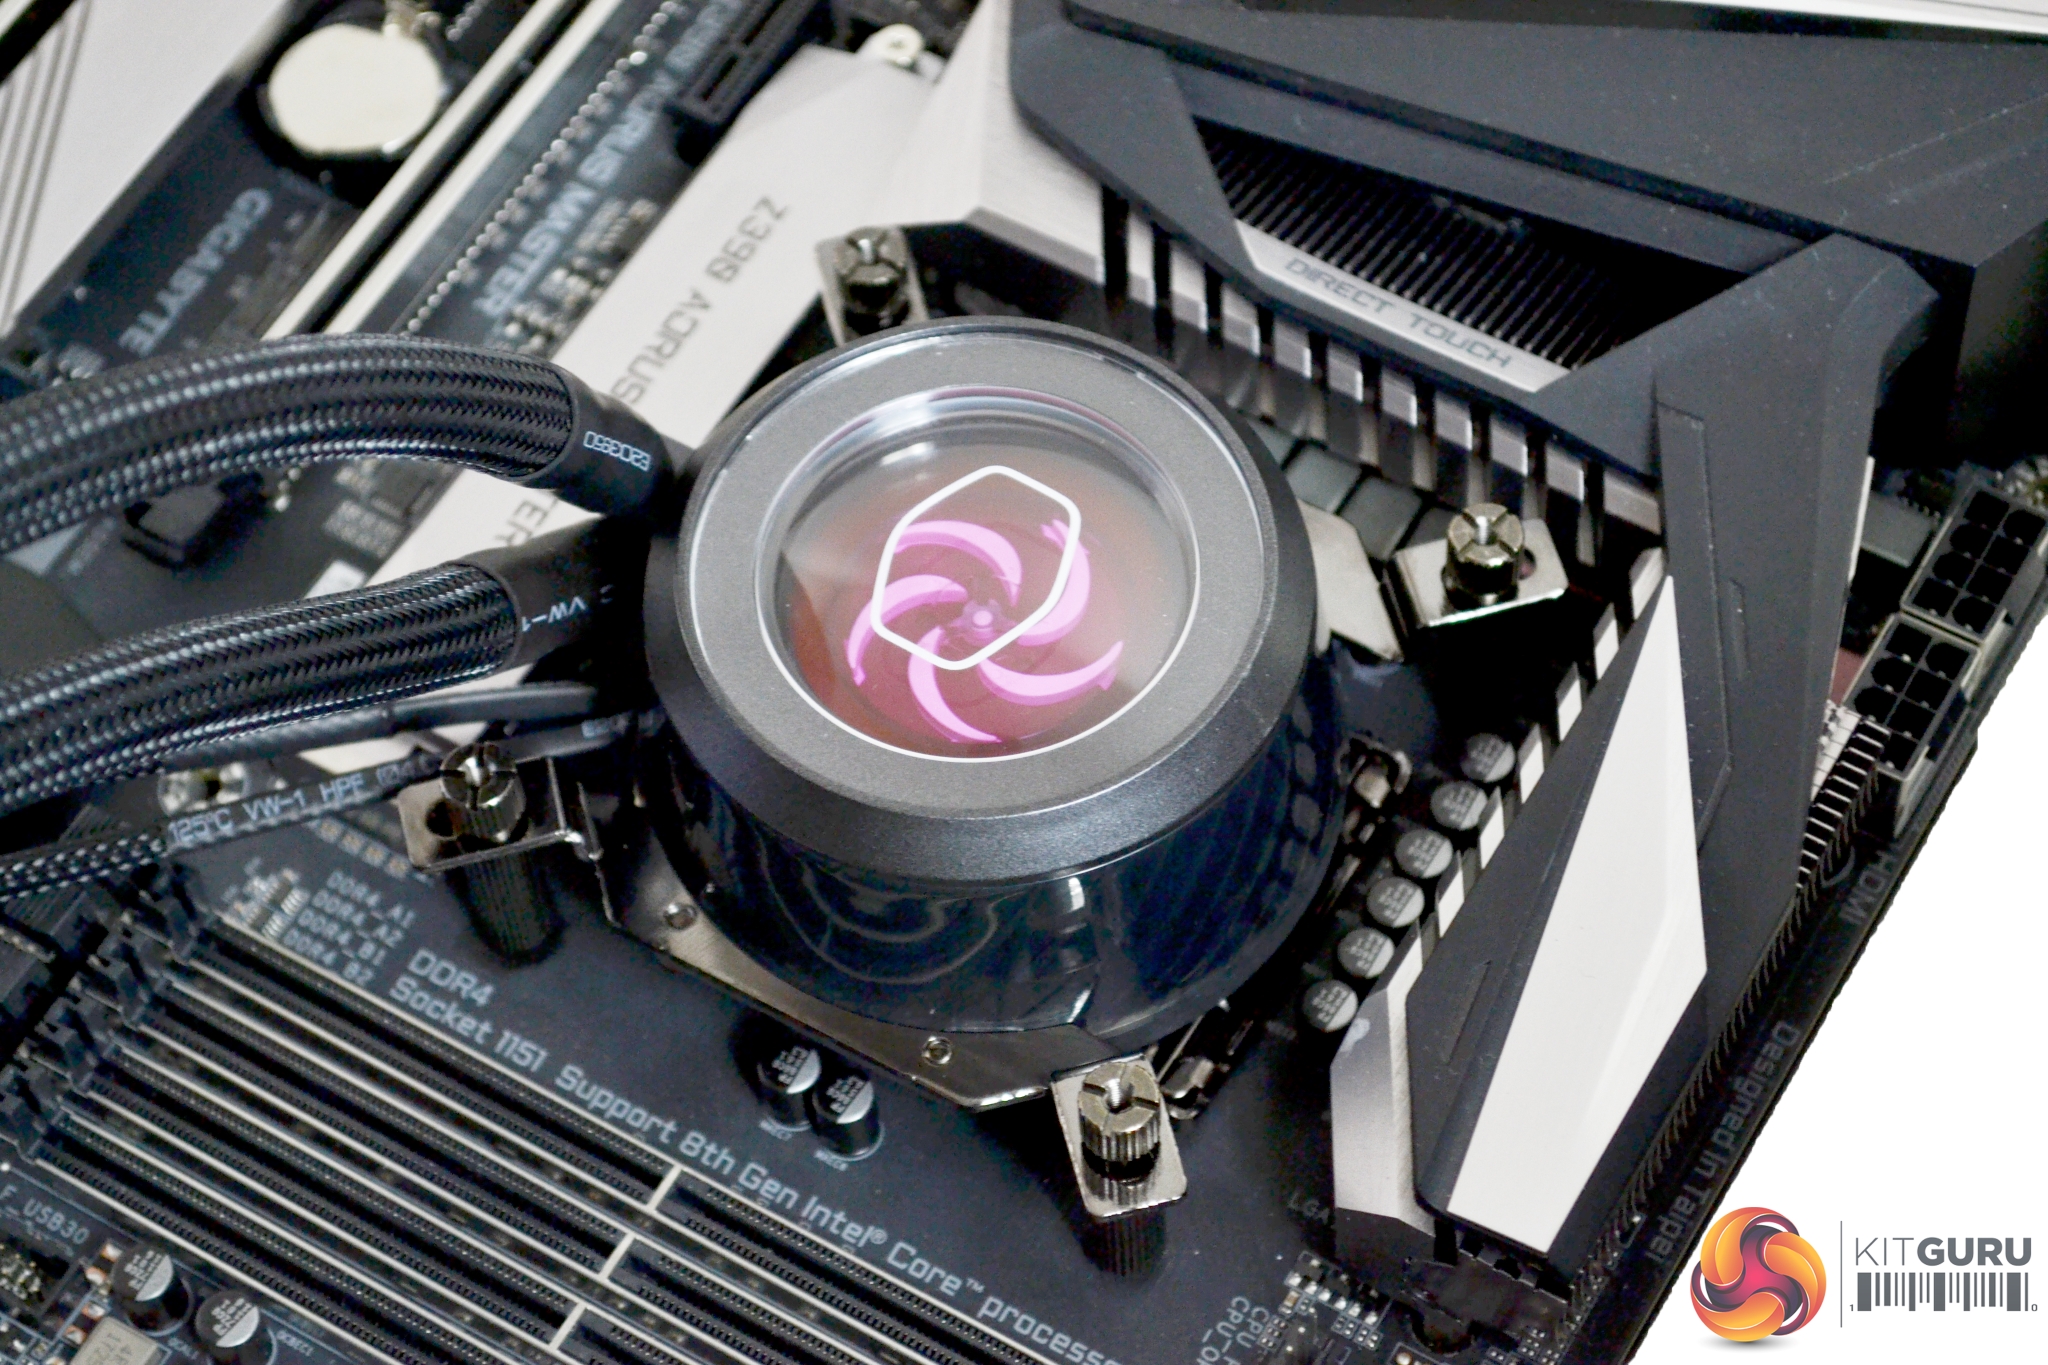
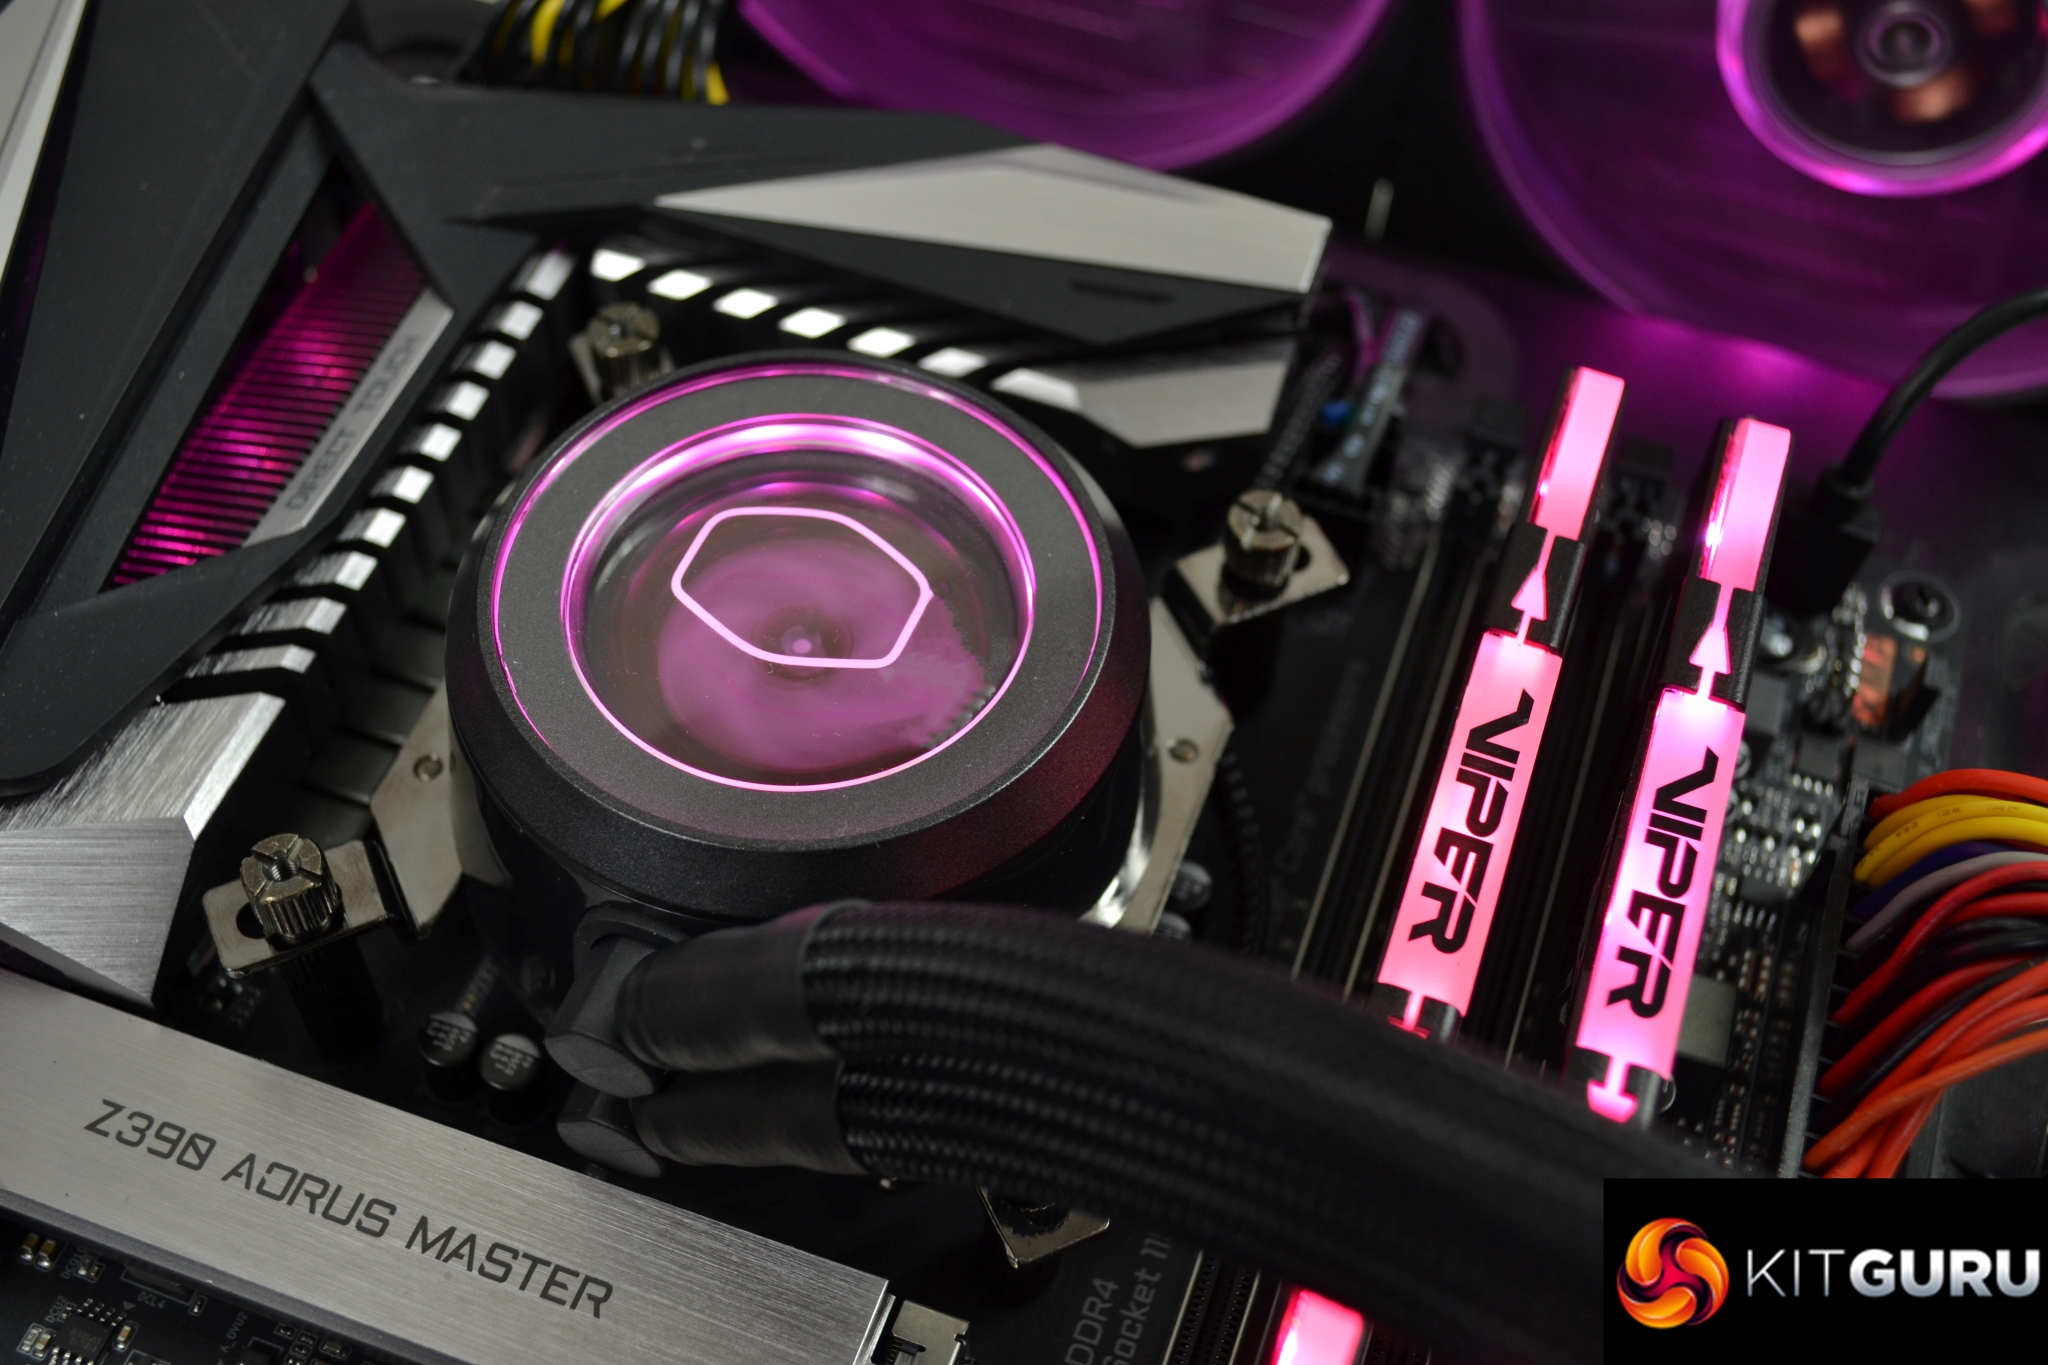
Moving on to the CPU block/pump, again, it is noticeable that there has been a significant amount of time spent on the design. On the top, there is a transparent cover, which gives you a look at the pump impeller. This is surrounded by a plastic ring, which has a gunmetal type finish. Underneath this is an RGB LED Lighting module and a glossy plastic casing, which has an attractive ripple design to add to the aesthetics.
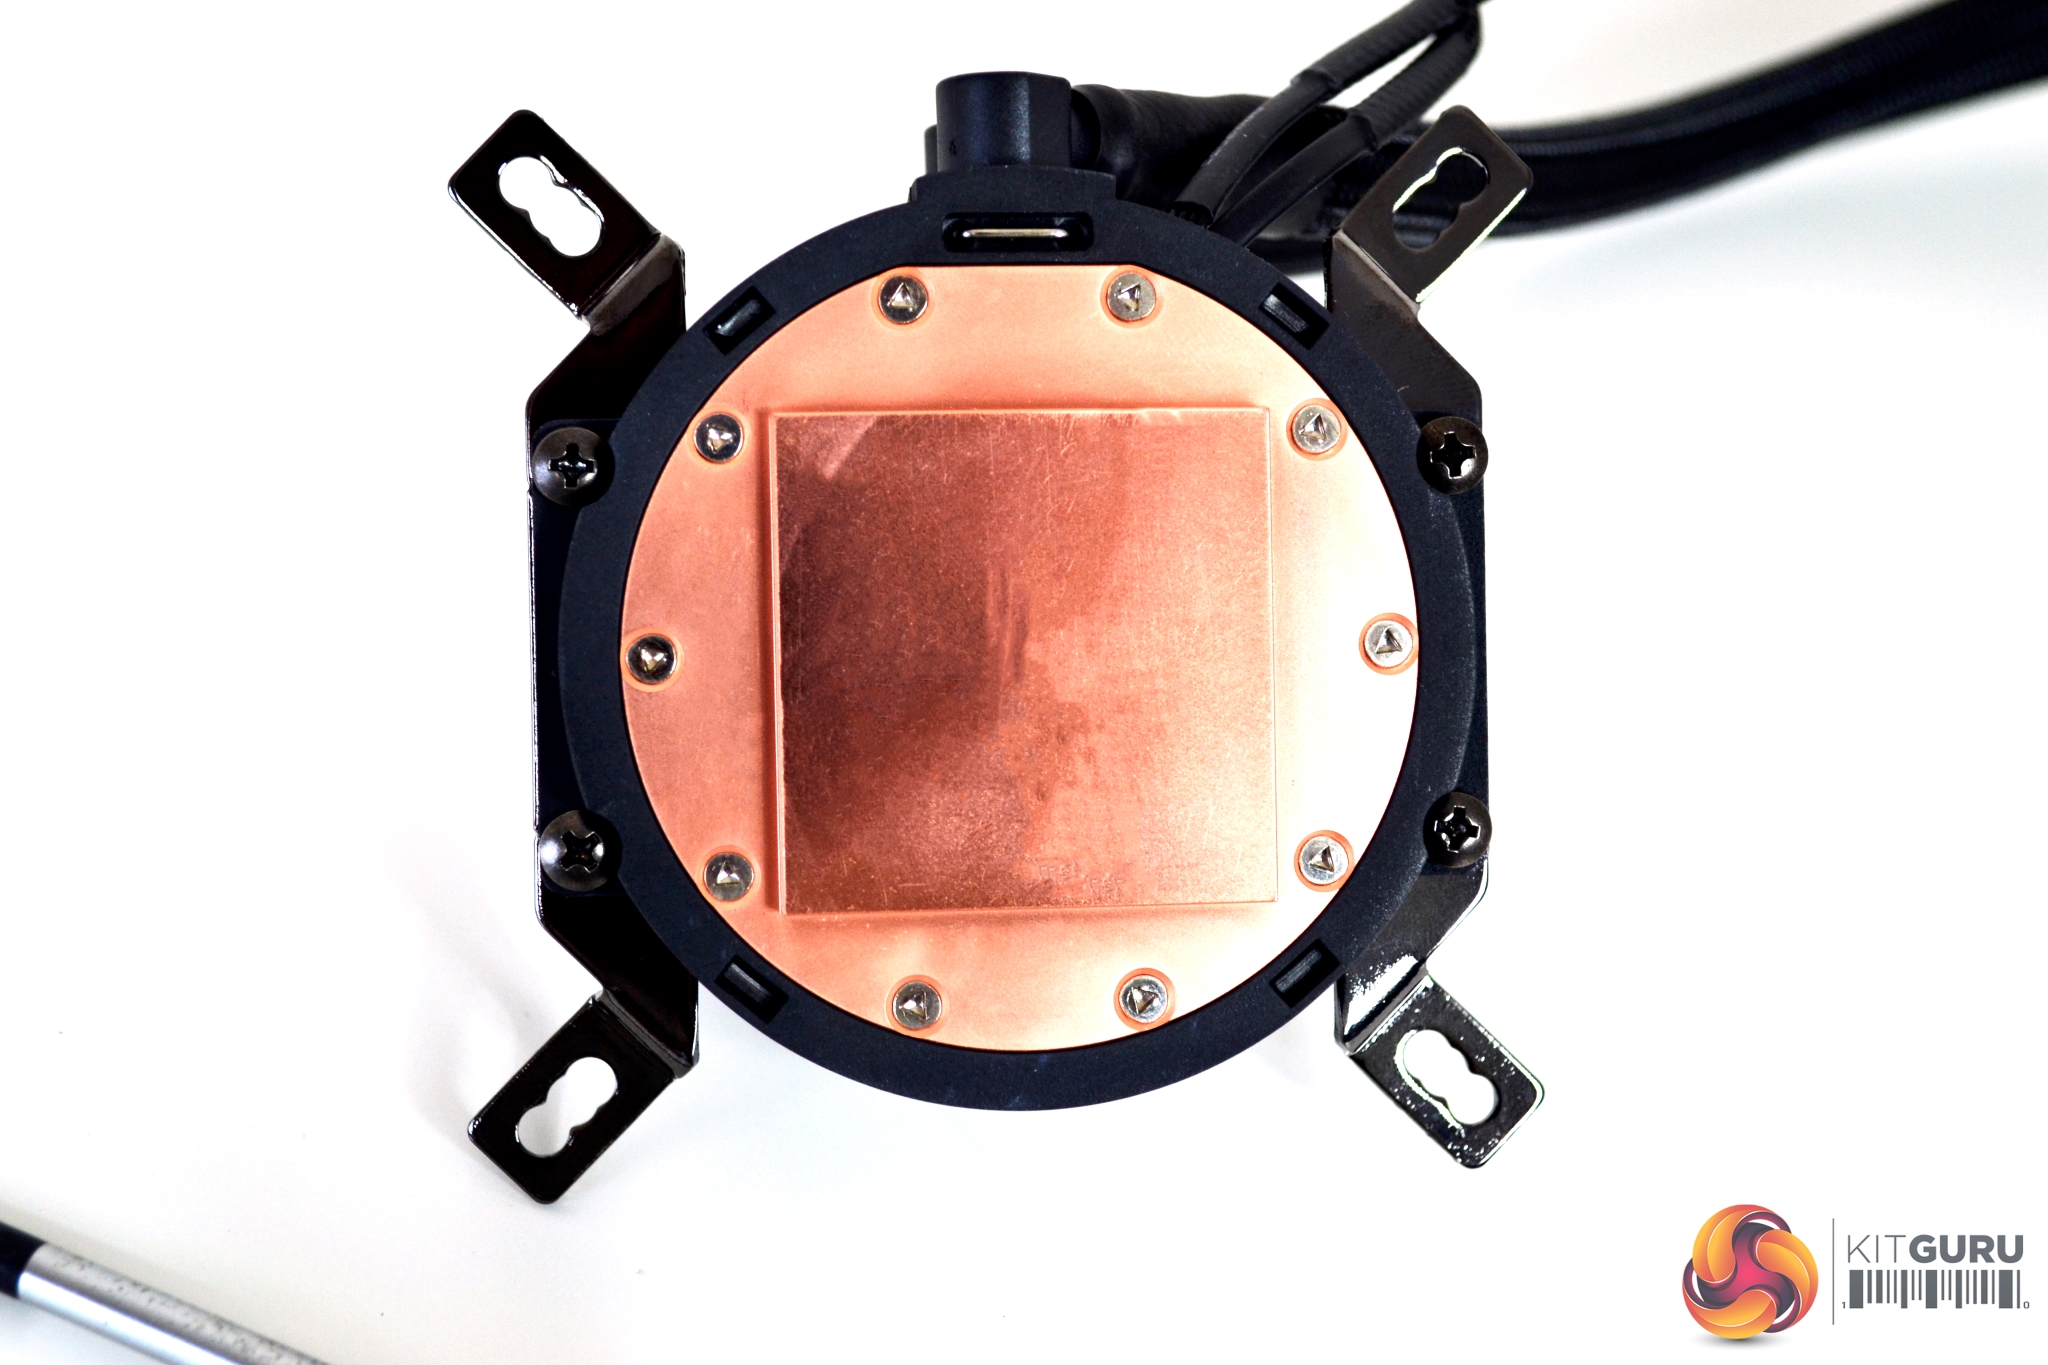
Construction of the pump is as follows – a high performance impeller, designed in house at Cooler Master, is driven by a Tri-phase/PWM motor with silent driver, which helps minimise operating current while keeping a low dBA noise level. At the base of the block, there is a rather hefty-looking copper micro-channel cold plate, with a square raised section for direct CPU IHS contact, which should aid thermal transfer performance.
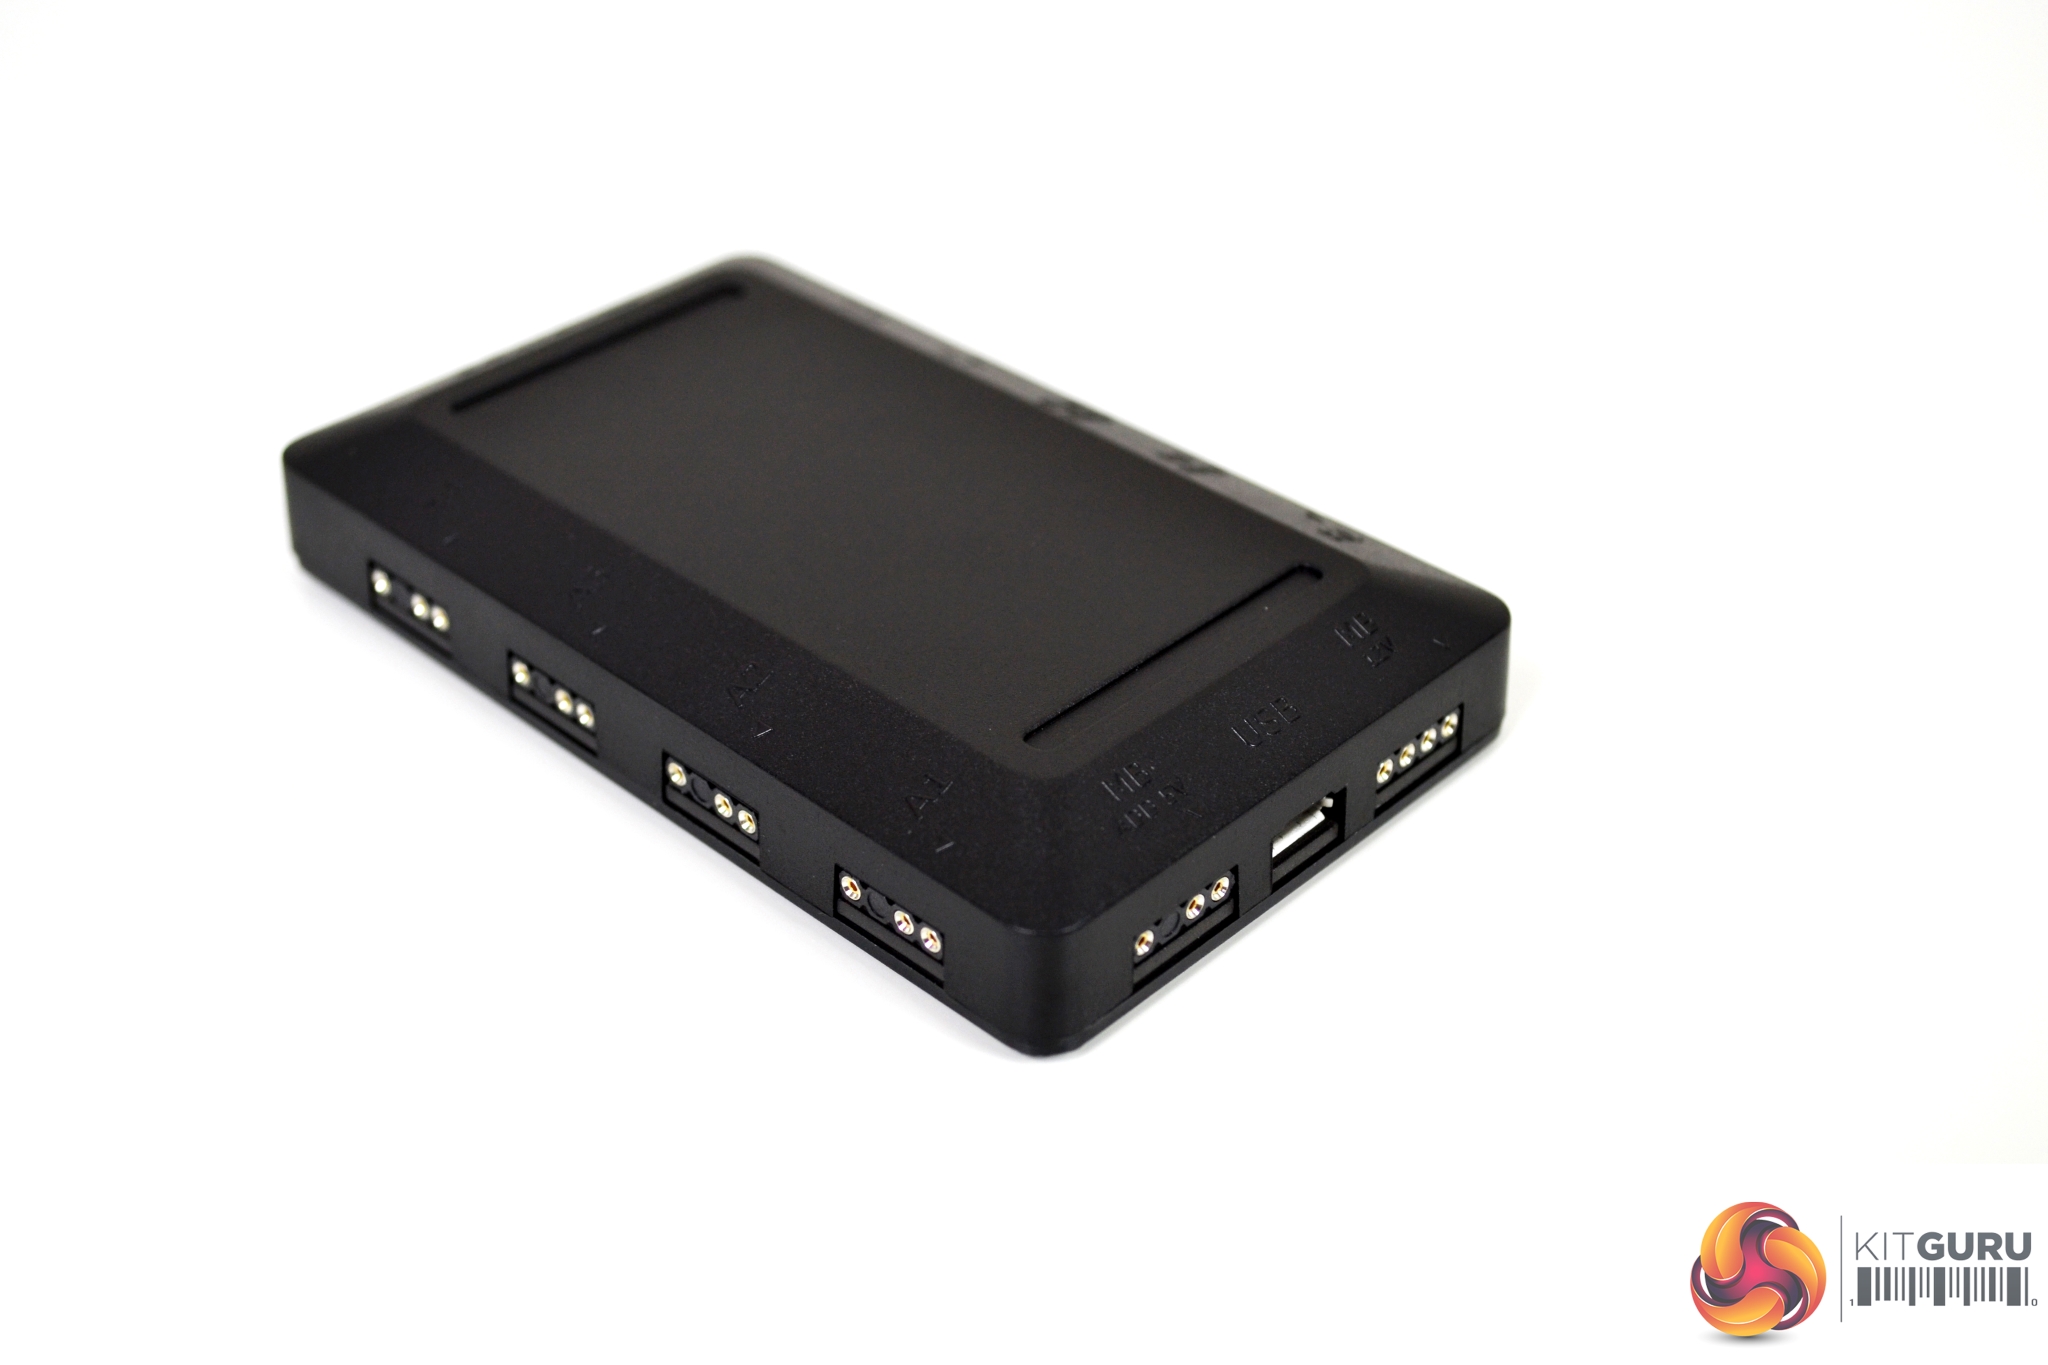
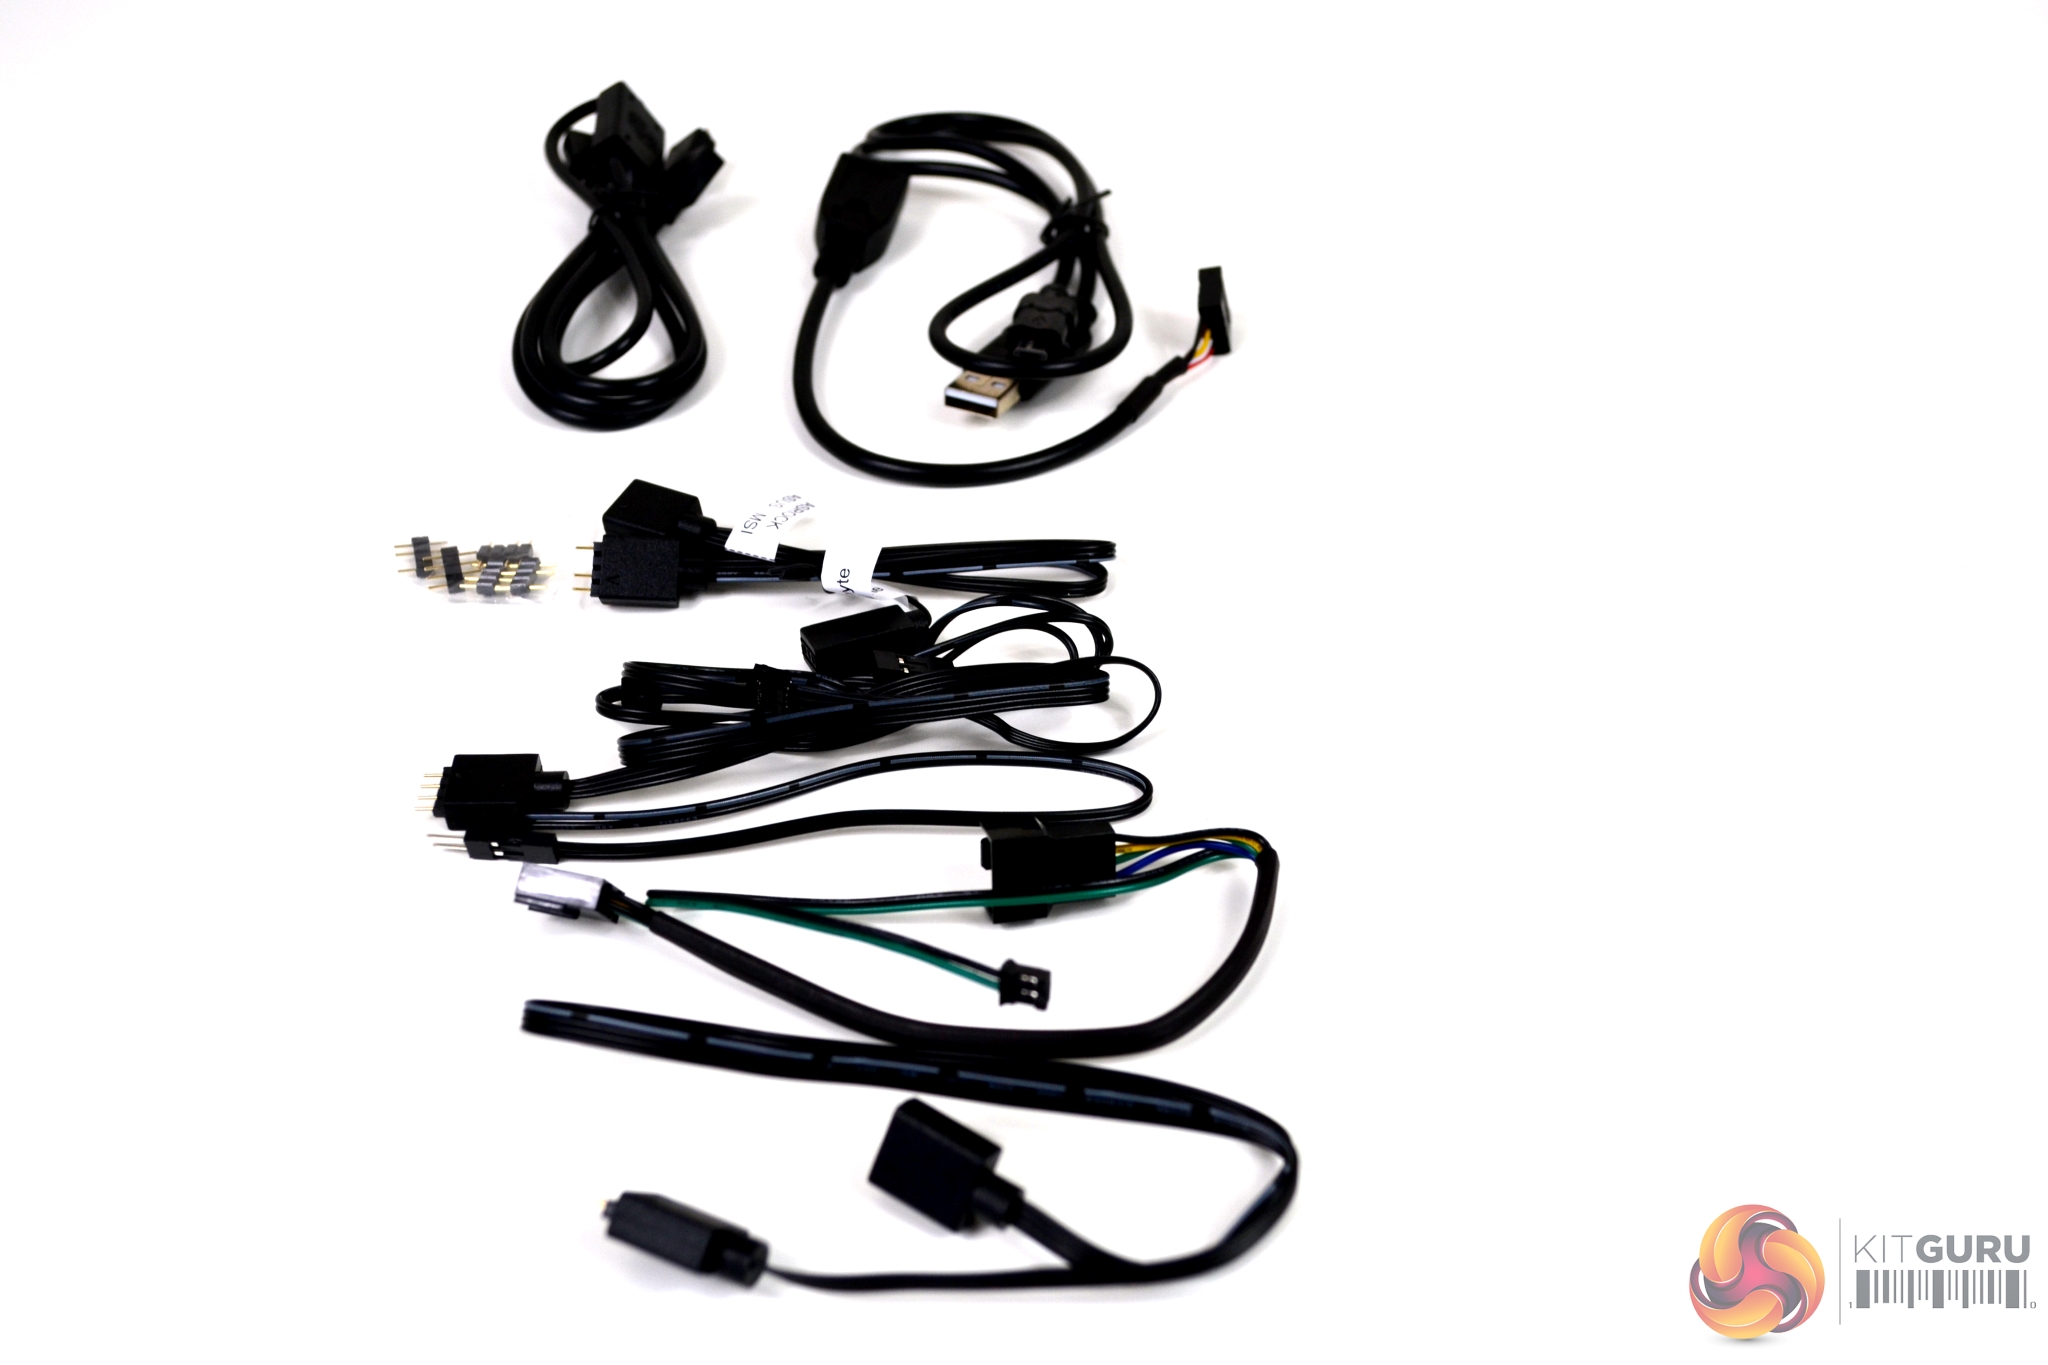
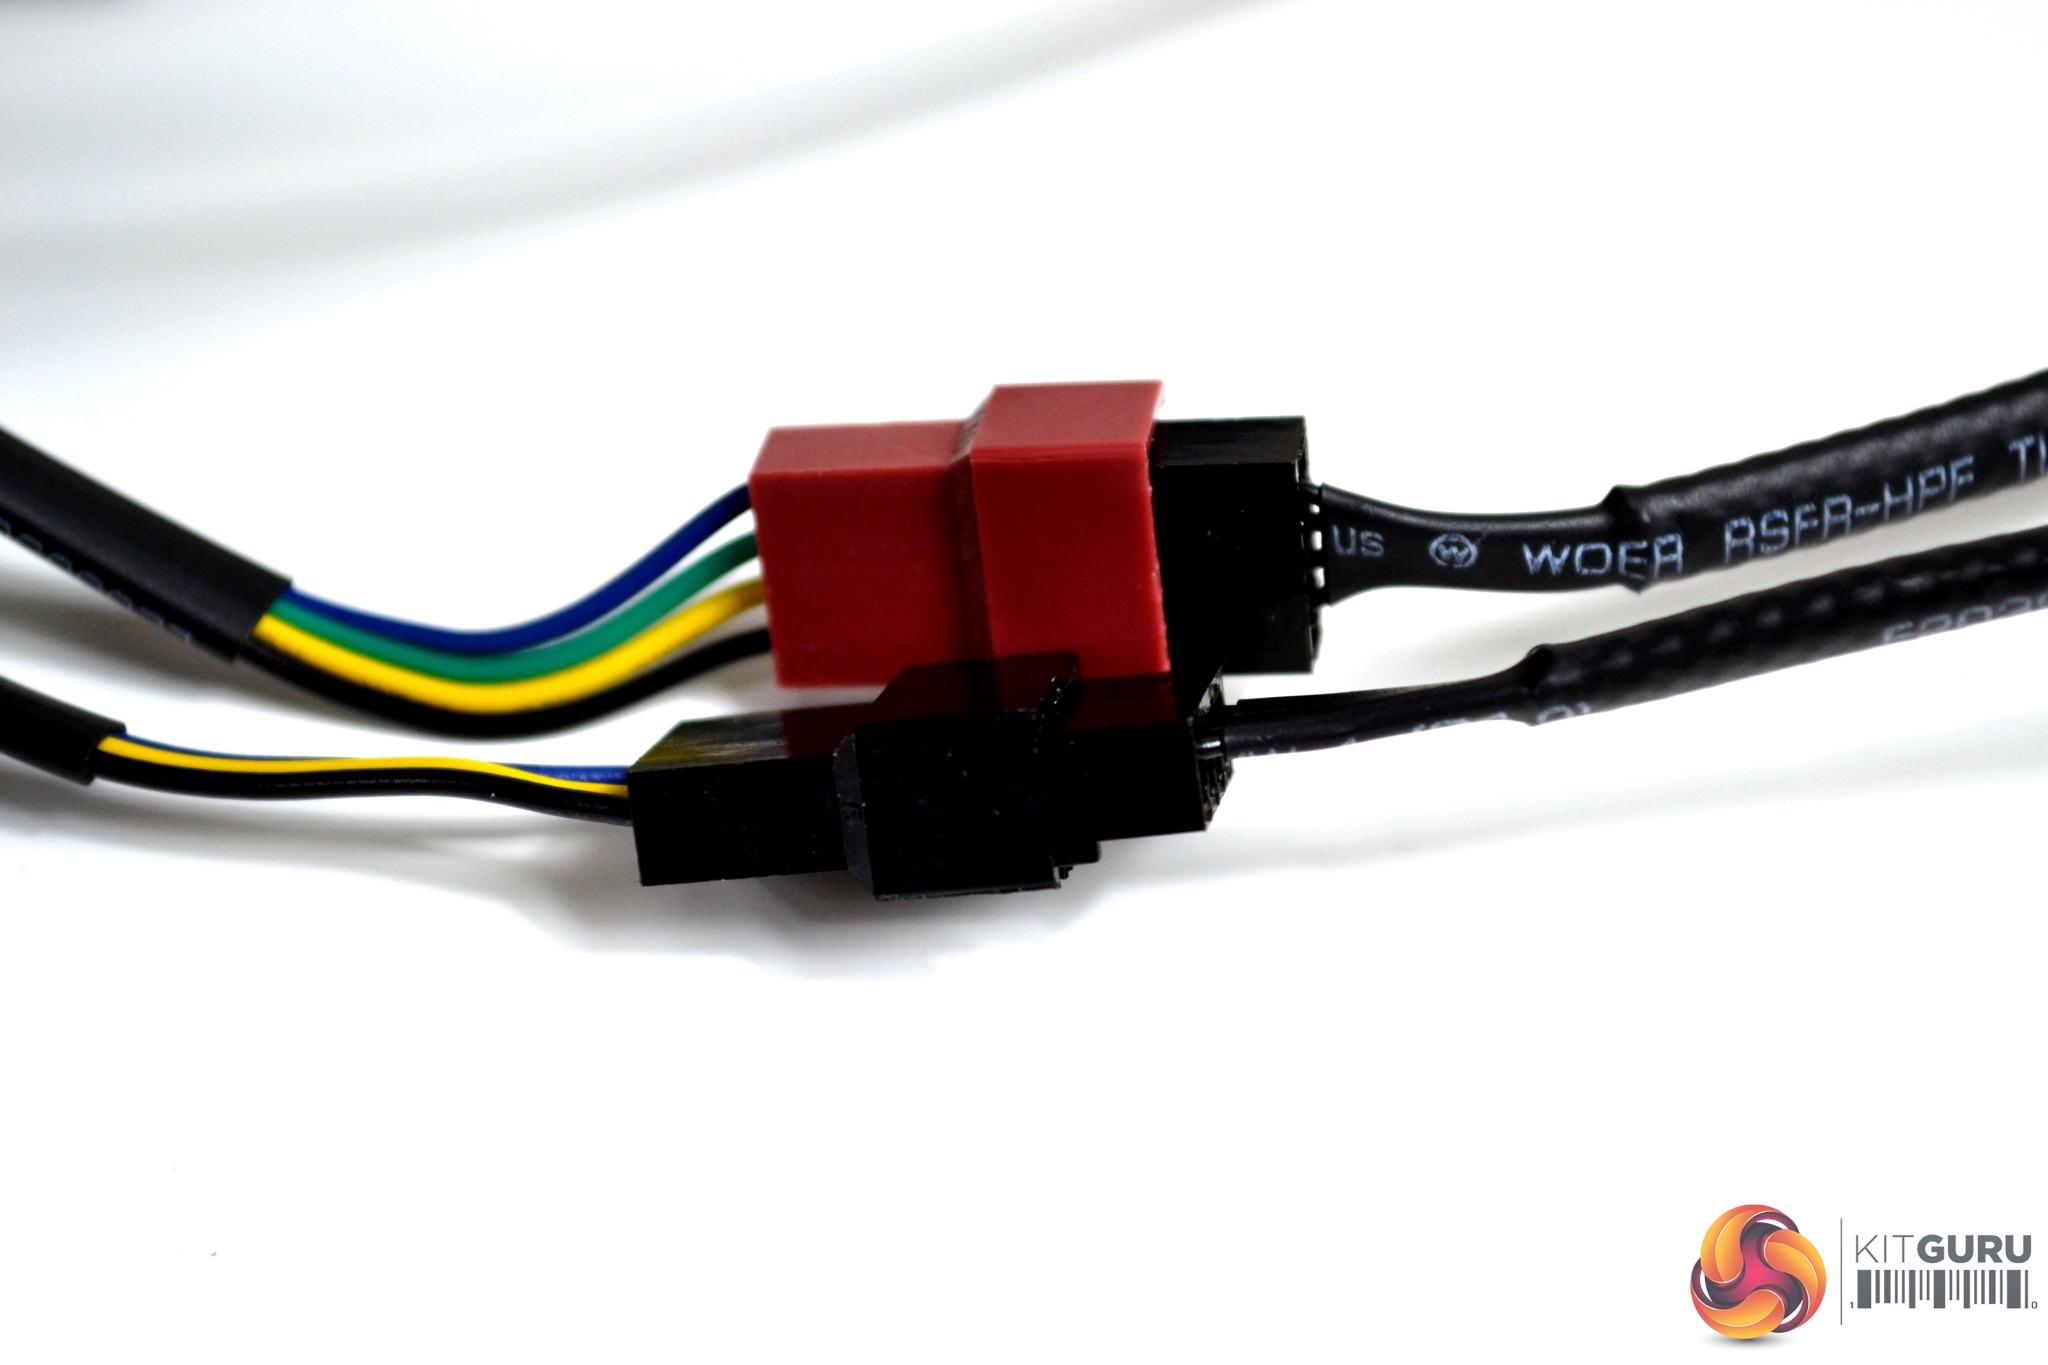
An RGB lighting controller has been included, so you have the ability to use the full range of RGB colours/sequences, even if your motherboard does not support RGB connections. There seems to be many connections on the controller and a large amount of cables are included, so careful consideration should be taken when planning cable management.
RGB Lighting Gallery
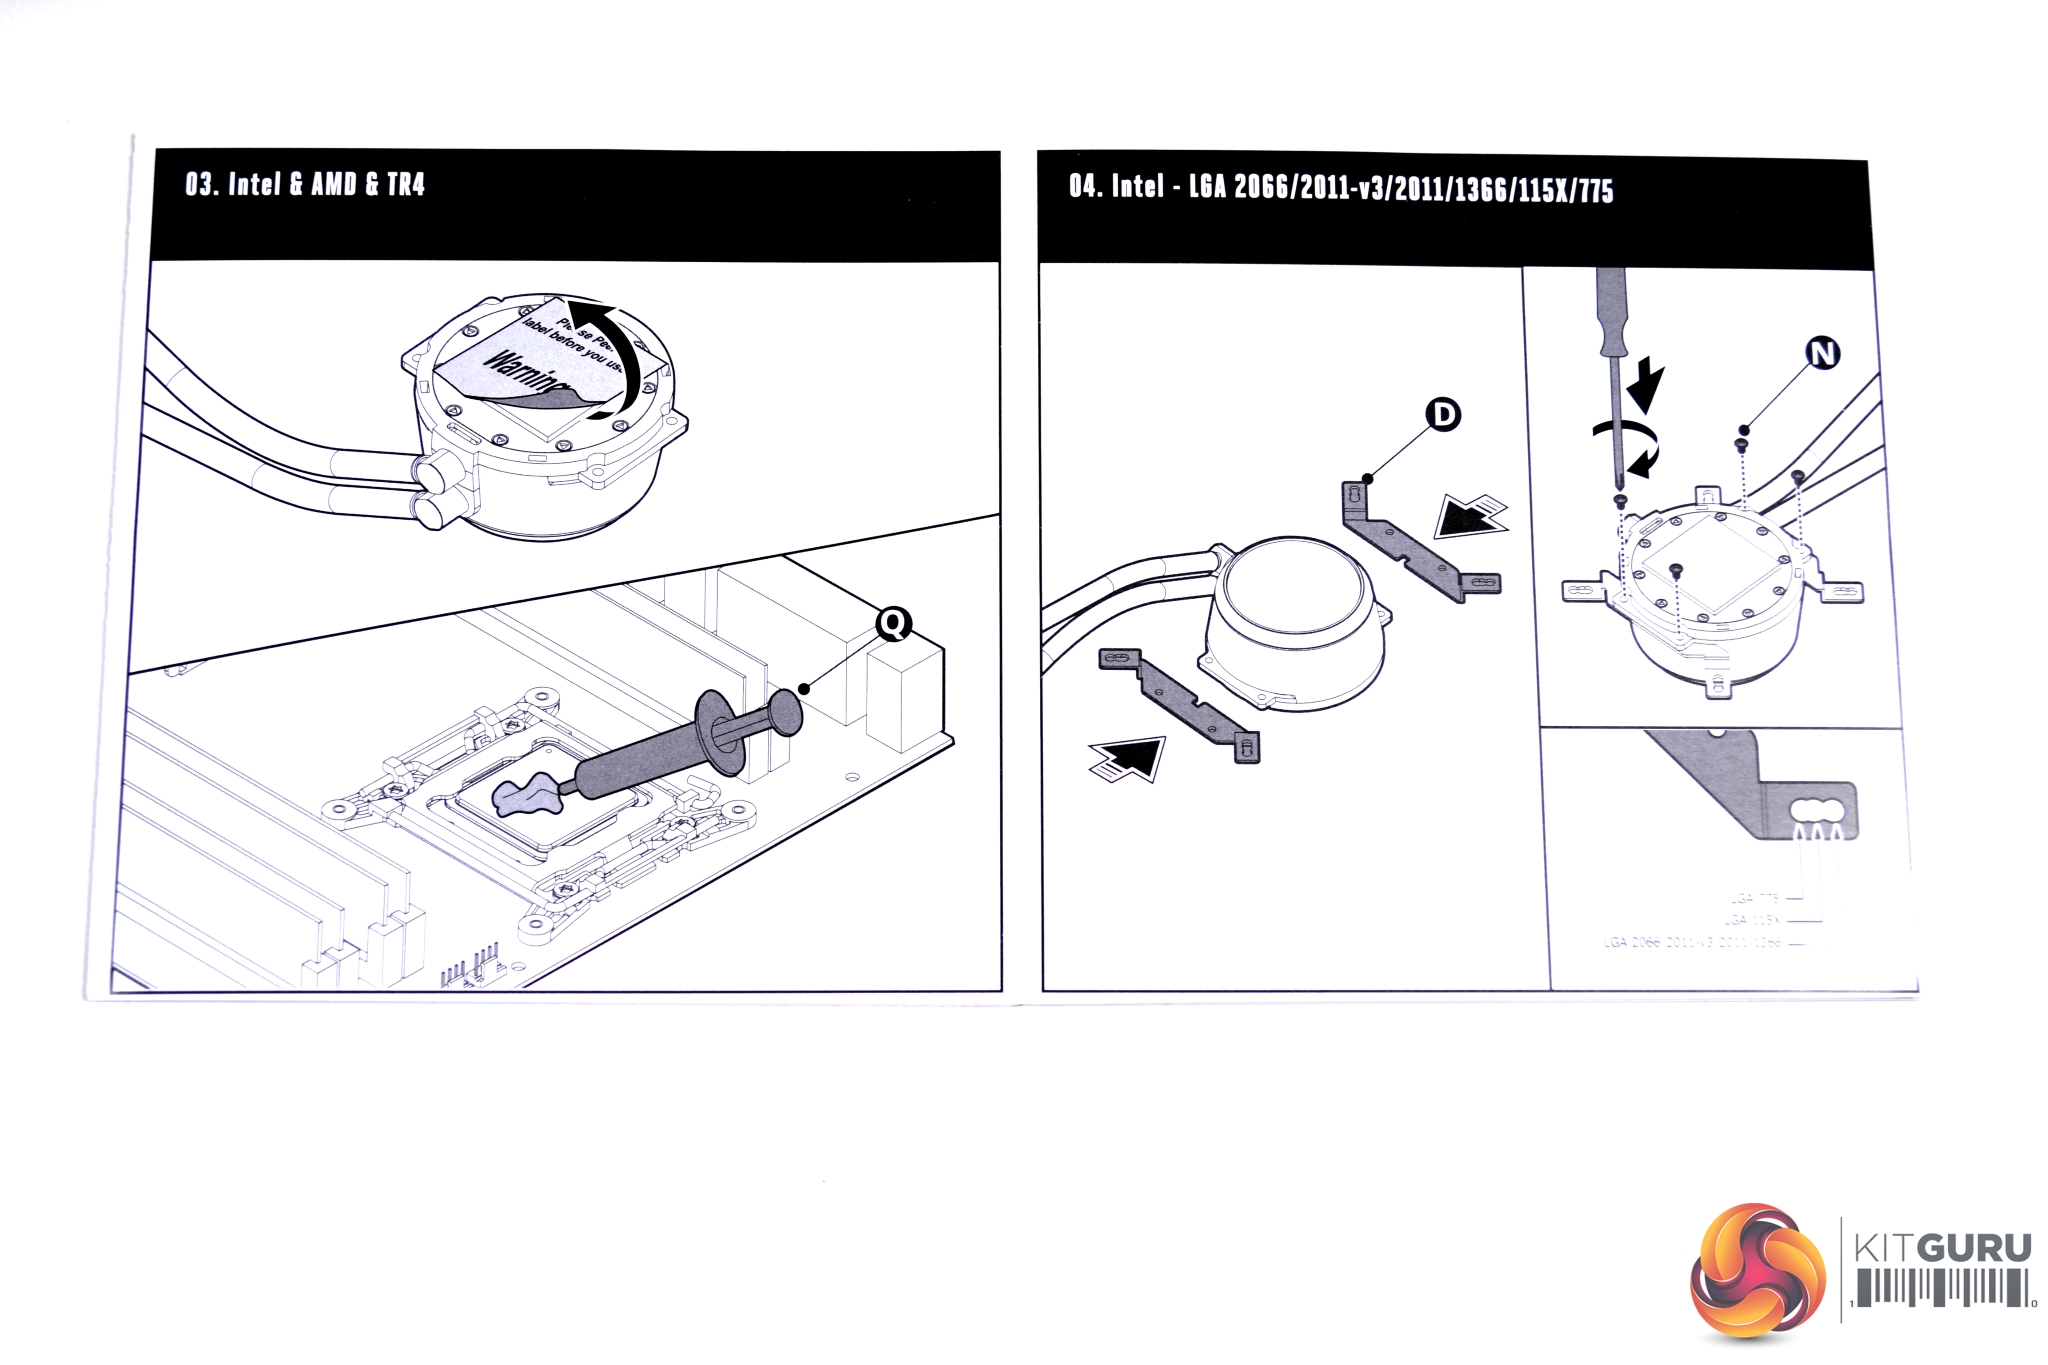
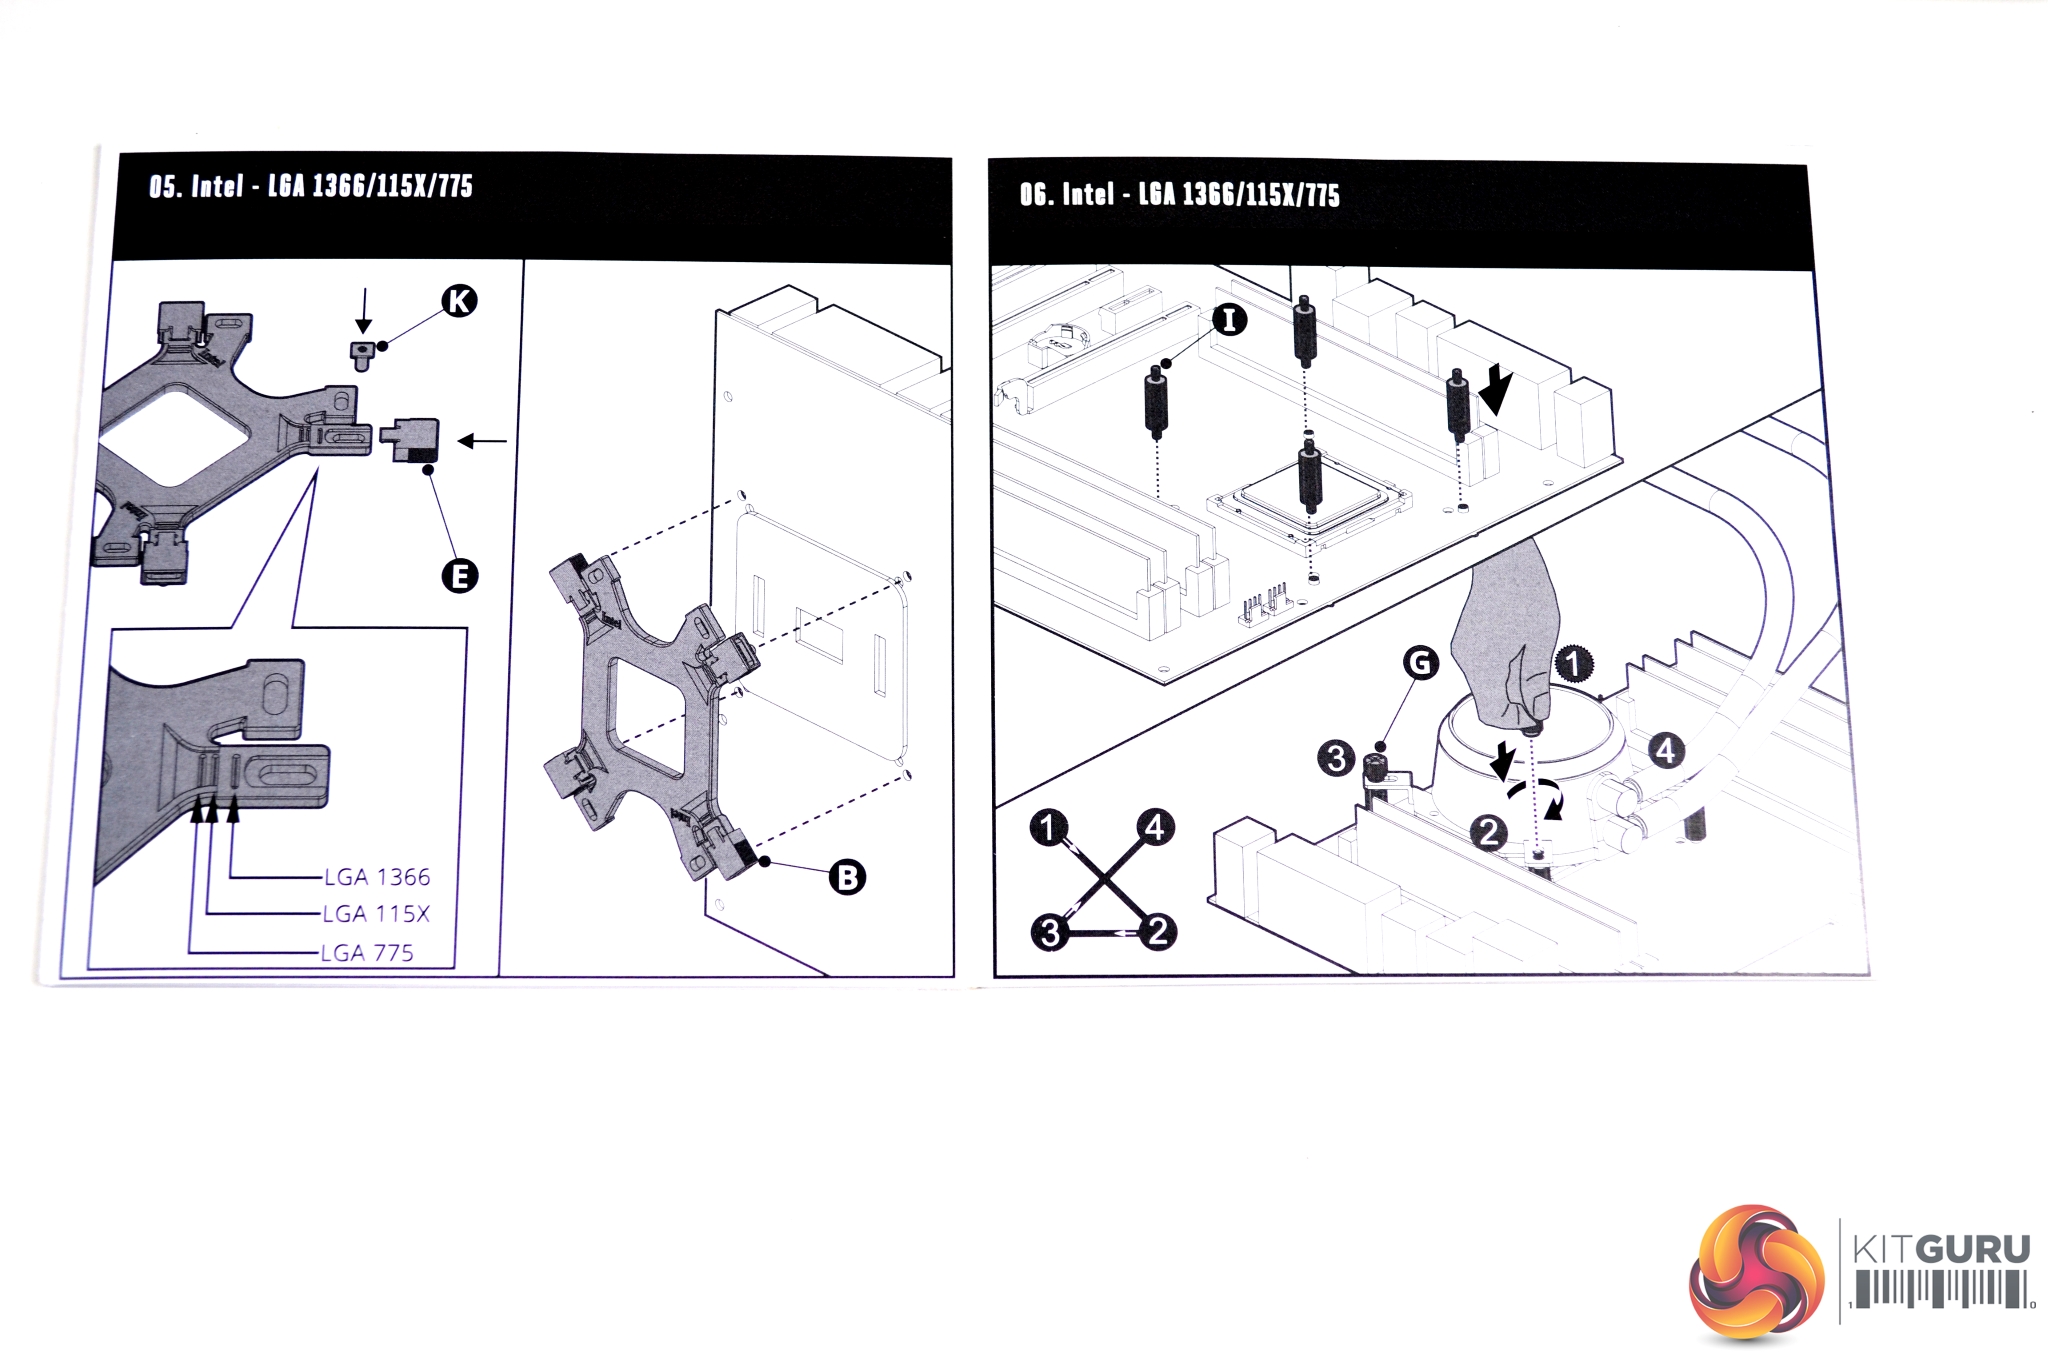
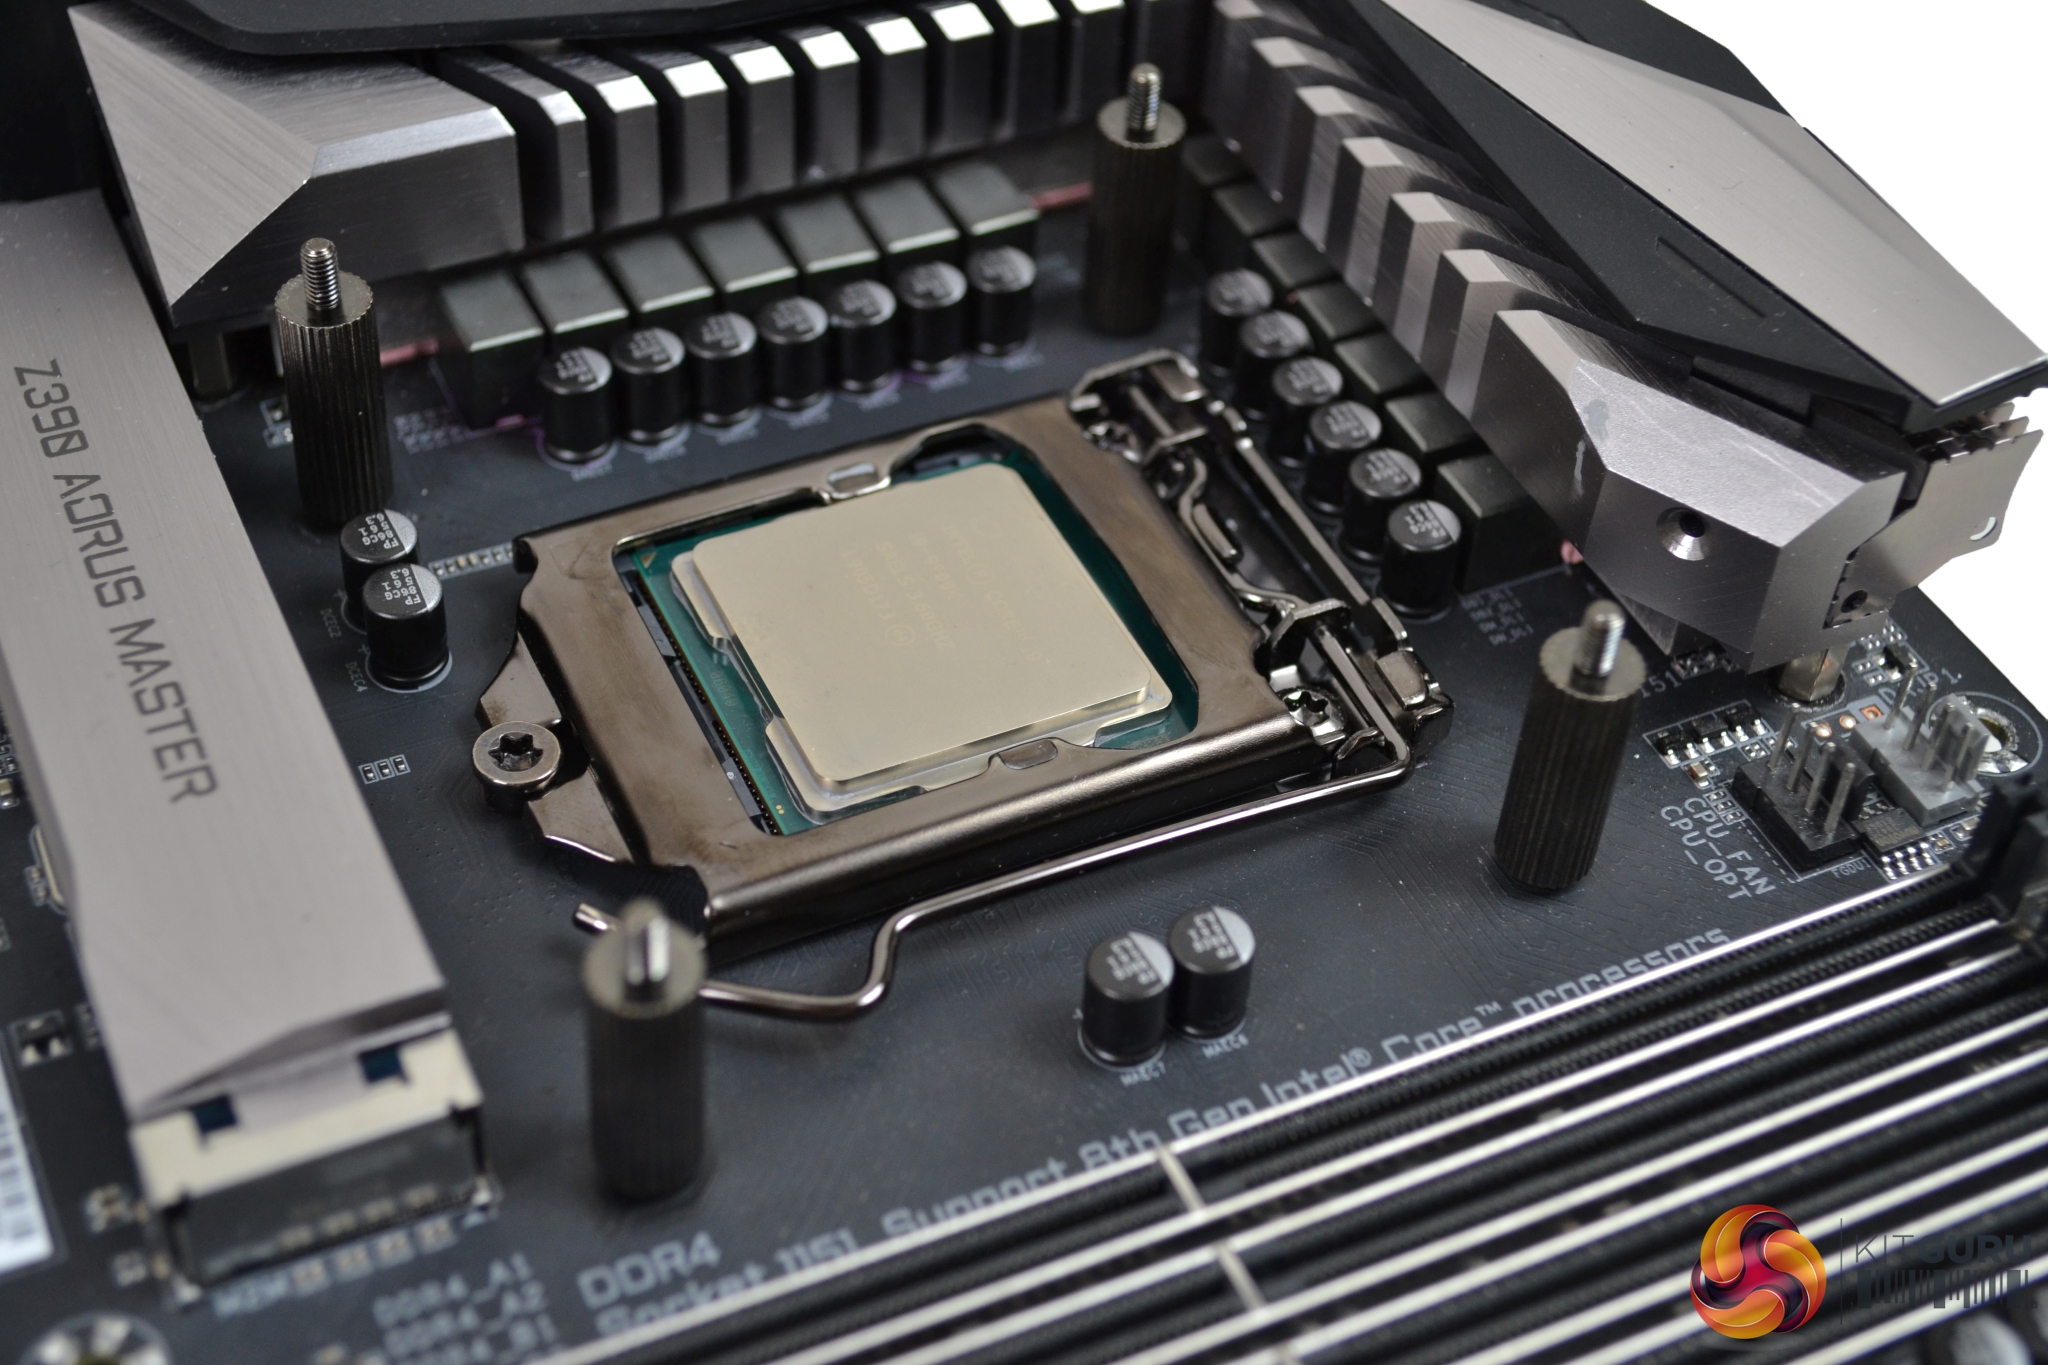
Installation of the ML240P Mirage is quite simple – Cooler Master has provided easy to follow directions with simple to understand diagrams. Our test system is Intel Z390 based, so we will be following the Intel 115X installation procedure.
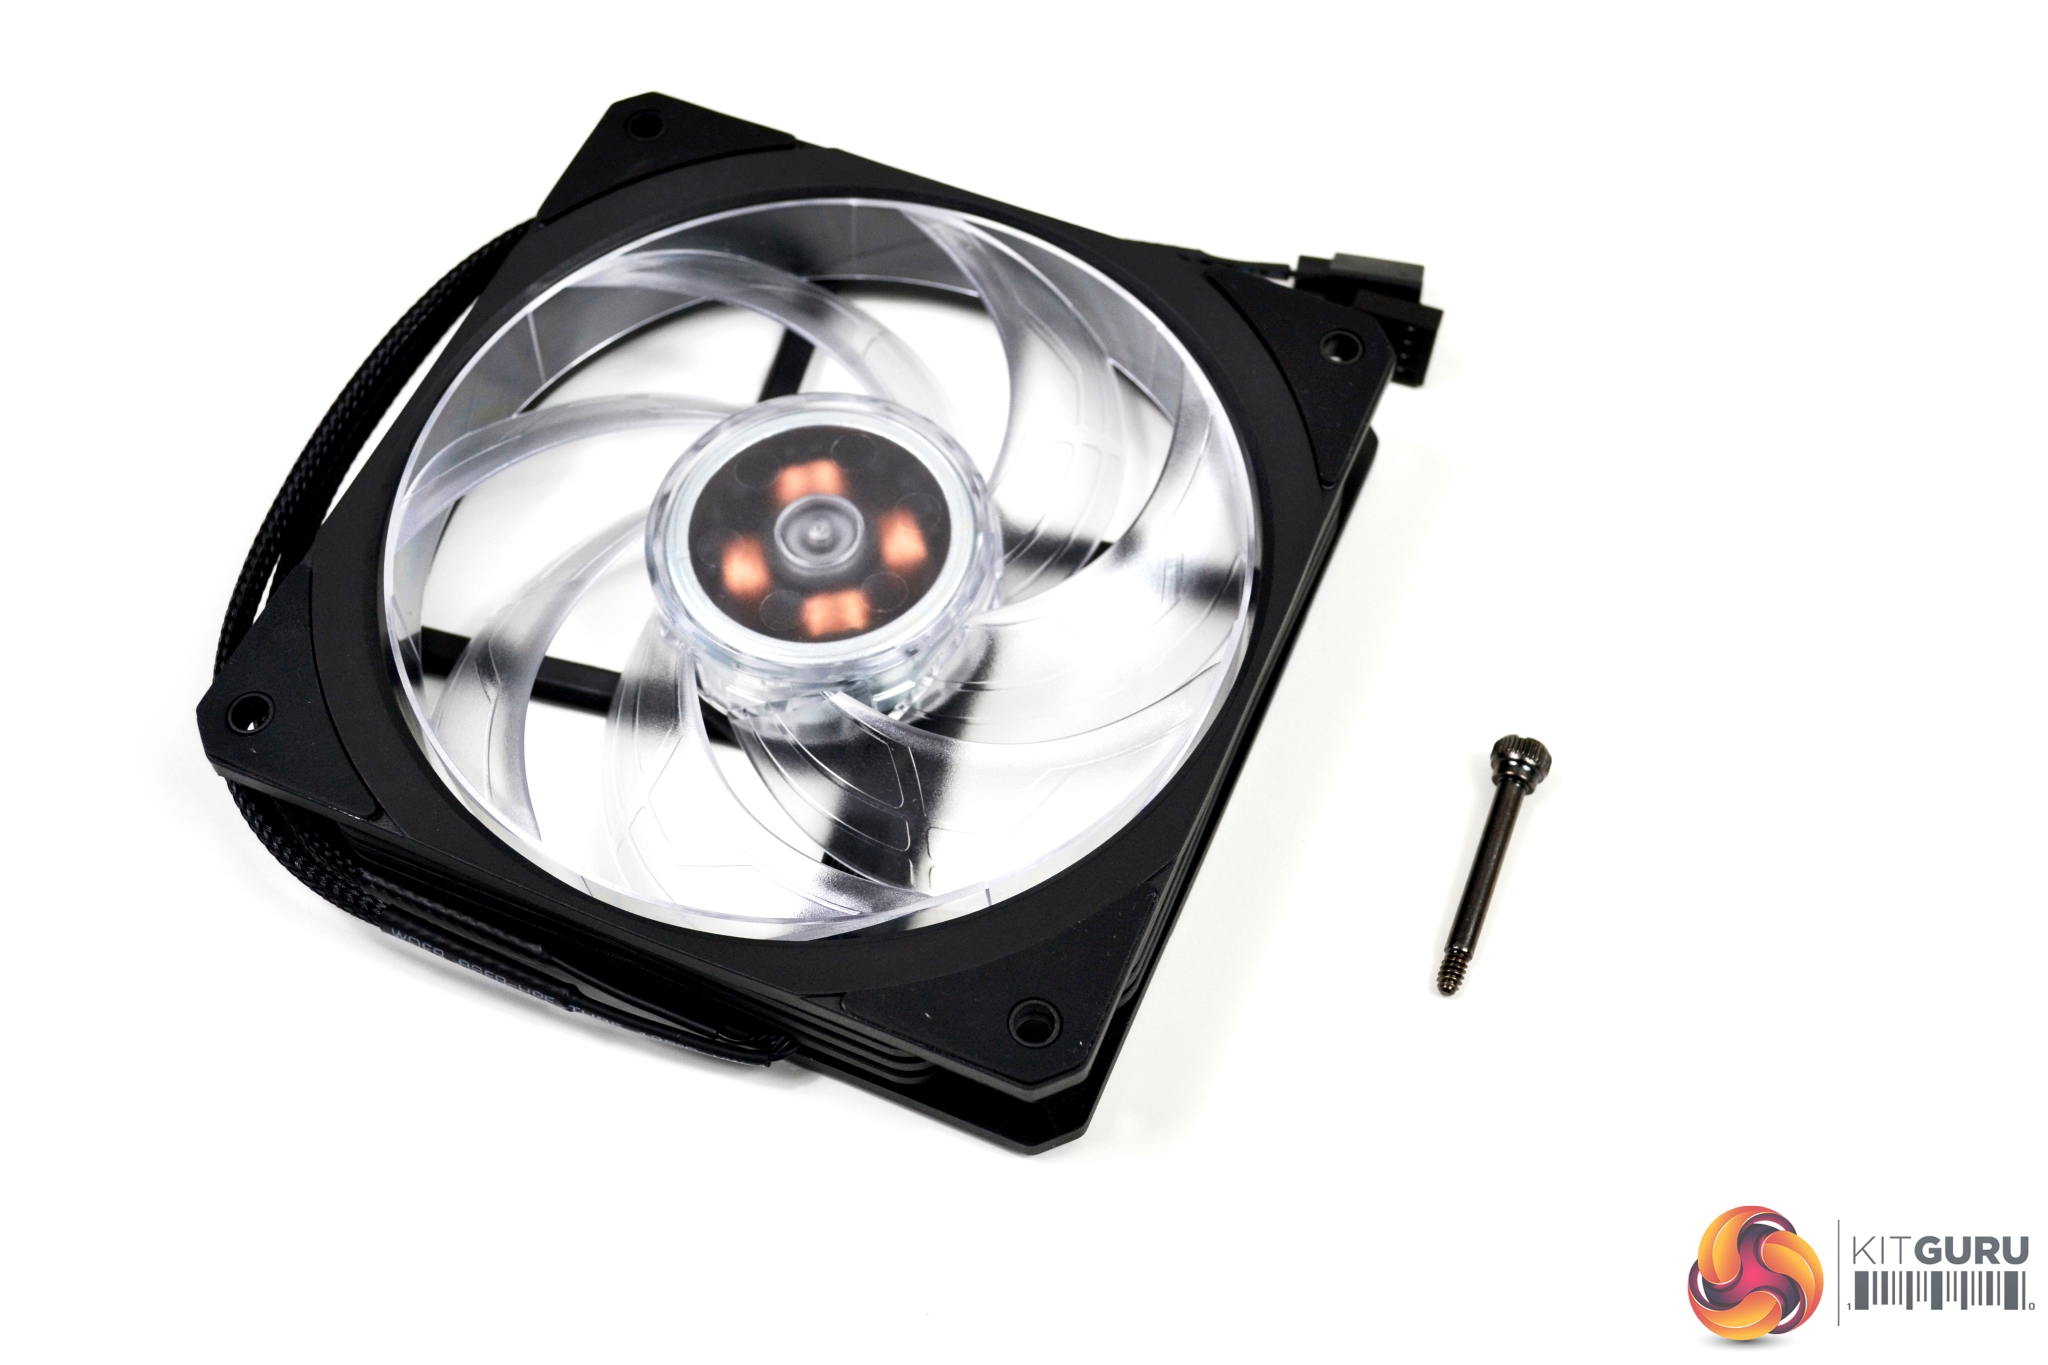
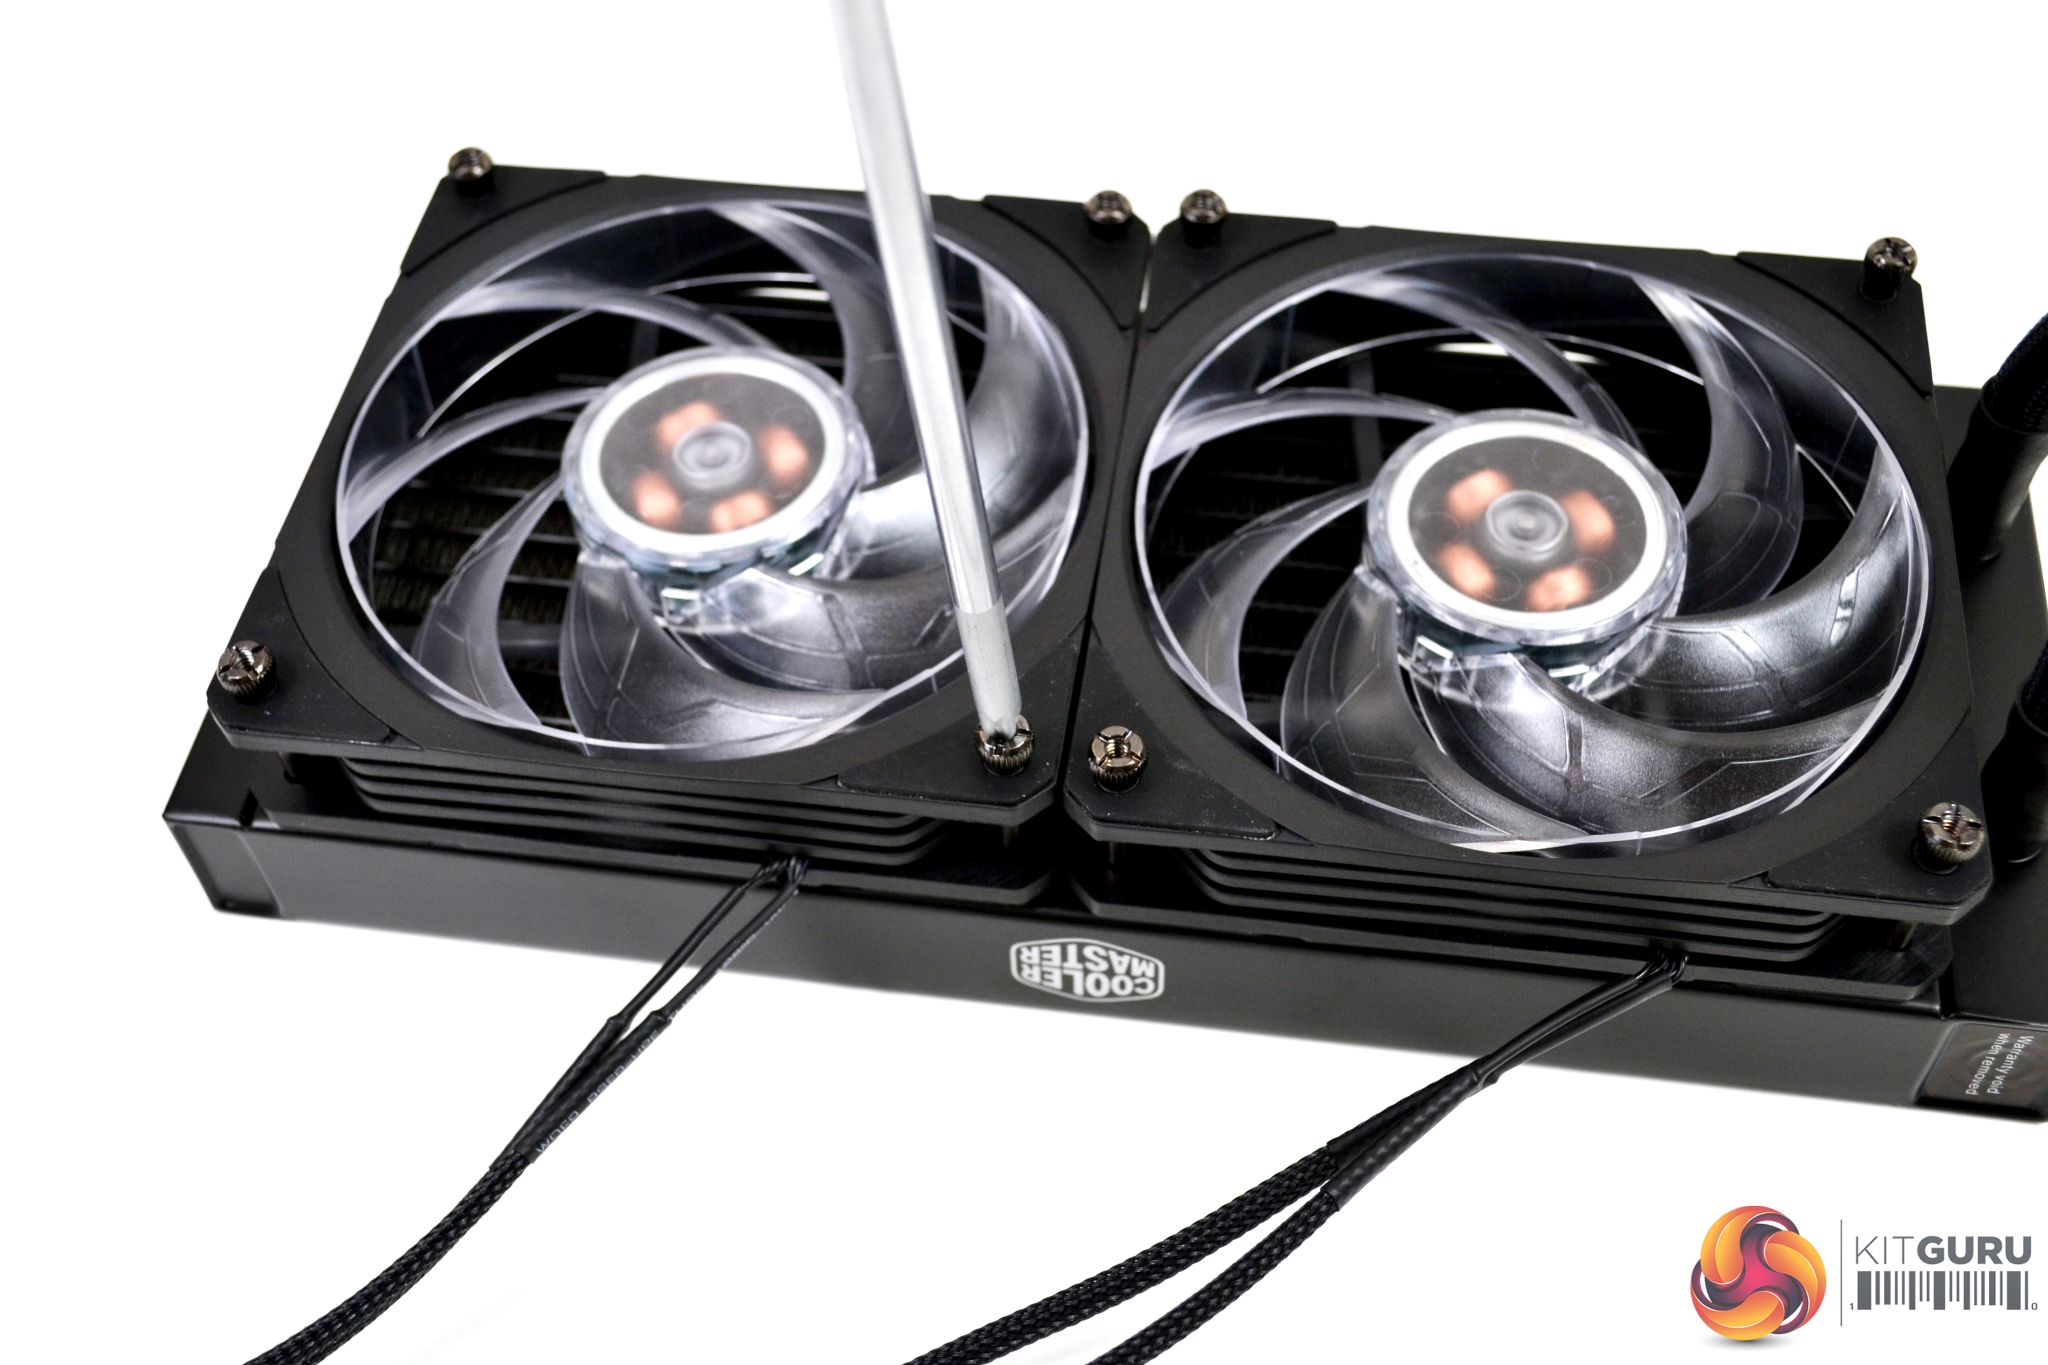
The first step is to attach the fans to the radiator. There are eight long thumbscrews, which have an attractive black chrome finish and Philips screw head for final tightening. The direction to install the fans depends on whether you are using a push or pull air-flow configuration. We have fitted them in a push configuration, as shown in the images.
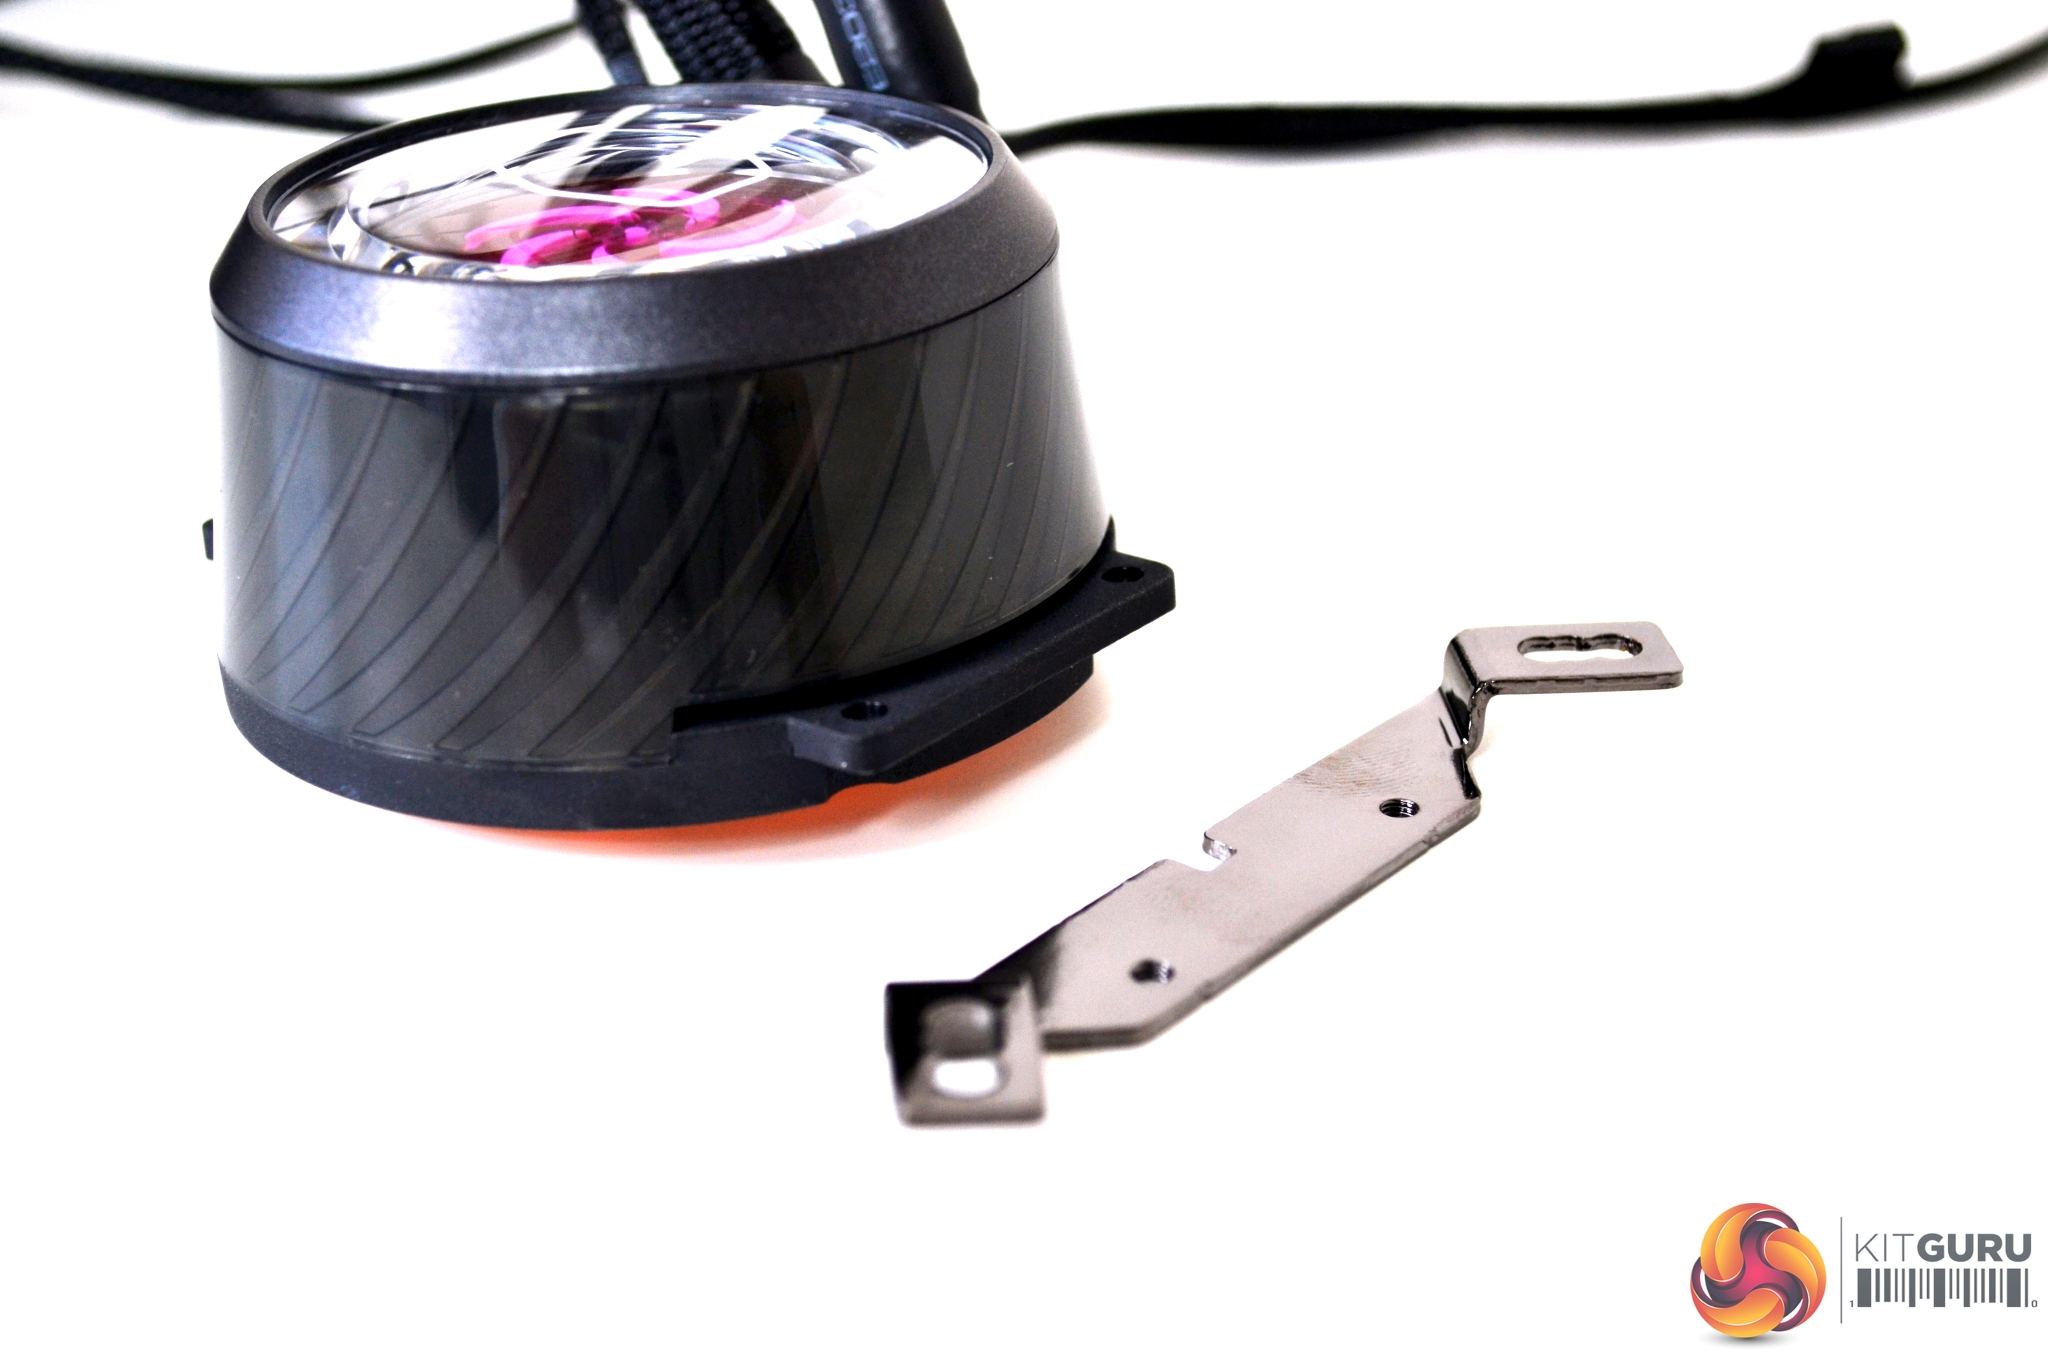
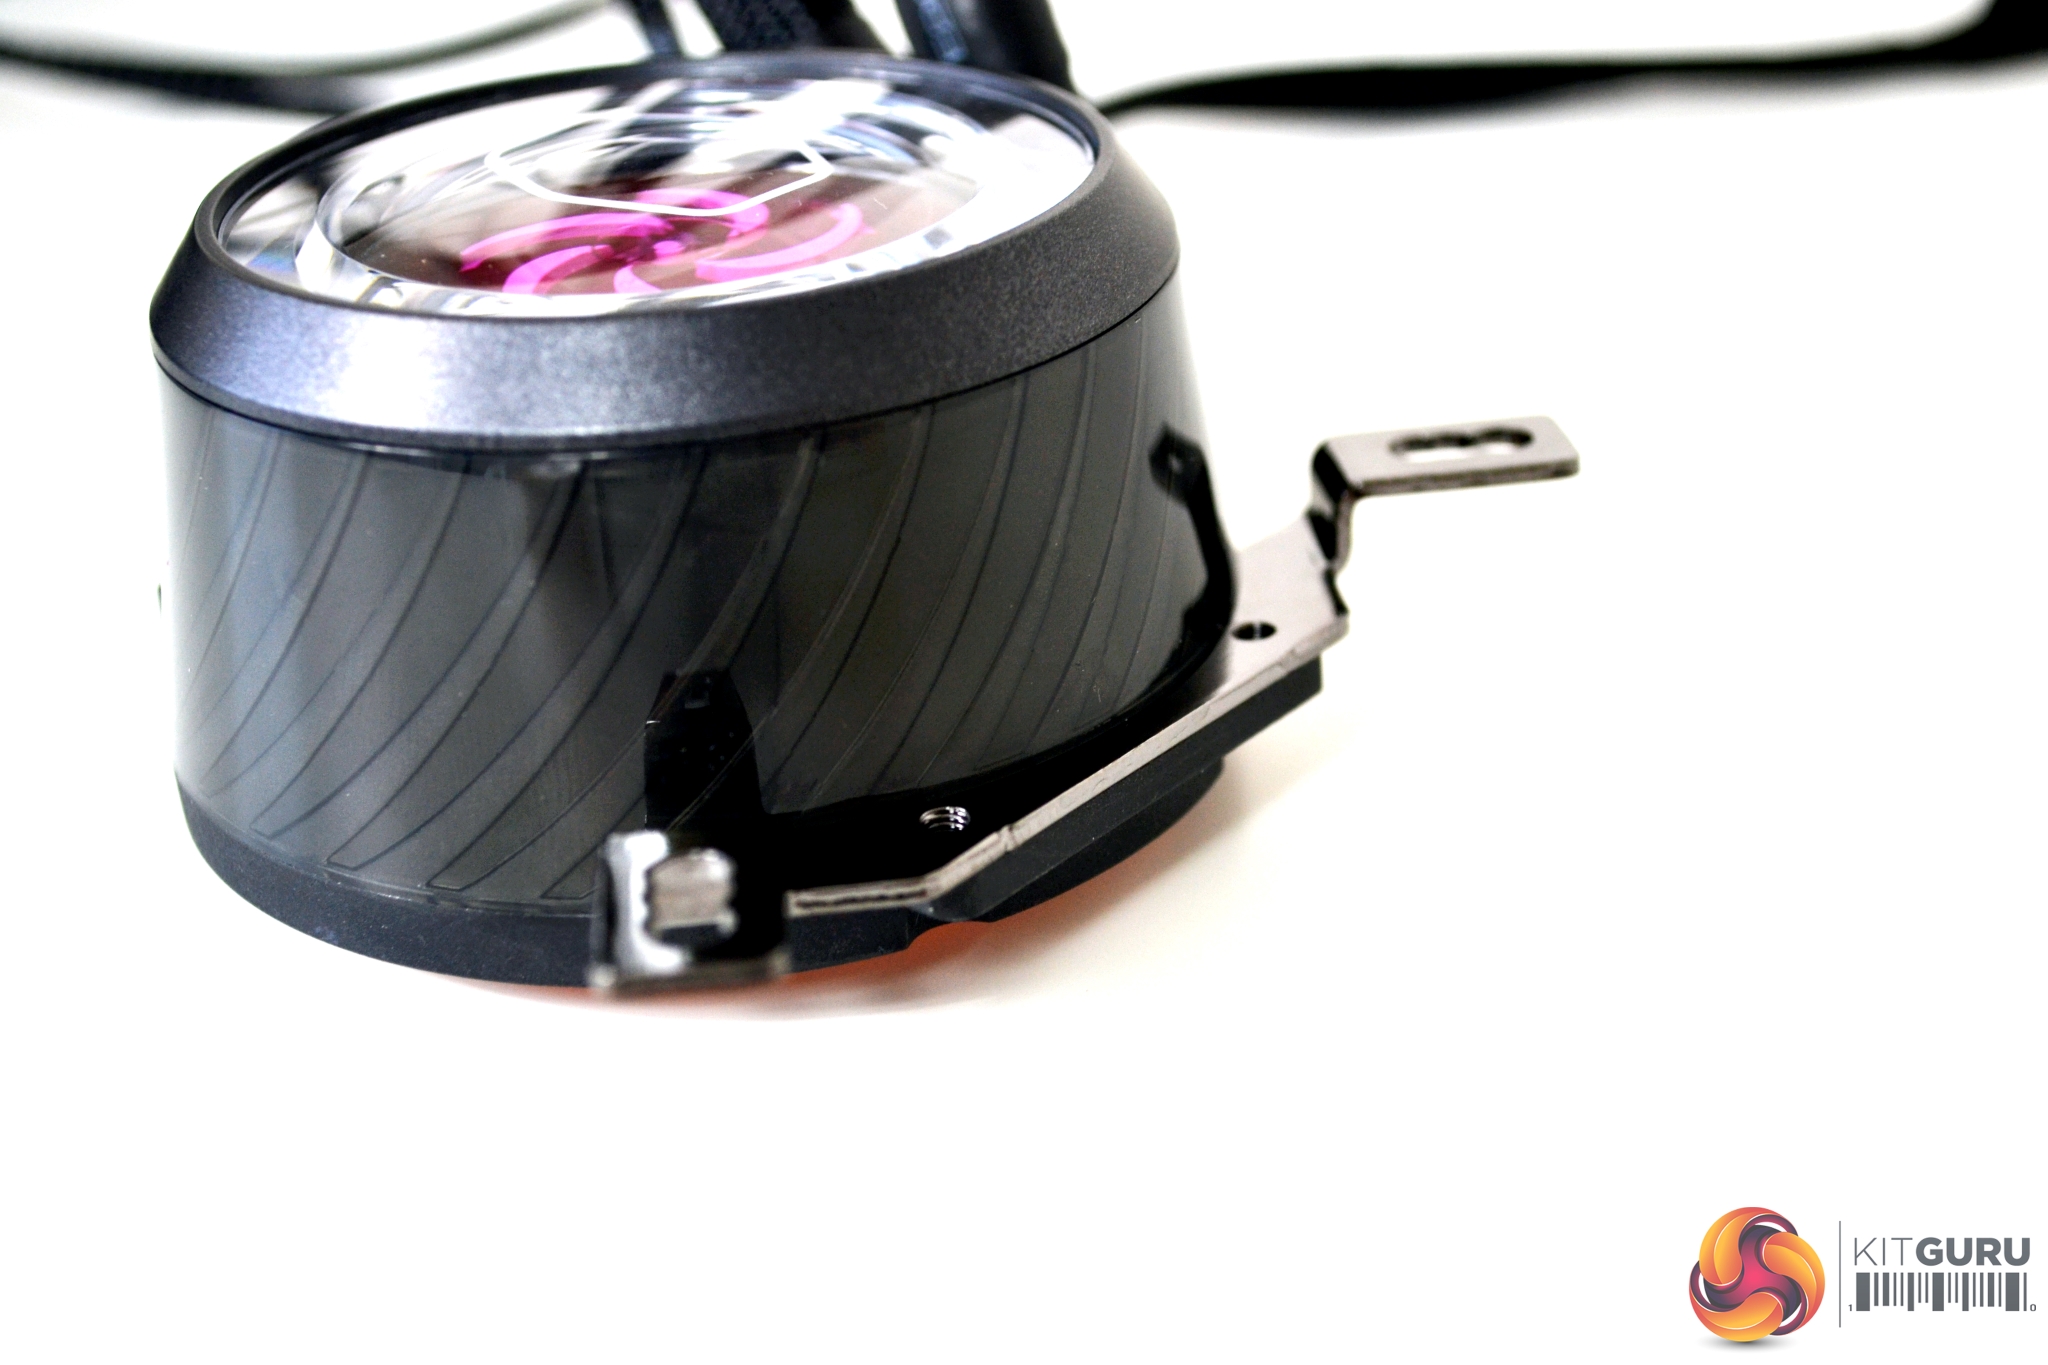
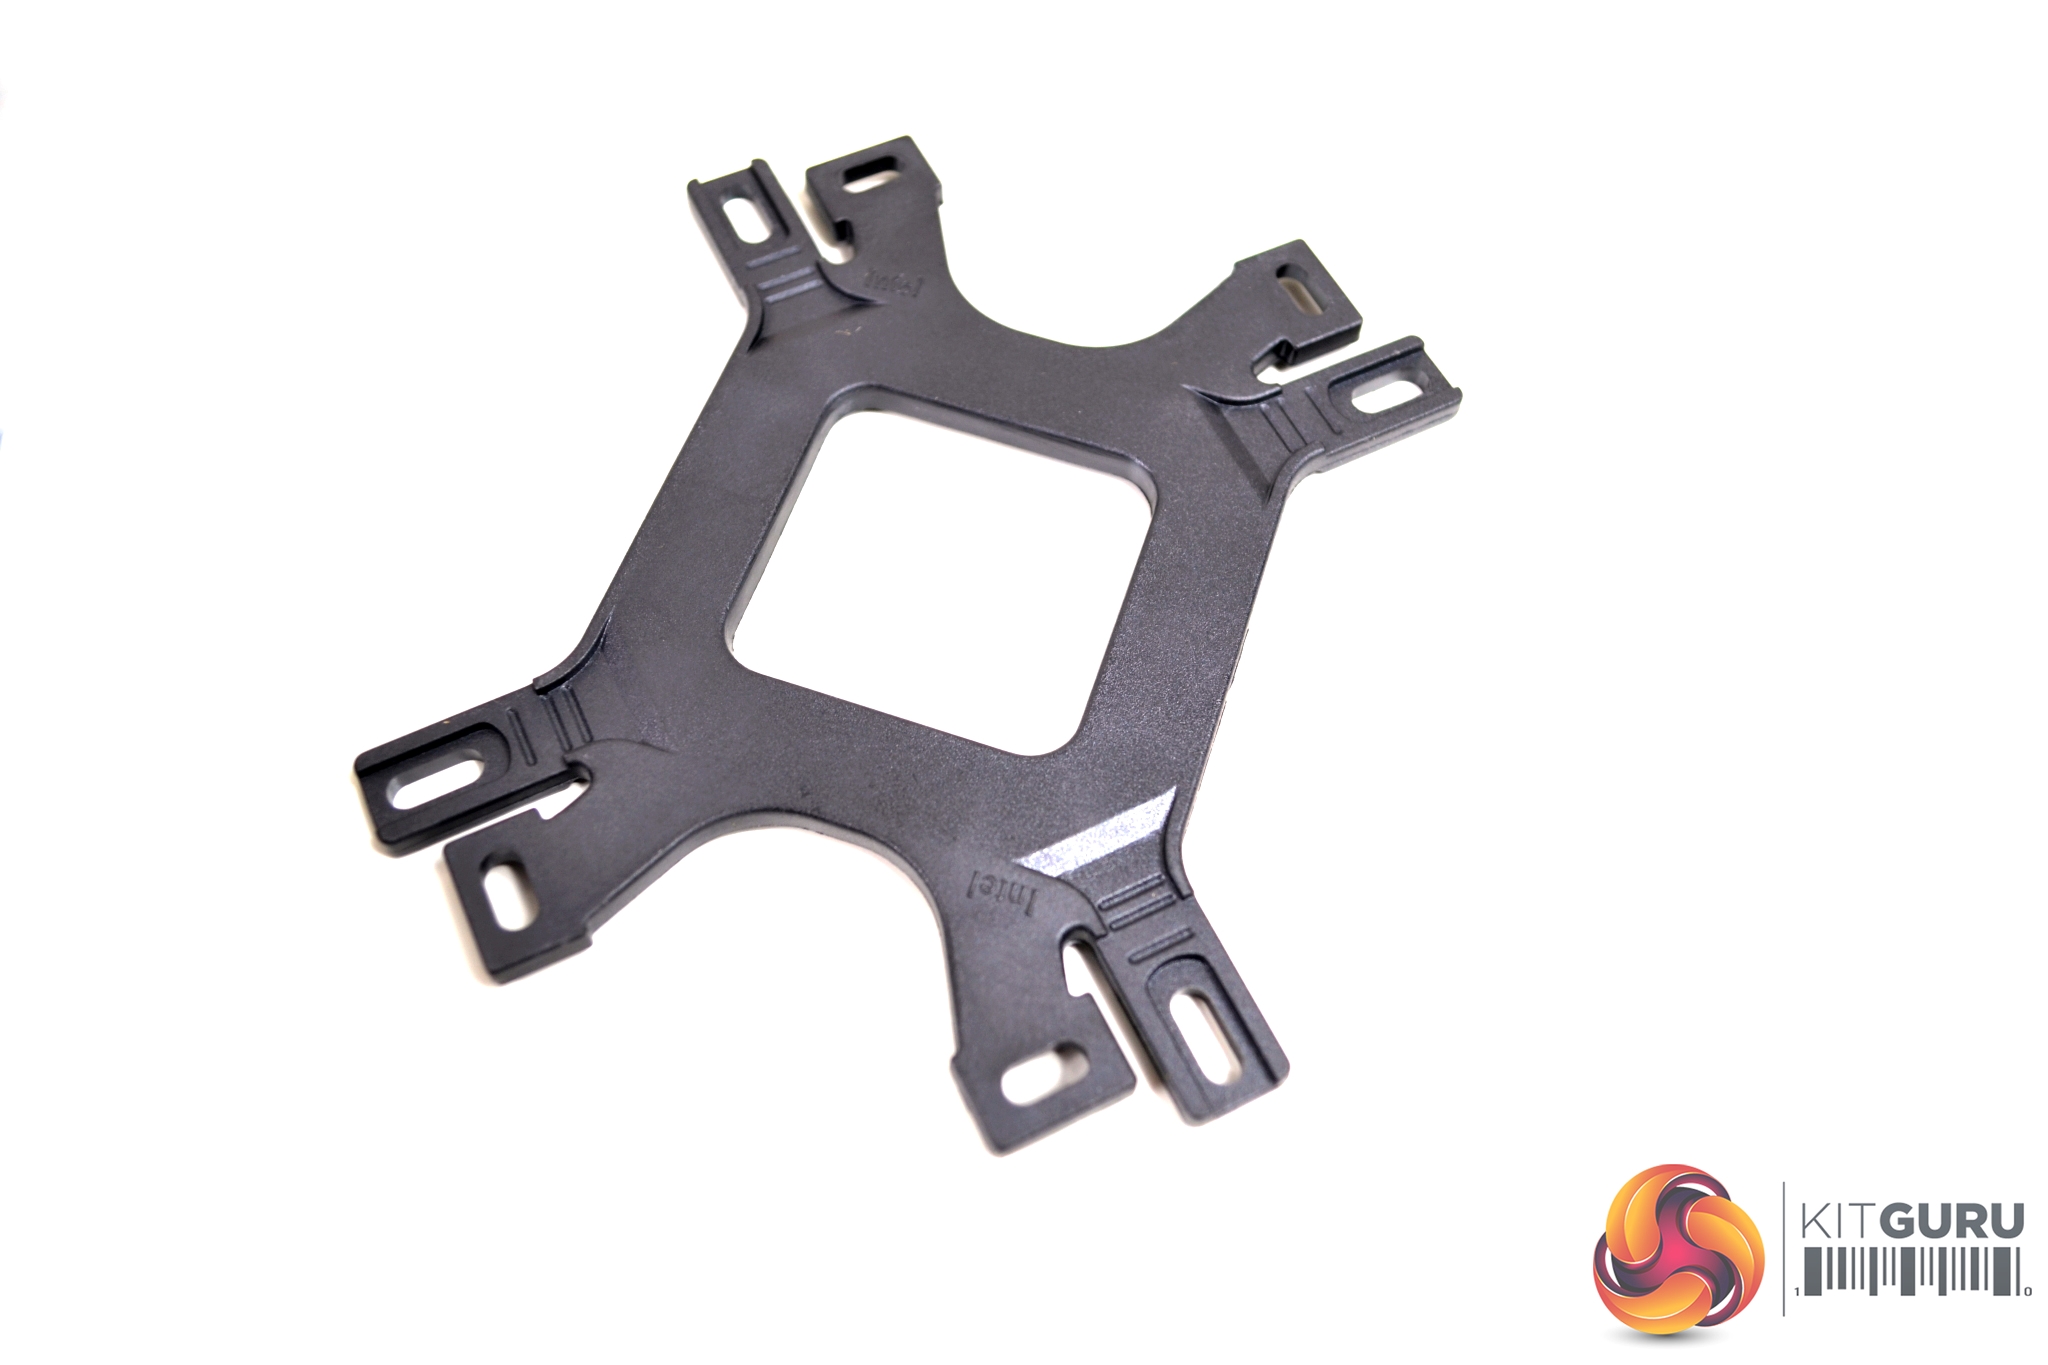
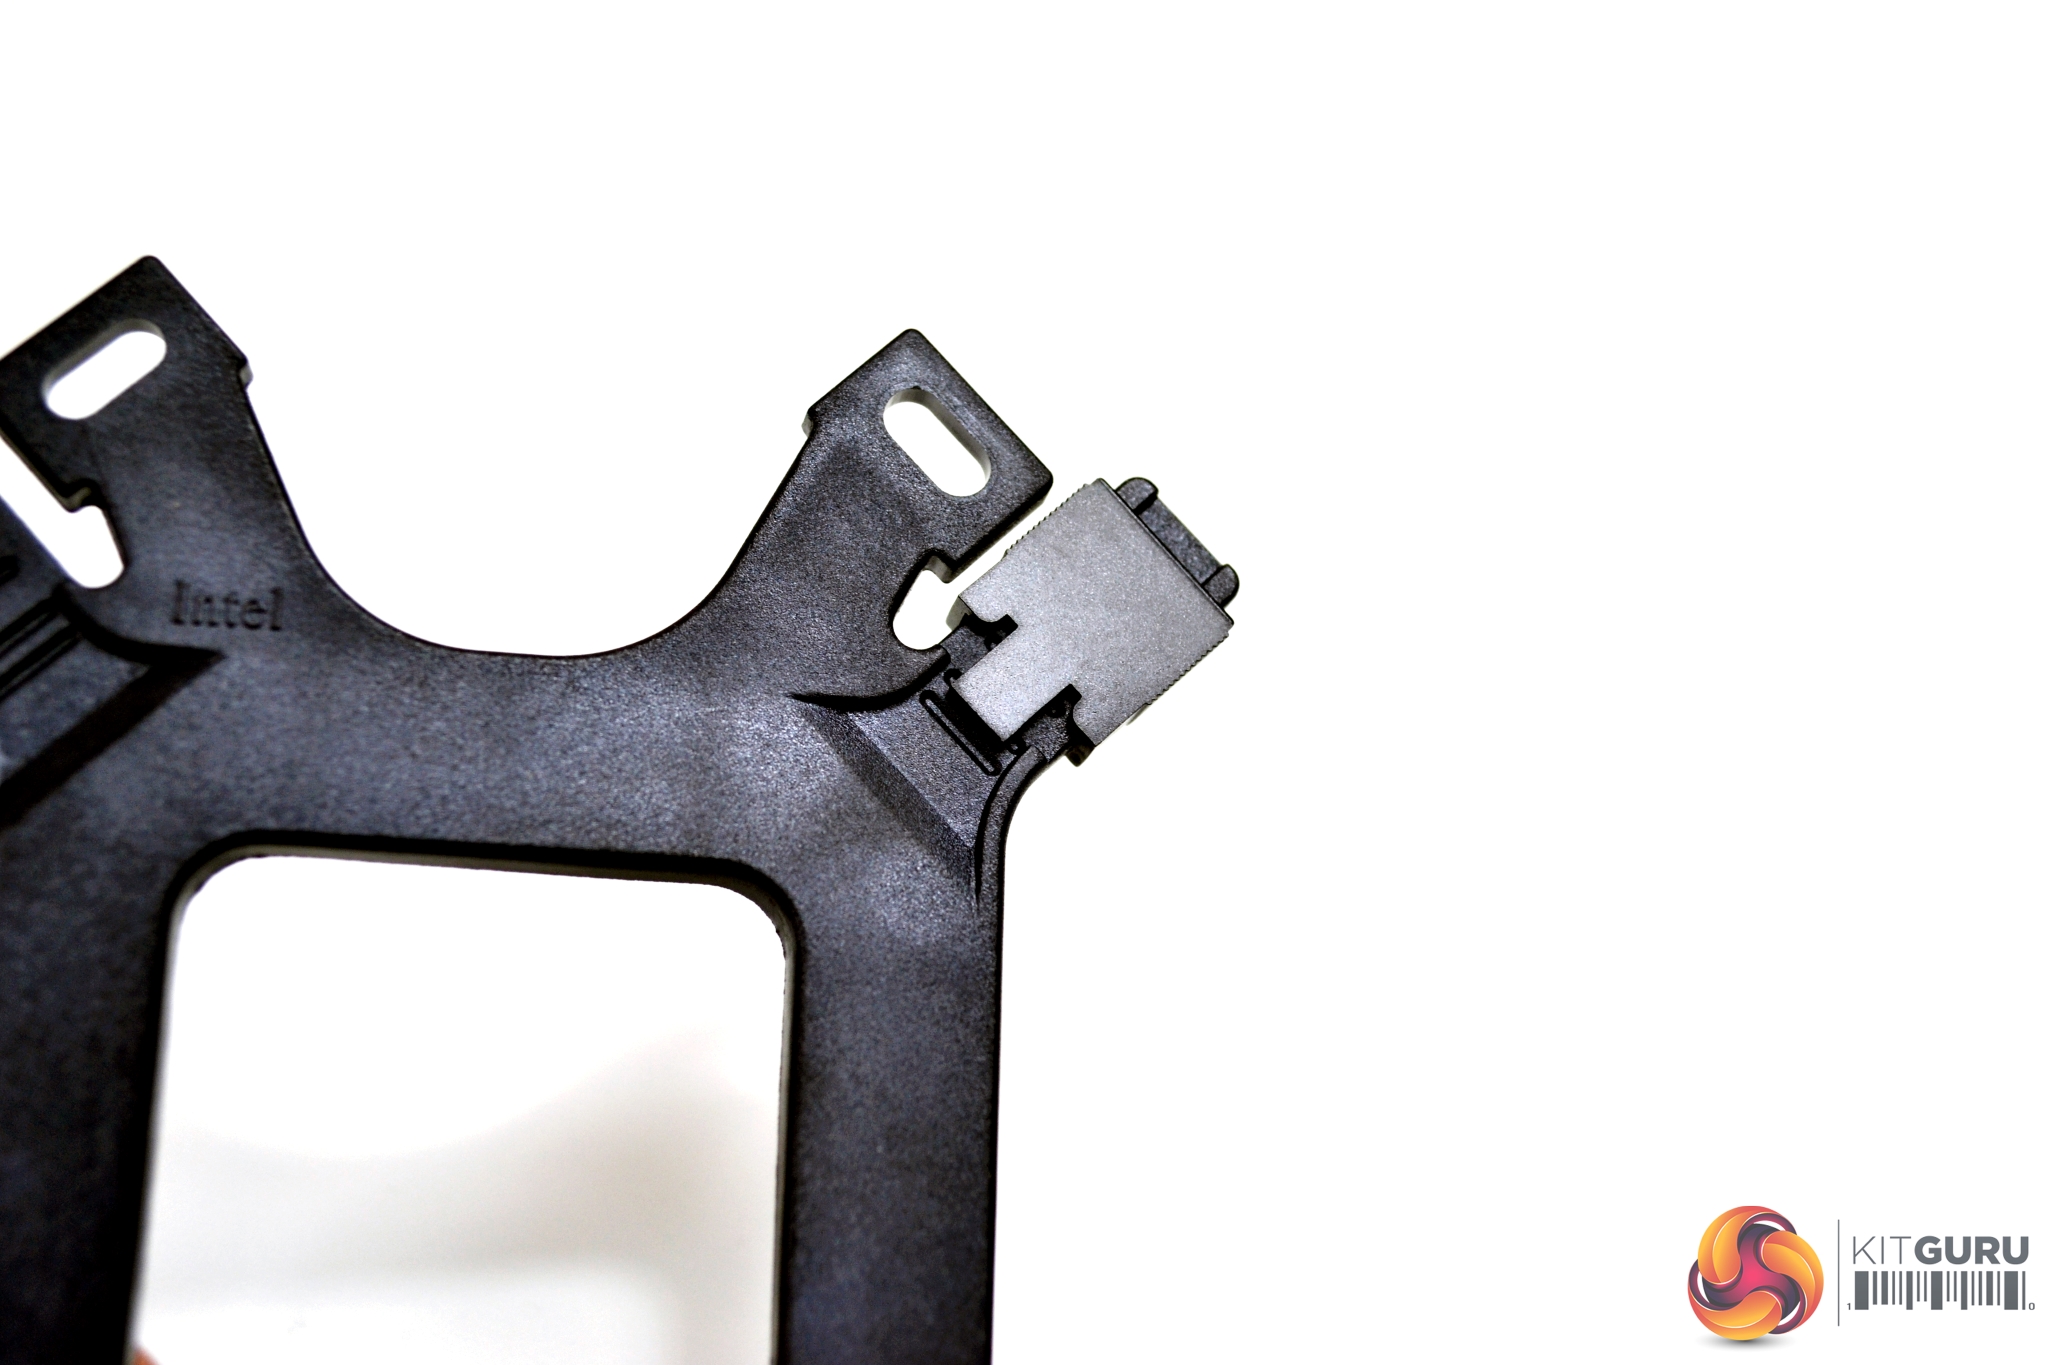
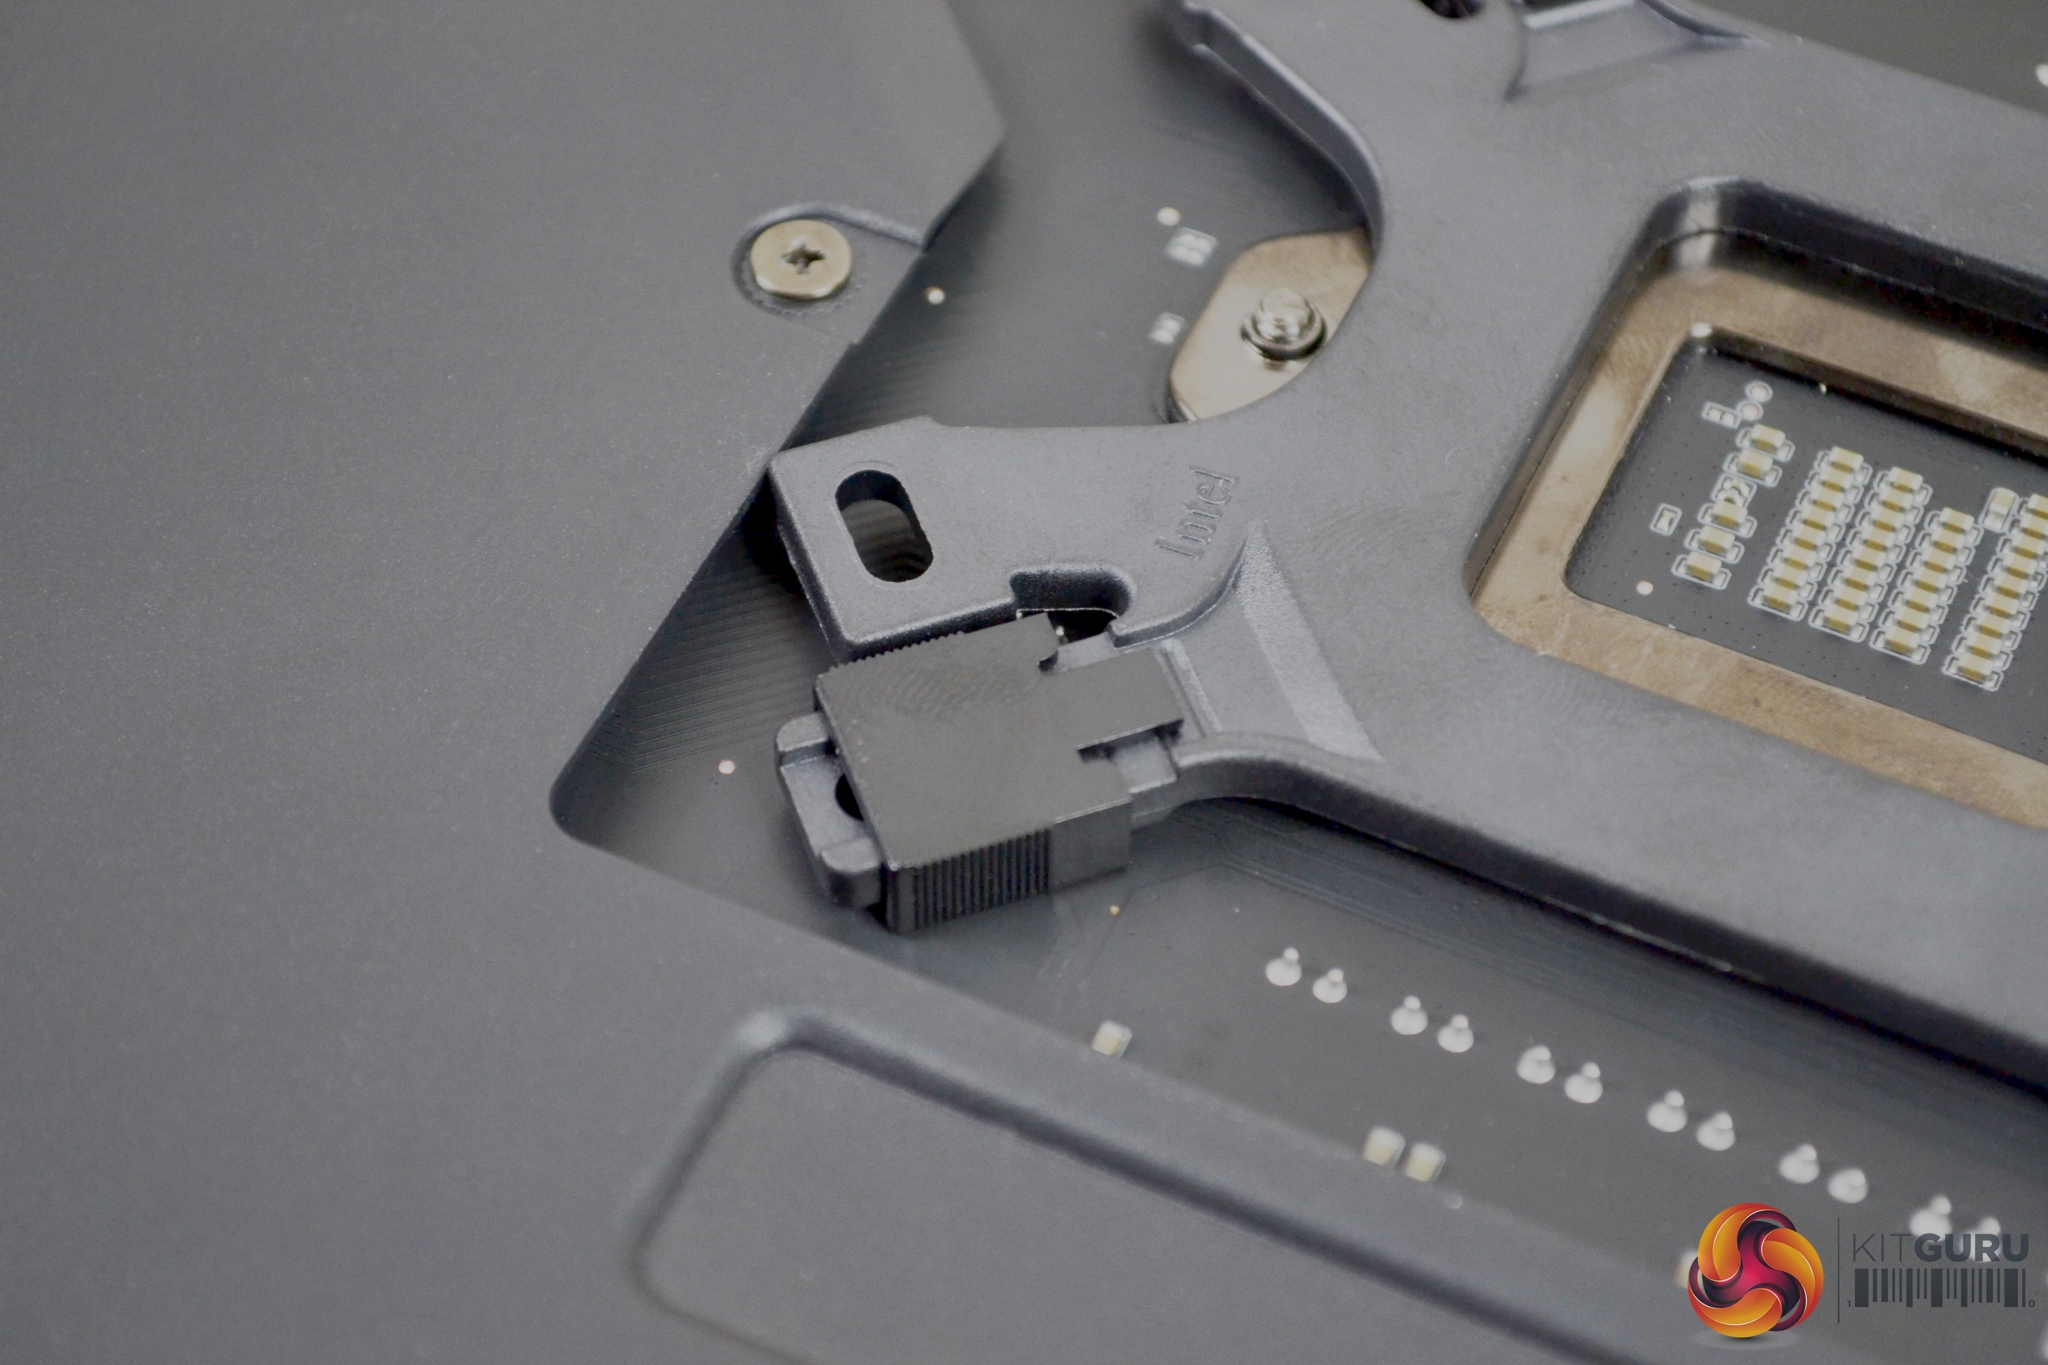
Next, we prepare the pump/block for installation by taking the relevant Intel retention brackets (also a black chrome finish) and inserting them into the notched slots in the side of the housing.

They are then tightened in place by four, fine thread Philips screws from the underside. Make sure the brackets are fitted in the correct orientation, as shown in the installation documentation. If not, the pump will not make contact with the CPU IHS, when offered up to the motherboard.
For both Intel and AMD platforms, there is a single retention bracket for mounting the cooler, which is marked on either side. When installed, the manufacturer's name should be visible from the back of the motherboard to correspond with your particular platform.
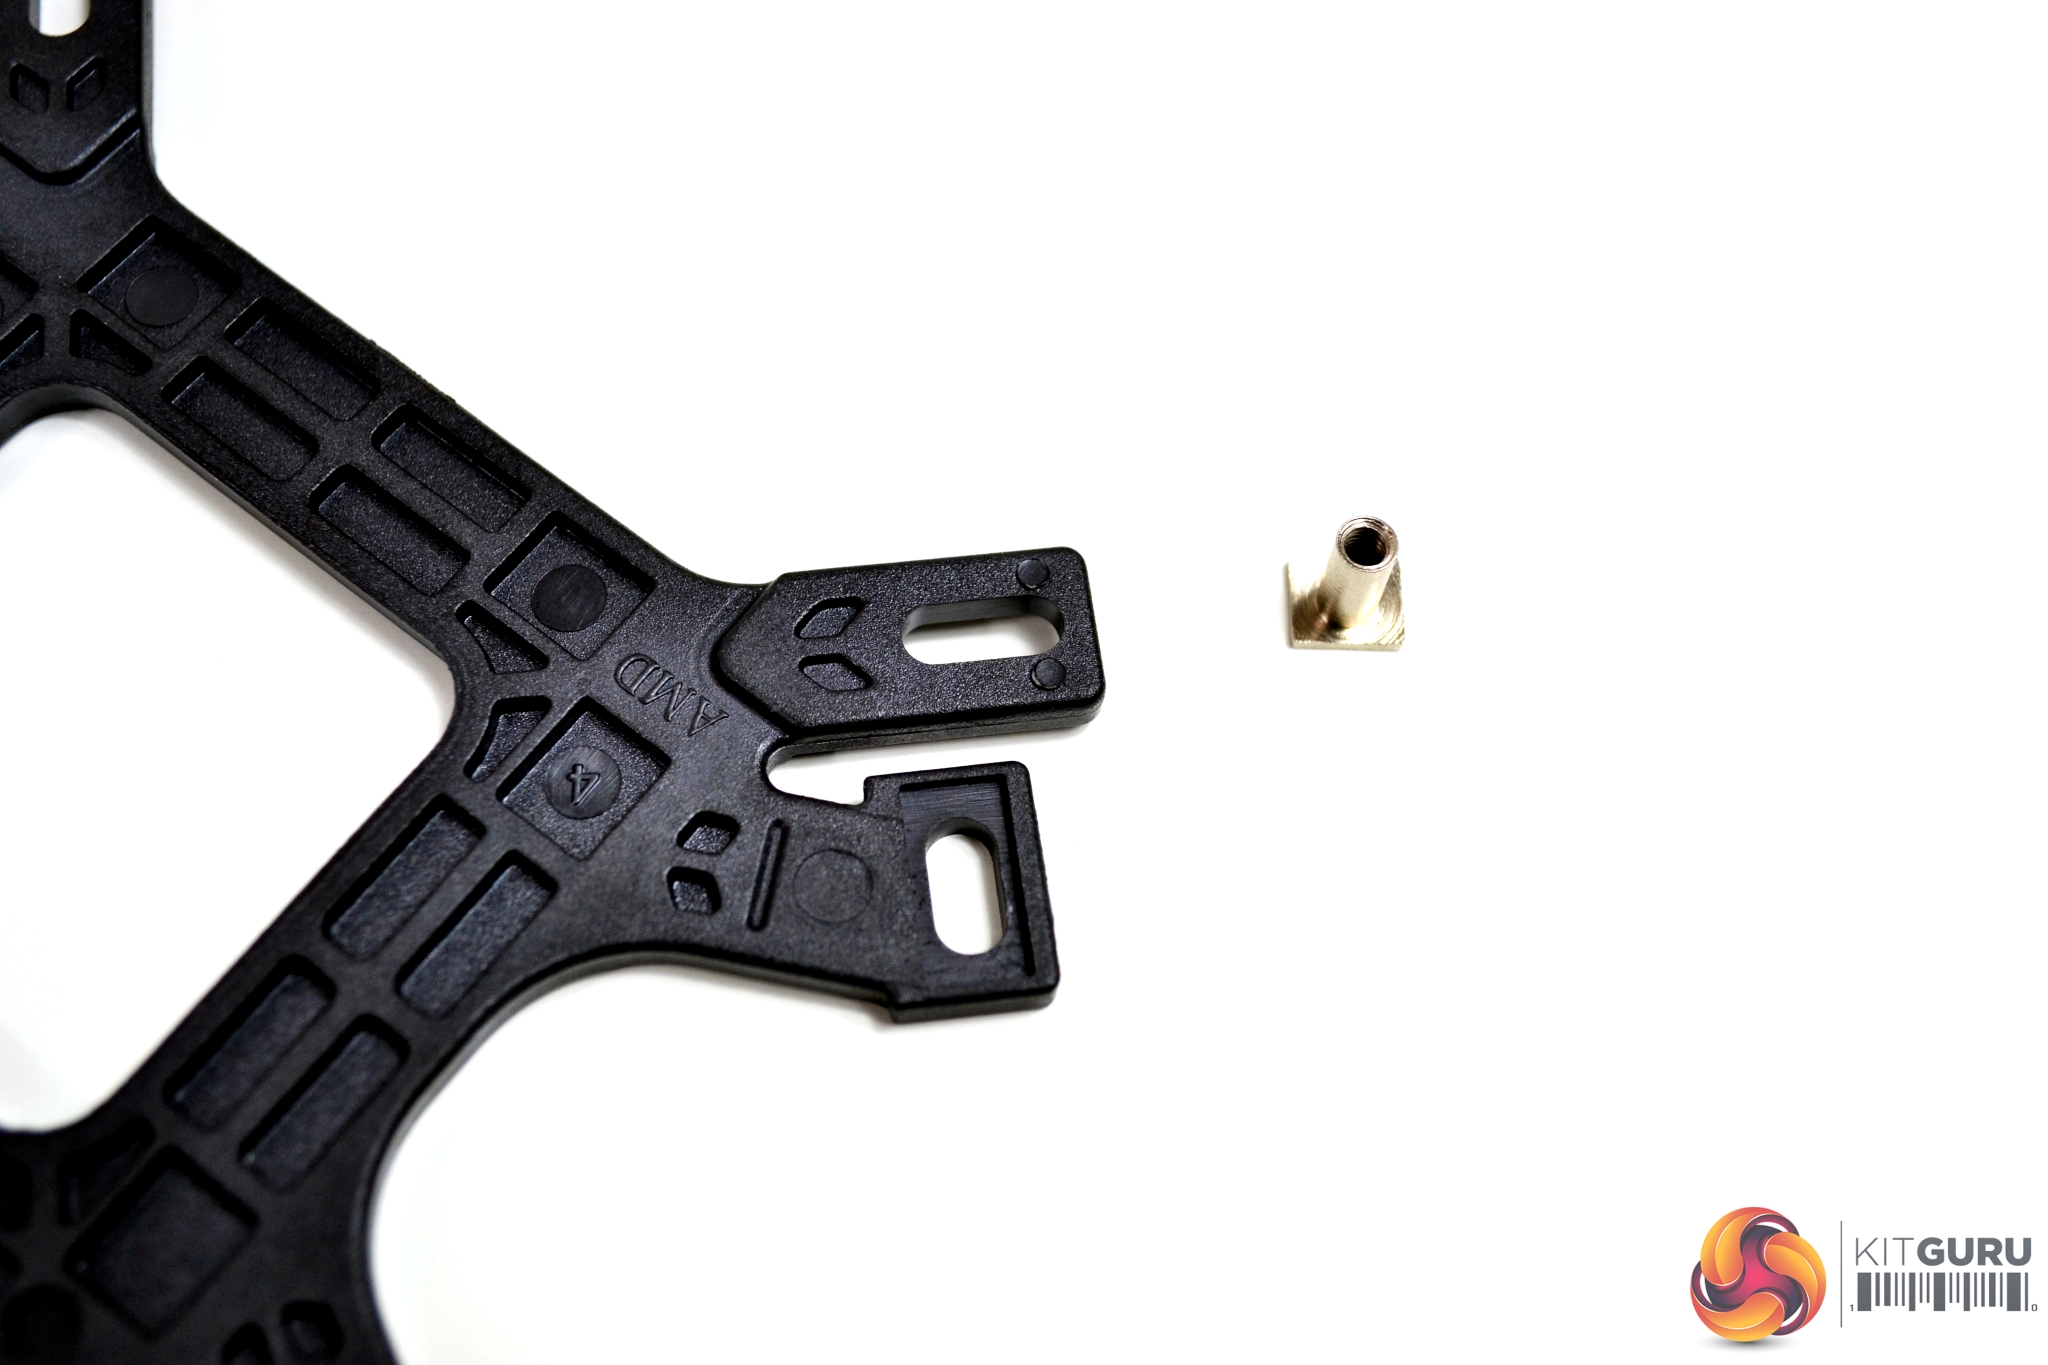
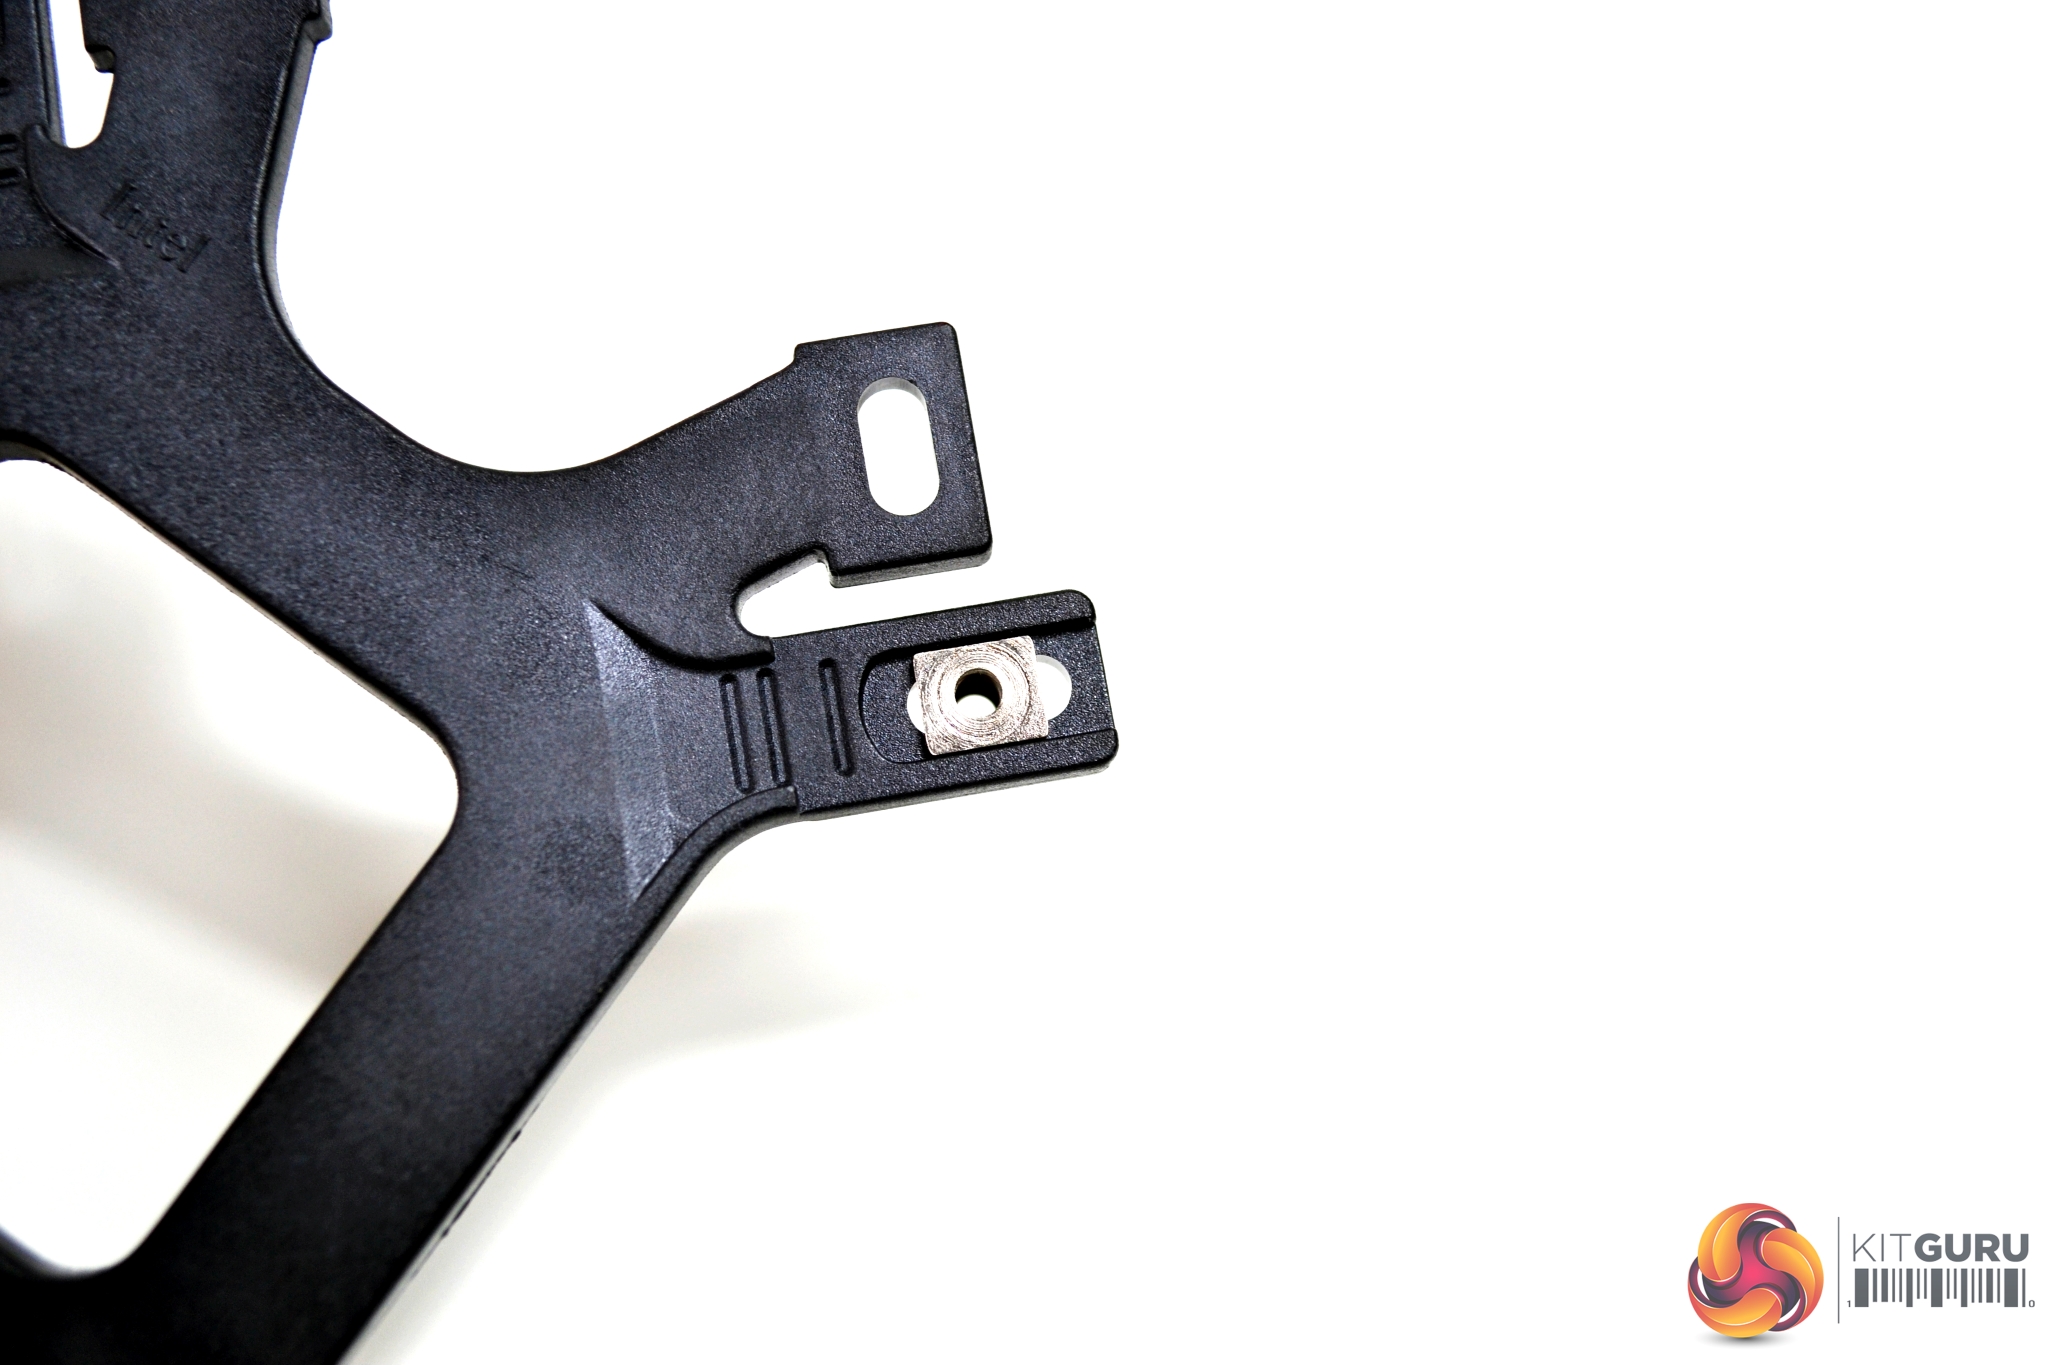
Four silver mounting nuts are pushed through the elongated holes on the bracket and then held in place by a plastic clip.
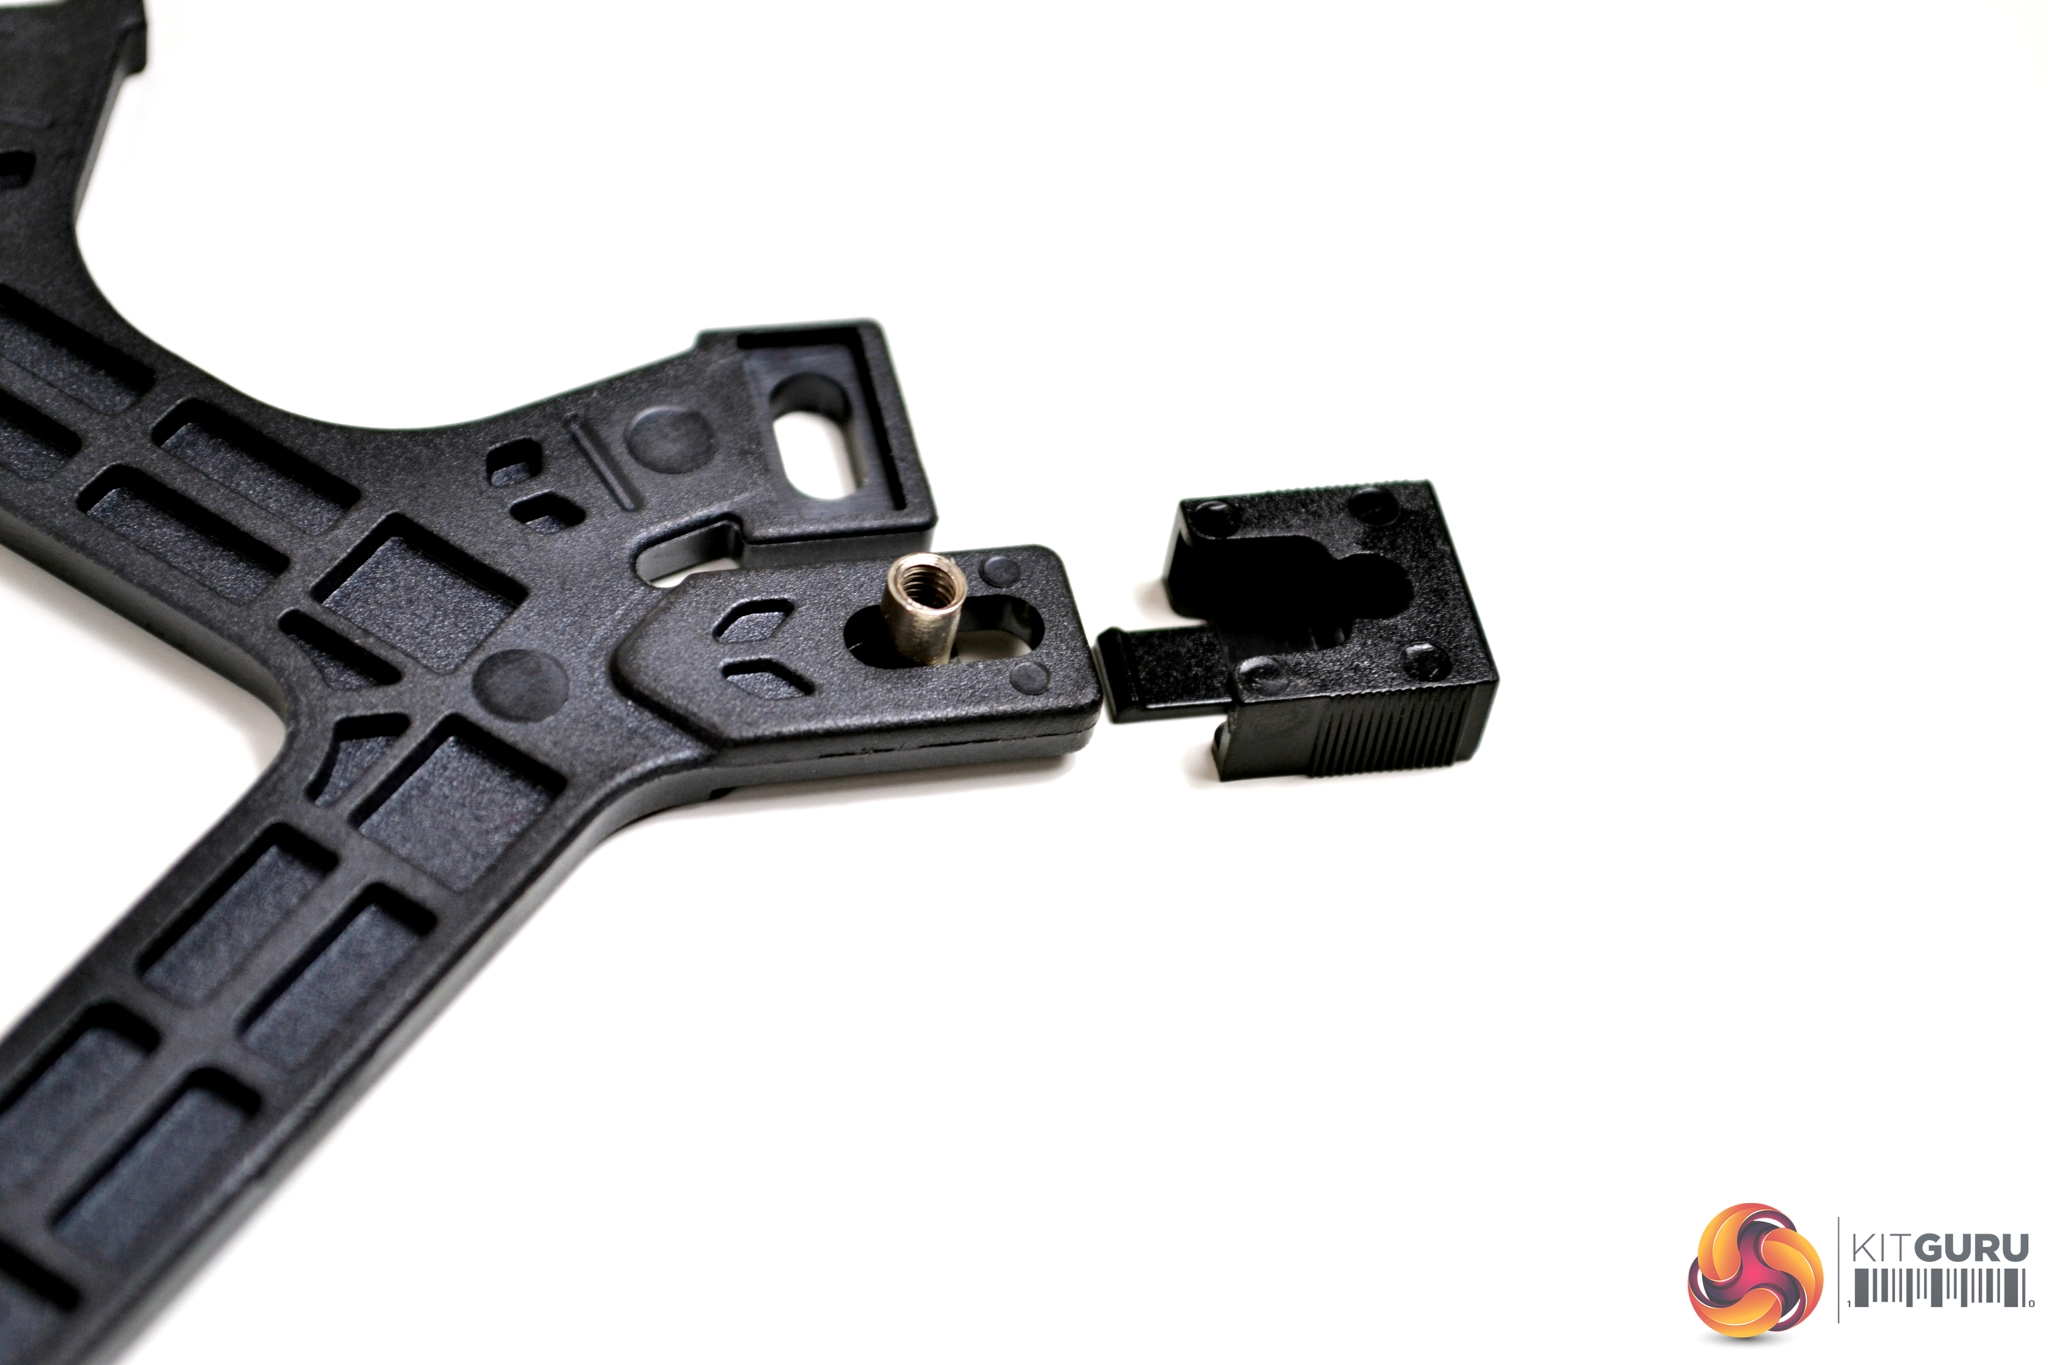
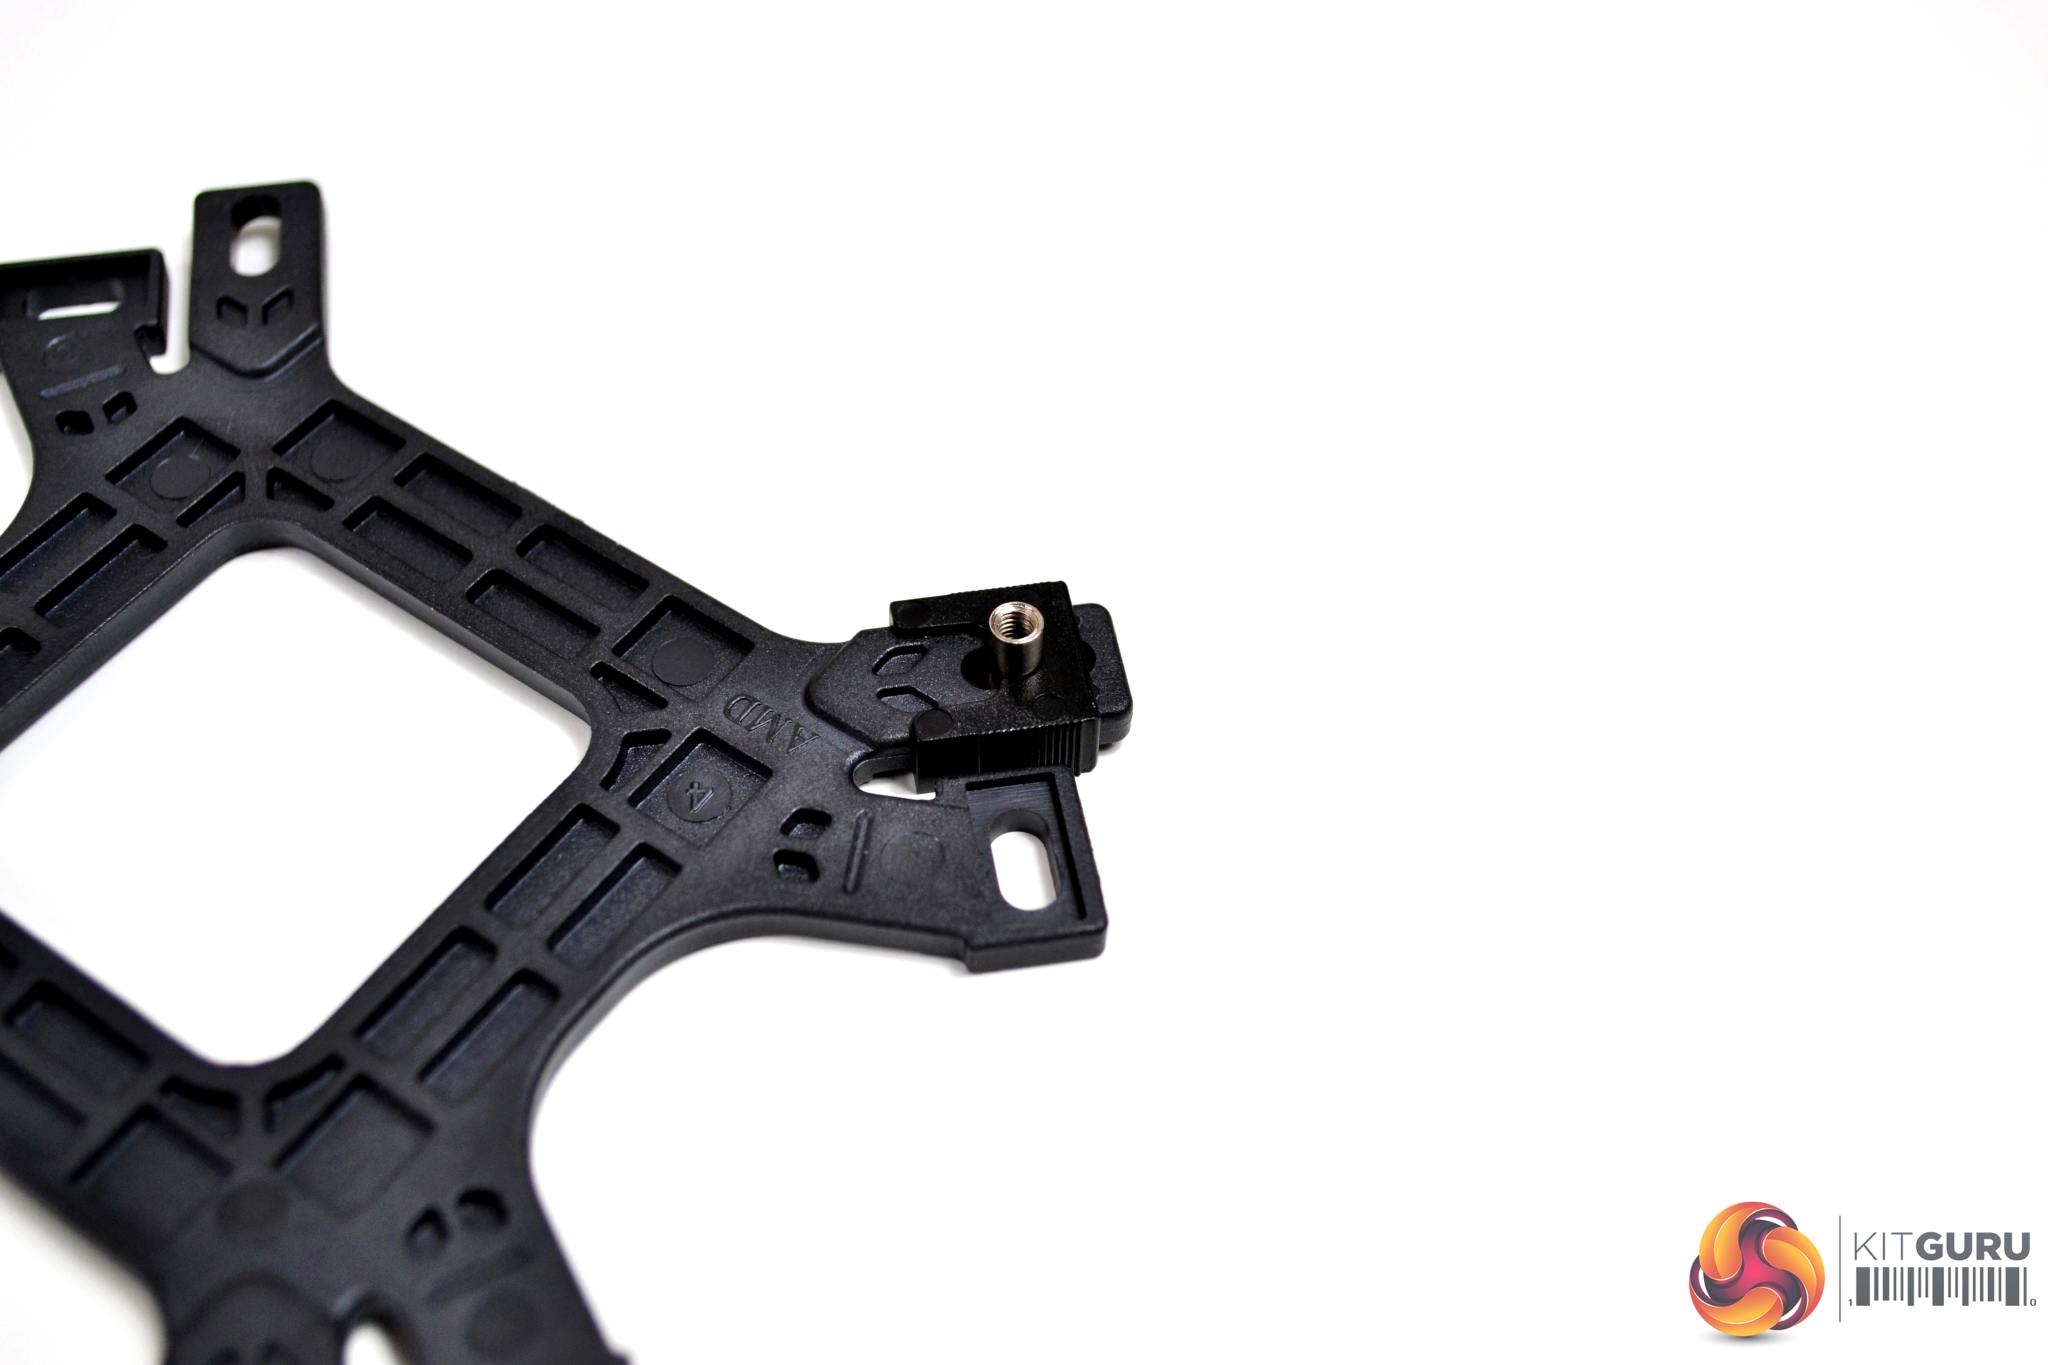
The retention bracket has a series of notches which represent the positioning of the nuts, depending on which Intel platform you are installing on. Sliding the clip to the correct notch, will lock it in place. These plastic clips are a great solution to stop the problem of the mounting nuts falling out during installation.
Once all four nuts are fitted in the correct position and held in place with the plastic clips, offer the retention bracket up to the four holes on your motherboard. They should line up with the motherboard mounting holes, with minimal effort required.
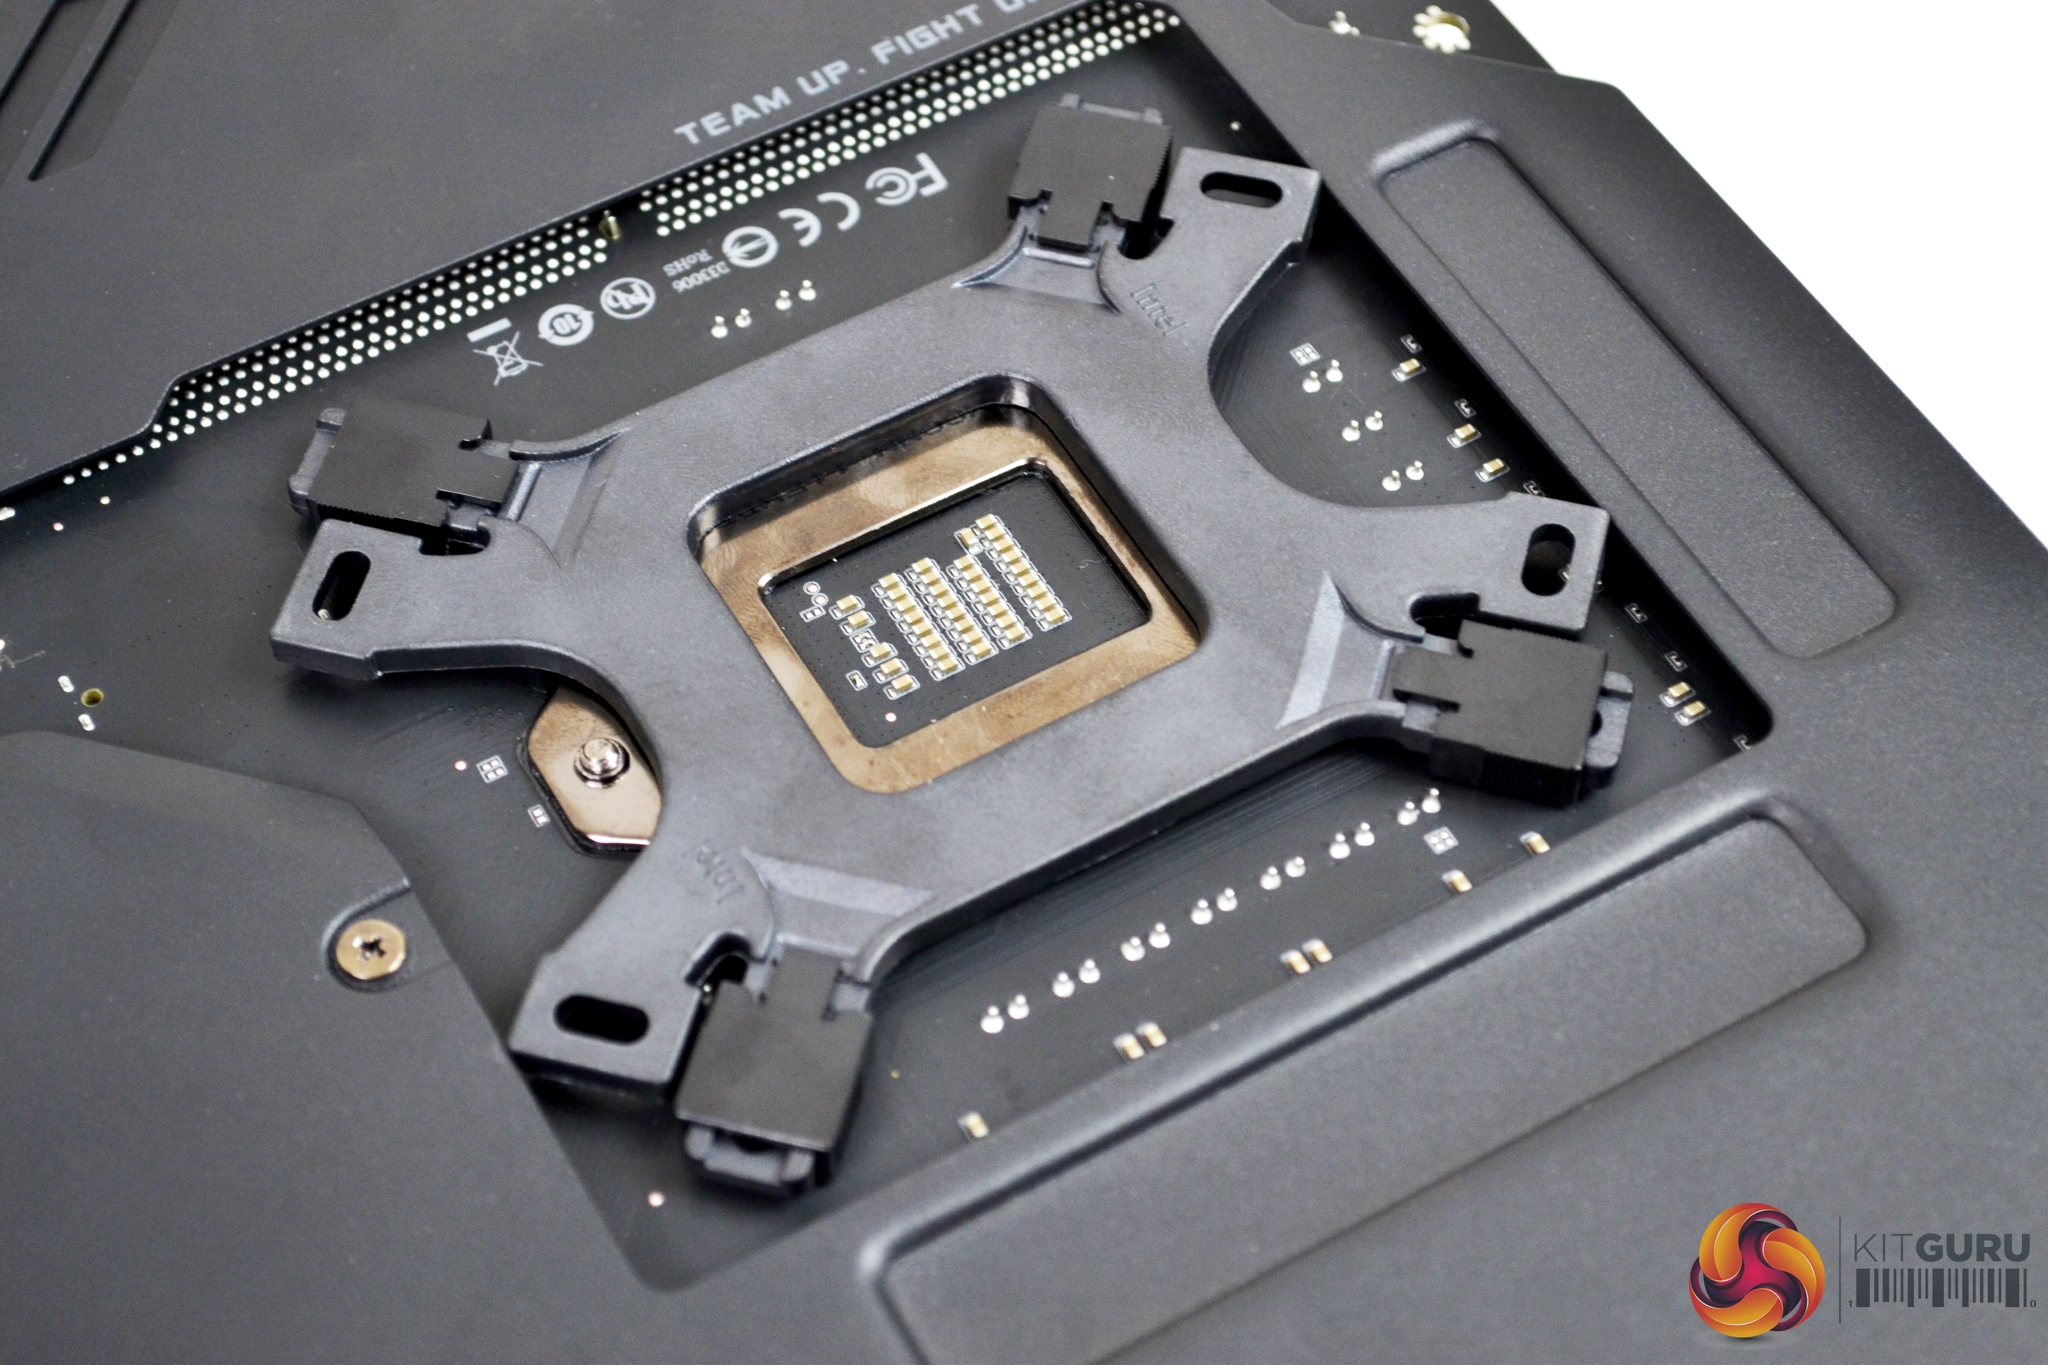
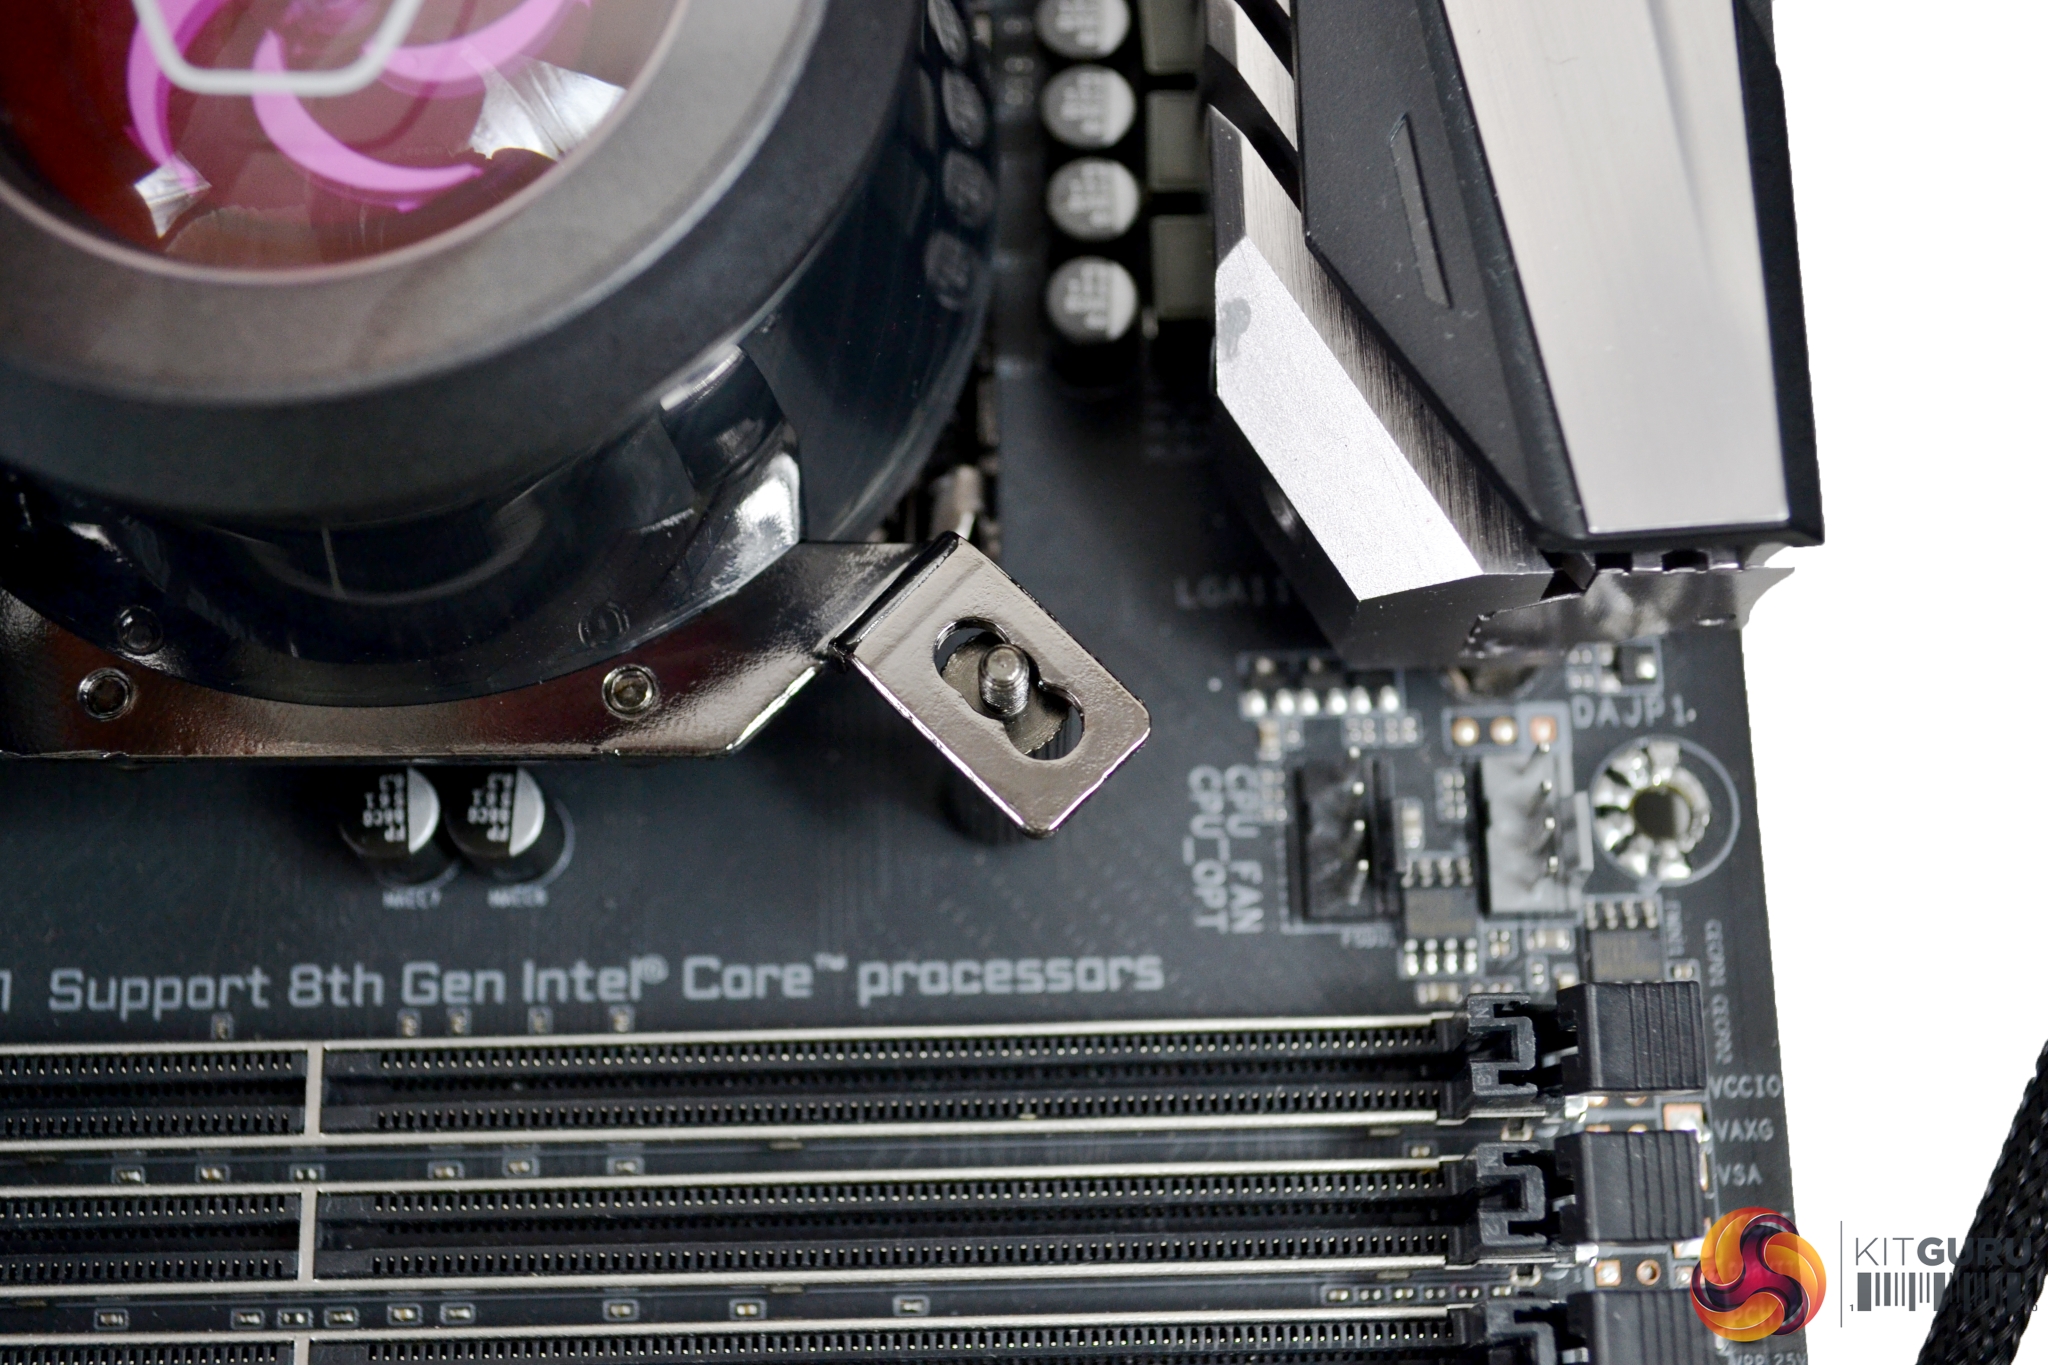
It is worth noting that motherboards which have a plate covering the back, such as our Gigabyte Z390 Aorus Master, may conflict with the Cooler Master retention bracket. As can be seen in the above image, ours is so close, it is touching.
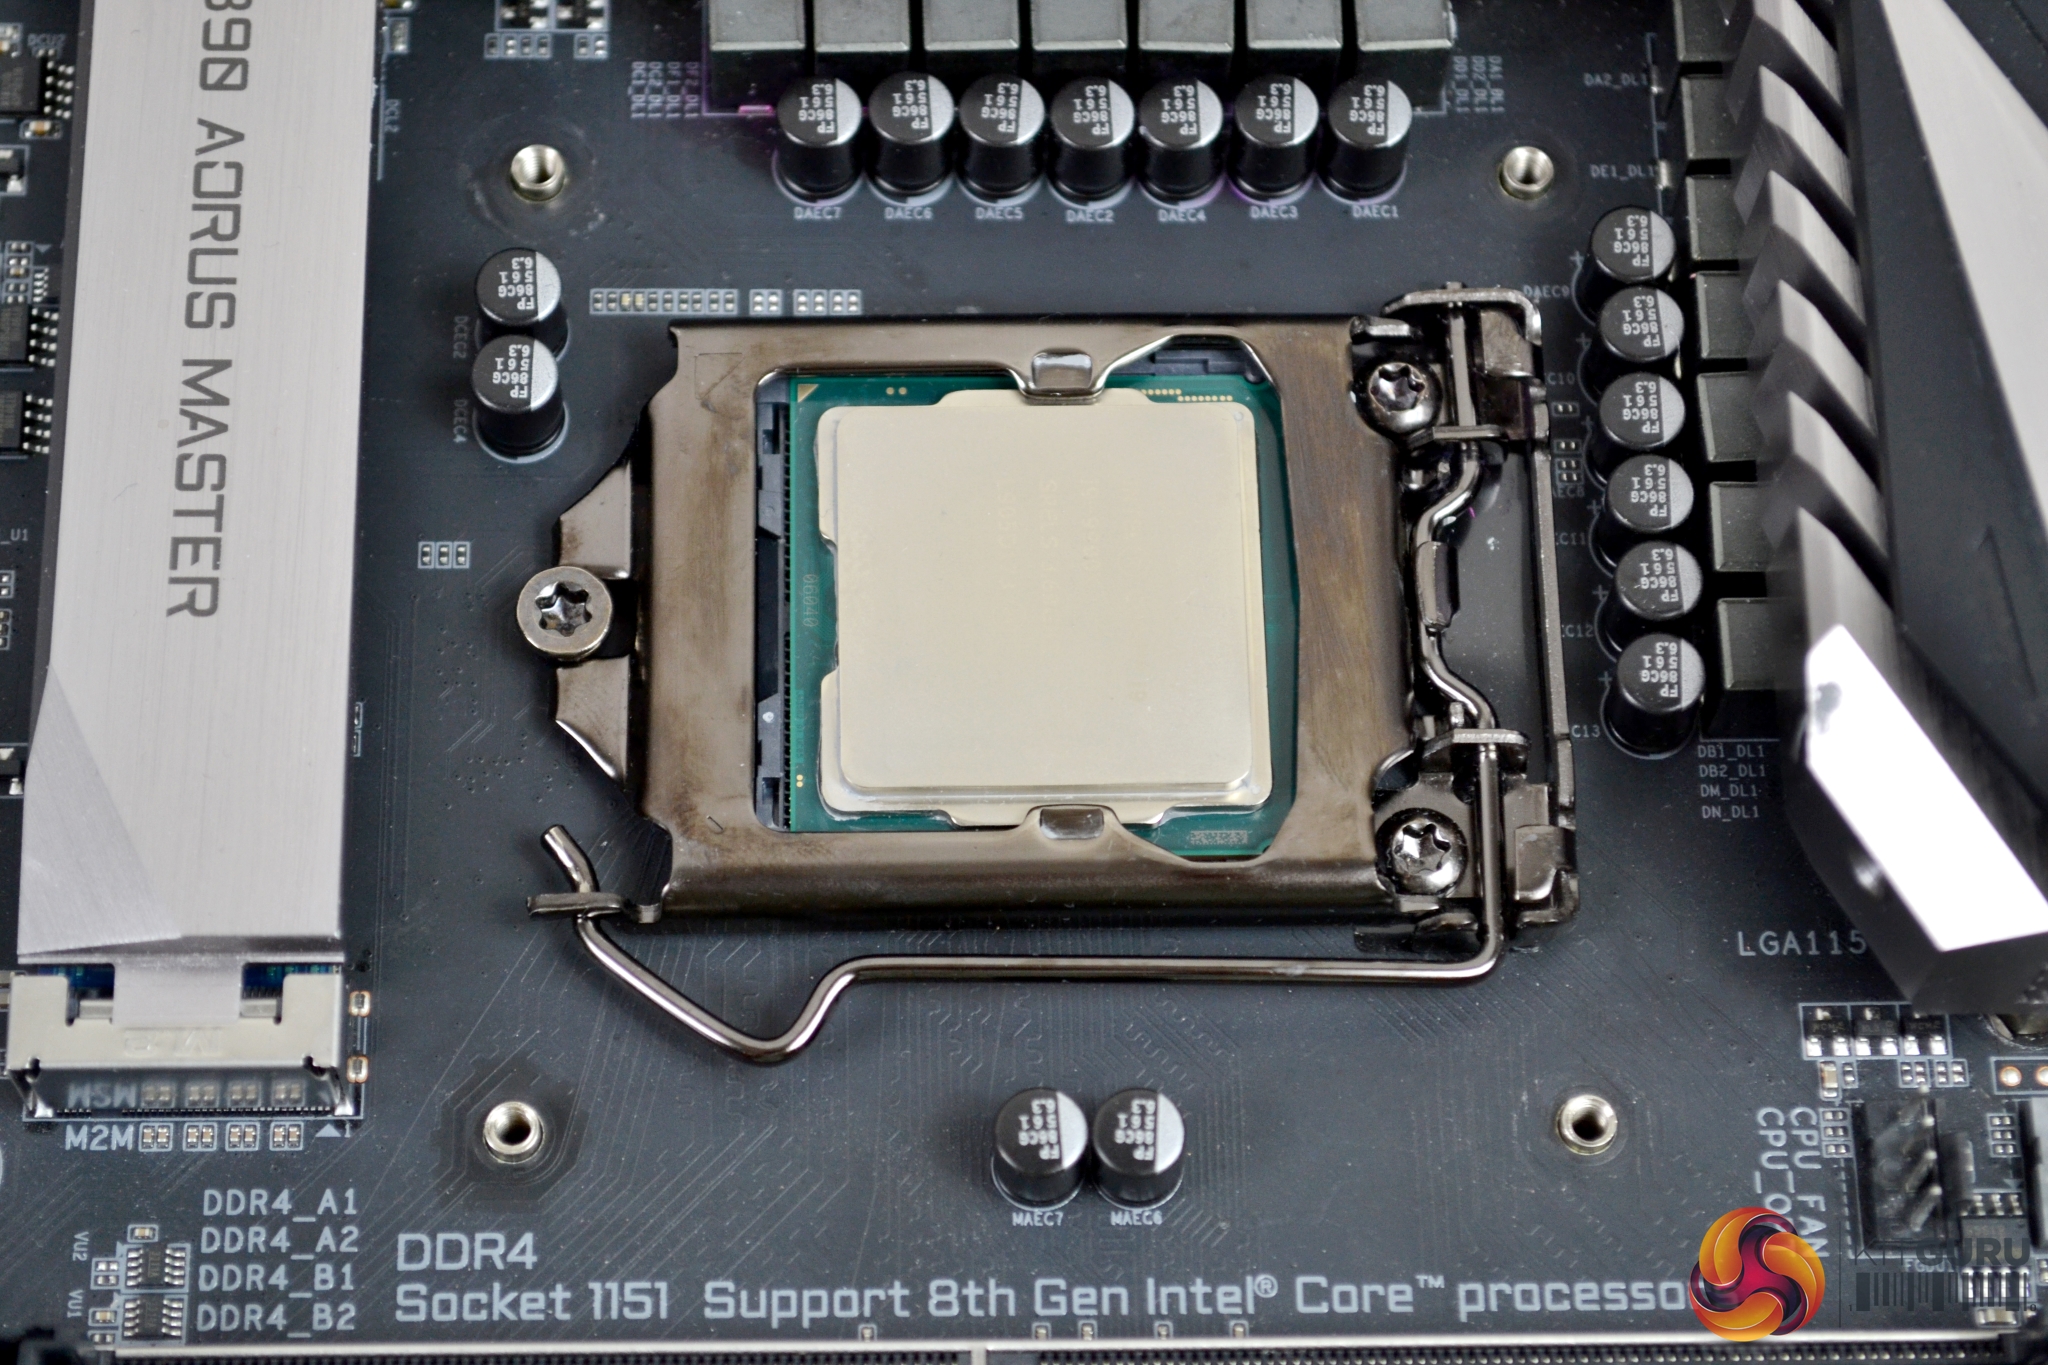
Now, we can install the Intel mounting posts, which have a fine thread on either end. By hand, they are tightened down to the retention bracket nuts, which should be slightly protruding through the front of motherboard.
Once the mounting posts are tightly secured, offer up the pump assembly with the holes on the bracket aligned in the correct orientation. There is a triple hole arrangement, which platform you are using determines which holes the threaded posts poke through. Our Intel 1151 platform uses the central holes.
Now, take the correct fixings and start to tighten them down on the posts. Be sure to tighten them by hand and in an X pattern, as show in the instructions. This ensures equal pressure is applied when tightening, to make the best possible contact with the CPU IHS. Final tightening can be nipped up with a Philips screwdriver, but do not over tighten!
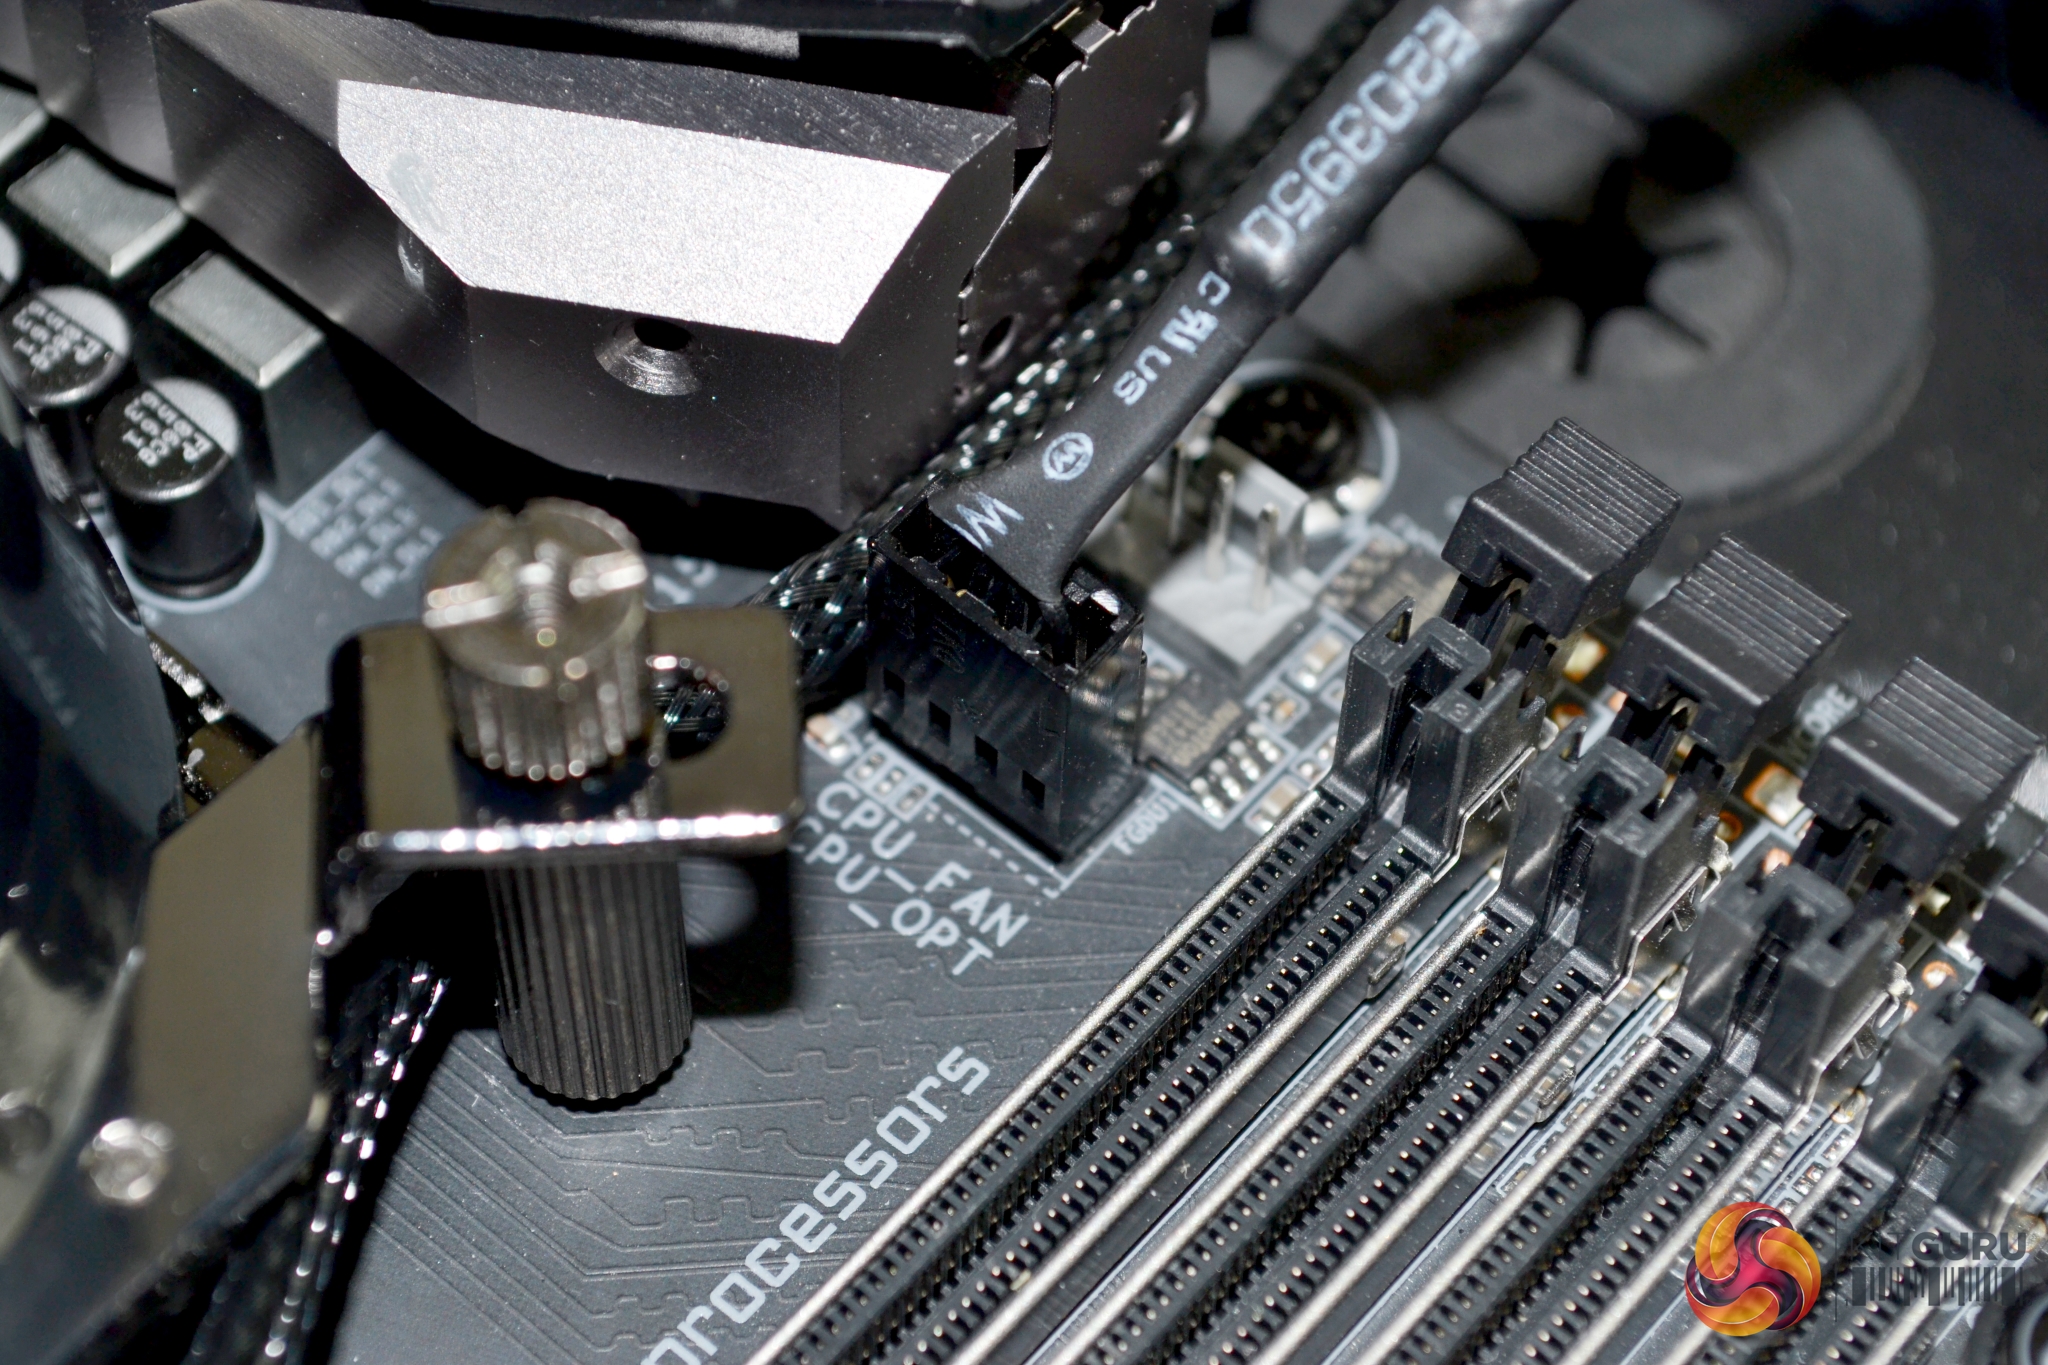
You have the option to connect the pump power cable either directly to a motherboard CPU_OPT fan header or via the splitter cable to the fan controller module. The same can be said for the RGB lighting cable, if you have RGB headers on your motherboard.
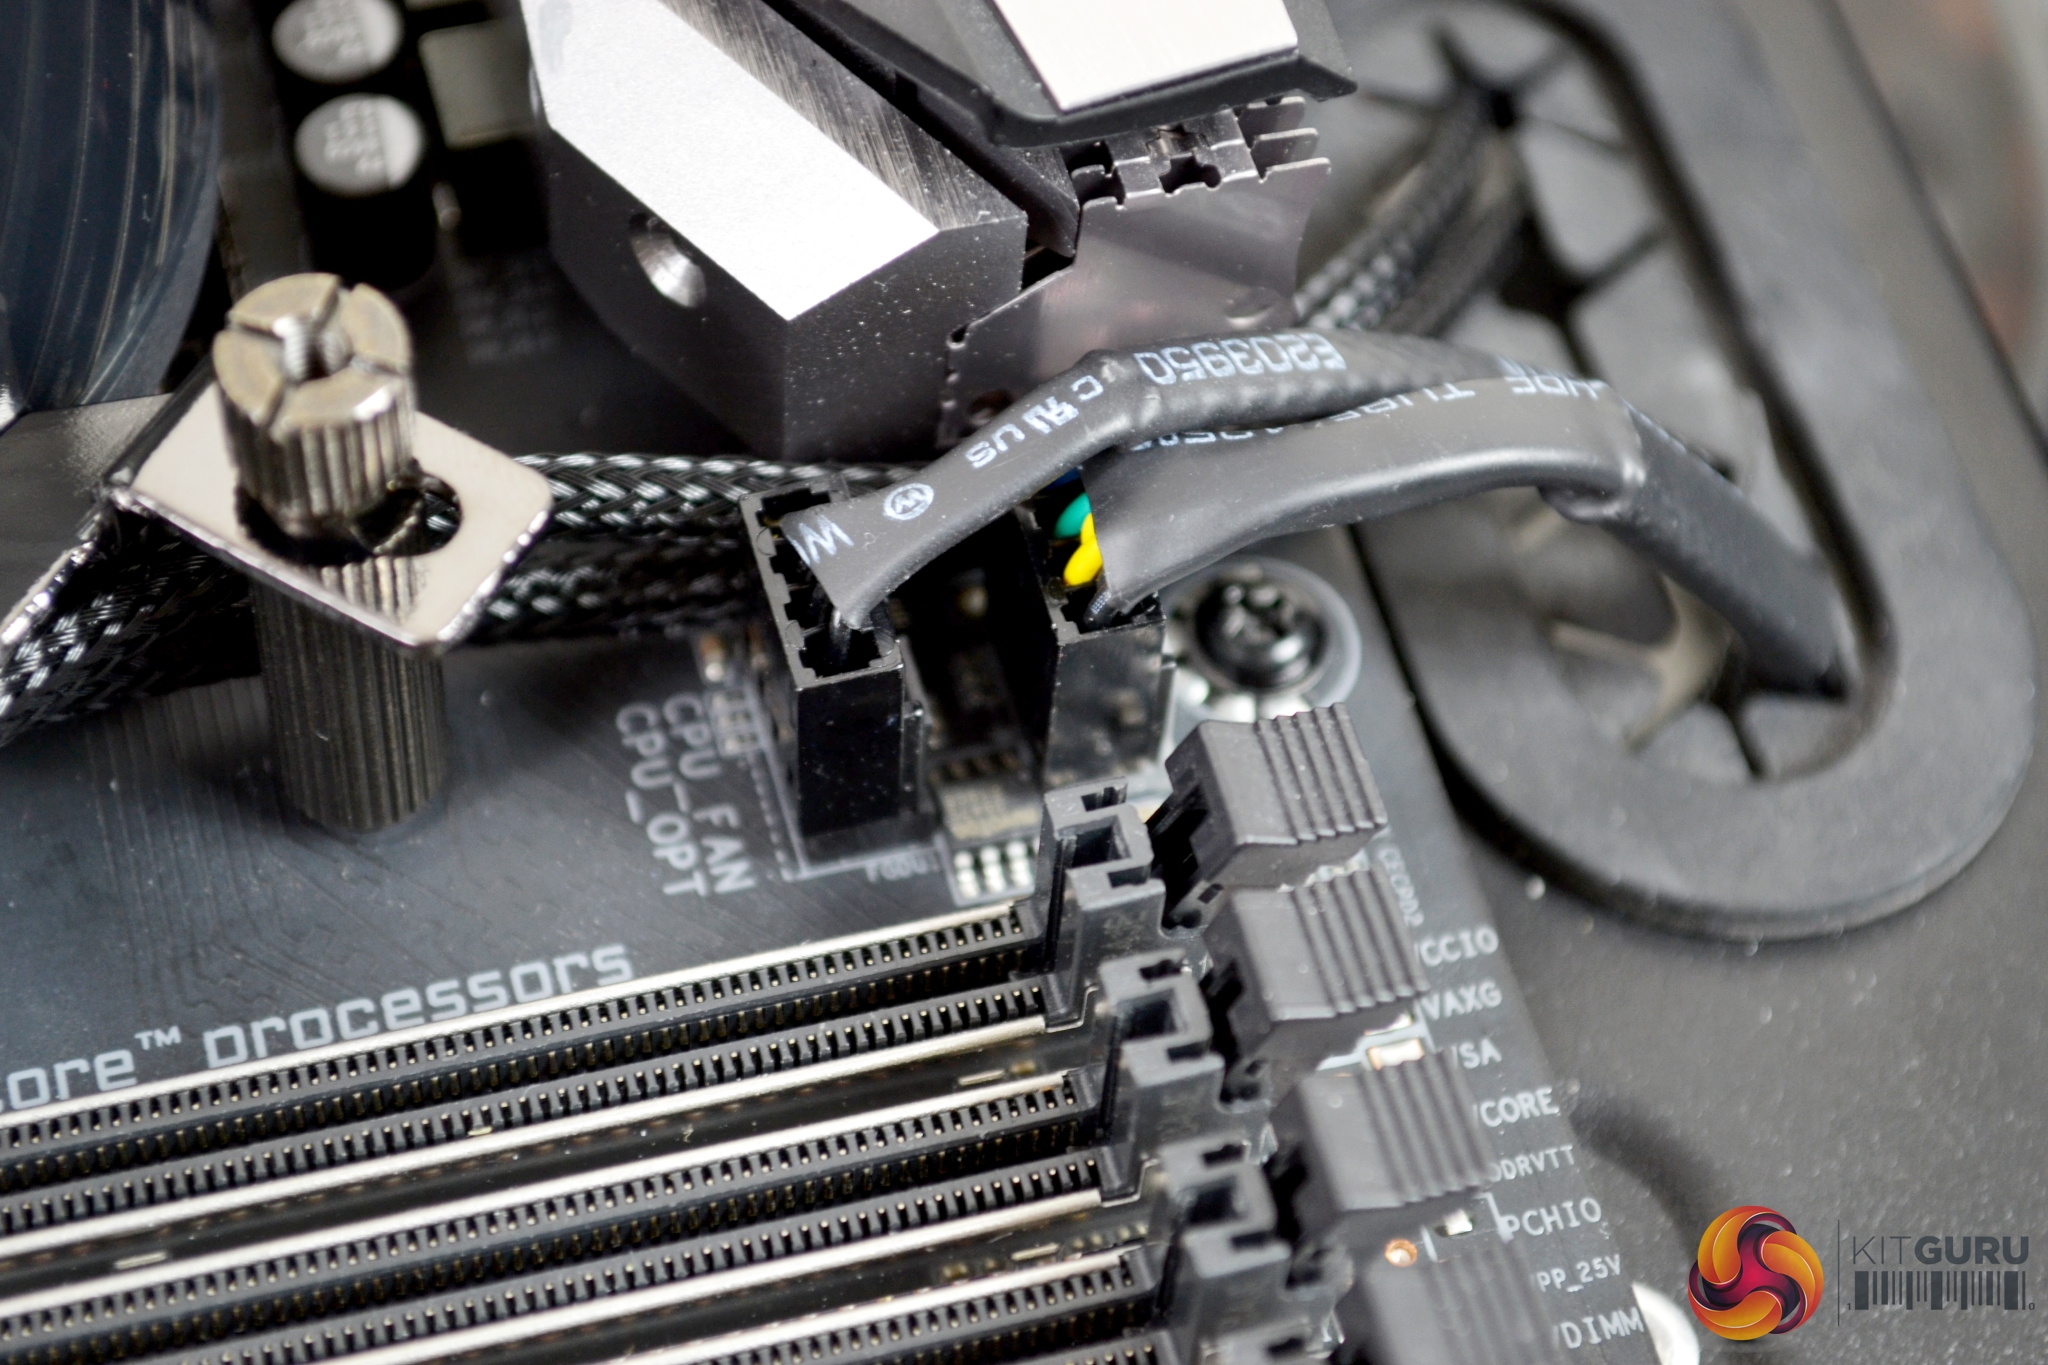
Mounting the radiator in your desired location should be simple, as it uses standard 240mm mounting hole centres. Our test bench is slightly different, so will not be relevant to mounting in an ATX case. Both the 120mm fans connect to a supplied splitter cable. Then, connect to the CPU_FAN header on your motherboard. The RGB lighting cables, attached to the fans, can be connected either directly to the motherboard or via the RGB controller module.
Installing the RGB control module takes a little more work than is normal for an All-In-One cooler installation. However, if you don’t have the facility on your motherboard to control the functions of the RGB lighting, it is required.
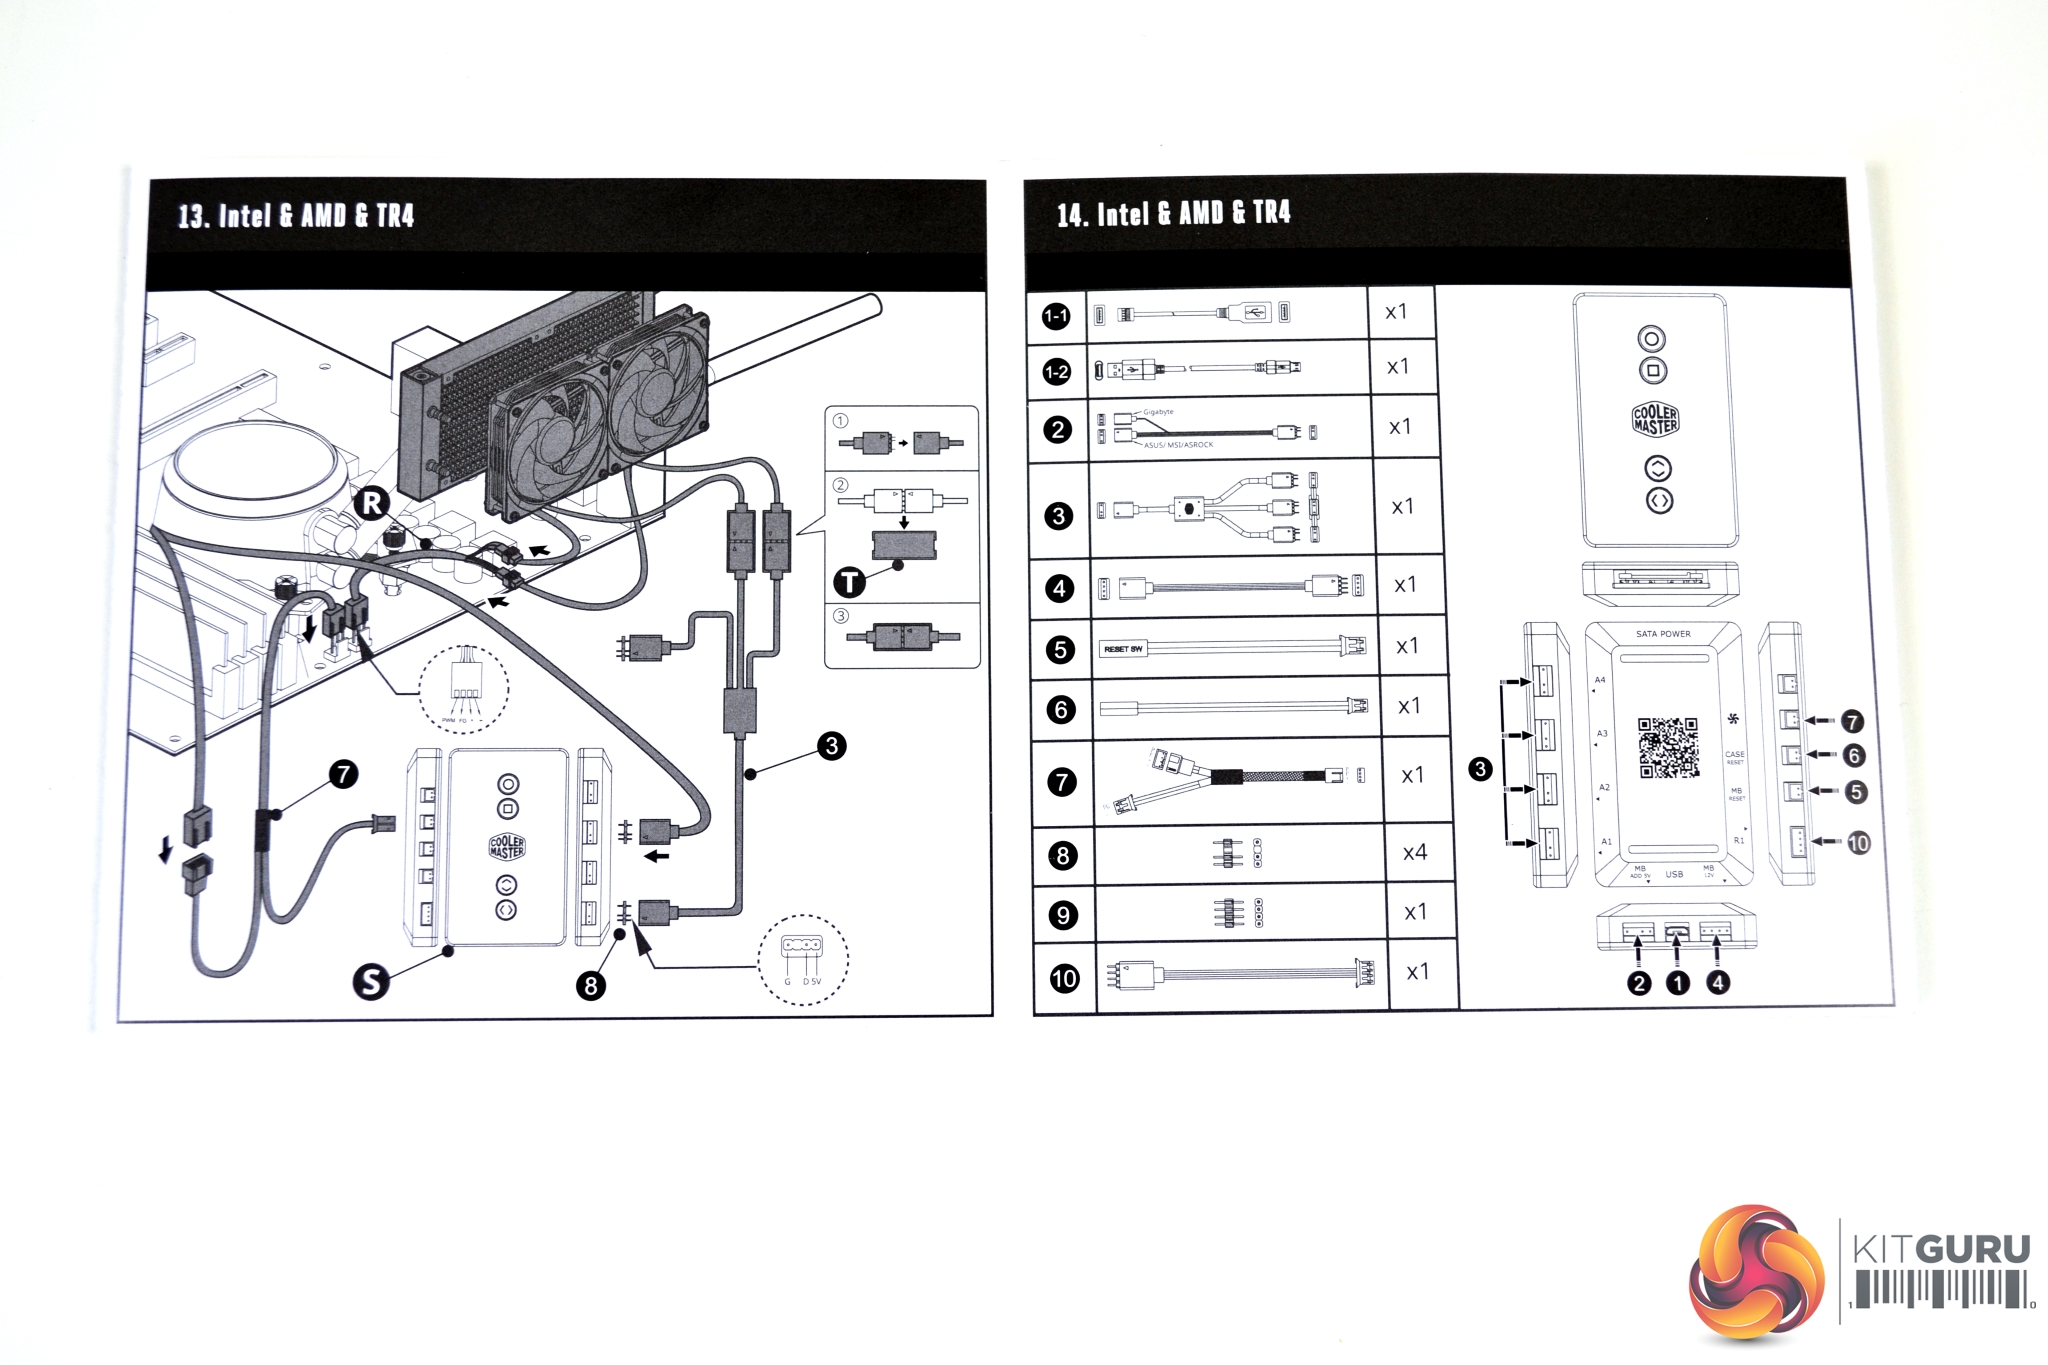
Cooler Master has included a wiring diagram of how to connect the RGB control module to the cooler. It is a little vague. Depending on what motherboard you have will determine the configuration and which cables are used.
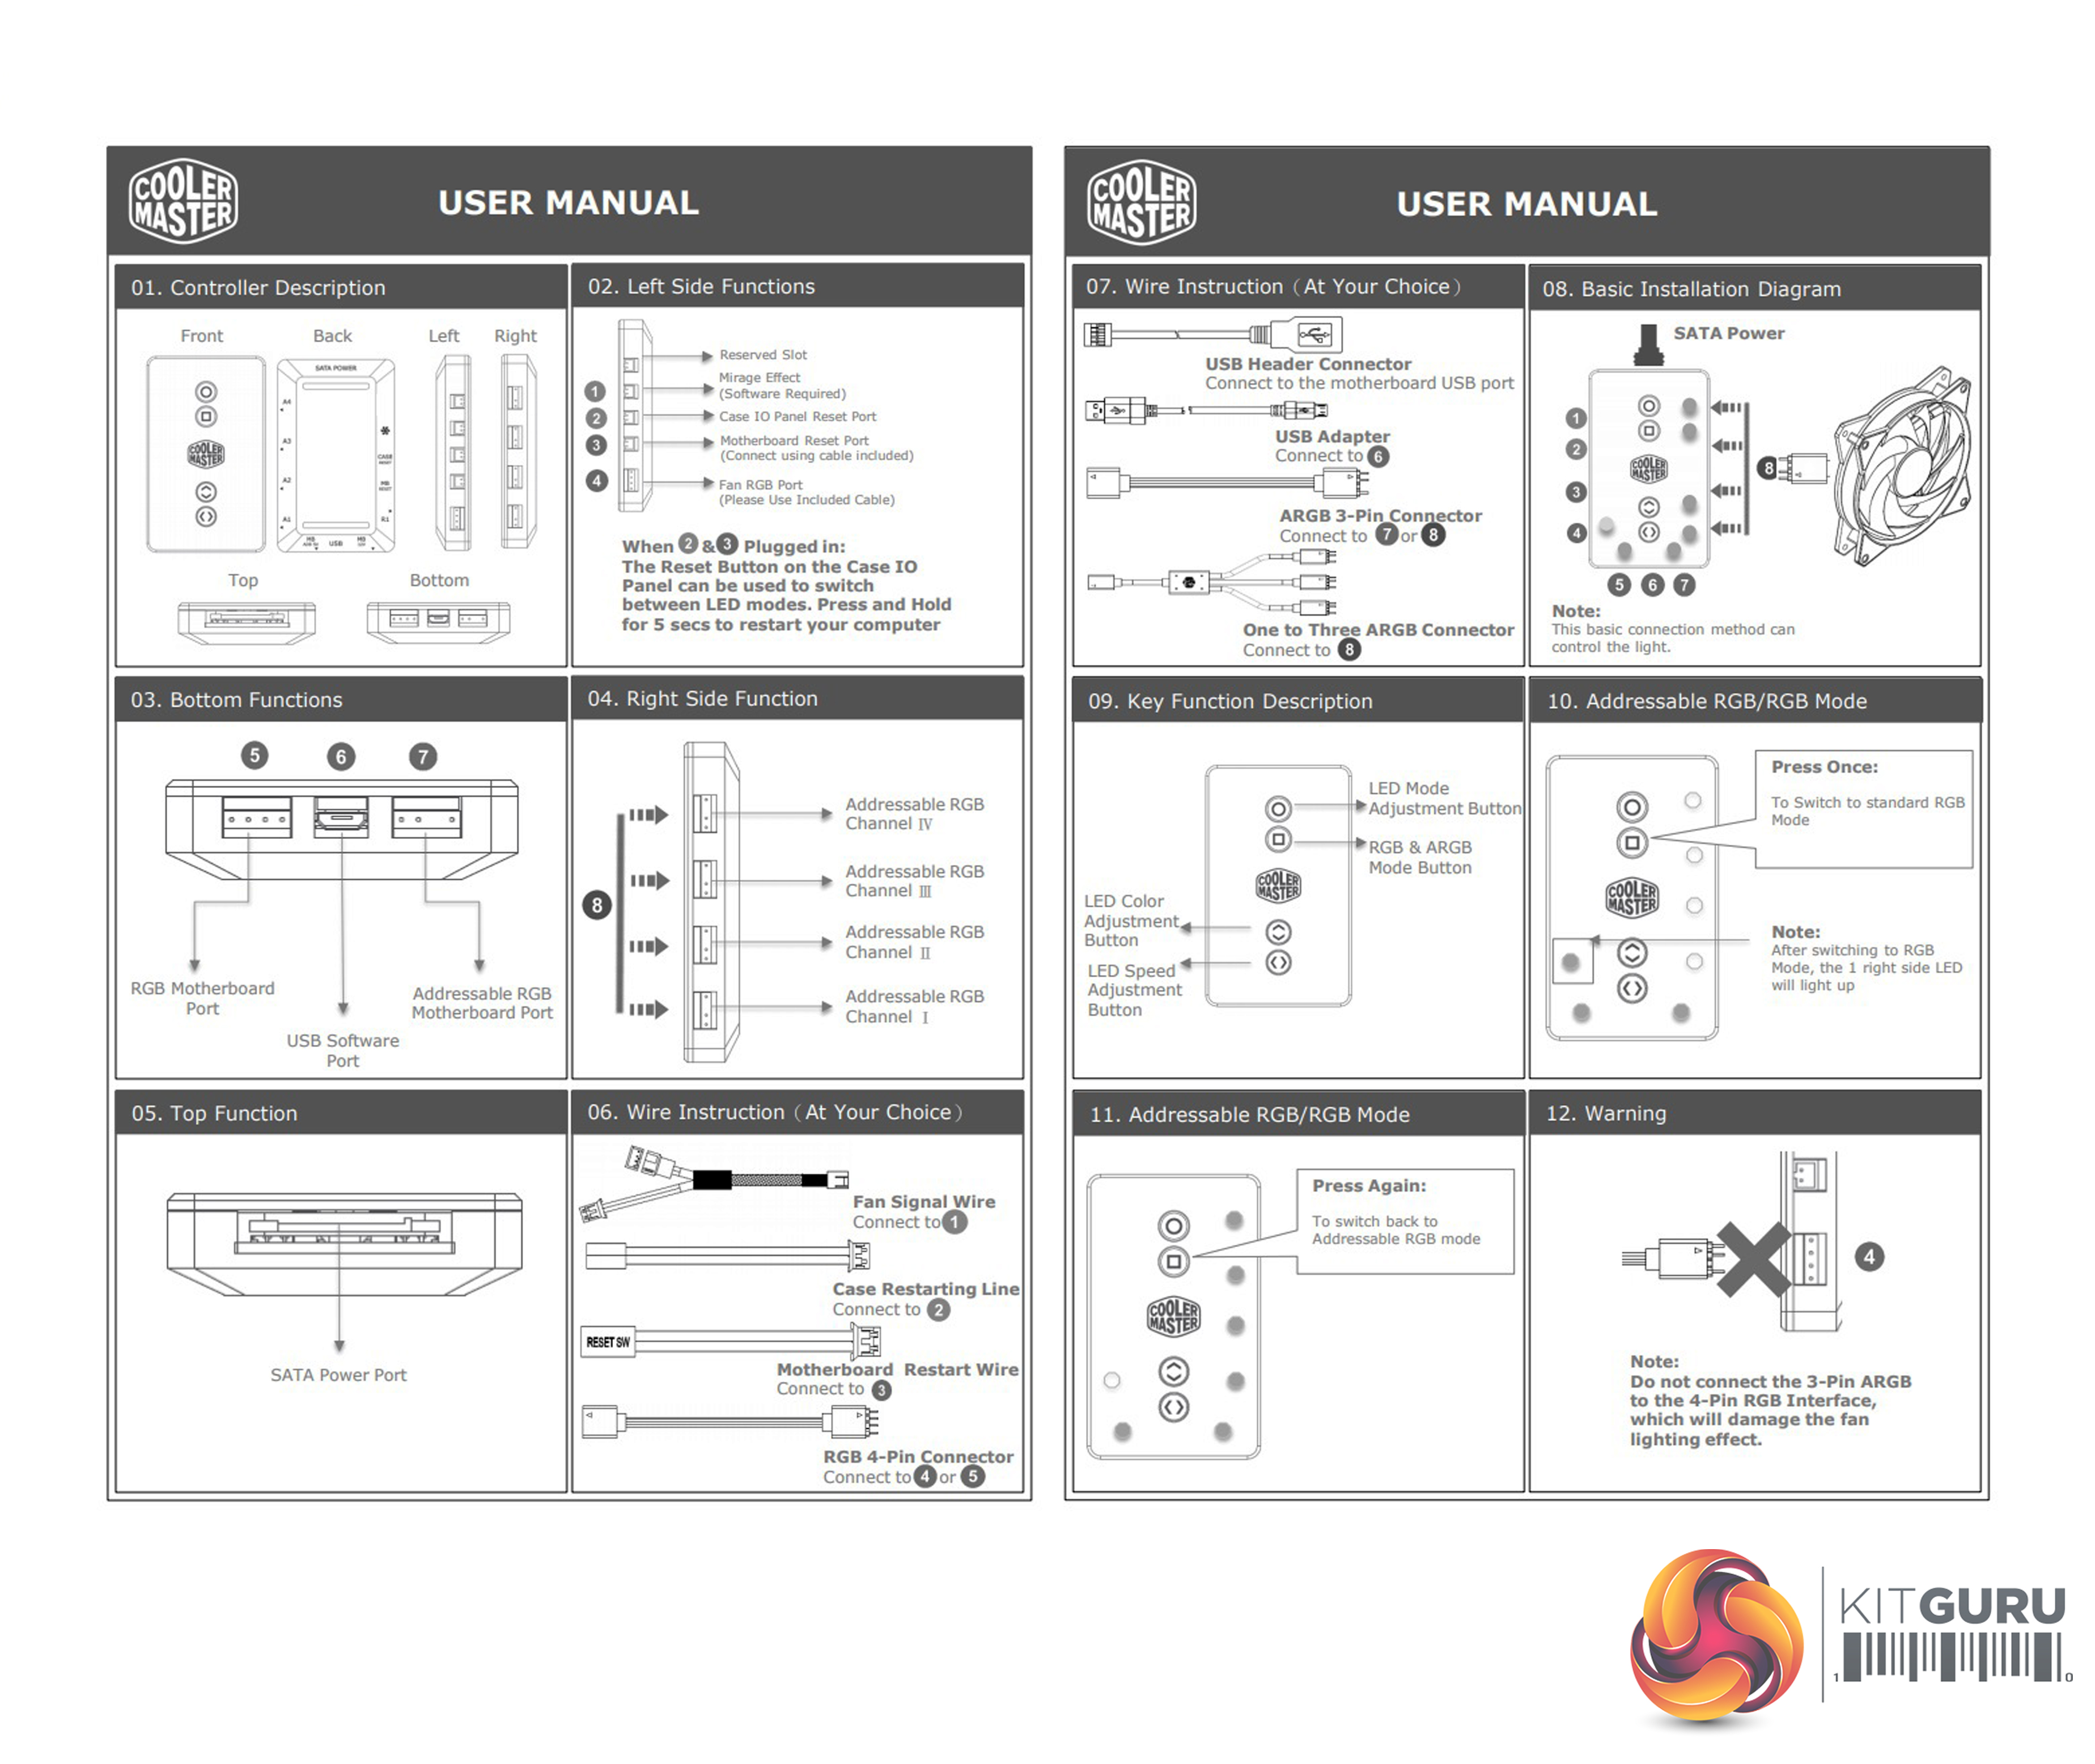
There are a series of buttons on the module itself, which can perform various operations. The top two buttons cycle through different RGB modes and patterns and switch between RGB and ARGB modes. The lower buttons cycle through LED colour and speed adjustment.
With the RGB control module disconnected and the pump and fans connected directly to the addressable RGB headers on our Gigabyte Aorus Master motherboard, the lighting on the ML240P could be controlled and worked in sync perfectly with our other RGB hardware in the system.
To measure the performance of CPU coolers, we devised an easily repeatable series of tests. The only variable is the coolers themselves to ensure the results can be accurately compared against one another.
Test Rig
To reflect current hardware demands, we have updated the test system at KitGuru. It now comprises of a Z390 platform and included is the Intel Core i9 9900k CPU, mated with a Gigabyte Z390 Aorus Master motherboard and 16GB (2x 8GB modules) Patriot Viper RGB running at 3600mhz CL16. Our storage device is the Corsair Force LE 120GB SATA SSD. Power to the test system is managed by a Seasonic Platinum Series 1000w PSU.
Thermal Testing Procedure
The procedure will consist of several tests, that will produce six temperature readings for each cooler. The data can then be used to compare cooling performance.
First, we will lock the 9900k at its 3.6GHz all core base clock speed, with a 1.15V Vcore applied in the BIOS. Then, let the system idle in windows for 15 minutes and measure temperature. At the same frequency, we will then measure the load temperature.
To simulate overclocked frequency, we will then lock the 9900k to 4.7GHz on all cores with a 1.20V Vcore and run the same idle and load test again. To measure an extreme overclocking situation, we will lock the 9900k frequency to 4.9GHz on all cores with 1.30V vcore and run the tests one final time – this should push the limits of the cooling performance of even the very best CPU coolers.
Admittedly, the overclocked frequencies/voltage may not be the highest achievable, but, nevertheless, it will give us a good set of data to compare the effect frequency/voltage changes have on temperature.
The temperatures presented in the graphs will be average Delta temperatures measured over the length of the test. We will calculate the Delta temperature by deducting the ambient temperature in the test room from the measured CPU temperature, both at idle and under load.
All idle temperatures are measured by letting the system idle in Windows for 15 minutes. Load temperatures are achieved by running AIDA64 stressing CPU, FPU and cache again for 15 minutes. This should give the CPU enough time to reach its maximum temperature. Throughout testing, Load Line Calibration will be set to level 6 (turbo) in BIOS and all CPU Fans/pumps set to maximum RPM.
Noise testing
Noise levels will be measured with our sound meter at a distance of 1 meter from the test bench. The cooler’s fans will be set to their maximum RPM rating. Ambient noise level in the room is measured at 37.5dBA. The peak noise level of the cooler will be recorded in dBA.
Thermal performance
All temperature charts are sorted with lowest load temperatures at the top. All temperatures measurements are presented as Delta Temperatures, the ambient temperature has been deducted from the CPU temperature giving us a delta.
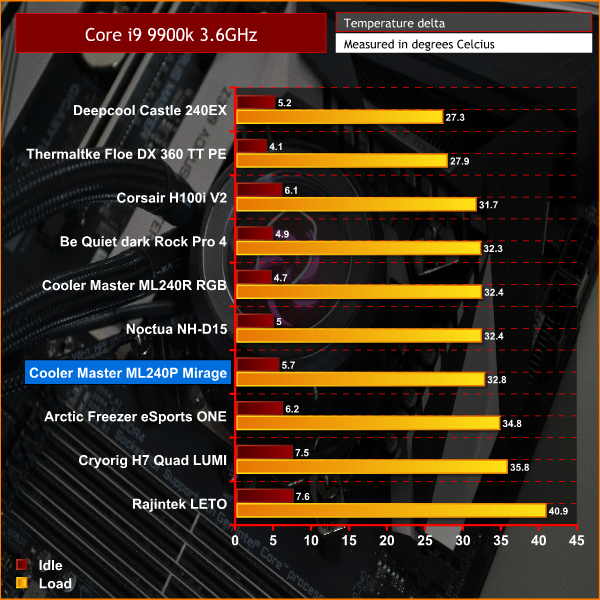
With the Core i9 9900k at stock frequency, our Cooler Master ML240P is sitting around mid table with just slightly higher idle and load temperatures than the mighty Noctua NH-D15. However, it is just below its cheaper brother the ML240R RGB which seems odd. Still outperforming the lower priced air coolers though.
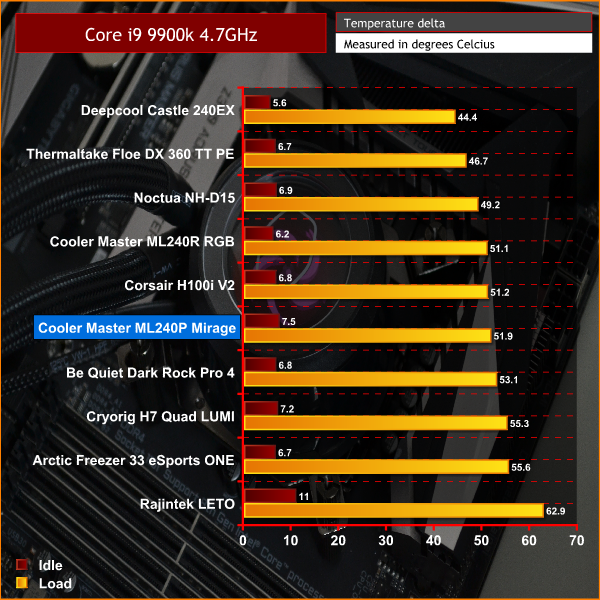
At 4.7GHz, the ML240P Mirage has overtaken the Dark Rock Pro 4 by 0.7°C at 100% load, but is still trailing the cheaper ML240R RGB at both idle and load. There seems to be a pattern emerging here.
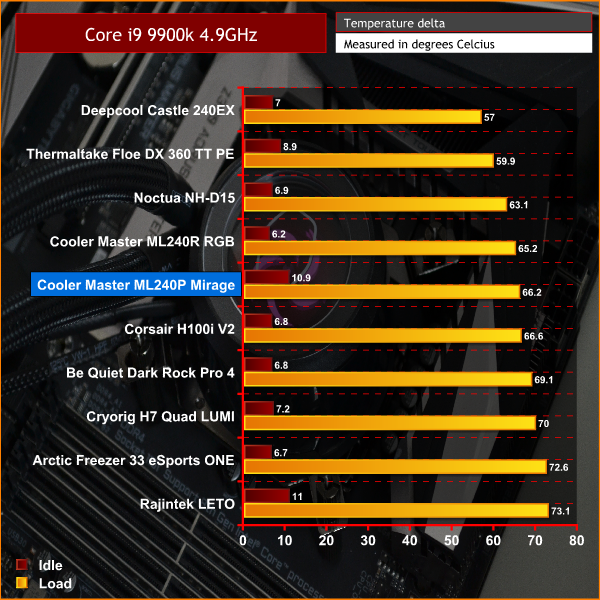
At 4.9GHz, the ML240P holds onto its mid table spot at just a couple of degrees lower than the Dark Rock Pro 4. With maximum temperature spikes peaking at 94°C, close to the 9900k's thermal limit, that is worrying. Once again, we see the cheaper Cooler Master ML240R RGB outperforming the ML240P Mirage without any sign of throttling CPU frequency.
Noise Levels
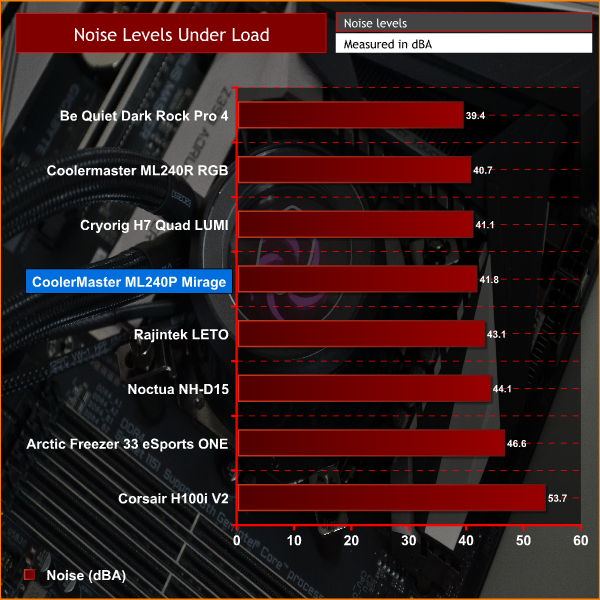
In the noise level test, under load, the ML240P continued its theme of being average and holding on to a mid table position. Once again, it has been outperformed by its cheaper alternative from Cooler Master. It is, however, quieter than several of the competition, including the Noctua NH-D15 and Corsair H100i V2.
When looking at Cooler Master's new MasterLiquid ML240P Mirage, we cannot help but feel a bit disappointed with its raw cooling performance. There is no getting away from the fact that it was beaten hands down by a cheaper alternative from the same manufacturer. This begs the question… why would anybody want to buy it?
Granted, the test rig we used is a very powerful heat generator and maybe on some lesser powered systems, the ML240P could perform admirably. If you stick to stock CPU frequency, the ML240P may be perfect for you. However, it would not be recommended to use on a heavily overclocked system – certainly not a 9900k anyway!
We should mention during initial testing we found abnormal results in performance. Under load in our overclocked test, the maximum temperature spikes would exceed the 100°C thermal limit of the Core i9 9900k and therefore would throttle CPU frequency up to 20%. We reached out to Cooler Master about this and they offered a replacement unit. The replacement unit did perform better and these are the results that were shown in our charts.
The MasterLiquid ML240P has so much going for it. With its attractive aesthetics and smart RGB functions, coupled with the copper cold plate and ultra quiet pump, there was a recipe there for something really pleasing, which was let down by the poor thermal transfer under load when trying to cool an overclocked CPU.
Currently, the market is flooded with RGB All-In-One liquid coolers and the Mirage isn't bad – but when it is out-performed by one of Cooler Master's own 240mm products, it becomes hard to recommend.
![]()
You can purchase the Cooler Master ML240P Mirage for £139.99 from Overclockers UK HERE.
Pros
- Attractively designed pump assembly, with transparent top.
- Addressable RGB LED lighting compatible with major motherboard vendors' software.
- Simple installation and clear instructions.
Cons
- RGB controller module has many cables to manage.
- Cooling performance under load is disappointing when our CPU is overclocked.
- High price/performance ratio.
KitGuru says: Cooler Master did a great job at making the MasterLiquid ML240P Mirage look flashy with its RGB, but thermal performance is underwhelming.