While you may know Thermaltake for its series of eye-catching and often outlandish cases, the company also manufacturers a range of liquid coolers as well. The product in question today, the Floe DX RGB 360 Premium Edition, is a new top-of-the-line AIO with plentiful RGB lighting and even support for Amazon Alexa. Is it worth the £219.99 asking price?
Thermaltake's brand-new Floe DX 360 RGB All-In-One liquid cooler may not present extreme visual design characteristics that we have come to expect from Thermaltake, but can it top our charts for raw cooling performance? After all, this is the real purpose we buy and use All-In-One coolers, right?
There are plenty of features packed in to the Floe DX 360, including fully customisable addressable RGB lighting with a software-controlled digital RGB module, high static pressure Ring Duo TT Premium RGB PWM fans, alongside Windows and mobile app software. And It can even be voice controlled!
A latest 6th generation Asetek pump is used within the Floe DX 360 with rotating side entry tubing, and quality copper micro channel cold plate with an aluminium radiator design. The tubing looks to be a good length at approximately 390mm. The same can be said for the cables connecting the fans and pump.
The Thermaltake Floe DX 360 RGB TT Premium Edition will set you back £219.99 in the UK and will be available to purchase from today at online retailers. This places it in the top pricing tier of 360mm All-In-One coolers, which will put it in direct competition with the likes of the NZXT Kraken X72 360 and ASUS ROG Ryujin 360 .
Specification
Pump
- Rated Voltage – 12 V / 5V
- Rated Current – 325 mA / 0.4A
- Motor Speed – 3600 R.P.M
Water Block
- Material – Copper
Fan
- Dimension – 140 x 140 x 25 mm
- Speed – 500 ~ 1400 RPM
- Noise Level – 19.8 ~ 26.2 dB-A
- Rated Voltage – 12 V
- Max. Air Flow – 60.87 CFM
- Max. Pressure – 1.74 mm-H2O
- Connector – 9 pin
Tube
- Length – 326 mm
- Material – Rubber
Radiator
- Dimension – 390 x 120 x 27 mm
- Compatibility – Intel LGA 2066/2011-3/20112066/2011-3/2011/1366/1156/1155/1151/1150 AMD AM4/FM2/FM1/AM3+/AM3/AM2+/AM2
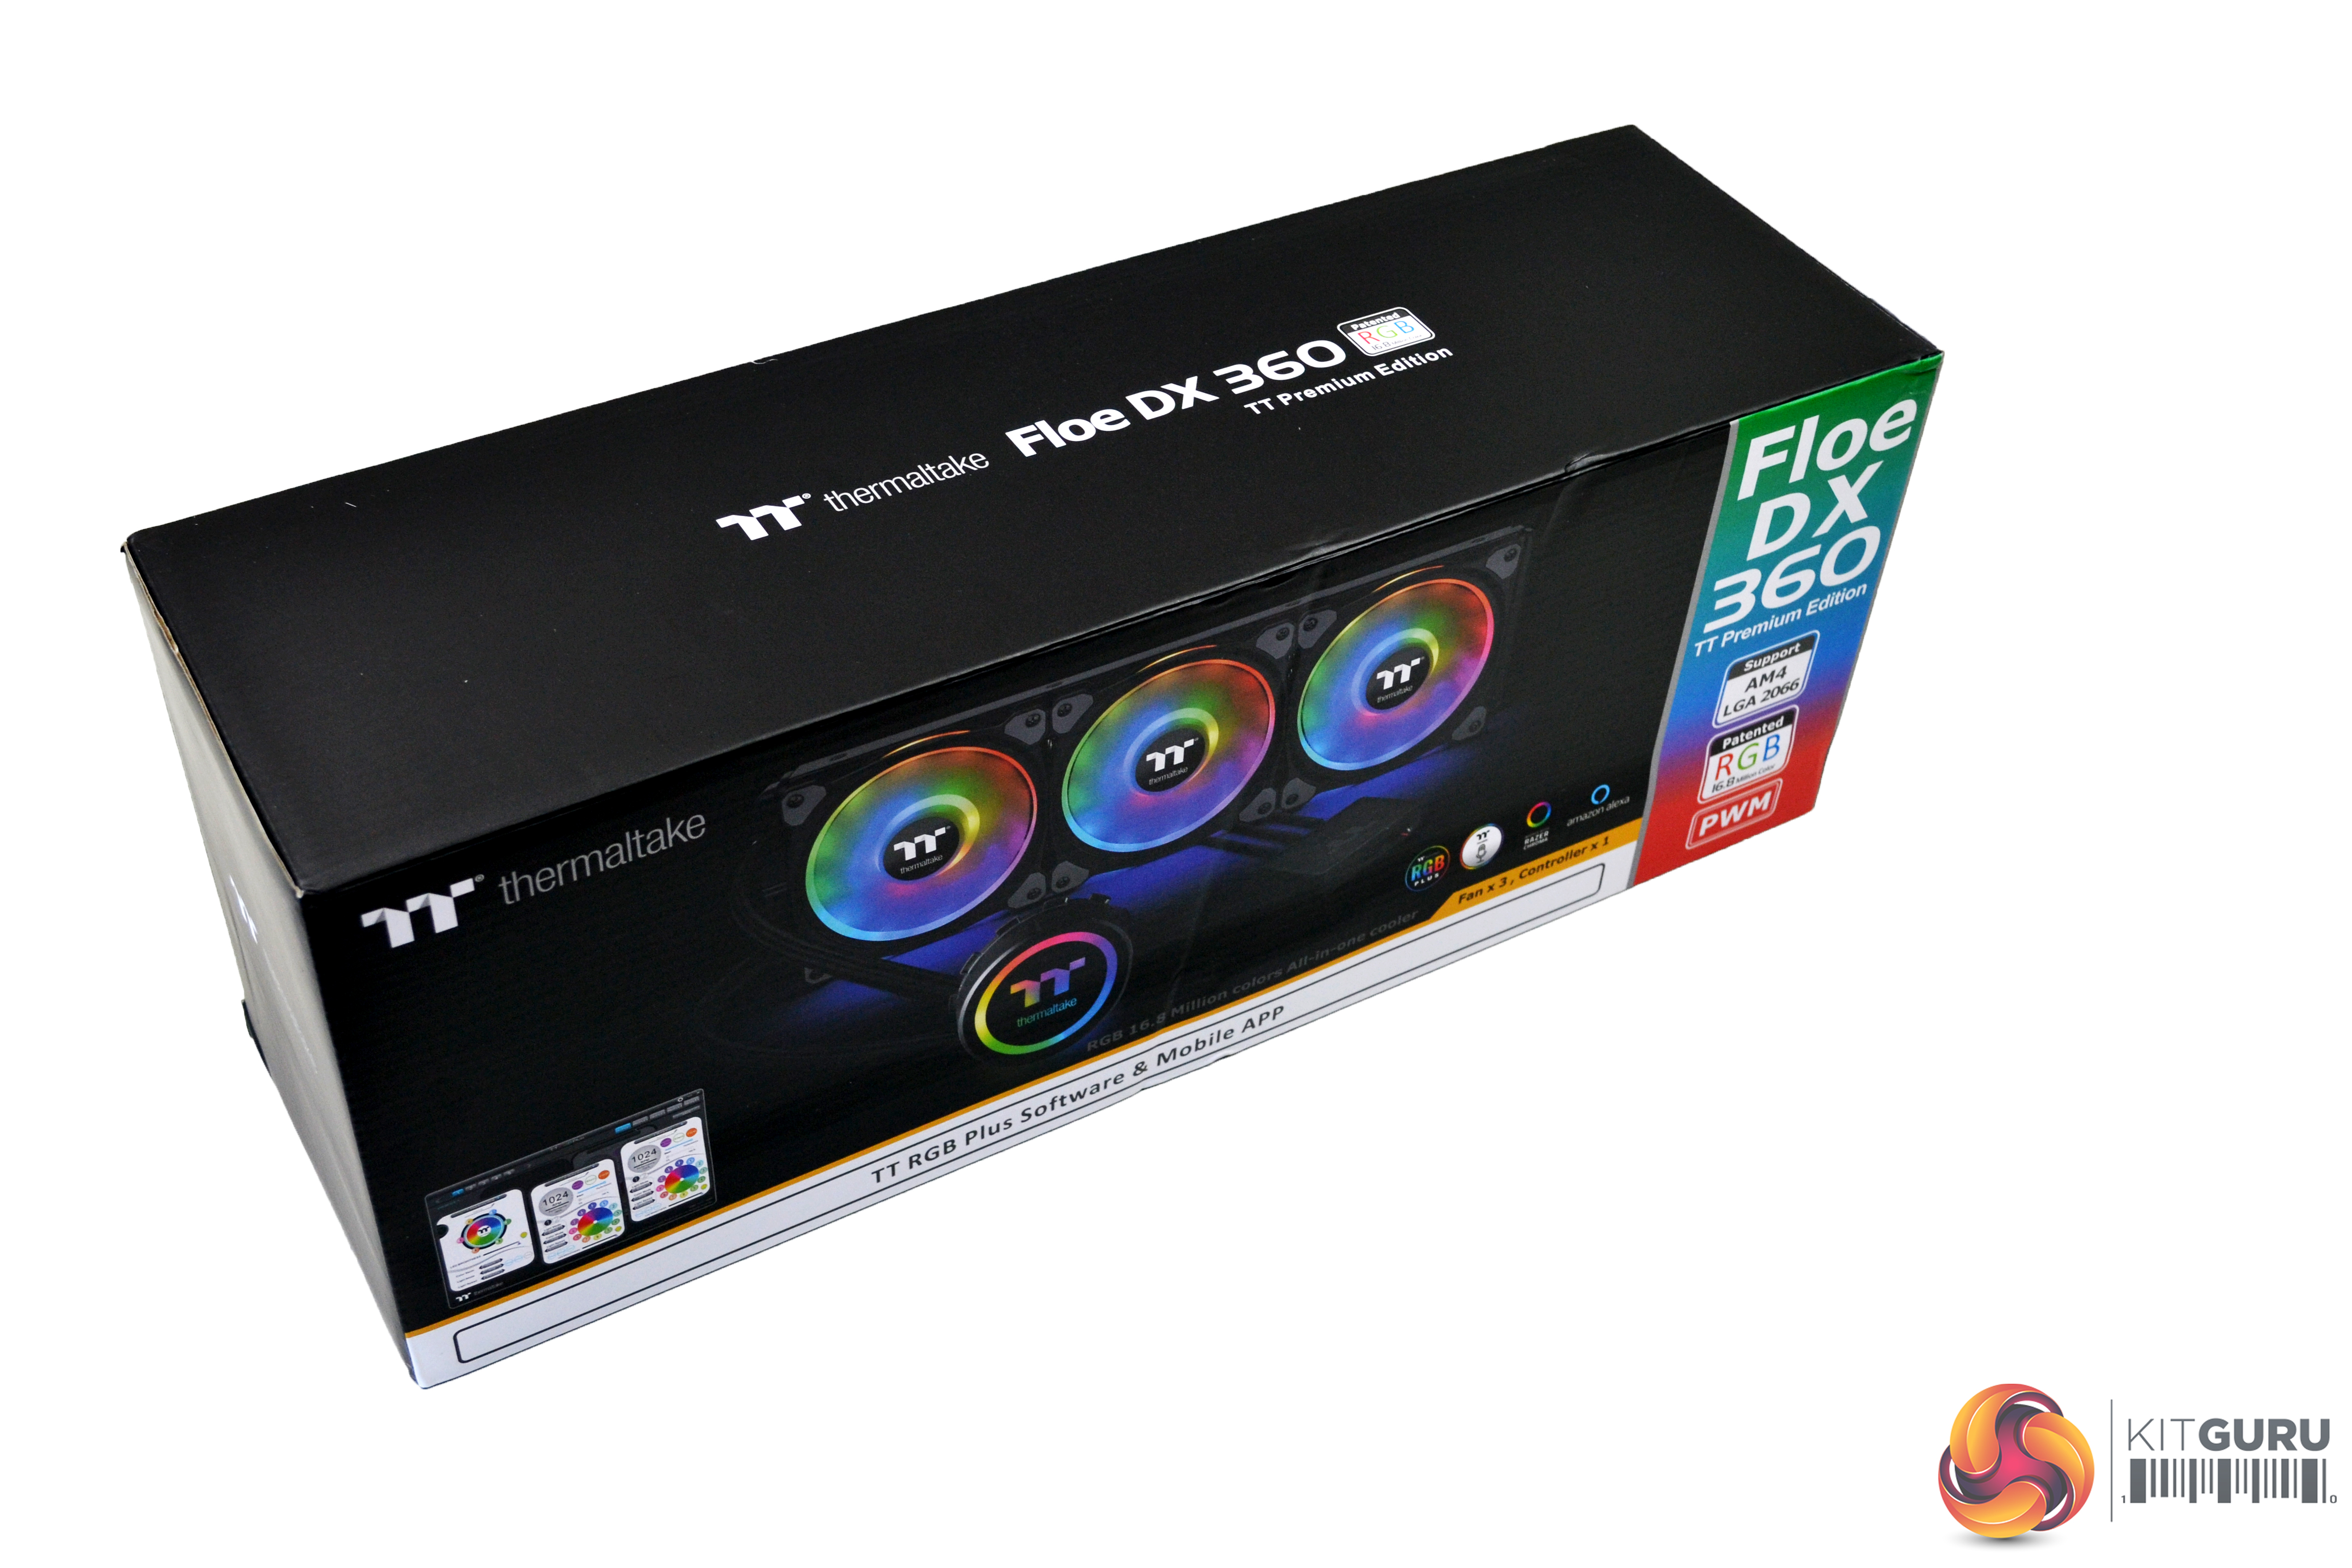
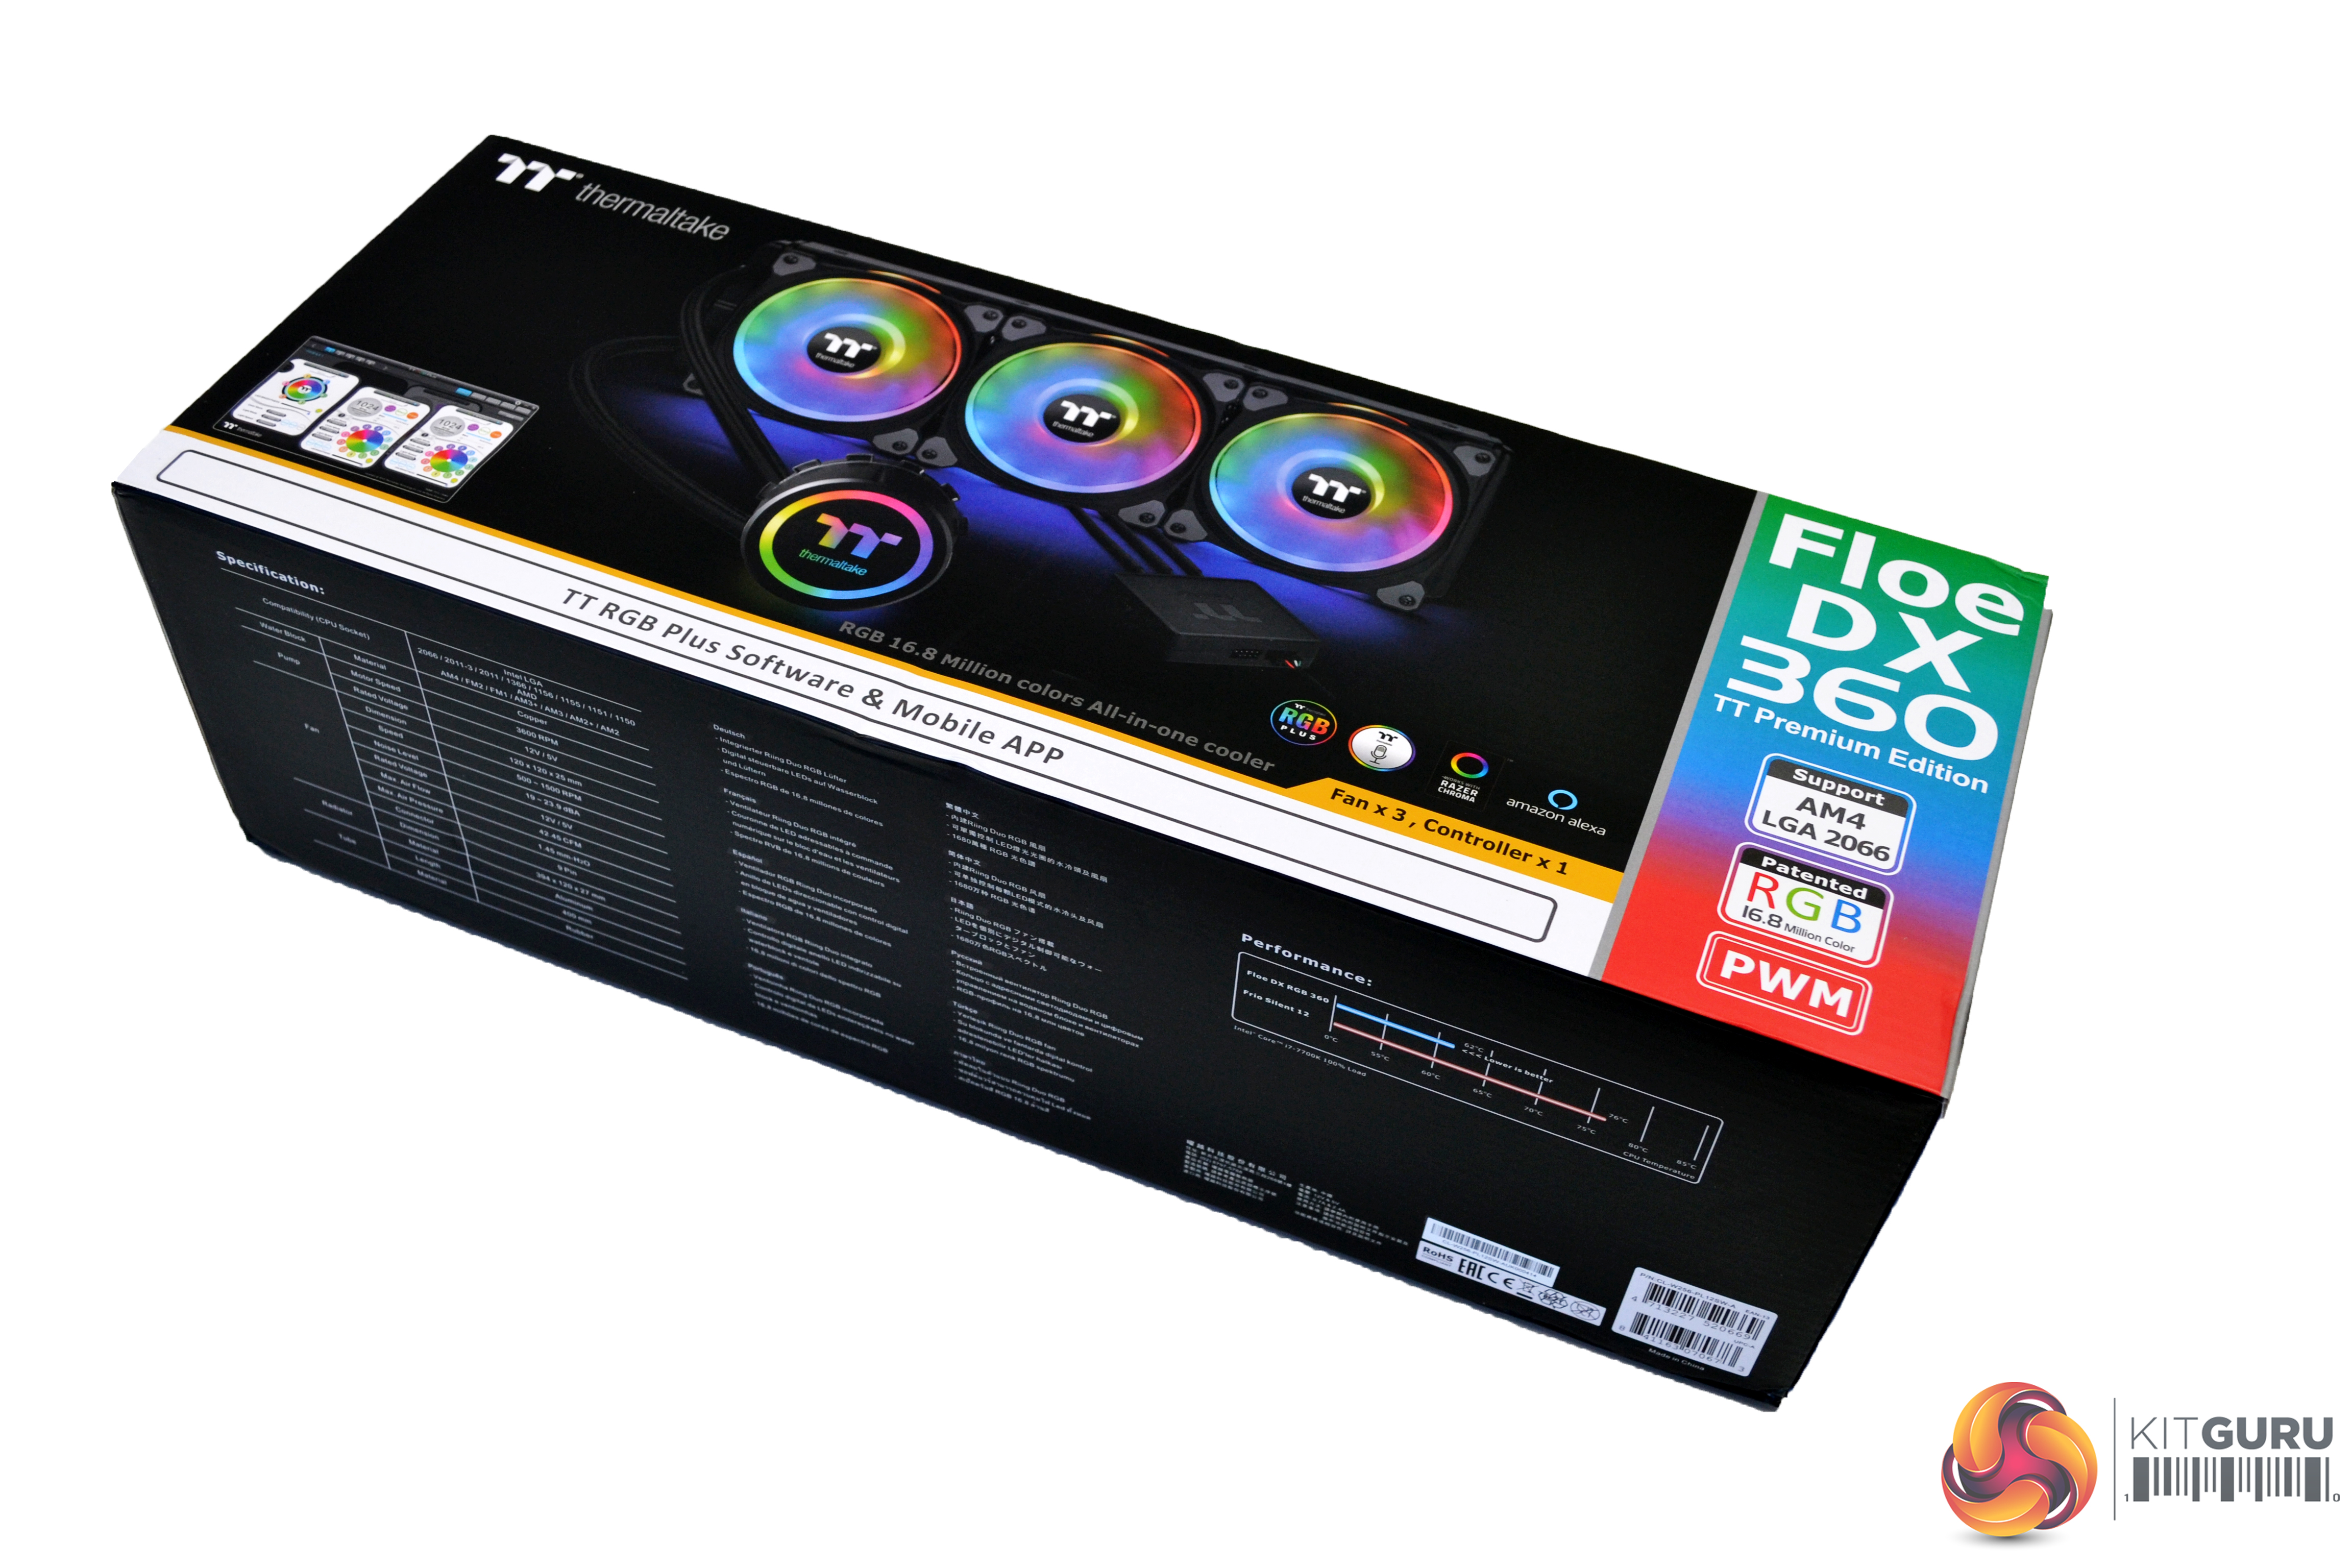
My first thought when getting a look at the Floe DX 360 RGB's box was, “that’s a pretty small box for such a big cooler”, so, obviously nothing has been wasted on packaging, which is good.
The box clearly shows what’s inside, with a large image of the product in the centre, the name and technical info on the right and a small image of the software to the left – nice and simple.
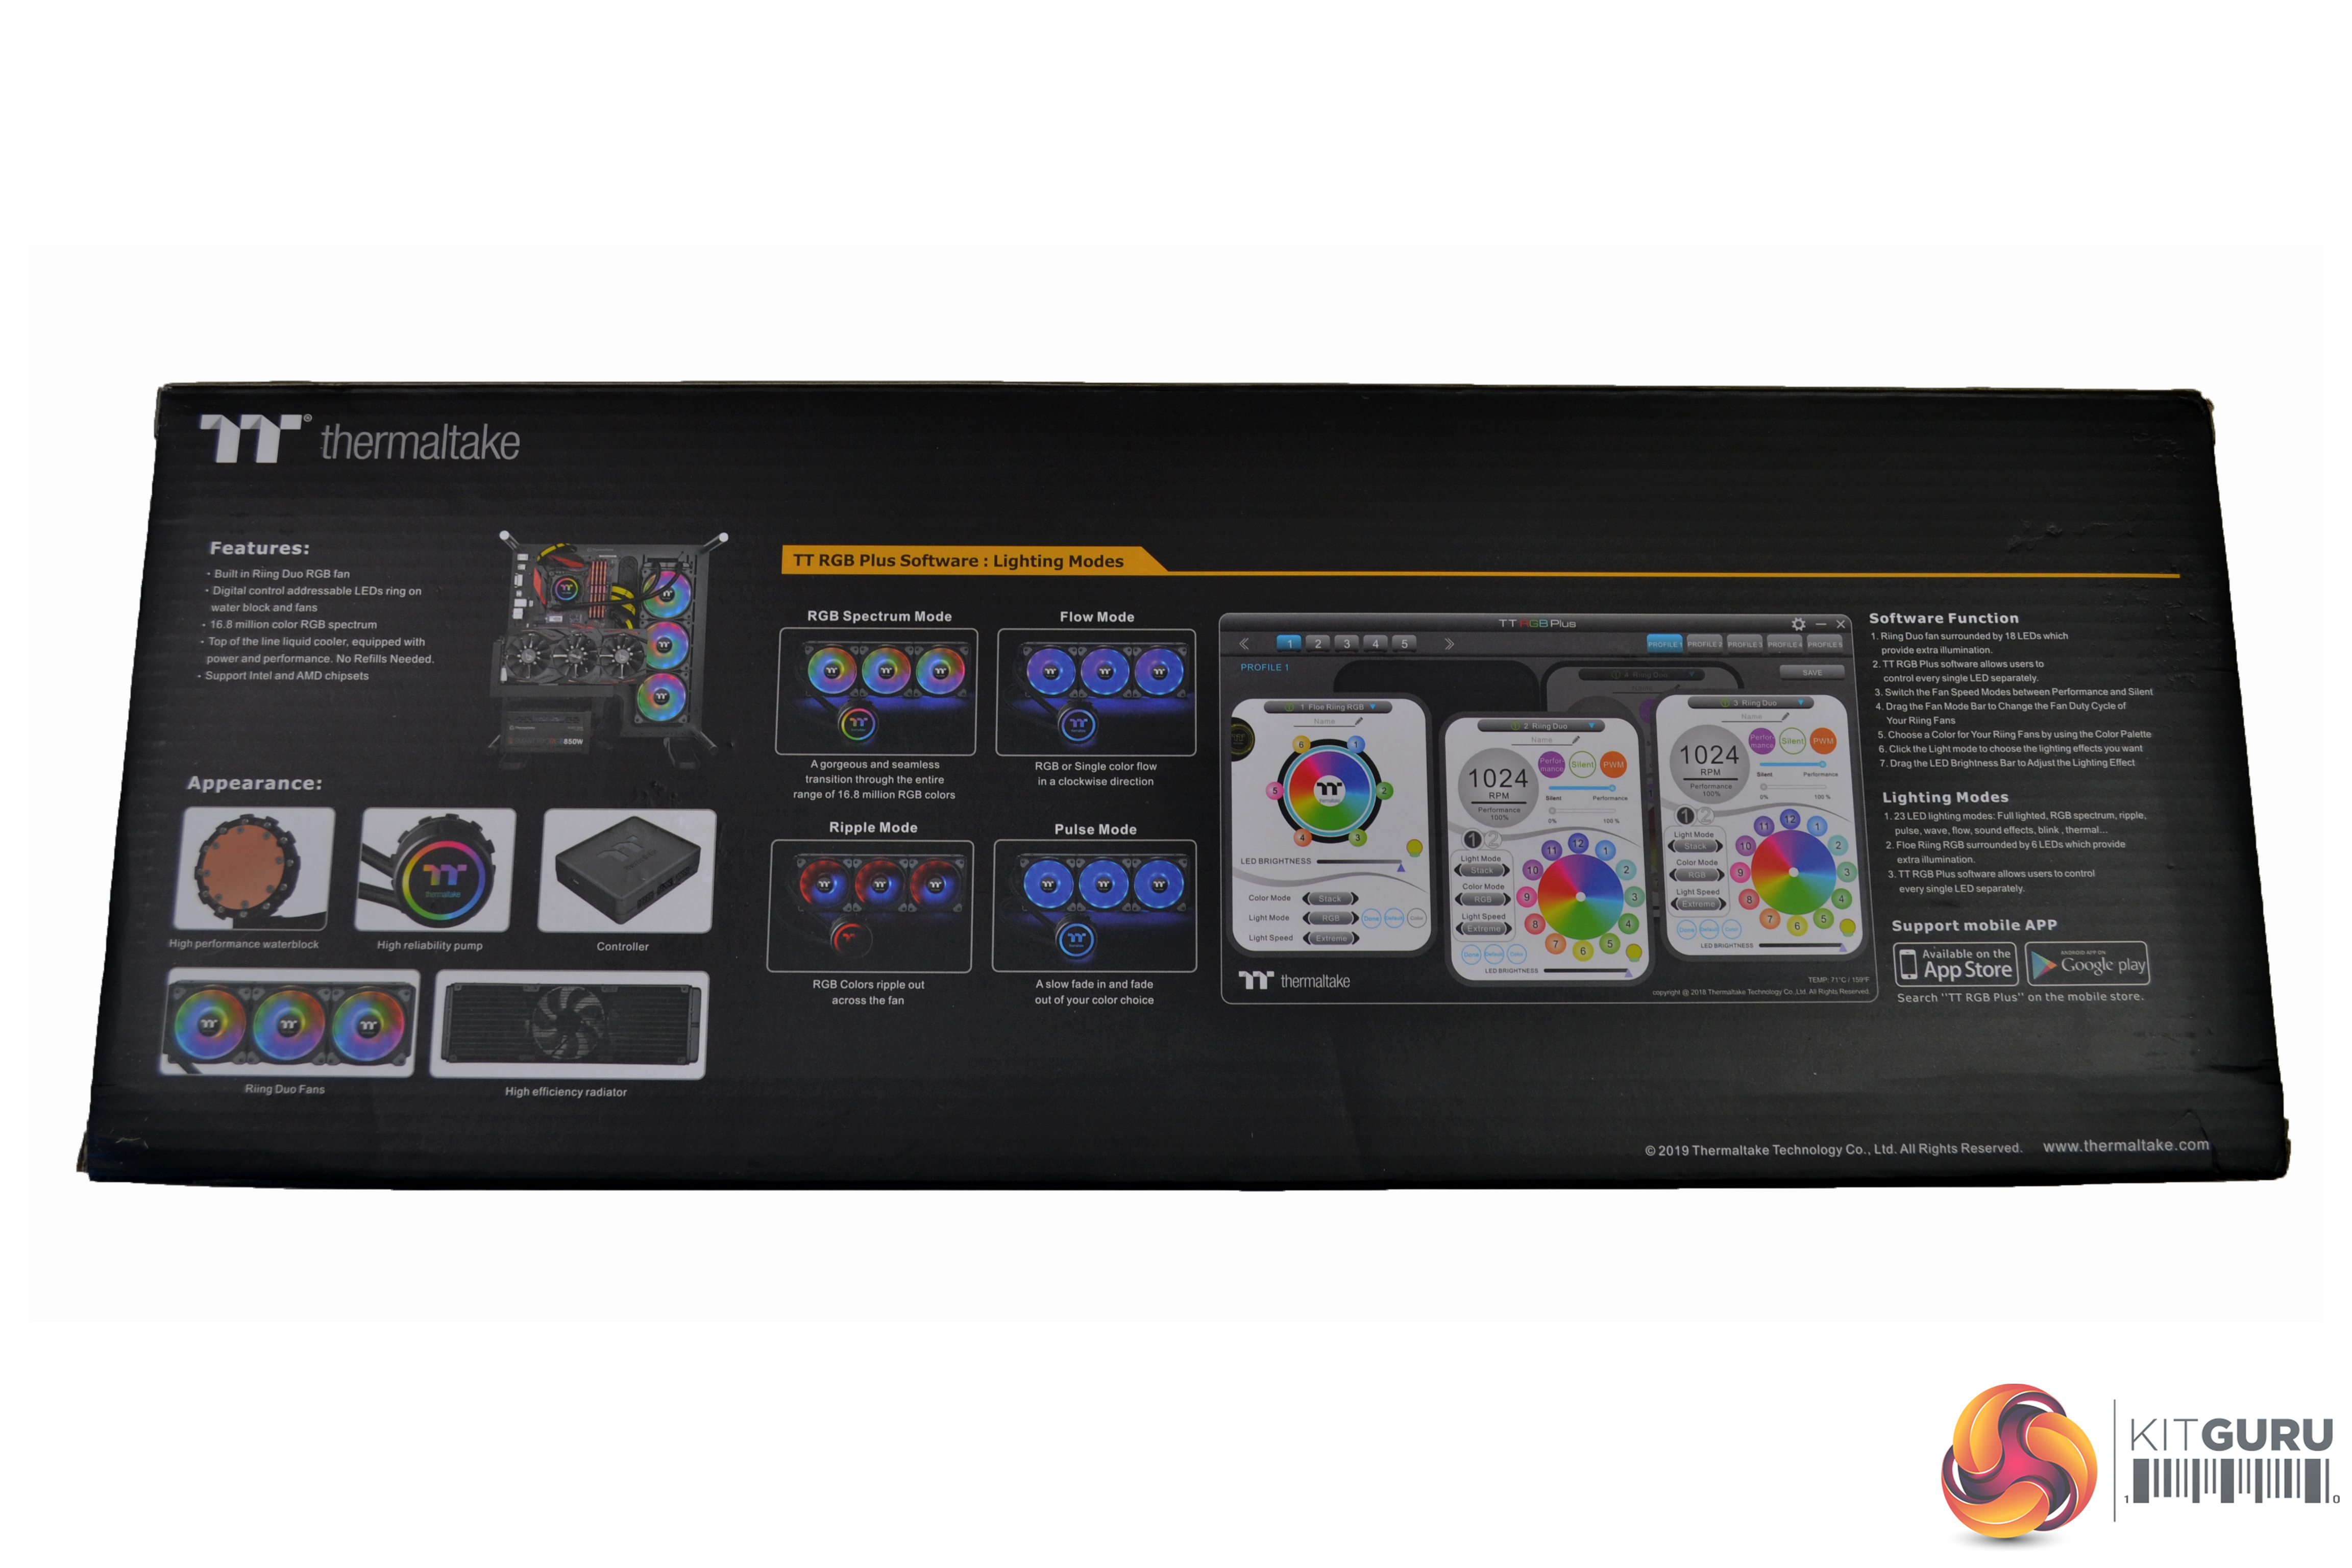
The rear of the box shows some more closeup images of the components included, a small list of features, a collection of RGB photos and further information about the software and android app. What is rather odd is that, on the packaging, there is no reference to the Alexa compatibility (yes, that’s right – a voice controlled All-In-One cooler), which you would think would be a major selling point…
Along the bottom of the box is the full specifications and a small graph indicating performance.
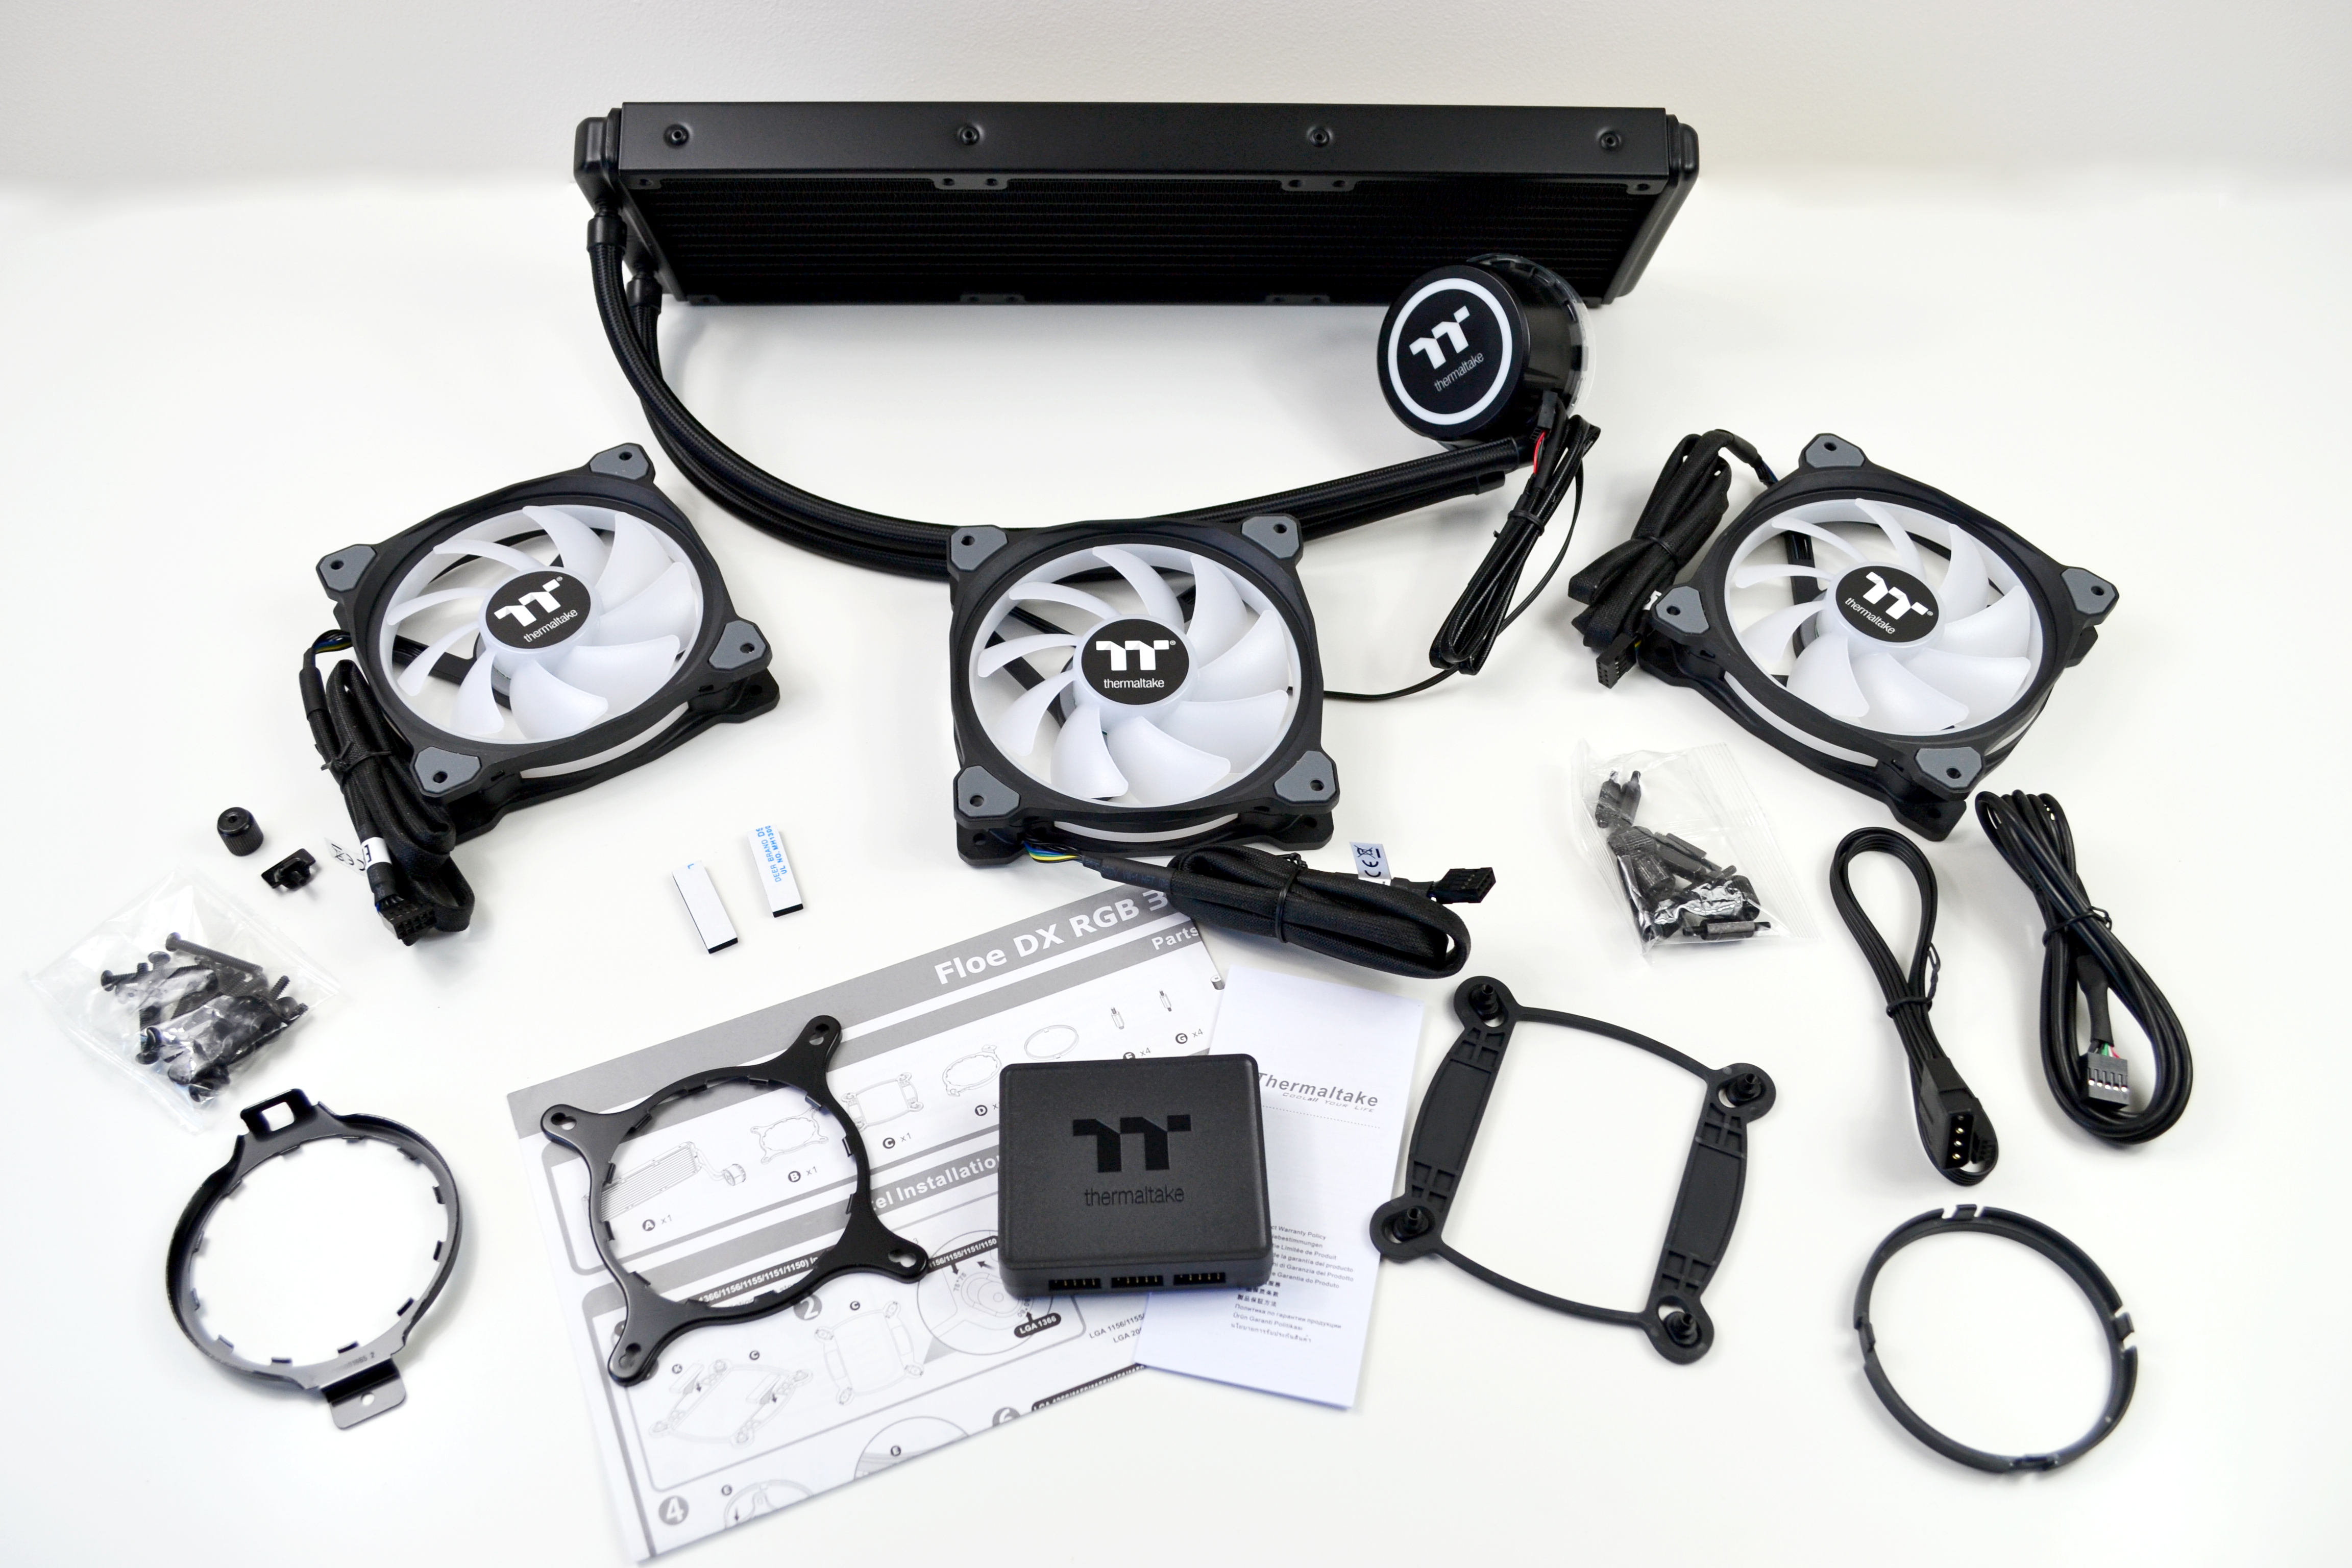
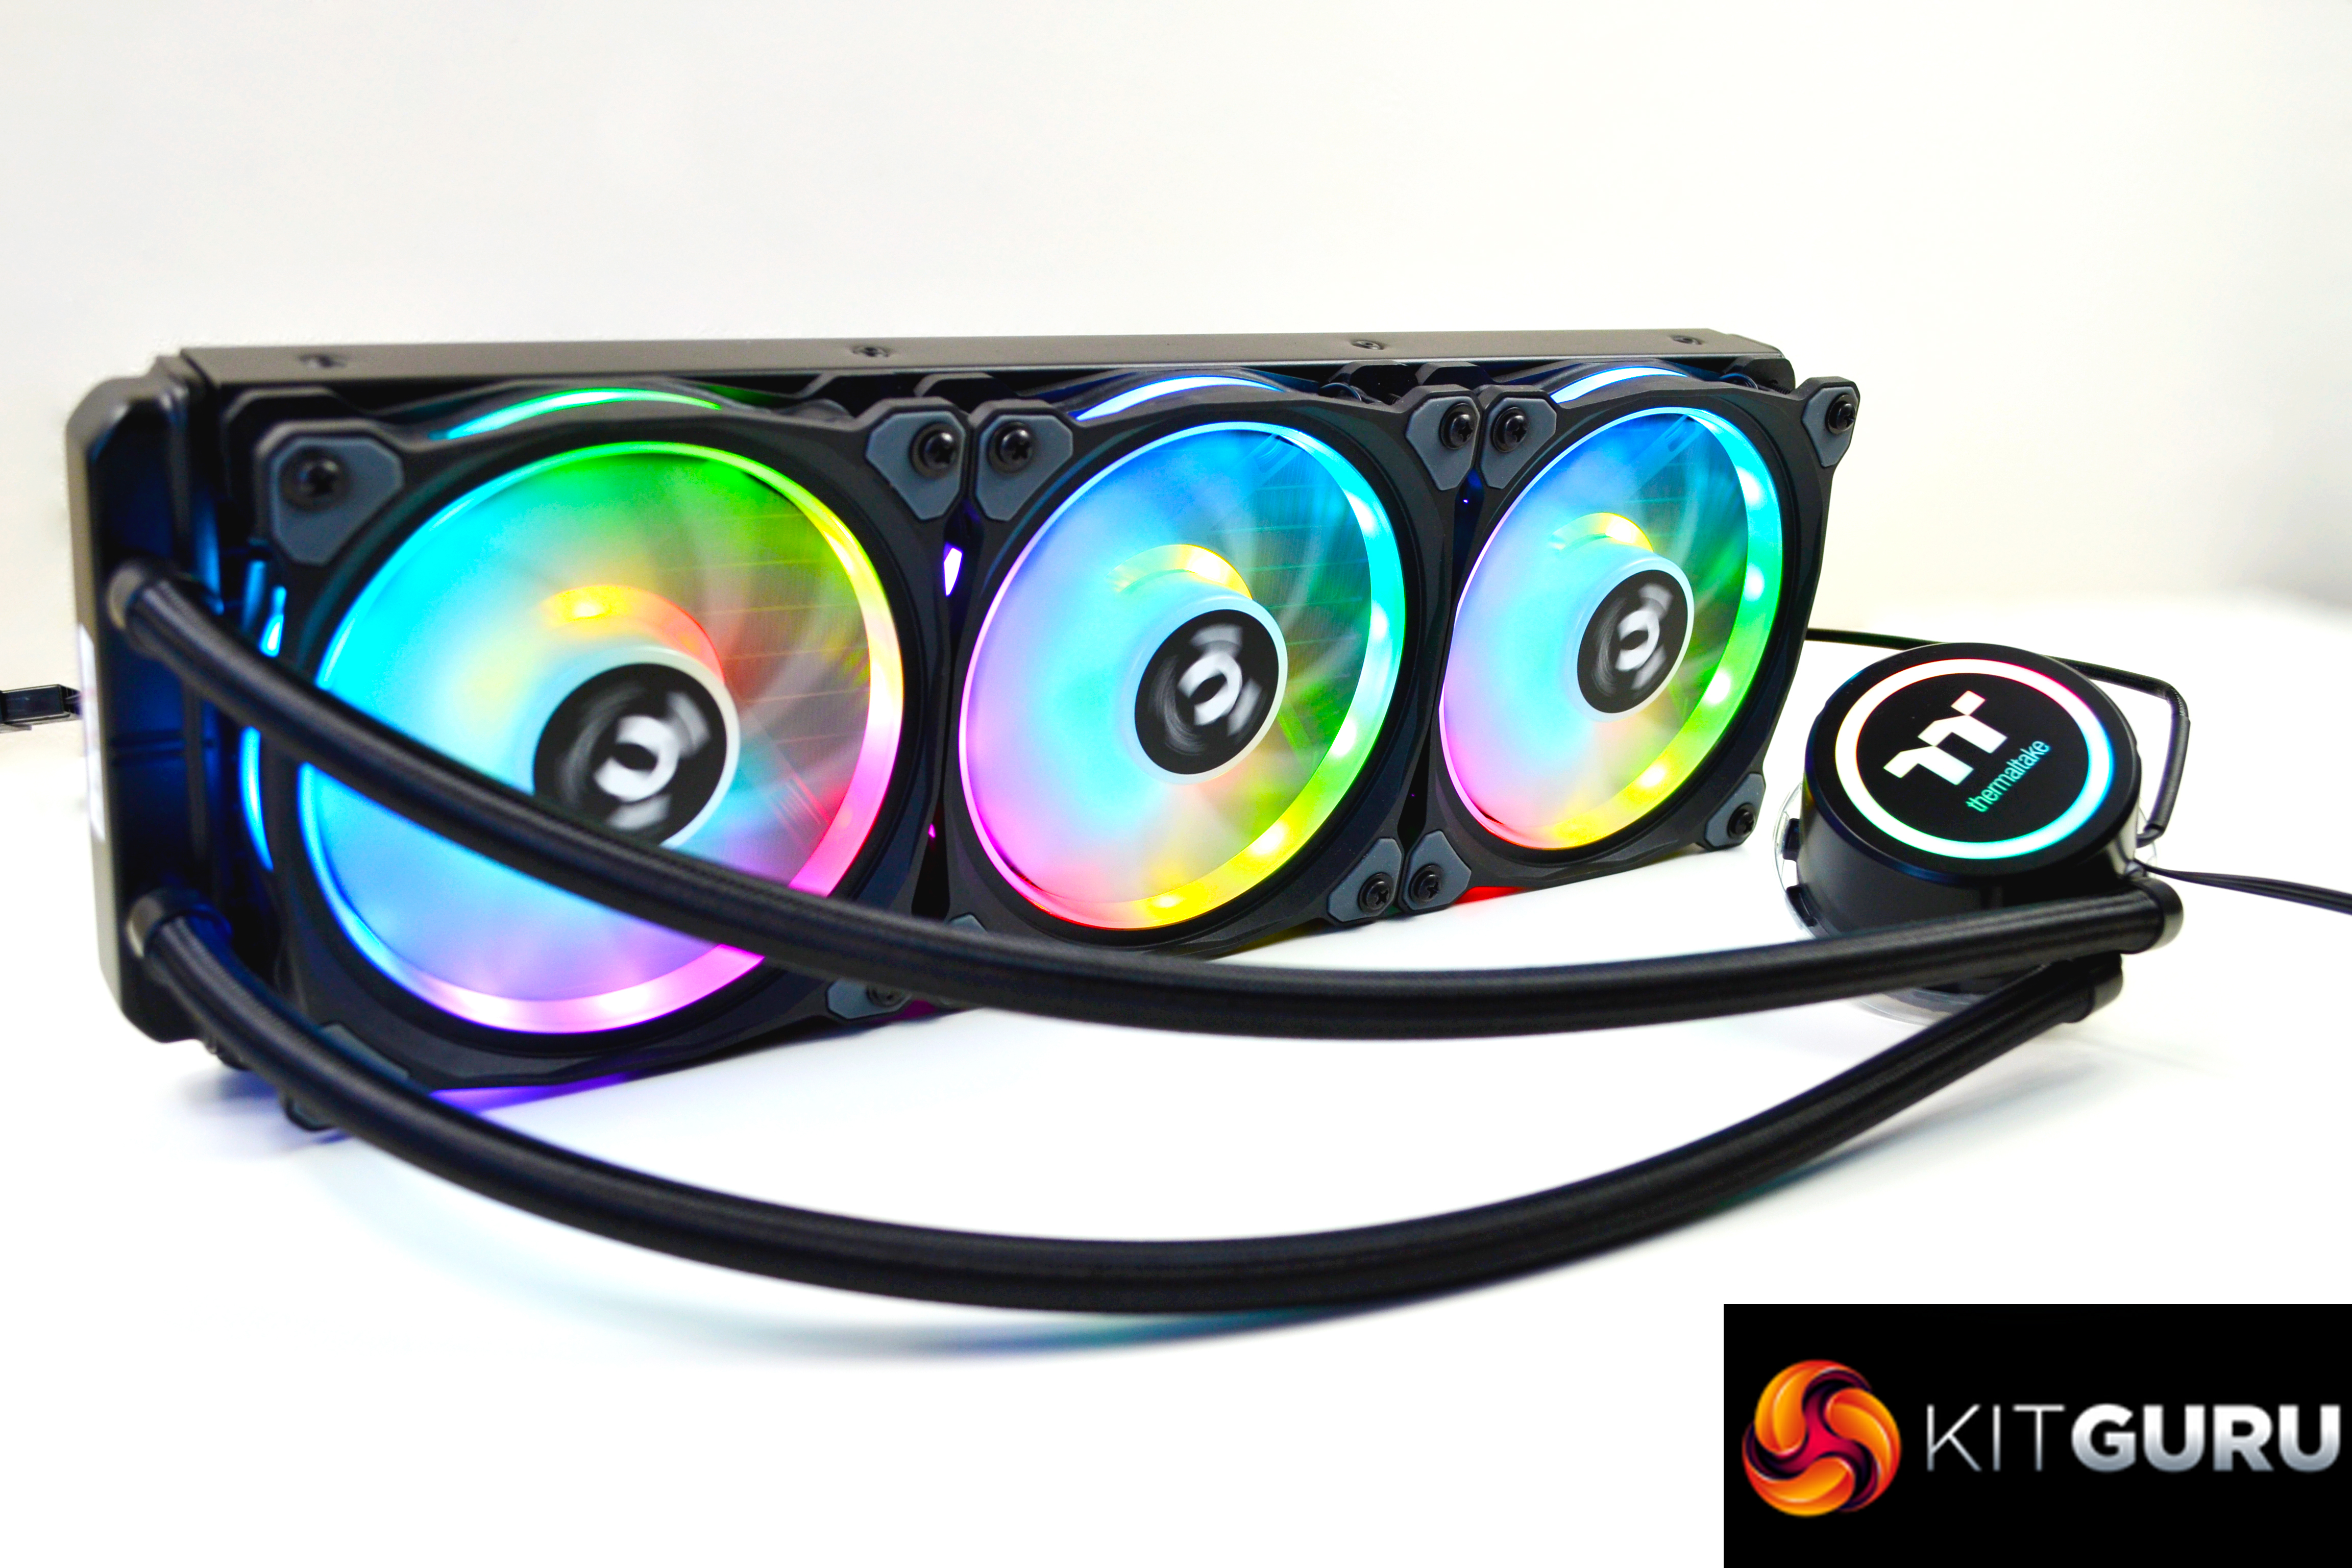
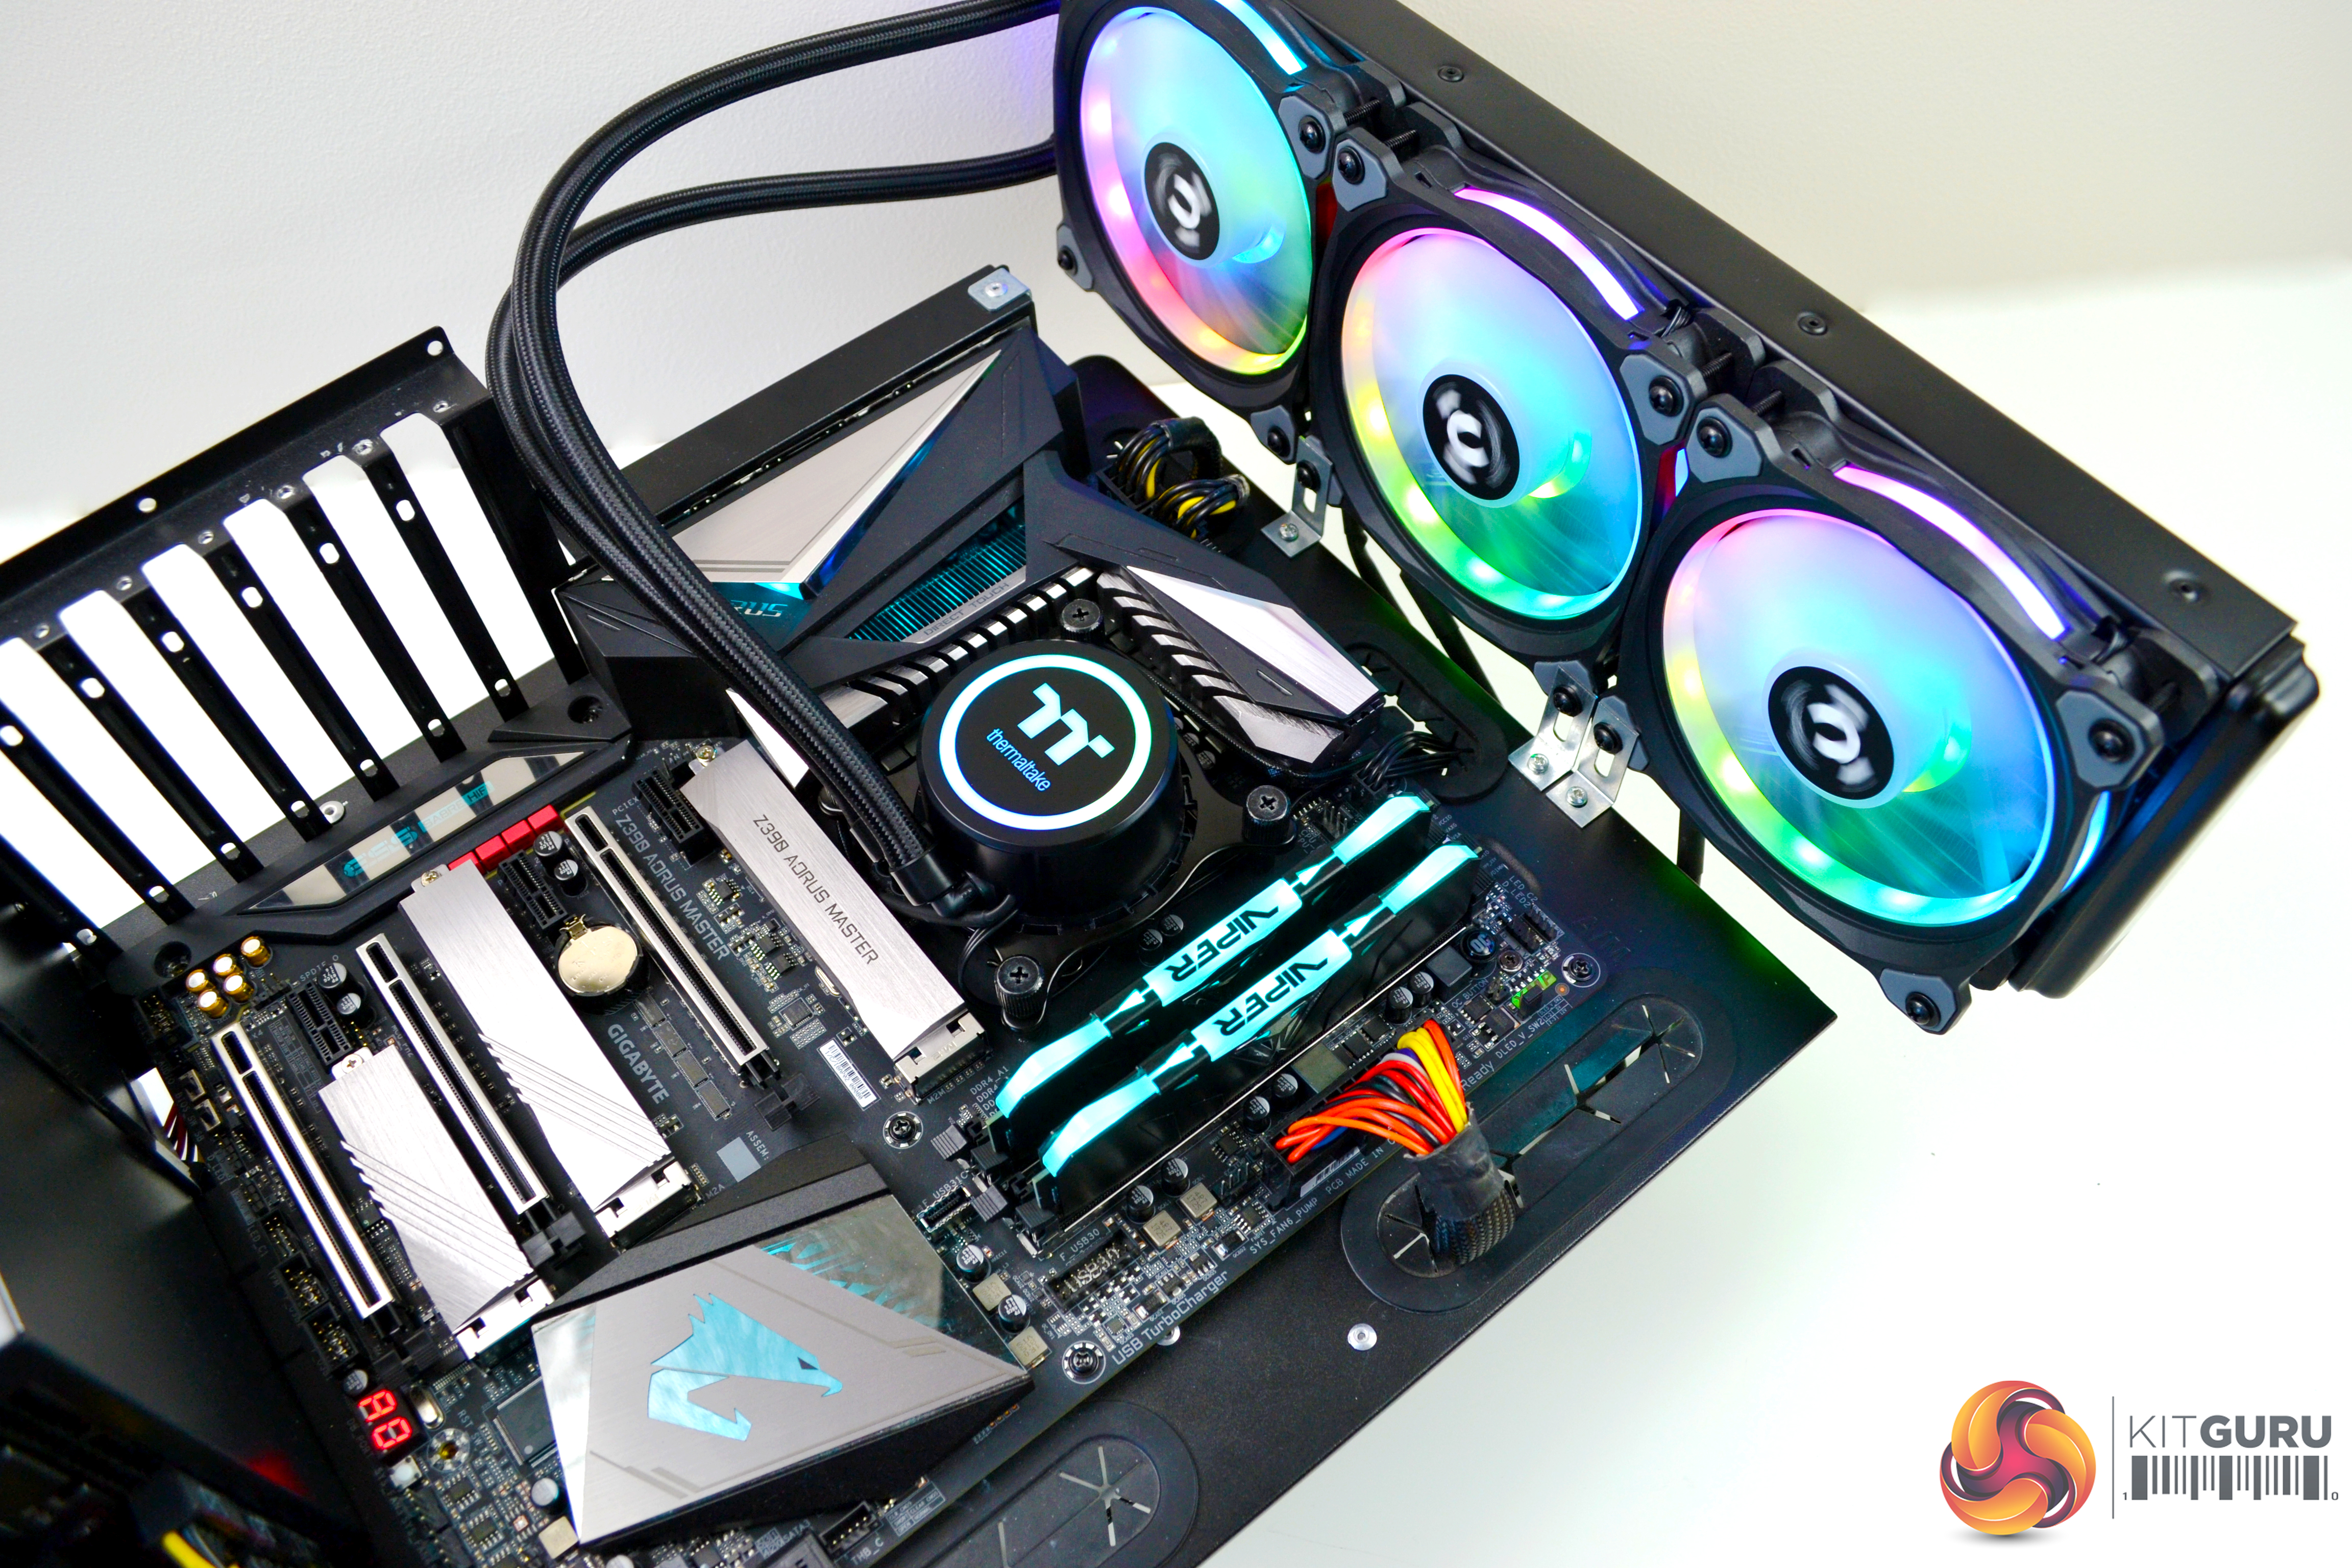
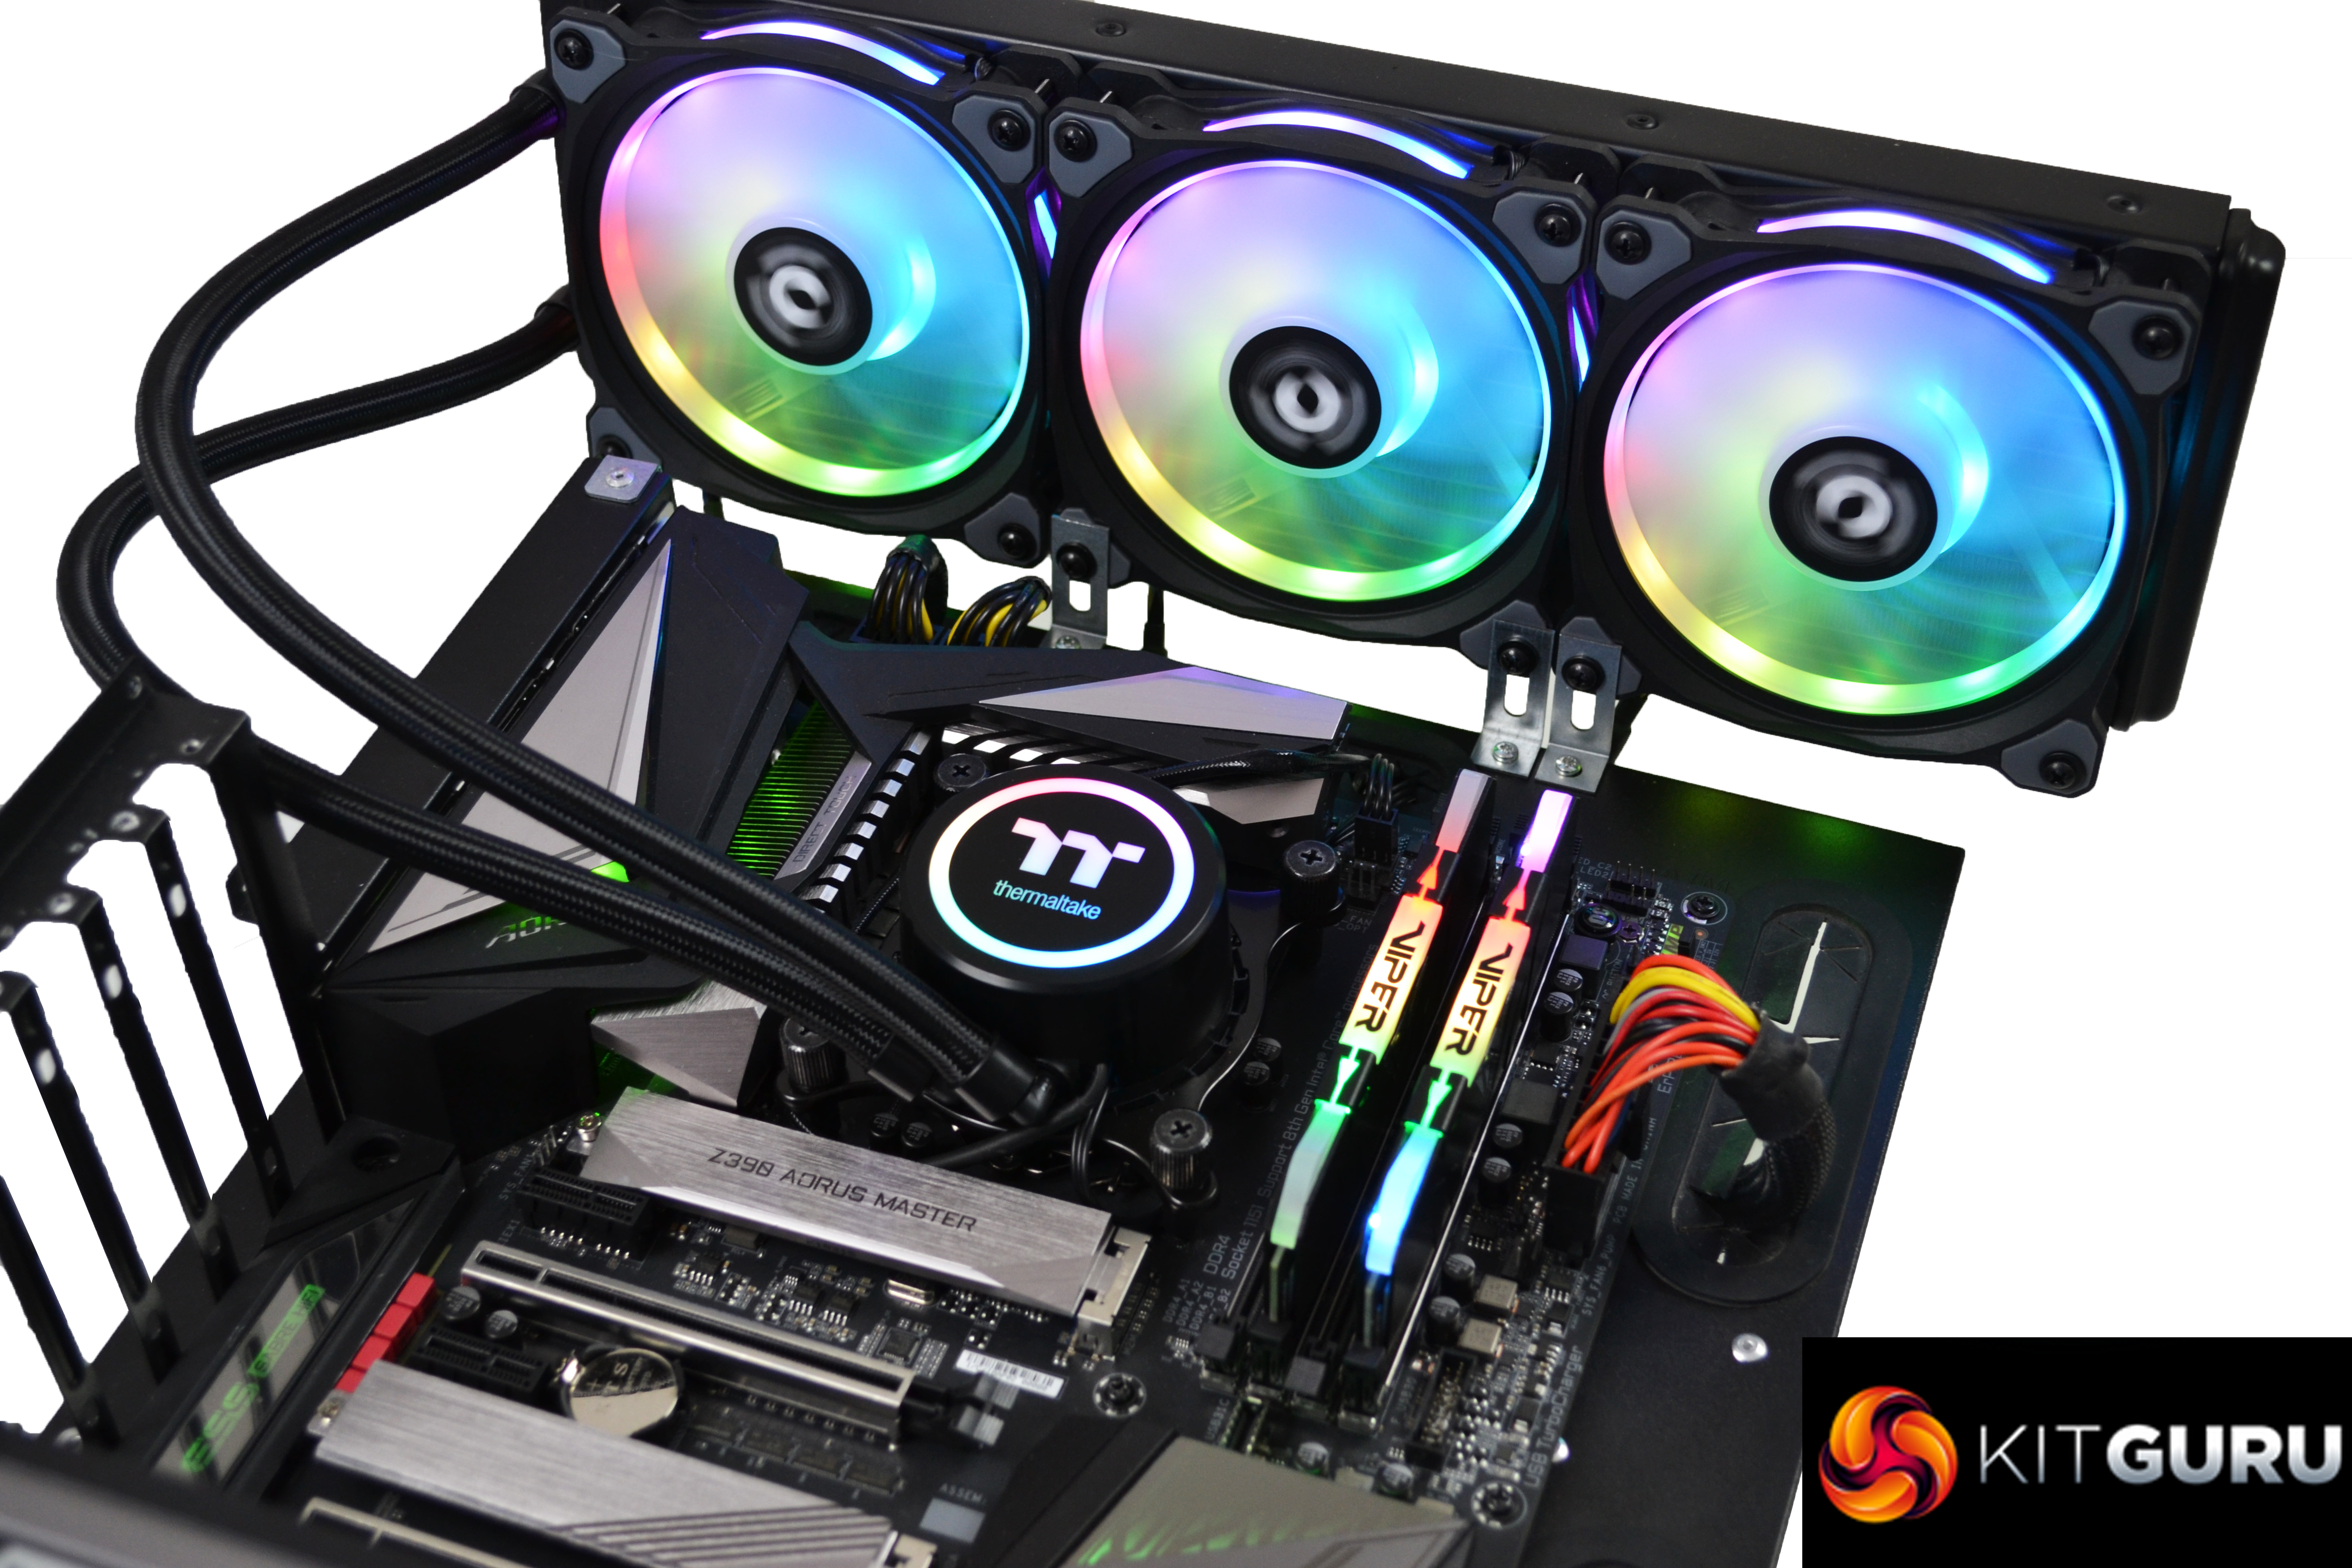
Once removed from the box and after uncovering the plastic wrapping, it instantly hits you how great this cooler looks. It has a real quality feel to it and so it should, since it’s in the higher price range for a cooler of this type.
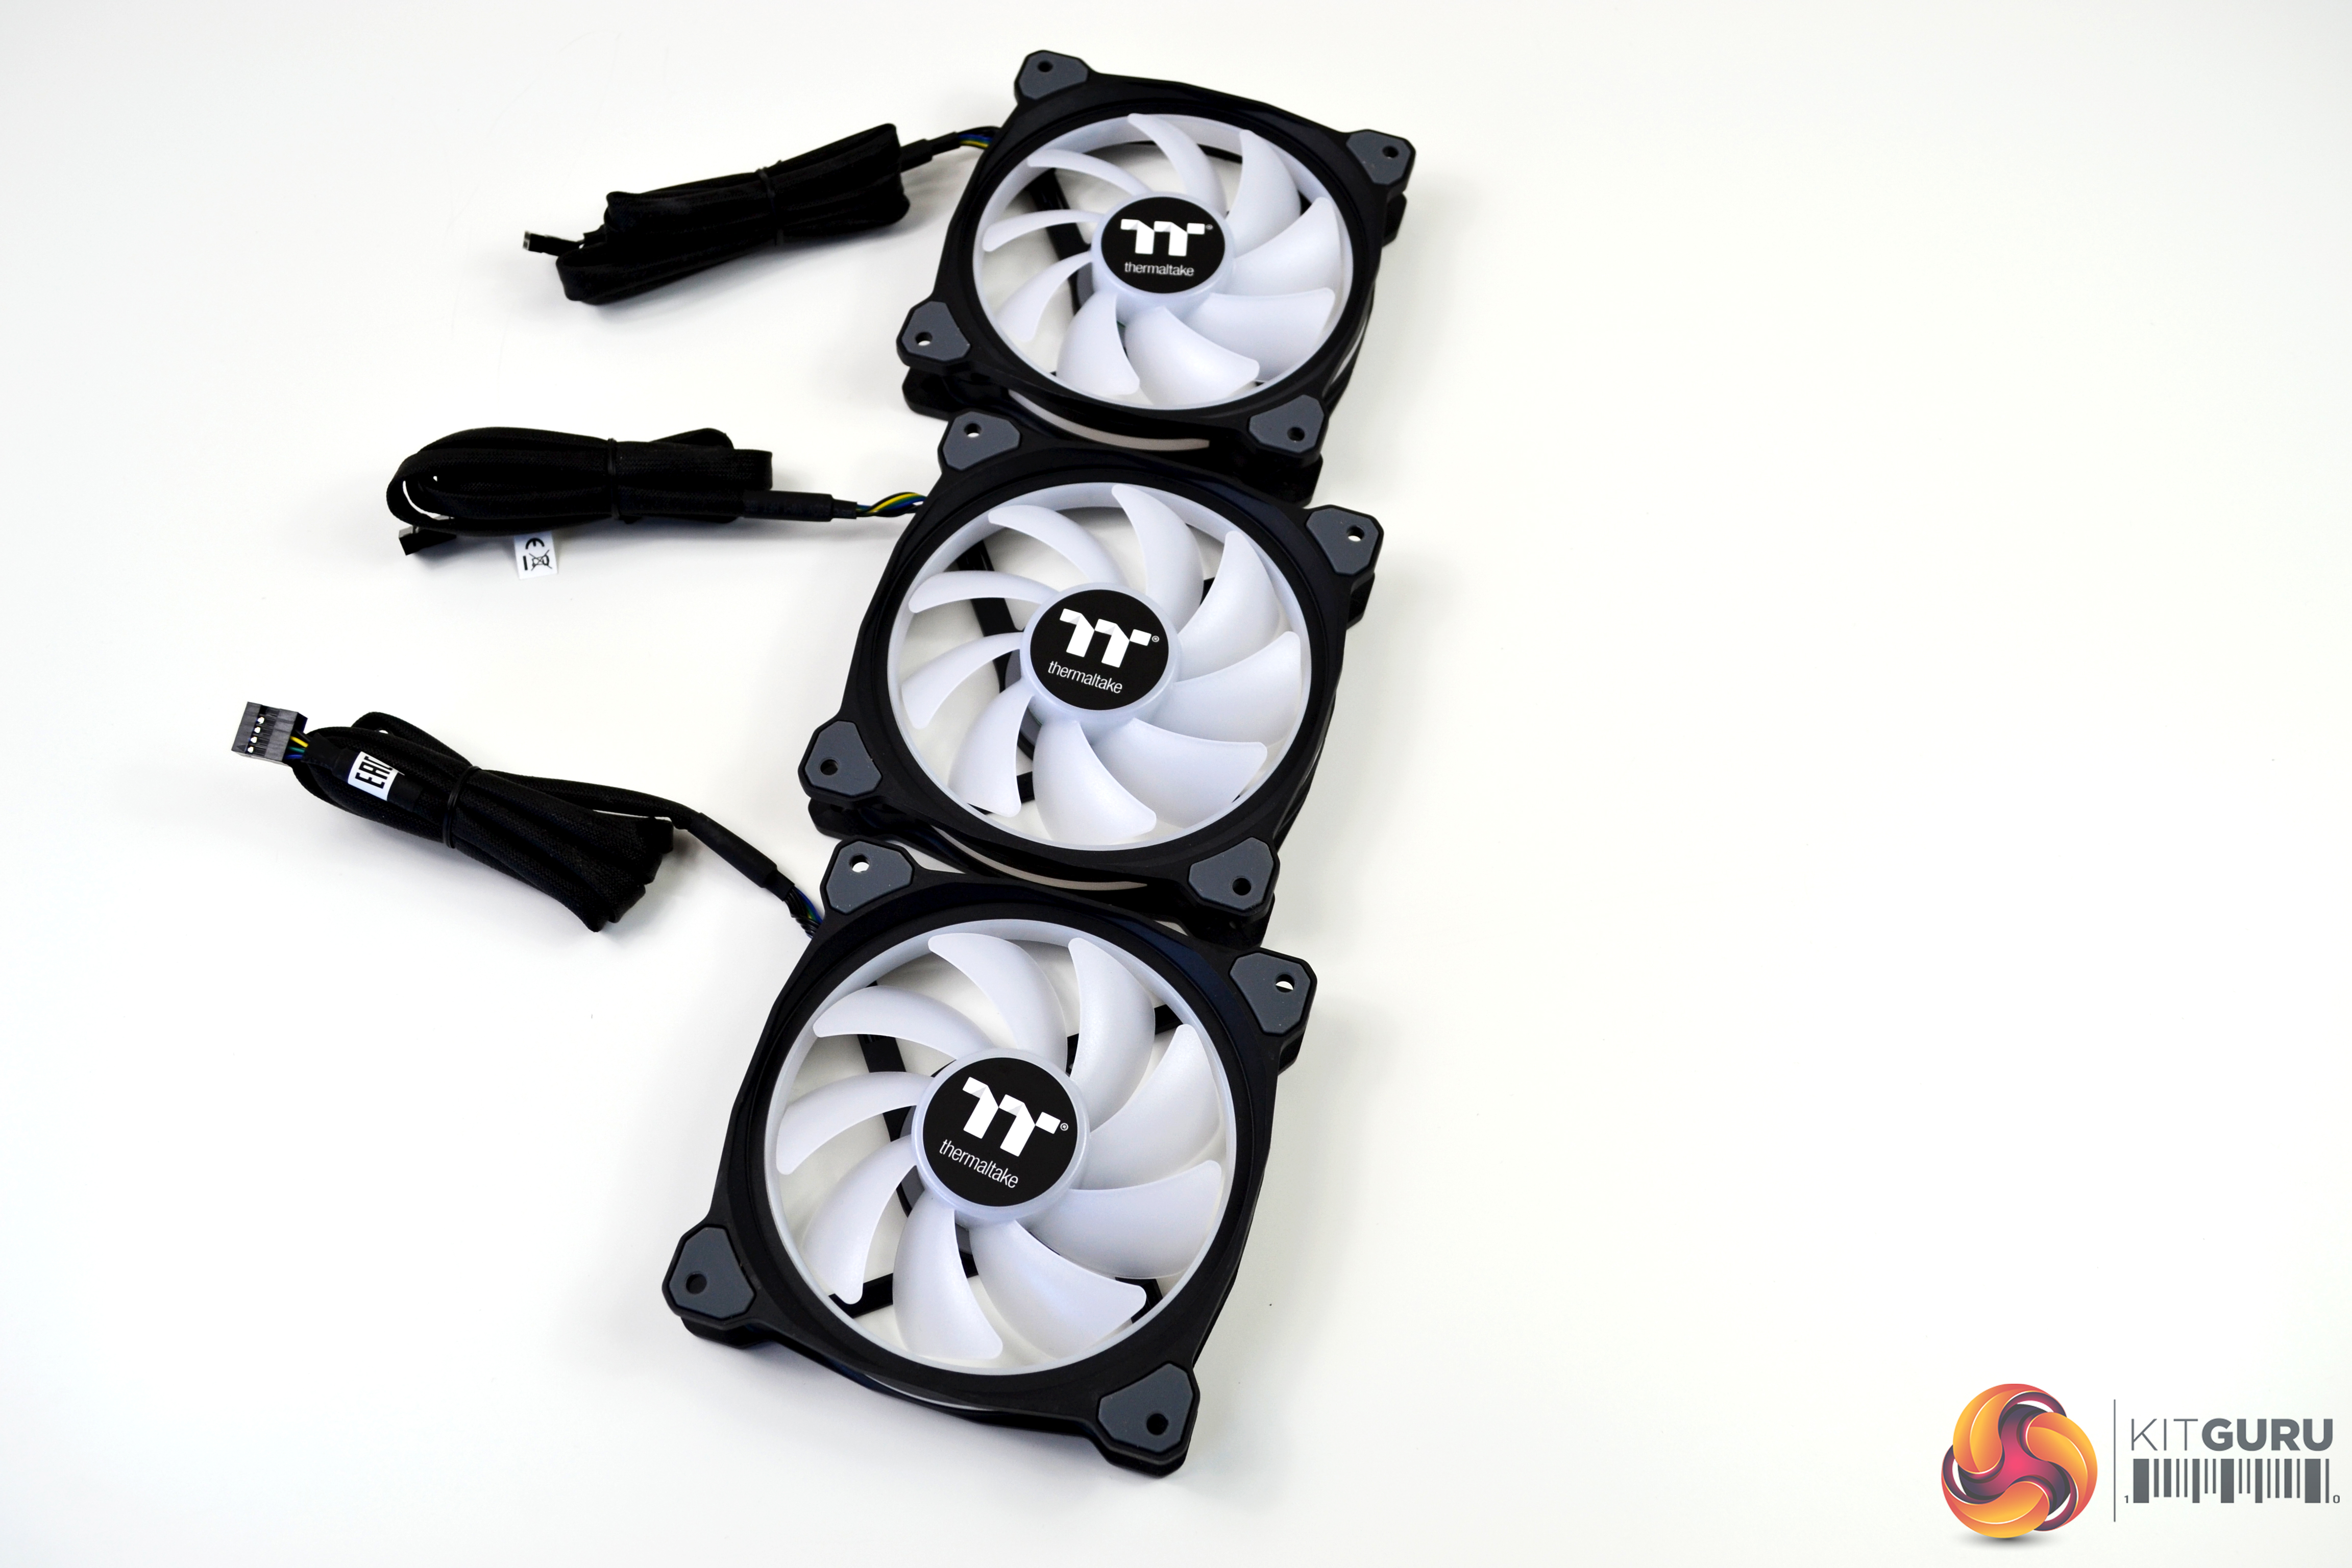
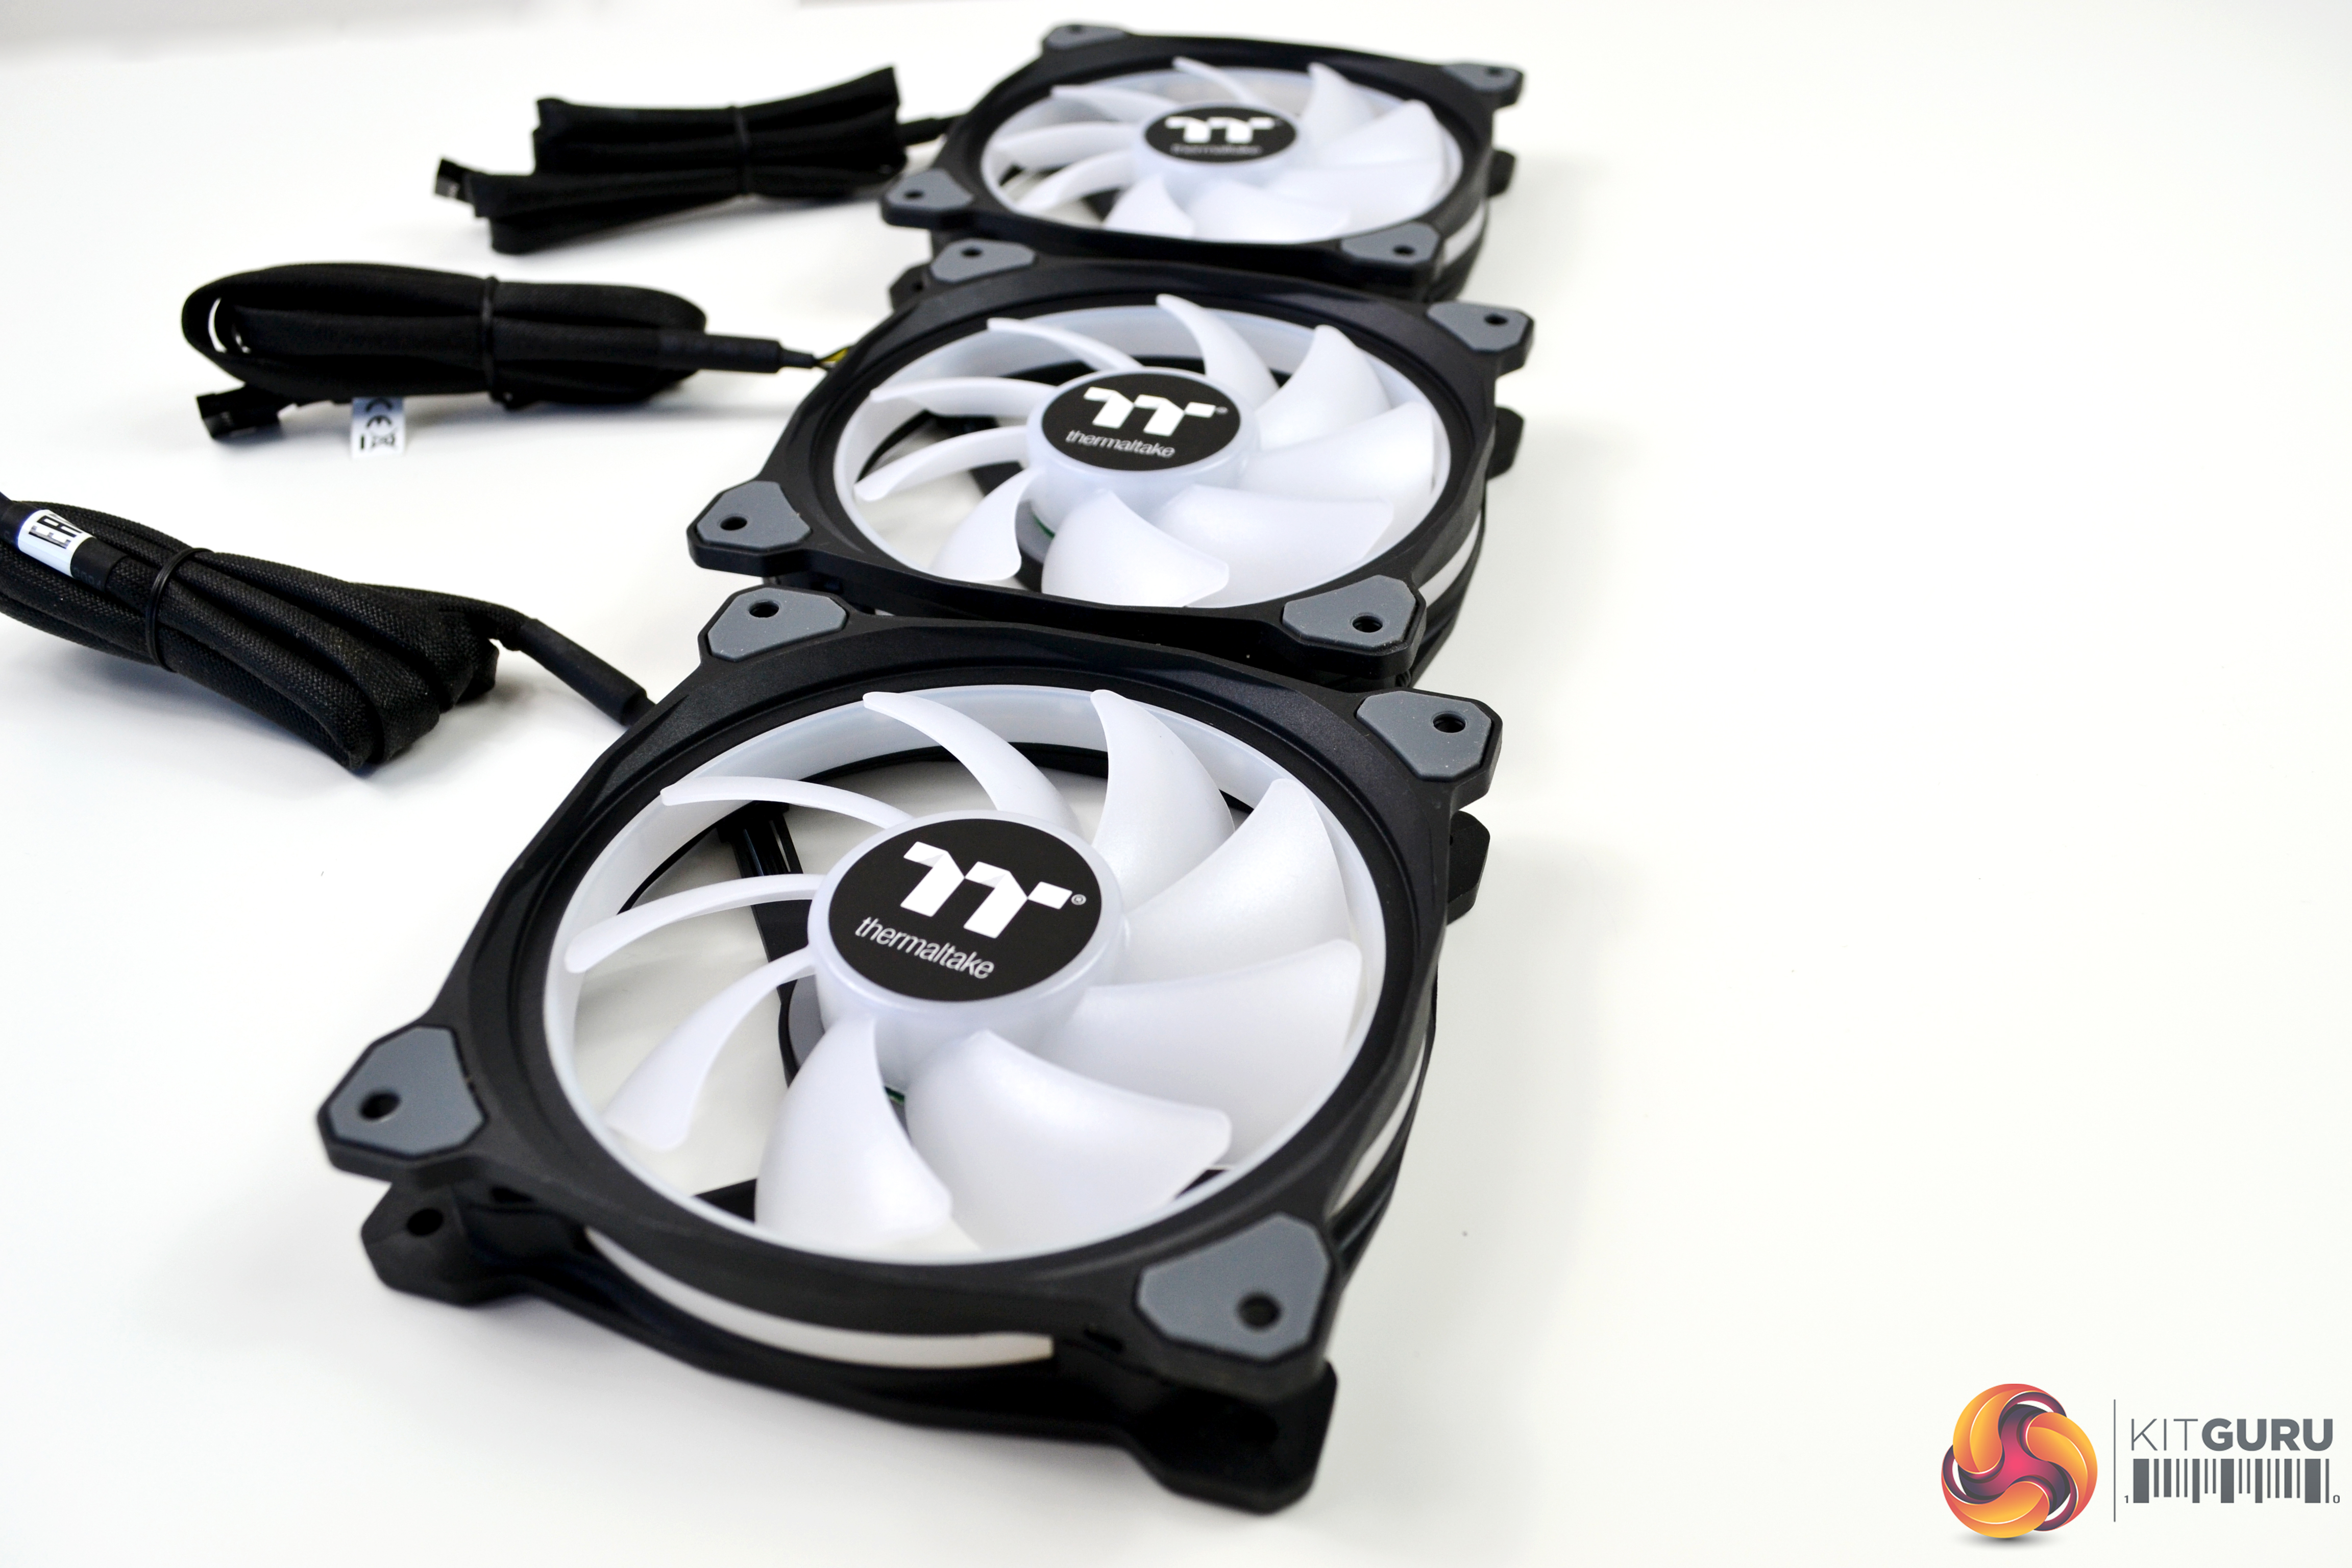
The three Ring Duo fans included are high static pressure, which look very clean even without the lighting on. There is some visually pleasing angular shaping to the four corners of the fans and around the mounting holes, there are anti vibration, noise dampening rubber pads. However, the fan cables have a proprietary connection, so cannot be installed on a standard three or four pin motherboard header and must be connected to the Thermaltake RGB control module included. The cables connected to the fans measure a huge 920mm in length.
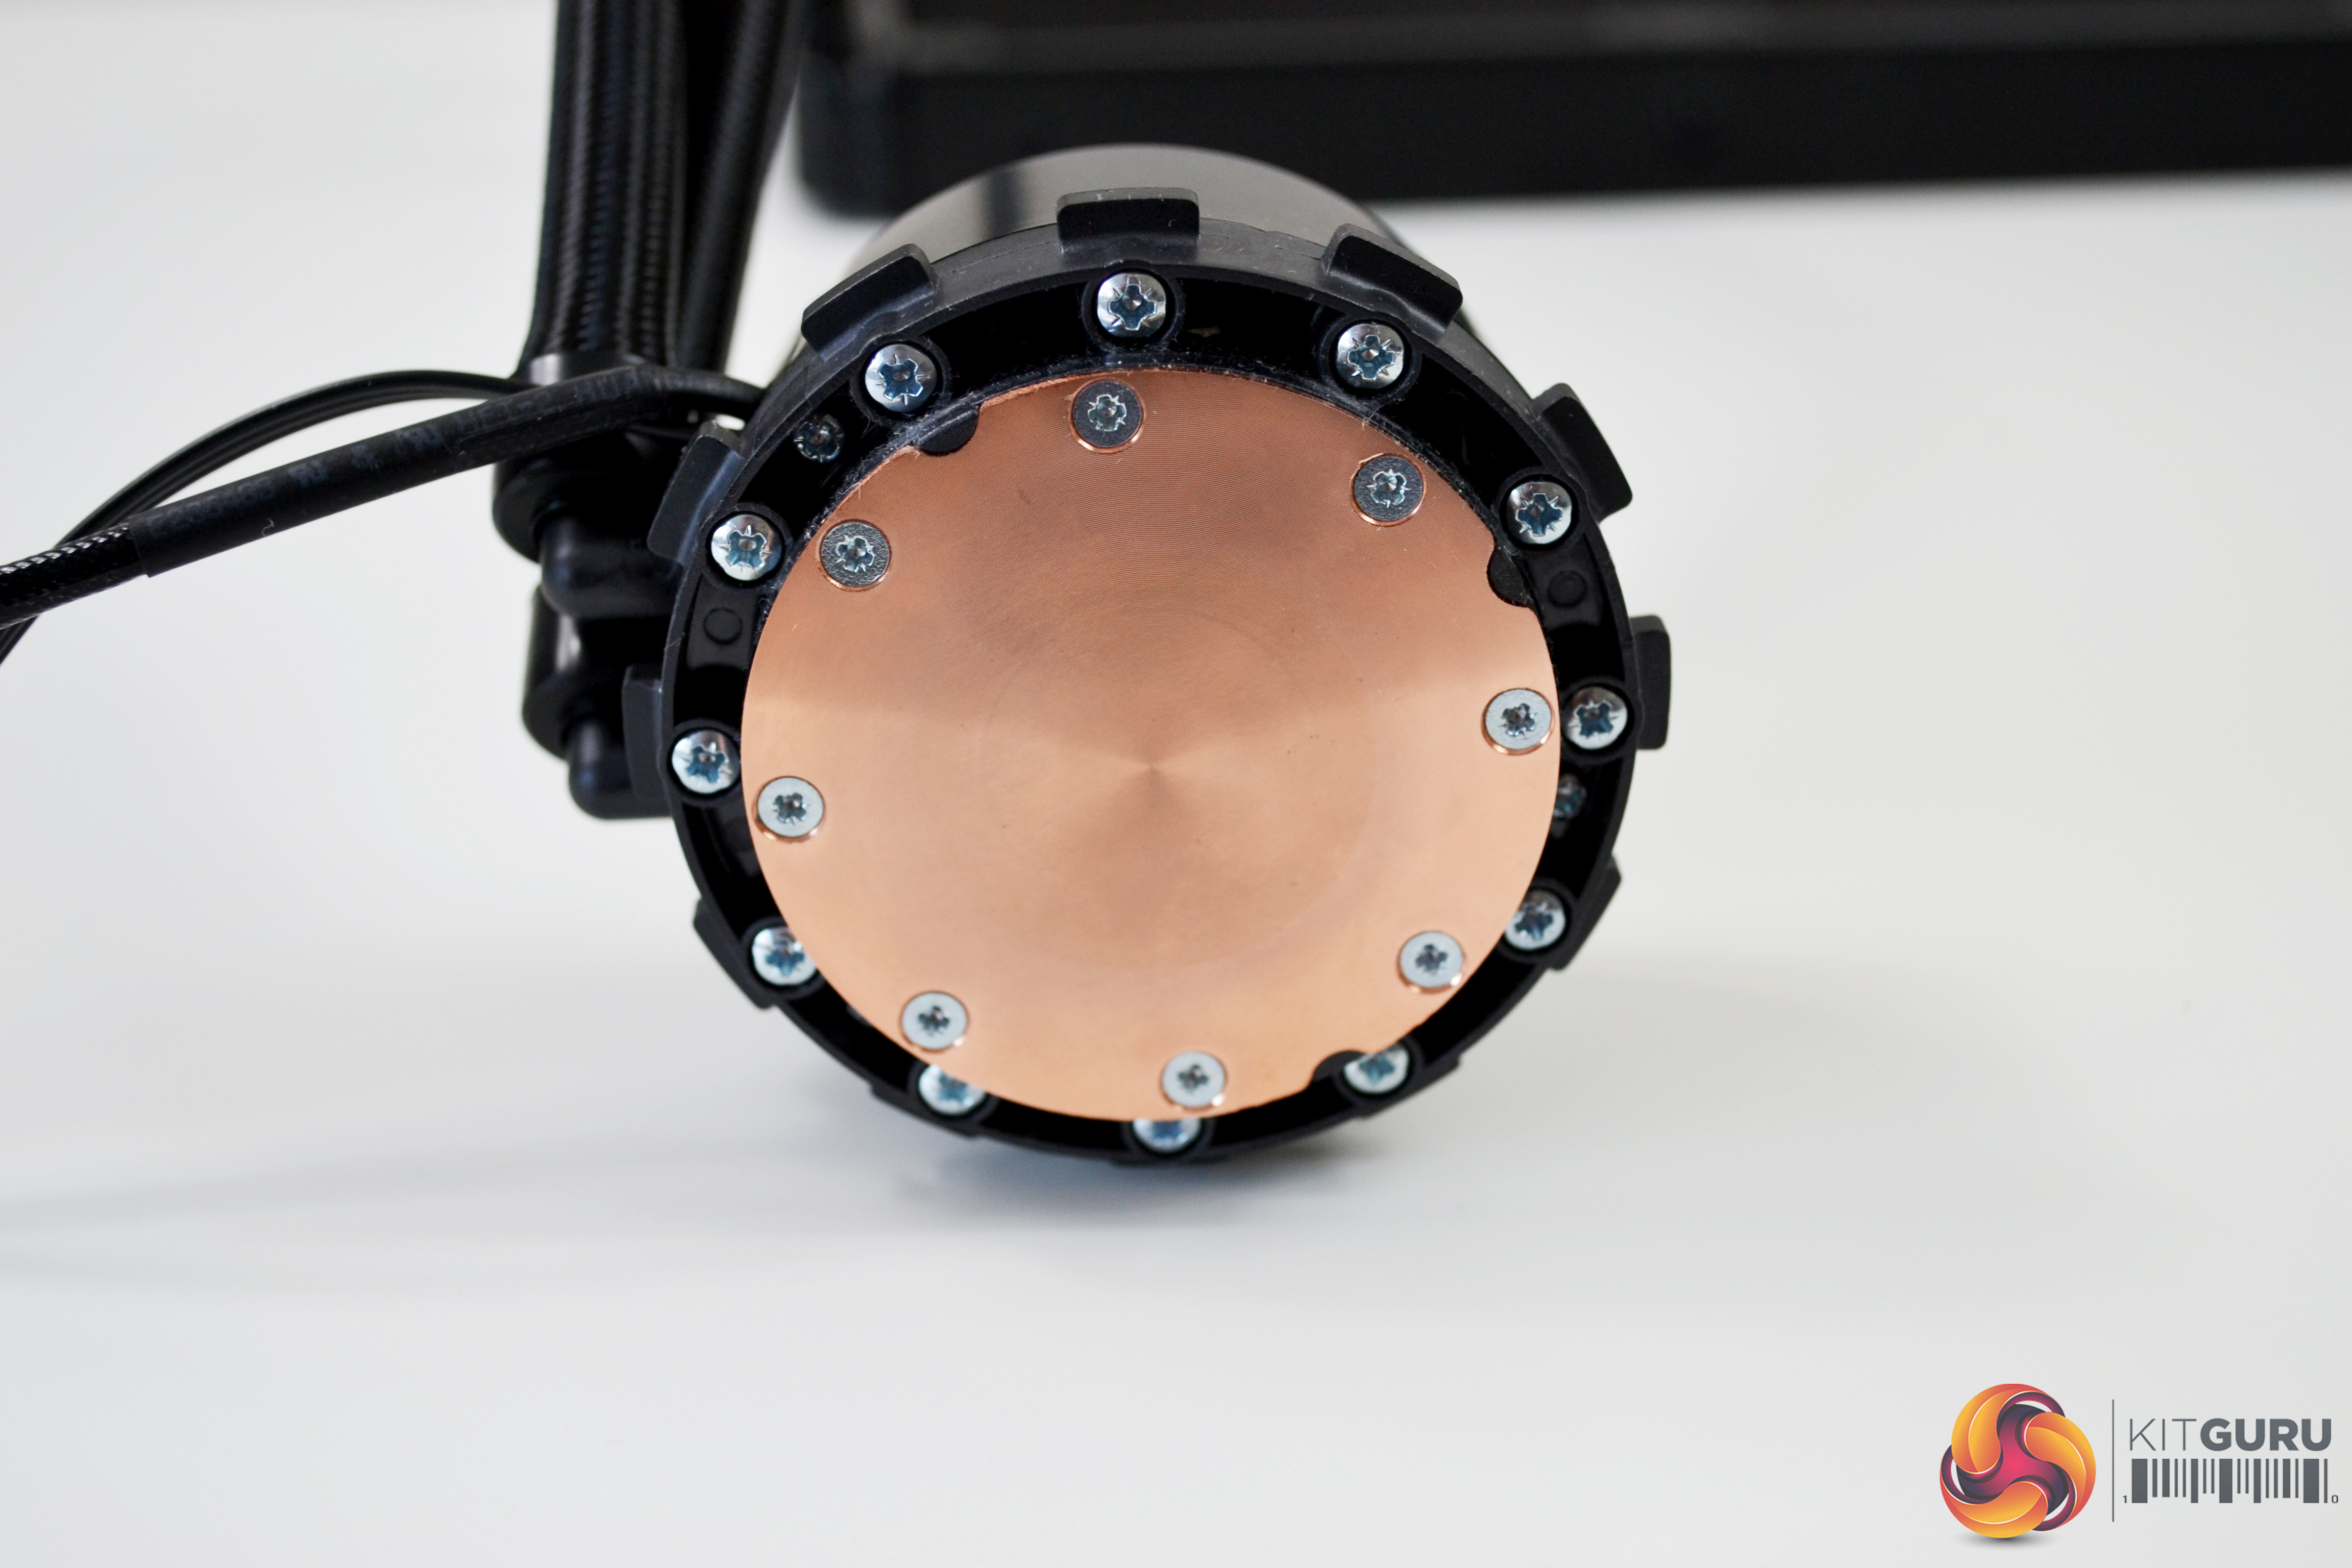
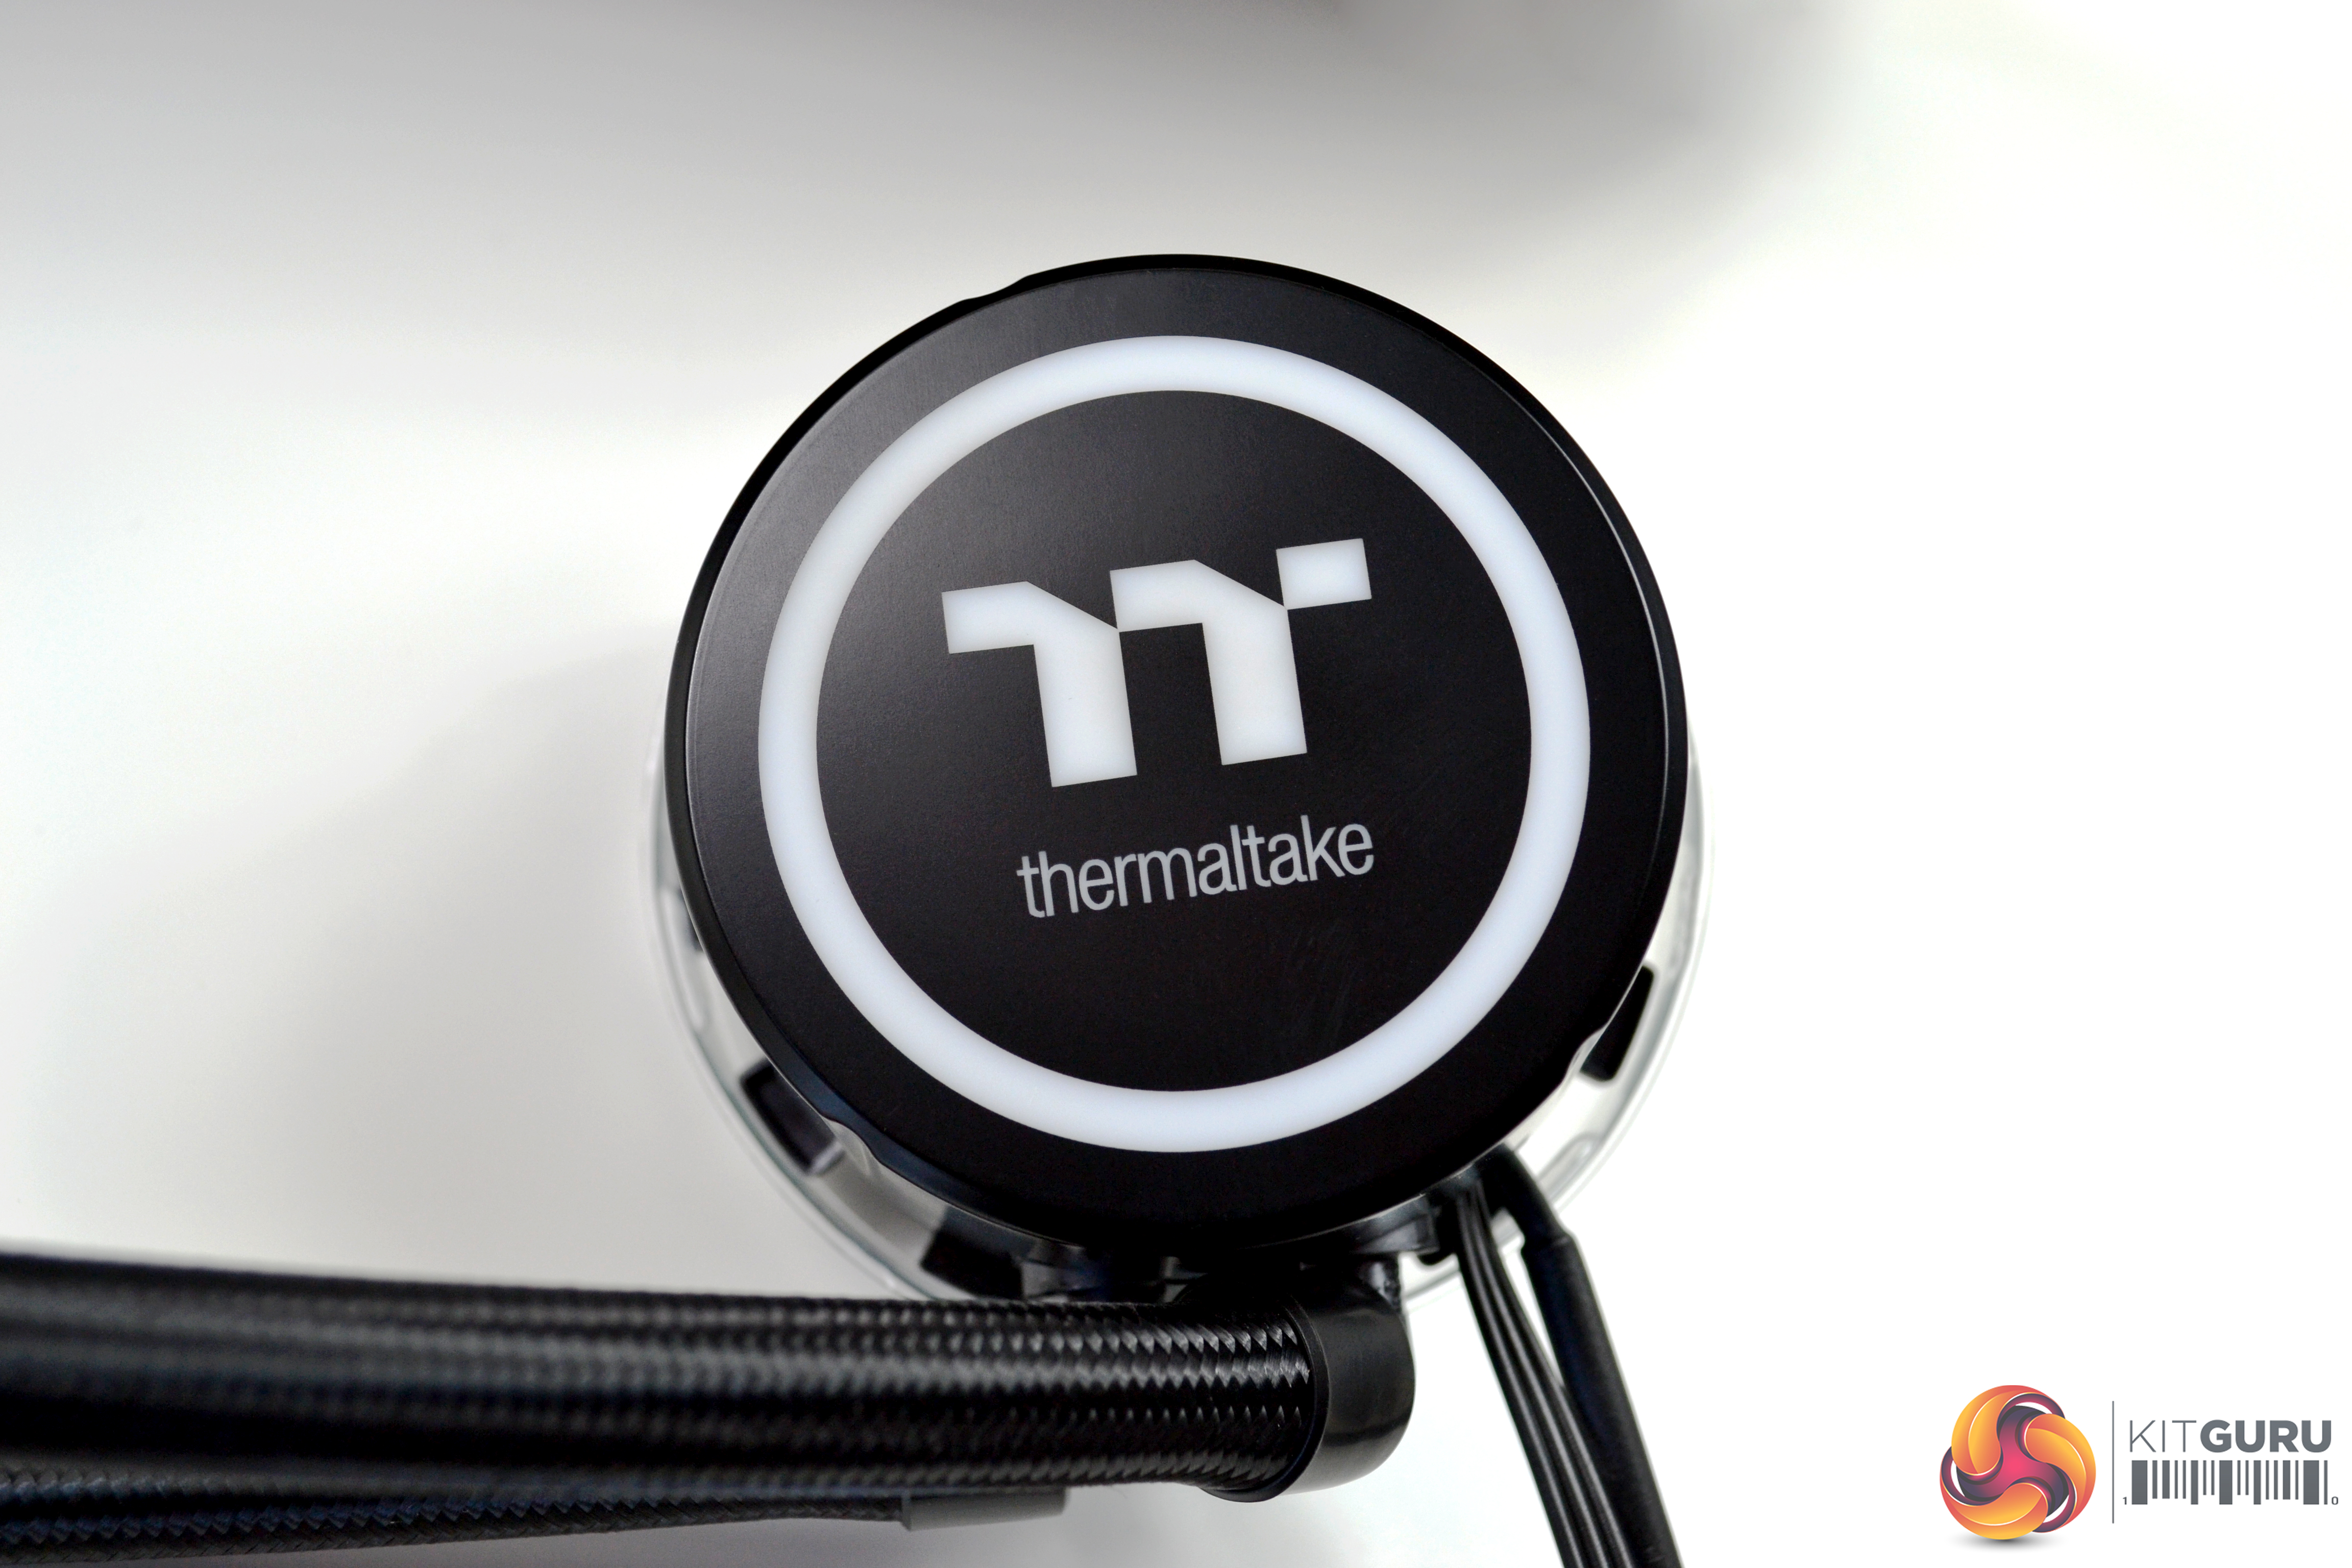
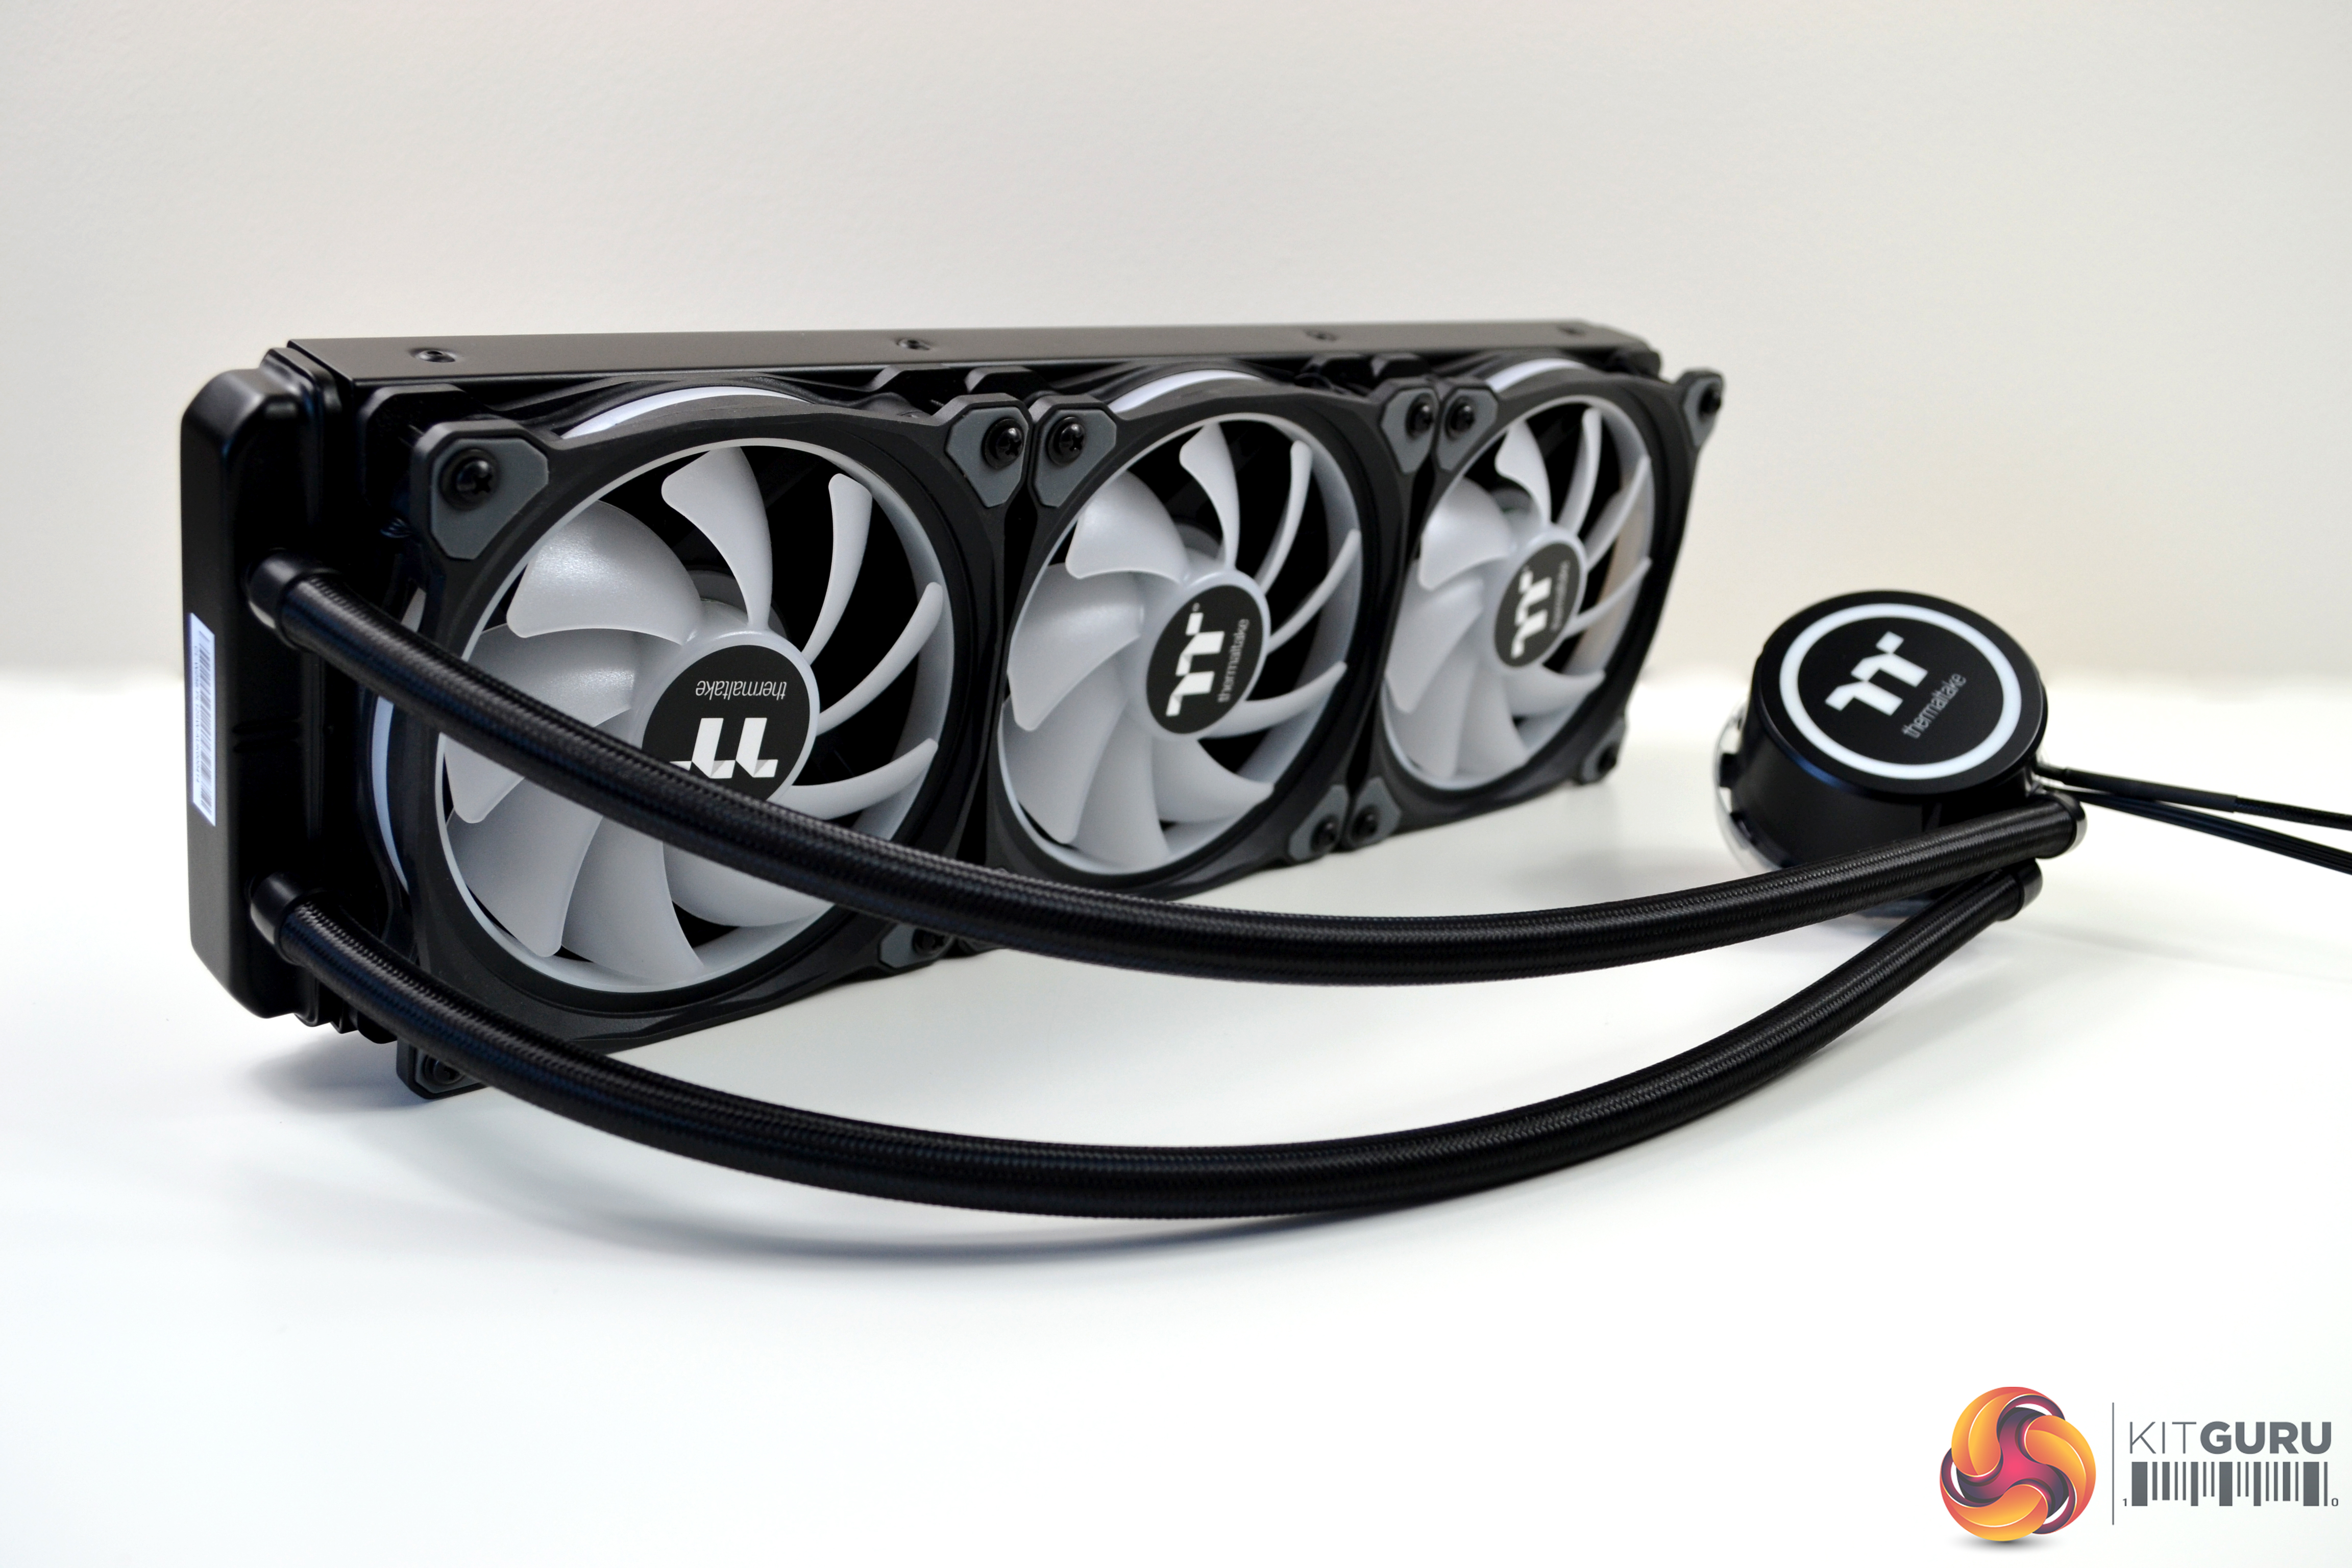
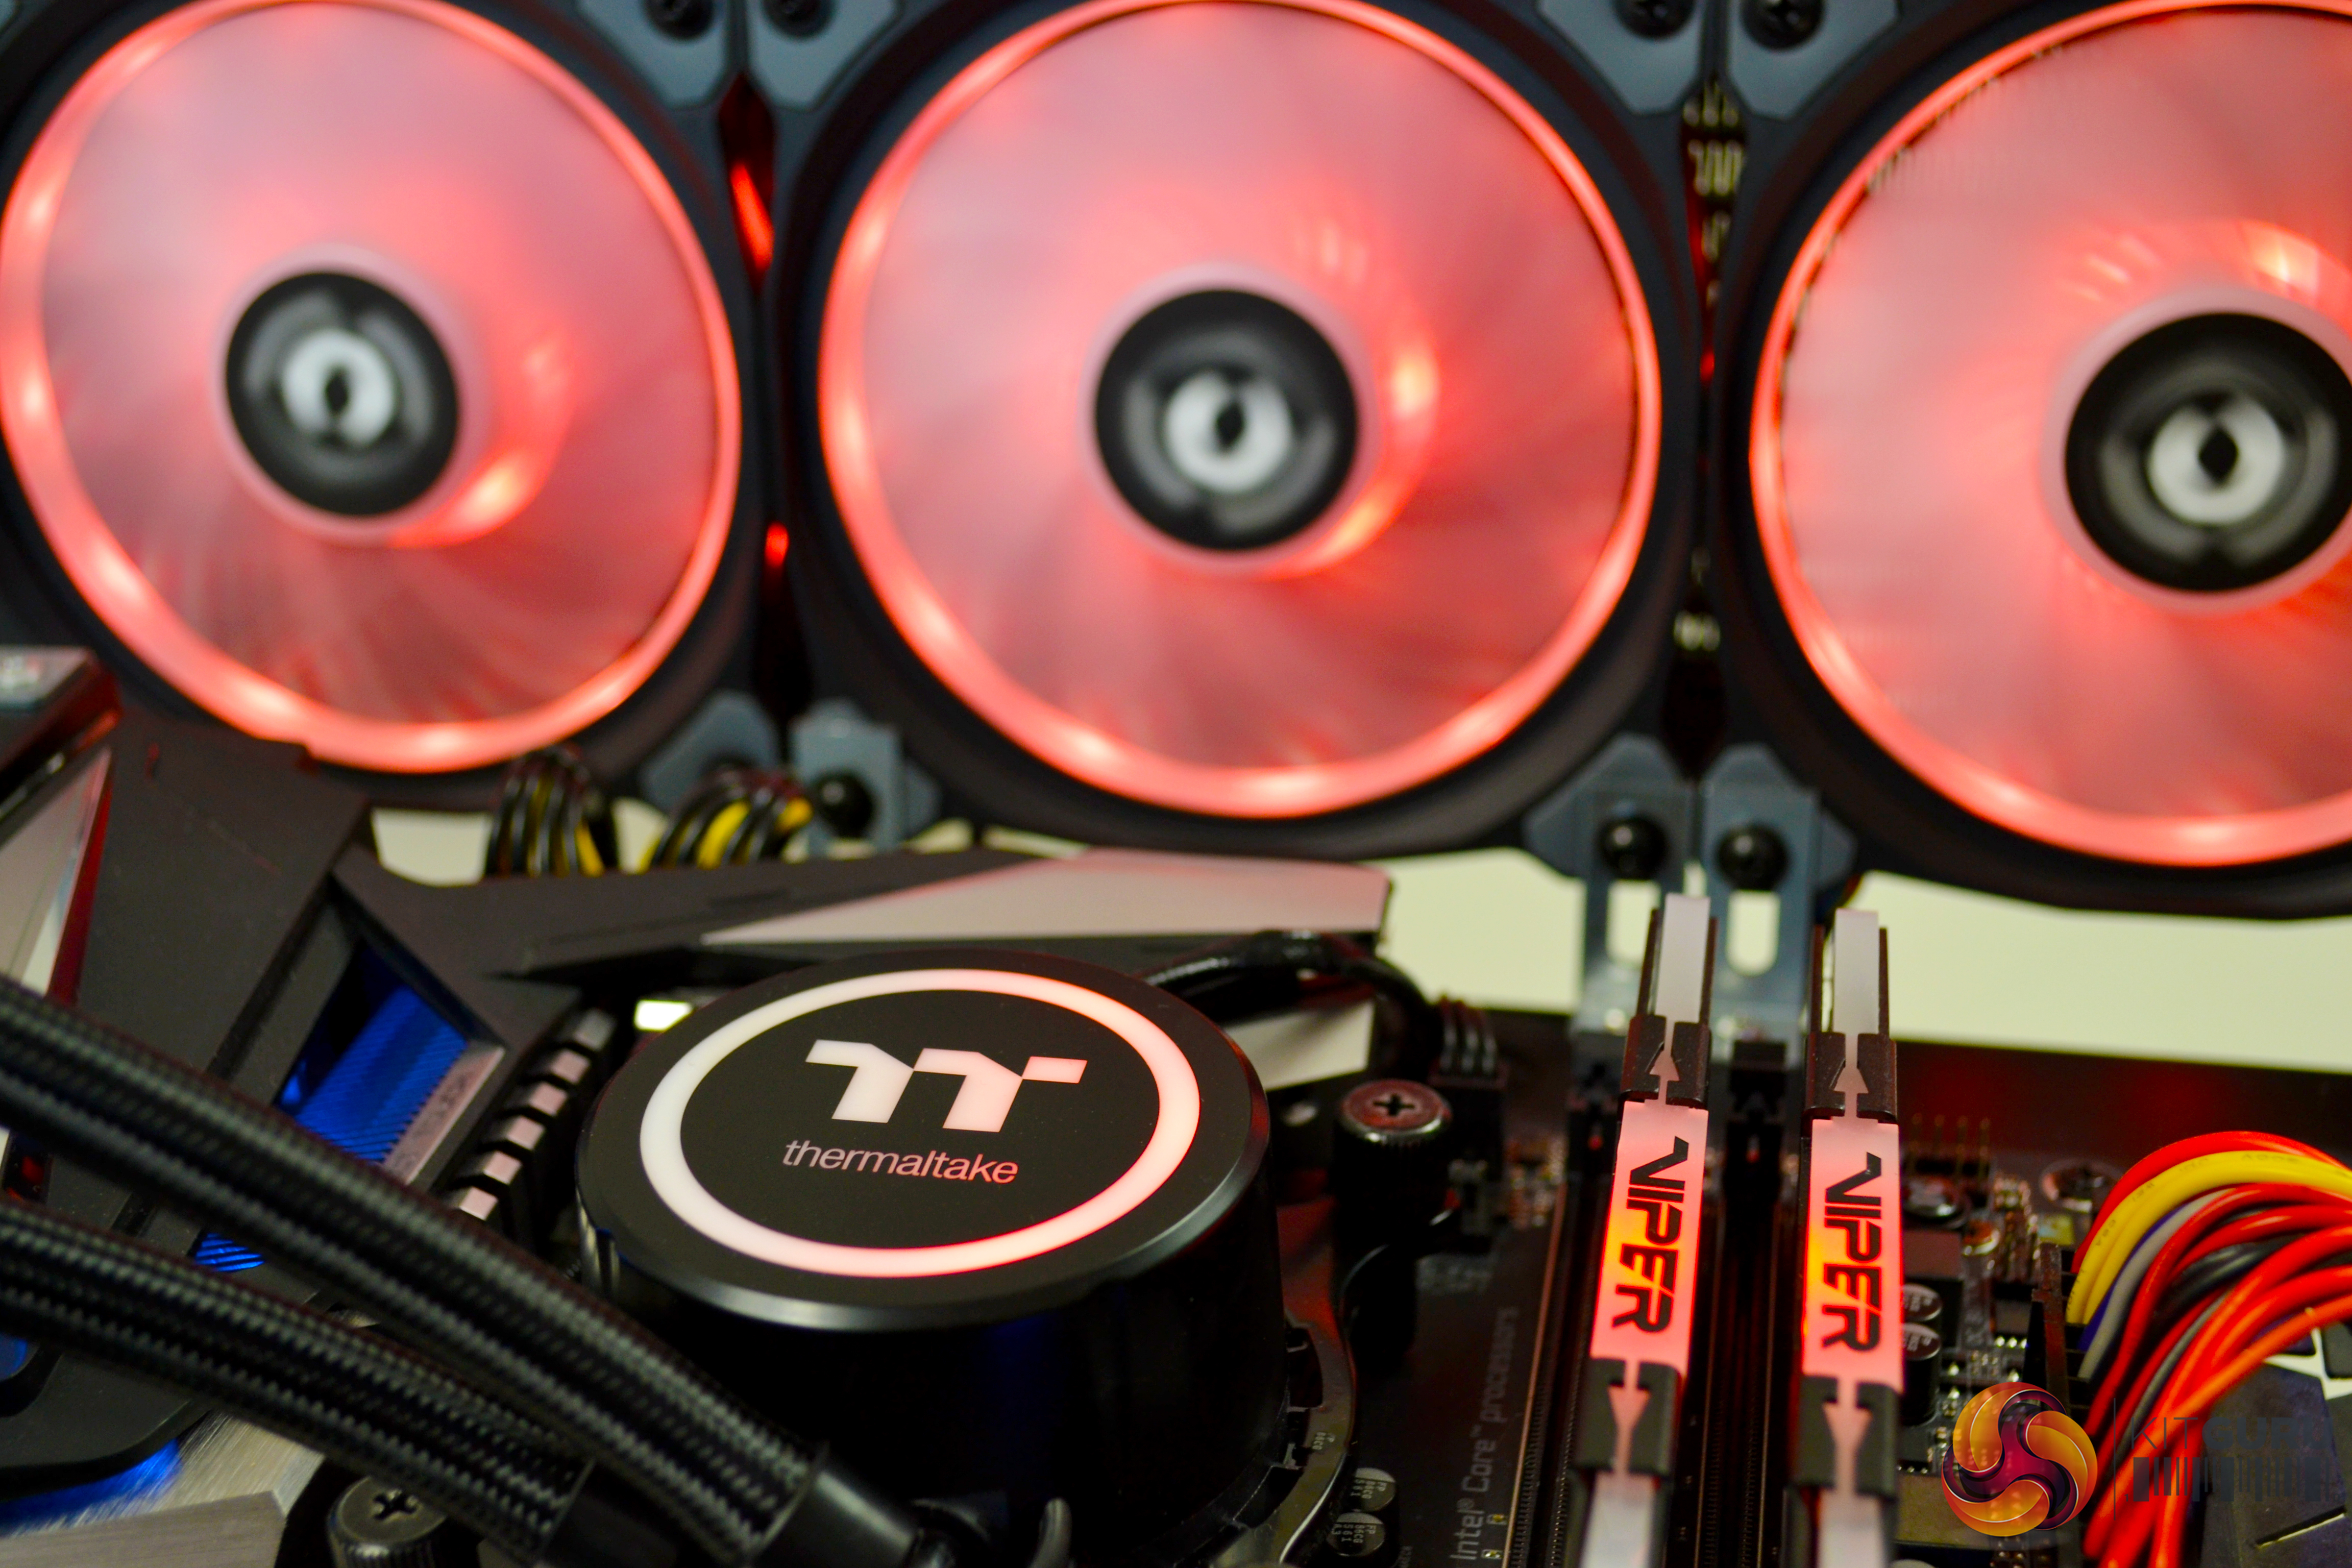
Looking at the CPU block/pump, it seems to be accurately machined and manufactured from high quality copper. The pump, which is rated at 12V 3600RPM, is contained in a black plastic housing, which has an RGB ring around the perimeter and the Thermaltake logo in the centre is also a RGB zone. Thermaltake state that “Combined with a copper base plate and a reliable pump, the Floe DX series provides high performance and unparalleled heat dissipation”. After carrying out our tests, we will find out how good the performance actually is.
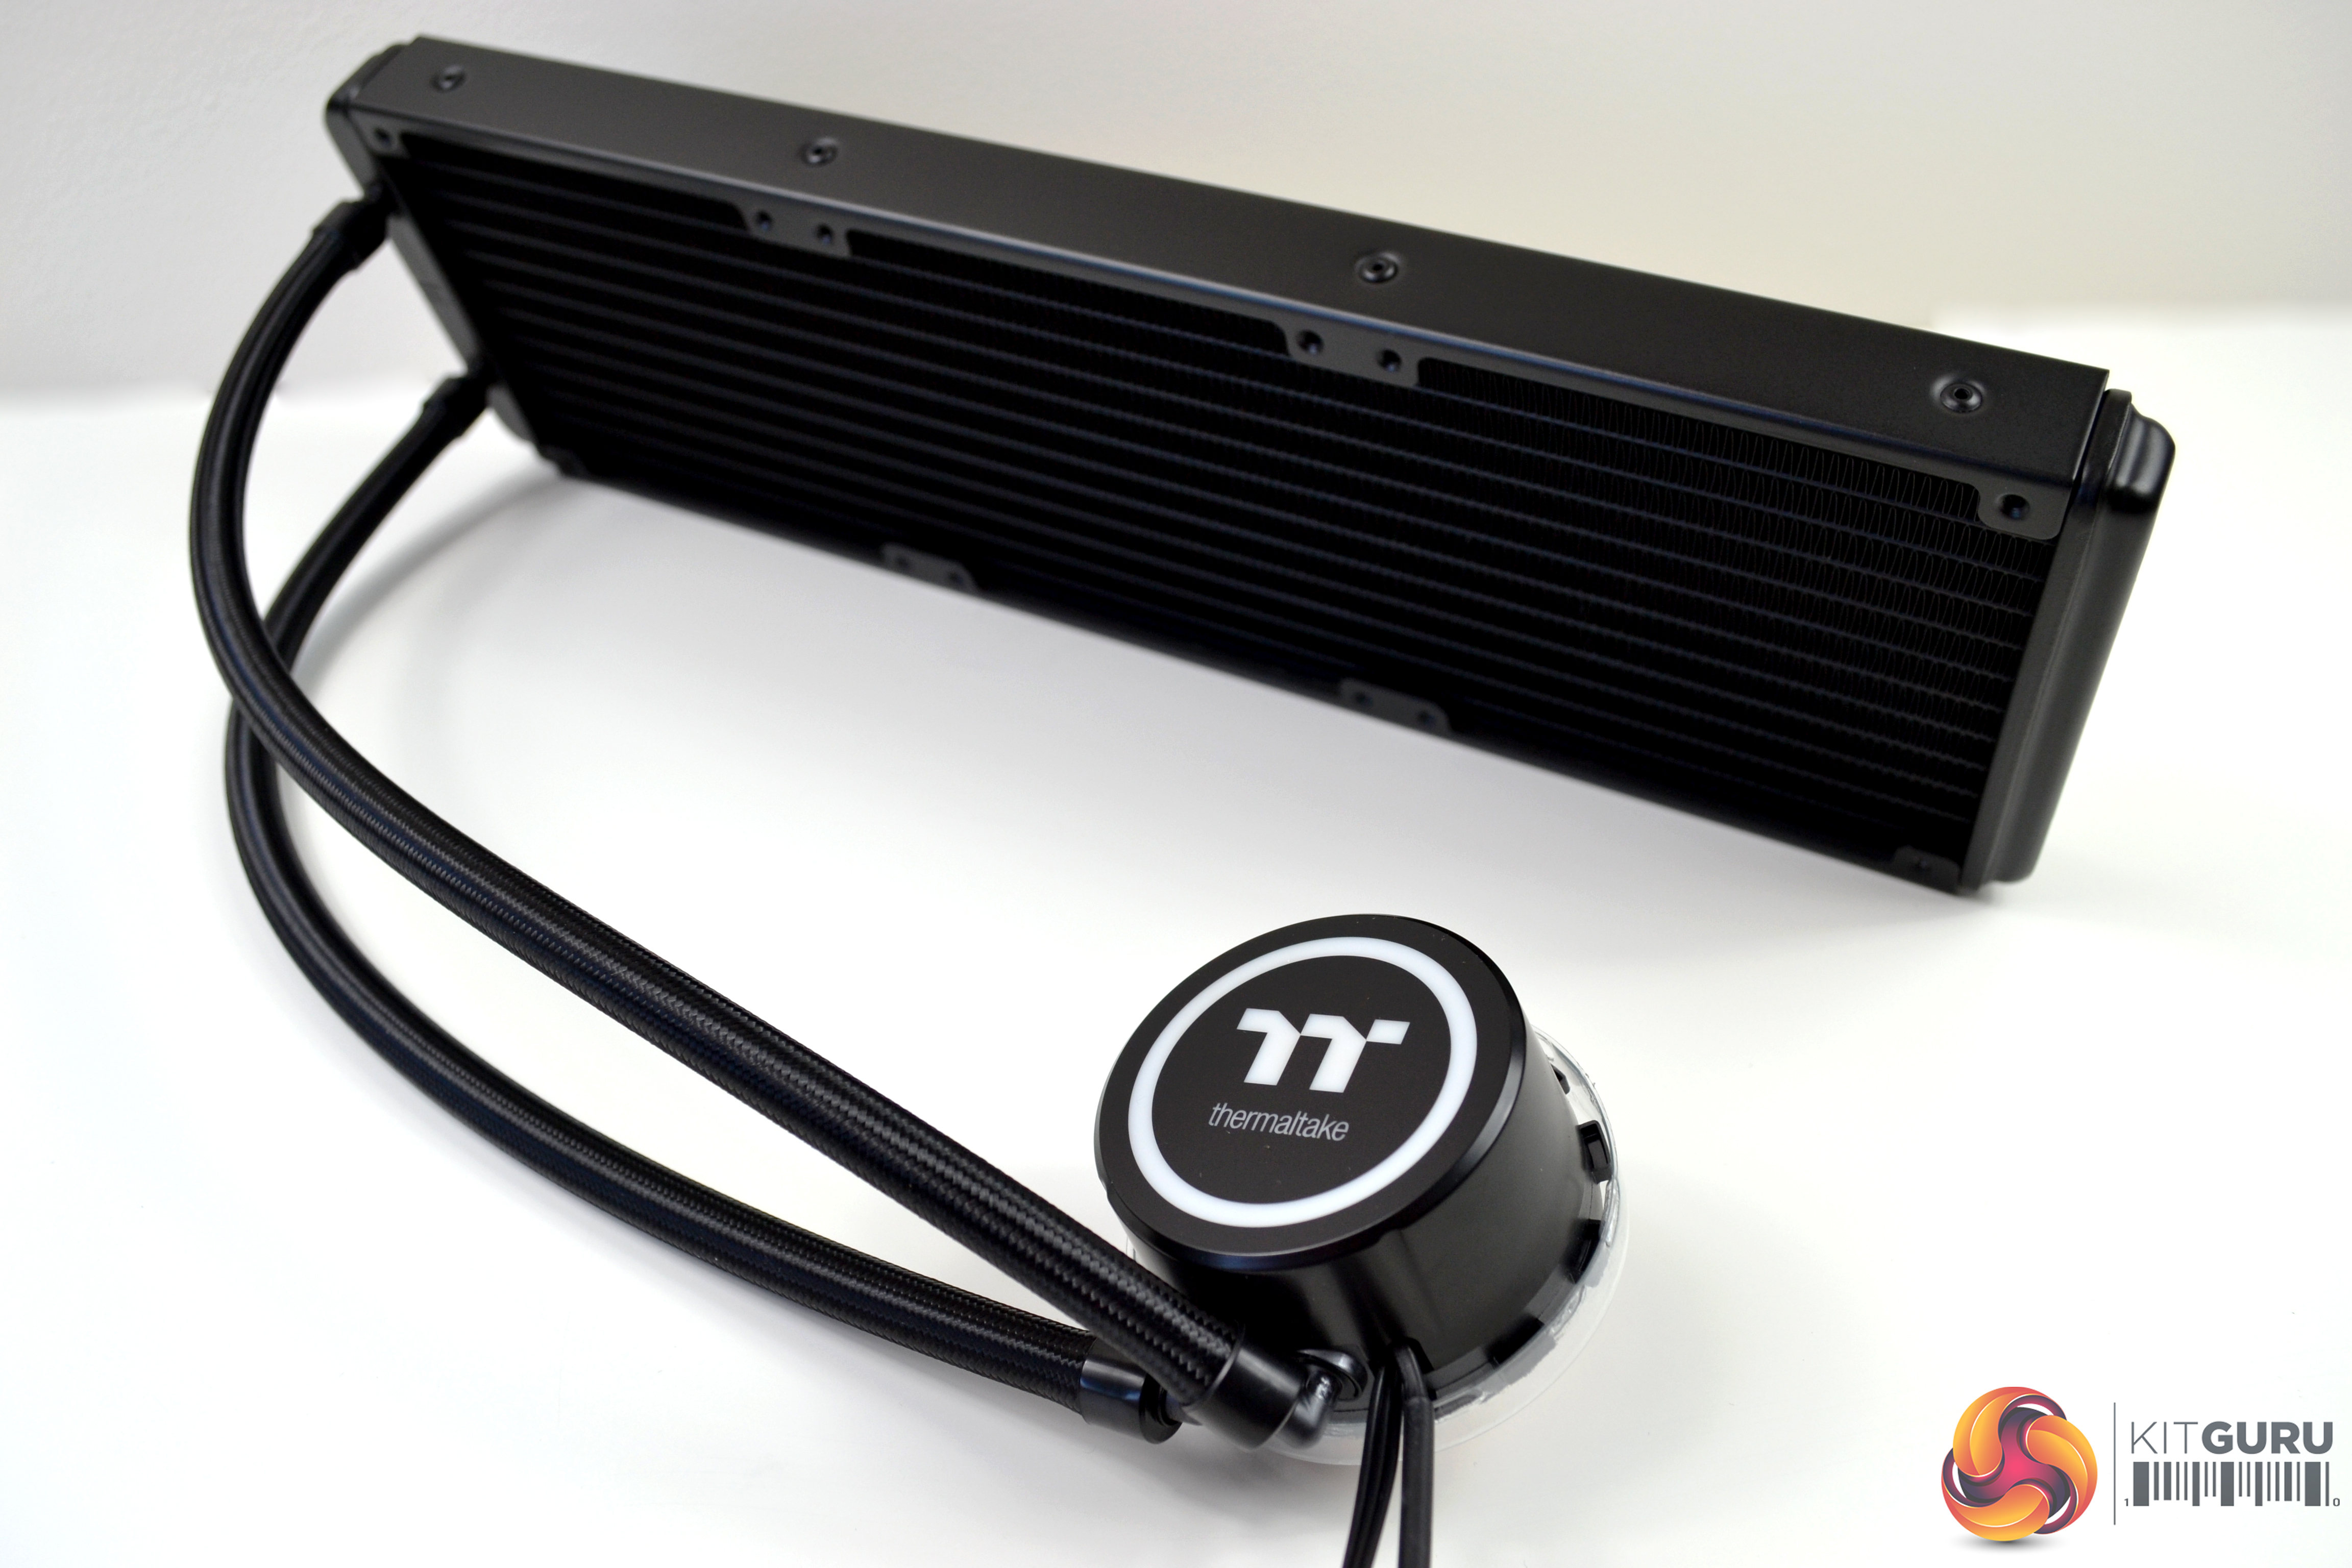
Moving onto the radiator, that too looks great. There isn’t much that can look wrong about an all-black Asetek patented radiator, though, to be fair. The dimensions of the radiator are 390mm long, 120mm wide and 27mm deep without fans fitted, increasing to 52mm thick with fans installed.
As we have examined with many All-In-One coolers recently, the tubing is rather narrow, at approximately 11mm, including the braided sleeving. Due to the size of the cooler, it does look a little out of proportion. The walls of the tubing are reinforced, so are strong enough to allow reasonably tight bends without kinking.


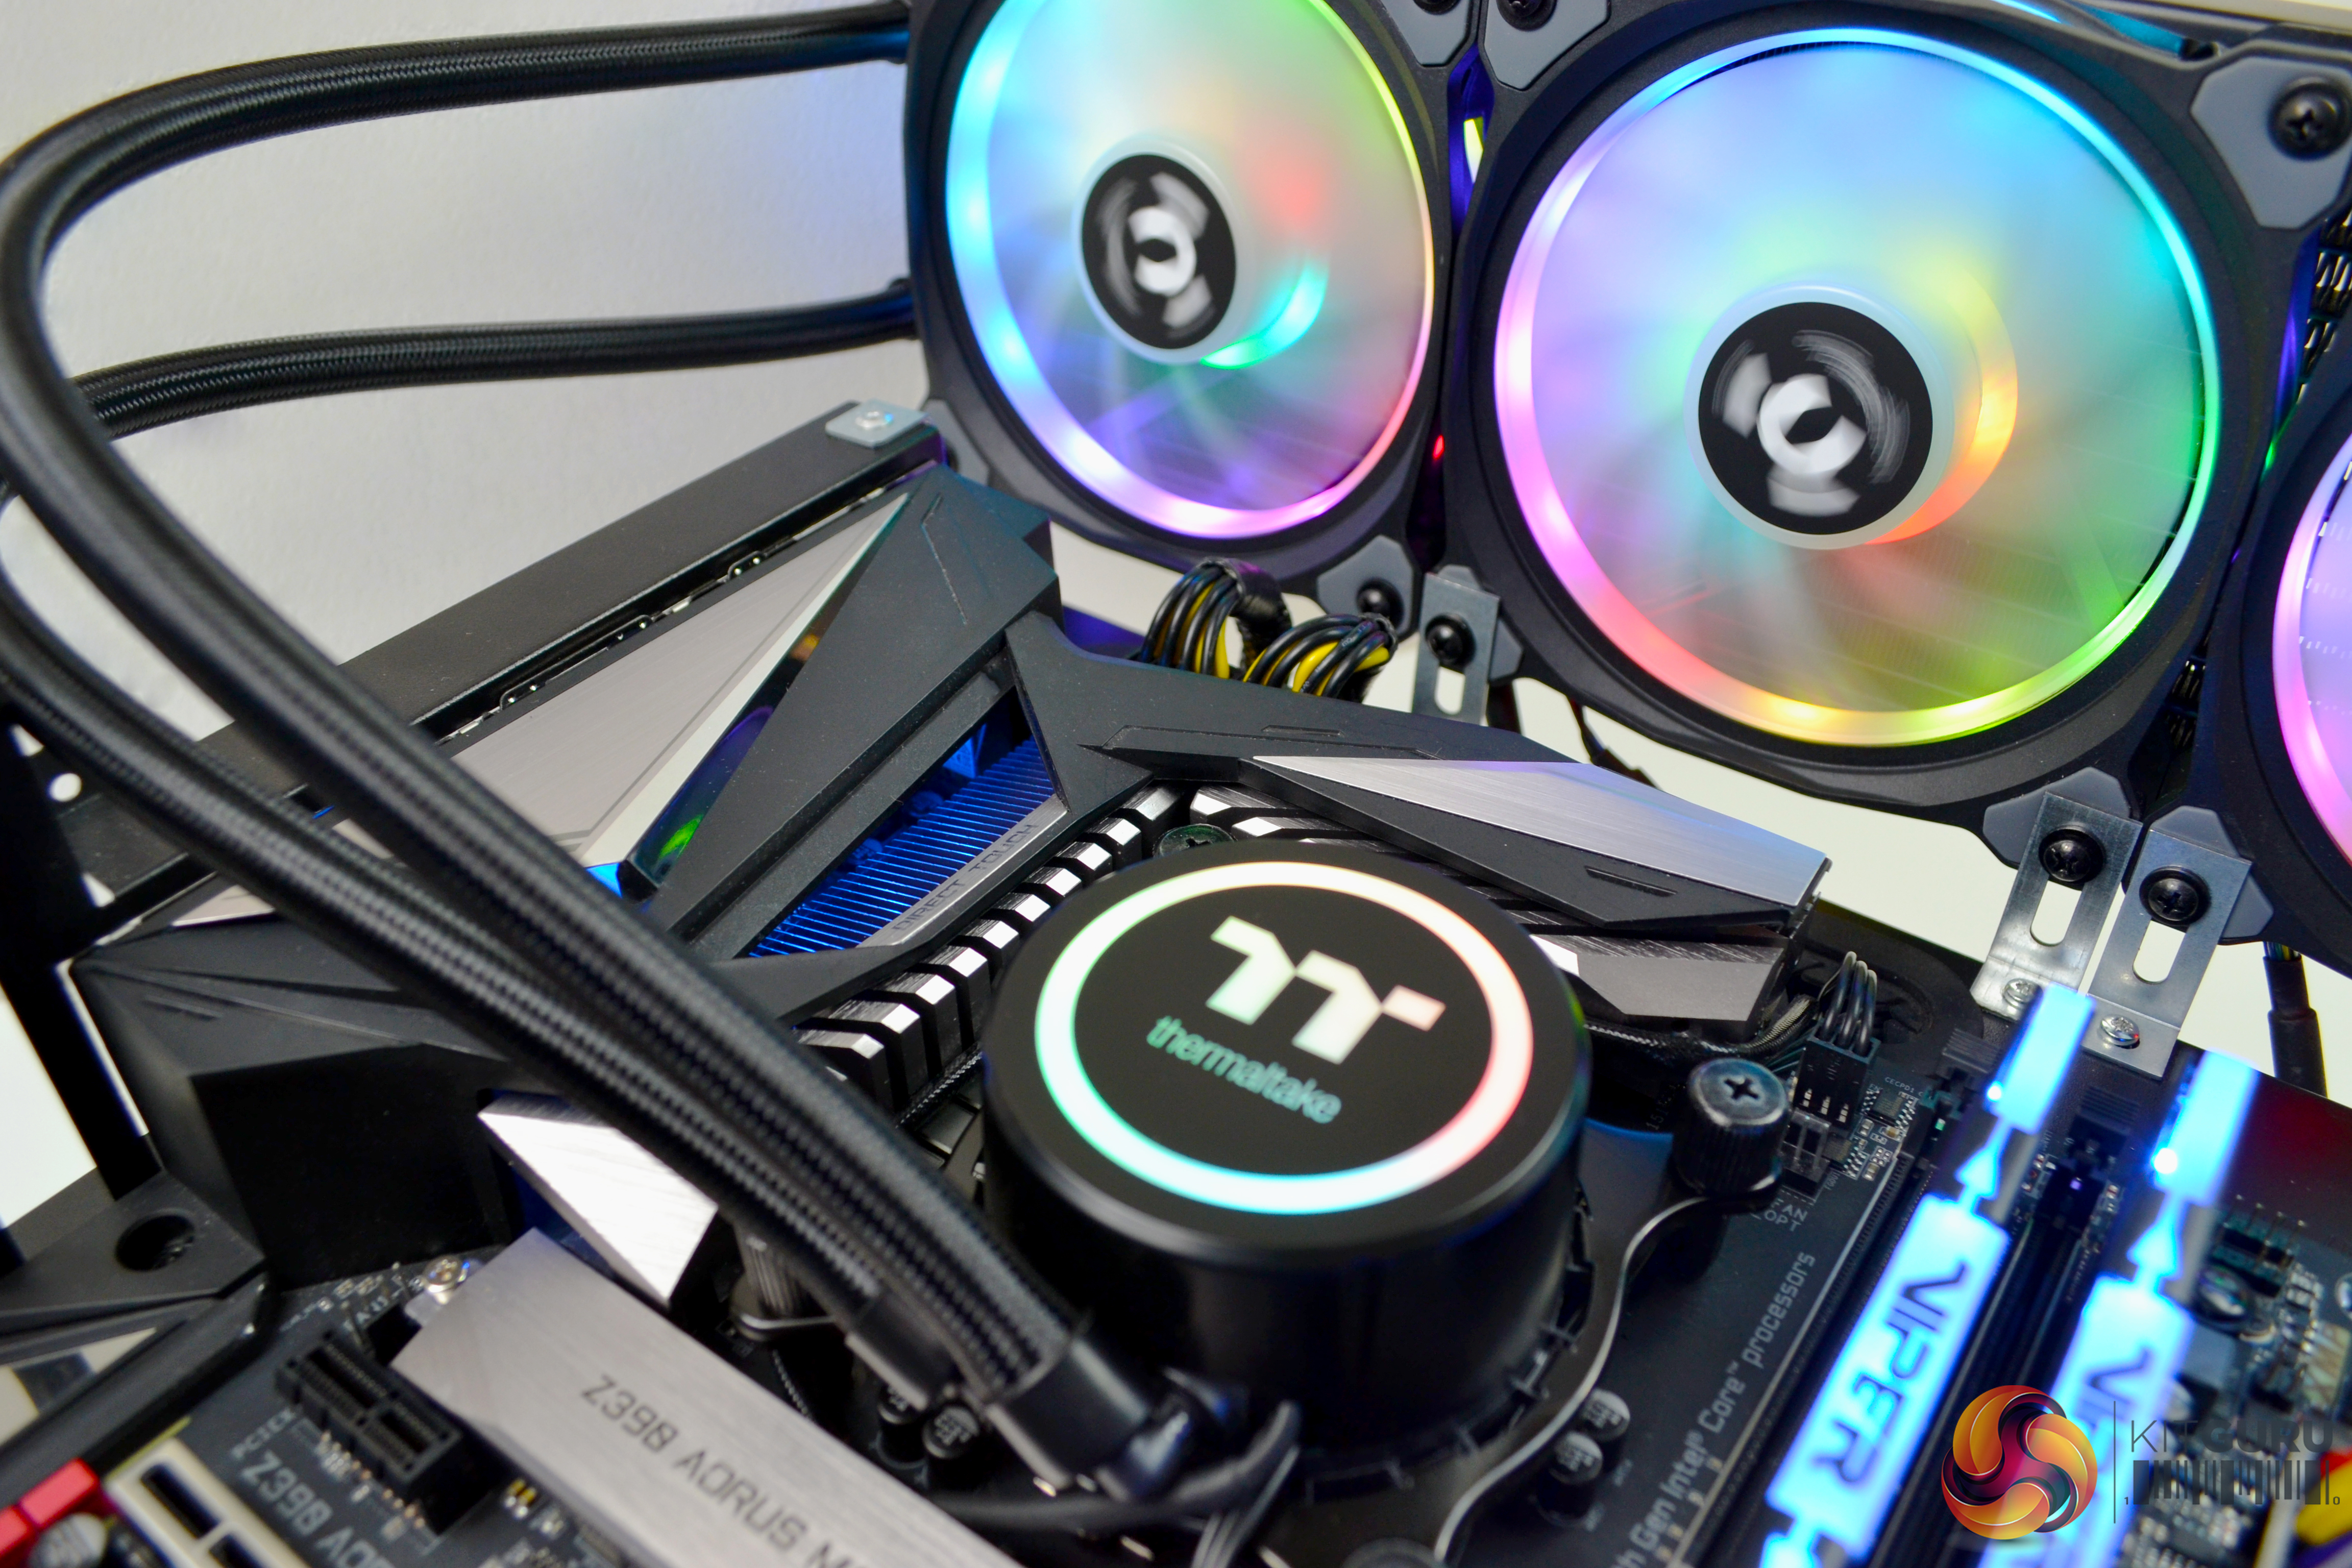
We were excited to see how this cooler looked, once powered up and the lighting turned on, so we eagerly found a spare power supply and rigged it up. It was worth the effort! As soon as it powered up, we were greeted with a beautiful display of colour. We have seen a boatload of RGB lately, but this has to be one of, if not, the best-looking RGB coolers on the market.
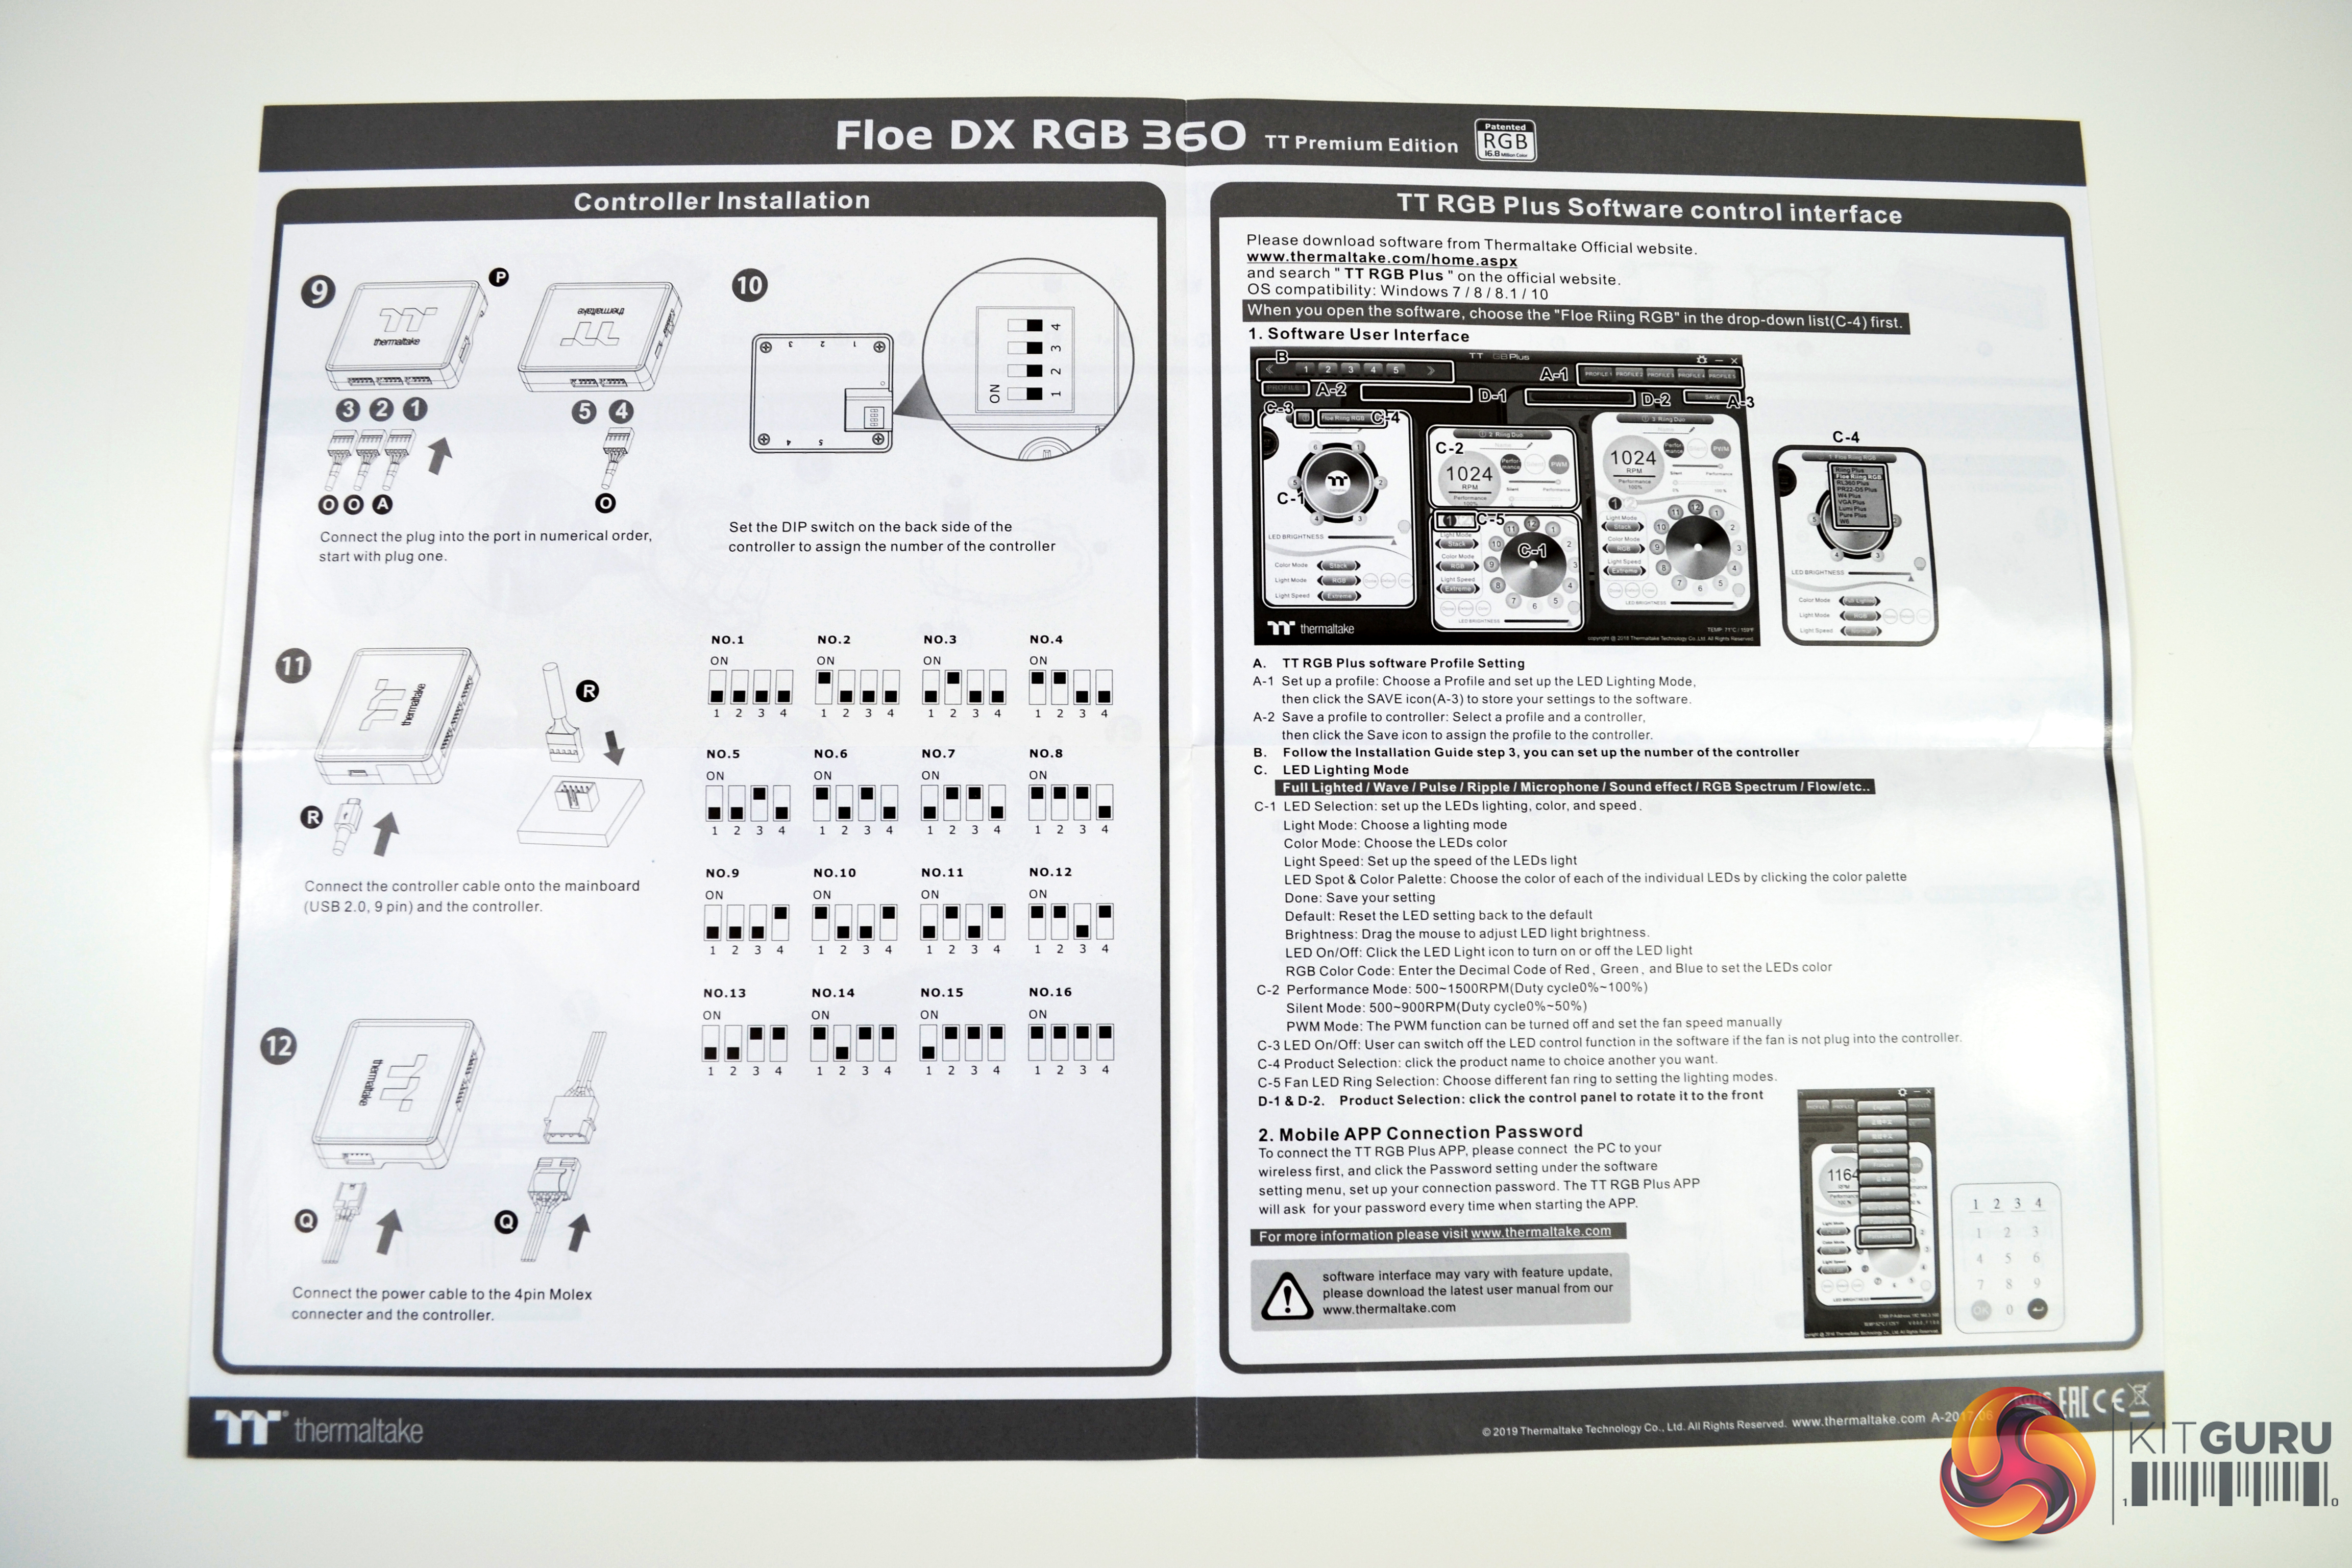
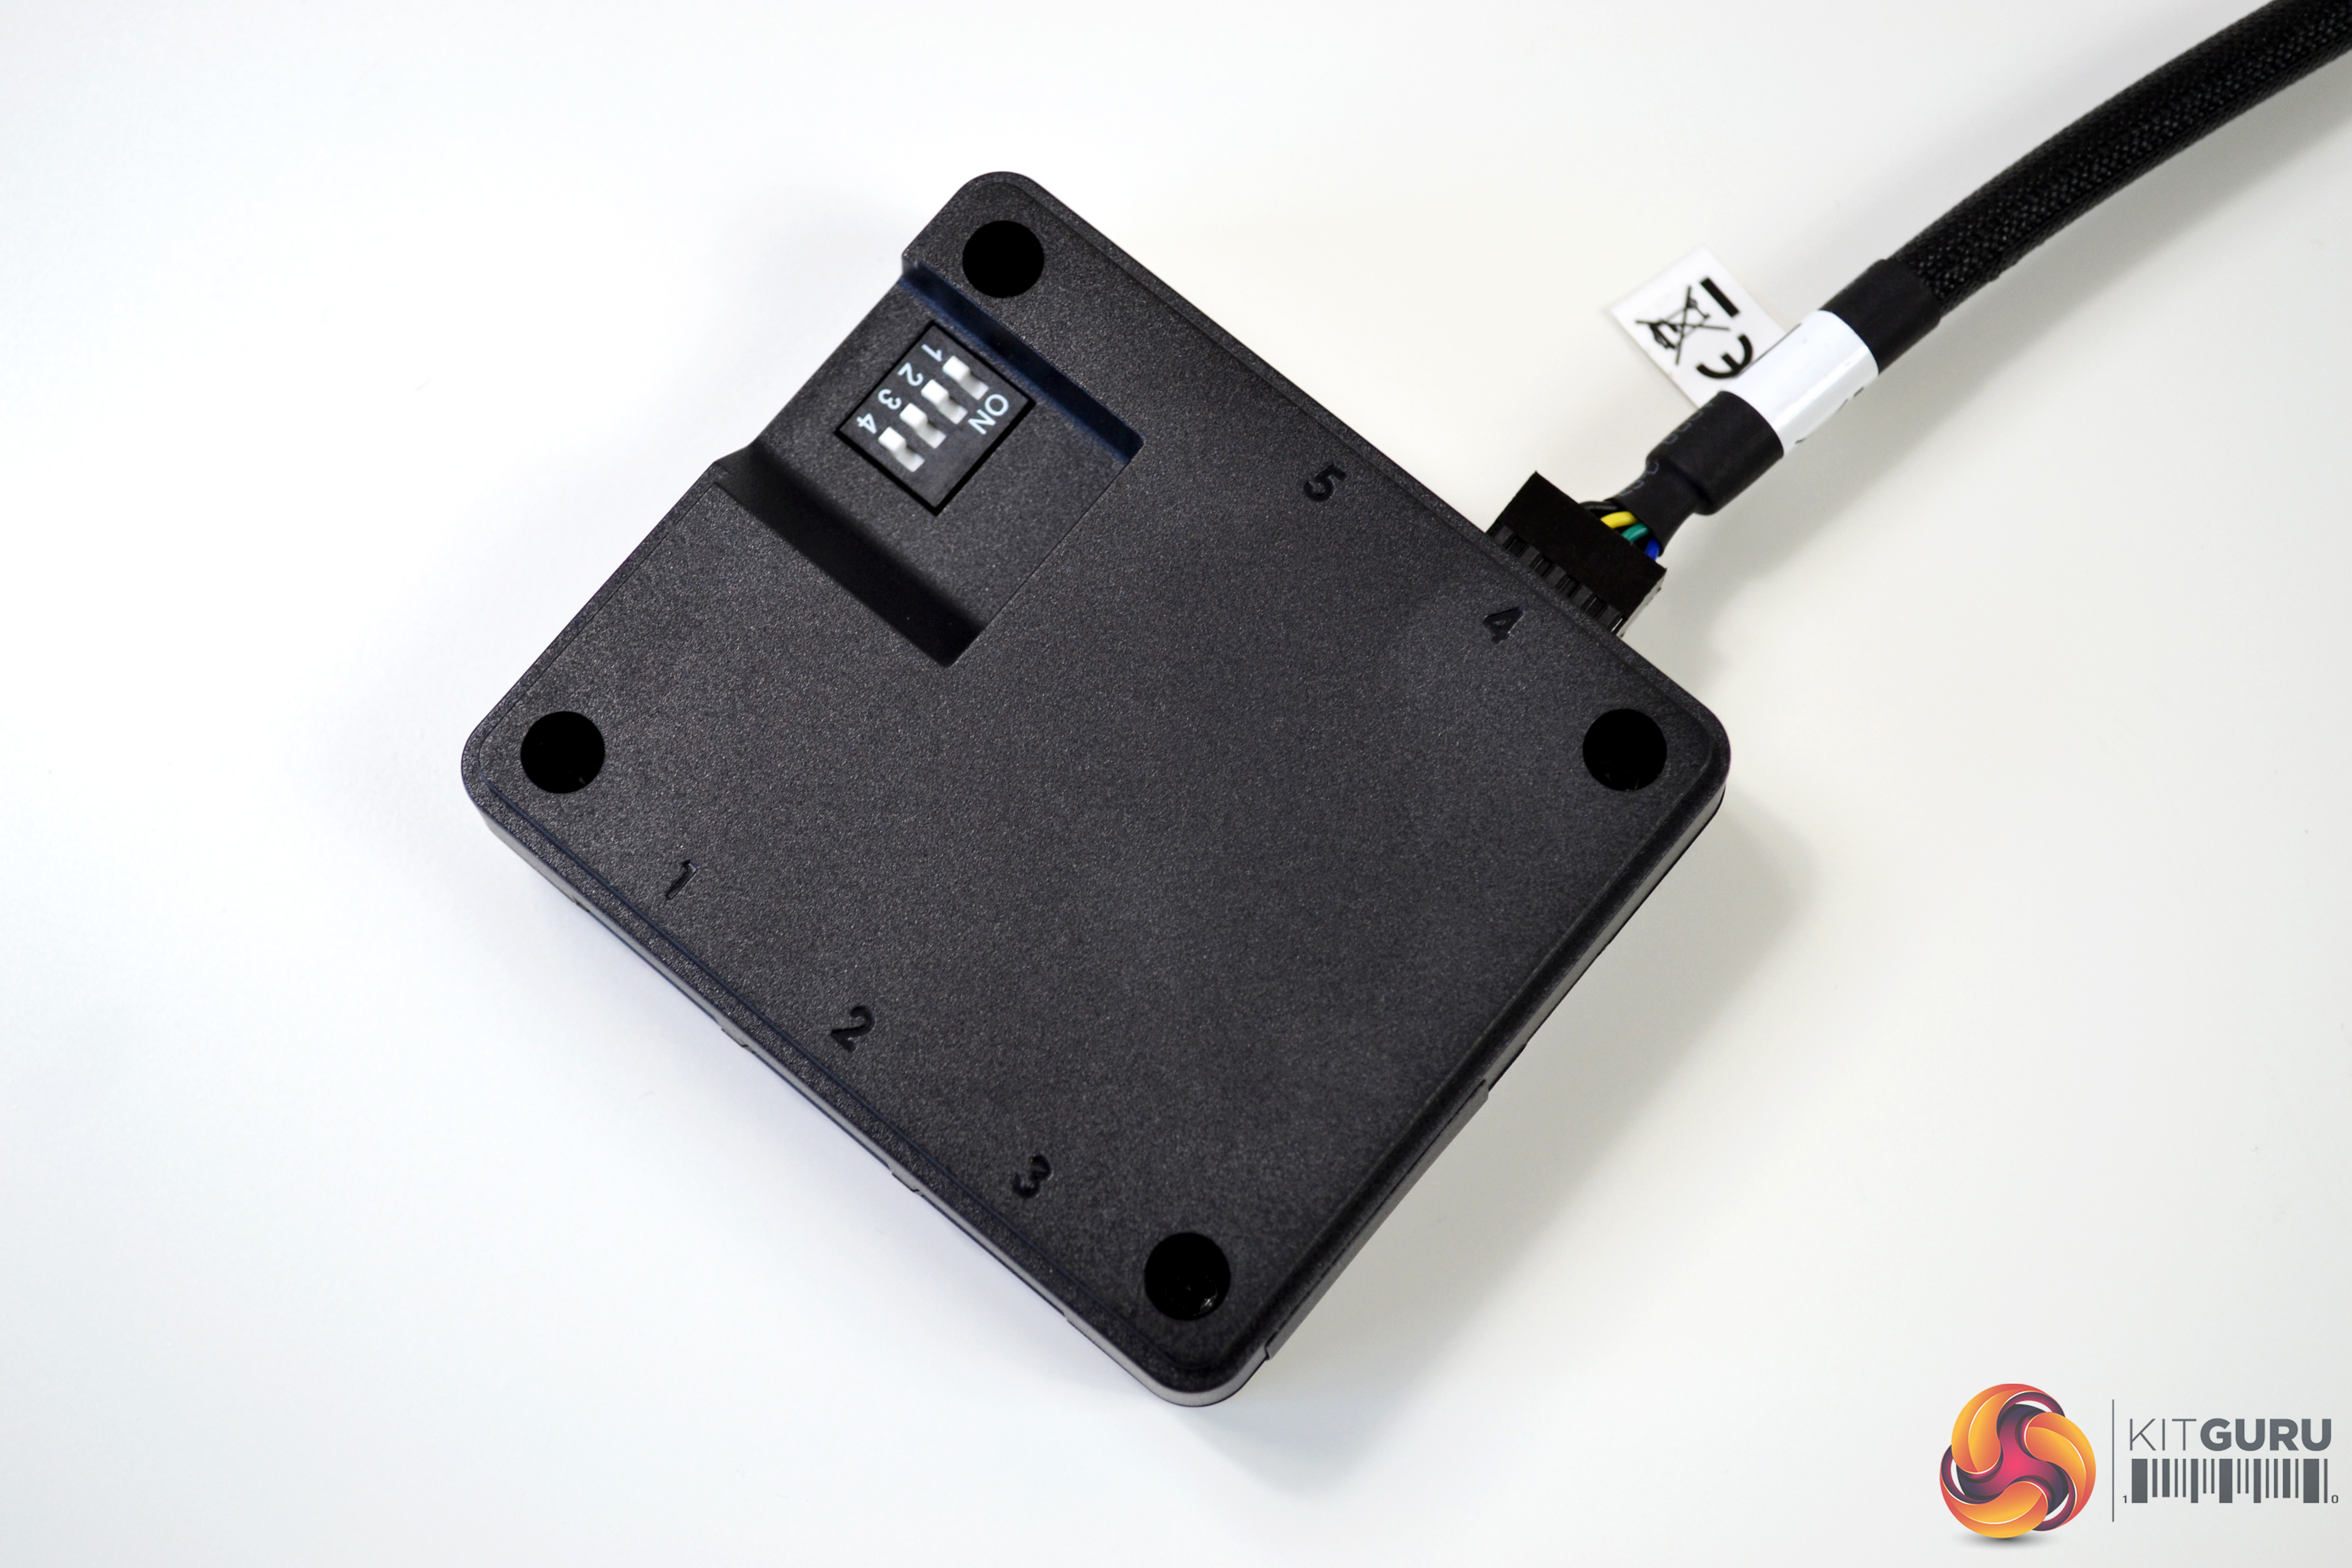
Digital Lighting Controller
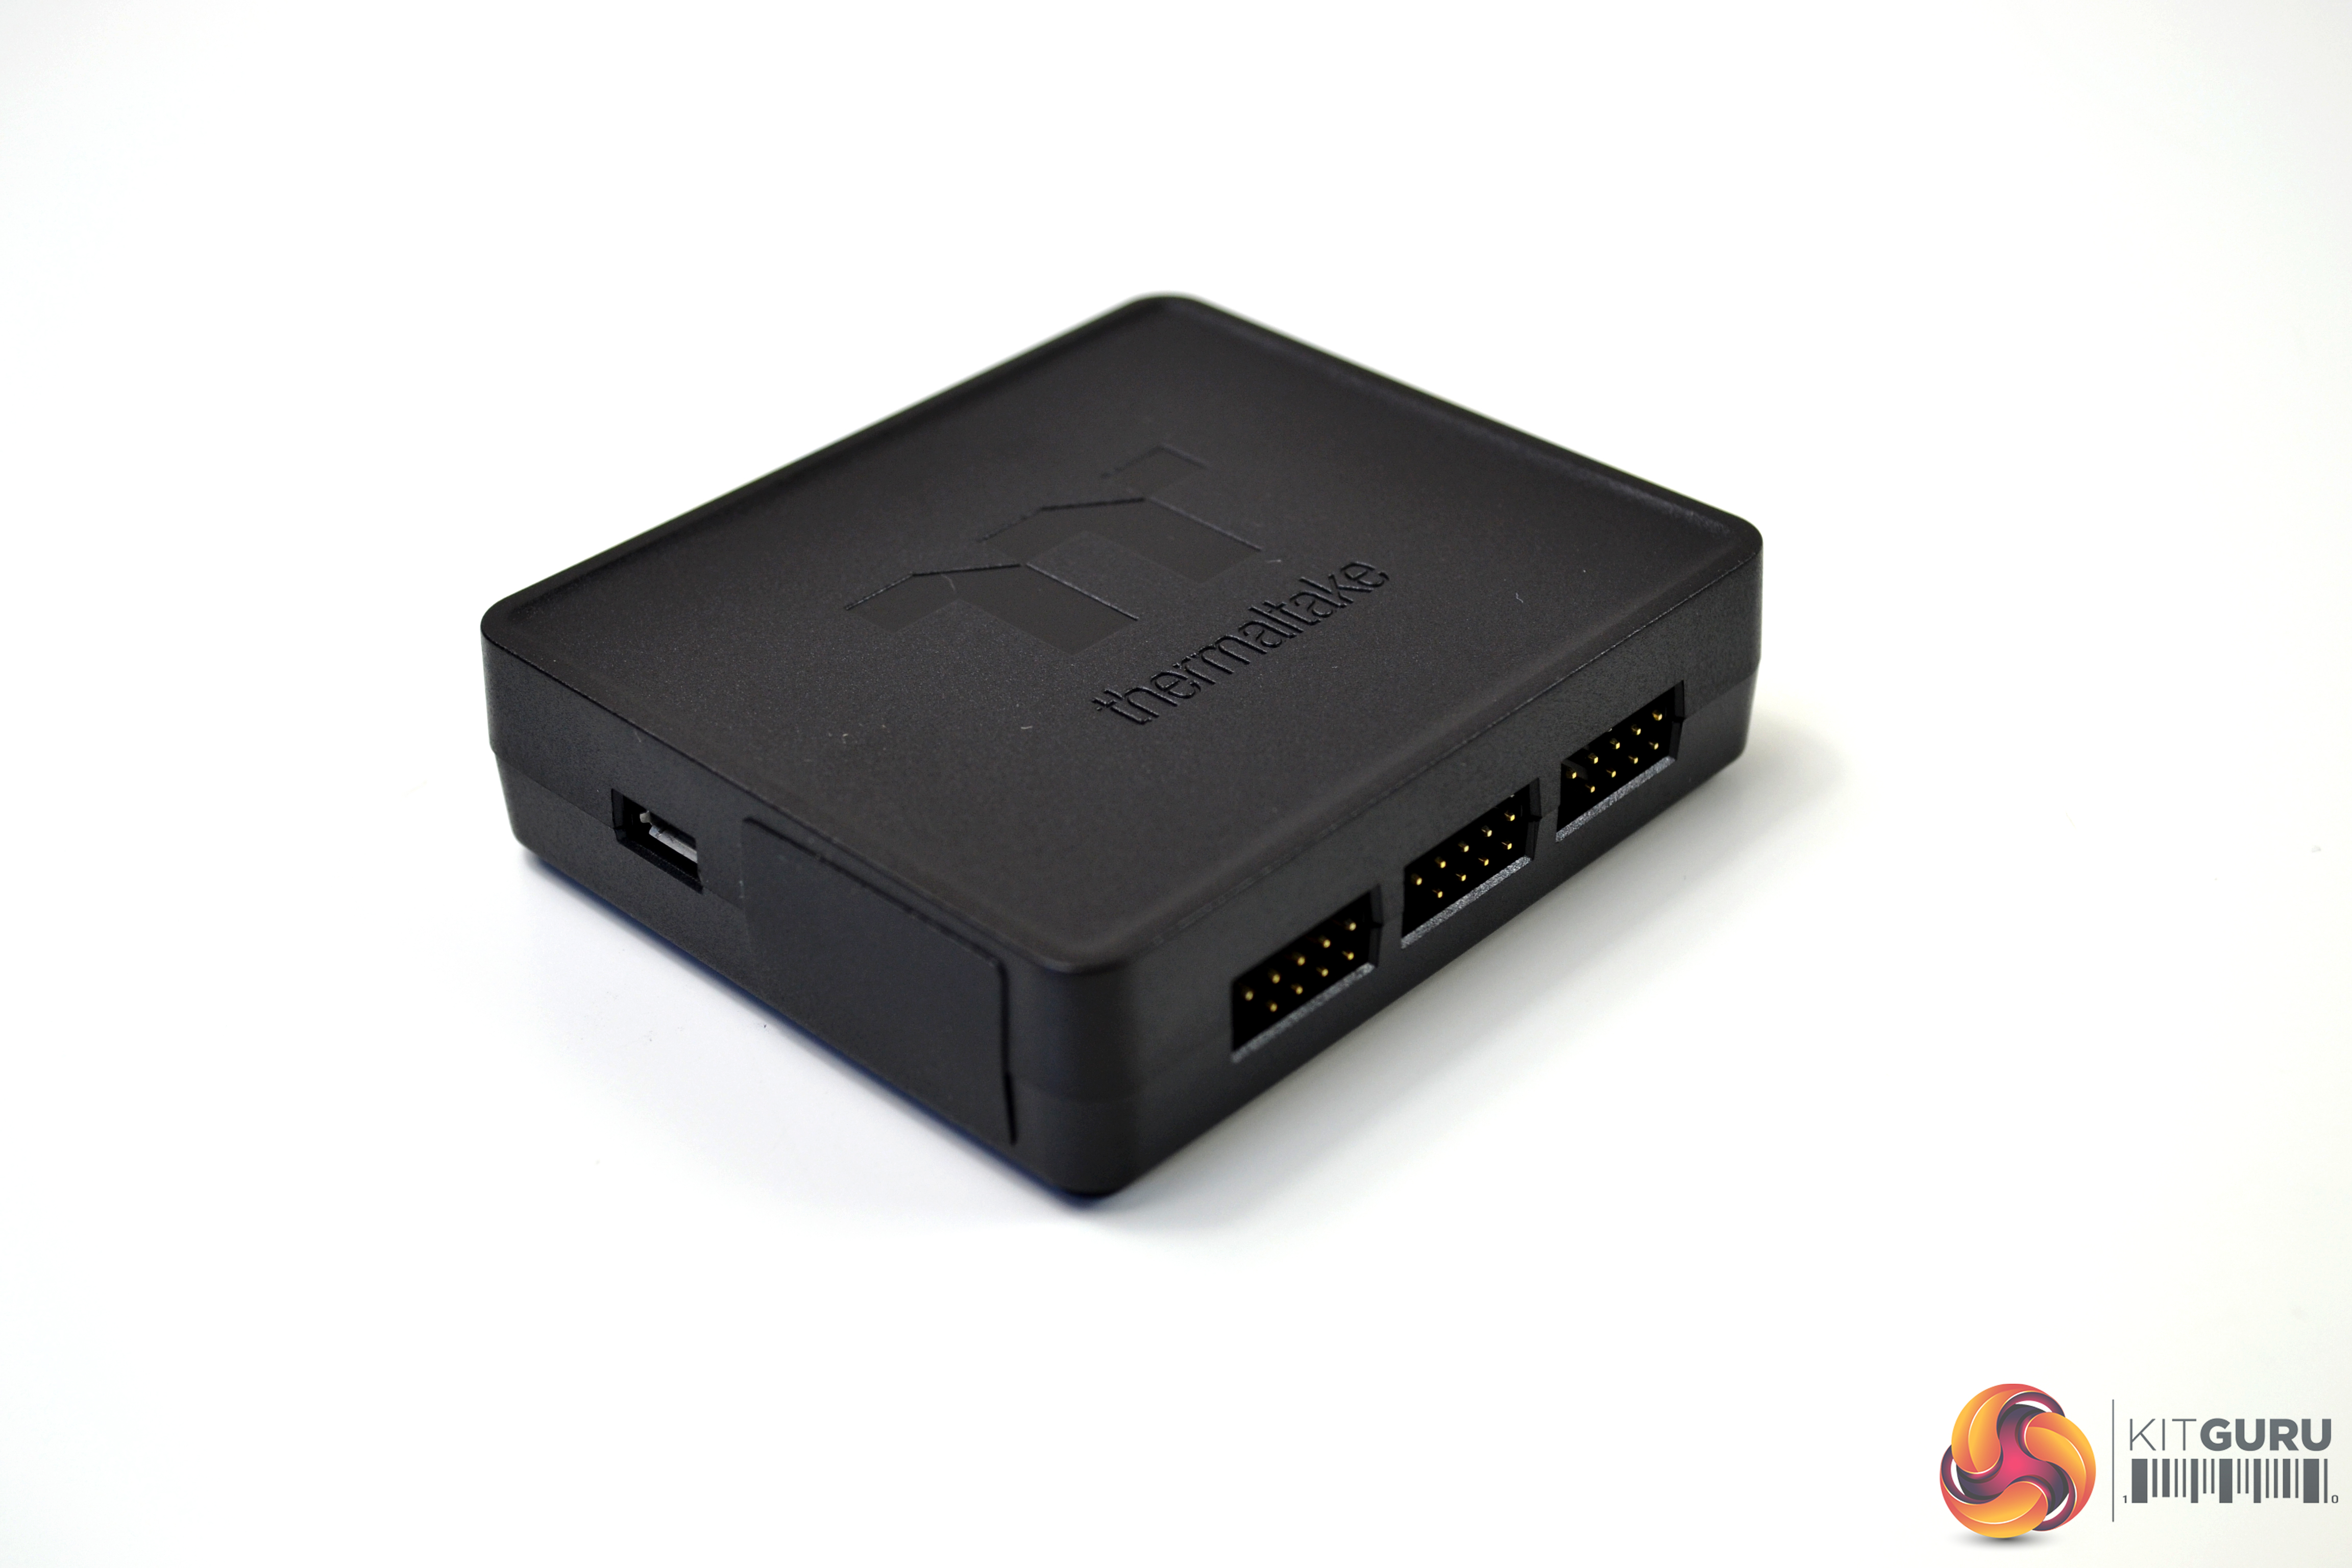
The controller is designed with a DIP switch on the back. Hence, you can set a number for each controller easily. You can add up to 5 devices to one lighting controller and up to 16 controllers to the software. The controller and the coding guide are included in all packs. It is recommended to connect up to 3 controllers on one peripheral cable (Molex) only. The controller measures approximately 73mm x 64mm x 20mm (L x W x D) so should be relatively easy to locate somewhere inside most ATX cases with minimal fuss. We will look at the controller and software later during the installation process.
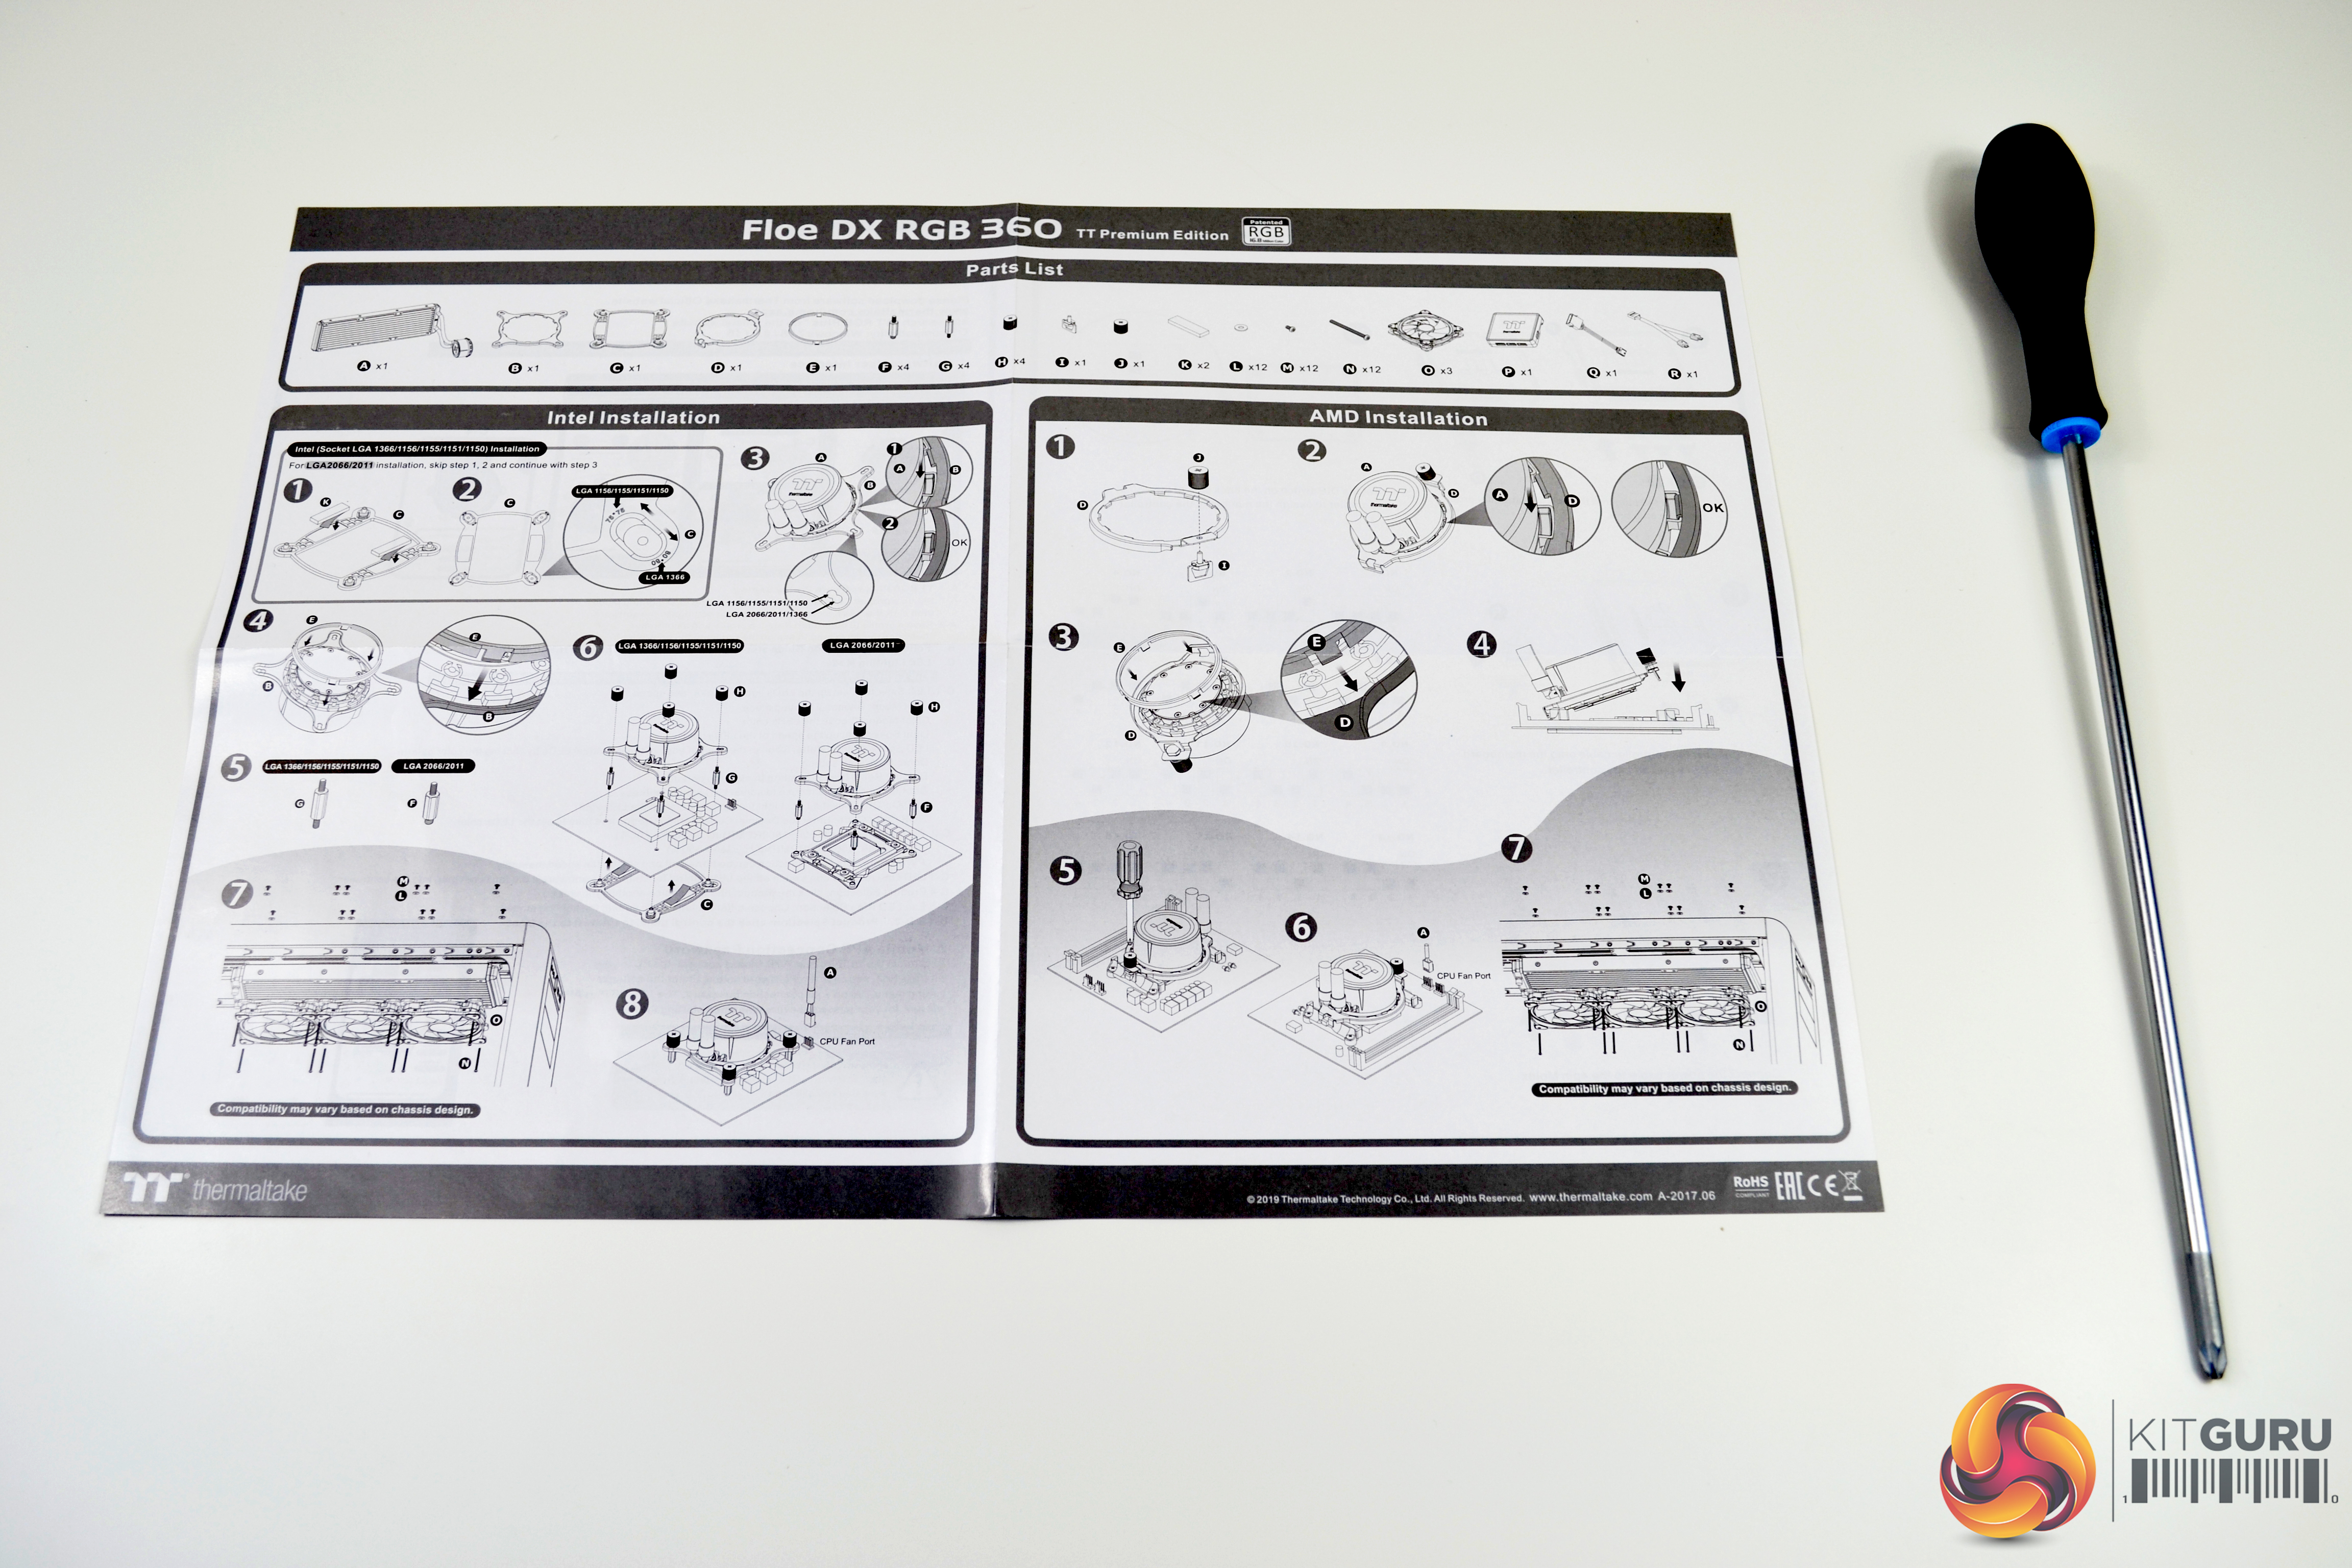
Since Thermaltake uses the Asetek designed pump, the installation process should be like all other Asetek models. This procedure has been documented many times before, but we will go though it again to refresh the memory. Thermaltake provide easy to follow directions with diagrams detailing the installation process.
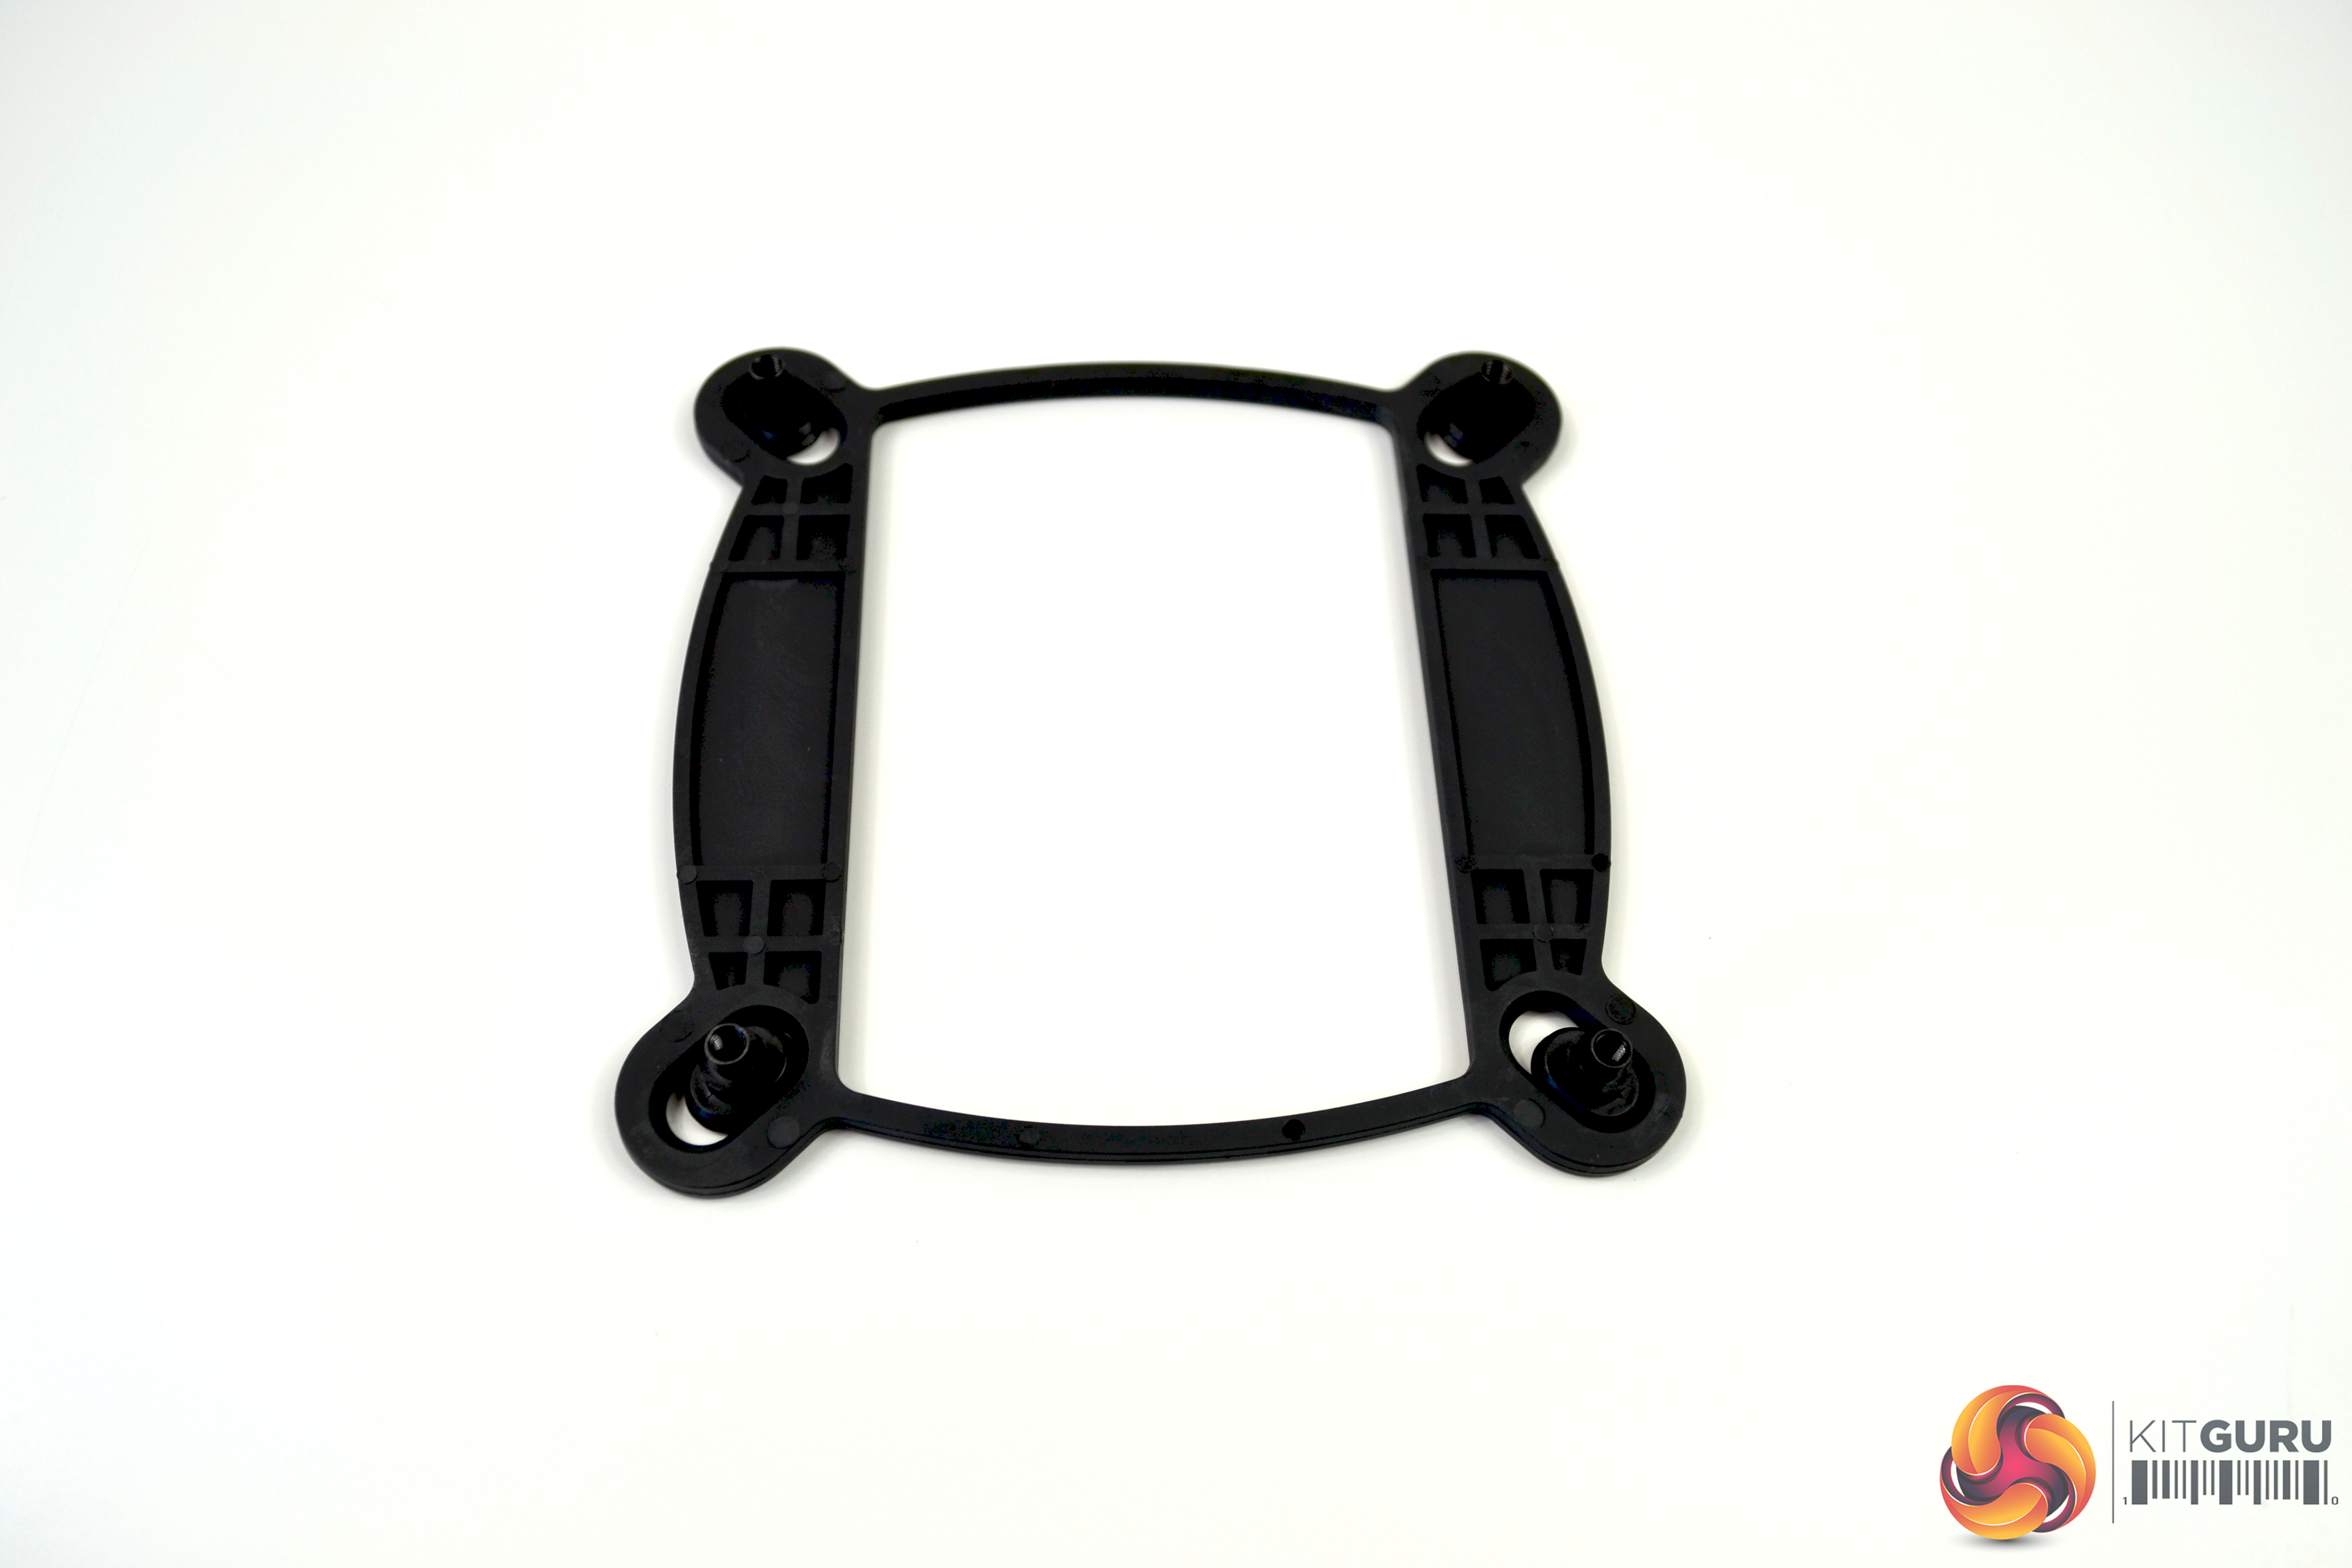
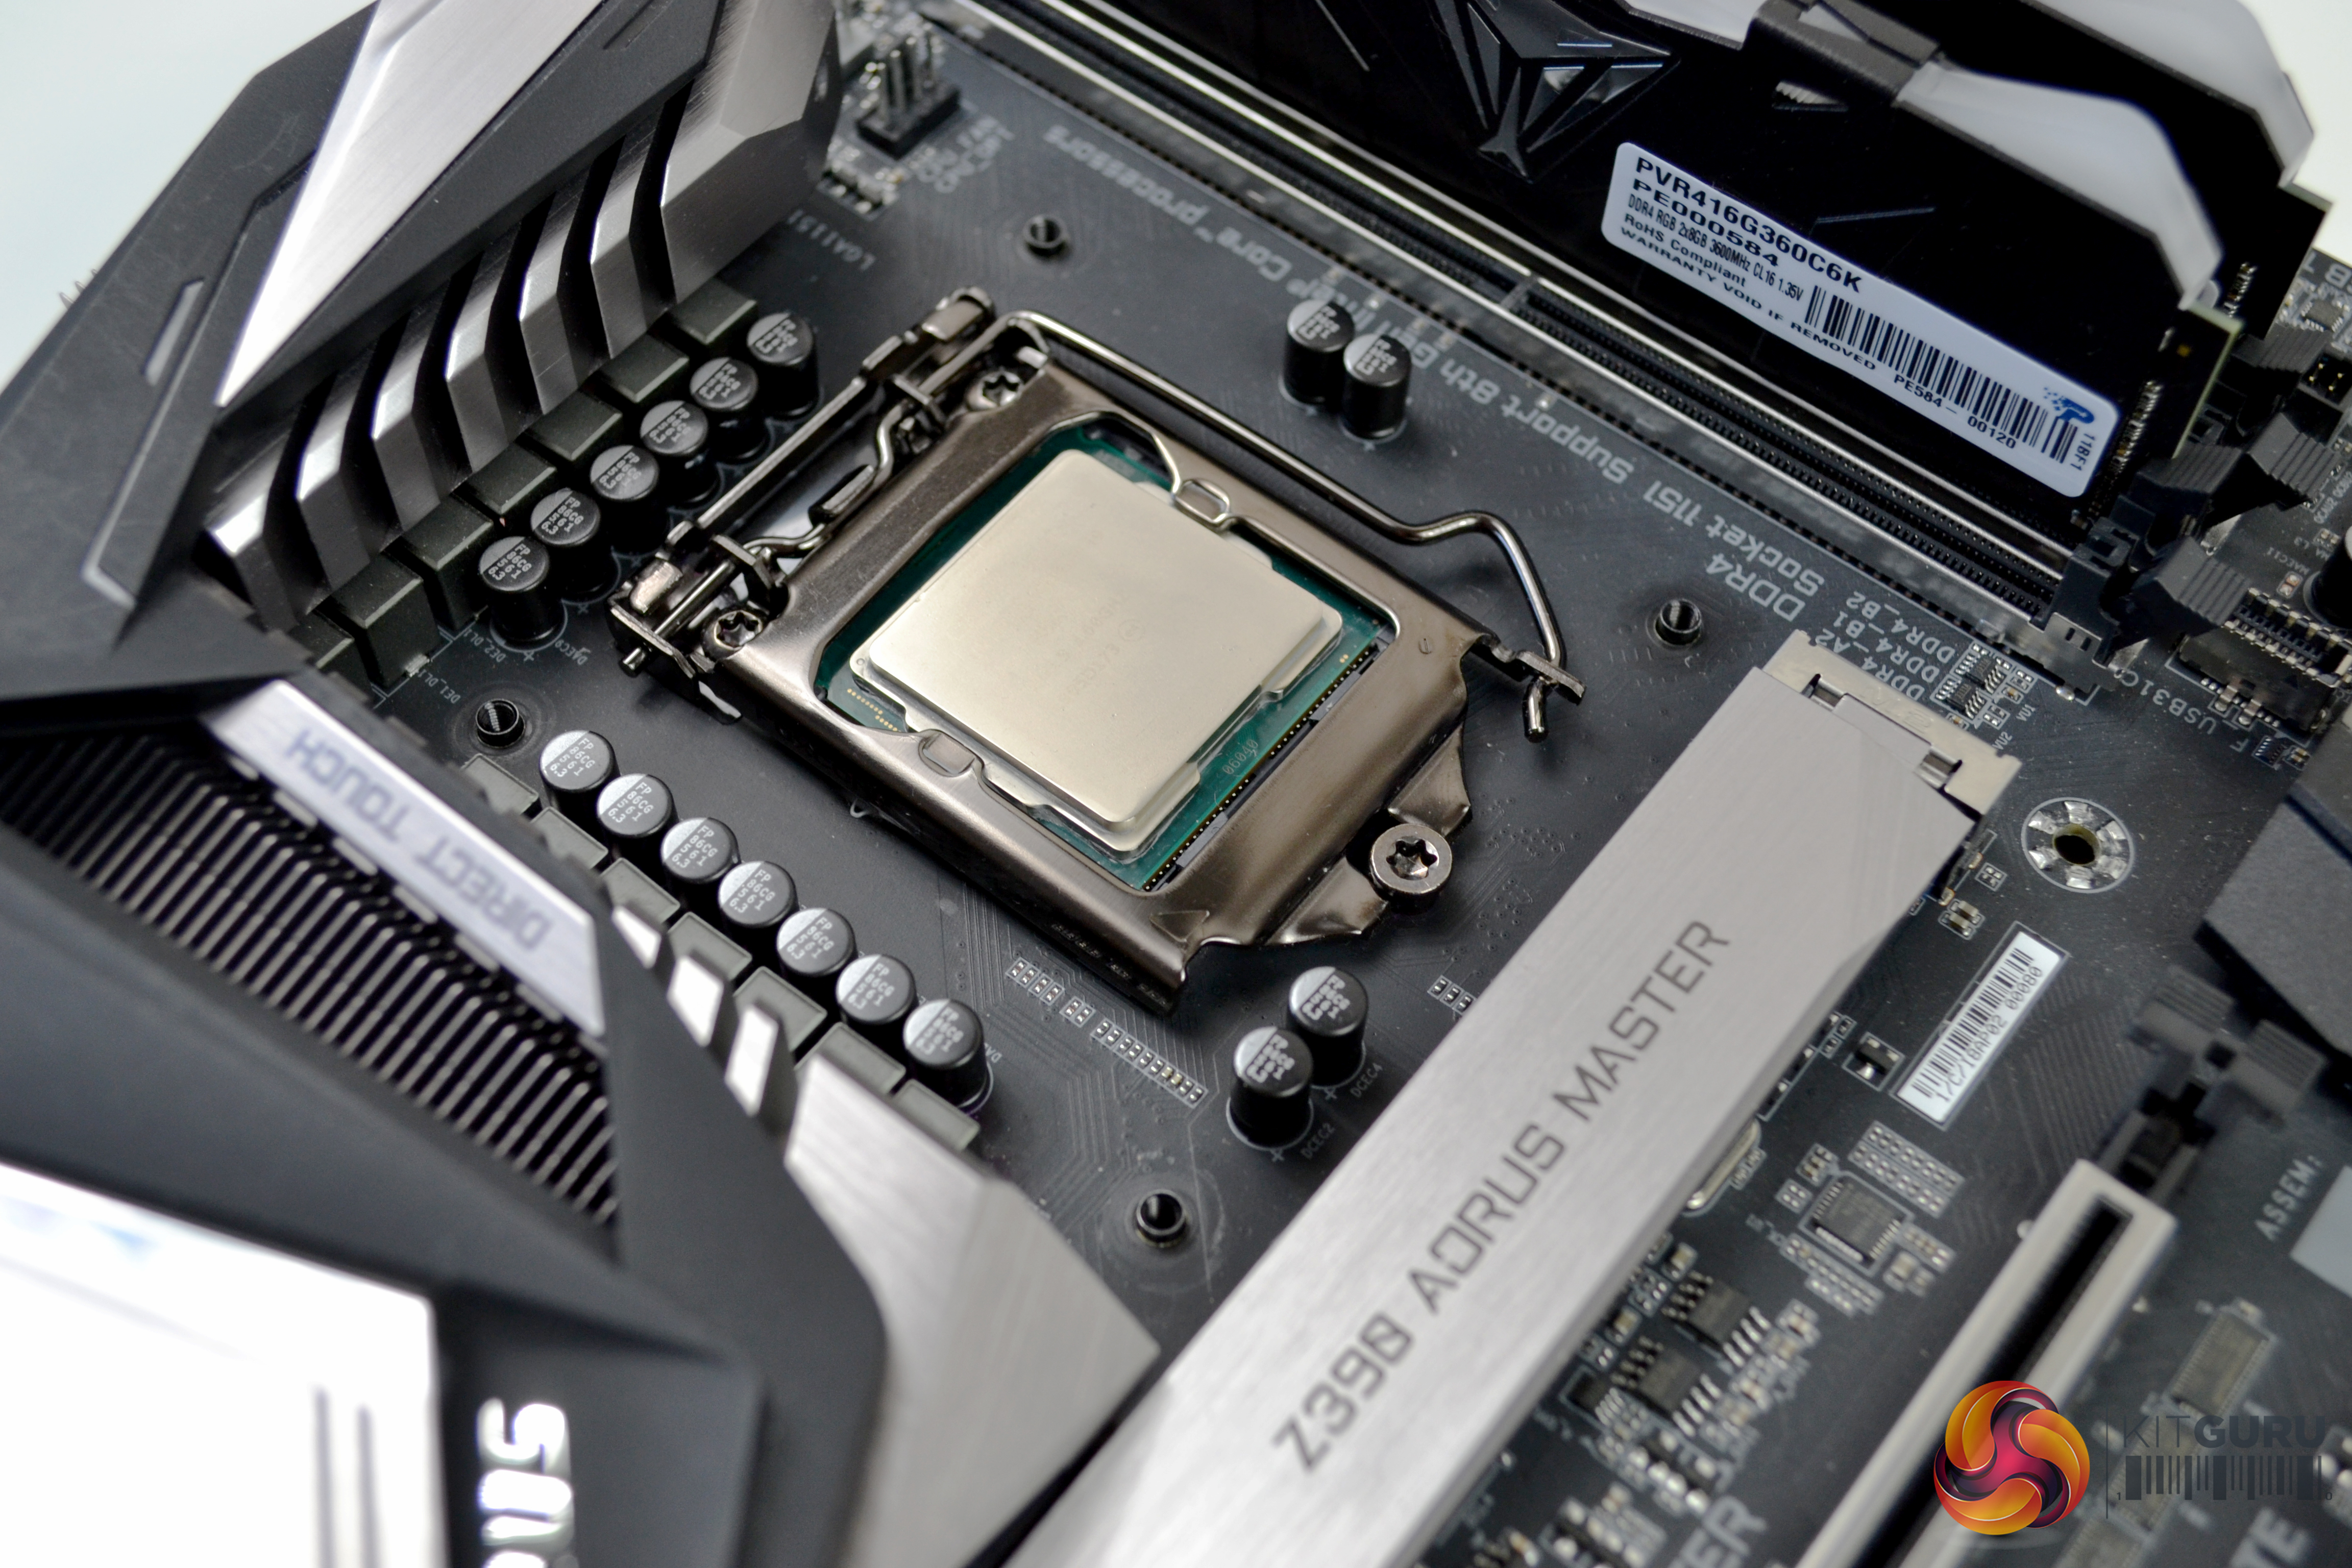
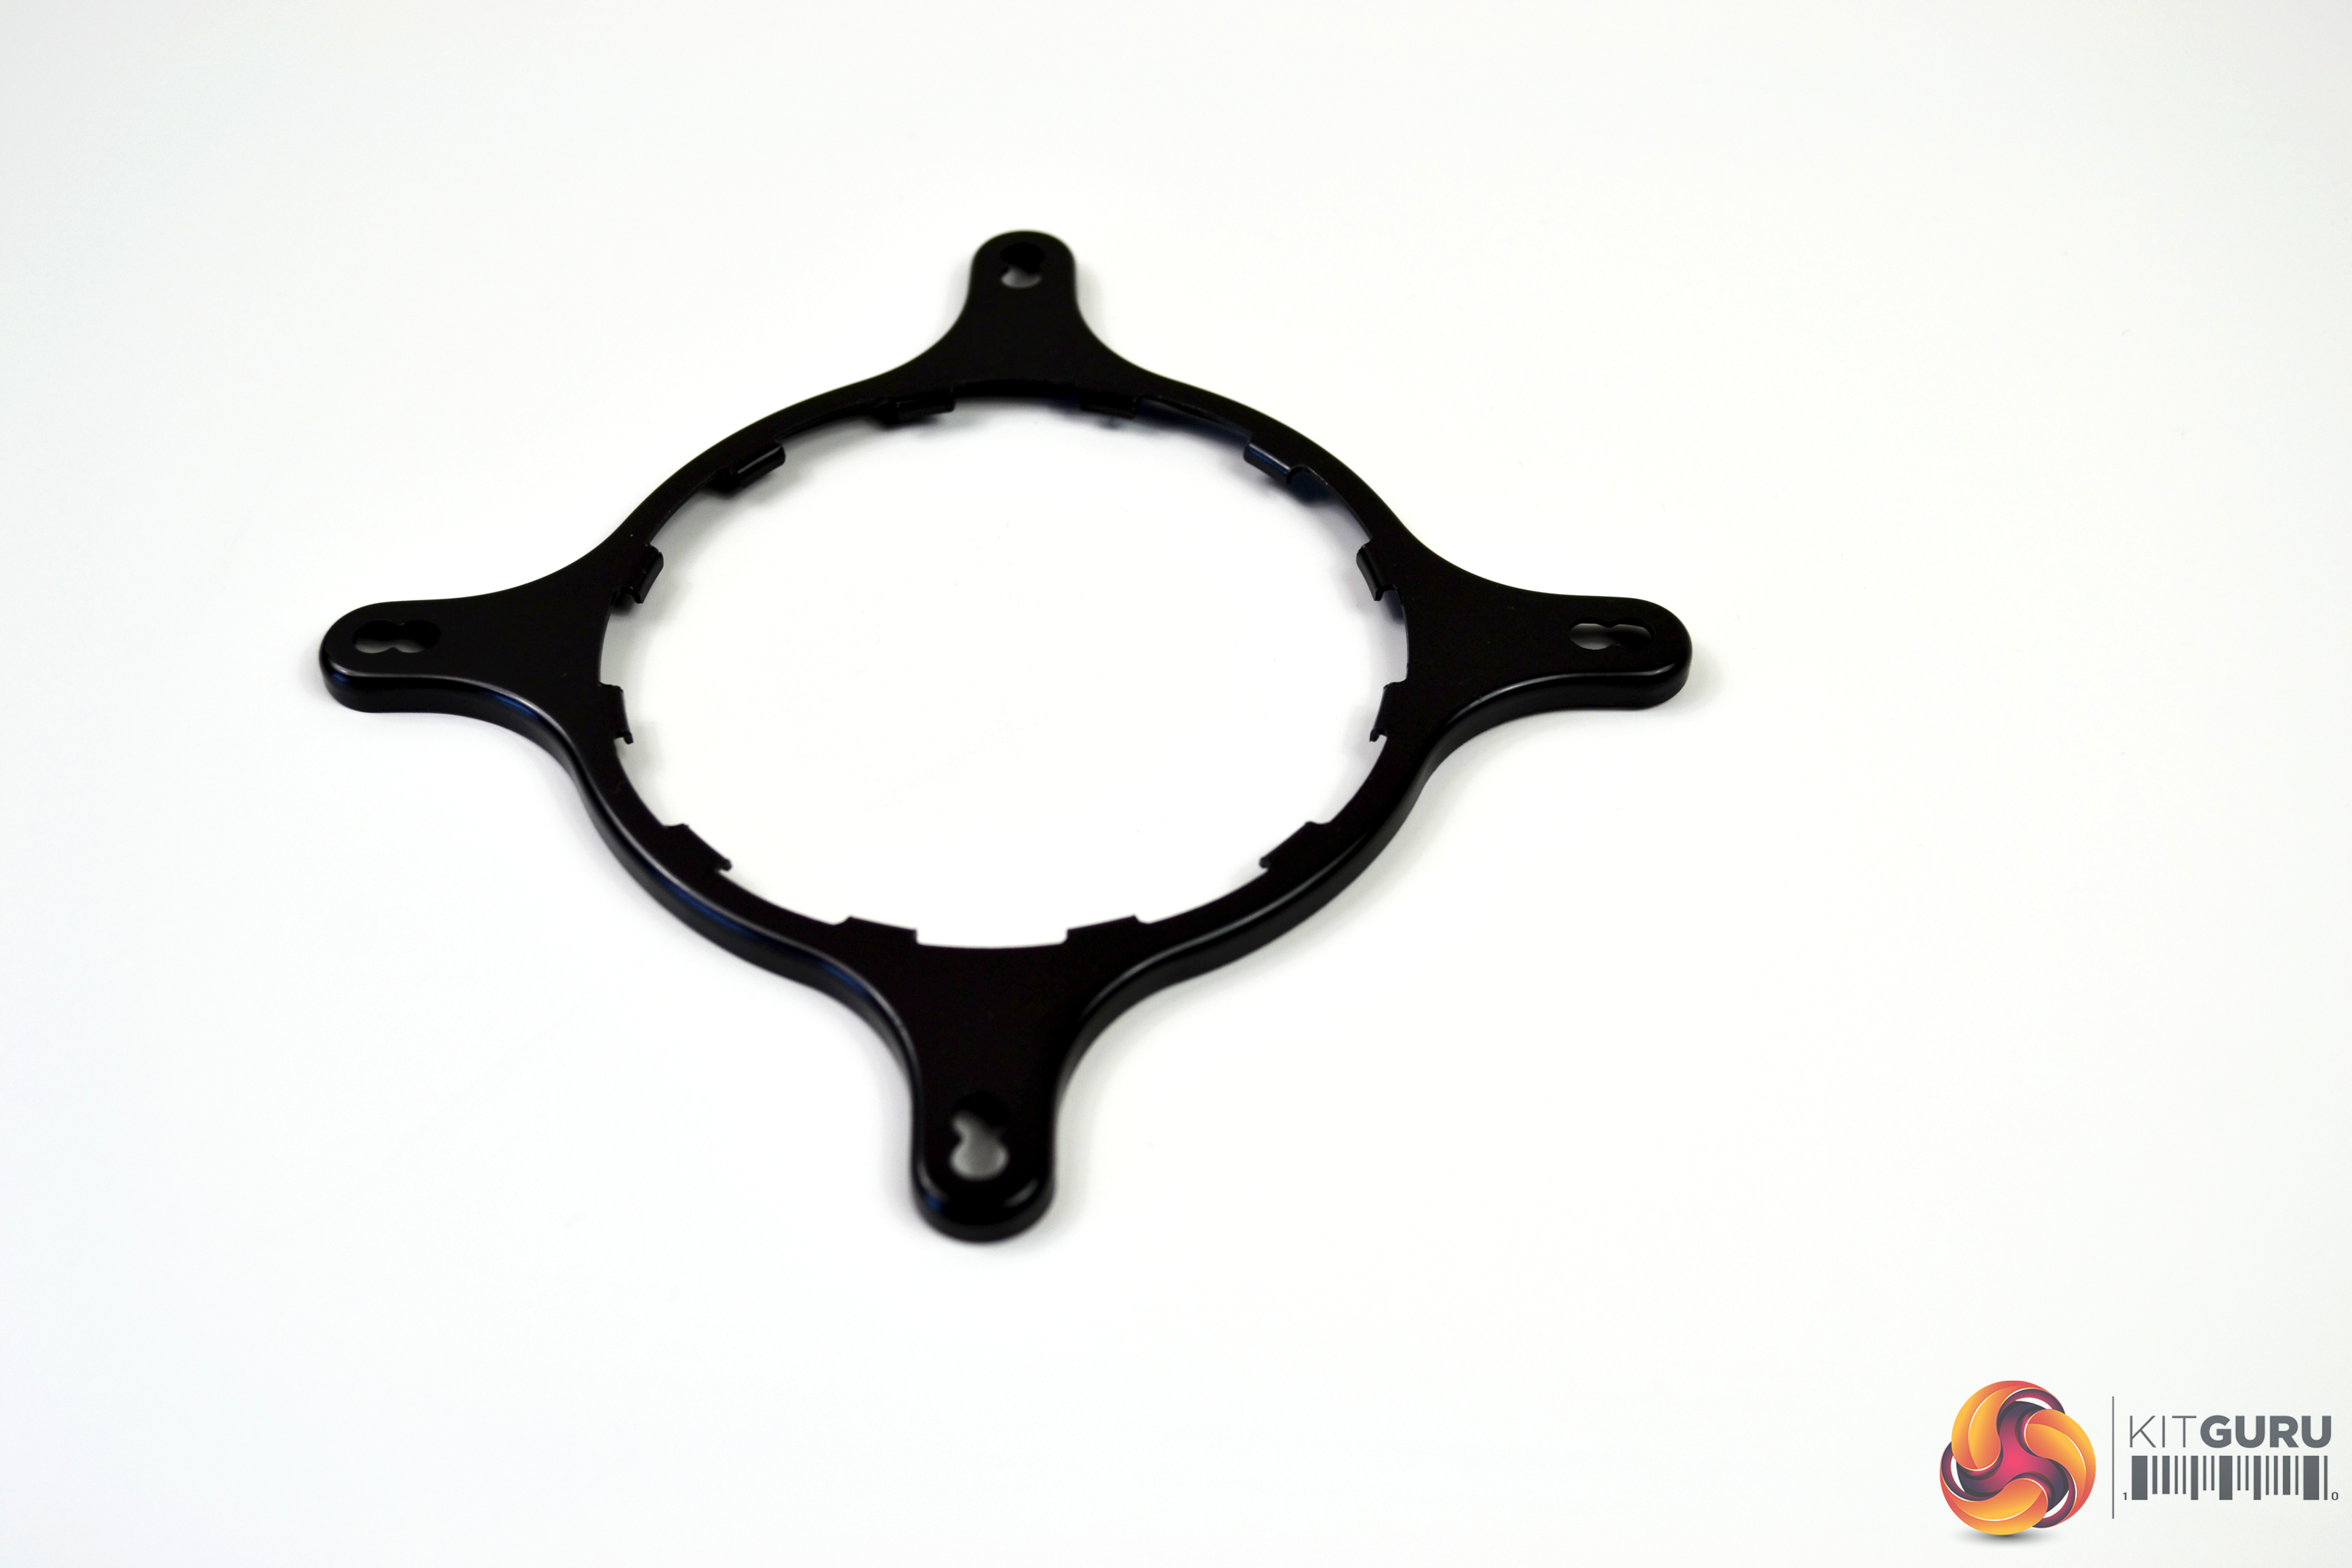
The first part of the installation process should be to select the correct retention back plate to correspond with your system. Our test bench is fitted with an Intel Z390 based motherboard, so we will be using the 115X back plate.
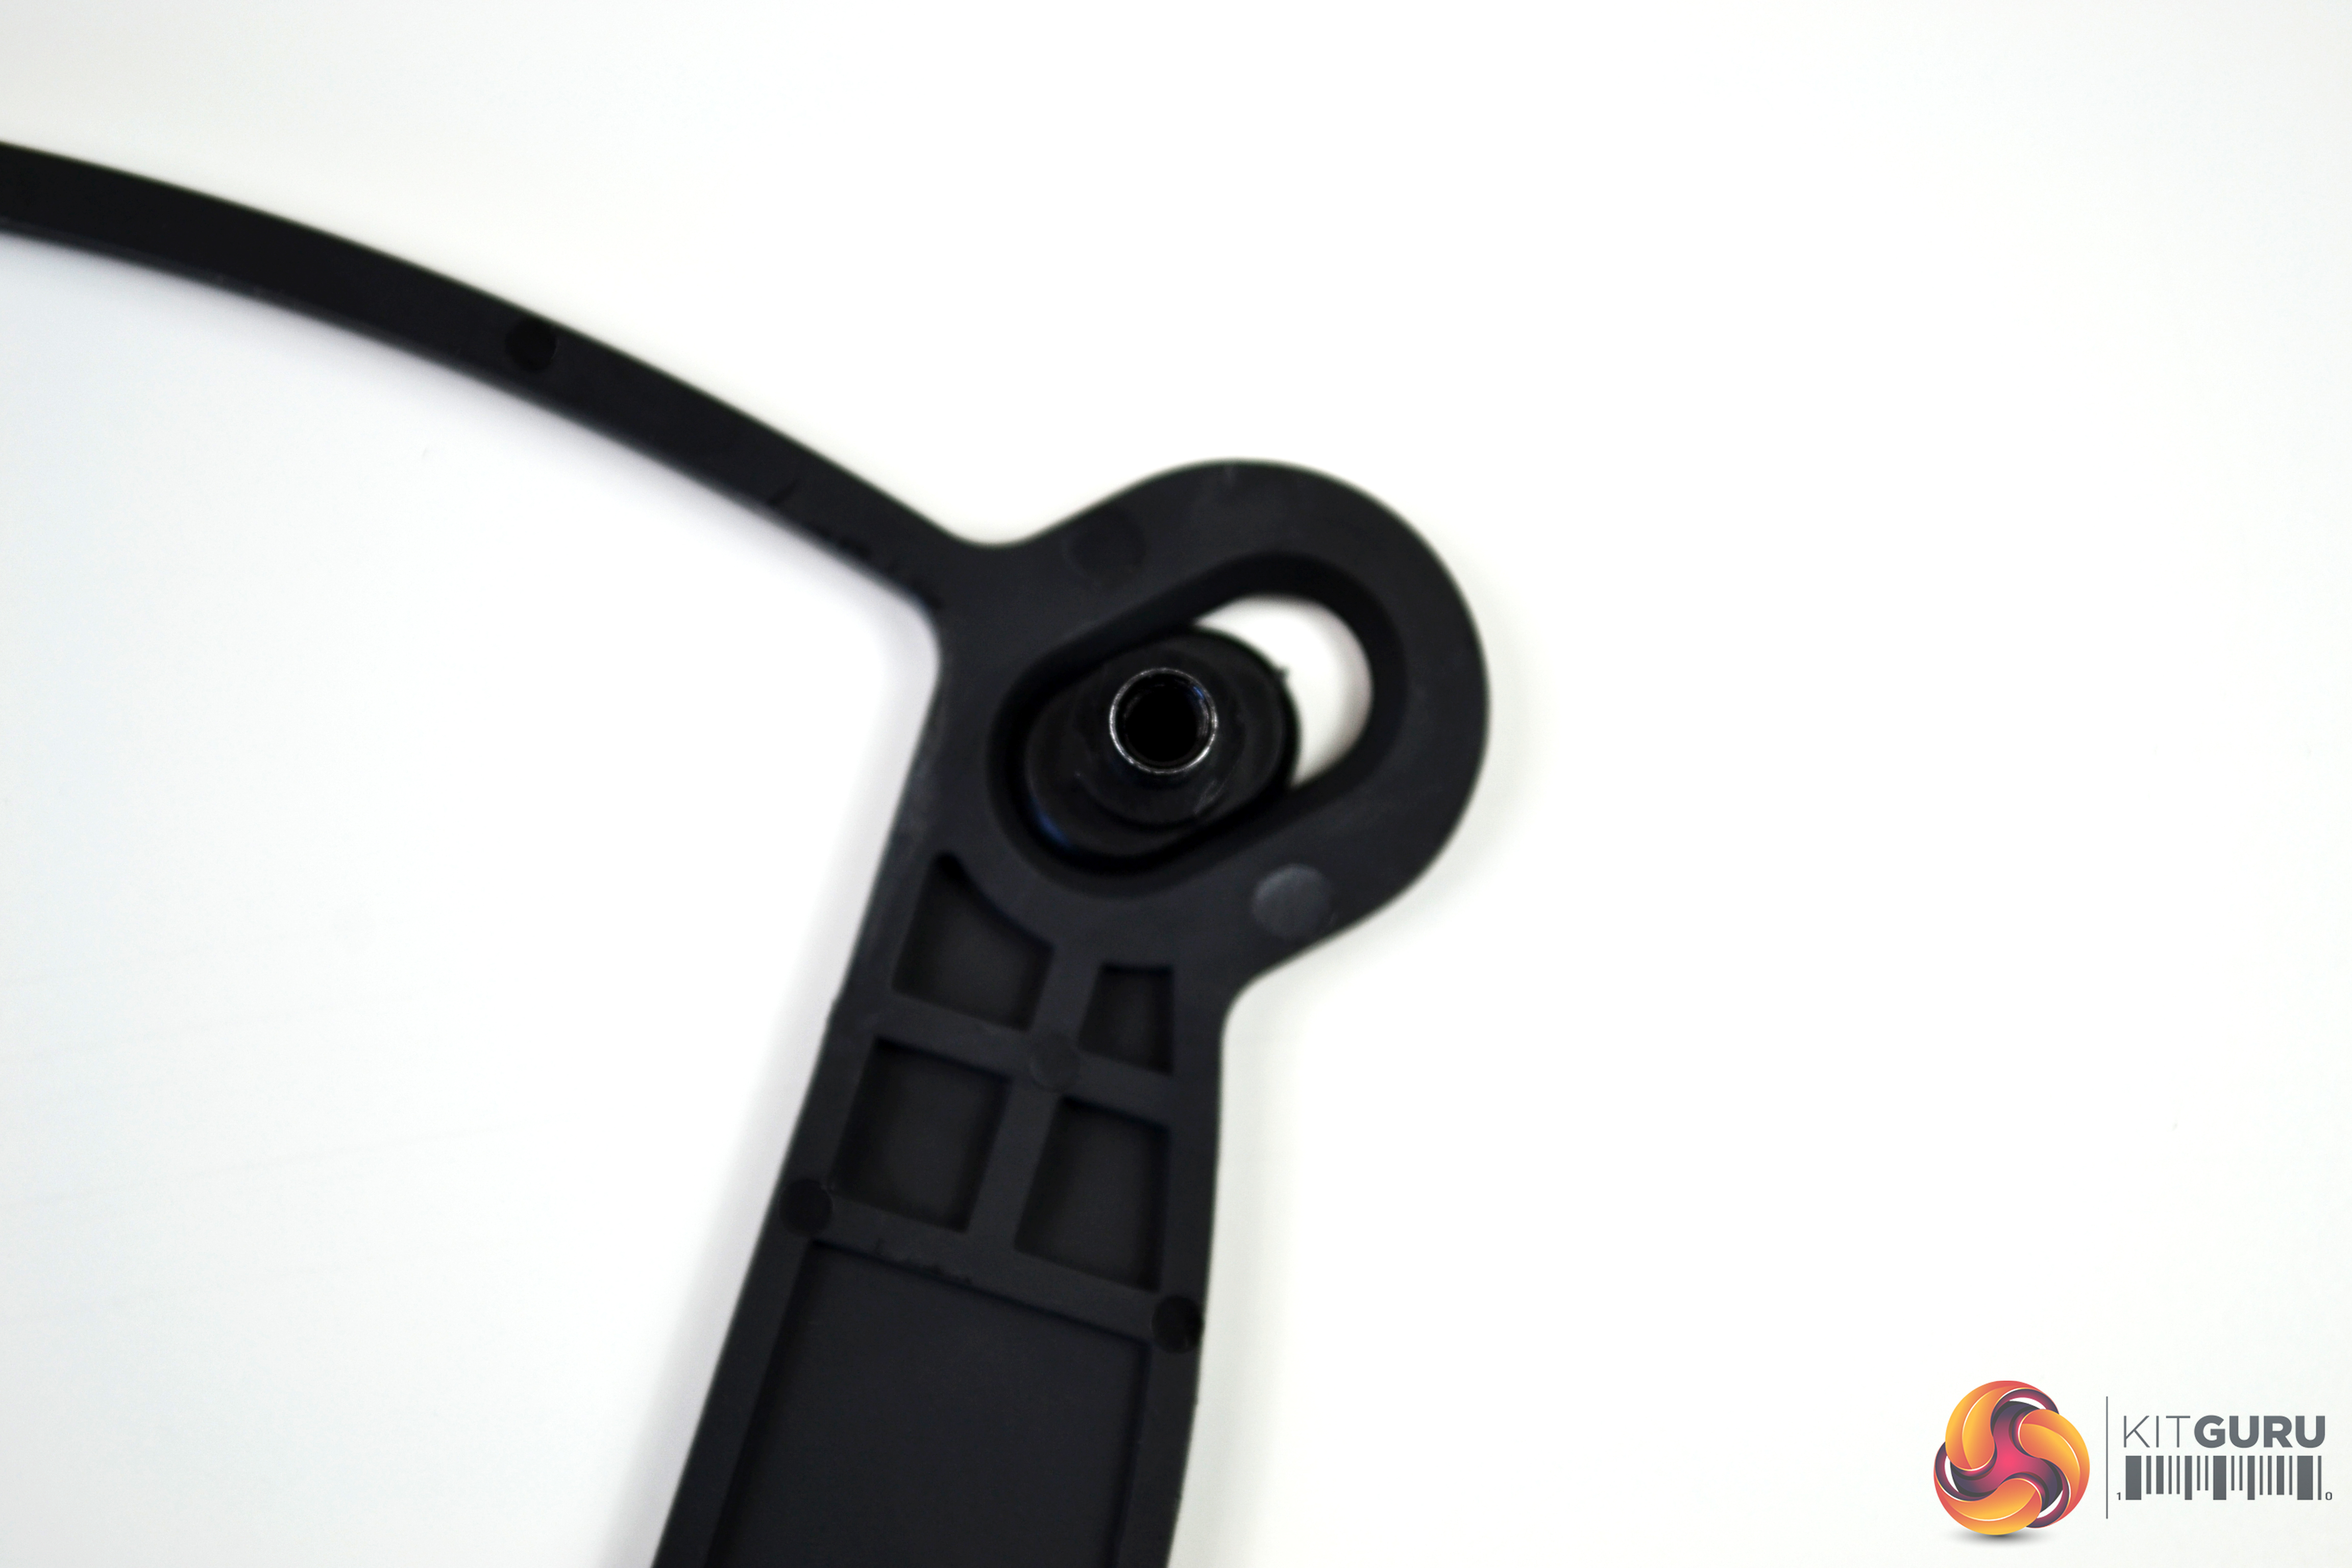
The back plate arrives fully assembled – all that’s required is to ensure the fixing points are in the correct position for socket 1151 motherboards. Ensure the captive steel fixings are pushed all the way to the inside of the elongated hole (marked 75*75).
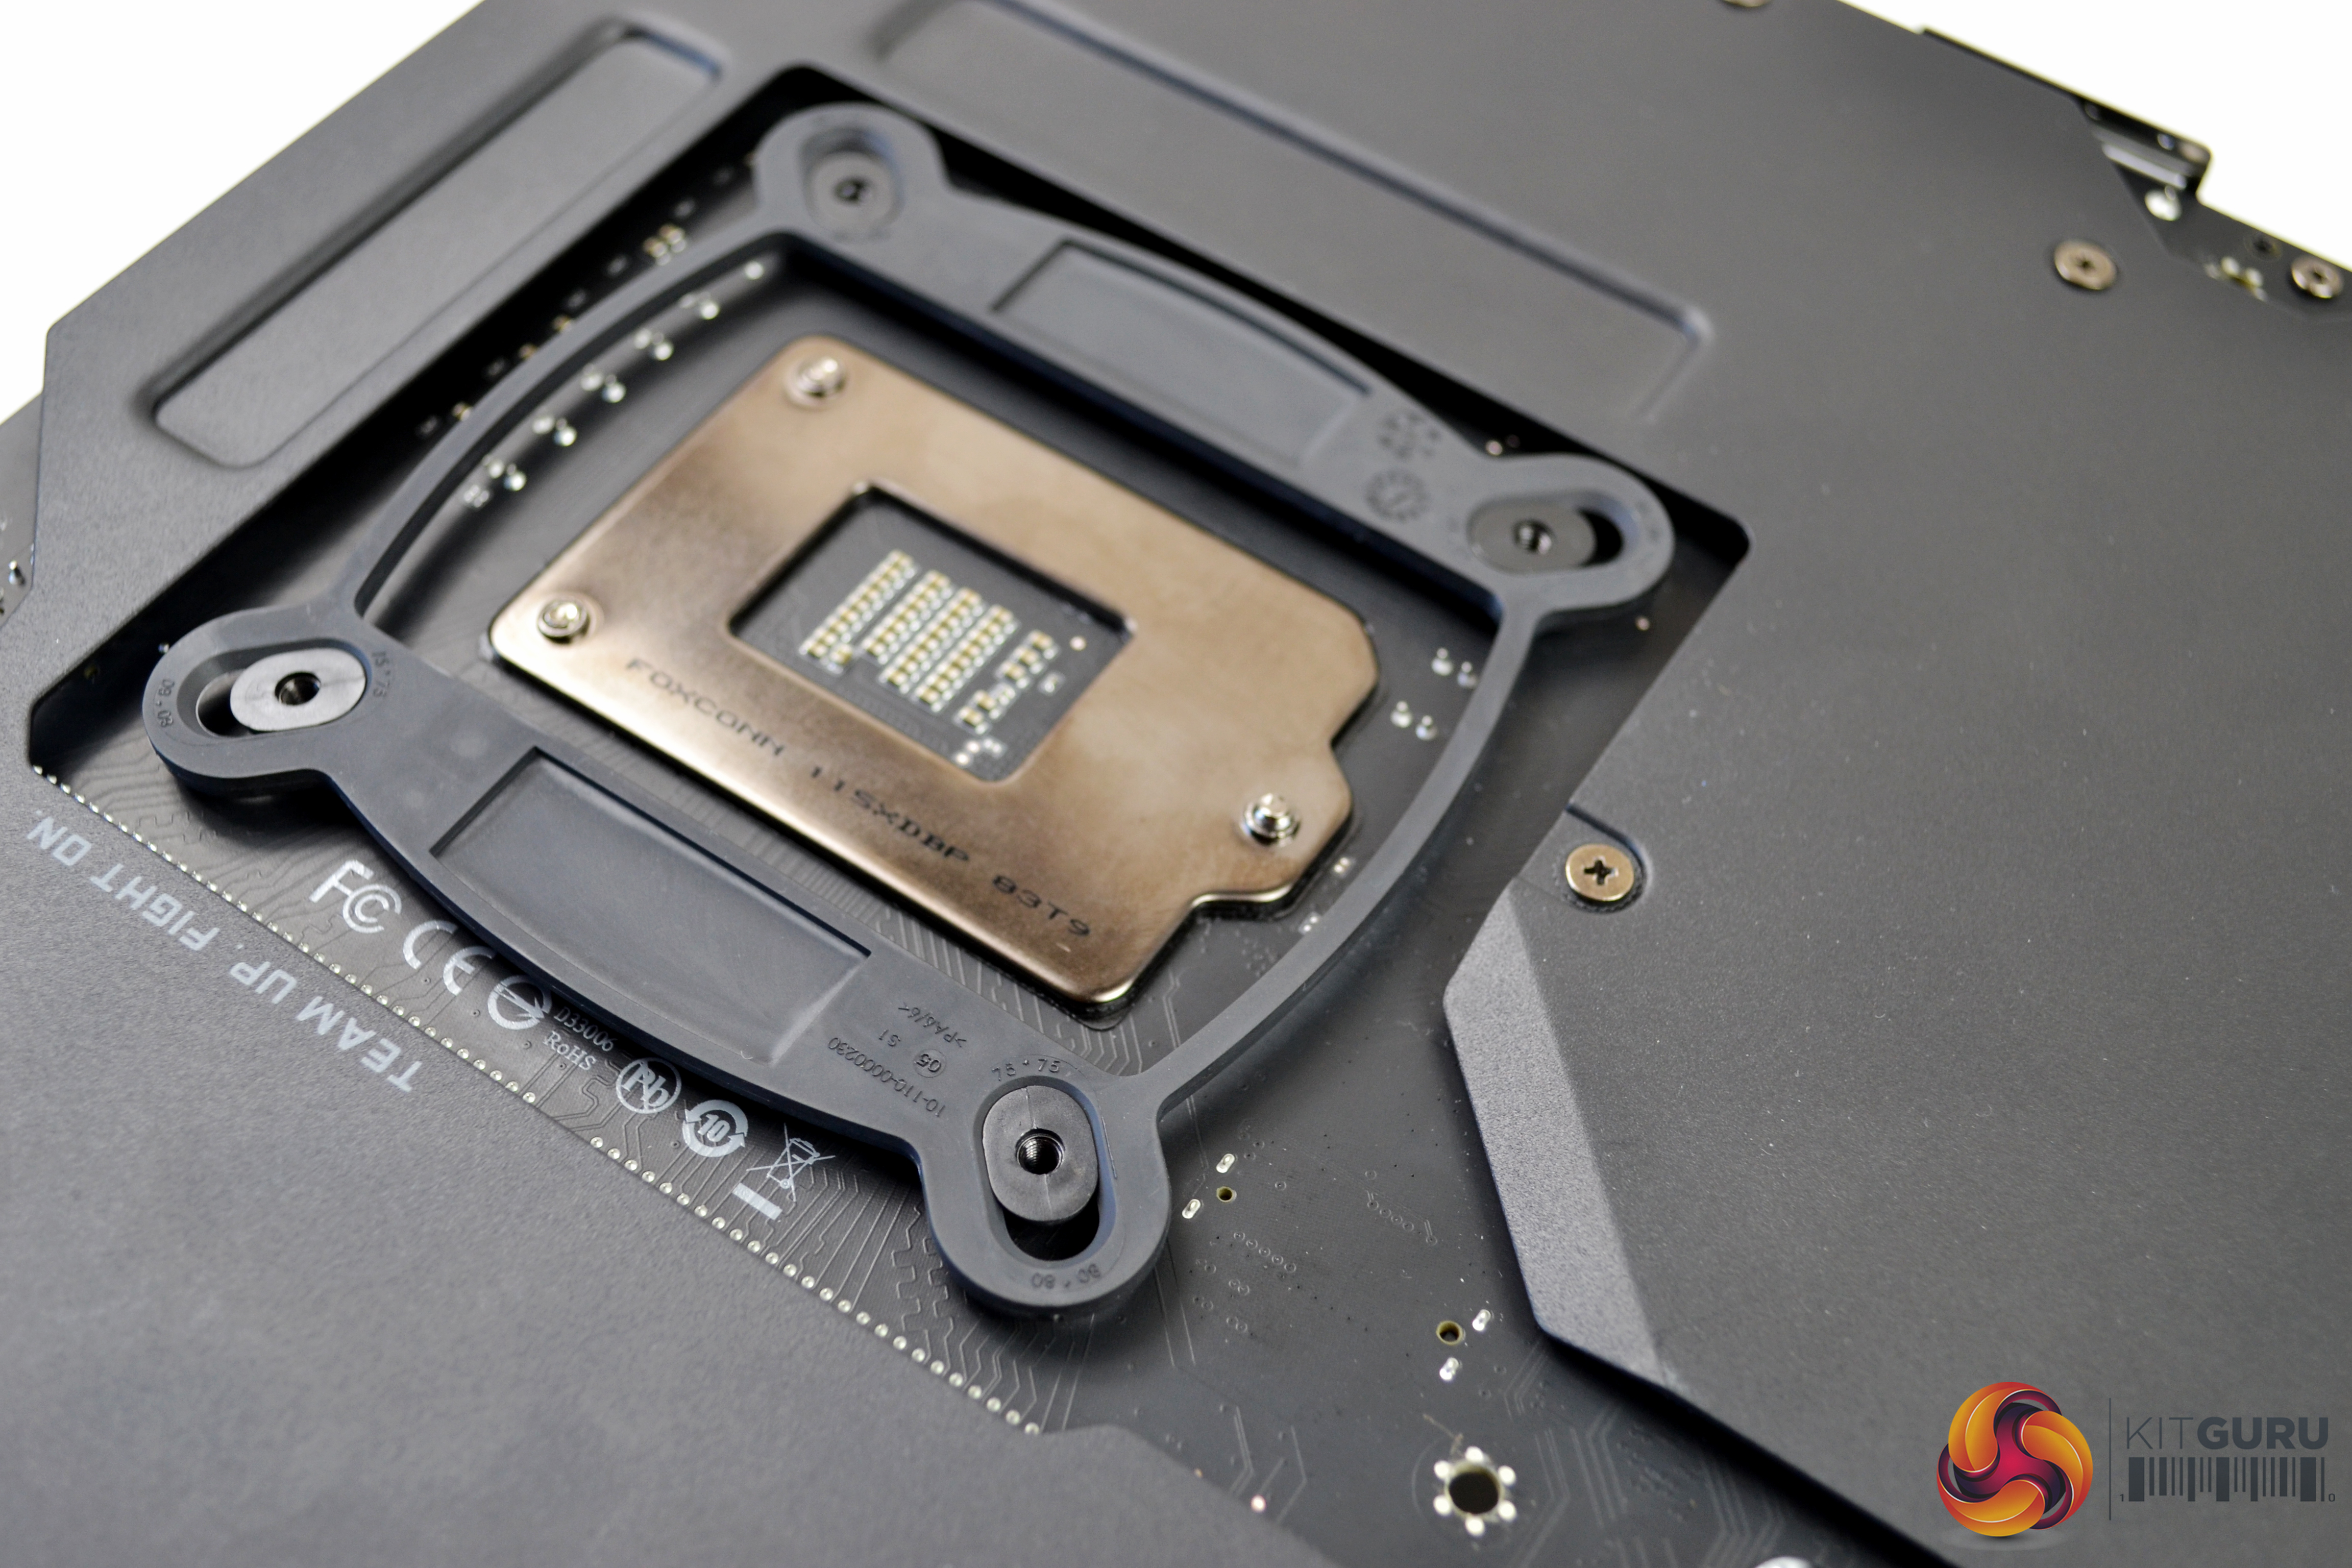
It is then just a simple case of lining up with the holes on the motherboard and putting the back plate in place. You will notice that the fixings slightly protrude through the motherboard on the socket side.
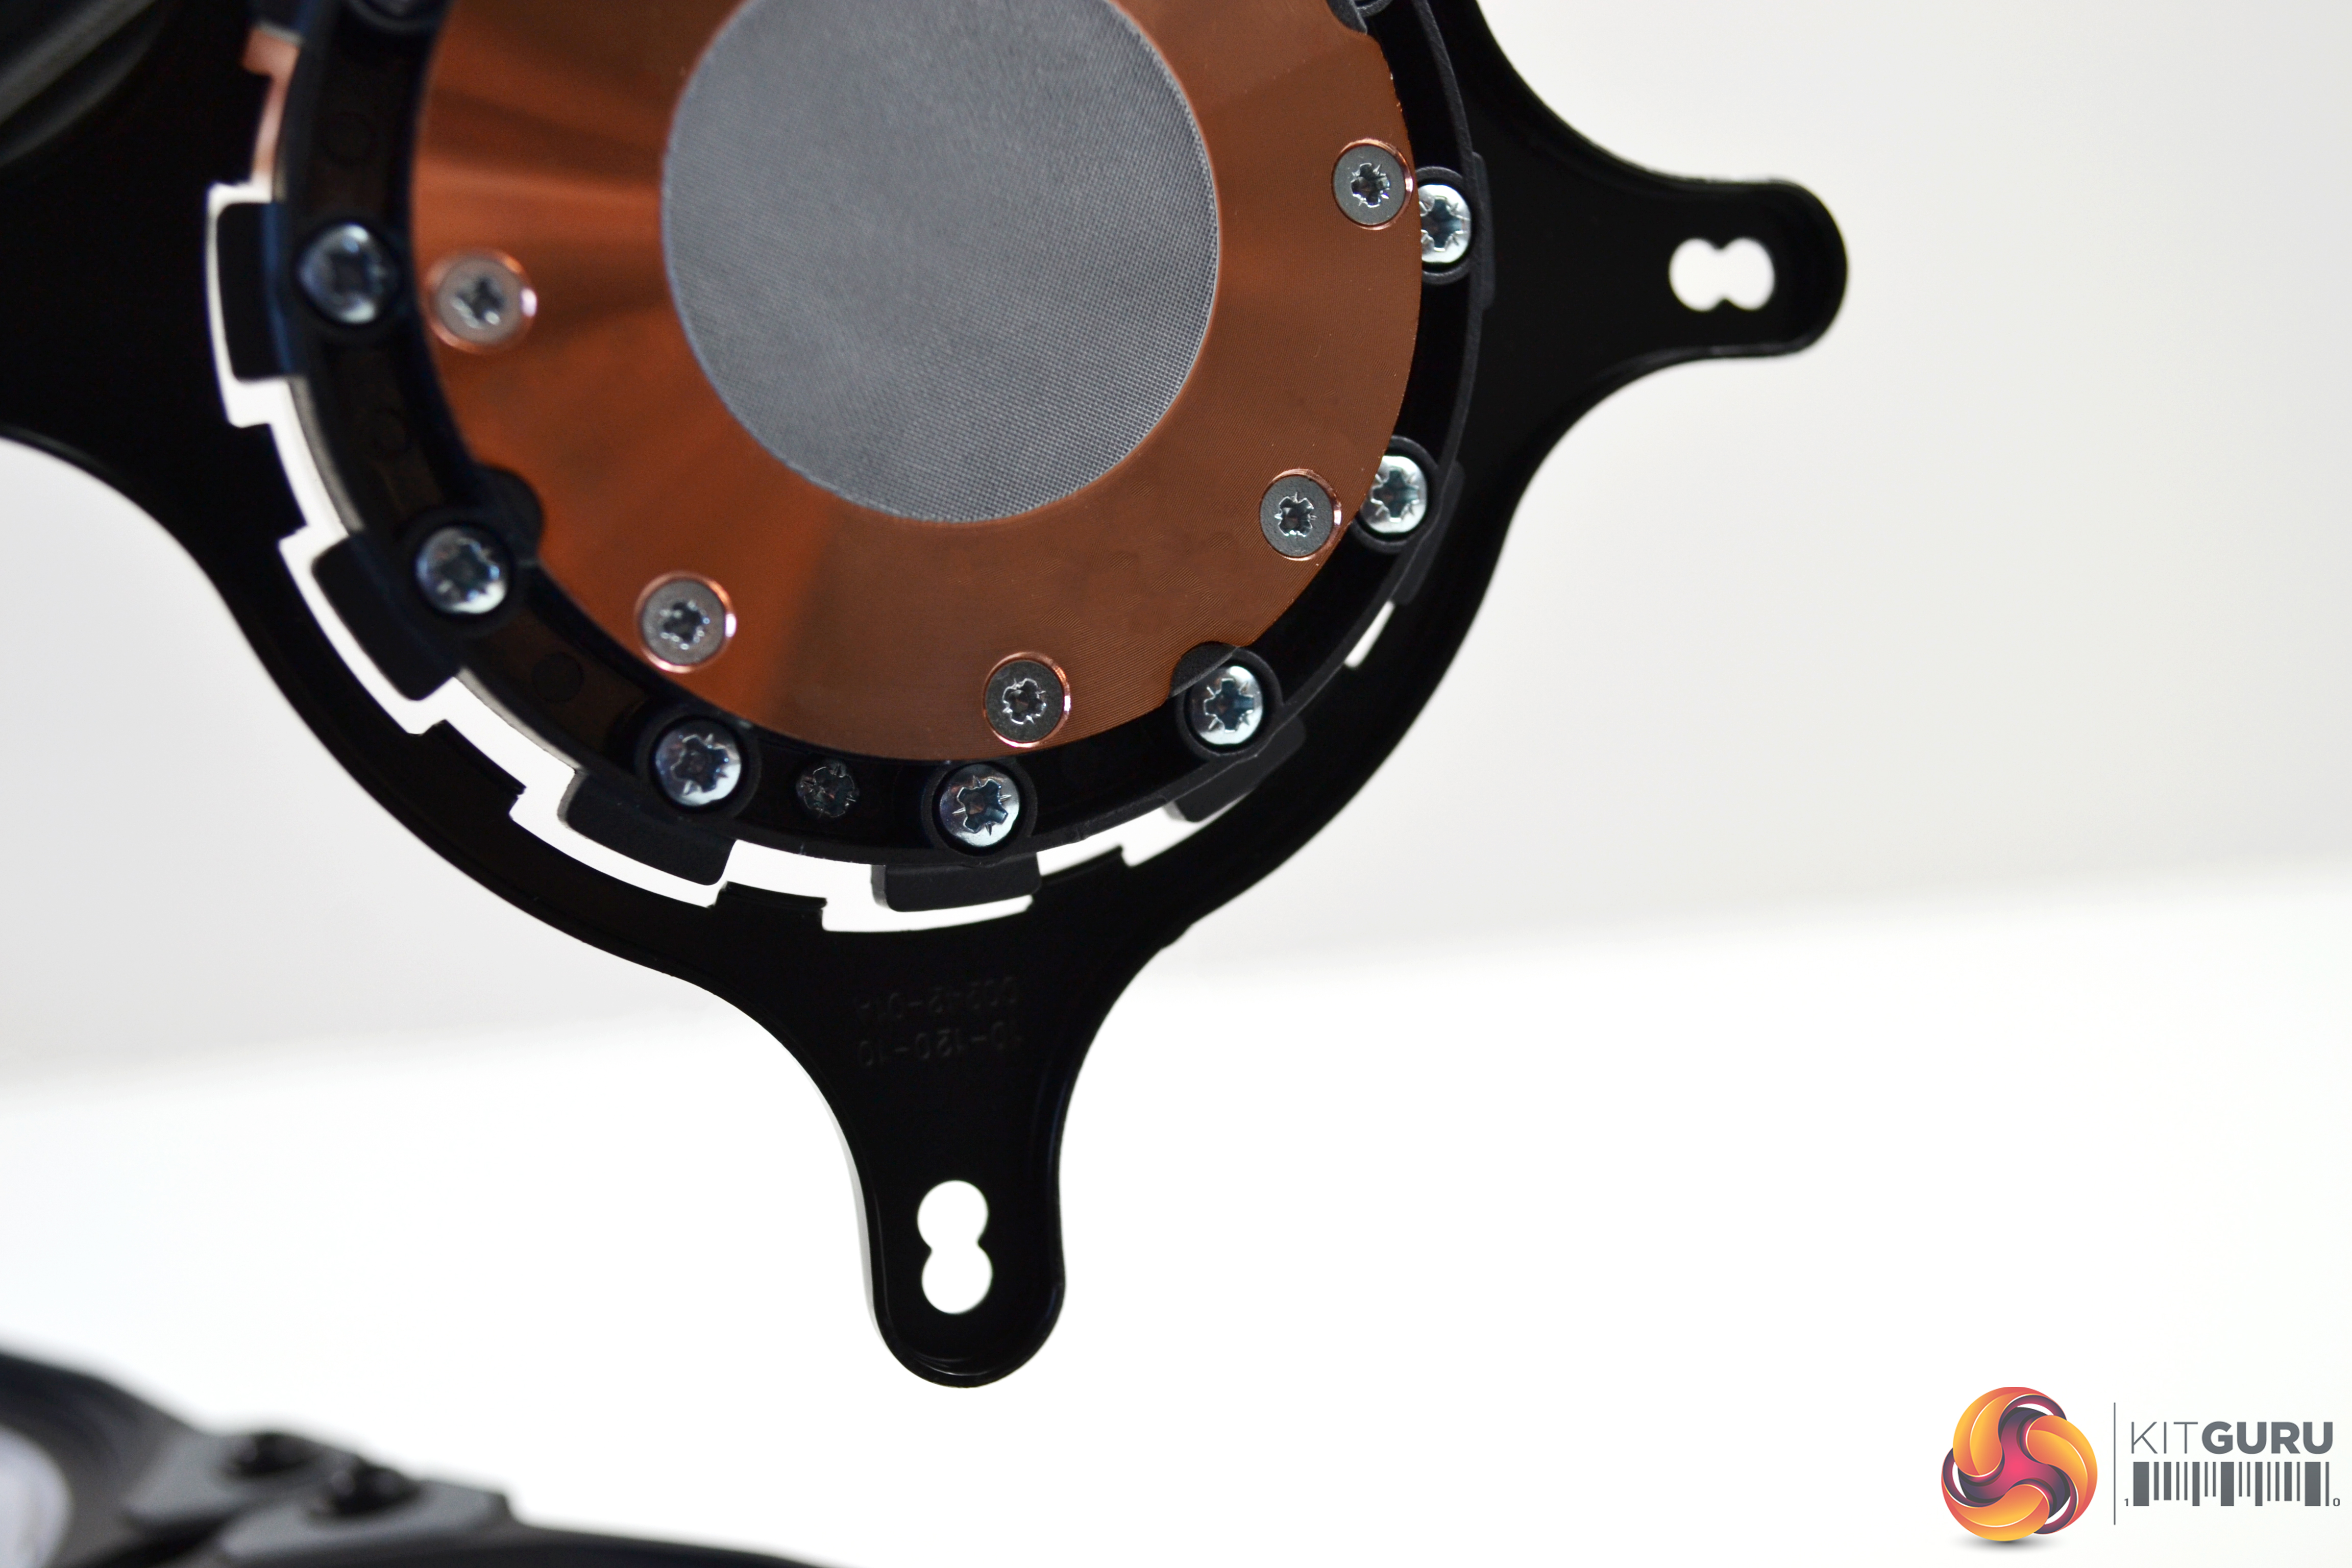
Next, take the appropriate upper retention bracket and slide it over the pump from the underside. Then, rotate it slightly until the hooks on the bracket line up with the notches on the pump.
There are four mounting posts for the 1151 socket, labelled ‘G' on the installation manual. Take these and gently screw them into the back plate from the socket side of the motherboard until they are tight. This should be done by hand, as over tightening could cause damage to the mounting posts or back plate.
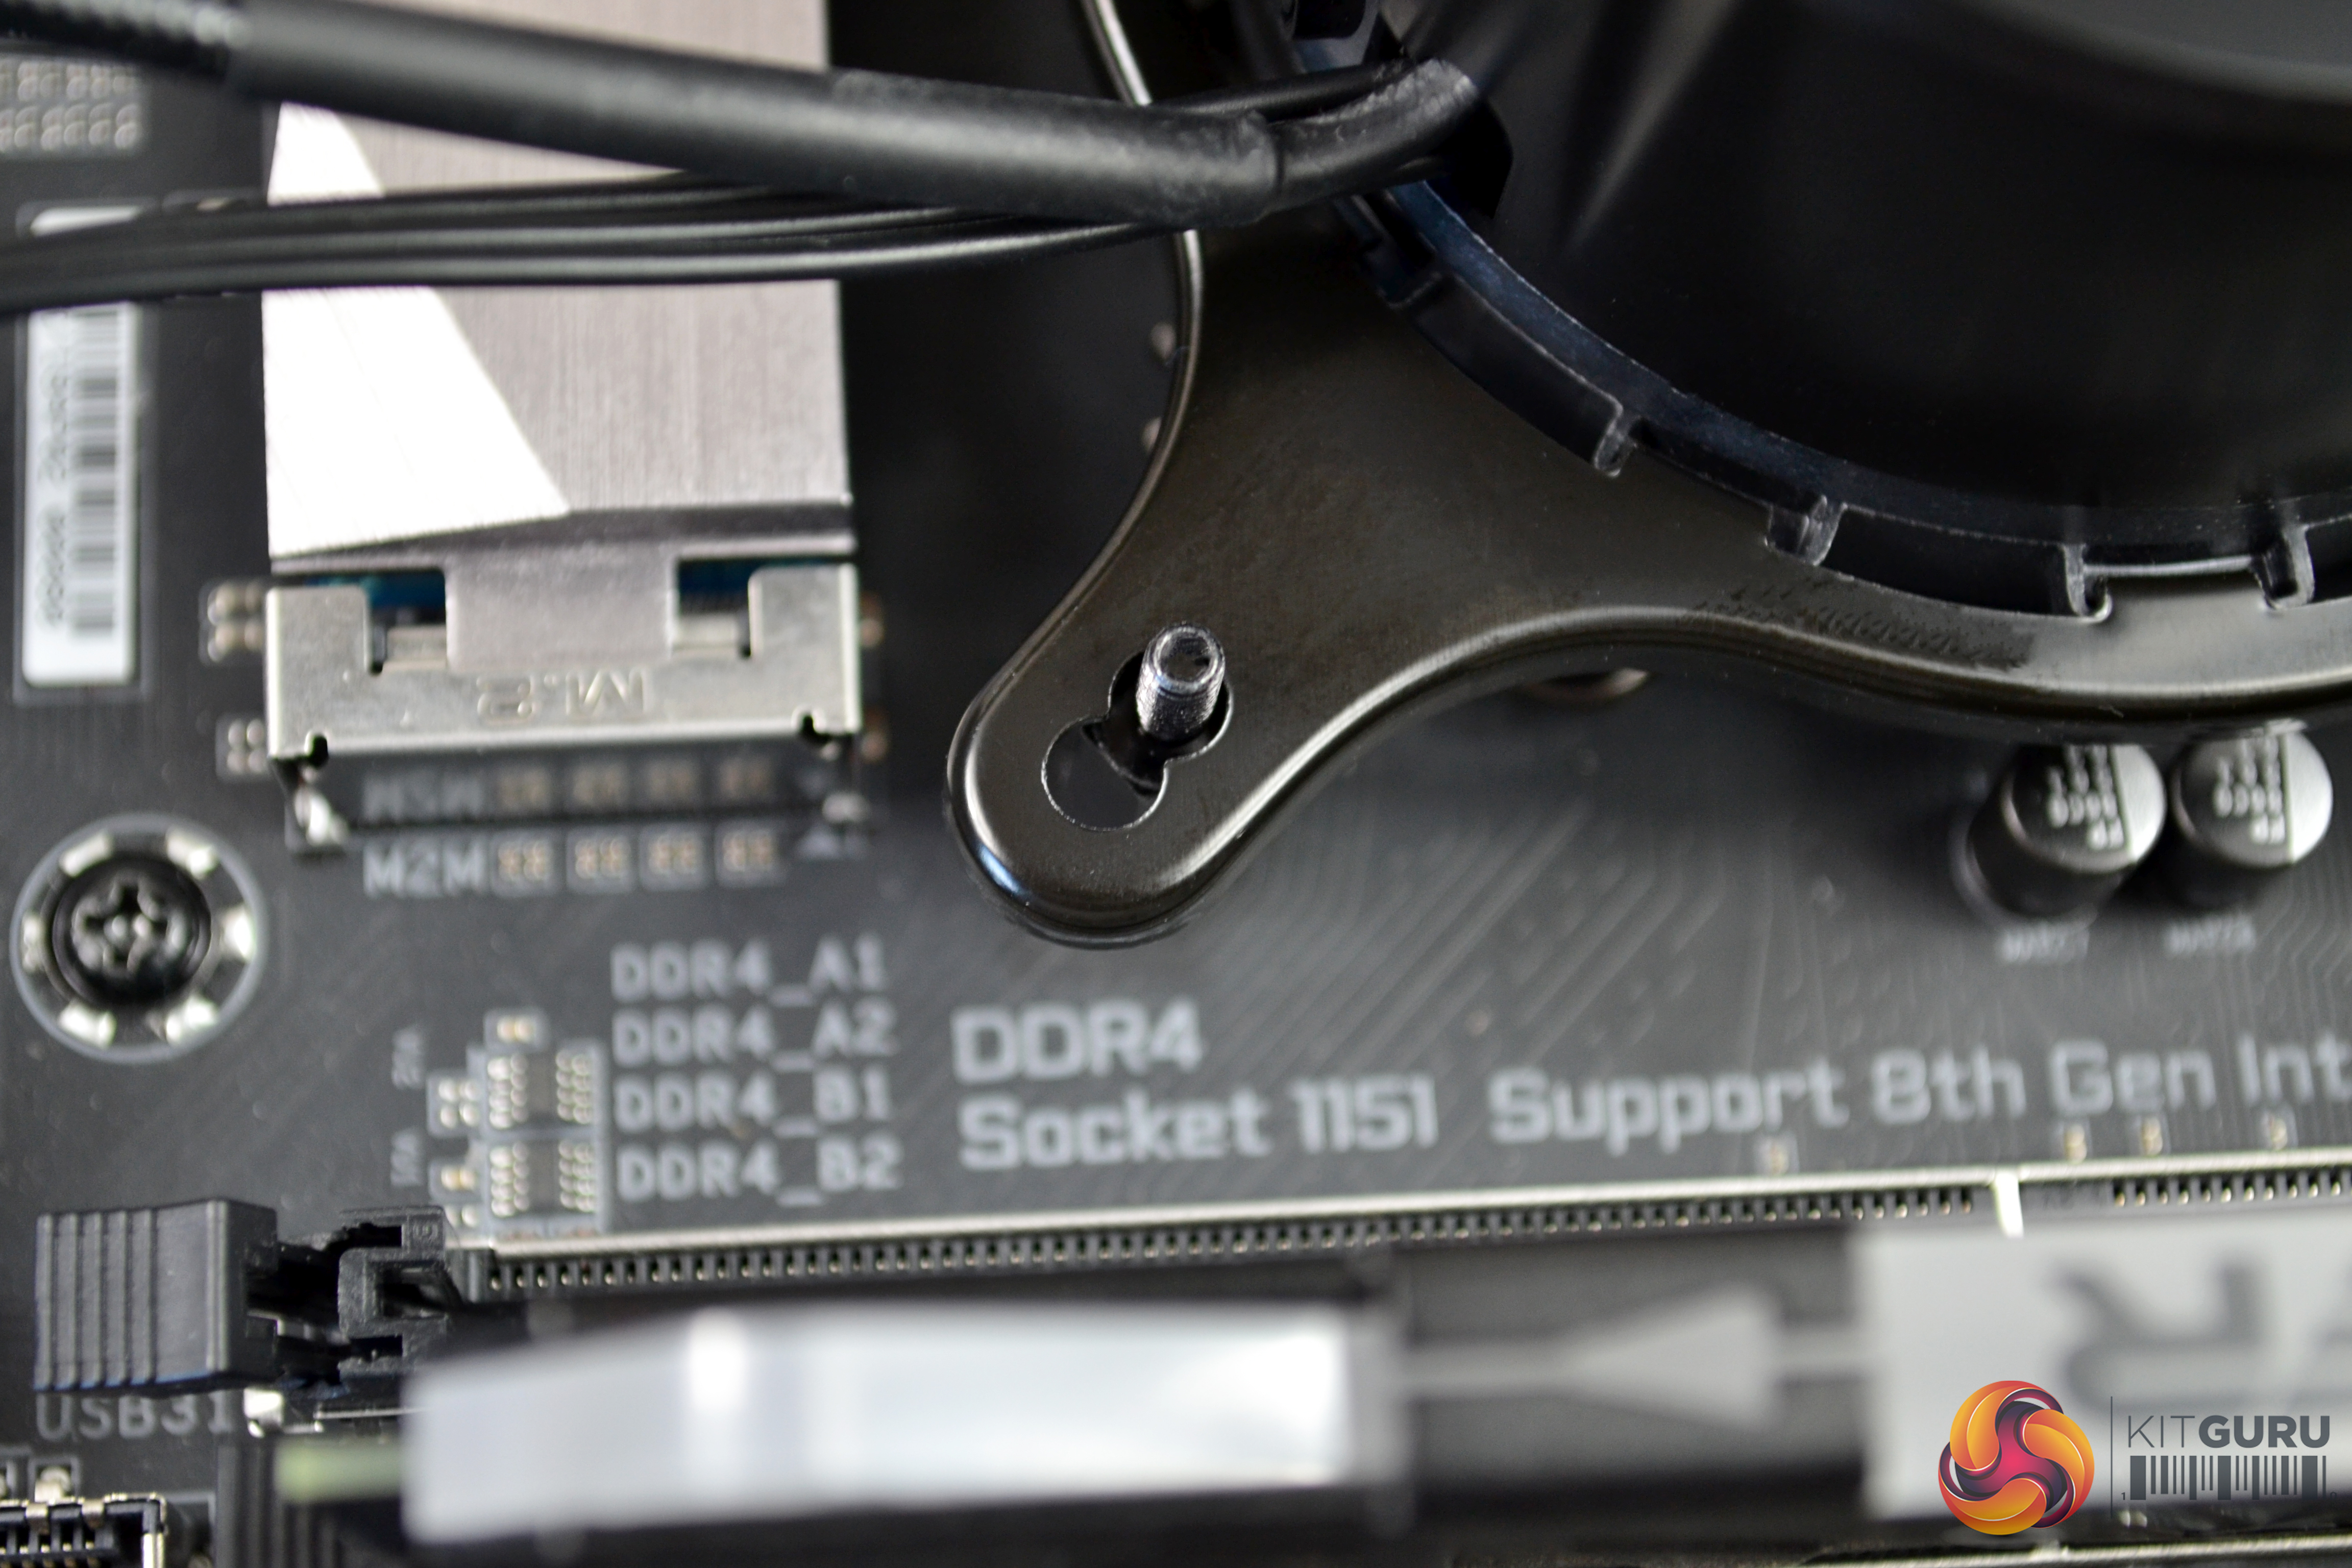
Now, with the upper retention bracket in place on the pump, align the pump assembly in the correct orientation and lower down onto the mounting posts, making sure all four mounting posts pass through the inner holes on the bracket.
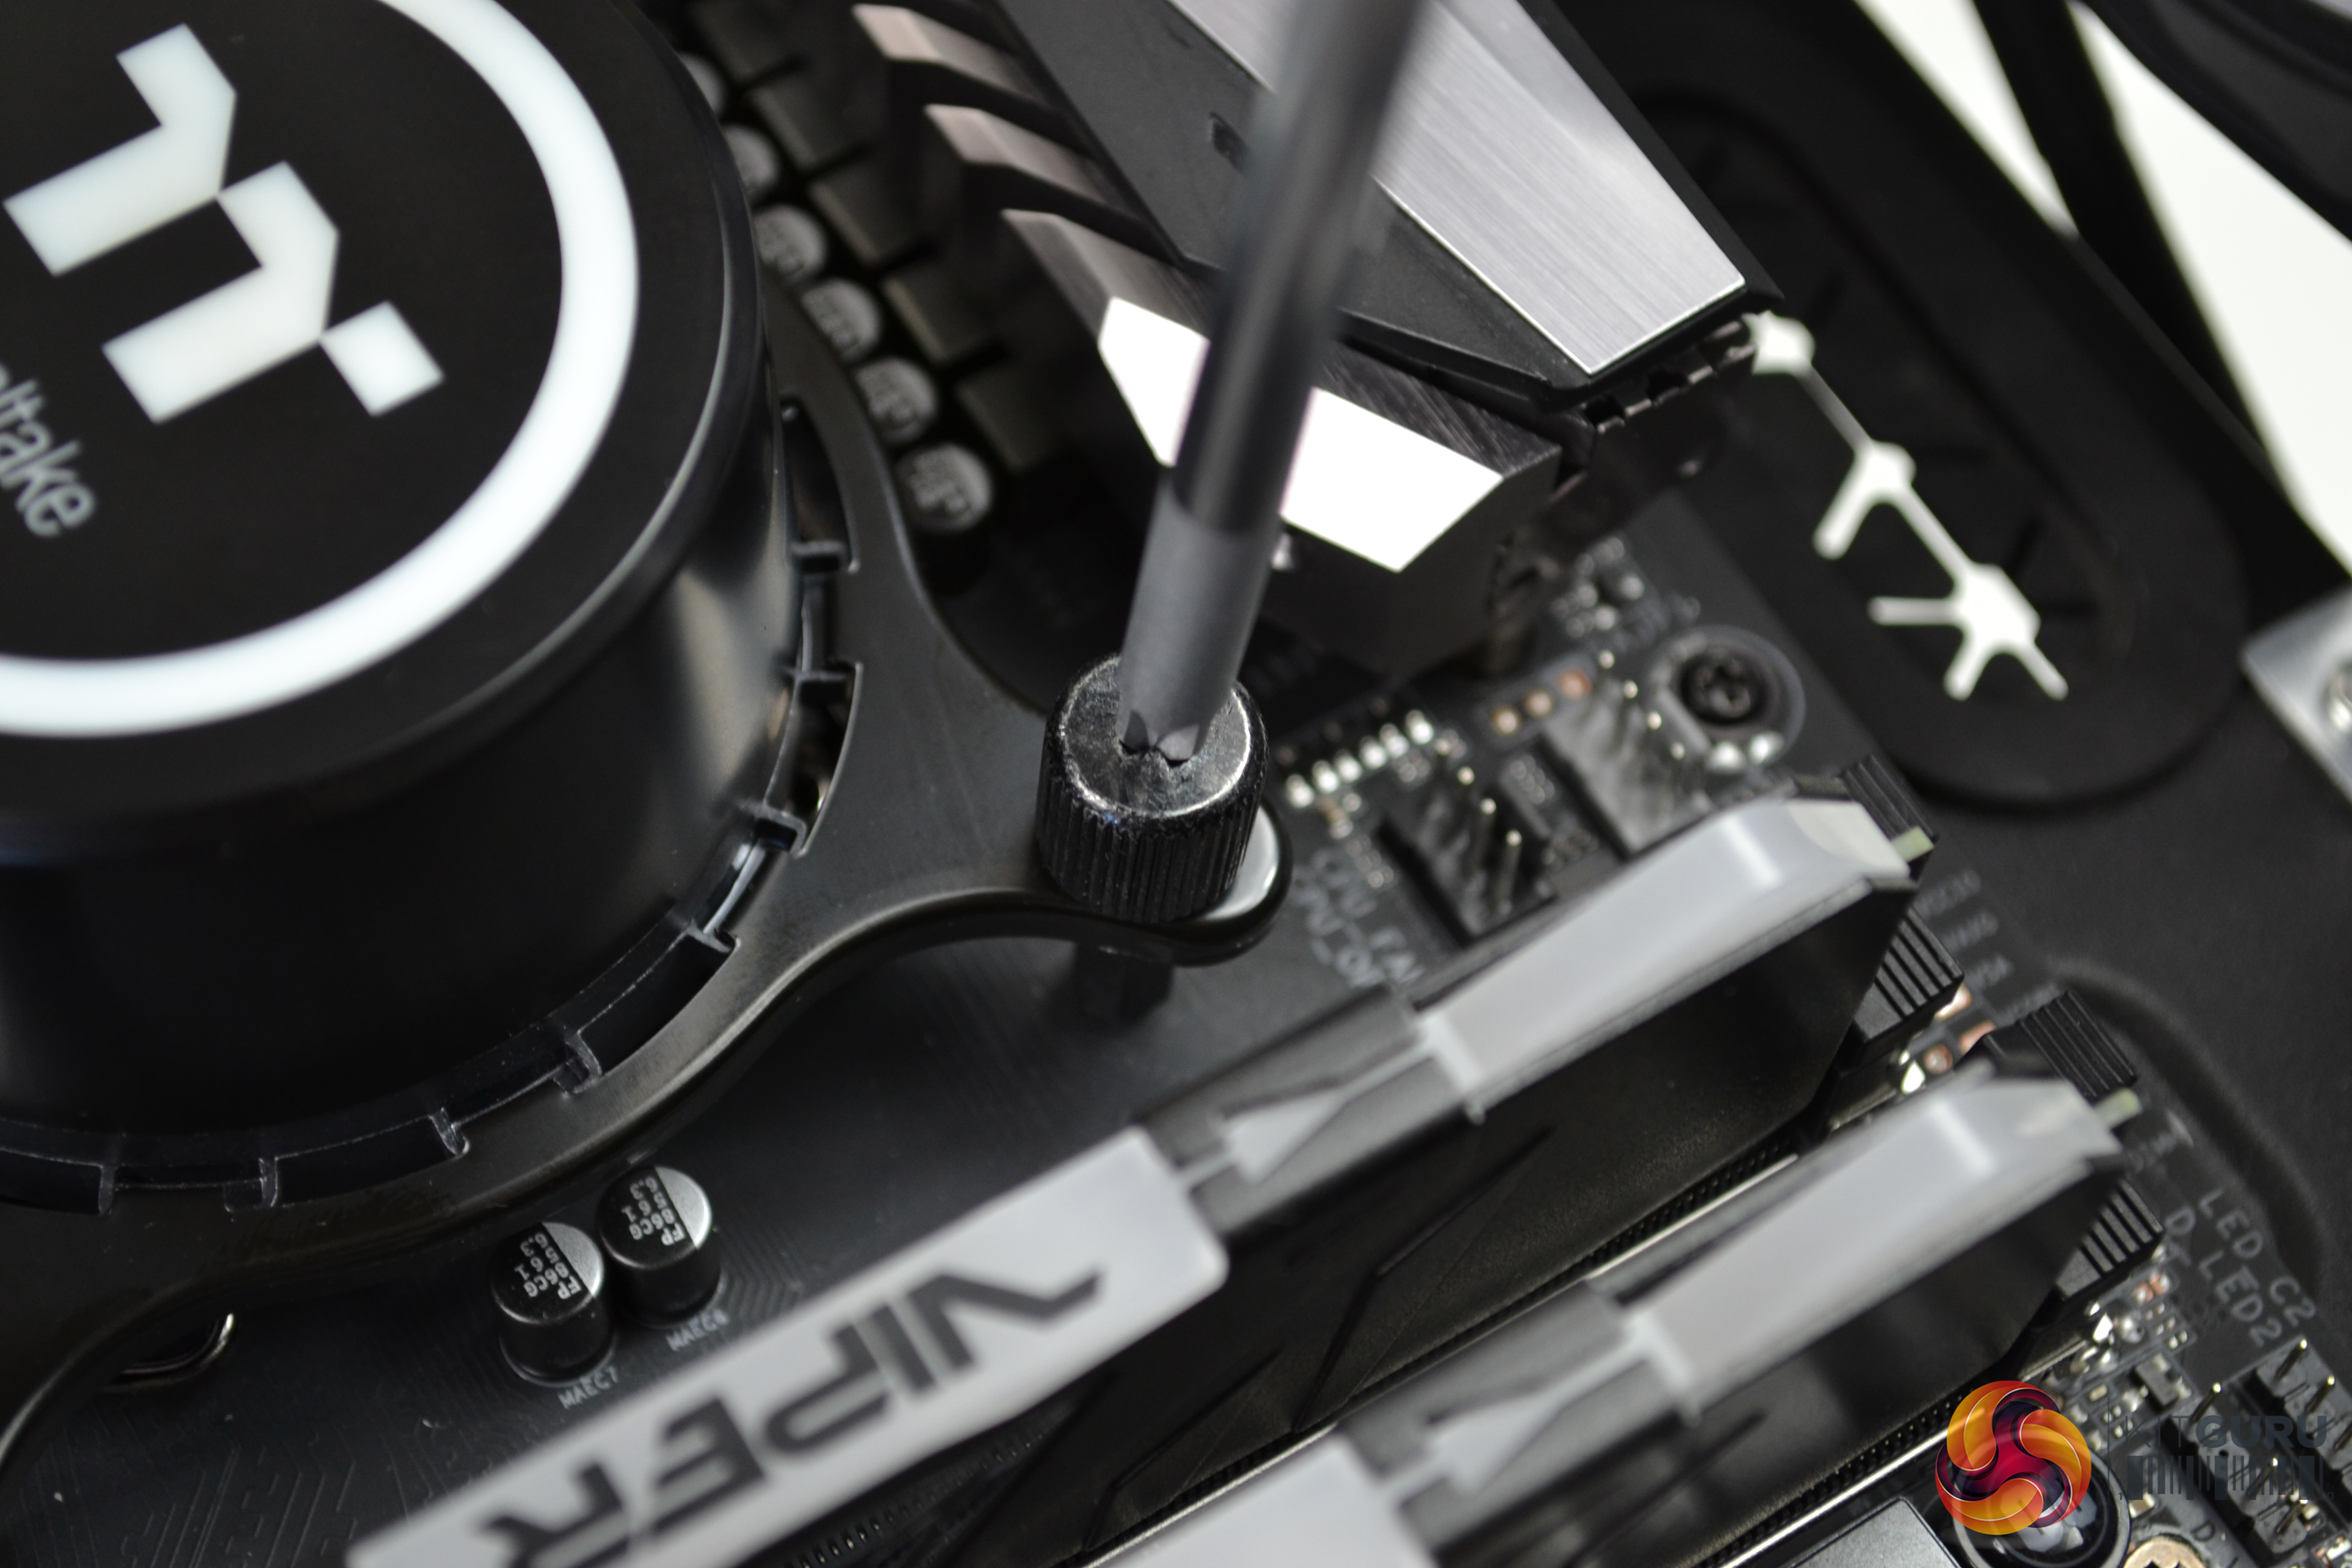
Next, take the four black steel thumbscrews and tighten down equally in an X pattern from corner to corner. This method helps ensure equal pressure and thermal compound spread, when tightening down. Final tightening can be nipped up with a Philips screwdriver. Connect the 3-pin pump cable to the CPU_FAN header on your motherboard.
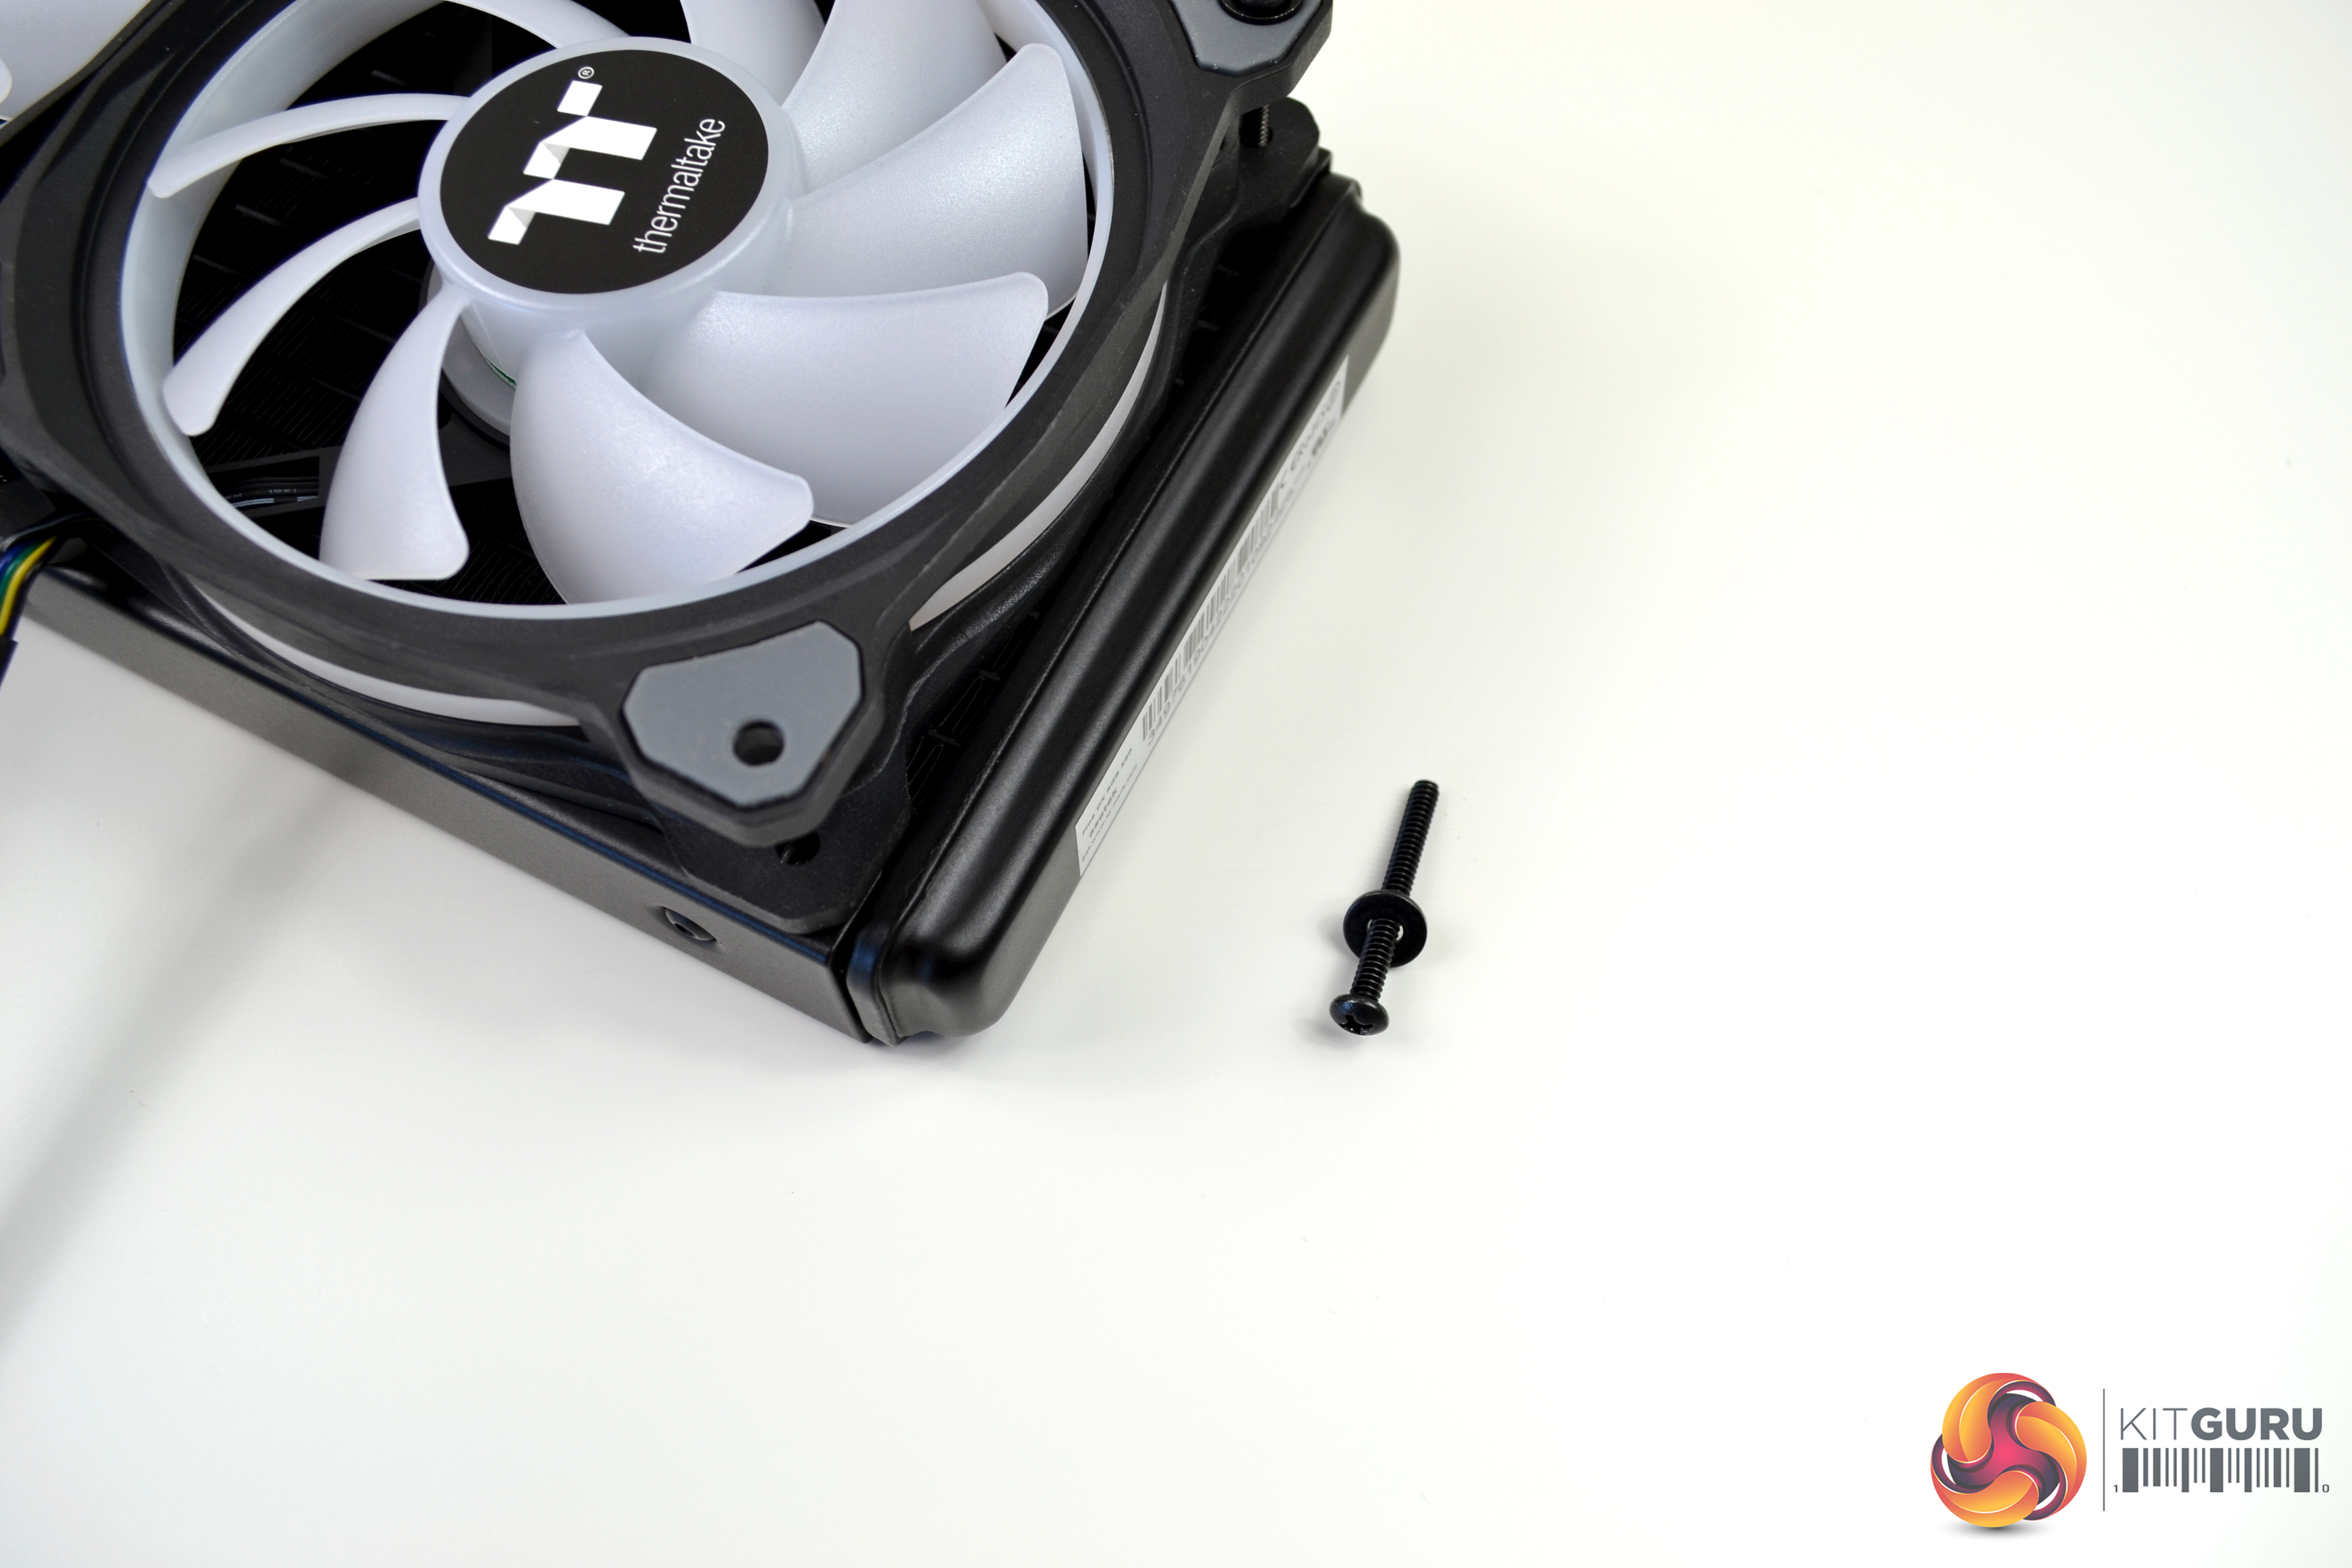
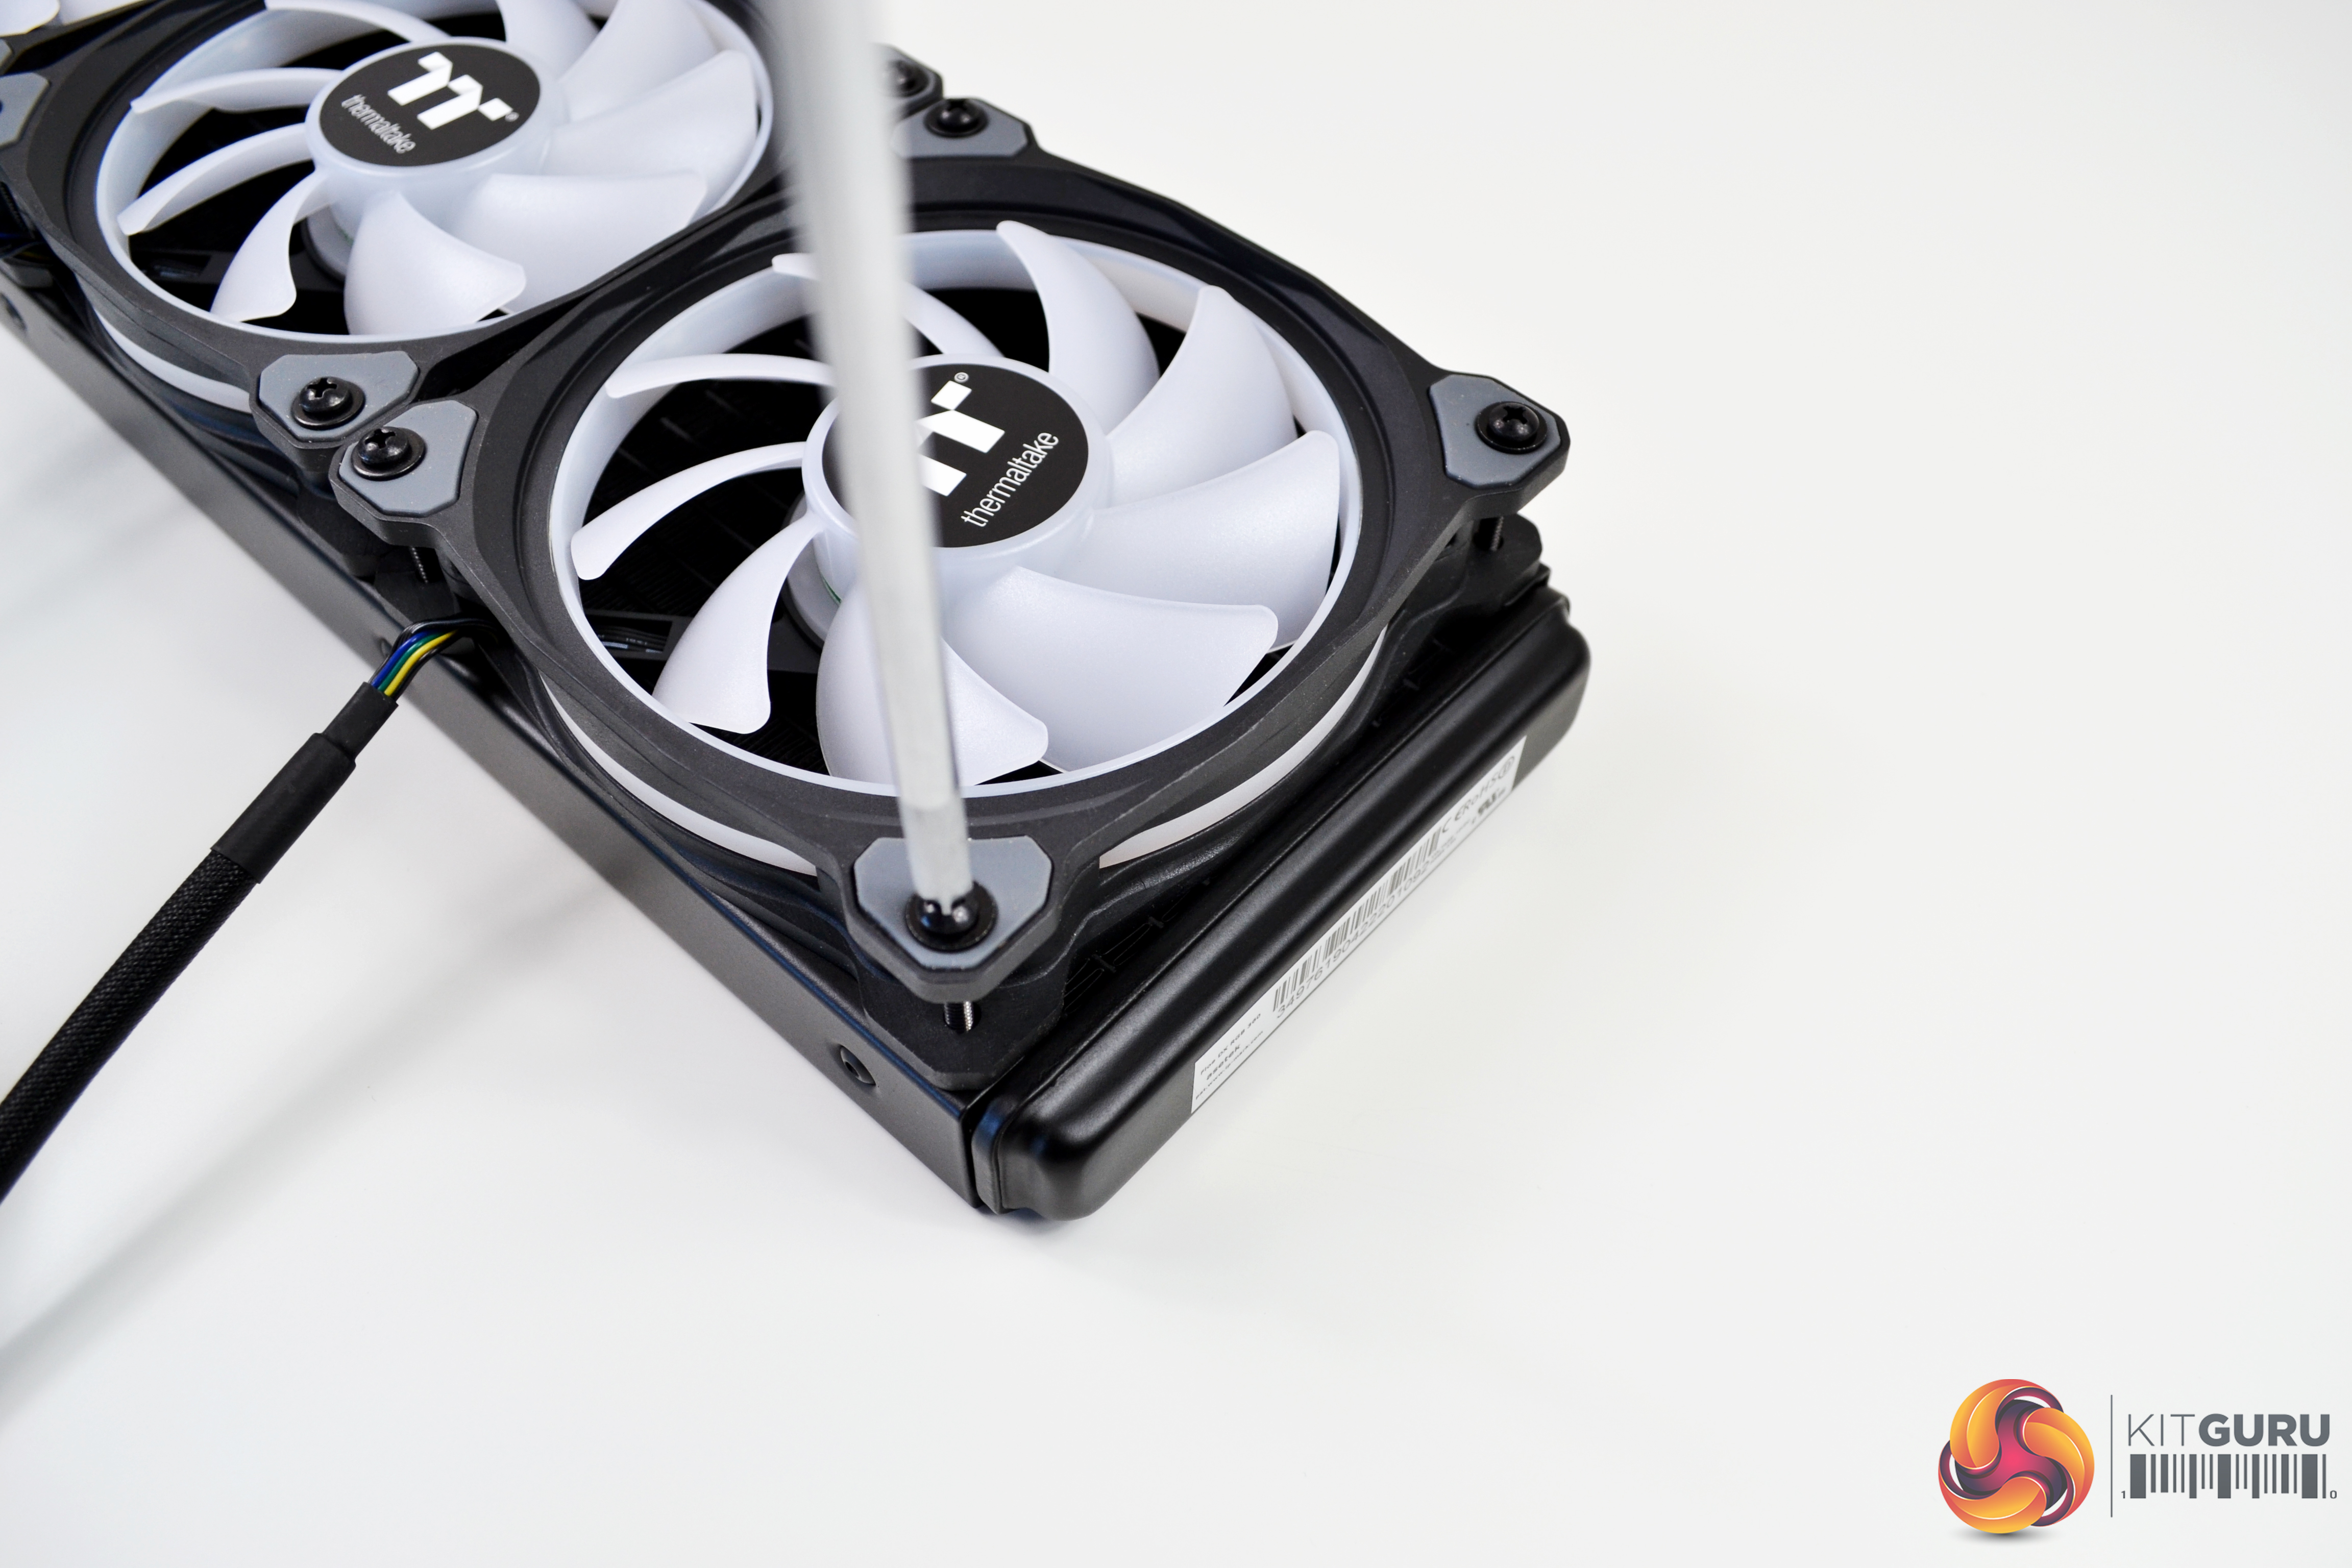
Finally, locate the twelve fan retention screws and black steel washes and secure the three fans to the radiator. Try not to over tighten the screws as it could potentially damage the anti-vibration rubbers, if too much force is applied when tightening.
The process of Mounting the radiator on our test bench is significantly different to mounting in a PC case, so it would not be relevant to detail the process. Once you have decided on the location you want to mount the radiator in your case, follow the simple directions in the manual and installation of the radiator should be easy.
Digital RGB Lighting Controller Installation

Installation of the digital RGB lighting controller is a straightforward process. On the under side of the controller, there are numbers associated with the RGB ports that the fans and pump connect to. The three fans should be plugged in ports numbered one to three and the pump should be connected to port number four. There are five ports in total on the controller for connecting a range of Thermaltake RGB products, so you could potentially plug one more fan into the controller included with the Floe DX.
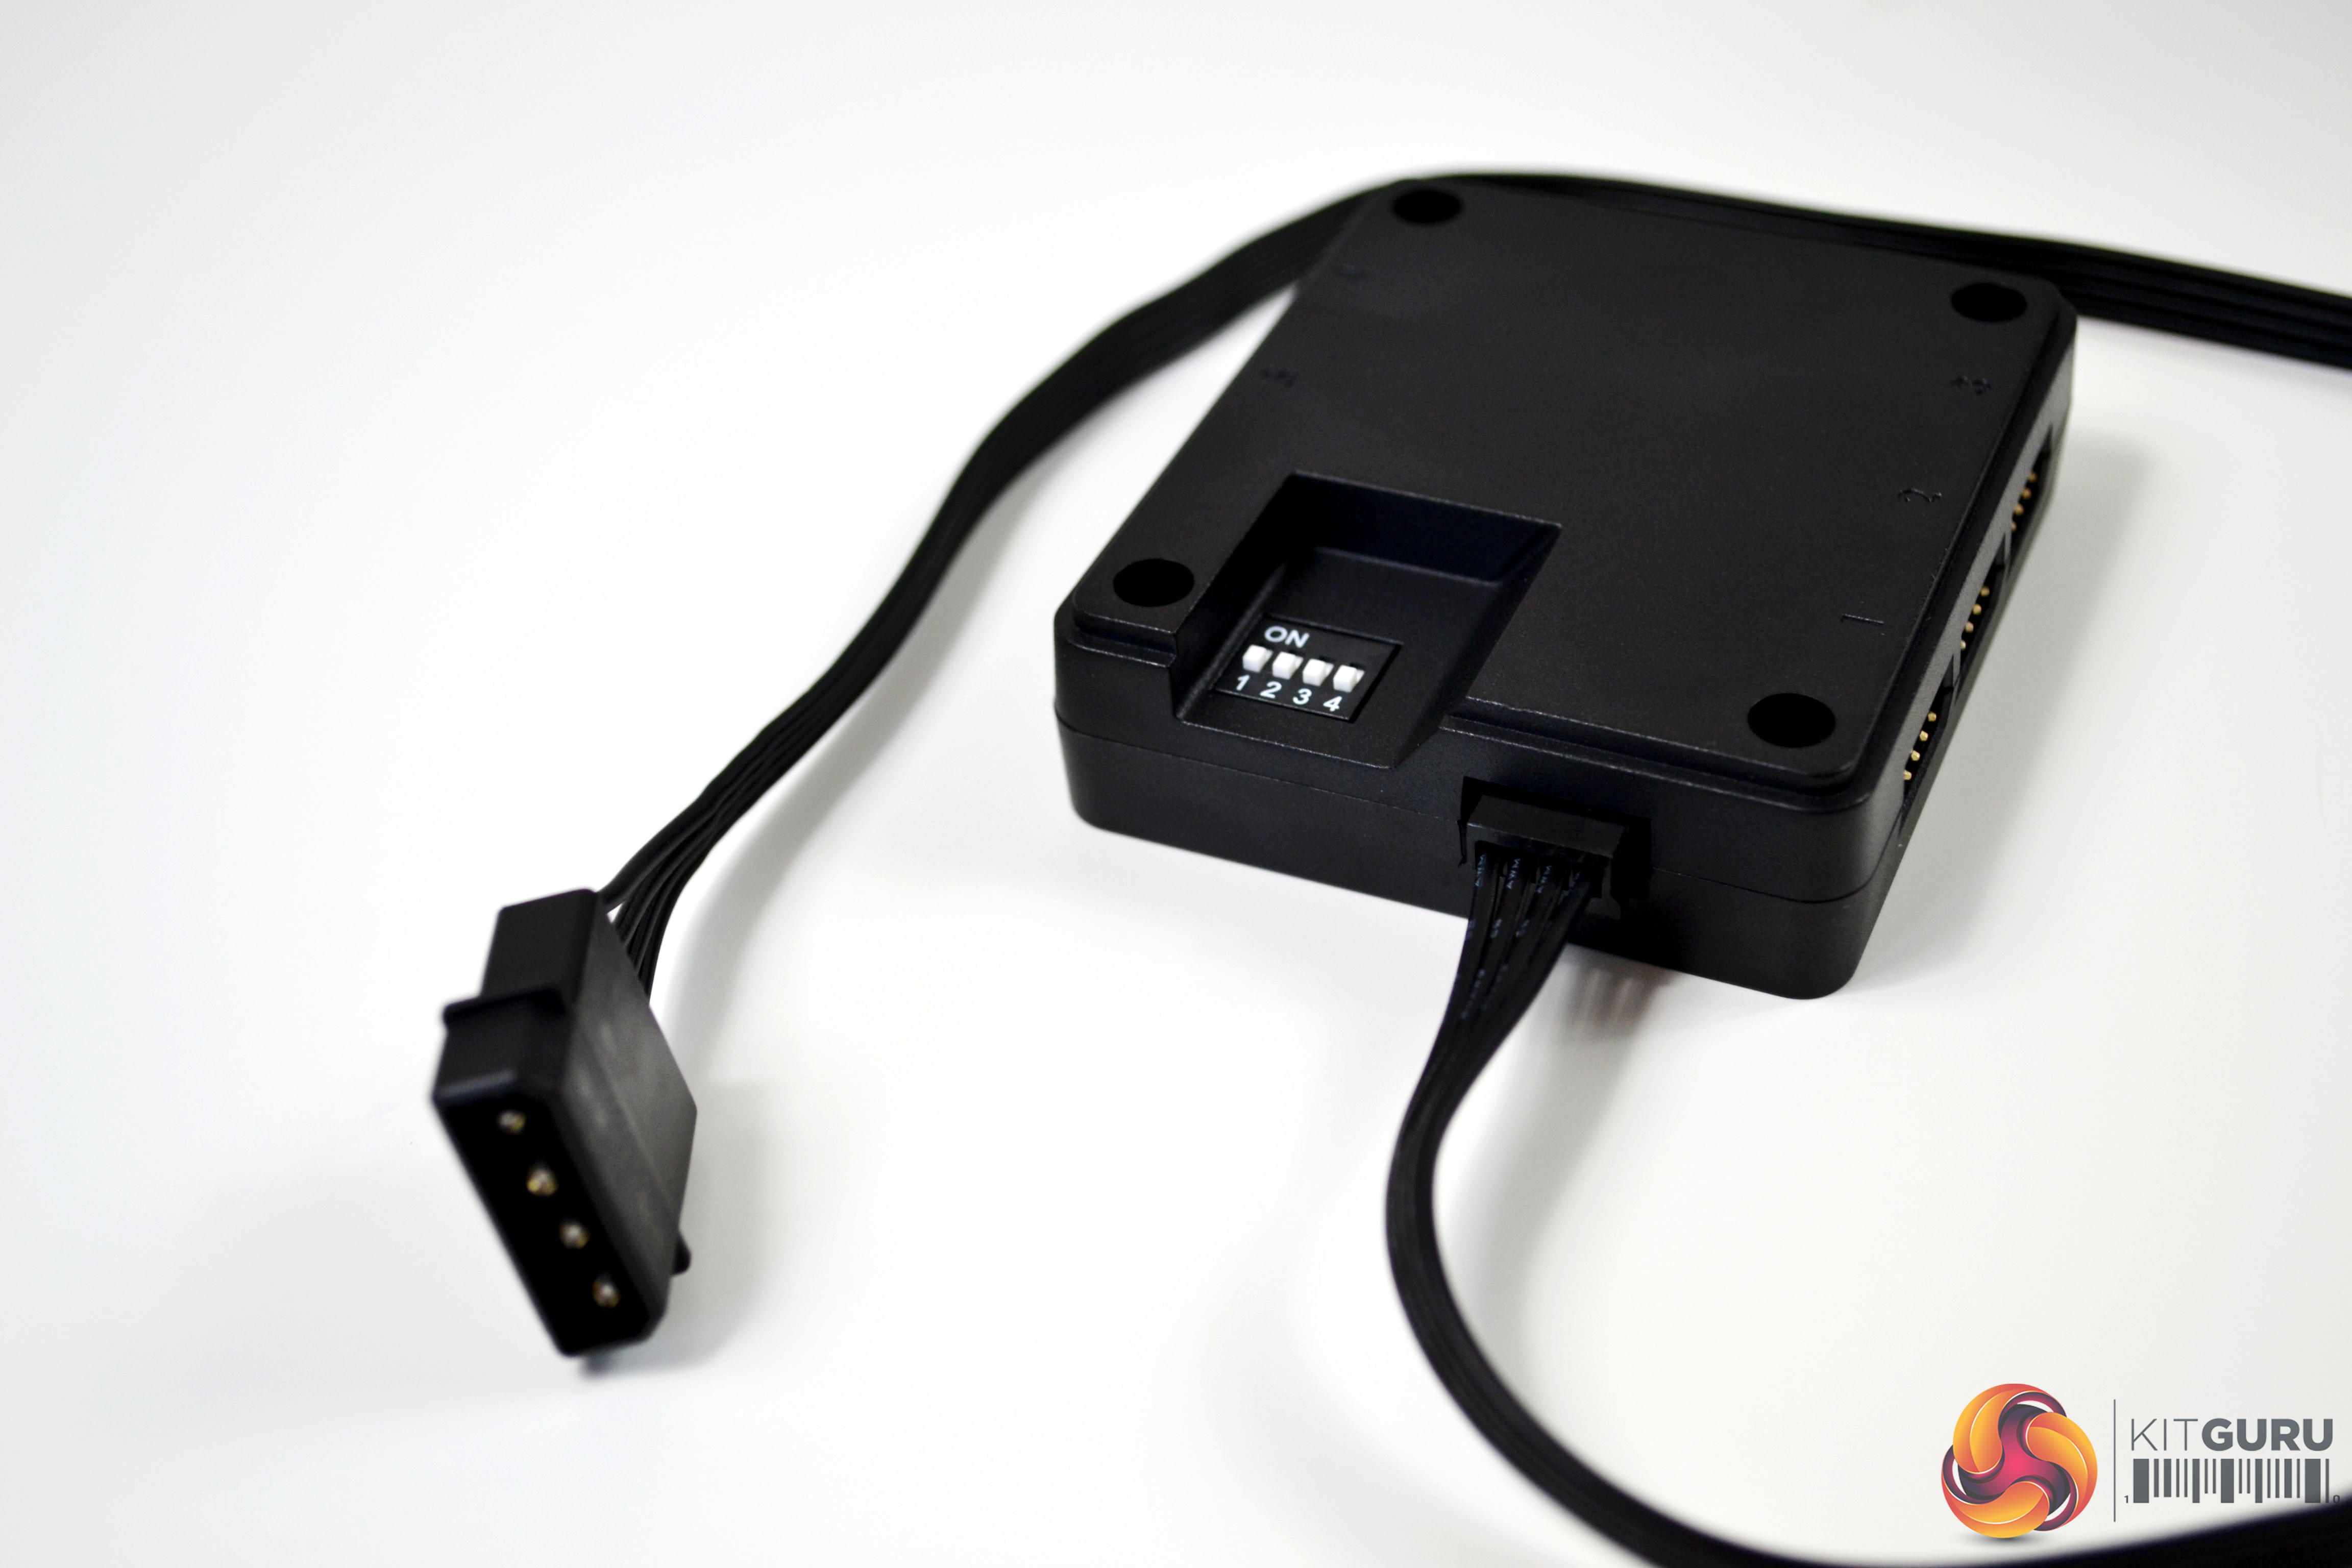
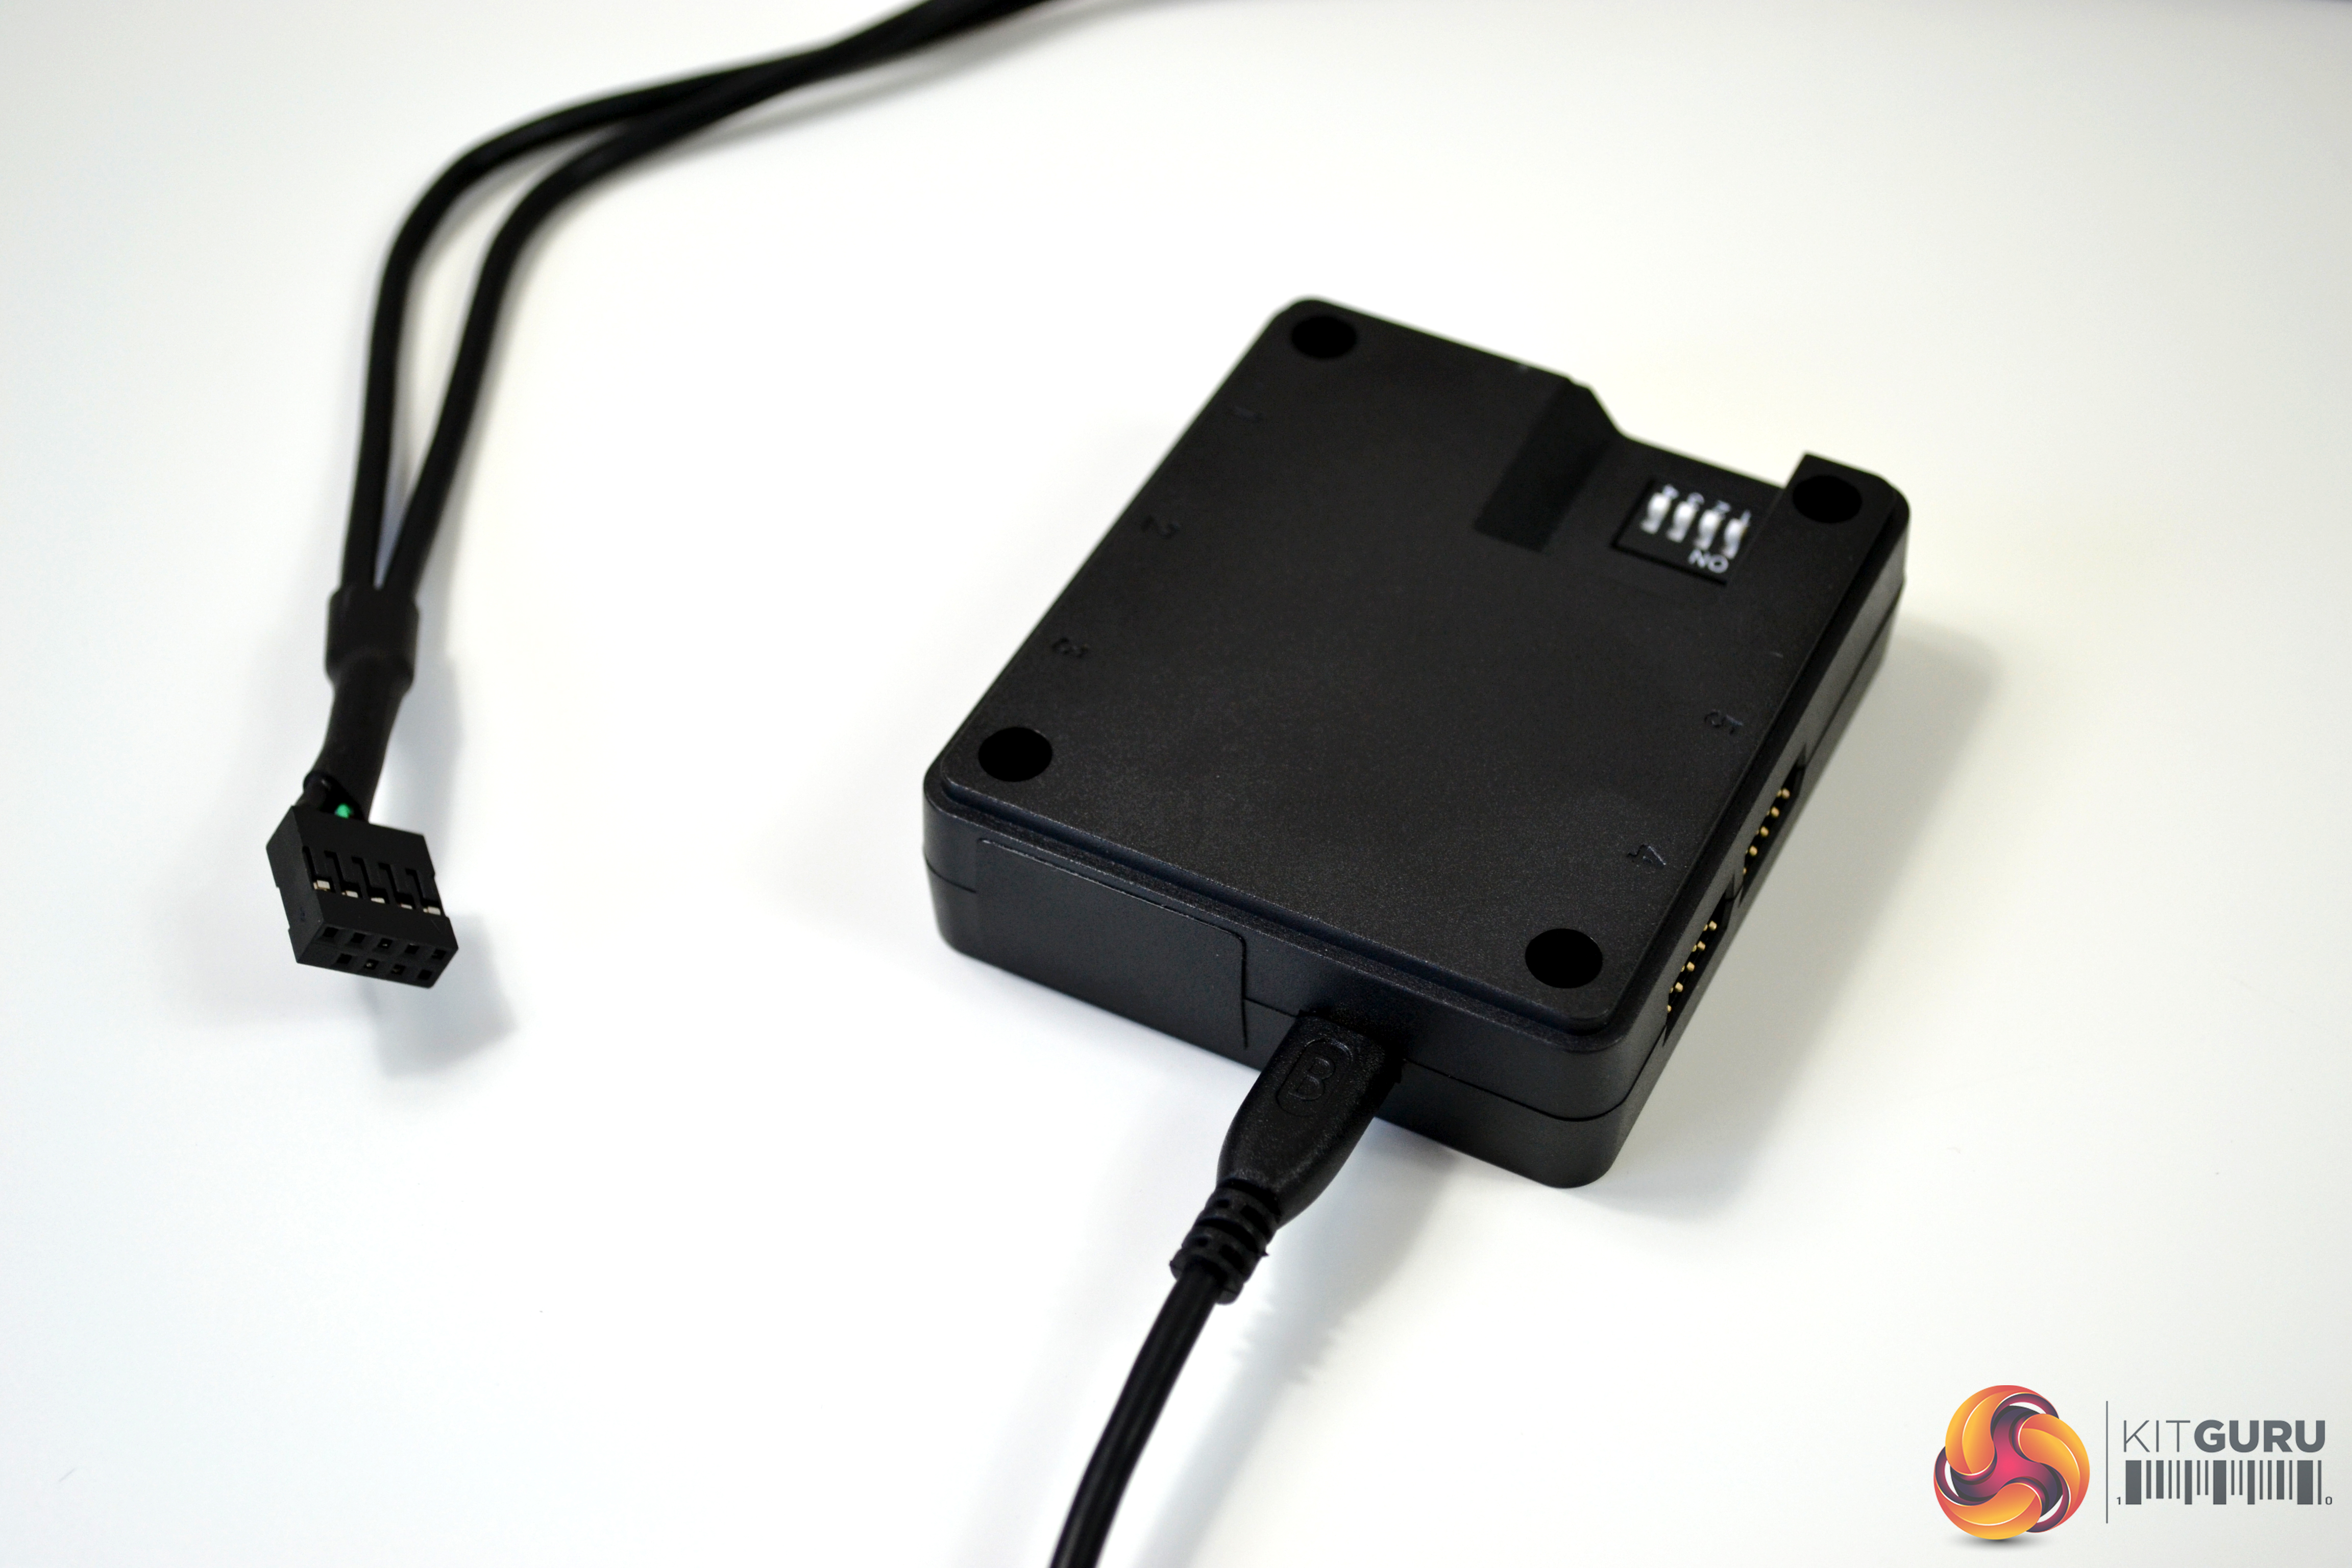
A four pin Molex connection is used to power the controller and a USB cable is supplied to connect the controller to a USB header on your motherboard. The USB connection is used to communicate with the software. The controller will power on without the USB cable connected and will display the default RGB lighting effects.
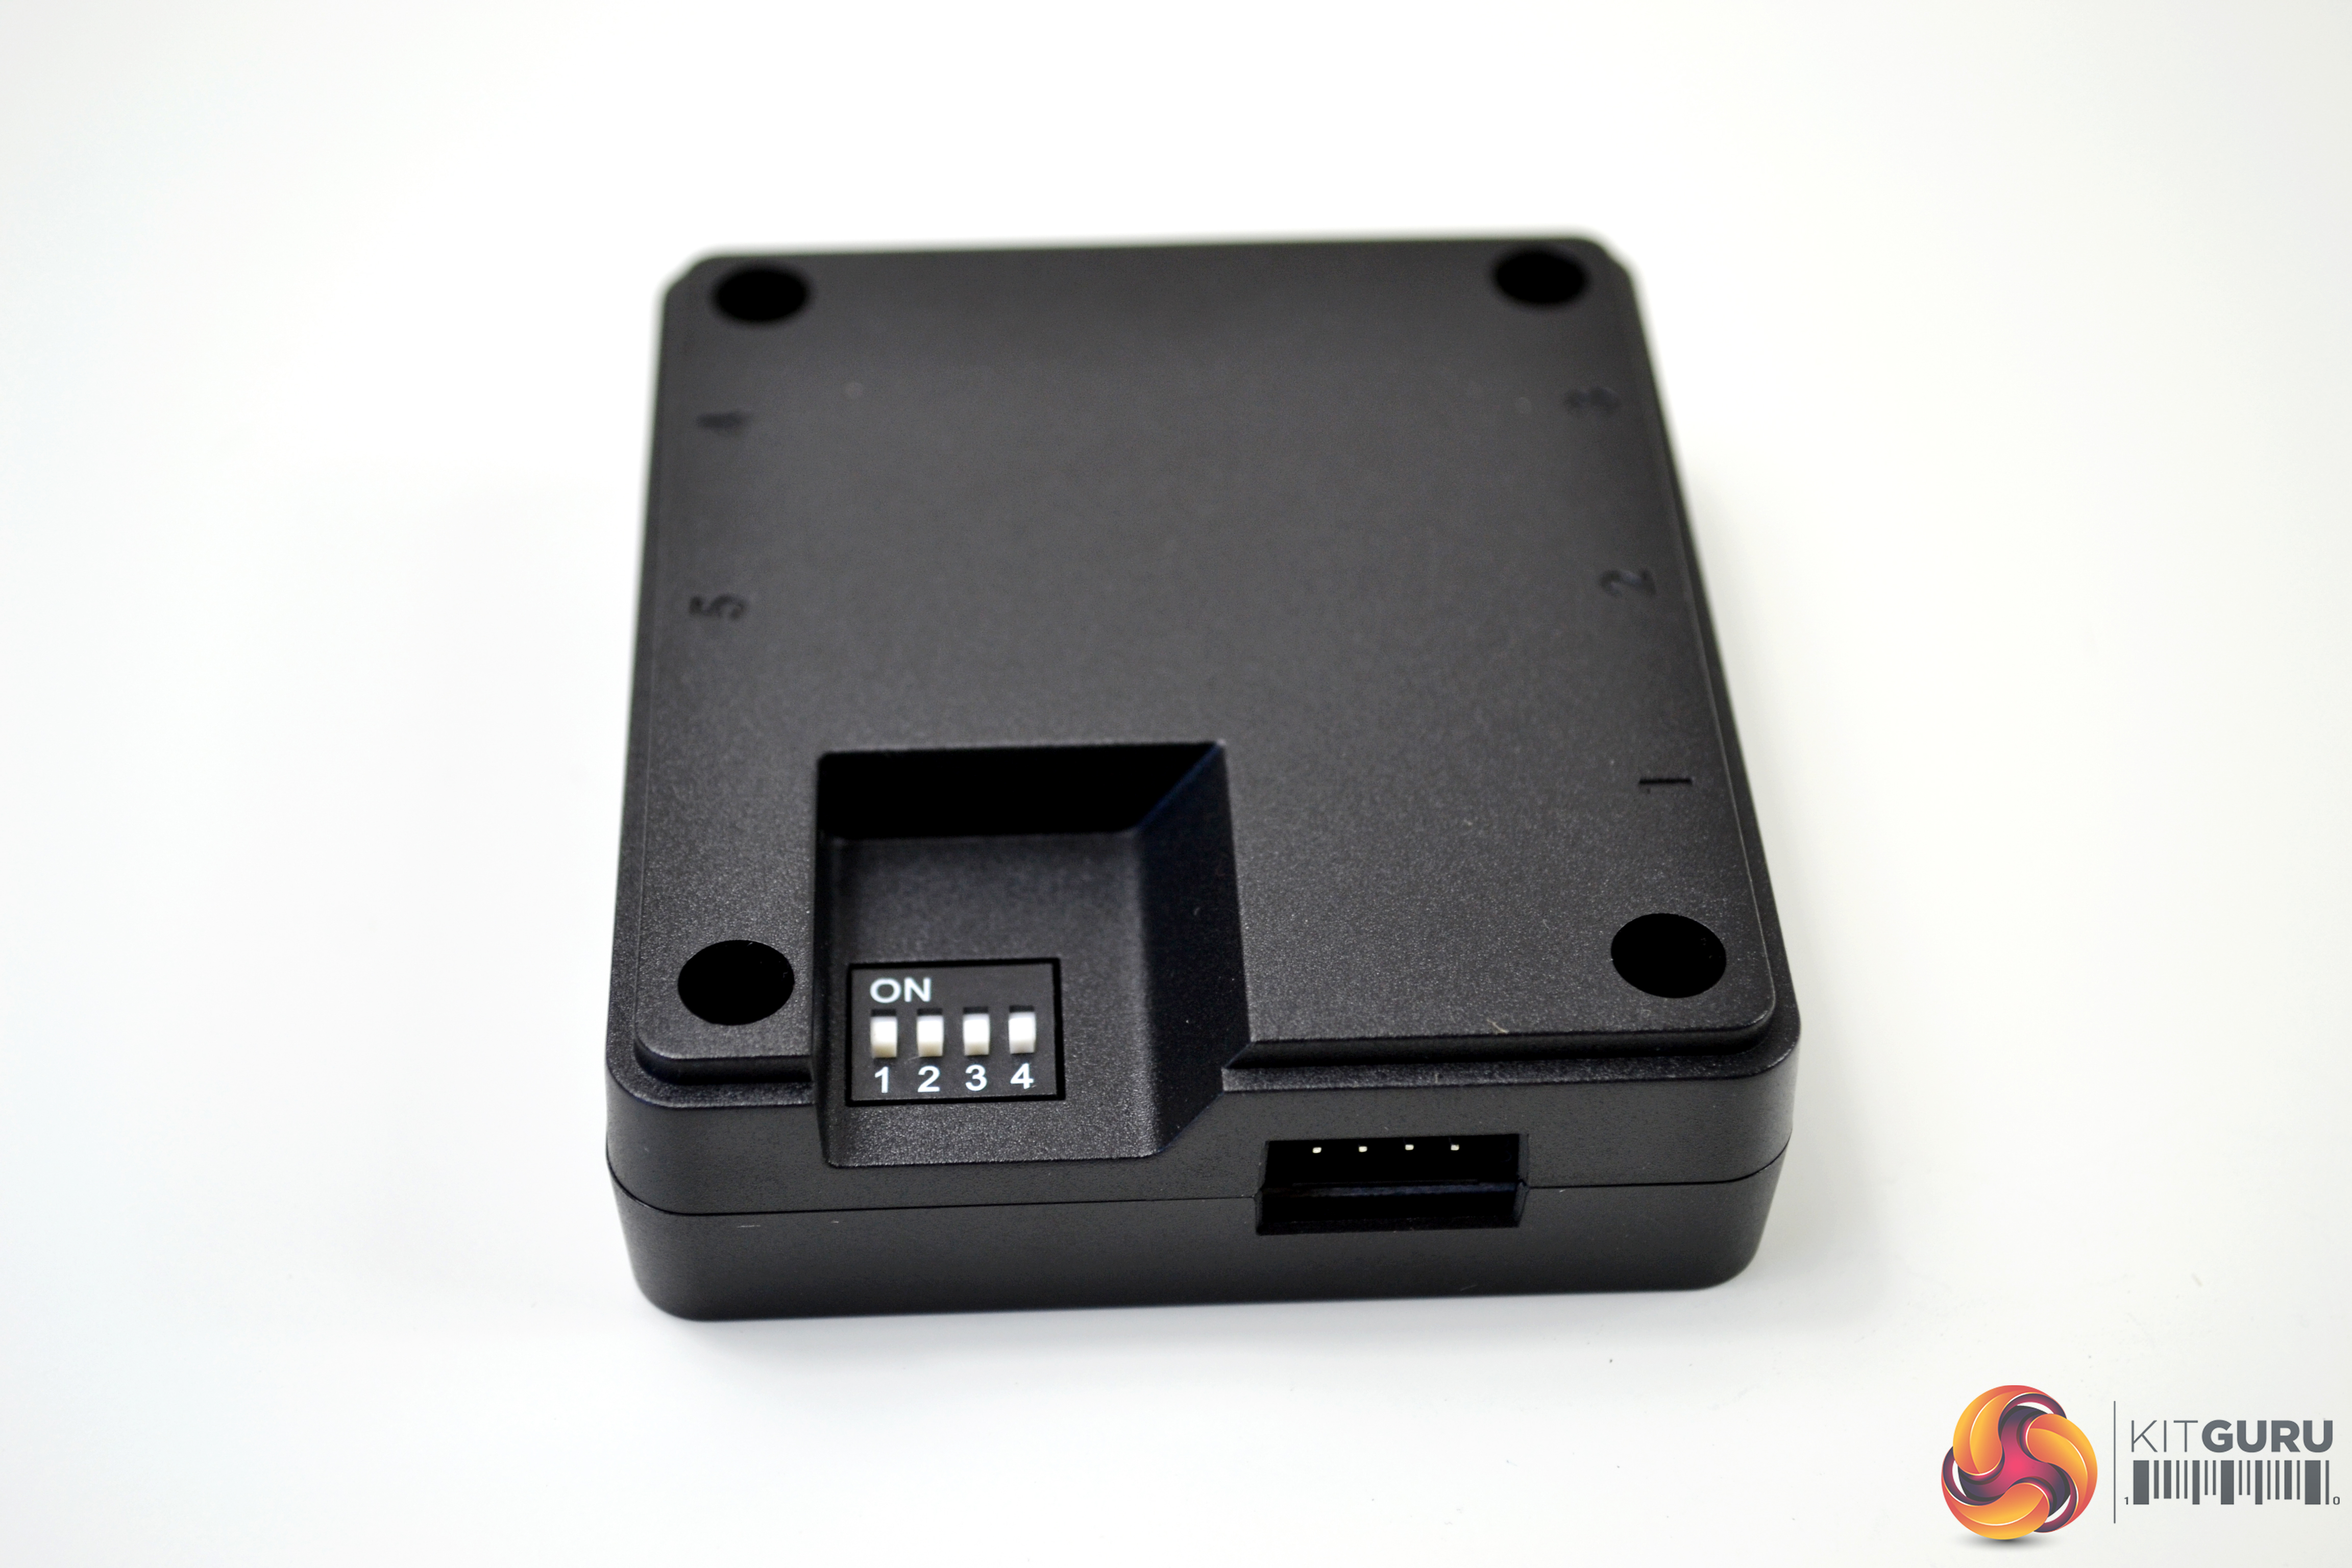
Thermaltake have made it possible to link multiple controllers to one system, which is useful if you have a large range of their RGB products. On the under side of the controller, there is a DIP switch, which is used to give each controller a number. The configuration is clearly shown in the user manual and it is possible to add up to sixteen controllers in one system.
Software Setup
With no official support for the Thermaltake Floe DX 360 to integrate with motherboard manufacturers' own RGB lighting software, such as Gigabyte RGB Fusion and Asus Aura Sync, you are encouraged to use Thermaltake's TT RGB plus software.
This comes in the form of a Windows application or Google Play Store App for Android and Apple Store App for iOS devices. Thermaltake refer to this system as the TT RGB Plus Ecosystem, which provides many possibilities for playing with colours, synchronising lights to games, music, CPU temperatures or other TT RGB PLUS products, including case fans, CPU/VGA waterblocks, AIO CPU coolers, PSUs, LED strips and peripherals.
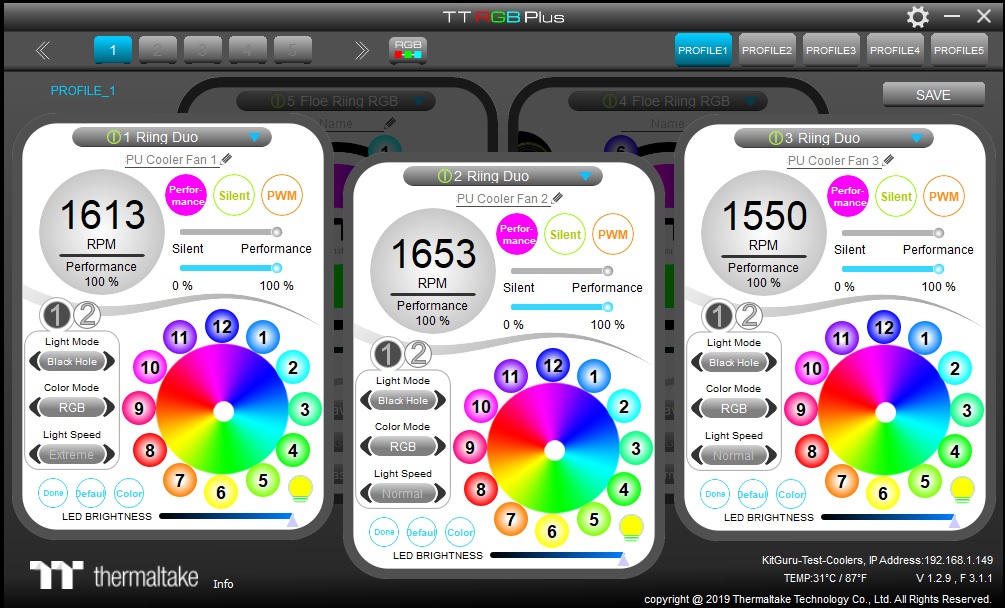
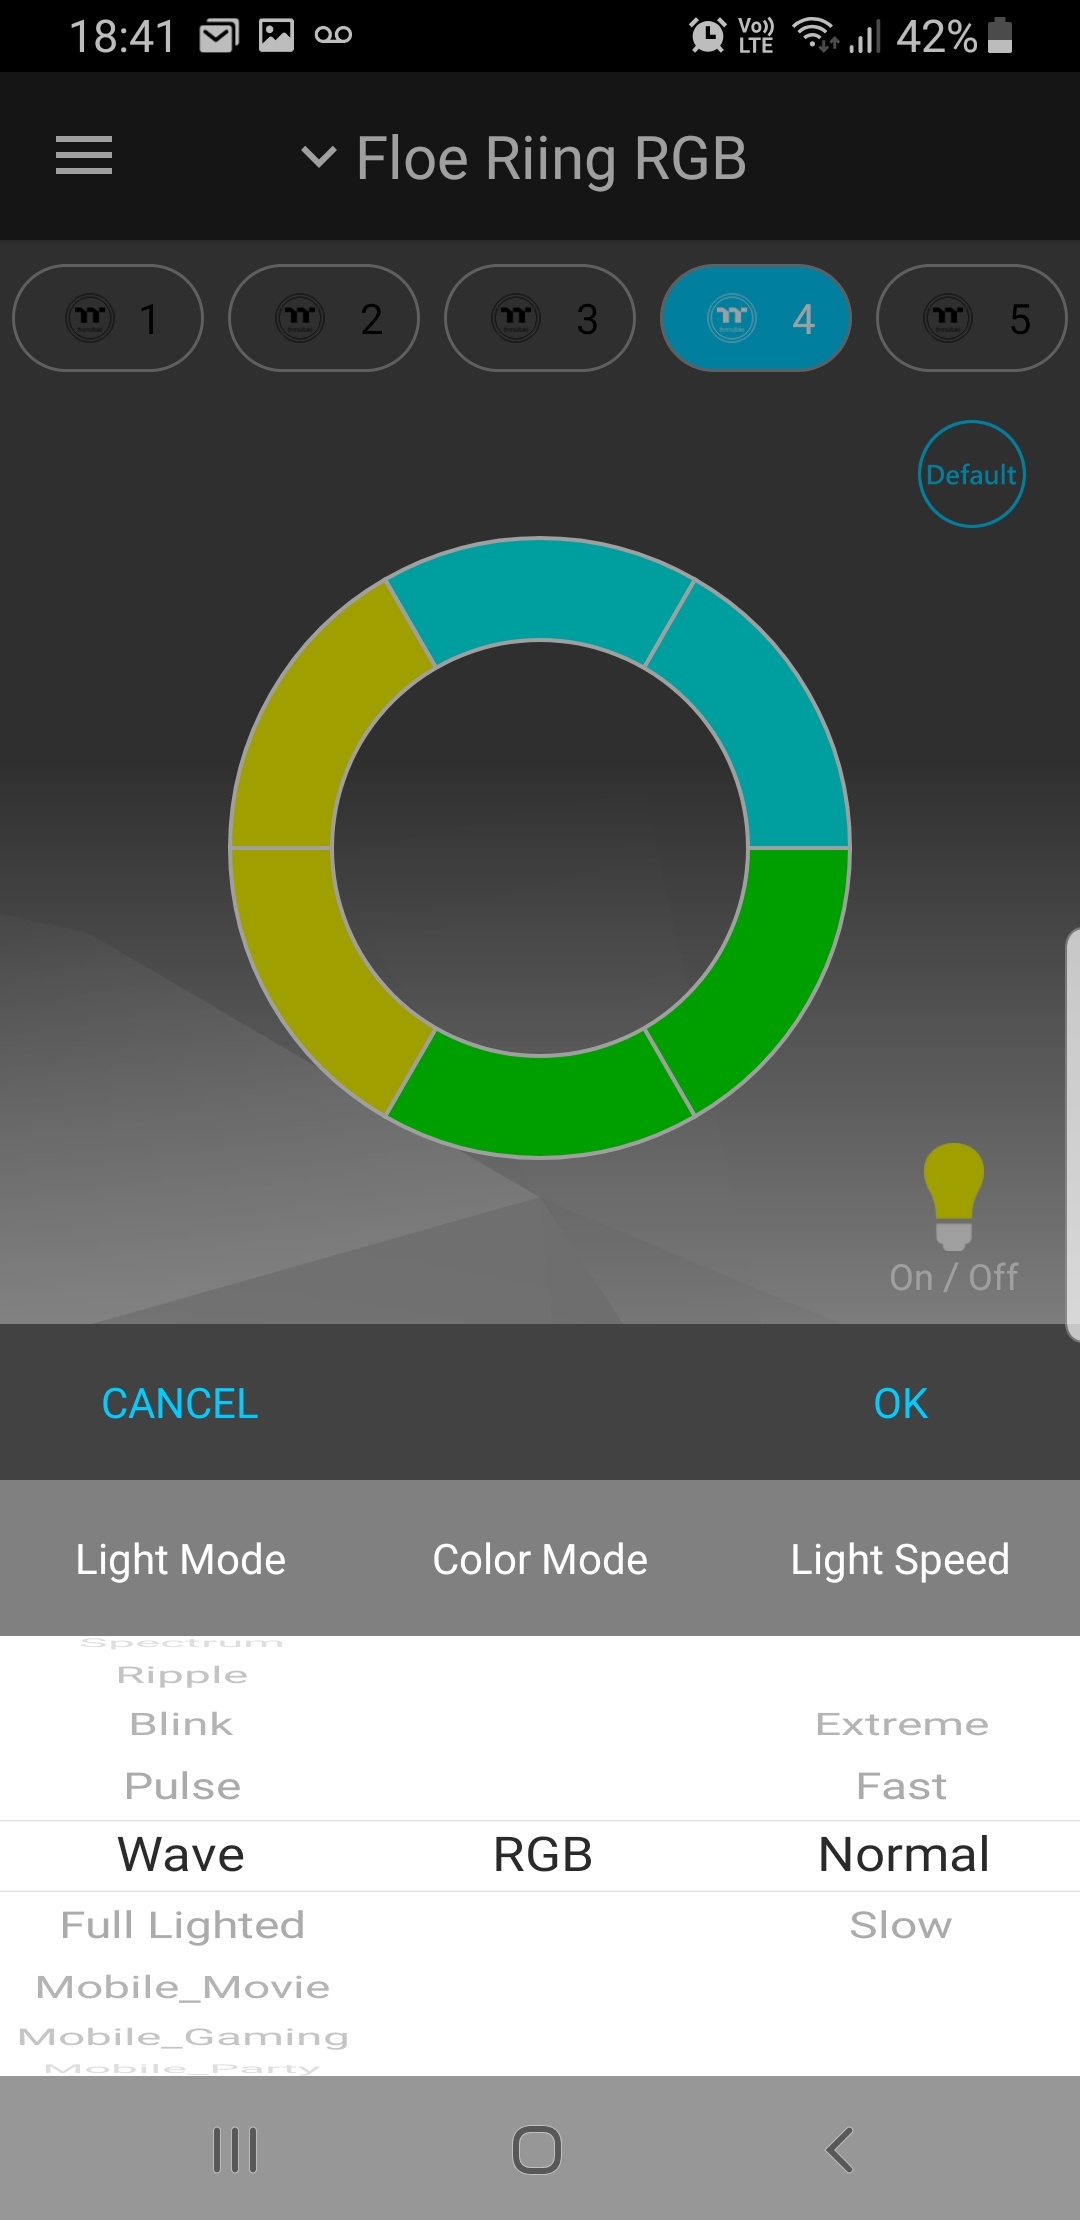
On both Windows and Android based devices, the TT RGB Plus software is very simple to setup and use. The main setup page provides you with options to give each device a custom name and scroll through over twenty different lighting modes such as Black Hole, Aurora, Twinkle, Heartbeat and swirl to name but a few.
Colour mode can be switched between RGB or single colour, and the speed of the modes can be adjusted between slow, normal, fast and extreme. Brightness of the RGB LEDs can be adjusted on a slider too.

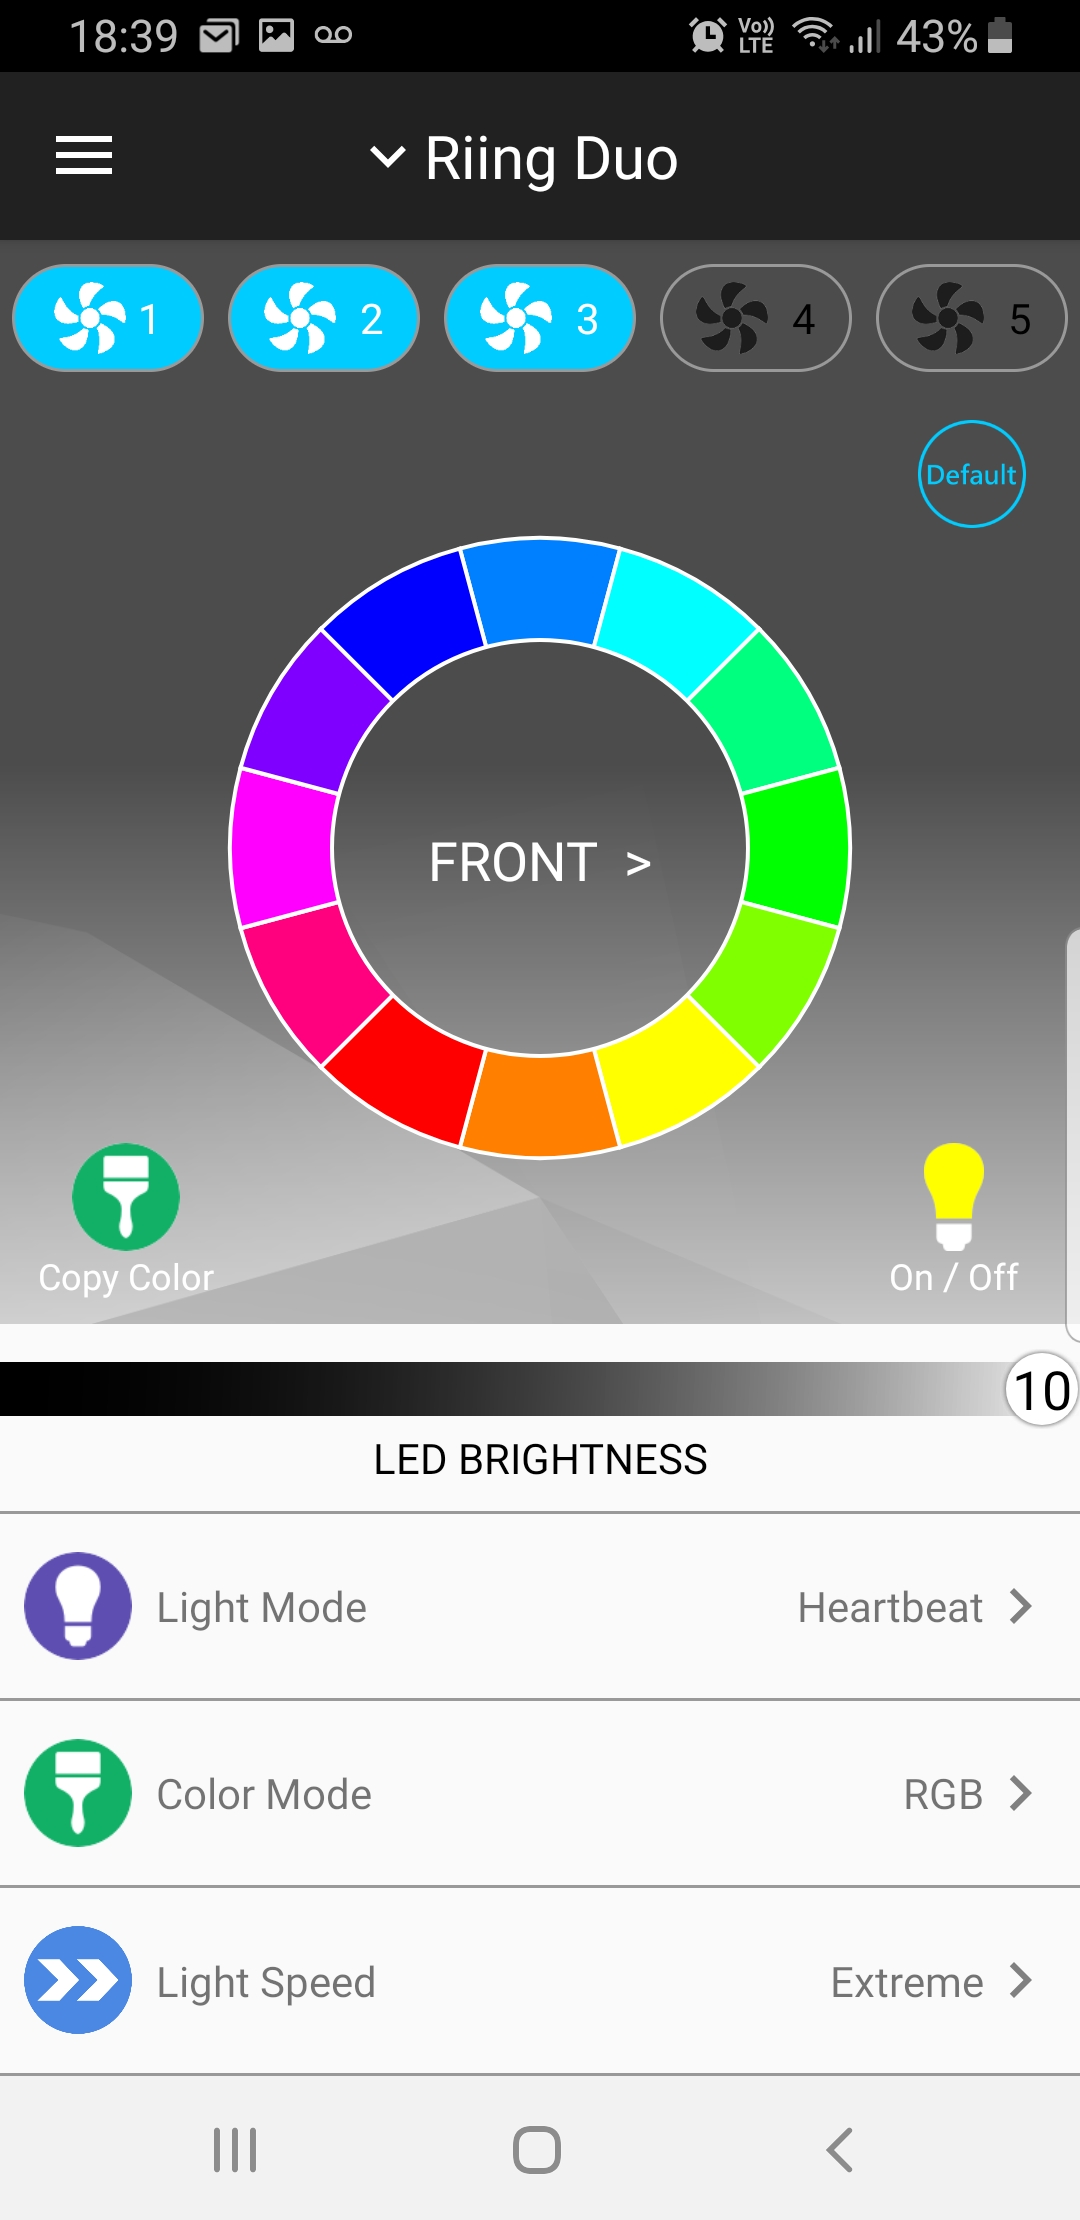
Each RGB device on the system can be configured depending on personal preference, with a combination of all settings mentioned above. Fan speed can also be adjusted in the software individually, with options for performance, silent and PWM. In PWM mode, you can adjust the fan speed slider from 0-100%.
Thermaltake have added the function of voice control for the TT RGB Ecosystem via Amazon Alexa. Unfortunately, at the time of writing, this is only available on the U.S Amazon Skills website and not in the UK or EU. Thermaltake have confirmed that they are working with Amazon to release a UK version of the Amazon Skill, which should be available very soon.
Due to this, we were unable to test the voice control as there was no workaround available, which was unfortunate.
To measure the performance of CPU coolers, we devised an easily repeatable series of tests. The only variable is the coolers themselves to ensure the results can be accurately compared against one another.
Test Rig
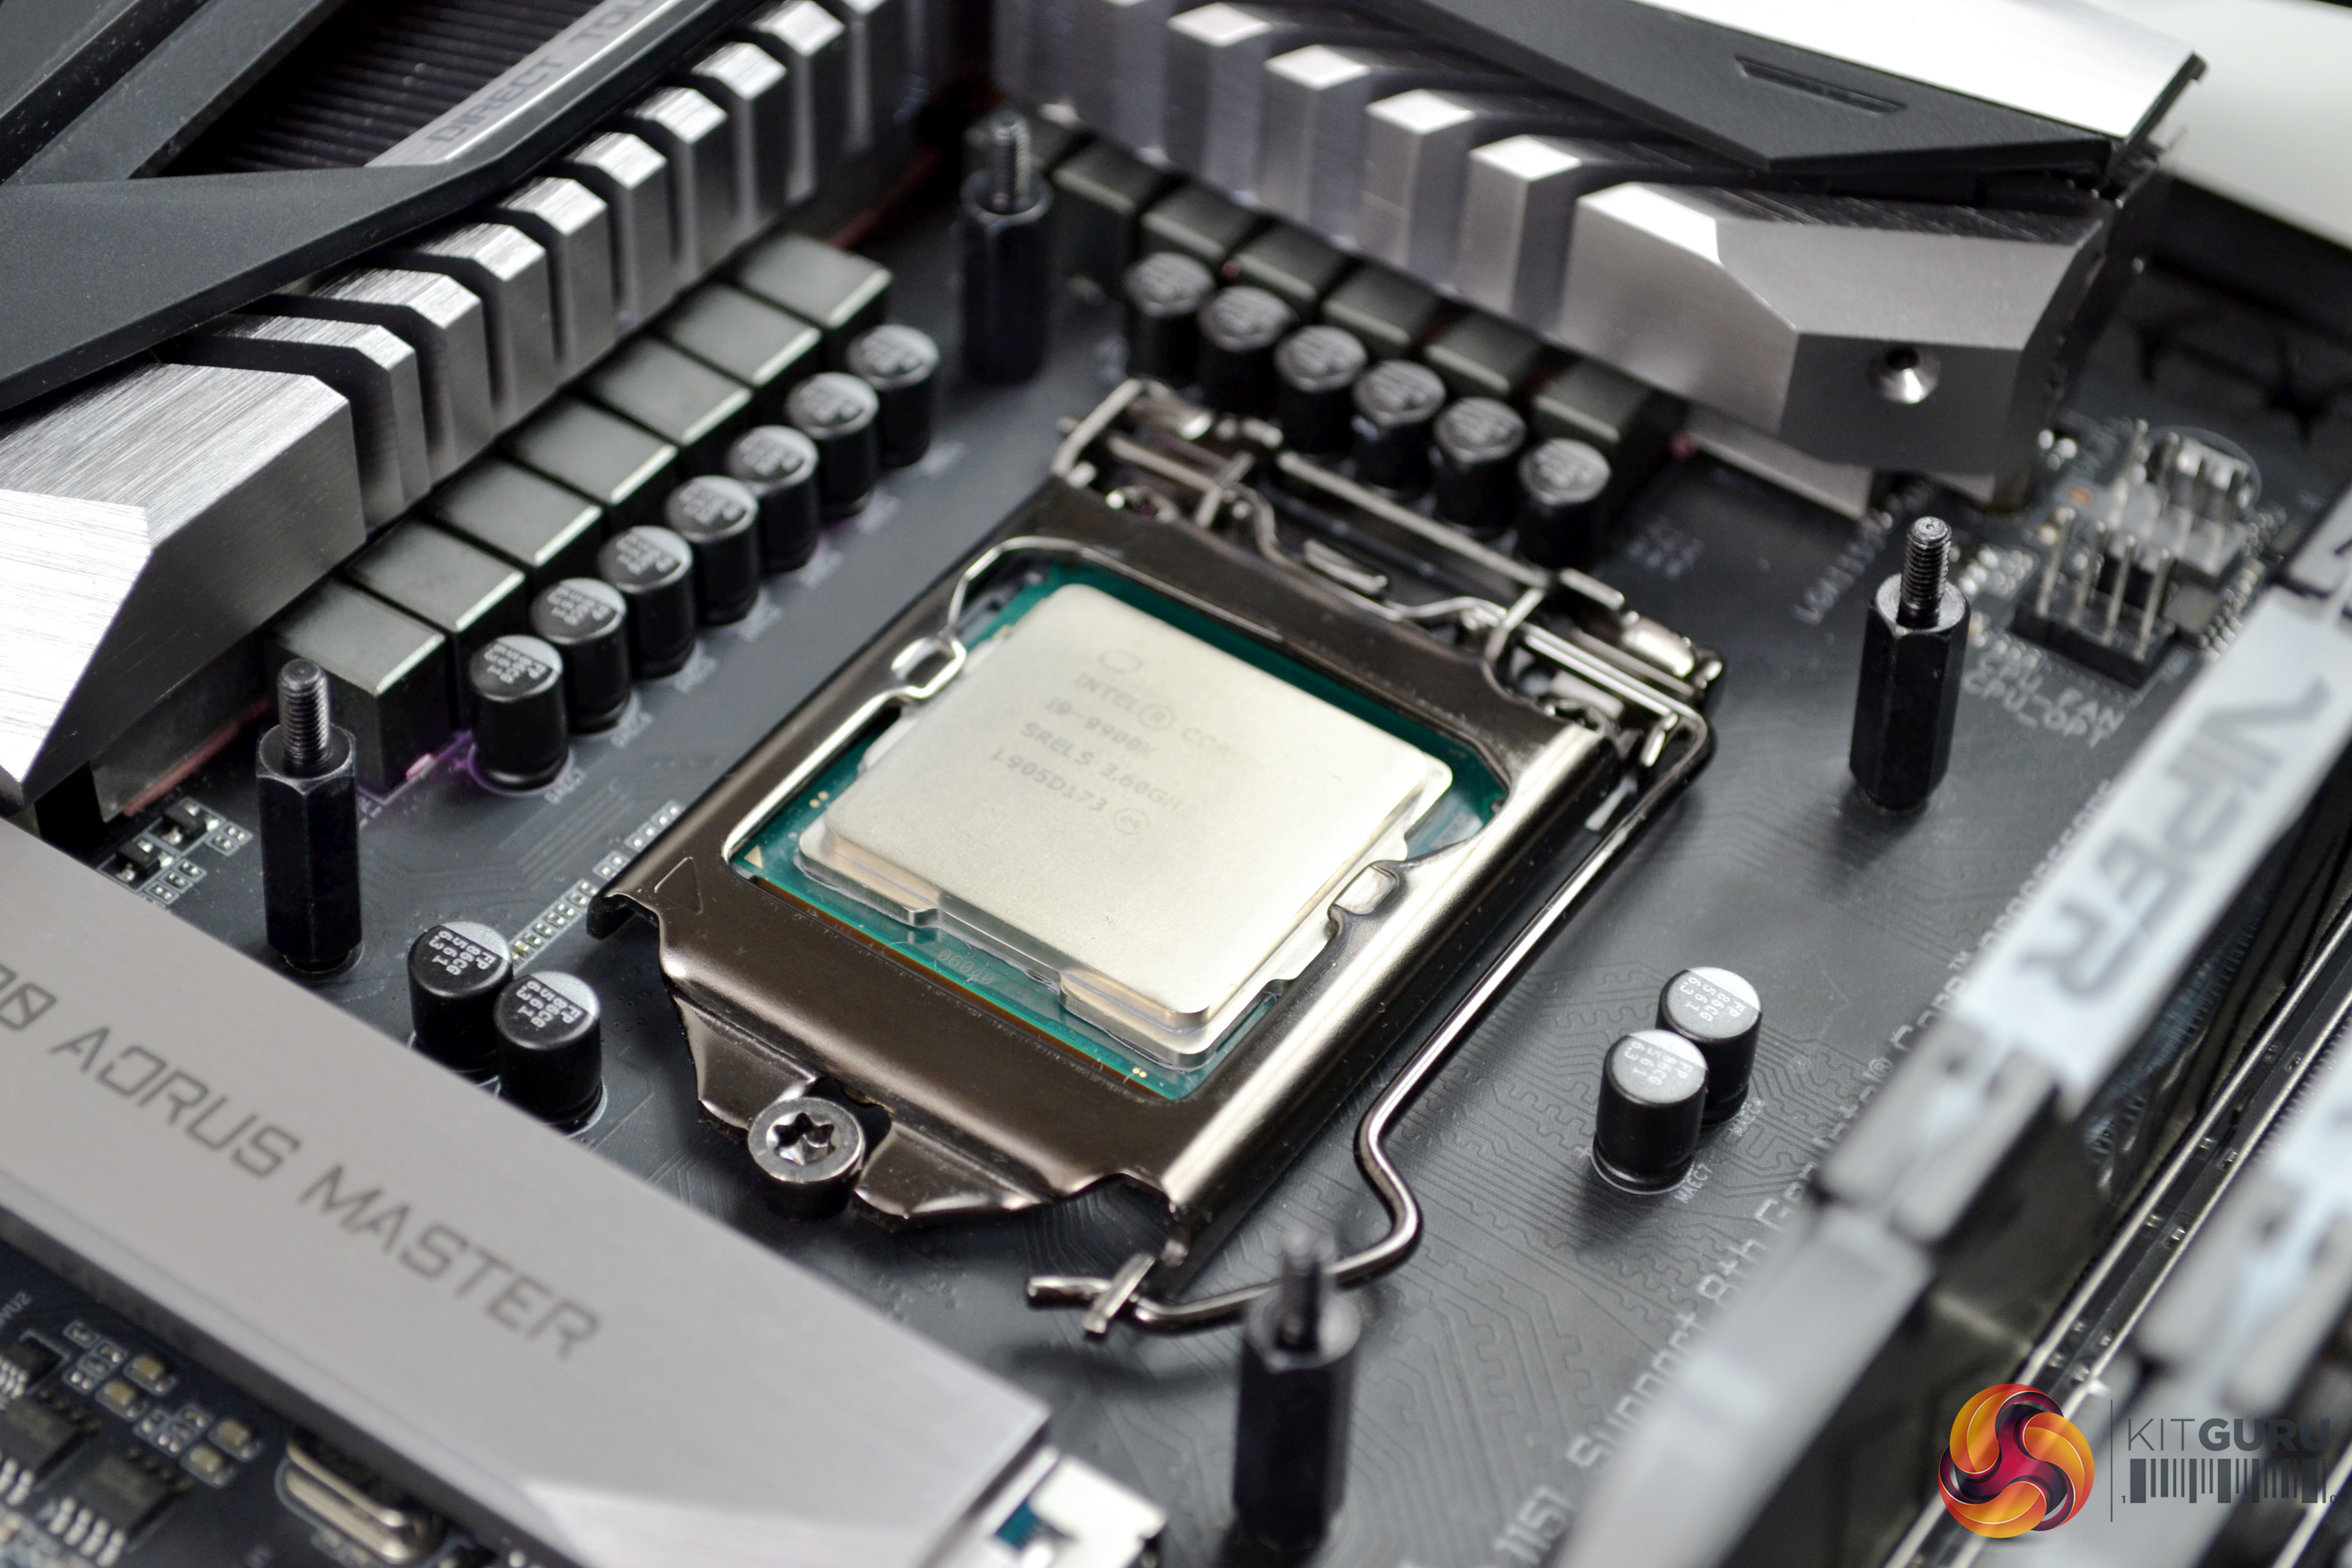
To reflect current hardware demands, we have updated the test system at KitGuru. It now comprises of a Z390 platform and included is the Intel Core i9 9900k CPU, paired with a Gigabyte Z390 Aorus Master motherboard and 16GB (2x 8GB modules) Patriot Viper RGB running at 3600MHz CL16. Our storage device is the Corsair Force LE 120GB SATA SSD. Power to the test system is managed by a Seasonic Platinum Series 1000w PSU.
Thermal Testing Procedure
The procedure will consist of several tests, that will produce six temperature readings for each cooler. The data can then be used to compare cooling performance.
First, we will lock the 9900k at its 3.6GHz all core base clock speed, with a 1.15V Vcore applied in the BIOS. Then we let the system idle in windows for 15 minutes and measure temperature. At the same frequency, we will then measure the load temperature.
To simulate overclocked frequency, we will then lock the 9900k to 4.7GHz on all cores with a 1.20V Vcore and run the same idle and load test again. To measure an extreme overclocking situation, we will lock the 9900k frequency to 4.9GHz on all cores at 1.30V and run the tests one final time – this should push the limits of the cooling performance of even the very best CPU coolers.
Admittedly, the overclocked frequencies/voltage may not be the highest achievable, but, nevertheless, it will give us a good set of data to compare the effect frequency/voltage changes have on temperature.
The temperatures presented in the graphs will be average Delta temperatures measured over the length of the test. We will calculate the Delta temperature by deducting the ambient temperature in the test room from the measured CPU temperature, both at idle and under load.
All idle temperatures are measured by letting the system idle in Windows for 15 minutes. Load temperatures are achieved by running AIDA64 stressing CPU, FPU and cache again for 15 minutes. This should give the CPU enough time to reach its maximum temperature. Throughout testing, Load Line Calibration will be set to level 6 (turbo) in BIOS and all CPU Fans/pumps set to maximum RPM.
Noise Testing
Noise levels will be measured with our sound meter at a distance of 1 meter from the test bench. The cooler’s fans will be set to their maximum rpm rating. Ambient noise level in the room is measured at 37.5dBA. The peak noise level of the cooler will be recorded in dBA.
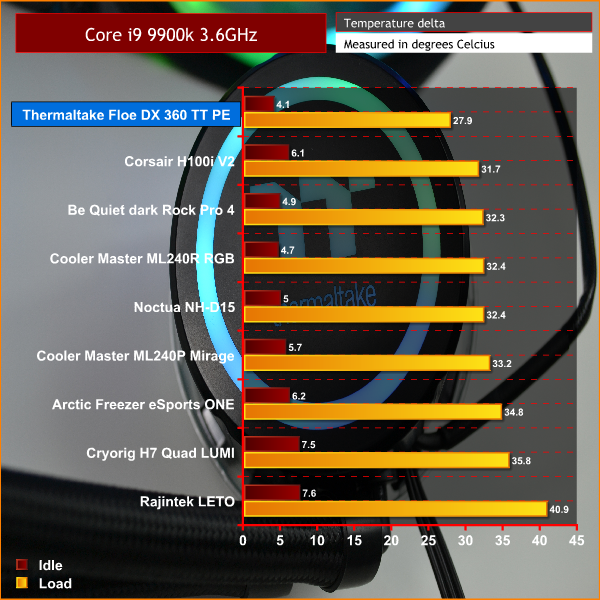
At the stock 3.6GHz frequency, it is a very convincing start to the tests from the Floe DX. It jumps right to the top of our charts both at idle and under load, beating the Corsair H100i V2 by just under 4ºC under load, which is pretty impressive. At idle, it is just 0.6°C below the 2nd place Cooler Master.
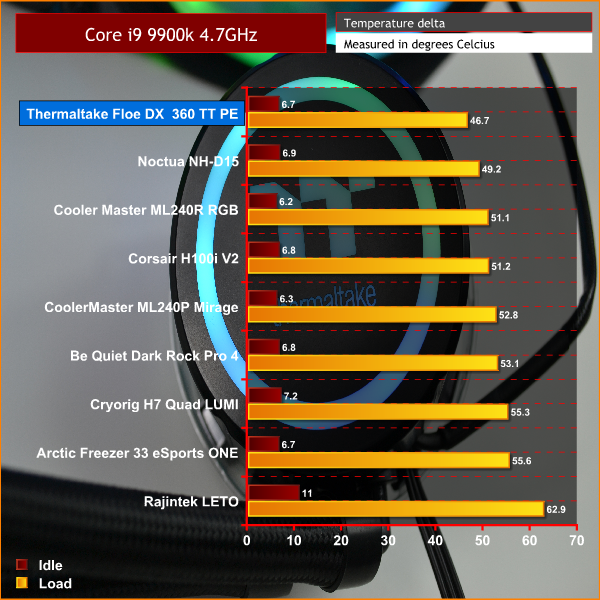
It is a similar story in our initial overclocking test. With CPU frequency set at 4.7GHz and a Vcore of 1.20v, we see the Floe DX 360 out in front by just 2.5°C versus the Noctua NH-D15. This is quite an impressive achievement, as the Noctua has been regarded, by many, as the best cooler for raw performance for some time.
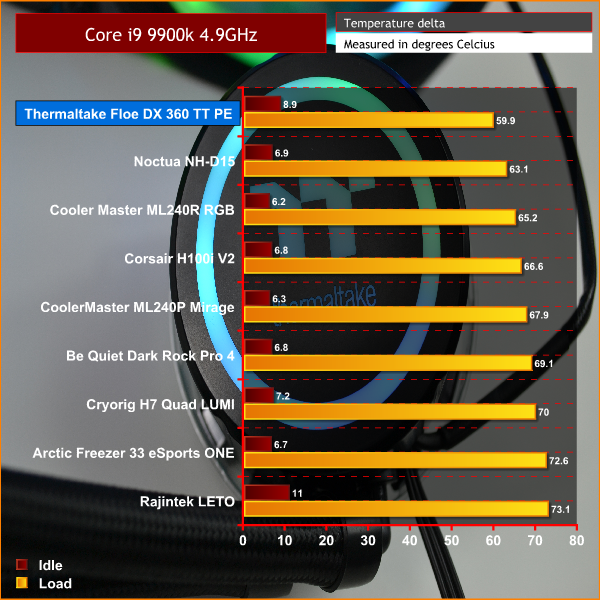
With the CPU set at our highest overclocked frequency of 4.9GHz and Vcore at 1.30v, we see the Floe DX 360 pull out an even bigger lead over the Noctua NH-D15, beating it by 3.2°C and over 5°C cooler than Cooler Master ML240R. Great results!
Noise Level Test
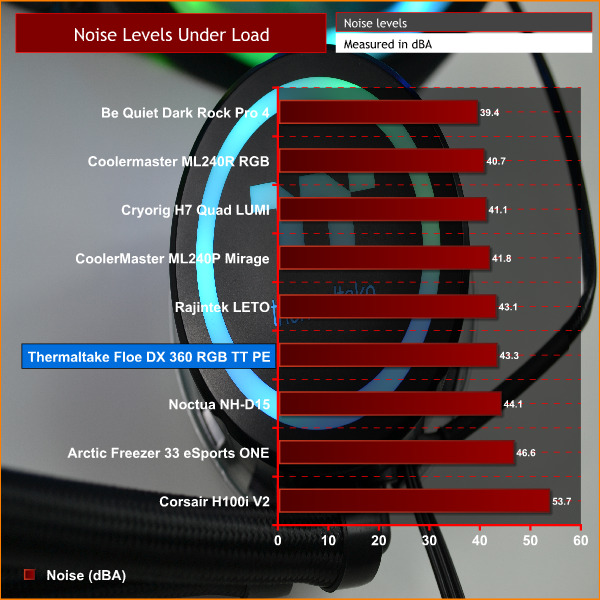
As you can see in the chart, the Floe DX 360 is by no means the quietest cooler we have tested. The Dark Rock Pro 4 still maintains its lead at the top. But considering the Floe DX is the only cooler in our chart with three 120mm fans, the noise levels are actually admirable at 100% speed. While the system was idle in windows and the fan speed lowered, it was barely audible.
The Thermaltake Floe DX 360 RGB TT Premium Edition is a stunning visual showcase of what can be done with RGB lighting. When implemented in this way, RGB can be mesmerising to watch – the colours and patterns dance around like a finely orchestrated ballet.
There is a lot to like about the Floe DX – it is difficult to know where to start. Thermaltake have just about covered all the bases for designing a great All-In-One liquid cooler.
Not only does it boast a simple installation process and high static pressure fans which do a great job of moving air, it also has a quiet, solid pump design and quality copper thermal transfer plate – meaning this cooler performs very well indeed.
Thermaltake have taken this recipe and added their own little twist of fantastic-looking RGB lighting and digital controller, with easy to use software to match. The generous length of fan cables is also a bonus for us – something which is really important to system builders, but often overlooked by manufacturers.
Not only is it a great looking cooler, but it was also excellent at its prime objective of keeping a CPU cool under load, topping our charts at every CPU frequency and voltage combination. The Core i9 9900k is well documented as being a difficult CPU to cool, but even running at 4.9GHz with 1.3v Vcore, the Floe DX 360 performed really well.
It is certainly difficult to find fault with the Floe DX 360. If we were to be really picky, we could say the tubing might have benefited from being a few mm thicker for the purpose of aesthetics. Currently, the lack of voice control for UK and EU users is also a little unfortunate. Hopefully, Thermaltake will be true to their word and have this up and running with Amazon Alexa very shortly.
The Thermaltake Floe DX 360 RGB TT Premium Edition is available for £219.98 from Scan HERE.
Pros:
- Beautiful display of RGB colour.
- Great build quality.
- Generous cable length.
- Easy installation.
- Simple to use software on multiple platforms.
- Top thermal performance.
Cons:
- Tubing slightly narrow looking.
- Current lack of Alexa voice control for UK users.
KitGuru says: With excellent implementation of RGB visuals, a sturdy build quality and great thermal transfer performance, the Thermaltake Floe DX 360 RGB TT Premium Edition should fit perfectly into any system.