Today we are going to take a look at another case from Aerocool, the GT Advance, which is designed for those users who are on the tightest of budgets. At a price of only £25, this is one of the cheapest branded models you will find, making it ideal for those who are willing to compromise on a case to spend their resources on the performance of the system.
Aerocool are best known for producing high-end touch screen fan controllers which are admired by enthusiasts around the globe. Their portfolio is much broader, though, encompassing other products such as power supplies, cooling products and cases. Their range of cases feature numerous models, including a handful of budget-friendly models. We were fairly impressed with the Aerocool Vs-92 that we reviewed recently, so we are excited to see what Aerocool can deliver at an even lower price point.

Features
- Specially designed front panel power LEDs with style.
- Easy-to-remove bay cover design.
- Accommodates high-end VGA cards up to 400mm.
- Includes 2 sets of ODD screw-less kit.
- 1 x 12cm fan in front+ 1x 12cm fan at rear.
- USB3.0x1 + USB2.0x1 + audio/mic
- Cable routing management.
- Pre-drilled CPU holes for easy mounting and removal of CPU cooler.
- Pre-drilled water-cooling holes.
- Includes dust filter for power supply.
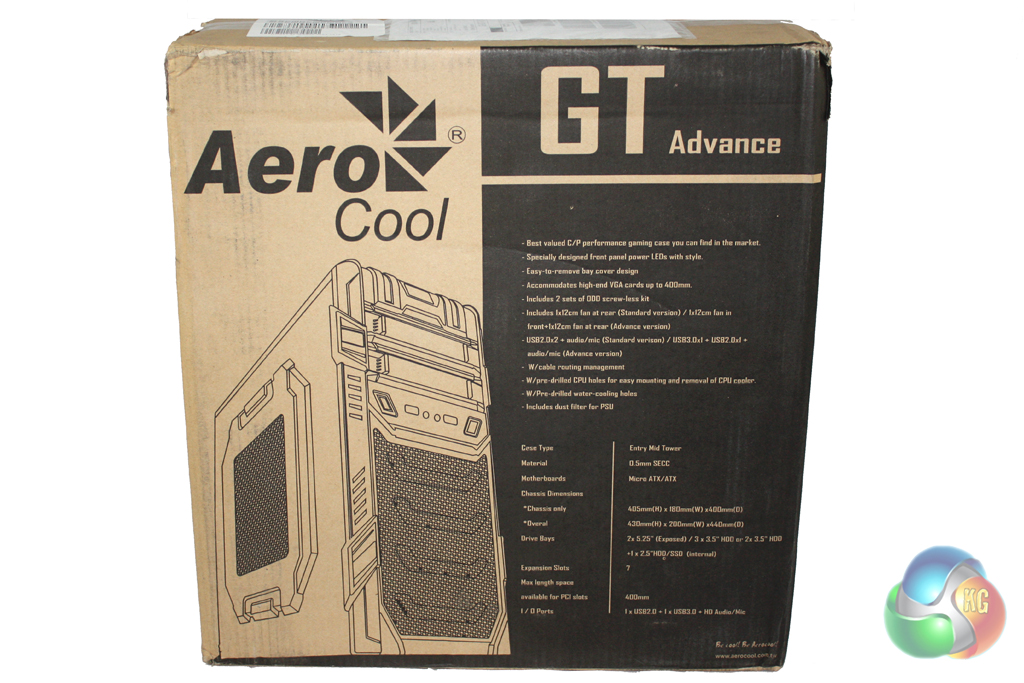
The GT Advance is supplied in a fairly simple brown cardboard box which is decorated in a simple black livery. This livery features a large image of the case alongside a list of the key features and specifications. The box isn't particularly high quality, but it should provide an adequate level of protection for the case within.

It's clear that Aerocool have designed this case with gamers in mind as it has a distinctive design, incorporating LED lighting and various stylistic design elements.
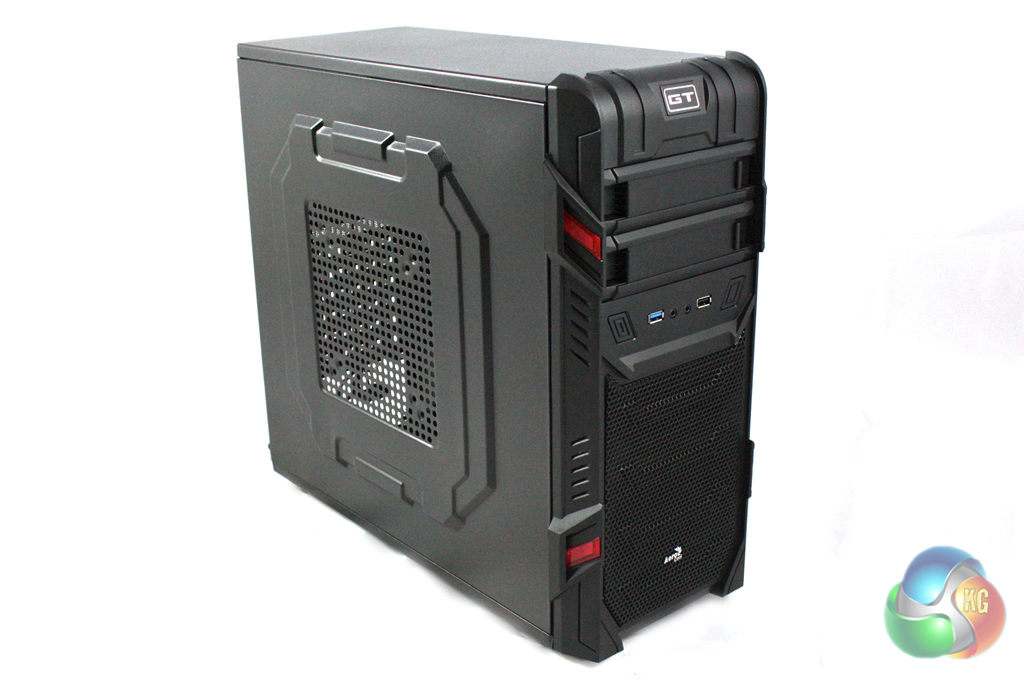
The construction of the case is a combination of SECC steel and plastic, which is what we would expect at this price point. The steel used isn't particularly thick, but the case feels fairly sturdy.
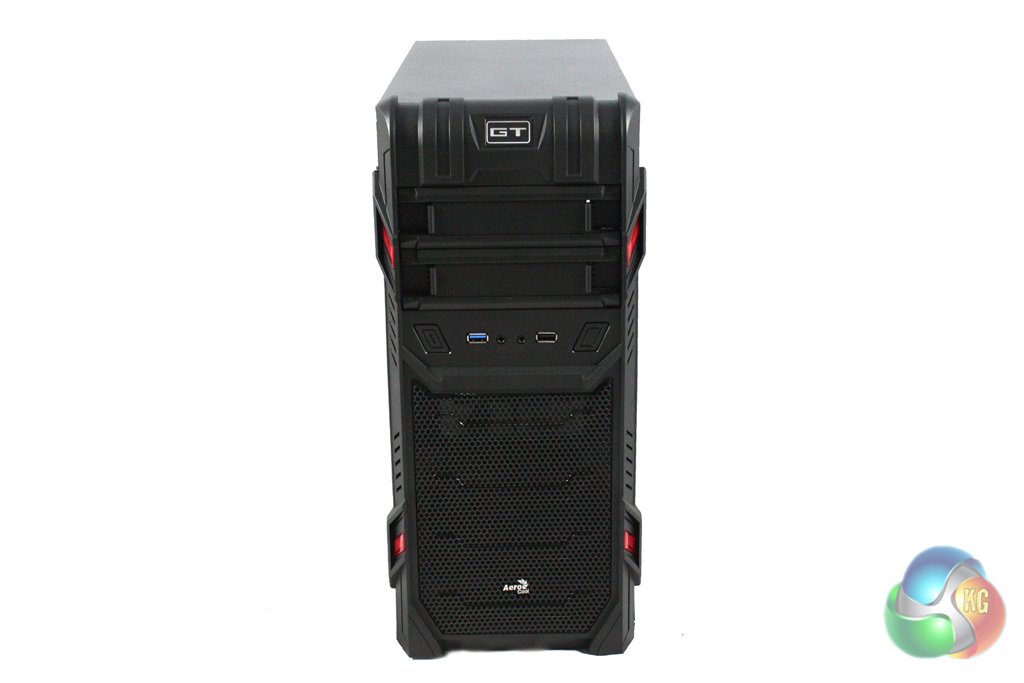
There is a large intake vent in the front of the case, below the two 5.25″ expansion bays. This intake vent is populated with a 120 mm fan to suck cool air into the front of the case. The front panel connections are located around half way up the front of the case, and consist of one USB 3.0 connector, one USB2.0 connectors and headphone and microphone jacks.
The top of the case consists of a solid panel of metal, as there are no air vents in the roof. We wouldn't think this will be an issue for the target market of this case as adding fans into the top would be an additional cost.
Aerocool have cut a large vent into the side panel of the case for ventilation, though, which also features mounting points for a 200 mm fan. We doubt that many users will populate this vent, but it should provide a decent level of ventilation for graphics cards.
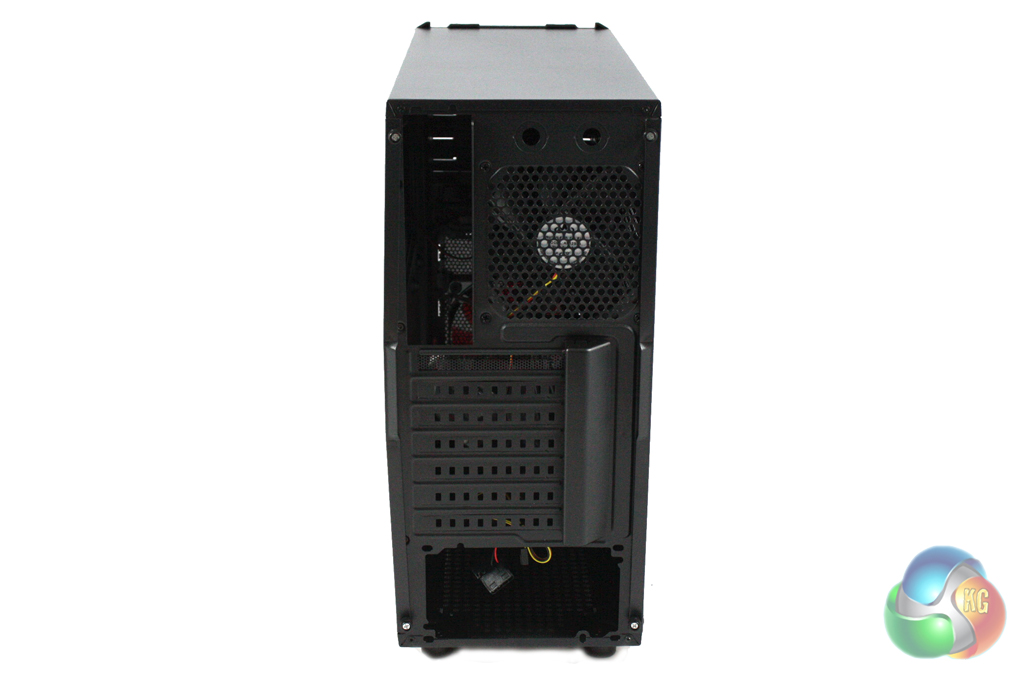
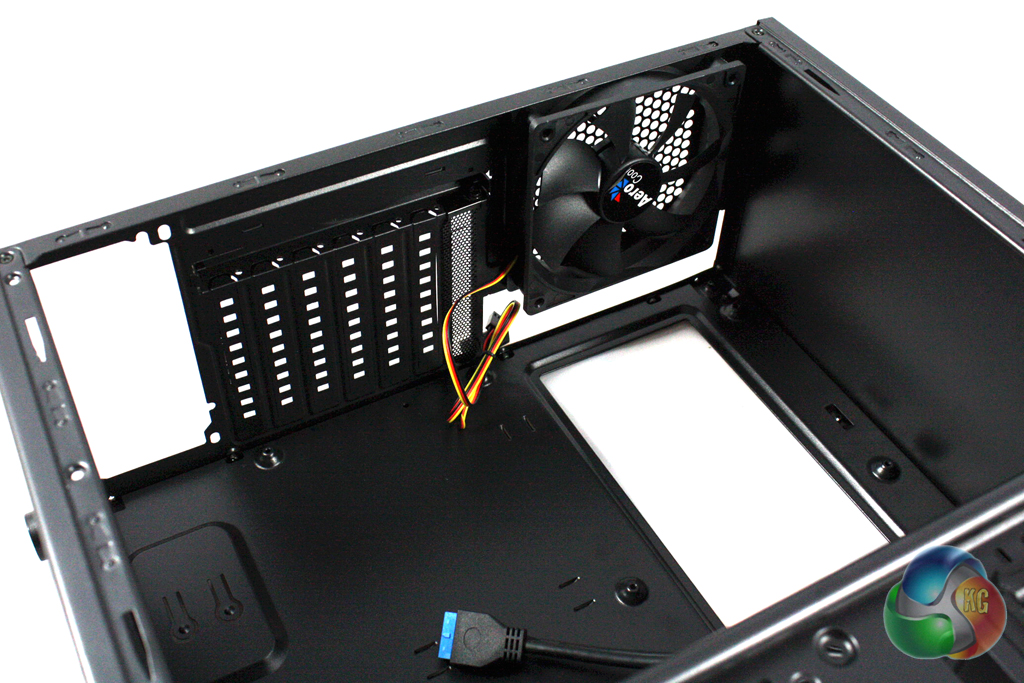
Moving round to the rear of the case, we find a fairly standard layout, consisting of a 120 mm exhaust fan vent and seven expansion slots. As you might expect from a budget-focused case, the covers aren't replaceable. So once you've removed them, they cannot be replaced.
Removing the side panel of the case is very easy indeed thanks to the plastic-coated thumbscrews that Aerocool have chosen to use. These are much easier to grip than standard thumbscrews … making it significantly easier to remove them.
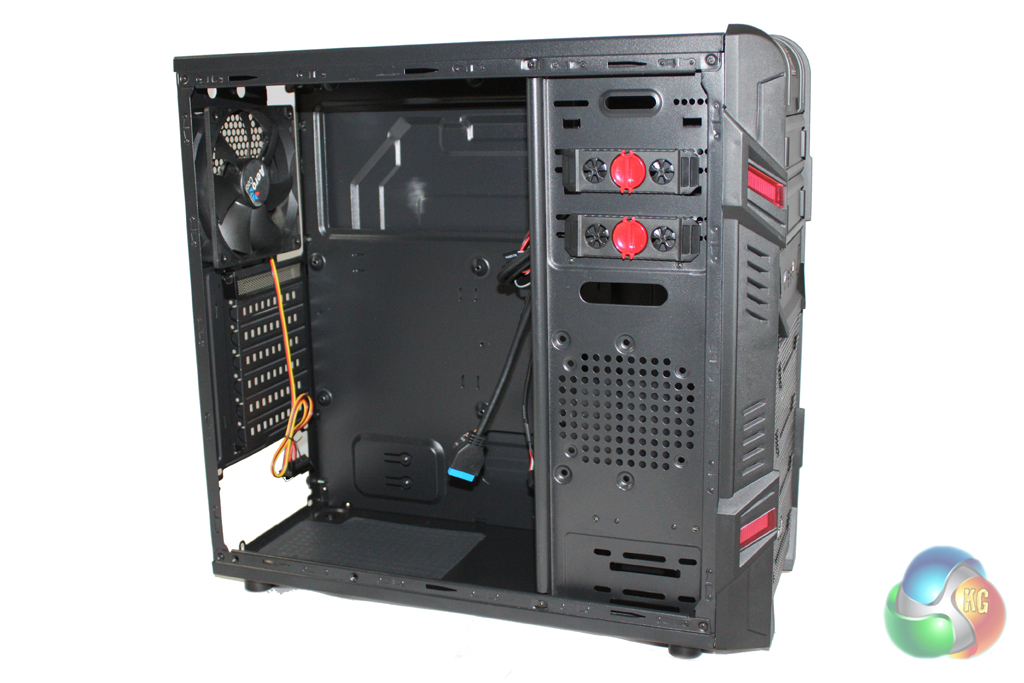
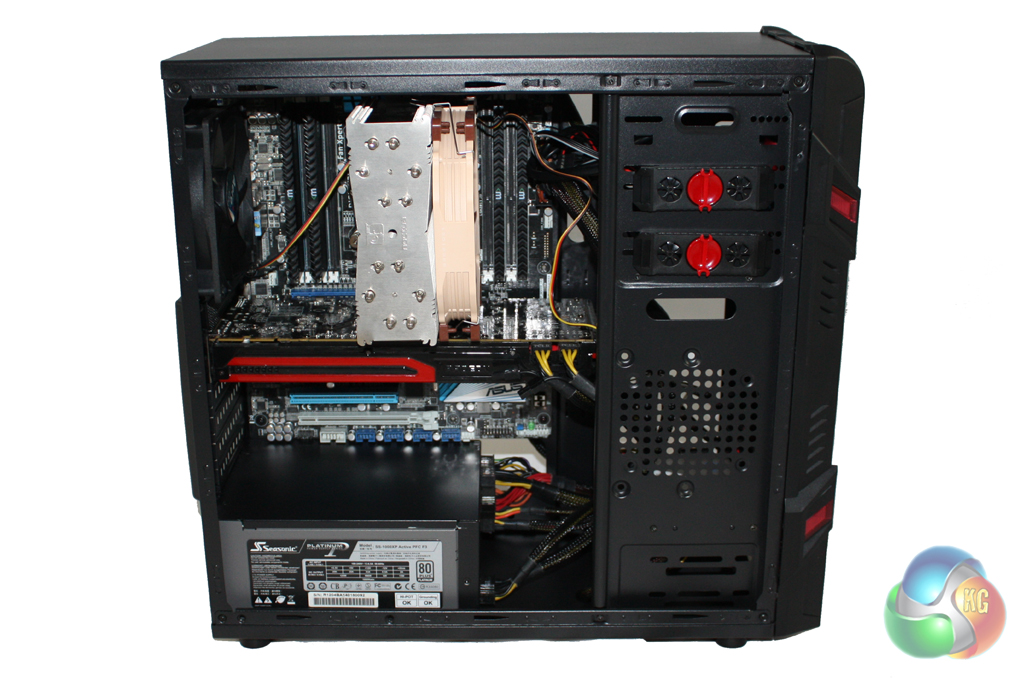
The inside of the case is painted entirely in black, which will make it easy to colour co-ordinate component selections. This is good to see on a case at this price point.
The drive bays are located over on the right hand side of the system. There is room for two 3.5″ drives and one 2.5″ drive, meaning you are quite restricted in your choice of storage configuration. We wouldn't think the target audience would be installing an array of hard drives in this case.
There is a large cut out area in the motherboard tray to facilitate CPU cooler installation, although we would usually recommend attaching it to the motherboard before installing it into the case.
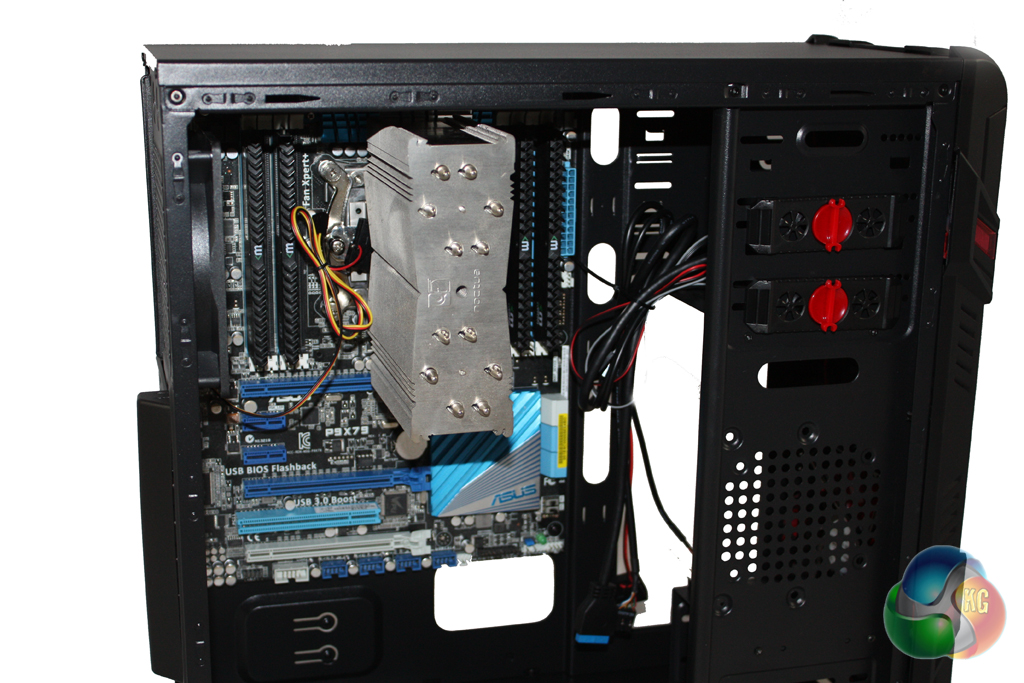
Installing the motherboard into the case is a very simple process. Stand-offs aren't required in this particular model, meaning you can put the motherboard straight in and screw it down into place.
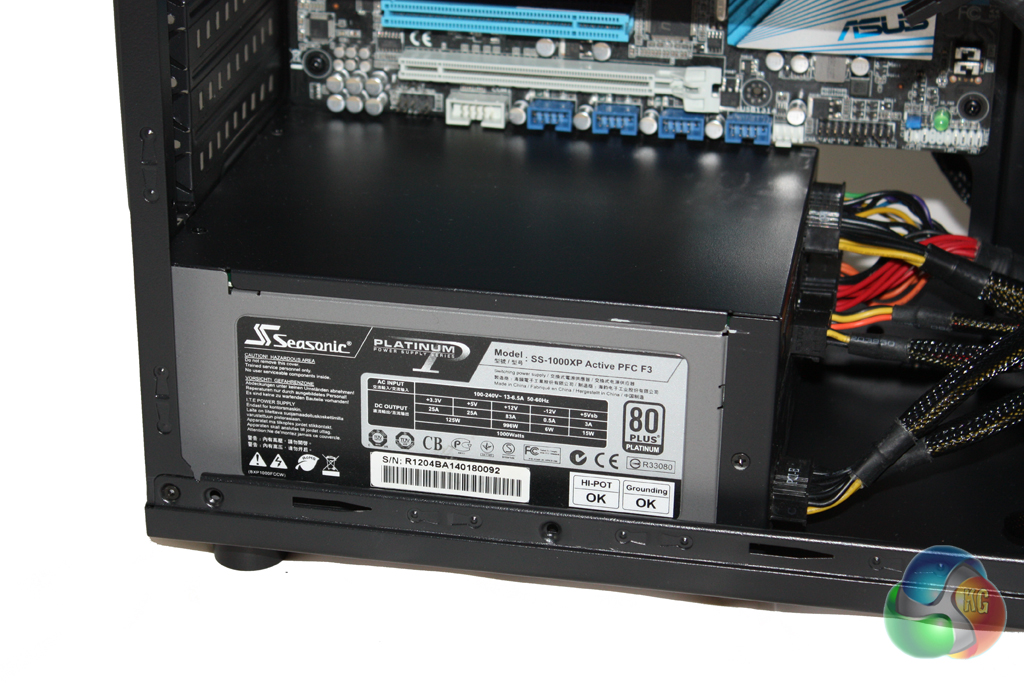
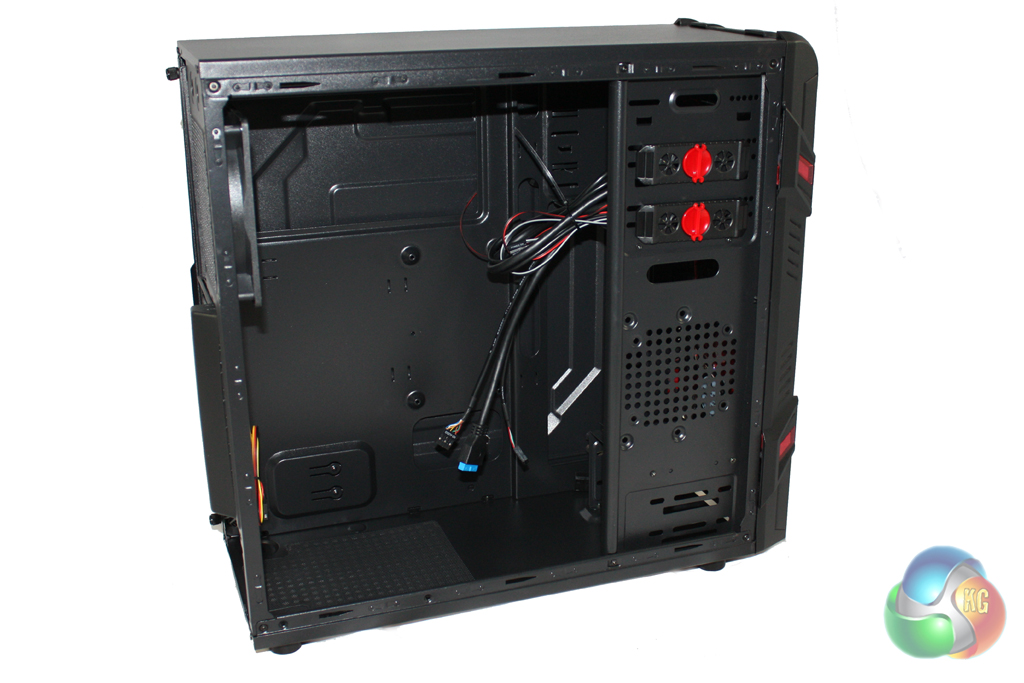
There is plenty of room for large power supplies in the base of the case, as well as a large space in the drive bay area which could be used to tidy up non-modular power supply cables.

Unfortunately, there isn't a great deal of room behind the motherboard tray for cable routing but this cannot really be expected at this price point. There are a few holes cut into the motherboard tray for the 24-pin power connector and to power the graphics card, as well as a small amount of room behind for these cables.
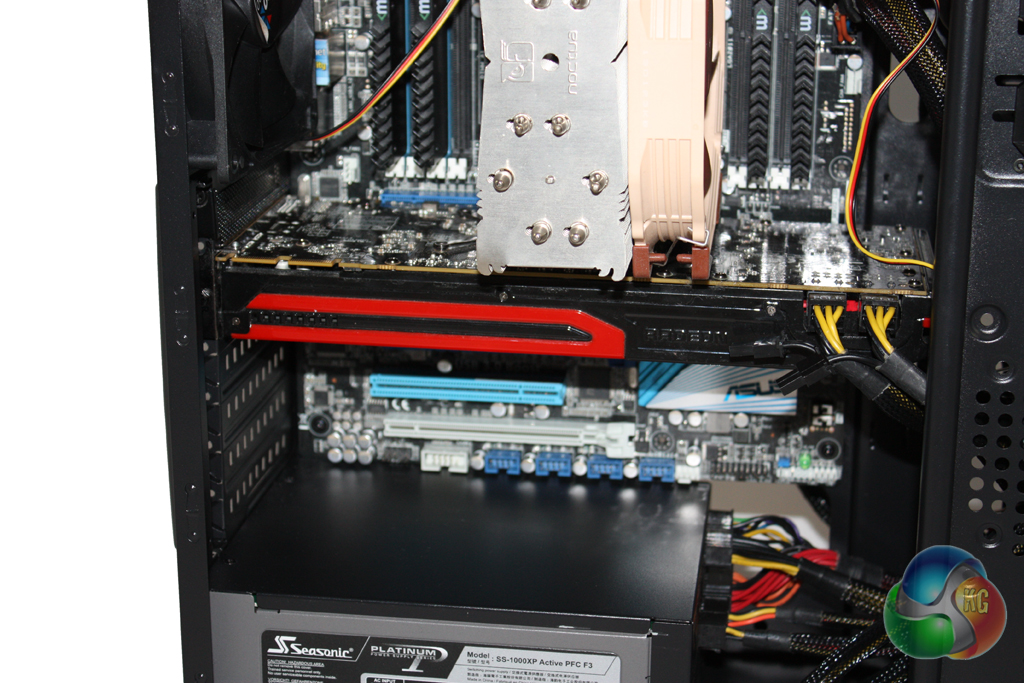
Installing the graphics card into the system is straightforward, although it can be a little fiddly, due to the location of the drive bays. The expansion slot covers aren't replaceable, so you need to make sure you only remove the correct ones.
For our tests we will be using a Noctua NH-U14S to cool the Intel Core i7-3930K CPU in the Aerocool GT Advance. Our test system also features an AMD Radeon HD 7950 graphics card.
We manually overclocked the i7-3930K to 4.3 GHz by increasing the multiplier to 43x, leaving the baseclock set at 100 MHz. The voltage was increased to 1.35V to achieve this frequency.
Test System:
- Processor: Intel Core i7-3930K
- Motherboard: Asus P9X79
- Cooler: Phanteks Noctua NH-U14S
- Thermal Paste: Arctic Cooling MX-2.
- Memory: 16GB (4x 4GB) Mushkin Blackline 1600 MHz
- Graphics Card: AMD Radeon HD 7950.
- Power Supply: Seasonic Platinum 1000W
- System Drive: Intel SSD 330 Series 120 GB
- Monitor: Viewsonic VX2260WM.
Software:
- Microsoft Windows 7 Home Premium (64-bit).
- CPUID Hardware Monitor.
- Prime95 64-bit.
- Furmark V1.10.6
To test the thermal performance of the Aerocool GT Advance we loaded our test system for 15 minutes using Prime95 and Furmark and recorded the maximum temperatures reached using CPUID Hardware Monitor. We then restarted the system and left it for 15 minutes before recording idle temperatures.
Room temperature was maintained at 20 degrees C for the duration of our tests.
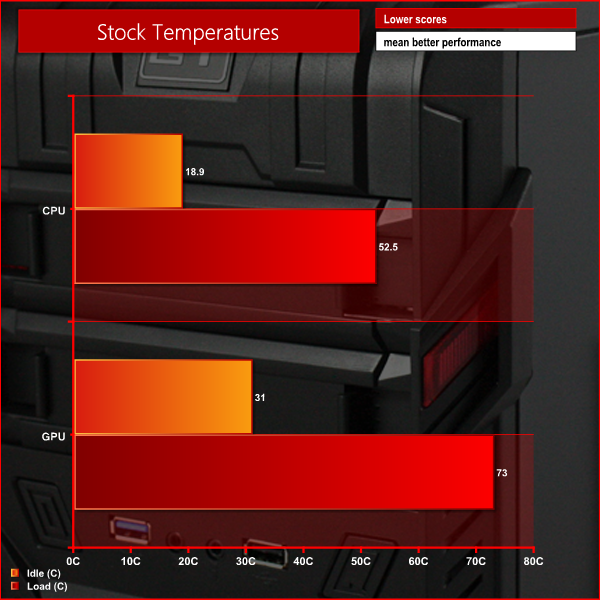
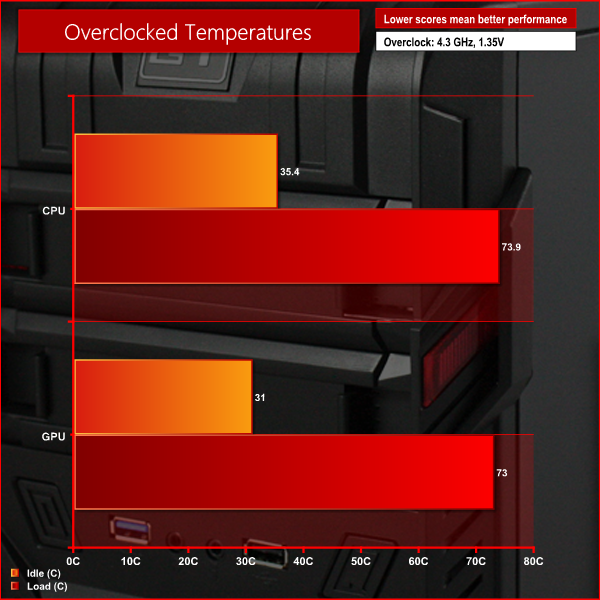
These temperatures are quite impressive, especially for such a budget case.
To conduct our noise level tests, we replaced the graphics card in our system with a AMD Radeon HD 5550 Silence which was passively cooled. We also momentarily disconnected the fans on the CPU cooler so we were only taking into account the noise generated by the fans in the case.
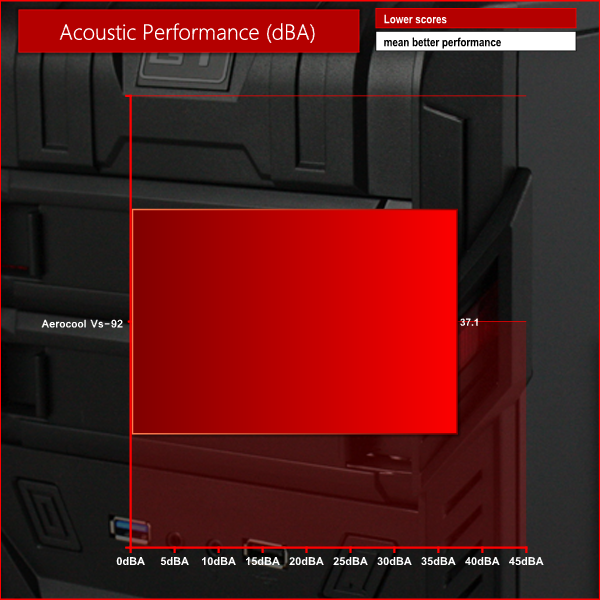
This case is quite loud, although we couldn't reasonably expect a silent case at this price point.
The Aerocool GT Advance is built for those people looking for the cheapest possible case, and there are very few branded alternatives which manage to achieve a similarly impressive price point. Even the Aerocool VS-92 that we looked at recently is almost £20 more expensive than this model, and we would also consider that to be a budget case.
There isn't anything particularly special about the Aercool GT Advance from an aesthetic point of view, but it is fairly attractive and is certainly better looking than most cases at this price point. The build quality is quite good when factoring in the cost, but it doesn't come close to that of more expensive cases. Those looking for a alternative at this price point should consider the Bitfenix Merc.
It is quite impressive that Aerocool have managed to include two fans with this case considering the price. The airflow they generate should be ample for most users, and we achieved decent temperatures in our tests. They were a little noisy, though, but we cannot realistically expect excellent acoustics from fans included with a case at this price.
At a price of £25 from CCL, the Aerocool GT Advance offers great value for money. While there are a few other cases on the market from the likes of Bitfenix that offer something similar, they are generally around £5 more expensive. This may not sound like a lot of money but it actually makes them 20% more expensive. So for those users who are on particularly tight budgets, this case is ideal.
Discuss on our Facebook page, over HERE.
Pros
- Impressive price.
- Available in black and white.
- Two fans included.
Cons
- Some users may not like the aesthetic design.
- Fans are quite noisy.
KitGuru says: An impressive budget case from Aerocool which is likely to appeal to a young gaming audience.