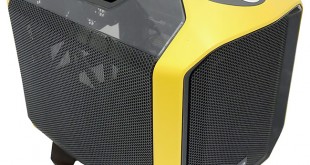
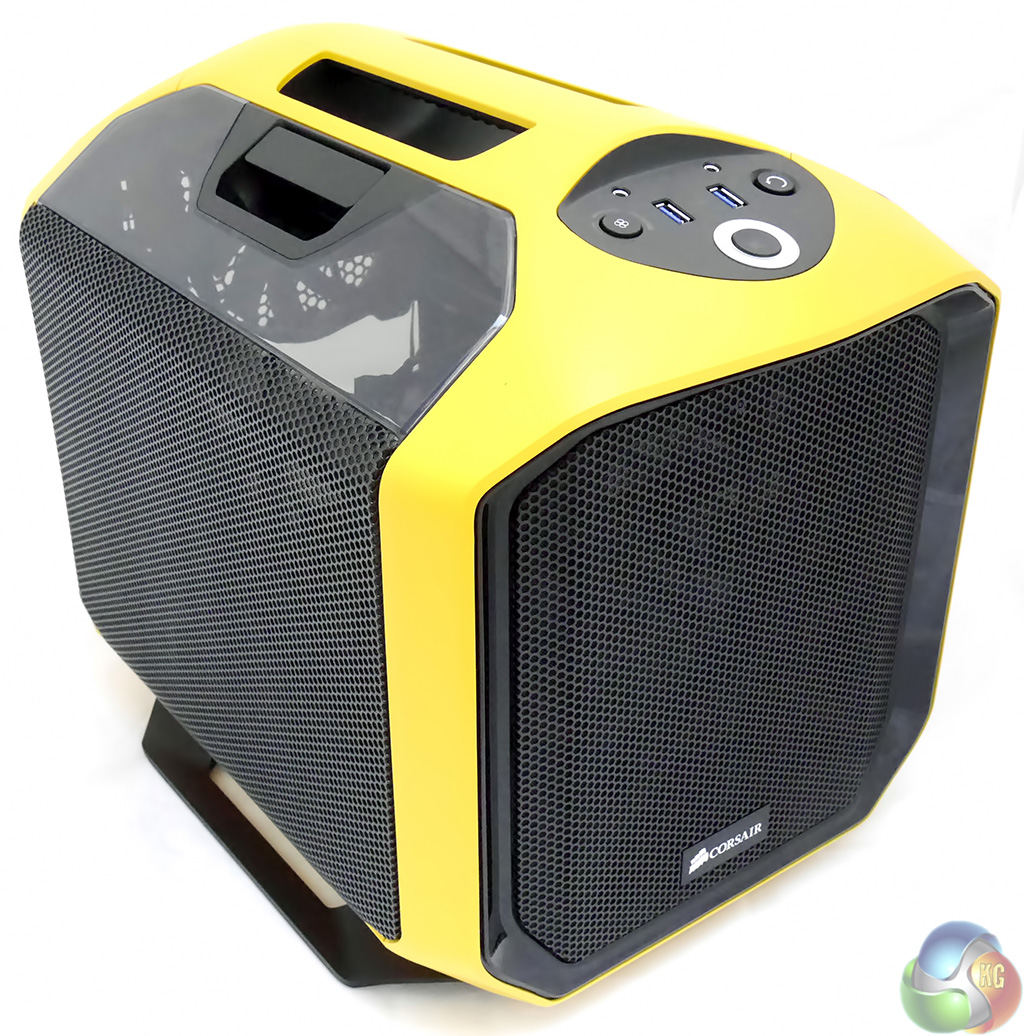
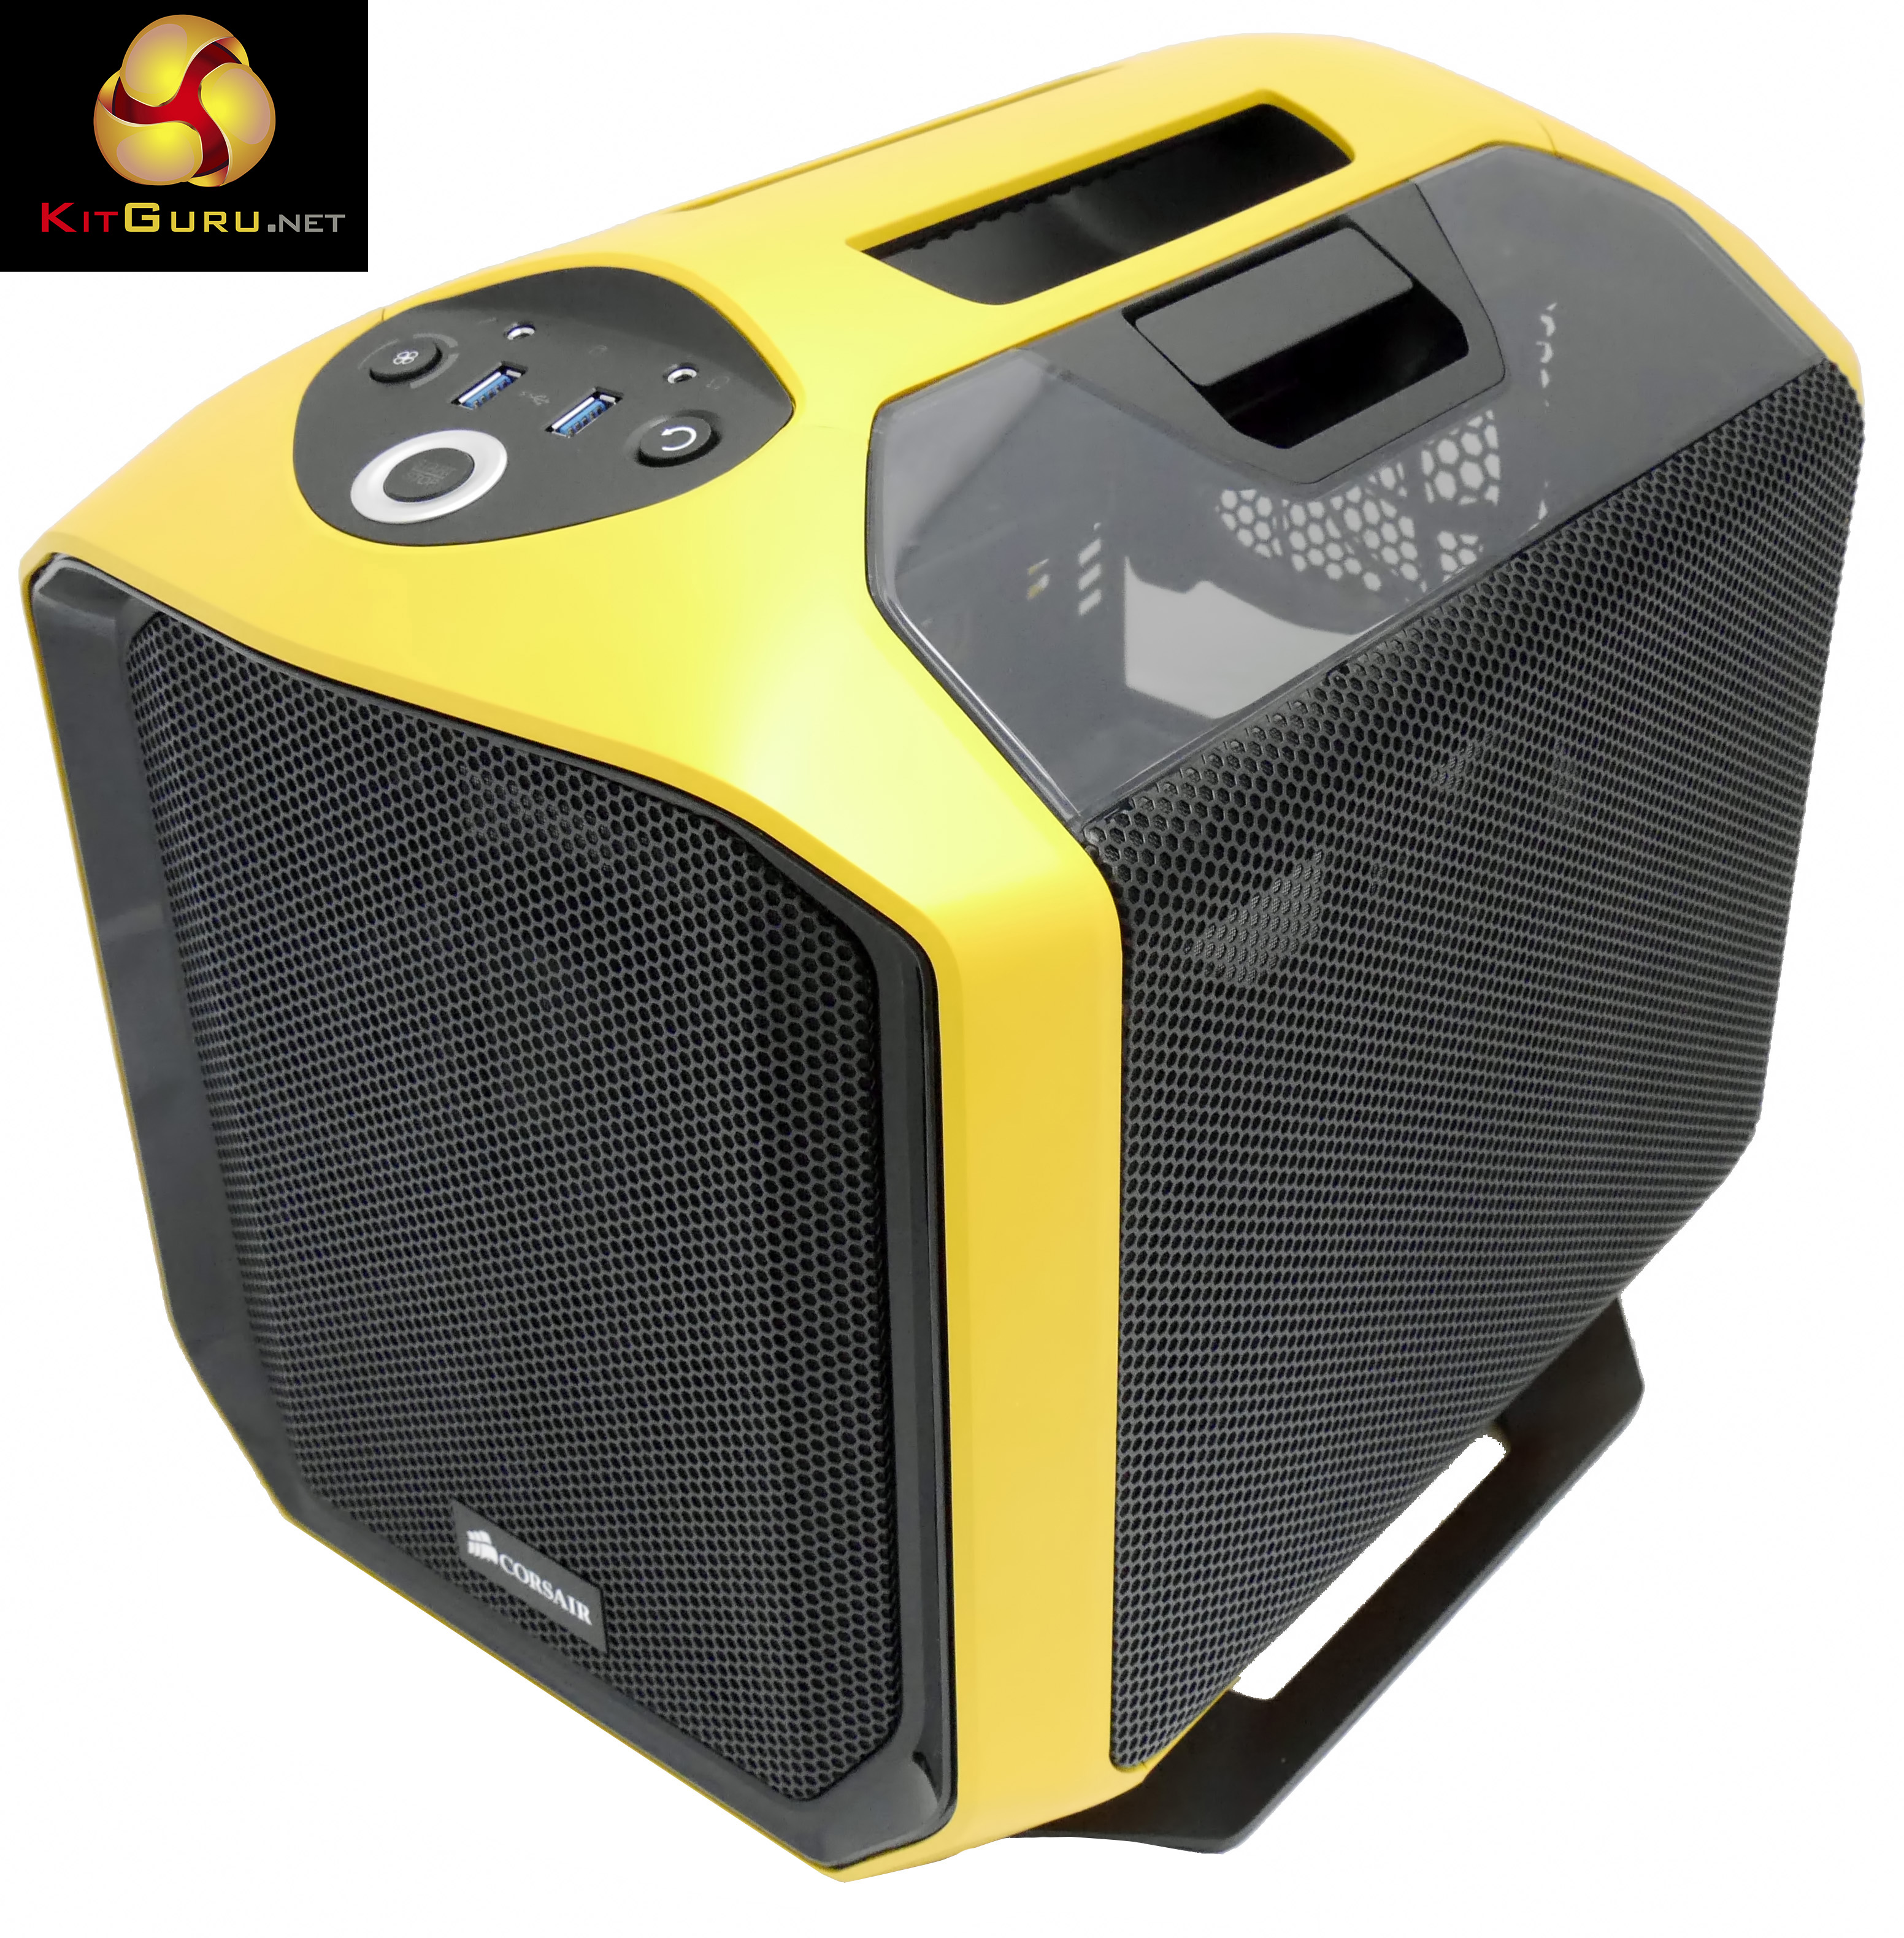
No doubt you are beginning to lose track of all the cases that Corsair has in its range but honestly, the Graphite 380T is easy to remember. You see it is Mini-ITX and it has a handle on the top, and the sample we have here is yellow and black in colour, rather like a wasp or hornet only with fewer wings. As it happens I was expecting either a black case with red lighting or a black and white model with white lighting, so you have avoided a weak joke about zebras by the narrowest of margins.
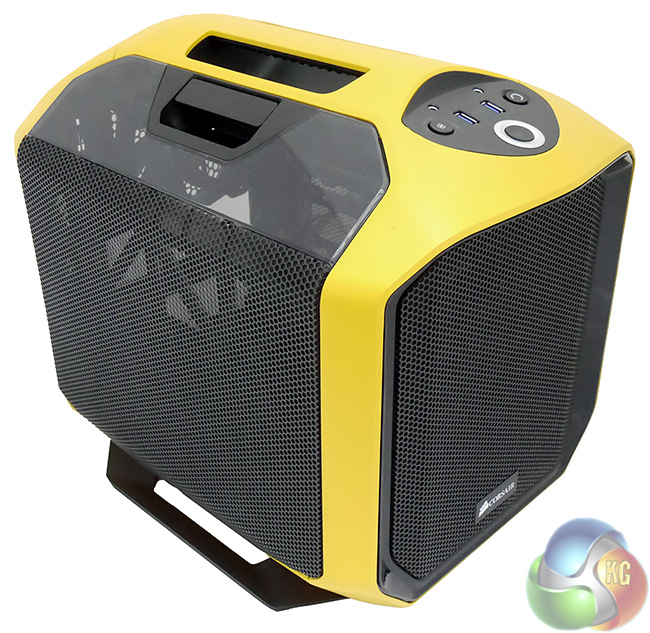
Corsair calls the yellow colour Midas, which is presumably meant to conjure up images of gold, however it looks more like Colman's mustard to me. ‘A handle?' you say, in surprise. Well yes, that's for the LAN party gamers.
It isn't difficult to build a small form factor case that is compact and easy to carry but rather less so if you want to install a decent processor and graphics card as that requires cooling and airflow. And that is where the Graphite 380T rolls up its sleeves and steps into the fight.
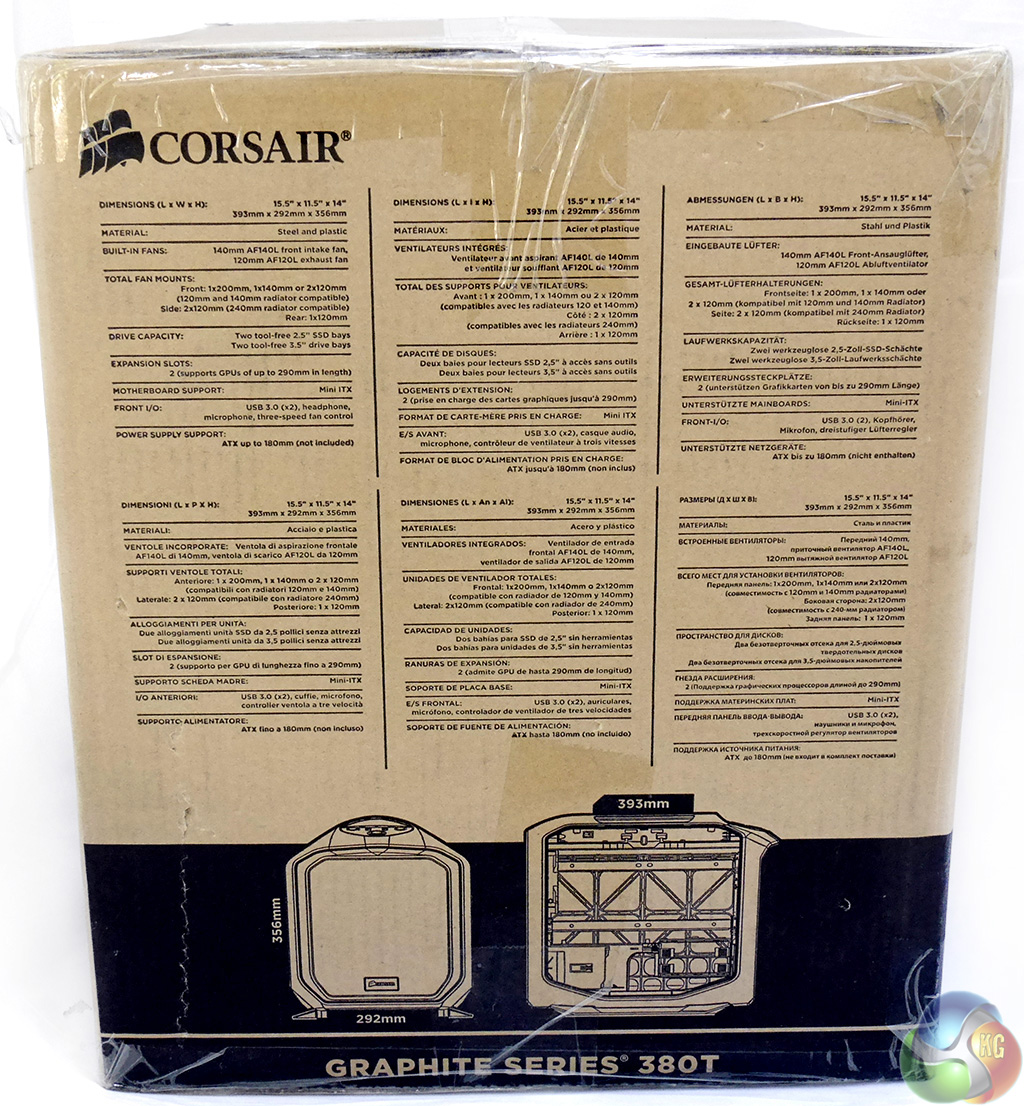
Specifications:
- Motherboard support: Mini-ITX.
- Expansion slots: 2.
- Included fans: 1x 140mm front intake, 1x 120mm rear exhaust.
- Fan mounts: 1x 200mm, 1x 140mm or 2x 120mm front, 2x 120mm side.
- Radiator support: 120mm or 140mm front, 240mm side
- Internal drive bays: 2x 3.5/2.5″, 2x 2.5″.
- Dimensions: 393mm deep x 292mm wide x 356mm high.

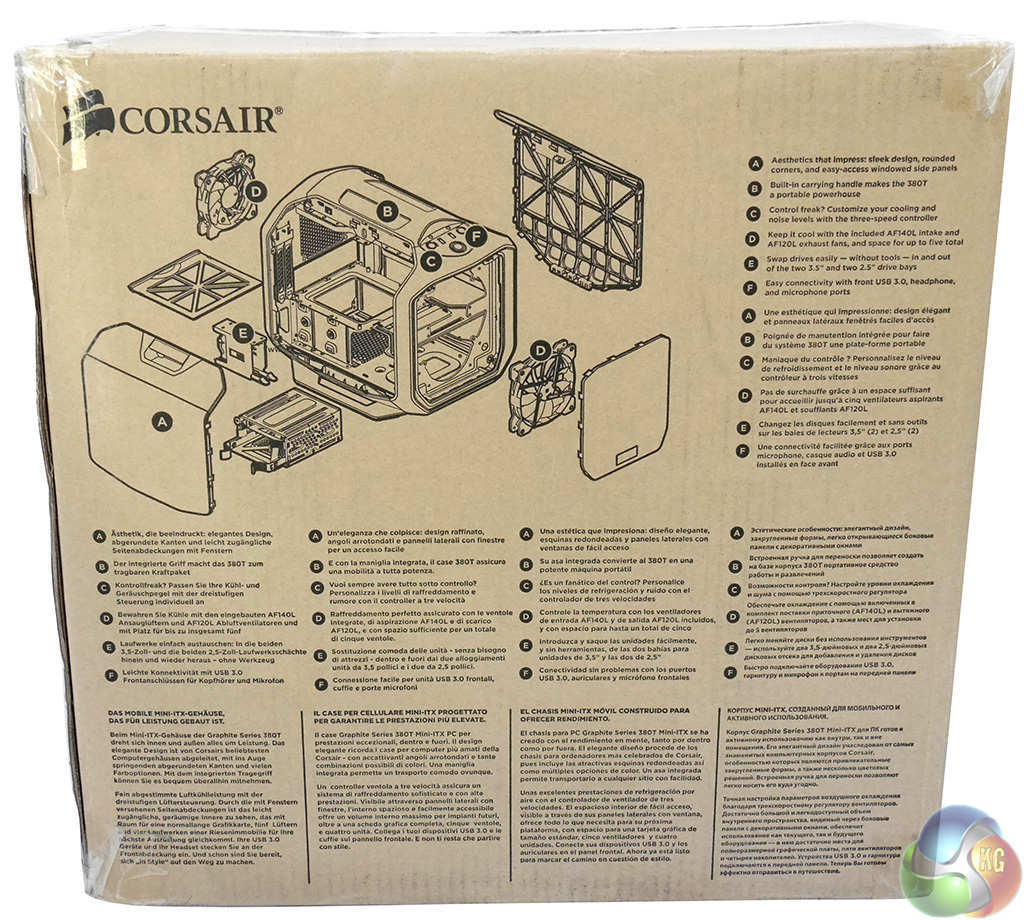
In the main I like Corsair's packaging however the box of the Corsair Graphite 380T leaves me cold. The line drawings on the outside of the box convey none of the excitement that you feel when you see the unique design of this case and instead make the 380T look like a pet carrier basket.
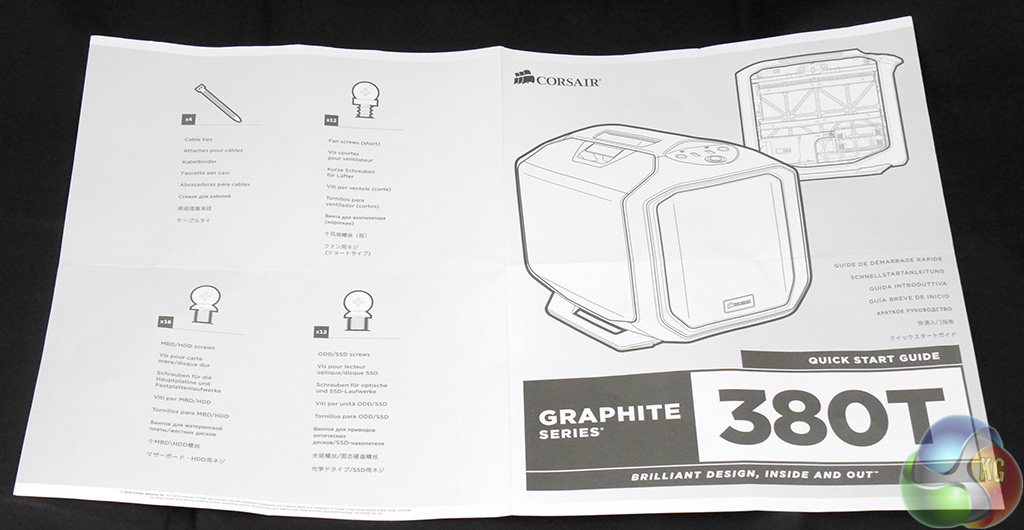
The packaging leaves me feeling meh but the quick start guide managed to annoy me, and that's quite a feat for two sheets of A4 paper. The problem is that the guide shows you what you get when you open up the 380T but doesn't spell out the way the 380T does things differently.
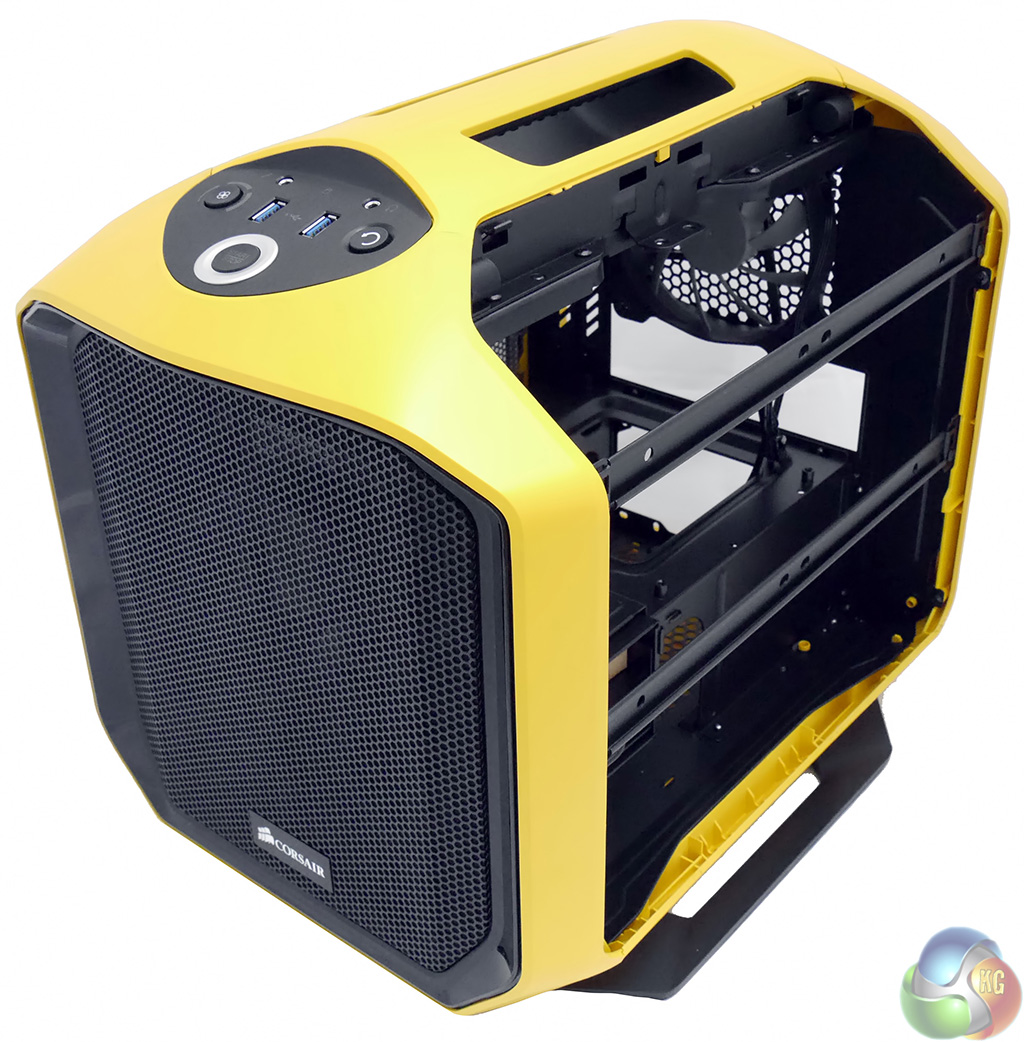
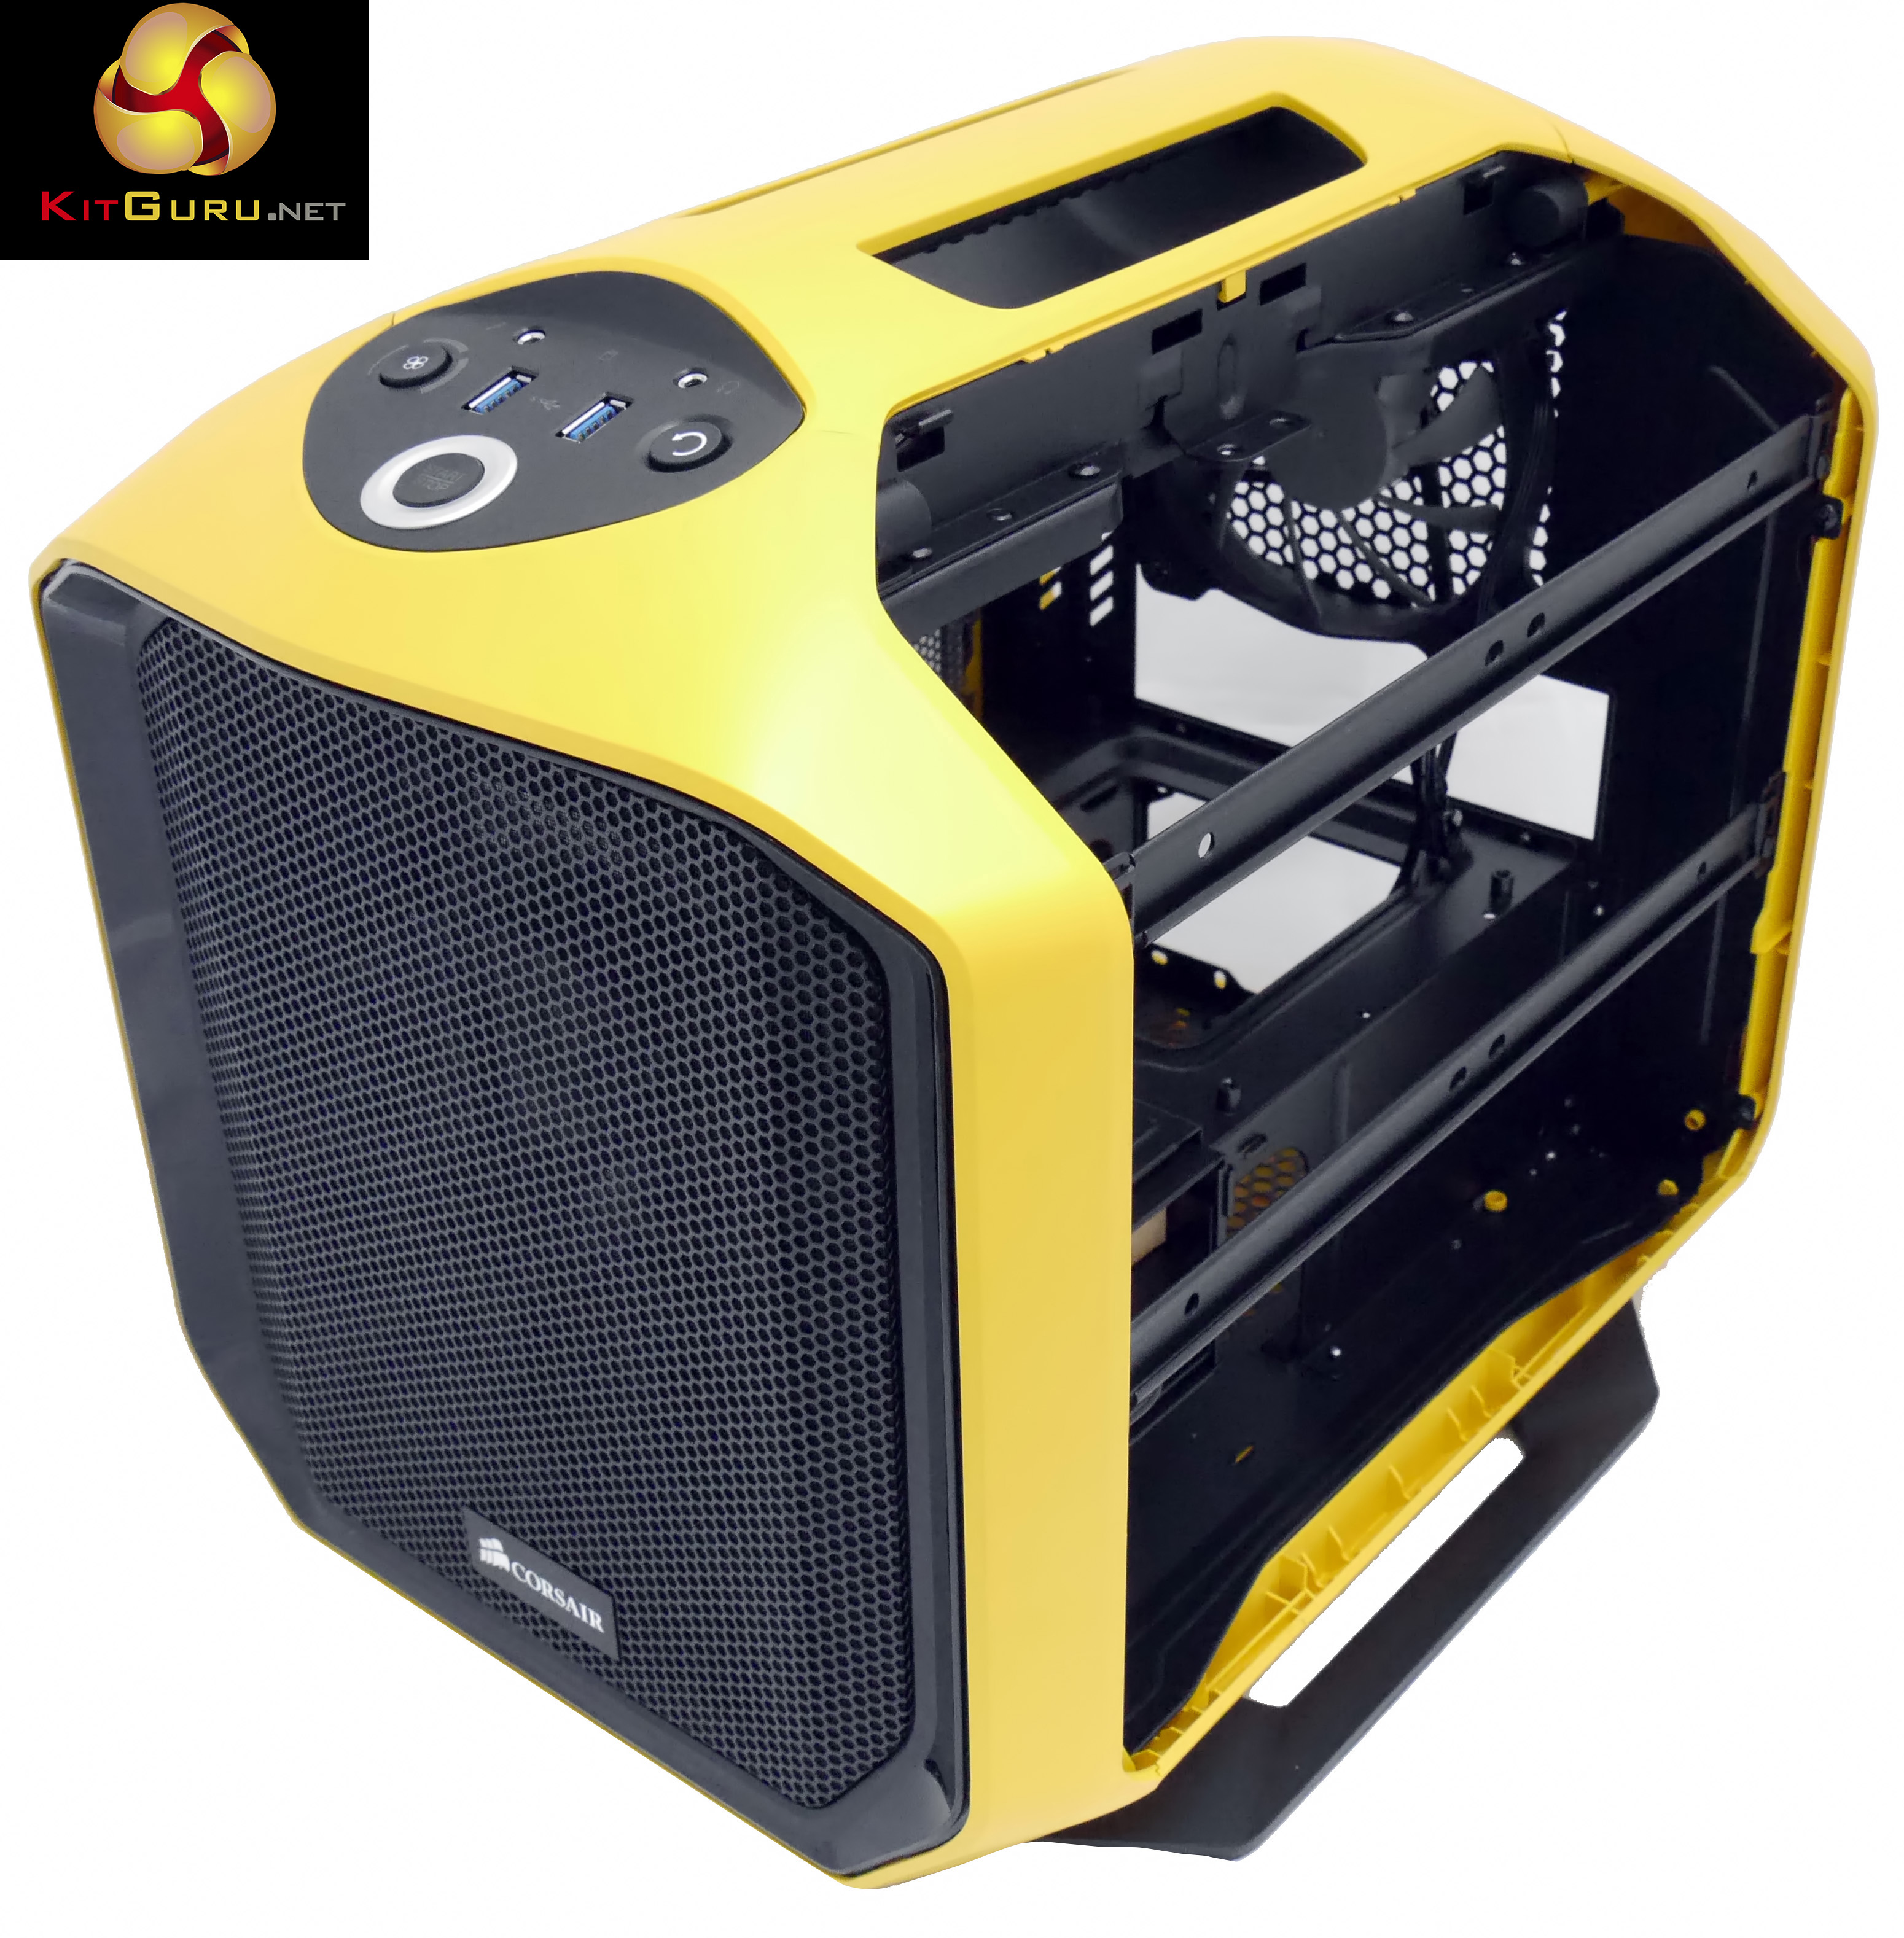
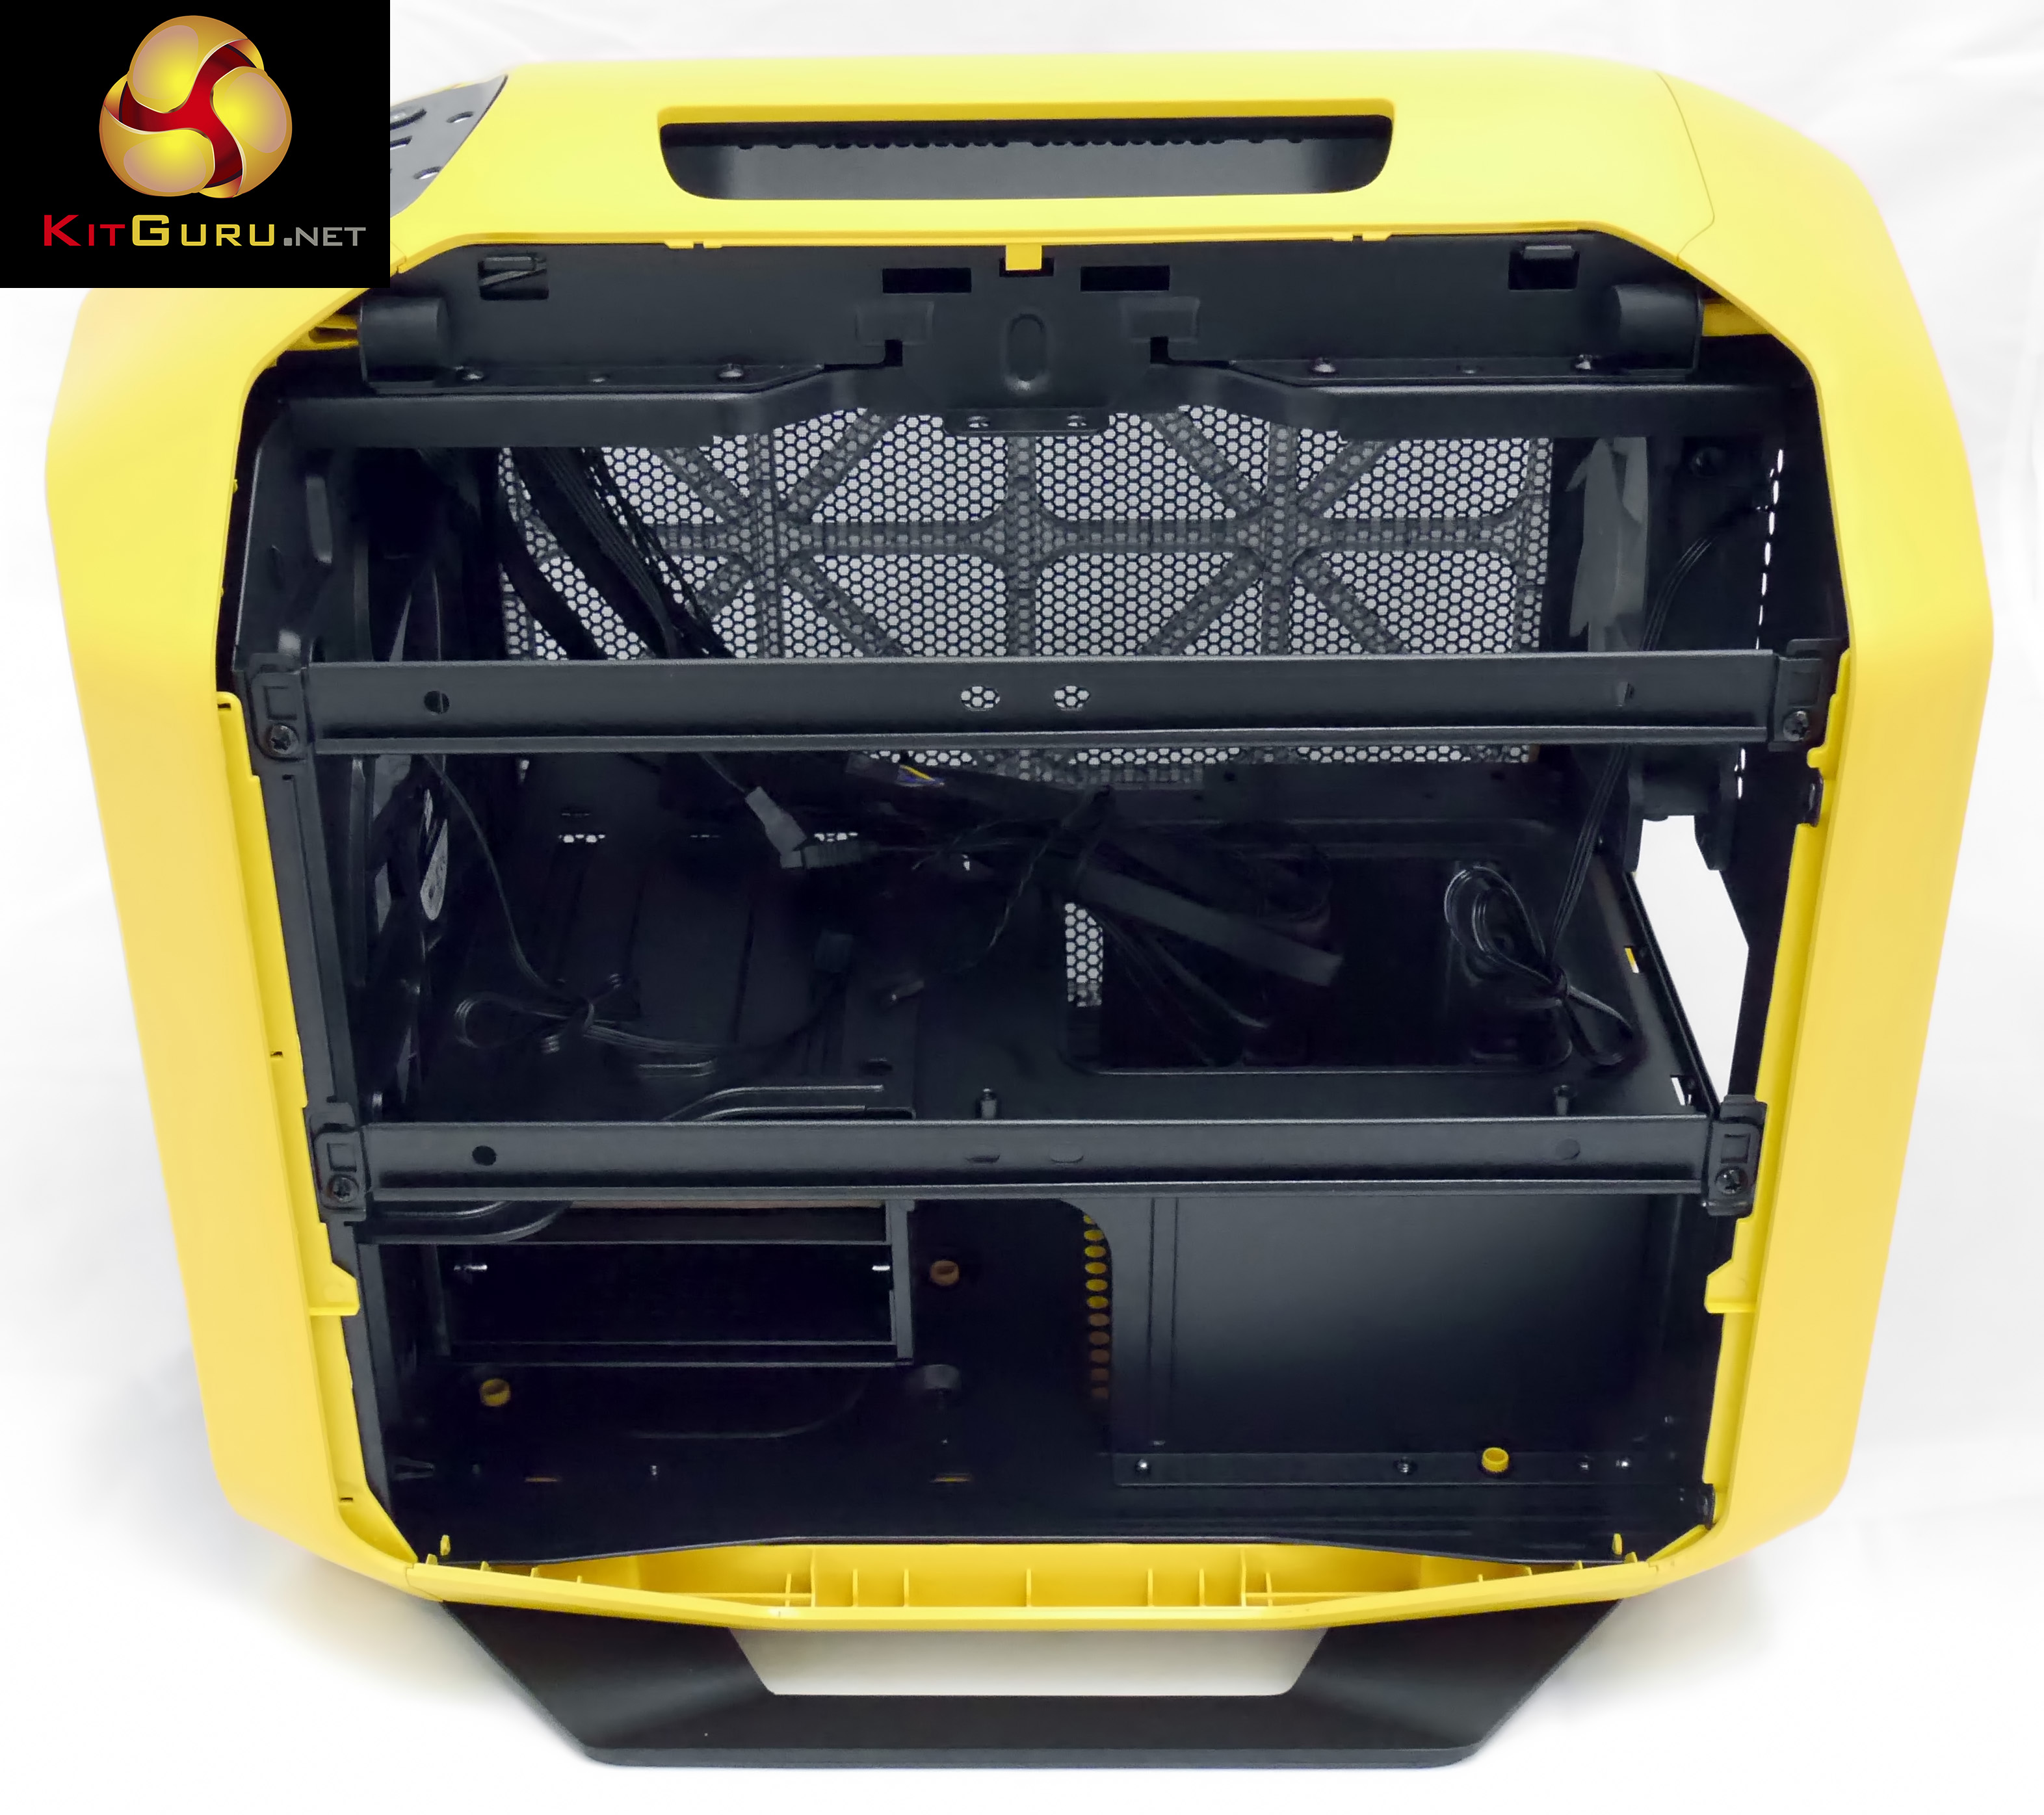
Take a look at the picture and I very much doubt that you will see the motherboard sits horizontally in the case with the I/O panel running from side to side. I recall seeing this layout in a Cubitek case a while back but it isn't something you see every day so a bit more help from Corsair would have been welcome.
The accessory pack consists of a handful of screws and a couple of tiny cable ties but realistically that is all you need to build your new PC.
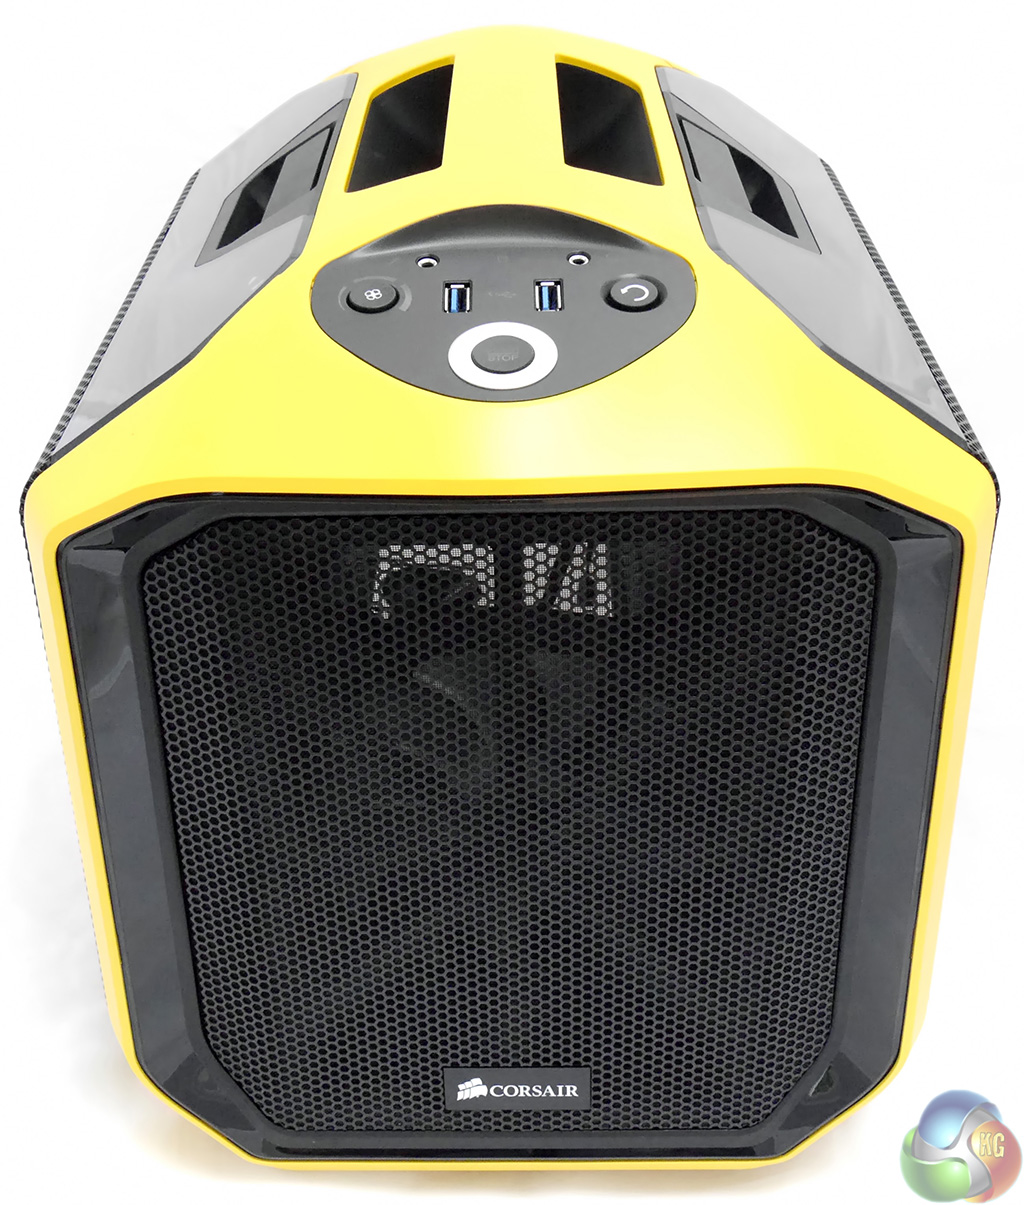
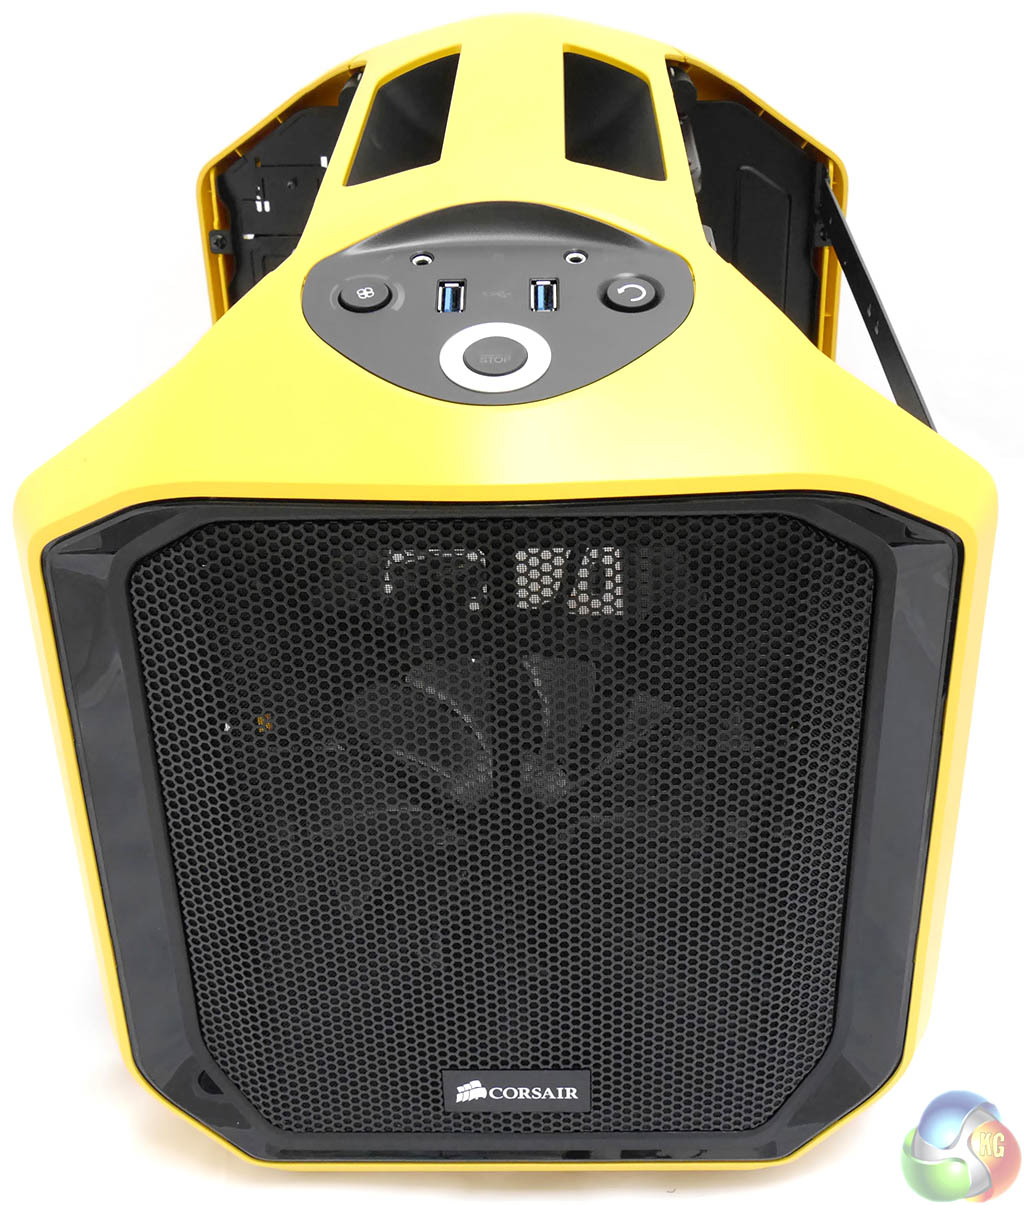
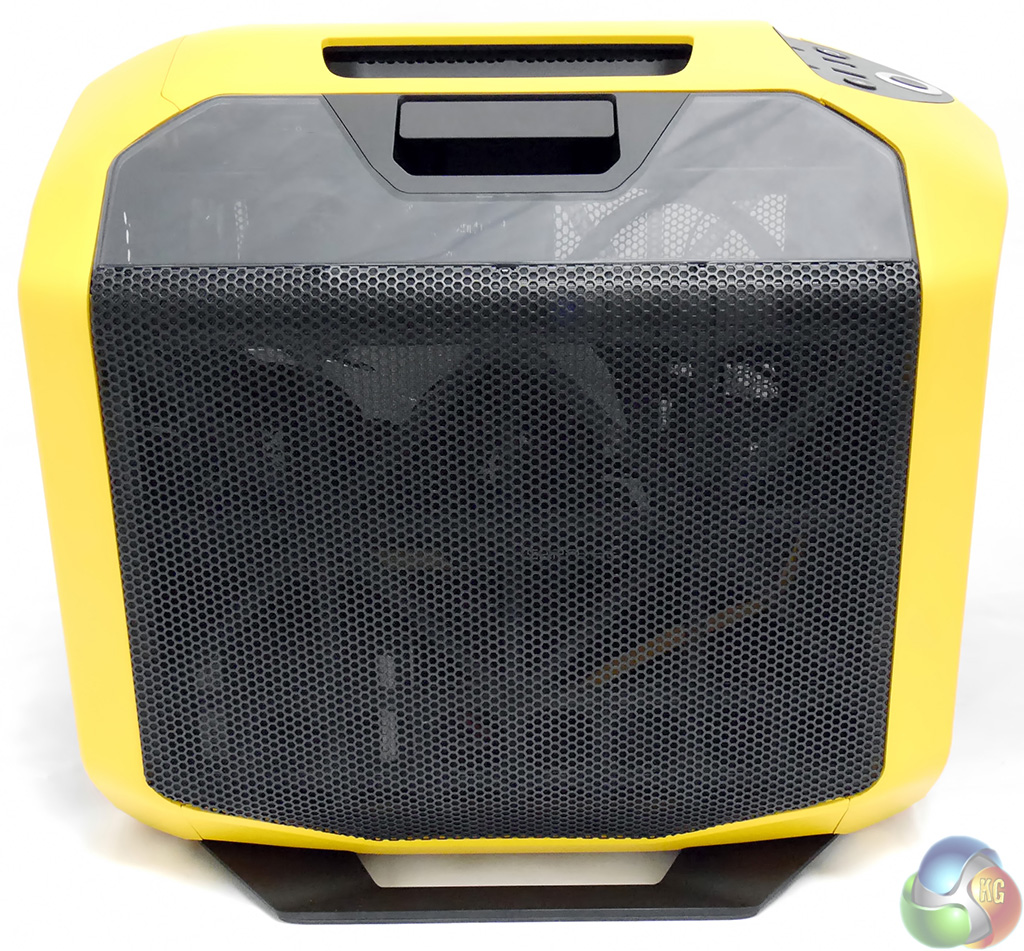
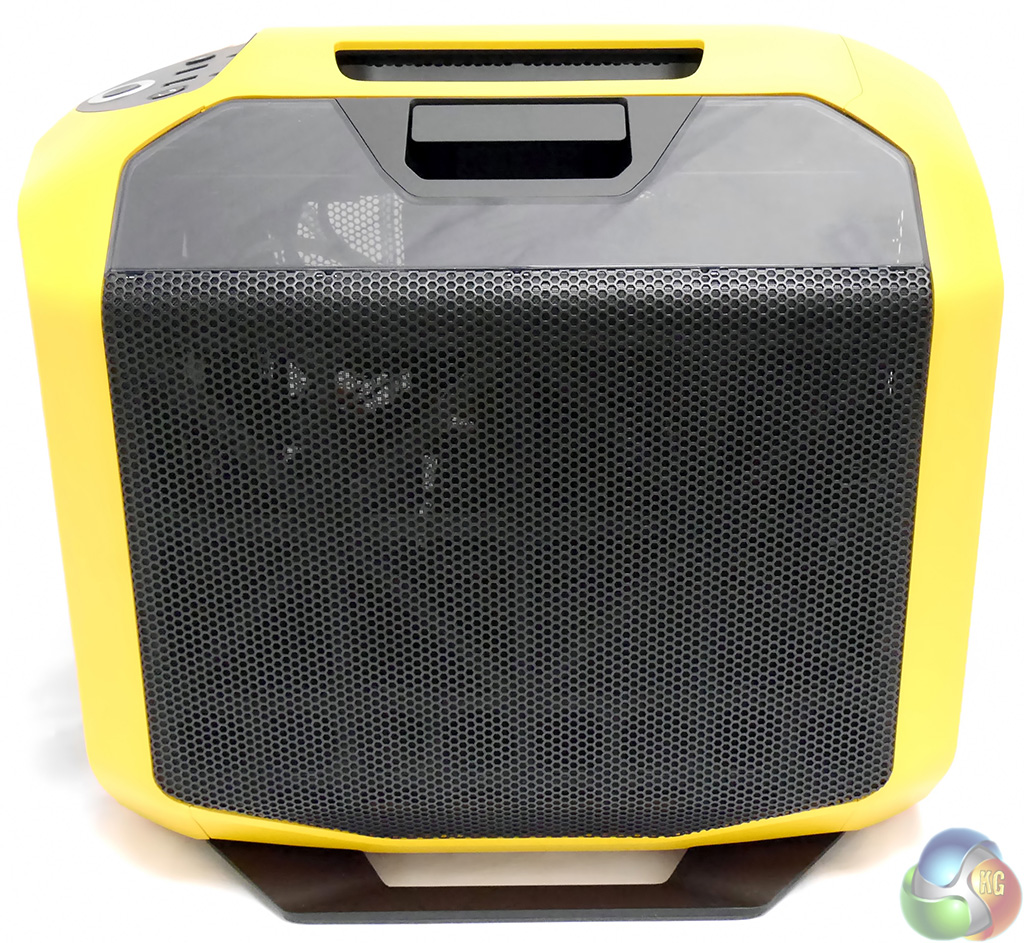
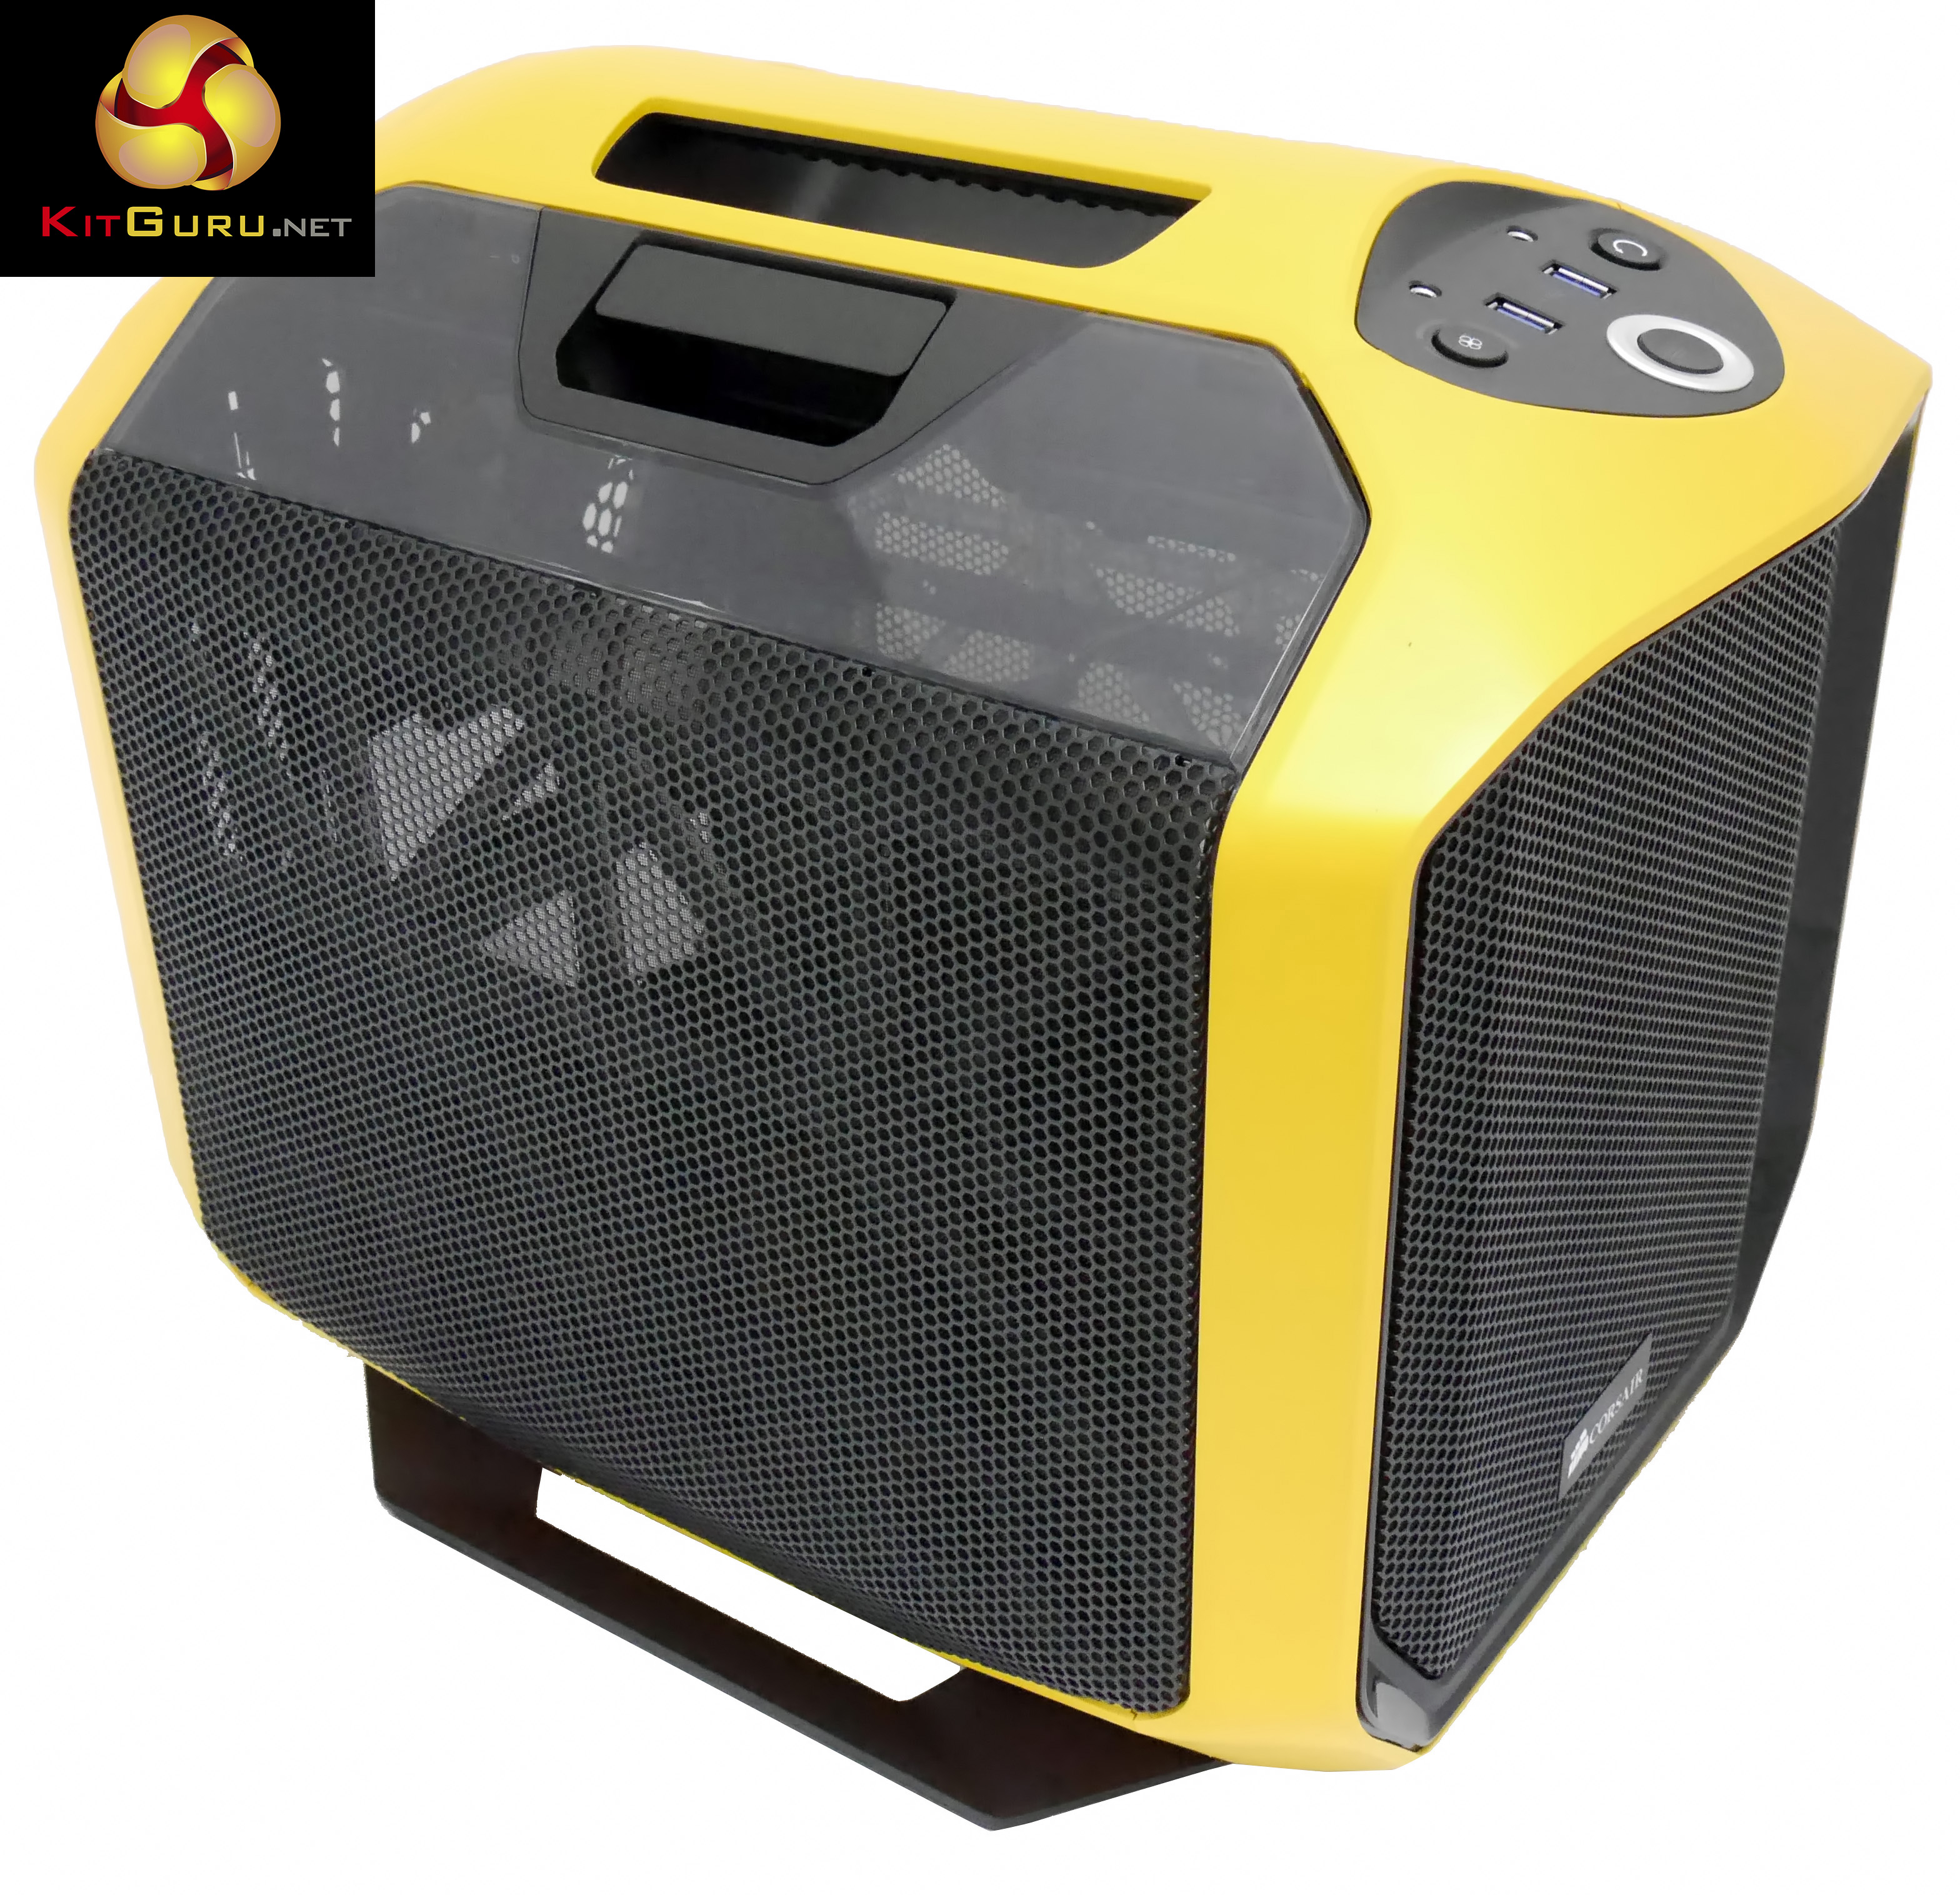
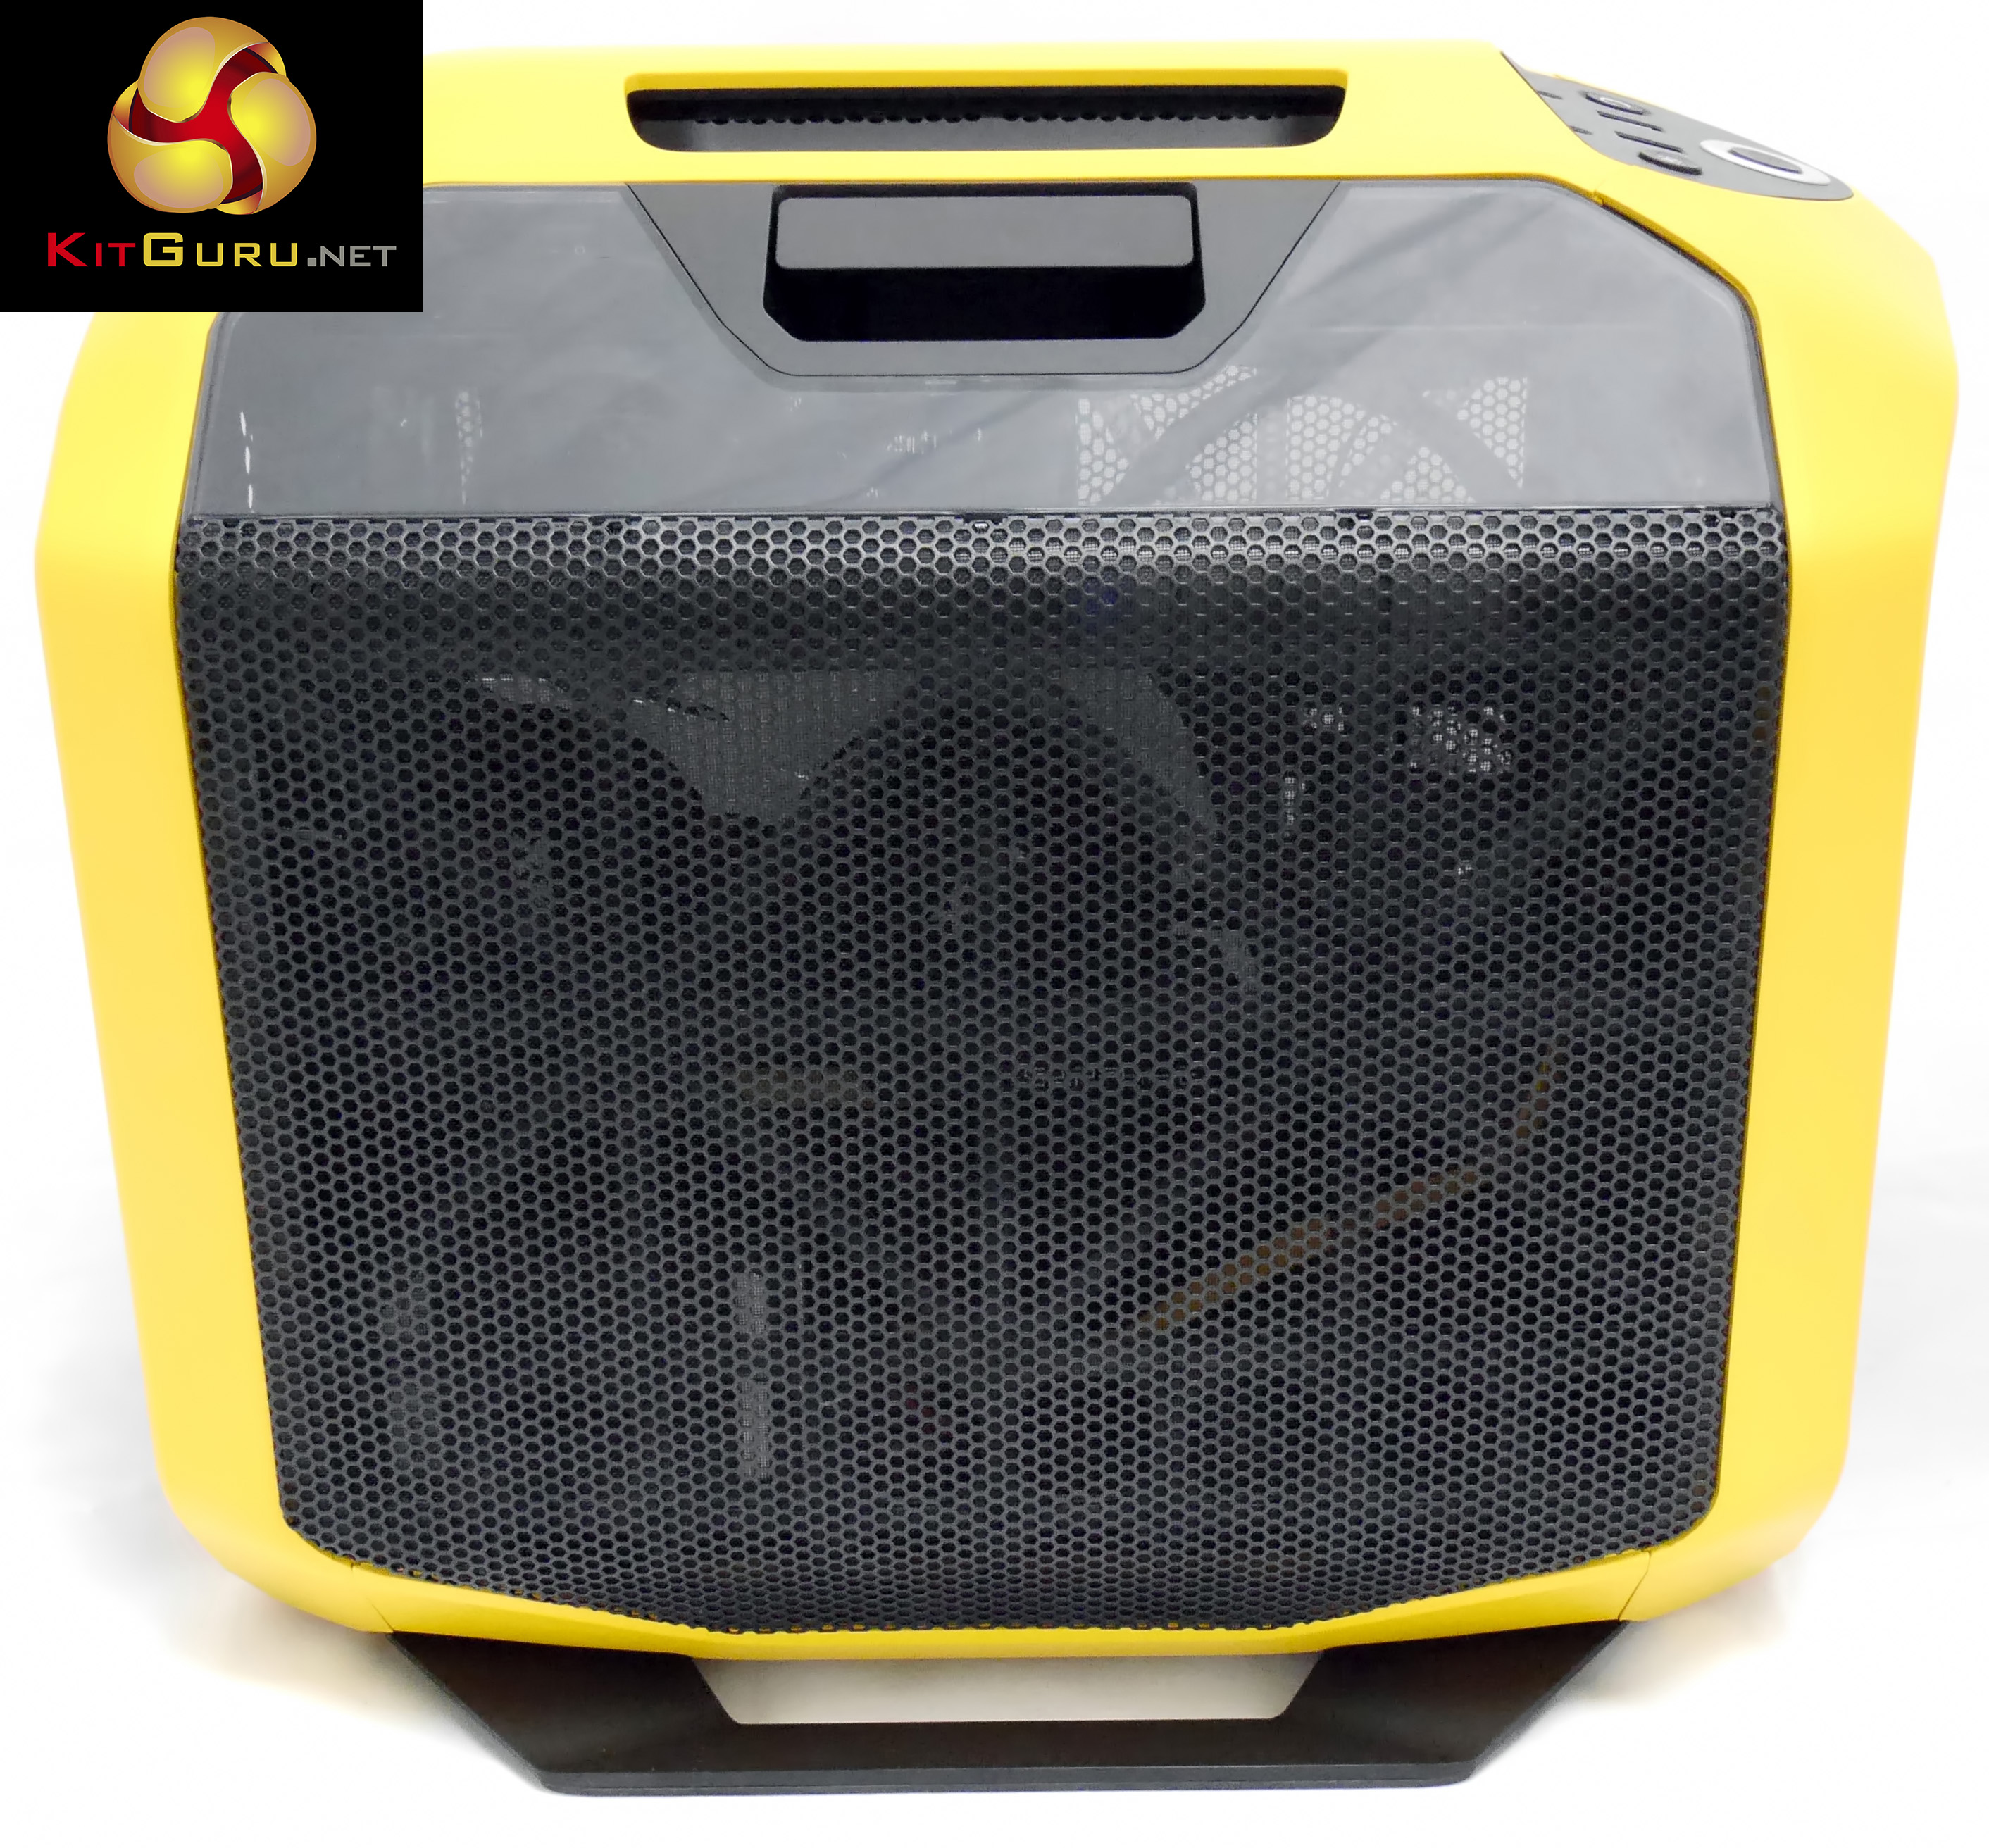
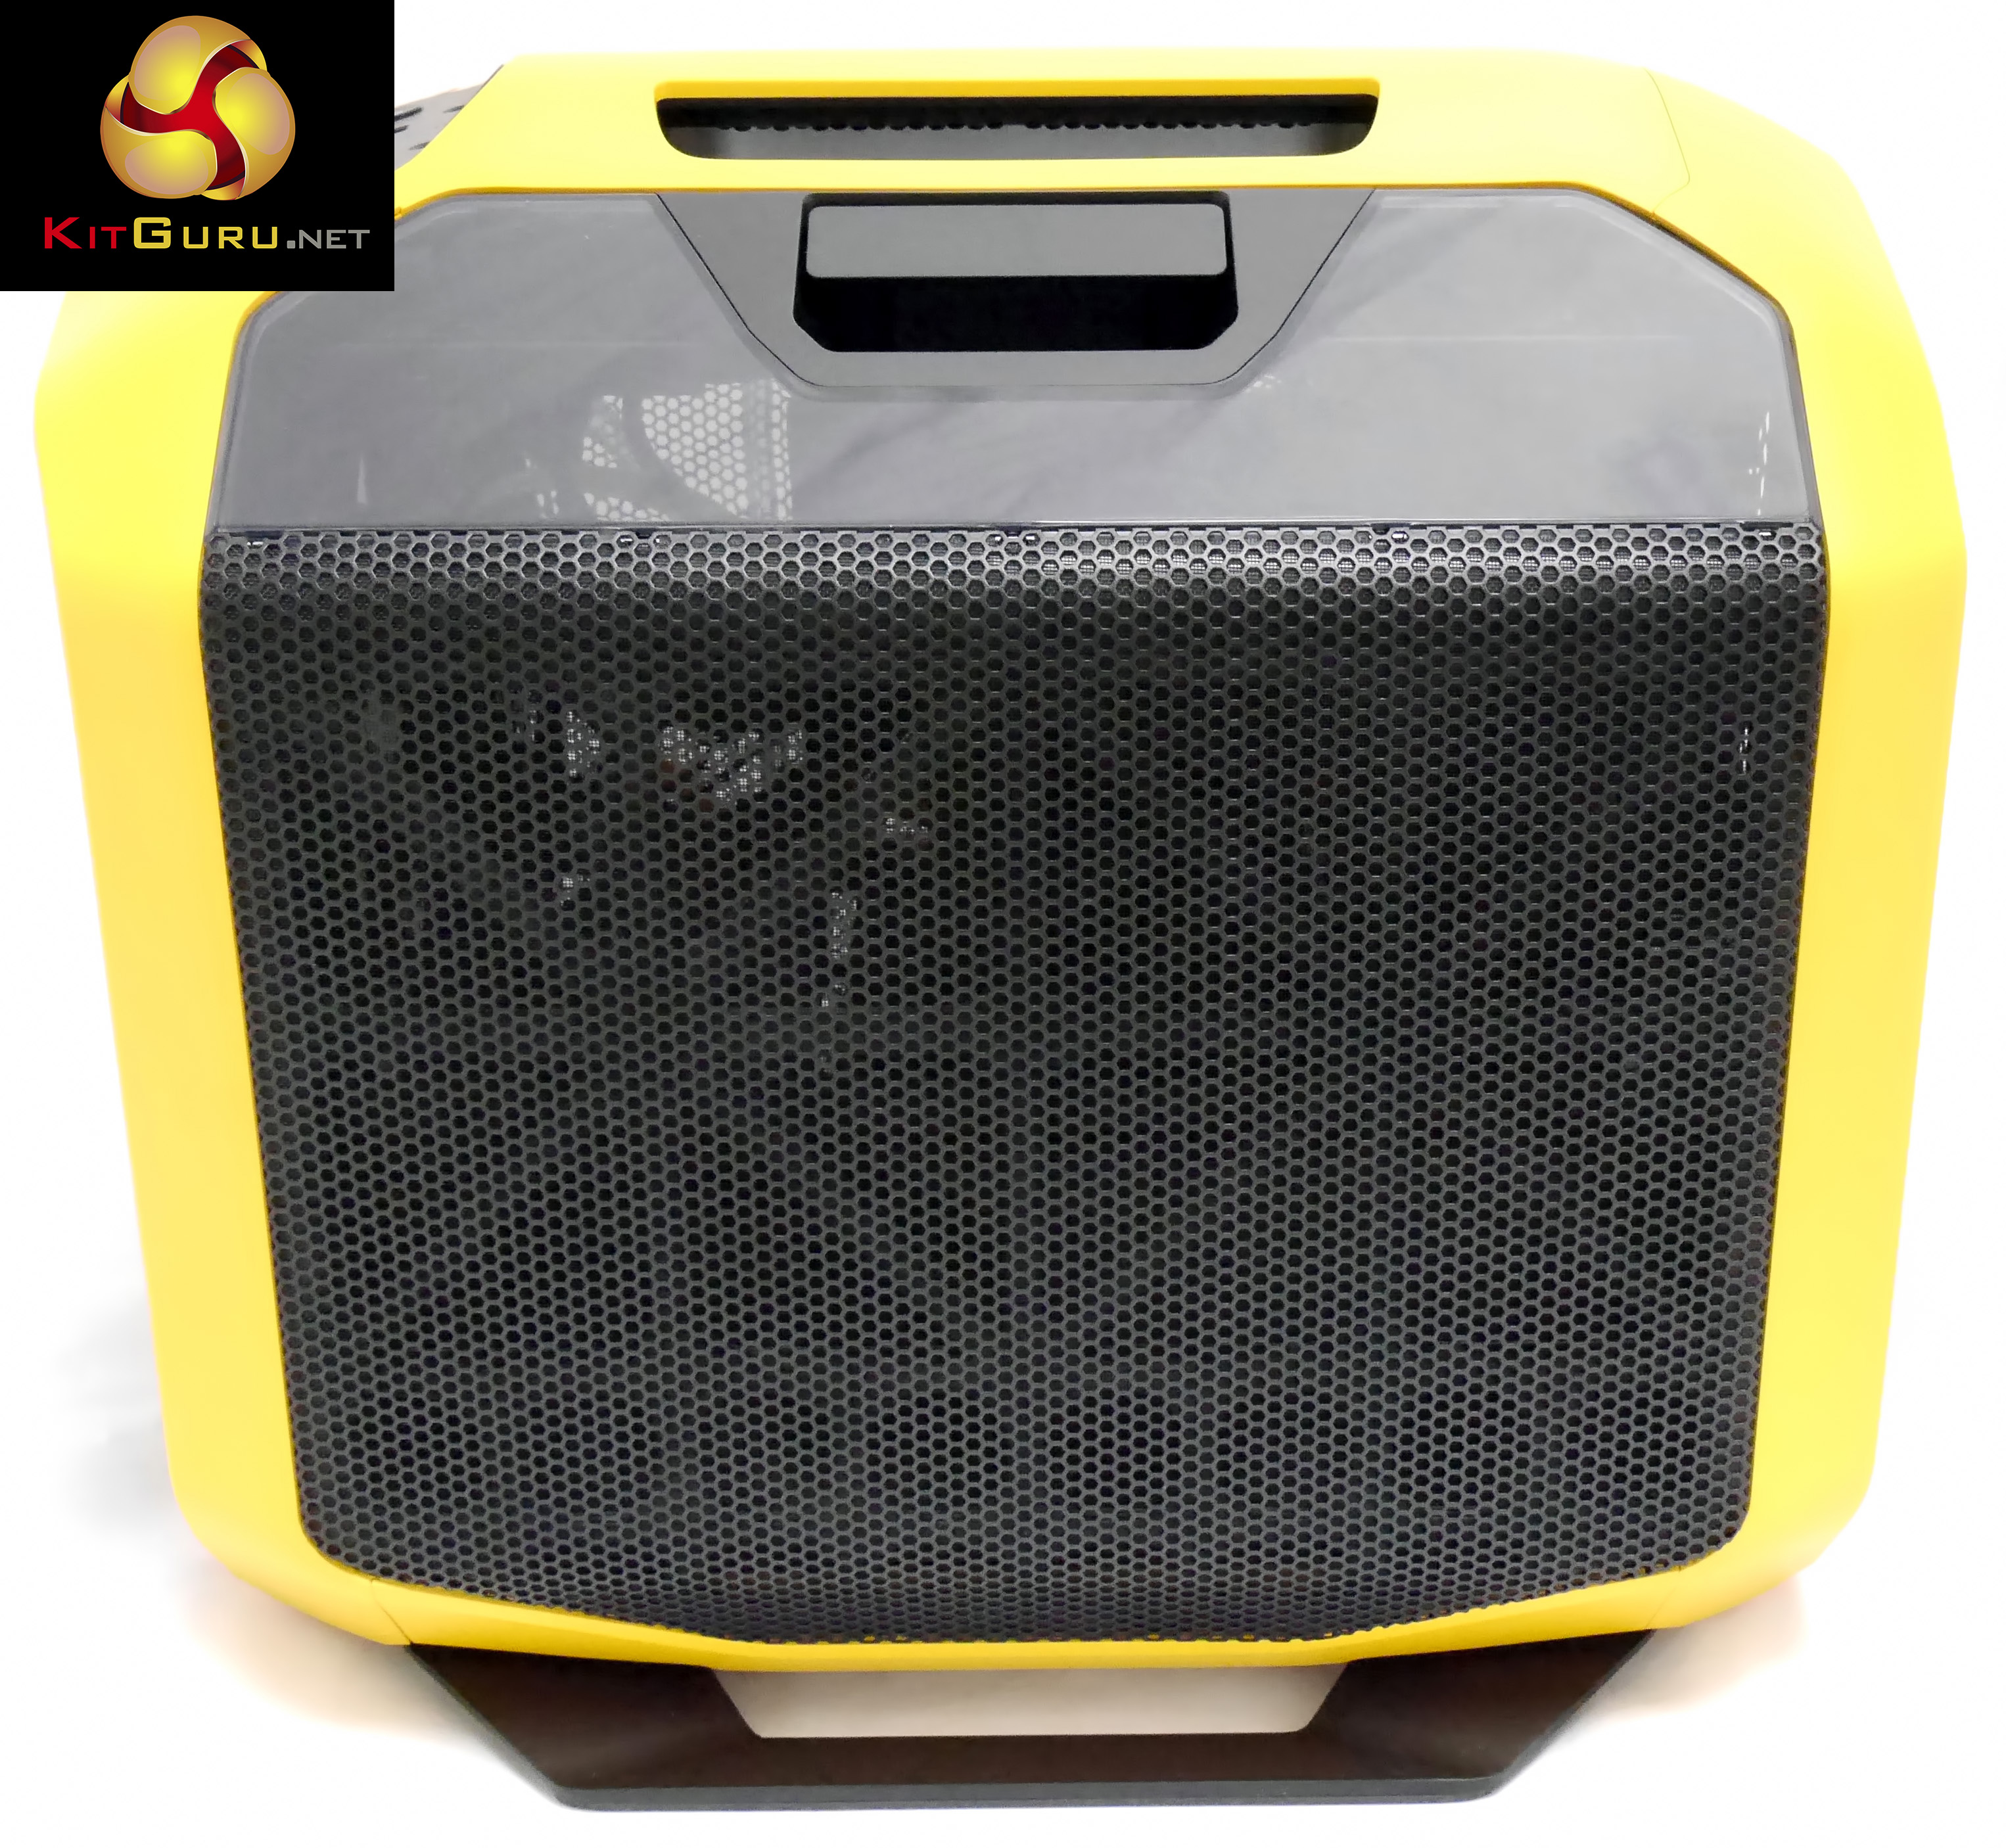
The front of the Corsair Graphite 380T is heavily perforated to assist airflow through the case. It would be more accurate to say ‘entirely perforated' as the illuminated 140mm front fan is clearly visible through the mesh panel. You will note there are no optical drive bays.
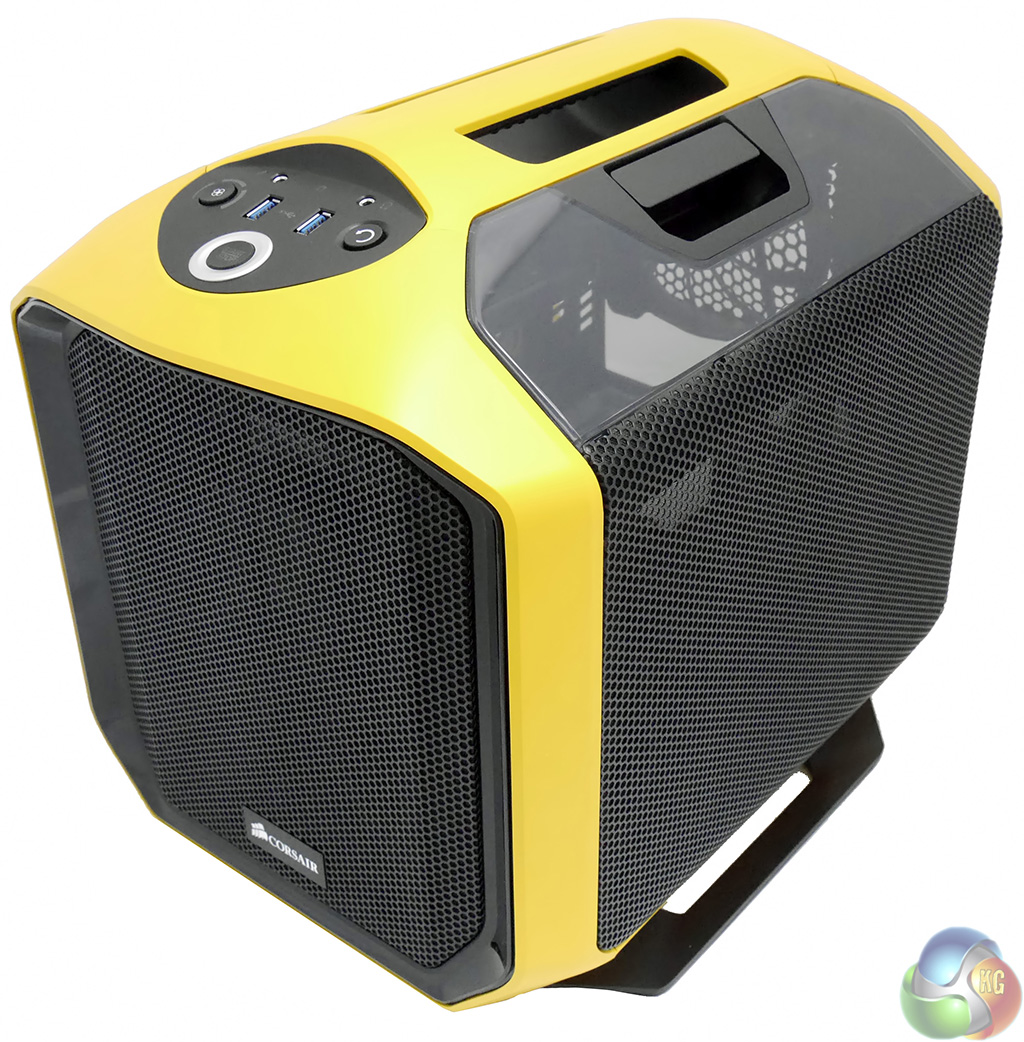
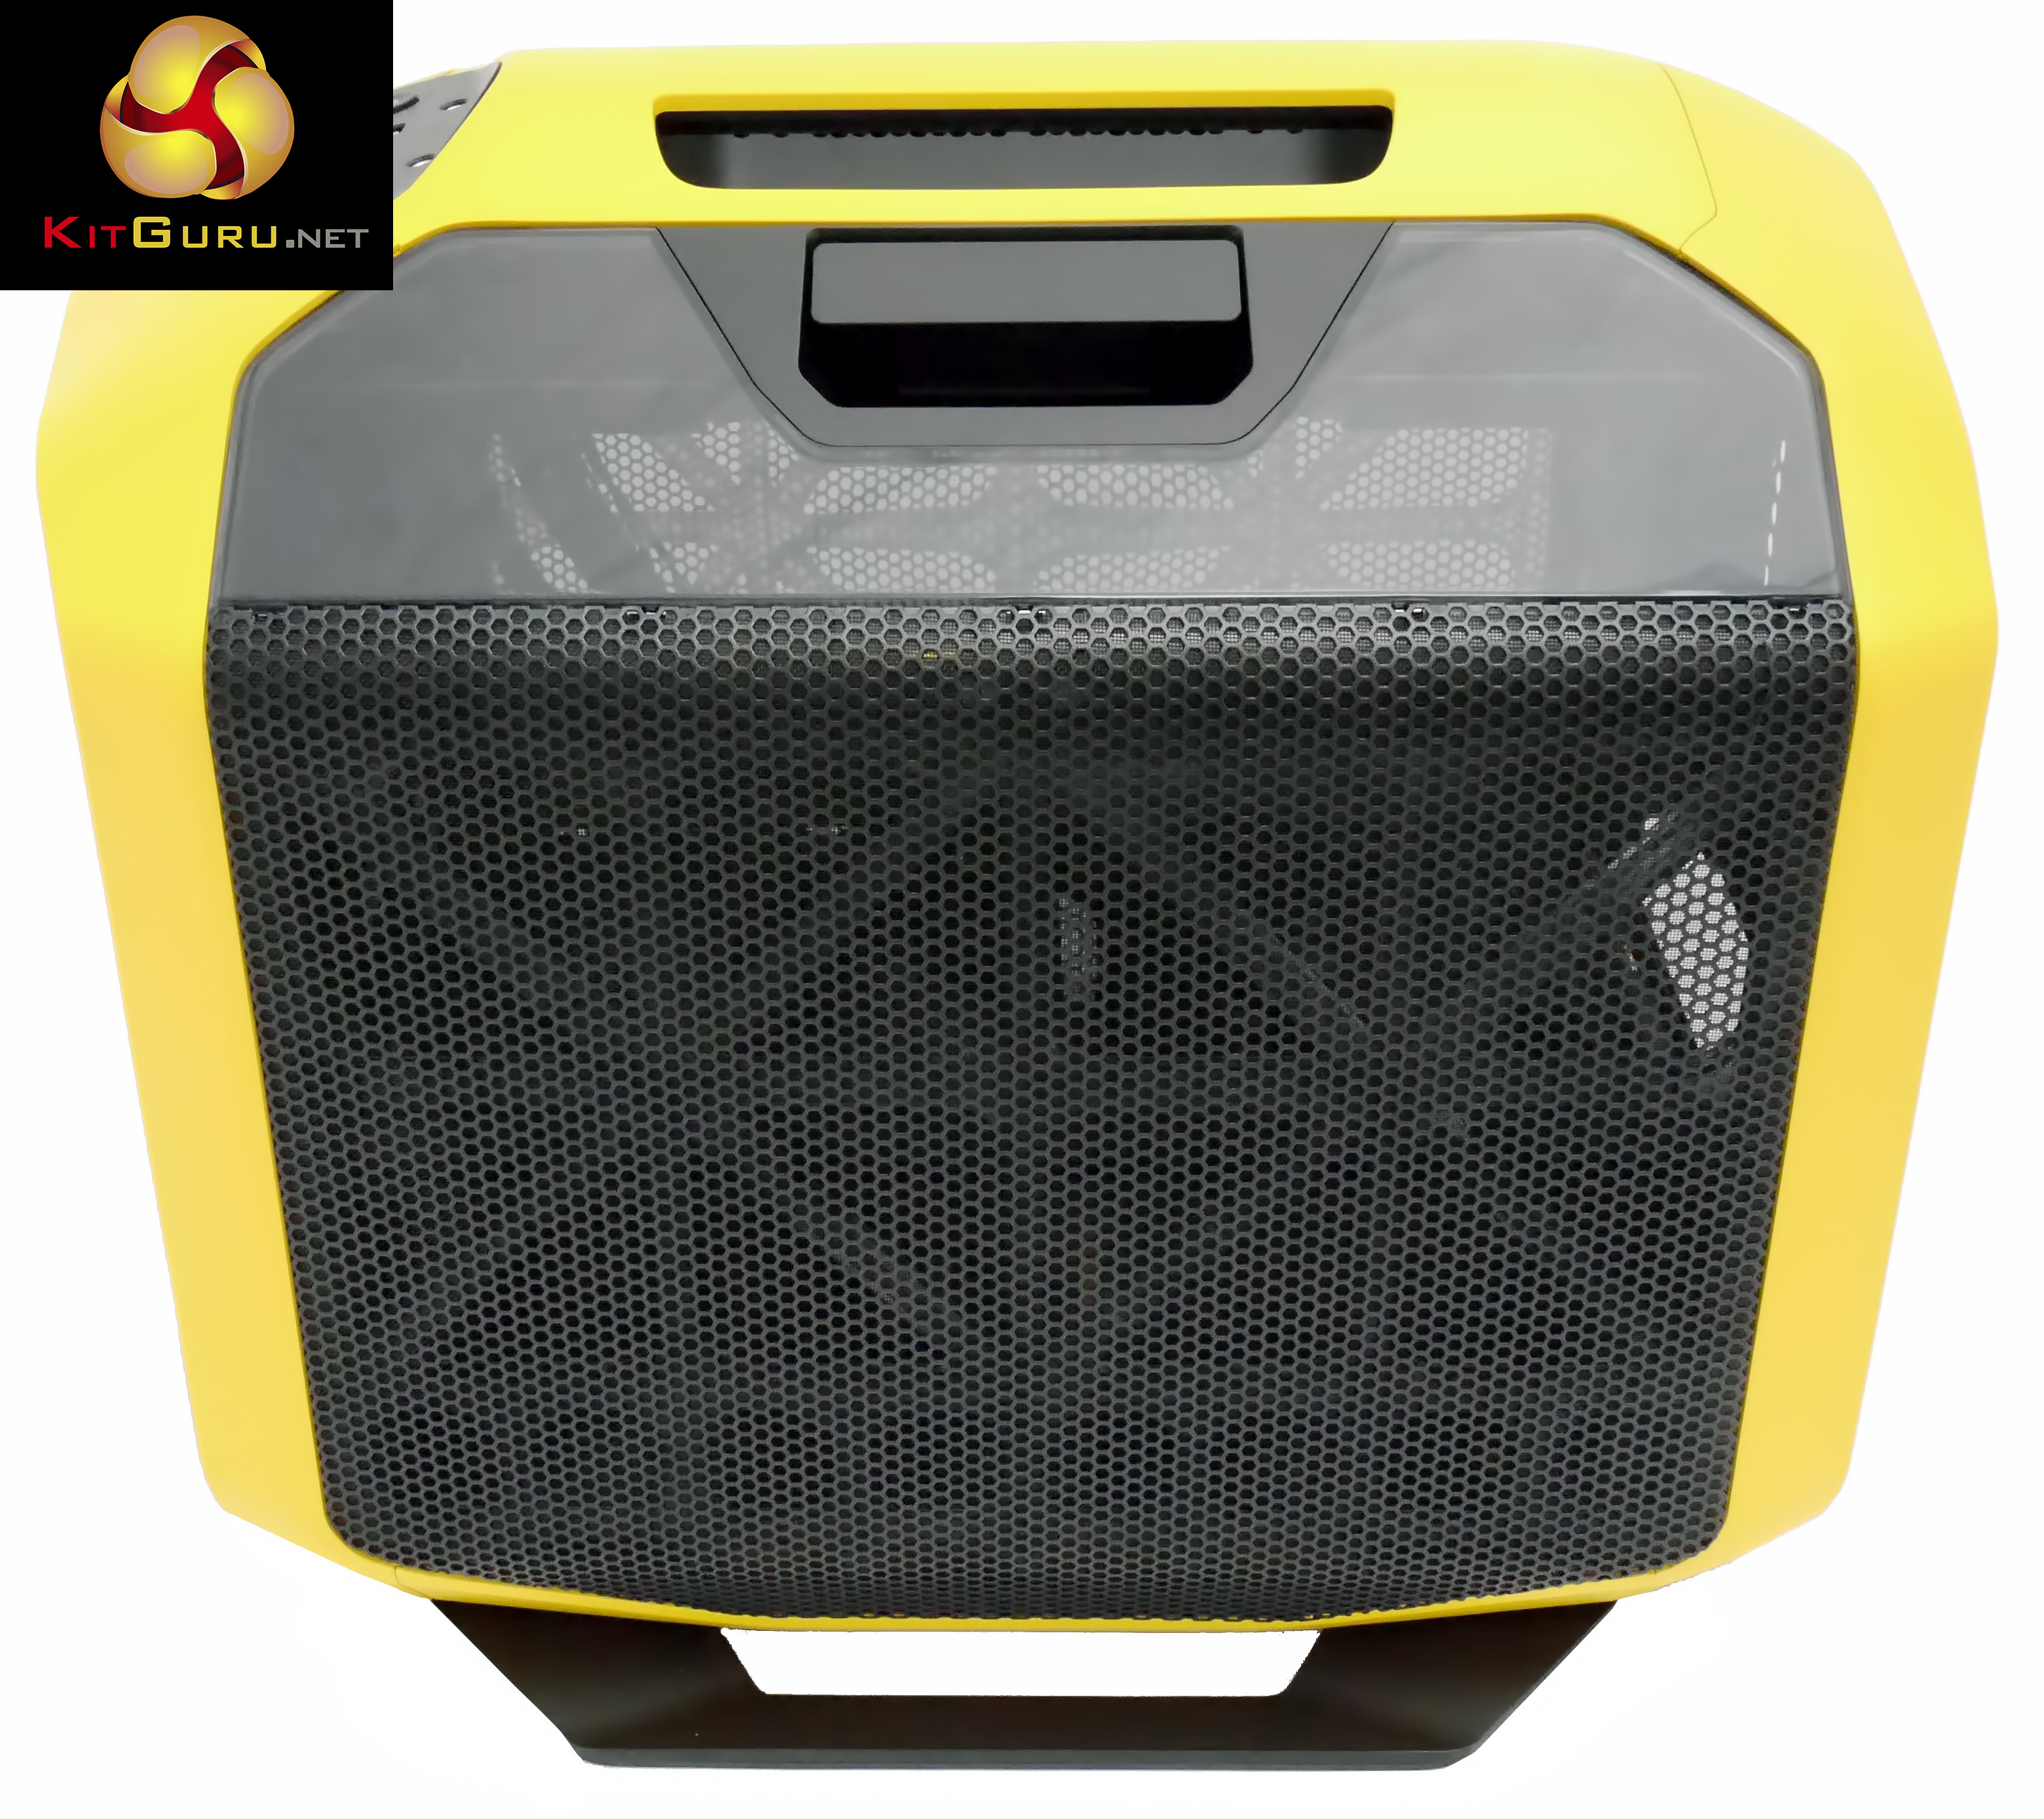
Both of the interchangeable side covers are perforated and held in place with a latching handle. This gives instant access to the innards however you need to take a certain amount of care when you replace a cover to ensure it sits correctly in place, otherwise it won't be locked securely in position.
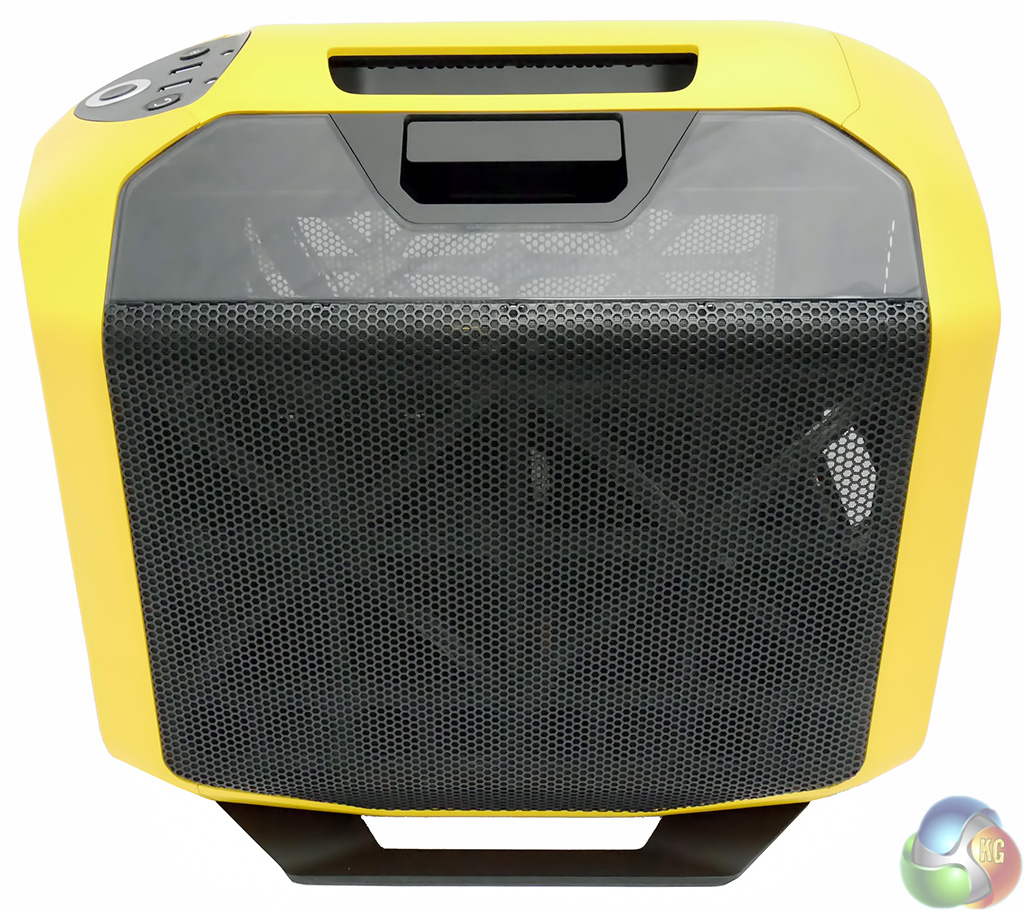
When you look directly at the side panel you can see just how much emphasis Corsair has placed on airflow i.e. plenty.
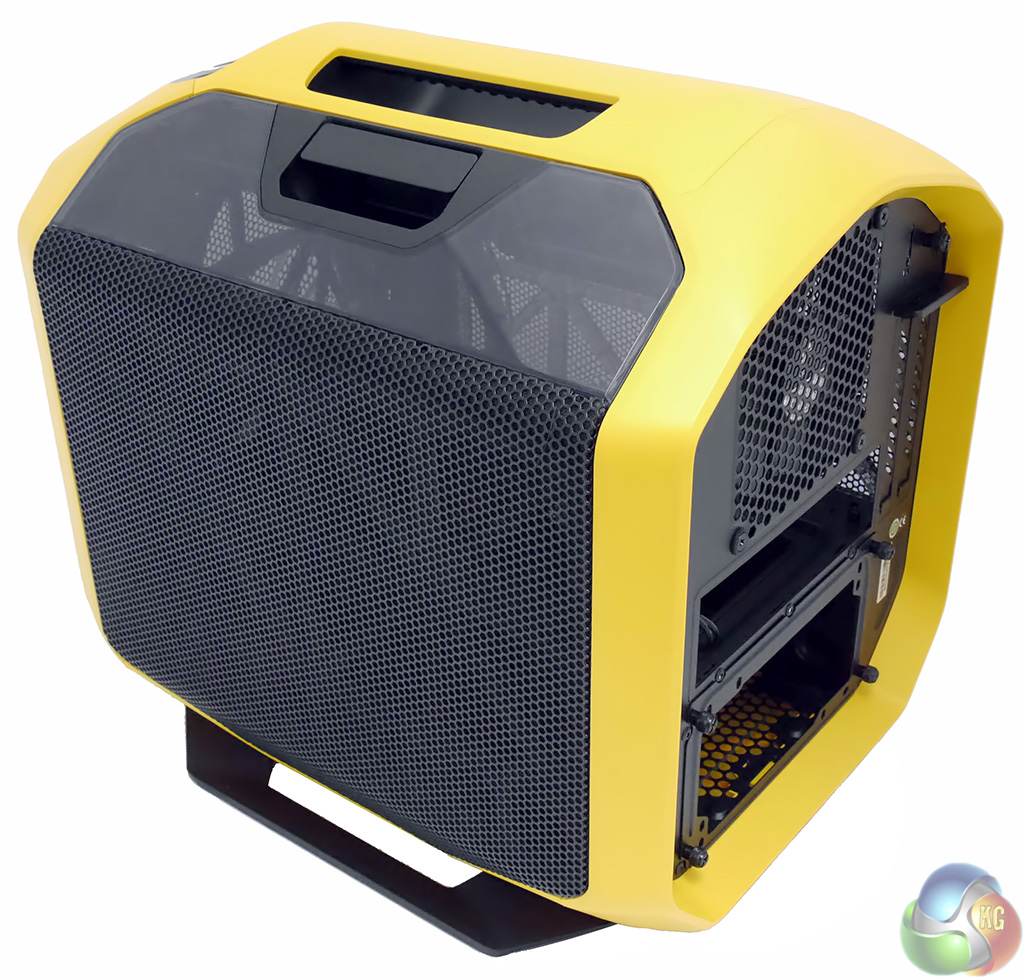
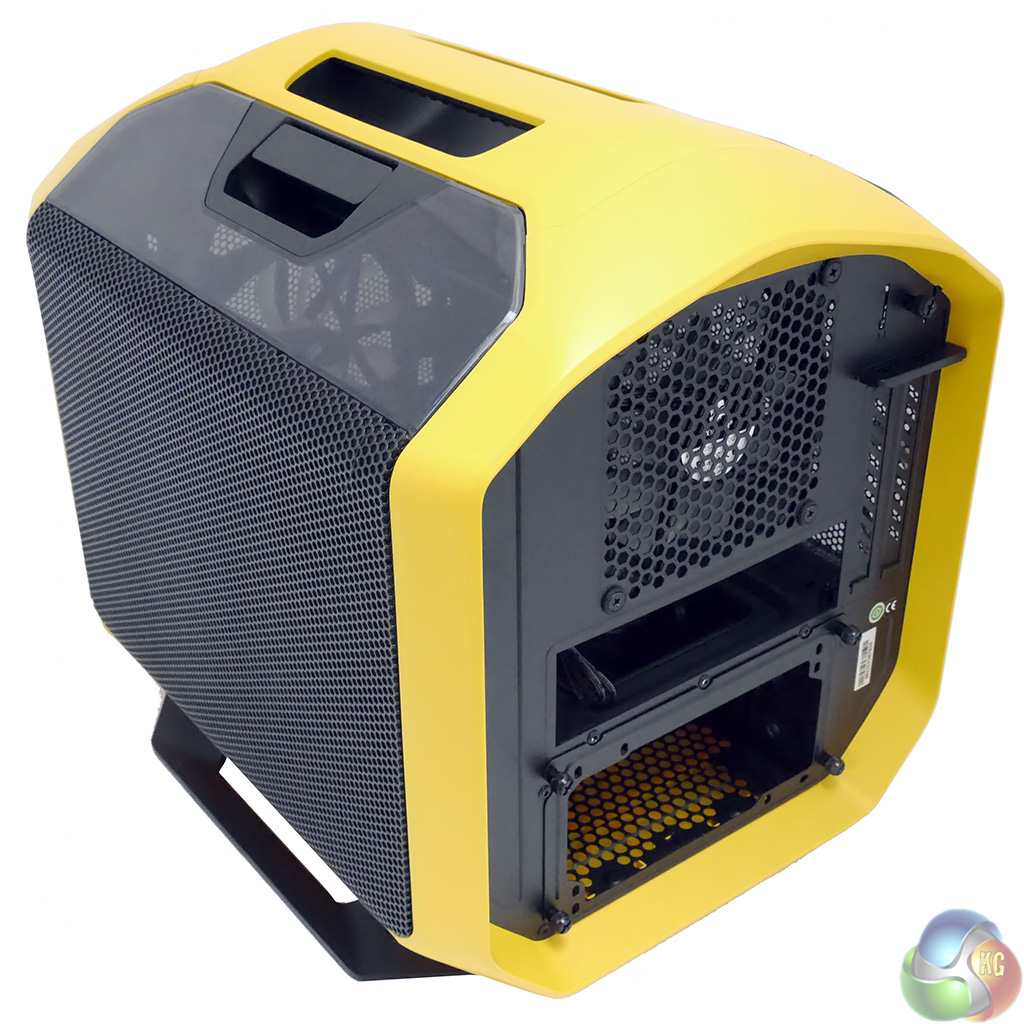
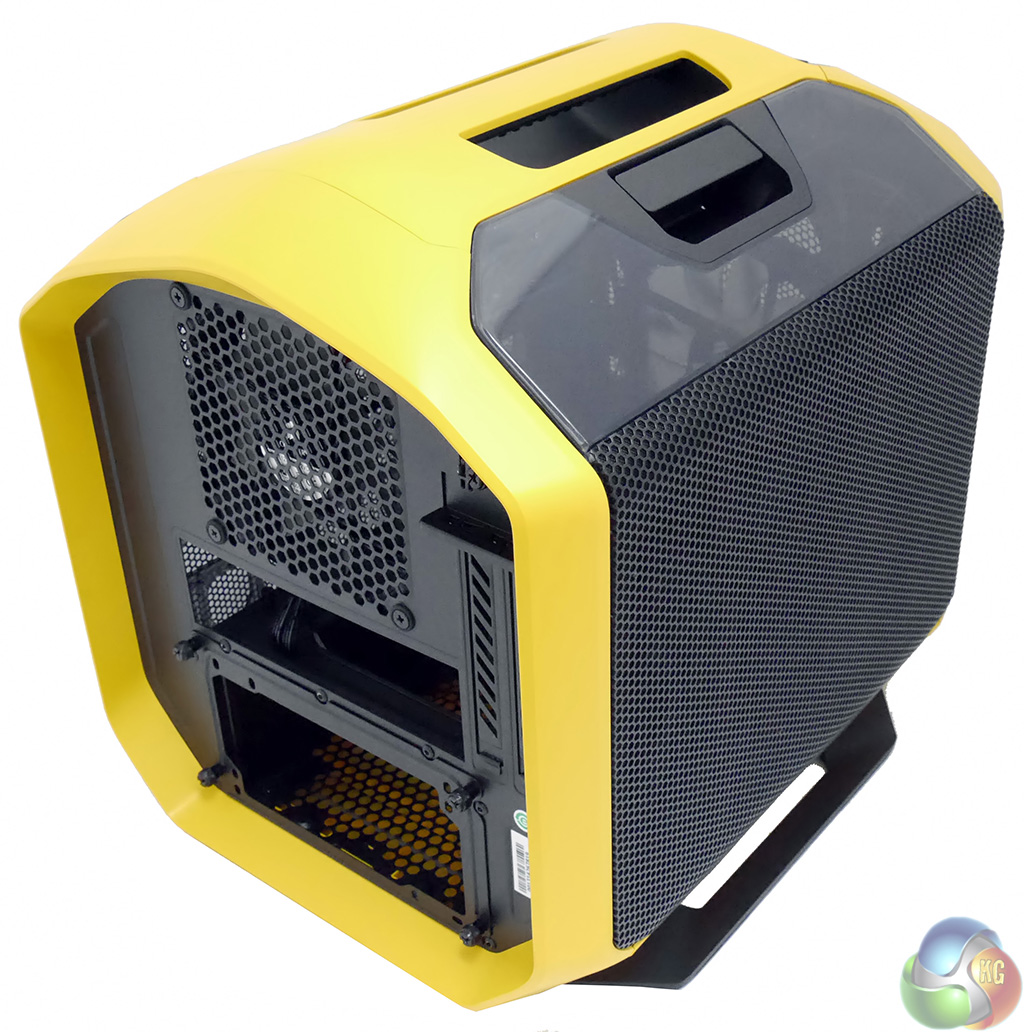
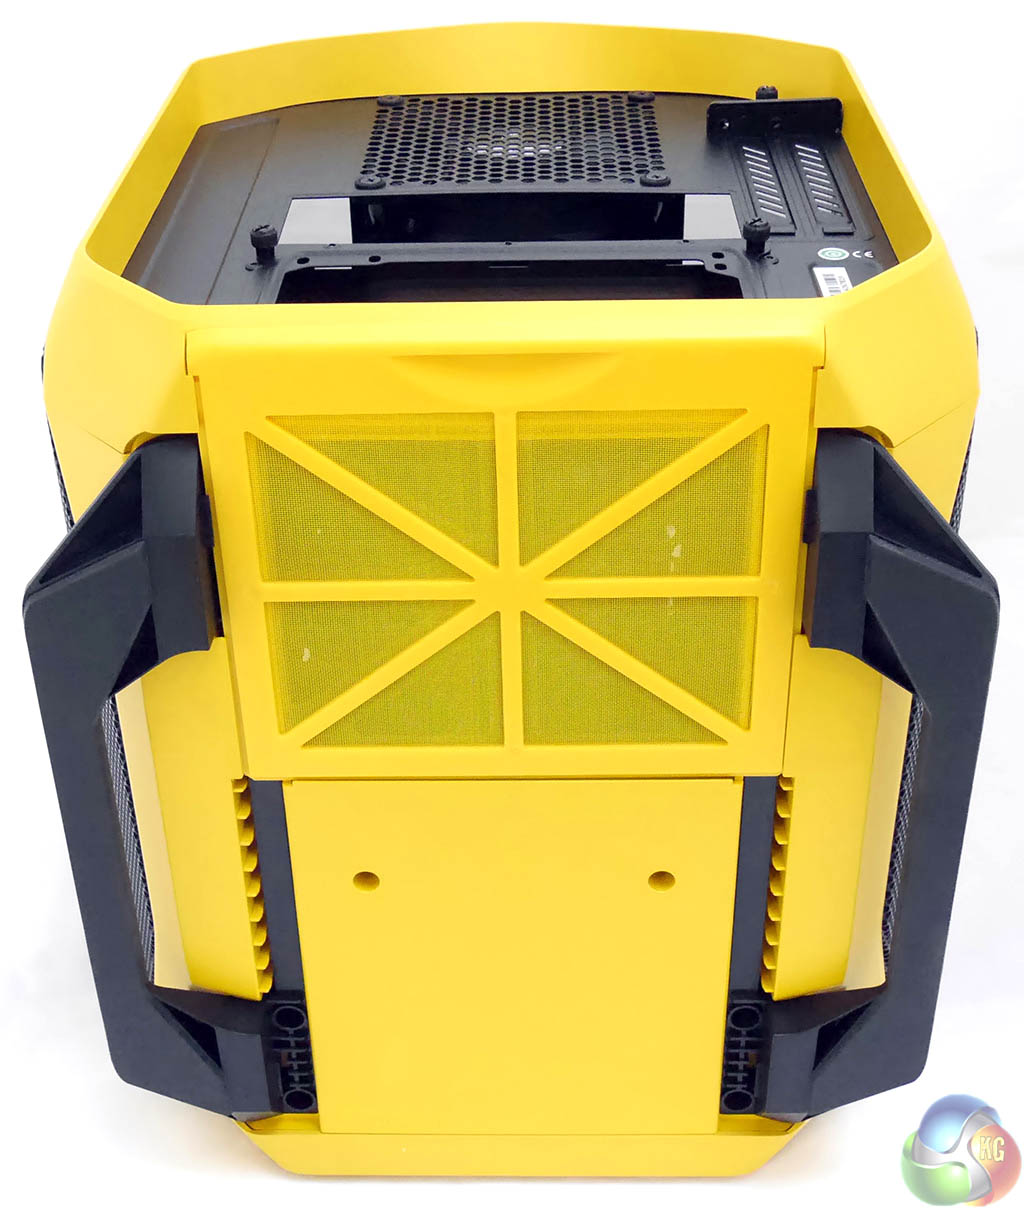
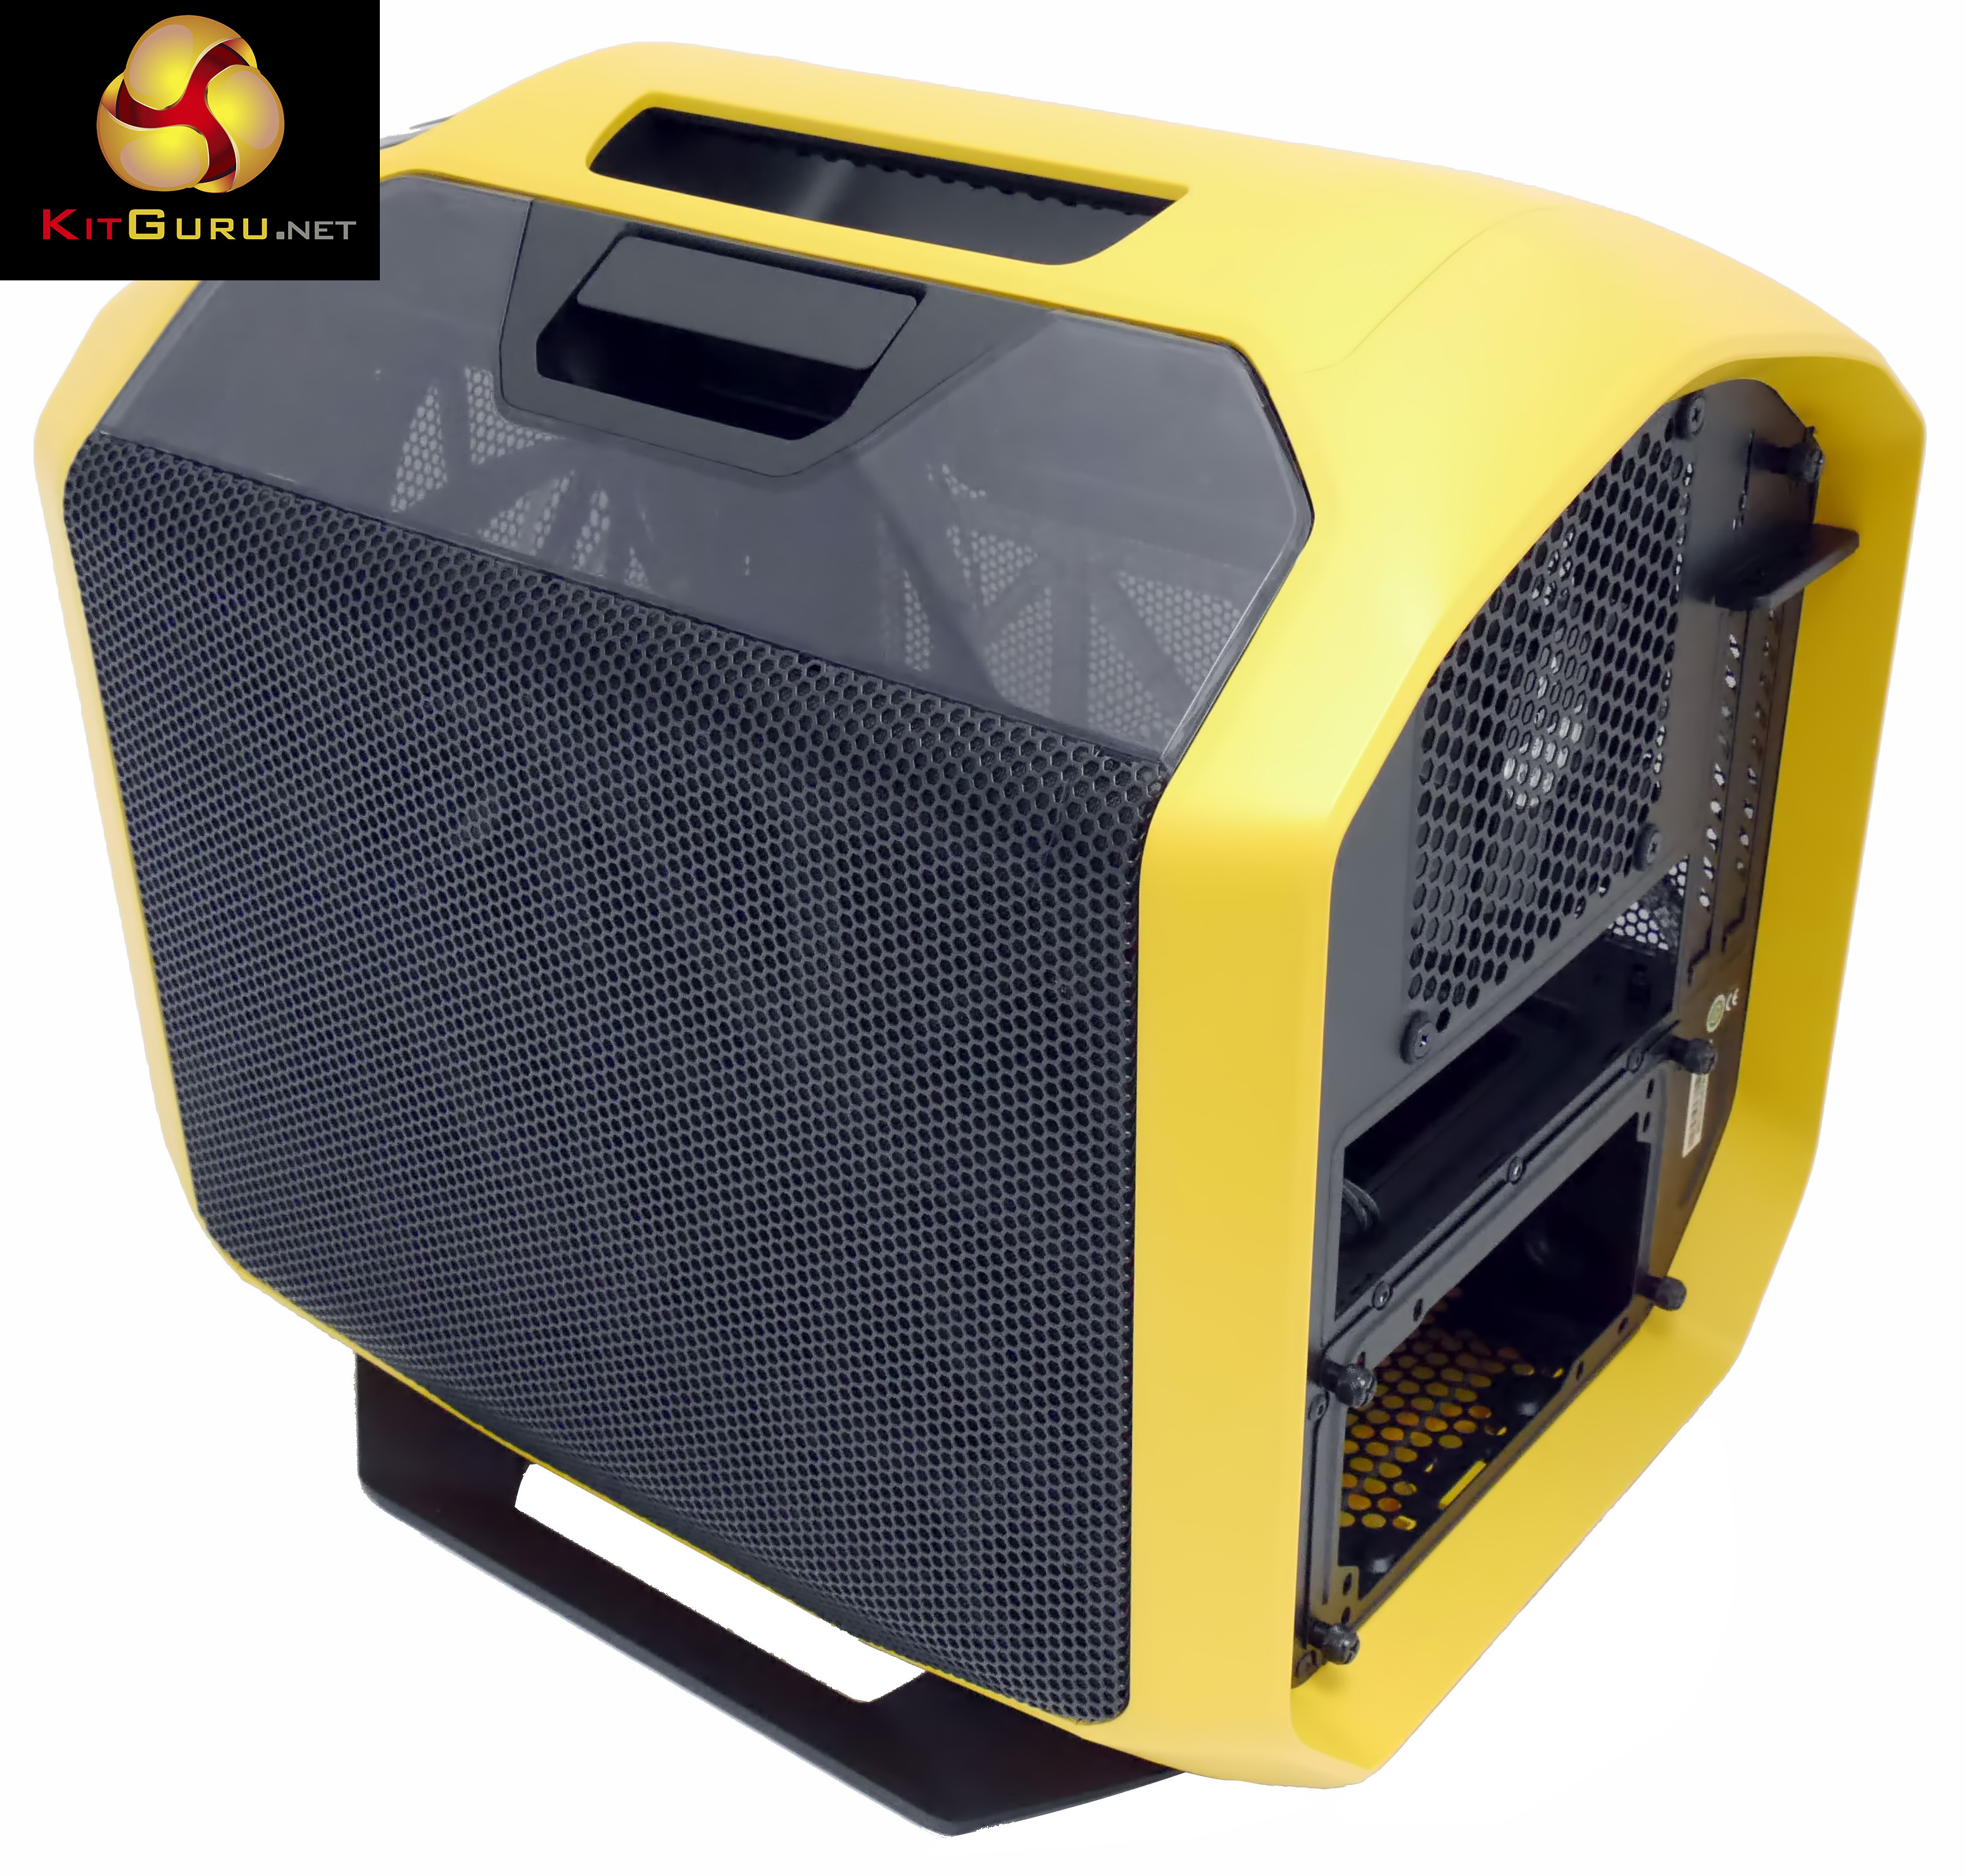
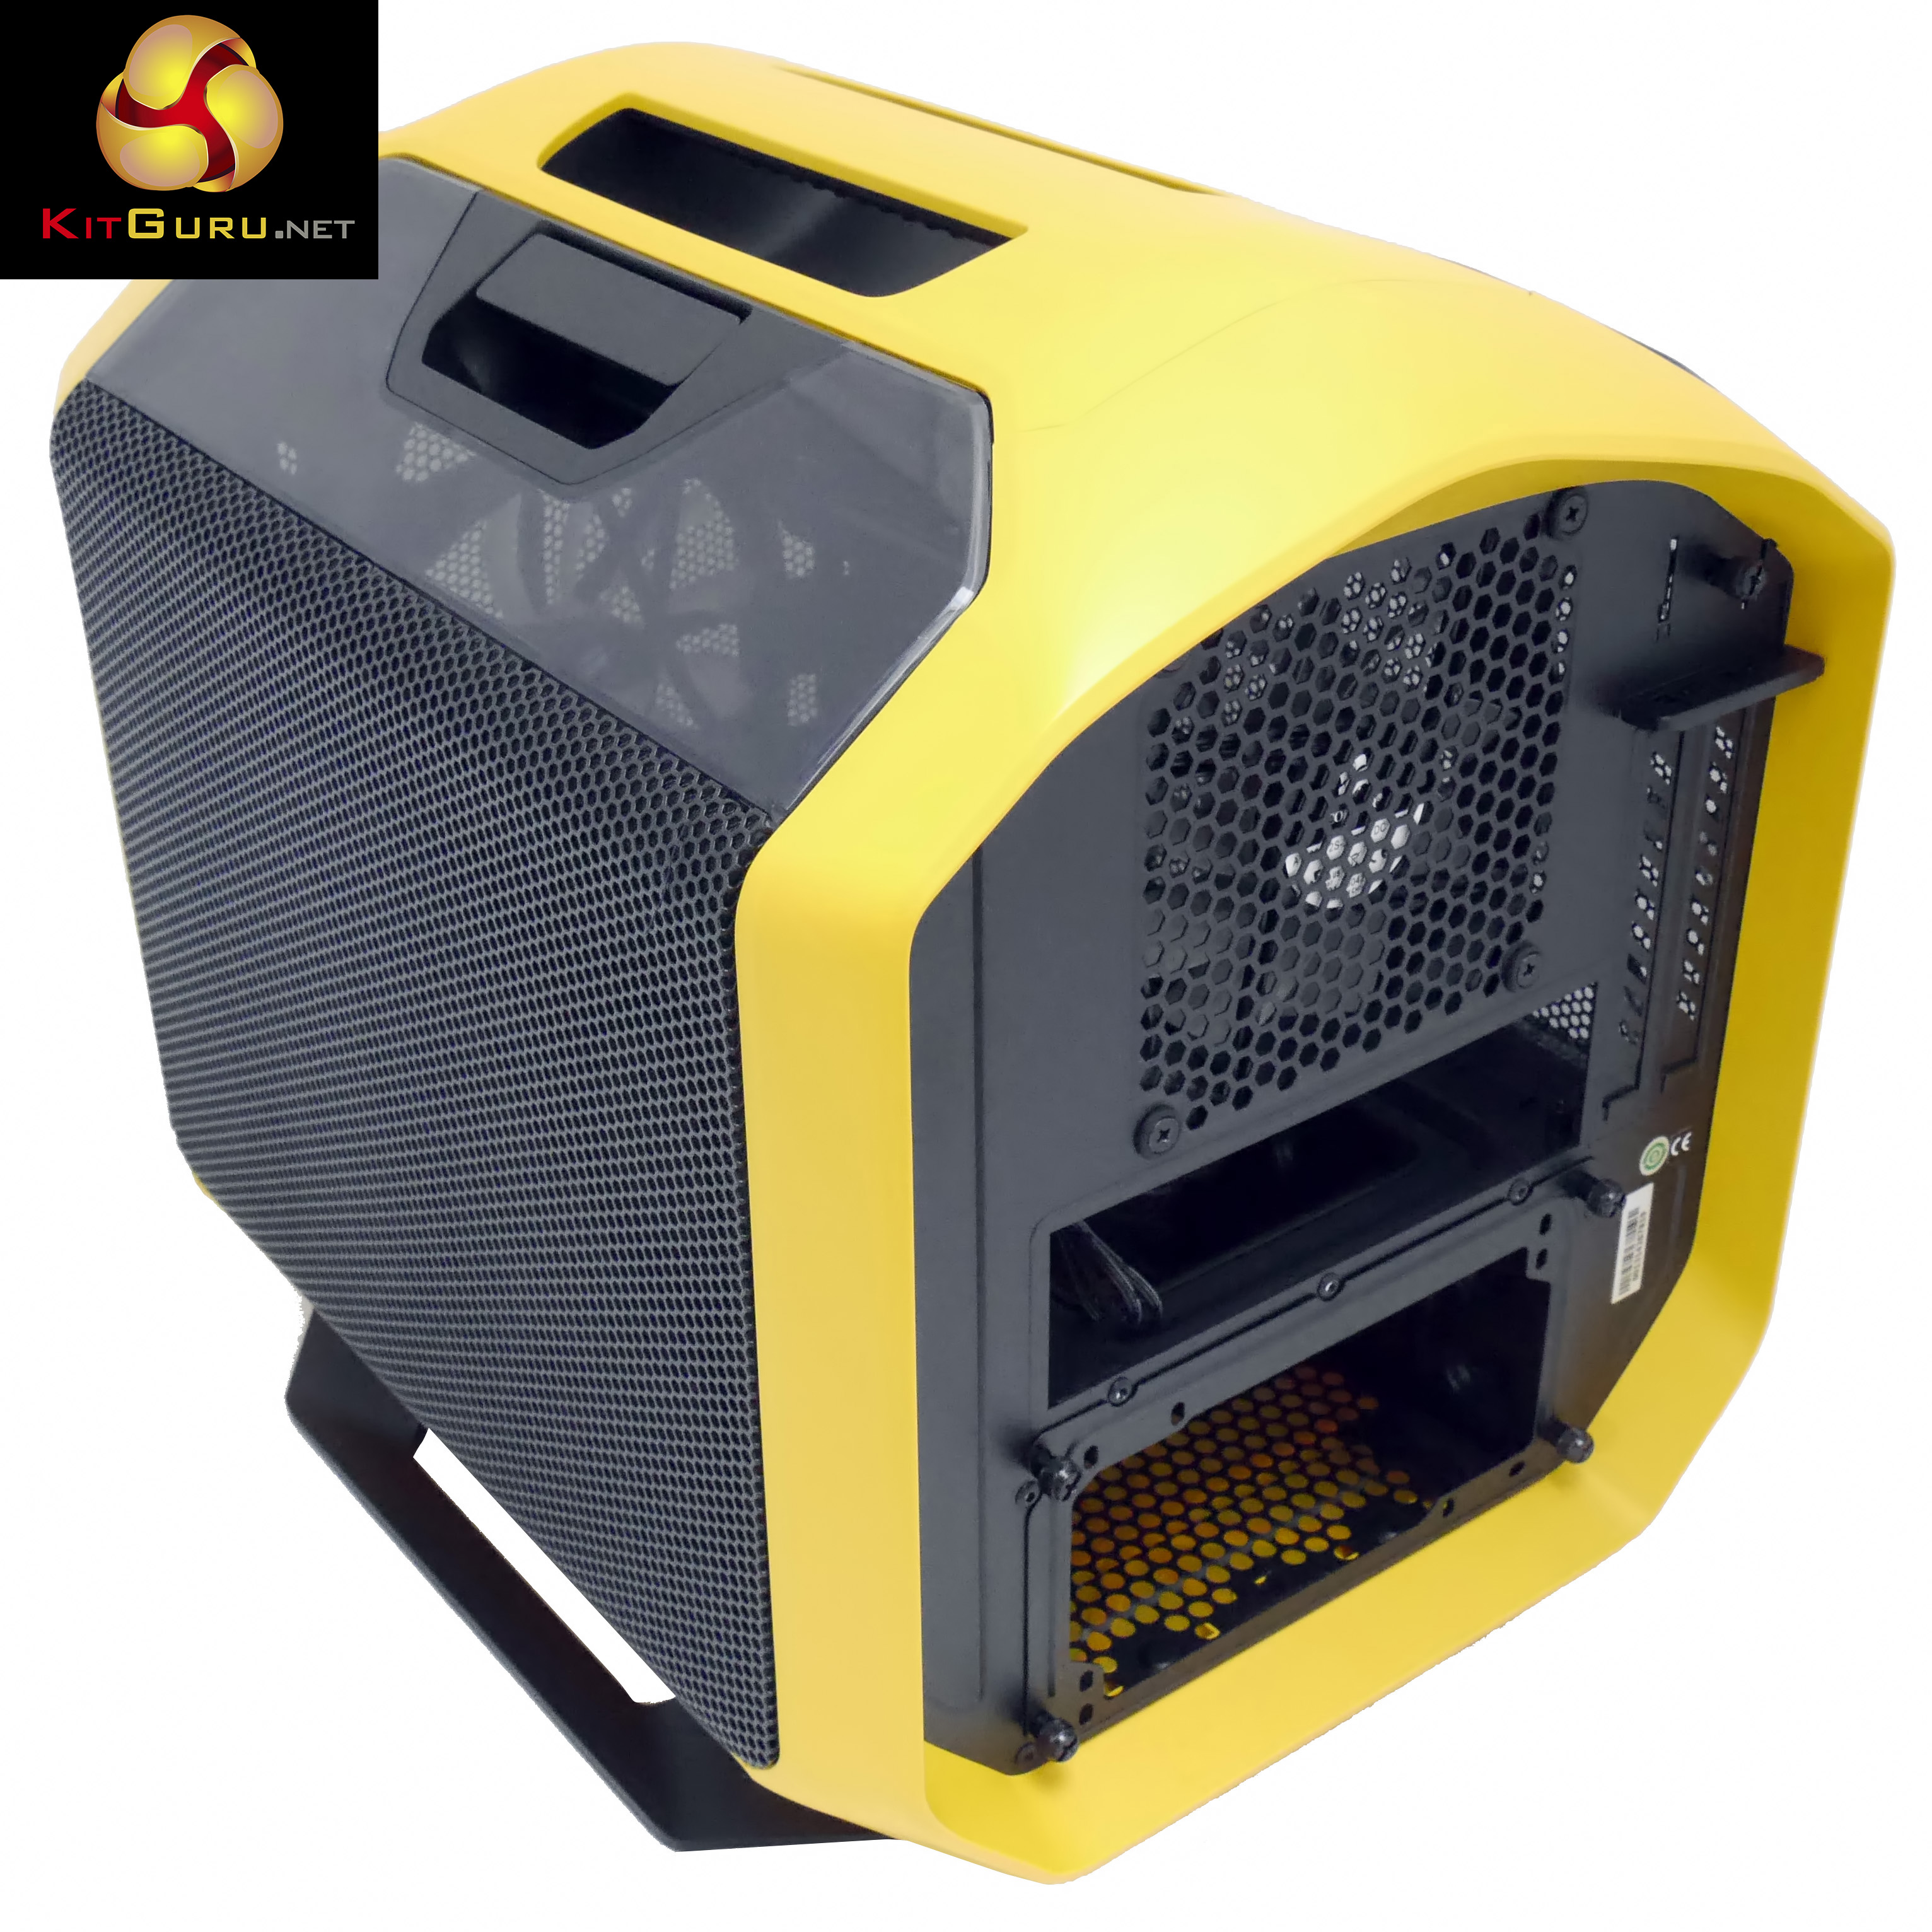
At the rear of the case there is more perforated mesh, this time over the 120mm exhaust fan. Below the fan you can see the horizontal I/O panel and below that you have the mounting plate for the power supply.
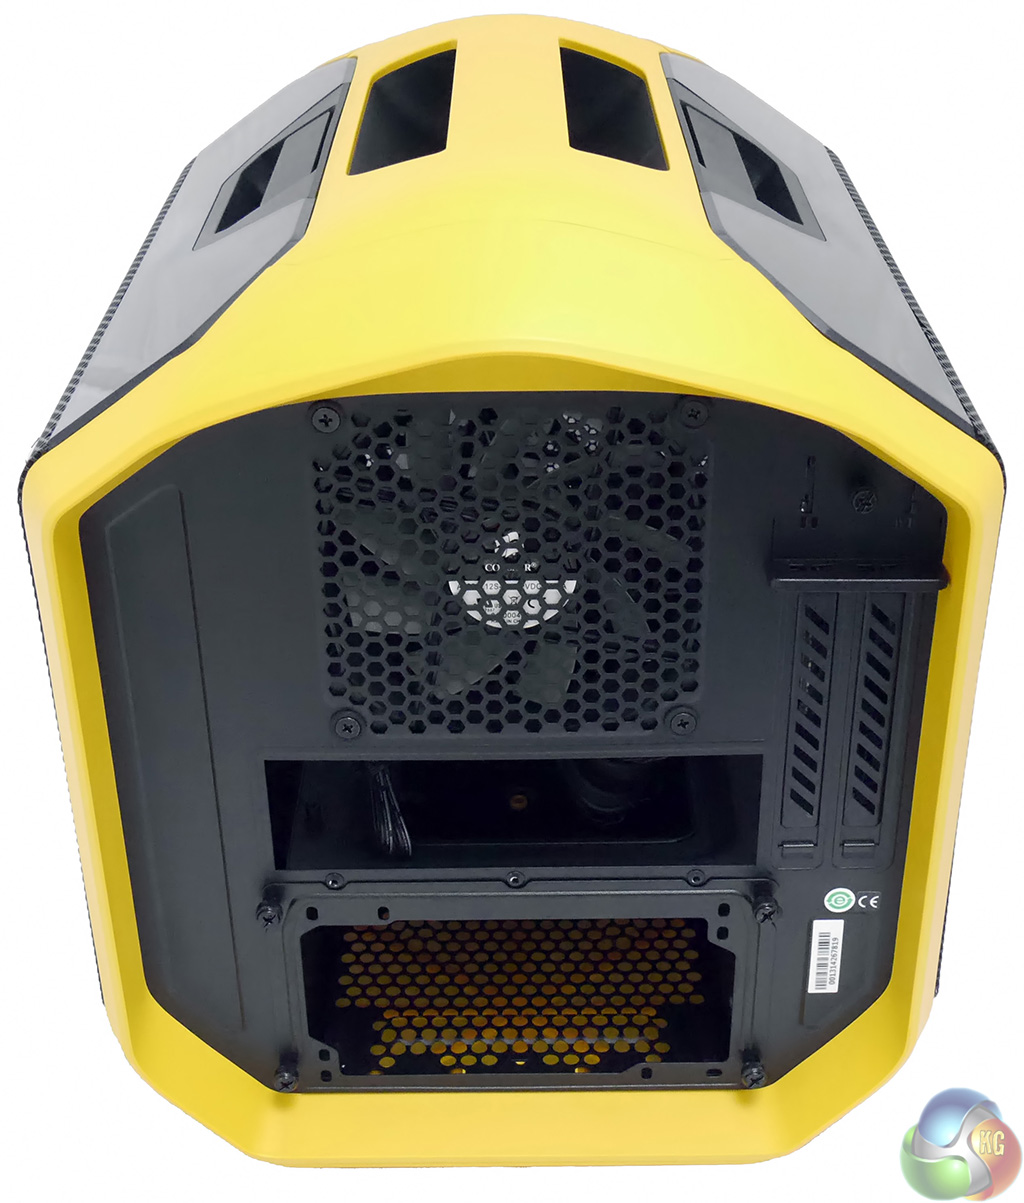
Look to the side and you'll see the two expansion slots which accommodate a dual slot graphics card up to 290mm in length. That is 11.4-inches which means you can forget about using one of the larger 12-inch gaming cards.
Above the two expansion slots there is a locking bracket that slides up and down to retain your graphics card and to ease installation.
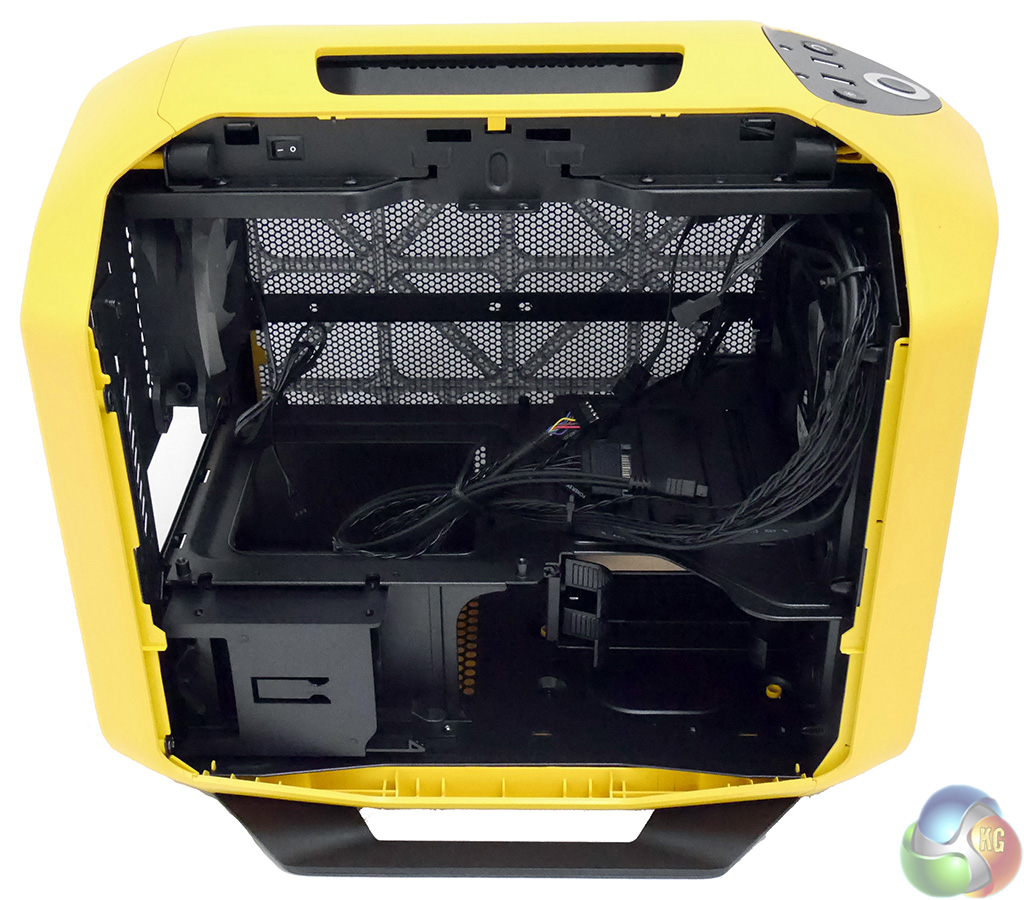
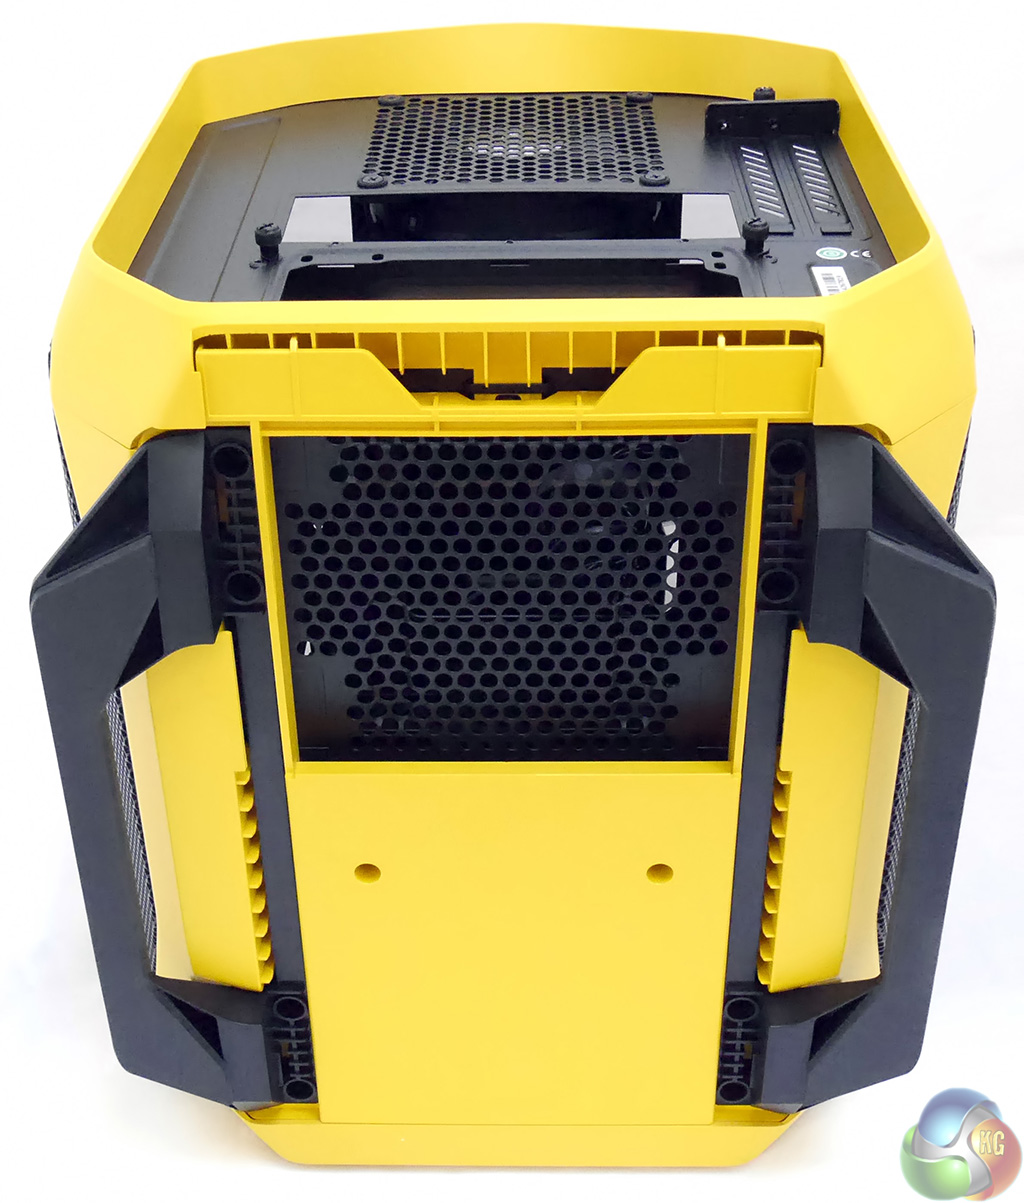
As we move round to the left hand side you can see the side cover is identical to the other side and with the cover removed you see the straight run for the cooling air from that front 140mm fan.

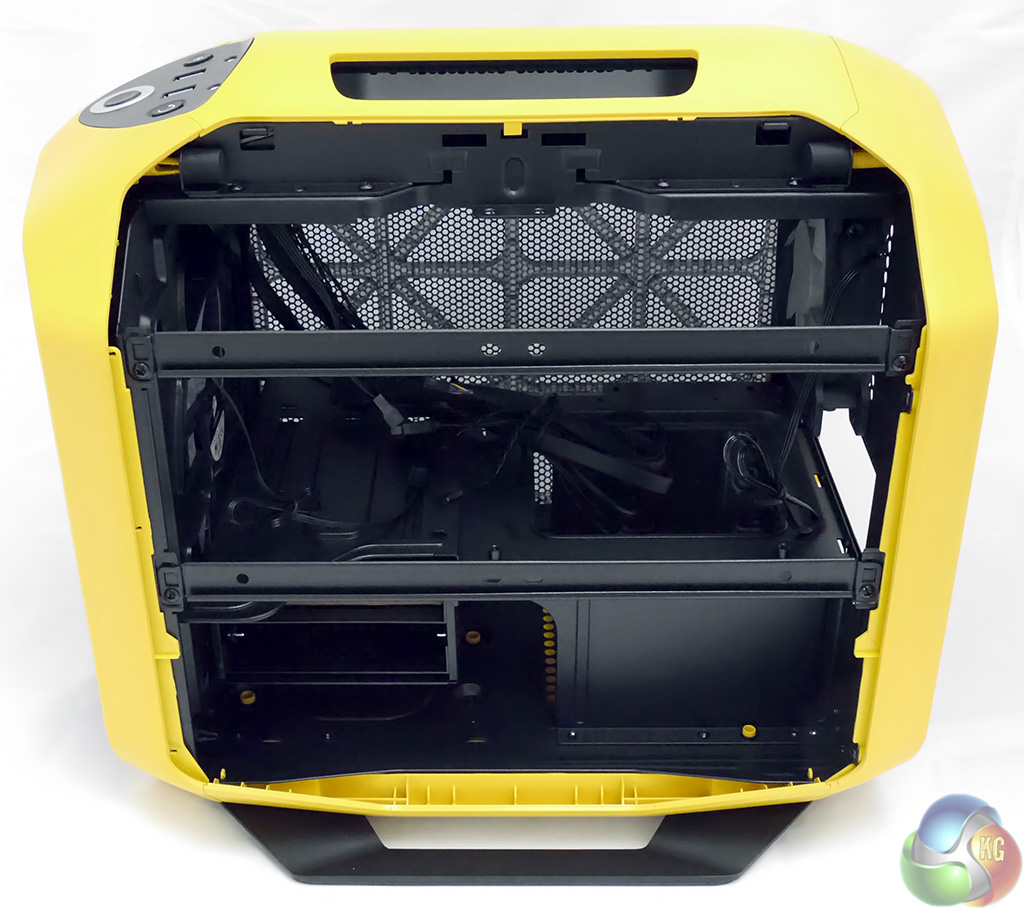
This photo of the side panel shows the skeleton of the case, even with the side panels in place.
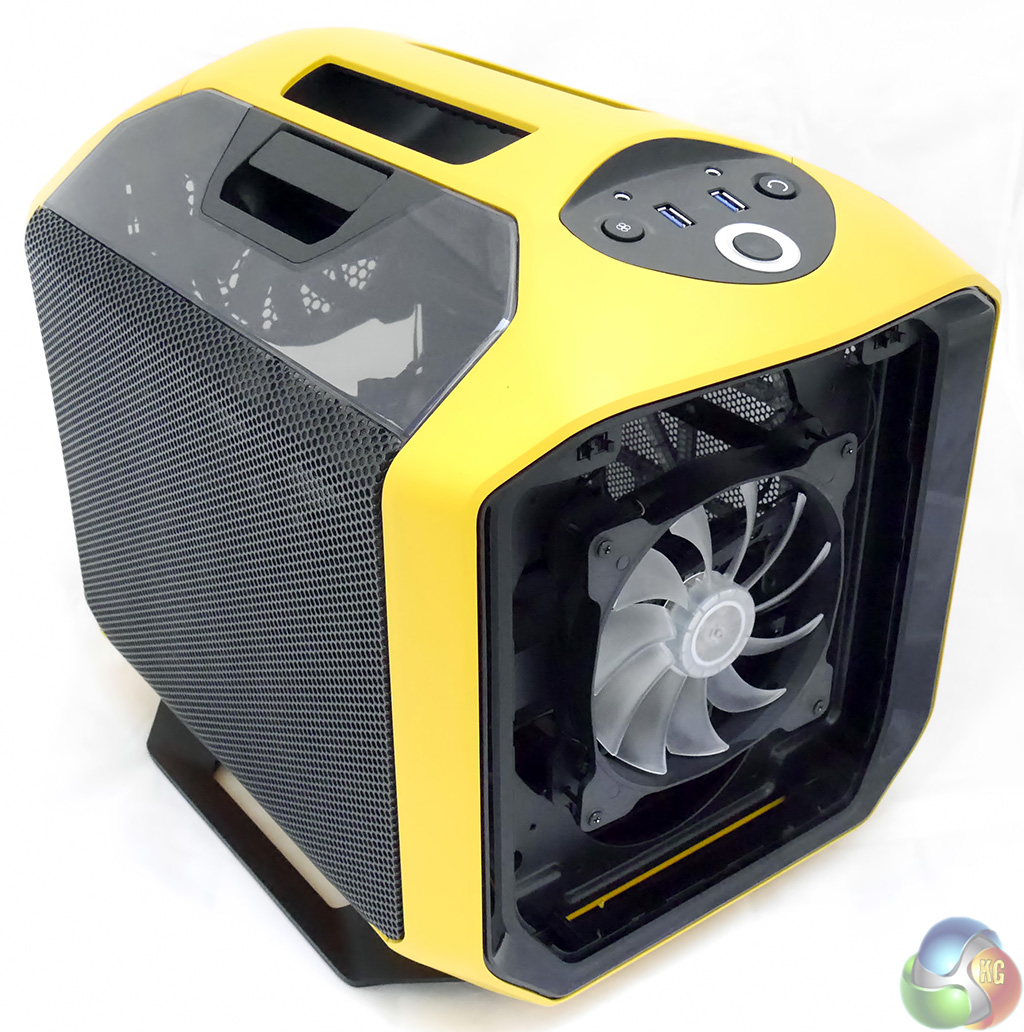
The perforated front panel pops out for easy cleaning and gives easy access to the 140mm fan that is illuminated by a white LED. If you choose you can replace the 140mm fan with one 200mm fan or a pair of 120mm fans.
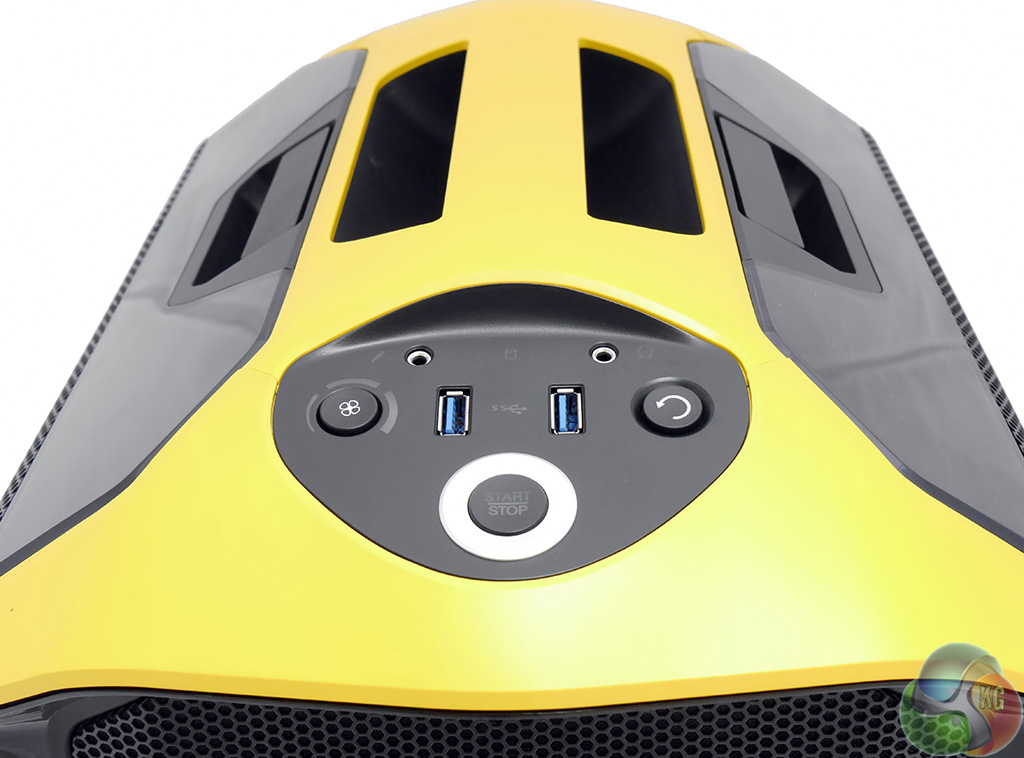
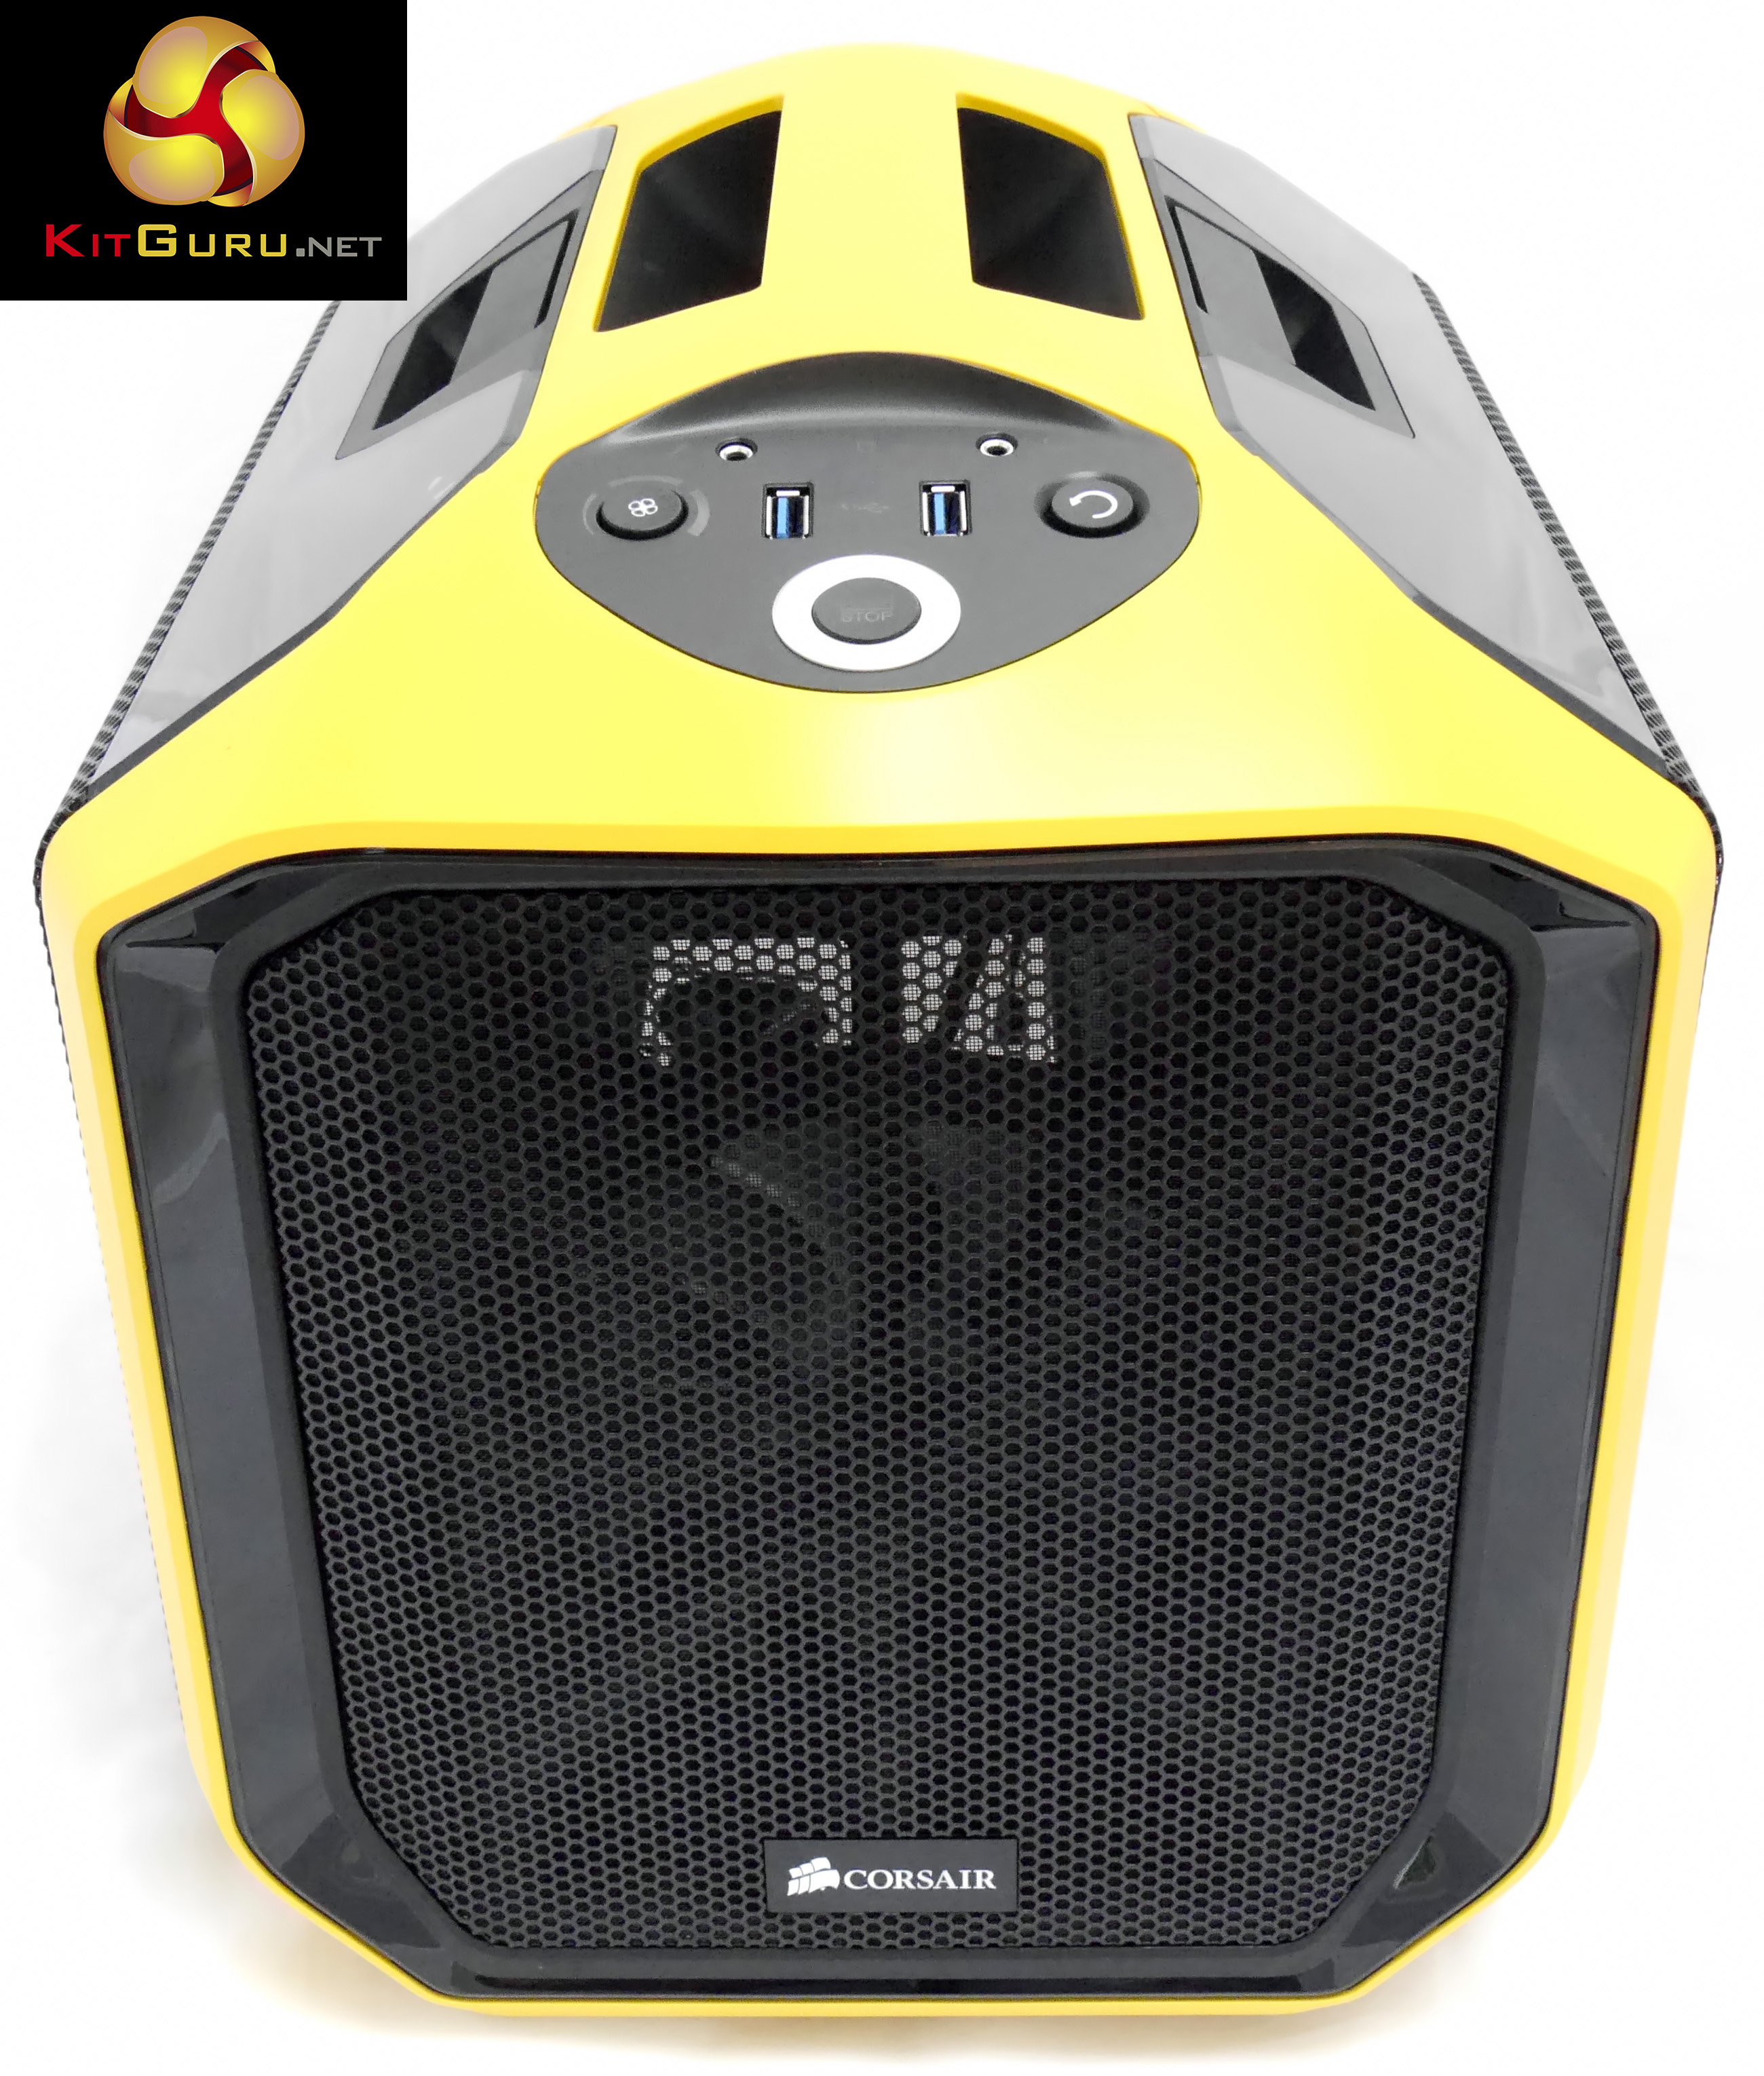
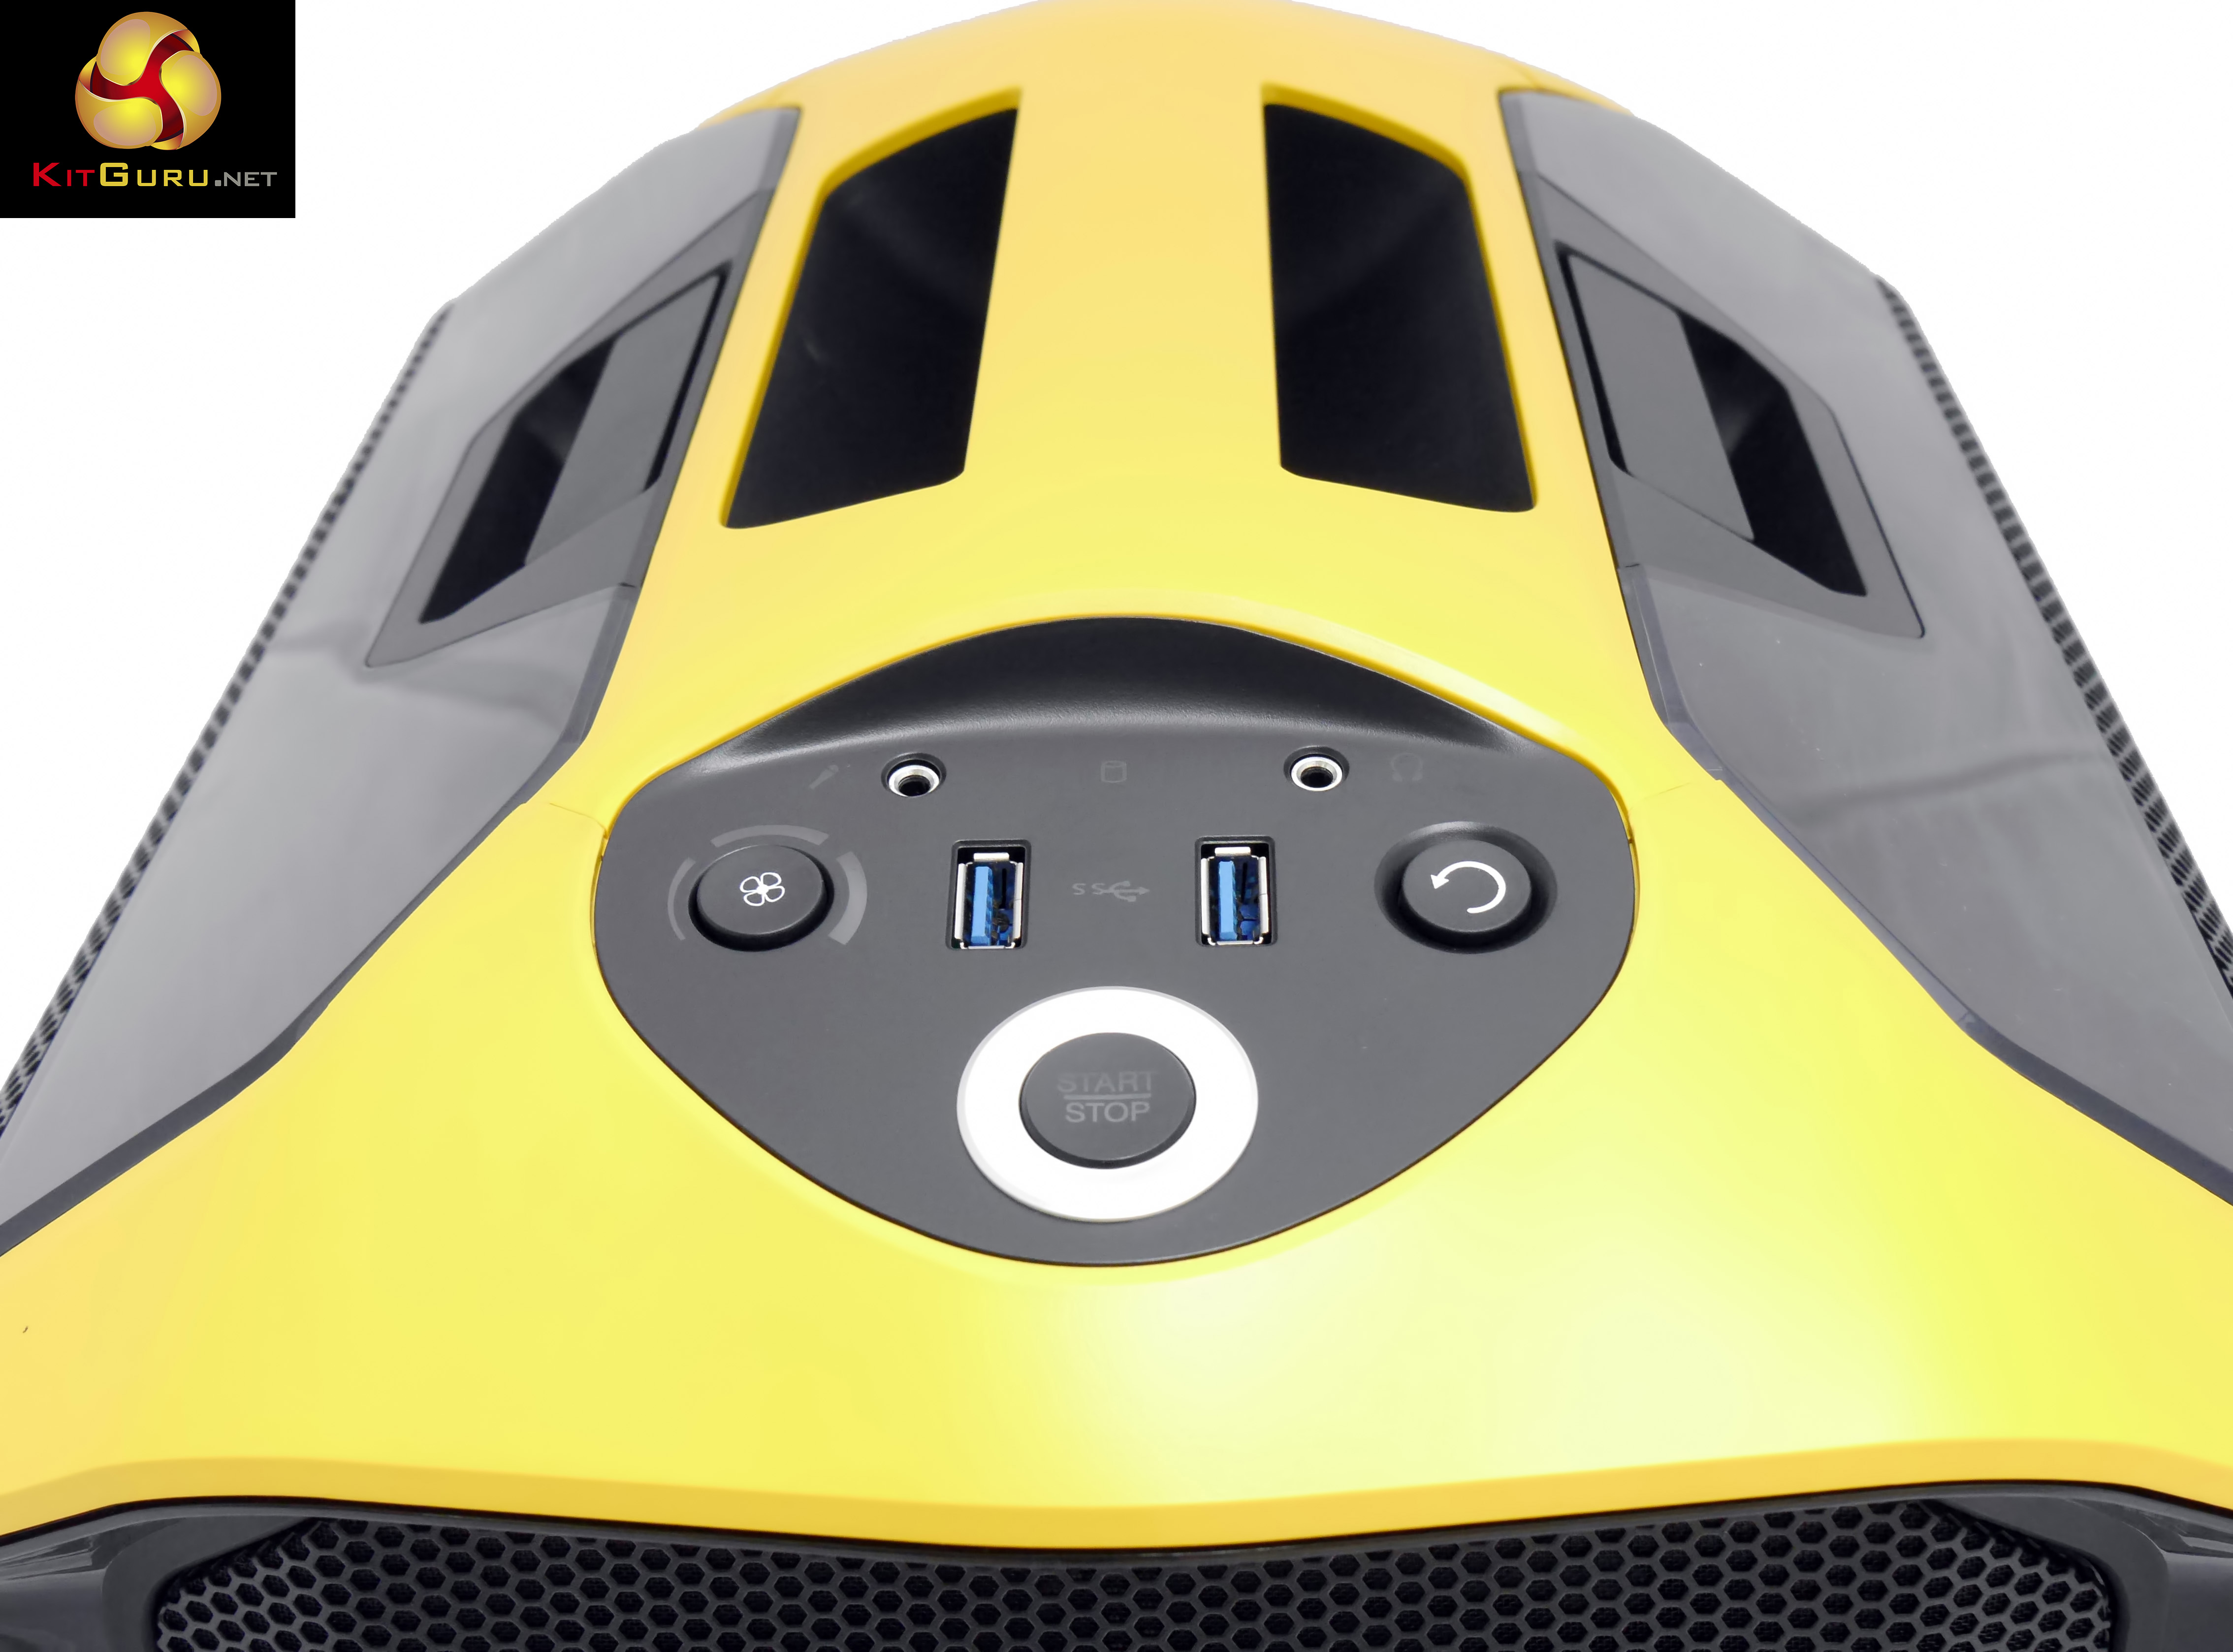
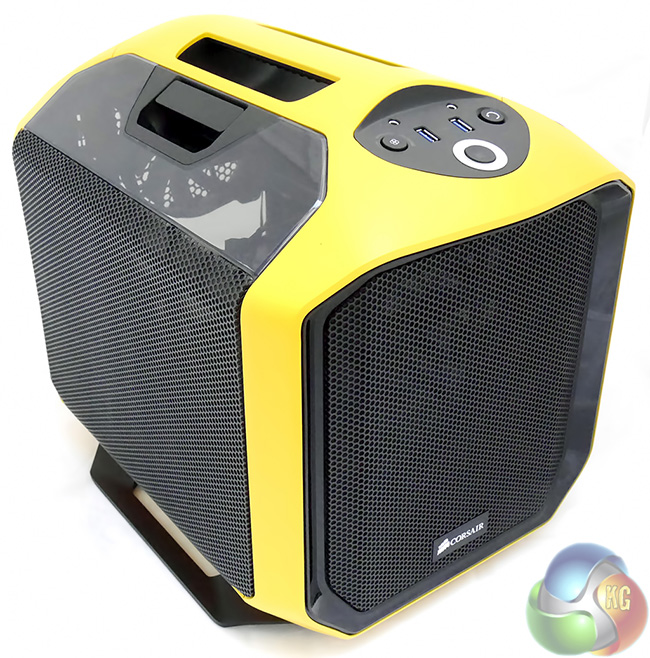
The control panel has an interesting symmetrical layout with the headset jacks at the top, two USB 3.0 ports below that and the large power button at the bottom. On the right you can see the reset button and on the left there is a fan speed controller which has three speeds that you toggle through.
Around the outside of the button there are three illuminated segments to show which speed you have selected. Corsair gave no information about the fan speeds but to my ear they sound like slow, medium and fast.
After I had built the PC I found the power button was faulty and had to jump the motherboard into life using a screwdriver. Clearly if I was a retail customer I would have put in a claim for a replacement case.
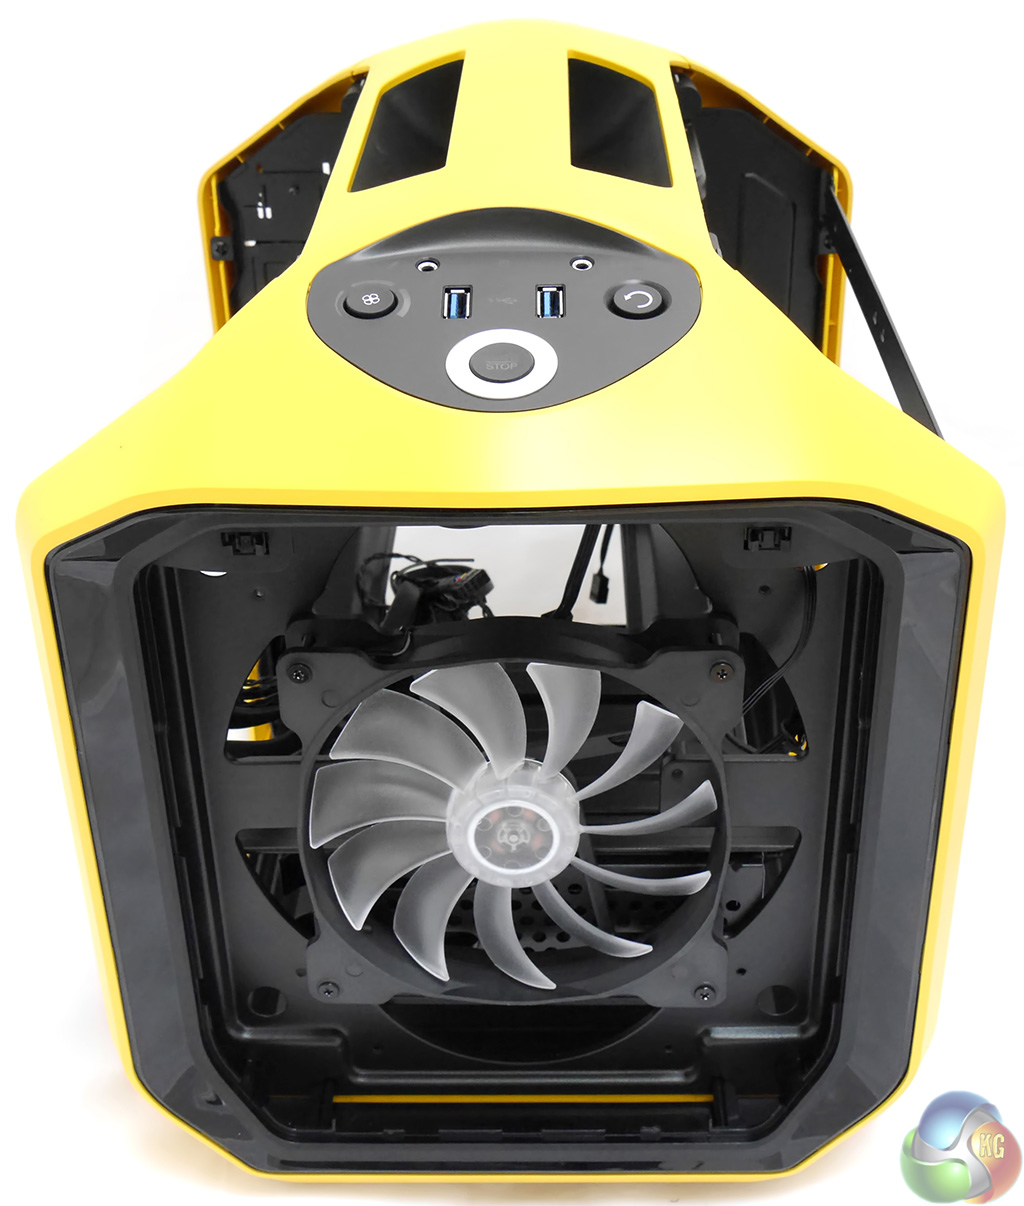
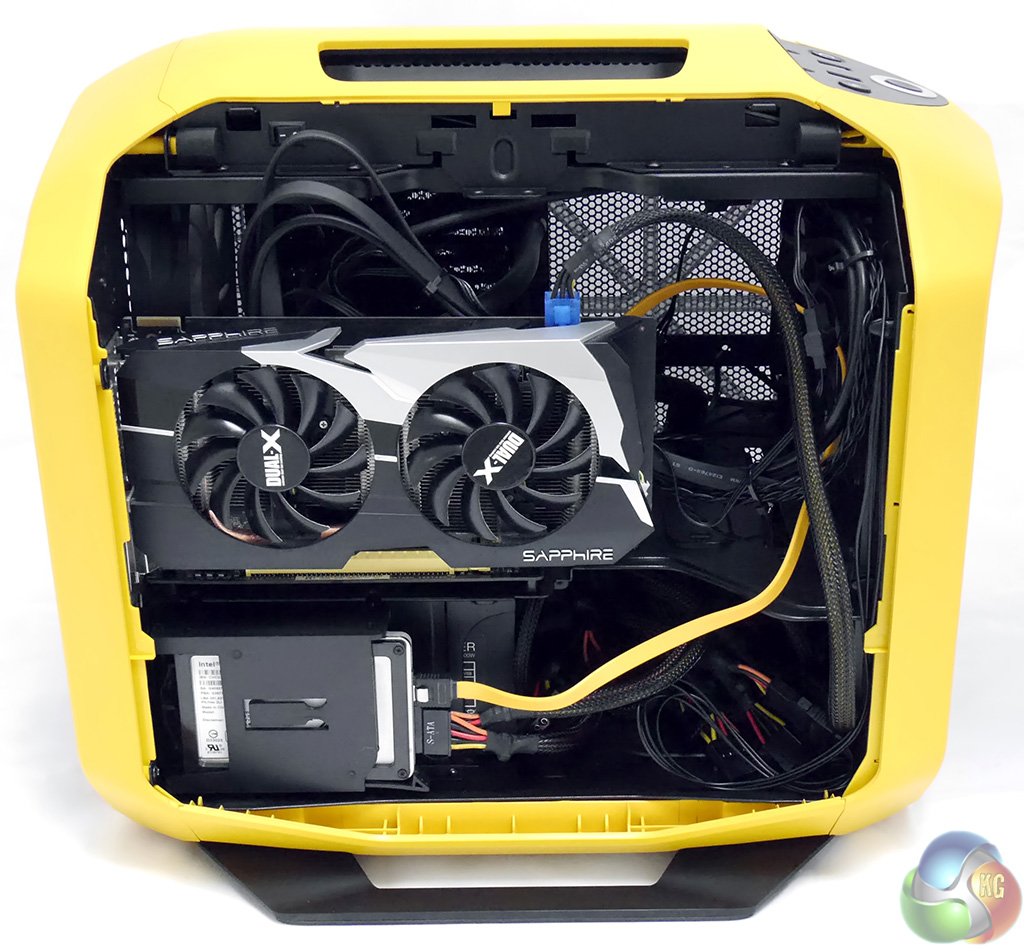
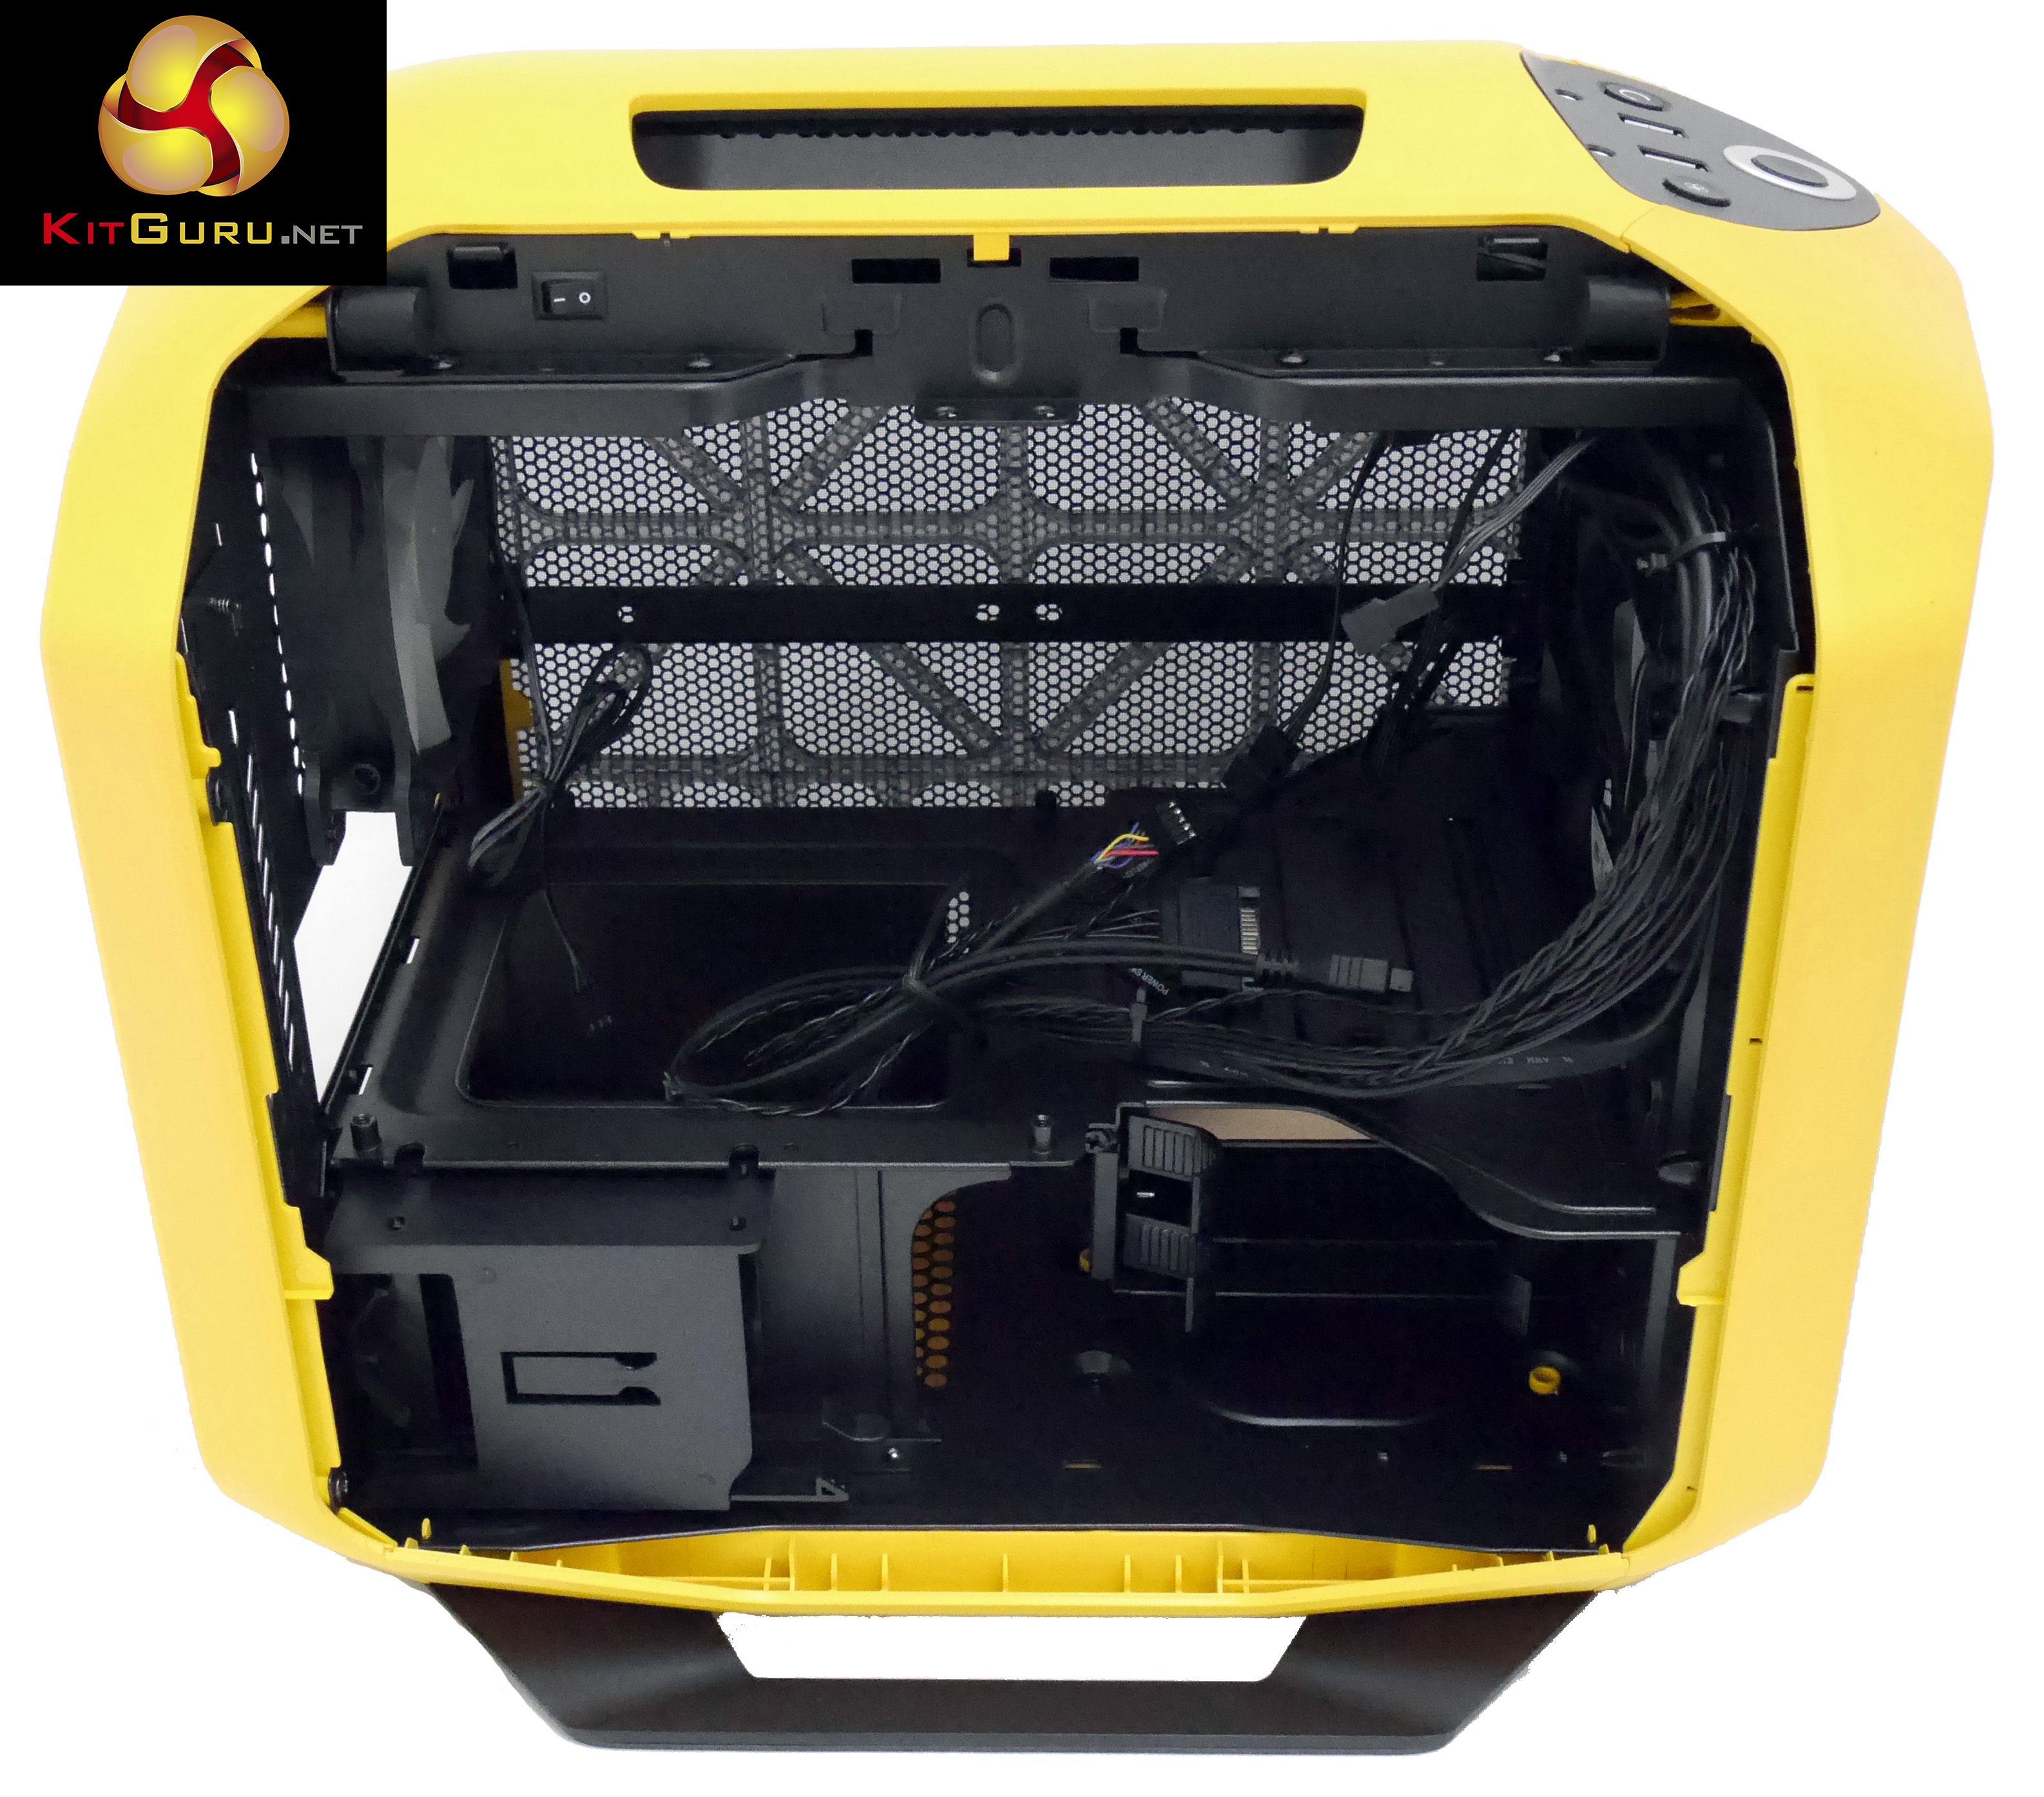
The front of the Corsair Graphite 380T is impressively open and free flowing however once the 140mm fan is removed you can see the 3.5-inch drive cage blocks the lower half of the case. If you choose to install two 120mm fans the lower fan would do little apart from cooling the hard drives. On the other hand if you install a massive 200mm fan you get the benefit of an extremely quiet cooling system.
My guess is that LAN party gamers have little need for a 2TB or 3TB storage drive and recommend you remove the drive cage in its entirety to open up a significant amount of space.
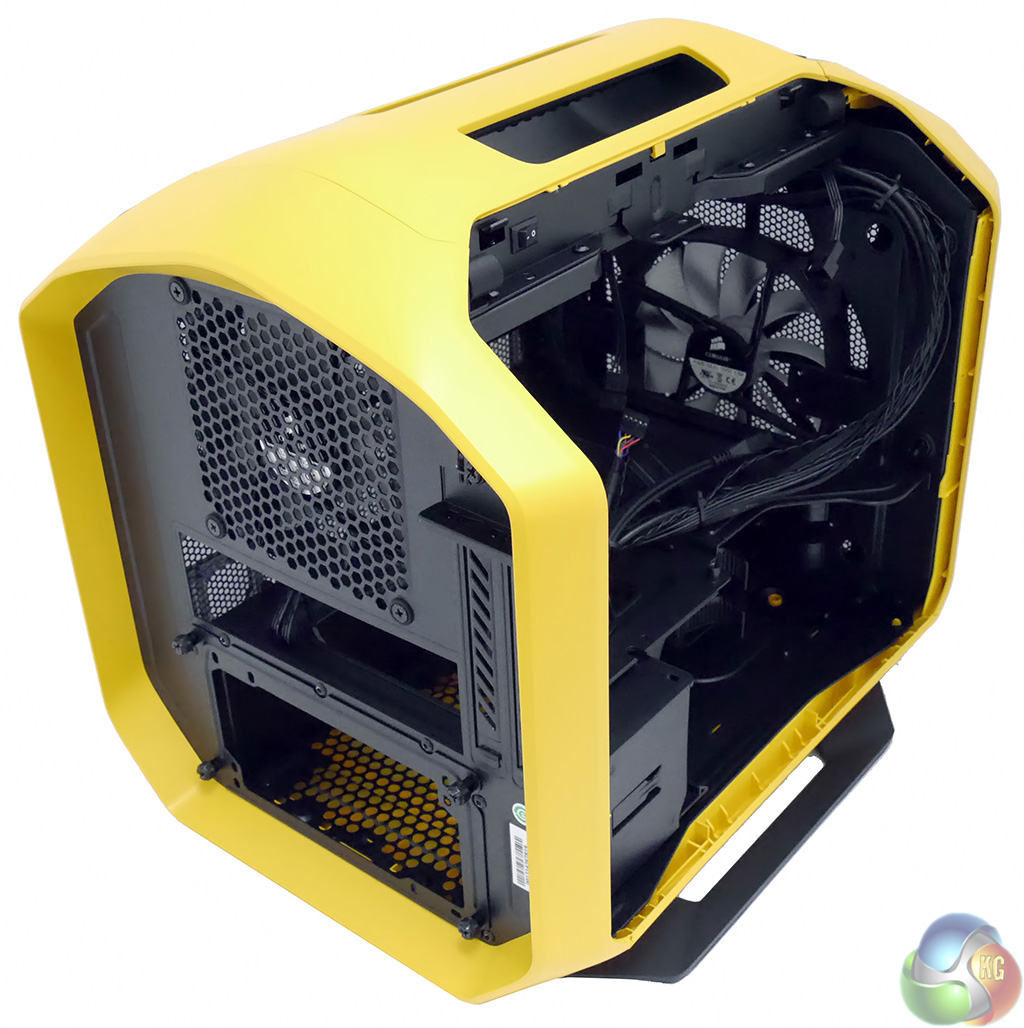
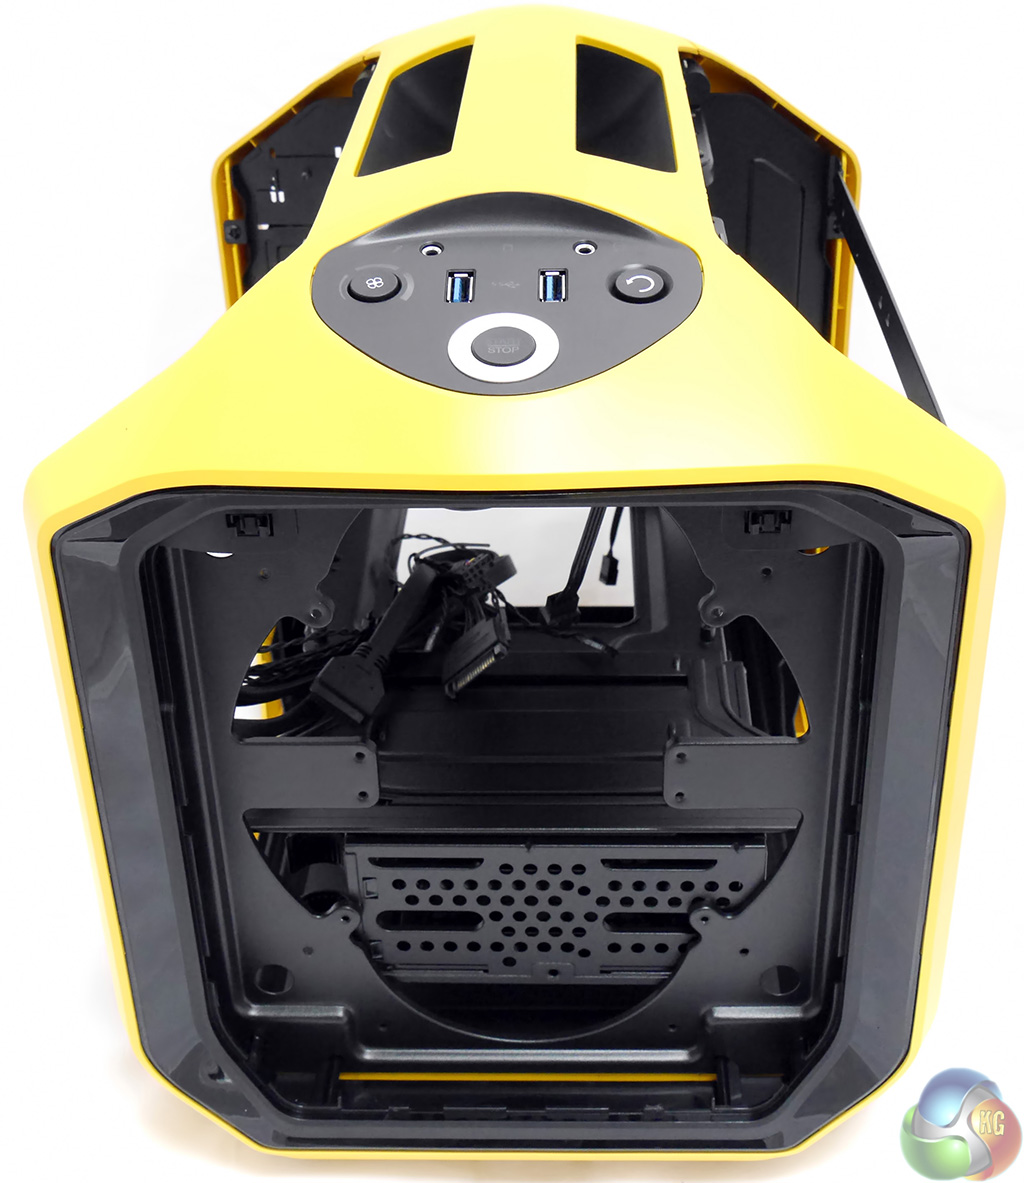
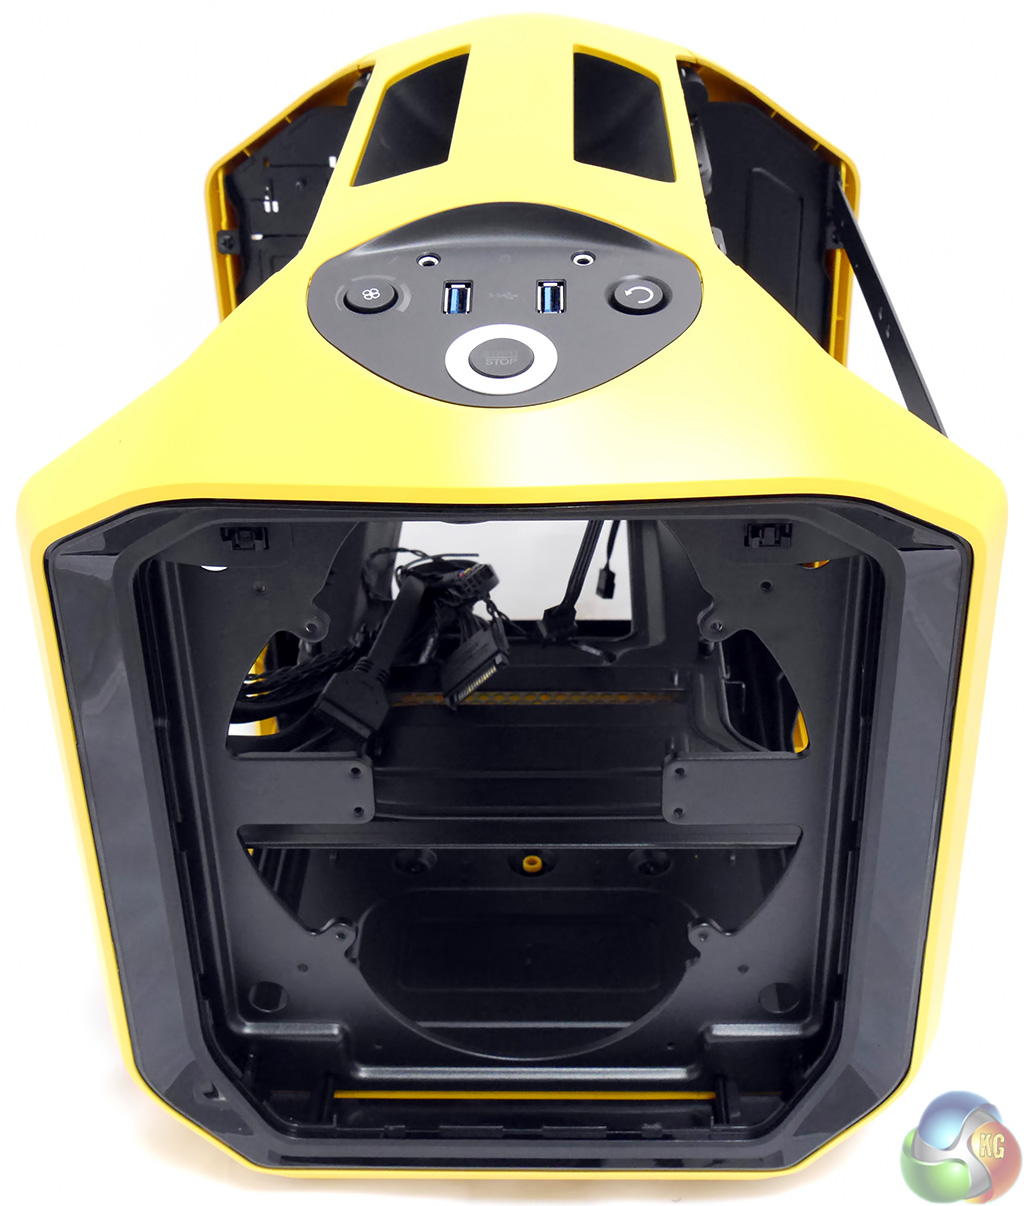
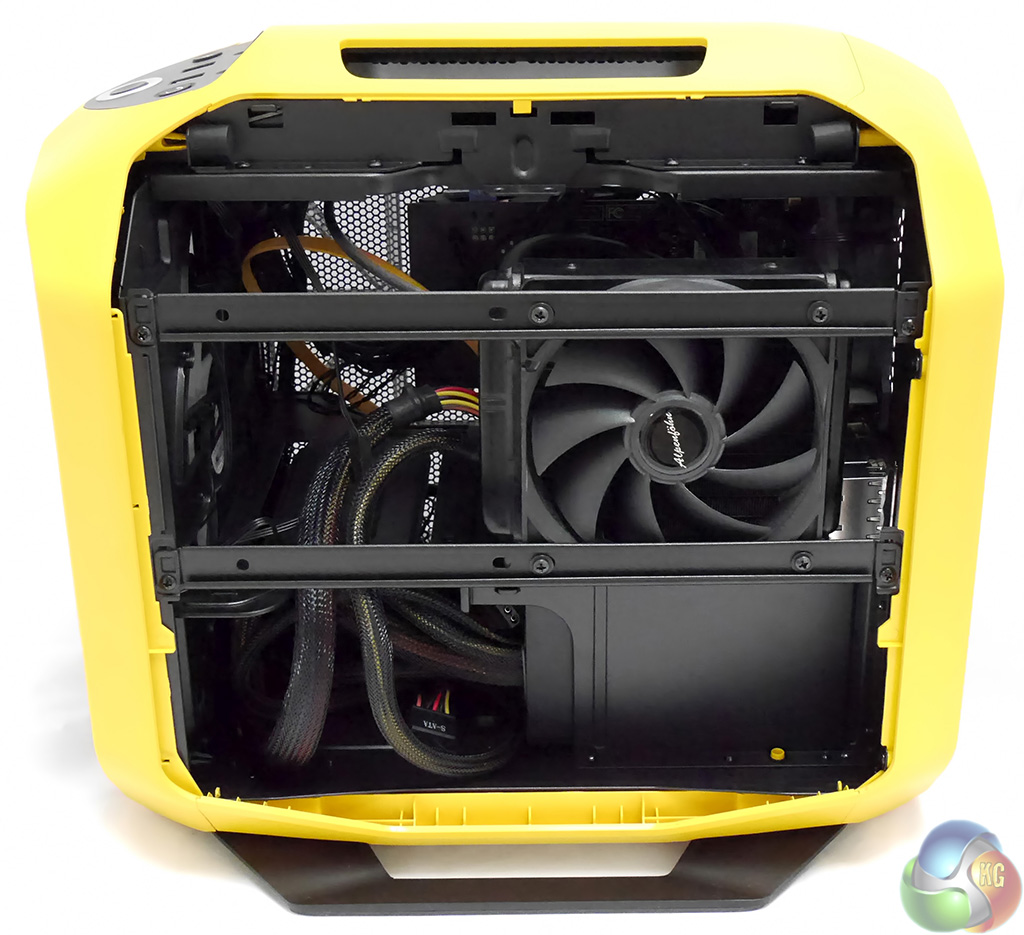
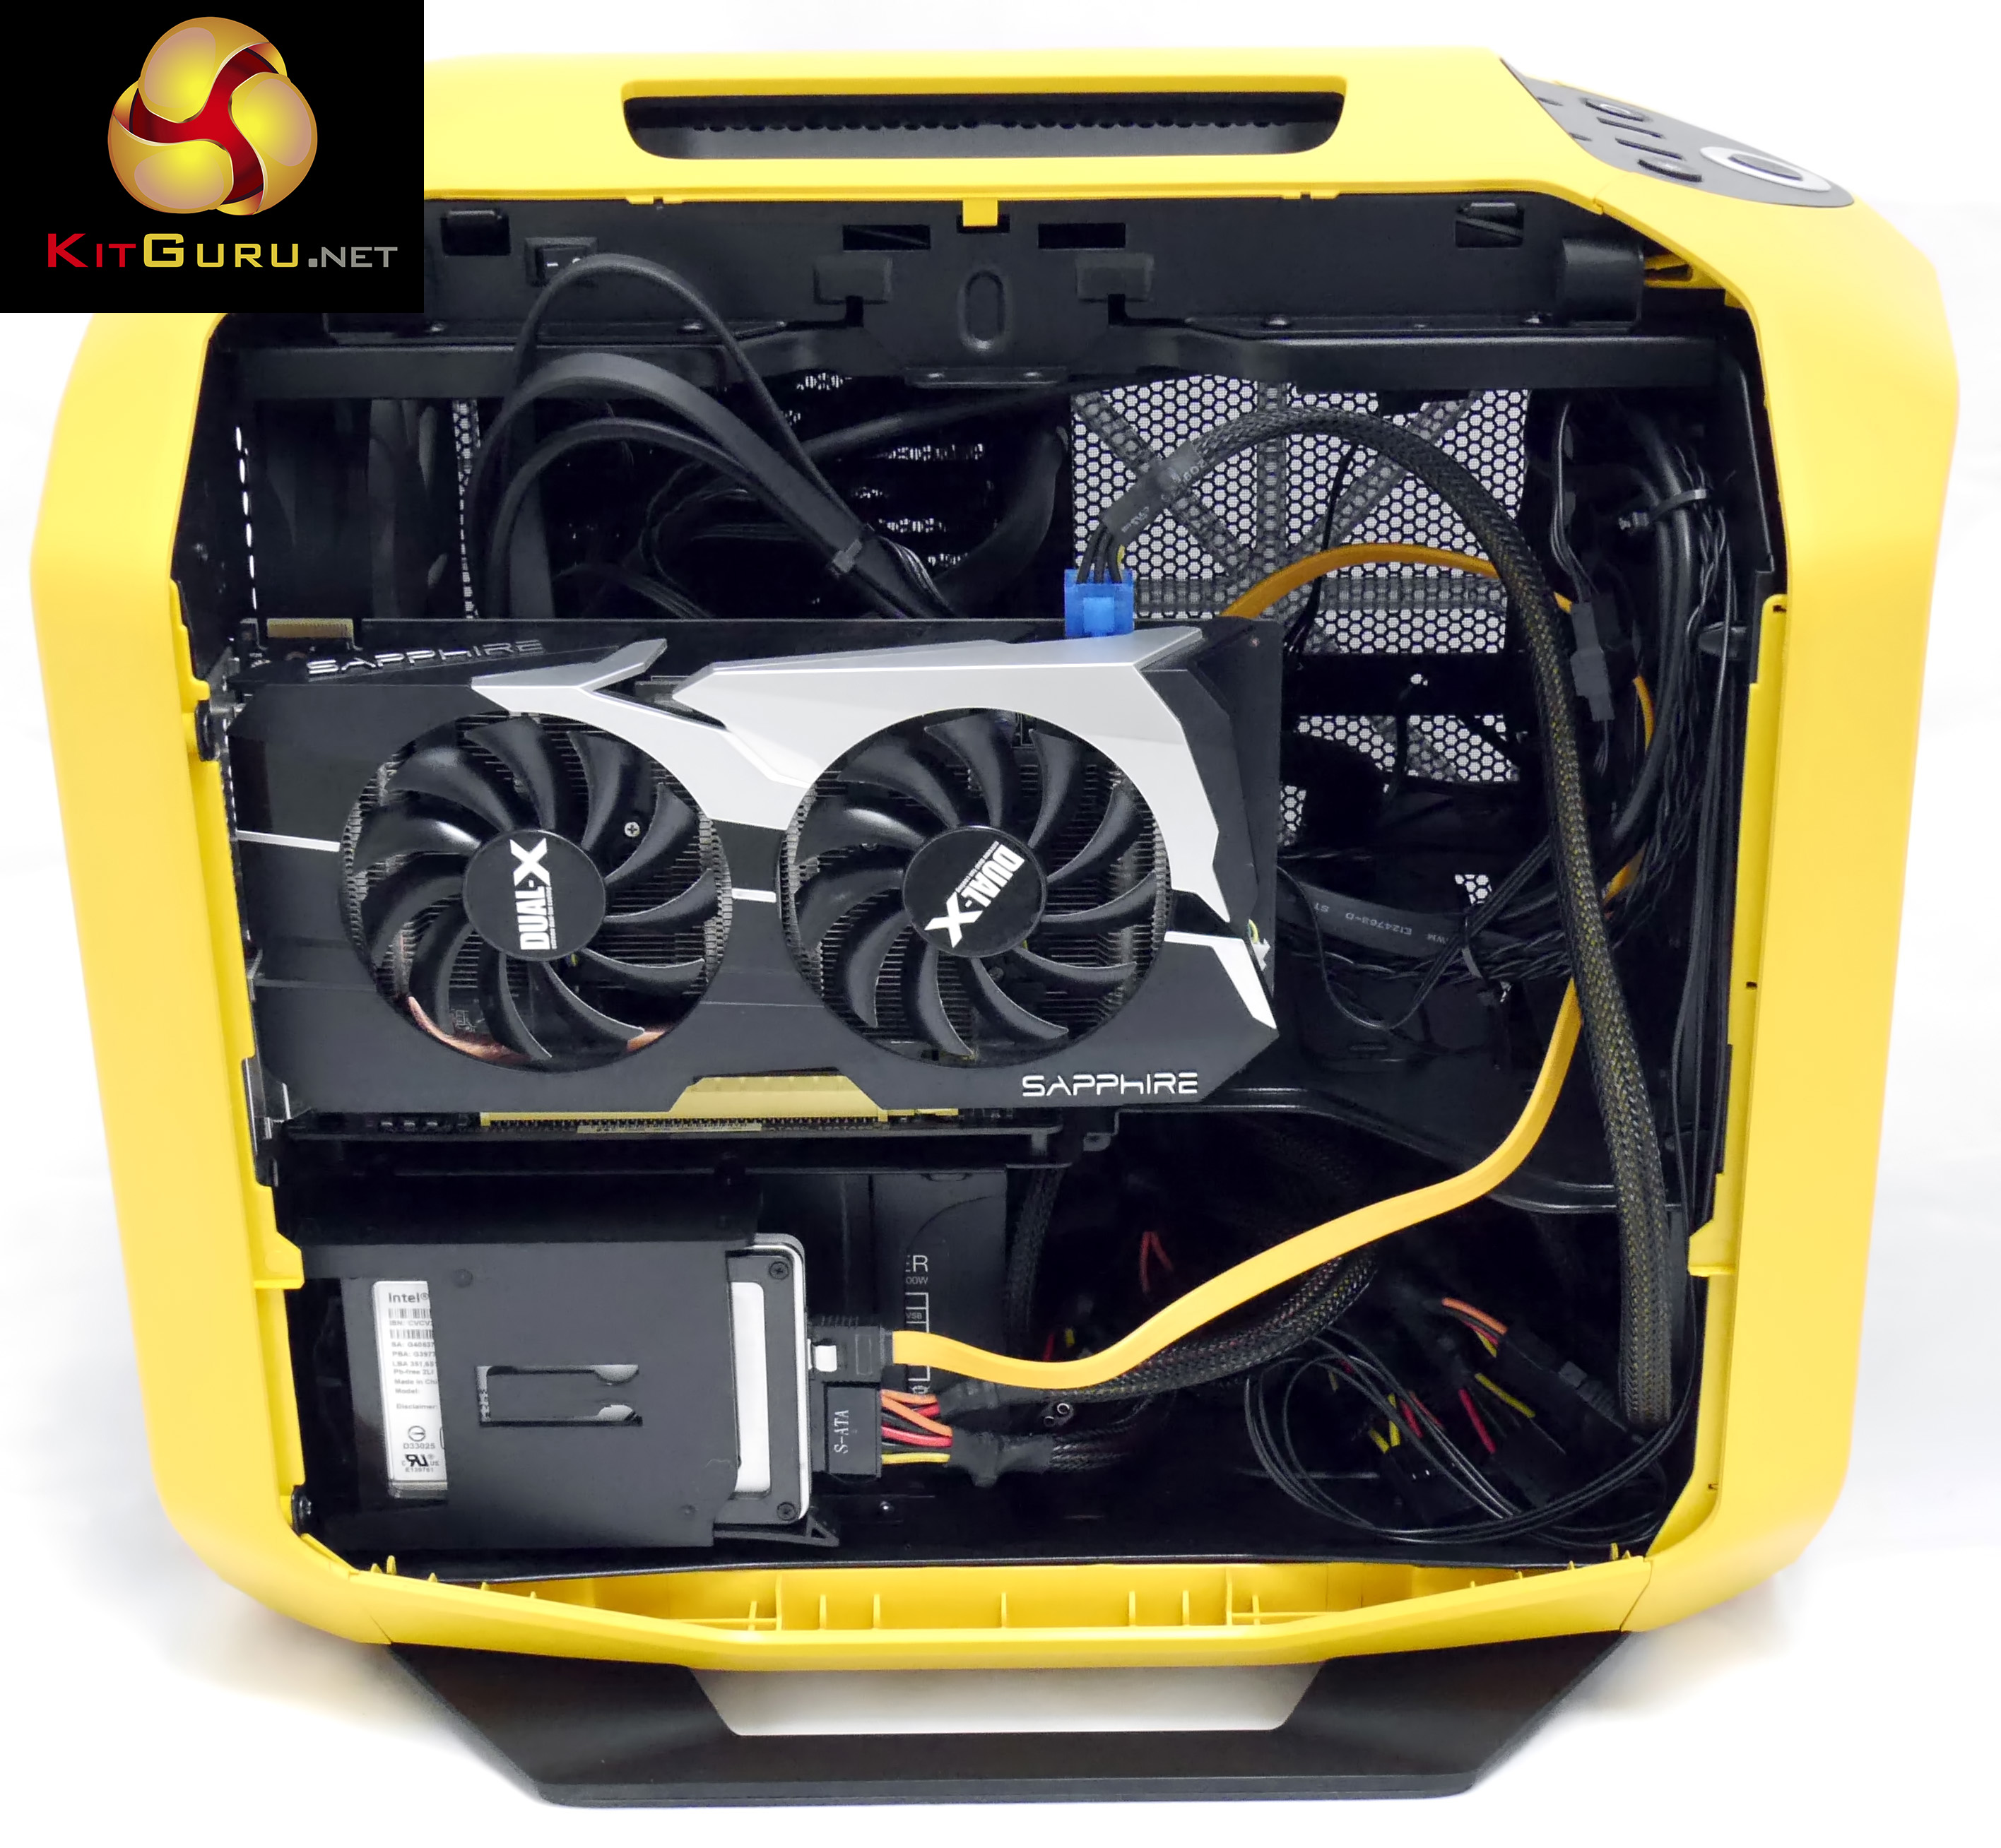
With the side of the 380T open you can see the horizontal motherboard tray and below that we have the power supply housing. To the left of the photo, at the rear of the case you can see the two tool-free SSD drive bays. The drives simply slide into place and clip home so the bays do not detach from the case and there is no fuss or bother.
Look high up inside the case and you'll see a rocker switch. Unexpectedly this controls a single white LED inside the chassis which appears to be an under-bonnet light to assist fault finding.
At the front of the case (positioned at the bottom) we have those two 3.5-inch drive bays which use the standard arrangement with sliding drive caddies that are tool-free with a 3.5-inch drive. Alternatively you can screw a 2.5-inch drive in place.
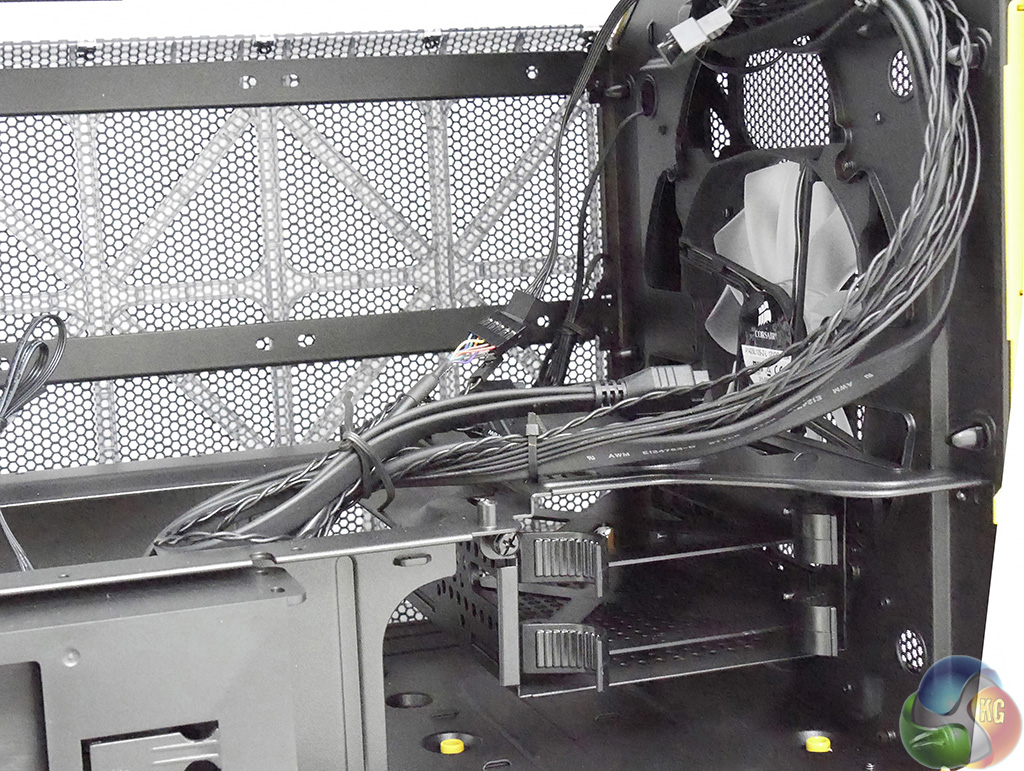
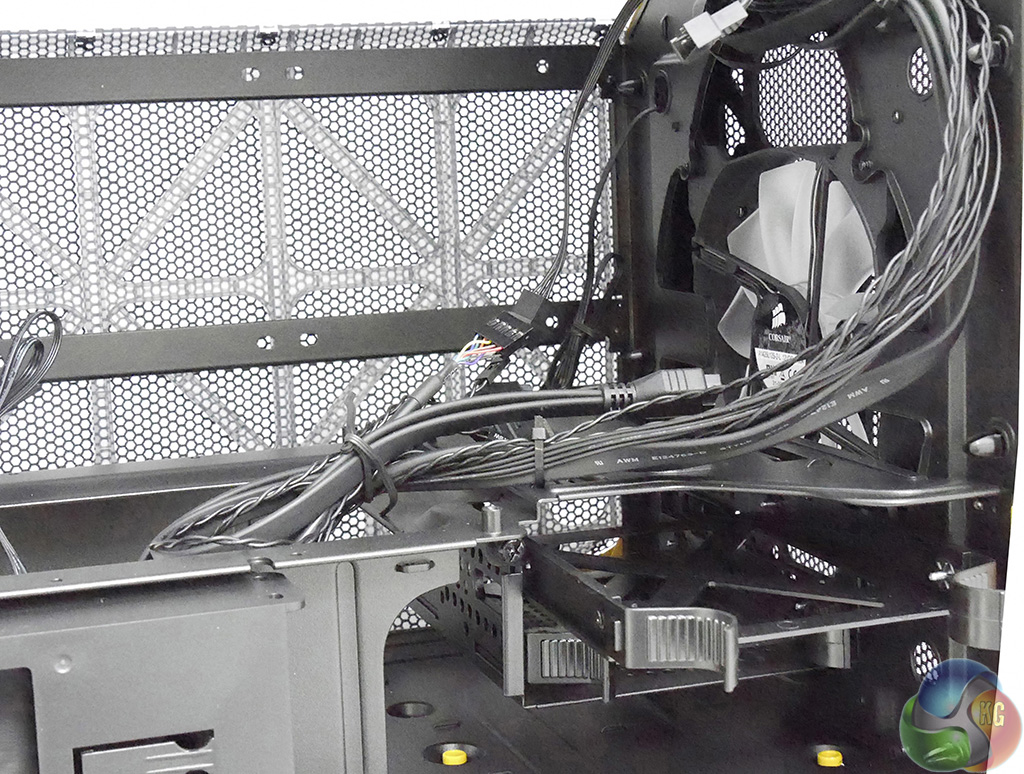
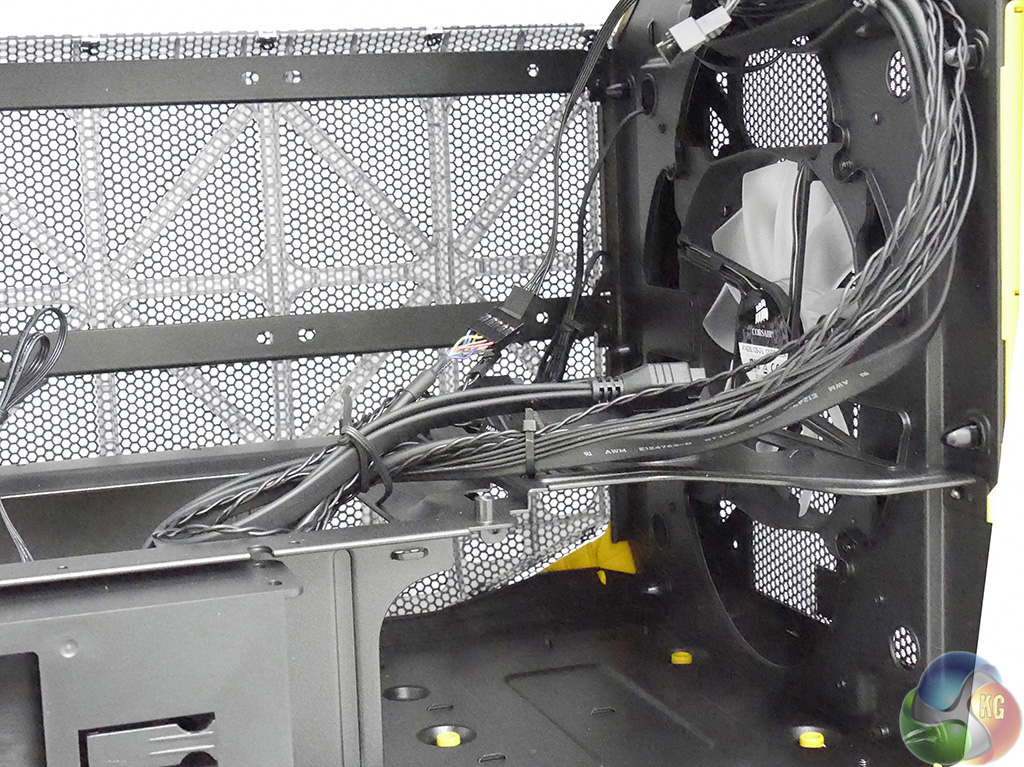
You will note the thick bundle of cables that feeds down from the control panel at the top of the case. There isn't much scope for cable management with the 380T so you pretty much have to accept there will be more clutter and untidiness than usual.
The right hand side of the 380T is interesting as Corsair has added two horizontal rails that run from the front of the case to the back. These rails have no obvious function and can be removed to give you more working room when you build your PC. Despite appearances they don't add to the rigidity of the chassis as the 380T is a solidly built piece of kit.
In fact the rails can be used as a radiator mount for a 120mm or 240mm cooling system. You could, if you choose, install a pair of case fans however this would be fairly pointless.
The reason that you would install a radiator to the side is that you cannot replace the rear fan with a radiator as there simply isn't the space. It is perfectly possible to install a 120mm or 140mm radiator at the front but this requires you to ditch the stock fan and means you cannot install a 200mm fan, which would be a better move. More to the point there isn't room to install a 240mm radiator at the front of the 380T so if that is your preferred method of cooling then side mounting is the only option you have.
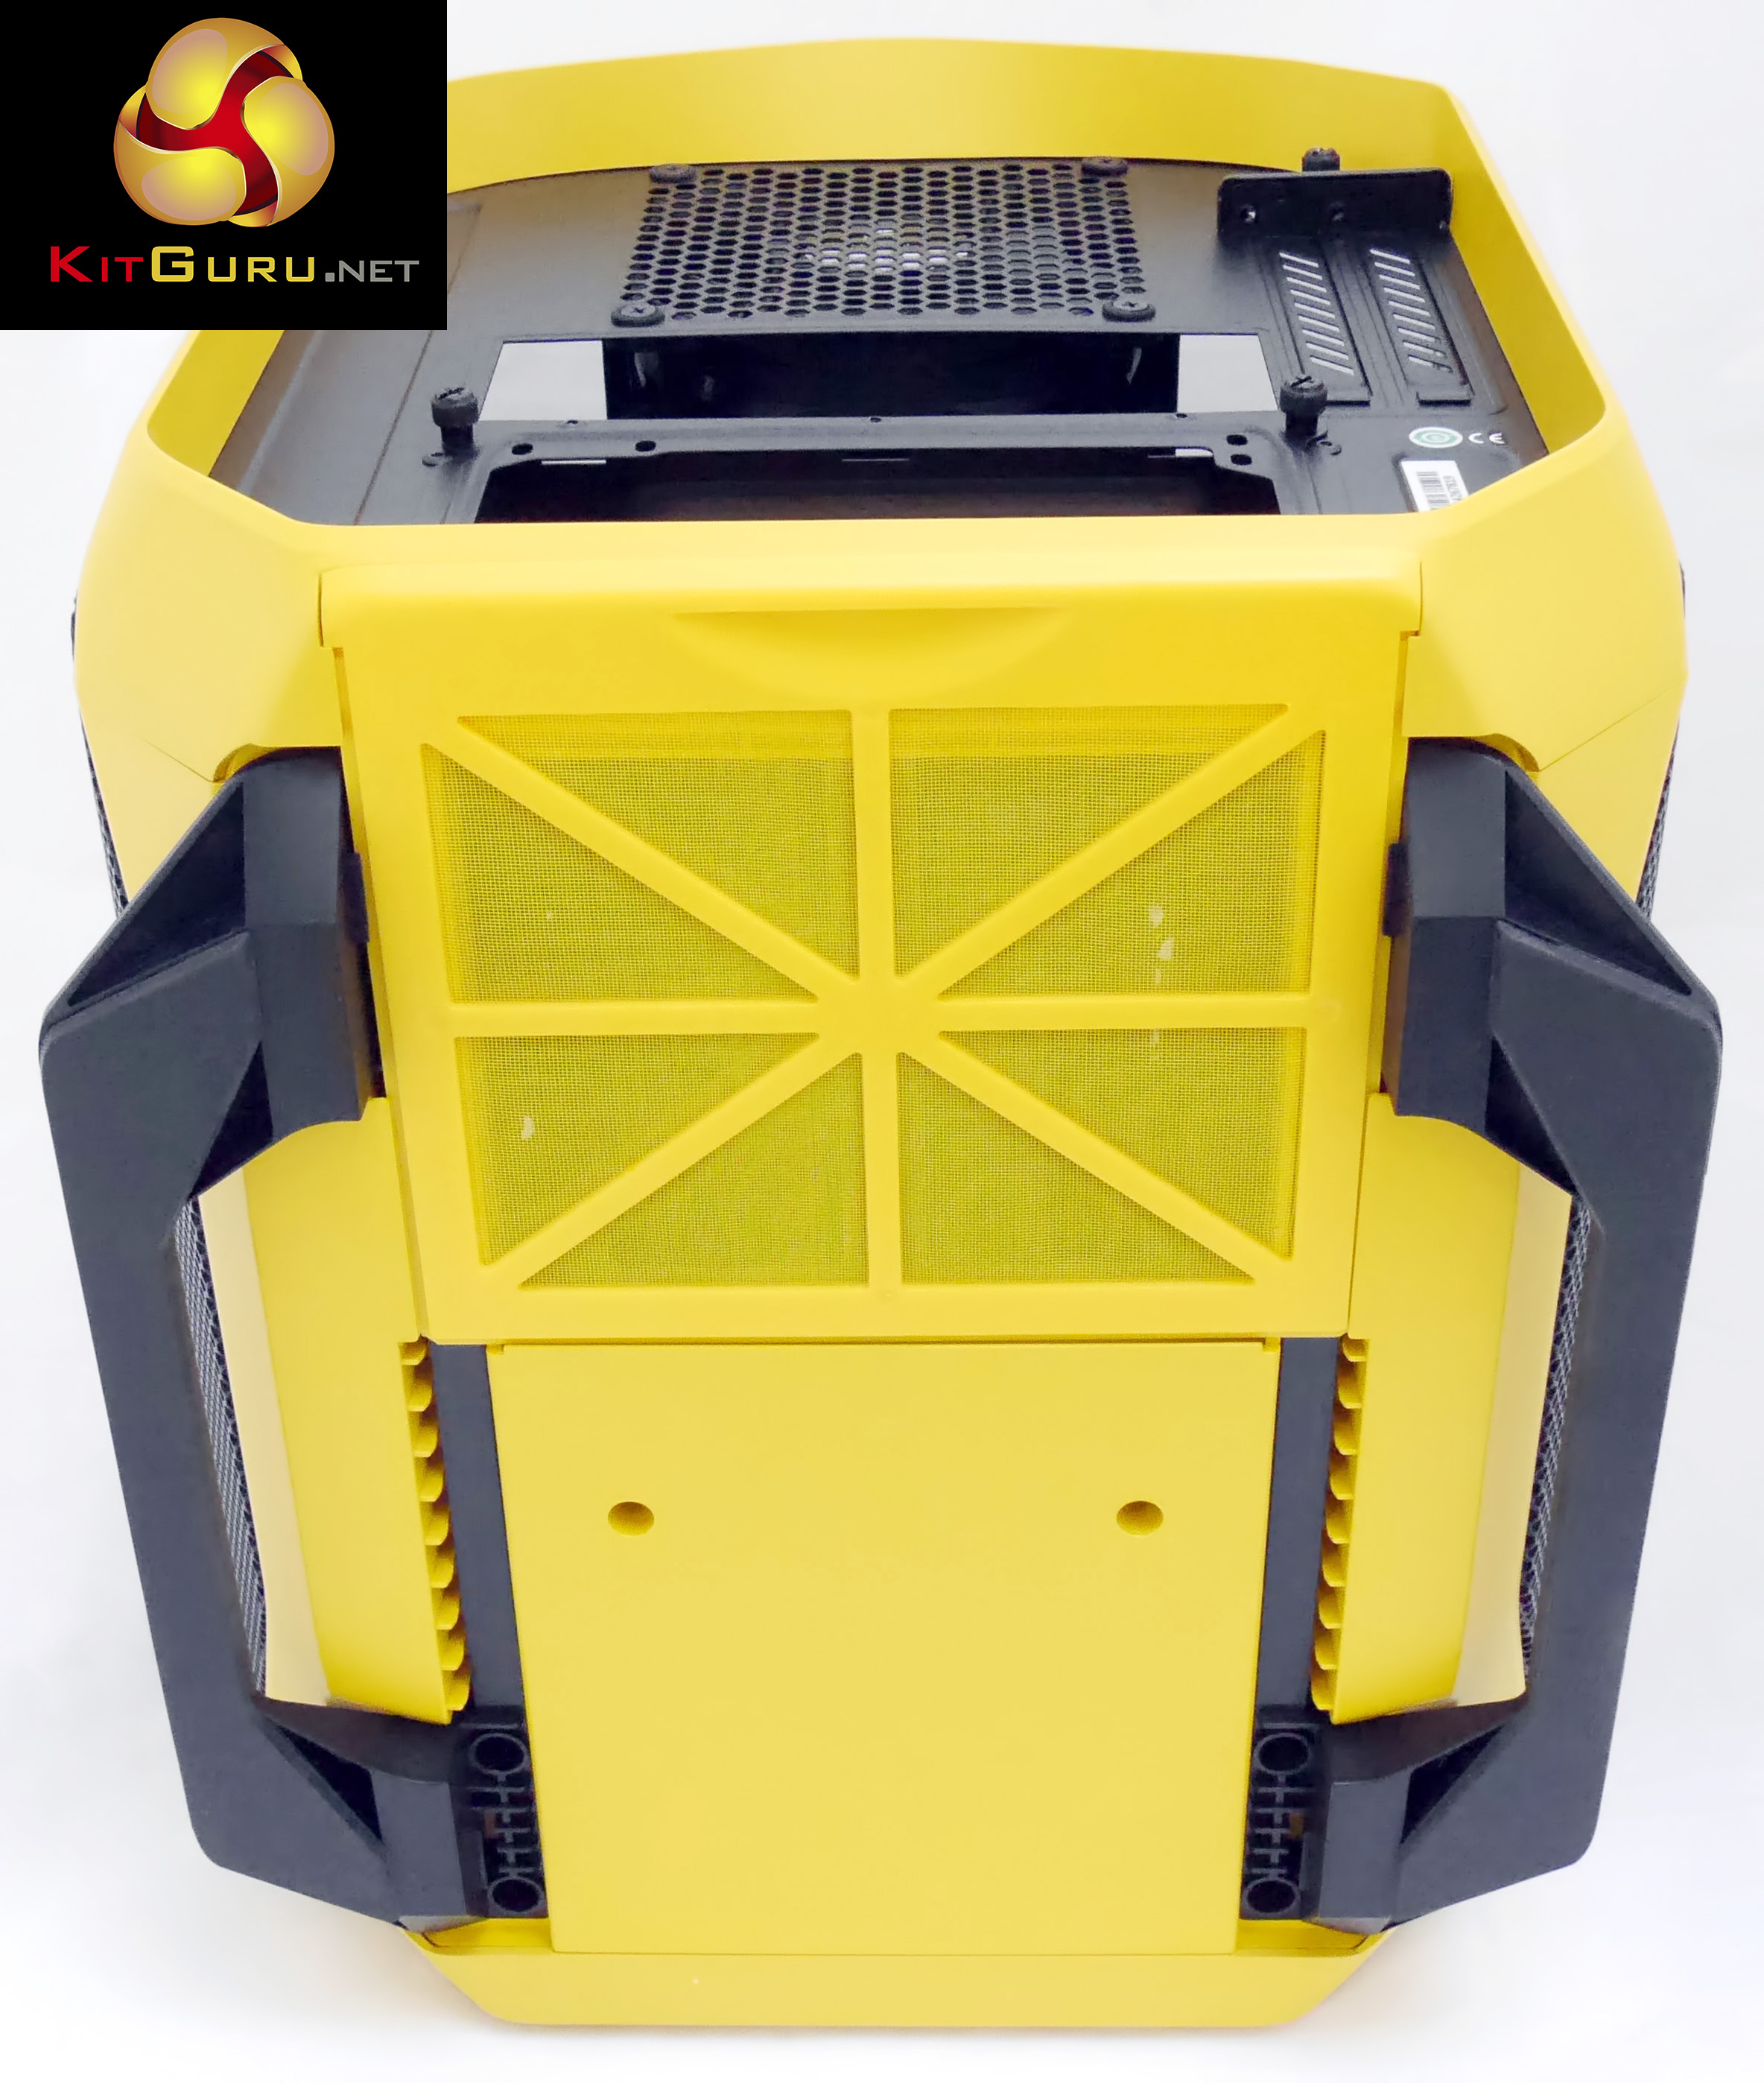
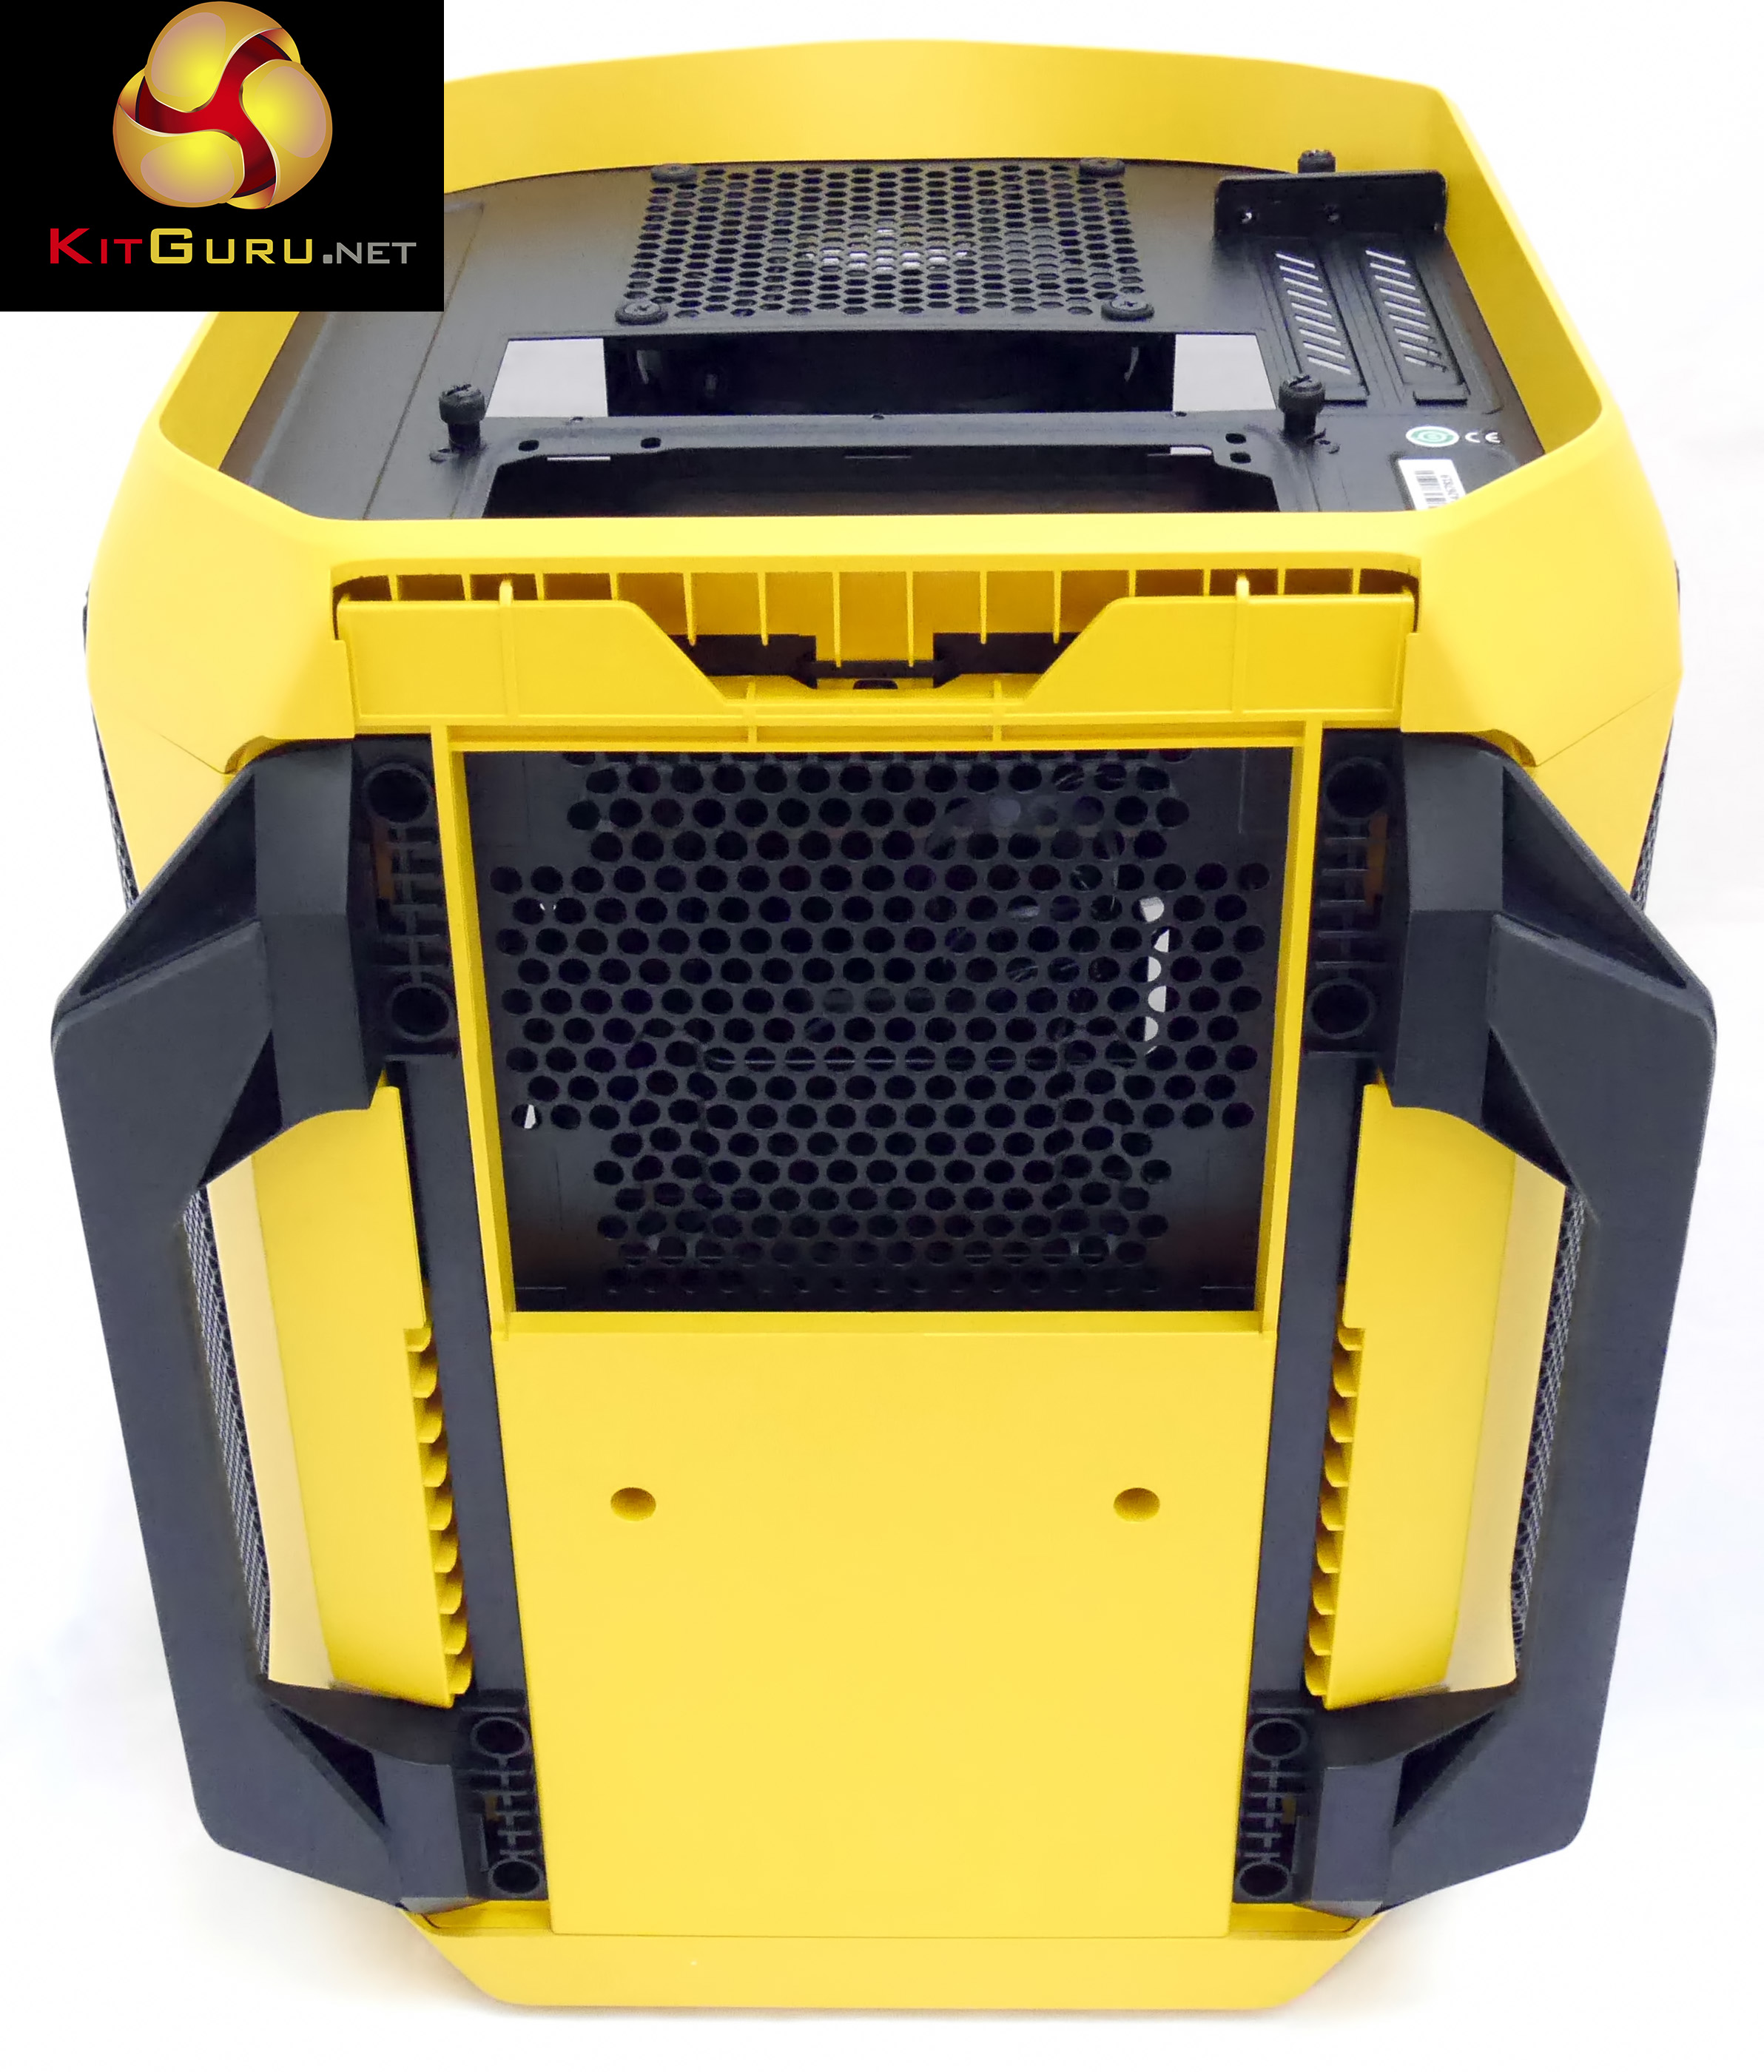
On the underside of the 380T there is a removable dust filter that screens the power supply intake.
I suffered during this PC build, partly because it is tricky to install the components but mainly because the finished results look so damn messy. Judging by these photos you might think I am an utter incompetent but hopefully some of my previous builds show that I can usually put the correct parts in the correct place.
Let's start by thanking Asus for the rapid delivery of a Z87I-Pro motherboard to get me out of a hole as I didn't have a suitable gaming Mini-ITX motherboard. I need to spell out that it is an Asus inside as you cannot see the motherboard in the finished PC.
I installed the Core i7-4770K CPU on the Asus along with 16GB of Avexir DDR3 and then installed the assembly in the case. With the two side panels removed you have just enough clearance to install the four screws that you use on a Mini-ITX motherboard however it was impossible to mount the CPU cooler.
Second time around I mounted the CPU cooler on the motherboard and then installed the whole lot in one go inside the Corsair 380T.
My chosen power supply is a BeQuiet Straight Power 400W which is a lovely slender unit. Unfortunately the BeQuiet is not modular so I had some extra cabling to deal with and the results can be seen in the photos.
I don't like the mess but my bigger concern is that the cables have to be secured simply to keep them away from the blades of the front fan.
This is a concern inside any PC but especially when you have a system that is intended to be carried around as that makes it all the more likely that cables will move unless they are firmly secured.
On this page we present some high resolution images of the product taken in our professional studio. These will take much longer to open due to the dimensions, especially on slower connections. If you use these pictures on another site or publication, please credit Kitguru.net as the owner/source.


To put this case through its cooling paces we will be using a test system consisting of an Intel Core i7-4770K, Radeon HD 7790 and a single SSD. This system allows us to produce a substantial amount of heat and effectively test the Corsair Graphite 380T ‘s cooling capabilities.
For stress testing we use a mixture of Prime95 and FurMark to create the maximum heat output. Prime95′s ‘Small FFTs’ setting allows us to stress our CPU. FurMark’s ‘GPU Burn-in’ mode creates the maximum amount of load our GPU is ever likely to see.
Test System:
- Processor: 3.9GHz Intel Core i7-4770K
- Motherboard: Asus Z87I-Pro
- CPU cooler: Alpenfohn Wasser
- Memory: Avexir 1600MHz RAM
- Graphics card: Sapphire Radeon HD 7790 1GB
- Power supply: BeQuiet Straight Power 400W
- Storage drives: Samsung 840 Evo 500GB SSD
- OS: Windows 7 Professional 64-bit.
Thermal Performance Test Procedures:
- The case’s default fan configuration is used to give an accurate interpretation of the out-of-the-box performance.
- The Corsair Graphite 380T ‘s default fan configuration is: 2x 140mm front intake, 1x 140mm rear exhaust fans.
- The fans are operating at full speed.
- We allow the system to idle for 15 minutes and record the stable temperatures.
- We allow the system to operate under extreme stress for 15 minutes and record the stable temperatures.
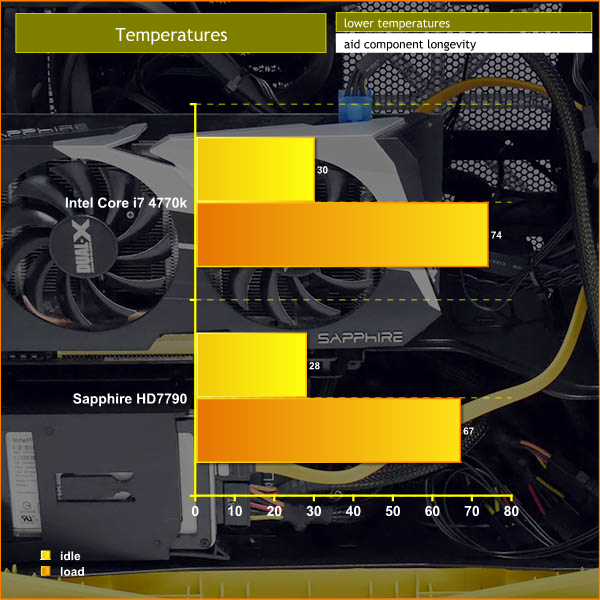
CPU idle temperature inside the Graphite 380T was slightly higher than similar systems that I built in the Phanteks Enthoo Luxe and Aerocool DS200 but we are only talking about 3-5 degrees. GPU temperatures were lower than before but that is not a fair comparison as I was using a mid-range Radeon HD 7790 graphics card instead of my usual R9 290.
Under load the CPU temperature was a respectable 74 degrees and the GPU rose to 67 degrees. Those figures are what you expect from a small form factor PC as the components are necessarily crammed together and airflow is never as good as you might hope.
Acoustic Performance Test Procedures:
- We placed our Digital Sound Level Meter one metre away from the case.
- The case fans are set to maximum speed.
- The CPU cooler’s fans are deactivated.
- The Corsair Graphite 380T ‘s default fan configuration is: 1x 140mm front intake, 1x 120mm rear exhaust fans.
Assess noise
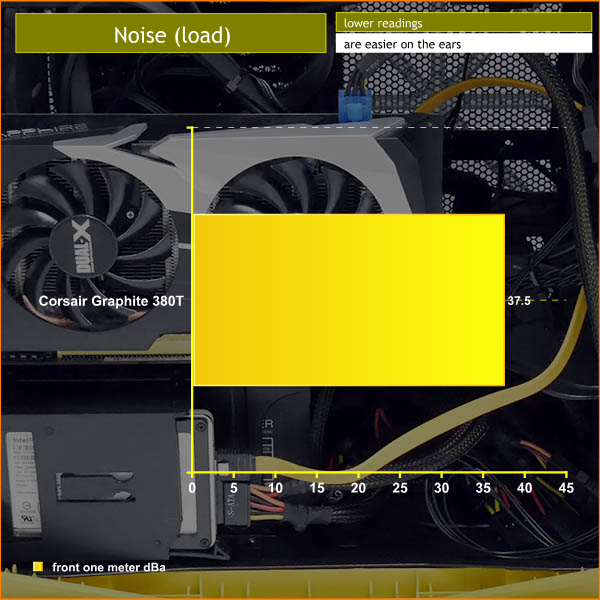
The Corsair Graphite 380T is impressively quiet with the fan speed controller set to speed one and doesn't sound much louder on speeds two and three. We are talking fractions of a dBA, however the extra fan speed didn't make any difference as the components were already reasonably cool.
No doubt this was thanks to the Alpenfohn Wasser liquid cooler and CPU air coolers may respond differently but fan speed one should be perfectly sufficient and that will keep the system nice and quiet.
The irony is that LAN gamers will probably be wearing headphones which means that noise levels aren't a major issue.
The Corsair Graphite 380T is an eye catching chassis which will appeal to the Mini-ITX enthusiast user with a desire to own something both functional and attractive. Corsair need to work on their box artwork however as first appearances may fool the user into thinking they are actually buying a pet carrier basket. In the flesh though, the brightly coloured case proves difficult to dislike.
The carry handle on top is the key and it is truly impressive that the 380T doesn't flex or wobble when you pick it up, even with the side and front covers removed. The bare chassis weighs 4.9kg and the built system is about 10kg – so we're not talking about a featherweight system.
Instead the Corsair Graphite 380T is a rugged chassis that should be able to take a few knocks and bumps without suffering too much and when it arrives at the LAN party you can be confident it will deliver performance and cooling in equal measure.
At the time of writing we don't have a UK price for the Corsair Graphite 380T, however it seems likely that it will cost £99 inc VAT. That sounds like a lot for a small form factor case – however the 380T is a solidly built piece of hardware that is designed with a specific role in life.
Corsair have crafted a chassis ideal for LAN gaming events, both portable enough to carry from home to car to event and durable enough to withstand some rough handling.
Discuss on our Facebook page, over HERE.
Pros:
- Carry handle for LAN parties
- Quick access side and front panels
- Mini-ITX form factor keeps the size reasonably small
- Impressive cooling
- Integrated fan controller
- Options to add radiators in the front or side
- Smart styling
- Impressively solid build quality
Cons:
- Restricted access makes the PC build tricky
- Limited to a 290mm length graphics card
- Cable management is very basic
- You need to remove the 3.5-inch drive bays to free up space for the cabling
- No optical drive bay
- Refitting the side panels can take a couple of attempts to locate them correctly.
KitGuru says: Designing the Graphite 380T around its carry handle is a genius touch that deserves a decent amount of trade from the LAN party community.