

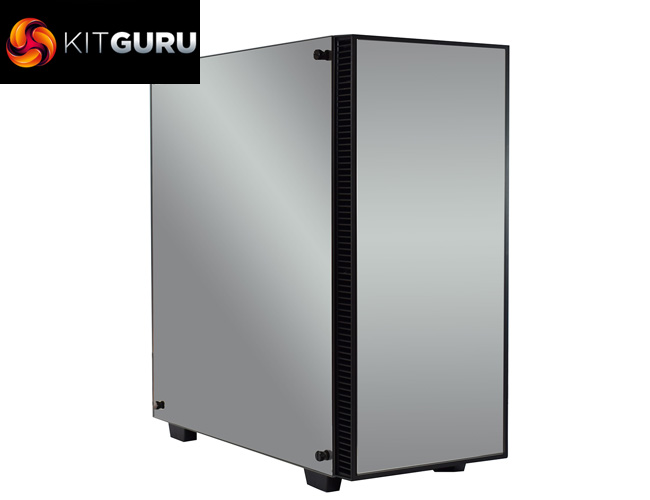
Recently we have reviewed a couple of cases from Game Max, and while they both scored very well, they were definitely aimed at users on a budget. Today, we are seeing what Game Max can offer those looking for a more luxurious case, as the Sapphire RGB is definitely luxurious – it features no less than 3 tempered glass side panels, and not ordinary tempered glass either. The Game Max Sapphire's highlight feature (quite literally) is its use of mirror-finish tempered glass.
Priced at £134.55, the Game Max Sapphire RGB faces stiff competition from the likes of Phanteks and Corsair, as both companies have released well-received tempered glass cases over the last few months. In this review, we go over build quality, practicality and cooling performance before giving our final verdict.
Specification
- Form Factor: Midi Tower
- Motherboard Support: ATX, Micro ATX, Mini ITX
- PSU Support: Standard ATX
- PSU Location: Bottom
- Supported Radiator Size: up to 420mm in the front, up to 360mm in the roof
- Body Material: 0.7mm
- Front Bezel Material: Plastic / Tempered Glass
- Side Panel: Tempered Glass
- Internal Cable Management Depth: 13mm
- External Bays: None
- Internal Bays: 2 x 3.5” Internal, 5 x 2.5” Internal
- Expansion Slots: 7 x Full Size
- Cooling Front: Space for 3 x 120mm or 3 x 140mm (3 x 120mm RGB inc.)
- Cooling Top: Space for 2 x 120mm or 2 x 140mm
- Cooling Rear: Space for 1 x 120mm or 140mm fan
- Cooling Side: None
- Cooling Bottom: Filter vent for PSU
- Fan Controllers: 1 Fan Controllers, controlling up to 6 fans in total
- IO Ports: 2 x USB 3.0, 2 x USB 2.0, 1 x HD Audio, 1 x Microphone
- GPU Max Length: 420mm
- CPU Cooler Maximum Height: 175mm

The Game Max Sapphire RGB case ships in a comparatively plain black box, with just a mention of some key features on the front.
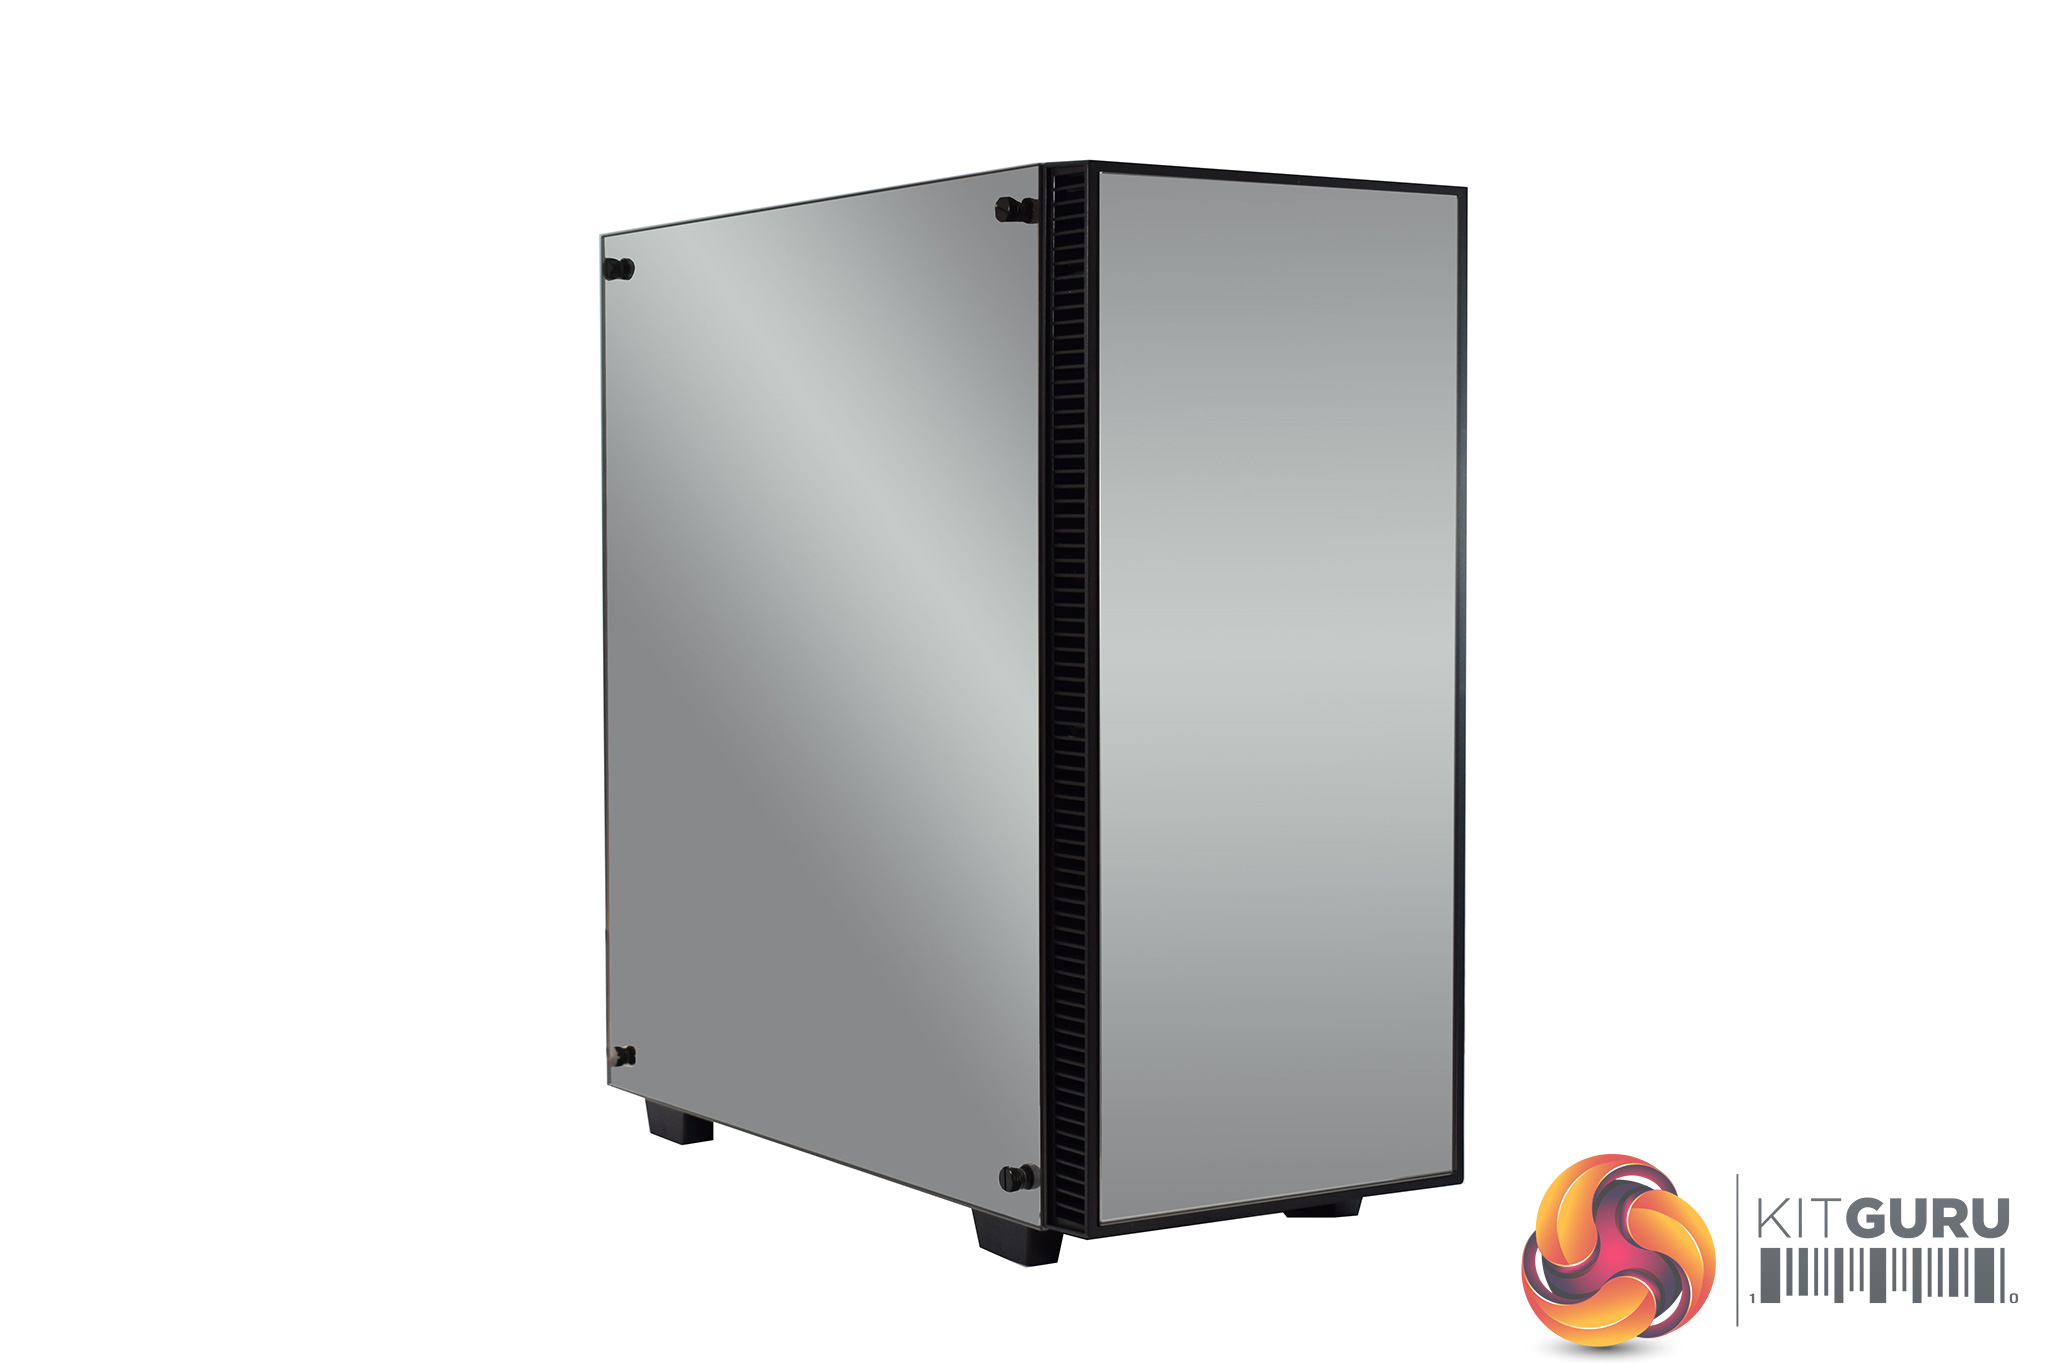
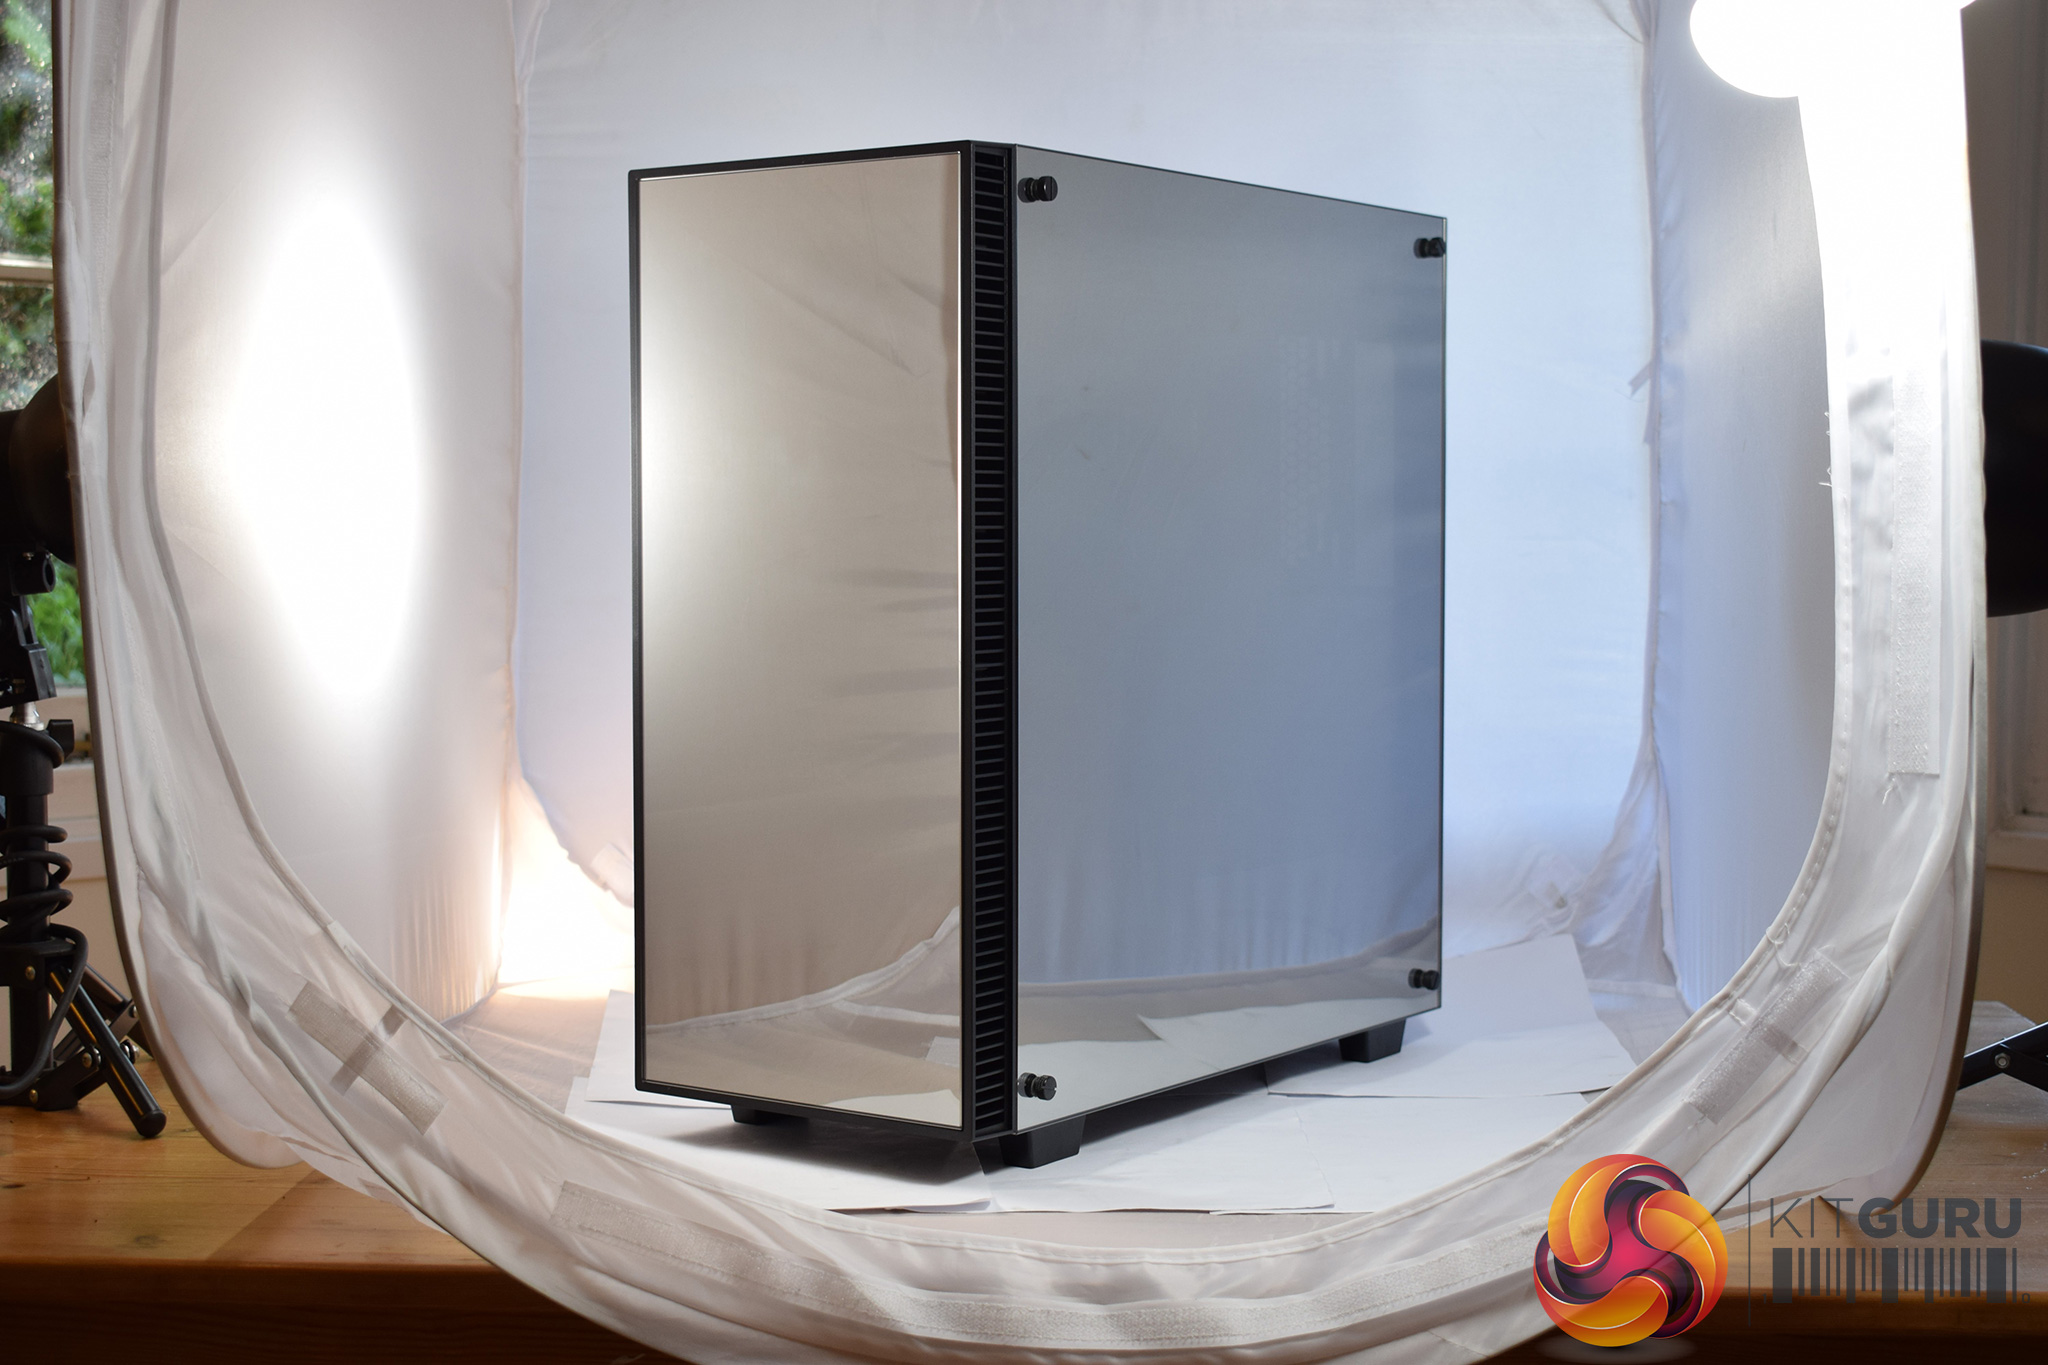
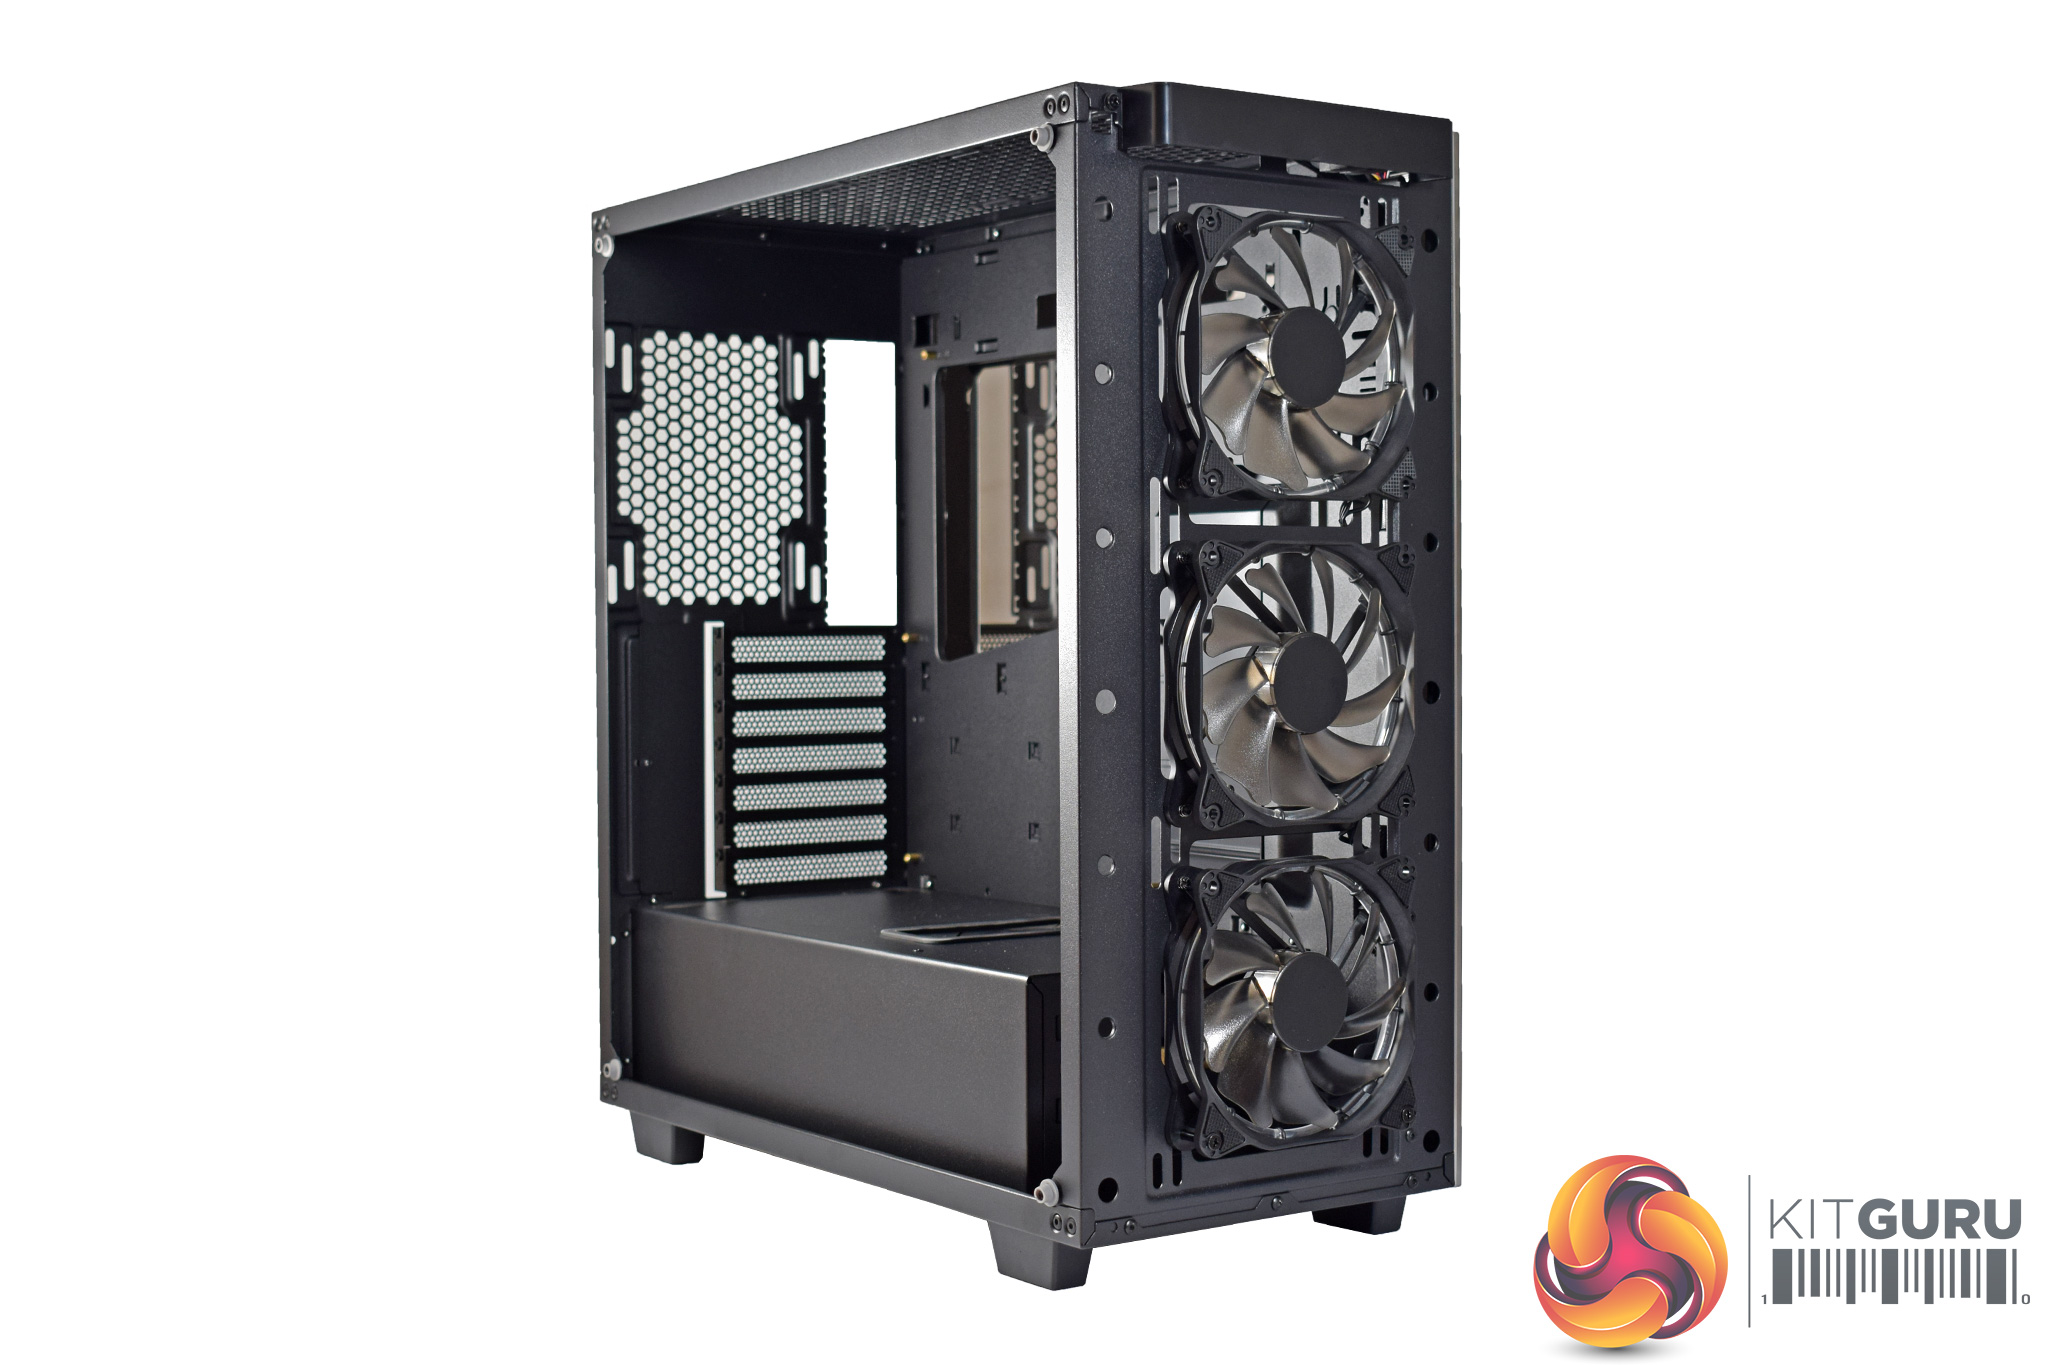
Obviously a key feature of the Sapphire case is the fact that it sports three mirror-finish tempered glass panels. This does make photographing the case very difficult, as anything and everything is reflected by the 3 glass panels, and it can look truly awful.
That's why we decided to include one ‘doctored', photo where we have removed the reflections for a cleaner look, as well as one ‘raw', completely unedited photo.
For all the photos I take for KitGuru, I need good lighting, so I use 3 day light lamps and a light tent – as you can see in the image above. Clearly, the tent is reflected in the glass panels, and we have included this just so you can get a ‘real-world' look at the case.
These glass panels are also mounted well, as they fit on rubber extrusions and are then screwed into the chassis. It is a secure way of doing it and it works well.
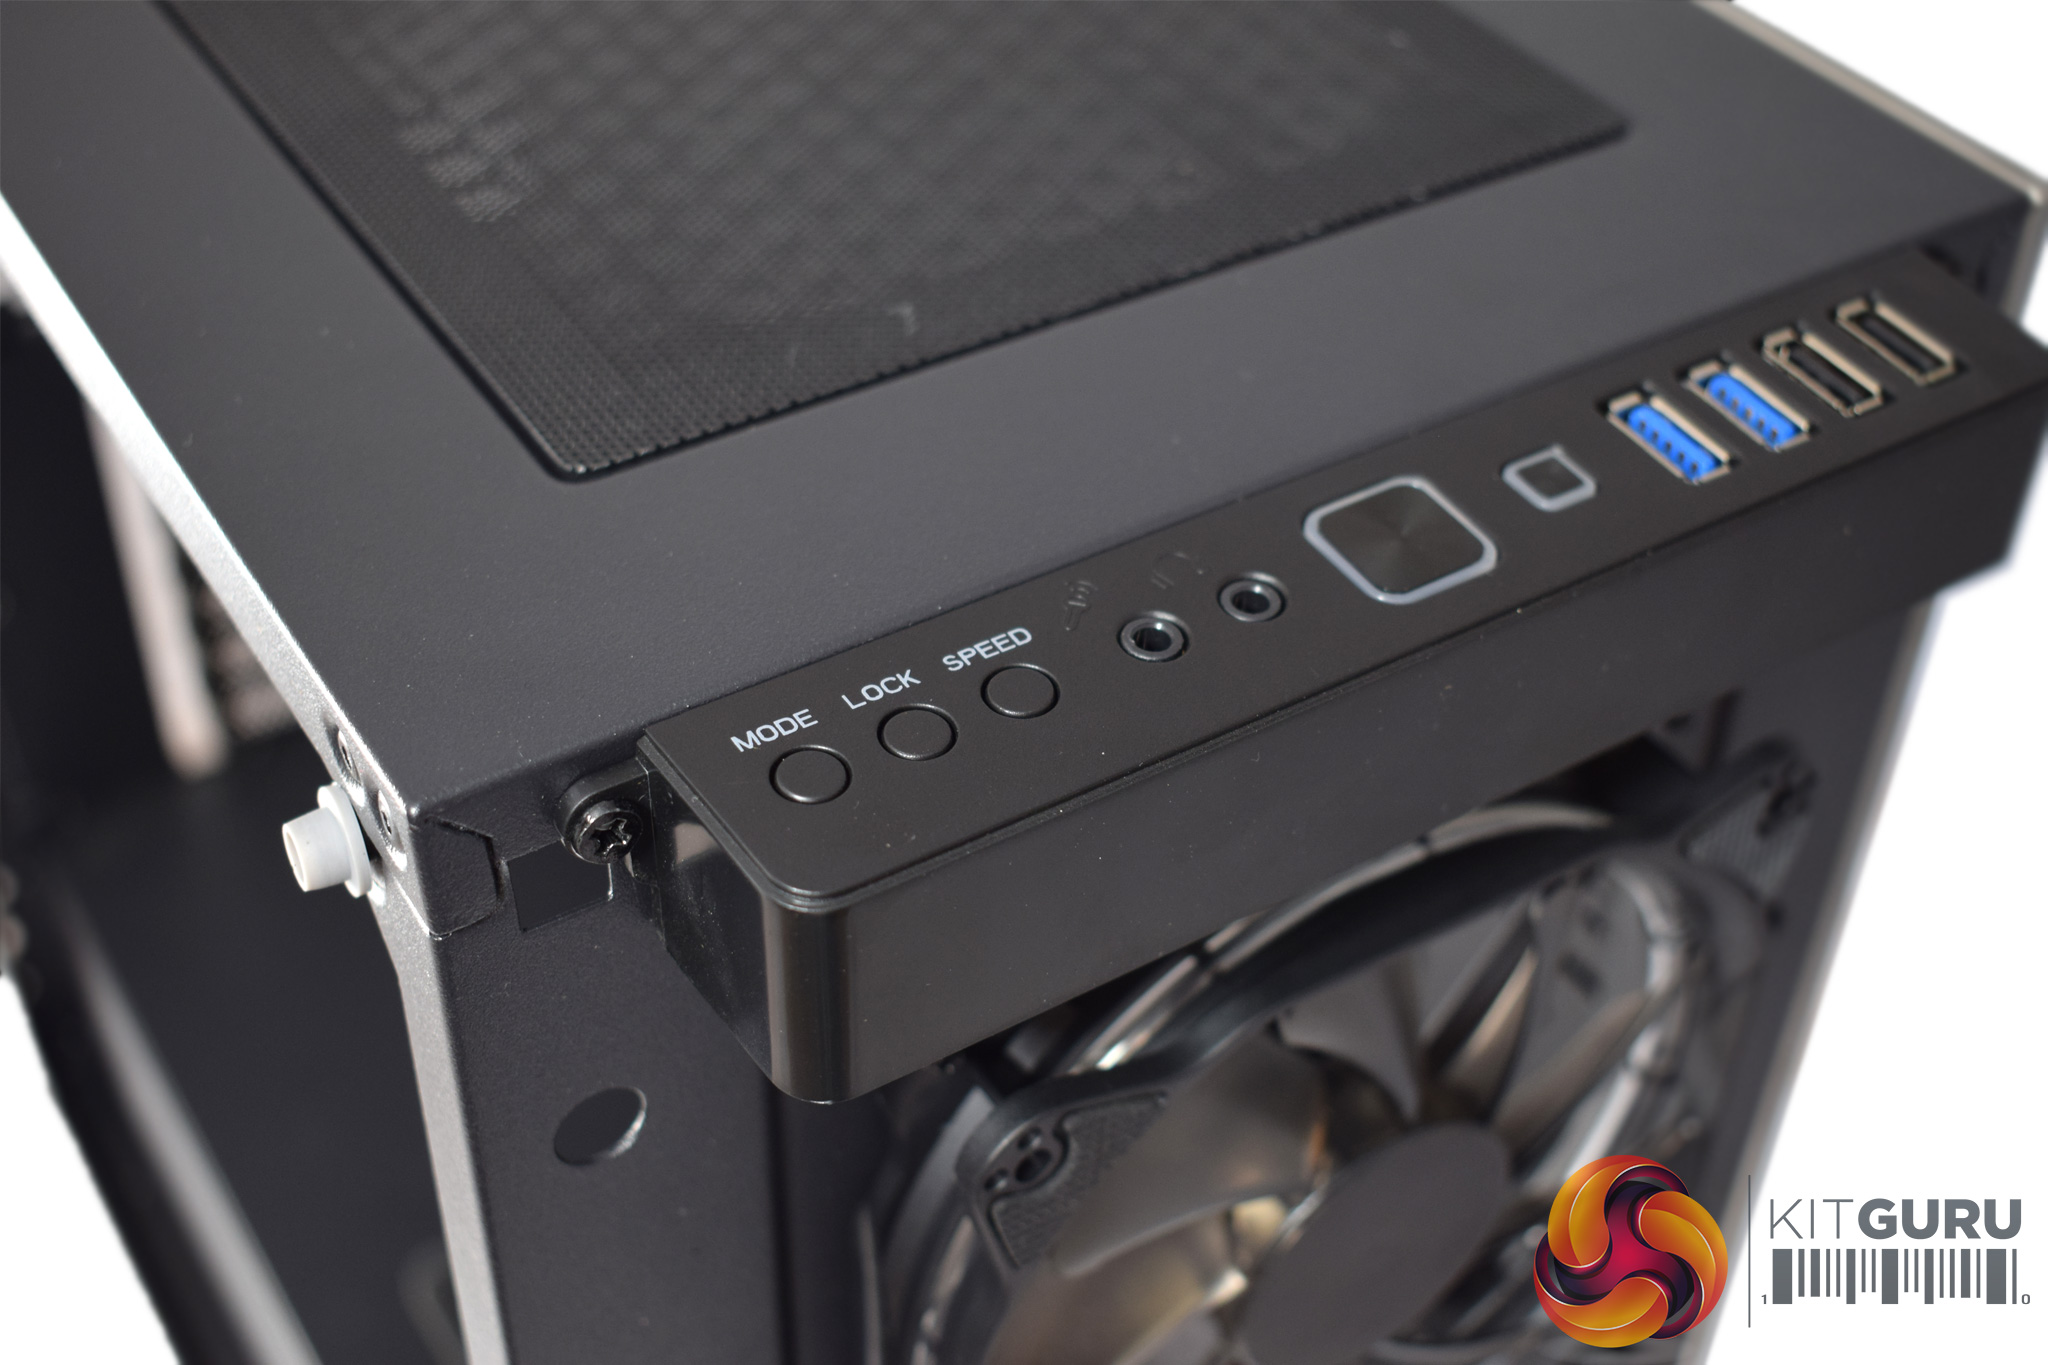

In terms of the front panel I/O, the selection is plentiful. On the left-hand side, we find 3 different buttons that are linked to the fan controller: you change the RGB LED colour, set the speed and lock the setting to prevent accidental changes. Next to the fan-control buttons are the headset jacks, while 2x USB 2.0 and 2x USB 3.0 ports can be found on the right-hand side.
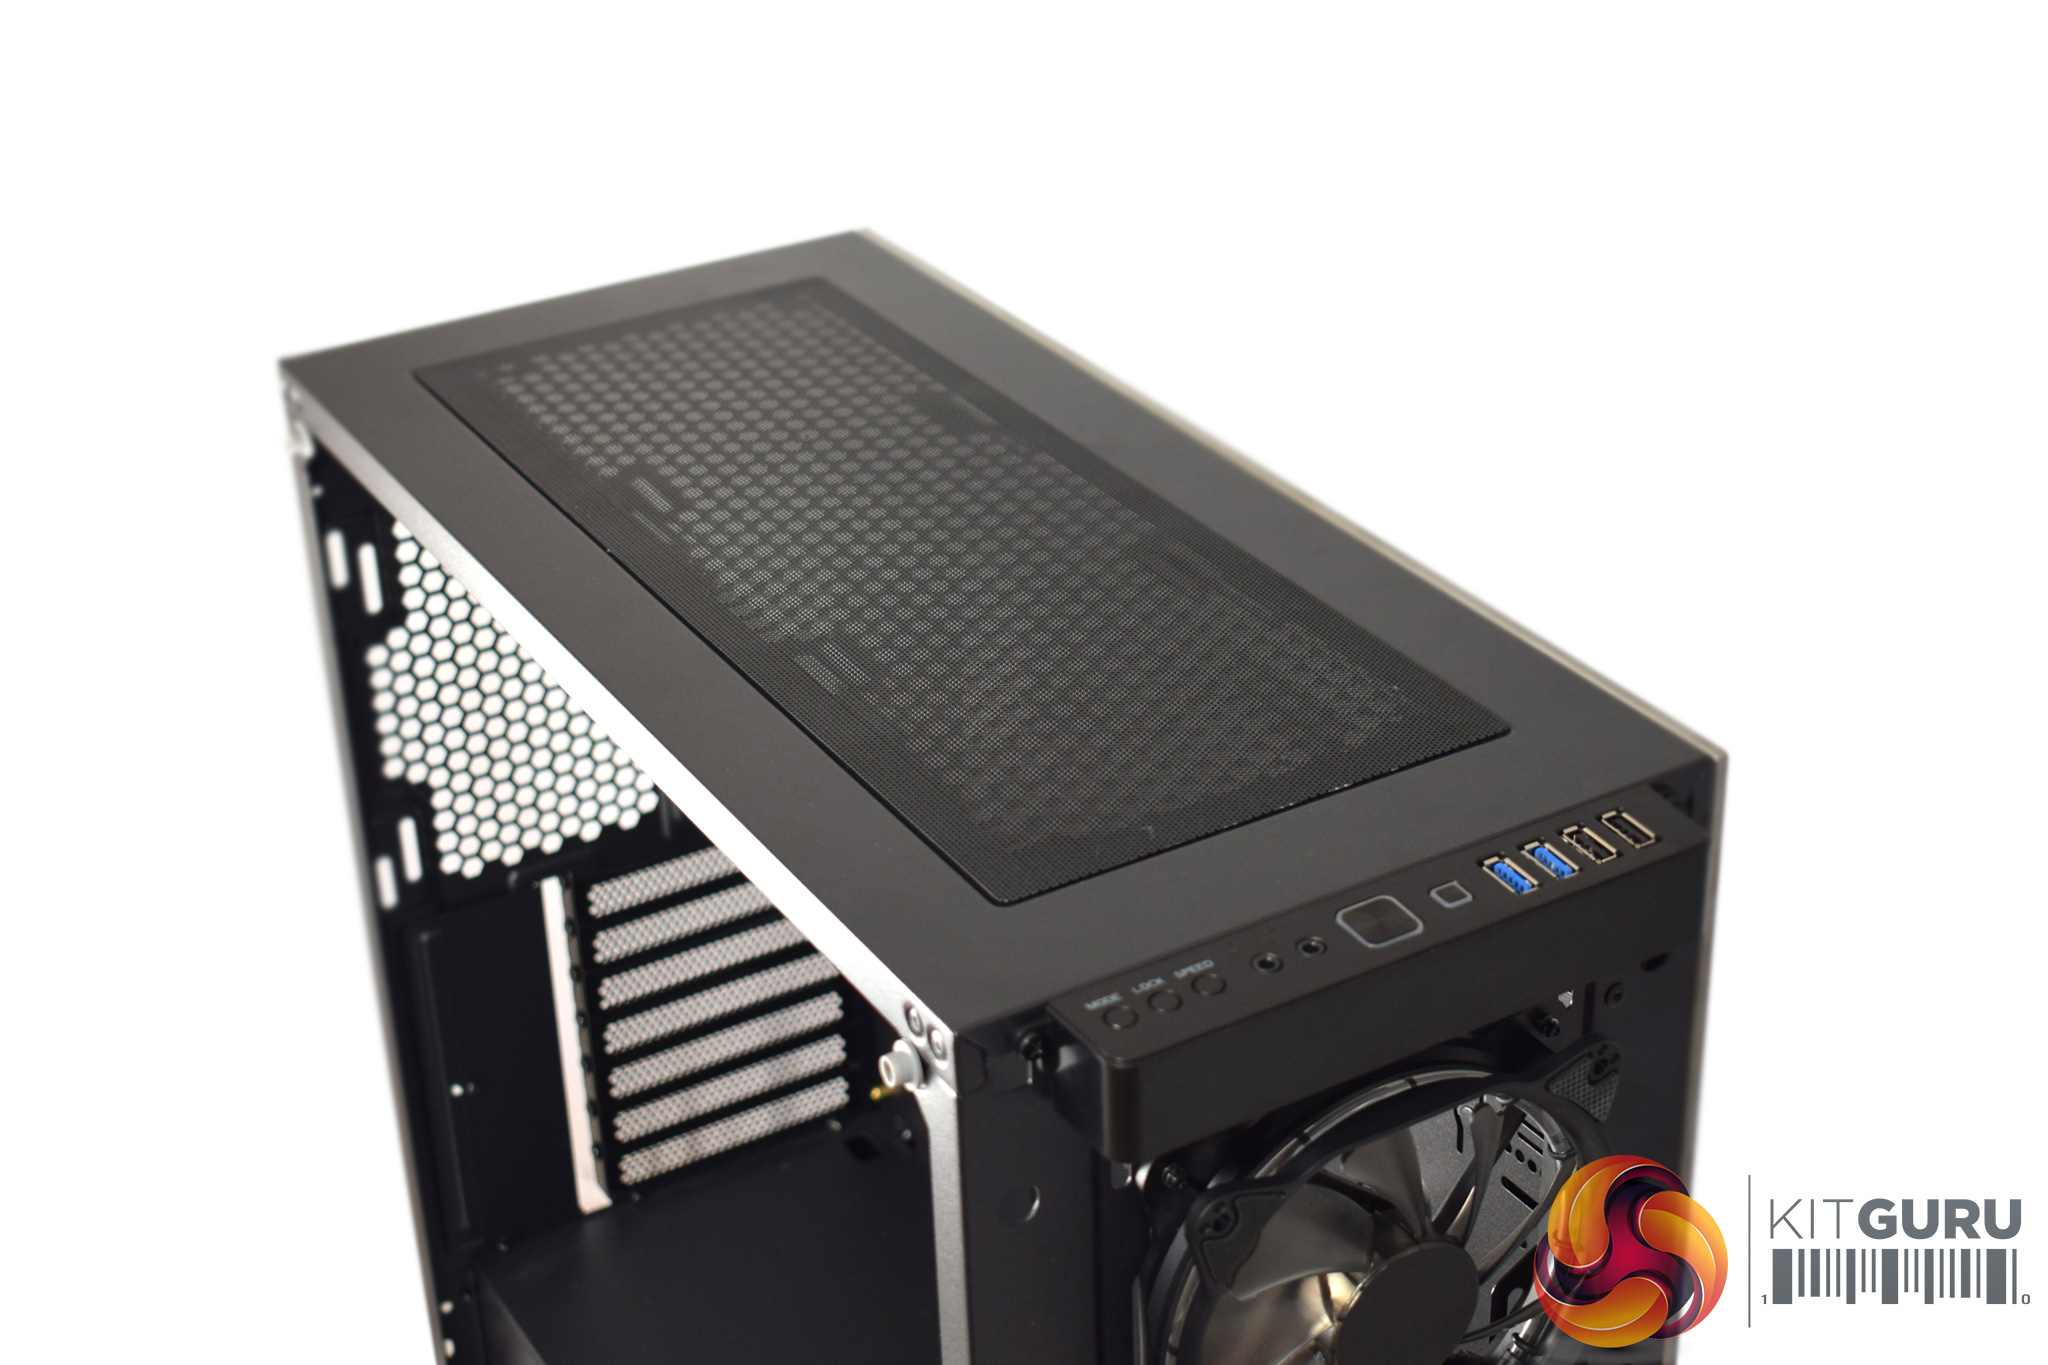
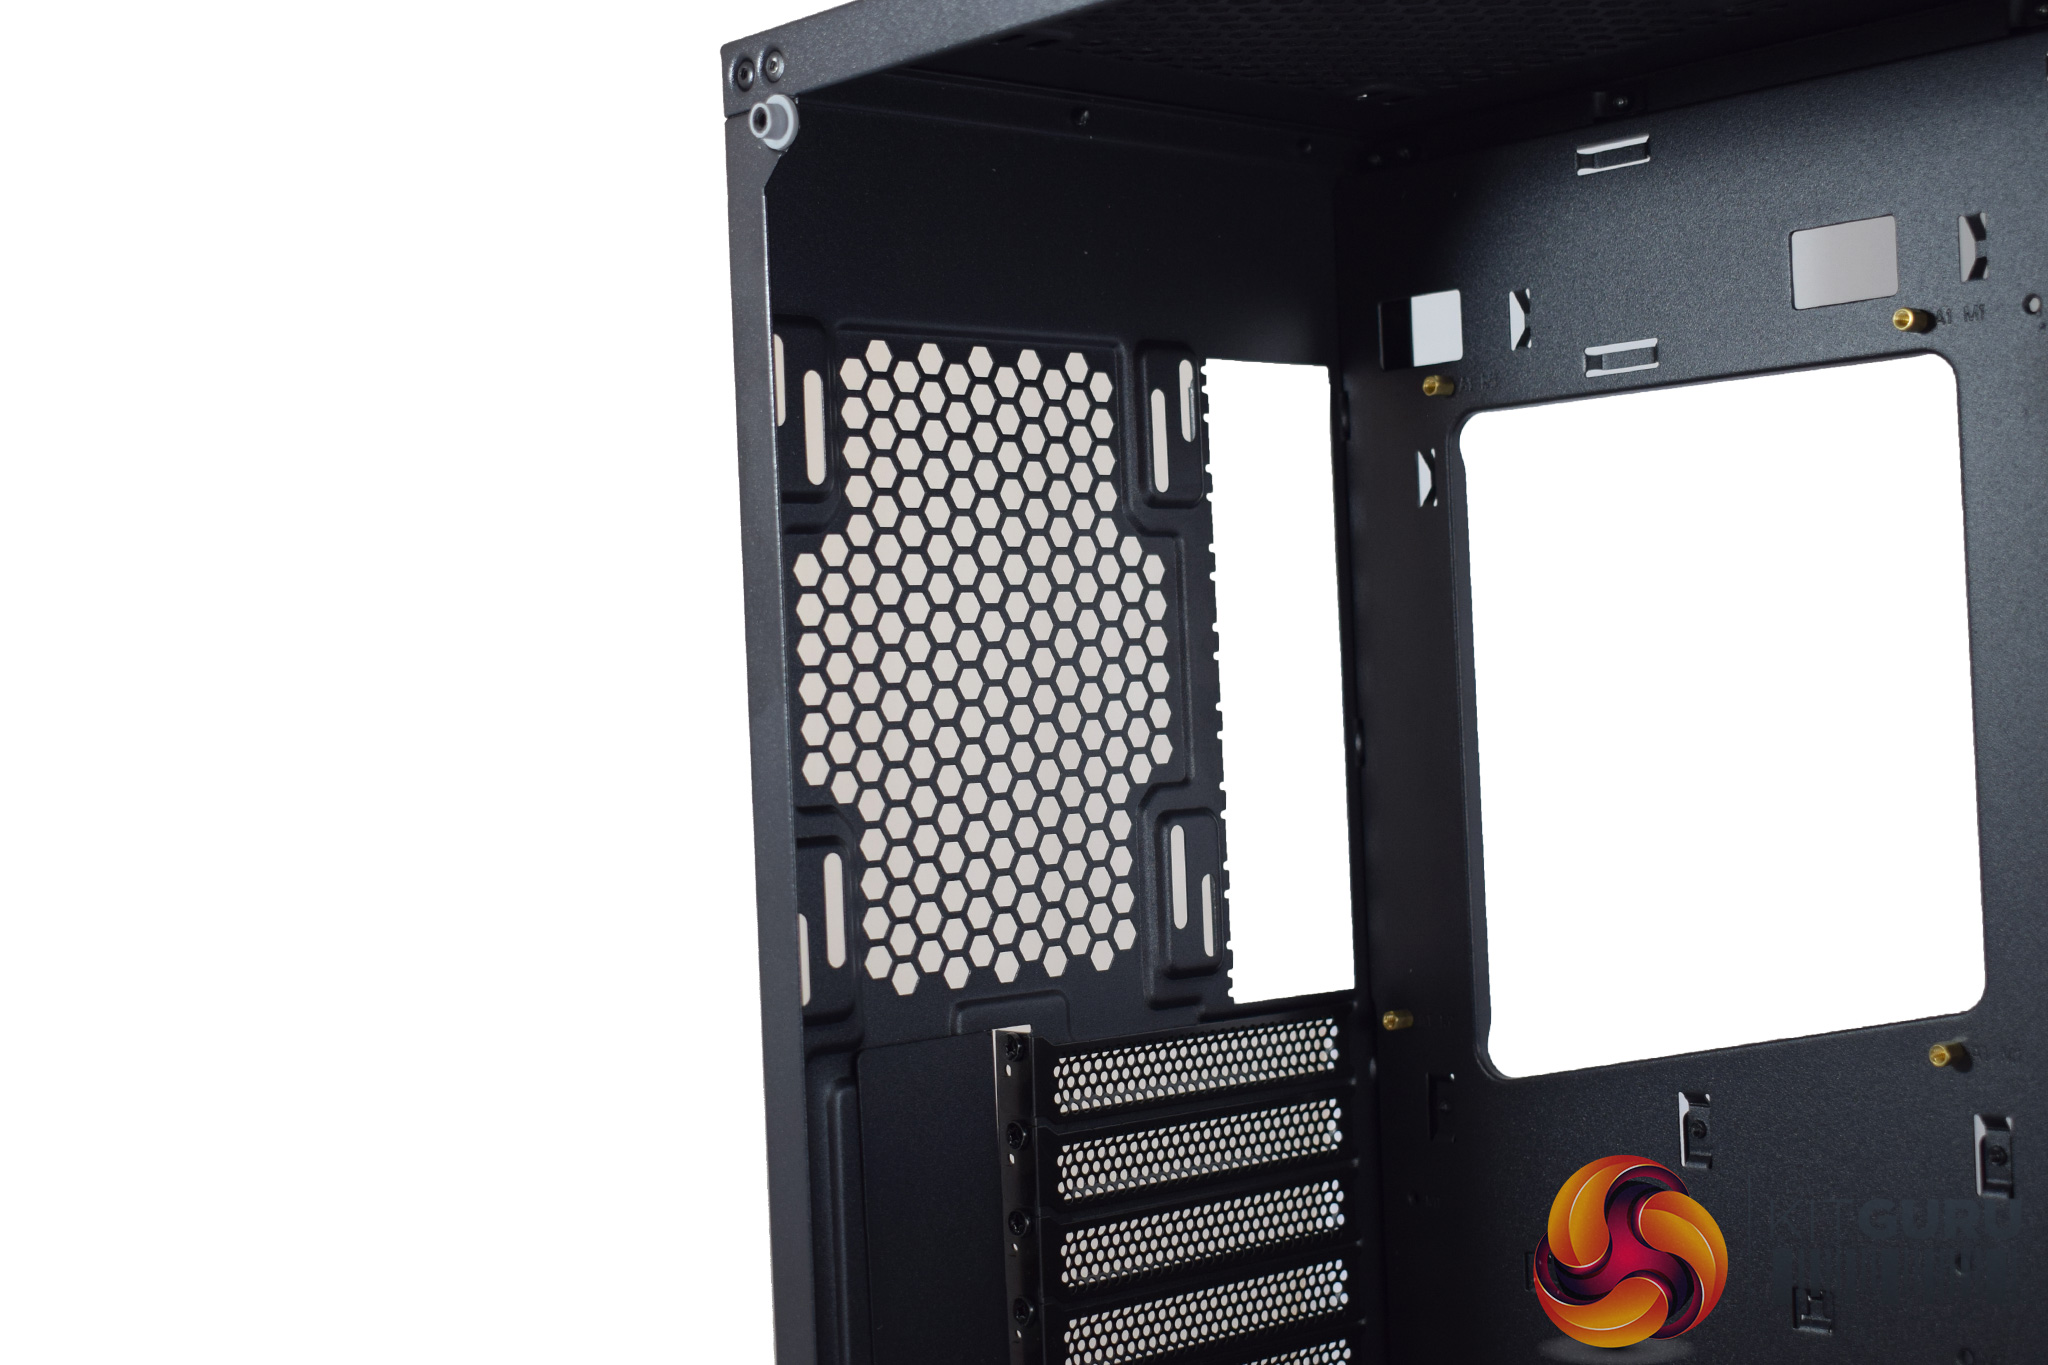
It is also worth noting that the roof of the case utilises a full-length magnetic dust-filter – something we always like to see.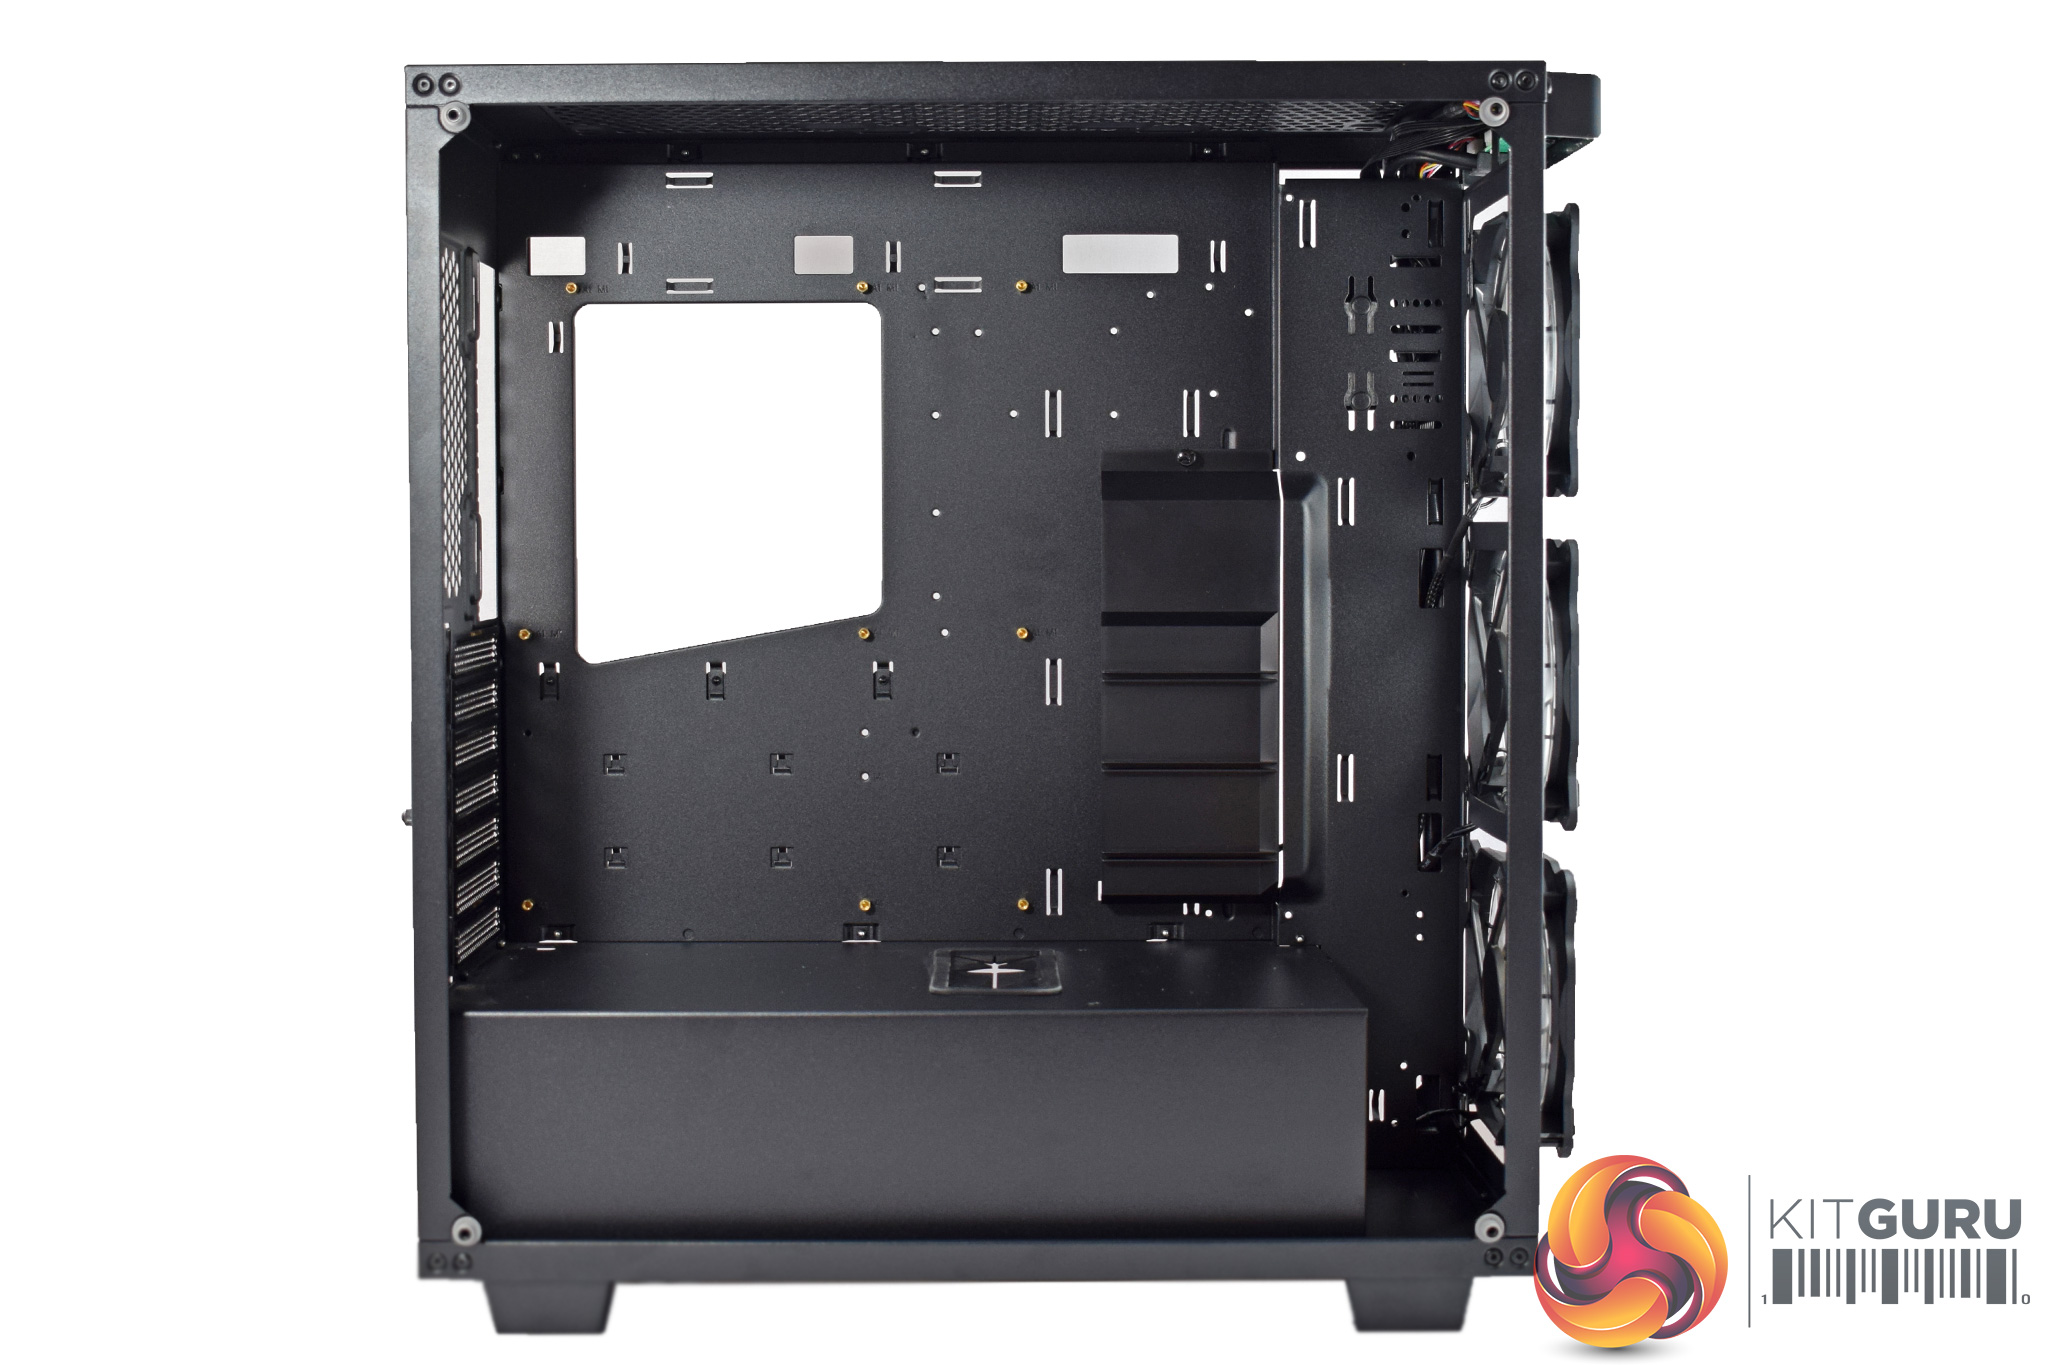
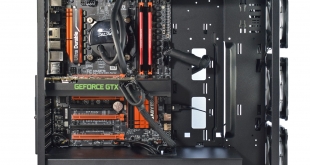
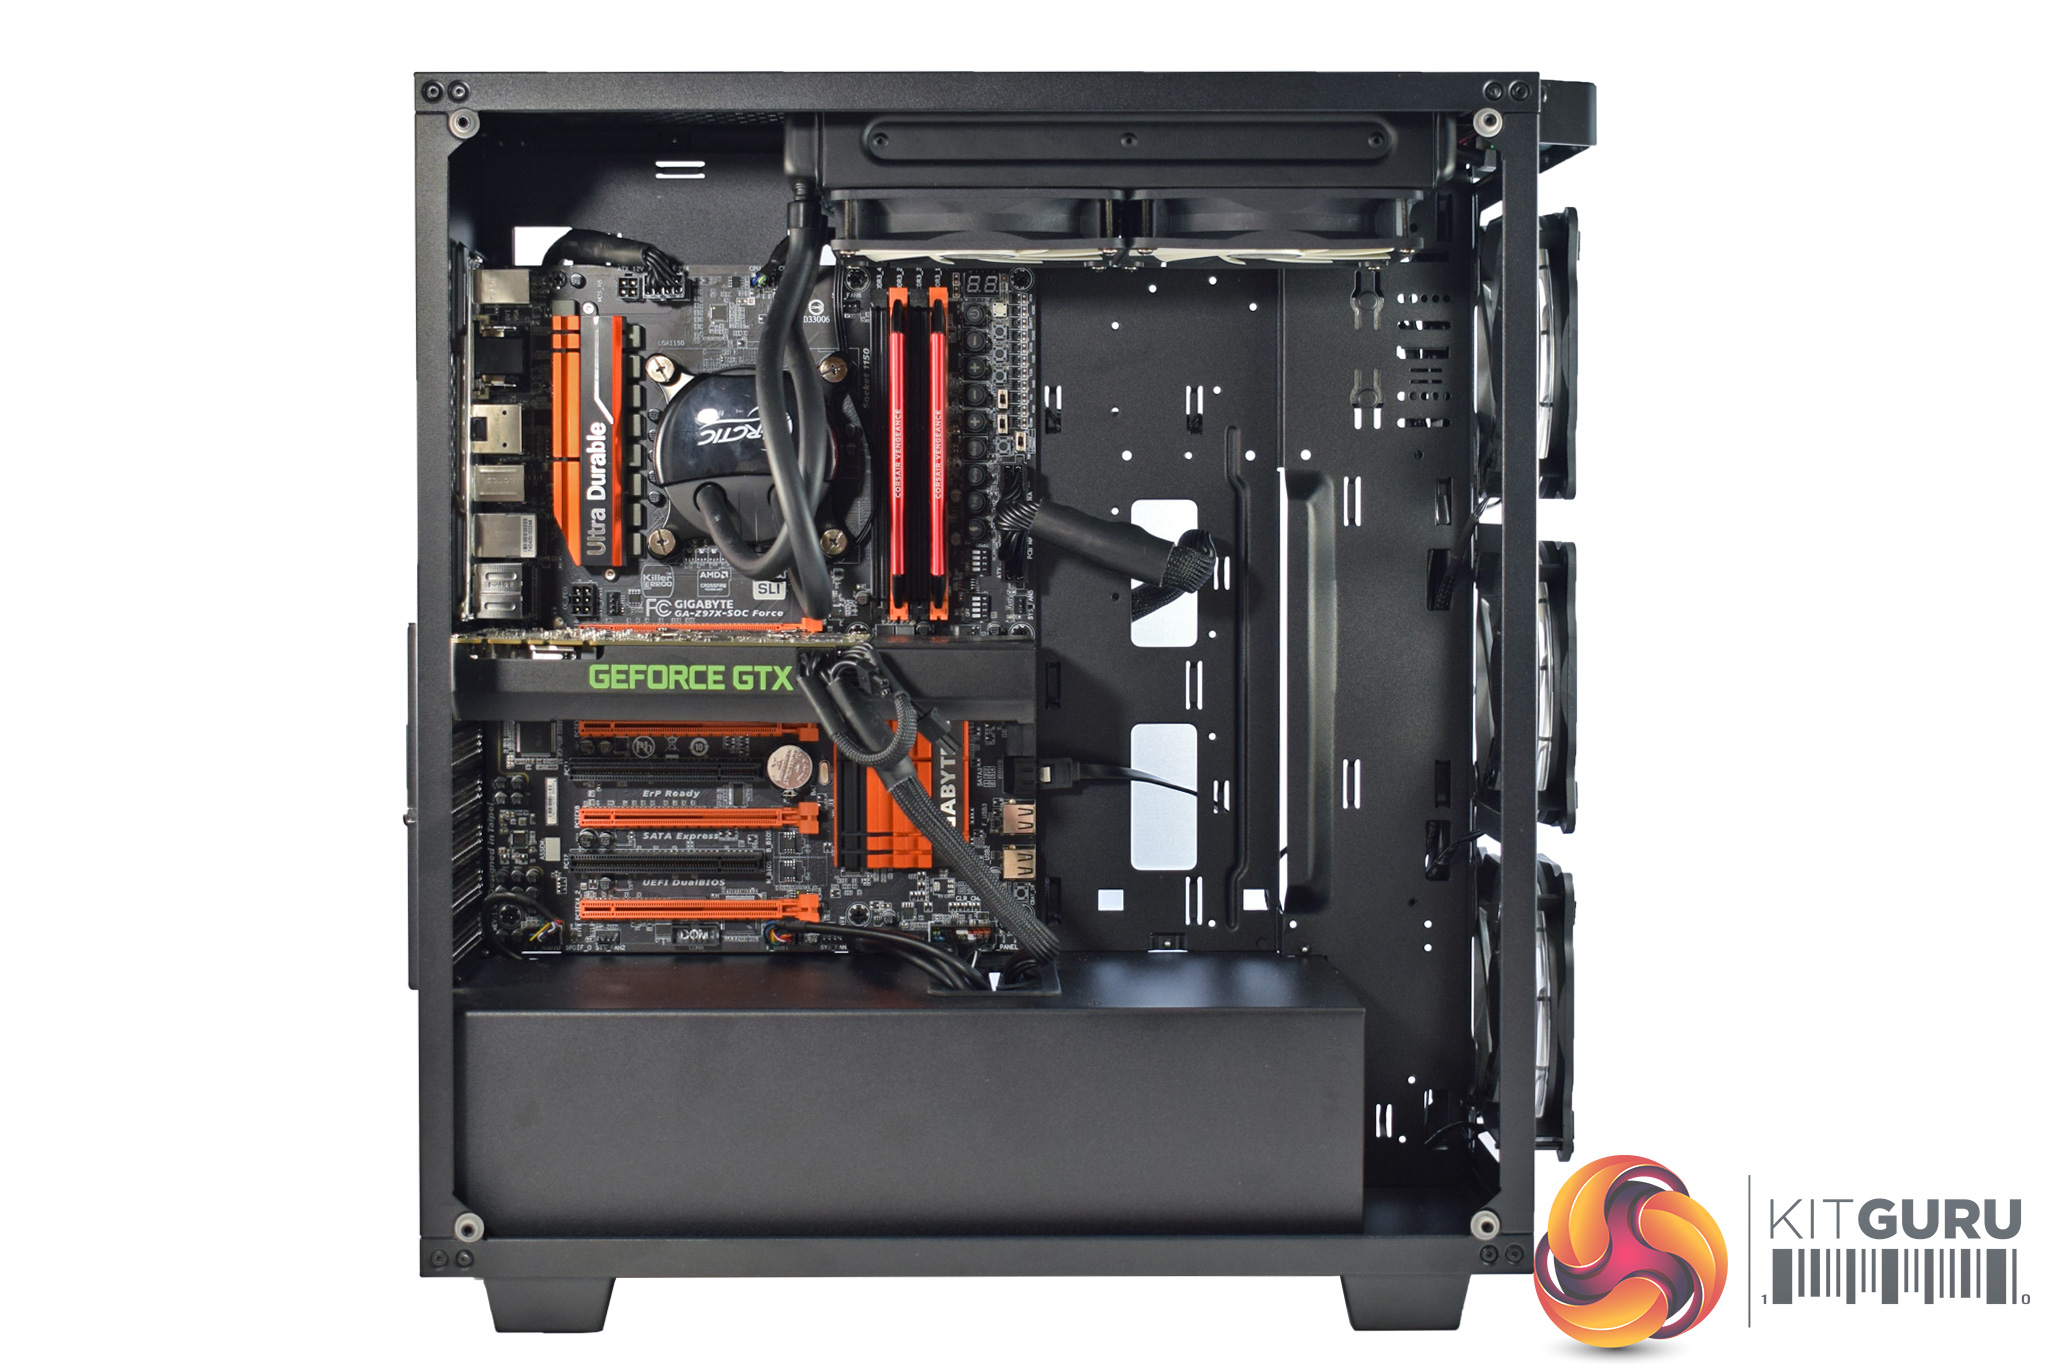
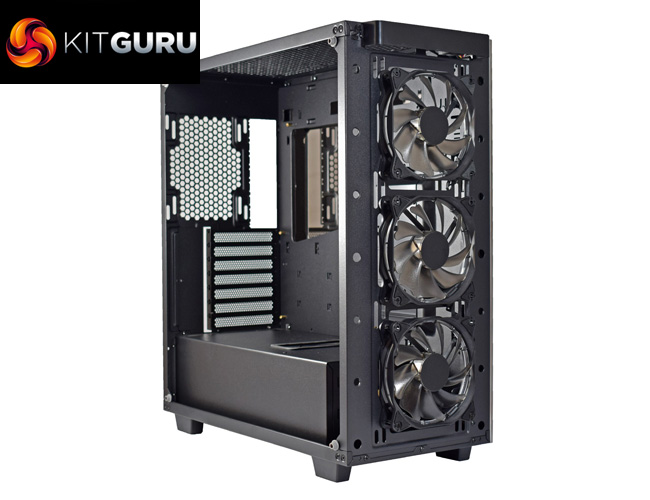
Once the 3 tempered glass panels are off, we get a good look at the internal chassis. As far as I can tell, it is made exclusively from thin steel, so the chassis itself is actually quite light. That is good to see as it instils a confidence in the quality of the case, and I am happy to see the all-metal chassis.
Inside, it is also good to see that the motherboard standoffs are pre-installed, while the large power supply shroud should help keep the system clean.
However, I am disappointed to see a lack of rubber grommets used. There are plenty of cut-outs to route your cables, but these have been left bare – in a £130+ case I would really expect some rubber grommets, as it looks a lot better and is also kinder on your power supply cables.
One other interesting feature to point out is the GPU support bracket. The idea is that longer, heavier graphics cards are likely to sag, so adding in a bracket (which should hold the edge of your card) will keep it nice and level. This bracket can be removed, though, as it is only held in-place with a single thumbscrew.
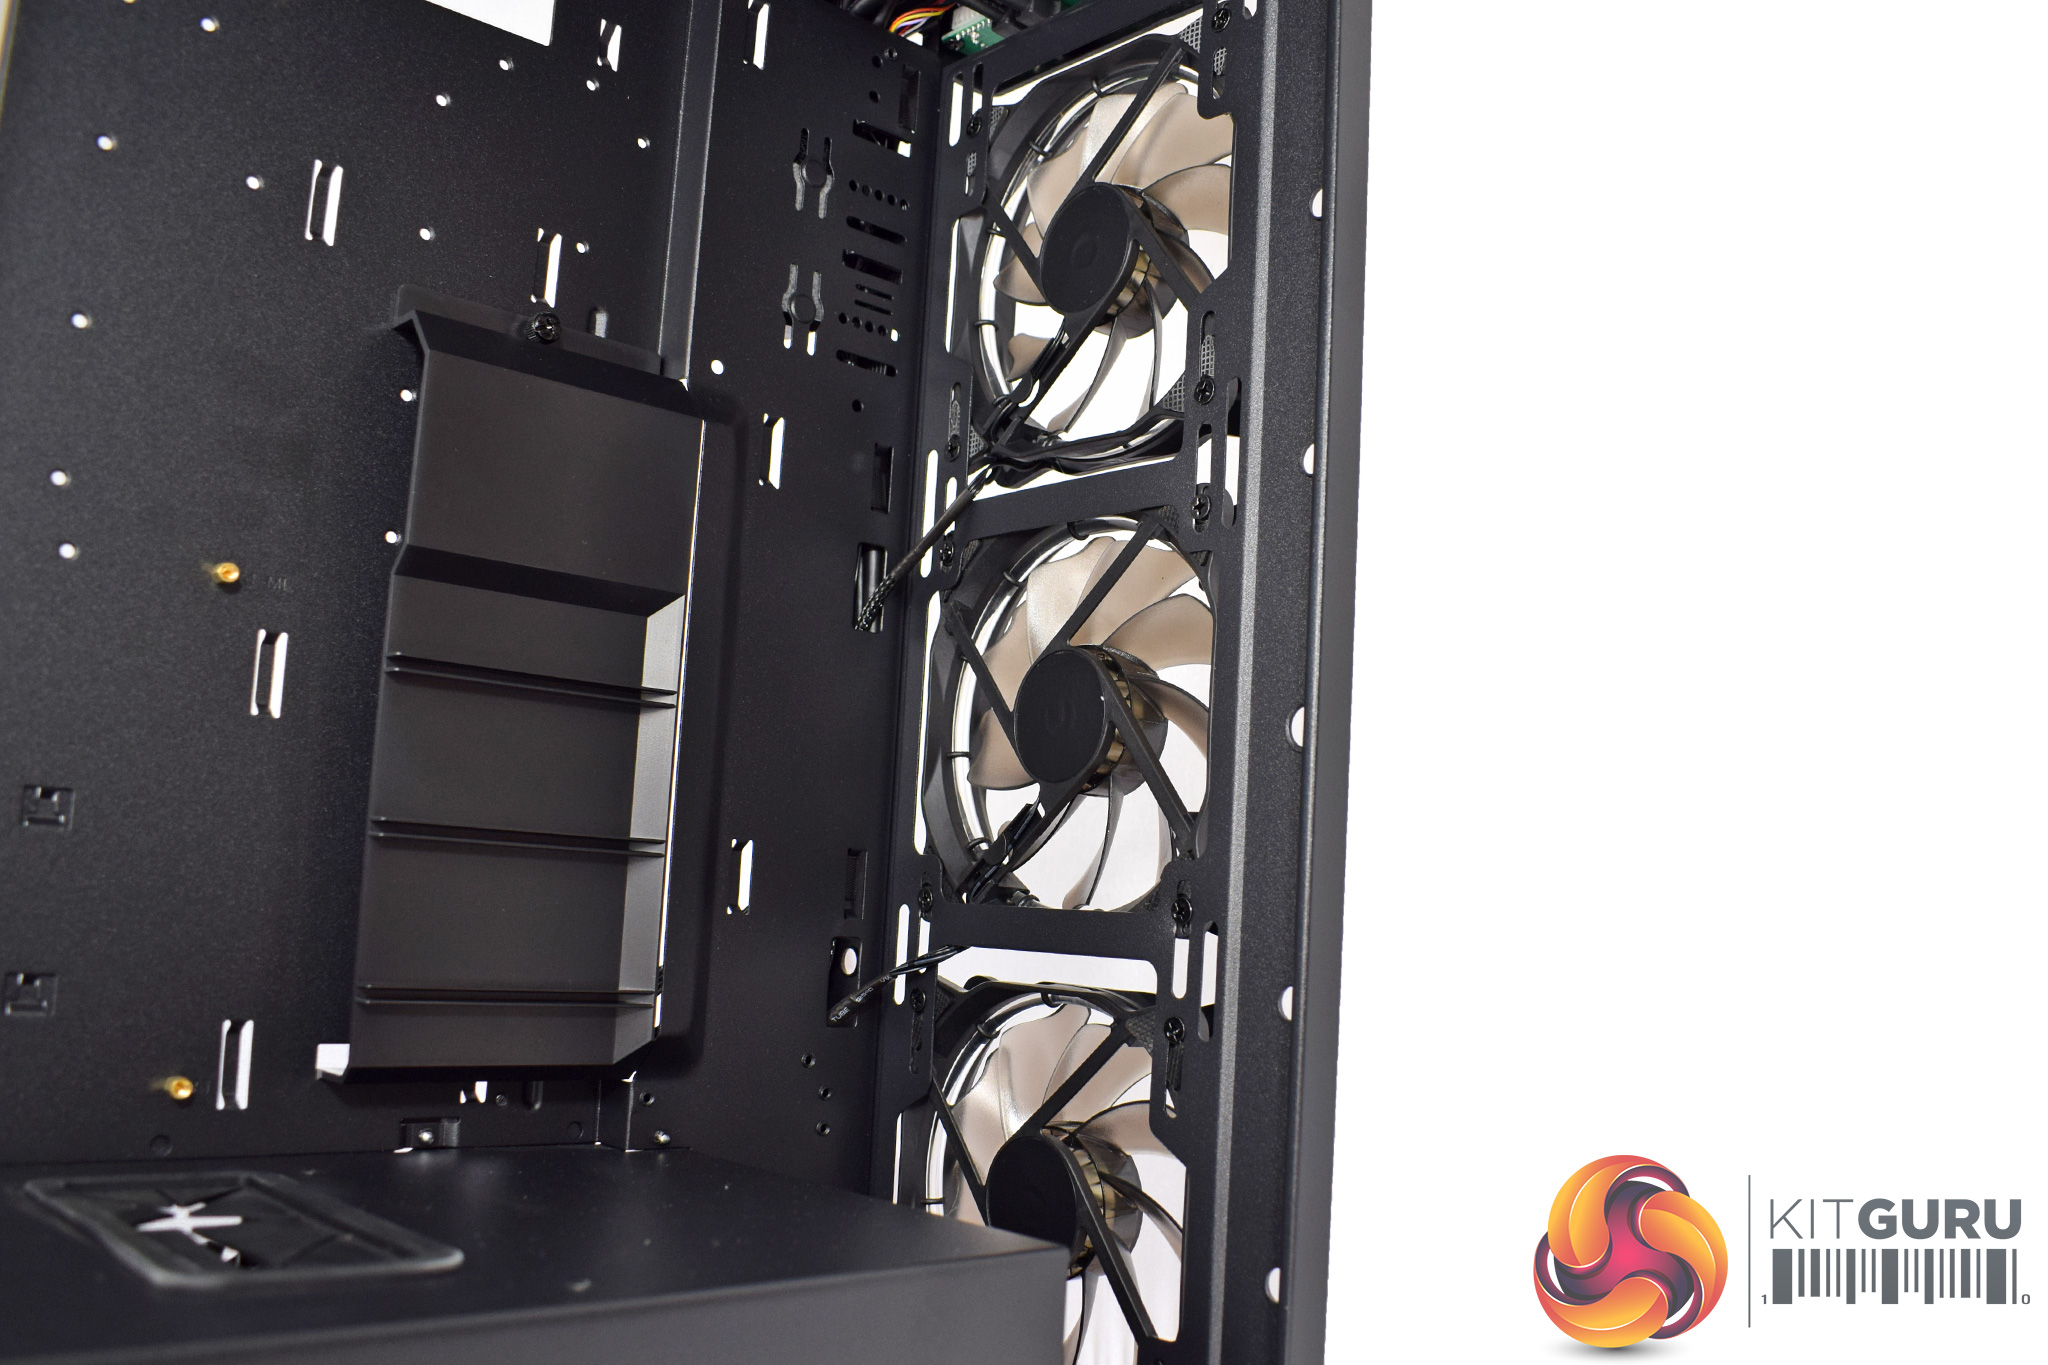
At the front of case, we find 3x120mm fans, pre-installed. These are RGB fans and actually arrived already hooked up to the front-panel fan controller.
The front of the Sapphire RGB is also a great place for a radiator if you are planning a custom waterloop – it can hold radiators up to 420mm (3x140mm) in size, and it looks like you may even be able to fit some 60mm-thick rads in there as well, although Game Max have not actually specified maximum thickness.
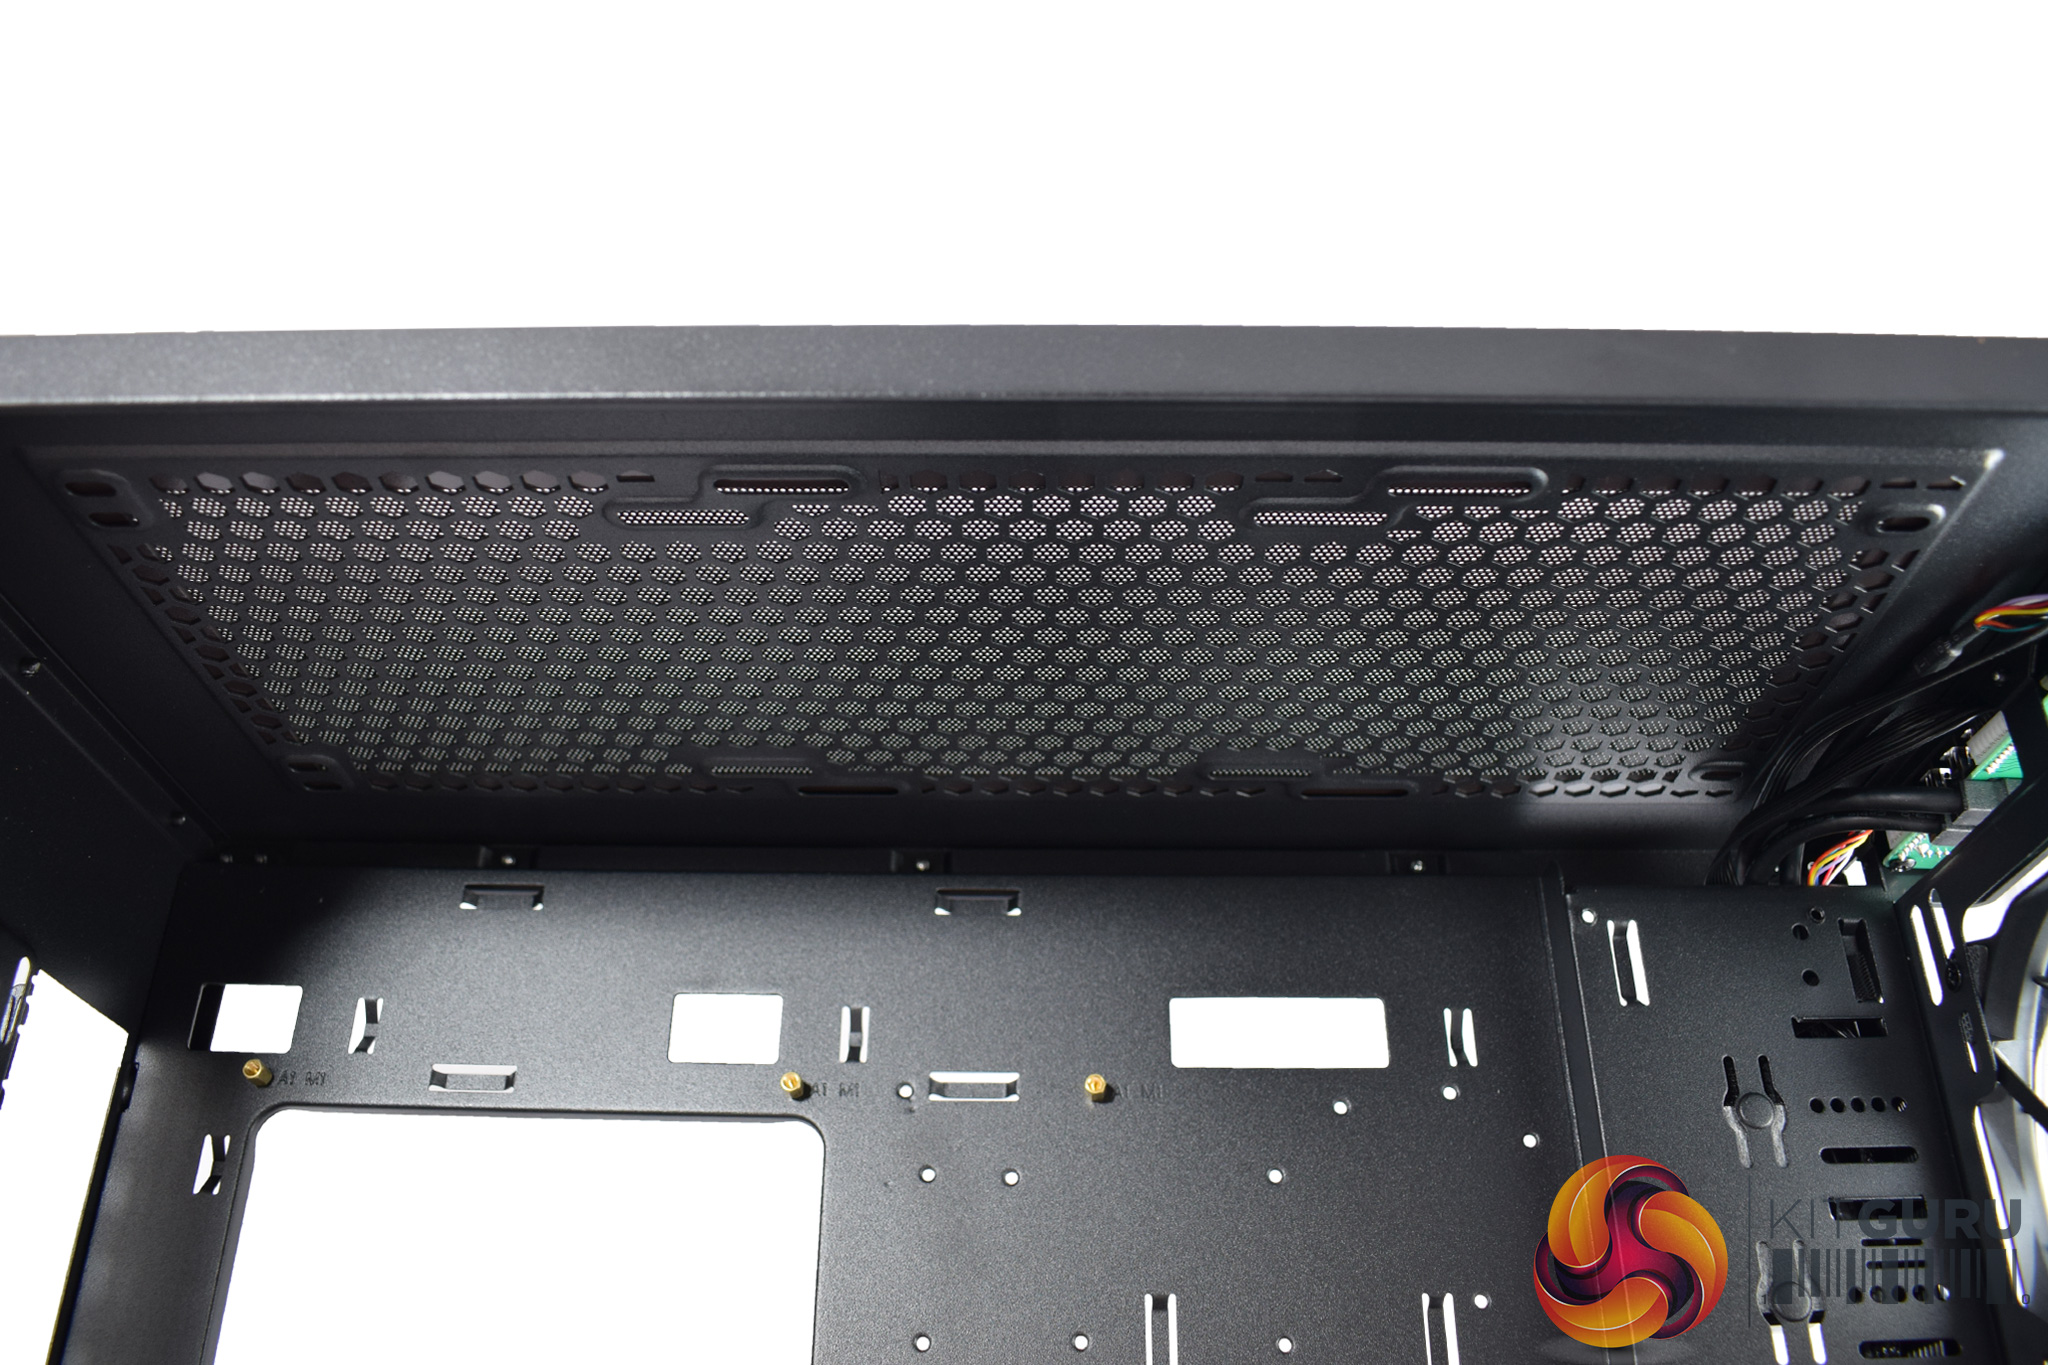
The roof also offers more space for fans or radiators, with 3x 120mm fans, or 2x 140mm, supported. A radiator could also fit up here, though you are restricted to slimmer models (something I learnt the hard way, as you will see on the next page). A 30mm radiator, plus fans, will fit no problem, though.
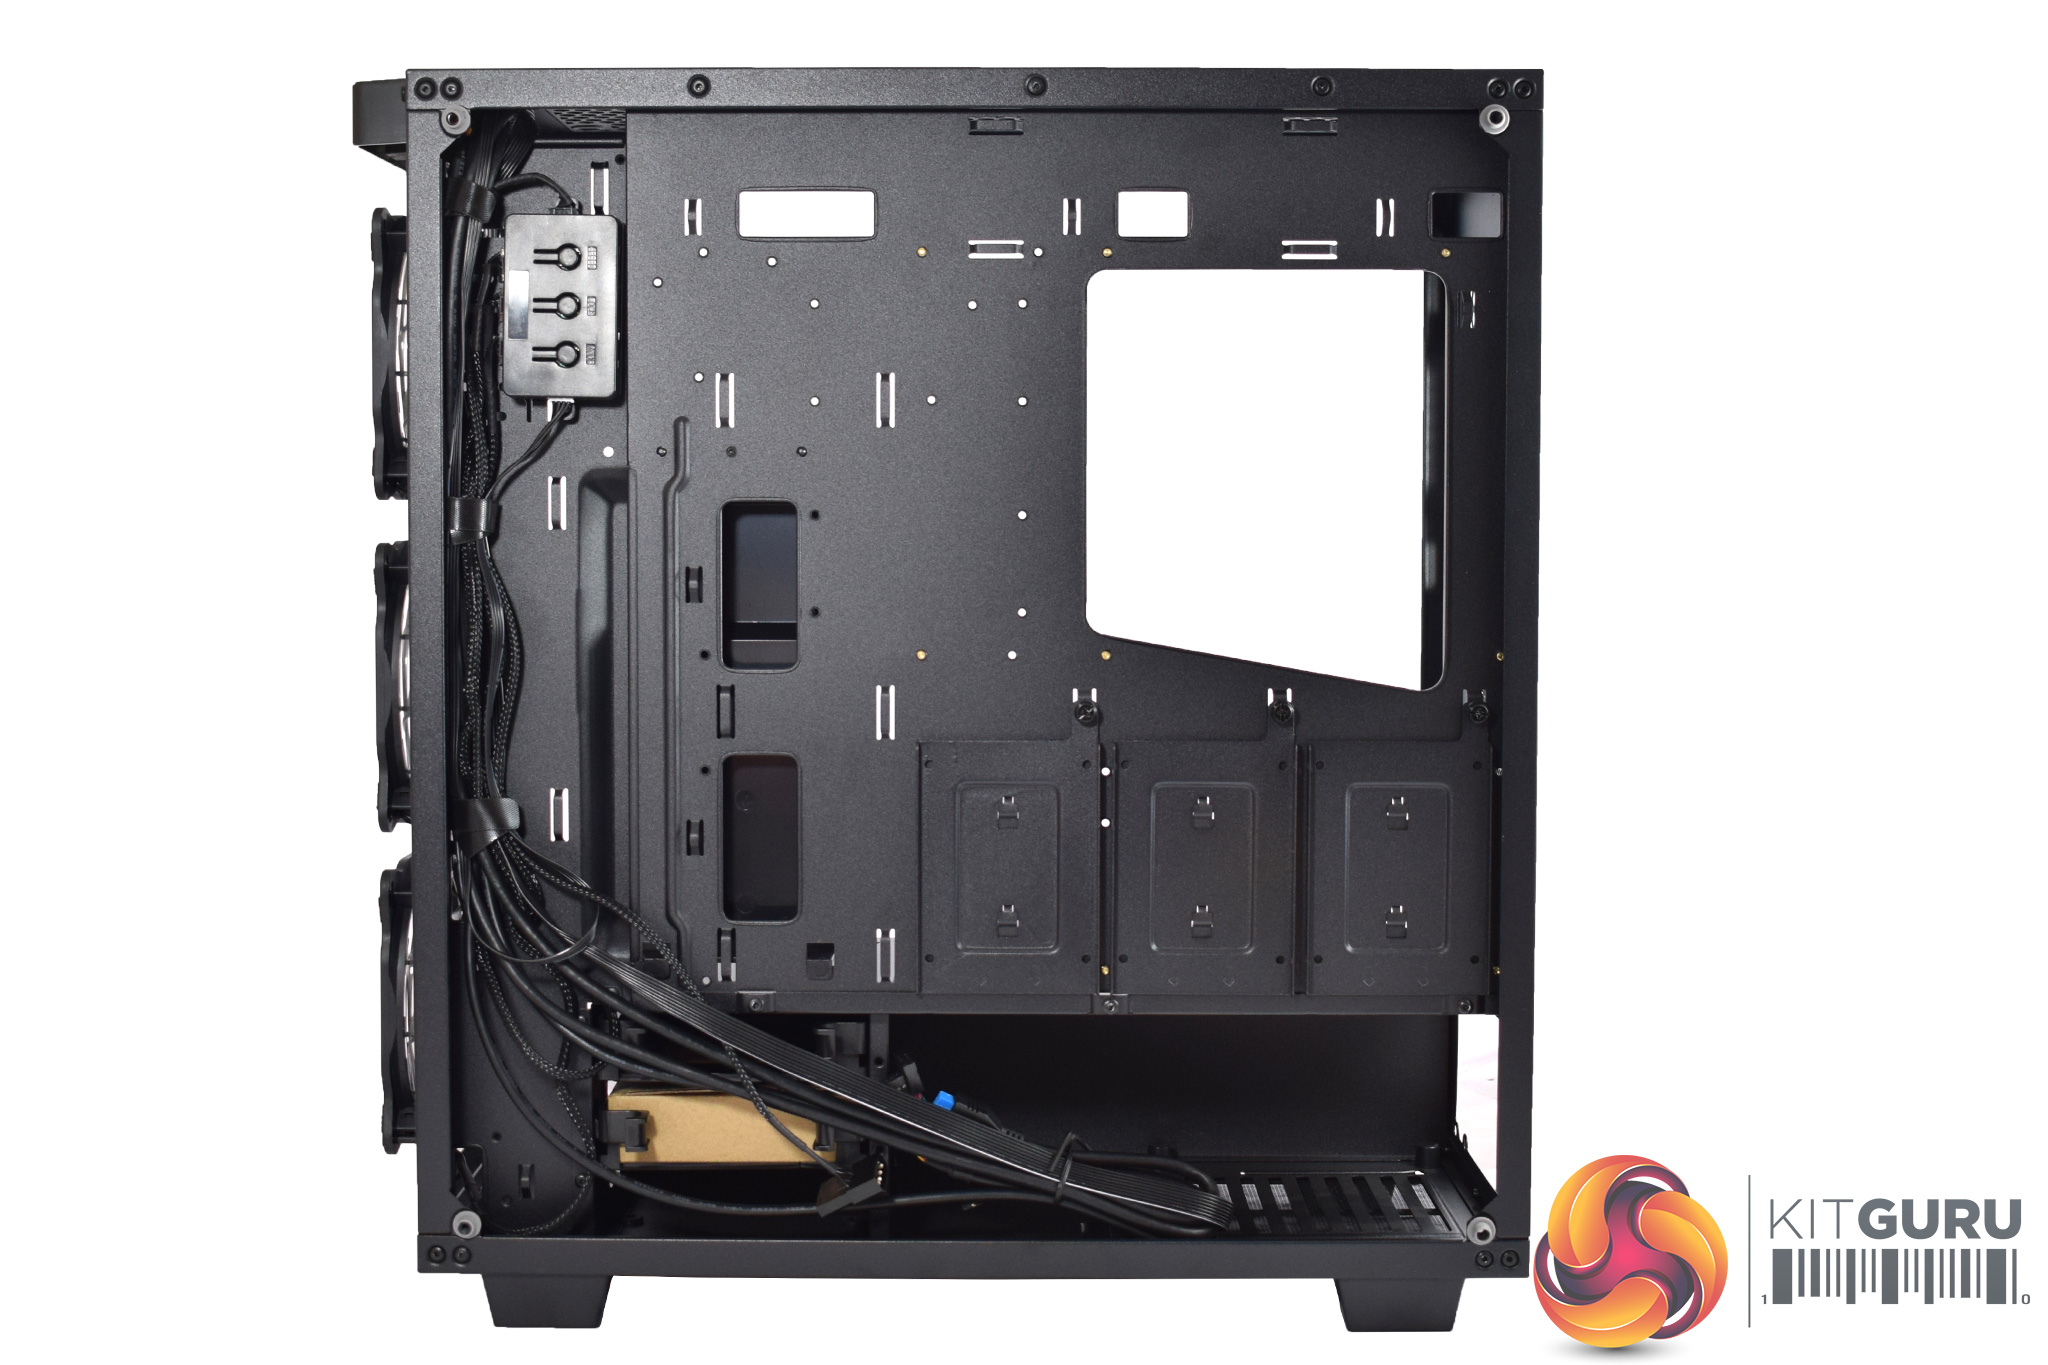
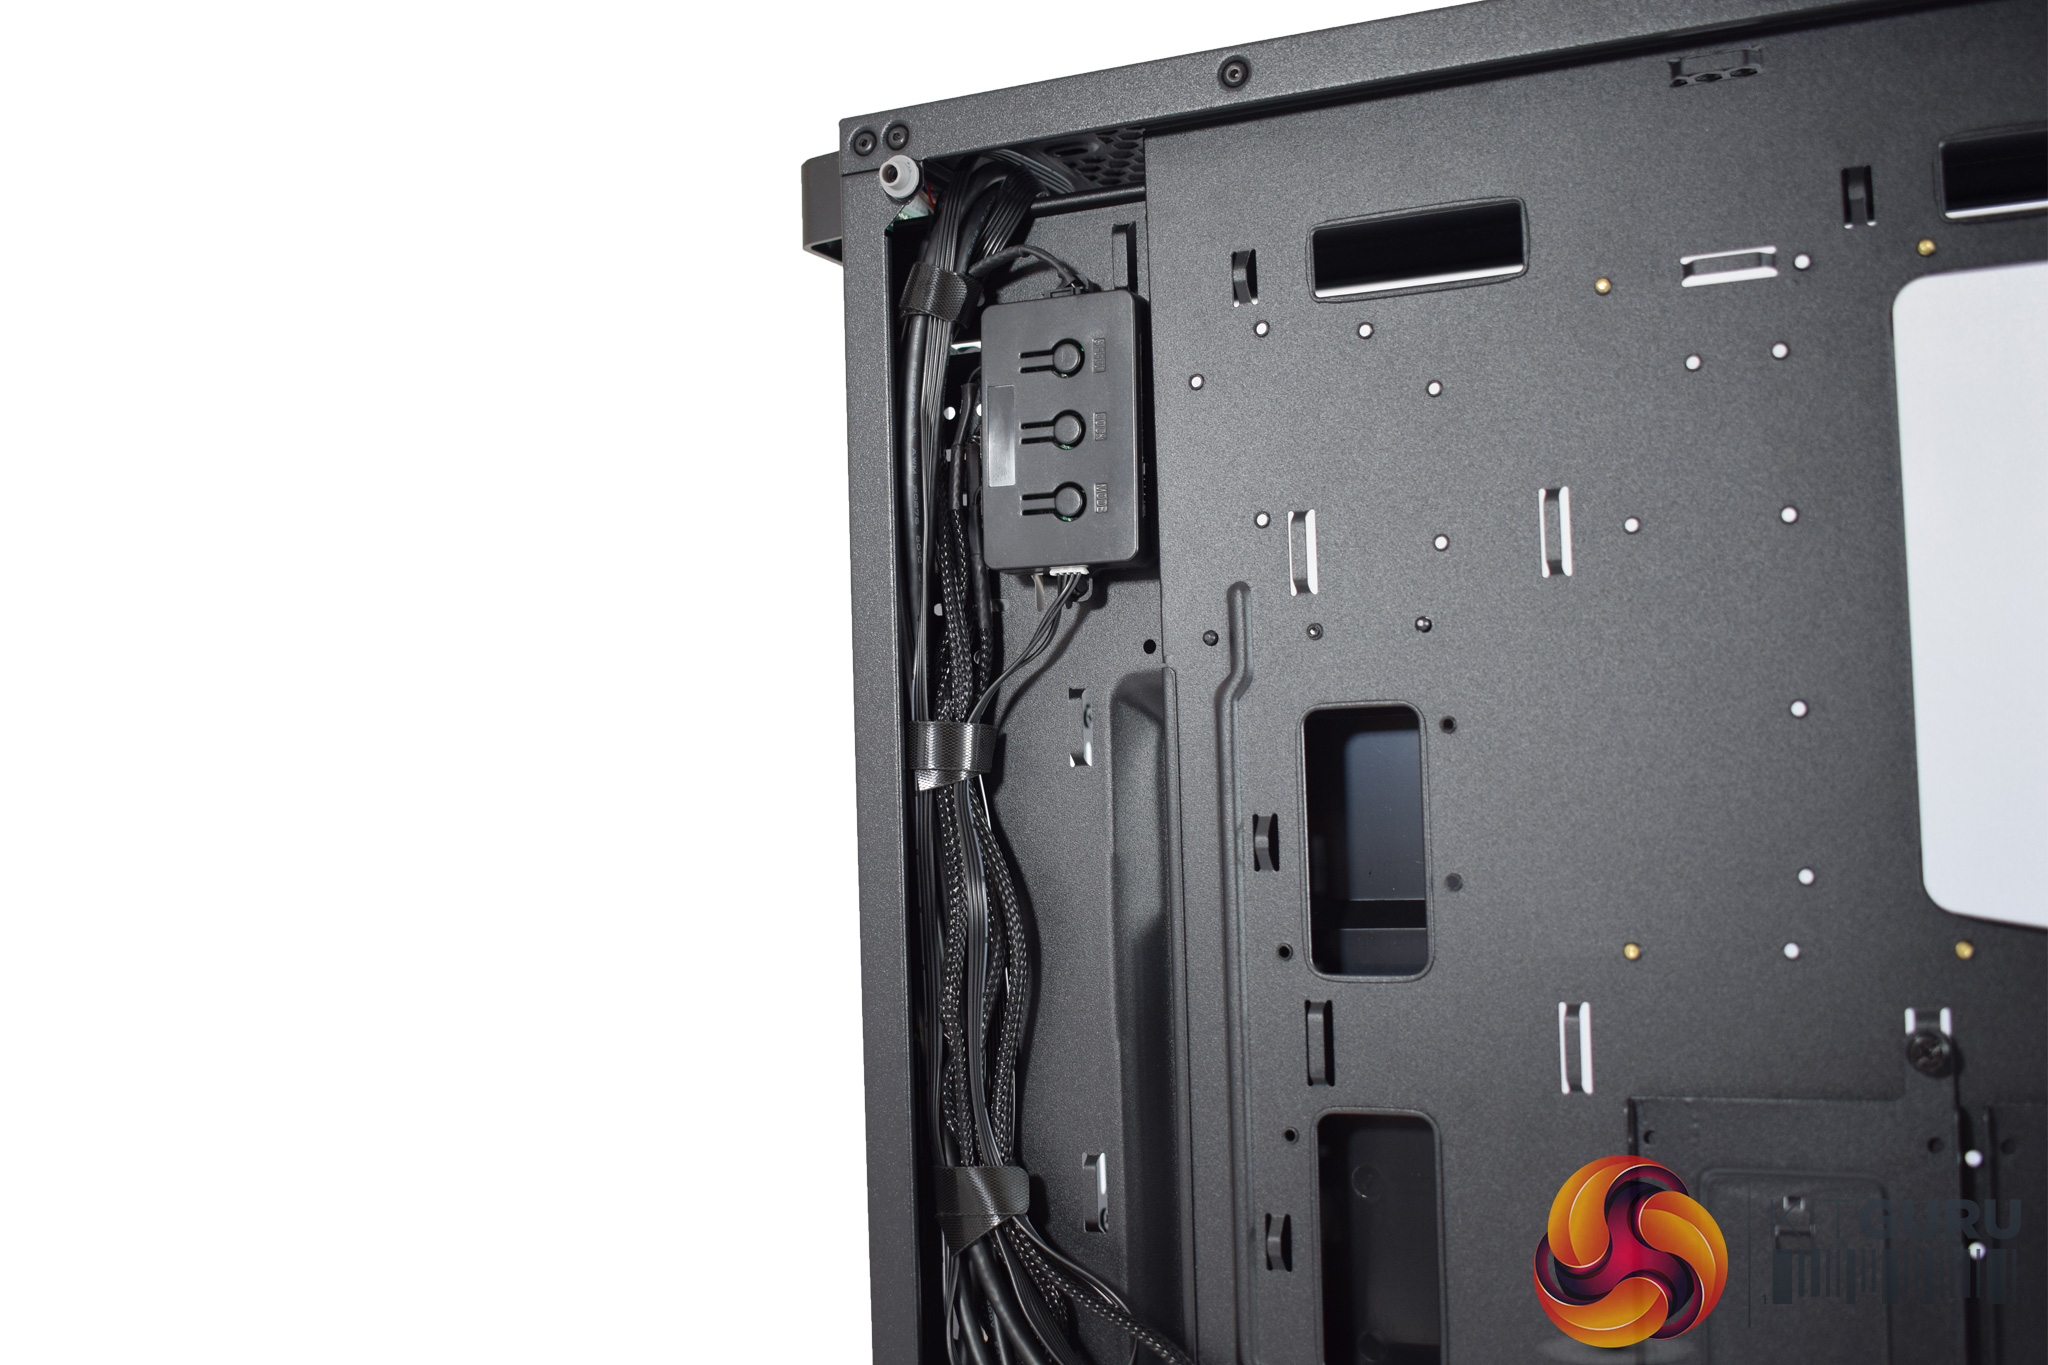
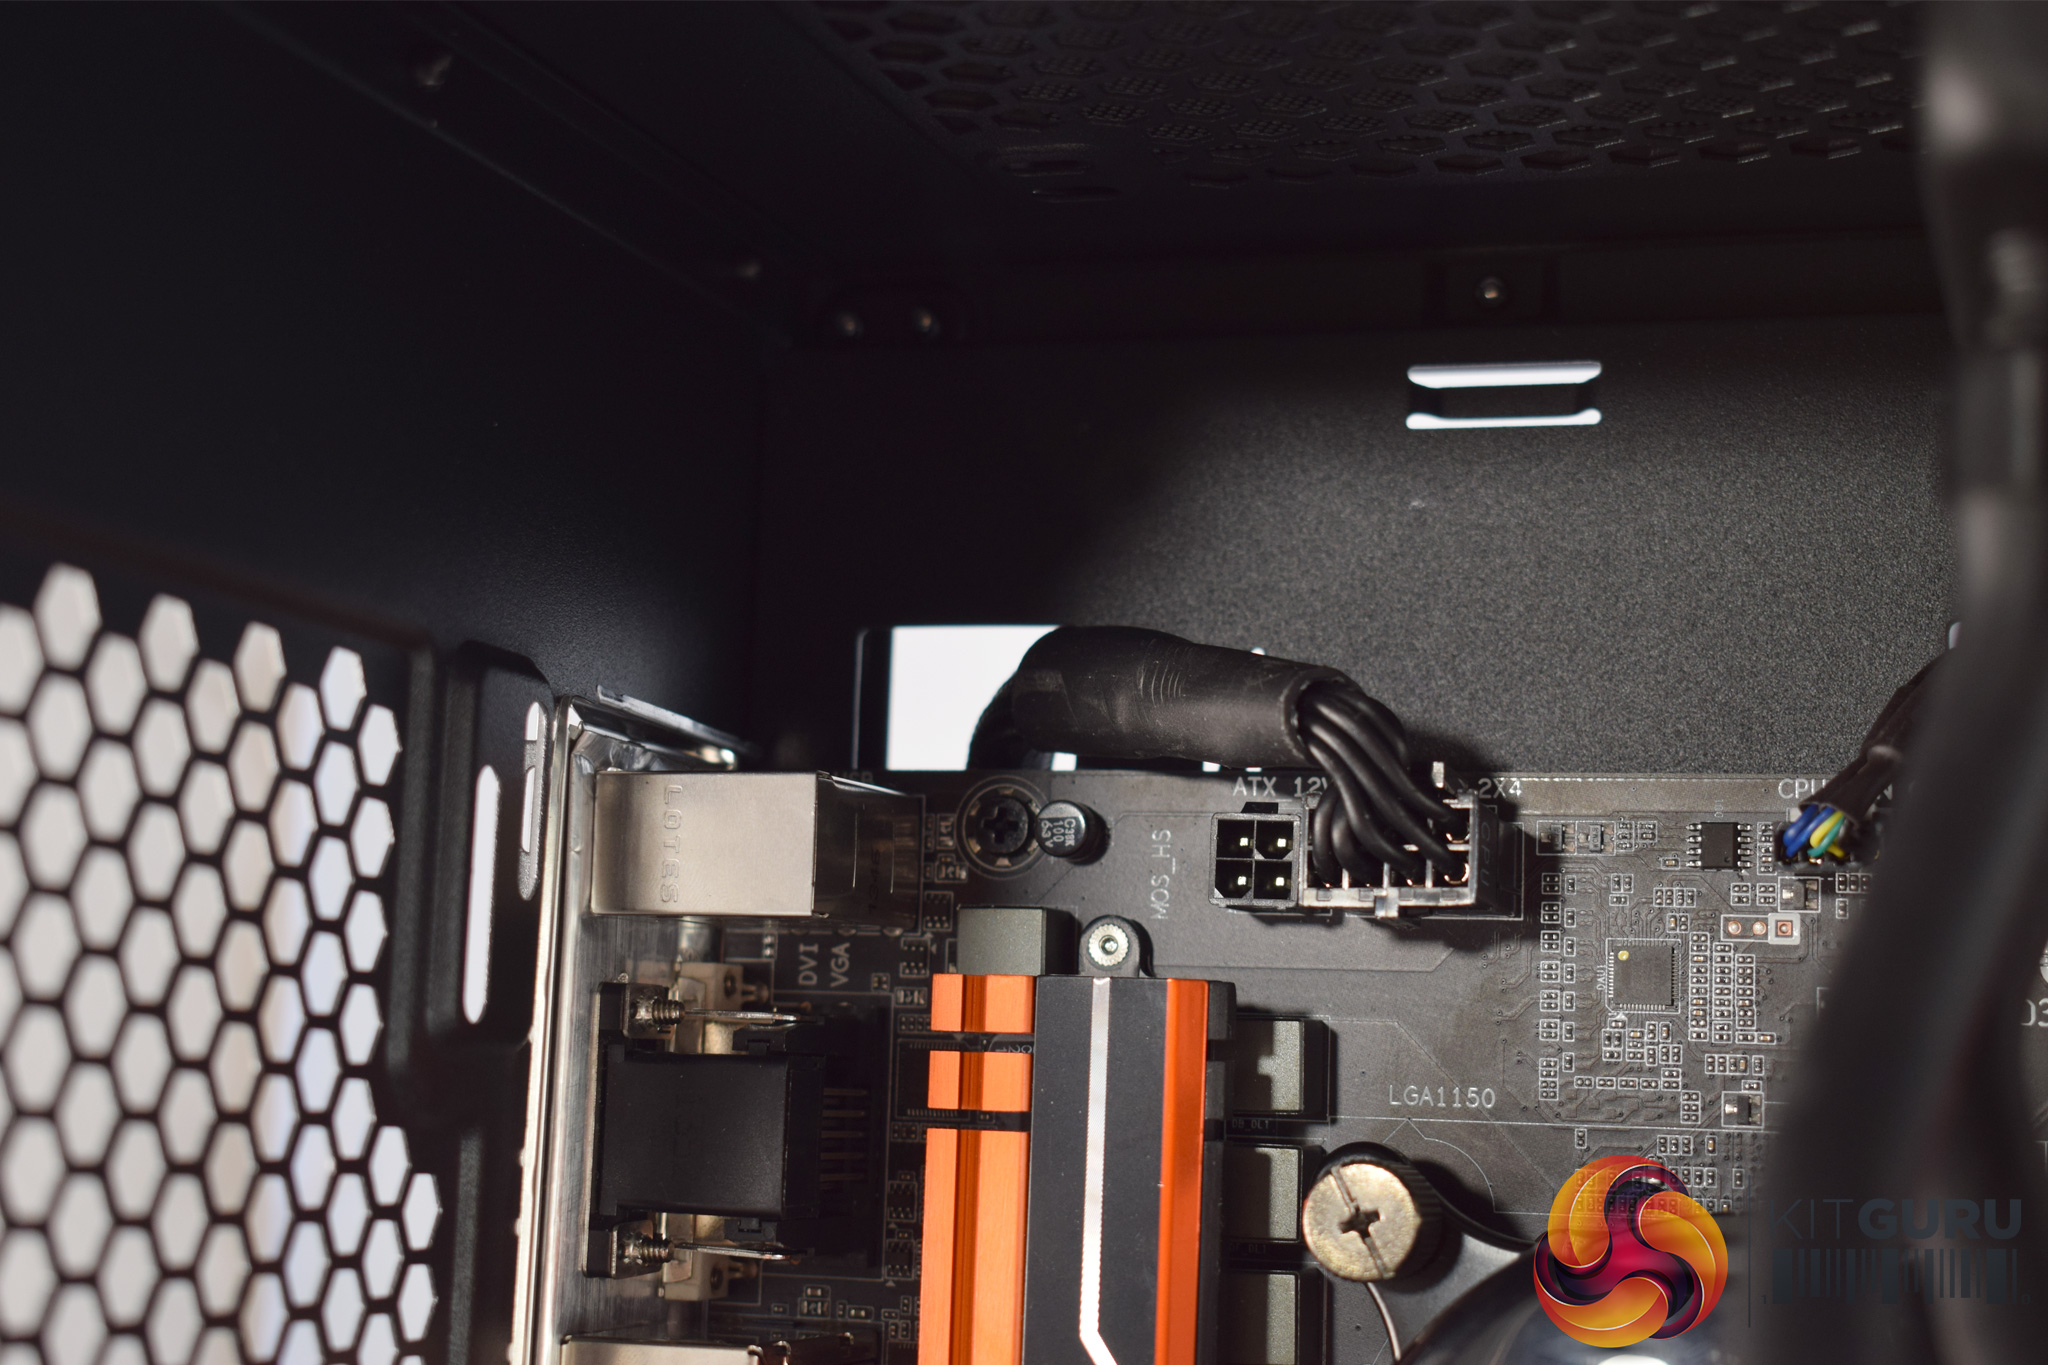
Moving round the back, it is good to see that Game Max has pre-routed the fan and front-panel connectors, and this should help when it comes to building in the chassis. Incidentally, the fan controller can also support up to 6 fans, so you can add your own and still have them controlled from the front panel.
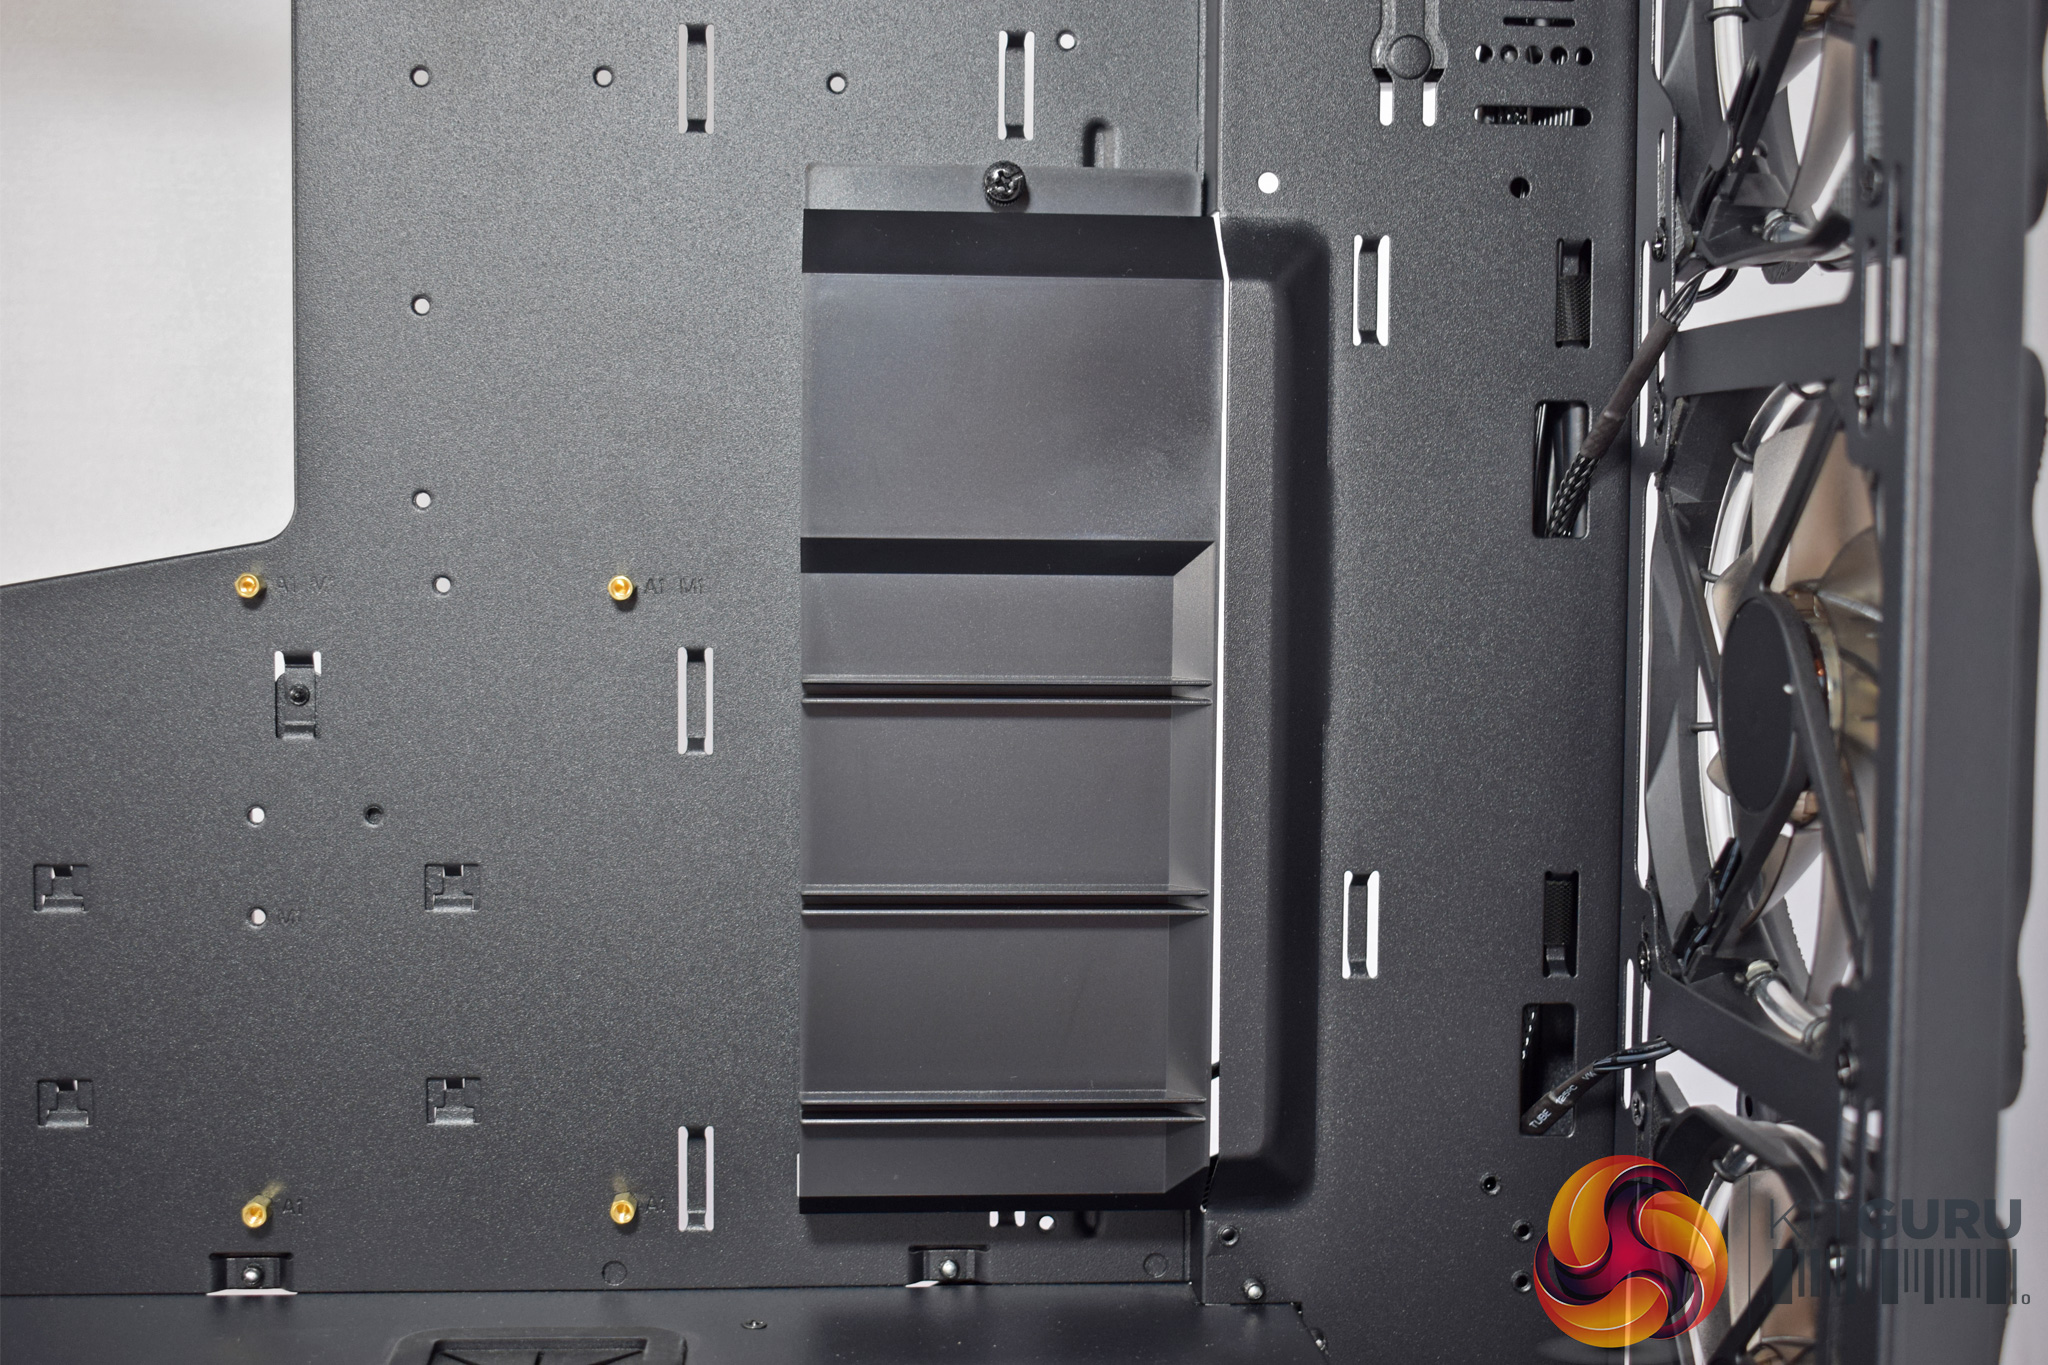
There are also 3 SSD/2.5-in drive caddies positioned behind the motherboard tray, held in-place with a single thumbscrew.
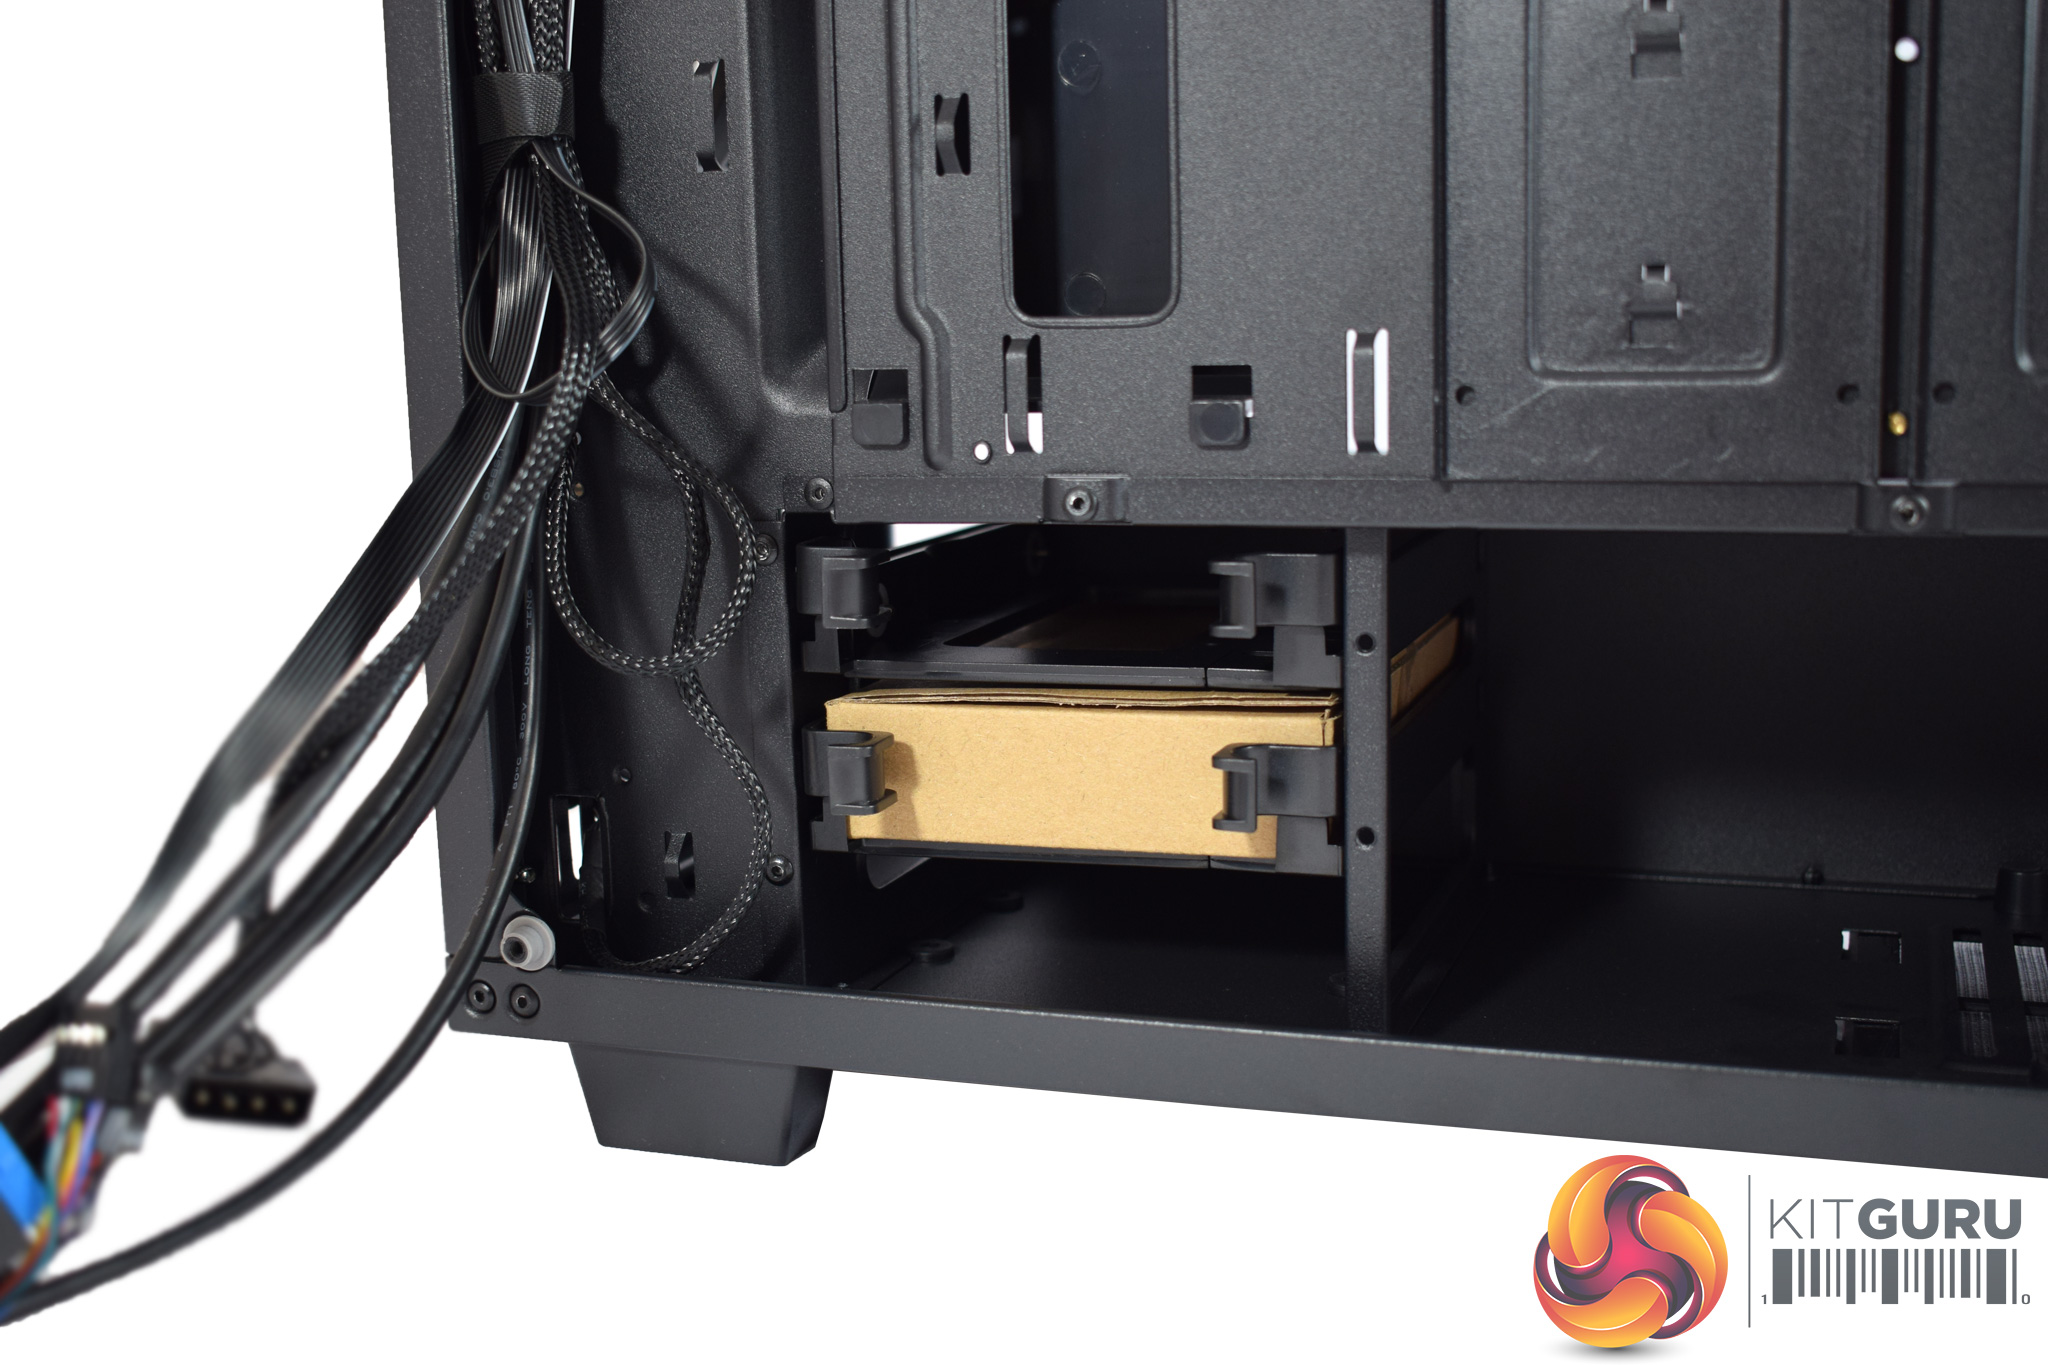
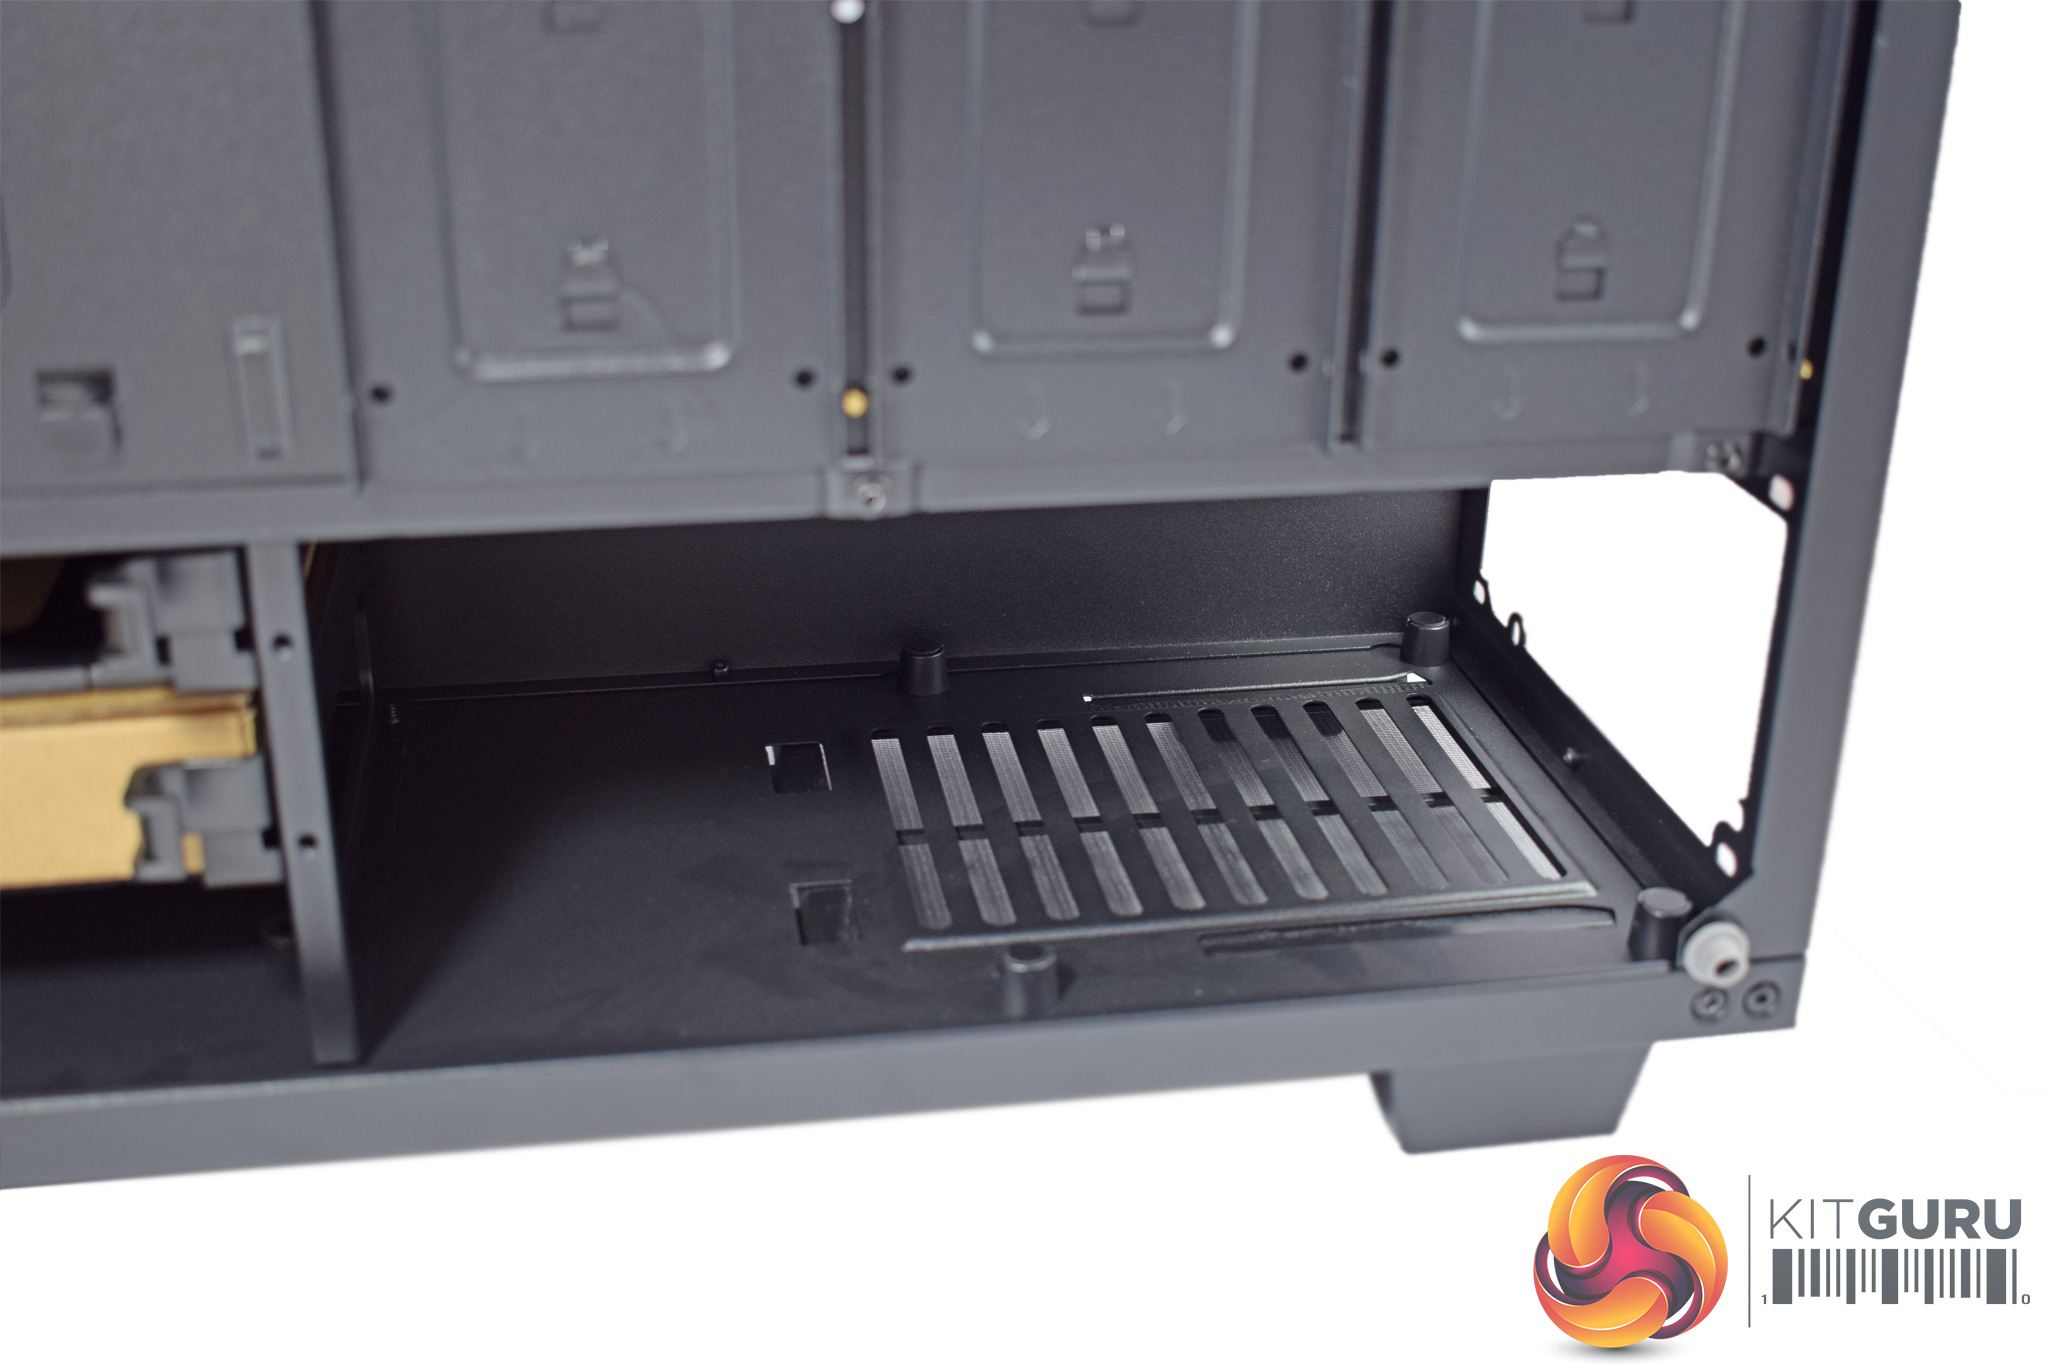
In the bottom-left, underneath the PSU shroud, is a small drive cage, capable of housing 2x 3.5-in HDDs. The drive caddies are easily removable and installation is tool-free, something I always appreciate.
In the bottom-right corner there is also a well-sized PSU dust-filter that can slide out for easy cleaning access.Here we present some pictures of our fully-built system, as well as a discussion of the pros and cons of building in the Sapphire RGB.
All-in-all, I was pleased with how the build turned out, and building in the Sapphire RGB is enjoyable and pretty easy.
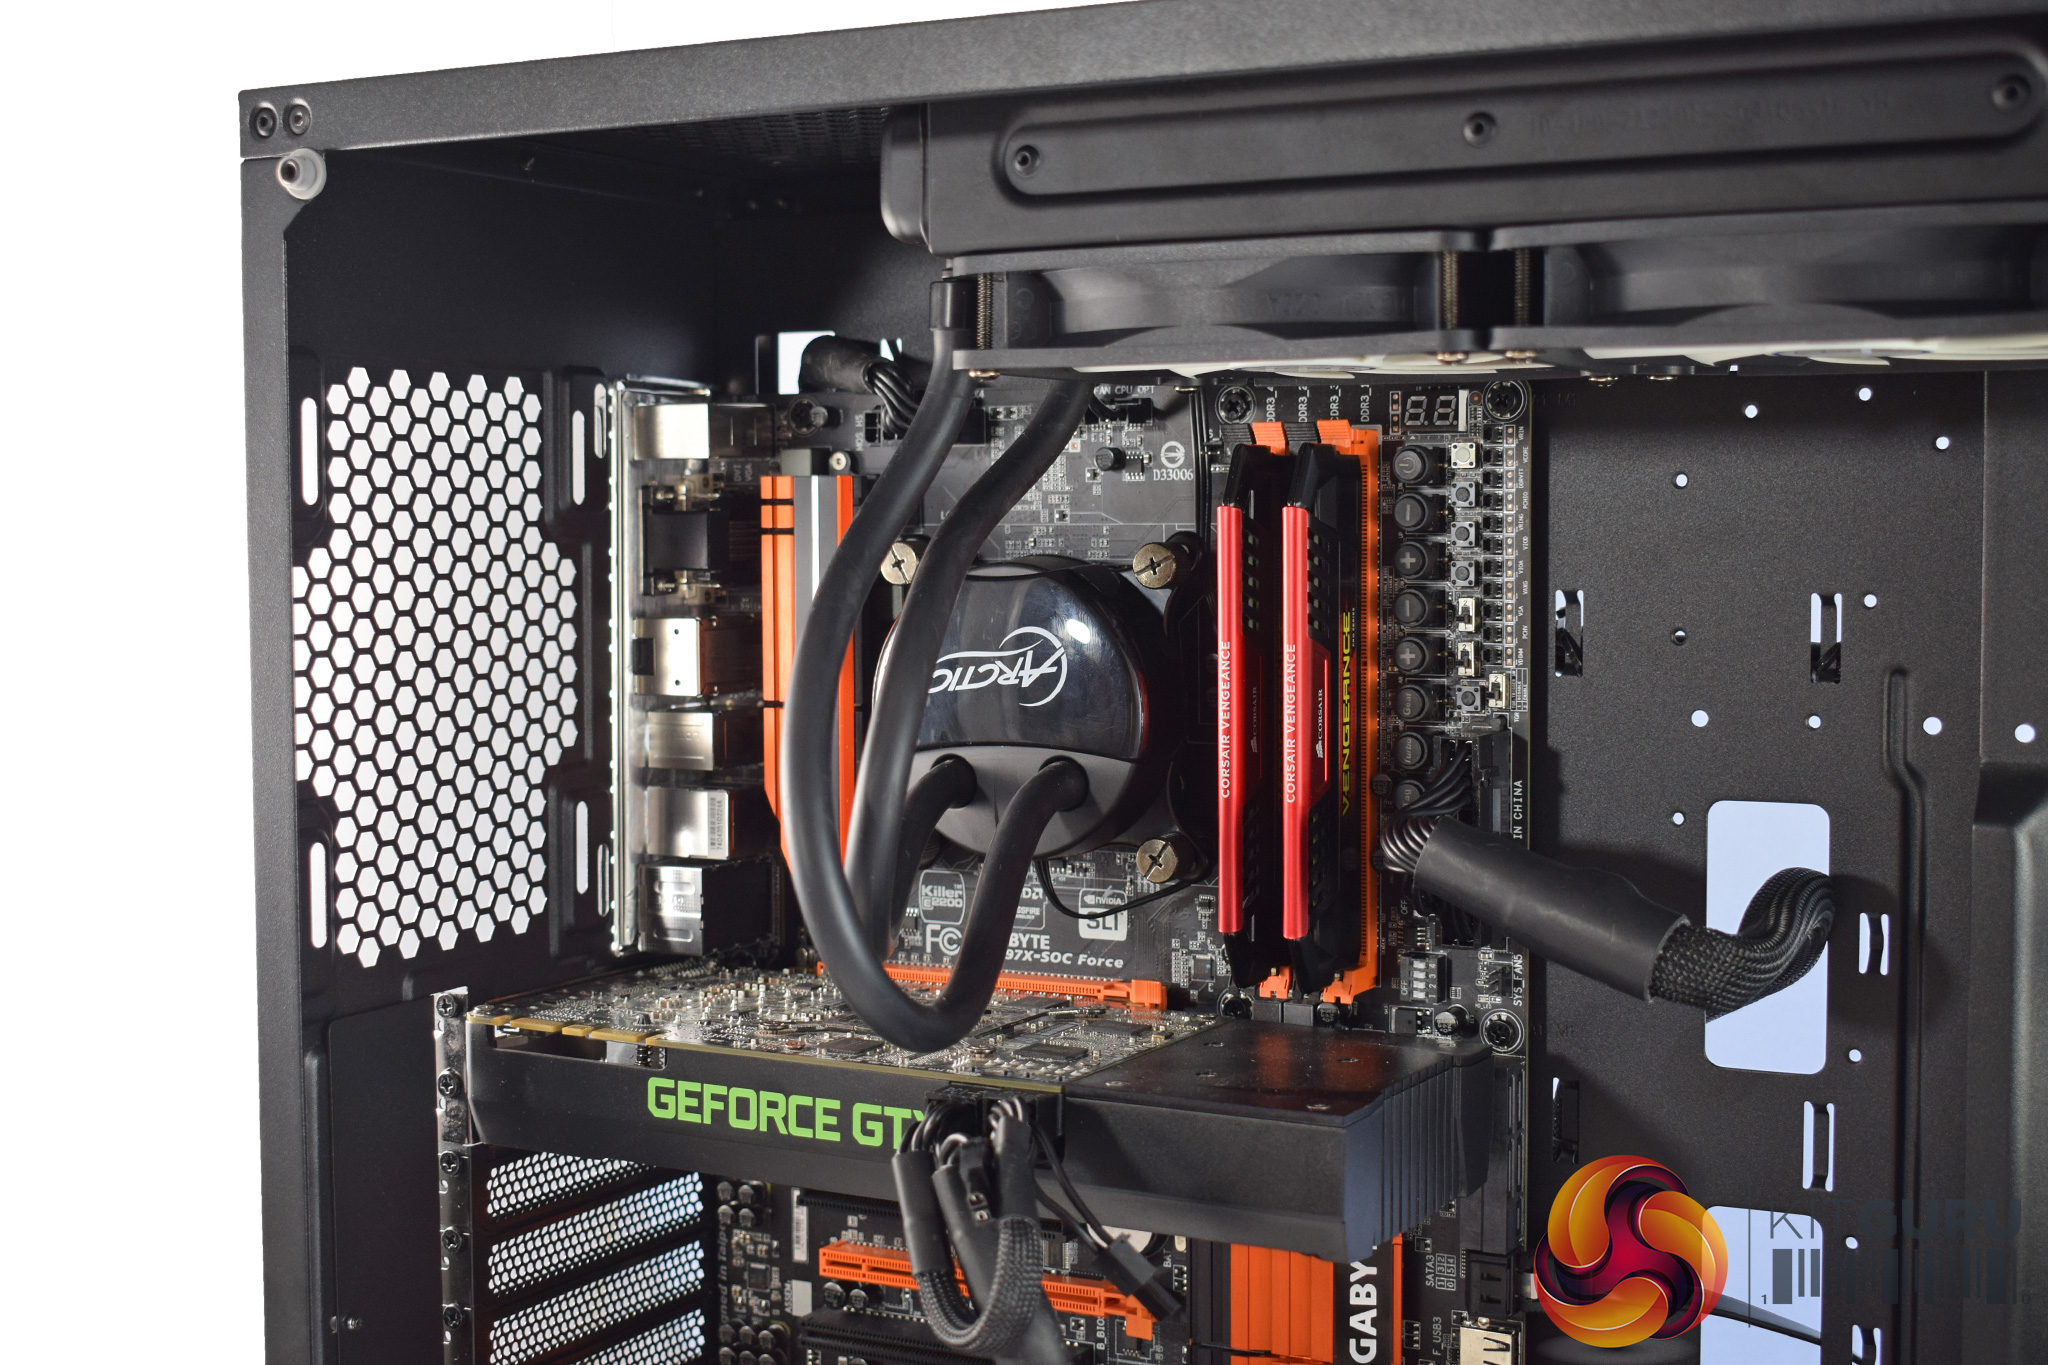
You may be wondering about the radiator placement, as it is certainly ‘unorthodox' to say the least, so I will address that first. Right from the off, I wanted to put an AIO liquid cooler in this case, as I would imagine most people buying a £150 tempered glass case are either going for an AIO or custom loop.
However, the only liquid cooler I currently have on-hand is the Arctic Liquid Freezer 240, and that is slightly thicker than other AIOs, measuring 38mm in thickness. This meant, once the CPU 8-pin power connector was installed, the radiator did not fit in the furthest-left mounting position. Thus, I moved it over to occupy the middle and furthest-right 120mm mounting positions.
However, I would not say this is a fault of the Sapphire RGB. A more conventional AIO, such as the Corsair H100i or NZXT Kraken X62, would fit in the roof just fine. It was my fault for not properly looking into the radiator height-limit for a roof-mounted AIO.
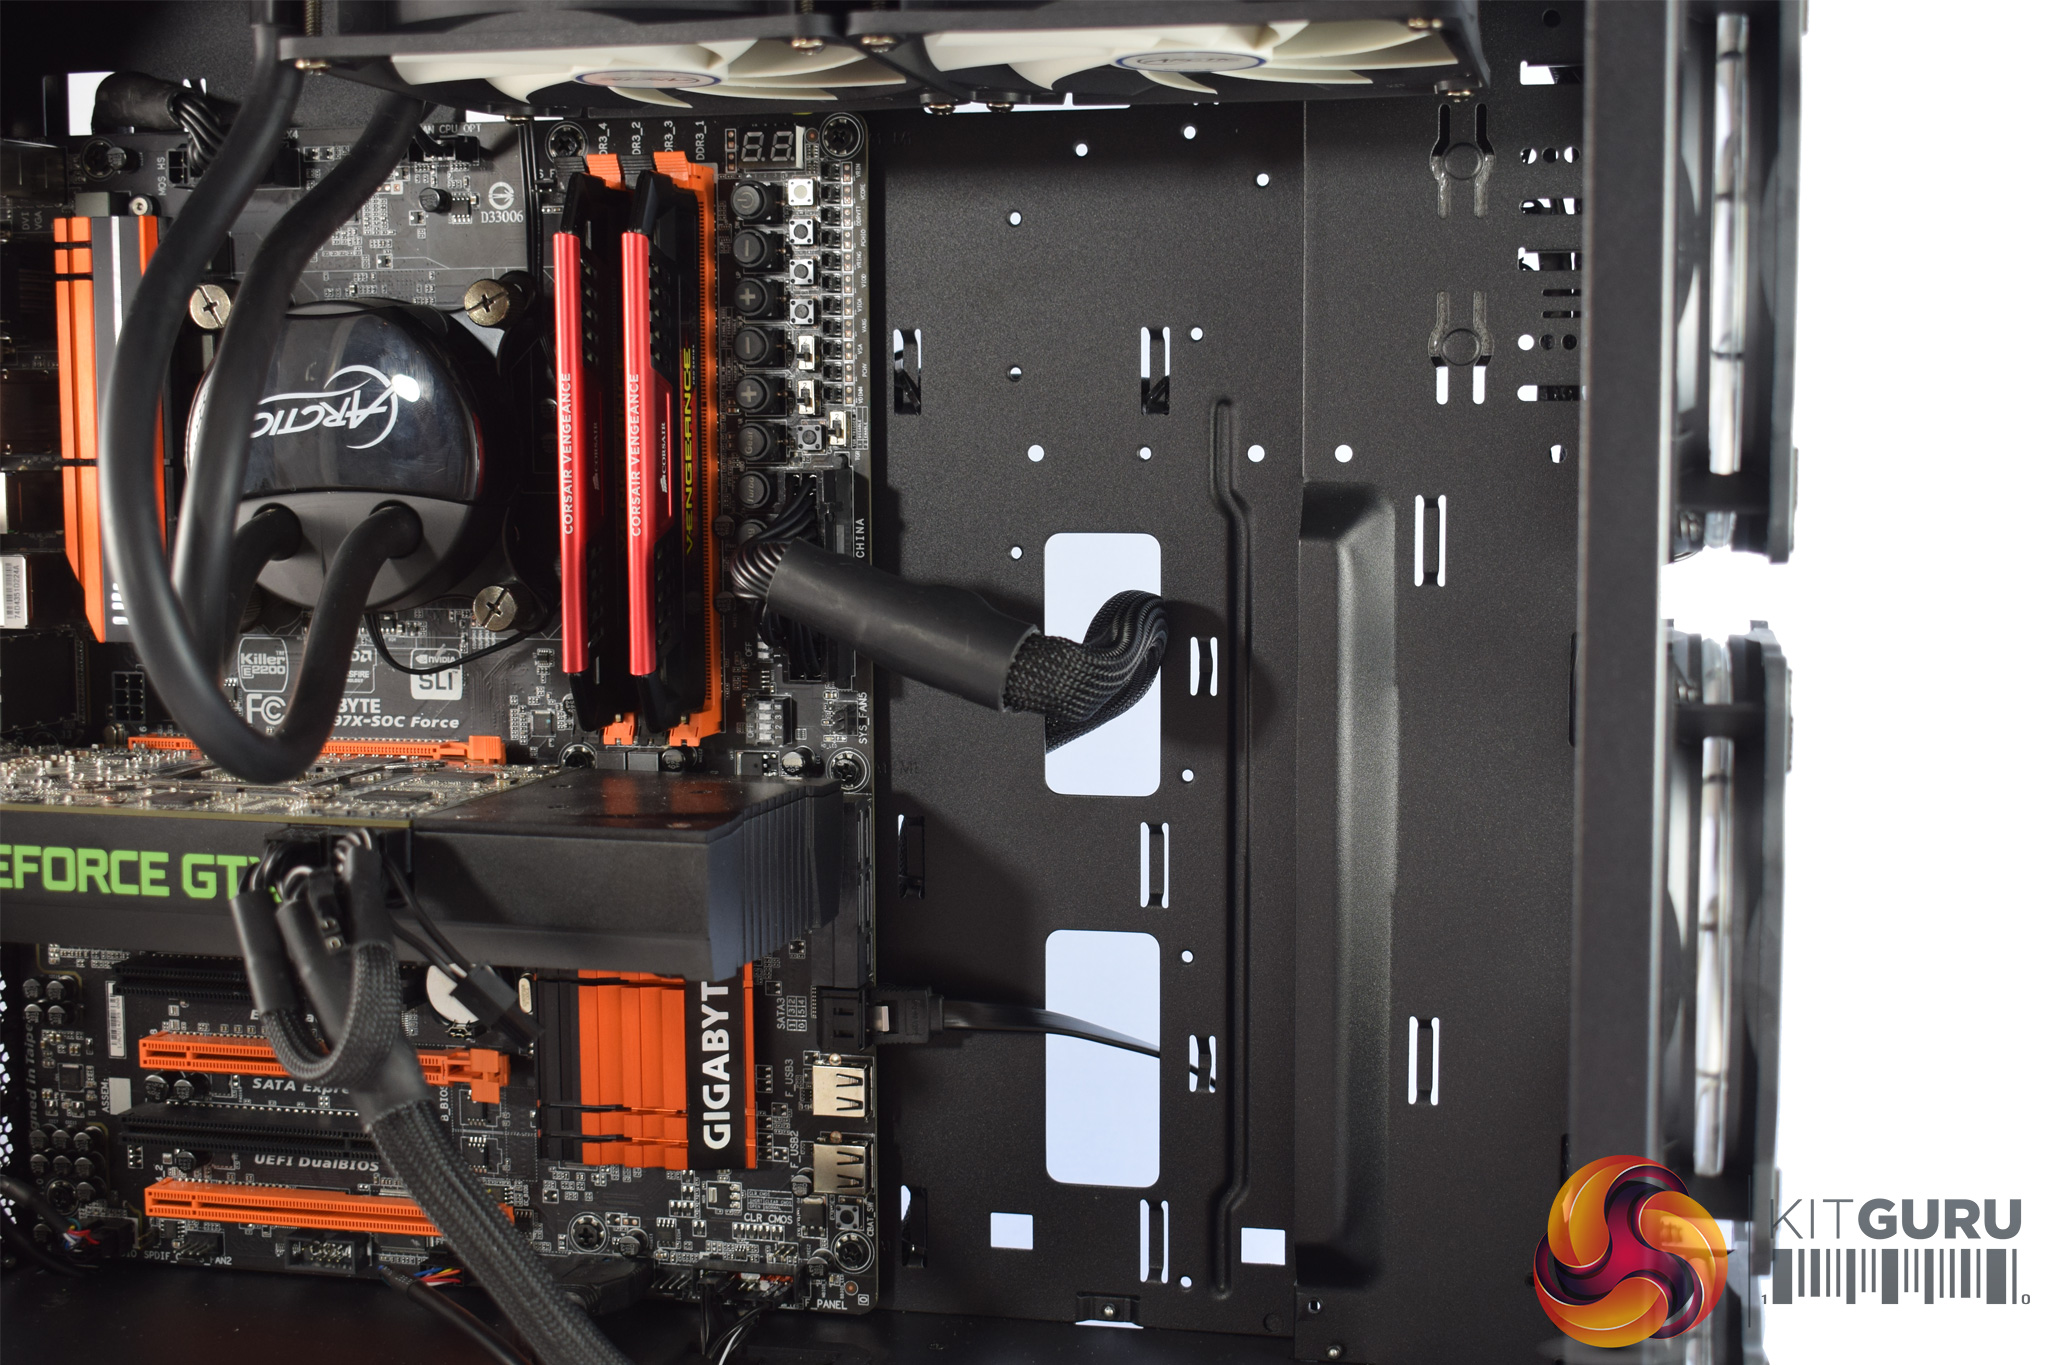
Elsewhere, I removed the GPU support bracket for two reasons: 1) the GTX 760 I used did not actually reach the bracket, rendering it pointless, and 2) it covers the two cable cut-outs, making it harder to route a 24-pin power cable. However, once it was out of the way, my cable came through fine and things were still nice and tidy.
There is also a perfectly-positioned cut-out in the top-corner for your CPU 8-pin connector, which also keeps the system looking tidy. However, as I mentioned on the previous page, there really should be some rubber grommets covering these cut-outs.
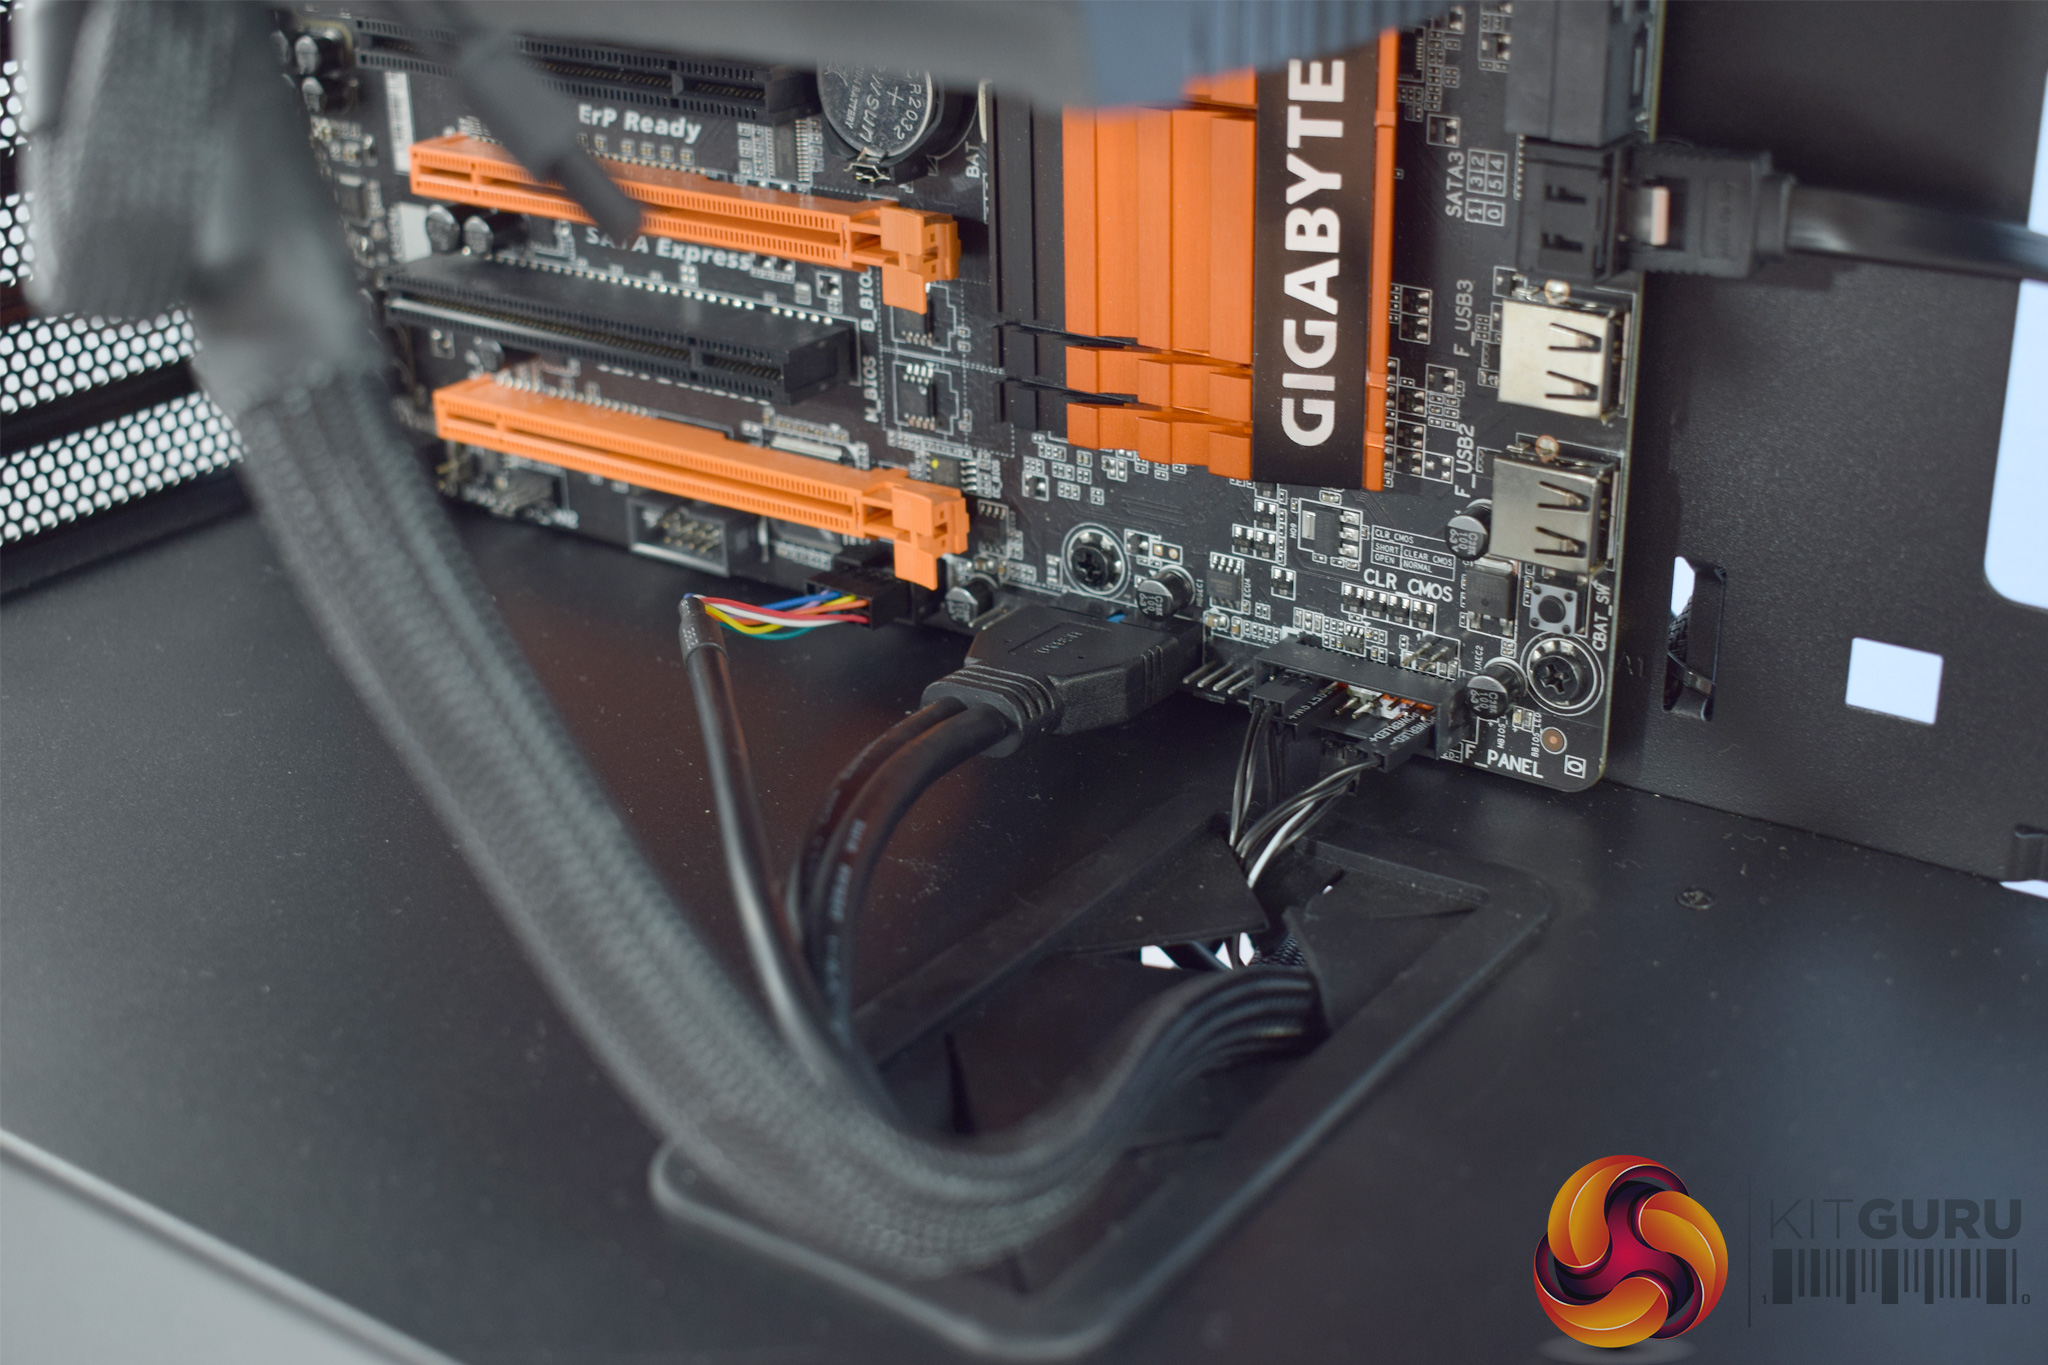
The only real issue I have (at the front of the chassis, at least) is with the front-panel connectors. There are only two cable cut-outs in the PSU shroud, and one is right in the corner, meaning it is only useful for the HD Audio connector. That means everything else (USB 3.0, USB 2.0, power button, HDD LED etc) has to come through the larger cut-out. It is only a minor issue, but I would have liked another cut-out in a more central position, as this would mean the USB 2.0 cable in particular would not have to trail as far as it does currently.
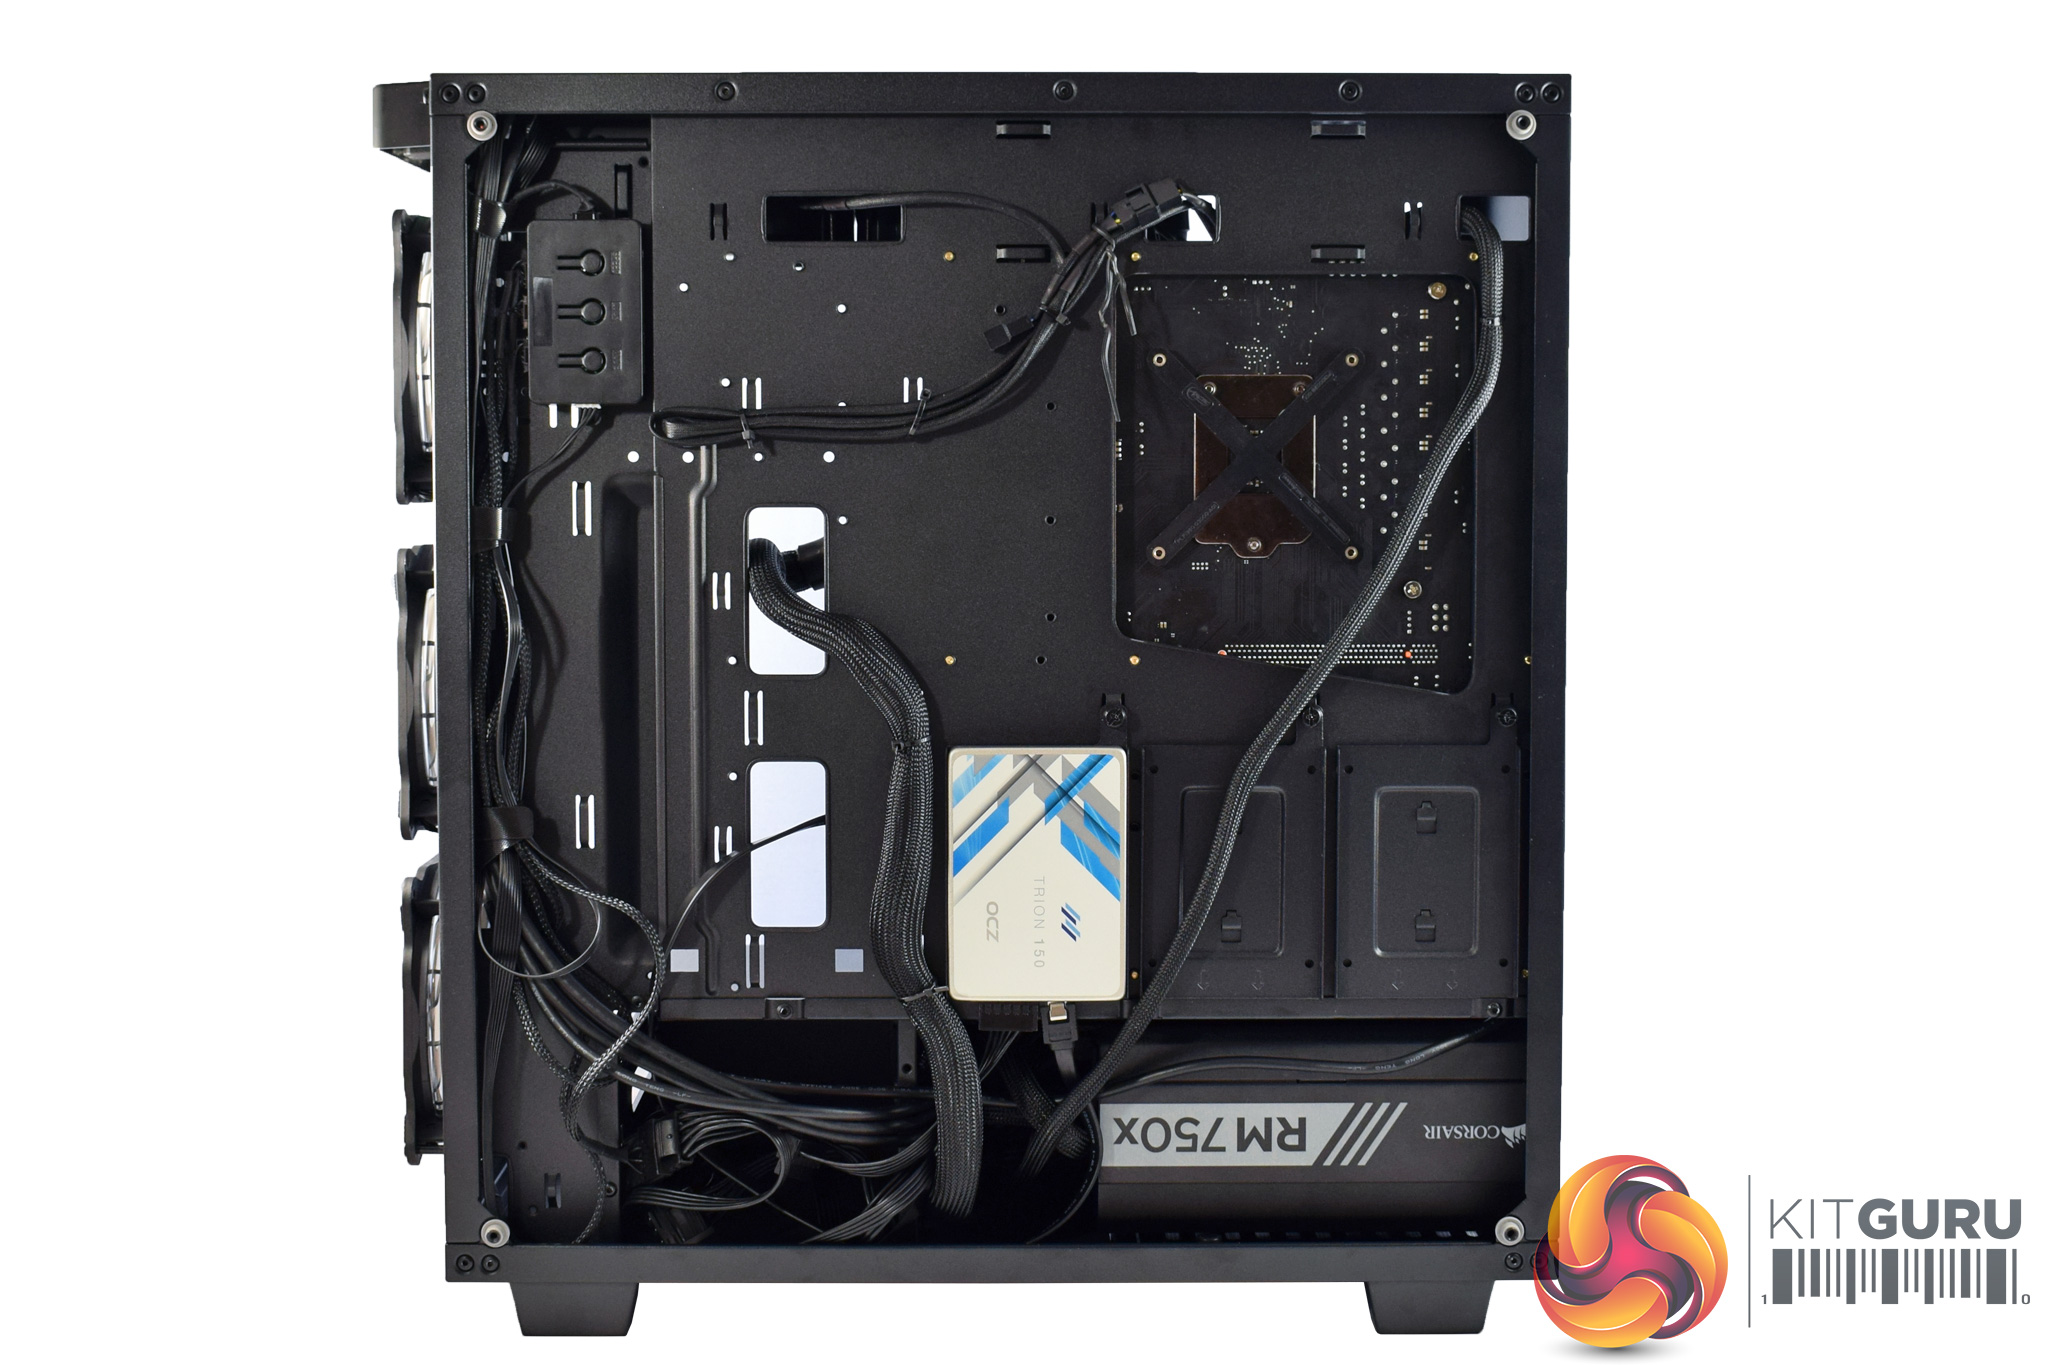
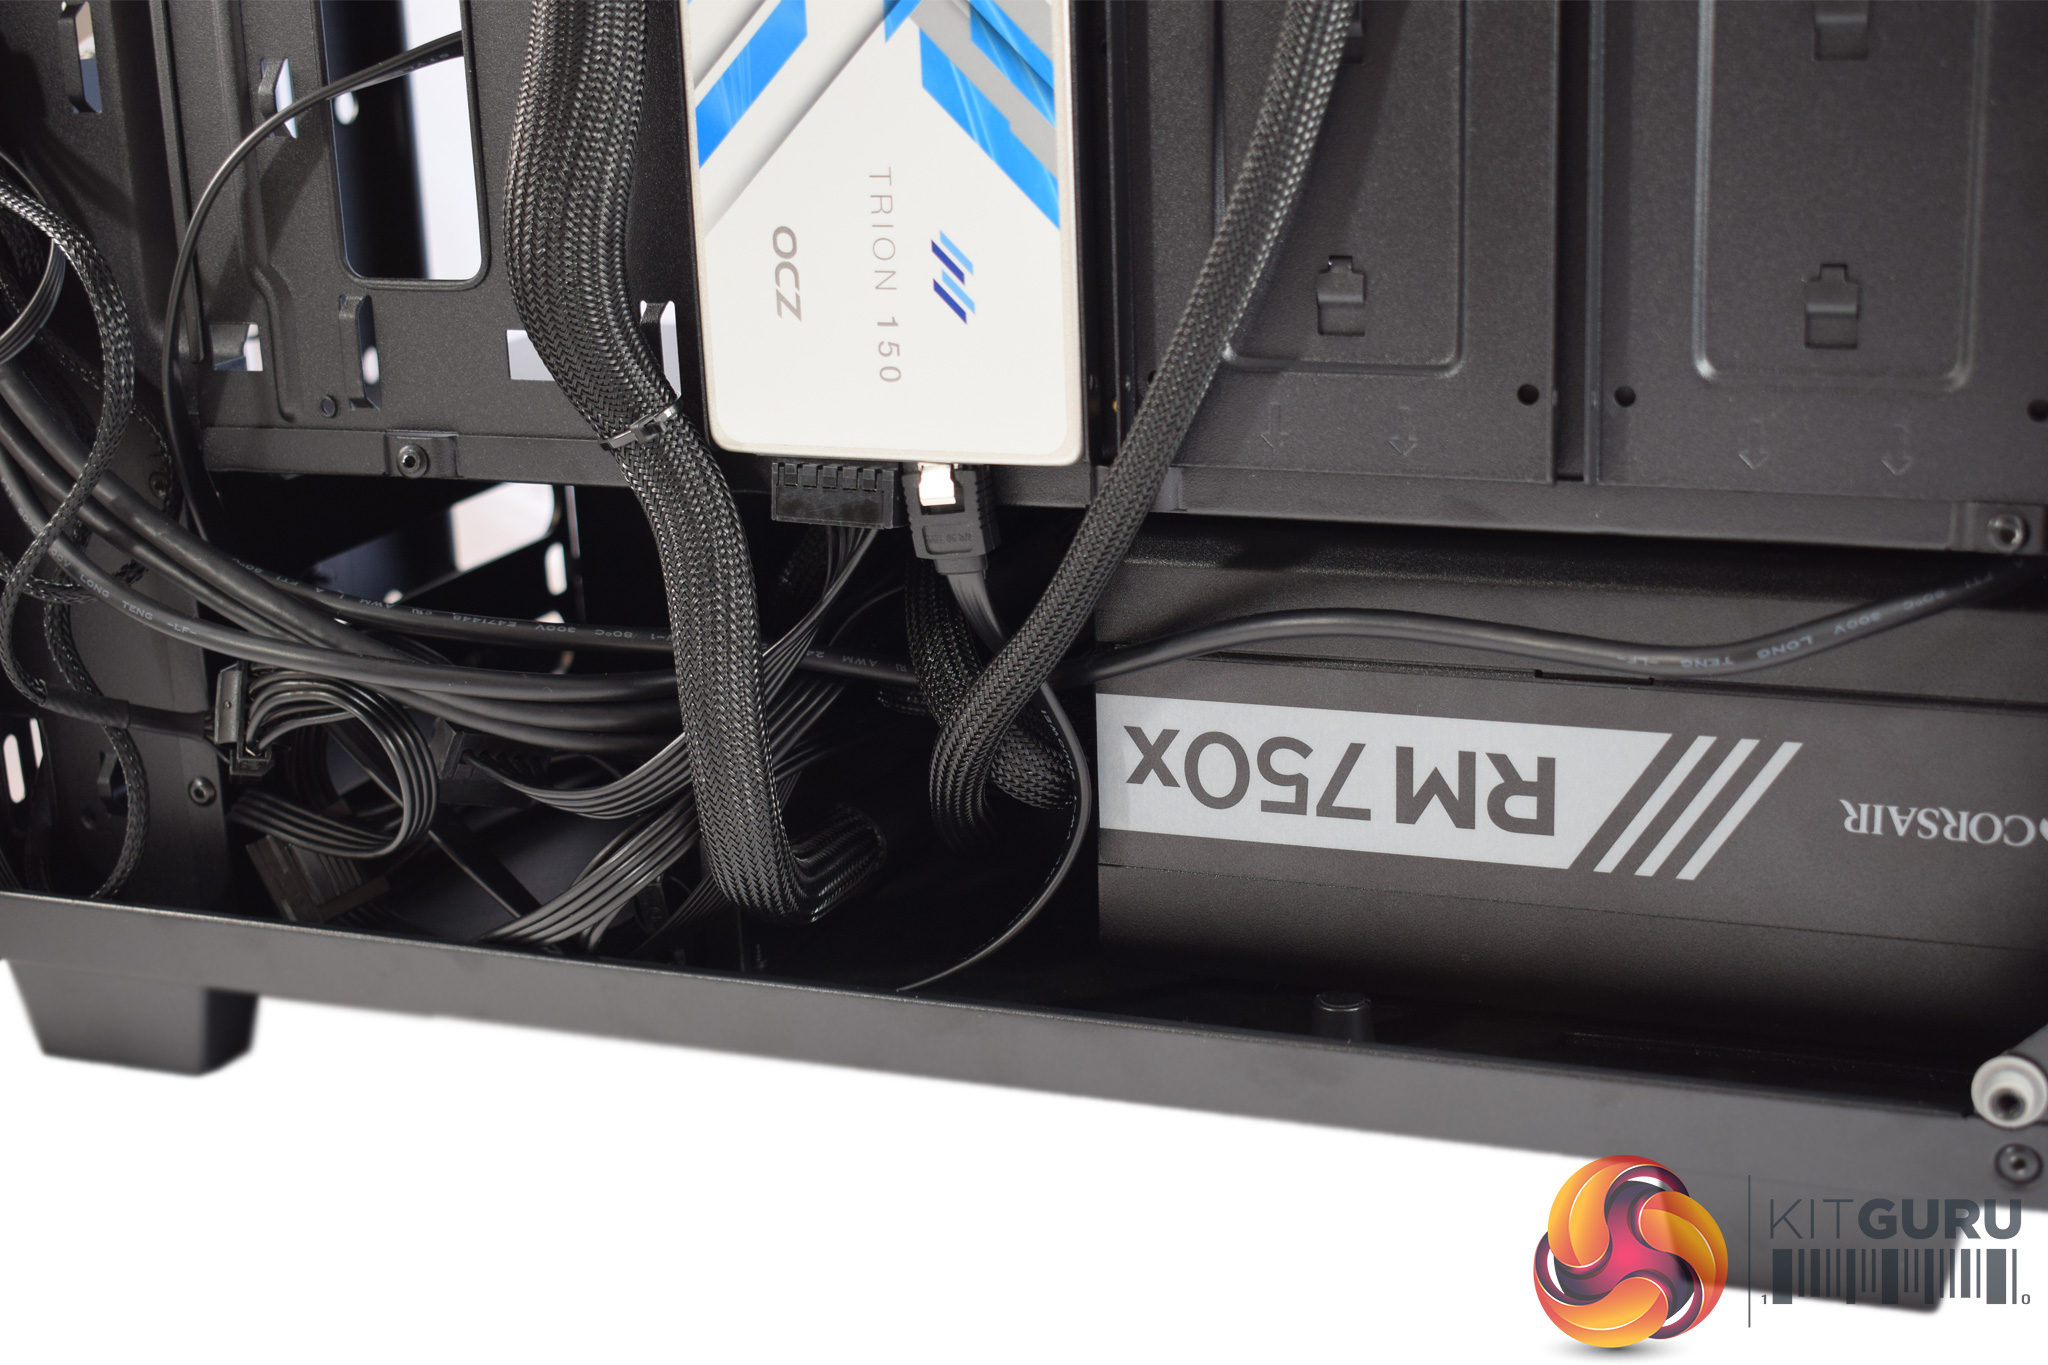
Moving round the back, I was also quite pleased with the rear cable-management. There are plenty of cable tie-down points, in a variety of positions, which makes things easy, while the pre-routed front-panel cables are also appreciated.
The only real issue I had back here was with the drive cage. Simply put, it is not removable, and although it is not a huge issue, I would have preferred a removable drive cage for two reasons. The first is that it restricts the length of your power supply, as my 180mm unit was a very tight fit – any bigger and it would not have made it. Many people probably won't have a power supply that long, though, but I would still have liked the drive cage to be removable as it would also open up more space in the basement for hiding spare or loose cabling.

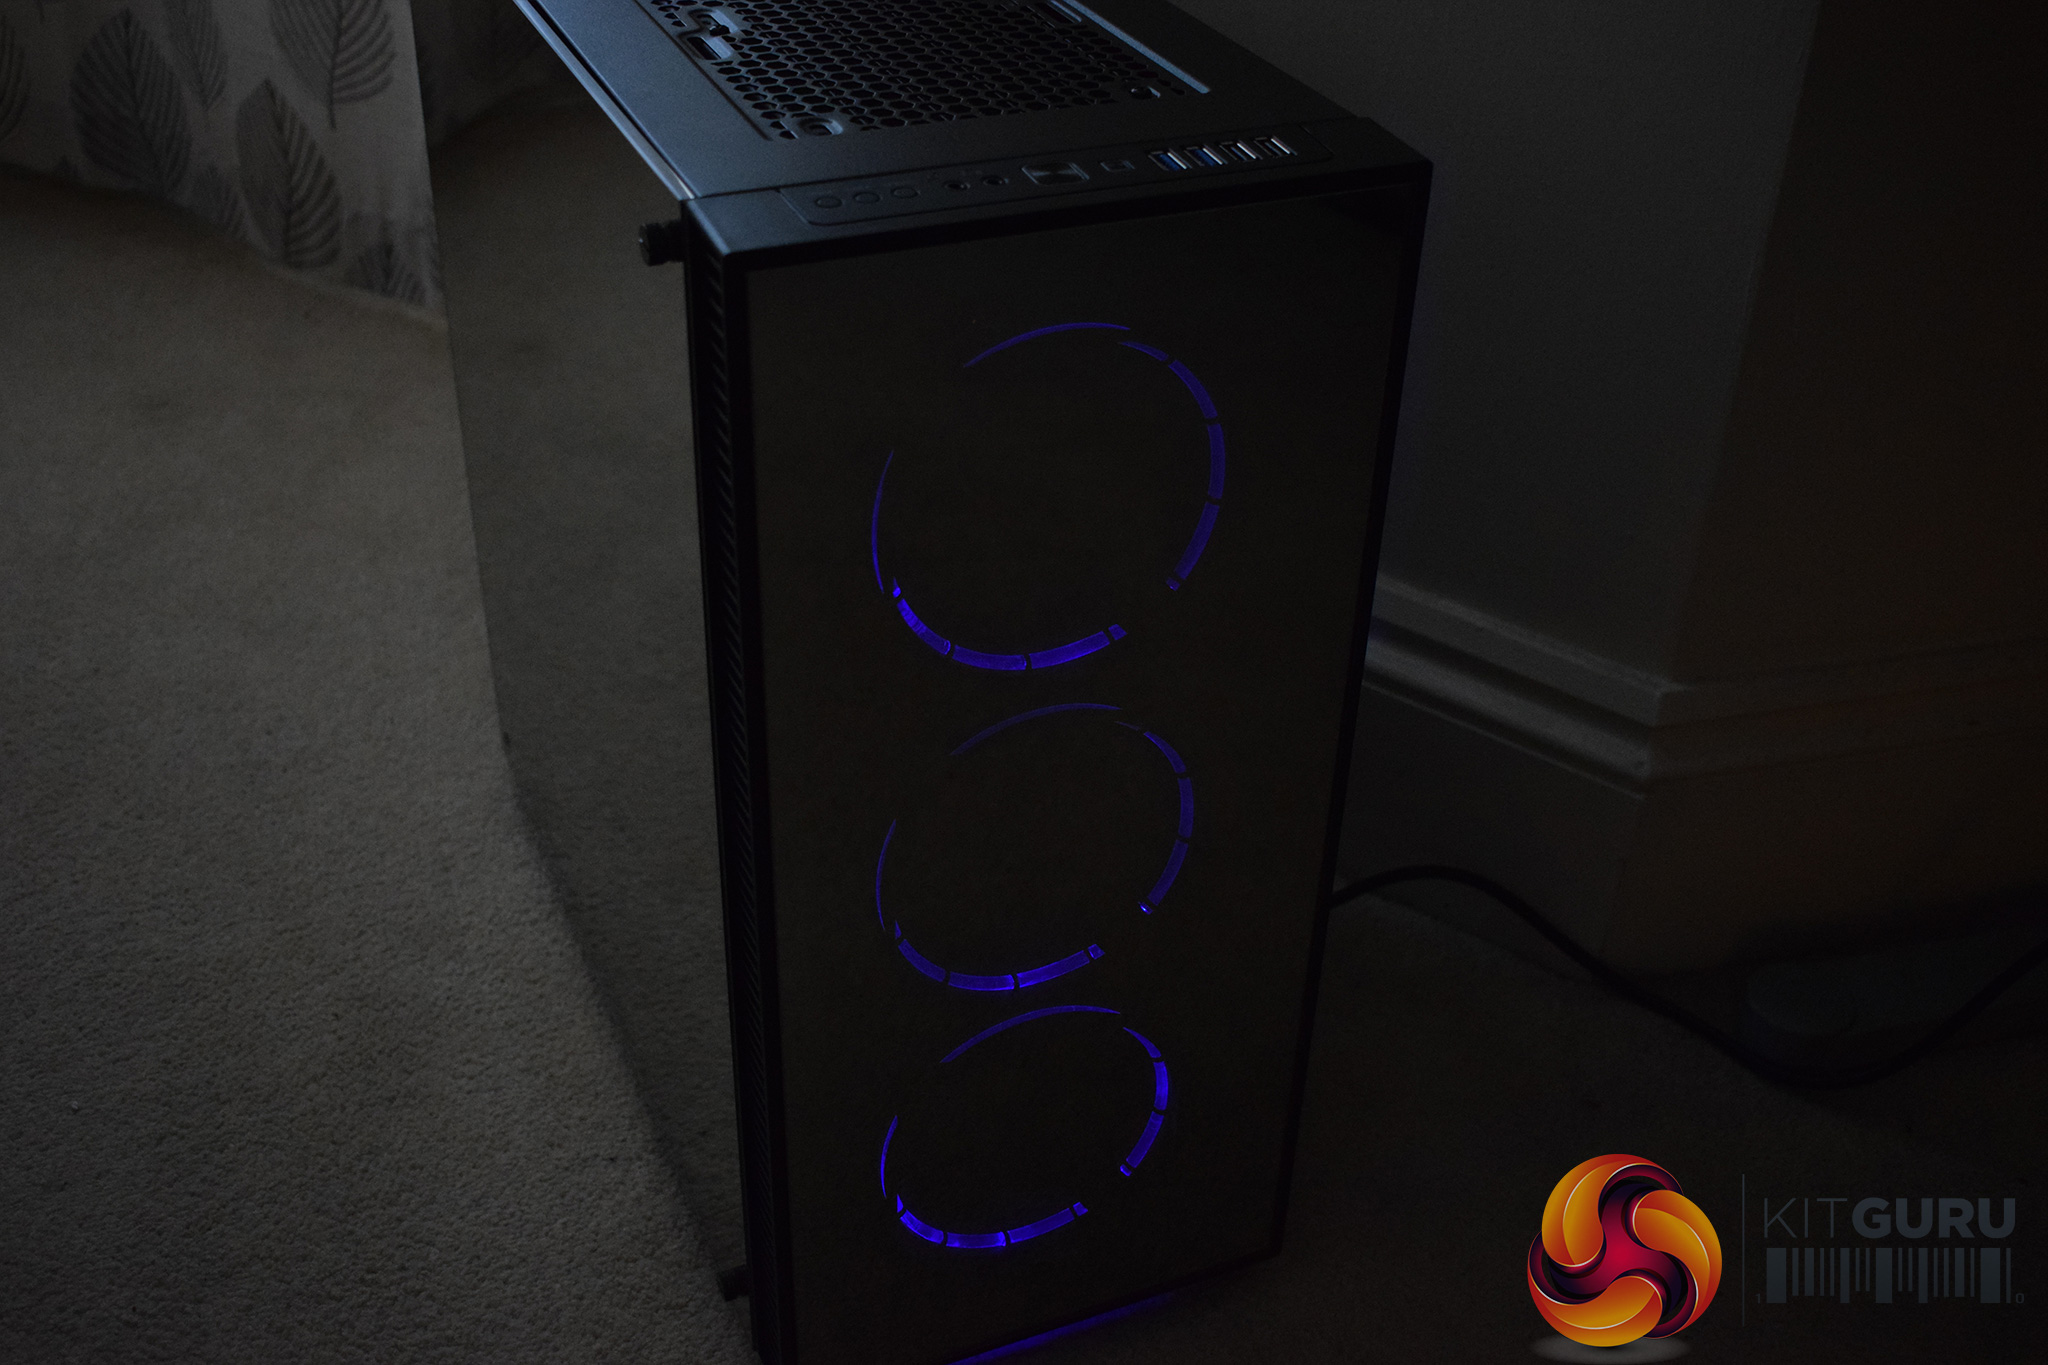
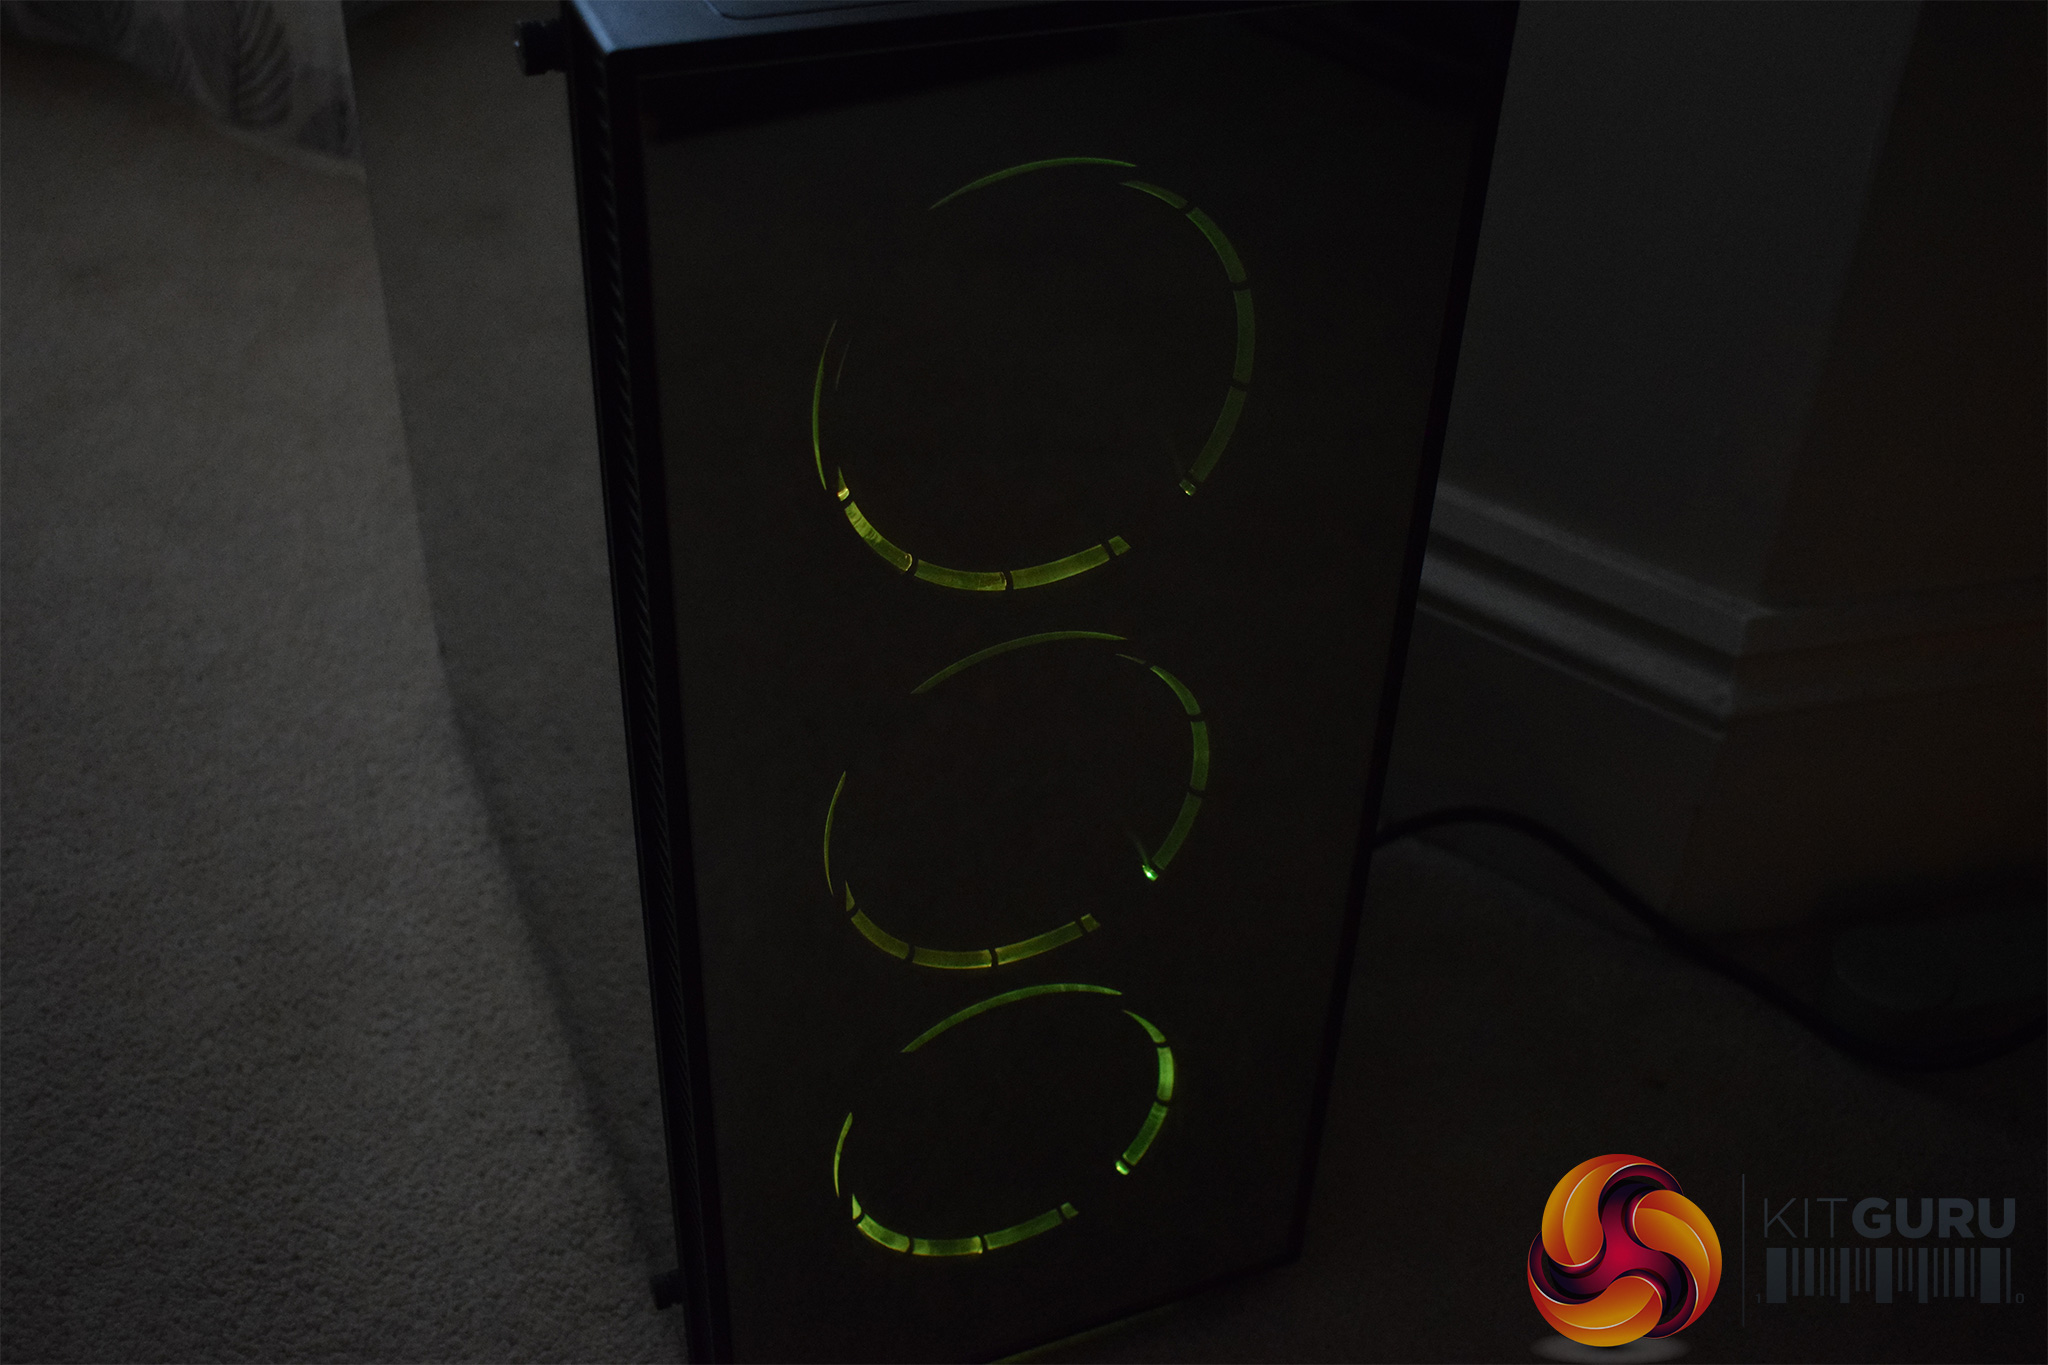
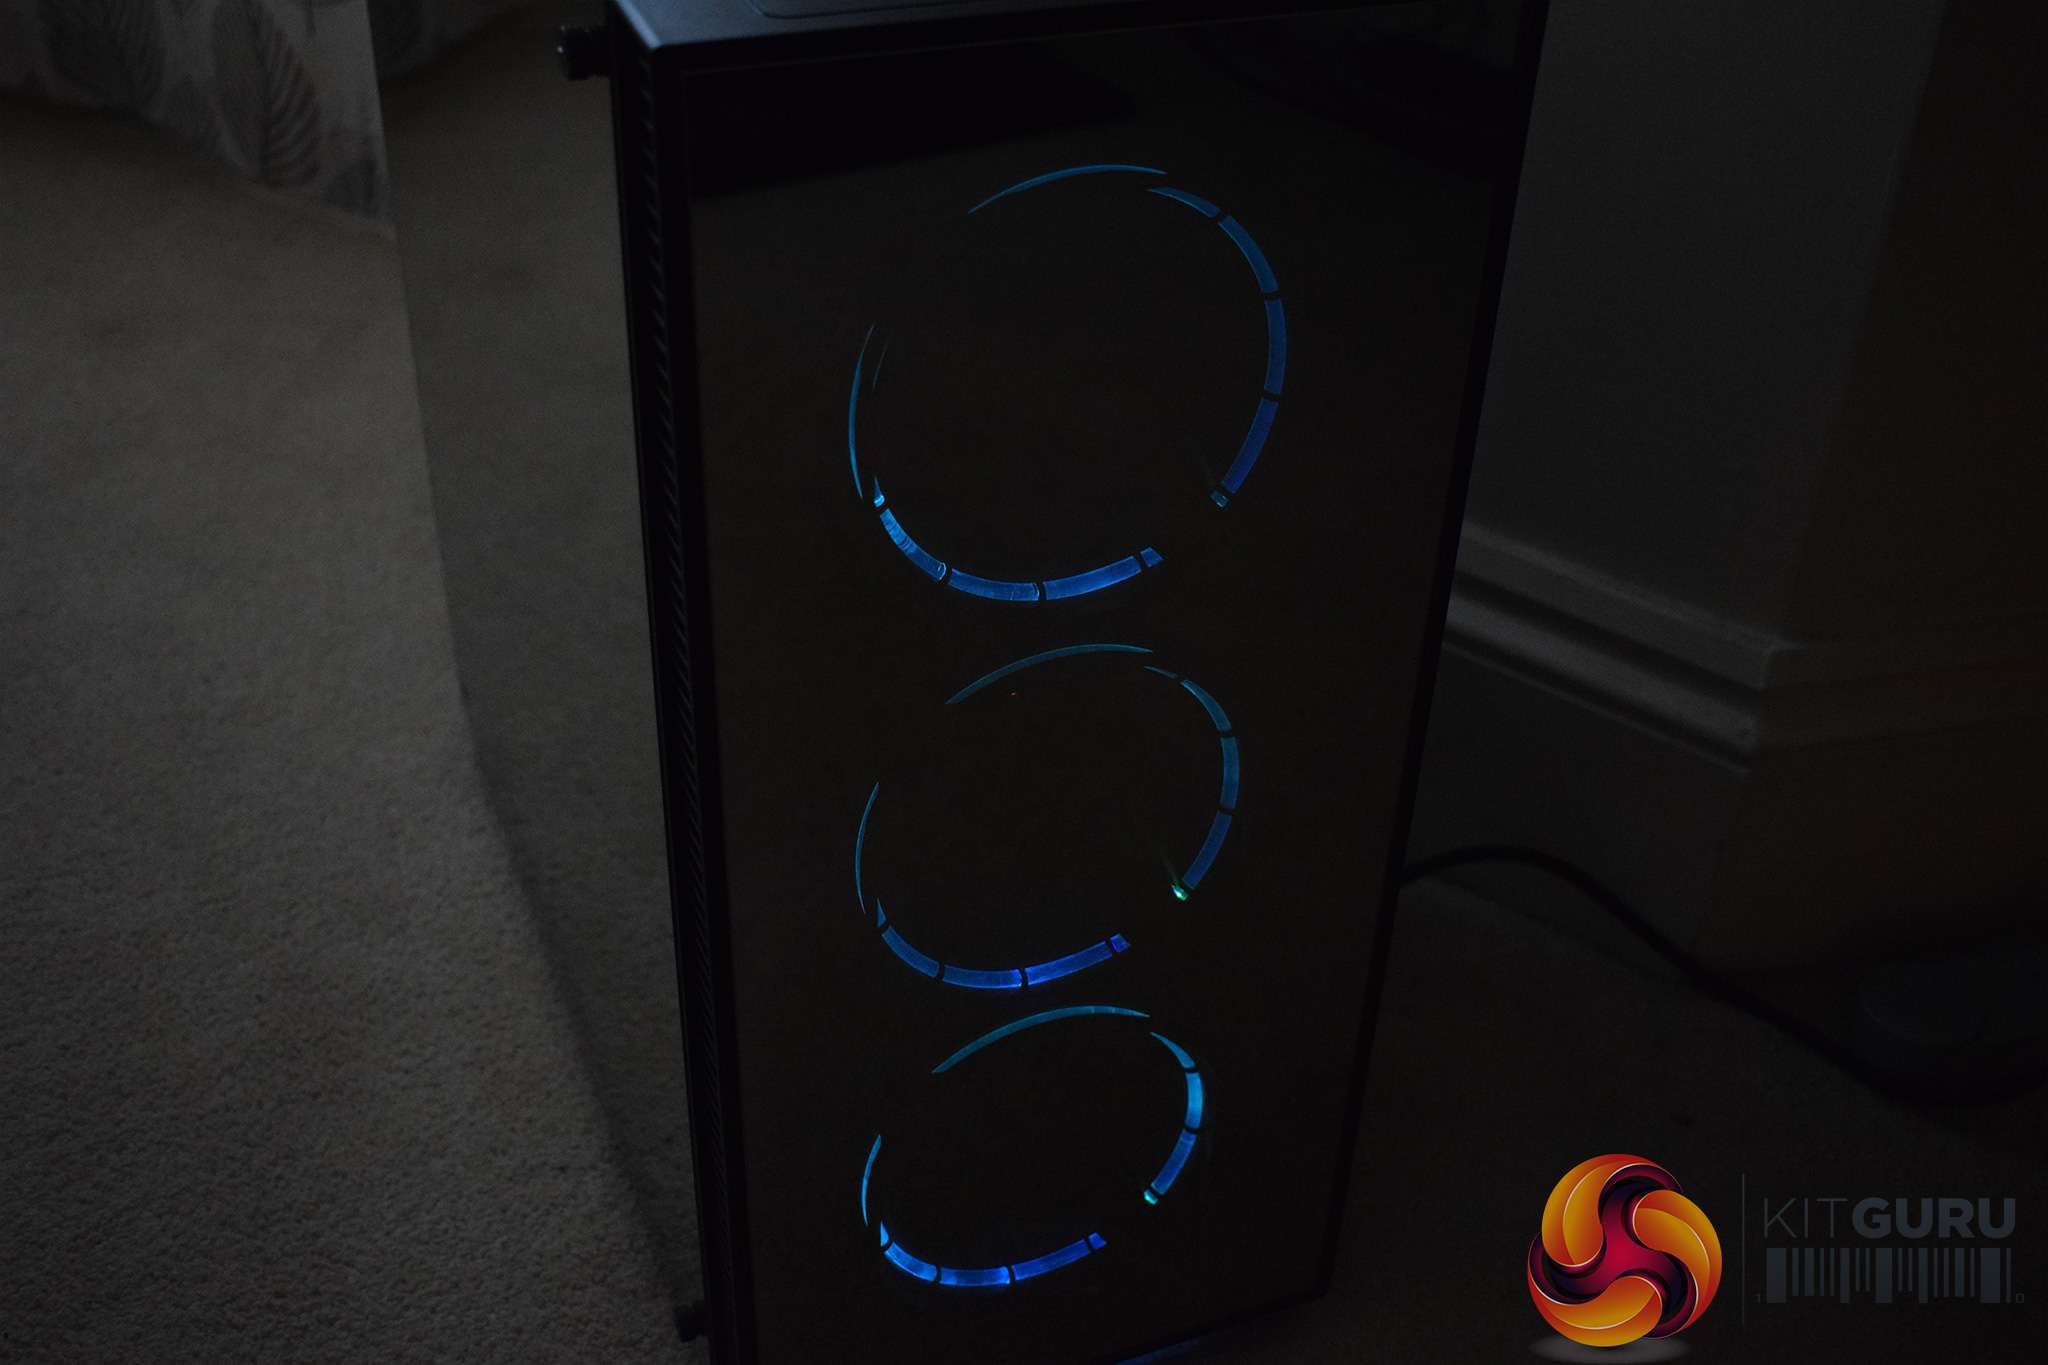
Once the system was built and powered-on, I also took some photos of the three 120mm RGB fans that are positioned in the front of the case.
I must confess I was a bit disappointed with the lighting – the LEDs are very dim and they did not illuminate the innards of the chassis at all. If you do buy the Sapphire RGB, I would recommend a couple of good-quality LED strips to really show-off your components.Testing a case consists of finding out how the chassis deals with heat generated by the installed components, and how much noise it produces while doing so.
To create excess heat, I ran Prime95 26.6 and 3DMark Fire Strike simultaneously to stress both the CPU and GPU. After 15 minutes, I recorded the maximum temperature for each component to report here.
To test the Sapphire RGB, I installed the following components:
- Intel i7-4790K CPU
- Arctic Liquid Freezer 240 CPU cooler
- 16GB Corsair Vengeance 2400MHz DDR3
- Gigabyte Z97X-SOC Force Motherboard
- GTX 760 Reference GPU
- Corsair RM750x PSU
- OCZ Trion 150 SSD
Thermal dynamics
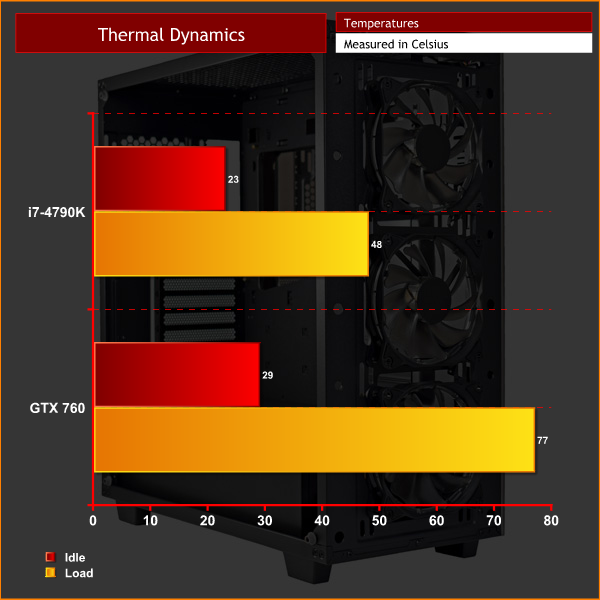
As you can see, thermal performance is very good. I did use a class-leading liquid cooler in the Liquid Freezer 240, but the 3 intake fans at the front of the chassis supply a good amount of air to the GPU as well, for which a 77 degree peak temperature is very good.
Acoustics
Thanks to the integrated fan controller, the Sapphire RGB can be as loud or quiet as you like. Incidentally, the fan controller can be set to ‘low,' ‘high,' or ‘off'. The low setting is a mere whisper, while the high speed is definitely audible but it would be easily drowned-out by any pair of headphones.
I really like the ‘off' setting, though, as it is very satisfying to completely switch-off your fans when you are just doing basic tasks – web browsing or emailing, for example. The ability to have a completely silent system available at the touch of a button is definitely a feature I appreciate.All-in-all, I am certainly impressed with the Game Max Sapphire RGB case.
In the past, we have seen a few budget offerings from Game Max, and while they certainly impressed us considering their low price-points, they weren't exactly going to win any awards for sheer beauty. The Sapphire RGB, however, looks stunning thanks to its three tempered glass side panels. This not just regular tempered-glass, either, as the glass actually has a mirror-finish coating. The effect is incredible and makes for a beautiful case.
Building a system in the Sapphire is also pretty straightforward. There are plenty of cable tie-down points to keep things clean, while the large power supply shroud prevent any unwanted cables from being visible.
However, I do have a couple of issues with the chassis. Firstly, it lacks cable grommets – there are plenty of cable cut-outs but no grommets to cover them, and I think that is slightly poor considering this is a £130+ case.
I would also have preferred to see a removable drive cage, as this opens up more space for those with longer power supplies, while it also allows space for tucking away excess cabling.
The 3 pre-installed RGB fans may appeal to prospective buyers, but I was a bit disappointed with them as well – they are quite dim and do not come close to illuminating the innards of the chassis. These fans do help the Sapphire deliver excellent thermal performance, though, and our graphics card peak temperature of 77 degrees is commendable considering we used an older, Kepler-based card.
As such, we feel the Game Max Sapphire RGB case definitely worth buying. It has the ‘wow-factor' thanks to the mirror-finish glass panels, and would make for a beautiful system when paired with a couple of bright LED strips. It is not quite perfect, with a couple of niggling issues preventing it from achieving our highest award, but it is still competitive in this price-bracket.
You can buy one for £134.55 inc VAT from CCL Computers HERE.
Pros
- Mirror-finish glass is stunning.
- Steel chassis feels solid and durable.
- Plenty of good features to help the building process.
- 3x 120mm RGB fans included.
- Fan controller can support up to 6 fans.
Cons
- The drive cage is not removable.
- Included RGB fans are quite dim and underwhelming.
- Could do with an extra cable cut-out in the middle of the power supply shroud.
- Motherboard tray lacks rubber grommets.
KitGuru says: The Game Max Sapphire RGB is visually stunning and provides a pretty easy build process. It does lack rubber grommets and a removable drive cage, though, while the included RGB fans are quite underwhelming.

This suspiciously looks just like the https://youtu.be/WqnvbWySNt4 Coincidence?
Its Worth buying………but would you buy it? “hey isn’t that one of those Game Max cases, my local pc store normally has them for £19.99, how much was it?”. THUD. Seriously you have to decide what end of the market you are aiming for and leaping from weekly special with a thrown in PSU to Phanteks/ Corsair prices, thats crazy.
My last paycheck was $22500 for working 12 hours a week online.Start earning $97/hour by working online from your home for few hours each day with GOOGLE… Get regular payments on weekly basis… All you need is a computer, internet connection and a litte free time… Read more here
!wr189c:
➽➽
➽➽➽➽ http://GoogleFinancialCashJobs189SolutionWork/GetPaid$97/Hour… ★✫★★✫★✫★★✫★✫★★✫★✫★★✫★✫★★✫★✫★★✫★✫★★✫★✫★★✫★✫★★✫★✫★★✫★✫★★✫:::!wr189u:………
Also looks just like the Fractal Design Define series:
https://uploads.disquscdn.com/images/8ccb129268bbebec56e96828904cd47942f6b51e17488cb2d337de962da70655.jpg
When I first saw the article, I thought Game Max must be a system builder. Either Fractal are selling their designs or these other case manufacturers may have a lawsuit on their hands. (Or maybe not, Fractal seems to go for a very generic look by design.)