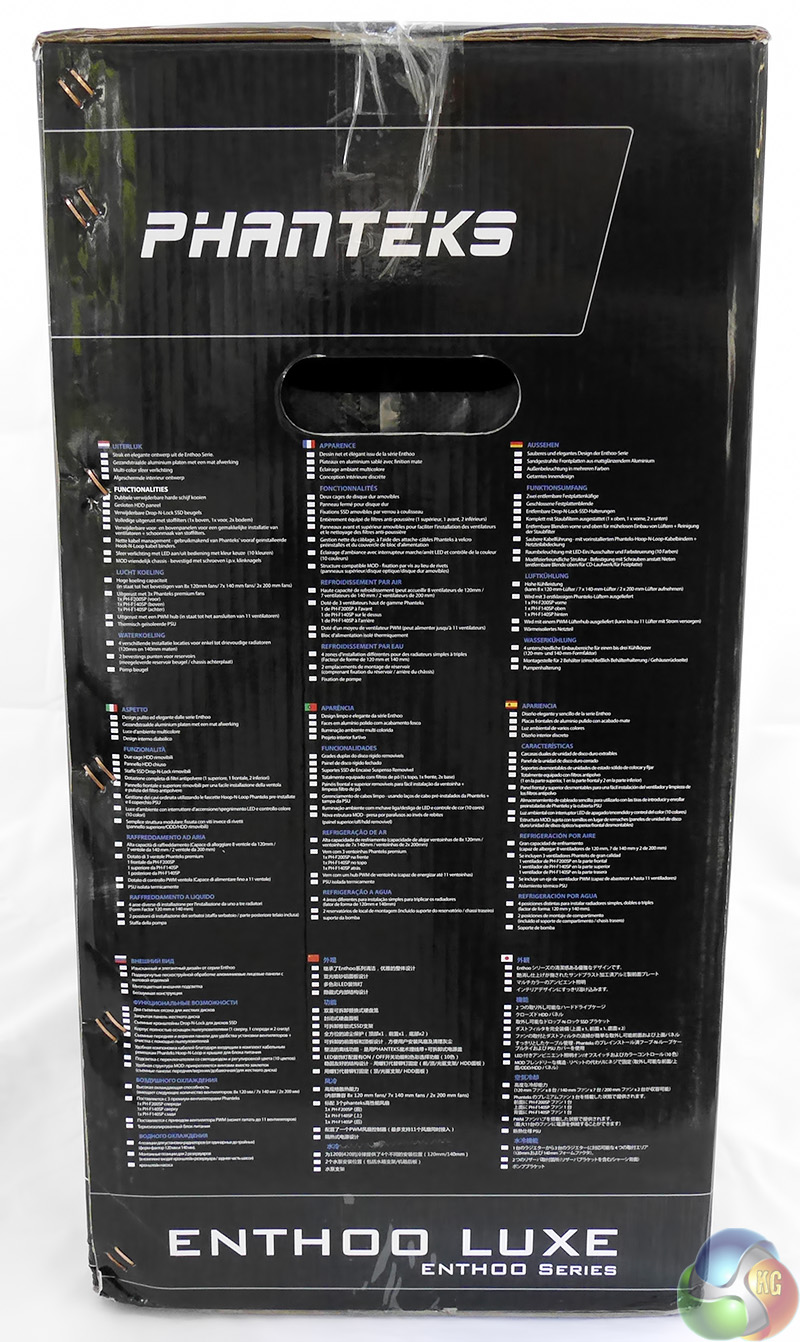
The new Enthoo Luxe tower case fills a gaping chasm in the Phanteks range between the £199.99 Primo and the £89.99 Pro (£79.99 without window). Priced at £129.99, the Luxe delivers a set of features that are similar to the Pro, however there are a couple of significant changes to the specification as the Luxe includes a lighting system and also has an extra fan. In addition the cosmetics have been given a significant overhaul and while there are obvious similarities the Luxe looks quite different to the Pro.
Specifications:
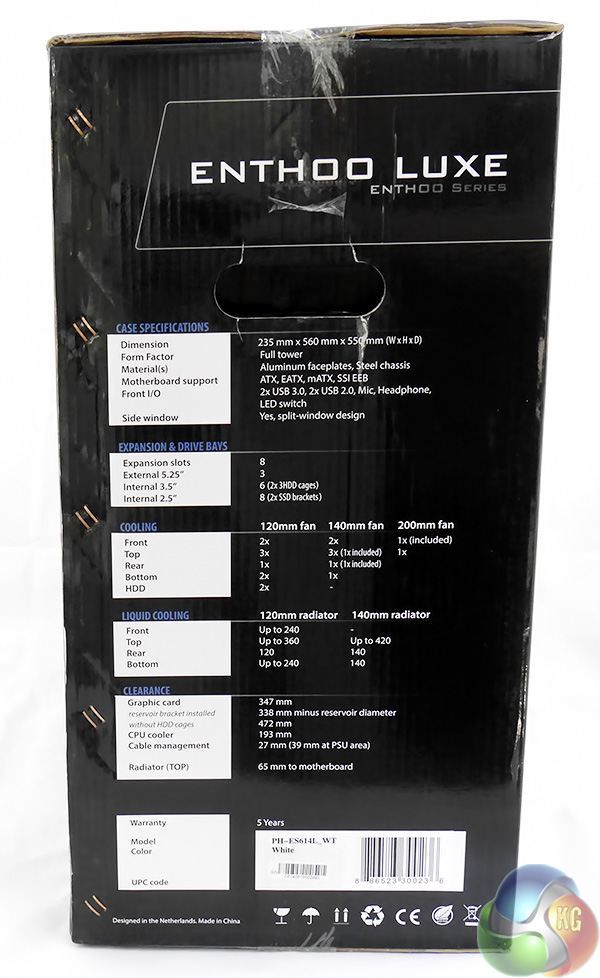
Motherboard support: E-ATX, ATX, Micro-ATX.
Expansion slots: 8.
Included fans: 1x 200mm front intake, 2x 140mm rear/top exhaust.
Fan mounts:
- Front: 2x 120/140mm or 1x 200mm roof.
- Top: 3x 120/140mm or 1x 200mm roof.
- Rear: 1x 120/140mm
- Bottom: 2x 120 or 1x 140mm
- Hard drive tower: 2x 120mm
120mm radiator mounts: up to 240mm front, up to 360mm roof, 120mm rear, up to 240mm bottom
140mm radiator mounts: up to 420mm roof, 140mm rear, 140mm bottom
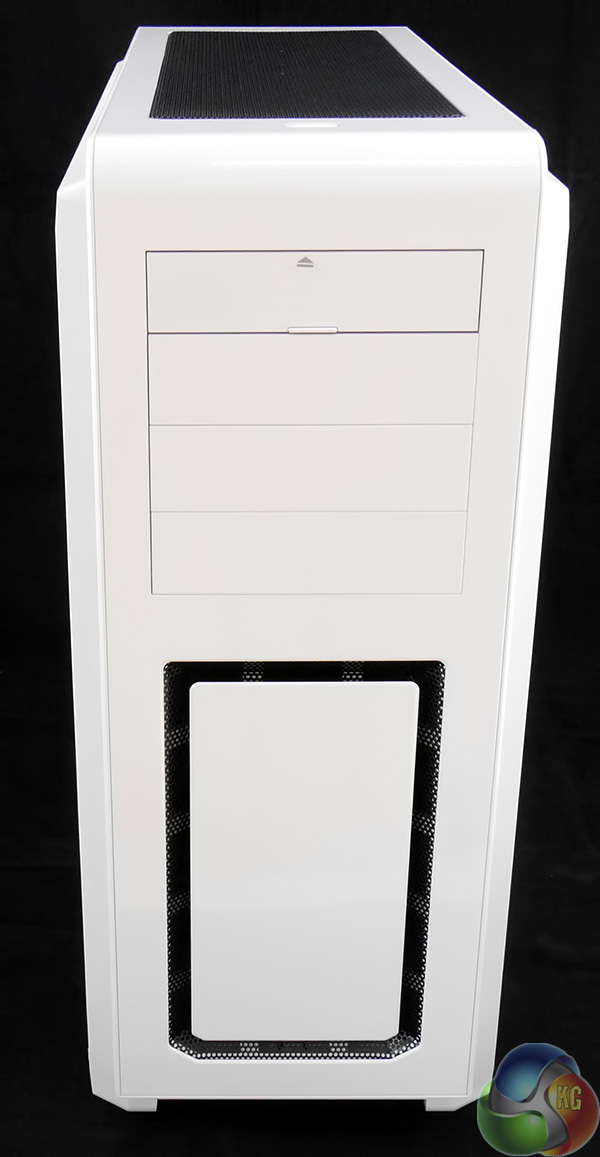
5.25″ drive bays: 3
Internal drive bays: 6x 3.5/2.5″, 1x 2.5″.
Dimensions: 560mm H x 550mm D x 235mm W.
Key features:
- Removable PSU cover
- Removable 3.5-inch drive bays
- Pre-installed hook and loop cable ties
- Compatible with a huge array of fans and liquid cooling systems
- Two Drop-n-Lock SSD brackets
- Dust filters at the top, front and bottom
- PWM hub
- Supplied with 200mm front fan and two 140mm fans at the rear and top
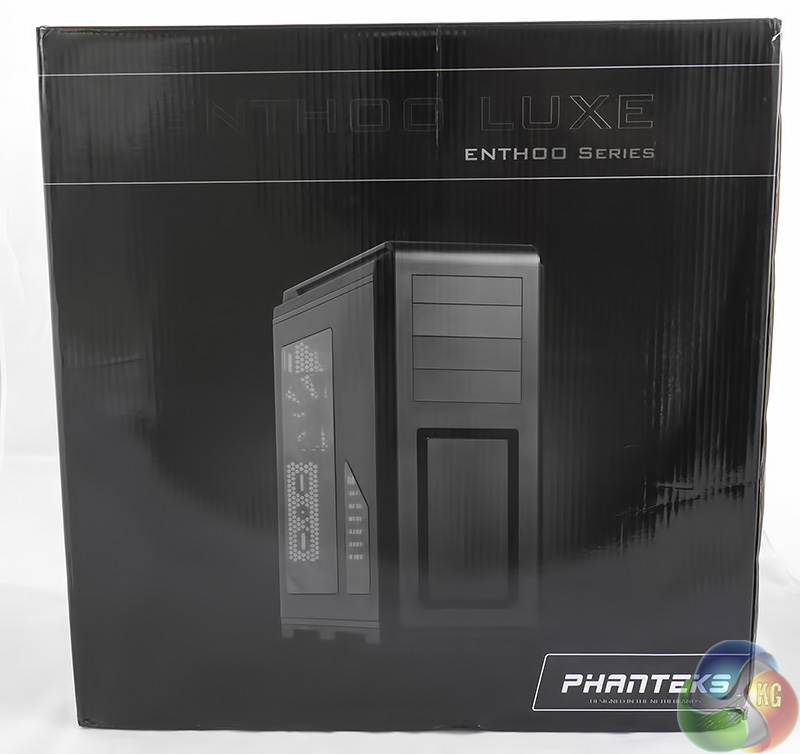
The packaging for Luxe shows the interior of the case and showcases a number of features including cable management, ambient LED lighting and the removable dust filters.
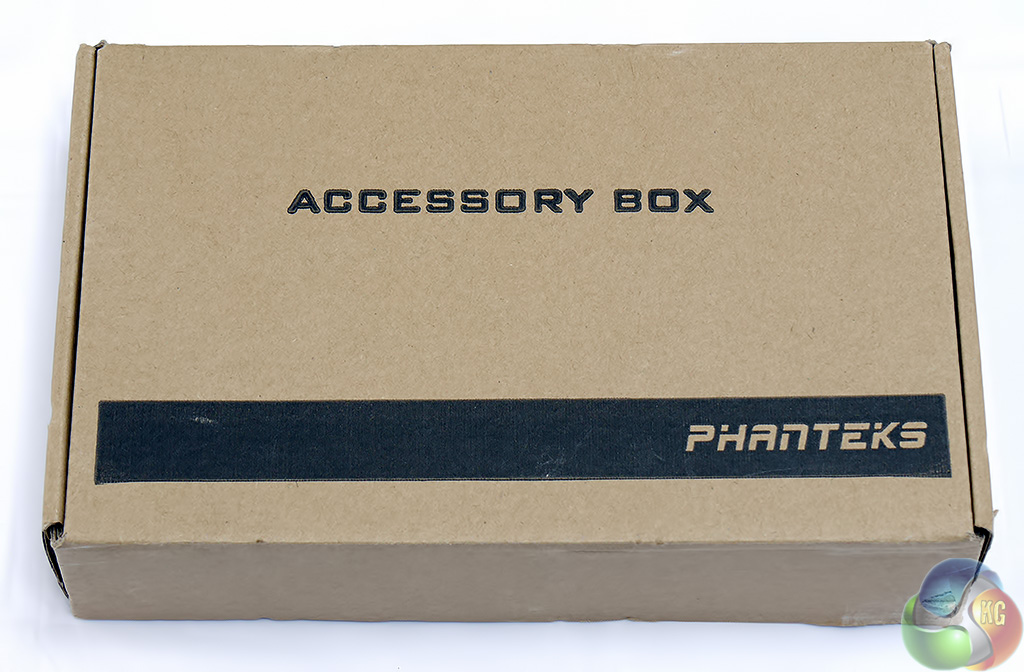
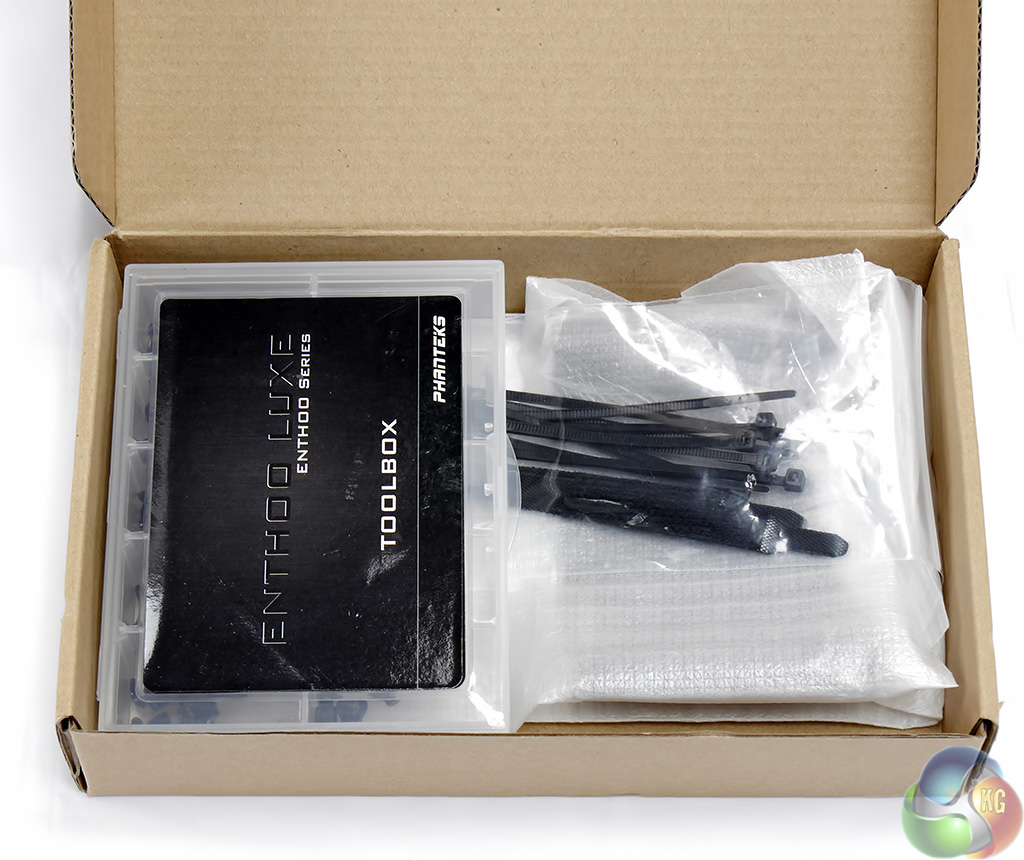
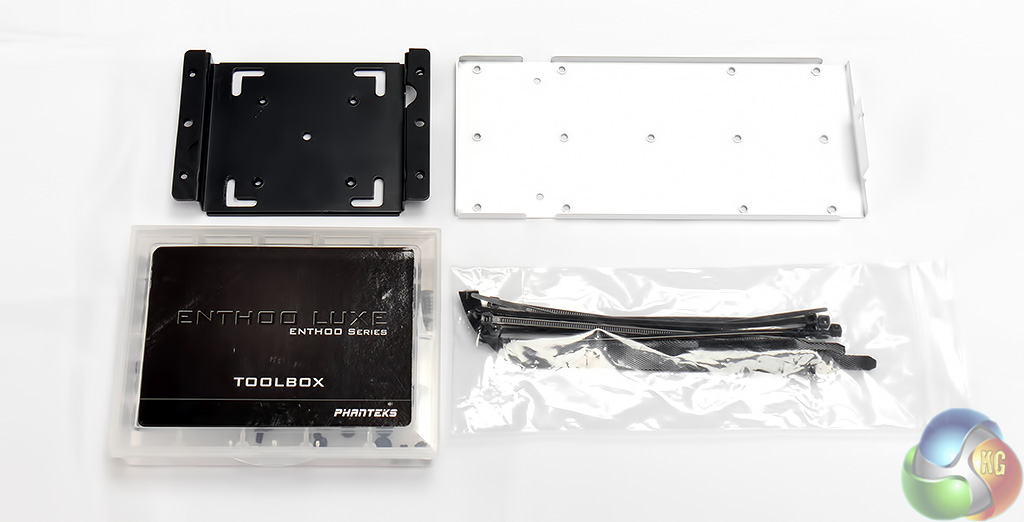
Inside the case you'll find the usual pack of accessories. Usual, that is, for a Phanteks case, but rather more extensive than the accessories that you get with many other brands of case.
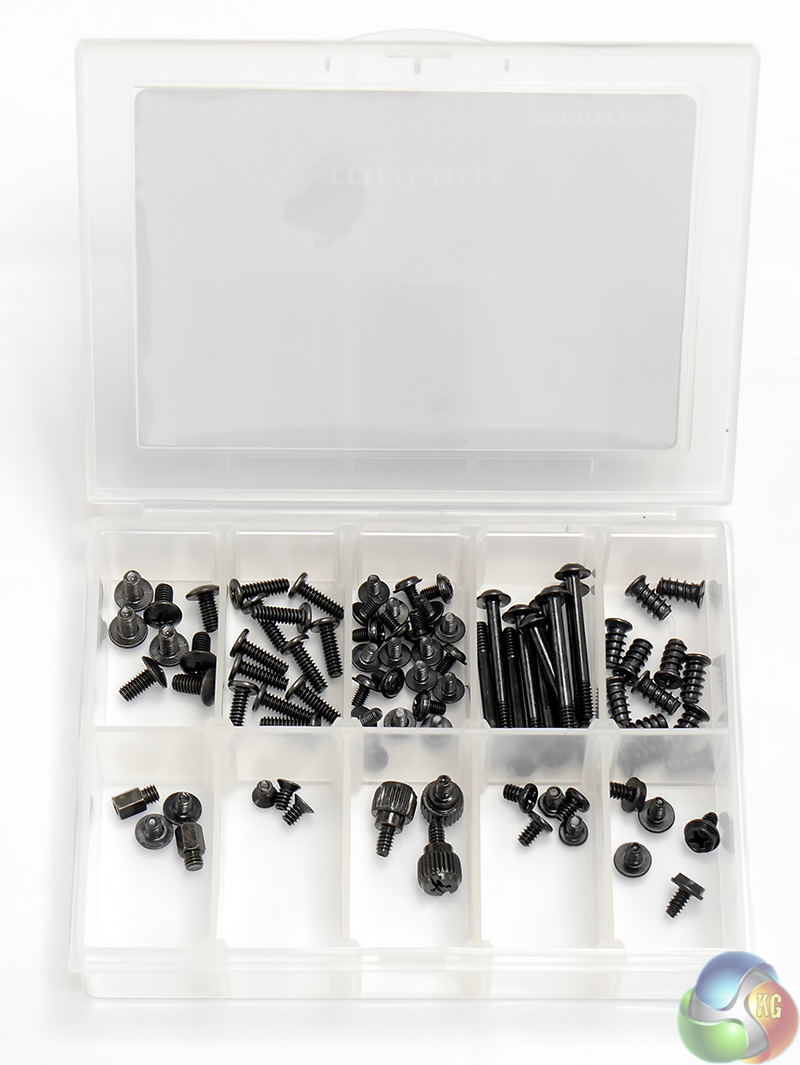
It is interesting to see that Phanteks includes a bag of cable ties however most people won't need them as the integrated cable management straps do a fine job. The Toolbox contains the various screws that you need, all neatly arranged in the compartments of a plastic case.
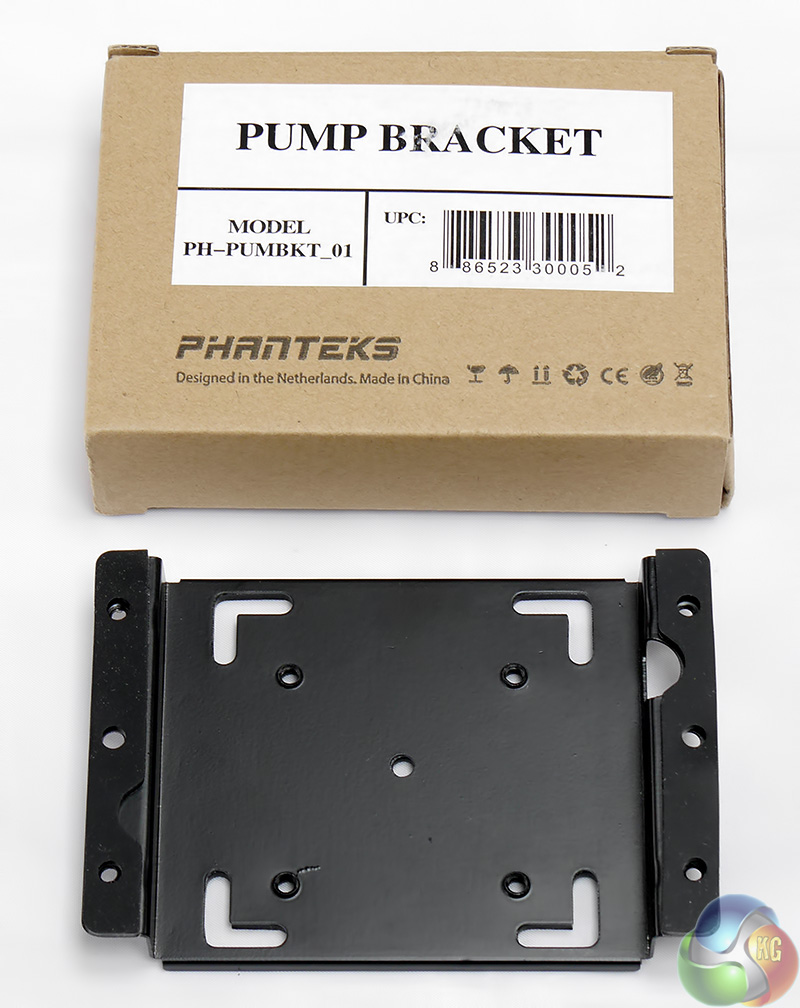
Phanteks distinguishes itself by including two pieces of hardware that you do not usually see in the shape of a water pump bracket and a reservoir bracket. If you are using air cooling or a closed loop water cooler these parts are irrelevant but anyone building a custom liquid cooler will welcome their inclusion.
In addition to the standard accessory pack I also received a number of accessories from a new product range that Phanteks has produced for the whole Enthoo Series.
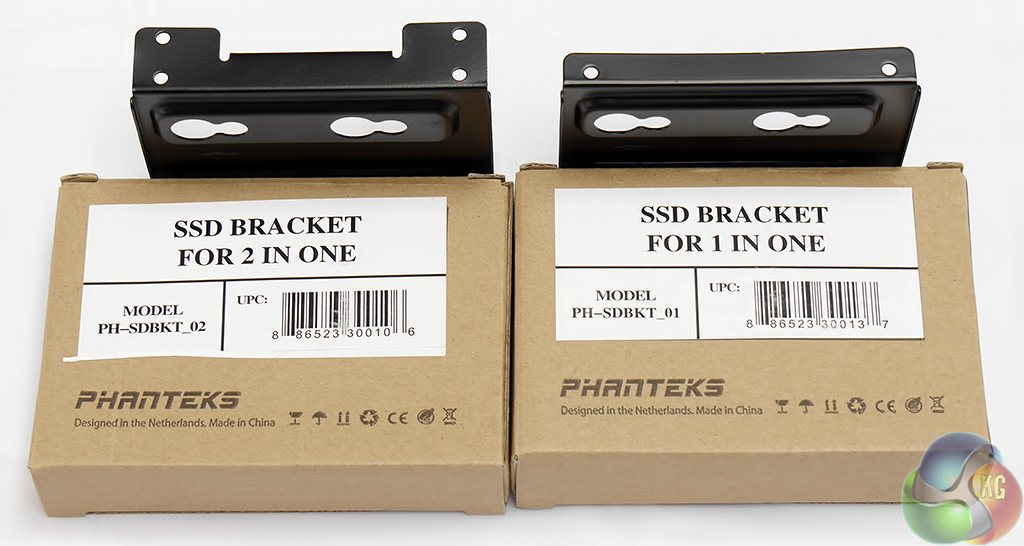
Here's the list of seven accessories along with their UK prices:
- PWM hub for 11 fans PH-PWHUB: £12.99
- Y-splitter cable PH-CB-Y3P: £2.99
- Pump bracket PH-PUMBKT_01: £5.99
- Single slot SSD bracket PH-SDBKT_01: £4.99
- Double slot SSD bracket PH-SDBKT_02: £5.99
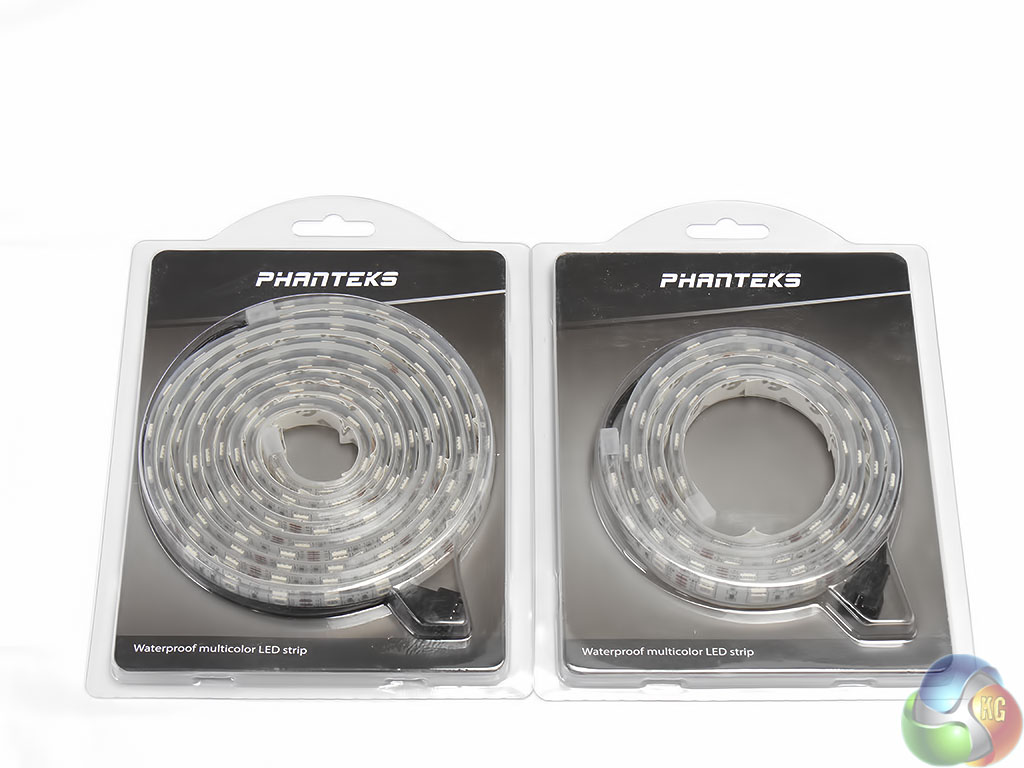
- 1 metre LED kit PH-LEDKT_M1: £13.99
- 2 metre LED kit PH-LEDKT_M2: £16.99
The curious thing is that you actually receive a number of these accessories with your Enthoo case. As mentioned the Luxe comes with the pump bracket and there are two single bay SSD brackets on the back of the motherboard tray. You also get a PWM hub that has connections for six fans, so if you hook up some Y cables you can install a truly massive number of fans.
Two accessories jump off the list and they are the one metre and two metre LED lighting strips that you can use to enhance the LEDs that are built in to the Luxe.
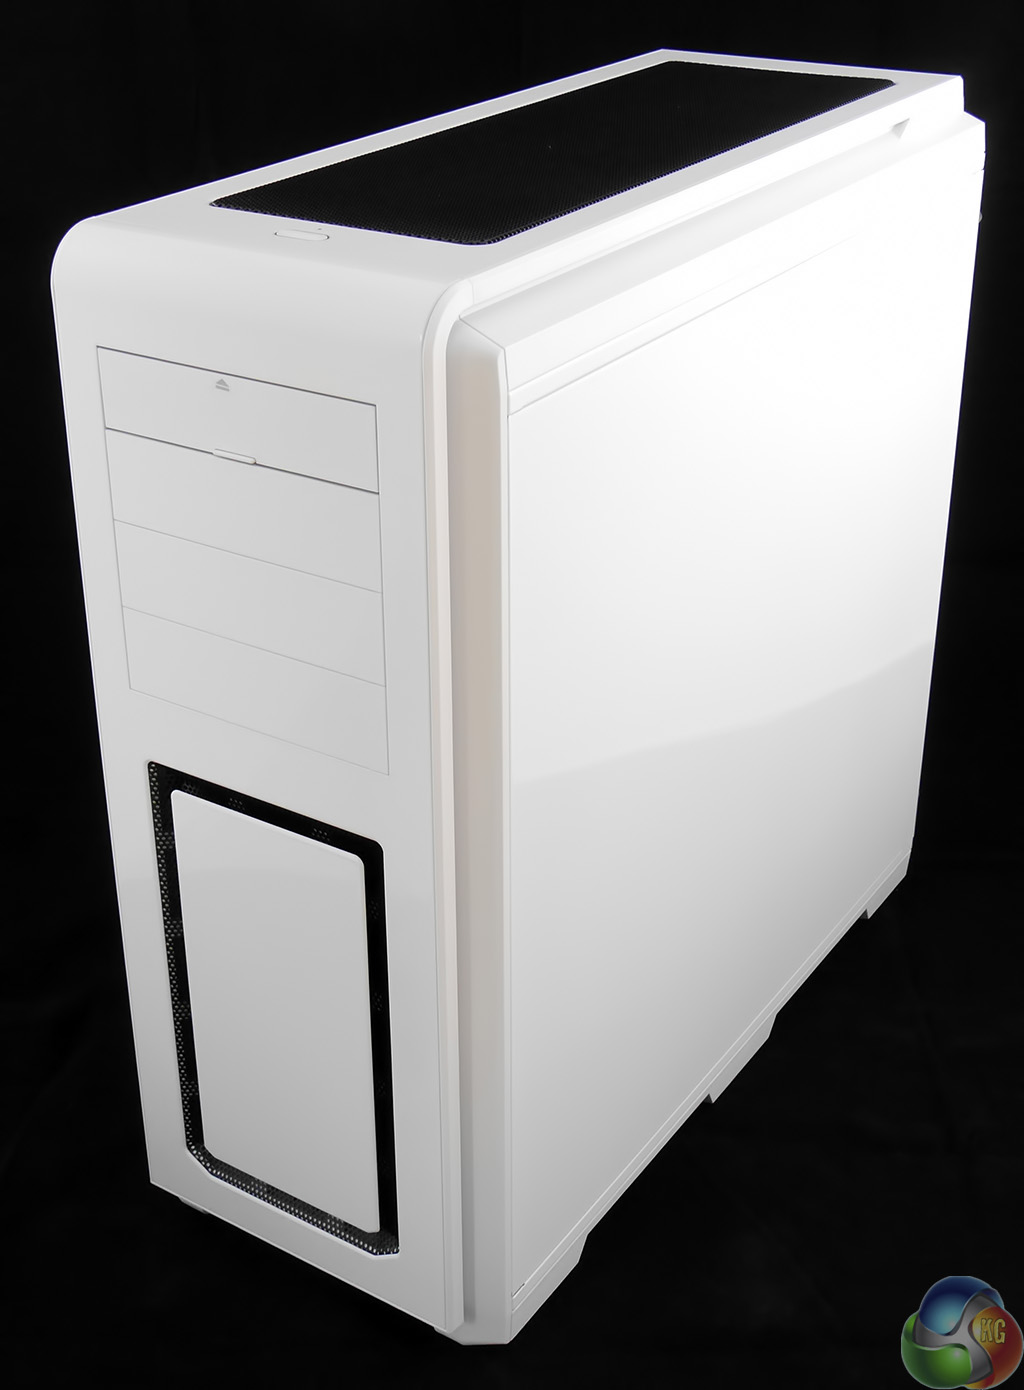

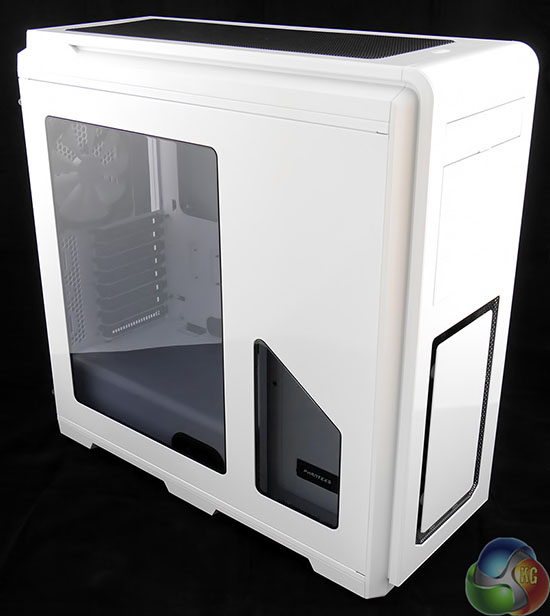
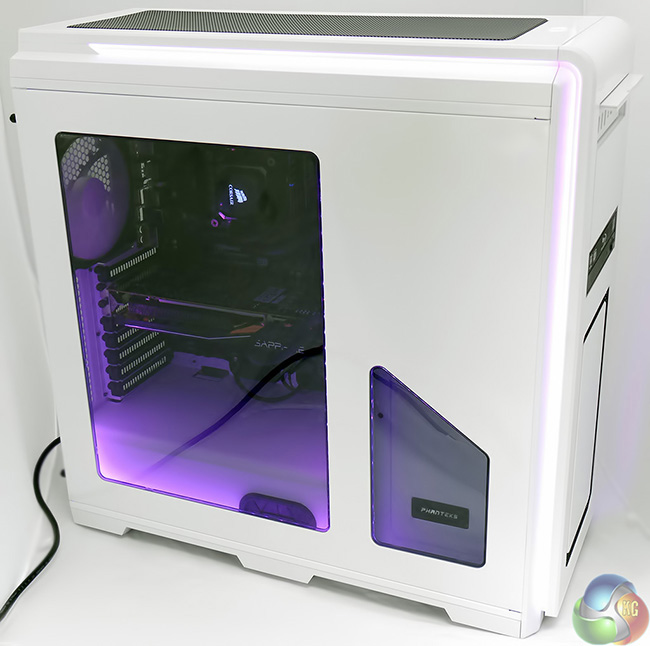
The Luxe is an impressive beast and the sample I received looks very, very white indeed. You know the ‘Imagine' video of John Lennon playing his white piano in a white room with Yoko Ono dressed in white? I can see the Enthoo Luxe fitting in perfectly in that situation.
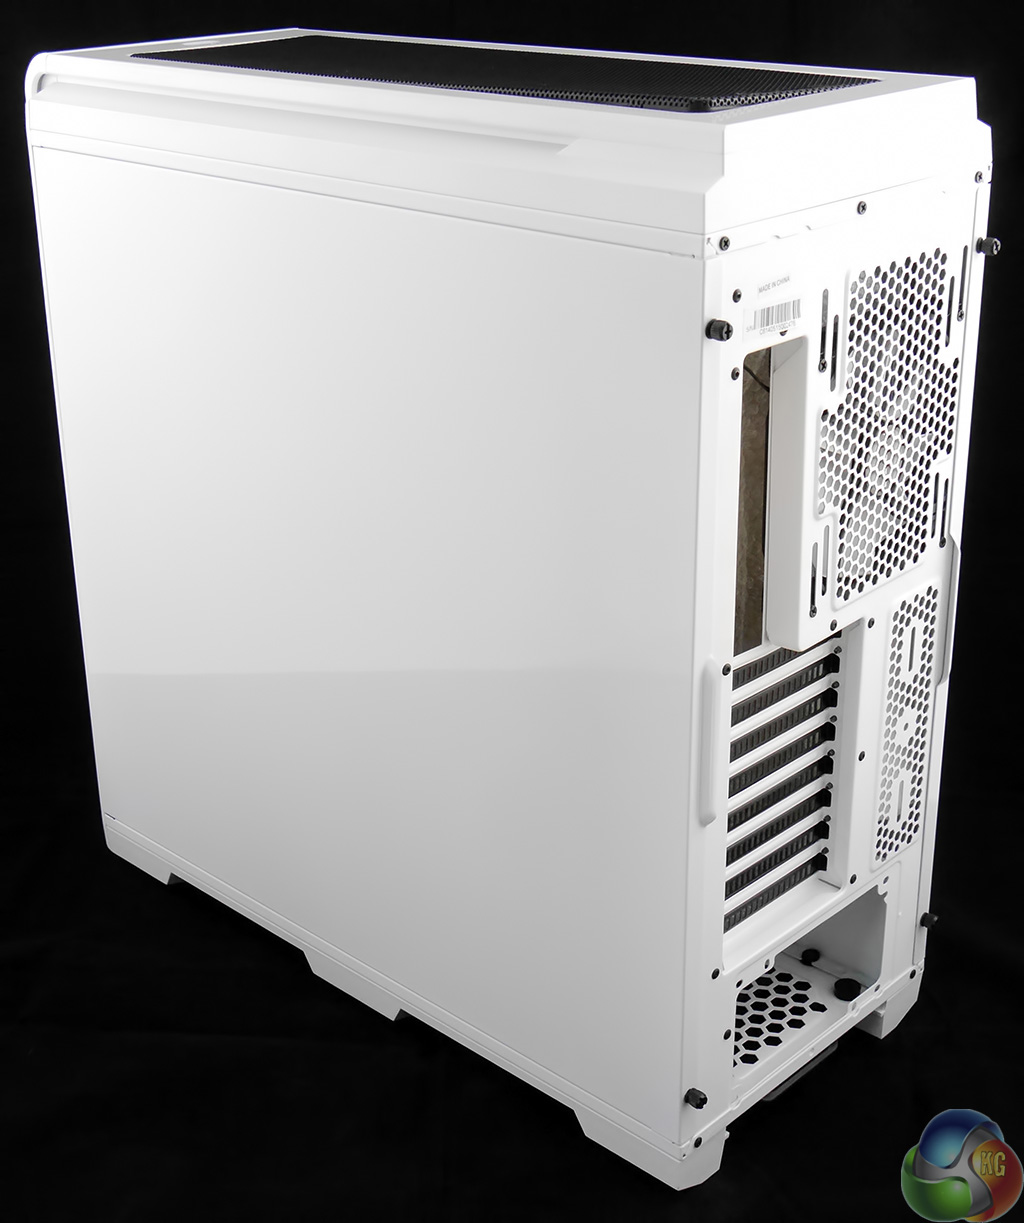
As you can see, the Luxe has a removable top mesh panel which assists fan installation and dust removal. By contrast the Pro has a mesh top that is fixed in place so it takes a bit more effort to give it a good clean.
At the front of the Luxe there are discreet vents that allow air to flow to the enormous 200mm fan that comes as part of the package.
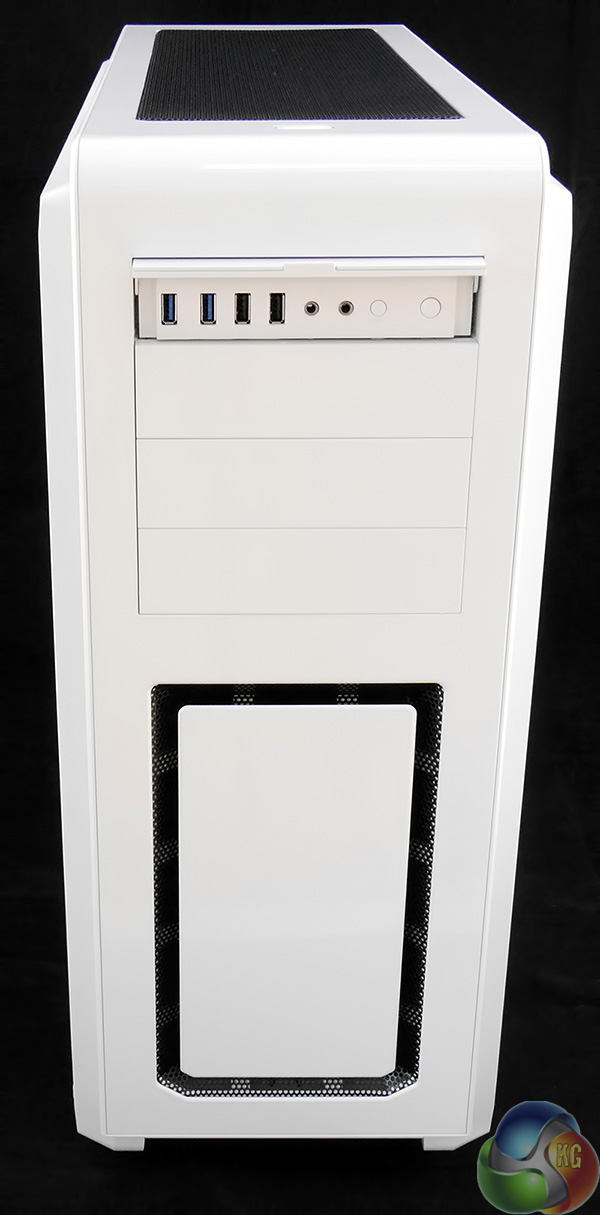
Above the three optical drive bays there's a control panel that is covered by a flip-up stealth door. On the panel you will find two USB 3.0 ports, two USB 2.0 ports, head set jacks, the Reset button and the control button for the LED lighting. The Power button is conveniently located on top of the chassis in front of the mesh panel.
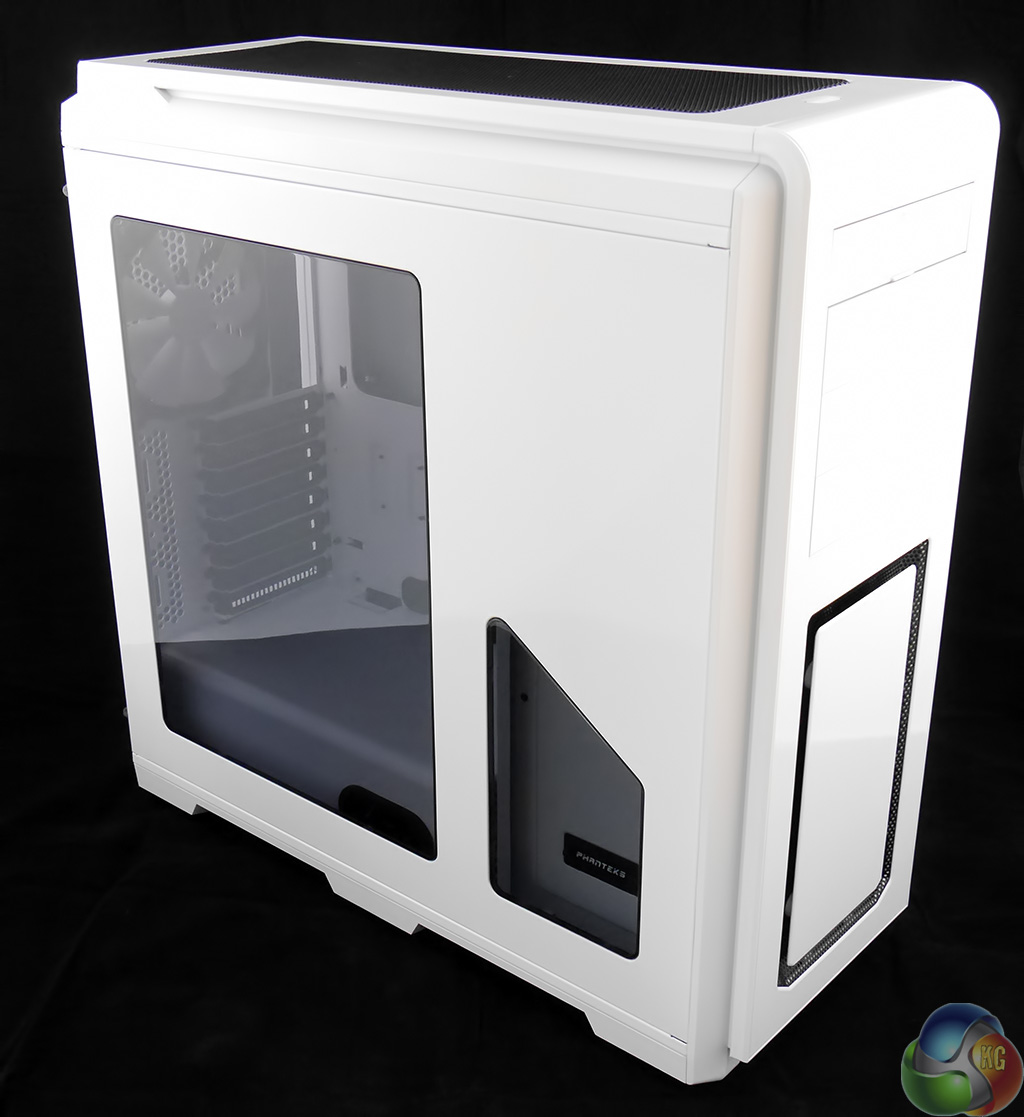
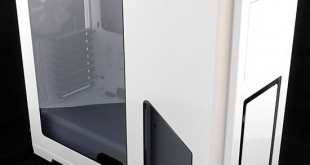
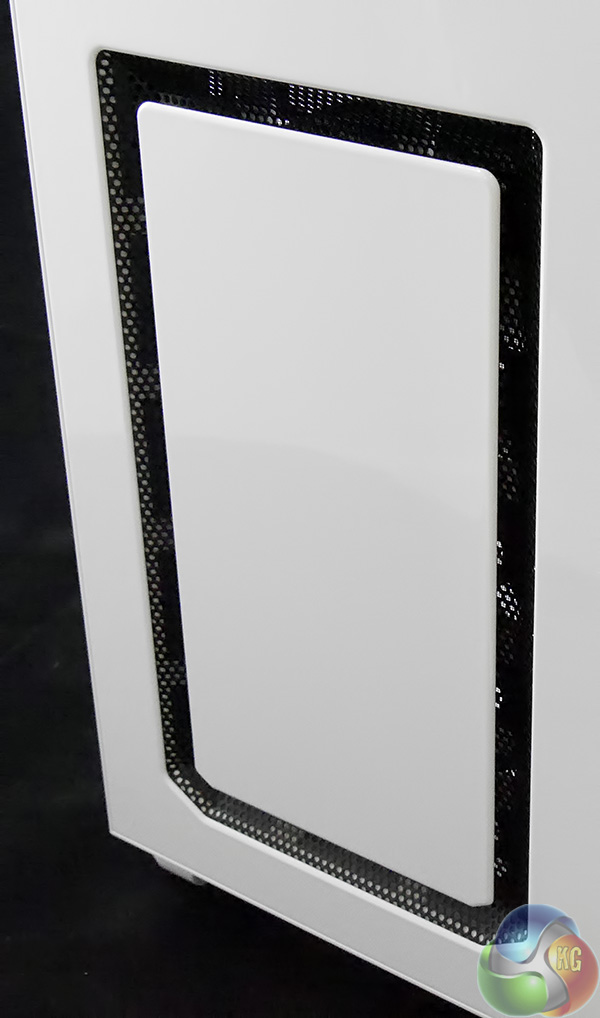
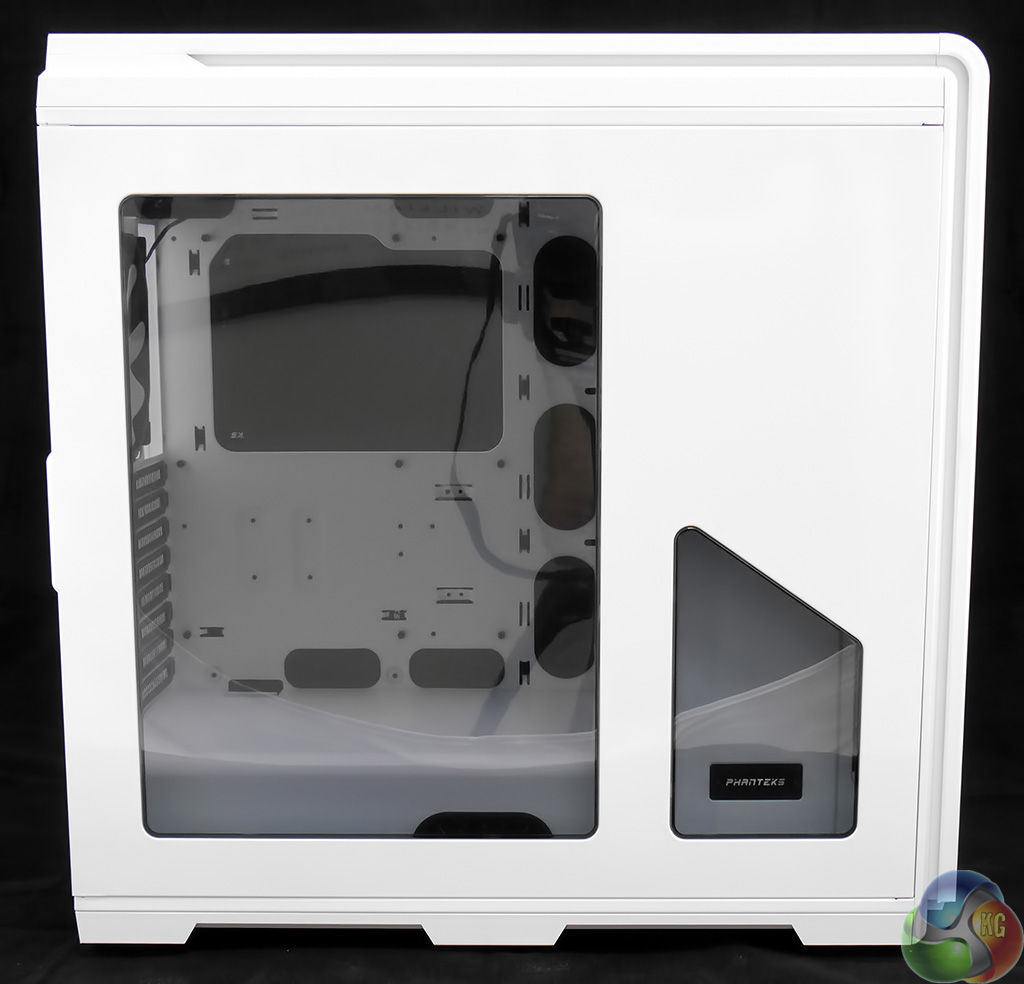
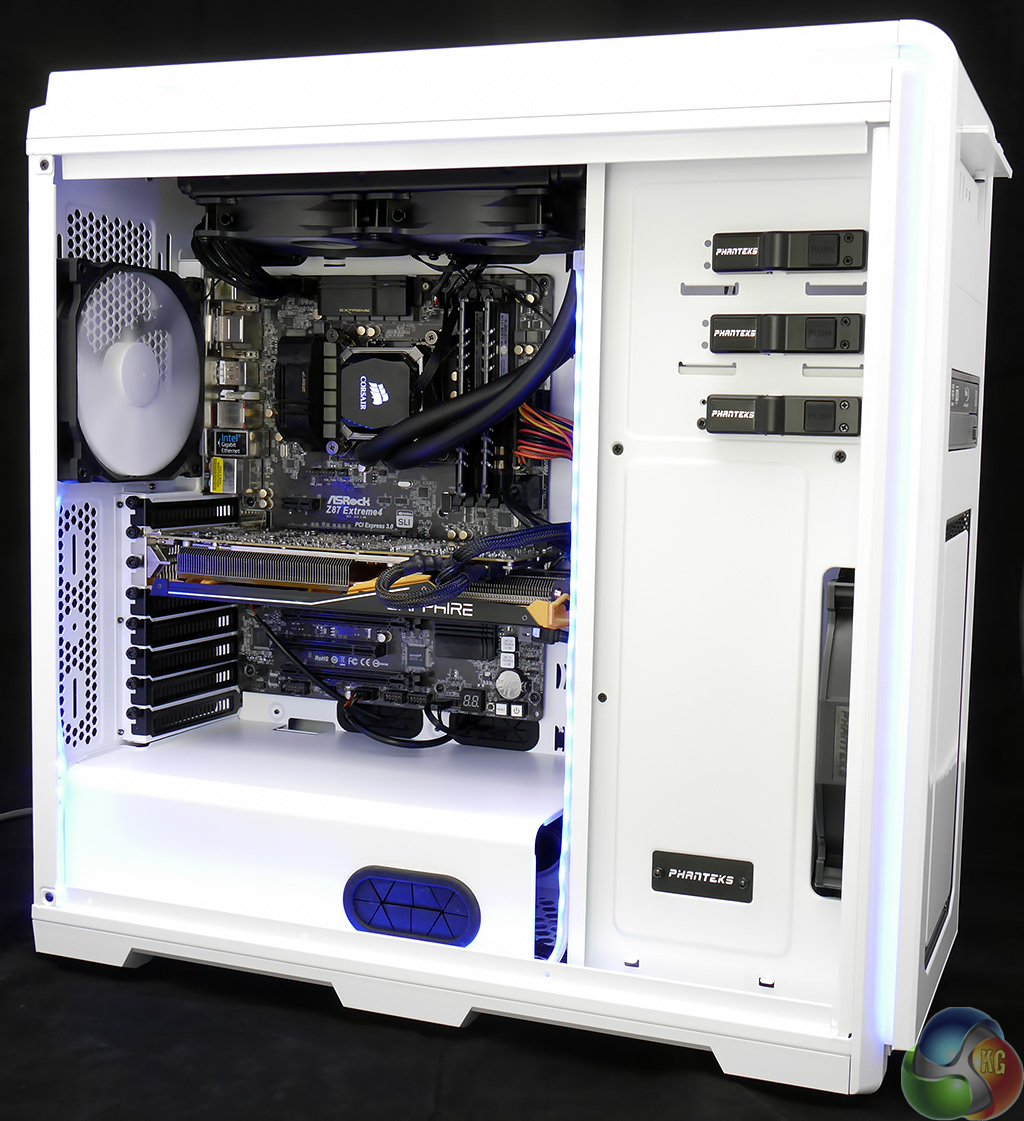
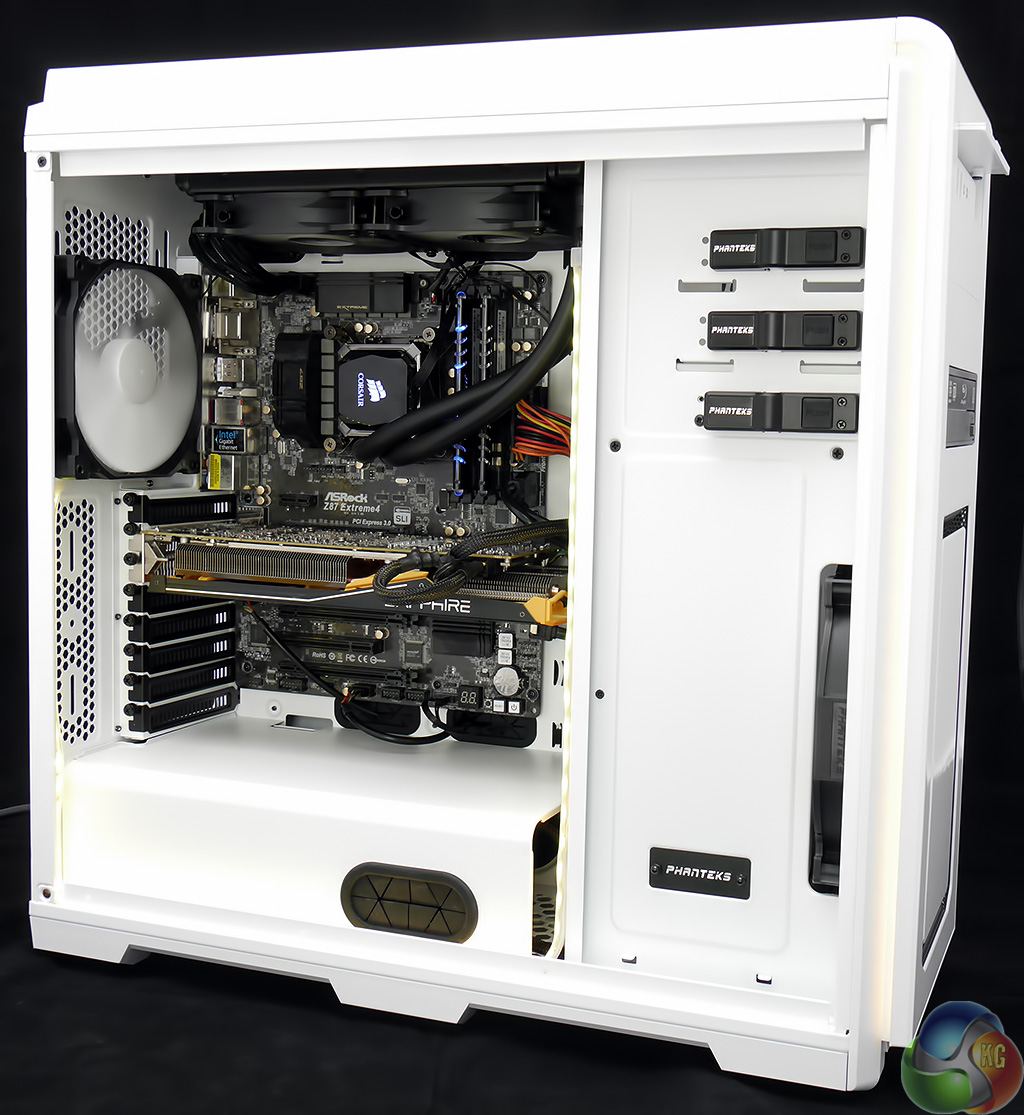
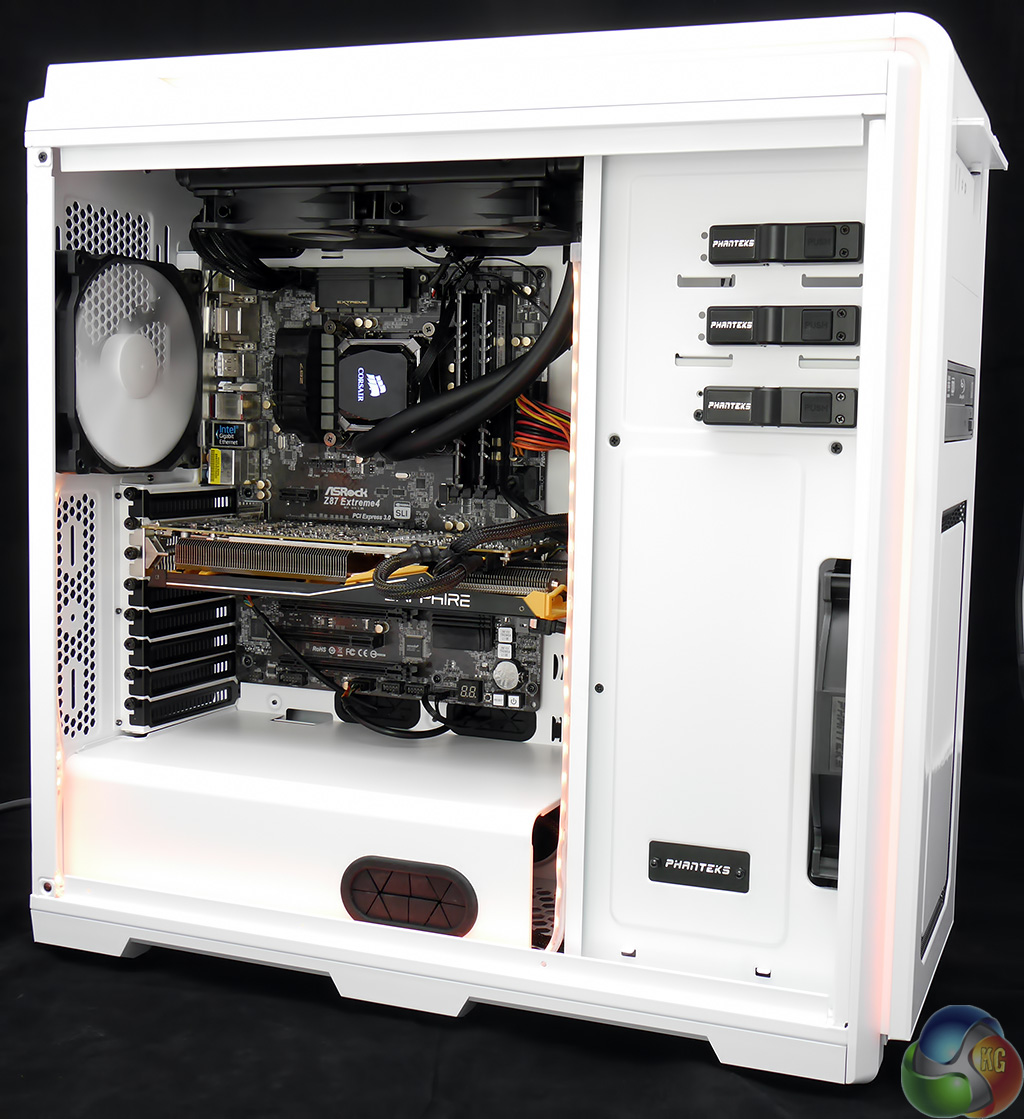
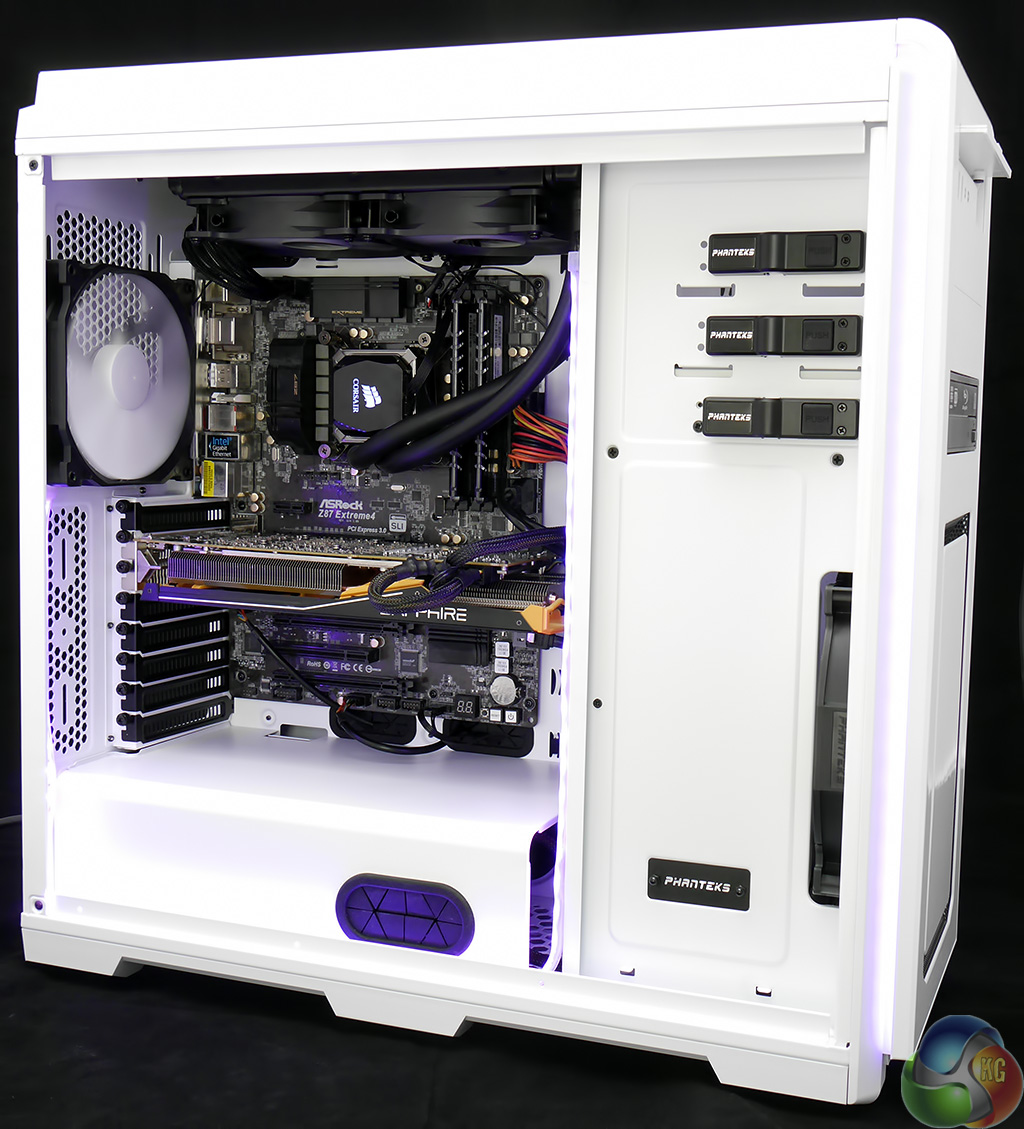
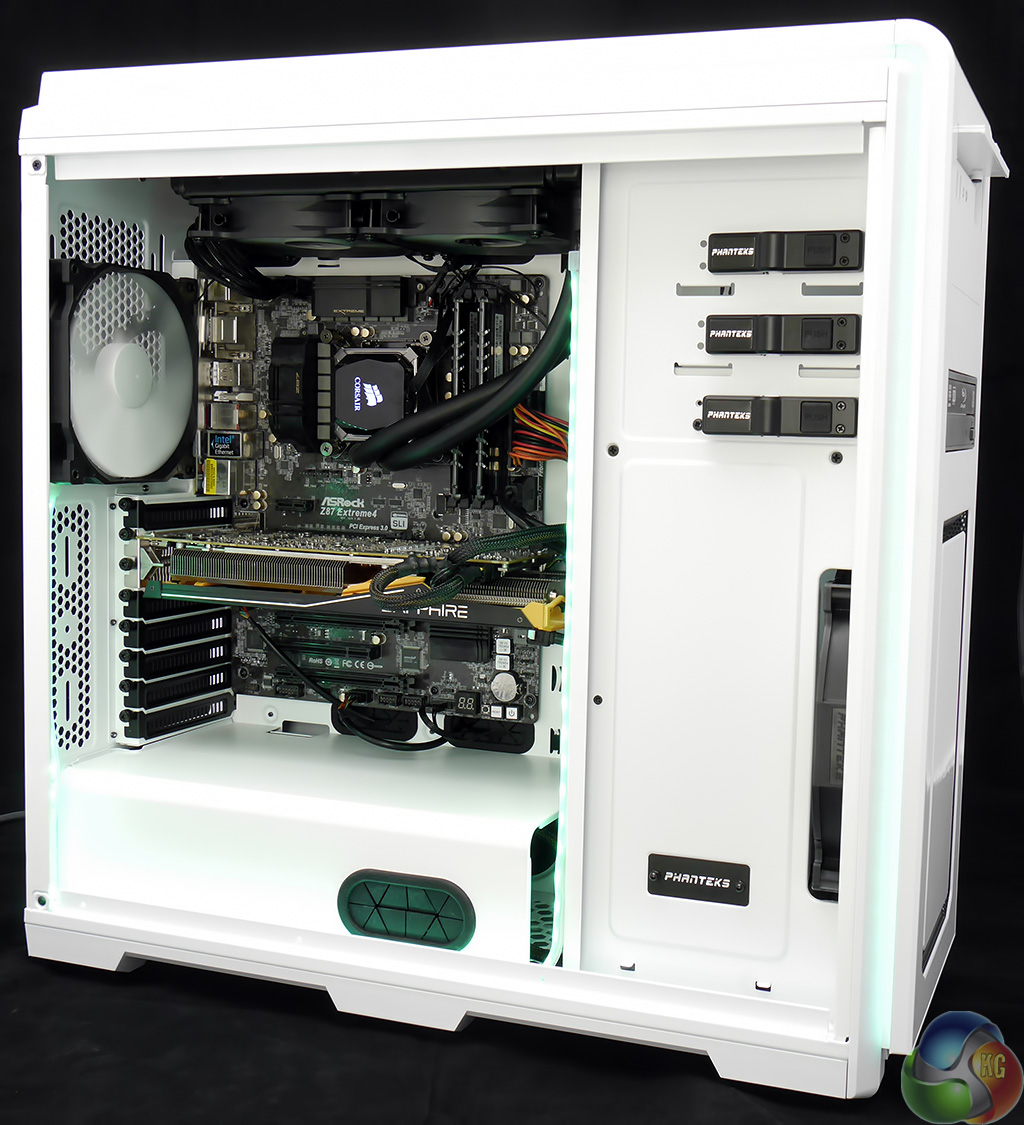
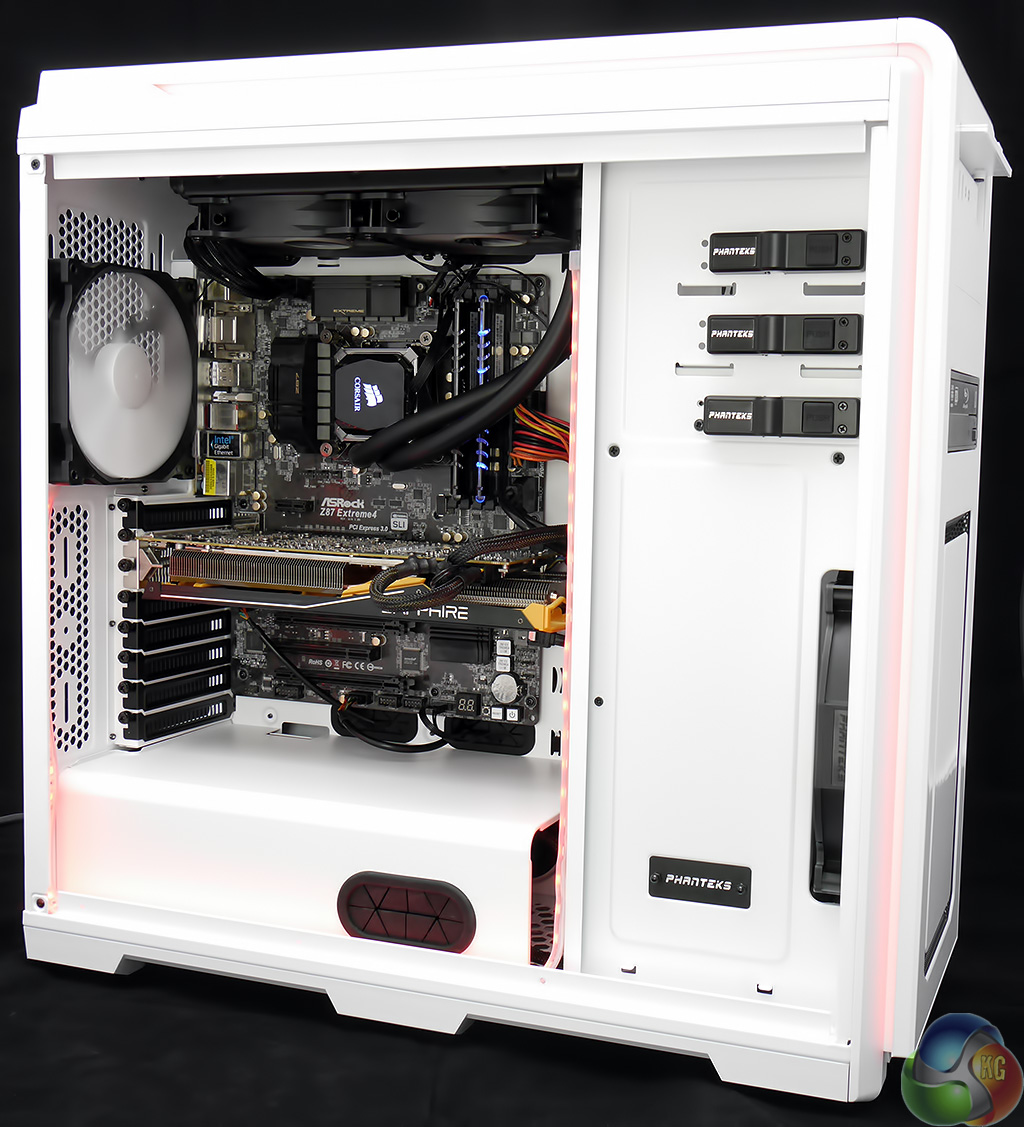
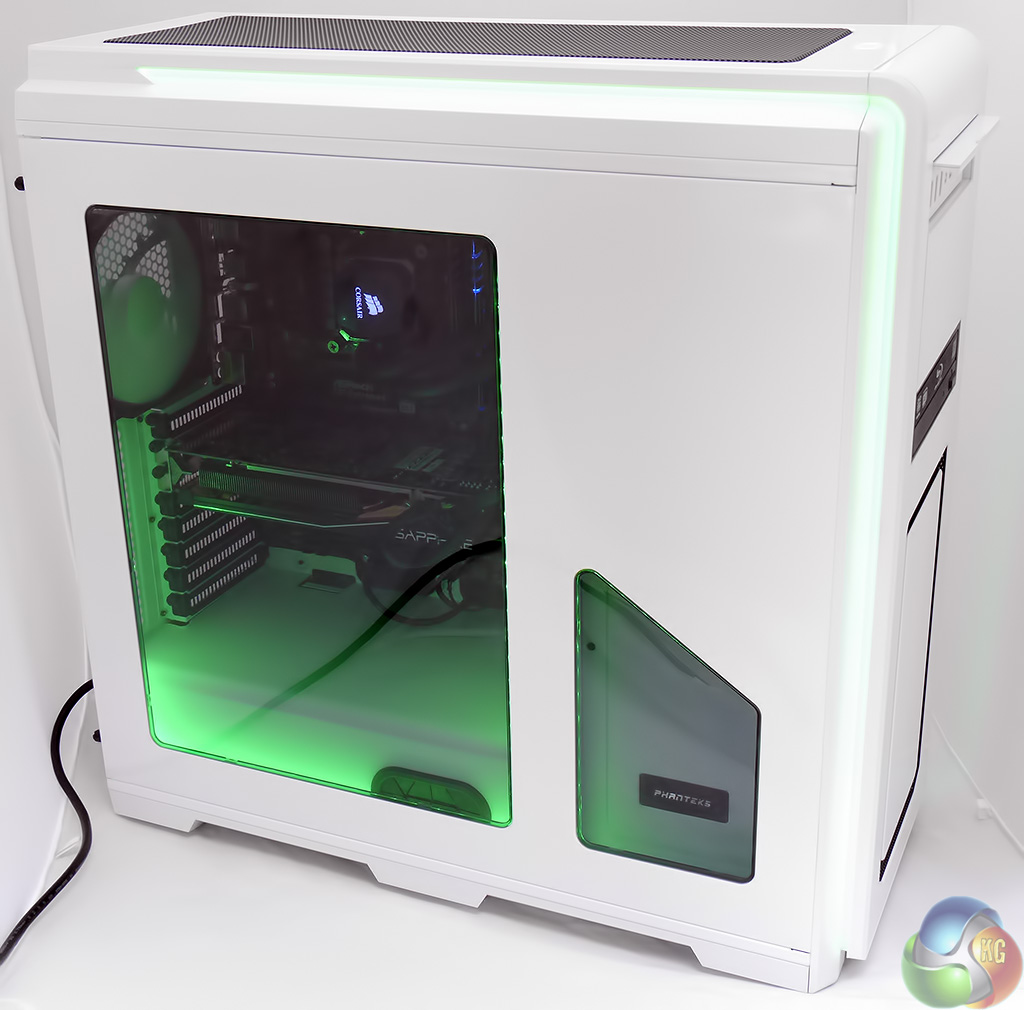
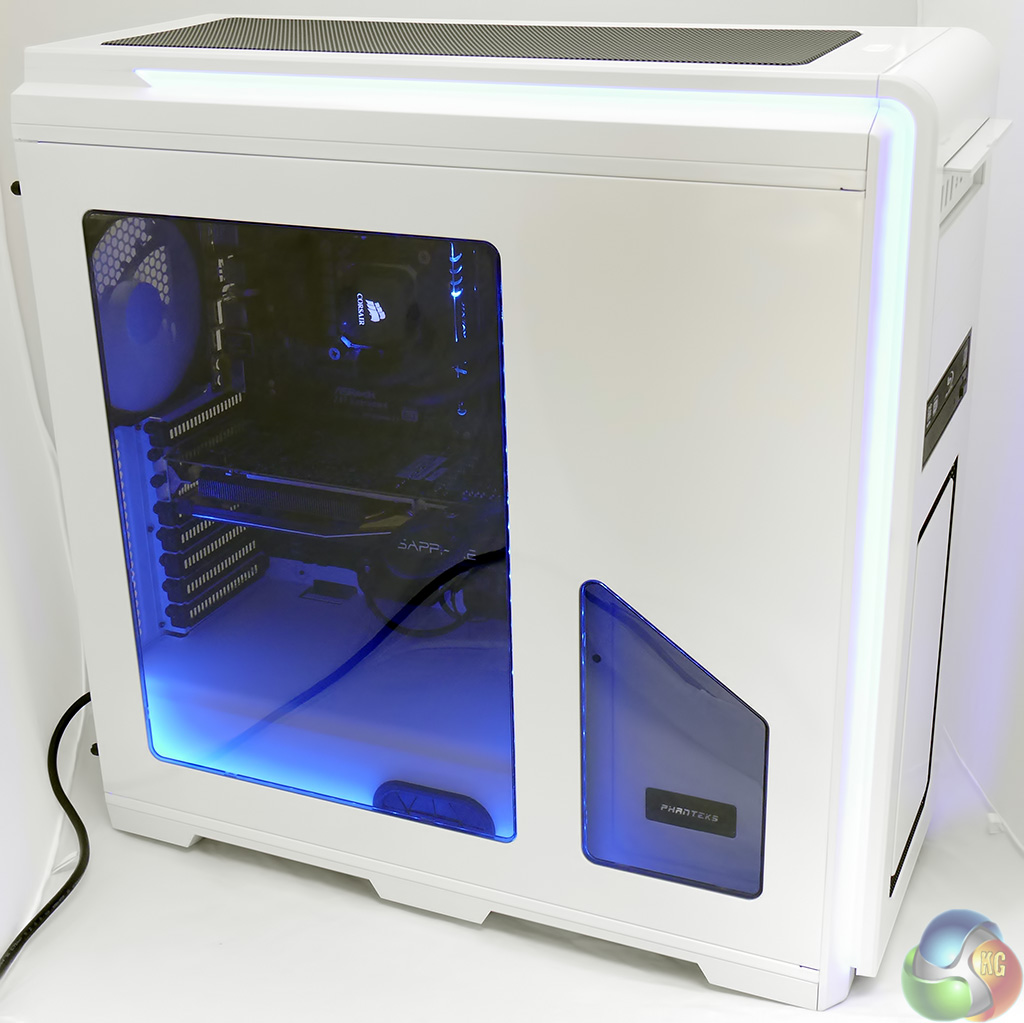
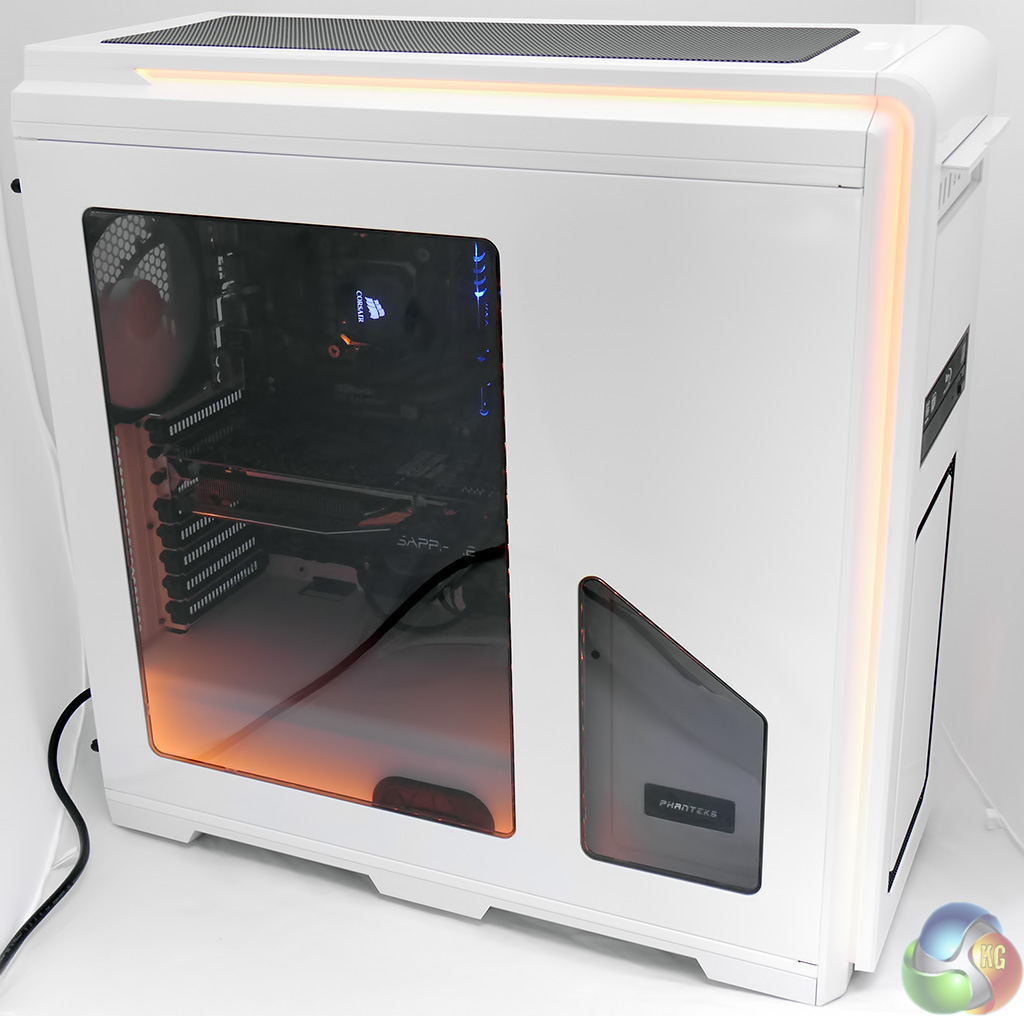
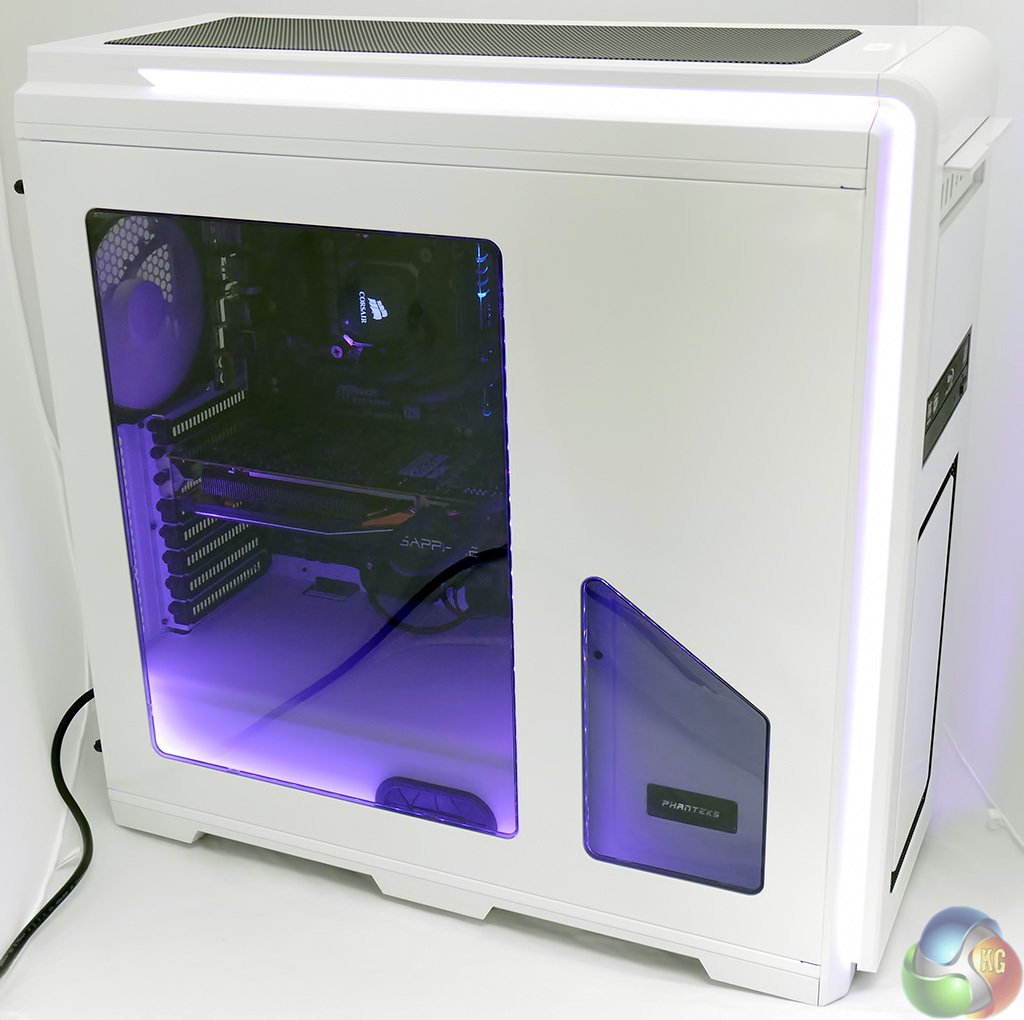
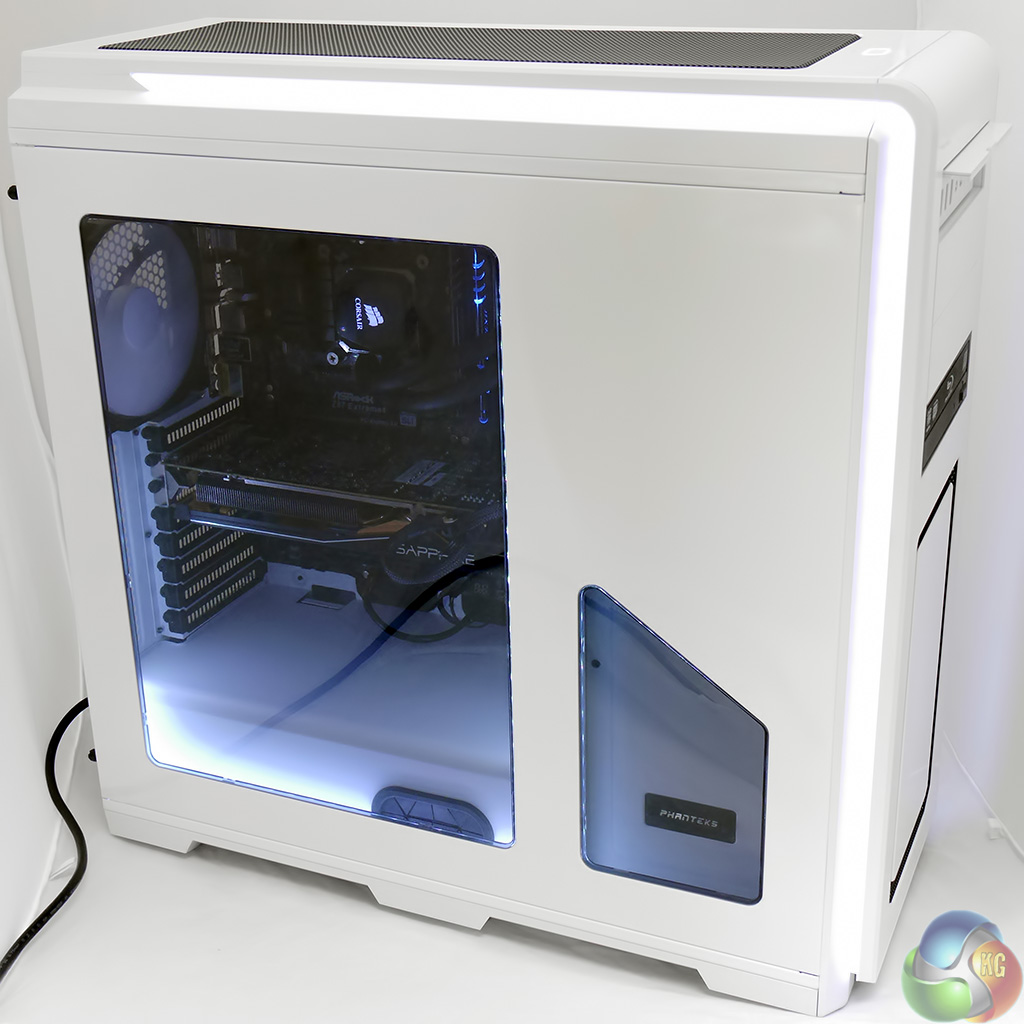
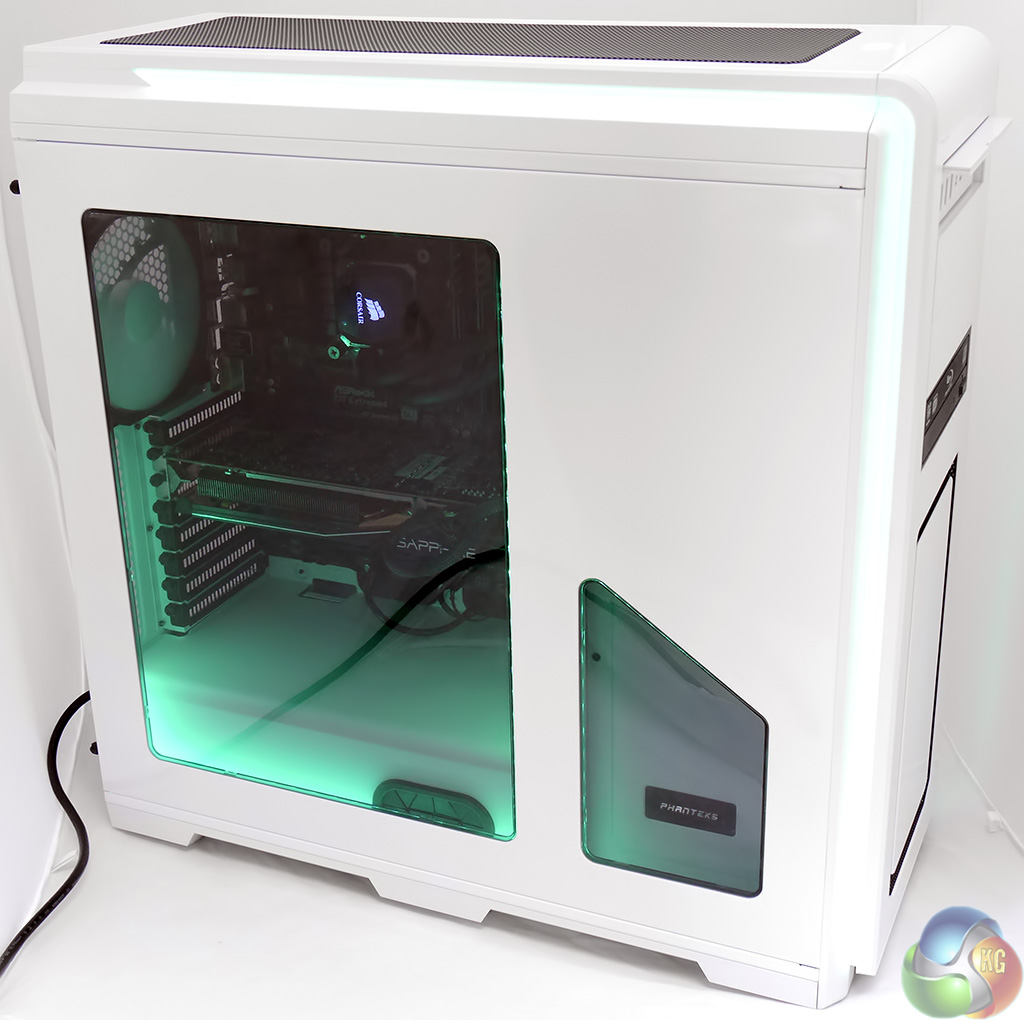
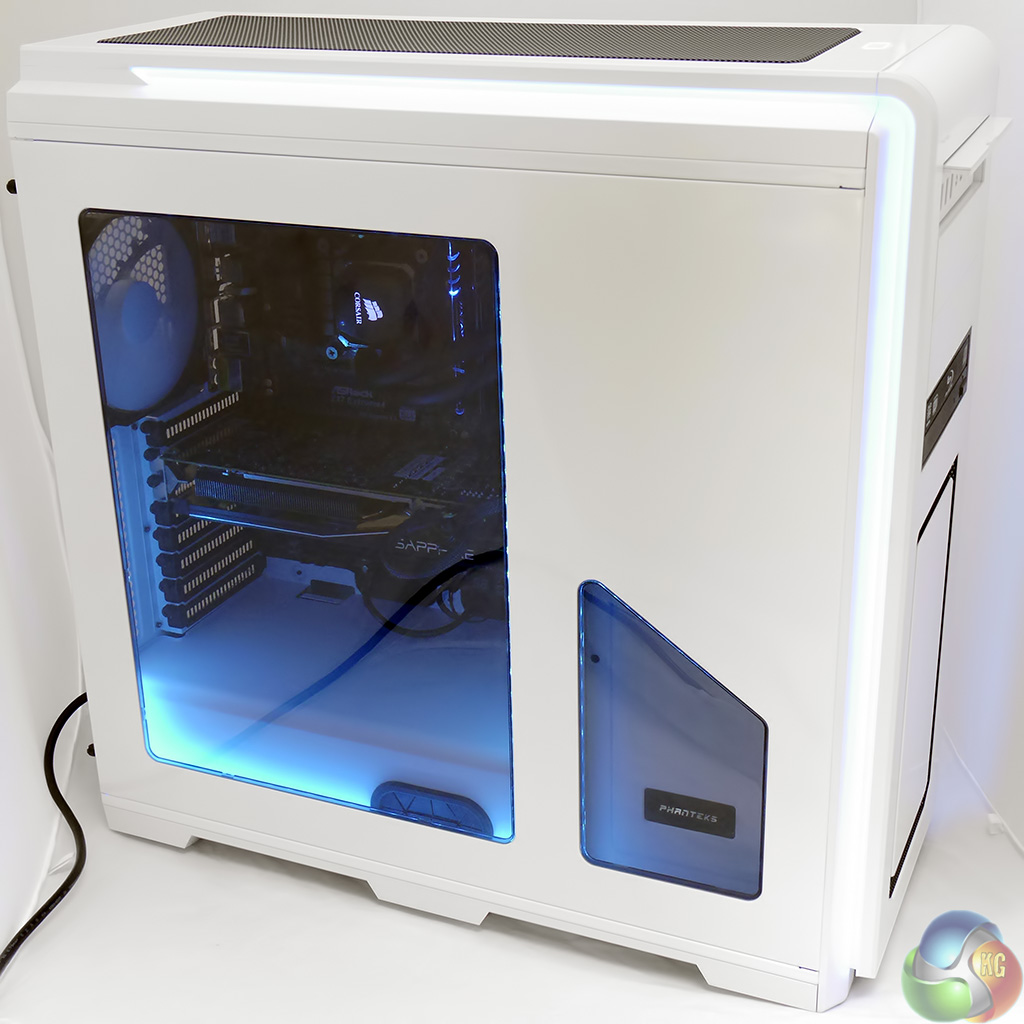
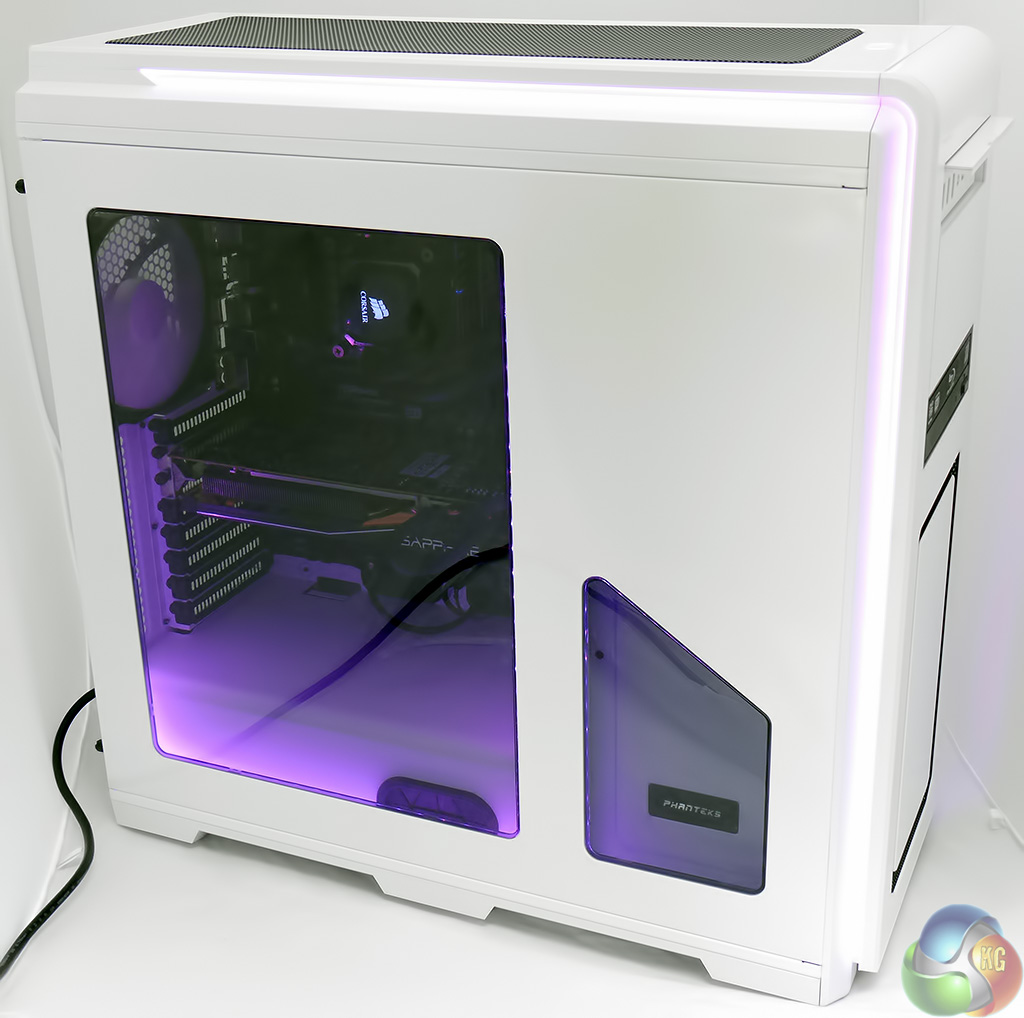
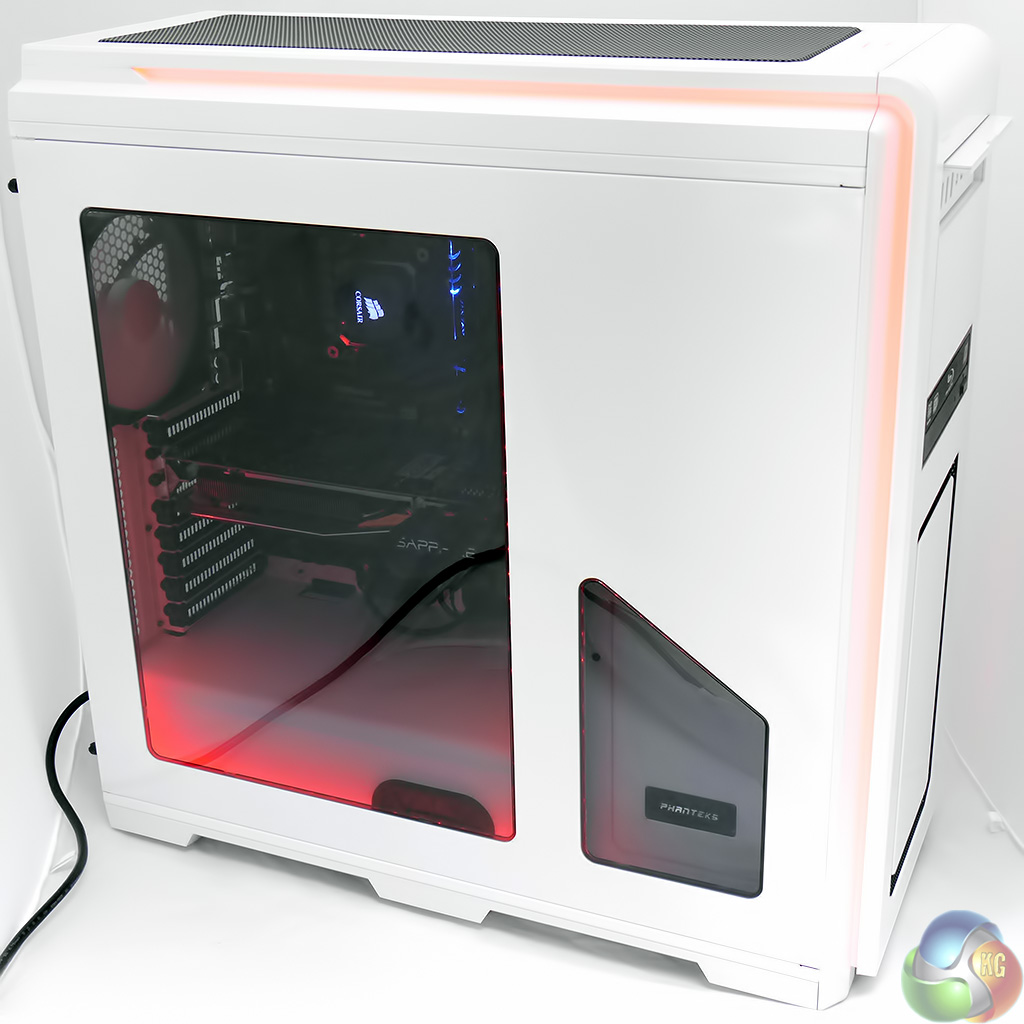
You get a pair of windows in the side panel. The smaller of the two windows didn't do much in the Pro, apart from showing off the Phanteks logo. In the Luxe both windows play their part with the lighting system as we'll see in a while. The main window also shows off the hardware installed in the PC, which is exactly what you would expect.

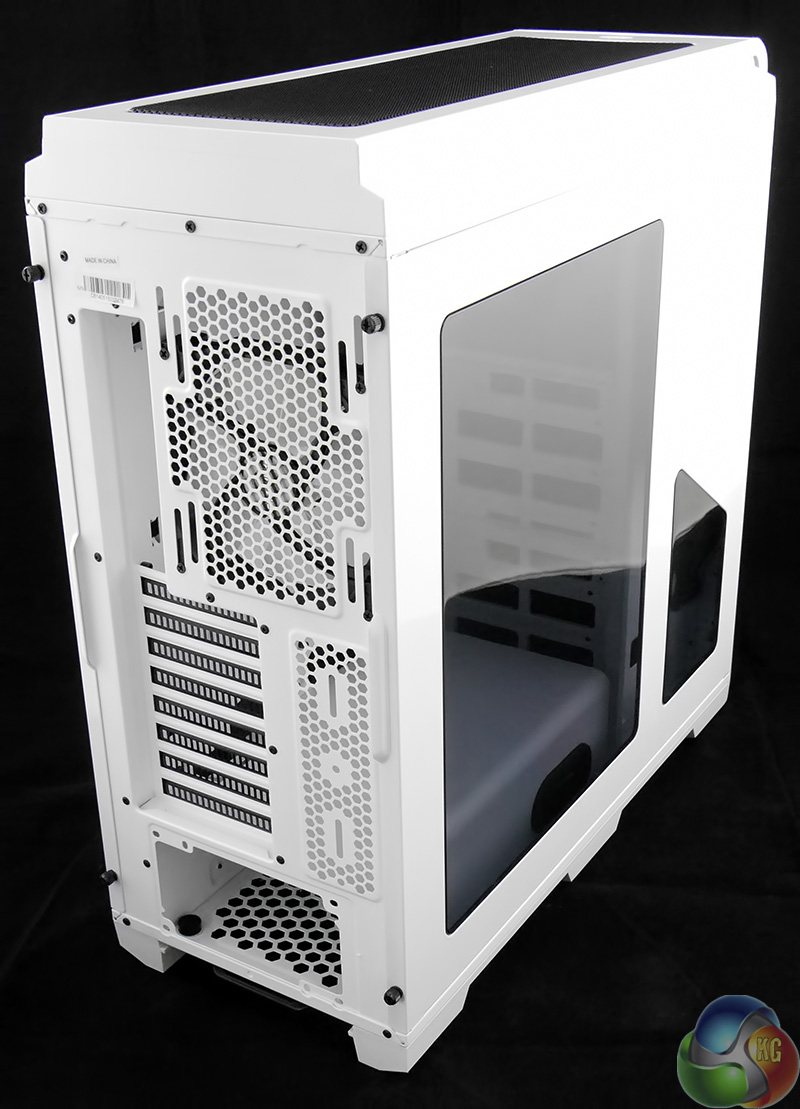
At the rear of the Enthoo Luxe the case is heavily perforated. Above the I/O panel we have ventilation for the 140mm fan and below that the eight blanking pieces for the expansion slots are also perforated.
The white finish on the Enthoo Luxe is very smart and the expanse of the side panel does a fine job of showcasing the quality of the painted finish.

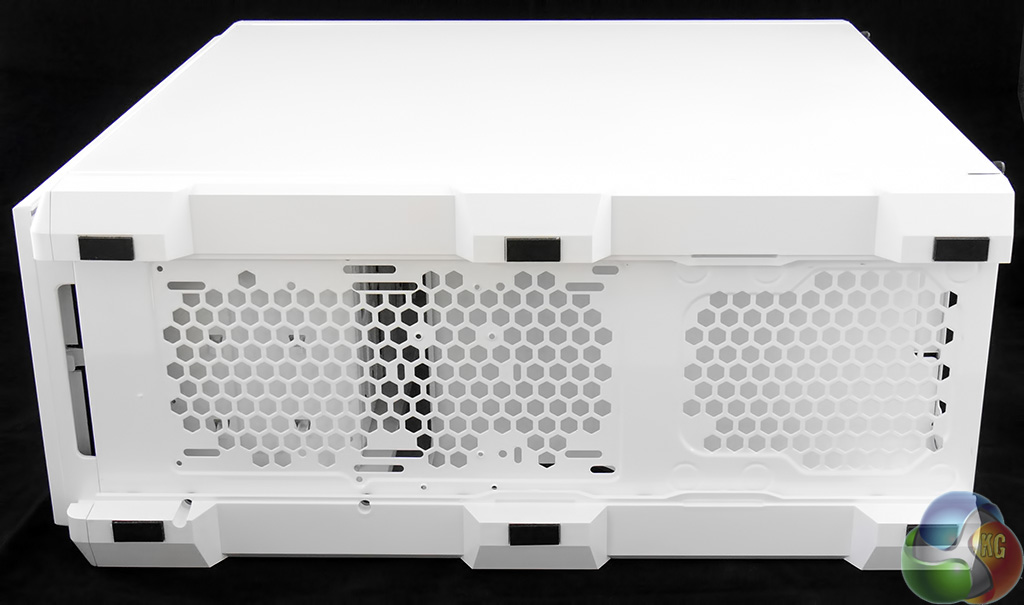
On the bottom of the case there are two removable plastic filter screens. One filter slides out to the front and the other to the rear which makes it easy to keep them clean.
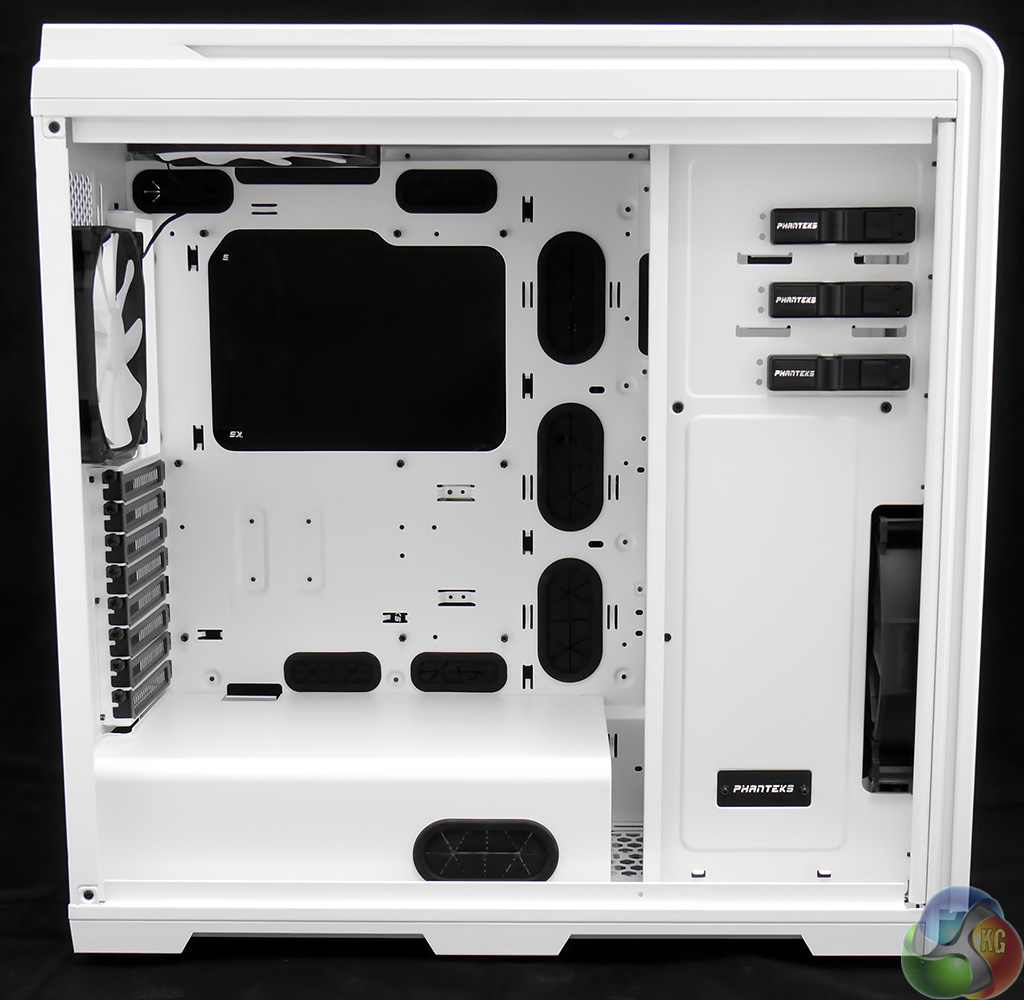
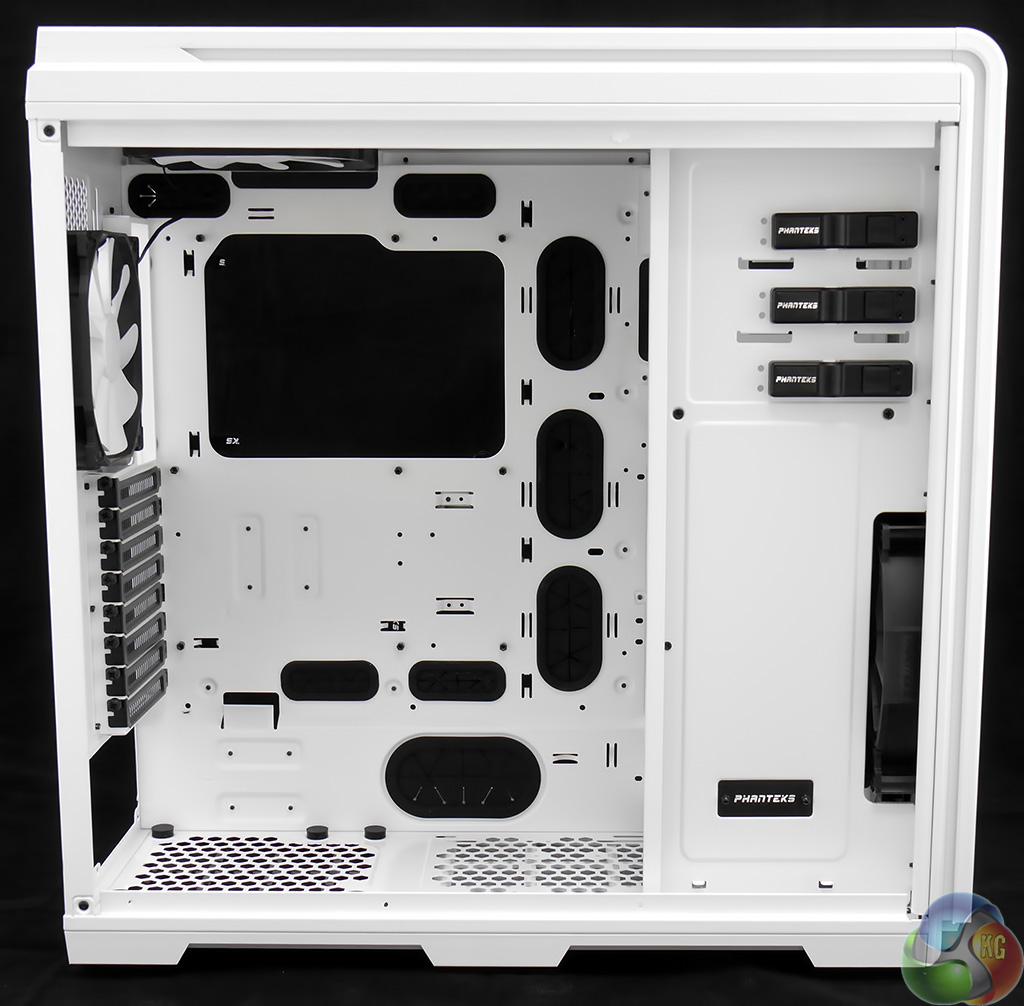
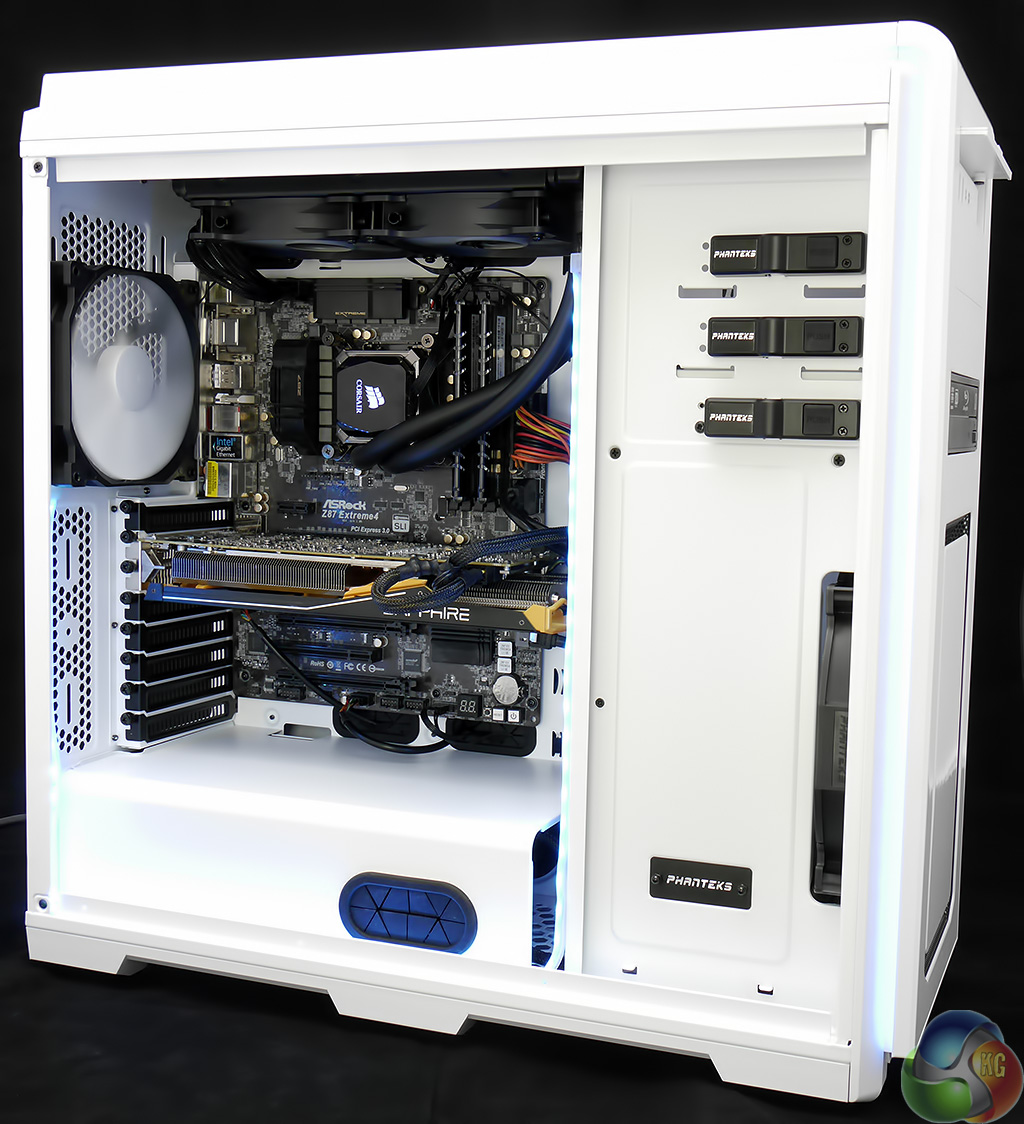
Removing the windowed side panel opens up the interior of the case and blimey it's bright and white inside. Removing three thumb screws allows you to pull out the power supply cover to leave the case ready for the system build.
As you can see there is plenty of space around the motherboard to make your PC build as easy as possible. There are massive holes for cable management with grommets that keep the cables nice and tidy. Naturally there is a huge opening to give access to the back of the motherboard so you can be confident you'll have the minimum of hassle installing your chosen CPU cooler.
What you cannot tell from the photos and video is that the Enthoo Luxe is manufactured from a variety of materials.
The main chassis, interior fittings and two side panels are made from steel. Phanteks makes the point that the structure of the Luxe is mod friendly as the components are fastened together with screws, instead of the usual rivets.
If you plan on modifying the Luxe you can remove the top of the case along with the optical drive bay and hard drive tower. The top and front panels are plastic and pop into the top and front of the chassis using a set of mounting posts. These panels require a firm pull to remove them from the case and once they are free (albeit hanging on their cables) it is all too easy to lay them to one side without paying them close attention. In fact these ‘plastic' panels are faced with painted aluminium panels that measure some 2mm thick.
I struggled to spot how Phanteks has engineered the Luxe merely by using my eyes but when I ran my fingers across the panels I could feel the aluminium parts were cool to the touch.
It is a shame that a great deal of tooling and clever work with materials will escape most people's attention but we are interested in results, rather than process. The result of this approach is a painted finish that looks superb whilst also avoiding the curse of greasy fingerprints. I suggest you put the thought of aluminium out of your mind and simply admire the finished result which is gorgeous.
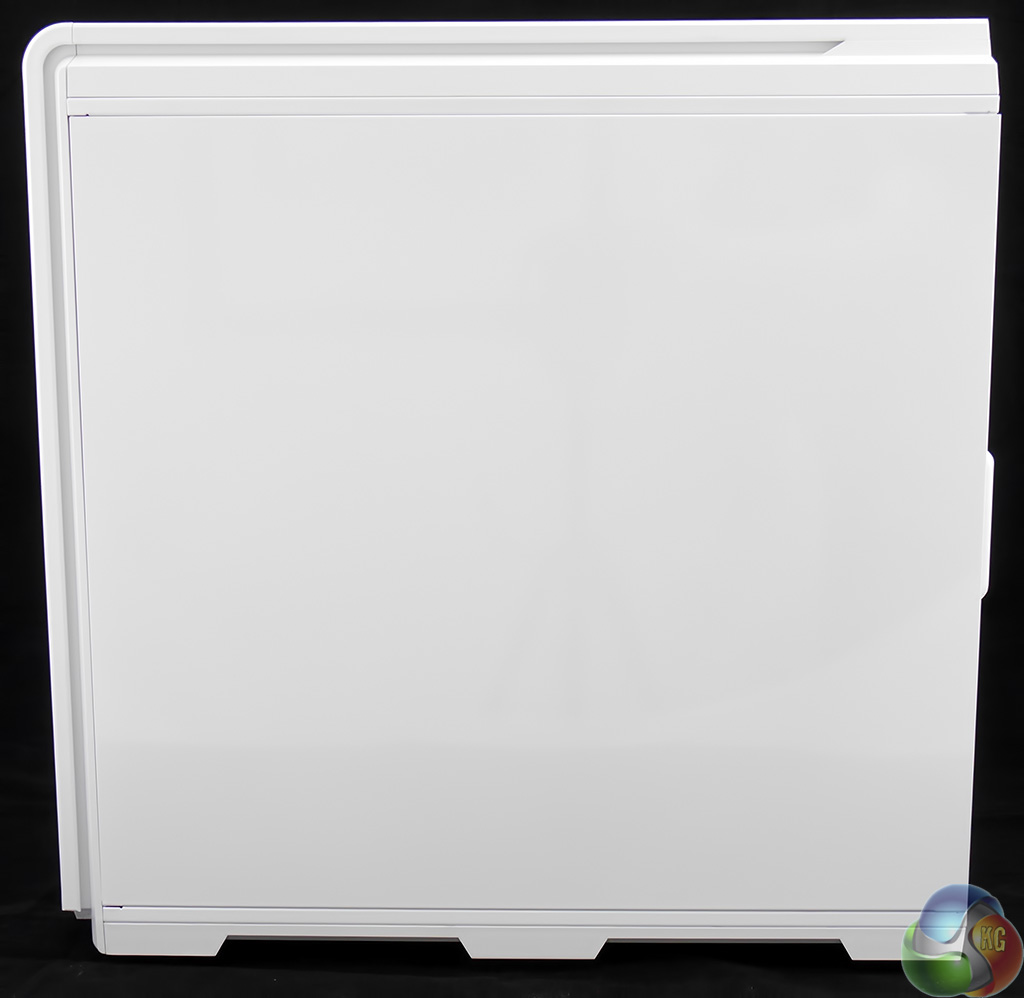
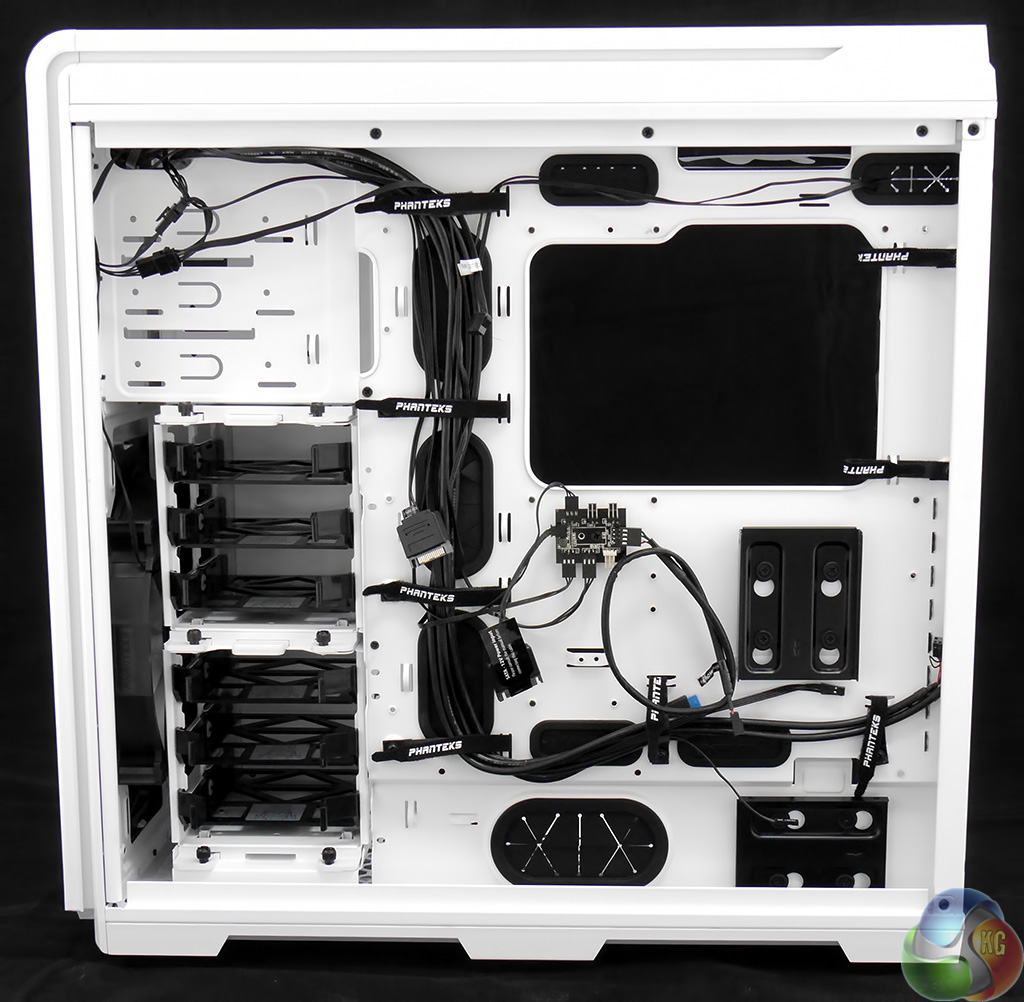
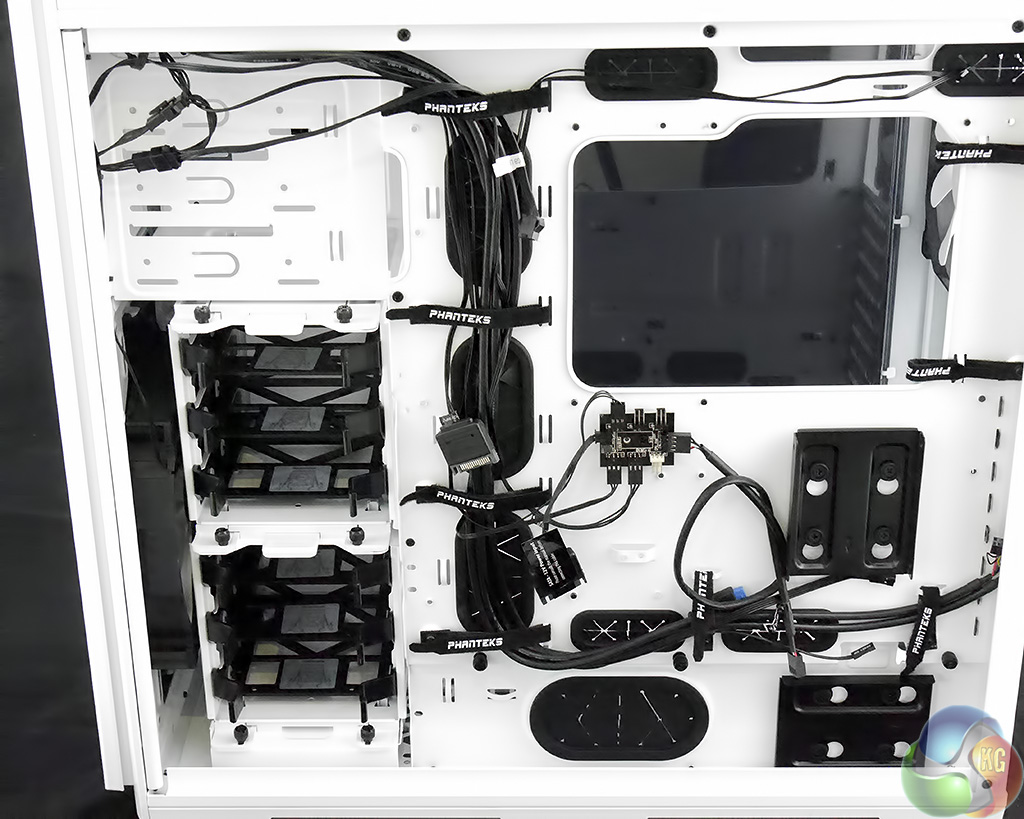
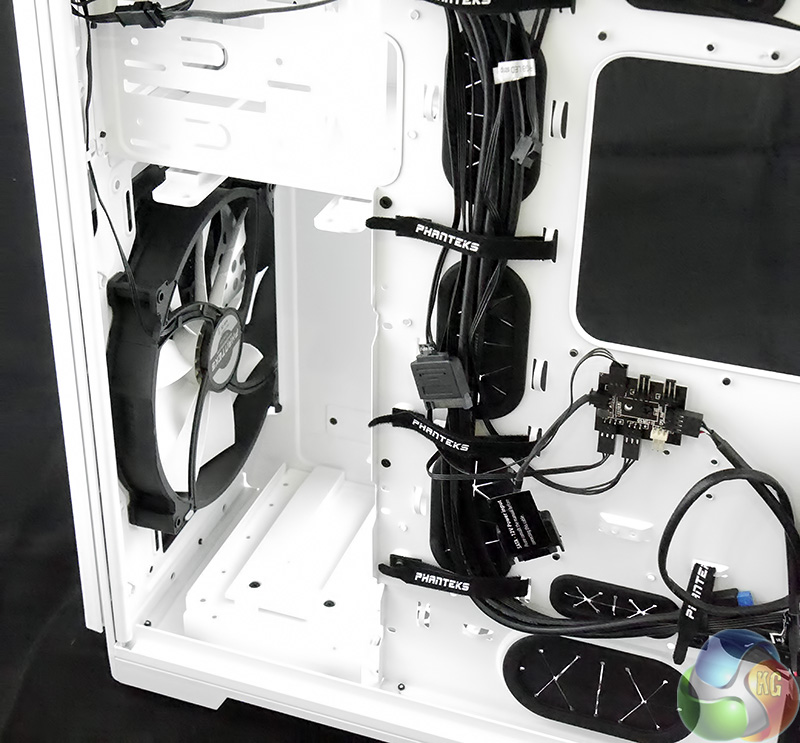
Turning to the other side of the case we have the side panel which is smooth and unblemished. Remove two thumbscrews, lift away the cover and you'll see a whole host of features. There are eight hook and loop straps for cable management, two single bay Drop-n-Lock SSD brackets and a PWM hub to manage your fan connections.
Mixed in with the bundle of cabling you might spot a couple of SATA power connectors. One powers the PWM hub while the other feeds juice to the lighting system.


At the front of the case, directly behind the 200mm case fan, there are six 3.5-inch drive bays that are stacked in two towers, one on top of the other. If you don't plan on using a bunch of high capacity drives it is simple to remove the towers and that helps air flow through the front of the case to an admirable extent.
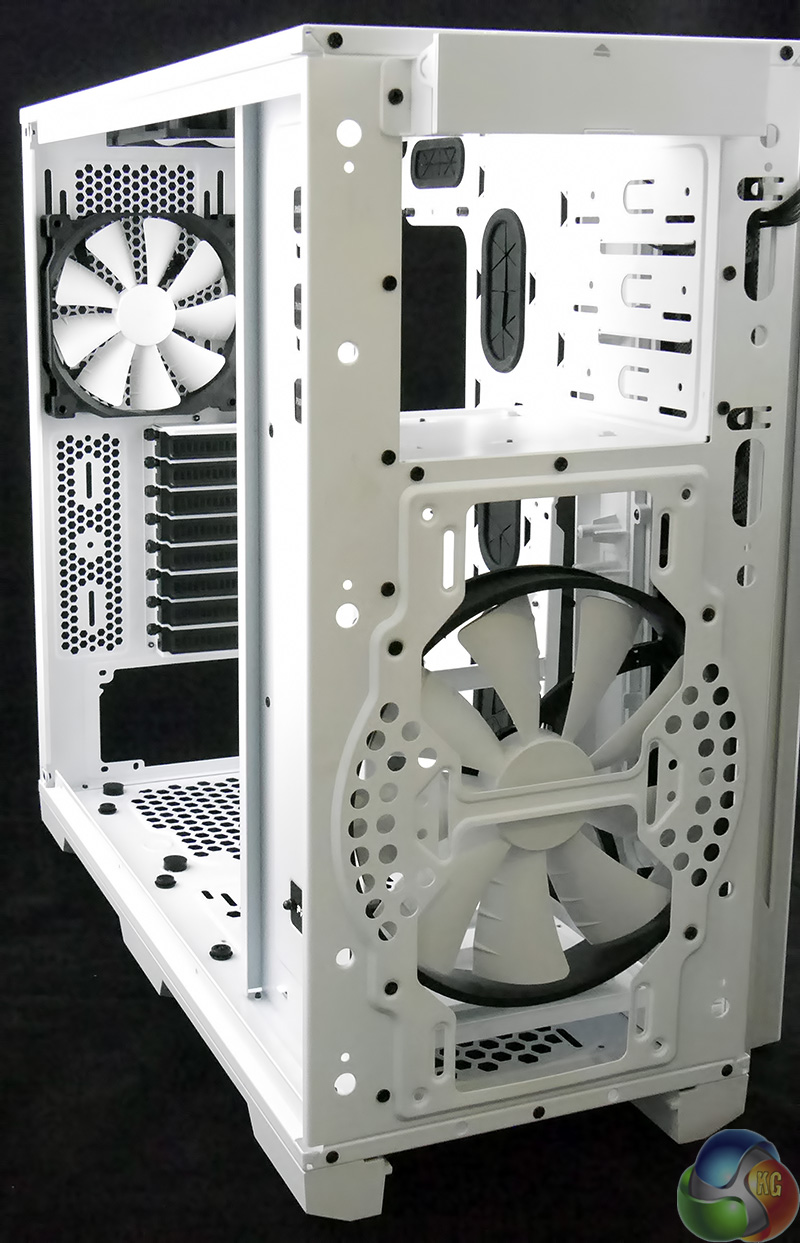
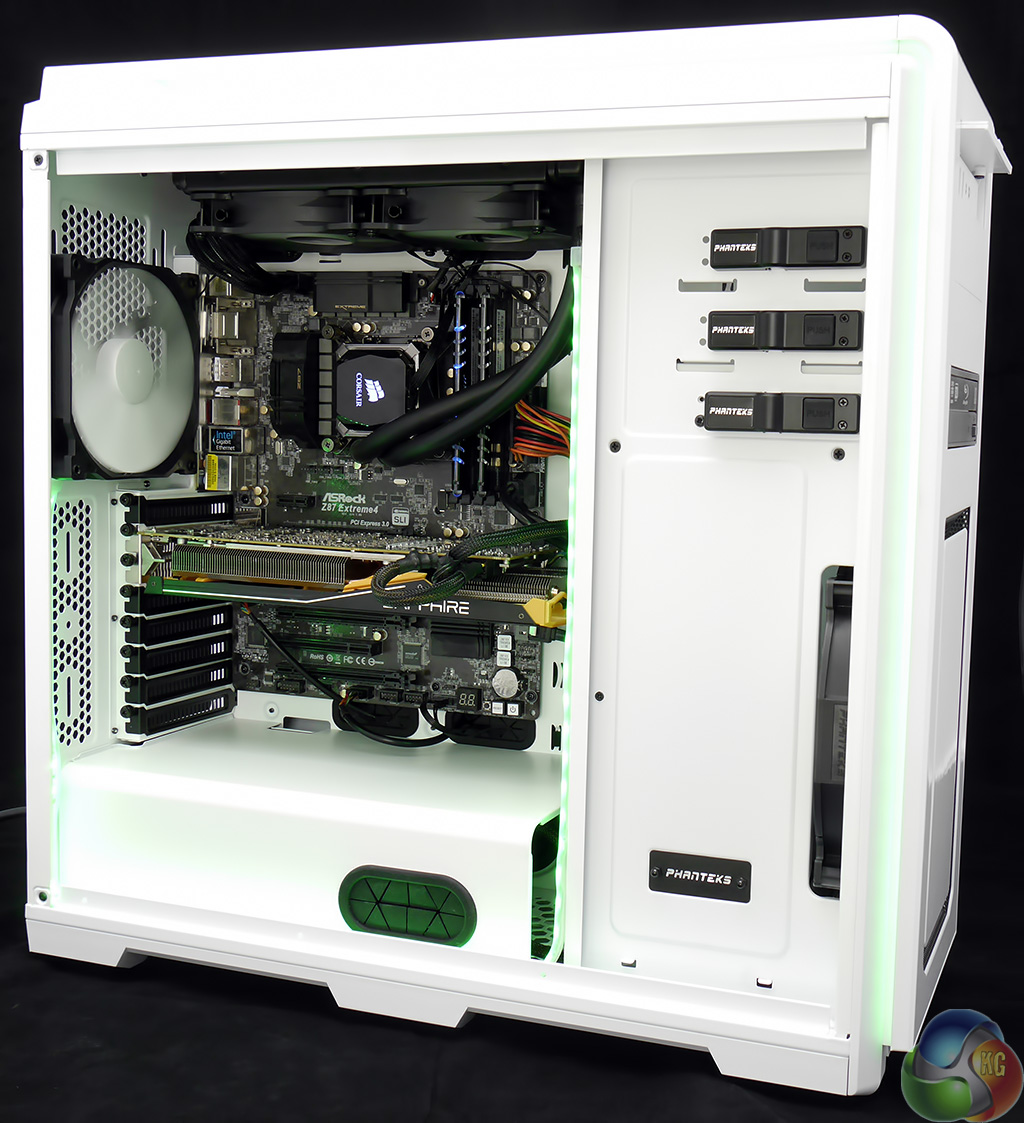
This photo of the Enthoo Luxe shows the case stripped of the side, top and front panels and shows the path of the airflow through the case from the massive 200mm fan at the front to the two 140mm fans at the rear.

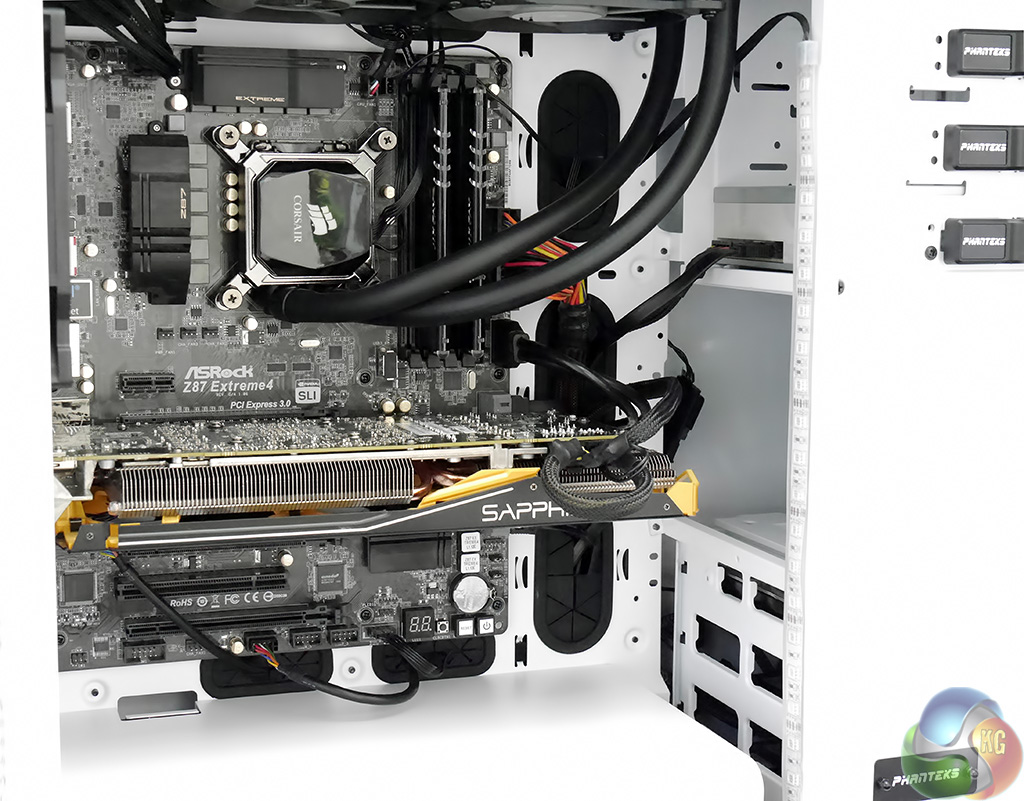

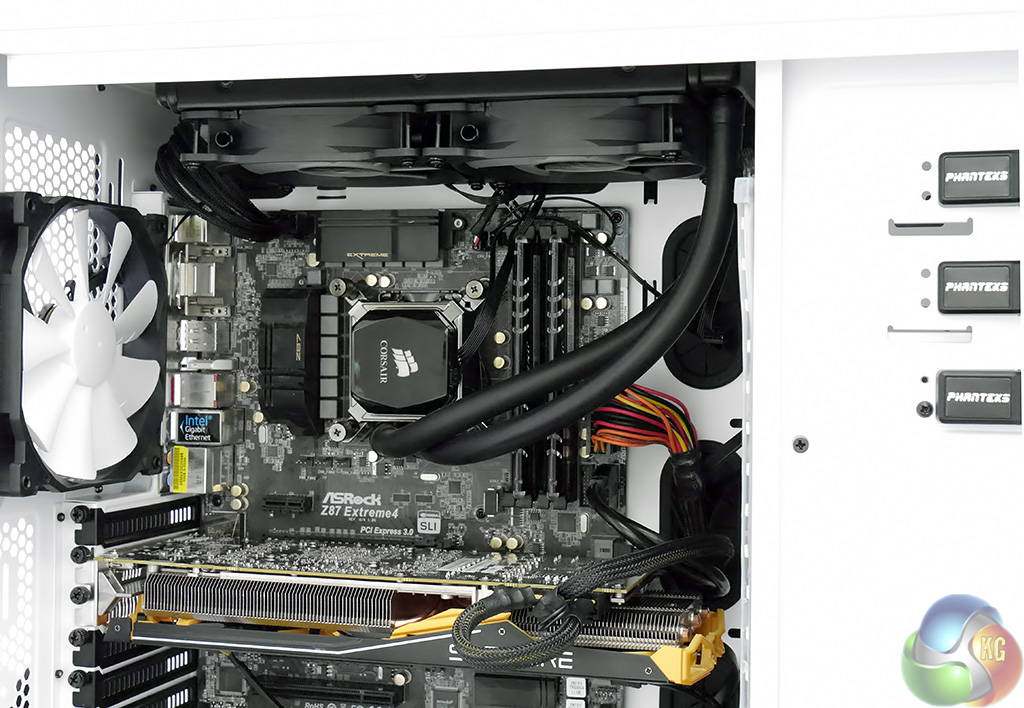
Installing an ASRock Core i7 motherboard in the Enthoo Luxe was a simple matter, however the same had also been true of the Enthoo Pro. It was during the installation of the Corsair H100i liquid cooling system that I came to appreciate the extra space in the roof of the case. The radiator vanishes out of sight with plenty of clearance above the top edge of the motherboard that allowed me to route the wiring pretty much wherever I wanted.
It is worth pointing out that I removed the upper 140mm fan from the case to ease the installation of the Corsair H100i. This wasn't strictly necessary as there are so many options for installing fans and radiators however the fan was redundant and only took seconds to remove.
I'll leave you to form your own judgement but I was happy with the finished PC.
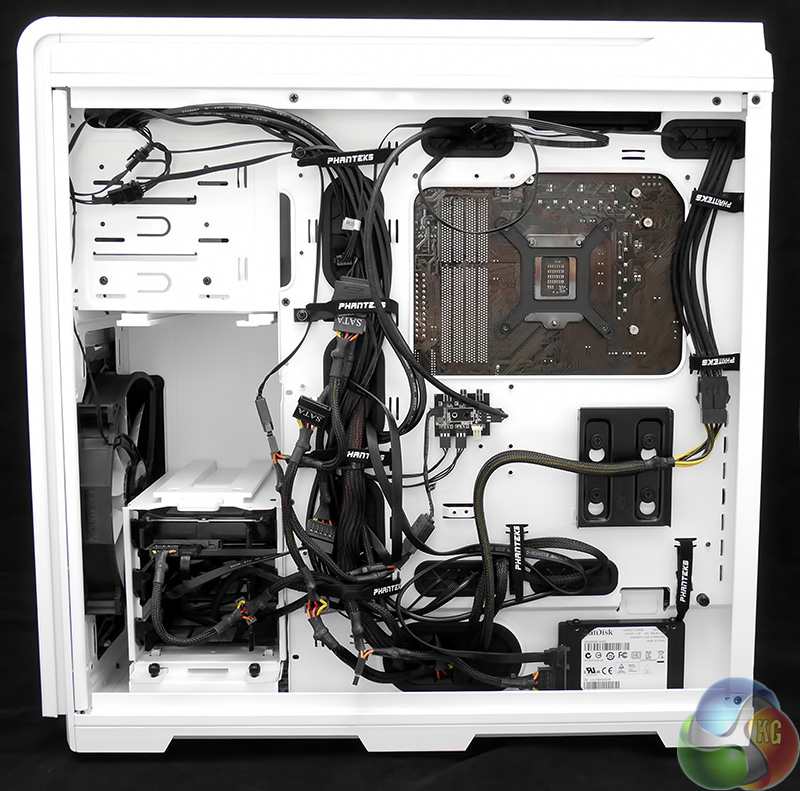
Admittedly the rear of the PC isn't quite so tidy as the front but I took a ‘That'll do' approach and did just enough work for the PC to look correct when viewed through the windowed panel. I installed a SanDisk SSD in one of the bays on the rear of the motherboard tray and a single data HDD in a 3.5-inch bay, which meant I was able to remove one of the two drive towers to assist airflow from the 200mm fan.
I didn't need to use any cable ties during the build as the supplied hook and loop straps did a fine job.

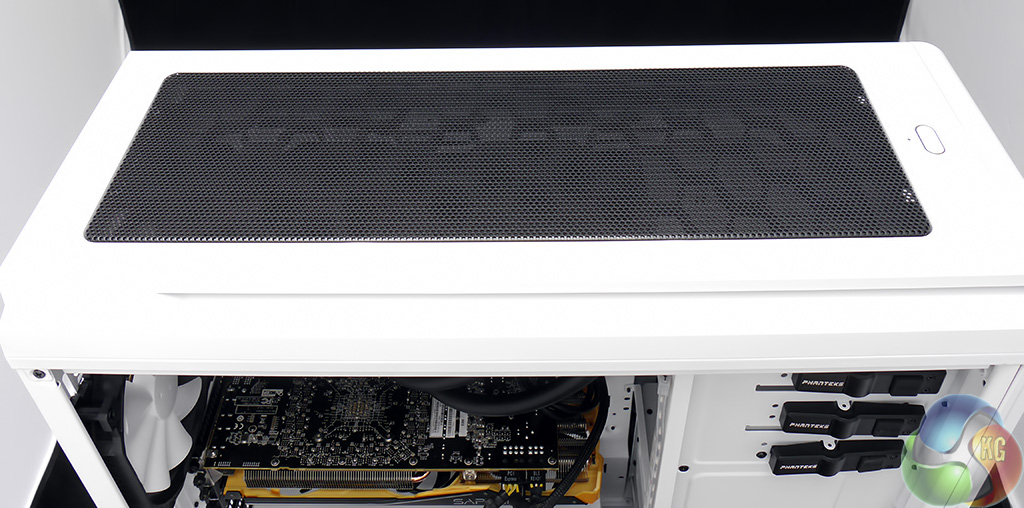
This top view shows you the access provided by the removable top grille. You can see the two latches that hold the grille in place on the left of the photo (the rear of the case). The latches were a bit hit and miss and it took a couple of attempts to get both latches to work at the same time.


[yframe url='http://www.youtube.com/watch?v=7C–NBnfgWE']
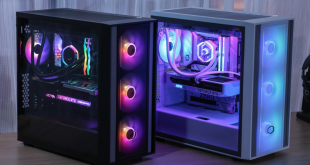
The photos and video of the lighting system pretty much speak for themselves. The lighting that is built into the case is impressive and sets the Enthoo Luxe apart from the competition. If you feel the urge you can add the one metre (£14) or two metre (£17) LED self adhesive lighting strip to illuminate the interior of the case. The strip isn't especially flexible and I feel that routing the two metre strip would be awkward. I liked the look of the one metre strip and was impressed by the results, and would certainly recommend you spend the extra £14 on this accessory.
Changing between the ten colours is a simple matter of toggling the control button on the front panel. I was glad to see that, unlike my Christmas tree lights, there are no options for flashing lights or flickering patterns, just a pleasant steady glow.
For stress testing we use a mixture of Prime95 and FurMark to create the maximum heat output. Prime95′s ‘Small FFTs’ setting allows us to stress our CPU. FurMark’s ‘GPU Burn-in’ mode creates the maximum amount of load our GPU is ever likely to see.
Test System:
- Processor: 3.9GHz Intel Core i7-4770K
- Motherboard: ASRock Z87 Extreme4
- CPU cooler: Noctua NH-D15 and Corsair H100i
- Memory: Avexir 1600MHz RAM
- Graphics card: Sapphire Radeon Tri-X R9 290 4GB
- Power supply: Akasa Freedom Power 1000W
- Storage drives: Sandisk Extreme SSD and Seagate Barracuda HDD
- OS: Windows 7 Professional 64-bit.
Thermal Performance Test Procedures:
- The Phanteks Enthoo Luxe‘s fan configuration is: 1x 200mm front intake, 1x 140mm rear exhaust fan (one 140mm fan removed, Corsair H100i with 2x 120mm fans installed).
- The fans are operating at full speed.
- We allow the system to idle for 15 minutes and record the stable temperatures.
- We allow the system to operate under extreme stress for 15 minutes and record the stable temperatures.
Assess cooling.
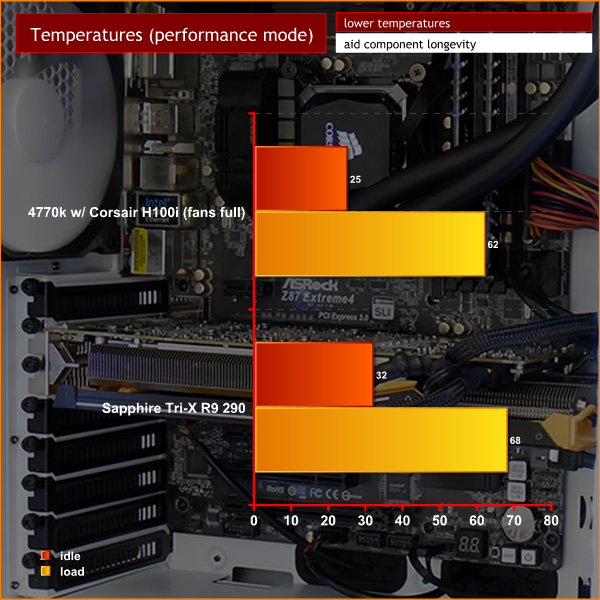
The Enthoo Luxe does a superb job, but I wouldn't have expected anything less with a huge 200mm case fan at the front, a 140mm fan at the rear, two 120mm fans on the liquid cooler, a hefty fan in the power supply and dual fans in the graphics card.
Added to that the case is heavily perforated and has excellent air flow. The final touch is that the power supply is shrouded which means the air flows around the CPU and graphics card with the minimum of interruption.
You can use the Enthoo Luxe loaded with full-on gaming hardware and be confident it will run at pleasingly low temperatures.
Acoustic Performance Test Procedures:
- We placed our Digital Sound Level Meter one metre away from the case.
- The case fans are set to maximum speed.
- The CPU cooler’s fans are deactivated.
- The Phanteks Enthoo Luxe‘s default fan configuration is: 1x 200mm front intake, 2x 140mm rear exhaust fans however I removed one of the 140mm rear fans when I installed the Corsair H100i liquid cooler.
Acoustic Performance
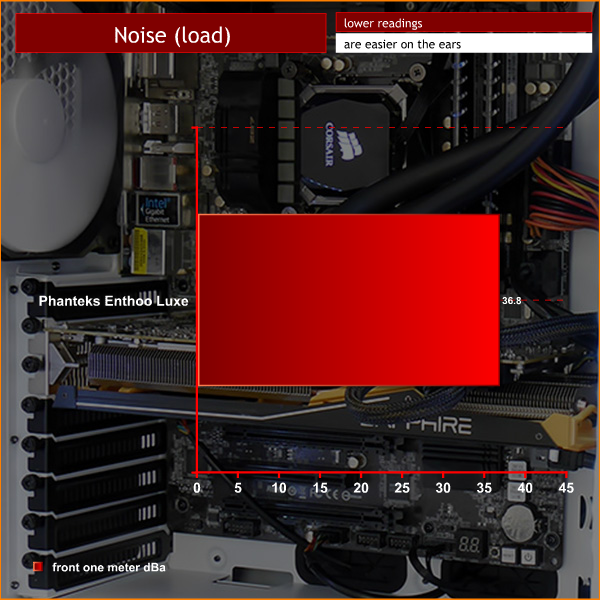
Noise levels are not quite as low as I would have liked, however this a direct trade-off with cooling. For one thing the Luxe is heavily perforated, and where you have air flow you also have noise. The other negative is that Phanteks hasn't used any noise deadening material in the side panels.
Having said that, the noise levels are well within tolerable limits and in no way count as a problem.
The Enthoo Luxe case faces stiff competition in the market, not least from the £89.99 Enthoo Pro which is a damn fine case that does pretty much everything you need a case to do.
I am relieved to report that Boon, the designer of the Luxe, has retained all the good stuff from the Pro, slightly modified the roof of the case to create more space and has also added an extra 140mm fan. Once those simple changes were made the Phanteks team went on to spend time and energy working on the cosmetics of the Luxe and the results are a revelation.
The shape and finish of the front and top panels are just as good as you could hope to see and the LED lighting kit is a superb feature. The option of extending the LED lighting with a one metre or two metre kit is a very nice touch indeed.
Overall there is a great deal to admire about the Luxe and almost nothing to dislike. That doesn't happen very often.
Discuss on our Facebook page, over HERE.
Pros:
- Excellent build quality.
- Massive list of options for air and liquid cooling.
- Supplied with 200mm front fan and two 140mm fans.
- Integrated LED lighting system.
- Top notch cosmetics.
- Integrated hook and loop straps for cable management.
- Plenty of room behind the motherboard tray for a tidy build.
- Removable power supply cover.
- PWM hub manages your fan connections.
- Drop-n-Lock SSD brackets.
- Removable 3.5-inch drive bays.
- Optional extras include a choice of extra LED lighting strips.
Cons:
- Noise levels are a little high. The fans can get noisy at full speed and the Luxe would benefit from some noise deadening material.
- If you load the drive towers with 3.5-inch drives this will have an impact on air flow.
KitGuru says: The Luxe cools superbly and does a fine job but the major attraction of the Luxe is the cosmetic polish delivered by Phanteks and in particular that classy and sophisticated LED lighting kit.