

After experiencing the straightforward installation process of the NZXT Kraken G10, we had high hopes for the Accelero Hybrid II. Unfortunately, the Accelero Hybrid II didn't match our expectations and is actually quite difficult to install.
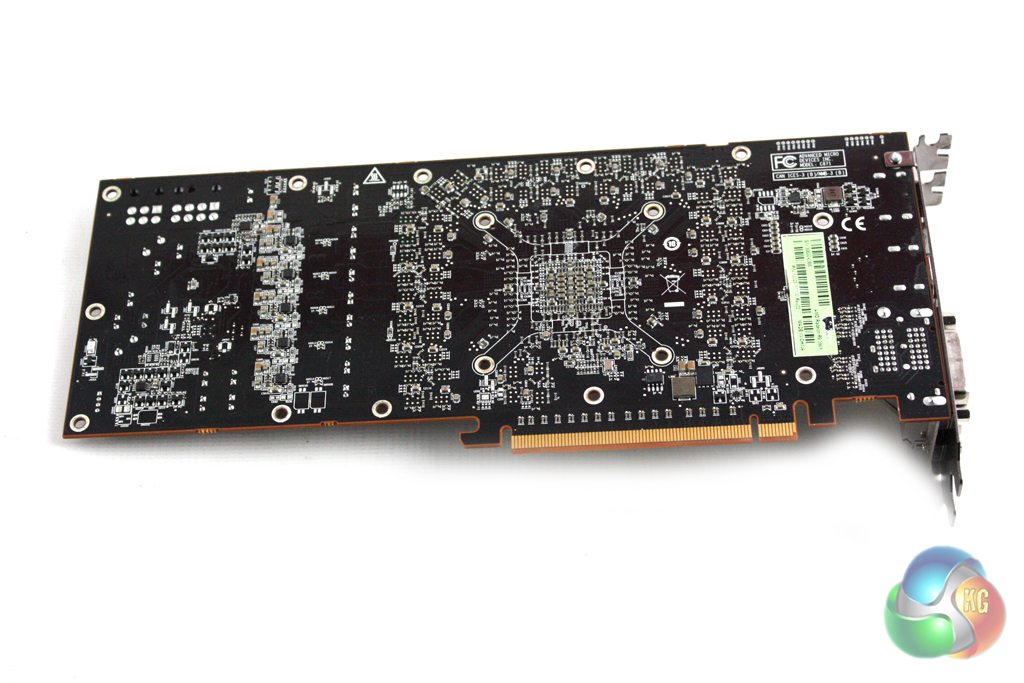
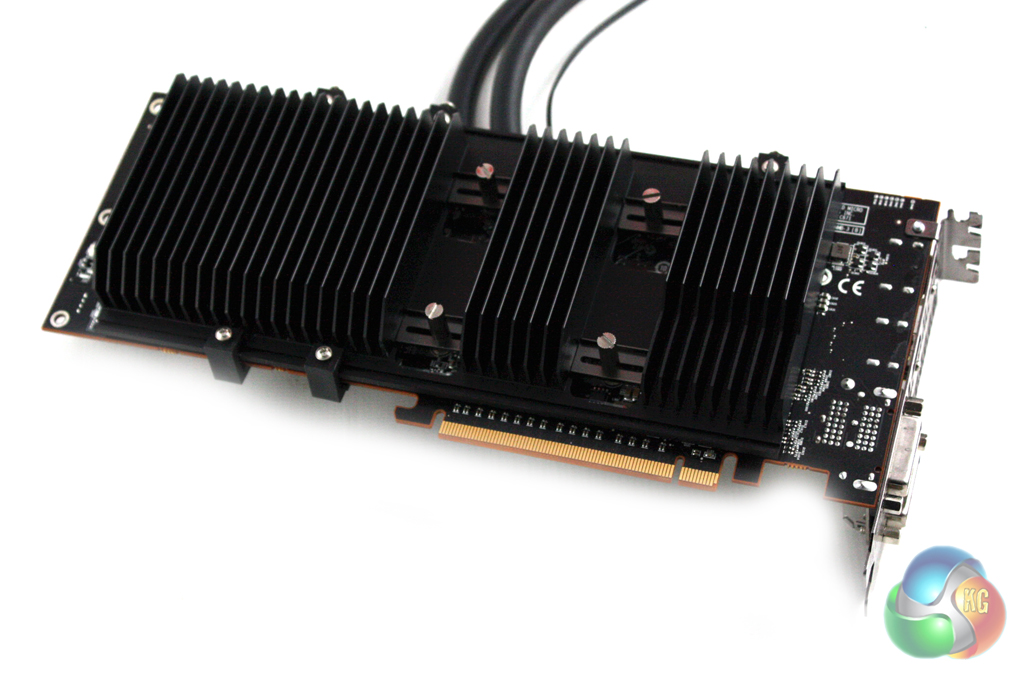
First of all we are directed to remove the stock cooler from our graphics card. We are using an AMD Radeon R9 290 for the purposes of this review.
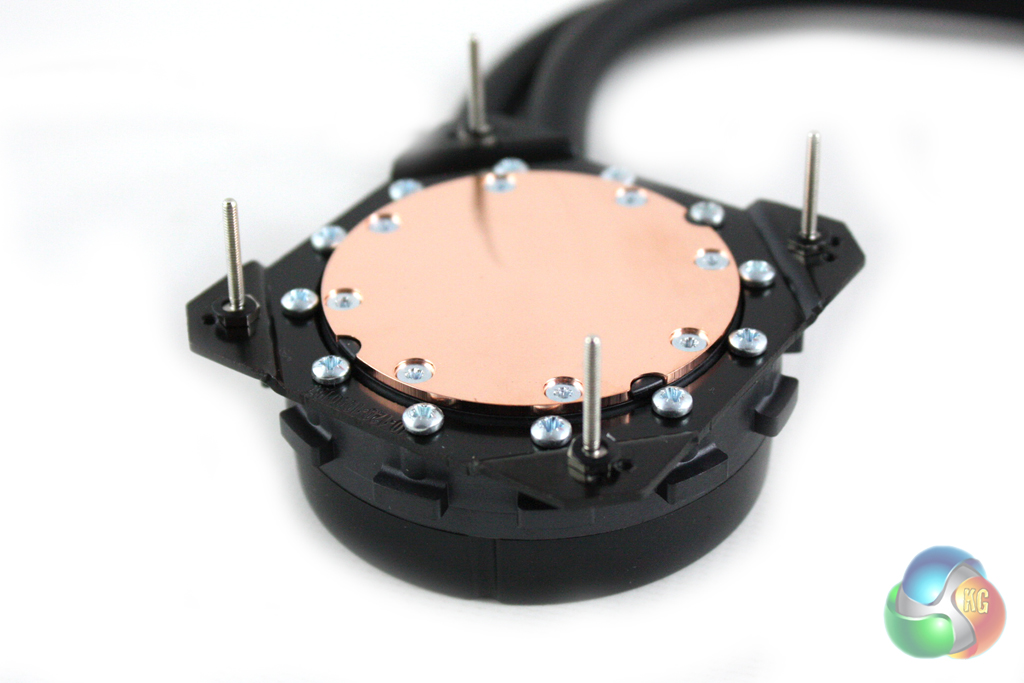
Then, we must identify the appropriate holes in the GPU block for our graphics card, using a provided list in the installation guide. We can then attach the appropriate bolts and washers to the CPU block, ready to mount it on the card.
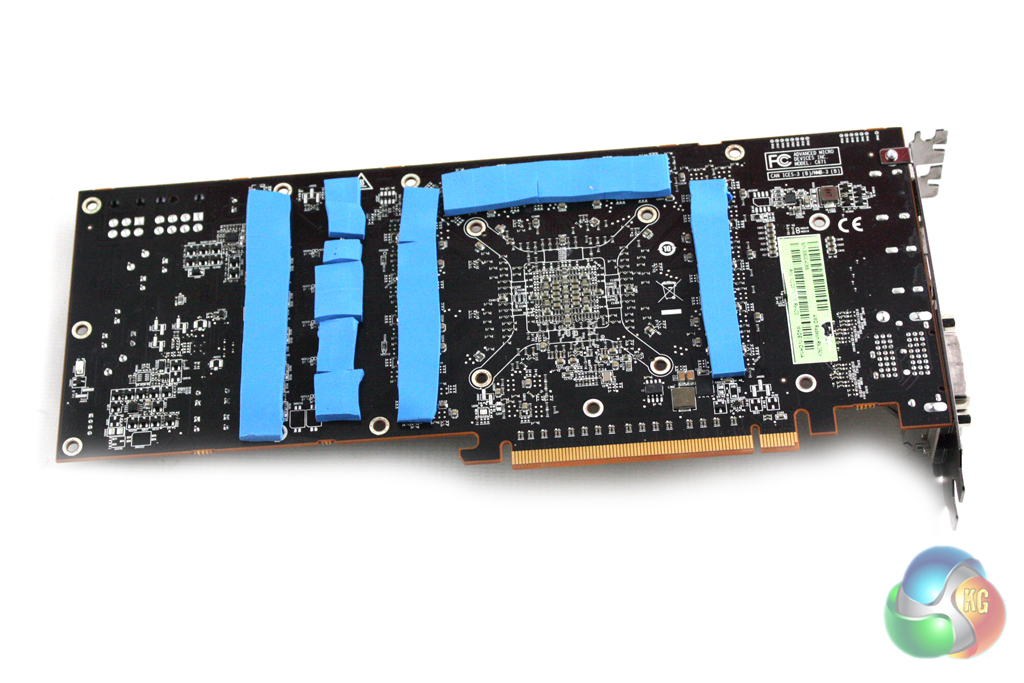
Next we must identify ‘hot areas' on the front side of the card and stick the provided thermal pads on the back of the card in the corresponding areas. This is quite ambiguous as it relies on a users ability to identify these areas – which may provide difficult to less experienced users.
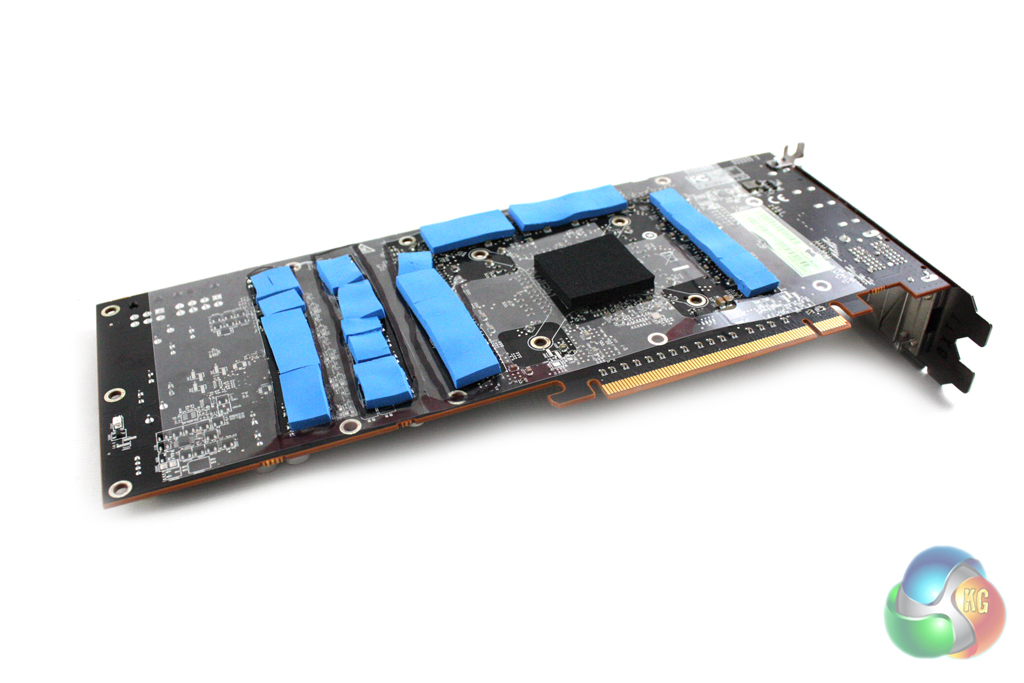
Perhaps the most annoying part of the installation process is cutting holes into a plastic sheet to fit over the thermal pads you have just installed. We did this by placing the sheet on top of the thermal pads, drawing around them and then cutting it out with a Stanley knife.
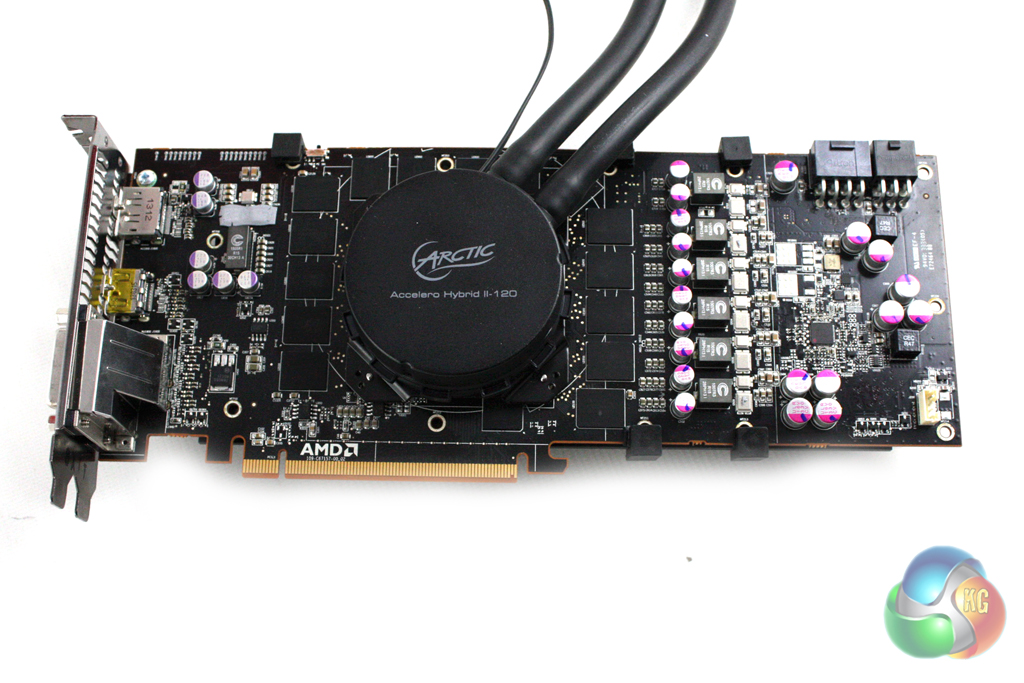
Once the protective plastic sheet is in place, we must simultaneously attach the heatsink to the back of the card while attaching the GPU block to the front of the card. They are then secured together using four nuts.
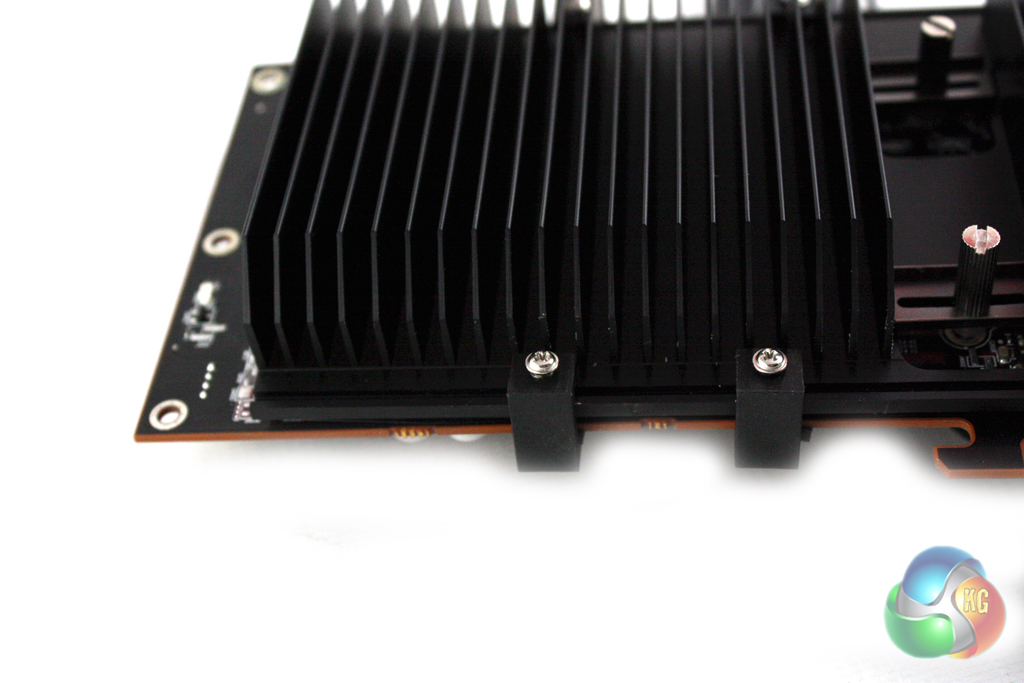
Then, we can secure the edges of the heatsink to the card using the six provided plastic clips. We were only able to fit five of these without risking damage to other components on the card.
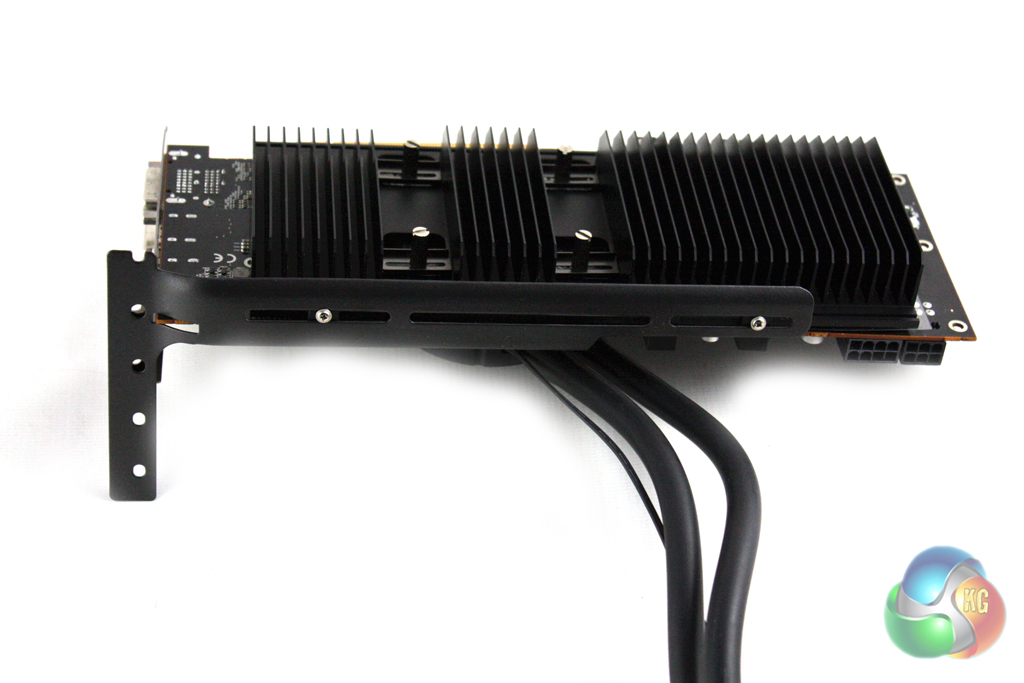
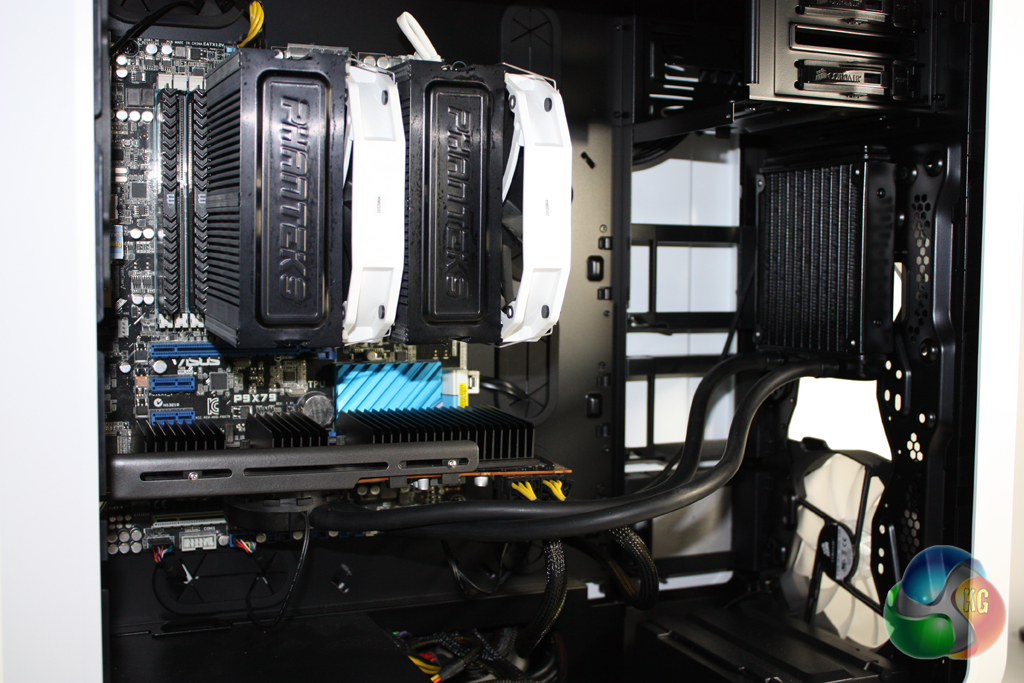
Once the card is installed into your system, a GPU support bracket must be attached which spans five expansion bays. We have photographed this outside of our test system to give you a better idea of what it looks like.
Finally, the radiator and fan can be installed into your system, using the provided screws.
Am a bit unclear about the configuration in picture 9. It looks like the white fan is next to the heatsink rather than on top of/under it, does that mean the bracket is 240mm x 120mm?
I only have a mid sized case with one 120mm intake at the front, one side panel, one top and one rear.
The rear is being used for CPU water cooling and the top is the exit (front being the intake) so I would like to attach the heatsink to the 120mm side panel.
Is this not possible? thx
Why is there no support for R9 280(x)?
@ Mr_Katanga, the white fan you are referring to is an additional intake fan which comes with the Corsair 780T case. The Hybrid II was configured with the fan on the outside of the case blowing through the radiator into the case. You should be able to install the radiator in the front (with fan as intake) or to the side panel, assuming there is at least 50mm of room for the fan and radiator to be installed, and further room for the radiator hoses and end tanks of the radiator.
Ah, that makes sense, thank you. I did consider that I might not have enough clearance to make the side panel set-up work, but I didn’t think about doubling up the front intake, so thanks again, I think that might be the way forward (this whole process is about stretching out my 1090t and card for a month or three, while saving up for X99 and 980).
I think it is because the 280x (and 7970, 7950, and most of the Tahiti GPUs) require the use of a copper shim plate due to the way the GPU core is designed. Unlike the other AMD GPU cores, the Tahiti has a metal frame around it for some reason which prevents the water block from making contact with the GPU core. The 290/290x and other GPUs also have metal frames but they are level with or slightly lower than the core so a water block will work on them. The Tahiti cores are lower than this metal frame. You probably can use this cooler because the bolt pattern is the same as the other AMD GPUs but you would have to modify it with a shim. This is probably why it isn’t listed as being officially supported. I found this out the hard way with a 7950 that I tried to cool with an NZXT G10.
Thanks for the review but I find it strange that you compare it with Kraken x40 since x40 have a larger radiator and fan than artic have. I can only use 12cm fans so the comparing results is not very useful sadly. Why not test with X30 (x31)?
I want to use it on my R9 290 but protective film and termopads are cut out for 780. Can i use some other ones and is protective film really needed?
I would suggest that the reason the temps aren’t great on auto is because the GPU probably aims to keep itself below 95C. This means that the fan won’t be spinning up very fast until quite late. If you set a custom curve, I’m sure you could reach a pretty good compromise between temps and noise.
Hi! Nice review im just asking what settings did you use on that furmark test because i want to do same test and watch it againts yours 🙂 I got hybrid 2 recently for R9 280
@henry_butt:disqus