

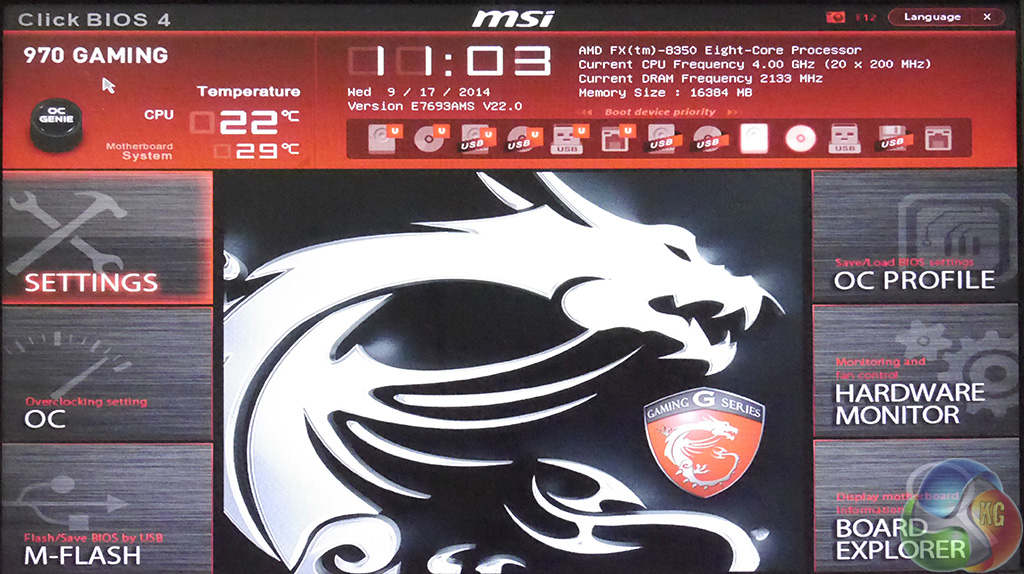
MSI Click BIOS 4 is a clunky name for the UEFI set-up screen that works very smoothly. Once you have hammered the Del key to enter set-up you can navigate Click BIOS 4 using either your mouse or keyboard. There are three enormous buttons on either side of the screen with an even larger MSI dragon logo in the middle.
M-Flash is the section where you update the BIOS using a USB flash drive, however our board arrived with the latest BIOS already installed.
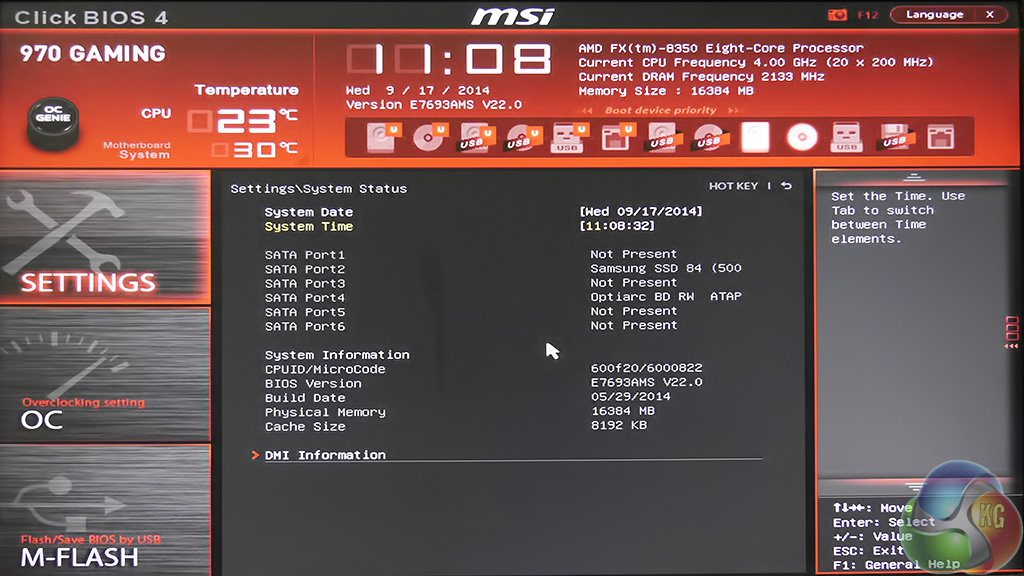
Settings handles the basic stuff, such as where your SATA devices are connected however there is a more visual way of checking your hardware.
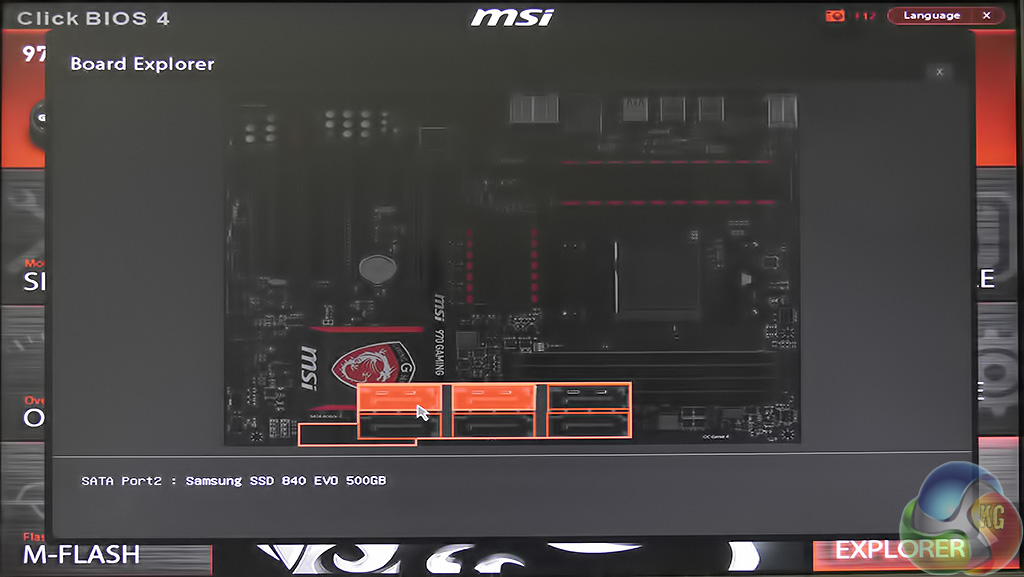
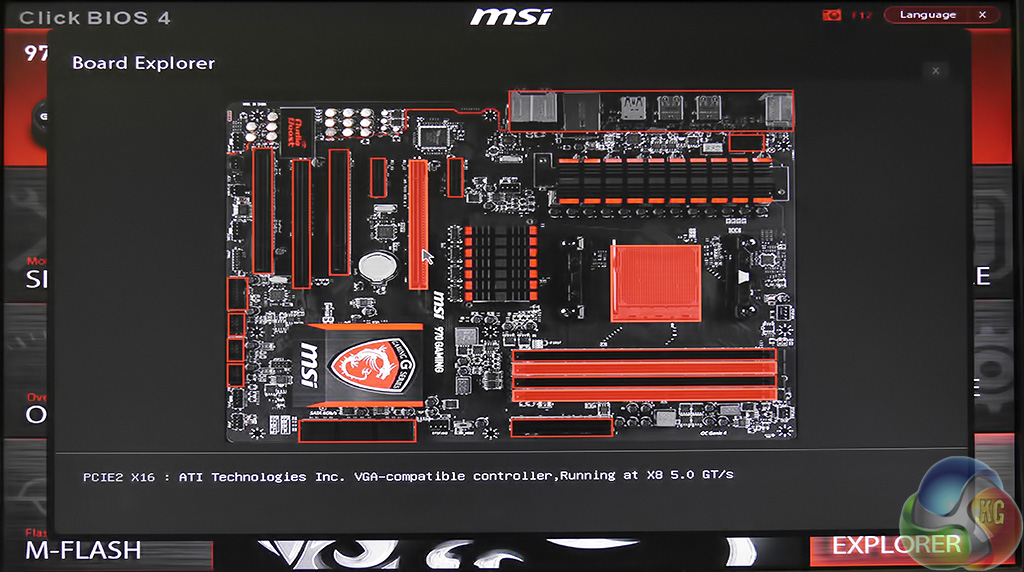
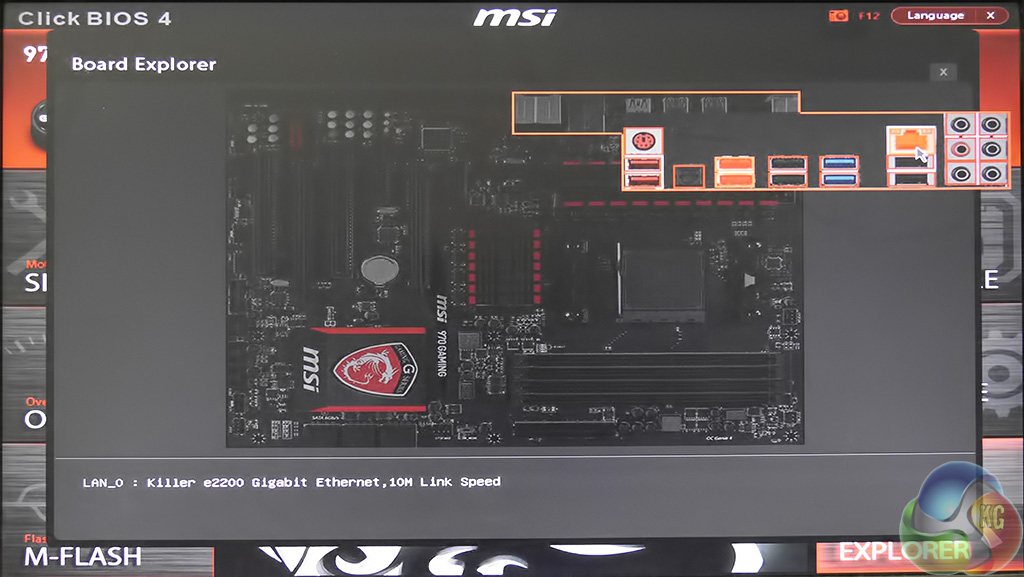
The Board Explorer button shows a picture of the motherboard and as you click on areas such as the memory, CPU, I/O panel or SATA you'll see how your PC is set up.
In some contexts this might seem like froth but the generic quick start guide tells you nothing worth knowing and the user manual could do with a photo or two to sit alongside the raft of line drawings. This makes Board Explorer a very useful way to check you have indeed plugged everything together correctly.
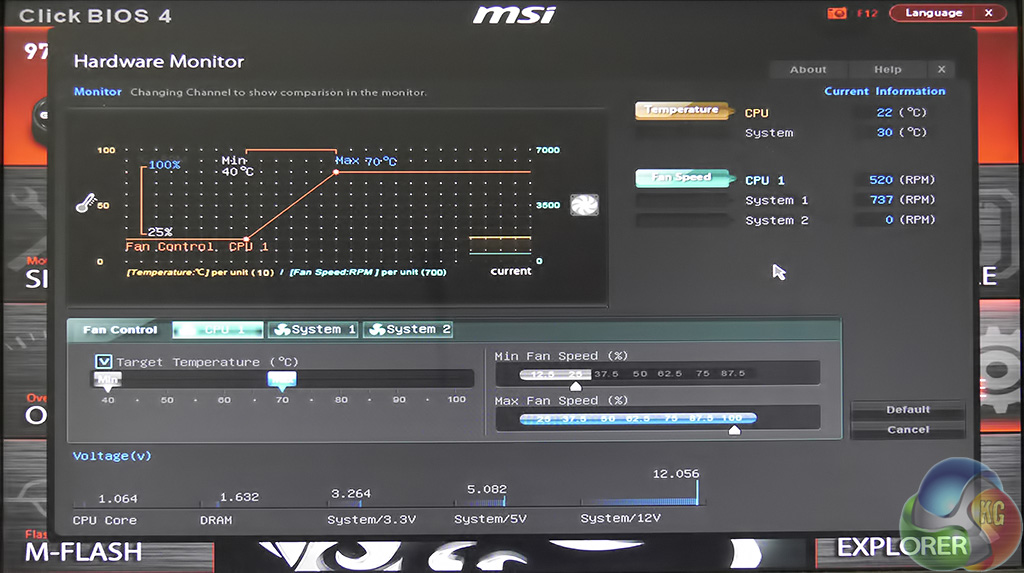
Hardware Monitor reports temperatures, fan speeds and voltages and gives you slider controls to adjust fan speeds and target temperatures.
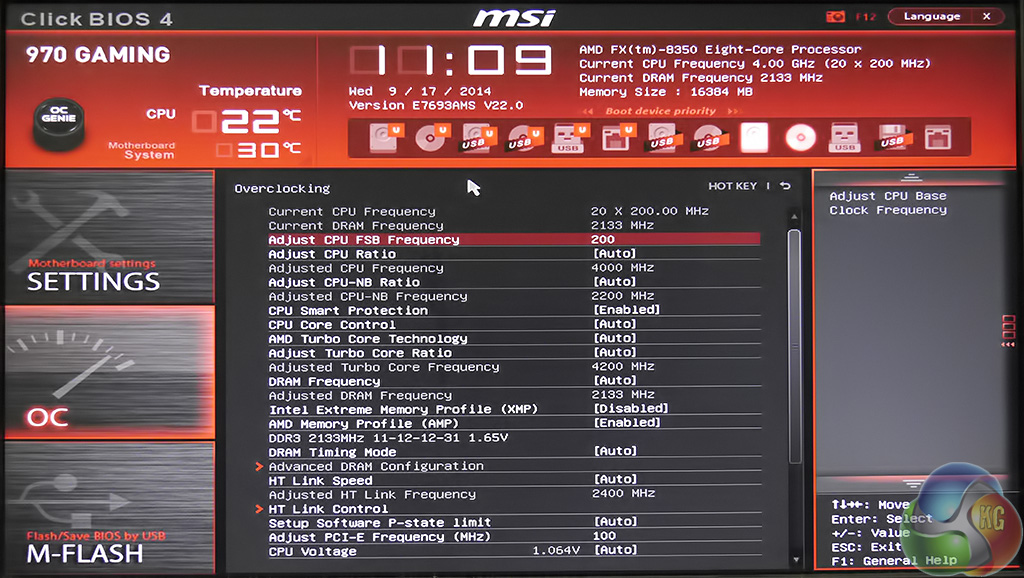
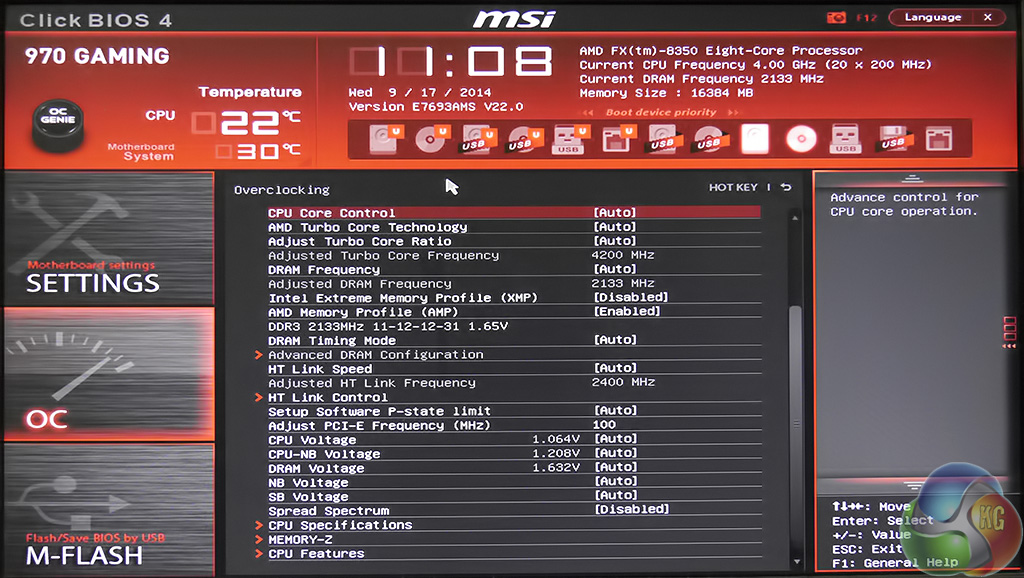
No doubt you'll want to spend some time in the OC (Over Clocking) section of the BIOS. You'll find all of the settings that you expect to see however most of the voltage settings are relative rather than absolute. For example if you want to adjust the CPU voltage to 1.20V you first need to establish the current voltage and then add 0.20V to achieve the desired goal.
It's not exactly the slickest way to adjust your settings but it does work fairly successfully. On the plus side you don't actually need to change many of the settings to overclock an AMD FX, as we shall see in a short while.

what a review !!
i’ve enjoyed reading every single page with joy ^^
and actually i gotta say im happy that it gets 4.7/5 rating cause im waiting this mobo to come in egypt after our ( Eid al-Adha ) feast ..
i’m gonna built a pc for blogging , video editing , and games , i was going with ga-990fxa chipset ,
but this mobo which has amazing price value and amazing features , just killing me ..
gonna built it with those parts :
AMD FX-8320 3.5GHz Eight Core 16MB Processor AM3+
Cooler Master Hyper 212 Evo Turbo Edition CPU Cooler
MSI 970 Gaming AM3+ Motherboard
G.skill RipjawsX 8GB (2 X 4GB) DDR3 1600 CL9 1.35v Dual Channel Memory Kit
SAPPHIRE VAPOR-X R9 270X 2GB GDDR5 OC WITH BOOST
Seagate 2TB MLC/8GB 7200 64MB SATA 6.0Gb/s 3.5 Hybrid SSHD
EVGA 600B 600W Bronze PSU
Cooler Master HAF 912 Combat Mid Tower Desktop Case
until I looked at the paycheck of $6867 , I didnt believe that my sister woz like realy taking home money parttime at there labtop. . there sisters roommate has been doing this 4 only about 1 year and just now paid the mortgage on there place and bourt themselves a McLaren F1 . Look At This
published here ………. http://➽.ws/gamepidia
oooh , i got it ^^
i bought the whole build , but i’ve changed the gfx to msi r9 270x hawk edition , and bought hdd not sshd , and after while i will go with samsung ssd , awesome and under test , but not good with 8.1 for the audio driver and some kinda of lag with network driver with 8.1
i will make some test and i will be back again folks ^^
AMD 970 chipset does not support USB 3.0 ??? What does it mean 970 GAMİNG does not support USB 3.0 ???
Hows the build holding up so far? I want to build one too but I have rock solid stability in mind.
It does support USB 3.0, there are 2 USB 3.0 port at the back and 1 front panel header.
I just want to know if it can run an amd fx 9590 8 core processor if someone could tell me ill be happy
Unfortunately, it does not support for the FX 9000 series of processors due to their higher TDP. The 990 chipset does. However, you could potentially get a BETA BIOS, although you risk frying your motherboard and/or voiding your warranty. If I were you I would Go for an 8370 and overclock lightly to get the best performance for the chipset.
Why are you using 2400 MHz memory? This board only supports 2133. Besides, AMD’s R9 2400 MHz RAM is CAS 11, whereas their gaming series 2133 is CAS 10. You are basically downclocking your RAM for worse performance. :
My rig;
MSI 970 Gaming
AMD FX-6300 (O/C’d to 4.1GHz)
16GB Corsair Vengeance 1600MHz Ram
MSI GeForce GTX 960 4GB
120GB Kingston SSD
1TB WD Black HDD
Corsair 600D PSU
Aerocool Aero-1000 case
Corsair H110gt CPU cooler
All runs very cool and very quiet. I haven’t managed to run it to it’s limits yet, no lag, no nothing. It’s always on, and even after a good few hours playing BF4 it only hits around 30 degrees C. I’m a little bit in love with it, to tell the truth.
Hello Noah, I recently purchased an MSI 970 Gaming MoBo and bought 4 Kingston Value RAM 12800 CL11 4GB 1600 mhz DIMM3 (KVR16N11S8/4), Currently running AMD Phenom II x4, upgrading to FX6300 CPU (in the mail). Attempts to OC or not, I’ve booted and seen 16gb RAM, but anywhere from 4gb to 12gb as being useable by Win 7 64 bit. Have I screwed up by not buying 1600mhz CAS10 (CL10) DIMMs? Also, due to total lack of MSI documentation (and OC knowledge), I’ve left the MoBo switch in SLO MODE, so I assume that any attempts at using the OC Genie or changing the memory type from AUTO to 1600mhz have been anti-productive? I’ve also been using the BIOS OC Genie ‘button’ in BIOS and assumed that when it was RED, the OC Genie was operating, what I’m reading here, is that it’s operating when it’s dark (blue/black, can’t remember now). The ‘MSI Command Center’ seems to be a joke, but maybe because I’ve not switched off SLO MODE and have miss-interpreted when the ‘Genie’ is on or off. Long wine, it’s red, so ok. I think I can rectify most, after reading the threads here, but am I going to have to start again on the RAM dumping $100 and go to CL10? I’ve not tried OCing before (and am having trouble just getting things to run to spec.), have had an MSI 770-C45 for years with the Phenom II with no probs, but getting lost now. Rosewil 850 Watt PSU, front and back 120mm fans, but stock (so far) for CPU cooling.
Your setup looks fine to me. “SLO MODE” is a way to boot at a stable CPU clockspeed if you have caused a crash. Seeing as though you are not overclocking beyond your processor’s limitations, you can probably turn the switch off. In addition, your DIMMs are completely compatible with your motherboard, and there is a negligible difference between CAS10 and CAS11, so there should be no reason to get a new set. The only problem I see with what you are describing is the amount of RAM windows is displaying as available, although I would expect Windows to reserve ~2GB for the OS.
Hi Noah, Thanks for the response. It appears something is wrong with the MoBo, I sent it back to the vendor. Genie or default, slo-mo or no, when booting, BIOS sees 16gb, when Win 7 64 bit Pro boots, it shows 16 installed and between 4 and 12 available (minus the bit that the hw/os uses, of course). Most often was coming up with 12 available to windows, so it’s dropping DIMMs. Also, it kept wanting to clock at 800mhz instead of 1600, which they’re rated for. I upgraded the CPU to an FX-6300 and a new ASUS GEForce GTX 750 (just ’cause), same behaviour. So getting my money back. Even though I’ve had a great MSI board for years, upgraded because I needed USB3 and had no slots, so went with 970 Gaming. Looking now at ASUS 970 Pro Gaming instead. I’ve been told by a NewEgg response to query that existing 4gb DIMM sticks should work on ASUS board, though I didn’t see it in Kingston’s list, we’ll see. Will probably take a week or so, back on the old-faithful 770-C45 in the meantime. Thanks again, Lorin.
Just to close this bit, I returned the defective MSI board (maybe should have got a replacement) and got an ASUS 970 Pro Gaming/Aura. The Kingston KVR16N11S8/4 don’t work for beans on the ASUS MB, ASUS is recommending Crucial CMZ8GX3M1A1600C10 8gb DIMMs. Have received them, am waiting on a Samsung XP941 256GB M.2 SSD PCIe device to use as system drive. Been learning a lot about M.2 SSD’s, if anyone goes that route, make sure it’s PCIe interface, not SATA, and PCIe x4 if possible. Puget Custom Computers has a good primer on M.2 devices at: https://www.pugetsystems.com/labs/articles/Overview-of-M-2-SSDs-586/
what is the wattage on this board, cant find anywhere need help
Hello this is compatible with AMD Octa-core FX-8370 4GHz Desktop Processor with Wraith Cooler, Black Edition FD8370FRHKHBX ?? Thanks